

Page 1
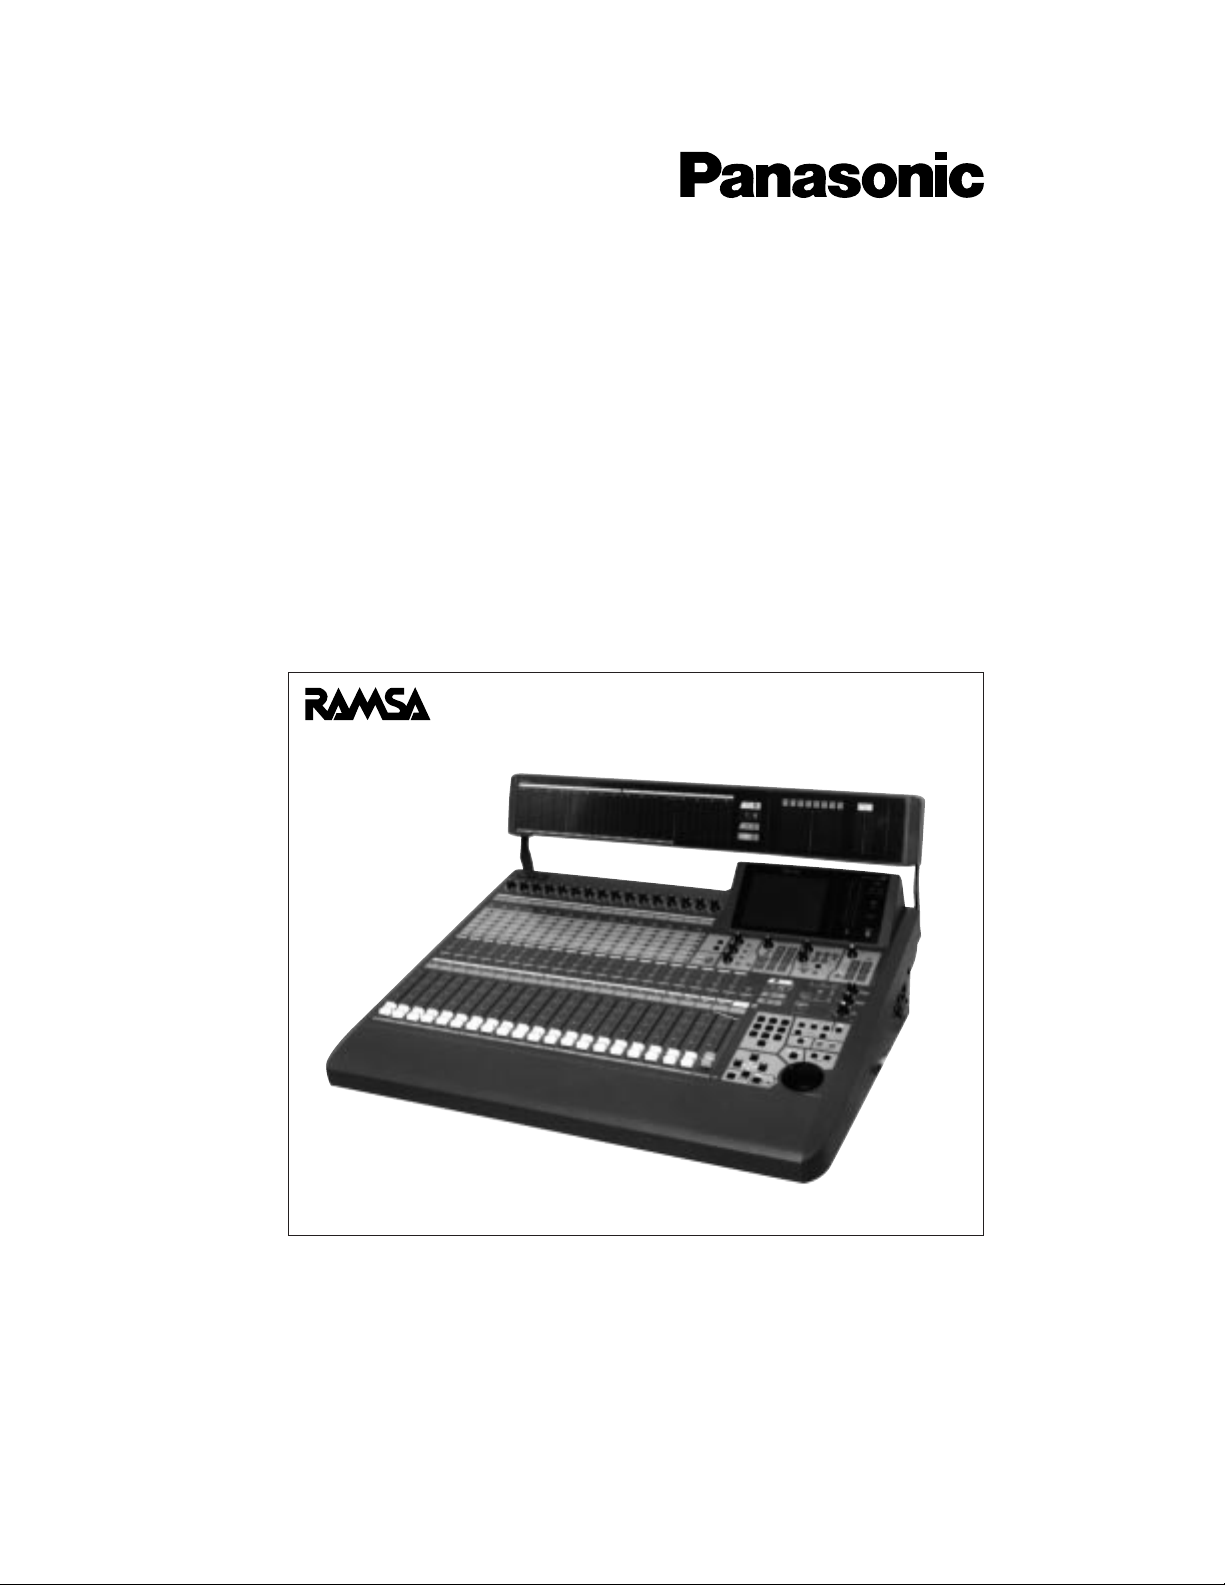
The meter bridge shown in photo is one of the optional accessories.
Application Guide
Audio Mixer
WR-DA7
Page 2

Limit of Liability/Disclaimer of Warranty: The author, Audio Video Systems Division of
Matsushita Communication Industrial Co., Ltd has used its best efforts in preparing this book.
However, Audio/Video Systems Division of Matsushita Communication Industrial Co., Ltd makes
no representation or warranties with respect to the accuracy or completeness of the contents of
this book and hereby specifically disclaims any implied warranties or merchantability or fitness for
any particular purpose and shall in no event be liable for any loss of profit or any other commercial damage, including but not limited to special, incidental, consequential, or other damages.
TRADEMARKS
Audio Video Systems Division of Matsushita Communication Industrial Co., Ltd has made every
effort to supply trademark information about company names, products, and services mentioned
in this document. Trademarks indicated below were derived from various sources. All products or
services not listed below are the trademarks, service marks, registered trademarks or registered
service marks of the respective owners.
ADAT is a registered trademark of Alesis Corporation
TDIF is copyrighted by TEAC Corporation and TASCAM is a registered trademark of TEAC
Corporation
IBM is a registered trademark of International Business Machines Corporation
Mac is a registered trademark of Apple Computer, Inc.
Mark of the Unicorn is a trademark of Mark of the Unicorn, Inc.
2
Page 3

Table of Contents
1. Introduction 5
2. Notes for connections with peripheral equipment 7
2.1 Wordclock 7
2.2 Installing and using option cards with the WR-DA7 7
2.3 ADAT, BRC 9
2.4 DA-98, 88, 38 11
2.5 DAT (with AES/EBU or S/PDIF I/O) 13
2.6 Digital timepiece 13
3. WR-DA7 system applications 15
3.1 Example of systems for ADAT(1unit)
(When a timecode is recorded on the tapetrack) 15
3.2 Example of systems for ADAT (3units) and BRC 17
3.3 Example of systems with Two WR-DA7 in tandem
with 4 ADATs and BRC 20
3.4 Example of systems with 3 DA-88s 24
3.5 Example of systems for WR-DA7 tandem connections
with DA-98(1unit) and DA-38(3units) 27
3.6 Example of systems for analog 16-track recorder(1unit) 30
3.7 Example of systems for Digtal Video Recorder (1unit) 32
3.8 Example of systems for VTR (1unit), ADAT (1unit),
and BRC 34
3.9 Example of systems for VTR (1unit) and DA-98 (1unit) 37
3
Page 4

1. Introduction
This Application Guide supplies examples for interfacing the WR-DA7 with commonly used
periperal recording equipment. This guide’s diagrams provide the necessary connections and
the methods for establishing proper system operation.
5
VIDEO IN
WORD SYNC OUT
(BNC)
SMPTE
Timecode
MIDI
IN
MTC MIDI IN
MMC MIDI OUT
MIDI
OUT
TIMECODE
IN
DA-98 ID1
3.9 System configuration
House Video Sync
WCK MASTER
WR-TDIF
TDIF-1 TDIF-1
PW-88DL
(BNC)
WORD CLOCK IN
(75Ω=ON)
W
REC O
VIDEO
OUT
VTR
TV
Monitor
C
O
C
)
y
y
y
SP
SP
MTC
3.1 System configuration
SP
SP
SP
SP
DAT
SP
SP
Power
AES/EBU
AMP
A B
CR MONITOR
MMC
REC
MONITOR
MIDI
MIDI
IN
WORD CLOCK IN
(75Ω=OFF)
WCK MASTER
SYNC OUT
PW-88S
SYNC OUT
MIDI
OUT
DA-98 ID1
IN
IN
ADAT
TDIF-1 TDIF-1
TDIF-1 TDIF-1
WORD SYNC OUT
(BNC)
MIDI
DA-38 ID2
TRACK8
ANALOG OUT
(RCA)
PW-88S
IN
DA-98 ID3
SYNC OUT
PW-88S
Terminator
IN
DA-38 ID3
DA-98 ID3
TDIF-1 TDIF-1
TDIF-1 TDIF-1
WCK MASTER
REMOTE OUT TO ADAT
WR-TDIF
PW-88DL
nc Cable
WCK MASTER
SYNC OUT
PW-88DL
nc Cable
SYNC OUT
nc Cable
PW-88DL
PW-88DL
IN
WR-TDIF
IN
WR-
(MASTER)
IN
WR-
(SLAVE)
WR-TDIF
WR-TDIF
DA-38 ID4
OUT
MIDI
OUT
(BNC)
SLOT 1
(17-24ch)
DIGITAL
OUT
SLOT 2
ADAT
(25-32ch)
IN
Optical Cable
TANDM
ADAT
SLOT 3
WCK MASTER
Sync
BRC
Cable
IN
SYNC OUT
OUT
Sync
Cable
SYNC OUT
WR-DA7
(MASTER)
SMPTE IN
(XLR)
ADAT
MIDI
IN
Sync
SLOT 3
Cable
SYNC OUT
Sync
Cable
WR-DA7
(SLAVE)
TANDM
SLOT 1
(17-24ch)
SLOT 2
(25-32ch)
MIDI
IN
REMOTE OUT
TO ADAT
IN
WR-ADAT
ID1
SLOT 1
IN
(17-24ch)
ID2
WR-SMPT
Mic
ID3
MIDI
OUT
IN
IN
Mic
OUT
B
CR MONITOR
MIDI
OUT
BRC
MONITOR
WCK OUT
B
(48kHz OUT)
DIGITAL
OUT
IN
Optical Cable
ADAT
DIGITAL
OUT
IN
Optical Cable
ADAT
DIGITAL
OUT
IN
Optical Cable
Keyboard
WR-DA7
ADAT
ADAT ID4
Keyboard
Power
MTC
AMP
AUX
2TR
SEND
A IN
A B
MMC
MIDI
IN
WCK OUT
R
WORD CLOCK IN
(48kHz OUT)
SR
(75Ω=ON)
DIGITAL
IN
OUT
WR-ADAT
OUT
IN
SLOT 1
(17-24ch)
ID1
DIGITAL
IN
OUT
WR-ADAT
OUT
IN
SLOT 2
(25-32ch)
ID2
IN
WR-ADAT
WR-ADAT
OUT
Sampler
SLOT 3
(9-16ch)
Mic
R
SR
DIGITAL
OUT
IN
ID3
DIGITAL
OUT
IN
Sampler
Effector
CR MONITOR
AES/EBU
AUX
MMC
RTN
MIDI
OUT
REC
OUT
(XLR)(BNC)
WORD CLOCK
OUT (75Ω=OFF)
OUT
Optical Cable
To PC
OUT
Optical Cable
INPUT 1-16
WR-DA7
WORD CLOCK IN
(75Ω=ON)
Keyboard
(SLAVE)
OUT
Optical Cable
INPUT 1-16
OUT
Optical Cable
DAT
Power
AMP
A B
Effector
MONITOR
MIDI
IN
AUX
2TR
WORD CLOCK IN
SEND
A IN
(75Ω=OFF)
WR-SMPT
IN
WR-ADAT
R
SLOT 1
SR
(17-24ch)
IN
WR-ADAT
SLOT 2
(25-32ch)
(MASTER)
WR-
TANDM
SLOT 3
Mic
MIDI
Sampler
WR-
TANDM
WR-ADAT
WR-ADAT
IN
SLOT 3
SLOT 1
(17-24ch)
SLOT 2
(25-32ch)
To PC
IN
IN
MIDI
OUT
AES/EBU
CR MONITOR
REC
MIDI
OUT
B
IN
AUX
RTN
WR-DA7
(MASTER)
INPUT 1-16
MIDI
OUT
Keyboard
WR-DA7
(SLAVE)
DAT
Power
AMP
A B
Mic
Mic
2TR
MONITOR
A IN
Sampler
AUX
SEND
B
AES/EBU
Effector
R
SR
INPUT 1-8
Keyboard
REC
AUX
OUT
RTN
DAT
2TR
A IN
Sampler
Sampler
Effector
AUX
SEND
R
SR
INPUT 1-16
R
SR
INPUT 1-16
AUX
RTN
WORD CLO
OUT (75Ω=
To PC
WORD CLO
IN (75Ω=ON
To PC
Keyboard
Page 5

2. Notes for connections
with peripheral equipment
2.1 Wordclock
The WR-DA7 as wordclock master
The DA7 has an internal wordclock generator that provides a timing reference for the external
(digital) audio devices connected to it. This is neither MIDI nor SMPTE timecode. You can set the
internal generator to synchronize to either 44.1 or 48K, selectable from The [D-I/O>INPUT SET]
window.
When multiple digital audio devices are used, it becomes necessary to synchronize the audio signals with a single reference timing signal or master wordclock source. In a system where all of the
digital audio devices share a common wordclock it is essential that all of the devices be turned on
even if they are not being used.
The WR-DA7 as wordclock slave
The DA7 can be slaved to an external wordclock source, to accomplish this you must go to the [DI/O>INPUT SET] window. Here you can choose Wordclock In [WCK IN], Video Sync In [V SYNC],
2 track A input [2TR IN A] and Slot 1,2 or 3.
For example: it is possible to select the WR-AESS card as the wordclock source of the WR-DA7.
The DA7 can be synchronized with the digital audio signals being input on Channels 1/2 of the
WR-AESS card. However, when no input is present on Channels 1/2 an UNLOCK status will be displayed. The wordclock synchronization with the other channels will not be realized either.
If the word clock is set incorrectly (for example, a system where multiple equipment units are set
as the wordclock master), noise (usually in the form of clicks and pops) may become audible. It is,
therefore, necessary that all of the slave units be synchronized with the wordclock master unit.
2.2 Installing and using option cards with the WR-DA7:
Be sure to install all of the Option Cards with the power of the DA7 turned OFF. Set the
Dipswitches on the card accordingly for the type of devices being connected.
Insert the card into the WR-DA7. Install all of the supplied mounting screws (for proper grounding) securely to the DA7’s chassis.
WR-TDIF: Set the dipswitches, or switches on the card, according to the devices being
connected.
When connecting a DA-38 or DA-98 (SW1) ON, (SW2) OFF
When connecting a DA-88 (SW1) OFF, (SW2) OFF
7
Page 6

WR-AESS: Select the switch on the card, according to the digital audio formats
(AES/EBU, S/PDIF) of the unit being connected. It is possible to select settings for each
pair of channels 1/2, 3/4, 5/6, and 7/8.
This switch is used for switching the electrical signal not for format
change.
WR-TNDM: The Tandem card is for use in Slot 3 (only) of both mixers.
WR-SMPT SMPTE Card, carefully follow the steps to install the WR-SMPT according to
the instructions in the owner’s manual.
Wordclock
For proper wordclock connections, it is necessary to terminate the last device in the wordclock
chain. The WR-DA7 allows ON/OFF of the 75-Ohm terminator on the wordclock input.
ON: Is selected when the WR-DA7 is used as a wordclock master or as a slave at the end of
the wordclock connections (terminated at 75 Ohm). (A clock output synchronized with DA7
is generated at the word clock’s output.)
OFF: Is selected when the WR-DA7 is used as a slave, the wordclock input entered in the WRDA7 is transmitted as a through output.
MIDI
To select the port for MIDI communication, press the MIDI switch until the [MIDI>SETUP] screen
appears. Then select the port for [Gen.Rx] and/or [Gen.Tx] from either MIDI or TO PC.
The MIDI channels assigned to Gen.Rx and Gen.Tx function serve as a device ID number of the
WR-DA7 during reception or transmission of MIDI data. (Select OMNI to receive messages on all
MIDI channels.) For selecting the MIDI channels, press the MIDI switch until the MIDI SETUP
screen appears. Then, select a channel for Gen.Rx or Gen.Tx.
To control external equipment using MIDI Machine Control commands, set the MMC port to MIDI
and assign a MIDI channel. The MIDI channel needs to be the same as the external equipment
being controlled. To make the setting, press the MIDI switch until the MIDI SETUP screen appears.
Then, set up the MMC port and CH (MIDI channel).
Timecode
The WR-DA7 can record and playback automation in synchronization with external timecode. The
WR-DA7 can be synchronized to MIDI timecode (MTC), MIDI clock, and SMPTE timecode (using
the option card WR-SMPT). To select the timecode settings, press the AUTOMATION button until
the SETUP screen appears. Select the appropriate timecode from the TIME BASE area in
Automation EXECUTE window, using the parameter dial select MTC, MIDI CLK, or SMPTE then
push the ENTER key.
When MTC is used, select a port to be used for receiving the MIDI data. The MTC receive port can
be selected by pressing the MIDI switch until the MIDI SETUP screen appears. Then, select the
MTC port from MIDI or TO PC.
8
Page 7

Tandem connection
Make all connections with the mixers turned OFF. You will need the following cables and cards:
(2) WR-TNDM cards, (1) Tandem cable (part # DA/DB-DB: Available in the USA), (1) MINI DIN 8Pin Serial cable (Macintosh Printer Cable), or (2) MIDI cable, (1) 75 ohm BNC-BNC wordclock
cable (part # DA/BNC: Available in the USA). Set up the consoles as master and slave and make the
tandem connections for the mixers accordingly.
MASTER: When used with the tandem master unit.
SLAVE: When used with the tandem slave unit.
To connect two WR-DA7 mixers in Tandem, install a WR-TNDM card in Slot 3 of each mixer (with
the mixers powered OFF).
Select MASTER/SLAVE on the front panel of each WR-TNDM card.
For proper wordclock synchronization between the two mixers, connect the WORD CLOCK OUT
terminal of the master unit to the WORD CLOCK IN terminal of the slave unit (75 ohm terminate
ON). To set the wordclock of the slave unit, press the D-I/O switch until the INPUT SETUP screen
appears. Then, set the SOURCE SELECT to WCK IN.
To establish communications between the Tandem mixers connect the specified serial cable
(Macintosh cross cable printer cable) or MIDI cable between the RS-422/485 and MIDI ports on
each of the mixers (TO PC or MIDI IN/OUT) must be selected to establish communications.
Communication setting are selected by pressing the D-I/O switch to display the TO SLOT screen of
D-I/O page then select the port from either TO PC or MIDI. In the case of TO PC connection, the
setting should be set so that the baud rates of the master and slave units are set the same on each
of the mixers (a baud rate of 125k is recommended). For baud rate setting, press the MIDI switch
to display the MIDI SETUP screen then select the necessary baud rate.
To establish tandem connections, press the D -I/O to display the TO SLOT screen of D-I/O and
switch the TANDEM setting to ON in Slot 3.
Press the MIDI button in the Set Up section on the TopPanel of the DA7 to select the MIDI SET UP
screen. In the PORT SELECT Area of the SERIAL I/O SETUP section, select TO PC. Set the BAUD
RATE for both consoles to 125K by highlighting the area with cursor and using dial to select the
rate. In the MIDI SETUP area, make sure the MIDI channels are set to the SAME channels for
Gen.Rx/Gen.Tx for BOTH consoles. Set Gen.Rx/Gen.Tx PORT to TO PC.
Press the D-I/O to display the TO SLOT Window. If TANDEM is not selected in the
NORMAL/INSert/TANDEM area, select it. Below the “SLOT 3 TANDEM” area, make sure TANDEM
is set to ON. Select AUTO in the OFFSET DELAY section. Make sure the PORT SELECT is set to TO
PC. The CONNECT area will read SLOT NG or DATA NG until the SLAVE console is configured.
On the Slave console, follow the same procedures. The CONNECT area in the TO SLOT window
will read SLOT NG or DATA NG until data is sent between the consoles. Turning a channel to ON
will initiate the data flow, and the CONNECT prompt in the D-I/O TO SLOT screen will then read
OK on both DA7s (this can take up 5 seconds).
2.3 ADAT, BRC
Connections
To connect an ADAT with the WR-DA7 digitally, the WR-ADAT option card is needed to connect the
9
Page 8

optical cables. Install the card (with the mixer turned OFF) and screw the option card securely
into place to ensure proper grounding. To use the ADAT’s DIGITAL INPUT press the DIGITAL IN
button on the ADAT to display DIGITAL IN. (Do not switch the DIGITAL I/O button on the BRC to
ON, this is for transferring data between ADATs and may cause unsuspected results.)
To select the ADAT’s wordclock source press the SET LOCATE and DIGITAL IN simultaneously, the
ADAT will display ‘int’ for internal word clock or ‘digi’ for external word clock.
To connect multiple ADAT units, each unit is required to make ID setting. The ID order of the
ADAT are set up automatically according to how the sync cable are connected, starting with 1, in
the order of ADAT SYNC cable connections from SYNC OUT to SYNC IN. (The same ID is used
even when the BRC is connected.)
The ADATs must be powered-up before the BRC. The BRC should be turned on last.
Wordclock
If the ADAT is being used as the wordclock master set the ADAT wordclock to INT. The WR-DA7
functions as an ADAT SLAVE. The WR-DA7 wordclock settings can be set by pressing the D-I/O
switch to display the INPUT SET window of the D-I/O setup section. Then; the SOURCE SELECT is
used to select the slot where the WR-ADAT card is inserted. Cursor to that Slot and press Enter.
LOCK should be displayed in the adjacent window.
When the ADAT and the BRC are in the wordclock master mode, the sampling rate is determined
by selecting the Fixed Mode to 48kHz.
To set the sampling rate at 44.1kHz, select the Variable Mode and press the PITCH DOWN switch
on the front panel. Make the setting -147 cent (‘44.1’ display).
For the ADAT-XT, this setting is done with the CLOCK SELECT switch on the front panel and the
ADAT is set to INT clock.
To use the WR-DA7 as the wordclock master, press the CLOCK SELECT switch on the front panel
of ADAT XT to set up the ADAT XT to DIG to slave to an external clock source. When using a BRC
as ADAT master controller it is recommended that the BRC be set to slave to the DA7. To do this
press the Edit button then the External Sync button on the BRC and select 48 kHz input using the
arrow keys. Press the Edit button to exit this mode. Make sure the EXTERNAL SYNC mode is
selected (the external sync button will light green).
MIDI
To use the ADAT’s MMC operations from the DA7 with a BRC, it is necessary that the transmitting
MIDI channel of the WR-DA7 match the MIDI channel of MMC to be received on the BRC.
For MIDI setting on the BRC, press the MIDI/UTIL to display #11:
MIDI Device screen and set up the value of (MIDI channel of the
MMC command to be output from the WR-DA7) – 1.
Set up ‘ALL’ if it is necessary for the BRC to receive the MIDI messages from other MIDI equipment.
When a MIDI message is received at the MIDI IN terminal of the BRC it is immediately transferred
as a through output from the MIDI OUT terminal. To send MIDI data through the BRC, press the
MIDI/UTIL switch several times on the front panel of the BRC to display the 1:MIDI ECHO screen,
then select ‘ON’ using the arrow keys.
10
Page 9

Timecode
To generate MTC from the BRC, press the EDIT switch and then press the GEN SYNC switch until
the MIDI screen appears. Select MTC, and turn the GEN SYNC switch to ON.
To generate SMPTE timecode from the BRC, press the EDIT switch and then press the GEN SYNC
switch until the SMPTE screen is displayed. Set to -10dB and turn the GEN SYNC switch to ON.
To generate timecode from the BRC when the ADAT is in FF/REW operation, press the MIDI/UTIL
switch on the front panel of the BRC until #8 is displayed. Output Rew/FF SMPTE AND MTC:
Screen, and select to ‘ON.’
2.4 DA-98, 88, 38
Connections
When making connections between the DA98, 88, 38 and the WR-DA7, use the WR-TDIF option
card and make the connections using the Panasonic part # DA/DB-TDIF(Available in the USA) or
use Part # PW-88D (1m) or PW-88D-L (5m) made by TASCAM.
Set the dipswitches on the WR-TDIF card, according to the model of DA-98, 88, or 38.
(SW1) ON, (SW2) OFF: When the DA-38 or DA-98 is connected.
(SW1) OFF, (SW2) OFF: When the DA-88 is connected.
To receive a digital signal on the DA-98, 88, or 38, press the DIGITAL IN switch on the front panel
to select the ‘DIGITAL IN’ indicator.
When multiple DA98, 88, or 38s are connected, set the machine ID to ‘1’ (‘0’ in the case of DA88s) on the first unit (master unit). The machine IDs of the slave units should be set sequentially,
starting with ‘2’ subsequent to the units connected using the PW-88S Sync cables.
The machine ID for the DA-88 is the number added with (ID No. of
the rear panel switch) + 1.
When multiple DA98, 88, 38s are connected using the PW-88S Sync cables, the terminator included
with the Sync cables should be connected to the Sync OUT terminal of the last device.
Wordclock
When the DA-98, 88, or 38 is used as the wordclock master, the wordclock for the DA-98, 88, or 38
is set to ‘INT.’ The Wordclock selection is made by pressing the CLOCK switch on the front panel
to select ‘INT.’
To set the clock selection to INT, WORD, or VIDEO press the CLOCK
switch on the front panel of the DA-98, 88, and 38, the machine IDs
of the DA-98, 88, and 38 are required to be set as
specified below.
DA-98, 38: ID=1
DA-88: ID=0
To use a DA-88 as the wordclock master, connect a 75 ohm BNC to BNC cable from the WORD
SYNC OUT terminal of the DA-88 to the WCK IN terminal of the WR-DA7. Then press the D-I/O
switch of the WR-DA7 several times in order to display the INPUT SET screen of the D-I/O window.
Then, select the SOURCE SELECT to ‘WCK IN.’
11
Page 10

12
When the DA-98 or 38 is the wordclock master, the slot where the WR-TDIF card is inserted can be
selected as the wordclock source, in addition to the above-mentioned WCK IN. For WR-DA7 wordclock setting, press the D-I/O switch several times to display the INPUT SET screen of the D-I/O
window. Then, select the SOURCE SELECT to the SLOT where the WR-TDIF card is installed.
The sampling rate settings for the DA-98, 88, 38 is dependent on the format of the tape being
used. Therefore, the sampling rate is automatically selected according to the sample rate on the
tape.
When the WR-DA7 is the wordclock master, the BNC cable should be connected from the WORD
CLOCK OUT terminal of the WR-DA7 to the WORD SYNC IN terminal of the DA-98 or 38. Select
WORD by pressing the CLOCK switch on the front panel of the DA-98 or 38.
When Connecting a DA-88 the WR-DA7 must function as the slave unit.
MIDI
For MMC control from the WR-DA7 to the DA-98, select Menu Group 3 in the DA-98 screen and
select the Ctrl Prt (Control Protocol) to ‘MIDI.’
For the MIDI ID of MMC being received on the DA-98, select Menu Group 7 in the DA-98 screen
and set the MIDI ID to the same number of the MIDI channel of the MMC to be sent from the WRDA7.
Install the SY-88 Sync board to perform MMC operation from the
WR-DA7 to the DA88.
For SY-88 Sync board setting, set the MODE dip switch 2 on the rear panel at 0 (OFF) so that control from external equipment can be accomplished through the MIDI port.
Timecode
When playing back the timecode recorded on the tape from the DA-98, select Menu Group 5 in
the DA-98 screen and set Tape (ABS) with OutTc Src.
To generate the MTC output from the DA-98, select Menu Group 7 on the DA-98 screen and set
the output to ‘ON’ with MTC Out. To generate the MTC output while the DA-98 is in FF/REW operation, set fast to ‘ON.’ To generate the MTC output when the DA-98 is stopped, set Stop to ‘ON.’
To generate the timecode output from the DA-98 in synchronization with the digital audio data,
select Menu Group 5 in the DA-98 screen and set ‘Digital’ with OutTc Tmg.
When an SY-88 Sync board is installed in the DA-88, it is possible to generate SMPTE timecode and
MTC (MIDI timecode) from the DA-88.
For proper SY-88 Sync board setting, set the MODE dip switch 6 on the rear panel to 1 (ON) so
that the timecode recorded on the tape of the DA-88 can be converted to MTC.
If the MODE dip switch 6 is set to 0 (OFF), the timecode received in the TIME CODE IN terminal
of the DA-88 is then outputted after being converted to MTC.
To generate timecode from the DA-88 in synchronization with the digital audio data set the MODE
dip switch 5 on the SY-88’s real panel to 0 (OFF).
Page 11

13
2.5 DAT (with AES/EBU or S/PDIF I/O)
To record and playback using the DAT Recorder as the wordclock master and the WR-DA7 as a
slave, connect the DAT to the REC OUT and 2TR IN terminals of the WR-DA7. Press the D-I/O
switch on the WR-DA7 to display the INPUT SET screen on the D-I/O so that synchronization is
secured with the digital audio signal of the DAT. Then, set the SOURCE SELECT to ‘2TR IN A.’
To record and playback using the WR-DA7 as the wordclock master and the DAT as the slave, connect the DAT to the REC OUT and 2TR IN terminals of the WR-DA7, and select a wordclock source
to another device other than the DAT connected to 2TR IN A.
To record with the S/PDIF output of the WR-DA7 connected to the DAT, please note that some DAT
units may not operate in the normal recording mode. In this case, the connection between the
WR-DA7 and the DAT should be made using the AES/EBU digital audio terminals.
2.6 Digital timepiece
Note the following: when setting up a system using the Mark of the Unicorn Digital Timepiece
(DTP).
When an ADAT is connected to the DTP using an ADAT Sync cable and the DTP is the master
machine the ADAT is synchronized using the timecode being generated by the DTP. Therefore, the
timecode of the DTP is kept unchanged even though the operation of PLAY and REC is performed
on the ADAT. For this reason, the ADAT cannot be synchronized with the timecode and normal
operation cannot be performed.
When the DA-98, 88, or 38 is controlled by the DTP, the DTP functions as the master unit and the
others operate as the slave. Therefore, set the machine ID to another ID other than ID=1 for the
DA-98 or 38, set at something other than ID=0 for the DA-88. When the CHASE switch of the DA98, 88, or 38 is set to ON, each unit works as a slave unit to the DTP and all other units run in synchronization with the DTP.
When the DTP is used as the MIDI interface with MMC from the WR-DA7 for the ADAT or the DA98, 88, or 38 connected through the DTP and the SYNC cable, the following operation takes place:
FF/REW operation: Stops where the timecode makes leading of less than
10 seconds.
REC operation: REC is effected upon the cancellation of the record
standby condition. No recording is performed.
When using the VIDEO OUT of the DTP as the wordclock source for the WR-DA7, the WR-DA7 may
be in a mode where the VIDEO frame rate of the DTP cannot be recognized correctly. Recognition
is not possible when the DTP frame rate is set to any rate other than 59.94 (frames/second).
Page 12

15
3. WR-DA7 system applications
3.1 Example of systems for ADAT (1 unit) (When a timecode is recorded on a tape track)
This system is used to record the SMPTE timecode on track # 8 of an ADAT. This timecode will be
used as the timecode reference for automation.
Method of connection
With the mixer powered ‘OFF’ Insert the option card WR-ADAT (Slot 1) and WR-SMPTE in the dedicated slot of the WR-DA7 and firmly fasten them to the mixer using the supplied screws.
Connect the WR-ADAT card of the WR-DA7 to the DIGITAL IN/OUT terminal of the ADAT using an
optical cable and press the DIGITAL IN switch on the front panel of the ADAT to select the digital
input mode.
The timecode is transferred by using the 8th Channel’s OUTPUT (RCA Pin Jack) of the ADAT
analogs output to the SMPTE IN (XLR: 1,3-GND, 2-SIGNAL) of the WR-DA7 using the (optional)
WR-SMPT installed.
WR-DA7 setting
Set the ADAT to the wordclock master and the WR-DA7 to the slave.
In the INPUT SET screen of D-I/O of the WR-DA7, set the SOURCE SELECT to ‘SLOT1.’
To display the SMPTE timecode received at the SMPTE IN, set the TIME BASE to ‘SMPTE’ in the
EXECUTE screen of the AUTOMATION window.
ADAT setting
To use the ADAT as the wordclock master, press the CLOCK SELECT switch to select ‘INT 48k’ or
‘INT 44.1k’ (for the ADAT-XT).
For ADAT’s other than the ADAT-XT select to INT 48kHz, select the Fixed Mode. For INT 44.1kHz
setting, select the Variable Mode. Then, press the PITCH DOWN switch to select the setting at 147cent (display of 44.1).
During ADAT playback, there is no PLAY output while ALL INPUT on the front panel is ON. ALL
INPUT must be turned OFF.
Page 13

16
System configuration-1
WCK MASTER
WR-ADAT
ADAT
DIGITAL
OUT
TRACK8
ANALOG OUT
(RCA)
IN
IN
OUT
Optical Cable
WR-SMPT
SMPTE IN
SLOT 1
(17-24ch)
(XLR)
SP
CR MONITOR
AES/EBU
SP
Power
AMP
REC
OUT
2TR
A IN
AUX
SEND
AUX
RTN
INPUT 1-16
DAT
WR-DA7
Mic
Effector
Sampler
Keyboard
A B
R
SR
MONITOR
B
Page 14

17
3.2 Example of systems for ADAT (3 units) and BRC
This system is configured using 3 ADATs and a BRC connected using the ADAT Sync cables and the
three ADAT units are being remote-controlled from the BRC. In addition, it is possible to perform
automation synchronized to timecode (MTC or SMPTE) from the ADAT using the MIDI out of the
BRC, and having the ADAT controlled by MMC from the WR-DA7.
Method of connection
With the mixer powered OFF insert the option card WR-ADAT in Slot 1, 2, 3 of the WR-DA7 and fasten them to the securely using the 4 screws.
Connect the WR-ADAT card in the WR-DA7 to the DIGITAL IN/OUT terminals of the ADAT using an
optical cable and press the DIGITAL IN switch on the front panel of each ADAT to set up the digital
input mode.
The BRC functions as the wordclock master. Connect the WORD OUT of the BRC to WORD
CLOCK IN of the WR-DA7 using a BNC cable and set the WR-DA7 wordclock termination to 75
Ohm=ON.
For MIDI connection, connect the WR-DA7 to the MIDI IN/OUT of the BRC using a MIDI cable.
The MMC and MTC functions are now available.
For the timecode, MTC is received using the MIDI connection. (Using the option card WR-SMPT, it
is possible to receive the SMPTE timecode. The SMPTE OUT (Phone Jack) of the BRC is connected
to the SMPTE IN (XLR: 1,3-GND, 2-SIGNAL) of the WR-DA7.)
WR-DA7 setting To use the WR-DA7 as a slave unit, set the SOURCE SELECT to ‘WCK IN’ in the
INPUT SET screen. (For synchronization with the ADAT card source, set SOURCE SELECT to
‘SLOT1.’)
For MMC, set MMC PORT to ‘MIDI’ in the MIDI SETUP screen. The MIDI channels should be set
to the same MIDI channel of the MMC being received on the BRC.
To receive MTC on the DA7, set the MTC PORT to ‘MIDI’ in the MIDI SETUP screen of the WRDA7.
To have the MTC read out on the LCD screen, set the TIME BASE to ‘MTC’ in the EXECUTE
screen of AUTOMATION SETUP.
(For SMPTE timecode using the optional WR-SMPTE card, set the TIME BASE to ‘SMPTE.’)
ADAT setting
For ADAT wordclock setting, connect a Sync cable from the BRC and turn on the power supply. At
that time, the setting is automatically set to ‘EXT’ and the ADAT works as a slave to the BRC.
The ADAT ID numbers are automatically set from 1, in the sequential order of the SYNC cable connections from SYNC OUT to SYNC IN.
The power supply of each ADAT should be turned on in the sequential order, starting with the last
unit located at the end of SYNC cable connections to the first unit. Finally, turn of the power supply of the BRC.
The audio input of the ADAT needs to be selected into the digital input mode. Press, the DIGITAL
IN buttons on the front panel of each ADAT being used.
Page 15

18
During ADAT playback there will be no playback while ALL INPUT is ON. ALL INPUT must be
turned OFF.
BRC setting
Select the Fixed Mode when the BRC is used as a word clock master and the sampling rate is set at
48kHz. Select the Variable Mode when the sampling rate is set at 44.1kHz. Press the PITCH DOWN
switch to make setting at -147cent ( ‘44.1’ display).
For MTC setting, set MIDI in the GEN SYNC setting at ‘MTC’ and turn on the GEN SYNC switch.
For SMPTE setting set SMPTE in the GEN SYNC setting at ‘-10dB’ and turn on the GEN SYNC
switch.
To obtain a timecode output from the BRC during FF/REW operations in the ADAT, secure a display
of 8: Output Rew/FF SMPTE & MTC: for ‘ON’ in MIDI/UTIL setting of the BRC.
To accomplish MMC operation, there must be coincidence of the MIDI channel between the WR-
DA7 and the MMC’s MIDI channel of the BRC. On the BRC, secure a display of 11: MIDI Device
screen by MIDI/UTIL setting. Set the value of ‘MIDI channel set for the WR-DA7 - 1.’ Otherwise, setting should be made at ‘ALL.’
Page 16

19
System configuration-2
WCK MASTER
WR-ADAT
ADAT
ADAT
ID1
BRC
WR-DA7
DIGITAL
OUT
IN
MIDI
IN
MTC
MMC
MIDI
OUT
WCK OUT
(48kHz OUT)
REMOTE OUT TO ADAT
Sync Cable
WORD CLOCK IN
(75Ω=ON)
IN
IN
OUT
Optical Cable
WR-ADAT
ID2
DIGITAL
OUT
IN
SYNC OUT
Sync Cable
IN
IN
OUT
Optical Cable
WR-ADAT
ADAT
ID3
DIGITAL
OUT
IN
SYNC OUT
Sync Cable
IN
IN
OUT
Optical Cable
SLOT 1
(17-24ch)
SLOT 2
(25-32ch)
WR-ADAT
SLOT 3
(9-16ch)
INPUT 1-8
MIDI
IN
MIDI
OUT
R
SR
Mic
Sampler
Keyboard
SP
CR MONITOR
AES/EBU
SP
Power
AMP
REC
OUT
2TR
A IN
AUX
SEND
AUX
RTN
DAT
Effector
A B
MONITOR
B
Page 17

20
3.3 Example of systems with Two WR-DA7 in tandem with 4 ADATs and BRC
This is a 32-track digital recording system utilizing two WR-DA7’s connected in tandem along with
four ADAT units a BRC and ADAT Sync cable connections. The four ADAT units can be controlled
from the BRC. It is also possible to perform recording and playback synchronized to timecode
(MTC or SMPTE) generated from the ADAT through the MIDI interface of the BRC, and also control ADAT operation via MMC from the WR-DA7 is possible.
Method of connection
With the consoles turned OFF, insert the option cards of WR-ADAT in Slots 1 and 2 and install the
WR-TNDM in Slots 3 of the two WR-DA7 units and firmly fasten them to the back panel using the
screws supplied.
Set the switch on the front of WR-TNDM card to MASTER for the WR-DA7 that is to being used as a
master unit. Set switch on the card to SLAVE of the WR-DA7 being used as a slave unit.
Make the connections between the mixers using the recommended cables for proper tandem connection. (Part No. DA/DB-DB: Available in the USA))
For serial or MIDI communications between the two WR-DA7 units, connect the master unit of the
WR-DA7 by selecting the TO PC (for serial) or the MIDI port of the slave unit using either the specified serial (Macintosh Printer Cable) or MIDI cables.
For wordclock communication, make the connections between the WORD OUT of the BRC
(48kHz) and WCK IN of the WR-DA7 on the master unit, and connect between the WCK OUT of
the master unit to the WR-DA7 and WCK IN of the slave unit using BNC cables (Part No./BNC:
Available in the USA).
Select he master mixer’s termination to 75 ohm OFF and set the slave unit to 75 ohm ON.
Make the connections between the BRC and ADAT and between the ADAT units using the ADAT
SYNC cables, in the order off the ADAT’s to be used from SYNC OUT to SYNC IN.
Connect the WR-ADAT card from the WR-DA7 to the DIGITAL IN/OUT terminal of the ADAT using
an optical cable (Part No. DA/TOS: Available in the USA) and press the DIGITAL IN switches on
each ADAT to select the digital-input mode.
To make the MIDI connections, establish a loop for the two WR-DA7 units and the BRC, and make
MIDI cable connections from MIDI OUT to MIDI IN. This makes MMC and MTC operative.
(It is possible to receive SMPTE timecode by using the WR-SMPT option card, by making the connections from the SMPTE OUT (Phone Jack) of the BRC to SMPTE IN (XLR: 1,3-GND, 2-HOT) of
the WR-DA7.)
WR-DA7 setting
To use the WR-DA7 as a slave unit, set the SOURCE SELECT in the Input Set Window of the D-I/O
SETUP SECTION to ‘WCK IN’ on the MASTER mixer.
(For synchronization with the ADAT card source, set the SOURCE SELECT to ‘SLOT1’ on the MASTER mixer. Select ‘WCK IN’ on the SLAVE mixer.)
To maintain communications between the two WR-DA7 units, set the PORT SELECT to ‘TO PC’ in
the SERIAL I/O SETUP area of the MIDI SETUP screen for both MASTER and SLAVE consoles. Then
set the baud rates at the same value.
Page 18

21
For proper tandem connections, select the TANDEM setting to ‘ON’ in the TO SLOT screen of the
D-I/O Input Setup Section.
To operate MMC, set the MMC PORT to ‘MIDI’ in the MIDI SETUP screen of the TANDEM MASTER
unit. In this case, the MIDI channel of MMC should be set at the same MIDI channel of MMC to be
received on the BRC.
To send/receive the MIDI messages, set the PORT of Gen.Rx and Gen.Tx to ‘MIDI’ in the MIDI
SETUP screen. For the TANDEM SLAVE unit, set the SEND/RECEIVE of the various MIDI messages
to ‘THRU.’
For MTC reception on the WR-DA7, set MTC PORT to ‘MIDI’ in the MIDI SETUP screen of the
TANDEM Master unit.
To obtain the MTC timecode display on the LCD screen set the TIME BASE to ‘MTC’ in the
AUTOMATION EXECUTE screen of the Automation SETUP SECTION.
(To use SMPTE timecode connect the WR-SMPTE card, and set the TIME BASE to ‘SMPTE.’)
ADAT setting
For ADAT wordclock setting, connect a Sync cable from the BRC and turn on the power supply.
The setting is automatically set to ‘EXT’ and the ADAT functions as a SLAVE to the BRC.
The ADAT ID numbers are automatically set in the order of the SYNC cable connections from
SYNC OUT to SYNC IN.
The power supply of each ADAT should be turned on first, then turn ON the power supply of the
BRC.
To use the digital input of the ADAT, the DIGITAL IN button should be selectedS on the ADAT’s
front panel.
During ADAT playback if ALL INPUT is ON there will be no playback. ALL INPUT must be turned
OFF.
BRC setting (BRC as the wordclock master)
Select the Fixed Mode when the BRC is used as the wordclock master and set the sampling rate to
48kHz. When the sampling rate is set to 44.1kHz select the Variable Mode and press the PITCH
DOWN switch to a setting of-147cent ( ‘44.1’ display).
To obtain a through output of the MIDI message received on the BRC, press the BRC’s MIDI/UTIL
button repeatedly to display the MIDI ECHO screen and select the ON setting.
For setting MTC, display the MIDI screen by pressing the GEN SYNC button to select a setting of
‘MTC.’ Press the EDIT button to exit the edit mode then, press the GEN SYNC button to enable
sync generation.
For setting SMPTE, press the GEN SYNC button to display SMPTE: and use the UP/DOWN to select
‘-10dB’ then, press the EDIT button to exit the edit mode press the GEN SYNC switch to enable
SMPTE sync the LED will light.
To obtain a timecode output from the BRC even during FF/REW operations of the ADAT, obtain a
display of 8: Output Rew/FF SMPTE & MTC: for ‘ON’ in MIDI/UTIL setting of the BRC.
Page 19

22
To accomplish MMC operation, the MIDI channel of the WR-DA7 and the MIDI channel of the BRC
must be set to the same channel. On the BRC, obtain a display of 11: MIDI Device screen by
MIDI/UTIL setting. Set the value of ‘MIDI channel set for the WR-DA7 - 1.’ Otherwise, the settings
should be made to ‘ALL.’
BRC setting (BRC as the wordclock slave)
When using a BRC and ADAT with the DA7, it may be necessary to sync the BRC to the DA7’s internal wordclock generator.
1. Connect a 75 ohm (BNC) wordclock cable from the DA7’s wordclock output to the BRC’s 48
kHz input.
2. Press the EDIT then EXTERNAL sync buttons on the BRC and using the arrow keys, select 48
kHz INPUT.
3. Press the EDIT button to go back to normal operation. Make sure the EXTERNAL sync button
is enabled (the button lights green).
Page 20

23
WCK MASTER
WR-ADAT
ADAT
ID1
ADAT
ID2
BRC
WR-DA7
DIGITAL
OUT
IN
MIDI
IN
MMC
MTC
MIDI
OUT
WCK OUT
(48kHz OUT)
REMOTE OUT
TO ADAT
Sync
Cable
WORD CLOCK IN
(75Ω=OFF)
IN
IN
OUT
Optical Cable
WR-ADAT
DIGITAL
OUT
IN
SYNC OUT
Sync
Cable
IN
IN
OUT
Optical Cable
WR-
TANDM
SYNC OUT
SLOT 1
(17-24ch)
(MASTER)
(MASTER)
(SLAVE)
SLOT 2
(25-32ch)
SLOT 3
INPUT 1-16
WORD CLOCK
OUT (75Ω=OFF)
To PC
WORD CLOCK
IN (75Ω=ON)
To PC
MIDI
IN
MIDI
OUT
MIDI
OUT
MIDI
IN
3.3 System configuration
WR-SMPT
(XLR)(BNC)
WR-ADAT
ADAT
ID3
WR-DA7
DIGITAL
OUT
IN
Sync
Cable
IN
IN
OUT
Optical Cable
WR-ADAT
ADAT ID4
DIGITAL
OUT
IN
SYNC OUT
Sync
Cable
IN
IN
OUT
Optical Cable
SLOT 1
(17-24ch)
(SLAVE)
SLOT 2
(25-32ch)
SLOT 3
INPUT 1-16
WR-
TANDM
R
SR
Mic
Sampler
Keyboard
R
SR
Mic
Sampler
Keyboard
SP
CR MONITOR
AES/EBU
SP
Power
AMP
REC
OUT
2TR
A IN
AUX
SEND
AUX
RTN
DAT
Effector
A B
MONITOR
B
System configuration-3
Page 21

24
3.4 Example of systems with 3 DA-88s
This is a 24-track digital recording system that uses three DA-88’s. The DA-88 can generate SMPTE
timecode and MTC by using the optional SY-88 SYNC card installed into the DA-88. By using the
MIDI connections between the WR-DA7 and the DA-88, it is possible to perform MMC (MIDI
Machine Control) from the WR-DA7.
Method of connection
With the DA7 powered OFF insert the WR-TDIF (option card) in Slot 1, 2, 3 of the WR-DA7 and
firmly fasten them to the console with the supplied screws. Using the dip switches on the WR-TDIF
card make the proper setting for the DA-88 (SW1, 2 to OFF, OFF respectively).
Connect the WR-TDIF card of the WR-DA7 to the DIGITAL I/O (TDIF-1) of the DA-88 using cable
(PW-88 DL) and press the DIGITAL IN switch of each DA-88 to select the digital input mode.
Connect each DA-88 with the PW-88S SYNC cables in the sequential order from SYNC OUT to
SYNC IN. Connect the terminator to the SYNC OUT terminal of the DA-88.
To use the DA-88 as the wordclock master, connect the WORD SYNC OUT of the DA-88 to WORD
CLOCK IN of the WR-DA7 using a BNC-BNC cable (Part # DA-BNC: Available in the USA) and select
the WR-DA7 termination at 75 ohm to ON.
For MIDI connections, connect the WR-DA7 to MIDI IN/OUT of the SY-88 using a MIDI cable. It is
possible to use the MMC and MTC functions.
For the timecode, MTC is received from the MIDI connection. (Using the option card WR-SMPT, it
is possible to receive the SMPTE timecode. In this example, the TIME CODE OUT (RCA Pin Jack)
of the DA-88 is connected to the SMPTE IN (XLR: 1,3-GND, 2-SIGNAL) of the WR-DA7.)
WR-DA7 setting
The DA-88 functions as the wordclock master and the WR-DA7 as a slave unit. In the INPUT SET
window of the D-I/O area on the top panel of the WR-DA7 set the SOURCE SELECT to ‘WCK IN’
(In the case of DA-98, 38 connections, synchronization with the SLOT and V-SYNC is also possible.)
In regards to the MIDI channel of MMC set the MMC PORT to ‘MIDI’ in the MIDI SETUP screen
and make the proper MIDI channel settings.
To receive MTC Timecode, set the MTC PORT to ‘MIDI’ in the MIDI SETUP screen.
To display the MTC timecode on the LCD display, set the TIME BASE to ‘MTC’ in the EXECUTE
screen of AUTOMATION window.
(To use the SMPTE timecode by connecting the optional WR-SMPTE card, and set the TIME BASE
to ‘SMPTE.’)
Page 22

25
DA-88 setting
Since the DA-88 receives digital input data from the TDIF-1, press the DIGITAL IN switch on the
control panel.
The machine ID number of the DA-88 is 0 for the wordclock master unit. These machine ID numbers are set at 0, 1, 2, and 3 using the rear rotary switch in the sequential order of the SYNC cable
connections attached from SYNC OUT to SYNC IN.
(* For the DA-98 and 38, machine ID numbers are set at 1, 2, 3, 4 in the sequential order of the
connections.)
Press the CHASE switch on the DA-88’s front panel with the machine IDs 2 and 3 to select CHASE
to ‘ON’ so that synchronization can be performed with the master DA-88.
Set the sampling rate of the wordclock master unit to INT 48k or INT 44.1k. The sampling rate of
the DA-88 is automatically changed to the sampling rate of the tape being used.
No playback is produced when ALL INPUT is ON; For playback, ALL INPUT should be set to OFF.
For MMC control of the DA-88 from the WR-DA7, set the MODE dip switch #2 to 0 (OFF) on the
rear panel of the SY-88 in order to make the MIDI port effective.
To produce a timecode output from the DA-88 in synchronization with the digital audio data set
the MODE dip switch #5 to 0 (OFF) on the rear panel of the SY-88.
To output tape-recorded timecode from the DA-88, set the MODE dip switch 6 to 1 (ON) on the
rear panel of the SY-88 Sync board.
Page 23

26
System configuration-4
WCK MASTER
WR-TDIF
DA-88
DA-88
DA-88
with SY-88
ID0
WR-DA7
TDIF-1 TDIF-1
WORD SYNC OUT
(BNC)
(BNC)
MIDI
IN
MTC
MMC
MIDI
OUT
WORD CLOCK IN
(75Ω=ON)
PW-88DL
WR-TDIF
TDIF-1 TDIF-1
PW-88DL
WR-TDIF
TDIF-1 TDIF-1
PW-88DL
IN
SYNC OUT
PW-88S
IN
SYNC OUT
PW-88S
Terminator
SLOT 1
(17-24ch)
SLOT 2
(25-32ch)
SLOT 3
(9-16ch)
MIDI
IN
MIDI
OUT
INPUT 1-8
R
SR
Mic
Sampler
ID1
ID2
Keyboard
SP
CR MONITOR
AES/EBU
SP
Power
AMP
REC
OUT
2TR
A IN
AUX
SEND
AUX
RTN
DAT
Effector
A B
MONITOR
B
Page 24

3.5 Example of systems for WR-DA7 tandem connections with DA-98 (1 unit) and DA-38 (3 units)
This is a 32-track digital recording configuration using two WR-DA7 mixer configured in tandem
with three DA-38’s being synchronized using the DA-98 as the master unit. Synchronization with
timecode (MTC or SMPTE) generated from the DA-98 and remote control operations function
using MMC generated from the WR-DA7.
Method of connection
With the mixers powered OFF, insert the WR-TDIF option cards in Slots 1and 2 and install the WRTNDM card in SLOT 3 of the two WR-DA7 units. For proper grounding fasten them to the console
using the supplied screws.
Set the dip switches on the WR-TDIF card of the DA-98 and 38 (both SW1, 2 at ON, OFF).
Set the rear switch of the WR-TNDM card to MASTER for the WR-DA7 that is to be used as a master
unit and set the slave WR-DA7 to SLAVE.
Make the tandem connection between the WR-TNDM cards of the two WR-DA7 units using the pro-
prietary D-sub 25-pin Tandem Cable (Part # DA/DB-DB: Available in the USA).
For communication between the two WR-DA7 units, connect the master unit of the WR-DA7 with
the TO PC port of the slave unit using the recommended serial cable (Macintosh Printer cable).
For wordclock connections, connect the WORD SYNC OUT of the DA-98 to the WORD CLOCK IN
of the WR-DA7’s master unit (or select the SLOT that has the DA-98 connected to it as the Master
Wordclock source), and connect between the WCK OUT of the master unit for the WR-DA7 to the
WCK IN of the slave unit using the BNC-BNC cables. (Part # DA/BNC: Available in the USA)
For terminating the wordclock signals, the master unit is selected to 75ohm=OFF (*75 ‘=ON to
obtain synchronization from the slot) and the slave unit is selected to 75 Ohm=ON.
Connect the WR-TDIF card with DIGITAL I/O (TDIF-1) of the DA-98, 38 using the recommended
cables (Part # WR-TDIF: Available in the USA) and press the DIGITAL IN switch on the front panel
of each DA-98, 38 to select the digital-input mode.
Make the connections to the DA-98, 38 using the PW-88S SYNC cables, from SYNC OUT to SYNC
IN. Connect a terminator to the SYNC OUT of the last DA-38.
To make MIDI connections, establish a loop of the two WR-DA7 units and the DA-98, and make
MIDI cable connections from MIDI OUT to MIDI IN. This makes MMC and MTC functions available.
(It is possible to receive the SMPTE timecode by using the option card WR-SMPT. Make the connection from TIME CODE OUT (XLR) of the DA-98 to SMPTE IN (XLR) of the WR-DA7.)
27
Page 25

28
WR-DA7 setting
To use the WR-DA7 as a slave unit, set the SOURCE SELECT to ‘WCK IN’ in the INPUT SET window
of the D-I/O Setup Section on the MASTER unit.
(For wordclock synchronization using the DA98’s connection slot, set the SOURCE SELECT to
‘SLOT1’ on the MASTER WR-DA7. Keep ‘WCK IN’ on the SLAVE unit.)
To establish communication between the tandem WR-DA7 units, set the PORT SELECT to ‘TO PC’
in the SERIAL I/O SETUP in the MIDI SETUP screen for both the MASTER and SLAVE units. Then
set the baud rates to the same value.
To send and receive MIDI messages, set the PORT select of Gen.Rx and Gen.Tx to ‘MIDI’ in the
MIDI SETUP screen. On the TANDEM SLAVE unit, set the SEND/RECEIVE of the various MIDI messages to ‘THRU.’
For MMC set the MMC PORT to ‘MIDI’ in the MIDI SETUP window for the same MMC channels to
be received on the BRC.
For MTC reception on the WR-DA7, set MTC PORT to ‘MIDI’ in the MIDI SETUP window of the
TANDEM (MASTER) unit.
To display the MTC timecode, set the TIME BASE to ‘MTC’ in the EXECUTE window of AUTOMATION SETUP Window.
(To use the SMPTE timecode connect the WR-SMPTE option card, and set the TIME BASE to
‘SMPTE.’ in the EXECUTE window of AUTOMATION SETUP Window.)
DA-98, 38 setting
Since the DA-98 and 38 receive digital input data from the TDIF-1, press the DIGITAL IN switch on
the control panel.
To set the machine ID numbers of the DA-98 and 38, ID: 1 is assigned to the DA-98. The machine
ID numbers are set to 1, 2, 3, and 4 in the order of cable connections from SYNC OUT to SYNC
IN.
Select the sampling rate of the DA-98 to INT 48k or INT 44.1k. The sampling rate of the DA-98 is
automatically set off the tape that≈ fs being used.
Operation of the DA-38 is synchronized with the DA-98, as a slave unit for the DA-98. Therefore,
when the ID is set for any value other than 1, the DA-38 is set to the wordclock from the PW-88S
SYNC cable.
Press the CHASE switch of the DA-38 front panel with the machine IDs 2, 3, and 4 to select CHASE
to ‘ON’ so that synchronization can be performed with the master DA-98.
While ALL INPUT is ON; no audio is played back. For playback ALL INPUT should be set at OFF.
Page 26

29
WR-DA7
MIDI
IN
MMC
MTC
MIDI
OUT
WR-
TANDM
SYNC OUT
SLOT 1
(17-24ch)
(MASTER)
(MASTER)
(SLAVE)
SLOT 2
(25-32ch)
SLOT 3
INPUT 1-16
WORD CLOCK
OUT (75Ω=OFF)
To PC
WORD CLOCK IN
(75Ω=ON)
To PC
MIDI
IN
MIDI
OUT
MIDI
OUT
MIDI
IN
WR-DA7
IN
SLOT 1
(17-24ch)
(SLAVE)
SLOT 2
(25-32ch)
SLOT 3
INPUT 1-16
WR-
TANDM
WCK MASTER
WR-TDIF
DA-98 ID1
TDIF-1 TDIF-1
WORD SYNC OUT
(BNC)
(BNC)
WORD CLOCK IN
(75Ω=OFF)
PW-88DL
WR-TDIF
DA-38 ID2
TDIF-1 TDIF-1
PW-88DL
IN
SYNC OUT
PW-88S
PW-88S
WR-TDIF
TDIF-1 TDIF-1
PW-88DL
WR-TDIF
TDIF-1 TDIF-1
PW-88DL
IN
SYNC OUT
PW-88S
Terminator
R
SR
Mic
Sampler
Keyboard
R
SR
Mic
Sampler
Keyboard
DA-98 ID3
DA-38 ID4
DA-38 ID3
SP
CR MONITOR
AES/EBU
SP
Power
AMP
REC
OUT
2TR
A IN
AUX
SEND
AUX
RTN
DAT
Effector
A B
DA-98 ID3
MONITOR
B
System configuration -5
Page 27

30
3.6 Example of systems for analog 16-track recorder (1 unit)
This is an editing system that uses AUTOMATION. The SMPTE timecode is recorded in the 16th
tape track of the analog 16-track recorder and the system works off this timecode.
Method of connection
Insert the option card WR-ADDA (Slot 1, 2) and WR-SMPTE in the WR-DA7 and firmly fasten them
to the main body with the supplied screws.
Connect the IN/OUT terminal using the recommended cable(Part # DA/DB-XLR M-F: Available in
the USA) of the WR-ADDA card of the WR-DA7 to the IN/OUT terminal of the analog 16-track
recorder.
The timecode is supplied from channel 16 of the analog recorder to the (optional) SMPTE IN
(XLR: 1,3-GND, 2-SIGNAL) of the WR-DA7.
WR-DA7 setting
Set the WR-DA7 to the wordclock master.
In the INPUT SET screen of D-I/O of the WR-DA7, set SOURCE SELECT to ‘INT 48k’ or ‘INT 44.1k.’
To display the SMPTE timecode being received at the SMPTE IN, set the TIME BASE to ‘SMPTE’ in
the EXECUTE screen of the AUTOMATION window.
Page 28

31
System configuration -6
WCK MASTER
WR-ADDA
16Track Analog
Multitrack Recorder
Track16
Analog Out
OUT
8
8
WR-SMPT
SMPTE IN
SLOT 1
(17-24ch)
(XLR)
INPUT 1-16
WR-ADDA
OUT
IN
8
8
SLOT 2
(25-32ch)
R
SR
Mic
Sampler
WR-DA7
Keyboard
MTR
SP
CR MONITOR
AES/EBU
SP
Power
AMP
REC
OUT
2TR
A IN
AUX
SEND
AUX
RTN
DAT
Effector
A B
MONITOR
B
Page 29

32
3.7 Example of systems for Digital Video Recorder (1 unit)
This is a post-production system consisting of the WR-DA7 and the Digital Video Recorder. The
audio signals are connected using the AES/EBU digital audio option card. The WR-DA7 receives
SMPTE timecode from the Digital Video Recorder for it’s editing and automation operations.
Method of connection
Insert the option card of WR-AESS (Slot 1) and the WR-SMPTE (option card) in the WR-DA7 and
fasten them to the console using the supplied screws. Select the switches on the WR-AESS card to
AES/EBU.
Make the connections to the digital I/O terminals of the WR-DA7 and the Digital Video Recorder
(WR-AESS card: D-sub 25-pin connector, Digital Video Recorder: XLR connector;
Use the House Video Sync signal to REF IN (BNC) of the Digital Video Recorder, and make the
connection from REF OUT to V-SYNC IN of the WR-DA7.
The termination of the Digital Video Recorder REF should be set to 75 Ohm=OFF.
The timecode is transferred from the SMPTE OUT (XLR) of the Digital Video Recorder to the
SMPTE IN (XLR) of the WR-DA7.
WR-DA7 setting
Set the SOURCE SELECT to ‘V-SYNC’ in the INPUT SET screen of D-I/O area in order to produce
synchronization with the V-SYNC input.
To display the SMPTE timecode received at the SMPTE IN, set the TIME BASE to ‘SMPTE’ in the
EXECUTE window of Automation Setup Section
Digital Video Recorder settings: To receive AES/EBU digital audio, make the settings of ‘DIGITAL
IN’ on the LCD screen.
A ‘CHANNEL STATUS CRCC ERROR’ may be displayed during Digital
recording from the DA7.
This is; however, a message in regards to the sub-code signal, even
with this being displayed proper audio recording and playback
should be performed.
Page 30

33
System configuration -7
WR-SMPT
WR-DA7
SW-OFF
REF
OUT
SMPTE OUT
(XLR)
DIGITAL
IN/OUT
DIGITAL
I/O
(XLR)
(D-sub
25pin)
(BNC)
REF
IN
V-SYNC IN(BNC)
SMPTE IN(XLR)
House Video Sync
SLOT 1
(17-24ch)
WCK MASTER
INPUT 1-16
Digital Video Recorder
WR-AESS
SW=AES/EBU
R
SR
Mic
Sampler
Keyboard
SP
CR MONITOR
AES/EBU
SP
Power
AMP
REC
OUT
2TR
A IN
AUX
SEND
AUX
RTN
DAT
Effector
A B
MONITOR
B
Page 31

34
3.8 Example of systems for VTR (1 unit), ADAT (1 unit), and BRC
This is a post-production system consisting of the ADAT and the BRC, in addition to the WR-DA7
and a video recorder. The SMPTE timecode output is generated from the video recorder, this output goes to the BRC. The BRC supplies the timecode and the wordclock to the ADAT and the WRDA7. Editing and Automation becomes possible in synchronization with the timecode from the
video recorder.
Method of connection
Insert the option card WR-ADAT in Slot 1 of the WR-DA7 and firmly fasten it to the Da7 with the
supplied screws.
Connect the WR-ADAT card from the WR-DA7 to the DIGITAL IN/OUT of the ADAT using an optical
cable and press the DIGITAL IN switch on the ADAT’s front panel to select the digital input mode.
Route the SMPTE timecode from the video recorder to the SMPTE IN (Phone Jack) of the BRC so
that the BRC is synchronized with the timecode of the video recorder.
To use the BRC as the clockmaster, connect WORD OUT (48kHz) of the BRC to WORD CLOCK IN
of the WR-DA7 using a BNC-BNC cable and set the WR-DA7 termination at 75 Ohm=ON.
Use MIDI cables to connect the WR-DA7 to MIDI IN/OUT of the BRC. This makes MMC and MTC
functions possible.
For the timecode, MTC is received from the MIDI connections. It is possible to receive SMPTE
timecode using the WR-SMPT option card (XLR: 1,3-GND, 2-SIGNAL) in the WR-DA7.)
WR-DA7 setting
To use the WR-DA7 as a slave unit, set SOURCE SELECT to ‘WCK IN’ in the INPUT SET screen of
the D-I/O. (For synchronization with the ADAT card source, set SOURCE SELECT to ‘SLOT1.’)
For MMC, set MMC PORT to ‘MIDI’ in the MIDI SETUP screen. The MIDI channel of MMC should
be set to the same MMC channel being received on the BRC.
To receive MTC on the DA7, set MTC PORT to ‘MIDI’ in the MIDI SETUP screen.
To view MTC on the DA7’s LCD screen, set TIME BASE to ‘MTC’ in the EXECUTE screen of
AUTOMATION. (To use the SMPTE timecode, set TIME BASE to ‘SMPTE.’)
ADAT setting
For ADAT wordclock setting, connect a Sync cable from the BRC and turn on the power supply. At
this time, setting is automatically made to ‘EXT’ and the ADAT works as a slave machine for the
BRC.
Regarding the power supply for the ADAT and the BRC; the power supply for the ADAT should be
turned on first, then, the power supply for the ADAT should be turned on next.
The audio input of the ADAT is used in the digital input mode. Therefore, the DIGITAL IN switch
should be selected.
During ADAT playback, there is no output if ALL INPUT is ON. ALL INPUT must be turned OFF.
Page 32

35
BRC setting
To synchronize the BRC with the SMPTE timecode from the video recorder set Locate Reference to
‘SMPTE Input’ and Clock Source to ‘Internal’ by selecting the EXT SYNC setting for the BRC. Then,
turn on the EXT SYNC switch.
Select the Fixed Mode when the BRC is used as a clockmaster and if the sampling rate is set at
48kHz. Select the Variable Mode when the sampling rate is set at 44.1kHz. Press the PITCH DOWN
switch to setting -147cent ( ‘44.1’ display).
For MTC setting, select MIDI in the GEN SYNC setting area to ‘MTC’ and turn on the GEN SYNC
switch.
For SMPTE select SMPTE in the GEN SYNC setting area to ‘-10dB’ and turn on the GEN SYNC
switch.
To obtain a timecode output from the BRC even during FF/REW operation of the ADAT, set the display to 8: Output Rew/FF SMPTE & MTC to ‘ON’ in MIDI/UTIL setting of the BRC.
To accomplish MMC operation, there must be coincidence of the MIDI channel between MMC
output from the WR-DA7 and MMC received on the BRC. On the BRC, set the display to 11: MIDI
Device screen by MIDI/UTIL setting. Set the value of ‘MIDI channel set for the WR-DA7 - 1.’
Otherwise, setting should be made to ‘ALL.’
A ‘CHANNEL STATUS CRCC ERROR’ may be displayed during
Digital recording from the DA7.
This is; however, a message in regards to the sub-code signal,
even with this being displayed proper audio recording and playback should be performed.
Page 33

36
System configuration -8
WCK MASTER
BRC
WR-DA7
SYNC IN
SMPTE IN
SMPTE Timecode
MIDI
IN
MTC MIDI IN
REC OUT
VIDEO
OUT
MMC MIDI OUT
MIDI
OUT
WCK OUT
(48kHz OUT)
REMOTE OUT
TO ADAT
Sync
Cable
WORD CLOCK IN
(75Ω=ON)
WR-SMPT
SMPTE OUT (Phone)
SMPTE IN (XLR)
WR-ADAT
ADAT ID1
VTR
TV
Monitor
DIGITAL
OUT
IN
IN
OUT
Optical Cable
SLOT 1
(17-24ch)
WR-ADAT
INPUT 1-16
R
SR
Mic
Sampler
Keyboard
SP
MONITOR
A
SP
Power
AMP
AUX
SEND
AUX
RTN
Effector
A B
Page 34

37
3.9 Example of systems for VTR (1 unit) and DA-98 (1 unit)
This is a post-production system consisting of the DA-98, one WR-DA7 and a video recorder. The
SMPTE timecode output is generated from the video recorder and is supplying timecode to the
DA-98. Receiving the SMPTE timecode, the DA-98 supplies the timecode and the wordclock to the
WR-DA7. In this mode, editing operation becomes possible by the use of the AUTOMATION feature
in synchronization with the timecode of the video recorder. In this system, House Video Sync is
used as the wordclock master.
Method of connection
With the DA7 powed off, insert the option card WR-TDIF in Slot 1 of the WR-DA7 and firmly fasten
it to the mixer with the supplied screws. Make the setting for the DA-88 with the dip switches on
the WR-TDIF card (SW1, 2 to OFF, respectively).
Connect the WR-TDIF card from the WR-DA7 to the DIGITAL I/O (TDIF-1) of the DA-98 and press
the DIGITAL IN switch of the DA-98 front panel to select the digital input mode.
Connect House Video Sync to VIDEO IN (BNC) of the video recorder and the DA-98.
Connect the WR-DA7 to the MIDI IN/OUT of the DA-98 using a MIDI cable to use the MMC and
MTC functions.
For timecode, MTC is received from the MIDI connection. (Using the option card WR-SMPT, it is
also possible to receive the SMPTE timecode. In this case, the TIME CODE OUT (XLR) of the DA98 is connected to the SMPTE IN (XLR) of the WR-DA7.)
When using the DA-88 in place of the DA-98, connect WORD SYNC OUT of the DA-88 to WORD
CLOCK IN of the WR-DA7 using a BNC cable and set the WR-DA7 wordclock termination to 75
Ohm=ON.
WR-DA7 setting
The DA-88 functions as the wordclock master and the WR-DA7 as a slave unit. Set the SOURCE
SELECT to ‘WCK IN’ in the INPUT SET screen of the D-I/O of the WR-DA7. (For DA-98, 38 connections, synchronization with the SLOT and V-SYNC is also possible.)
To set the MIDI channel for MMC, set MMC PORT to ‘MIDI’ in the MIDI SETUP screen and select
the MIDI channel setting.
To recieve MTC timecode, set MTC PORT to ‘MIDI’ in the MIDI SETUP screen.
To display MTC on the DA7’s LCD screen, set TIME BASE to ‘MTC’ in the EXECUTE screen of
AUTOMATION.
(To use the SMPTE timecode set TIME BASE to ‘SMPTE.’)
DA-98 setting
Operation of the DA-98 is synchronized with the SMPTE timecode being generated from the video
recorder.
To enable DA-98 operation synchronized with the SMPTE timecode, press the CHASE switch on
the front panel and set CHASE to ‘ON.’
Set the machine ID number of the DA-98 to 1. (ID=0 for the DA-88)
Page 35

38
To enable the DA-98 to receive digital input from the TDIF-1, press the DIGITAL IN button on the
front panel.
When the timecode output of the video recorder is generated after being converted to MTC, the
MODE dip switch 6 on the SY-88 rear side is set to OFF. (If this switch is set to ON, the timecode
recorded on the tape is converted into MTC and the resultant output is generated.)
Use the tape where the recorded timecode has the same frame rate as that of the SMPTE timecode
output generated from the video. It is impossible to perform operation synchronized with the
SMPTE timecode of the video recorder if no timecode is recorded in the tape or there is failure in
coincidence of the frame rate.
Turn on the CHASE switch of the DA-98.
Set the dipswitch 8 at ON the SY-88 board.
While ALL INPUT is ON; no playback is generated. To realize playback, ALL INPUT should be set to
OFF.
A ‘CHANNEL STATUS CRCC ERROR’ may be displayed during
Digital recording from the DA7.
This is; however, a message in regards to the sub-code signal, even
with this being displayed proper audio recording and playback
should be performed.
Page 36

39
System configuration-9
VIDEO IN
WORD SYNC OUT
(BNC)
SMPTE
Timecode
MIDI
IN
MTC MIDI IN
MMC MIDI OUT
MIDI
OUT
TIMECODE
IN
DA-98 ID1
House Video Sync
WCK MASTER
WR-TDIF
TDIF-1 TDIF-1
PW-88DL
(BNC)
WORD CLOCK IN
(75Ω=ON)
WR-DA7
REC OUT
VIDEO
OUT
VTR
TV
Monitor
INPUT 1-16
R
SR
Mic
Sampler
Keyboard
SP SP
Power
AMP
AUX
SEND
AUX
RTN
Effector
A B
MONITOR
A
Page 37

aV0499-0 DA7ApplicationGuide Printed in Japan
Matsushita Communication Industrial Co., Ltd. 1999
 Loading...