

Page 1
Operating Instructions
Wireless Video Intercom System
English Français Deutsch Italiano
Model No.
VL-SWD501UEX
VL-SWD501EX
Español
Thank you for purchasing a Panasonic product.
Please read this manual before using the product and save it for future reference.
Installation Guide is supplied separately.
Nederlands
Page 2

Table of Contents
1. Introduction
Introduction
1.1 Model composition ........................................3
1.2 Accessory information ...................................3
1.3 General information .......................................4
1.4 Operating procedures and icons ...................4
1.5 Trademarks and registered
trademarks ....................................................5
1.6 Abbreviations ................................................5
2. Important information
Important information
2.1 For your safety ..............................................6
2.2 Important safety instructions .........................7
2.3 For best performance ....................................7
2.4 Other important information ..........................7
3. Preparation
Preparation
3.1 Using SD cards (sold separately) ................10
3.2 Controls .......................................................10
3.3 Displays .......................................................12
3.4 Battery installation .......................................14
3.5 Charging the sub monitor ............................14
3.6 Wall mounting .............................................15
3.7 Setting the language, date and time ...........15
3.8 Wide/zoom settings and zoom position
settings ........................................................15
4. Talking/Monitoring
Talking/Monitoring
4.1 Answering calls ...........................................17
4.2 Transferring doorphone calls ......................17
4.3 Monitoring the outside with the
doorphone ...................................................18
4.4 Talking between the main monitor and the sub
monitor ........................................................18
5. Recording/Playing
Recording/Playing
5.1 Image and audio recording .........................19
5.2 Recording doorphone images and
conversations ..............................................20
5.3 Playing recorded images (main monitor
only) ............................................................20
6.6 Changing camera settings ..........................26
7. Using electric locks
Using electric locks
7.1 Connecting with electric locks .....................29
8. Incoming call operations
Incoming call operations
8.1 When another incoming call is received - main
monitor ........................................................30
8.2 When another incoming call is received - sub
monitor ........................................................31
9. Additional functions
Additional functions
9.1 Changing how images are displayed (wide/
zoom and pan/tilt settings) ..........................33
9.2 Audio and display settings for talking and
monitoring ...................................................33
9.3 Ringtone settings ........................................34
9.4 Functions settings list - main monitor ..........35
9.5 Function settings list - sub monitor ..............37
10. General information
General information
10.1 Registering sub monitors ............................39
10.2 Using repeaters ...........................................39
10.3 Cancelling sub monitors, cameras, and
repeaters .....................................................40
10.4 Using SD cards (formatting/copying data/
playing images) ...........................................41
10.5 Cleaning ......................................................42
10.6 Specifications ..............................................42
11. Troubleshooting
Troubleshooting
11.1 Troubleshooting ..........................................44
11.2 Error messages - main monitor ...................49
11.3 Error messages - sub monitor .....................50
12. Index
12.1 Index............................................................51
6. Using a camera
Using a camera
6.1 Connecting with a camera ...........................23
6.2 Monitoring the outside with the
camera ........................................................23
6.3 When camera sensors are triggered ...........24
6.4 Turning off camera sensor detections for
specified periods of time (main monitor
only) ............................................................24
6.5 Recording camera images and
conversations ..............................................25
2
Page 3
1.1 Model composition
1. Introduction
1. . Introduction
Model composition
VL-SWD501EX VL-MWD501EX VL-WD613EX VL-V554EX
VL-SWD501UEX VL-MWD501EX VL-WD613EX VL-V554UEX
*1 Product names used in this manual.
VL-MWD501EX VL-WD613EX VL-V554EX (surface mount)/
R The illustrations in the supplied manual
Caution:
R Before attempting to connect or operate this product, please read the label on the rear of the main monitor.
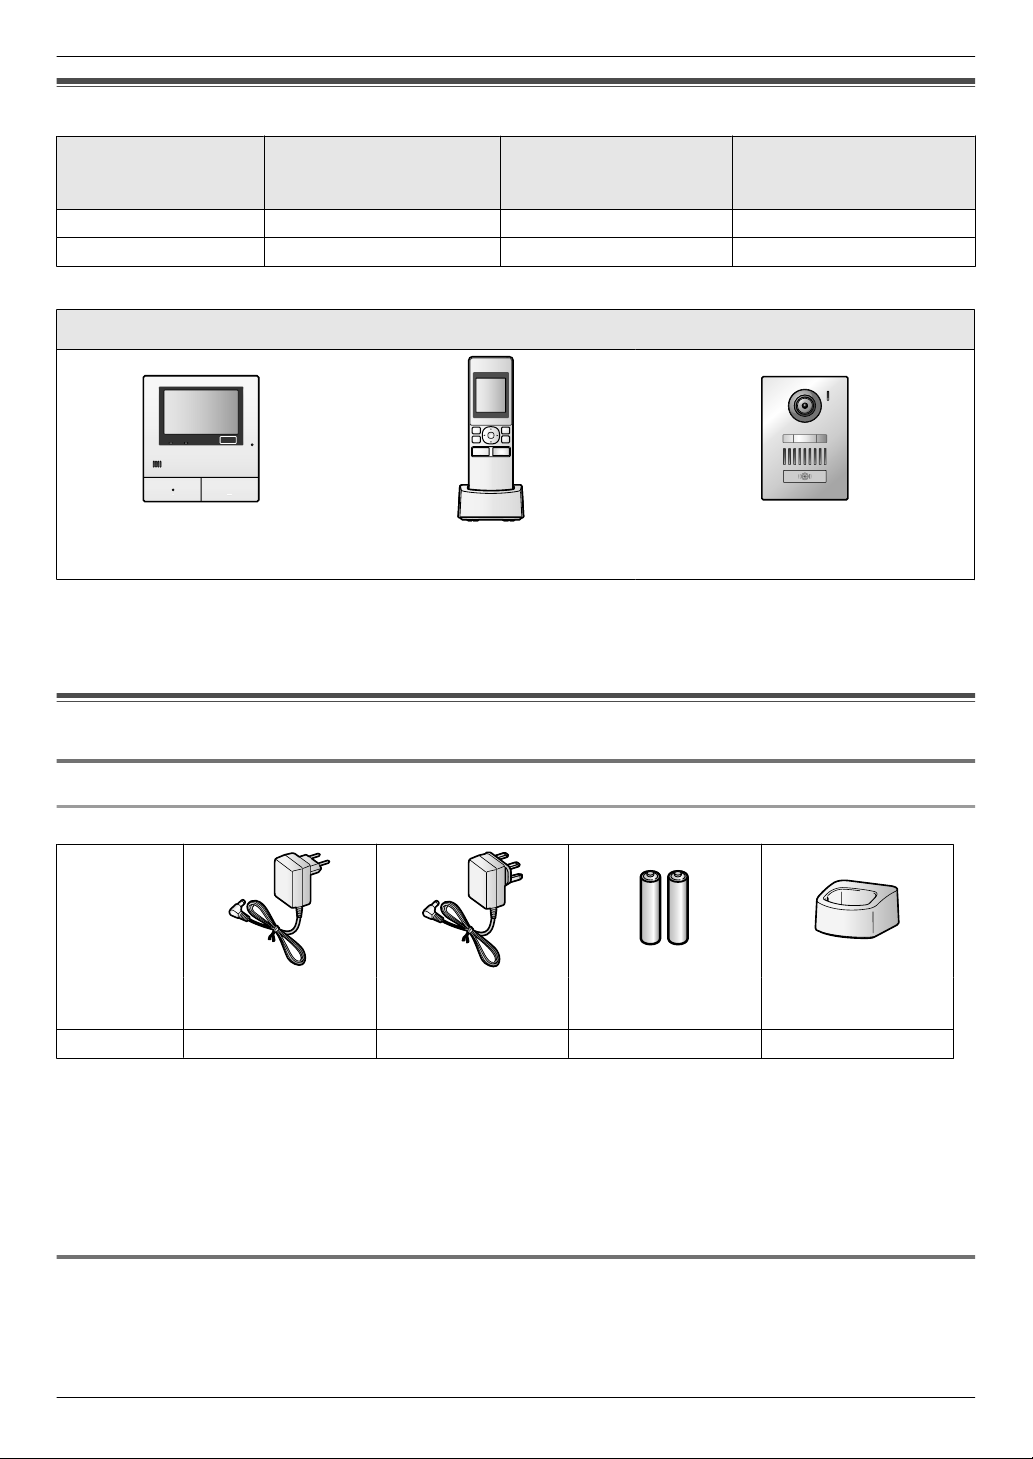
Main monitor station
(Main monitor*1)
Product figure
(s) may vary slightly from the actual product.
Wireless monitor
station
(Sub monitor*1)
Door station
(Doorphone*1)
VL-V554UEX (flush mount)
1.2 Accessory information
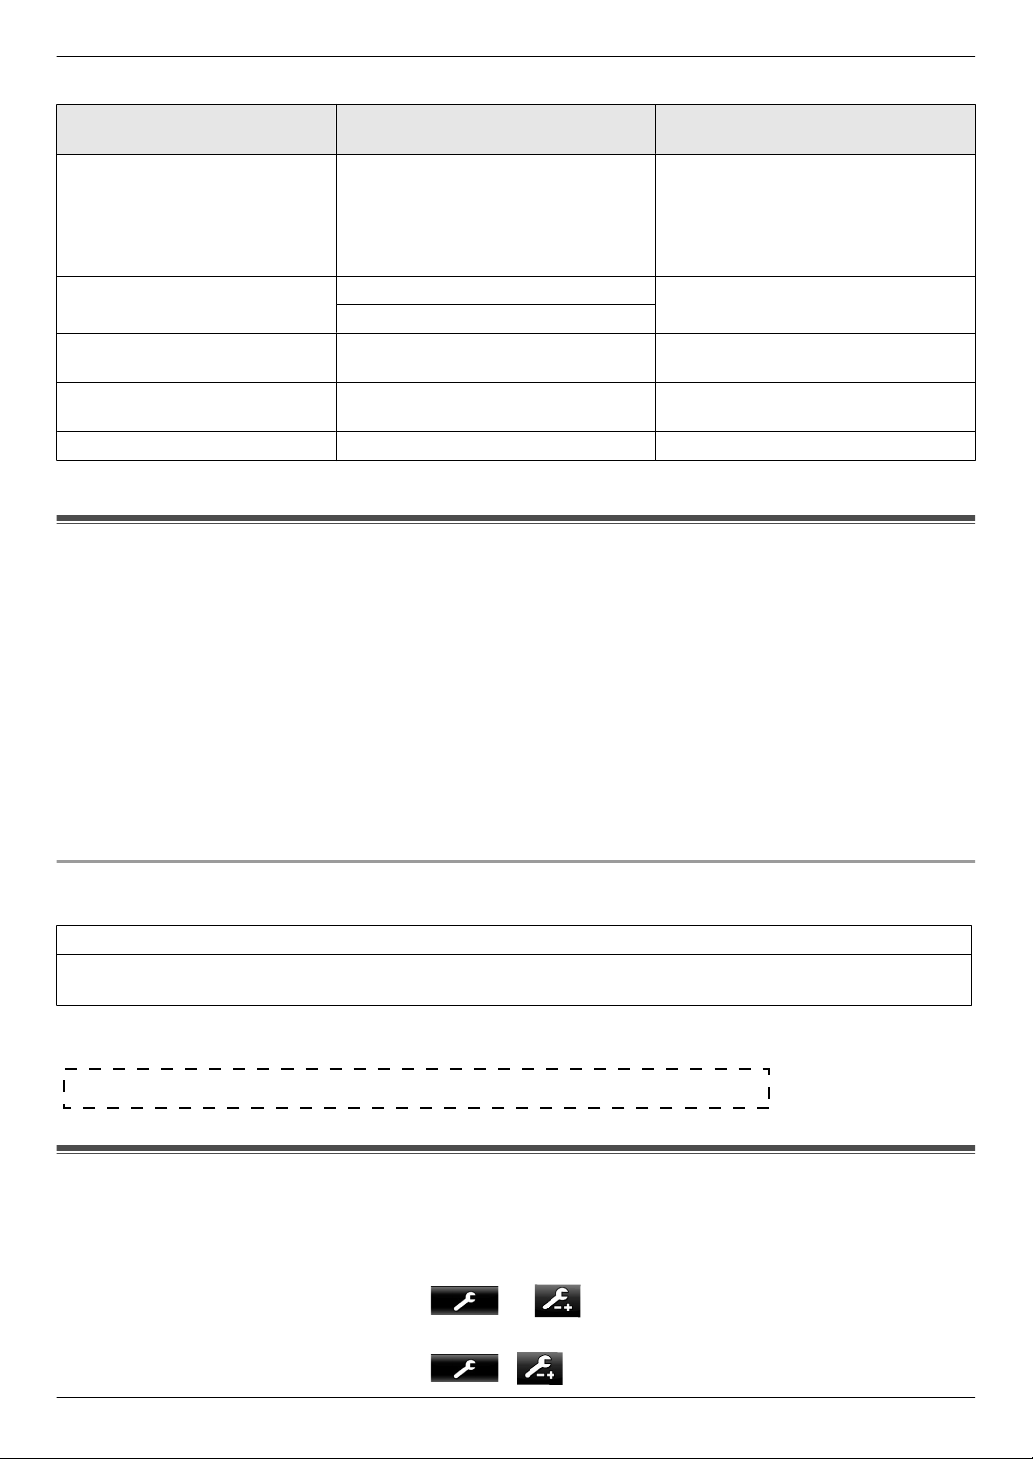
1.2.1 Supplied accessories
For the sub monitor
Accessory
item
AC adaptor/
PNLV226CE
Quantity 1 1 2 1
*1 Appropriately dispose of the AC adaptor that will not be used.
Note:
R Accessories for installing the main monitor and the doorphone are described in the supplied
R You will need the following additional items (locally procured) to install the charger on the wall.
– Screws ´ 2 (for wall mounting):
Prepare the screws according to the material, structure, strength and other factors of the mounting area and
the total weight of objects to be mounted.
*1
1.2.2 Additional/replacement accessories
AC adaptor/
PNLV226E
*1
Rechargeable
batteries
Charger
Installation Guide.
Please contact your nearest Panasonic dealer for sales information.
3
Page 4
1. Introduction
As of November, 2013
Accessory item Order number
Rechargeable batteries
Door station (called doorphone) VL-V554EX (surface mount)
Sub monitor VL-WD613EX Max. of 6 (including the supplied
Wireless sensor camera (called
camera)
DECT repeater (called repeater) VL-FKD2EX Max. of 2
*1 Replacement batteries may have a different capacity from that of the supplied batteries.
HHR-4MVE
Battery type:
Nickel metal hydride (Ni-MH)
–
– 2 x AAA (R03) size for each
handset
VL-V554UEX (flush mount)
VL-WD812EX Max. of 4
*1
Number of devices that can be
connected
-
Max. of 2 (including the supplied
devices)
devices)
1.3 General information
R In the event of problems, you should contact your equipment supplier in the first instance.
Declaration of Conformity:
R Panasonic System Networks Co., Ltd. declares that this equipment
compliance with the essential requirements and other relevant provisions of Radio & Telecommunications
Terminal Equipment (R&TTE) Directive 1999/5/EC.
Declarations of Conformity for the relevant Panasonic products described in this manual are available for download
by visiting:
http://www.ptc.panasonic.eu
Contact to Authorised Representative:
Panasonic Testing Centre
Panasonic Marketing Europe GmbH
Winsbergring 15, 22525 Hamburg, Germany
(VL-SWD501EX/VL-SWD501UEX) is in
For your future reference
We recommend keeping a record of the following information to assist with any repair under warranty.
Serial No. Date of purchase
(found on the rear of the main monitor)
Name and address of dealer
Attach your purchase receipt here.
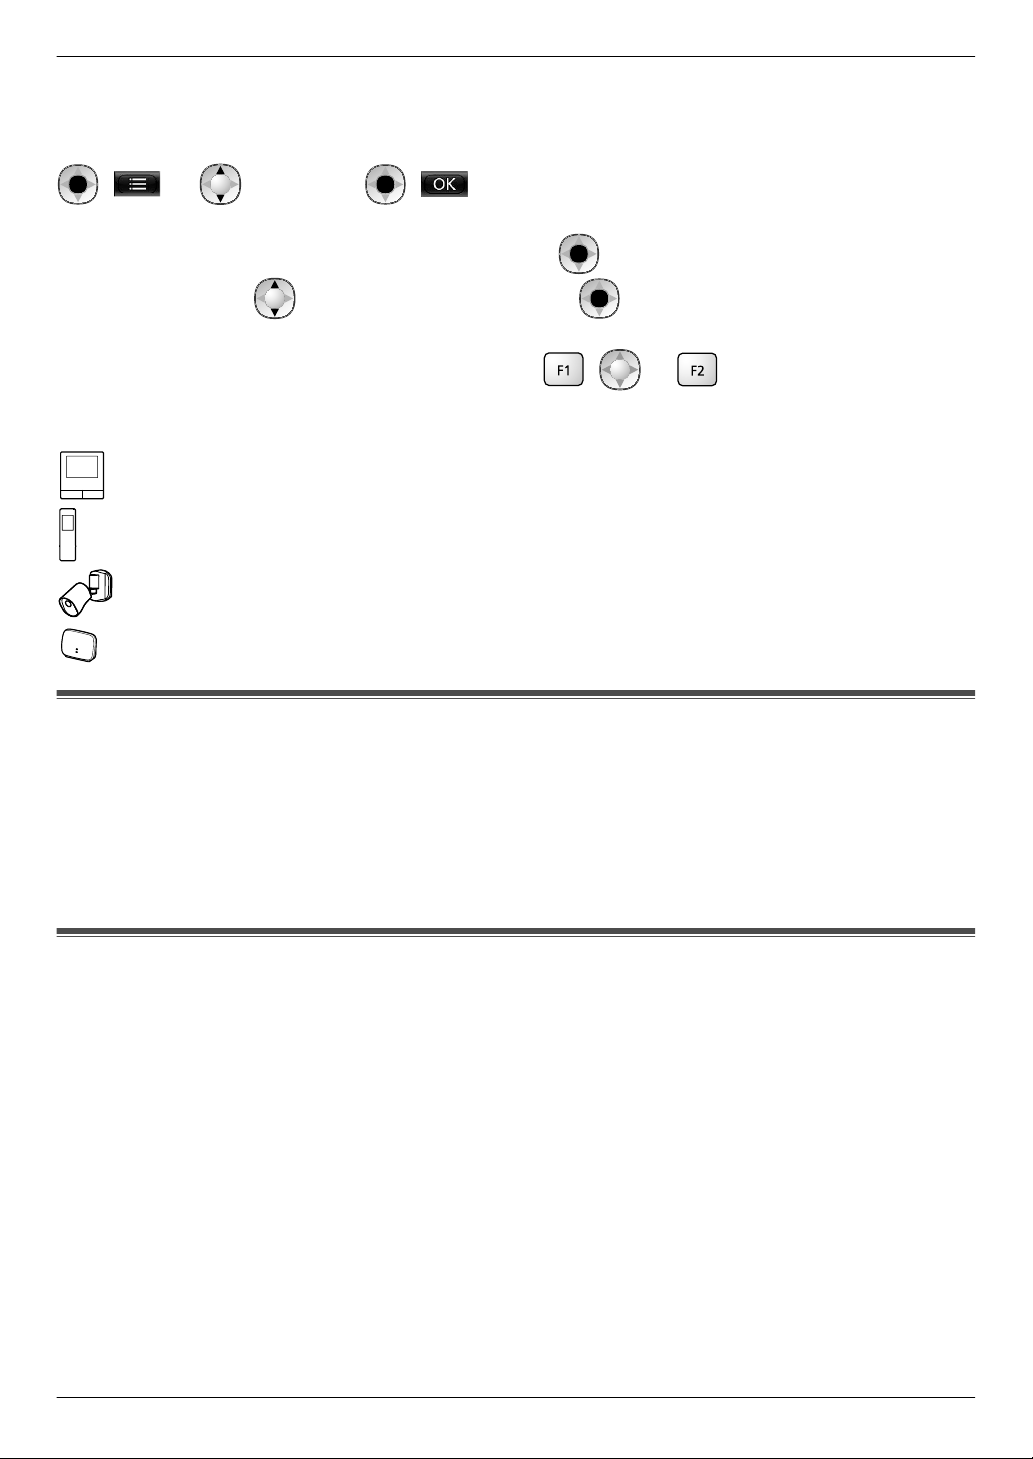
1.4 Operating procedures and icons
n This
manual provides operating procedures for the product. These operating procedures can be understood in the
following way:
Main monitor example:
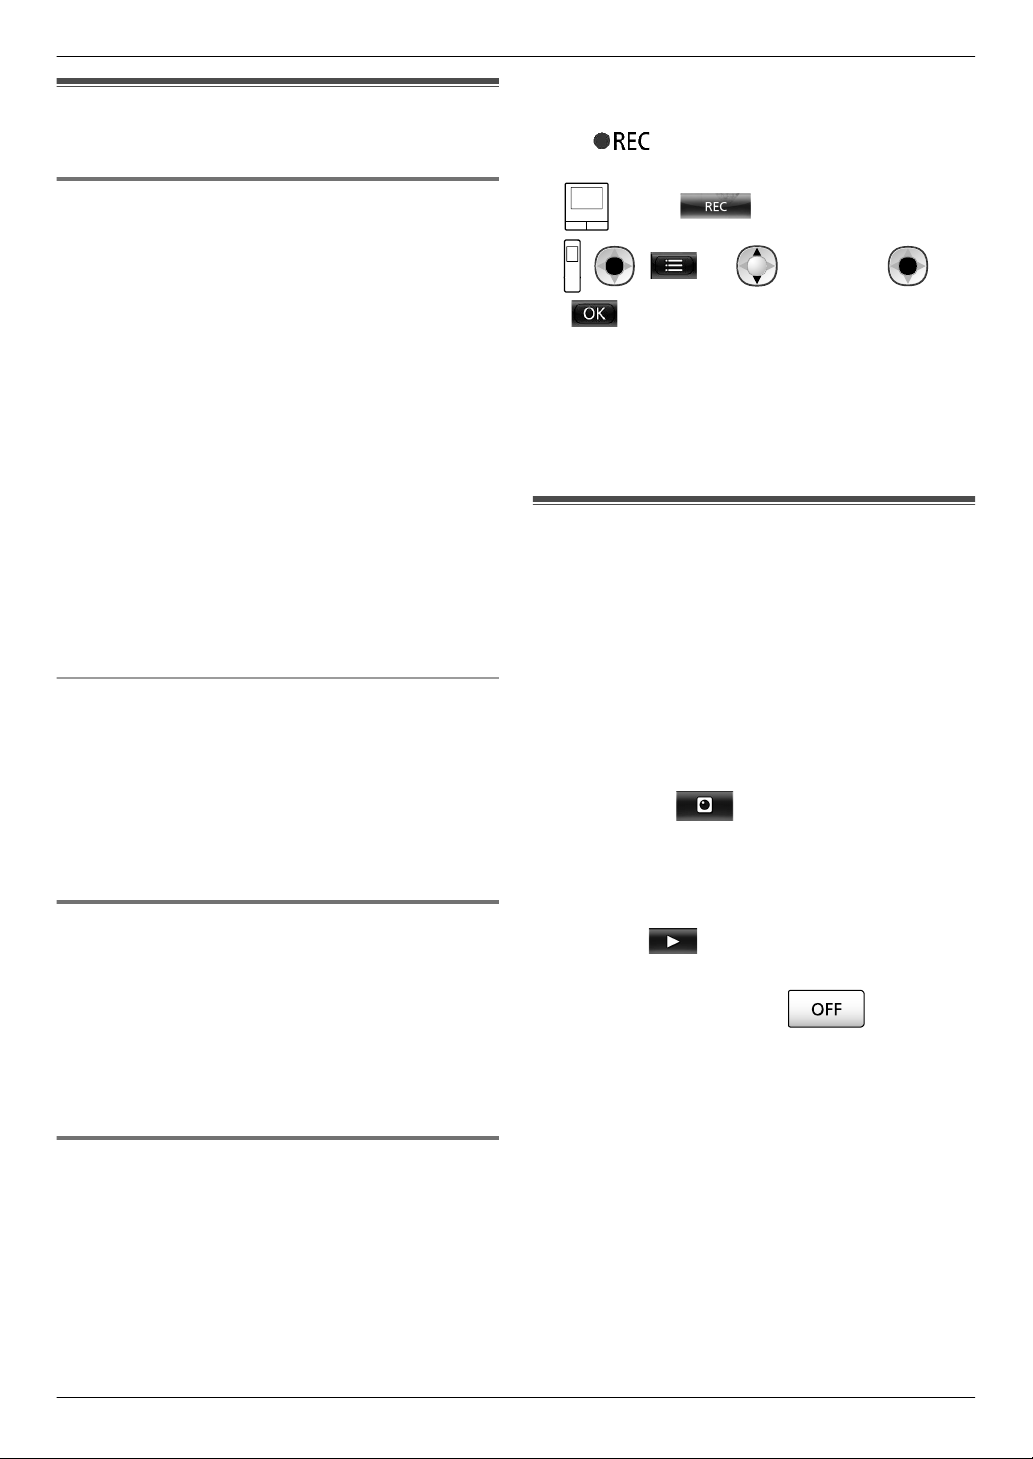
From the top menu of the main monitor, touch
Meaning
From the top menu of the main monitor, touch , , [Register/Cancel], [Register], and then [Camera].
4
® ® [Register/Cancel] ® [Register] ® [Camera].
Page 5
1. Introduction
– Words written in [ ] indicate touch buttons.
– Words written in " " indicate items or messages displayed on the screen that cannot be selected.
Sub monitor example:
( ) ® : "Ringtone" ® ( )
Meaning
Press the round button in the centre of the multifunction button (
the multifunction button (
– Words written in " " indicate settings, items, and messages displayed on the screen.
– Words or icons written in "( )" after multifunction buttons (
displayed on the screen above the multifunction buttons.
n Icons are used in the following way in this manual.
: Indicates that the information or procedure is for the main monitor.
: Indicates that the information or procedure is for the sub monitor.
: Indicates that the information or procedure is for the camera.
: Indicates that the information or procedure is for the repeater.
), and then press the round button ( ).
), select "Ringtone" by pressing up or down with
, , or ) indicate the words or icons
1.5 Trademarks and registered trademarks
R SDXC Logo is a trademark of SD-3C, LLC.
R Mac OS, QuickTime, and the QuickTime Logo are trademarks of Apple Inc., registered in the U.S. and other
countries.
R Microsoft, Windows, Windows Vista, and Windows Media are either registered trademarks or trademarks of
Microsoft Corporation in the United States and/or other countries.
R The software of the sub monitor is based in part on the work of the Independent JPEG Group.
R All other trademarks identified herein are the property of their respective owners.
1.6 Abbreviations
The following abbreviations are used in this manual.
R Microsoft
R Microsoft
R Microsoft
R Microsoft
R SDXC/SDHC/miniSDHC/microSDHC/SD memory card/miniSD memory card/microSD memory card are
described as SD card.
®
Windows® XP operating system is described as Windows XP.
®
Windows Vista® operating system is described as Windows Vista.
®
Windows® 7 operating system is described as Windows 7.
®
Windows® 8 operating system is described as Windows 8.
5
Page 6
WARNING
CAUTION
2. Important information
2.1 For your safety
To prevent severe injury and loss of life/property, read
2. . Important information
this section carefully before using the product to ensure
proper and safe operation of your product.
Preventing fire and electric shock
R Use
R Use only the specified power supply unit and AC
R Do not attempt to disassemble or modify this product.
R Never touch the power supply unit and AC adaptor
R Do not touch the power supply unit and the AC
R Do not use the product (excluding the doorphone) in
R Do not perform any actions (such as fabricating,
R Do not overload the power outlet or wiring above the
R Never put metal objects inside the product. Never
R Do not use a microwave oven or other devices, such
R Completely insert the AC adaptor into the power
R Regularly remove any dust, etc., from the AC adaptor
R Turn off a circuit breaker or unplug the product from
only the power source marked on the product. If
you are not sure of the type of power supplied to your
home, consult your dealer or local power company.
adaptor.
Contact an authorised service centre for repairs.
with wet hands.
adaptor during an electrical storm.
areas that are exposed to rain, moisture, steam, or
oily smoke, or areas that have excessive dust.
twisting, stretching, bundling, forcibly bending,
damaging, altering, exposing to heat sources, or
placing heavy objects on the power cable and the AC
adaptor) that may damage the power cable and the
AC adaptor. Using the product with a damaged power
cable or AC adaptor may cause electric shock, short
circuits, or fire. Contact an authorised service centre
for repairs.
specified levels. Overloading by having many
connections on one power outlet may cause heat
generation, resulting in a fire.
spill any liquid on the product (excluding the
doorphone).
If metal objects enter the product or the product
becomes wet, turn off a circuit breaker or unplug the
product from the power outlet and contact an
authorised service centre.
as electromagnetic cookers, to speed up the drying
process of any parts of the product.
outlet. Failure to do so may cause electric shock and/
or excessive heat resulting in a fire. Do not use
damaged AC adaptors or power outlets.
by unplugging it from the power outlet, then wiping it
with a dry cloth. Accumulated dust may cause an
insulation defect from moisture, etc., resulting in a
fire.
the power outlet if the product emits smoke, an
abnormal smell or makes unusual noise, or if the
product has been dropped or physically damaged.
These conditions can cause fire or electric shock.
Confirm
an authorised service centre.
R Hold the main body (not the metal parts) of the AC
adaptor when unplugging it. Unplugging the AC
adaptor while holding its cord or the cord’s plugs may
result in fire, electric shock, or injury.
Preventing accidents
R SD cards may become a choking hazard. Keep SD
cards out of reach of children. If you suspect a child
has swallowed an SD card, seek medical advice
immediately.
R Do not use the product in health care facilities if any
regulations posted in the area instruct you not to do
so. Hospitals or health care facilities may be using
equipment that could be sensitive to external RF
(radio frequency) energy.
R Do not install or use this product near automatically
controlled devices such as automatic doors and fire
alarms. Radio waves emitted from this product may
cause such devices to malfunction, resulting in an
accident.
R Consult the manufacturer of any personal medical
devices, such as pacemakers or hearing aids, to
determine if they are adequately shielded from
external RF (radio frequency) energy. (The product
operates in the frequency range of 1.88 GHz to
1.90 GHz, and the RF transmission power is 250 mW
(max.).)
Preventing accidents, injuries, and property damage
R Do not use the product in unstable areas or areas
prone to strong vibrations. This may cause the
product to fall, resulting in damage to the product or
injury.
R Do not put your ear(s) near the speaker, as loud
sounds
impairment.
R Do not place coins or other metal objects in the
charger. Metal objects may become hot, causing
burns.
R Do not place magnetic cards or other devices that
store data magnetically (such as credit cards) near
the charger. Failure to do so may make the cards or
devices unusable.
Sub monitor batteries
Preventing leakage, heat generation, rupture, or
accidents
R We recommend using the batteries noted on
page 4. USE ONLY rechargeable Ni
AAA (R03) size.
R Do not mix old and new batteries.
R Do not open or mutilate the batteries. Released
electrolyte from the batteries is corrosive and may
that smoke has stopped emitting and contact
emitted from the speaker may cause hearing
-MH batteries
6
Page 7

2. Important information
cause burns or injury to the eyes or skin. The
electrolyte is toxic and may be harmful if swallowed.
R Charge the batteries provided or identified for use
with the product only, in accordance with the
instructions and limitations specified in this manual.
not heat batteries or dispose of batteries in a fire.
R Do
R Do not touch the ends of batteries (
objects.
R Handle the batteries with care. Do not allow
conductive
to touch the batteries, otherwise a short circuit may
cause the batteries and/or the conductive material to
overheat and cause burns.
R Only use the specified charger and AC adaptor to
charge the batteries. Failure to follow these
instructions may cause the batteries to swell or
explode.
materials such as rings, bracelets or keys
, ) with metal
2.2 Important safety instructions
When
using this product, basic safety precautions should
always be followed to reduce the risk of fire, electric
shock, or personal injury.
1. Do not use this product near water. For example,
near a bathtub, wash bowl, kitchen sink, or laundry
tub, in a wet basement, or near a swimming pool, etc.
2. Use only the power supply unit, AC adaptor, and
batteries indicated in this manual.
Do not dispose of the battery(ies) in a fire.
They may explode. Check with local codes for
possible special disposal instructions.
SAVE THESE INSTRUCTIONS
2.3 For best performance
Location/avoiding noise (main
The main monitor, sub monitor, and other compatible
Panasonic units use radio waves to communicate with
each other. (The product operates in the frequency range
of 1.88 GHz to 1.90 GHz, and the RF transmission power
is 250 mW (max.).)
R For maximum coverage (approx. 100 m) and
noise-free communications, install your main
monitor:
– at a convenient, high, and central location with no
obstructions between the sub monitor and main
monitor in an indoor environment.
– away from electronic appliances such as TVs,
radios, personal computers, wireless devices, or
digital cordless phones.
– facing away from radio frequency transmitters,
such as external antennas of mobile phone
stations. (Avoid installing the main monitor near
a window.)
R Coverage and voice quality depends on the local
environmental conditions.
monitor/sub monitor)
R Do not place the charger near TVs, speakers, or
other devices that emit electromagnetic waves.
Failure to do so may prevent the charger from
charging the product.
Environment (main monitor/sub monitor)
R Keep the unit (main monitor and sub monitor) away
from electrical noise generating devices, such as
fluorescent lamps and motors.
R The unit should not be exposed to direct sunlight.
R The
R Do not install the product in locations that are suspect
R Even when the main monitor and sub monitor are
R Some types of hearing aids may receive noise from
R Operating the unit near electrical appliances may
R In areas surrounded by a high electrical field,
unit should be kept away from heat sources such
as radiators, cookers, etc. It should not be placed in
rooms where the temperature is less than 0 °C or
greater than 40 °C. Damp basements should also be
avoided.
to sudden changes in temperature. Failure to do so
may cause condensation to form on the product
causing malfunction.
used within 100 m of each other, obstructions can
cause weak signals, noise, interrupted
transmissions, distorted images and slow image
refresh rates. Obstructions can include:
– Metal doors or metal shutters.
– Heat insulation including aluminium foil.
– Concrete walls or walls made of galvanized iron
sheet.
– If the sub monitor is being used in a different
building, or a different part of the house, i.e. a
different floor to the where the main monitor has
been installed.
– Many walls.
– Double insulated glass windows.
wireless communications between the main monitor,
sub monitor and other compatible Panasonic units.
cause interference. Move away from the electrical
appliances.
disturbances may occur in the unit’s image or sound.
2.4 Other important information
R The AC adaptor is used as the main disconnect
device. Ensure that the power outlet is installed near
the product and is easily accessible.
Caution:
R Risk of explosion if battery is replaced by
incorrect types. Dispose of used batteries
according to the instructions.
Tapping
This product uses digital wireless technology so that a
call is rarely intercepted. However, calls may be tapped
by
a third party because the product also communicates
using radio waves.
7
Page 8
ABC
2. Important information
R "Tapping" means that the other party intercepts a
radio message intentionally or accidentally by using
a receiver.
Privacy and rights of portrait
installing or using the doorphone, please take into
When
consideration the rights of others with regard to privacy.
R It is generally said that "privacy" means the ability of
an individual or group to stop information about
themselves from becoming known to people other
than those whom they choose to give the information.
"Rights of portrait" means the right to be safe from
having your own image taken and used
indiscriminately without consent.
Personal information
The main monitor’s internal memory and SD cards
record personal information (image and audio recordings
of visitors, etc.). Panasonic assumes no liability for any
unforeseen damages arising from the exposure of the
recorded information.
R Disclaimer
Recorded data may be altered or deleted as a result
of incorrect operations, exposure to static electricity,
accidents, malfunction, repairs or other operations.
Panasonic assumes no liability for any direct or
indirect damages resulting from the loss or alteration
of recorded images.
Requesting repairs for the product
R Make sure to back up recorded data, from the main
monitor’s internal memory, to an SD card and then
delete all recorded data from the internal memory
before sending the product for repairs. After backing
up the data, make sure to remove the SD card from
the main monitor.
R After backing up the data, initialize the settings of the
main monitor and sub monitor.*1 (All information
saved to the internal memory is deleted when
settings are initialized.)
– Even if the product is sent for repairs without
being initialized, the memory (including recorded
data and settings) for the main monitor or sub
monitor may be cleared and set to factory default
after repair.
– If operations cannot be performed due to the main
monitor or sub monitor malfunction, consult with
the place of purchase for appropriate action.
Note for product disposal, transfer, or return
R This product can store your private/confidential
information.
To protect your privacy/confidentiality, we
recommend that you erase the information (recorded
images) from the memory before you dispose of,
transfer or return the product.
All the recorded images can be erased at once by
initializing the main monitor or sub monitor.
R Remove the SD card from the main monitor.
*1
– See page 10 for information about the disposal
or transfer of the SD card.
Main monitor: perform [Initialize settings + Delete
*1
images] in [Initialize settings]. (® page 37)
Sub monitor: perform "Initialize". (® page 38)
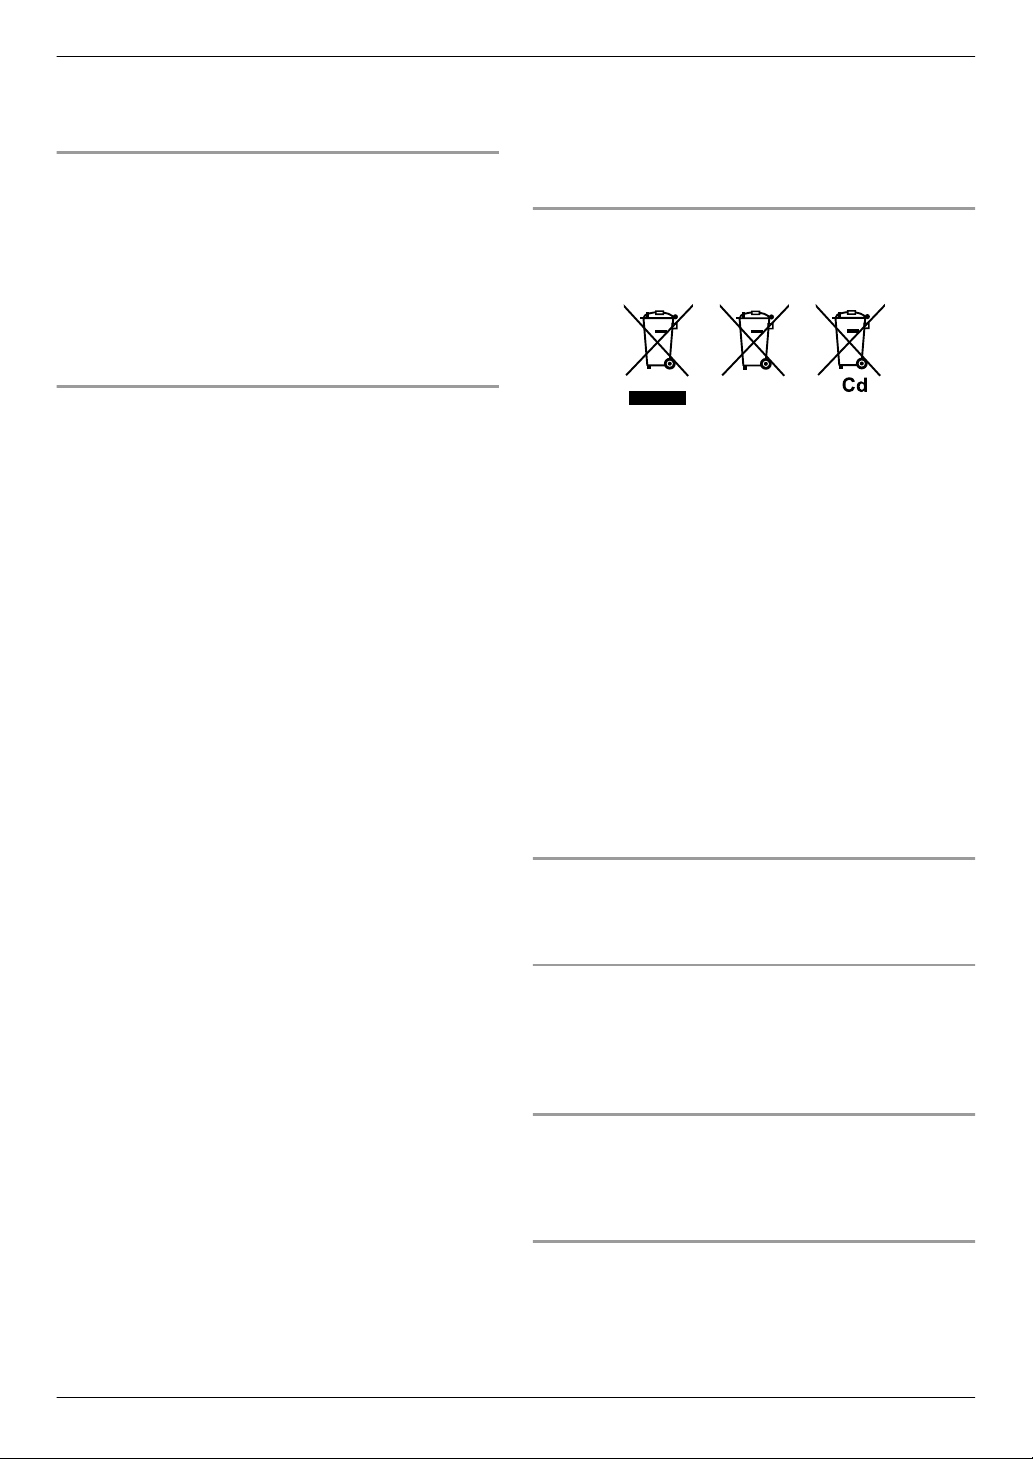
Information for Users on Collection and Disposal of
Old Equipment and used Batteries
These symbols (A, B, C) on the products, packaging,
and/or accompanying documents mean that used
electrical and electronic products and batteries should
not be mixed with general household waste.
For proper treatment, recovery and recycling of old
products and used batteries, please take them to
applicable collection points, in accordance with your
national legislation and the Directives 2002/96/EC and
2006/66/EC.
By disposing of these products and batteries correctly,
you
will help to save valuable resources and prevent any
potential negative effects on human health and the
environment which could otherwise arise from
inappropriate waste handling.
For more information about collection and recycling of
old products and batteries, please contact your local
municipality, your waste disposal service or the point of
sale where you purchased the items.
Penalties may be applicable for incorrect disposal of this
waste, in accordance with national legislation.
For business users in the European Union
you wish to discard electrical and electronic equipment,
If
please contact your dealer or supplier for further
information.
Information on Disposal in other Countries outside
the European Union
symbols (A, B, C) are only valid in the European
These
Union. If you wish to discard these items, please contact
your local authorities or dealer and ask for the correct
method of disposal.
Note for the battery symbol
This symbol (B) might be used in combination with a
chemical symbol (C). In this case it complies with the
requirement set by the Directive for the chemical
involved.
Others
R It
is prohibited to disassemble or modify this product.
Contact the dealer where you purchased this product
for repair.
R When power fails, this product cannot be used.
R For the recorded image:
8
Page 9

The recorded image may be lost when:
–
Mishandled
– Electric shock or radio wave interference occurs.
– The power is turned off during use.
R Panasonic may not be liable for damages due to
external factors such as power failures.
R If you stop using the main monitor and the
doorphone, remove the main monitor and the
doorphone from the walls to prevent them from falling
off. (Consult your dealer for information about
removing the product.)
2. Important information
9
Page 10
3. Preparation
3.1 Using SD cards (sold
separately)
3. . Preparation
SD cards can be used with the main monitor to record
images and calls from the doorphone and camera. (®
page 19)
When an SD card is not used, the main monitor’s internal
memory is used to save images. In this case, only
doorphone images can be saved and the memory
capacity is limited. We therefore recommend using an
SD card to save images.
See page 42 for information about SD cards that
can be used.
3.1.1 Cautions for SD cards
R The SD card indicator (® page 11) flashes when
data is being read from or written to the SD card.
Do not remove the SD card, press the RESET
button (® page 11), or turn off the power to the
main monitor while the SD card indicator is
flashing. Failure to observe this may cause data to
become corrupted.
R SD cards formatted by PCs or other devices must
be formatted by the main monitor before they can
be used. (® page 41)
R When the write-protect lock
switch (A) is set to "LOCK", the
SD card cannot be formatted, and
images and audio cannot be
recorded or deleted.
R We recommend backing up important data to a PC
or other device. Data on SD cards may become
corrupted or be deleted if SD cards malfunction, or
are exposed to electromagnetic waves or static
electricity.
Disposing or transferring SD cards
R Users are solely responsible for the managing of
SD card data.
Formatting or deleting SD cards with the main
monitor, a PC or other device, only changes the file
management information and does not completely
delete all data stored on the SD cards. When
disposing of or transferring SD cards, we
recommend physically destroying SD cards or
using commercially available computer software to
completely delete all data in SD cards.
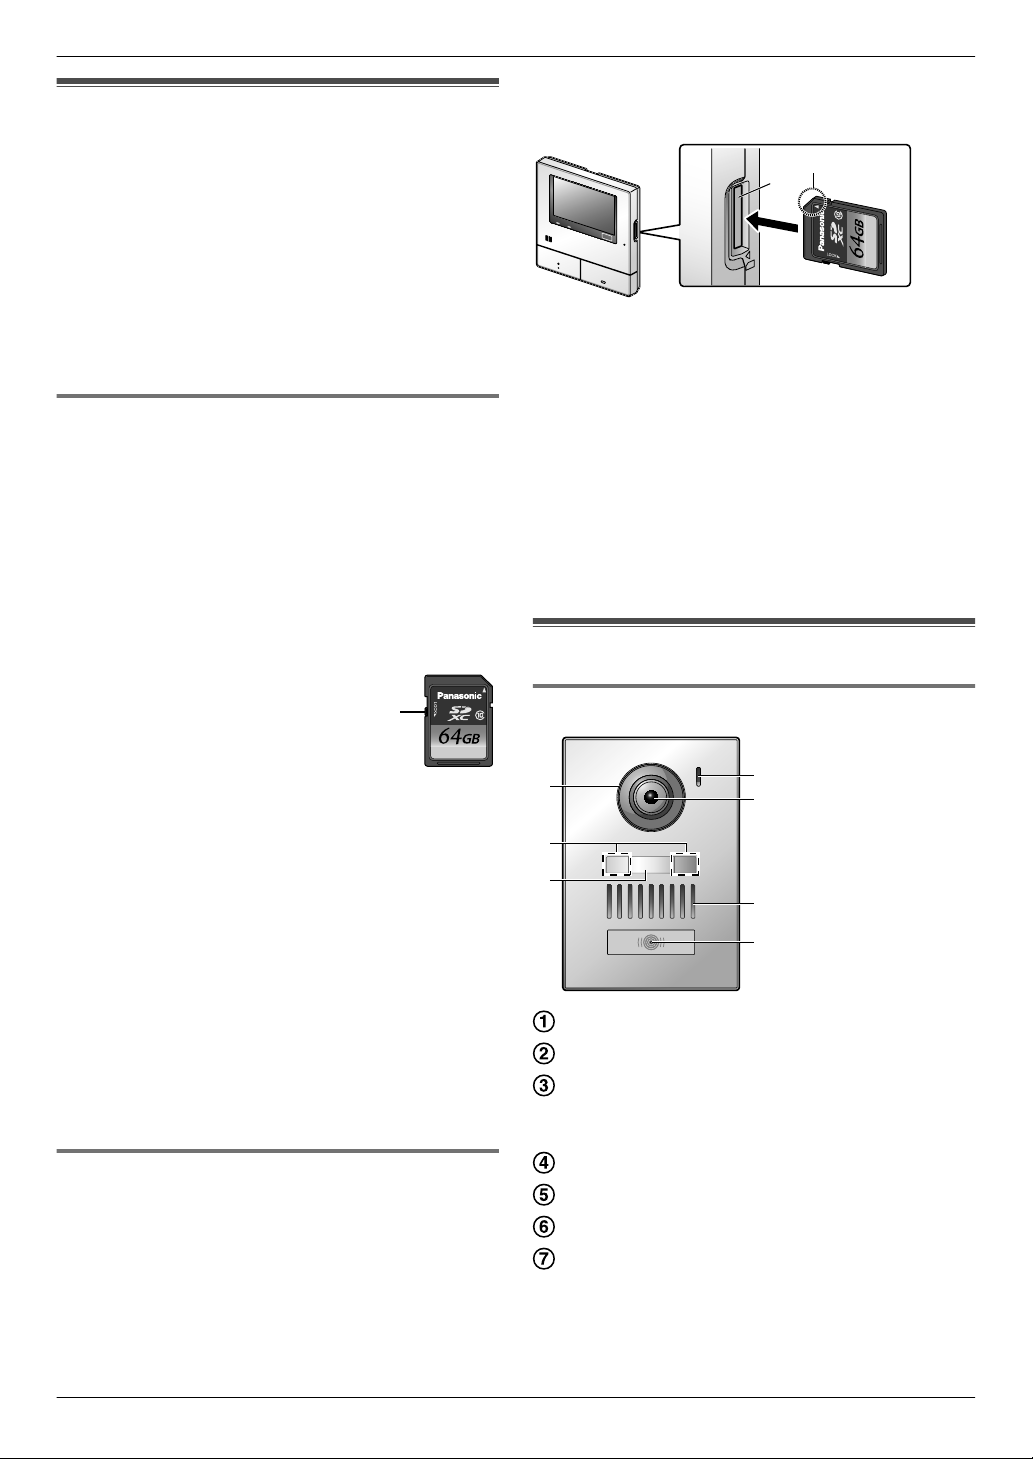
3.1.2 Inserting SD cards
Important:
R Do not touch the SD card’s metal contacts.
A
1 After confirming that the screen of the main monitor
is off, insert the SD card into the SD card slot (A).
B
A
R Insert the SD card with the notched corner (B)
facing upwards until it clicks into place.
R The SD card indicator flashes and the main
monitor starts to confirm the recorded image
information.
2 Confirm that "The SD card is ready." is displayed on
the screen.
R The SD card indicator turns off and then the
screen automatically turns off.
Removing SD cards
After confirming that the SD card indicator is off, push in
the SD card and then remove it.
3.2 Controls
3.2.1 Doorphone
A
B
C
Lens cover
LED lights (for illumination)
Name plate (supplied accessory)
R Can be attached as required when installing the
doorphone.
Microphone
Camera lens
Speaker
Call button and indicator (red)
R The indicator lights in red when the power is on.
D
E
F
G
10
Page 11
A
B
C
D
E
F
G
I
H
J
A
B
C
D
F
G
H
I
J
E
A
B
3. Preparation
Doorphone image quality
The
quality of doorphone images may change depending
on factors such as the installation environment and the
time when images are viewed.
See page 44 for more information.
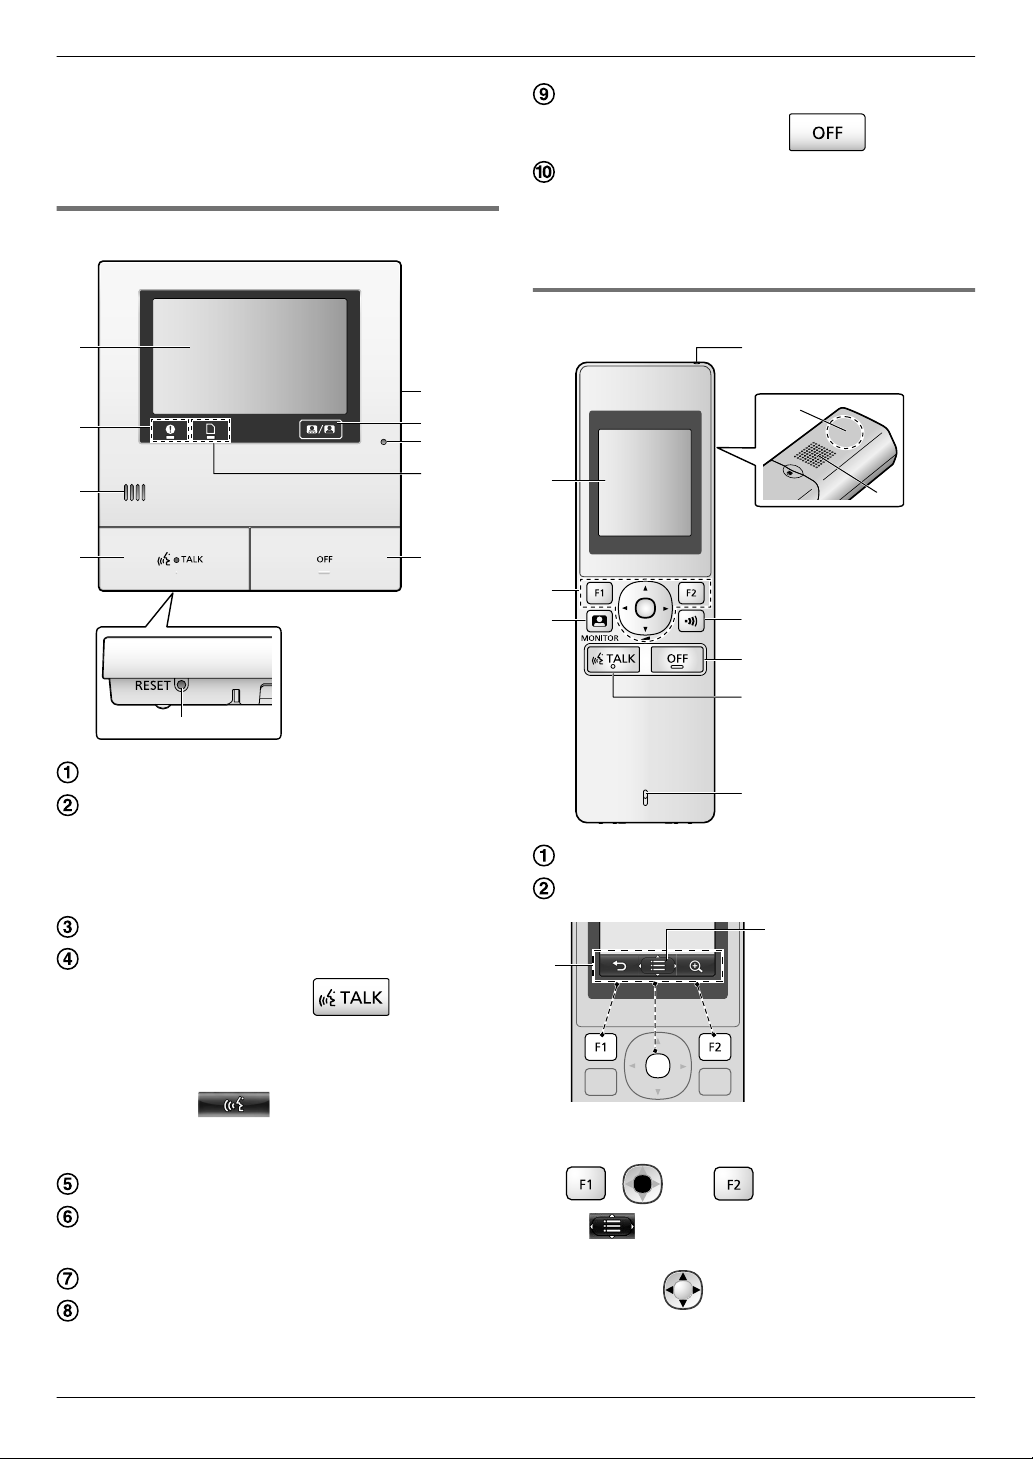
3.2.2 Main monitor
Off button
Described in this manual as .
Reset button
If the main monitor cannot be correctly operated,
press
the RESET button with a pointed object to reset
the main monitor. (Recorded images and configured
settings are not affected.)
3.2.3 Sub monitor
Display (touch panel) (® page 12)
Notification indicator (blue)
R Flashes when there is a notification.
(®
page 13)
– When the display is touched, the top menu is
displayed and the indicator stops flashing.
Speaker
Talk button and indicator (blue)
Described in this manual as .
R The indicator flashes when there is an incoming
call from a doorphone or sub monitor and lights
when there is a call.
R When
SD card slot (side panel) (® page 10)
the
screen, calls can also be answered by touching
this button.
touch button is displayed on
Displays or hides the touch buttons and icons
displayed over images.
Microphone
SD card indicator (blue)
R Flashes
when data is being written to or read from
an SD card. (® page 10)
Display (® page 13)
Multifunction buttons
A Soft key icons (® page 14)
Displays the functions that can be operated by
, , and .
B is displayed in screens such as the
information screen (® page 13). The arrows
displayed in indicate the direction that the
button can be used in.
11
Page 12
ヒビホパパヒビホパパ
モヮモヮモヮ
ビパ
チョㄆㄓㄖㄓㄚ
ビパヒフ
ンㄆㄐㄓㄅㄆㄅチ
ㄊㄎㄈㄆチㄍㄊㄔㄕ
B
A
C
B
Recorded
image list
3. Preparation
R In the information screen, the volume can be
changed by pressing up or down.
(monitor) (® page 18, 24)
Charge indicator (® page 14)
Antenna (built-in)
R Do not cover the antenna when using the sub
monitor. (This may weaken radio waves.)
Speaker
(page) (® page 17, 18)
(off)
(talk) (® page 17)
Microphone
3.3 Displays
3.3.1 Main monitor - touch panel and screen
information
Important:
R Only touch the display using your fingers.
R Do not operate the display using hard and/or
pointy objects (such as ball point pens), sharp
objects, or finger nails.
not touch or press the display with excessive
R Do
force.
R Do not use commercially available LCD display
protection sheets. The touch panel may not
operate correctly if protection sheets are used.
R When there are sudden changes to the
temperature, such as when a heater or cooler is
turned on, the inside of the display may appear
cloudy and it may not operate correctly. In this
case, wait for 1 or 2 hours before attempting to
operate the display.
Top menu
The top menu is the screen displayed when you touch
the
standby (black) screen. (Only displayed after the date
and time settings have been configured, see page 15.)
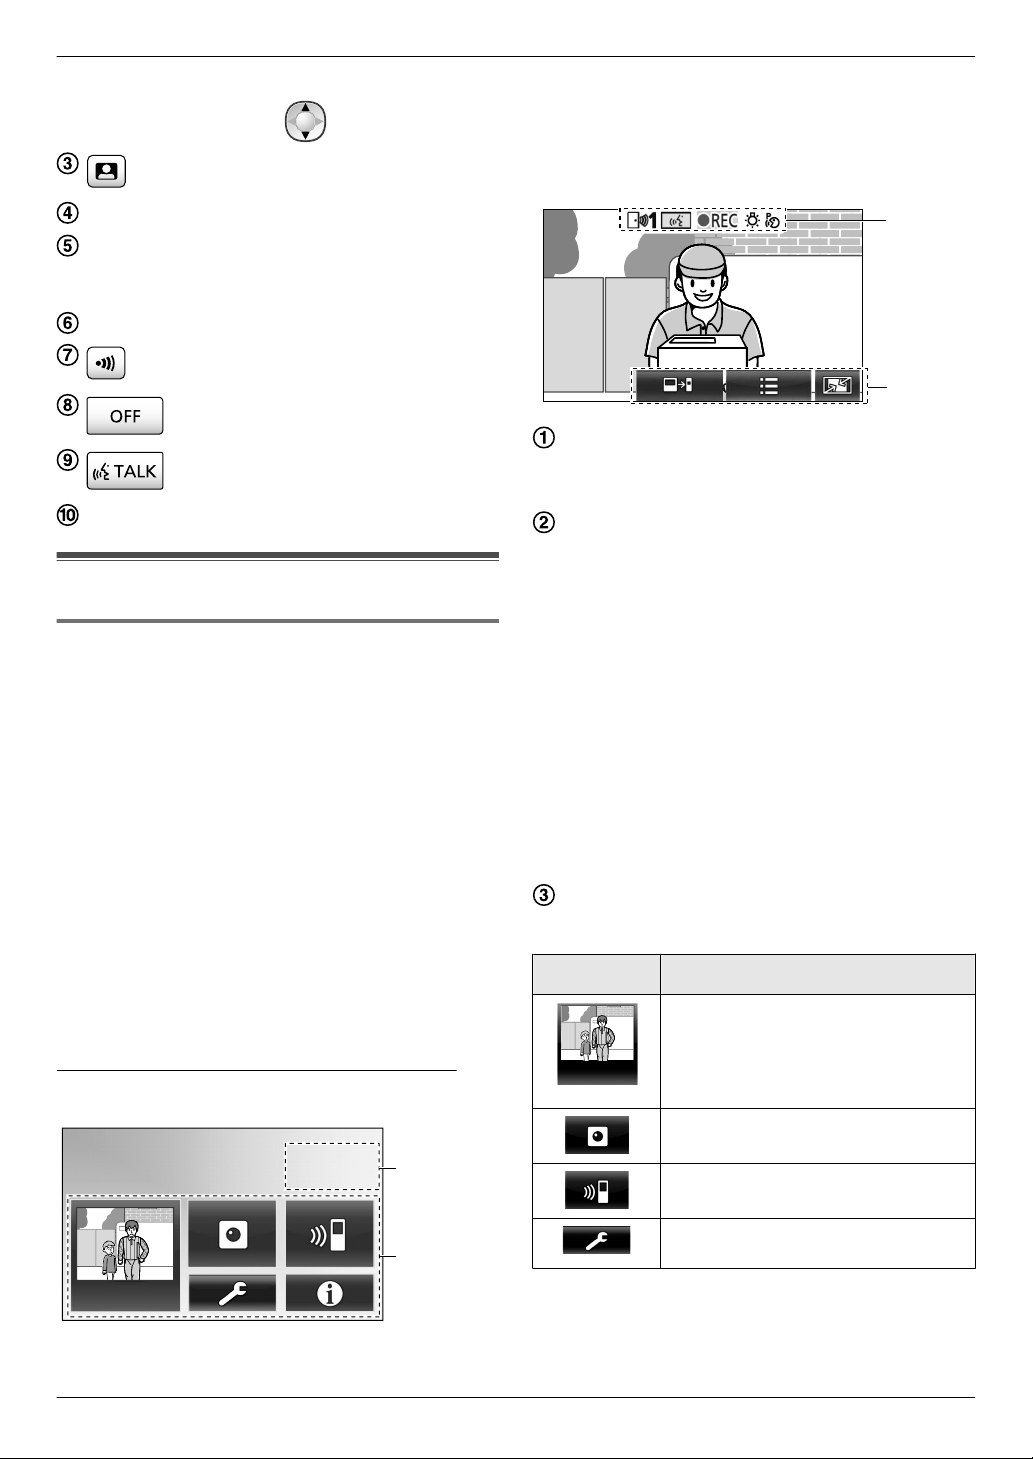
Image viewing screen
"Have notices" is displayed when there are
notifications.
Touch [Check] to view the notification’
Touch buttons (buttons
screen)
The touch buttons change depending on the
displayed screen and actions being performed.
R Touch buttons on the screen to perform
operations.
– When a button is touched, a beep sounds and
the button’s colour changes to orange.
– The sounds made by the main monitor can be
turned off in the [Touch sound] settings. (®
page 37)
– See page 12 for information about the top
menu buttons.
– See page 13 for information about the main
buttons displayed in the image viewing
screen.
Status information icons (® page 13)
Top menu buttons
Button Action
Displays the recorded image list. (®
page 20)
R "New" is displayed when there
Monitors the doorphone or camera.
(® page 18, 24)
Calls/pages the sub monitor. (®
page 18)
Displays the settings menu. (®
page 26, 35)
displayed in dark blue on the
are
messages that have not been
viewed.
s contents.
12
Page 13
ABC
A
B
Ʒ
Ʒ
Ʒ
Ʒ
ƪƪンユヤ
ンユヤ
ƪ
ンユヤ
A
B
3. Preparation
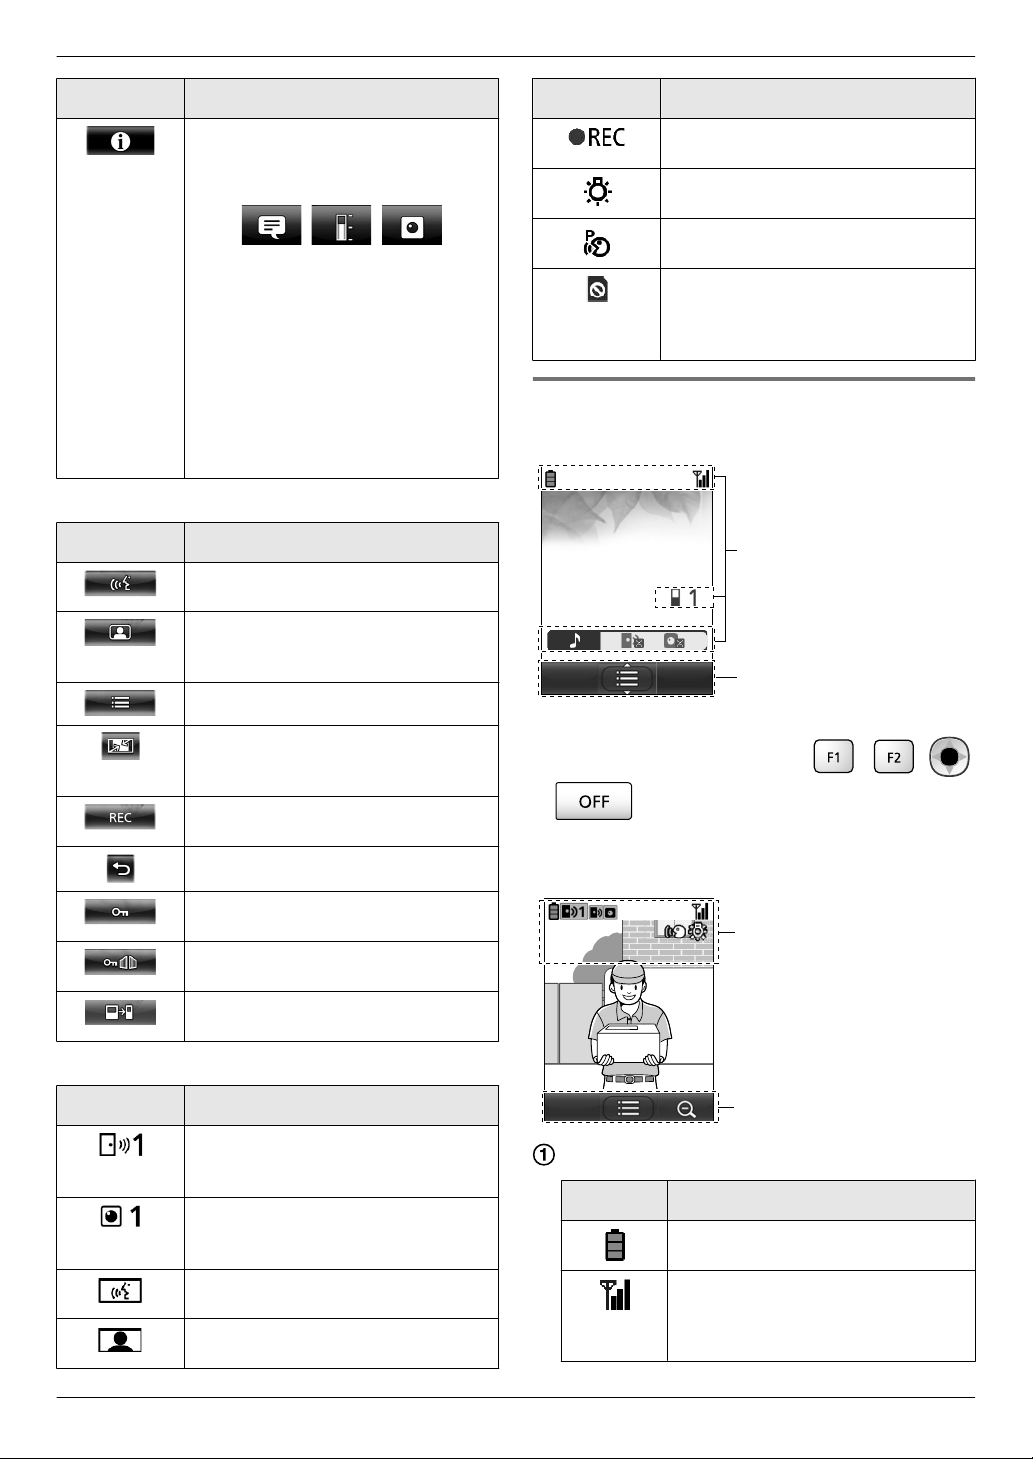
Button Action
Displays the following information
menus:
R Touch
Main buttons in the image viewing screen
Button Action
Answers or starts a call with the
displayed visitor.
Monitors the displayed visitor.
(Sound and images can be
monitored.)
Displays menus.
Changes the display from wide
display to entire image display.
page 33)
Records the displayed image. (®
page 20, 25)
Returns to the previous screen.
the button of the menu that
you want to check.
A Displays notifications for the
main monitor and camera.
B Displays the recording
information (save destination,
available memory, etc.).
C Displays whether the sensors
have been enabled and if the
camera can be connected to.
(®
Icon Meaning
Indicates that images are being
recorded. (® page 20)
Indicates that the doorphone’s LED
lights are on. (® page 34)
Indicates that "Press-to-talk"
on. (® page 17)
Indicates that the write-protect lock
switch of this SD card is set to
"LOCK",
recorded to is inserted. (® page 10)
or an SD card that cannot be
mode is
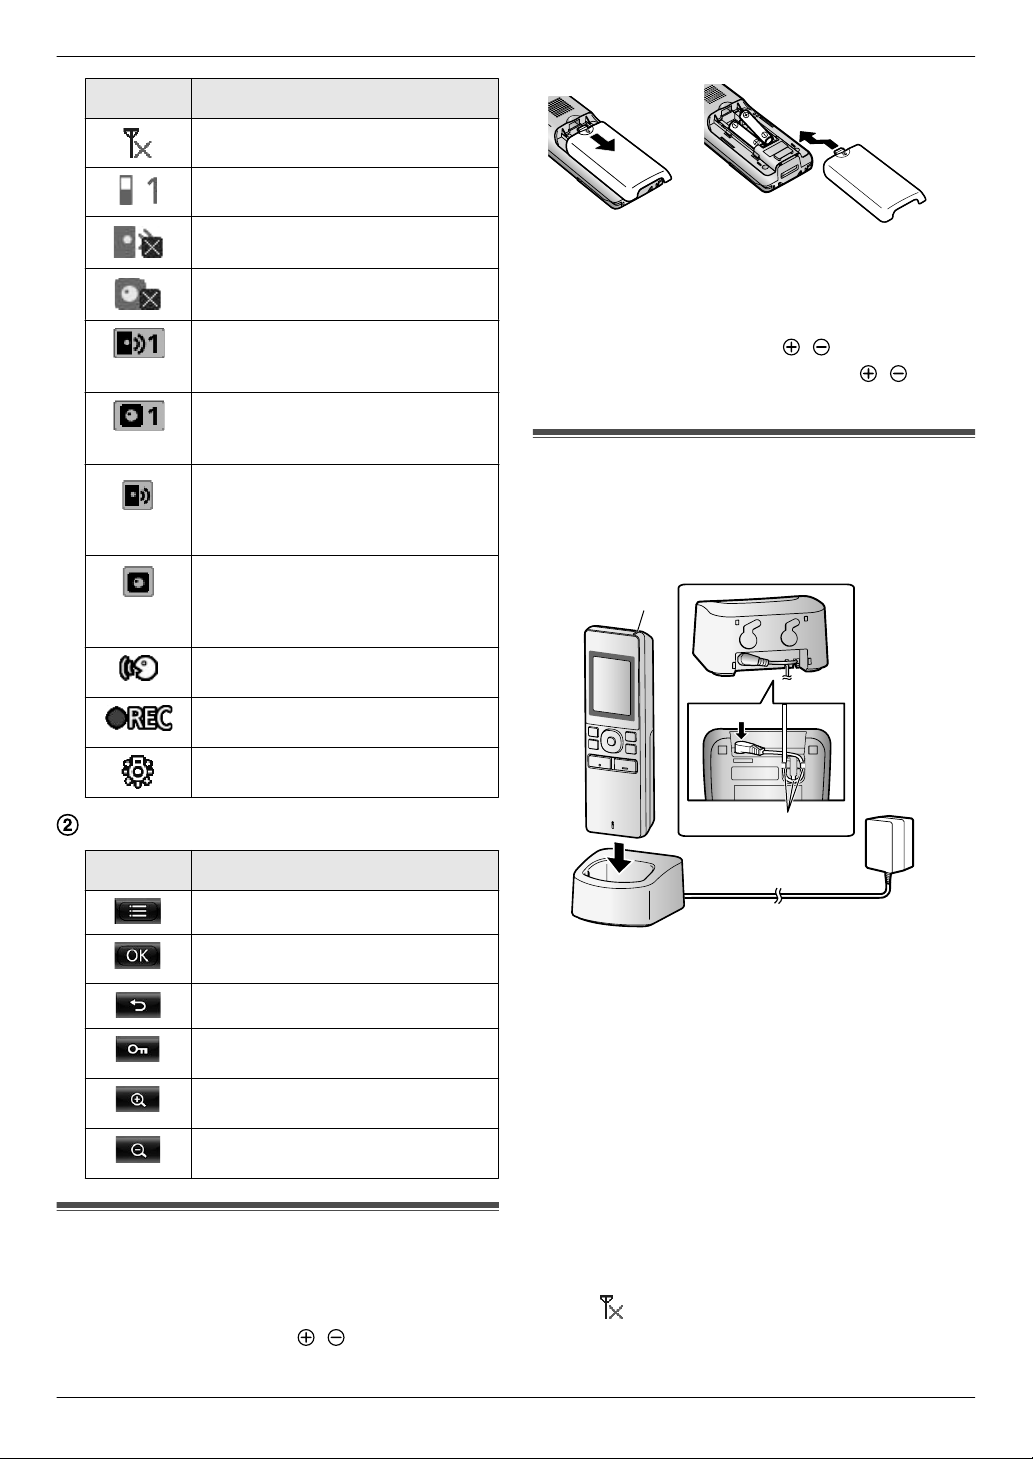
3.3.2 Sub monitor - monitor display
Information screen
The information screen is displayed when the sub
monitor
or are pressed when the screen is off.
Talking/monitoring screen
is taken off the charger, or
, , ,
Unlocks the electric door lock. (®
page 29)
Unlocks the electric vehicle gate lock.
(® page 29)
Transfers calls from the main monitor
to the sub monitor. (® page 17)
Status information icons
Icon Meaning
Indicates which doorphone is calling,
monitoring, or on a call.
("1" indicates the device number.)
Indicates which camera is calling,
monitoring, or on a call.
("1" indicates the device number.)
Indicates that the main monitor is on
a call.
Indicates that the main monitor is
monitoring.
Status information icons
Icon Meaning
Battery level. (® page 15)
Range status: The more bars
displayed, the stronger the signal
between sub monitor and main
monitor.
13
Page 14
A
*1
B
3. Preparation
Icon Meaning
Out of range.
Indicates the number of the sub
monitor being used.
Indicates that the doorphone’s
ringtone volume is muted.
Indicates that the camera’s ringtone
volume is muted.
Indicates which doorphone is
calling, monitoring, or on a call.
("1" indicates the device number.)
Indicates which camera is calling,
monitoring, or on a call.
("1" indicates the device number.)
Indicates there is a call from the
doorphone when calling,
monitoring,
device. (® page 32)
Indicates there is a call from a
camera when calling, monitoring, or
on a call with another device.
page 32)
Indicates that "Press-to-talk" mode
is on. (® page 17)
Indicates that images are being
recorded. (® page 20)
Indicates that the doorphone’s LED
lights are "On". (® page 34)
or on a call with another
(®
Note:
R Use the supplied rechargeable batteries (Ni-MH
ONLY). For replacement, we recommend using the
Panasonic rechargeable batteries noted on page 4.
R Wipe the ends of batteries (
R Avoid touching the ends of batteries (, ) or the
unit contacts.
, ) with a dry cloth.
3.5 Charging the sub monitor
Only connect the charger with the supplied Panasonic
AC adaptor (® page 3).
AC adaptor connections
Soft key icons
Icon Action
Displays menus.
Executes the selected item or
operation.
Returns to the previous screen.
Unlocks the electric lock. (®
page 29)
Changes the display to zoom
3.4 Battery installation
– USE
– Do NOT use Alkaline/Manganese/Ni-Cd batteries.
– Confirm correct polarities (
ONLY rechargeable Ni-MH batteries AAA (R03)
size.
display. (® page 33)
Changes the display to wide display.
(® page 33)
, ).
*1 Press plug firmly.
R Connect the charger to the power outlet, and then
place the sub monitor in the charger to charge it.
Charging usually takes about 8 hours.
A Charge indicator
when charging: lights
–
– when charging is completed: off
B Hook
R Charging may take longer in the following situations.
– When the operating temperature is low. (®
page 43)
– When the sub monitor is picked up off the charger
or used during charging.
– When the sub monitor’s signal is out of range
). (® page 14)
(
R The sub monitor does not overcharge even if it is
continuously placed in the charger.
14
Page 15
25 mm
3. Preparation
Battery level
Icon Battery level
High
Medium
Low
Needs charging
R See page 43 for a guide on operating times for the
sub monitor.
Note:
R When the sub monitor is off the charger or the AC
adaptor
the batteries in order to maintain battery performance
and prevent the batteries from discharging.
– Recharge the batteries before using the sub
is disconnected for 1 week or more, remove
monitor again.
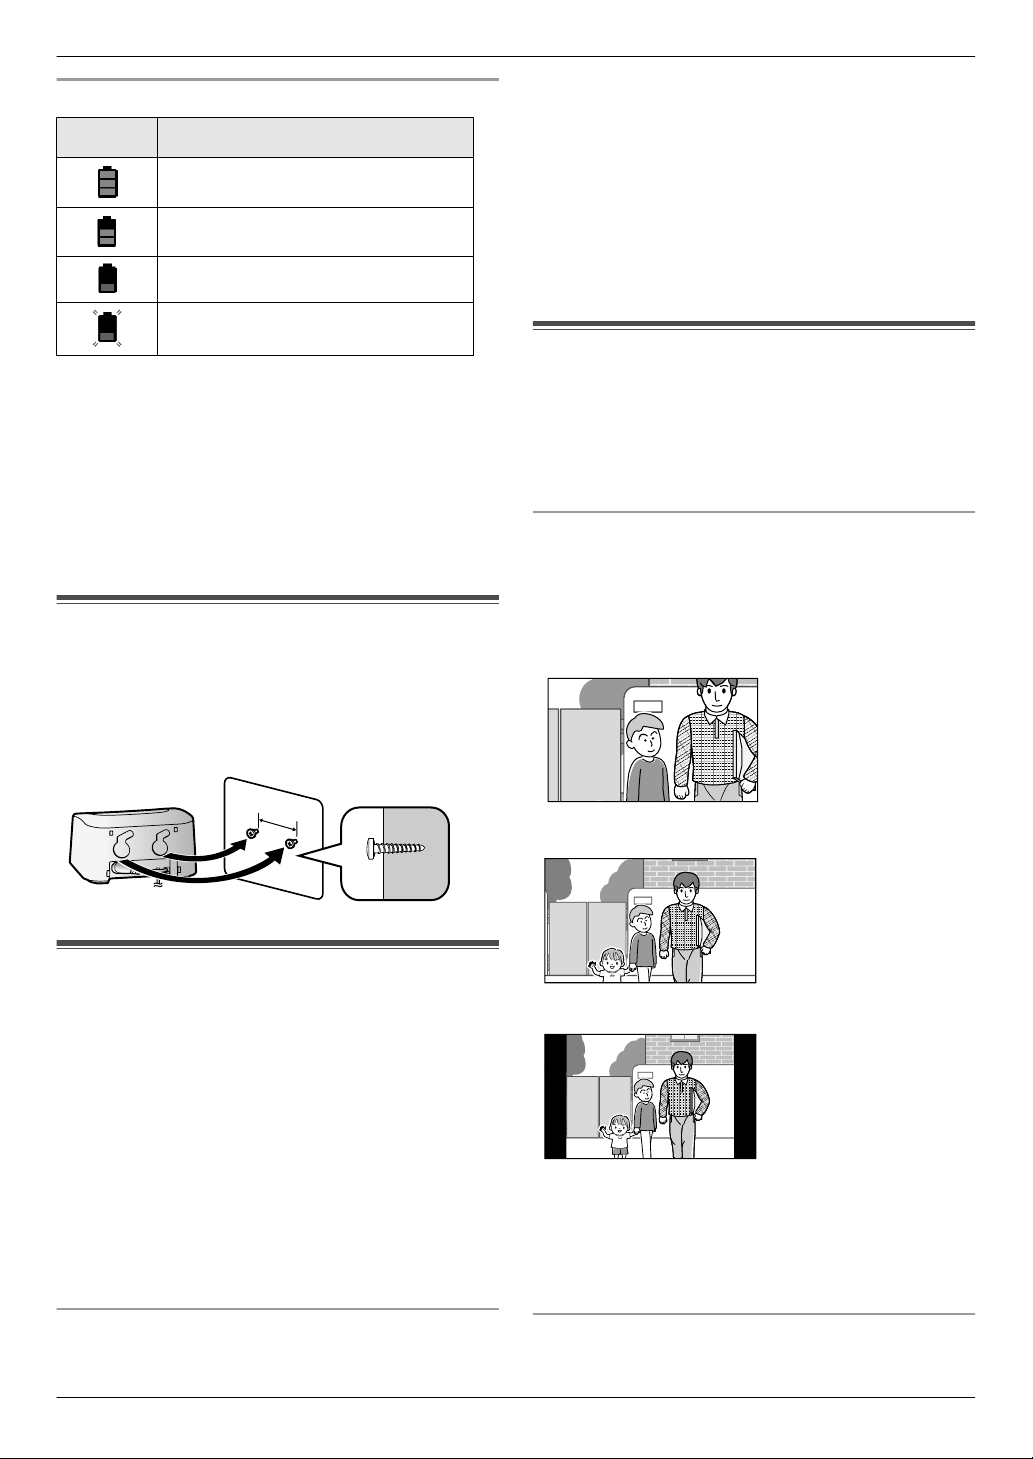
3.6 Wall mounting
Note:
R Make sure that the wall and the fixing method are
strong enough to support the weight of the unit.
R Drive the screws (locally procured) into the wall.
Note:
R The sub monitor’s language
of additionally registered sub monitors) is
automatically matched to the main monitor’s
language setting.
R The date and time settings may be deleted when
there is a power outage. In this case, reconfigure the
settings.
R The time may get out of sync by about 60 seconds a
month.
(including the language
3.8 Wide/zoom settings and zoom
position settings
–
This operation can only be performed on the main
monitor.
You can configure how doorphone images are initially
displayed on the main monitor and sub monitor.
Wide/zoom settings
From
the following 3 settings, you can select how images
are initially displayed when visitors come or when
monitoring.
Zoom display
*1
(images are zoomed in
on 2 times more that in
wide display)
3.7 Setting the language, date and
time
– This operation can only be performed on the main
monitor.
A language selection screen is displayed when the main
monitor is first used. Follow the steps below to configure
the language, date and time. (The notification indicator
flashes when these settings have not been configured.)
1 Touch the language that you want to use and then
touch [Next].
2 Configure the date and time by touching [+] and [–].
3 Touch [OK] to complete the settings.
R A beep sounds and the screen turns off.
Changing the language, date and time
The language, date and time can be changed from the
settings button in the top menu. (® page 35)
Wide display*2 (default setting)
Entire image display (main monitor only)
*1 Because a digital zoom is used, image quality is
lower when compared to images in wide display or
entire image display.
*2 The
Zoom position settings
You can configure which parts of images are zoomed in
on when displaying zoomed images. Adjust the position
top and bottom parts of wide display images on
the main monitor are cut off when compared to
images in entire image display.
15
Page 16
3. Preparation
so that the people or objects that you want to view are
displayed centrally in the screen.
Settings:
1. From the top menu, touch
[Initial settings].
Configuring wide/zoom settings:
2.
A Touch [Wide/Zoom settings] and then select
the doorphone to be configured.
B Touch [When visitors come] or [When
monitoring], and then select the display
method (Zoom, Wide, or All).
R A beep sounds and the settings are
changed.
C To end the operation, press
Configuring zoom position settings:
A
[Zoom position settings] ® select the
doorphone to be configured.
current doorphone image is displayed in
(The
the wide display.)
B Touch the position that you want to be
zoomed in on, and then touch
confirming the selected position.
R A beep sounds, "Configured" is
displayed, and then the screen
automatically turns off.
® ®
[OK] after
.
Note:
R When [Zoom] is selected for [Wide/Zoom settings]:
– Adjust
– When images are recorded, only the areas
R The zoom position screen automatically turns off if
settings are not completed in about 90 seconds. In
this case, settings are not saved and must be redone.
the zoom position so that people or objects
that you want to view are displayed centrally in
the screen. (® page 15)
displayed when zooming are recorded.
16
Page 17
4. Talking/Monitoring
4.1 Answering calls
– This operation is the same for the main monitor and
4. . Talking/Monitoring
sub monitor.
When you receive a call from a doorphone, the main
monitor and sub monitor ring and display an image from
the doorphone. You can answer calls with the following
operations.
1 Press and talk to the visitor.
R Speak alternatively with the visitor (staying within
about 50 cm from the microphone).
– If you and the visitor speak at the same time,
you will not hear each other.
– Talking time: up to about 90 seconds.
2 To end the operation, press
Features available while talking or when there is an
incoming call
Monitor visitors (incoming call only)
–
: Touch .
: Press .
–
Adjust wide/zoom and pan/tilt settings (®
page 33)
– Adjust sound and display settings (® page 33)
– Talk using "Press-to-Talk" (® page 17)
– Transfer calls (® page 17)
– Unlock electric locks (® page 29)
Note:
R The display will turn off if you do not answer a call
within about 30 seconds.
R Incoming call images are automatically recorded to
the main monitor. (® page 20)
Release .
Note:
R "Press-to-talk"
mode is cancelled after the call ends.
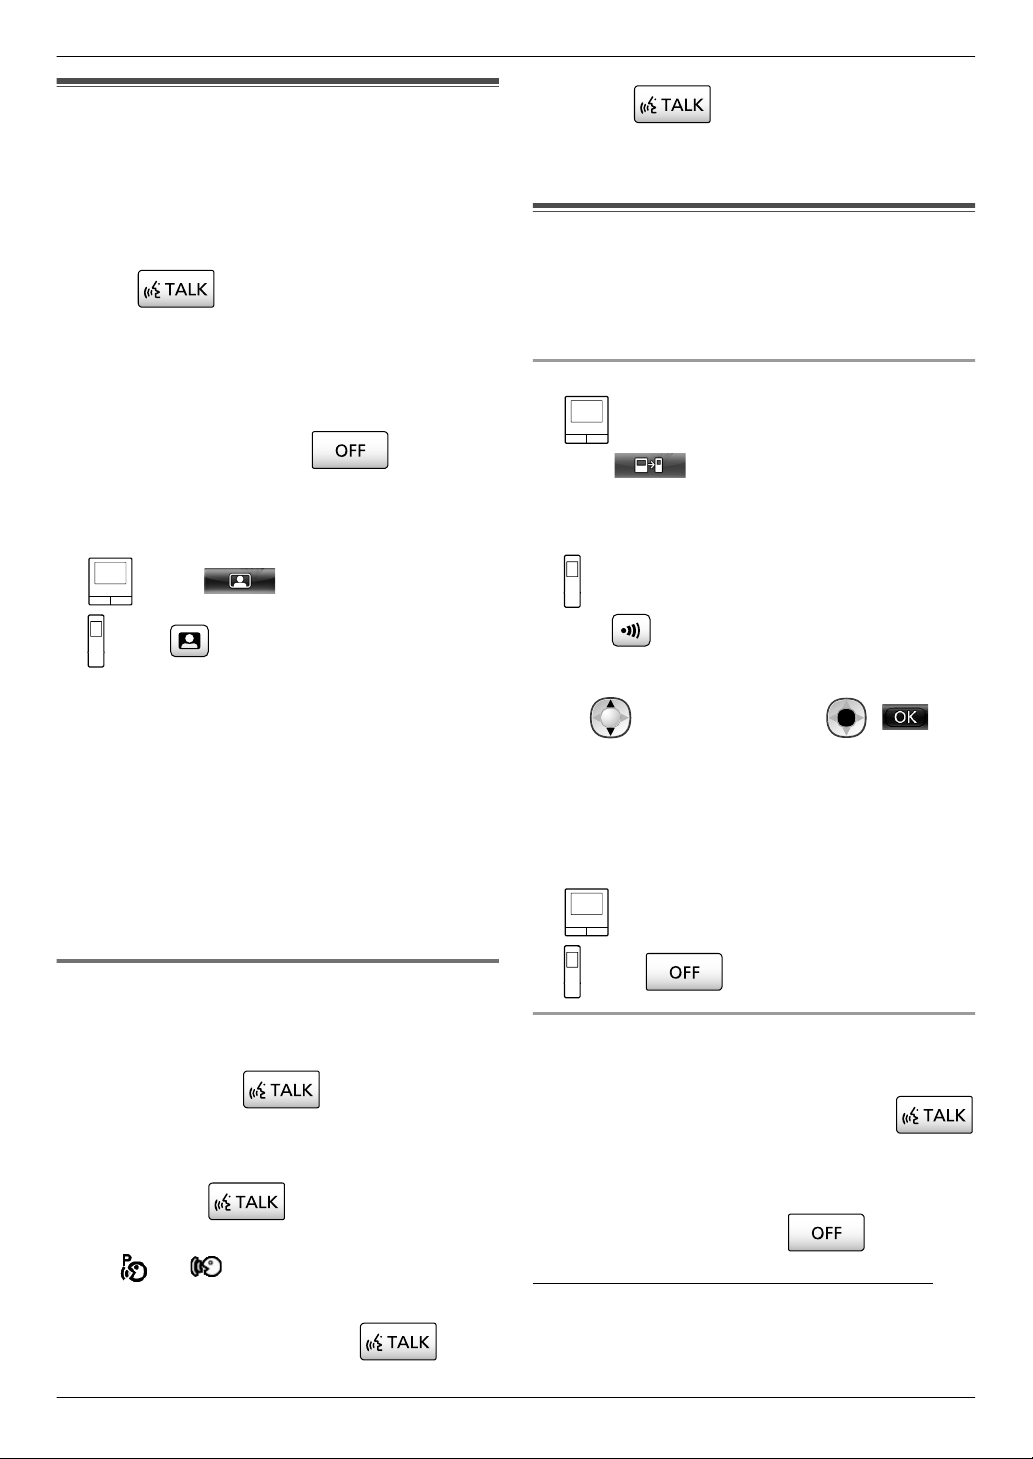
4.2 Transferring doorphone calls
You can transfer a doorphone call between the main
monitor and the sub monitor.
R When using multiple sub monitors, you can transfer
a doorphone call between the sub monitors.
To transfer calls
1. : While talking to the visitor at the doorphone,
.
touch .
R When there are multiple devices that can be
selected, select the device. To page all devices,
touch [Call all together]
: While talking to the visitor at the doorphone,
press .
R When there are multiple devices that can be
selected:
: Select the device.*1 ® ( )
*1
To page all devices, select
together".
2. Page the other party.
3. When the paged party answers, ask them to receive
the call from the doorphone. Perform the following to
transfer the call to the paged party.
: Touch [Transfer to sub monitor].
.
"Call all
4.1.1 Press-to-talk mode
If
it is difficult for you or the visitor to hear each other due
to noise, the "Press-to-talk" mode can be used to make
conversations easier to hear. Speak with the visitor
alternately by pressing
talking mode and the receiving mode. (You can operate
this feature in the same way by using either the main
monitor or the sub monitor.)
1 Press
and hold
a call until a beep sounds.
R (or ) is displayed on the screen.
to switch between the
for about 2 seconds during
2 To speak to the visitor:
Speak while pressing and holding
To hear the visitor:
.
: Press .
To receive calls
This operation is the same for the main monitor and
–
sub monitor.
1. When the intercom call is received, press
to talk to the paging party.
2. When the image from the doorphone is displayed,
talk to the visitor.
3. To end the operation, press .
Note:
R The visitor cannot hear voices during paging.
17
Page 18
ヵㄐㄖㄉチㄕㄉㄆチㄔㄓㄆㄆㄏチㄕㄐチㄎㄐㄏㄊㄕㄐㄓ
ビ ヒ ビピフヒ
ヒヒ
A B
4. Talking/Monitoring
R To talk to the visitor if the paged party does not
answer:
: Touch [Talk to visitor].
: Press .
4.3 Monitoring the outside with
the doorphone
You can monitor the sounds and images from the
doorphone.
1
: From the top menu, touch .
R When
Example: When there are both doorphones and
cameras.
there are multiple devices displayed, touch
the number of the doorphone that you want to
monitor with (A) and then the image (B).
: About 3 minutes
4.4 Talking between the main
monitor and the sub monitor
Intercom calls between the main monitor and the sub
monitor can be made.
When using multiple sub monitors, you can make
–
intercom calls between the sub monitors.
To make calls
1. : From the top menu, touch .
R When there are multiple devices that can be
selected, select the device. To call all devices,
touch [Call all together]
: Press .
R When there are multiple devices that can be
selected:
: Select the device.*1 ® ( )
*1
To call all devices, select "Call all together
2. Page the other party.
3. Talk with the paged party when they answer the call.
.
".
: Press .
R When there are multiple devices displayed:
: Select the destination. ® ( )
2 The images from the doorphone are displayed.
R Press to speak to the monitored party.
3 To end the operation, press .
Features available while monitoring
–
Adjust wide/zoom and pan/tilt settings (®
page 33)
– Adjust sound and display settings (® page 33)
– Record monitored images (® page 20)
Note:
R The sound from your end will not be heard at the
doorphone.
R Monitoring time:
: About 90 seconds (can be extended up to 3
minutes
by performing operations during monitoring)
4. To end the operation, press
To receive calls
–
This operation is the same for the main monitor and
sub monitor.
1. When the intercom call is received, press
to talk to the paging party.
Note:
R Paging automatically ends after about 30 seconds
and intercom calls automatically end after about 90
seconds.
.
18
Page 19
5. Recording/Playing
5.1 Image and audio recording
The amount of audio and image content that can be recorded depends on the where the content is being saved
5. . Recording/Playing
(internal memory or SD card).
In order to enjoy the full capabilities of the product, we recommend using an SD card for the save destination.
– When an SD card is inserted into the main monitor, it automatically becomes the default save destination. (The
save destination cannot be selected.)
– See page 10 for information about supported SD cards and how they are used.
Internal memory
Save destination SD card (2 GB - 64 GB)
Maximum number of images
Recorded image type Doorphone images
and calls
(® page 20)
Incoming call
recordings
Content of
each
(automatic
recording)
Monitor recordings
(manual recording)
Video: max of
approx. 30 seconds
recording
Video and audio:
Talk recordings
max of approx. 90
seconds
*2
*1
3,000
Camera images and
calls
(® page 25)
Series of images
recorded at 1 second
intervals and audio:
max of approx. 30
seconds
Series of images
recorded at 1 second
intervals and audio:
max of approx. 90
seconds
*2
(when an SD card is
not inserted)
Doorphone images
only
(® page 20)
Still images: max of 8
Cannot record
50
*1 Differs
depending on the capacity of the SD card. See page 19 for a guide to the capacity and number of images
that can be recorded with SD cards.
*2 See page 36 for audio recording settings in [Record calls] for the doorphone and camera.
Note:
R Recorded images from the internal memory can be copied to SD cards. (® page 41)
R Images recorded on SD cards can be played on a PC. (® page 41)
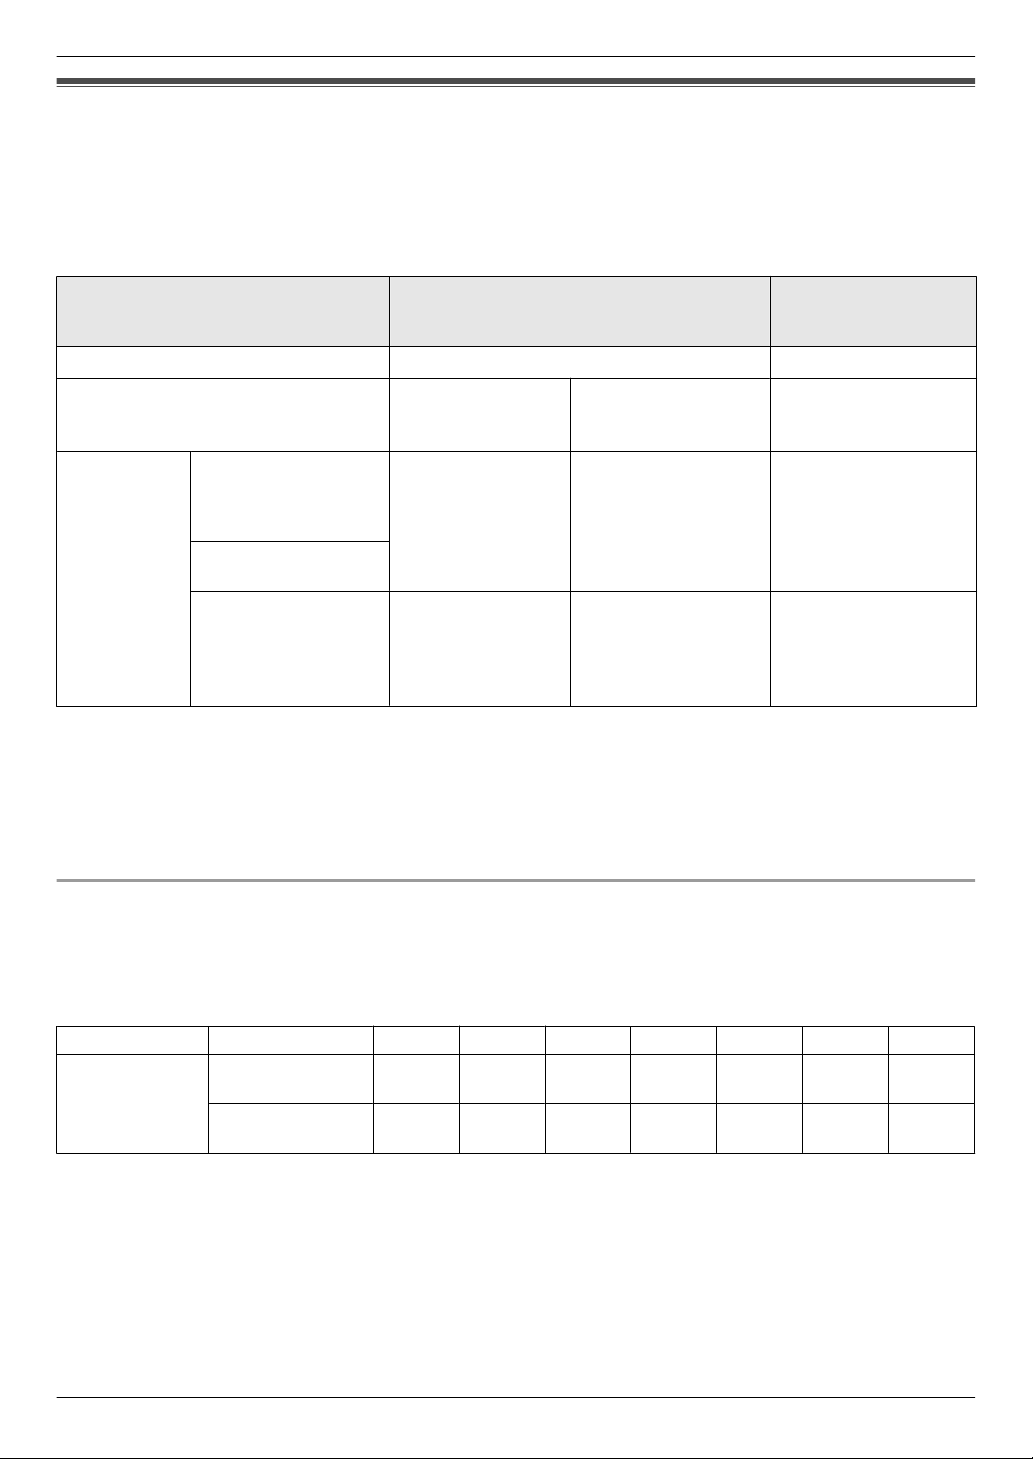
Guide for SD card capacity and recording
following table gives an approximate guide to the number of images that can be recorded, based on which device
The
took the images and the size of the SD card used, when the default settings are used ([Record calls] is set to
[Disable] (® page 36)).
Unit: number of recorded images
Capacity 2 GB 4 GB 8 GB 16 GB 32 GB 48 GB 64 GB
Recorded
image type
Doorphone
images only
Camera images
125 255 520 1,040 2,090 3,000 3,000
2,300 3,000 3,000 3,000 3,000 3,000 3,000
only
Note:
R When using a camera, we recommend using an SD card with a capacity of 4 GB or more.
R The number of images that can be recorded in the table are just a guide and may differ from the actual number
of images that can be recorded.
R Because SD cards contain data such as file system management information, the complete capacity cannot be
to save data. When other data is saved to an SD card, the number of images and videos that can be saved
used
is reduced.
19
Page 20
5. Recording/Playing
5.2 Recording doorphone images
and conversations
5.2.1 Automatically recording incoming call
images
When there is an incoming call, regardless of whether
you answer the call or not, images are automatically
recorded about 2 seconds after receiving the call.
page 19 for information about the recorded contents.)
When calls are not answered:
Recorded images are saved as unchecked images, and
the notification indicator of the main monitor flashes.
Note:
R When there is an incoming call from another
doorphone when talking or monitoring with a
doorphone (® page 30), you must end the call or
monitoring in order to display and save the image
from the incoming call.
R When there are multiple doorphones and there is an
incoming call from another doorphone, while
receiving an incoming call, the number of recorded
images (8 images), and the length of recorded videos
(about 30 seconds), are reduced.
When the internal memory or SD card’s memory is
full (auto image updating)
When
the memory is full, it is not necessary to manually
delete images in order to record new messages because
existing images, starting with the oldest image, are
automatically deleted.
– Images that have not been viewed are also deleted.
– See page 13 for information about checking the
recording status of the internal memory or SD card.
5.2.2 Record images and audio until the end
of calls (Record calls)
To use this function, an SD card must be in the main
monitor and [Record calls]
configured (® page 36).
In this case, when calls from a doorphone are answered,
the calls can be recorded from start to finish in 1 video
file that includes audio data. (The maximum length of the
video is about 120 seconds.)
must be appropriately
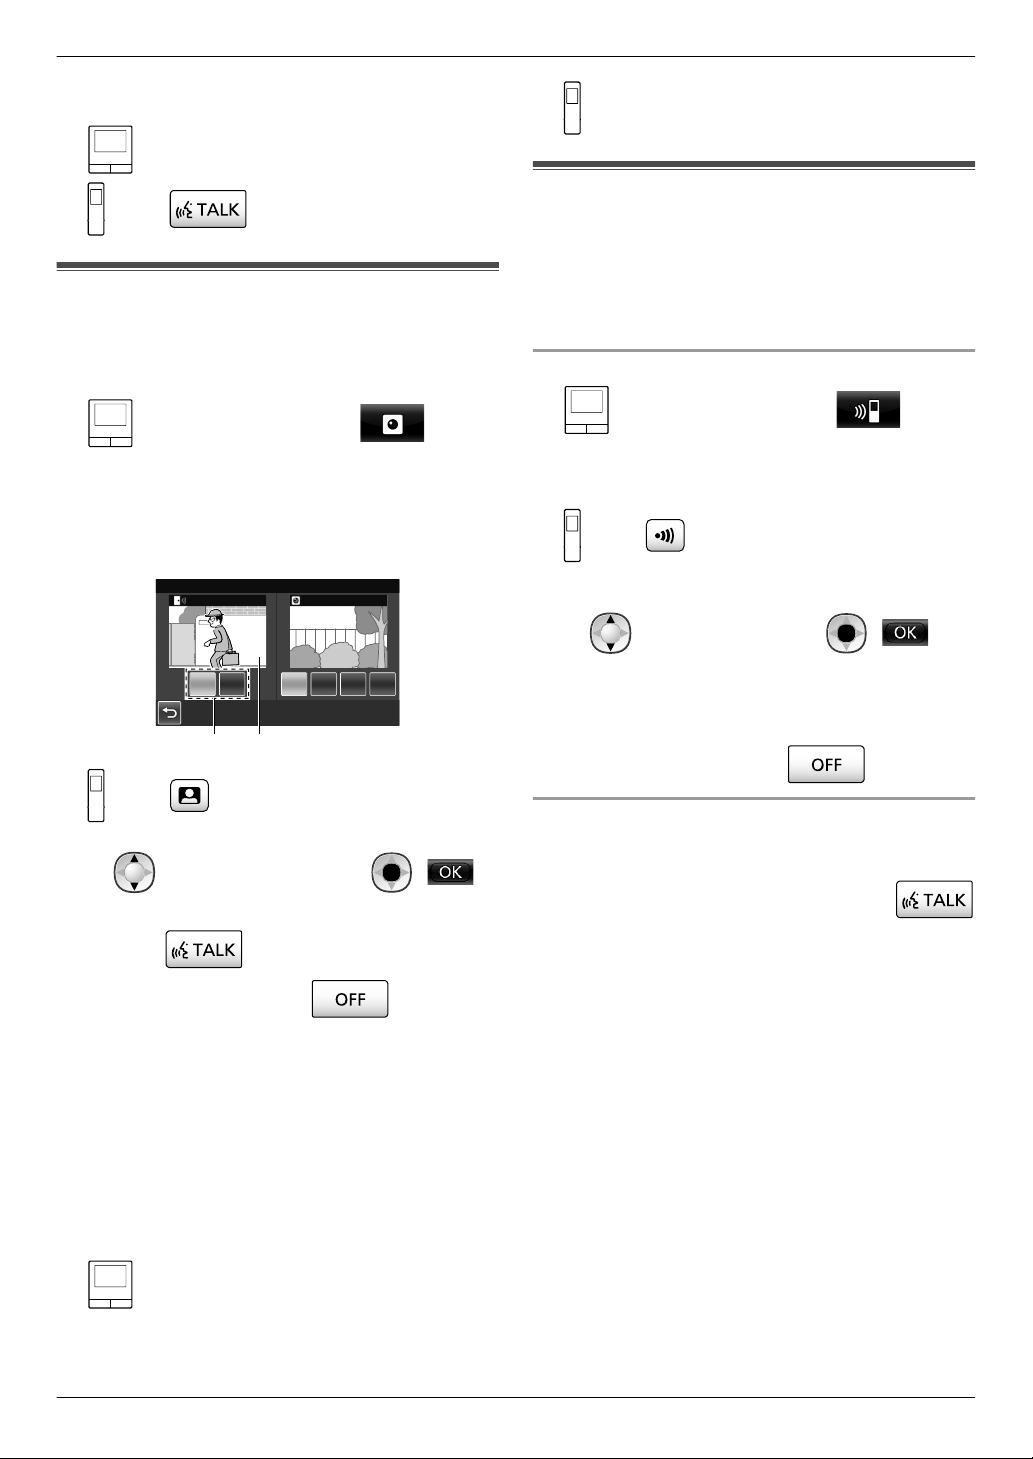
5.2.3 Manually recording monitored images
(See
1 Perform the following operations when monitored
images are displayed.
R
recording.
: ( ) ® : "Record" ®
( )
Note:
R When recording images with the sub monitor,
because there is a lag from when operations are
performed to when recording actually starts, there
may be a difference between the contents of the
monitored images and the recorded images.
is displayed on the screen when
: Touch .
5.3 Playing recorded images
(main monitor only)
When there are recently recorded images that have not
been viewed, the notification indicator flashes and
"New" is displayed.
1 From the top menu, touch [Recorded image list]
R A list of recorded images for each day is displayed
in a 1 week calendar.
– To view a recorded image list from another
day, touch the button of the desired date. This
will show all recorded images from that day.
– Touch
recorded images.
See page 21 and 22 for information about
–
how to navigate this screen and play images.
to view a list of camera
2 Touch the image that you want to view.
R Touch
selected date.
to view all of the images after the
3 To end the operation, press .
Note:
R The
notification indicator stops flashing when the top
menu is displayed, and "New" in the top menu
disappears from the display when the recorded
image list screen is displayed.
.
Monitored images can be manually recorded with the
main monitor and sub monitor.
information about the recorded contents.)
Images monitored with the camera can also be recorded
with the same operations.
(See page 19 for
20
Page 21
ヒパホパパチモヮ パホビビチヱヮ
ビパバヒパ
ヮㄐㄏ
ビフバヒパ
ョㄓㄊ
ビブバヒパ
ヴㄕ
ビプバヒパ
ヴㄖㄏ
ビヒバヒパ
ヵㄖㄆ
ビビバヒパ
ヸㄆㄅ
ビピバヒパ
ヵㄉㄖ
A
B
C
ビピチチヰㄕㄐㄆㄓチチヒパホフピチモヮ
5. Recording/Playing
5.3.1 Navigating the recorded image list and
image playing screens
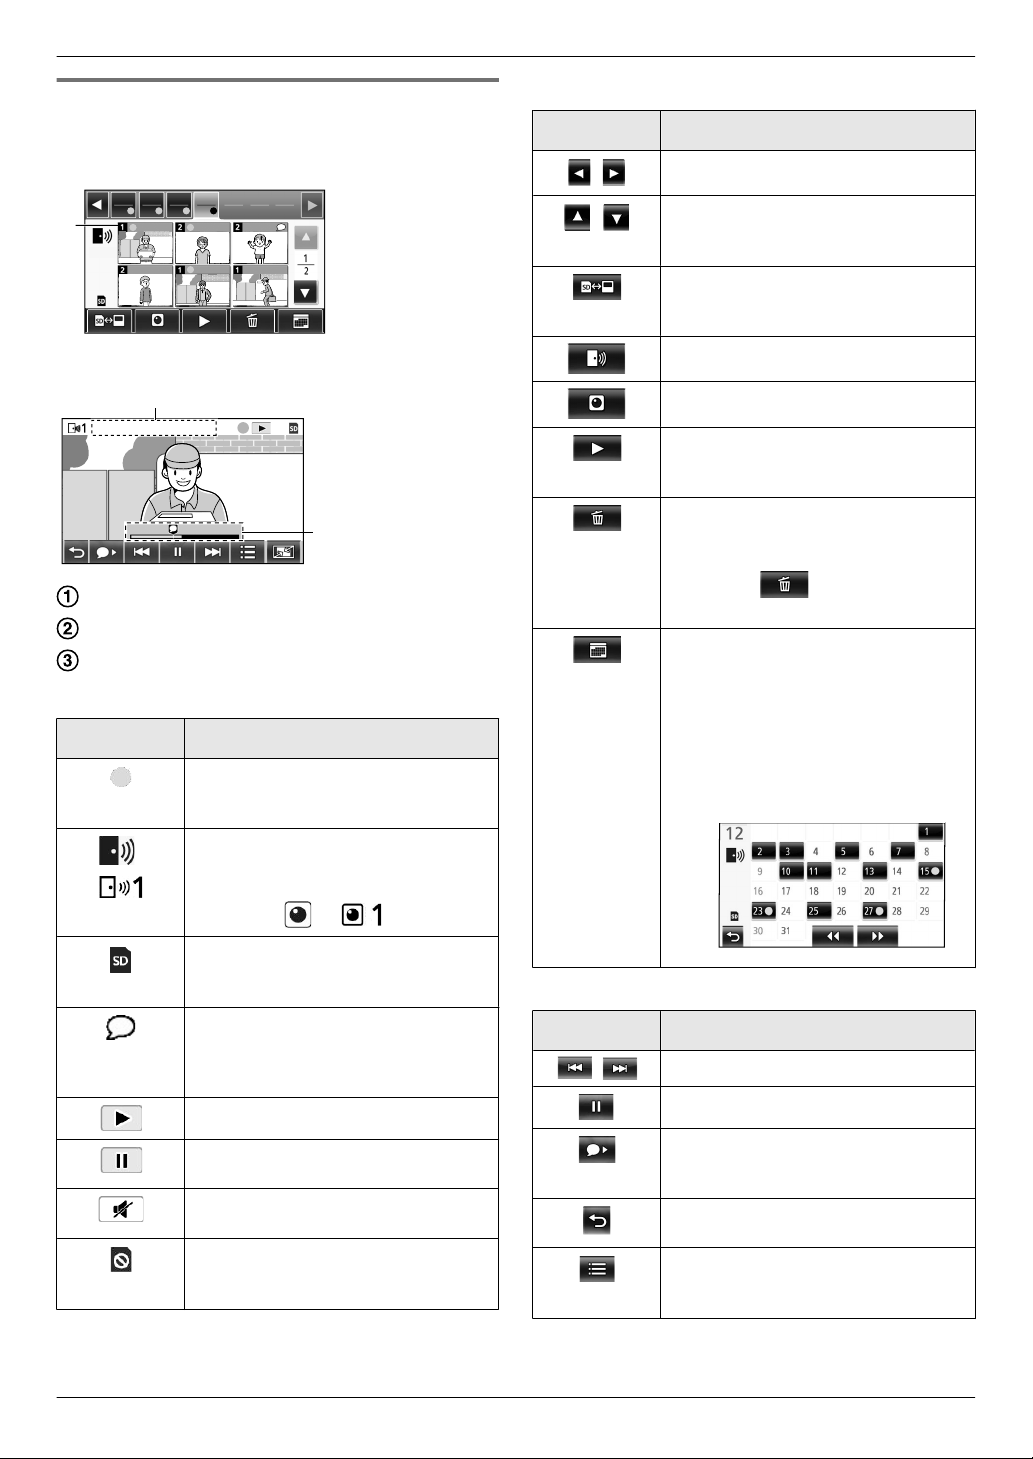
Recorded image list screen
Image playing screen
The recording device’s number
Recording date and time
Time that the image has been played for
Display and other icons
Icon Meaning
Indicates that there is an image that
has not been viewed, and which
images have not been viewed.
Displayed when images from a
doorphone are displayed.
When images from a camera are
displayed, or is displayed.
Operation buttons in the recorded image list screen
Button Action
/
/
Go to the previous or next week.
Go to the previous or next page (only
displayed when there are 7 or more
recorded images).
Switches the memory (internal
memory or SD card) that recorded
images are displayed from.
Goes to the doorphone’s image list.
Goes to the camera’s image list.
Plays images from the selected date
and all images recorded after that
date.
Deletes all images from the selected
day.
R To delete:
Touch
® confirm the
message and then touch [Yes].
Allows you to search for images
the calendar (this is convenient
using
for searching for an image when
there are many recorded images).
R When touched, a calendar such
as the following is displayed.
Touch the date button of the
images that you want to view.
Indicates that an image recorded on
the SD card is being displayed or
played.
Indicates there is recorded audio
(displayed at the start position of
recorded calls in the playback
screen).
Displayed when playing images.
Displayed when images being played
are paused.
Displayed when the audio is muted.
(® page 22)
Displayed when the write-protect
lock switch of the SD card is set to
"LOCK". (® page 10)
Operation buttons in the playing screen
Button Action
/
Skips to the next or previous image.
Pauses images.
When audio is recorded with an
image, audio is played from the start
of recorded calls.
Returns to the recorded image list
screen.
Allows you to delete images, and
adjust the brightness and volume.
(® page 22)
21
Page 22
5. Recording/Playing
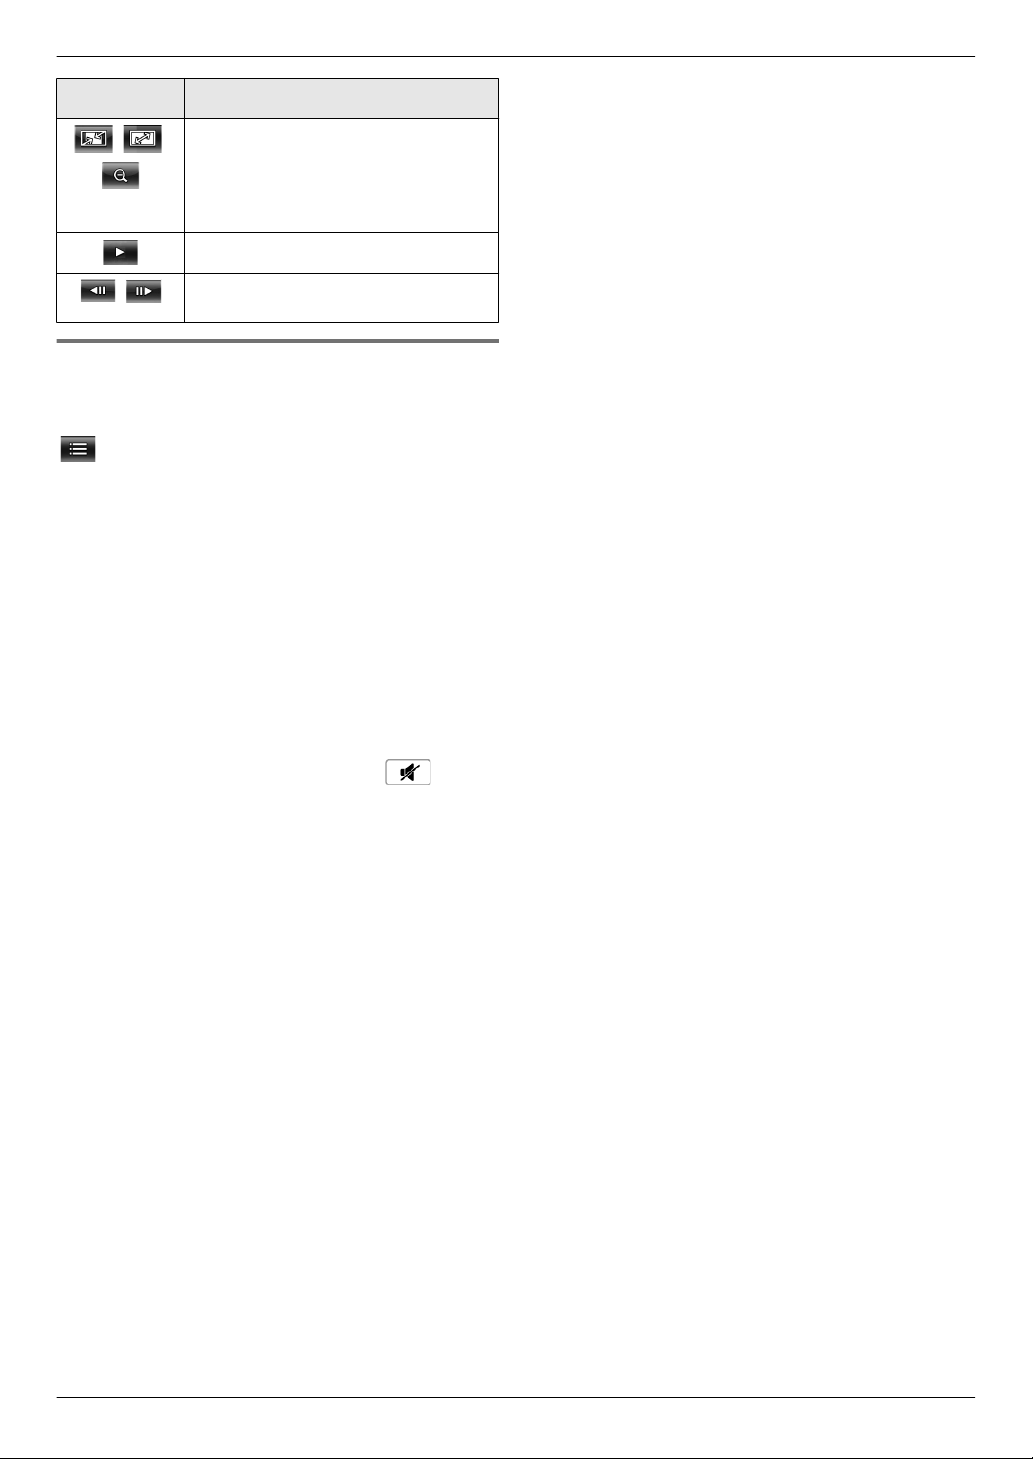
Button Action
/ /
/
Switches between wide, entire
image, and zoom displays.
page 33)
R The display can also be zoomed
by touching an image.
Plays paused images.
Skips to the next or previous frame
(image).
(®
5.3.2 Menu button functions when playing
images
following operations can be performed by using the
The
button displayed when playing images.
Deleting individual images:
Images can be deleted 1 image at a time.
R Touch [Delete], check the displayed message and
then touch [Yes].
Changing the screen’s brightness:
R Touch [Brightness],
touching [–] (Darker) or [+] (Brighter).
Changing the volume of played images:
The volume can be changed when playing the images.
R Touch [Volume], and then adjust the volume by
touching [–] (Quieter) or [+] (Louder).
– To mute the audio, touch [–] until
displayed.
Note:
R The
[Delete all images] setting can be used to delete
all images in the save destination (internal memory
or SD card) in a single operation. (® page 36)
and then adjust the brightness by
is
22
Page 23
A
A
B
C
6. Using a camera
6.1 Connecting with a camera
By connecting with a camera (additional accessories,
6. . Using a camera
® page 4), you can monitor outside images with the
camera, and the main monitor and sub monitor can
receive notifications with sounds and images when
camera sensors are triggered.
– See the camera’s manuals for detailed information
about using the camera.
– An SD card is required to record camera images.
Note:
R The image quality of camera images may be lower
than the image quality of doorphone images.
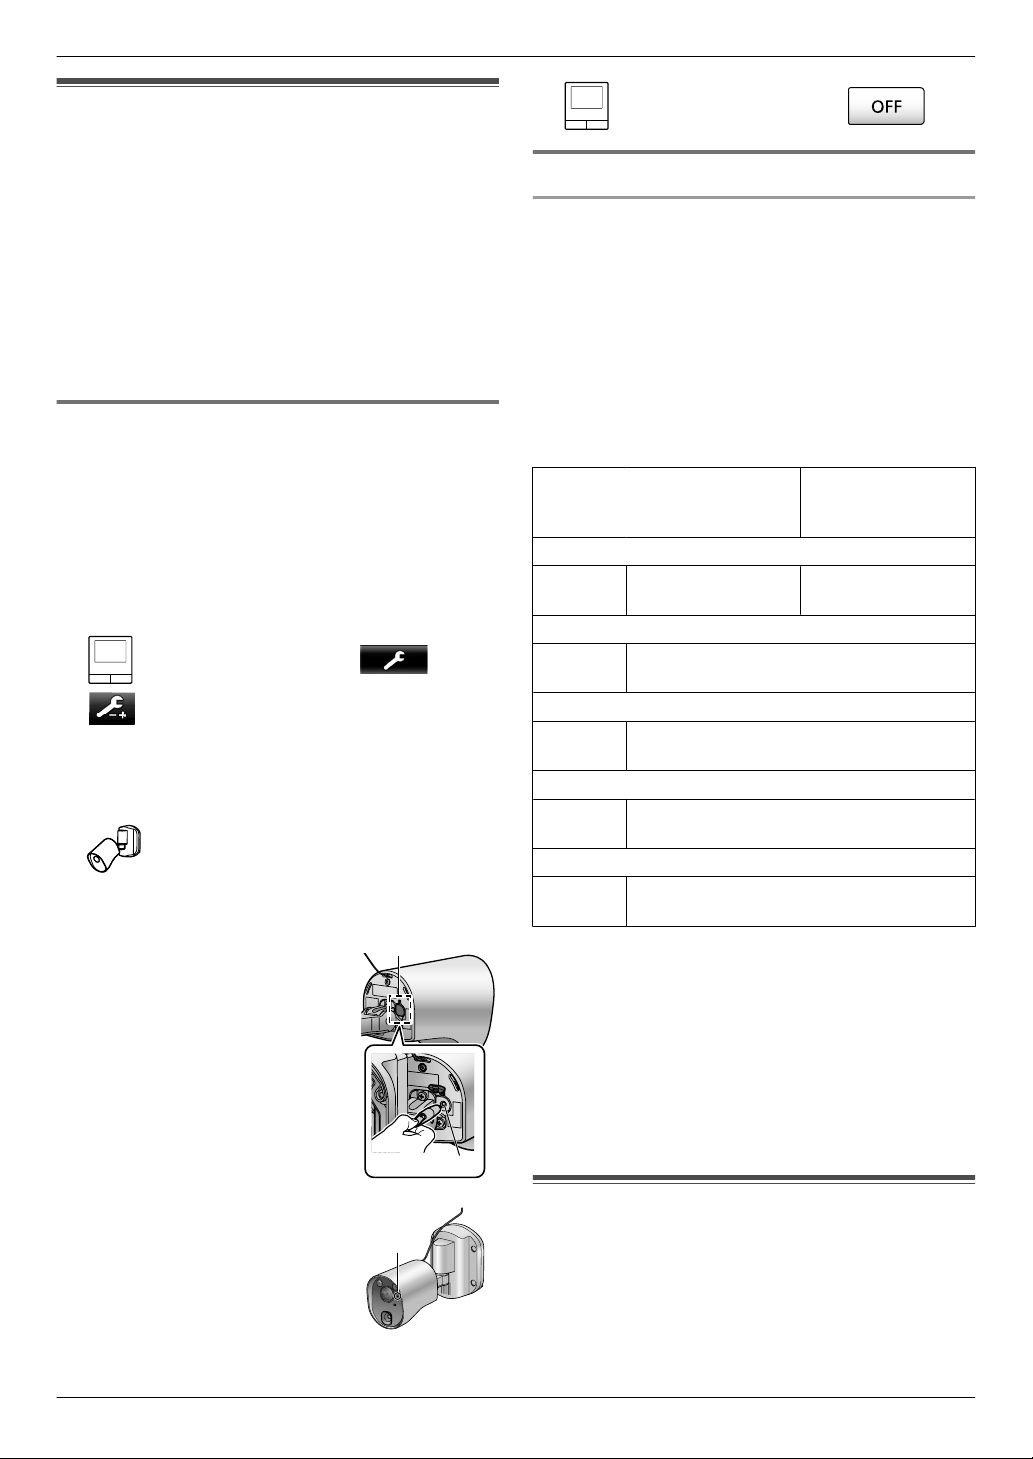
6.1.1 Registering a camera to the main
monitor
Register the camera after connecting it to a power
supply.
– Register
be registered at the same time.
– These operations are for VL-WD812EX model
cameras. See the camera’s manuals as required.
1
[Camera] ® the number of the camera to be
registered.
R After this, use the camera and complete the
2 : With the power connected to the camera,
press the register button on the rear side of the
camera.
R The register button is
1 camera at a time. Multiple cameras cannot
: From the top menu, touch ®
® [Register/Cancel] ® [Register] ®
following steps within about 5 minutes.
located behind the register
button cover (A).
Peel open the register
button
cover and use the thin
end of the sensor range cap
removement tool (supplied
accessory) to press and hold
the register button (B) for
about 3 seconds. After this
make sure to firmly close the
register button cover.
3 : To end the operation, press .
6.1.2 Images sent from the camera
Camera image recording intervals
The camera records images
sends them to the main monitor. The main monitor and
sub monitor display the images by continuously updating
still images one image at a time. (Video data is not sent
from the camera.)
Images recorded due to sensor detections
The timing that the 1st image is recorded changes
depending on whether [Recording before detection] (®
page 27) is set to [1 second before] or [2 seconds
before].
Recording from 1
second before
detection
1st
image
2nd
image
3rd
image
4th
image
5th
image
R Images from the 6th image onwards are recorded in
approx. 1 second intervals.
R The following issues may occur when it is dark.
– The
– Objects in images may appear blurred.
Images recorded when monitoring
Images are recorded in approx. 1 second intervals from
when monitoring is started.
1 second before
detection
Just after detection
1 second after detection
2 seconds after detection
Approx. 4 to 5 seconds after detection
first image is dark. (The LED lights are not lit
because no detections have been made yet.)
(series of images) and
Recording from 2
seconds before
detection
¯
2 seconds before
detection
¯
¯
¯
¯
R The
camera’s indicator lamp
(C) flashes in green during
registration. When
registration is complete, a
beep sounds and the
indicator lamp lights in
green.
6.2 Monitoring the outside with
the camera
You can monitor the sounds and images from the
camera.
The sound from your end will not be heard at the
–
camera.
23
Page 24
OffOn
6. Using a camera
1 : From the top menu, touch and then
the image.
the camera selection screen is displayed, touch
R If
the number of the camera that you want to
monitor with and then the image.
: ® : Select the camera you want to
monitor with. ®
( )
2 The images from the camera are displayed.
R Press to speak to the monitored party.
3 To end the operation, press
Features available while monitoring
Adjust wide/zoom and pan/tilt settings (®
–
page 33)
– Adjust sound and display settings (® page 33)
– Make a warning sound come out of the camera (®
page 24)
– Record monitored images (® page 20)
Note:
R Monitoring time:
–
–
R In situations where it is difficult to see images, such
as
the camera’s [Brightness] setting and activate the
[Backlight compensation] setting as required. (®
page 27)
: About 90 seconds (can
3 minutes by performing operations during
monitoring)
: About 3 minutes
when it is dark or when there is backlight, change
.
be extended up to
– The
–
R Making a warning sound come out of the
camera:
[Play sound].
( )
Features available when a sensor is triggered
–
Adjust wide/zoom and pan/tilt settings (®
page 33)
– Adjust brightness settings (® page 34)
– Record monitored images (® page 20)
Note:
R Images from when camera sensors are triggered are
automatically recorded to the SD card. (®
page 25)
R Once a sensor is triggered, the next sensor detection
cannot be made until about 10 seconds after the first
triggered images have finished being displayed. (The
time that detections are not made for can be selected.
® page 26)
R In situations where it is difficult to see images, such
as when it is dark or when there is backlight, change
the camera’s [Brightness] setting and activate the
[Backlight compensation] setting as required. (®
page 27)
R The volume and the types of sounds used by the
[Warning sound] setting can be changed. (®
page 28)
monitoring time is about 90 seconds (can
be extended up to 3 minutes by performing
operations during monitoring).
: Press .
The monitoring time is about 3 minutes.
: Touch ® [Warning sound] ®
: ( ) ® : "Warning" ®
6.3 When camera sensors are
triggered
When a camera sensor is triggered, the main monitor
and sub monitor are notified in the follow manner.
1 When a sensor is triggered the ringtone sounds and
camera images are displayed for about 30 seconds.
R Talking to the other party at the camera side:
Press .
R Monitoring
24
party without talking:
(watching and listening) the other
: Touch .
6.4 Turning off camera sensor
detections for specified periods
of time (main monitor only)
Camera
periods of times as required.
– When camera sensor detections are turned off,
– When there are multiple cameras, sensor detections
1 From the top menu, touch
sensor detections can be turned off for specified
notifications are not sent to the main monitor and sub
monitor and images are not automatically recorded.
for all of the cameras will be turned off.
®
.
Page 25
OffOn
6. Using a camera
2 Touch the time you want to turn off sensor detection
for.
R A beep sounds and "Off" is highlighted in yellow
when settings are completed.
3 To end the operation, press
Turning sensor detection back on again
When sensor detection is turned off, it will automatically
turn on again after the specified time has passed. You
can turn on the sensor detection again at any time with
the following operations.
1. From the top menu, touch ®
turn the sensor detection on again.
2. To end the operation, press
Note:
R The status of camera sensor detections can be
checked in the camera information menu.
page 13)
.
to
.
(®
6.5 Recording camera images and
conversations
Camera images with audio data can be recorded to an
SD card. (Including doorphone images, a maximum of
3,000 images can be saved.)
R When there are multiple cameras, and another
camera’s sensor is triggered whilst receiving an
incoming call, the recording time of camera images
(about 30 seconds maximum) may be reduced.
6.5.2 Recording images and audio until the
end of calls (Record calls)
To
use this function, an SD card must be inserted in the
main monitor and [Record calls] must be set to
[Enable] (® page 36). With this function, calls can be
recorded from start to finish in 1 video file that contains
audio data (max. length of about 120 seconds).
6.5.3 Manually recording monitored images
and playing recorded images
The operations are the same for doorphone images.
Manually recording monitored images. (® page 20)
–
– Playing recorded images. (® page 20)
6.5.1 Automatically recording images when
sensors are triggered
When a sensor is triggered, images from 1 or 2
seconds*1 before the detection are automatically
recorded*2 to an SD card. (® page 19)
*1
The timing when recording starts before detections
depends on the [Recording before detection] setting.
(® page 27)
*2 When a call is made after a sensor is triggered, audio
from the main monitor or sub monitor will also be
recorded.
When calls are not answered:
Recorded images are saved as unchecked images, and
the notification indicator of the main monitor flashes to
indicate that there are unchecked images.
Note:
R When there are multiple cameras, multiple incoming
calls may be received at the same time. In this case,
the most recent incoming call is given priority and
recorded.
R When there is an incoming call from another camera
when talking or monitoring with a camera (®
page 30, 31), you must end the call or monitoring
in order to display and save the image from the
incoming call.
25
Page 26
6. Using a camera
6.6 Changing camera settings
You can change the settings to match how the camera is used.
How to change the settings (using the main monitor)
1. From the top menu of the main monitor, touch
2. Select the number (1 - 4) of the camera to be configured.
3. Touch the item name, function name, and setting contents.
R Operations may have to be repeated depending on the function.
4. To end the operation, press
Note:
R The
R In the following table, < > indicates the default settings.
Item name: Sensor settings
setting function screen automatically quits if an incoming call is received or if no operations are performed for
about 90 seconds.
Function name Setting contents and other information
Sensor selection Heat sensor only, <Heat sensor + motion detection>, External sensor only, All
sensors, Off (disables all sensors)
*1
Heat sensor detection
Motion detection
Day and night switch <Auto>, Timer
*1
<Night only>, Always
R Select the time period for heat sensor detection.
– When [Night
Day only, <Always>
R Select the time period for motion detection.
– When [Day
R Select whether to automatically set the day and night switch settings or set them
manually to a preferred time.
–
.
only] is selected, the heat sensor operates according to the settings
of [Day and night switch] (® page 26).
only] is selected, motion detection operates according to the settings
of [Day and night switch] (® page 26).
This setting is active when the [Heat sensor detection] or [Motion detection]
settings are set to [Night only] or [Day only].
® ® [Connected devices] ® [Camera].
Auto: the camera automatically switches between night and day modes depending on
the brightness of the surrounding area.
Timer: allows you to configure the time for the night.
(After selecting [Timer], set the time with [+] and [–], and then touch [OK].)
Time with no detection <10 seconds>, 30 seconds, 60 seconds
R Select the time after an image is detected by a sensor or a monitored image is
displayed until the sensor can make detections again.
Select a long time period if you do not want the sensor to make frequent
–
detections.
Heat sensor sensitivity High sensitivity, <Normal>, Low sensitivity, Very low sensitivity, Do not detect
R If
it is difficult for the sensor to make detections, select [High sensitivity]. If detections
are being too frequently made, select [Low sensitivity] or [Very low sensitivity].
Motion detection
sensitivity
High sensitivity, <Normal>, Low sensitivity, Very low sensitivity
you want to detect small changes in motion, select [High sensitivity]. If you do not
R If
want to detect small changes in motion, select [Low sensitivity] or [Very low
sensitivity].
26
Page 27
6. Using a camera
Function name Setting contents and other information
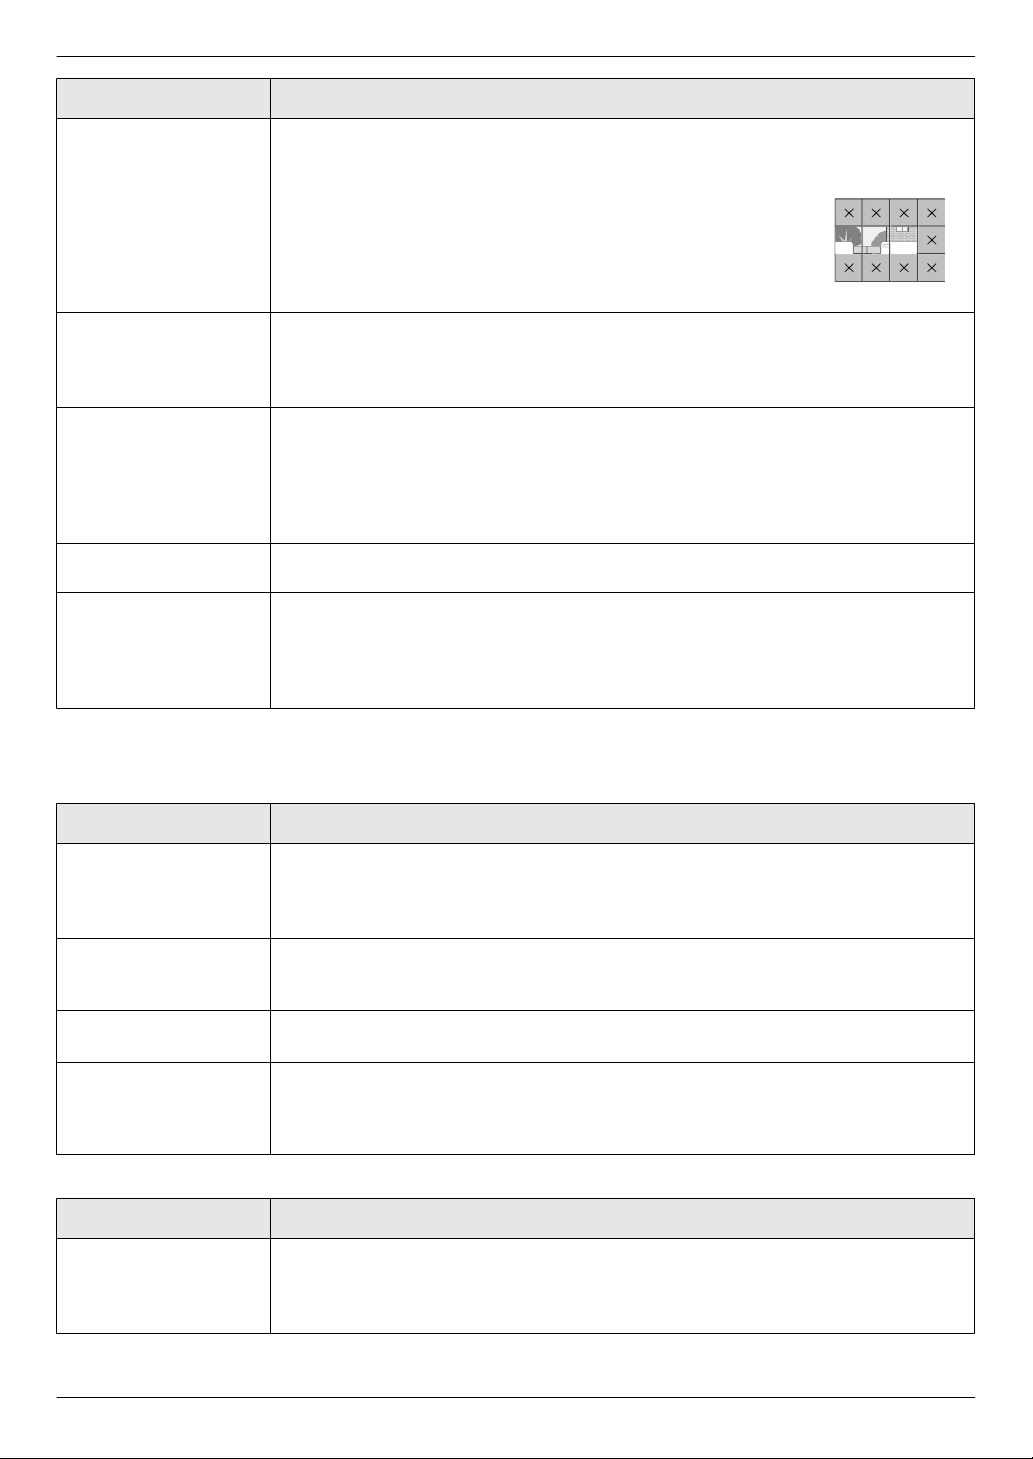
Motion detection range R Select the range (area) of motion detection.
– By
setting the areas that you do not want motion to be detected in to X, you can
narrow down the areas that motion can be detected in.
Configuration
1. Touch
2. Touch [Configure].
Recording before
detection
Check sensors Heat sensor, Motion detection, External sensor
Recording test R Confirm if images are correctly recorded before and after images are recorded for
External sensor <Make contact>, Break contact
<1 second before>, 2 seconds before
R Select to start recording 1 or 2 seconds before a sensor detection is made.
R You can check the operations of each sensor when setting the camera, or at any
R When using commercially available external sensors, select the type of contact
areas that you do not want motion to be detected in so
that X is displayed on those areas. (Touch again to remove
X.)
See page 23 for information about recording intervals and sensor detection
recordings.
other time.
– Select the type of sensor that you want to check, trigger it, and then confirm if
detections were correctly made. (See the Installation Guide for the camera for
information about how to check the sensors.)
sensor detections. (See the Installation Guide for the camera for more information.)
points used by the sensor.
Select the type of contact point according to the external sensor used and its
–
function.
*1 When [Day and night switch] is set to [Timer], the configured time periods are displayed above the [Night only]
and [Day only] setting buttons.
Item name: Screen settings
Function name Setting contents and other information
Brightness -3, -2, -1, <0>, +1, +2, +3
R Adjust the brightness of camera images.
brighter the image.)
– Make adjustments when the images are very dark or bright.
Backlight compensation On, <Off>
R When [On] is selected, backlight compensation is performed. However, depending
on the background of the subject, the backlight compensation may not be effective.
Automatic illumination When the sensor is triggered: Enable, <Only when dark>, Disable
When monitoring
Uneven colour
prevention
Item name: Sound settings
Function name Setting contents and other information
Sensor trigger sound Sound type: <Sound a>, Sound b, Sound c
On, <Off>
R Normally use this setting set to [Off]. Only set this setting to [
camera images is uneven. (When set to [On], the image quality may be reduced
when it is dark.)
Volume: <Loud>, Normal, Quiet, Mute
R Select the type and volume of the sound to be made by the camera when there is
a sensor detection.
: Enable, <Only when dark>, Disable
(The higher you set the brightness, the
On] if the colour in
27
Page 28
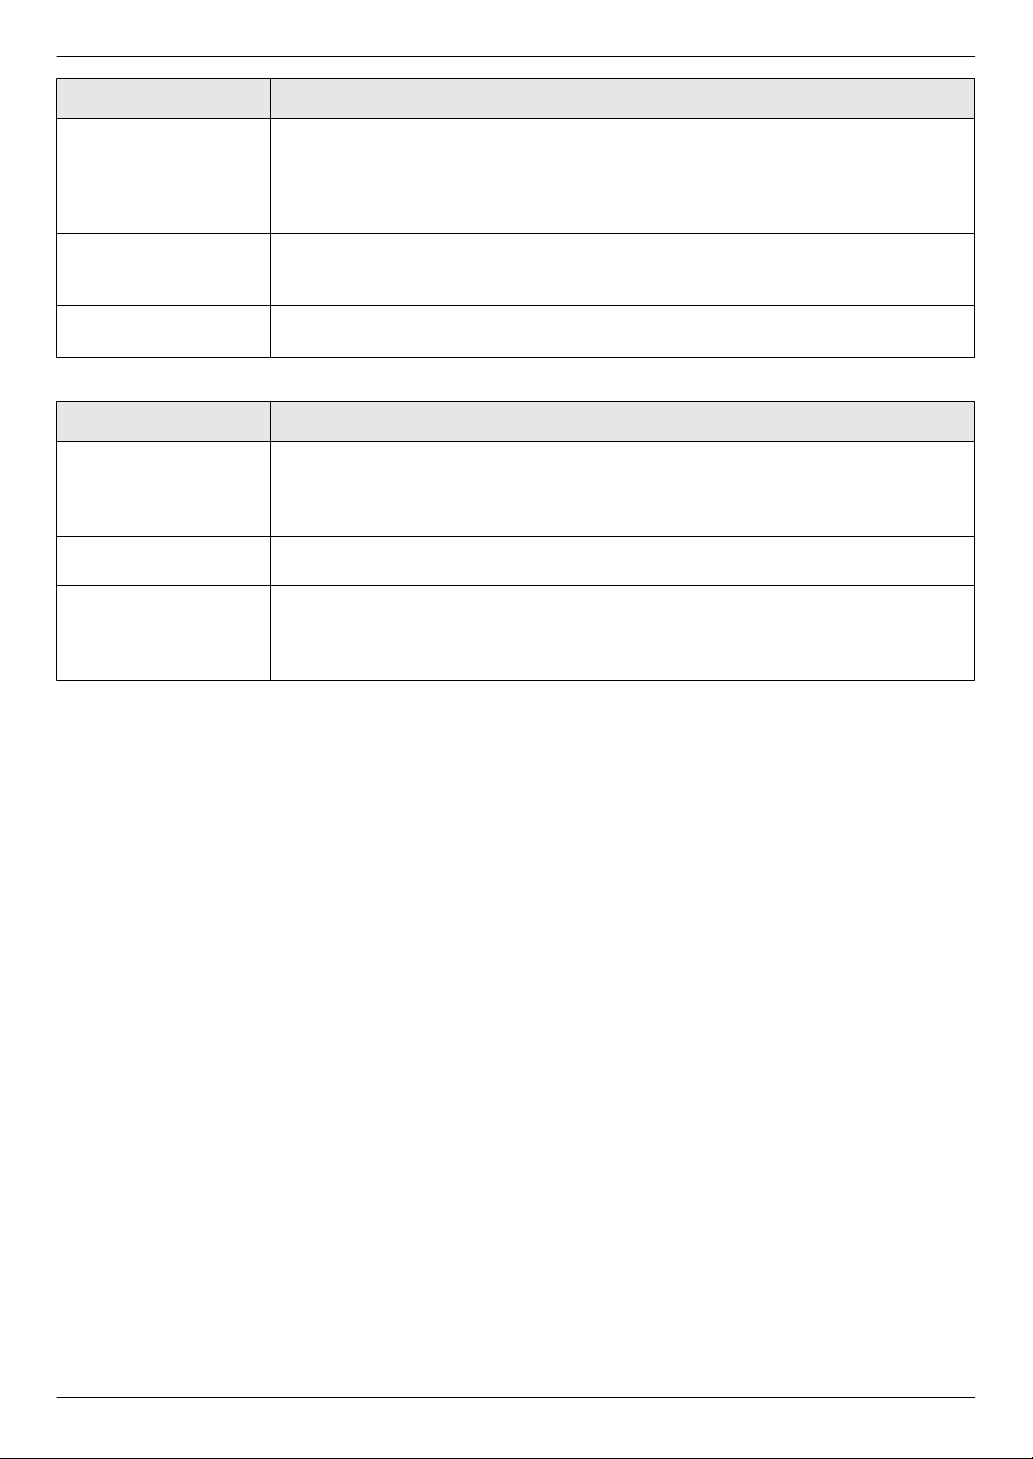
6. Using a camera
Function name Setting contents and other information
Warning sound Sound type: <Sound a>, Sound b, Sound c
Volume: <Loud>, Normal, Quiet
R By
operating the main monitor or sub monitor when monitoring or performing other
actions, you can make a warning sound come out of the camera. Select the type
and volume of the sound.
Owner’s voice volume Loud, <Normal>, Quiet
R Select the volume of the sound from the camera when talking or calling out to
visitors.
Camera mic sensitivity <High>, Normal, Low
R When too much sound is picked up, select
Item name: Other settings
Function name Setting contents and other information
Indicator lamp <Always>, When transmitting, Off
R Select how the indicator lamp lights up.
–
When [When transmitting] is selected, the lamp only lights up when the main
monitor or sub monitor are talking or monitoring with the camera.
Camera detection
history
Initialize settings Yes, No
R Displays the sensor detection history. (Displays the latest 24 entries.)
R Returns the camera’s settings to the factory default.
– The
camera remains registered to the main monitor even if the camera’s settings
are initialized. (Registration information is not deleted.)
[Normal] or [Low].
28
Page 29
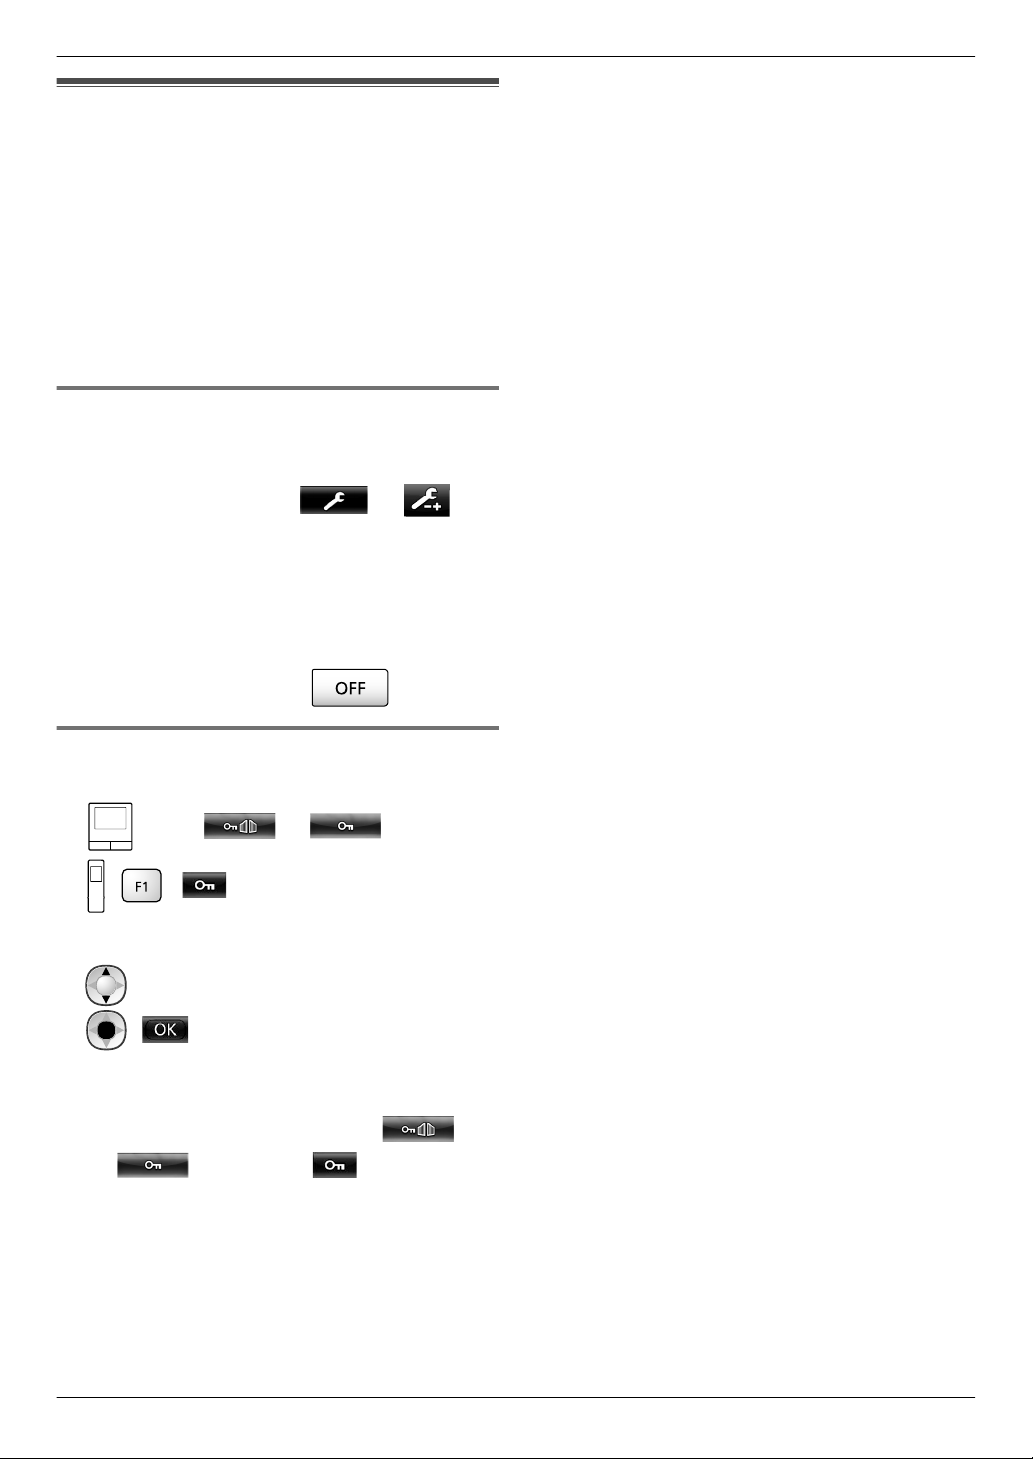
7.1 Connecting with electric locks
When a commercially available electric lock is connected
7. . Using electric locks
to the main monitor, you can open a door or gate using
the main monitor or the sub monitor. You can also select
how long the door or gate remains open.
To use electric locks, they must be configured on the
main monitor.
R A maximum of 4 electric locks can be connected to
the main monitor.
R For detailed information about connections, see the
manual included with the electric lock and the
Installation Guide of this product.
7.1.1 Configuring electric locks
This operation can only be performed on the main
–
monitor.
7. Using electric locks
1 From the top menu, touch
[Connected devices]
doorphone to be configured.
R [Unlocking buzzer sound] can also be configured.
(® page 37)
® [Electric lock] ® the
® ®
2 Touch the electric lock to be configured and then
touch the unlocking time.
3 To end the operation, press
.
7.1.2 Unlocking electric locks
1 When talking or monitoring with the doorphone:
: Touch or .
: ( )
R When there are 2 electric locks connected to the
same doorphone:
: Select the electric lock to be unlocked. ®
( )
Opening another door or gate:
R After opening the door or gate, you can open
another door or gate by touching
or
(sub monitor: ).
Note:
R You can only open the door or gate when talking or
monitoring.
R When using multiple electric locks with different
doorphones:
You can only open the electric locks from the
doorphone that they are linked to.
29
Page 30
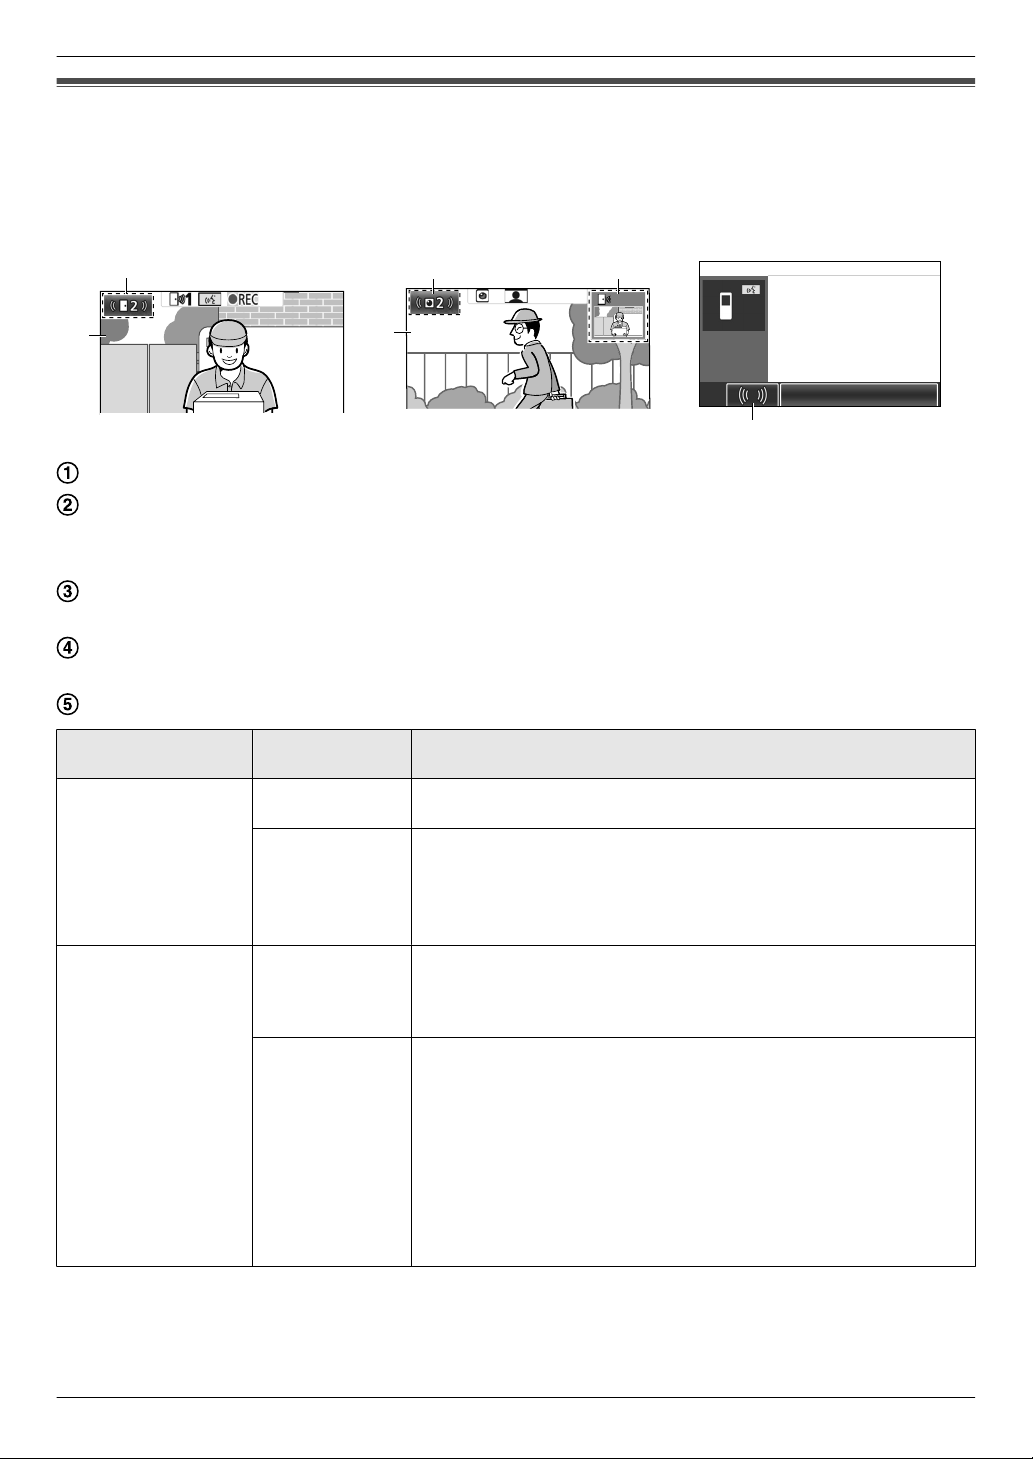
A
B
ヒ
ヒヒヒ
C D
A
ヒ
リㄏㄕㄆㄓㄐㄎチㄍㄍ
ンㄆㄆㄊㄗㄆㄓチㄗㄐㄍㄖㄎㄆ
E
8. Incoming call operations
8.1 When another incoming call is received - main monitor
When another incoming call is received from a doorphone or camera while talking, monitoring, or receiving an incoming
8. . Incoming call operations
call with the main monitor, the ringtone sounds and notifications are received in the following manner.
Example: When there is an
incoming call from doorphone 2
while talking with doorphone 1.
Example:
When there are incoming
calls from doorphone 1 and camera
2 while monitoring with camera 1.
Example: When there is an
incoming call from a doorphone or
camera during intercom calls.
Main screen
Doorphone button indicating that there is a new incoming call (the
example shows an incoming call from doorphone
2)
– By touching this button, you can display the image from the incoming call in the main screen.
Camera button indicating that there is a new incoming call (the example shows an incoming call from camera 2)
–
By touching this button, you can display the image from the incoming call in the main screen.
Sub screen indicating that there is a new incoming call (the example shows an incoming call from doorphone 1)
–
By touching the sub screen, you can display the image from the sub screen in the main screen.
Incoming call notification button
Current action
Receiving an
incoming call from a
doorphone
New incoming
call from
Next action
Doorphone The display changes to the new incoming call, and the previous
incoming call is terminated.
Camera The existing incoming call from the doorphone is displayed in the
screen and the new incoming call from the camera is displayed
main
in the sub screen*1.
R By touching the sub screen, you can switch the images displayed
in the main screen and sub screen.
Talking or monitoring
with a doorphone
Doorphone The number of the doorphone that the incoming call is from is
displayed in the touch button
(B).
R When B is touched, the display changes to the new incoming call
and the existing call or monitoring is terminated.
Camera
The incoming call from the camera is displayed in the sub screen*1.
R When talking with the doorphone:
By touching the sub screen, you can switch the images
–
displayed in the main screen and sub screen. (You can
continue talking with the original call when images are
switched.)
R When monitoring with the doorphone:
– When the sub screen is touched, the display changes to the
new incoming call from the camera and the existing monitoring
is terminated.
30
Page 31

8. Incoming call operations
Current action
Receiving an
incoming call from a
camera
Talking or monitoring
with a camera
Transferring
doorphone calls
During an intercom
call
New incoming
call from
Doorphone The existing incoming call from the camera is displayed in the sub
screen and the new incoming call from the doorphone is displayed in
the main screen.
R By touching the sub screen, you can switch the images displayed
in the main screen and sub screen.
Camera The display changes to the new incoming call, and the previous
incoming call is terminated.
Doorphone The incoming call from the doorphone is displayed in the sub screen
(D).
R When talking with the camera:
By touching D, you can switch the images displayed in the
–
main screen and sub screen. (You can continue talking with
the original call when images are switched.)
R When monitoring with the camera:
– When D is touched, the display changes to the new incoming
call from the doorphone and the existing monitoring is
terminated.
Camera The incoming call can be displayed by touching the camera button
(C)*2.
R When C
and the existing call or monitoring is terminated.
Doorphone The incoming call notification button (E) is displayed.
R When E is touched, transferring is cancelled and the screen is
returned to the original doorphone screen. The number of the
doorphone that the incoming call is from is displayed in a touch
button such as B.
R When B
and the existing call or monitoring is terminated.
Camera The incoming call notification button (E) is displayed.
R When E is touched, transferring is cancelled and the screen is
returned
call is displayed in the sub screen*1.
R By touching the sub screen, you can switch the images displayed
in the main screen and sub screen. (You can continue talking with
the original call when images are switched.)
Doorphone or
camera
The incoming call notification button (E) is displayed.
R When E
and the existing intercom call is terminated.
is touched, the display changes to the new incoming call
is touched, the display changes to the new incoming call
to the original doorphone screen. The incoming camera
is touched, the display changes to the new incoming call
Next action
*1 When multiple incoming camera calls are received, the most recent incoming call received is given priority and
is displayed in the sub screen.
*2
When multiple incoming camera calls are received, the most recent incoming call received is given priority and
is shown in the camera button.
Note:
R The sub screen display can be turned off by touching
.
8.2 When another incoming call is received - sub monitor
When another incoming call is received from the doorphone or camera while talking, monitoring, or receiving an
incoming call with the sub monitor, notifications are received in the following manner.
31
Page 32

8. Incoming call operations
Current action
Receiving an
incoming call from a
doorphone or camera
Talking or monitoring
with a doorphone or
camera, or during an
intercom call
New incoming
call from
Doorphone or
camera
Doorphone or
camera
Next action
The doorphone’s or camera’s ringtone sounds, and or
flashes. (See page 13 for information about the display.)
R When
R When an incoming call from both the doorphone and camera are
R When multiple camera incoming calls are received, the original
To talk to the visitor at the doorphone:
R Press
To monitor with the doorphone or camera:
R ® : Select the device. ® ( )
The doorphone’s or camera’s ringtone sounds and the icon of the
incoming call
(See page 13 for information about the display.)
To answer the incoming call:
multiple doorphone incoming calls are received, the original
incoming call is terminated, and the new incoming call is given
priority and is displayed.
received, the doorphone’s incoming call is given priority and is
displayed.
incoming call is terminated, and the new incoming call is given
priority and is displayed.
.
’s device is displayed.
R Press
– The original call or monitoring is terminated and the displayed
image is changed.
– Press to talk with the visitor at the doorphone or
camera.
.
32
Page 33

9. Additional functions
9.1 Changing how images are displayed (wide/zoom and pan/tilt
settings)
9. . Additional functions
When displaying doorphone and camera images, the display can be changed between wide and zoom displays, and
the zoom position can be changed using pan and tilt operations.
Operation
Wide ® zoom
Entire image display ® zoom
Zoom ® wide
Entire image display ® wide
Wide ® entire image display
Pan/tilt Touch the position that you want to
– See page 15 for an image of what the wide, zoom, and entire image displays look like.
Note:
R Because a digital zoom is used, the image quality of zoom display is lower than that of wide display or entire image
display.
R When images are recorded in zoom display, only the areas displayed are recorded.
R When using the main monitor, pan and tilt, wide, zoom, and entire image display operations can be performed
even when playing recorded images.
R Even if the display is changed, it will go back to the configured settings when the next image is displayed.
– To change how incoming doorphone calls and monitored images are initially displayed, change the [Wide/
Zoom settings] or [Zoom position settings] settings. (® page 15)
– Incoming call images, monitored images, and recorded images from the camera can only initially be displayed
in the wide display.
Touch the position that you want to
enlarge.
view.
( )
–
( )
–
–
9.2 Audio and display settings for talking and monitoring
following audio and display settings can be configured for talking and monitoring with doorphones and cameras.
The
Status
Talking or monitoring with a
doorphone
Talking or monitoring with a camera R Receiving volume of incoming
*1 This
*2 Can also be changed when there is an incoming call from the doorphone.
*3 Can also be changed when there is an incoming call from the camera.
is the volume that can be heard outside at the doorphone when talking with the doorphone. (This setting can
only be changed by the main monitor.)
Sound settings that can be
changed
R Receiving volume of incoming
calls
R Owner’s
the doorphone)
R Voice changer function (makes
the voice output to the
doorphone sound deeper)
calls
voice volume (output to
*1
Display settings that can be
changed
R Doorphone LED lights
illumination (manually ON/
*2
OFF)
R Doorphone backlight
compensation
R Brightness settings
R Brightness settings
*2
*2
*3
’
33
Page 34

9. Additional functions
Configuration (Configure the settings as follows while talking or monitoring.)
: Touch ® [Sound]
table).
*1 [Sound] and [Display] are not displayed when talking or monitoring with a camera.
: ( ) ® configure the settings that you want to change
Changing the
receiving volume of
incoming calls
Changing the owner’s
voice volume (output
to the doorphone)
Using voice changer
Turning the
doorphone
lights on or off
*1
*1
’s LED
*1
or [Display]*1 ® configure the settings that you want to change (see the following
(see the following table).
Touch [Receiver
or [+] (Louder).
: "Volume" ® ( ) ® : Adjust the volume.
Touch [Owner’s voice volume] and then adjust the volume by touching
[Quiet] or [Normal].
Touch [Voice changer] ® [On].
: "Voice changer" ® ( )
Touch [Illumination], and then touch [On] or [Off].
: "Illumination" ® ( ) ® : Select the required setting.
volume], and then adjust the volume by touching [–] (Quieter)
Touch [Backlight compensation] and then
adjust the backlight compensation using
Using backlight
compensation for
doorphone images
Changing the
screen’s brightness
*1 Can only be configured when talking or monitoring with a doorphone.
*1
either [–], [Off]
: "Backlight" ® ( ) ®
: Adjust the backlight compensation.
Touch [Brightness],
[+] (Brighter).
: "Brightness" ® ( ) ® : Adjust the brightness.
, or [+].
and then adjust the brightness by touching [–] (Darker) or
R [–]: use when faces appear
too bright (makes images
darker)
R [Off]: turns off backlight
compensation
R [+]: use when faces appear
too dark (makes images
brighter)
9.3 Ringtone settings
9.3.1 Ringtone type settings
You can change the ringtone that is heard when receiving calls from the doorphone or the camera.
the intercom call cannot be changed.)
– For information about how to configure settings, see page 36 for the main monitor and page 38 for the sub
monitor.
(The ringtone of
34
Page 35

9. Additional functions
9.3.2 Ringtone volume settings
The ringtone volume for doorphone calls, camera calls, and paging can be changed.
: See page 36.
: Perform the following procedure.
1 When the information screen is displayed, select the item to change the volume for with and then press
( ).
2 : Adjust the volume.
3 To end the operation, press
*1
To mute the sound, press and hold until is displayed. (The paging volume cannot be turned off.)
– To activate the sound again, press
*1
.
.
9.4 Functions settings list - main monitor
You can change the settings to match how the main monitor is used.
How to change settings
1. From the top menu, touch
2. Touch the item name, function name, and setting contents.
R Operations may have to be repeated depending on the function.
3. To end the operation, press .
Note:
R The
R In the following table, < > indicates the default settings.
Item name: Initial settings
setting function screen automatically quits if an incoming call is received or if no operations are performed for
about 90 seconds.
® .
Sub-menu
1 2 3
Time and date
settings
Time display format – – <12h>, 24h
Set day for first day of
week
Zoom position settings Doorphone 1 - 2 – –
Wide/Zoom settings Doorphone 1 - 2 When visitors
*1
– – 2013-1-1 0:00
– – Sunday, <Monday>
Zoom, <Wide>, All
come/When
monitoring
Settings
For details,
see page 15.
35
Page 36

9. Additional functions
Sub-menu
1 2 3
Settings
Power supply
frequency
Select language
*1
When
Item name: Ringtone
Ring volume Doorphone <Loud>, Normal, Quiet, Mute
Ringtone Doorphone 1 <Sound 1>, Sound 2, Sound 3, Sound 4 <Normal>, Repeat
Item name: Recording/Play
*1
using the product for the first time, follow the on-screen instructions to configure this setting. (® page 15)
Sub-menu
1 2
Camera <Loud>, Normal, Quiet, Mute
Page <Loud>, Normal, Quiet
Doorphone 2 Sound 1, <Sound 2>, Sound 3, Sound 4 <Normal>, Repeat
Camera 1 - 4 <Sound A>, Sound B, Sound C, Sound D
Sub-menu
1 2
– – <50 Hz>, 60 Hz
R To prevent mottled or uneven colour from
being displayed, choose the appropriate
power supply frequency for your area.
– – <English>, Français, Deutsch, Italiano,
Español, Nederlands
Settings
Settings
Record calls Doorphone 1 -
Camera 1 - 4
Delete all images Internal memory Yes, No
SD card Yes, No
Item name: SD card
Sub-menu
1 2
Format – Yes, No
Copy to SD card – Yes, No
Item name: Connected devices
Sub-menu
1 2 3
Camera – – For details, see page 26.
Doorphone
connection
*1
Doorphone 1 – <Device connected>, Auto detection, Device
Doorphone 2 – Device connected, <Auto detection>, Device
2/
Enable, <Disable>
R If you want to record images and audio until the end of calls (®
page 20, 25) select [Enable].
Settings
For details, see page 41.
Settings
not connected
not connected
36
Page 37

Sub-menu
1 2 3
9. Additional functions
Settings
Electric lock Doorphone 1 - 2 Electric door
lock/Electric
vehicle
Unlocking
buzzer sound
Repeater connections Repeaters are
connected
separately:
Repeater 1 - 2
Repeaters are
connected
together:
Repeater
(connected
together)
Automatic illumination Doorphone 1 - 2 When visitors
come/When
monitoring
*1 Select [Device not connected] for doorphones that are no longer used.
Item name: Register/Cancel
Sub-menu
1 2
gate lock
– <On>, Off
– <Sub monitor station>,
<No connection>, Unlock for 1
second - Unlock for 7 seconds
Camera
<Enable>, Disable
R With this setting, you can select whether or
not to automatically turn on the LED lights
when
dark.
For details,
see page 29.
For more
information
about
connecting
repeaters,
see
page 39.
the area surrounding the doorphone is
Settings
Register Sub monitor
station/Camera/
Cancel Cancellation method: Sub monitor station, Camera, and Repeater
Item name: Other
Sub-menu
1 2
Touch sound – <On>, Off
Initialize settings
Demo mode – Do not use this setting unless the product is being used in a sales
*1 The following settings are not initialized.
– [Power supply frequency], [Select language], [Electric lock], [Repeater connections], and [Camera] settings.
– Registration information of devices registered to the main monitor. (All devices remain registered to the main
monitor even after initialization.)
*1
Repeater
– Initialize settings + Delete images, Only initialize settings
Registration method: Sub monitor station and Repeater ®
page 39 and 40
® page 40
R Select [Initialize settings + Delete images]
transferring, or returning the product.
display.
On, Special SD card required
, Camera ® page 23
Settings
when disposing,
, <Off>
9.5 Function settings list - sub monitor
You can change the settings to match how the sub monitor is used.
37
Page 38

9. Additional functions
How to change settings
1. In the information screen, press ( ).
2. : Select the function name. ® ( )
3.
4. To end the operation, press
Note:
R The
R In the following table, < > indicates the default settings.
: Select the setting contents. ® ( )
R To adjust "Contrast", use
R To execute "Initialize", press (Yes). (Initialization is completed when the screen turns off.)
setting function screen automatically quits if an incoming call is received or if no operations are performed for
about 60 seconds.
Sub-menu
1 2
Ringtone Doorphone 1 <Sound 1>, Sound 2, Sound 3, Sound 4 <Normal>, Repeat
Doorphone 2 Sound 1, <Sound 2>, Sound 3, Sound 4 <Normal>, Repeat
Camera 1 - 4 <Sound A>, Sound B, Sound C, Sound D
Key sound – <On>, Off
Contrast – The contrast can be adjusted to 5 different levels (default setting:
Register – Yes, No
Initialize – Yes, No
and then press ( ).
.
level 3). When it is difficult to see the monitor display, adjust the
contrast as necessary.
R Used when registering sub monitors to the main monitor.
The supplied sub monitor is pre-registered to the main
–
monitor.
– See page 39 for information about re-registering cancelled
sub monitors.
R The sub monitor remains registered to the main monitor even if
its settings are initialized.
deleted.)
Settings
(The registration information is not
38
Page 39

10.1 Registering sub monitors
Additional sub monitors (additional accessories, ®
10. . General information
page 4) can be registered and used with this product.
10.1.1 Registering a sub monitor to the main
monitor
1 : From the top menu, touch ®
® [Register/Cancel] ® [Register] ® [Sub
monitor station] ® select the number of the sub
monitor to be registered.
R After this, use the sub monitor and complete the
following steps within about 2 minutes.
*1
2
: When "Please register the device." is displayed
10. General information
registering devices to the main monitor (®
page 40), see the repeater’s Getting Started for
information about appropriate installation locations.
Signal range and repeater installation example
Using each repeater connected separately
This extends signals away from the main monitor.
Because signals are sent through the main monitor,
different types of devices can be connected to each
repeater. (For example, sub monitors can be connected
to one repeater and cameras can be connected to
another.) This is useful when you want to connect to
different types of devices over shorter distances.
When repeaters are not used:
on the sub monitor screen, press
(Yes).
R "Registering completed" is displayed.
( ) ®
3 : Press .
*1 To re-register cancelled sub monitors:
( ) ® : "Register" ®
( ) ® (Yes)
10.2 Using repeaters
If the sub monitor or camera are used away from the
main monitor, or if there are obstructions (® page 7)
between the sub monitor or camera and the main
monitor, the following problems may occur. In these
cases, using a repeater (additional accessory, ®
page 4) may improve transmissions between the
devices.
– calls with the sub monitor cut out and images are
distorted
– images from the camera are distorted or notifications
from camera sensors cannot be received
– When
camera’s indicator lamp flashes in red, the main
monitor cannot connect to the sub monitor or camera
Note:
R Up to 2 repeaters can be used. A single repeater can
be used to send signals to multiple sub monitors or
cameras. However, the same repeater cannot send
signals to both sub monitors and cameras.
R Signal range differs depending on factors such as the
structure of rooms or the types of walls used. After
is displayed for the sub monitor or the
When repeaters are used:
Using 2 repeaters connected together
This extends the signal away from the main monitor by
sending signals directly between repeaters. Because the
signals are sent between repeaters, the same type of
device must be connected to both repeaters (all sub
monitors or all cameras). This is useful when you want
to connect to the same type of devices over long
distances.
39
Page 40

10. General information
When repeaters are not used:
When repeaters are used:
10.2.1 Registering a repeater to the main
monitor
1 : From the top menu, touch ®
® [Register/Cancel] ® [Register] ®
[Repeater] ® select the number of the repeater to be
registered.
2 Registering the first repeater:
Go to step 3.
Registering the second repeater:
Select the connection method according to how you
want to use the repeater. (® page 39)
R If [Connected together] is selected, go to step 5.
3 Touch [Next].
4 Select the device that you want the repeater to
connect to.
R After this, use the repeater and complete the
following steps within about 2 minutes.
5
: Connect power to the repeater that you want
to register, and then press PROGRAM (A) for about
3 seconds.
R The
B
R The indicator lights when the registration is
completed.
(Depending on the signal status, the indicator
may not light in green. In this case, see the
repeater’s Getting Started.)
indicator (B) flashes green.
ID
A
6 : Press .
Note:
R When using devices in separate buildings or over
long distances, cut outs and image distortions may
not be improved even if a repeater is used.
10.3 Cancelling sub monitors,
cameras, and repeaters
– Cancelling can only be performed on the main
monitor.
1 From the top menu, touch ® ®
[Register/Cancel] ® [Cancel] ® select the type of
device to be cancelled.
2 Select the device to cancel from the displayed list.
R Cancelling repeaters:
When 2 repeaters are connected together, only
the farthest from the main monitor can be
cancelled.
3 Confirm the message and then touch [Yes].
R A beep sounds and "Cancel completed" is
displayed.
40
4 To end the operation, press .
Important:
R To prevent incorrect operations, remove the
batteries from cancelled sub monitors.
Page 41

10.4 Using SD cards (formatting/
DCIM/100_D501
A
DRI_0001.JPEG
A B
copying data/playing images)
Formatting:
SD cards formatted by PCs or other devices must be
formatted by the main monitor before they can be used.
Copying recorded images (internal memory ® SD
cards)
A maximum of 50 recorded images saved to the main
monitor can be copied at one time.
R Copied data is saved to the "BACKUP
"PRIVATE" folder of the SD card (® page 42). If
data is copied again to the same SD card, all of the
recorded data already saved to the "BACKUP" folder
is overwritten.
R Copied data can only be played on a PC and cannot
be played on the main monitor.
Operations (main monitor only)
1 Insert the SD card that you want to format or copy
recorded data to into the SD card slot. (® page 10)
2 From
the top menu, touch
card].
3 When formatting:
Touch [Format],
[Yes].
When copying recorded data:
Touch [Copy to SD card], confirm the message and
then touch [Yes].
Important:
R The SD card indicator flashes while
formatting or copying. Do not remove the SD
card or press the RESET button (® page 11)
when the indicator is flashing.
confirm the message and then touch
4 To end the operation, press
" folder in the
® ® [SD
.
10. General information
Supported operating systems*1:
Windows® XP/Windows Vista®/Windows® 7/Windows
8/Mac OS® X
Images and videos may not be able to be played
*1
correctly depending on the compatibility between
the viewer or video software and the operating
system.
How to play images:
See the PC’s operating instructions.
10.4.2 SD card folder structure and file
formats
When an SD card is inserted into the main monitor,
folders are created in the SD card. Data directly saved
the SD card and data copied from the internal memory
to
to the SD card are saved to separate folders.
R Do not change the name of folders or delete folders
with a PC. (If you do so data cannot be played with
the main monitor.)
R The following 3 types of files are saved to the SD
card.
– JPG: still images (JPEG format)
– MOV: videos (Motion JPEG format)
– TXT: recording data (text format)
Recorded image folder structure and file formats
when saving data directly to SD cards
Folder structure
Example:
Folder number (100 - 129)
R When
File format
Example:
using SD cards with data saved from other
devices, folder numbers 100 - 999 are available.
®
R Remove the SD card as required.
10.4.1 Playing images on a PC
By inserting an SD card into an SD card slot on a PC or
SD card reader connected to a PC, images saved on
an
the SD card (still images and videos) can be played on
a PC.
– Still images (JPEG format) can be viewed with viewer
software that supports JPEG.
– Videos (Motion JPEG format) can be played with
QuickTime Player. (On PCs installed with
Windows® 7 or Windows® 8, videos can also be
played with Windows Media® Player.)
Name of the device the image was recorded from
R DR1 - DR2: Doorphone 1
R CM1 - CM4: Camera 1 - 4
File number
R 1 recorded image is saved to each number.
R File numbers from 0001 to 0100 are created in
each folder.
- 2
41
Page 42

PRIVATE/PANA_GRP/DOOR/BACKUP/20141013
A
13450000.TXT
A C
B
10. General information
Folder structure and files types of data copied from
the internal memory of the main monitor to the SD
card
Folder structure
Example:
Recorded date (Example: October 13, 2014)
File format
Example:
Recorded time (Example: 13:45)
Counter (00 - 49)
Recording number for each recorded file
R 00: indicates the files contain recording
information
- 08: indicates the image number from among
R 01
8 images
10.5 Cleaning
Wipe the product with a soft, dry cloth.
For
excessive dirt, wipe the product with a slightly damp
cloth.
Important:
R Do not use any cleaning products that contain
alcohol, polish powder, powder soap, benzine,
thinner, wax, petroleum, or boiling water. Also do
not spray the product with insecticide, glass
cleaner, or hair spray. This may cause a change
in colour or quality of the product.
Cleaning the charger:
For safety, disconnect the charger from the power supply
before cleaning.
Cleaning the sub monitor:
To avoid mistakenly operating the sub monitor, remove
its batteries before cleaning.
Cleaning the main monitor’s touch panel:
From the top menu, touch
–
The "Touch panel cleaning" screen is displayed for
approx. 90 seconds. You can clean the main monitor
during this time. (Press
finished.)
– Use
a soft, dry cloth to clean the touch panel making
sure not to scratch its surface.
® .
when you have
10.6 Specifications
Main monitor (VL-MWD501EX)
Power source Power supply unit (VL-PS240)
24 V DC, 0.5 A
Power
consumption
Dimensions
(mm) (height ´
width ´ depth)
Mass (weight) Approx. 470 g
Operating
environment
Display Approx. 5 inches, wide colour
Talking method Hands-free
Installation
method
Frequency
range
Option output (A
contact)
R Compatible SD cards
The following SD cards, that comply with the SD
standards, can be used (we recommend SD cards
manufactured by Panasonic).
–
Supported SD card types
SD memory card*2: 2 GB
SDHC memory card*3: 4 GB - 32 GB
SDXC memory card: 48 GB and 64 GB
– Format
SD memory card: FAT16
SDHC memory card: FAT32
SDXC memory card: exFAT
*1 See page 19 for a guide to the capacity and number
of recordings possible with SD cards.
*2 miniSD and microSD memory cards can also be
used. However, an adaptor is required.
*3 miniSDHC and microSDHC memory cards can also
be used. However, an adaptor is required.
Power supply unit (VL-PS240) (indoor use only)
Power source Input: 220-240 V AC, 0.2 A,
Standby: approx. 1.4 W
During operation: approx. 10
Approx. 180´165´21
(excluding protruding sections)
Ambient temperature: approx.
0 °C to +40 °C
Relative humidity
(non-condensing): up to 90
display
Wall mount (mounting bracket
supplied)
1.88 GHz to 1.90 GHz
Rated load:
24 V AC/DC, 0.3 A or lower
Minimum applicable load:
5 V DC, 0.001 A
(Output when there is a call from
the doorphone (® page 17).)
*1
50/60 Hz
Output: 24 V DC, 0.6 A
W
%
42
Page 43

10. General information
Dimensions
(mm) (height ´
Approx. 116´100´54
protruding sections)
(excluding
width ´ depth)
Mass (weight) Approx. 230 g
Operating
environment
Ambient temperature: approx.
0 °C to +40 °C
Relative humidity
(non-condensing): up to 90
Installation
Attach to DIN rail
method
Doorphone (VL-V554EX/VL-V554UEX)
Power source Power supplied by the main
monitor
20 V DC, 0.23 A
Dimensions
(mm) (height ´
width ´ depth)
VL-V554EX: approx. 169´118
´30 (excluding protruding
sections)
VL-V554UEX: approx. 169´118
´16.5 (excluding sections
embedded into the wall)
Mass (weight) VL-V554EX: approx. 405 g
VL-V554UEX: approx. 345 g
Operating
environment
Ambient temperature: approx.
-10 °C to +50 °C
Relative humidity
(non-condensing): up to 90
Viewing angle Horizontally: approx. 170°
°
Installation
method
Vertically: approx. 115
VL-V554EX: surface mount
(mounting base supplied)
VL-V554UEX: flush mount
(flush mounting box supplied)
Minimum
illuminance
required
1 lx
(within approx. 50
camera lens)
cm from the
Lighting method LED lights
IP rating
IP54
*1
IK rating Compliant with IK07
%
%
Operating
environment
Ambient temperature: approx.
0 °C to +40 °C
Relative humidity
(non-condensing): up to 90
Display Approx. 2.2 inches, colour
display
Frequency
1.88 GHz to 1.90 GHz
range
Talking method Hands-free
*1
Operating time
Charging time
Transmitting
range
Standby use: approx. 80 hours
*2
Approx. 8 hours
Approx. 100 m (line-of-sight
distance from the main monitor)
*1 When used fully charged in an operating
temperature of 20 °C.
*2
When the operating temperature is 20 °C. The
charging time may increase when the operating
temperature is lower than this.
n Charger
Power source AC adaptor (PNLV226CE/
PNLV226E)
Input: 220-240 V AC, 0.1 A,
50/60 Hz
Output: 5.5 V DC, 0.5 A
Power
consumption
Standby: approx. 0.4 W
(when the sub monitor is not
placed in the charger)
During charging: approx. 1.4
Dimensions
(mm) (height ´
Approx. 43´81´76
(excluding protruding sections)
width ´ depth)
Mass (weight) Approx. 70 g (excluding the AC
adaptor)
Operating
environment
Ambient temperature: approx.
0 °C to +40 °C
Relative humidity
(non-condensing): up to 90
%
W
%
*1 Water
resistance is only assured if the doorphone is
installed correctly according to the instructions in the
Installation Guide, and appropriate water protection
measures are taken.
Sub monitor (VL-WD613EX)
n Main body
Power source
Dimensions
(mm) (height ´
Rechargeable Ni-MH (AAA ´ 2)
Approx. 173´52´30
(excluding protruding sections)
width ´ depth)
Mass (weight) Approx. 160 g (including the
batteries)
Note:
R Design and specifications are subject to change
without notice.
43
Page 44

11. Troubleshooting
11.1 Troubleshooting
Monitor display (doorphone images)
11. . Troubleshooting
Problem Cause & Solution Page
Images appear distorted. R Images may appear distorted because of the characteristics of the
camera lens. This is not a malfunction.
The background appears
greenish.
Images at night are dark
and faces cannot be
identified.
The images of people’s
faces are dark.
Images are dirty or
unclear.
R Images are not in
focus.
Images are white or
black.
Images are white, or
white lines or circles are
shown on the display.
Images are flickering. R AC (alternating
Images of the area you
want to view in the zoom
screen are not displayed
correctly.
Images displayed on the
sub monitor distort or are
displayed
5 seconds or more to be
displayed.)
slowly. (It takes
R At
night or when there is poor light in the area around the doorphone,
lights or white objects near the doorphone may appear greenish. This
is not a malfunction.
R [Automatic illumination]
→ Change the setting to [Enable].
R Even when the doorphone
the LED lights cannot illuminate the edges of the visible area (the areas
directly next to the doorphone), faces of people may not be identifiable
even when they are close to the doorphone.
→ We recommend installing extra lights in the area around the
doorphone.
R Images
a backlight in the area around the doorphone.
→ Use the backlight compensation function.
R There is dirt on the surface of the doorphone
→ Wipe the lens with a soft, dry cloth.
R There is water condensation on the surface of the doorphone
→ Wait for the condensation to evaporate.
R The brightness of the display is not correctly adjusted.
→
R Strong light such as sunlight is shining into the lens of the doorphone
causing images to be difficult to see on the display.
malfunction.)
→ Locating the doorphone away from direct sunlight or changing the
the doorphone.
→ AC (alternating current) lights such as fluorescent lights may cause
R Change the zoom position setting to a suitable position.
→
R The antenna on the sub monitor is being covered with your hand.
→ Do not cover it.
R The
such as a concrete wall obstructing the signal.
→ Move the sub monitor closer to the main monitor or to an area that
of people’s faces appear dark when there is strong sunlight or
Adjust the brightness when images are displayed.
angle that the doorphone is installed may help reduce this problem.
current) lights such as fluorescent lights are used near
flickering in dark environments. (This is not a malfunction.)
Configure the [Zoom position settings] settings.
sub monitor is too far from the main monitor, or there is an object
does not have any obstructions.
is set to [Disable].
’s LED lights are lit, because the light from
’s lens.
’s lens.
(This is not a
-
-
37
-
34
42
-
34
-
-
15
12
7
44
Page 45

Monitor display (camera images)
Problem Cause & Solution Page
11. Troubleshooting
Even though there are
people, they cannot be
viewed at all or can only
be partially viewed.
Images are dirty or
unclear (out of focus).
Images are not displayed
with the correct
brightness.
Images are blurry and
s faces or other
people’
objects are hard to
distinguish.
Objects in images are
blurred.
White points or coloured
light points are displayed
in images.
Images have uneven
colour.
R You may not be able to correctly view people with the camera in the
following cases.
–
When people are moving near the edge of the sensor range.
– When people move slowly or quickly across the front of the camera.
– When people move closely across the front of the camera (approx.
1 m).
R There is dirt on the surface of the camera’s lens cover.
Wipe the lens cover with a soft, dry cloth.
→
R The brightness in the area where the camera is installed is changing
rapidly.
Wait about 1 second. The brightness will be automatically
→
adjusted.
R When images of dark areas are viewed, due to the characteristics of
the image sensor of the camera, people’s faces can be hard to
distinguish. (This is not a malfunction.)
→ We recommend installing extra lights in the area around the
camera. (The camera’s LED lights cannot produce enough light to
illuminate the area in this situation.)
R Images may blur when the subject moves.
the image sensor of the camera and is not a malfunction.)
R Images of objects can easily blur when images of dark areas are
viewed or if the object is dark.
→ We recommend installing extra lights in the area around the
camera. (The camera’s LED lights cannot produce enough light to
illuminate the area in this situation.)
R White points or coloured light points may appear in images when
images of dark areas are viewed or if the object is dark.
characteristic of the image sensor of the camera and is not a
malfunction.)
→ We recommend installing extra lights in the area around the
camera. (The camera’s LED lights cannot produce enough light to
illuminate the area in this situation.)
R AC (alternating current) lights such as fluorescent lights may cause
uneven colouring or flickering.
→ Setting [Uneven
colour and flickering. (However, this may reduce the image quality
of images with dark areas.)
colour prevention] to [On] may reduce the uneven
(This is a characteristic of
(This is a
-
-
-
-
-
-
27
Ringtone
Problem Cause & Solution Page
The ringtone for the
doorphone or camera
does not sound.
R The ringtone volume is muted.
→
Activate the sound for the ringtone.
R The sub monitor’s batteries are discharged.
Charge the batteries.
→
35
14
45
Page 46

11. Troubleshooting
Calls (doorphone, camera, and intercom calls)
Problem Cause & Solution Page
Sound cuts in/out or
fades.
Calls cannot be heard
because of noise or
feedback.
Your voice cannot be
heard by the visitor but
the visitor’s voice can be
heard.
Sub monitor (charging)
R The surroundings of the main monitor, the sub monitor, or the
doorphone are noisy, causing the sound to cut out or fade.
→
Try using the "Press-to-talk" mode.
R When talking with the sub monitor or camera:
The antenna (® page 12) on the sub monitor is being covered with
your hand.
→
Do not cover it.
R When talking with the sub monitor or camera:
The sub monitor or camera is too far from the main monitor, or there
is an object such as a concrete wall obstructing the signal.
→
Move the sub monitor or camera closer to the main monitor or to
an area that does not have any obstructions.
If the sub monitor or camera cannot be moved to another area,
installing a repeater (additional accessory) may improve the signal.
R Noise
R You
or feedback may occur when you are too close to the other party.
→ Move away from the other party.
are using the "Press-to-talk" mode. (
monitor and is displayed on the sub monitor.)
→
When using the "Press-to-talk" mode, the visitor can hear your
voice only while you are pressing
is displayed on the main
.
17
-
7
39
-
17
Problem Cause & Solution Page
flashes and 2 short
beeps sound.
Even if you place the sub
monitor on the charger,
charge indicator does
the
not light up.
The charge indicator
does not go off after the
batteries have been
charged for about 8
hours.
flashes after only
the sub monitor 2 or
using
3 times after charging.
R The battery level is very low.
Charge the batteries immediately.
→
R The AC adaptor is disconnected from the power outlet.
→ Plug the AC adaptor into the power outlet firmly.
R The sub monitor is not placed on the charger correctly.
Replace the sub monitor securely. (The charge indicator lights in
→
red.)
R The batteries are new or discharged.
Place the sub monitor on the charger and wait for a few minutes.
→
the sub monitor is picked up off the charger or used during charging,
R If
the charging time will become longer.
R The charging time may increase when the operating temperature is
lower than 20 °C.
R The charging time increases when the power of the main monitor is
turned off or
→ Make sure the power of the main monitor is turned on, and charge
the sub monitor in a location near the main monitor where
displayed for the sub monitor
R Clean the ends of batteries (
again.
R It is time to replace the batteries.
is displayed on the sub monitor.
’s signal display.
and ) with a dry cloth and charge
14
-
-
7
14
is
14
46
Page 47

OffOn
11. Troubleshooting
Problem Cause & Solution Page
The sub monitor, the AC
adaptor, or the charger is
warm.
Camera (sensor operations)
Problem Cause & Solution Page
Monitoring can be
performed with the
camera but sensor
notifications are not
received.
Sensors do not make
detections.
R The motion detection
and heat sensor do
not work
R This is normal. (It may feel a little warmer in summer than in winter.)
→ If
it feels very hot, disconnect the AC adaptor from the power outlet
and contact an authorised service centre.
R The camera (sensor detection) is turned off.
→
Touch
R The camera’s [Sensor selection]
detections).
→ Set [Sensor selection] to a setting other than [Off].
Motion detection/heat sensor
R The sensors do not operate when
[External sensor only].
→ Check the settings.
Motion detection does not work
R Motion
R Detections may not be made when the object makes small
R Detections are hard to make when it is dark.
Heat sensor does not work
R The heat sensor does not operate at midday when
R Detections may not be made in the following situations.
R When the outside temperature is close to the body temperature, it is
detection does not operate at night when [Motion detection] is
set to [Day only].
→ Check the settings.
movements.
Change the [Motion detection sensitivity] setting to a higher
→
sensitivity.
→ Use
detection] is set to [Night only].
→ Check the settings.
– when
– when snow is on the surface of the heat sensor
– when people move towards the front of the camera
hard to make detections. It is also hard to make detections when
people wear thick clothes.
→ Change
the heat sensor for detections or install lights to illuminate the
area around the object.
reflective objects are in front of the camera and can interfere
with the heat detection, such as glass
the [Heat sensor sensitivity] setting to a higher sensitivity.
®
.
setting is set to [Off] (not make
[Sensor selection] is set to [Off] or
[Heat sensor
-
24
26
26
26
26
-
26
26
47
Page 48

11. Troubleshooting
Problem Cause & Solution Page
The sensors do not work
correctly.
R Sensors are triggered
each time a car
passes by (separated
by more than 5 m)
R Sensors are triggered
when there are no
people near the
camera.
The heat sensor has
trouble making
detections.
People moving towards
the front of the camera
cannot be detected.
Motion detection/heat sensor
R In the following situations, the sensors are triggered by detecting
changes to the temperature and movement of objects.
–
When a car enters the detection range. (When a car or light from
a car’s headlights enters the detection range, movement is
detected. The high temperature of a car’s muffler or bonnet may
cause sensors to be triggered even from 5 m away, or more.)
– When objects that are in the detection range are moved by wind,
such as tree branches or clothes hung out to dry.
– When small animals such as dogs or cats enter the detection
range.
– When rain or snow falls.
→ Adjust the angle of the camera so that it does not face roads. → When using motion detection, adjust the detection range with the
[Motion detection range]
from car headlights at night, set [Motion detection] to [Day only].
→ When using the heat sensor, you can use the heat sensor’s lever to
adjust the sensor’s angle and the sensor range cap to adjust the
detection range. (See the camera
Heat sensor only
R The
R When
R The surface of the heat sensor is dirty.
R Because
heat sensor may make incorrect detections in the follow locations.
– where the camera can be exposed to direct sunlight
– near heating and cooling devices that cause rapid temperature
change
– in a greasy or moist place
– underneath outdoor lights or other areas that can become hot
– near fire or heating devices
– where the camera can be exposed to interference from magnetic
devices
– where reflective objects are in front of the camera and can interfere
with the heat detection, such as glass
– where there are strong light emitting devices such as fluorescent
lights that can affect the temperature
– near devices that emit radio waves, such as mobile phones
the outside air temperature is cold, the detection range (approx.
5 m) becomes longer and too many detections may be made.
→ Change the [Heat sensor sensitivity] setting to a lower sensitivity.
Wipe the surface of the heat sensor with a soft, dry cloth.
→
of the characteristics of the sensors, the camera may not be
able to detect people moving towards the front of the camera.
→ Perform the following operations.
– Change the camera location so that objects pass the camera
from the sides. (It is easier to detect objects moving sideways
in front of the camera.)
– If you want to detect objects moving towards the front of the
camera, use a commercially available external sensor. (See
the camera’s manuals for more information.)
setting. To avoid mistakenly detecting light
’s manuals for more information.)
26
27
-
-
26
-
-
48
Page 49

Others
11. Troubleshooting
Problem Cause & Solution Page
R "Demo mode" is
displayed on the
screen.
R The
R You cannot talk or
The product does not
work with correct
operations.
The product does not
work properly.
The main monitor does
not work properly.
R Nothing is displayed
R The
R Voices cannot be
Notifications for camera
detections
the sub monitor.
When you touch the
touch panel of the main
monitor:
R the touch panel does
R a button other than
ringtone regularly
sounds.
make calls.
on the monitor.
ringtone does not
sound.
heard.
do not come to
not respond
the one touched
responds
R The [Demo mode] function setting is configured on the main monitor.
From [Other] in the function settings, set [Demo mode] to [Off].
→
R Perform the following operations.
–
–
R Check the power connection.
R If the power is connected, there may be a problem with the electrical
wiring.
→
R The sub monitor is too far from the main monitor, or there is an object
such as a concrete wall obstructing the signal.
→ Move the sub monitor closer to the main monitor or to an area that
R The sub monitor’s batteries are discharged.
→
R When the touch panel does not respond.
–
– If cleaning does not help, adjust the touch panel.
R When a button other than the one touched responds.
–
Adjusting the touch panel
1. While pressing
times.
2. Follow
with your finger.
3. Touch [OK].
: Press the RESET button on the bottom side of the main
monitor with a pointed object.
settings are not affected.)
: Remove the battery and insert it again. (Recorded
configured settings are not affected.)
Contact an authorised service centre.
does not have any obstructions.
Charge the batteries.
The touch panel is dirty. Clean the touch panel.
The touch panel needs to be adjusted.
on the main monitor, press 3
the on-screen instructions and touch the "+" marks (in 5 places)
(Recorded images and configured
images and
37
11
-
-
7
14
42
-
-
11.2 Error messages - main monitor
When using devices for the first time or registering devices
Display Cause & Solution Page
"Cannot register" R Registration failed because it was not completed within the specified
time.
→ Check that the devices to be registered are correctly connected
and receiving power, and then try again.
23
39
40
49
Page 50

11. Troubleshooting
Camera connections
Display Cause & Solution Page
"Cannot connect to
camera"
"Cannot transmit"
R The
camera is too far from the main monitor, or there is an object such
as a concrete wall obstructing the signal.
→ Move the camera closer to the main monitor or to an area that does
not have any obstructions. If the camera cannot be moved to
another area, installing a repeater (additional accessory) may
improve the signal.
11.3 Error messages - sub monitor
Display Cause & Solution Page
"Cannot connect to main
monitor station"
"Cannot connect to
camera 1"
(When there are multiple
cameras, the camera
number may not be 1.)
"Registration failed" R Registration to the main monitor has not been completed. Bring the
R The sub monitor or camera is too far from the main monitor, or there
is an object such as a concrete wall obstructing the signal.
→
Move the sub monitor or camera closer to the main monitor or to
an area that does not have any obstructions.
If the camera cannot be moved to another area, installing a
repeater (additional accessory) may improve the signal.
sub monitor closer to the main monitor and try registering again.
7
7
-
50
Page 51

12.1 Index
A
Accessories: 3
Adding devices
Camera: 23
Repeater: 40
Sub monitor station: 39
Antenna: 12
B
Backlight compensation (camera): 27
Backlight compensation (doorphone): 34
Batteries (charging): 14
Battery cover: 3
Battery level: 15
Battery level display: 13
Brightness settings
Camera image brightness: 27
Image brightness: 22
Screen brightness: 34
C
Call button: 10
Camera information: 13
Camera lens: 10
Camera monitoring: 23
Cancel: 40
Changing the volume
Owner’s voice volume: 34
Receiver volume: 34
Ring volume: 35
Volume when playing images: 22
Charge indicator: 12
Charger: 3, 14
Charging: 14
Cleaning: 42
Contrast: 38
D
DECT repeater: 4
Delete all images: 36
Display: 11
Door station: 3, 4
Doorphone: 10
Doorphone monitoring: 18
E
Electric lock: 29
Entire image display: 15, 33
F
Function settings - camera
Automatic illumination: 27
Backlight compensation: 27
Brightness: 27
Camera detection history: 28
(Register)
Camera mic sensitivity: 28
Check sensors: 27
Day and night switch
External sensor: 27
Heat sensor detection: 26
Heat sensor sensitivity: 26
Indicator lamp: 28
Initialize settings: 28
Motion detection: 26
Motion detection range: 27
Motion detection sensitivity: 26
Owner’s voice volume: 28
Recording before detection: 27
Recording test: 27
Sensor selection: 26
Sensor trigger sound: 27
Time with no detection: 26
Uneven colour prevention: 27
Warning sound: 28
Function settings - main monitor
Automatic illumination: 37
Camera: 36
Cancel: 37
Copy to SD card: 36, 41
Delete all images: 36
Demo mode: 37
Doorphone connection: 36
Electric lock: 29, 37
Format: 36, 41
Initialize settings: 37
Power supply frequency: 36
Record calls: 36
Register: 37
Repeater connections: 37
Ring volume: 36
Ringtone: 36
Select language: 15, 36
Set day for first day of week: 35
Time and date settings: 15, 35
Time display format: 35
Touch sound: 37
Wide/Zoom settings: 15, 35
Zoom position settings: 15, 35
Function settings - sub monitor
Contrast: 38
Initialize: 38
Key sound: 38
Register: 38, 39
Ringtone: 38
: 26
I
Illumination settings (camera): 27
Illumination settings (doorphone)
Automatic illumination: 37
Manually ON/OFF: 34
Images (recording)
Auto image updating: 20
Deleting: 21, 22
Playing: 20
Searching: 21
Information screen: 13
Initialize settings
12. Index
51
Page 52

12. Index
Camera: 28
Main monitor: 37
Sub monitor: 38
Intercom calls: 18
K
Key sound: 38
L
LED lights: 10
Lens cover: 10
M
Main monitor: 11
Main monitor station: 3
Microphone
Monitoring: 18, 23
Multifunction buttons: 11
: 10, 11, 12
S
SD card indicator: 11
SD cards: 10
Copying (internal memory ® SD cards): 41
File formats: 41
Folder structure: 41
Format: 41
Inserting SD cards: 10
Number of recordings
Recording information: 13
Removing SD cards: 10
Write-protect lock switch: 10
Select language: 15, 36
Sensor detections
Camera sensors: 24, 25
Speaker: 10, 11, 12
Specifications: 42
Supported models: 3
: 19
N
Notification indicator: 11
Notification screen: 13, 15
O
Owner’s voice volume: 28, 34
P
Page: 12
Intercom calls: 18
Transferring doorphone calls: 17
Pan/tilt: 33
Playing
Doorphone and camera recorded images and
audio: 20
Press-to-talk: 17
R
Record calls: 20, 25, 36
Recording calls (camera calls): 25
Recording calls (doorphone calls): 20
Recording images and audio (doorphone and camera)
Automatic recording: 20, 25
Automatically updating recorded images: 20
Manually recording: 20, 25
Record calls: 20, 25
Register (adding devices)
Camera: 23
Repeater: 40
Sub monitor station: 39
Repeater: 39
Reset: 11, 49
RESET button: 11, 49
Ring volume: 35
Ringtone (changing the type): 34
T
Talk indicator: 11
Time: 15
Time and date settings: 15
Top menu: 12
Touch panel: 11
Transferring calls (doorphone): 17
U
Using a camera: 23
Cancelling devices: 40
V
Voice changer: 34
Volume: 34
W
Wall mounting: 15
Wide display: 15, 33
Wide/zoom: 15, 33
Wireless monitor station: 3
Wireless sensor camera: 4
Z
Zoom display: 15, 33
52
Page 53

Notes
53
Page 54

Notes
54
Page 55

Mode d’emploi
Système d’intercom vidéo sans fil
Modèle
VL-SWD501EX
VL-SWD501UEX
Français
Merci d’avoir acquis un produit Panasonic.
Lisez attentivement le présent manuel avant d’utiliser le produit, et conservez-le pour référence ultérieure.
Le Guide d’installation est fourni séparément.
Page 56

Sommaire
1. Introduction
Introduction
1.1 Composition des modèles .....................................3
1.2 Informations relatives aux accessoires .................3
1.3 Informations générales ..........................................4
1.4 Procédures d’utilisation et icônes ..........................4
1.5 Marques et marques déposées .............................5
1.6 Abréviations ...........................................................5
2. Informations importantes
Informations importantes
2.1 Pour votre sécurité ................................................6
2.2 Consignes de sécurité importantes .......................7
2.3 Pour des performances optimales .........................7
2.4 Autres informations importantes ............................8
3. Préparation
Préparation
3.1 Utilisation de cartes SD (vendues
séparément) ........................................................10
3.2 Commandes ........................................................10
3.3 Ecrans .................................................................12
3.4 Installation des piles ............................................14
3.5 Charge du moniteur secondaire ..........................14
3.6 Montage mural ....................................................15
3.7 Réglage de la langue, de la date et de
l’heure ..................................................................15
3.8 Réglages écran large/affichage zoom et réglages de
position de zoom .................................................15
4. Conversation/Surveillance
Conversation/Surveillance
4.1 Prise d’appels ......................................................17
4.2 Transfert d’appels interphone ..............................17
4.3 Surveillance extérieure par interphone ................18
4.4 Conversation entre le moniteur principal et le
moniteur secondaire ............................................18
5. Enregistrement/Lecture
Enregistrement/Lecture
5.1 Enregistrement audio et vidéo .............................20
5.2 Enregistrement des images et des conversations de
l’interphone ..........................................................21
5.3 Lecture d’images enregistrées (moniteur principal
uniquement) ........................................................21
6.5 Enregistrement des images de la caméra et des
conversations ......................................................26
6.6 Modification des réglages de la caméra ..............27
7. Utilisation de verrous électriques
Utilisation de verrous électriques
7.1 Connexion de verrous électriques .......................30
8. Opérations en cas d’appel entrant
Opérations en cas d’appel entrant
8.1 En cas de réception d’un autre appel entrant -
moniteur principal ................................................31
8.2 En cas de réception d’un autre appel entrant -
moniteur secondaire ............................................32
9. Fonctions supplémentaires
Fonctions supplémentaires
9.1 Modification de l’affichage des images (réglages
écran large/affichage zoom et panoramique/
inclinaison) ..........................................................34
9.2 Réglages audio et vidéo pour la conversation et la
surveillance .........................................................34
9.3 Réglages de sonnerie .........................................35
9.4 Liste des réglages de fonctions - moniteur
principal ...............................................................36
9.5 Liste des réglages de fonctions - moniteur
secondaire ...........................................................38
10. Informations générales
Informations générales
10.1 Enregistrement de moniteurs
secondaires .........................................................40
10.2 Utilisation de répétiteurs ......................................40
10.3 Annulation de moniteurs secondaires, de caméras
et de répétiteurs ..................................................41
10.4 Utilisation de cartes SD (formatage/copie de
données/lecture d’images) ..................................42
10.5 Nettoyage ............................................................43
10.6 Spécifications ......................................................43
11. Dépannage
Dépannage
11.1 Dépannage ..........................................................46
11.2 Messages d’erreur - moniteur principal ...............52
11.3 Messages d’erreur - moniteur secondaire ...........52
6. Utilisation d’une caméra
Utilisation d’une caméra
6.1 Connexion d’une caméra ....................................24
6.2 Surveillance extérieure à l’aide de la
caméra ................................................................25
6.3 Déclenchement des capteurs de la
caméra ................................................................25
6.4 Désactivation des détections par capteur de caméra
pendant une période de temps définie (moniteur
principal uniquement) ..........................................26
2
12. Index
12.1 Index............................................................53
Page 57

1.1 Composition des modèles
1. Introduction
1. . Introduction
Composition des modè-
les
VL-SWD501EX VL-MWD501EX VL-WD613EX VL-V554EX
VL-SWD501UEX VL-MWD501EX VL-WD613EX VL-V554UEX
*1 Noms de produits utilisés dans ce manuel.
VL-MWD501EX VL-WD613EX VL-V554EX (montage apparent)/
R Le produit illustré dans le(s) manuel(s) fourni(s) est susceptible de varier légèrement par rapport au produit réel.
Attention :
R Avant de tenter de connecter ou de faire fonctionner ce produit, lisez attentivement l’étiquette figurant sur la face
arrière du moniteur principal.
Station du moniteur princi-
pal
(Moniteur principal*1)
Illustration du produit
Station du moniteur sans
fil
(Moniteur secondaire*1)
VL-V554UEX (montage encastré)
Station de porte
(Interphone*1)
1.2 Informations relatives aux accessoires
1.2.1 Accessoires fournis
Pour le moniteur secondaire
Accessoire
Adaptateur secteur/
PNLV226CE
Quantité 1 1 2 1
*1 Mettez correctement au rebut l’adaptateur secteur non utilisé.
Remarques :
R Les accessoires nécessaires pour l’installation du moniteur principal et de l’interphone sont décrits dans le Guide
d’installation fourni.
R Vous aurez besoin des éléments supplémentaires suivants (achetés sur place) pour installer le chargeur au mur.
– Vis ´ 2 (pour montage mural) :
Préparez les vis en fonction du matériau, de la structure, de la solidité, etc., de la zone de montage, ainsi que du poids
total des objets à installer.
*1
1.2.2 Accessoires supplémentaires/de rechange
Adaptateur secteur/
PNLV226E
*1
Piles rechargeables Chargeur
Pour toute information relative à la vente de ces accessoires, contactez votre revendeur Panasonic.
3
Page 58

1. Introduction
A partir de novembre 2013
Accessoire Référence Nombre d’appareils connectables
Piles rechargeables
Station de porte (interphone appelé) VL-V554EX (montage apparent)
Moniteur secondaire VL-WD613EX 6 max. (appareils fournis compris)
Caméra à capteur sans fil (caméra
appelée)
Répétiteur DECT (répétiteur appelé) VL-FKD2EX 2 max.
*1 Les piles de rechange peuvent avoir une capacité différente de celle des piles fournies.
HHR-4MVE
Type de piles :
– Nickel-métal-hydrure (Ni-MH)
– 2 x type AAA (R03) pour chaque com-
VL-V554UEX (montage encastré)
VL-WD812EX 4 max.
*1
-
biné
2 max. (appareils fournis compris)
1.3 Informations générales
R En cas de problème, commencez par contacter votre revendeur.
Déclaration de conformité :
R Panasonic System Networks Co., Ltd. déclare que le présent équipement (VL-SWD501EX/VL-SWD501UEX) est en conformité
avec les exigences essentielles et d’autres dispositions pertinentes de la directive 1999/5/CE sur les équipements hertziens
et les équipements terminaux de télécommunications.
Les déclarations de conformité relatives aux produits Panasonic présentées dans le présent manuel sont disponibles pour
téléchargement sur le site suivant :
http://www.ptc.panasonic.eu
Contact du représentant autorisé :
Panasonic Testing Center
Panasonic Marketing Europe GmbH
Winsbergring 15, 22525 Hambourg, Allemagne
Pour référence ultérieure
Nous vous recommandons de conserver les informations suivantes pour faciliter les procédures de réparation dans le cadre de la
garantie.
Nº de série Date d’achat
(information indiquée à l’arrière du moniteur principal)
Nom et adresse du revendeur
Collez ici votre reçu.
1.4 Procédures d’utilisation et icônes
n Ce manuel décrit les procédures d’utilisation du produit. Ces procédures peuvent être comprises comme suit :
Exemple relatif au moniteur principal :
Dans le menu supérieur du moniteur principal, effleurez
[Caméra].
Signification
Dans le menu supérieur du moniteur principal, effleurez
4
® ® [Enregistrer/annuler] ® [Enregistrer] ®
, , [Enregistrer/annuler], [Enregistrer], puis [Caméra].
Page 59

1. Introduction
– Les termes indiqués entre [ ] font référence à des boutons tactiles.
– Les termes indiqués entre " " font référence à des éléments ou des messages non sélectionnables affichés à l’écran.
Exemple relatif au moniteur secondaire :
( ) ® : "Sonnerie" ® ( )
Signification
Appuyez sur le bouton rond au centre du bouton multifonction (
avec le bouton multifonction (
– Les termes indiqués entre " " font référence aux paramètres, aux éléments et aux messages affichés à l’écran.
– Les termes ou icônes indiqués entre "( )" après des boutons multifonction (
ou icônes affichés à l’écran au-dessus des boutons multifonction.
n Les icônes sont utilisées comme suit dans le présent manuel.
: Indique que l’information ou la procédure concerne le moniteur principal.
: Indique que l’information ou la procédure concerne le moniteur secondaire.
: Indique que l’information ou la procédure concerne la caméra.
: Indique que l’information ou la procédure concerne le répétiteur.
), puis appuyez sur le bouton rond ( ).
), sélectionnez "Sonnerie" en appuyant en haut ou en bas
, ou ) font référence aux termes
1.5 Marques et marques déposées
R Le logo SDXC est une marque déposée de SD-3C, LLC.
R Mac OS, QuickTime et le logo QuickTime sont des marques d’Apple Inc., déposées aux Etats-Unis et dans d’autres pays.
R Microsoft, Windows, Windows Vista et Windows Media sont des marques ou des marques déposées de Microsoft Corporation
aux Etats-Unis et/ou dans d’autres pays.
R Le logiciel du moniteur secondaire repose partiellement sur le travail de l’Independent JPEG Group.
R Toutes les autres marques citées dans le présent document sont la propriété de leurs détenteurs respectifs.
1.6 Abréviations
Les abréviations suivantes sont utilisées dans le présent manuel.
R Le système d’exploitation Microsoft
R Le système d’exploitation Microsoft
R Le système d’exploitation Microsoft
R Le système d’exploitation Microsoft
R Les cartes mémoire SDXC/SDHC/miniSDHC/microSDHC/SD/miniSD/microSD sont appelées cartes SD.
®
Windows® XP est appelé Windows XP.
®
Windows Vista® est appelé Windows Vista.
®
Windows® 7 est appelé Windows 7.
®
Windows® 8 est appelé Windows 8.
5
Page 60

AVERTISSEMENT
ATTENTION
2. Informations importantes
2.1 Pour votre sécurité
Pour éviter des blessures graves voire mortelles et des pertes
2. . Informations importantes
matérielles, lisez attentivement cette section avant d’utiliser le
produit, de façon à assurer son utilisation correcte et en toute
sécurité.
Prévention des incendies et des chocs électriques
R Utilisez uniquement la source d’alimentation électrique
indiquée sur le produit. En cas de doute quant au type
d’alimentation électrique domestique dont vous disposez,
consultez votre revendeur ou votre compagnie d’électricité.
R Utilisez uniquement le module d’alimentation et
l’adaptateur secteur spécifiés.
R Ne tentez pas de démonter ni d’altérer ce produit. Pour
toute réparation, contactez un centre de réparation agréé.
R Ne touchez jamais le module d’alimentation ni l’adaptateur
secteur avec les mains mouillées.
R Ne touchez jamais le module d’alimentation ni l’adaptateur
secteur pendant un orage.
R N’utilisez pas le produit (à l’exception de l’interphone) dans
des zones exposées à la pluie, à l’humidité, à de la vapeur
ou de la fumée grasse, ou dans des zones excessivement
poussiéreuses.
R Ne réalisez aucune action (telles qu’un assemblage, une
torsion, un étirement, une mise en faisceau, un pliage forcé,
un endommagement, une altération, une exposition à des
sources de chaleur, ou un placement d’objets lourds sur le
cordon d’alimentation et l’adaptateur secteur) susceptibles
d’endommager le cordon d’alimentation et l’adaptateur
secteur. L’utilisation de ce produit avec un cordon
d’alimentation ou un adaptateur secteur endommagé
risquerait de provoquer un choc électrique, des
courts-circuits, voire un incendie. Pour toute réparation,
contactez un centre de réparation agréé.
R Ne surchargez pas la prise secteur ni le câblage au-delà
des niveaux spécifiés ci-dessus. Une surcharge résultant
de nombreux branchements sur une même prise secteur
peut générer une chaleur suffisamment importante pour
provoquer un incendie.
R Ne placez jamais d’objets métalliques à l’intérieur du
produit. Ne renversez jamais de liquide sur le produit (à
l’exception de l’interphone).
En cas d’introduction d’objets métalliques dans le produit
ou de contact du produit avec un liquide, éteignez un
disjoncteur ou débranchez le produit de la prise secteur,
puis contactez un centre de réparation agréé.
R N’utilisez pas de four à micro-ondes ni d’autres appareils,
tels que des appareils de cuisson électromagnétiques,
pour accélérer le processus de séchage des composants
du produit.
R Insérez complètement l’adaptateur secteur dans la prise
secteur. A défaut, un choc électrique et/ou une chaleur
excessive susceptible de provoquer un incendie risquent
de se produire. N’utilisez jamais d’adaptateurs secteur ni
de prises secteur endommagés.
R Eliminez régulièrement la poussière, etc., de l’adaptateur
secteur en le débranchant de la prise secteur, puis en
l’essuyant avec un chiffon sec. Une accumulation de
poussière risquerait de provoquer un défaut de protection
contre l’humidité, etc., susceptible d’être à l’origine d’un
incendie.
R Eteignez un disjoncteur ou débranchez le produit de la
prise secteur si il émet de la fumée, une odeur anormale
ou un bruit inhabituel, ou en cas de chute ou
d’endommagement physique du produit. Ces états peuvent
être à l’origine d’un incendie ou d’un choc électrique.
Assurez-vous que l’émission de fumée s’arrête et
contactez un service de réparation agréé.
R Saisissez le corps principal (pas les parties métalliques) de
l’adaptateur secteur pour le débrancher. Le
débranchement de l’adaptateur secteur par son cordon ou
les fiches du cordon peut résulter en un incendie, un choc
électrique ou une blessure.
Prévention des accidents
R Les cartes SD présentent un risque de suffocation.
Conservez les cartes SD à l’écart des enfants. Si vous
soupçonnez un enfant d’avoir avalé une carte SD,
consultez immédiatement un médecin.
R N’utilisez pas le produit dans des établissements médicaux
si des réglementations régissant la zone en interdisent
l’utilisation. Les hôpitaux et les établissements médicaux
peuvent utiliser des équipements sensibles à l’énergie RF
(radiofréquence) externe.
R N’installez pas et n’utilisez pas ce produit à proximité
d’appareils à commande automatique, telles que des
portes automatiques et des alarmes incendie. Les ondes
radioélectriques émises par ce produit peuvent provoquer
le dysfonctionnement de tels appareils, ce qui peut être à
l’origine d’un accident.
R Consultez le fabricant de tout appareil médical personnel,
tels que des stimulateurs cardiaques ou des appareils
auditifs, pour déterminer s’ils sont correctement protégés
contre l’énergie RF (radiofréquence) externe. (Ce produit
fonctionne dans la plage de fréquence 1,88 GHz 1,90 GHz, et la puissance de transmission RF est de
250 mW (max.).)
Prévention des accidents, des blessures et des dommages
matériels
R N’utilisez pas le produit dans des zones instables ou des
zones sujettes à de fortes vibrations. Une chute du produit
pourrait en résulter, ce qui serait susceptible
d’endommager le produit voire de provoquer des
blessures.
R Ne placez pas vos oreilles à proximité de l’enceinte, car elle
peut émettre des sons à volume élevé susceptibles de
provoquer une perte d’acuité auditive.
R Ne placez aucun objet métallique (pièces de monnaie ou
autres) dans le chargeur. Les objets métalliques peuvent
devenir très chauds et provoquer des brûlures.
6
Page 61

R Ne placez pas de cartes magnétiques ou d’autres
dispositifs de stockage magnétique de données (tels que
des cartes de crédit) à proximité du chargeur. Le
non-respect de cette instruction peut résulter en des cartes
ou des dispositifs inutilisables.
Piles du moniteur secondaire
Prévention des fuites, d’une génération de chaleur, d’une
rupture ou d’accidents
R Nous vous recommandons d’utiliser les piles spécifiées à
la page 4. UTILISEZ UNIQUEMENT des piles Ni-MH
rechargeables de type AAA (R03).
R Ne mélangez pas des piles usagées et des piles neuves.
R N’ouvrez et n’endommagez pas les piles. L’électrolyte des
piles est corrosif et sa libération risquerait de provoquer des
brûlures ou des blessures oculaires ou cutanées.
L’électrolyte est toxique et peut s’avérer nocif en cas
d’ingestion.
R Chargez uniquement les piles fournies ou identifiées
comme utilisables avec le produit, conformément aux
instructions et aux limitations spécifiées dans le présent
manuel.
R Ne chauffez pas les piles et ne les jetez pas au feu.
R Ne touchez pas les extrémités des piles (
objets métalliques.
R Manipulez les piles avec précaution. Evitez tout contact
entre des matériaux conducteurs (bagues, bracelets ou
clés, par exemple) et les piles, au risque de provoquer un
court-circuit susceptible d’être à l’origine d’une surchauffe
des piles et/ou du matériau conducteur, et de blessures.
R Chargez les piles uniquement à l’aide du chargeur et de
l’adaptateur secteur spécifiés. A défaut, un gonflement ou
une explosion des piles risquerait de se produire.
, ) avec des
2.2 Consignes de sécurité
importantes
Lors de l’utilisation de ce produit, observez toujours les
consignes de sécurité élémentaires afin de réduire le risque
d’incendie, de choc électrique et/ou de blessure corporelle.
1. N’utilisez pas ce produit à proximité d’eau. Par exemple, à
proximité d’une baignoire, d’un lavabo, d’un évier ou d’une
lessiveuse, dans un sous-sol humide ou à proximité d’une
piscine, etc.
2. Utilisez uniquement le module d’alimentation, l’adaptateur
secteur et les piles spécifiés dans le présent manuel.
Ne jetez pas les piles au feu.
Elles risqueraient d’exploser. Vérifiez si la réglementation
locale donne des instructions spéciales concernant leur
mise au rebut.
CONSERVEZ LES PRESENTES INSTRUCTIONS
2. Informations importantes
2.3 Pour des performances optimales
Emplacement/éviter les problèmes de bruit (moniteur
principal/moniteur secondaire)
Le moniteur principal, le moniteur secondaire et les autres
unités Panasonic compatibles communiquent les uns avec les
autres à l’aide d’ondes radioélectriques. (Ce produit fonctionne
dans la plage de fréquence 1,88 GHz - 1,90 GHz, et la
puissance de transmission RF est de 250 mW (max.).)
R Pour une couverture optimale (100 m environ) et des
communications sans bruit, installez votre moniteur
principal :
– à l’intérieur, à un emplacement adapté, central et en
hauteur, en veillant à ce qu’il n’y ait aucune obstruction
entre le moniteur secondaire et le moniteur principal.
– à l’écart de tout appareil électronique, tel que des
téléviseurs, des postes radio, des ordinateurs, des
appareils sans fil ou des téléphones numériques sans
fil.
– en l’orientant dans la direction opposée au lieu
d’installation d’émetteurs de radiofréquences, tels que
les antennes externes des stations de téléphonie
mobile. (Evitez d’installer le moniteur principal à côté
d’une fenêtre.)
R La couverture et la qualité de la voix varient en fonction des
conditions environnementales locales.
R Ne placez pas le chargeur à proximité de téléviseurs,
d’enceintes ou d’autres appareils émettant des ondes
électromagnétiques. Le non-respect de cette instruction
peut résulter en l’impossibilité pour le chargeur de charger
le produit.
Environnement (moniteur principal/moniteur secondaire)
R Maintenez l’unité (moniteur principal et moniteur
secondaire) à l’écart d’appareils générant du bruit
électrique, tels que des lampes fluorescentes et des
moteurs.
R N’exposez pas l’unité à la lumière directe du soleil.
R Maintenez l’unité à l’écart de sources de chaleur, telles que
des radiateurs, des cuisinières, etc. Ne la placez pas dans
des pièces où la température est inférieure à 0 °C ou
supérieure à 40 °C. Evitez également les sous-sols
humides.
R N’installez pas le produit dans des lieux où des variations
brusques de température risquent de se produire. Le
non-respect de cette instruction peut être à l’origine d’une
formation de condensation sur le produit, elle-même
susceptible de provoquer un dysfonctionnement.
R Même si le moniteur principal et le moniteur secondaire
sont utilisés à moins de 100 m l’un de l’autre, des obstacles
peuvent être l’origine de signaux faibles, de bruit, de
transmissions interrompues, d’images déformées et de
fréquences faibles de rafraîchissement d’image. Parmi ces
obstructions figurent notamment :
– Portes ou volets métalliques.
– Isolation thermique incluant un voile d’aluminium.
– Murs en béton ou parois en tôle de fer galvanisé.
– Utilisation du moniteur secondaire dans un bâtiment
différent ou dans une section différente de la maison
7
Page 62

ABC
2. Informations importantes
(par exemple à un étage différent de celui où le
moniteur principal est installé).
– Nombreux murs.
– Fenêtres à double vitrage.
R Certains types d’appareils auditifs peuvent recevoir du bruit
généré par des communications sans fil entre le moniteur
principal, le moniteur secondaire et d’autres unités
Panasonic compatibles.
R L’utilisation de l’unité à proximité d’appareils électriques
peut être à l’origine d’interférences. Eloignez-vous des
appareils électriques.
R Dans les zones entourées par un champ électrique de forte
intensité, des perturbations de l’image ou du son de l’unité
sont susceptibles de se produire.
2.4 Autres informations importantes
R L’adaptateur secteur est utilisé comme dispositif principal
de déconnexion. Assurez-vous que la prise secteur est
installée à proximité du produit et qu’elle est facilement
accessible.
Attention :
R Risque d’explosion en cas de remplacement des piles
par des piles de type incorrect. Mettez les piles
usagées au rebut conformément aux instructions.
Ecoute clandestine
Ce produit exploite une technologie numérique sans fil, si bien
que les interceptions d’appel sont rares. Il est cependant
possible que des appels fassent l’objet d’une écoute
clandestine par un tiers dans la mesure où le produit
communique également par ondes radioélectriques.
R L’expression "écoute clandestine" fait référence à
l’interception intentionnelle ou accidentelle d’un message
radioélectrique par un tiers à l’aide d’un récepteur.
Vie privée et droit à l’image
Lors de l’installation ou de l’utilisation de l’interphone, veuillez
prendre en considération les droits des autres en matière de
vie privée.
R Il est généralement admis que "vie privée" fait référence à
la capacité d’un individu ou d’un groupe à arrêter la
divulgation d’informations les concernant à des personnes
autres que celles auxquelles ils choisissent de divulguer
ces informations. Le "droit à l’image" fait référence au droit
de ne pas avoir votre photo prise et utilisée de façon
inconsidérée, sans votre autorisation.
Informations personnelles
La mémoire interne du moniteur principal et les cartes SD
enregistrent des informations personnelles (enregistrements
audio et vidéo des visiteurs, etc.). Panasonic décline toute
responsabilité relative à d’éventuels dommages imprévus
résultant de la divulgation des informations enregistrées.
R Avis de non-responsabilité
Une modification ou un effacement des données
enregistrées peut être provoqué(e) par des opérations
incorrectes, une exposition à de l’électricité statique, un
dysfonctionnement, des réparations ou d’autres
opérations. Panasonic décline toute responsabilité relative
à des dommages directs ou indirects résultant de la perte
ou de la modification des images enregistrées.
Demande de réparation du produit
R Veillez à effectuer une sauvegarde sur carte SD des
données enregistrées dans la mémoire interne du moniteur
principal, puis à effacer de la mémoire interne toutes les
données enregistrées avant d’envoyer le produit en
réparation. Après avoir sauvegardé les données, n’oubliez
pas de retirer la carte SD du moniteur principal.
R Après avoir sauvegardé les données, initialisez les
réglages du moniteur principal et du moniteur
secondaire.*1 (Toutes les informations enregistrées dans
la mémoire interne sont effacées lorsque les réglages sont
initialisés.)
– Même si le produit est envoyé en réparation sans
initialisation, la mémoire (y compris les données et les
réglages enregistrés) du moniteur principal ou du
moniteur secondaire peut être réinitialisée et définie sur
les réglages par défaut après réparation.
– En cas d’impossibilité de réalisation de ces opérations
en raison d’un dysfonctionnement du moniteur
principal ou du moniteur secondaire, contactez votre
revendeur pour connaître la procédure à suivre.
Remarque relative à la mise au rebut, à la cession ou au
retour du produit
R Ce produit peut stocker des informations privées/
confidentielles.
Pour protéger votre vie privée/confidentialité, nous vous
recommandons d’effacer les informations (images
enregistrées) de la mémoire avant de mettre le produit au
rebut, de le céder ou de le retourner.
Toutes les images enregistrées peuvent être
immédiatement effacées via l’initialisation du moniteur
principal ou du moniteur secondaire.
R Retirez la carte SD du moniteur principal.
– Reportez-vous à la page 10 pour en savoir plus sur
la mise au rebut ou la cession de la carte SD.
*1 Moniteur principal : effectuez la procédure [Initialiser
param.+ Suppr. images] décrite sous [Initialiser les
réglages]. (® page 38)
Moniteur secondaire : effectuez la procédure "Initialiser".
(® page 39)
Avis aux utilisateurs concernant la collecte et l’élimination
des batteries et des appareils électriques et électroniques
usagés
Apposé sur le produit lui-même, sur son emballage, ou figurant
dans la documentation qui l’accompagne, ce pictogramme
(A, B, C) indique que les batteries et appareils électriques et
*1
8
Page 63

électroniques usagés doivent être séparés des ordures
ménagères.
Afin de permettre le traitement, la valorisation et le recyclage
adéquats des batteries et des appareils usagés, veuillez les
déposer à l’un des points de collecte prévus, conformément à
la législation nationale en vigueur ainsi qu’aux directives
2002/96/CE et 2006/66/CE.
En éliminant batteries et appareils usagés conformément à la
réglementation en vigueur, vous contribuez à prévenir le
gaspillage de ressources précieuses ainsi qu’à protéger la
santé humaine et l’environnement contre les effets
potentiellement nocifs d’une manipulation inappropriée des
déchets.
Pour de plus amples renseignements sur la collecte et le
recyclage des batteries et appareils usagés, veuillez vous
renseigner auprès de votre mairie, du service municipal
d’enlèvement des déchets ou du point de vente où vous avez
acheté les articles concernés.
Le non-respect de la réglementation relative à l’élimination des
déchets est passible d’une peine d’amende.
Pour les utilisateurs professionnels au sein de l’Union
européenne
Si vous souhaitez vous débarrasser de pièces d’équipement
électrique ou électronique, veuillez vous renseigner
directement auprès de votre détaillant ou de votre fournisseur.
2. Informations importantes
Information relative à l’élimination des déchets dans les
pays extérieurs à l’Union européenne
Ces symboles (A, B, C) ne sont valables que dans l’Union
Européenne. Pour connaître la procédure applicable dans les
pays hors Union Européenne, veuillez vous renseigner auprès
des autorités locales compétentes ou de votre distributeur.
Note relative au pictogramme à apposer sur les batteries
Le symbole (B) peut être combiné avec un symbole chimique
(C). Dans ce cas, il remplit également les exigences posées
par la Directive relative au produit chimique concerné.
Autres
R Il est interdit de démonter ou d’altérer ce produit. Pour toute
réparation, contactez votre revendeur.
R Ce produit ne peut pas être utilisé en cas de coupure de
courant.
R Pour l’image enregistrée :
Une perte d’image enregistrée peut avoir lieu en cas de :
– Mauvaise manipulation
– Choc électrique ou interférences radioélectriques.
– Coupure de courant en cours d’utilisation.
R La responsabilité de Panasonic ne saurait être engagée
pour des dommages résultant de facteurs externes, tels
que des coupures de courant.
R Si vous arrêtez d’utiliser le moniteur principal et
l’interphone, désinstallez-les pour éviter qu’ils ne chutent.
(Contactez votre revendeur pour en savoir plus sur la
désinstallation du produit.)
9
Page 64

3. Préparation
3.1 Utilisation de cartes SD (vendues
séparément)
3. . Préparation
Les cartes SD peuvent être utilisées avec le moniteur principal
pour l’enregistrement d’images et des appels de l’interphone et
de la caméra. (® page 20)
Lorsqu’aucune carte SD n’est utilisée, les images sont
enregistrées dans la mémoire interne du moniteur principal. Le
cas échéant, seules les images de l’interphone peuvent être
enregistrées, et la capacité de la mémoire est limitée. Nous
recommandons par conséquent d’utiliser une carte SD pour
enregistrer les images.
Reportez-vous à la page 43 pour en savoir plus sur les
cartes SD utilisables.
3.1.1 Précautions relatives aux cartes SD
R Le voyant de carte SD (® page 11) clignote lorsque
des données sont lues depuis la carte SD ou sont écrites
sur la carte SD.
Evitez de retirer la carte SD, d’appuyer sur le bouton
RESET (® page 11) ou de mettre le moniteur principal
hors tension pendant le clignotement du voyant de carte
SD. Le non-respect de cette instruction peut être à l’origine d’une détérioration de données.
R Les cartes SD formatées à l’aide d’ordinateurs ou d’au-
tres appareils doivent être reformatées à l’aide du moniteur principal avant de pouvoir être utilisées. (® page 42)
R Lorsque le commutateur de verrouil-
lage de protection en écriture (A) est
placé sur la position de verrouillage
("LOCK"), la carte SD ne peut pas être
formatée, et l’enregistrement ou la
suppression de données audio et vidéo est impossible.
R Nous vous recommandons de sauvegarder les données
importantes sur un ordinateur ou un autre appareil. Un
endommagement ou un effacement des données enregistrées sur les cartes SD est possible en cas de dysfonctionnement des cartes SD ou d’exposition des cartes
SD à des ondes électromagnétiques ou à de l’électricité
statique.
Mise au rebut ou cession de cartes SD
R Les utilisateurs sont les seuls responsables de la gestion
des données enregistrées sur les cartes SD.
Le formatage ou la réinitialisation des cartes SD à l’aide
du moniteur principal, d’un ordinateur ou d’un autre appareil provoque uniquement la modification des informations de gestion de fichier et n’efface pas complètement toutes les données enregistrées sur les cartes SD.
Avant de mettre au rebut ou de céder des cartes SD,
nous vous recommandons de les détruire physiquement
ou d’utiliser un logiciel informatique disponible sur le
marché pour effacer complètement toutes les données
qui y sont stockées.
A
3.1.2 Insertion des cartes SD
Important :
R Evitez de toucher les contacts métalliques de la carte
SD.
1 Après avoir vérifié que l’écran du moniteur principal est
éteint, insérez la carte SD dans la fente de carte SD (A).
B
A
R Insérez la carte SD en orientant vers le haut le coin
avec l’encoche (B) jusqu’à ce qu’un déclic se fasse
entendre.
R Le voyant de carte SD clignote et le moniteur principal
lance une vérification des informations relatives aux
images enregistrées.
2 Assurez-vous que le message "La carte SD est prête."
s’affiche à l’écran.
R Le voyant de carte SD s’éteint, puis l’écran s’éteint
automatiquement.
Retrait des cartes SD
Après vous être assuré que le voyant de carte SD est éteint,
appuyez sur la carte SD puis retirez-la.
3.2 Commandes
3.2.1 Interphone
A
B
C
Volet de l’objectif
Voyants LED (pour éclairage)
Plaque de nom (accessoire fourni)
R Peut être montée selon le besoin lors de l’installation
de l’interphone.
Microphone
Objectif de la caméra
Enceinte
D
E
F
G
10
Page 65

A
B
C
D
E
F
G
I
H
J
A
B
C
D
F
G
H
I
J
E
A
B
3. Préparation
Bouton et voyant d’appel (rouge)
R Le voyant s’allume en rouge lorsque l’appareil est sous
tension.
Qualité d’image de l’interphone
La qualité des images de l’interphone peut varier en fonction
de facteurs, tels que l’environnement d’installation et l’heure de
visualisation des images.
Pour en savoir plus, reportez-vous à la page 46.
3.2.2 Moniteur principal
Voyant de carte SD (bleu)
R Clignote lorsque des données sont écrites sur ou lues
depuis une carte SD. (® page 10)
Bouton de désactivation
Décrit dans ce manuel comme
.
Bouton de réinitialisation
Si le moniteur principal ne fonctionne pas correctement,
appuyez sur le bouton RESET à l’aide d’un objet pointu afin
de réinitialiser le moniteur principal. (Les images
enregistrées et les réglages configurés ne sont pas
affectés.)
3.2.3 Moniteur secondaire
Ecran (panneau tactile) (® page 12)
Voyant de notification (bleu)
R Clignote lorsqu’il y a une notification. (® page 13)
– Lorsque l’écran est effleuré, le menu supérieur
s’affiche et le voyant arrête de clignoter.
Enceinte
Bouton et voyant de conversation (bleu)
Décrit dans ce manuel comme
R Le voyant clignote lorsqu’il y a un appel entrant en
provenance d’un interphone ou d’un moniteur
secondaire, et s’allume pendant un appel.
R Lorsque le bouton tactile est affiché à
l’écran, il est également possible de répondre aux
.
appels en effleurant ce bouton.
Fente de carte SD (panneau latéral) (® page 10)
Permet d’afficher ou de masquer les boutons tactiles et les
icônes qui s’affichent au-dessus des images.
Microphone
Ecran (® page 13)
Boutons multifonction
A Icônes de touches de fonction (® page 14)
Affiche les fonctions pouvant être contrôlées à l’aide des
boutons
B
, et .
s’affiche sur les écrans tels que l’écran
d’information (® page 13). Les flèches affichées sur
11
Page 66

ヒビホパパヒビホパパ
モヮモヮモヮ
B
A
20
Février
2014
Liste des images
enregistrées
C
B
Liste des images
enregistrées
3. Préparation
indiquent la direction dans laquelle le bouton peut
être utilisé.
R Le volume peut être réglé au niveau de l’écran
d’information via une pression vers le haut ou vers le
bas sur le bouton
(moniteur) (® page 18, 25)
Indicateur de charge (® page 14)
Antenne (intégrée)
R Ne couvrez pas l’antenne pendant l’utilisation du
moniteur secondaire. (Ceci risquerait de réduire
l’intensité des ondes radioélectriques.)
Enceinte
(page) (® page 17, 18)
(désactivation)
(conversation) (® page 17)
Microphone
.
Menu supérieur
Le menu supérieur est l’écran qui s’affiche lorsque vous
effleurez l’écran de veille (noir). (Affiché uniquement une fois
les paramètres de date et d’heure configurés. Reportez-vous
à la page 15.)
Ecran d’affichage des images
3.3 Ecrans
3.3.1 Moniteur principal - informations relatives au
panneau tactile et à l’écran
Important :
R Touchez l’écran avec les doigts uniquement.
R Ne faites pas fonctionner l’écran à l’aide d’objets durs
et/ou pointus (tels que des stylos à bille), d’objets
acérés ou d’ongles.
R Ne touchez pas l’écran et n’appuyez pas dessus avec
une force excessive.
R N’utilisez pas de pellicules de protection pour écrans
LCD disponibles dans le commerce. Le panneau tactile
risquerait de ne pas fonctionner correctement en cas
d’utilisation de telles pellicules de protection.
R En cas de variations brusques de température, comme
par exemple lorsqu’un radiateur ou un climatiseur est
activé, l’intérieur de l’écran peut avoir un aspect
trouble et l’écran risque de ne pas fonctionner
correctement. Le cas échéant, attendez 1 ou 2 heures
avant de tenter de faire fonctionner l’écran.
12
"Contient des avis" s’affiche en cas de notifications.
Effleurez [Vérifier] pour visualiser le contenu de la
notification.
boutons tactiles (boutons affichés en bleu foncé à l’écran)
Les boutons tactiles changent en fonction de l’écran affiché
et des actions réalisées.
R Boutons tactiles affichés à l’écran pour la réalisation
d’opérations.
– Lorsqu’un bouton est effleuré, un bip retentit et la
couleur du bouton devient orange.
– Les sons émis par le moniteur principal peuvent
être désactivés dans les réglages [Son au
toucher]. (® page 38)
– Reportez-vous à la page 12 pour en savoir plus
sur les boutons du menu supérieur.
– Reportez-vous à la page 13 pour en savoir plus
sur les principaux boutons affichés sur l’écran
d’affichage des images.
Icônes d’information sur l’état (® page 13)
Boutons du menu supérieur
Bouton Action
Affiche la liste des images enregistrées.
(® page 21)
R "Nouveau" s’affiche en cas de pré-
sence de messages non visualisés.
Surveille l’interphone ou la caméra. (®
page 18, 25)
Page 67

ABC
A
B
Ʒ
Ʒ
Ʒ
Ʒ
ƪƪンユヤ
ンユヤ
ƪ
ンユヤ
A
B
3. Préparation
Bouton Action
Appelle/bipe le moniteur secondaire. (®
page 18)
Affiche le menu des réglages. (® page 27, 36)
Affiche les menus d’information suivants :
R Effleurez le bouton correspondant au
menu à vérifier.
A Affiche les notifications pour le
moniteur principal et la caméra.
B Affiche les informations relatives
aux enregistrements (destination des
enregistrements, mémoire disponible, etc.).
C Affiche si les capteurs ont été activés et si la caméra peut être connectée.
Principaux boutons de l’écran d’affichage des images
Bouton Action
Icône Signification
Indique que le moniteur principal est sur
un appel.
Indique que le moniteur principal effectue
une surveillance.
Indique que les images sont en cours
d’enregistrement. (® page 21)
Indique l’activation de l’éclairage LED de
l’interphone. (® page 35)
Indique l’activation du mode "Talkie-Walkie". (® page 17)
Indique que le commutateur de verrouillage de protection en écriture de cette
carte SD est placé sur la position de verrouillage ("LOCK"), ou qu’une carte SD
sur laquelle aucun enregistrement n’est
réalisable est insérée. (® page 10)
3.3.2 Moniteur secondaire - écran du moniteur
Ecran d’information
Permet de répondre ou d’initier un appel
avec le visiteur affiché.
Surveille le visiteur affiché. (Possibilité de
surveillance audio et vidéo.)
Affiche les menus.
Modifie l’affichage en le faisant passer du
mode écran large au mode affichage de
l’image entière. (® page 34)
Enregistre l’image affichée. (® page 21, 26)
Permet de revenir à l’écran précédent.
Débloque le verrou électrique de la porte.
(® page 30)
Débloque le verrou électrique du portail
pour véhicule. (® page 30)
Transfère les appels du moniteur principal vers le moniteur secondaire. (® page 17)
Icônes d’information sur l’état
Icône Signification
Indique quel interphone appelle, réalise
une surveillance ou est en cours d’appel.
("1" indique le numéro de l’appareil.)
Indique quelle caméra appelle, réalise
une surveillance ou est en cours d’appel.
("1" indique le numéro de l’appareil.)
L’écran d’information s’affiche lorsque le moniteur secondaire
est retiré du chargeur, ou que le bouton , ,
ou est enfoncé lorsque l’écran est éteint.
Ecran de conversation/surveillance
13
Page 68

A
*1
B
3. Préparation
Icônes d’information sur l’état
Icône Signification
Niveau de charge des piles. (® page 15)
Etat du signal : plus il y a de barres affichées, plus le signal est fort entre le moniteur secondaire et le moniteur principal.
Aucun signal.
Indique le numéro du moniteur secondaire utilisé.
Indique que le volume de la sonnerie de
l’interphone est en mode muet.
Indique que le volume de la sonnerie de
la caméra est en mode muet.
Indique quel interphone appelle, réalise
une surveillance ou est en cours d’appel.
("1" indique le numéro de l’appareil.)
Indique quelle caméra appelle, réalise
une surveillance ou est en cours d’appel.
("1" indique le numéro de l’appareil.)
Indique qu’il y a un appel depuis l’interphone pendant un appel, une surveillance ou un appel avec un autre appareil.
(® page 33)
Indique qu’il y a un appel depuis la caméra pendant un appel, une surveillance
ou un appel avec un autre appareil. (®
page 33)
Indique l’activation du mode "Talkie-Walkie". (® page 17)
Indique que les images sont en cours
d’enregistrement. (® page 21)
Indique que les voyants LED de l’interphone sont "Activé". (® page 35)
3.4 Installation des piles
– UTILISEZ UNIQUEMENT des piles Ni-MH rechargeables
de type AAA (R03).
– N’UTILISEZ PAS de piles alcalines/manganèse/Ni-Cd.
– Assurez-vous que les polarités sont correctes ( , ).
Remarques :
R Utilisez les piles rechargeables fournies (Ni-MH
UNIQUEMENT). Pour le remplacement, nous vous
recommandons d’utiliser les piles rechargeables
Panasonic spécifiées à la page 4.
R Essuyez les extrémités des piles (
chiffon sec.
R Evitez de toucher les extrémités des piles (
contacts de l’unité.
, ) à l’aide d’un
, ) et les
3.5 Charge du moniteur secondaire
Connectez uniquement l’adaptateur secteur Panasonic fourni
au chargeur (® page 3).
Connexions de l’adaptateur secteur
Icônes de touches de fonction
Icône Action
Affiche les menus.
Exécute l’élément ou l’opération sélectionné(e).
Permet de revenir à l’écran précédent.
Débloque le verrou électrique. (® page 30)
Fait passer l’affichage en mode affichage zoom. (® page 34)
Fait passer l’affichage en mode écran
large. (® page 34)
14
*1 Enfoncez fermement la fiche.
R Branchez le chargeur sur la prise secteur, puis placez le
moniteur secondaire sur le chargeur pour le charger. La
charge dure généralement 8 heures environ.
A Indicateur de charge
– pendant la charge : allumé
– une fois la charge terminée : éteint
B Crochet
Page 69

25 mm
3. Préparation
R La charge peut durer plus longtemps dans les situations
suivantes.
– Par basse température de fonctionnement. (®
page 44)
– Lorsque le moniteur secondaire est retiré du chargeur
ou qu’il est utilisé pendant la charge.
– Lorsque le signal du moniteur secondaire est hors de
portée (
R Aucune surcharge du moniteur secondaire n’a lieu, même
s’il se trouve en permanence sur le chargeur.
Niveau de charge des piles
Icône Niveau de charge des piles
R Reportez-vous à la page 44 pour en savoir plus sur les
durées de fonctionnement du moniteur secondaire.
Remarques :
R Lorsque le moniteur secondaire est retiré du chargeur ou
que l’adaptateur secteur est déconnecté pendant
1 semaine ou plus, retirez les piles afin de maintenir leurs
performances et d’éviter leur décharge.
– Rechargez les piles avant d’utiliser à nouveau le
moniteur secondaire.
). (® page 14)
Elevé
Moyen
Faible
Charge nécessaire
3.6 Montage mural
pour configurer la langue ainsi que la date et l’heure. (Le voyant
de notification clignote lorsque ces réglages n’ont pas été
configurés.)
1 Effleurez la langue à utiliser, puis effleurez [Suivant].
2 Configurez la date et l’heure en effleurant [+] et [–].
3 Effleurez [Ok] pour confirmer les réglages.
R Un bip retentit et l’écran s’éteint.
Modification de la langue, de la date et de l’heure
La langue, la date et l’heure peuvent être modifiées à partir du
bouton des réglages du menu supérieur. (® page 36)
Remarques :
R La langue du moniteur secondaire (ainsi que celle des
moniteurs secondaires supplémentaires) correspond
automatiquement à celle du réglage de langue du moniteur
principal.
R Les réglages de date et d’heure peuvent s’effacer en cas
de coupure de courant. Le cas échéant, reconfigurez ces
paramètres.
R Il est possible que l’heure se désynchronise de
60 secondes environ par mois.
3.8 Réglages écran large/affichage
zoom et réglages de position de zoom
– Cette opération peut uniquement être réalisée sur le
moniteur principal.
Vous pouvez configurer l’affichage initial des images de
l’interphone sur le moniteur principal et le moniteur secondaire.
Réglages Ecran large/affichage zoom
Vous pouvez sélectionner un des 3 réglages suivants pour
l’affichage initial des images lorsque des visiteurs se présentent
ou pendant une surveillance.
Remarques :
R Assurez-vous que le mur et la méthode de fixation sont
suffisamment résistants pour supporter le poids de
l’appareil.
R Insérez les vis (achetées sur place) dans le mur.
3.7 Réglage de la langue, de la date et
de l’heure
– Cette opération peut uniquement être réalisée sur le
moniteur principal.
Un écran de sélection de langue s’affiche à la première
utilisation du moniteur principal. Suivez la procédure ci-après
Affichage zoom
Ecran large*2 (réglage par défaut)
*1
(un zoom avant sur image
2 fois plus puissant qu’en
mode écran large)
15
Page 70

3. Préparation
Affichage de l’image entière (moniteur principal
uniquement)
*1 En raison de l’utilisation d’un zoom numérique, la qualité
d’image de l’affichage zoom est inférieure à celle de
l’écran large ou de l’affichage de l’image entière.
*2 Les sections supérieure et inférieure des images affichées
en mode écran large sur le moniteur principal sont
coupées par rapport aux images affichées en mode
affichage de l’image entière.
Réglages de position de zoom
Vous pouvez configurer les sections des images sur lesquelles
le zoom est réalisé lors de l’affichage des images en mode
affichage zoom. Réglez la position de façon à placer les
personnes ou les objets à visualiser au centre de l’écran.
Réglages :
1. Dans le menu supérieur, effleurez
® [Réglages initiaux].
2. Configuration des réglages Ecran large/affichage
zoom :
®
– Réglez la position du zoom de façon à placer les
personnes ou les objets à visualiser au centre de
l’écran. (® page 16)
– Lorsque les images sont enregistrées, seules les zones
affichées pendant le zoom sont enregistrées.
R L’écran de position de zoom s’éteint automatiquement si
les réglages ne sont pas terminés dans un délai de
90 secondes environ. Le cas échéant, les réglages ne sont
pas enregistrés et doivent être répétés.
A Effleurez [Réglages écran large/zoom], puis sé-
lectionnez l’interphone à configurer.
B Effleurez [Si des visiteurs se présentent] ou [Pen-
dant la surveillance], puis sélectionnez la méthode
d’affichage (Zoom, Large ou Tout).
R Un bip sonore retentit et les réglages sont mo-
difiés.
C Pour mettre fin à l’opération, appuyez sur le bouton
.
Configuration des réglages de position de zoom :
A
[Param. position zoom] ® sélectionnez l’interphone à configurer.
(L’image de l’interphone actuel s’affiche en mode
écran large.)
B Effleurez la position sur laquelle vous voulez ef-
fectuer un zoom avant, puis effleurez [Ok] après
avoir vérifié la position sélectionnée.
R Un bip sonore retentit, "Configuré" s’affiche,
puis l’écran s’éteint automatiquement.
Remarques :
R Lorsque l’option [Zoom] est sélectionnée pour [Réglages
écran large/zoom] :
16
Page 71

4. Conversation/Surveillance
4.1 Prise d’appels
– La procédure à suivre est identique pour le moniteur
4. . Conversation/Surveillance
principal et le moniteur secondaire.
Lorsque vous recevez un appel interphone, le moniteur
principal et le moniteur secondaire sonnent et affichent une
image de l’interphone. Vous pouvez répondre aux appels
comme suit.
1 Appuyez sur le bouton et parlez au visiteur.
R Parlez à tour de rôle avec le visiteur (en vous tenant à
environ 50 cm du microphone).
– Si vous et le visiteur parlez en même temps, vous
ne vous entendrez pas.
– Durée de conversation : jusqu’à 90 secondes
environ.
2 Pour mettre fin à l’opération, appuyez sur le bouton
.
Fonctionnalités disponibles pendant une conversation ou
en cas d’appel entrant
– Surveillance des visiteurs (appel entrant uniquement)
: Effleurez .
: Appuyez sur le bouton .
– Ajustement des réglages écran large/affichage zoom et
panoramique/inclinaison (® page 34)
– Ajustement des réglages audio et vidéo (® page 34)
– Conversation avec la fonction "Talkie-Walkie" (®
page 17)
– Transfert d’appels (® page 17)
– Déblocage des verrous électriques (® page 30)
Remarques :
R L’écran s’éteint si vous ne répondez pas à un appel dans
un délai de 30 secondes environ.
R Les images des appels entrants sont automatiquement
enregistrées dans le moniteur principal. (® page 21)
4.1.1 Mode Talkie-Walkie
Si vous-même ou votre visiteur avez des difficultés à vous
entendre en raison de la présence de bruit, le mode
Talkie-Walkie peut être utilisé pour accroître la clarté audio des
conversations. Parlez à tour de rôle avec le visiteur en appuyant
sur le bouton
conversation et le mode réception. (Vous pouvez utiliser cette
fonctionnalité de la même façon sur le moniteur principal et sur
le moniteur secondaire.)
pour basculer entre le mode
1 Appuyez sur le bouton
2 secondes enfoncé pendant une conversation, jusqu’à
l’émission d’un bip sonore.
R
(ou ) s’affiche à l’écran.
et maintenez-le
2 Pour parler au visiteur :
Parlez en appuyant sur le bouton
maintenant enfoncé.
Pour entendre le visiteur :
Relâchez le bouton
Remarques :
R Le mode "Talkie-Walkie" est désactivé une fois l’appel
terminé.
.
et en le
4.2 Transfert d’appels interphone
Vous pouvez transférer un appel interphone du moniteur
principal au moniteur secondaire, et vice-versa.
R Si plusieurs moniteurs secondaires sont utilisés, vous
pouvez transférer un appel interphone entre les moniteurs
secondaires.
Pour transférer des appels
1.
2. Bipez l’autre personne.
3. Lorsque la personne bipée répond, demandez-lui de
: Pendant la conversation avec le visiteur se
trouvant devant l’interphone, effleurez
R Si plusieurs appareils peuvent être sélectionnés,
sélectionnez l’appareil. Pour biper tous les appareils,
effleurez [Appeler l’ensemble].
: Pendant la conversation avec le visiteur se trouvant
devant l’interphone, appuyez sur le bouton
R Si plusieurs appareils peuvent être sélectionnés :
: Sélectionnez l’appareil.*1 ® ( )
*1
Pour biper tous les appareils, sélectionnez
"Appeler tous".
prendre l’appel interphone. Procédez comme suit pour
transférer l’appel vers la personne bipée.
: Effleurez [Transf. écran sec].
: Appuyez sur le bouton .
.
.
Pour recevoir des appels
– La procédure à suivre est identique pour le moniteur
principal et le moniteur secondaire.
17
Page 72

Touchez l'écran pour surveiller
ビ ヒ ビピフヒ
ヒヒ
A B
4. Conversation/Surveillance
1. Lorsque l’appel intercom est reçu, appuyez sur le bouton
pour parler à la personne à l’origine du bipage.
2. Lorsque l’image de l’interphone est affichée, parlez au
visiteur.
3. Pour mettre fin à l’opération, appuyez sur le bouton
.
Remarques :
R Le visiteur ne peut pas entendre les voix pendant le bipage.
R Pour parler au visiteur si la personne bipée ne répond pas :
: Effleurez [Parler au visiteur].
: Appuyez sur le bouton .
4.3 Surveillance extérieure par
interphone
Vous pouvez surveiller les données audio et vidéo transmises
par l’interphone.
1
: Dans le menu supérieur, effleurez .
Fonctionnalités disponibles pendant la surveillance
– Ajustement des réglages écran large/affichage zoom et
panoramique/inclinaison (® page 34)
– Ajustement des réglages audio et vidéo (® page 34)
– Enregistrement des images d’une surveillance (®
page 21)
Remarques :
R Le son de votre côté n’est pas audible au niveau de
l’interphone.
R Durée de surveillance :
: 90 secondes environ (possibilité d’extension
jusqu’à 3 minutes via la réalisation d’opérations pendant la
surveillance)
: 3 minutes environ
4.4 Conversation entre le moniteur
principal et le moniteur secondaire
Des appels intercom peuvent être effectués entre le moniteur
principal et le moniteur secondaire.
– Lorsque plusieurs moniteurs secondaires sont utilisés,
vous pouvez effectuer des appels intercom entre les
moniteurs secondaires.
R Lorsque plusieurs appareils sont affichés, effleurez le
numéro de l’interphone avec lequel vous souhaitez
réaliser la surveillance (A) puis l’image (B).
Exemple : Affichage avec deux interphones et
caméras.
: Appuyez sur le bouton .
R Lorsque plusieurs appareils sont affichés :
: Sélectionnez la destination. ®
( )
2 Les images de l’interphone s’affichent.
R Appuyez sur le bouton
personne surveillée.
3 Pour mettre fin à l’opération, appuyez sur le bouton
.
pour parler à la
Pour effectuer des appels
1.
2. Bipez l’autre personne.
3. Parlez avec la personne bipée lorsqu’elle répond à l’appel.
4. Pour mettre fin à l’opération, appuyez sur le bouton
Pour recevoir des appels
– La procédure à suivre est identique pour le moniteur
1. Lorsque l’appel intercom est reçu, appuyez sur le bouton
: Dans le menu supérieur, effleurez .
R Si plusieurs appareils peuvent être sélectionnés,
sélectionnez l’appareil. Pour appeler tous les appareils,
effleurez [Appeler l’ensemble].
: Appuyez sur le bouton .
R Si plusieurs appareils peuvent être sélectionnés :
: Sélectionnez l’appareil.*1 ® ( )
*1
Pour appeler tous les appareils, sélectionnez
"Appeler tous".
.
principal et le moniteur secondaire.
pour parler à la personne à l’origine du bipage.
18
Page 73

Remarques :
R Le bipage est automatiquement arrêté au bout de
30 secondes environ et les appels intercom sont
interrompus au bout de 90 secondes environ.
4. Conversation/Surveillance
19
Page 74

5. Enregistrement/Lecture
5.1 Enregistrement audio et vidéo
La quantité de données audio et d’images qui peut être enregistrée dépend de l’emplacement d’enregistrement du contenu
5. . Enregistrement/Lecture
(mémoire interne ou carte SD).
Pour pouvoir exploiter toutes les fonctionnalités du produit, nous vous recommandons d’utiliser une carte SD comme destination
pour les enregistrements.
– Lorsqu’une carte SD est insérée dans le moniteur principal, elle est automatiquement définie comme destination par défaut
pour les enregistrements. (La destination des enregistrements ne peut pas être sélectionnée.)
– Reportez-vous à la page 10 pour en savoir plus sur les cartes SD prises en charge et sur leur utilisation.
Mémoire interne
Destination des enregistrements Carte SD (2 Go - 64 Go)
Nombre maximal d’images
Type d’image enregistrée Appels et images de
l’interphone
(® page 21)
*1
3 000
Appels et images de la
caméra
(® page 26)
Enregistrements des
Contenu de
chaque enregistrement
appels entrants (enregistrement automatique)
Enregistrements des
surveillances (enregistrement manuel)
Données vidéo : 30
secondes max. environ
Série d’images enregistrées à intervalles d’1 seconde et données audio :
30 secondes max. environ
Série d’images enregis-
Enregistrements des
conversations
Données vidéo et audio : 90 secondes
max. environ
*2
trées à intervalles d’1 seconde et données audio :
90 secondes max. envi-
ron
*2
(lorsqu’aucune carte SD
n’est insérée)
50
Images de l’interphone
uniquement
(® page 21)
Images fixes : 8 max.
Enregistrement impossible
*1 Variable en fonction de la capacité de la carte SD. Reportez-vous à la page 20 pour obtenir un guide sur les capacités des
cartes SD et sur le nombre d’images enregistrables sur ces cartes.
*2 Reportez-vous à la page 37, sous [Enreg. appels], pour en savoir plus sur les réglages relatifs à l’enregistrement des données
audio pour l’interphone et la caméra.
Remarques :
R Les images enregistrées dans la mémoire interne peuvent être copiées vers des cartes SD. (® page 42)
R Les images enregistrées sur des cartes SD peuvent être lues sur un ordinateur. (® page 42)
Guide de capacités des cartes SD et d’enregistrement sur carte SD
Le tableau suivant donne une estimation du nombre d’images enregistrables en fonction de l’appareil ayant réalisé les prises de
vue et de la carte SD utilisée lorsque les réglages par défaut sont utilisés ([Enreg. appels] est réglé sur [Désactiver] (®
page 37)).
Unité : nombre d’images enregistrées
Capacité 2 Go 4 Go 8 Go 16 Go 32 Go 48 Go 64 Go
Type d’image
enregistrée
Images de l’interphone uniquement
Images de la ca-
125 255 520 1 040 2 090 3 000 3 000
2 300 3 000 3 000 3 000 3 000 3 000 3 000
méra uniquement
Remarques :
R En cas d’utilisation d’une caméra, nous recommandons d’utiliser une carte SD de 4 Go minimum.
R Le nombre d’images enregistrables indiqué dans le tableau n’est qu’une estimation et peut différer du nombre d’images
réellement enregistrables.
20
Page 75

5. Enregistrement/Lecture
R Les cartes SD contenant des données telles que des informations de gestion de système de fichiers, la capacité complète des
cartes n’est pas disponible pour l’enregistrement des données. Lorsque d’autres données sont enregistrées sur une carte SD,
le nombre d’images et de vidéos enregistrables est réduit.
5.2 Enregistrement des images et des
conversations de l’interphone
5.2.1 Enregistrement automatique des images des
appels entrants
En cas d’appel entrant, les images sont automatiquement
enregistrées 2 secondes environ après la réception de l’appel,
que vous répondiez ou non à cet appel. (Reportez-vous à la
page 20 pour en savoir plus sur le contenu enregistré.)
En l’absence de réponse aux appels :
Les images sont enregistrées en tant qu’images non vérifiées,
et le voyant de notification du moniteur principal clignote.
Remarques :
R Lorsqu’un appel entrant depuis un autre interphone a lieu
pendant une conversation ou une surveillance avec un
interphone (® page 31), vous devez interrompre la
conversation ou la surveillance pour afficher et enregistrer
l’image de l’appel entrant.
R S’il y a plusieurs interphones et qu’un appel entrant a lieu
depuis un autre interphone, pendant la réception de l’appel
entrant, le nombre d’images enregistrables (8 images) et
la longueur des vidéos enregistrées (environ 30 secondes)
sont réduits.
Lorsqu’il ne reste plus de place disponible dans la
mémoire interne ou dans la mémoire de la carte SD (mise
à jour automatique des images)
Lorsque la mémoire est saturée, il n’est pas nécessaire de
supprimer manuellement des images pour pouvoir enregistrer
de nouveaux messages dans la mesure où les images
existantes sont automatiquement effacées par ordre
chronologique.
– Les images non visualisées sont également effacées.
– Reportez-vous à la page 13 pour en savoir plus sur la
vérification de l’état d’enregistrement de la mémoire interne
ou de la carte SD.
5.2.2 Enregistrement d’images et de données
audio jusqu’à la fin des appels (Enreg. appels)
Pour pouvoir utiliser cette fonction, une carte SD doit être
insérée dans le moniteur principal et l’option [Enreg. appels]
doit être correctement configurée (® page 37).
Le cas échéant, lorsque vous répondez à des appels via
interphone, les appels peuvent être enregistrés dans leur
intégralité en 1 fichier vidéo incluant des données audio. (La
durée maximale d’une vidéo est de 120 secondes environ.)
5.2.3 Enregistrement manuel des images d’une
surveillance
Les images d’une surveillance peuvent être enregistrées
manuellement avec le moniteur principal et le moniteur
secondaire. (Reportez-vous à la page 20 pour en savoir plus
sur le contenu enregistré.)
Les images d’une surveillance caméra peuvent également être
enregistrées avec la même procédure.
1 Effectuez les opérations suivantes pendant l’affichage des
images d’une surveillance.
R
: ( ) ® : "Enregistrer" ®
( )
Remarques :
R Lorsque des images sont enregistrées avec le moniteur
secondaire, il peut y avoir une différence entre le contenu
des images d’une surveillance et des images enregistrées
en raison d’un décalage entre le moment où la procédure
est réalisée et le moment où l’enregistrement commence
vraiment.
s’affiche à l’écran pendant l’enregistrement.
: Effleurez .
5.3 Lecture d’images enregistrées
(moniteur principal uniquement)
Lorsque des images récemment enregistrées n’ont pas été
visualisées, le voyant de notification clignote et l’indication
"Nouveau" s’affiche.
1 Dans le menu supérieur, effleurez [Liste des images
enregistrées].
R Une liste des images enregistrées pour chaque jour
s’affiche dans un calendrier d’1 semaine.
– Pour afficher la liste des images enregistrées à une
autre date, effleurez le bouton de la date souhaitée.
Toutes les images enregistrées ce jour s’affichent.
– Effleurez
images enregistrées par la caméra.
– Reportez-vous à la page 22 et à la 23 pour en
savoir plus sur la navigation sur cet écran et sur la
lecture des images.
2 Effleurez l’image à visualiser.
R Effleurez
après la date sélectionnée.
pour afficher une liste des
pour visualiser toutes les images
21
Page 76

ヒパホパパチモヮ パホビビチヱヮ
ビパバヒパ
ロㄖㄏ
ビフバヒパ
ヷㄆㄏ
ビブバヒパ
ヴㄎ
ビプバヒパ
ュㄊㄎ
ビヒバヒパ
ヮㄓ
ビビバヒパ
ヮㄆㄓ
ビピバヒパ
ルㄆㄖ
A
B
C
ビピチチヰㄕㄐㄓㄆチチヒパホフピチモヮ
5. Enregistrement/Lecture
3 Pour mettre fin à l’opération, appuyez sur le bouton
.
Remarques :
R Le voyant de notification arrête de clignoter lorsque le menu
supérieur s’affiche, et l’indication "Nouveau" disparaît du
menu supérieur lorsque l’écran de la liste des images
enregistrées s’affiche.
5.3.1 Accès à la liste des images enregistrées et
aux écrans de lecture d’images
Ecran de la liste des images enregistrées
Ecran de lecture d’images
Numéro de l’appareil enregistreur
Date et heure de l’enregistrement
Durée de lecture de l’image
Ecran et autres icônes
Icône Signification
Indique l’existence d’une image non visualisée et spécifie les images non visualisées.
Affichée lorsque les images d’un interphone sont affichées.
Lorsque les images d’une caméra sont
affichées, ou s’affiche.
Icône Signification
Affichée lorsque la lecture en cours des
images est mise en pause.
Affichée lorsque la sortie audio est en
sourdine. (® page 23)
Affichée lorsque le commutateur de verrouillage de protection en écriture de la
carte SD est placé sur la position de verrouillage ("LOCK"). (® page 10)
Boutons d’opération dans l’écran de la liste des images
enregistrées
Bouton Action
/
/
Permet de passer à la semaine précédente ou suivante.
Permet de passer à la page précédente
ou suivante (uniquement affichée lorsqu’il y a au moins 7 images enregistrées).
Permet de changer la mémoire (mémoire
interne ou carte SD) depuis laquelle les
images enregistrées s’affichent.
Permet de passer à la liste des images de
l’interphone.
Permet de passer à la liste des images de
la caméra.
Lit les images de la date sélectionnée et
toutes les images enregistrées après cette date.
Efface toutes les images du jour sélectionné.
R Pour effacer les images :
Effleurez
® vérifiez le mes-
sage puis effleurez [Oui].
Permet de rechercher des images à l’aide
du calendrier (cette méthode s’avère pratique pour rechercher une image parmi
un grand nombre d’images enregistrées).
R Lorsque ce bouton est effleuré, un
calendrier tel que celui illustré
ci-après s’affiche. Effleurez le bouton
correspondant à la date des images
à visualiser.
22
Indique qu’une image enregistrée sur la
carte SD est en cours d’affichage ou de
lecture.
Indique la disponibilité de données audio
enregistrées (icône affichée au niveau de
la position de début de lecture des appels
enregistrés sur l’écran de lecture).
Affichée pendant une lecture d’images.
Boutons d’opération dans l’écran de lecture
Page 77

Bouton Action
5. Enregistrement/Lecture
/
/ /
/
Permet de passer à l’image suivante ou
précédente.
Permet d’effectuer une pause sur image.
Lorsque des données audio sont enregistrées avec une image, ces données
audio sont lues dès le début de lecture
des appels enregistrés.
Permet de revenir à l’écran de la liste des
images enregistrées.
Permet d’effacer des images, et de régler
la luminosité et le volume. (® page 23)
Permet de basculer entre le mode écran
large, l’image entière et le mode affichage
zoom. (® page 34)
R Il est également possible d’effectuer
un zoom en effleurant une image.
Permet de poursuivre la lecture d’images
mises en pause.
Permet de passer à l’image suivante ou
précédente.
5.3.2 Fonctions du bouton de menu pendant la
lecture d’images
Les opérations suivantes peuvent être réalisées à l’aide du
bouton
affiché pendant la lecture des images.
Effacement d’images individuelles :
Les images peuvent être effacées 1 par 1.
R Effleurez [Supprimer], vérifiez le message affiché puis
effleurez [Oui].
Modification de la luminosité de l’écran :
R Effleurez [Luminosité], puis réglez la luminosité en
effleurant [–] (Plus sombre) ou [+] (Plus lumineux).
Modification du volume des images lues :
Le volume peut être modifié pendant la lecture des images.
R Effleurez [Volume], puis réglez le volume en effleurant [–]
(Moins fort) ou [+] (Plus fort).
– Pour couper le son, effleurez [–] jusqu’à ce que
s’affiche.
Remarques :
R Le réglage [Supprimer toutes les images] peut être utilisé
pour effacer en une seule opération toutes les images
enregistrées dans la destination des enregistrements
(mémoire interne ou carte SD). (® page 37)
23
Page 78

A
A
B
C
6. Utilisation d’une caméra
6.1 Connexion d’une caméra
En connectant une caméra (accessoires supplémentaires, ®
6. . Utilisation d’une caméra
page 4), vous pouvez surveiller les images extérieures avec la
caméra, et le moniteur principal et le moniteur secondaire
peuvent recevoir des notifications avec données audio et vidéo
en cas de déclenchement des capteurs de la caméra.
– Reportez-vous aux manuels de la caméra pour obtenir des
informations détaillées sur son utilisation.
– Une carte SD est nécessaire pour l’enregistrement des
images de la caméra.
Remarques :
R La qualité d’image des images de la caméra peut être
inférieure à la qualité d’image des images d’interphone.
R La lampe du témoin de caméra
(C) clignote en vert pendant
l’enregistrement. Une fois l’enregistrement terminé, un bip sonore retentit et la lampe du témoin s’allume en continu en
vert.
3 : Pour mettre fin à l’opération, appuyez sur le bouton
.
6.1.2 Images envoyées depuis la caméra
6.1.1 Enregistrement d’une caméra auprès du
moniteur principal
Enregistrez la caméra après l’avoir connectée à une
alimentation électrique.
– Enregistrez 1 caméra à la fois. Il n’est pas possible
d’enregistrer plusieurs caméras simultanément.
– Cette procédure concerne les caméras modèle
VL-WD812EX. Reportez-vous aux manuels de la caméra
selon le besoin.
1
: Dans le menu supérieur, effleurez ®
® [Enregistrer/annuler] ® [Enregistrer] ®
[Caméra] ® numéro de la caméra à enregistrer.
R Une fois cette opération terminée, utilisez la caméra et
effectuez la procédure ci-après dans un délai de
5 minutes environ.
2 : Avec la caméra connectée à l’alimentation
électrique, appuyez sur le bouton enregistrer situé à
l’arrière de la caméra.
R Le bouton enregistrer se trouve
derrière le cache du bouton enregistrer (A).
Ouvrez le cache du bouton enregistrer et utilisez l’extrémité fine de l’outil de retrait du capuchon de plage du capteur (accessoire fourni) pour appuyer
sur le bouton enregistrer (B) et
le maintenir enfoncé pendant 3
secondes environ. Une fois cette opération réalisée, veillez à
bien refermer le cache du bouton enregistrer.
Intervalles d’enregistrement des images de la caméra
La caméra enregistre des images (série d’images) et les envoie
au moniteur principal. Le moniteur principal et le moniteur
secondaire affichent les images en actualisant les images fixes
en continu une à une. (Les données vidéo ne sont pas
envoyées depuis la caméra.)
Images enregistrées suite à des détections par capteur
Le moment auquel la 1ère image est enregistrée change selon
que [Enregistrement avant détection] (® page 28) est réglé
sur [1 seconde avant] ou sur [2 secondes avant].
Enregistrement à
compter d’1 seconde avant la détection
¯
1ère ima-ge1 seconde avant la
détection
¯
2nde
image
3ème
image
4ème
image
5ème
image
R Les images à compter de la 6ème image sont enregistrées
à des intervalles d’environ 1 seconde.
R Les problèmes suivants peuvent se produire lorsqu’il fait
sombre.
– La première image est sombre. (Les voyants LED ne
– Les objets dans l’image peuvent apparaître flous.
Juste après la détection
¯
1 seconde après la détection
¯
2 secondes après la détection
¯
4 à 5 secondes environ après la détection
sont pas allumés parce qu’aucune détection n’a encore
eu lieu.)
Enregistrement à
compter de 2 secondes avant la détection
2 secondes avant la
détection
24
Page 79

Images enregistrées pendant une surveillance
Les images sont enregistrées à des intervalles d’environ 1
seconde à partir du démarrage de la surveillance.
6.2 Surveillance extérieure à l’aide de
la caméra
Vous pouvez surveiller les données audio et vidéo transmises
par la caméra.
– Le son de votre côté n’est pas audible au niveau de la
caméra.
1
: Desde el menú superior, toque y a
continuación, la imagen.
R Si l’écran de sélection de caméra s’affiche, effleurez le
numéro de la caméra avec laquelle vous souhaitez
réaliser une surveillance, puis effleurez l’image.
: ® : Sélectionnez la caméra avec laquelle
6. Utilisation d’une caméra
6.3 Déclenchement des capteurs de la
caméra
Lorsqu’un capteur de caméra est déclenché, le moniteur
principal et le moniteur secondaire sont notifiés comme suit.
1 Lorsqu’un capteur est déclenché, la sonnerie retentit et les
images de la caméra sont affichées pendant 30 secondes
environ.
R Conversation avec la personne se trouvant côté
caméra :
Appuyez sur le bouton
R Surveillance (observation et écoute) de l’autre
personne sans parler :
: Effleurez .
– La durée de la surveillance est de 90 secondes
(possibilité d’extension jusqu’à 3 minutes via la
réalisation d’opérations pendant la surveillance).
.
vous souhaitez effectuer une surveillance. ®
( )
2 Les images de la caméra s’affichent.
R Appuyez sur le bouton
personne surveillée.
pour parler à la
3 Pour mettre fin à l’opération, appuyez sur le bouton
.
Fonctionnalités disponibles pendant la surveillance
– Ajustement des réglages écran large/affichage zoom et
panoramique/inclinaison (® page 34)
– Ajustement des réglages audio et vidéo (® page 34)
– Activation de l’émission d’un son d’alerte par la caméra
(® page 25)
– Enregistrement des images d’une surveillance (®
page 21)
Remarques :
R Durée de surveillance :
–
–
R Lorsque la visualisation des images est difficile, comme par
exemple la nuit ou en cas de fort contre-jour, modifiez le
réglage du paramètre [Luminosité] de la caméra et activez
le paramètre [Compensation du rétroéclairage] selon le
besoin. (® page 28)
: 90 secondes environ (possibilité d’extension
jusqu’à 3 minutes via la réalisation d’opérations
pendant la surveillance)
: 3 minutes environ
: Appuyez sur le bouton .
– La durée de la surveillance est de 3 minutes
environ.
R Activation de l’émission d’un son d’alerte par la
caméra :
: Effleurez ® [Son
d’avertissement] ® [Lire le son].
: ( ) ® : "Avertissmt" ®
( )
Fonctionnalités disponibles en cas de déclenchement
d’un capteur
– Ajustement des réglages écran large/affichage zoom et
panoramique/inclinaison (® page 34)
– Ajustement des réglages de luminosité (® page 35)
– Enregistrement des images d’une surveillance (®
page 21)
Remarques :
R Les images capturées en cas de déclenchement des
capteurs de caméra sont automatiquement enregistrées
sur la carte SD. (® page 26)
R Une fois un capteur déclenché, aucune détection par
capteur ne peut avoir lieu dans un délai de 10 secondes
après la fin de l’affichage des images du premier
déclenchement. (La durée pendant laquelle les détections
n’ont pas lieu est sélectionnable. ® page 27)
R Lorsque la visualisation des images est difficile, comme par
exemple la nuit ou en cas de fort contre-jour, modifiez le
réglage du paramètre [Luminosité] de la caméra et activez
le paramètre [Compensation du rétroéclairage] selon le
besoin. (® page 28)
25
Page 80

Activé
Désactivé
Désactivé
Activé
6. Utilisation d’une caméra
R Le volume et les types de sons utilisés par le réglage [Son
d’avertissement] peuvent être modifiés. (® page 29)
6.4 Désactivation des détections par
capteur de caméra pendant une
période de temps définie (moniteur
principal uniquement)
Les détections par capteur de caméra peuvent être désactivées
pendant des périodes de temps définies, selon le besoin.
– Lorsque les détections par capteur de caméra sont
désactivées, aucune notification n’est envoyée au moniteur
principal ni au moniteur secondaire, et les images ne sont
pas automatiquement enregistrées.
– Si plusieurs caméras sont installées, les détections par
capteurs pour toutes les caméras sont désactivées.
1 Dans le menu supérieur, effleurez
2 Effleurez la valeur correspondant à la durée pendant
laquelle vous voulez désactiver la détection par capteurs.
R Un signal sonore retentit et "Désactivé" est surligné en
jaune une fois les réglages terminés.
3 Pour mettre fin à l’opération, appuyez sur le bouton
.
Réactivation de la détection par capteurs
Lorsque la détection par capteurs est désactivée, elle est
automatiquement réactivée une fois le laps de temps spécifié
écoulé. Vous pouvez réactiver la détection par capteurs à tout
moment en procédant comme suit.
1. Dans le menu supérieur, effleurez
pour rétablir la détection par capteurs.
2. Pour mettre fin à l’opération, appuyez sur le bouton
.
Remarques :
R L’état de détection par capteur de caméra peut être vérifié
dans le menu d’information de la caméra. (® page 13)
®
®
.
6.5.1 Enregistrement automatique des images en
cas de déclenchement des capteurs
Lorsqu’un capteur est déclenché, les images capturées 1 ou 2
secondes*1 avant la détection sont automatiquement
enregistrées*2 sur une carte SD. (® page 20)
*1 Le laps de temps entre le démarrage de l’enregistrement
et les détections varie en fonction du réglage
[Enregistrement avant détection]. (® page 28)
*2 Lorsqu’un appel est réalisé après le déclenchement d’un
capteur, les données audio du moniteur principal ou du
moniteur secondaire sont également enregistrées.
En l’absence de réponse aux appels :
Les images sont enregistrées en tant qu’images non vérifiées,
et le voyant de notification du moniteur principal clignote pour
indiquer l’existence d’images non vérifiées.
Remarques :
R Si plusieurs caméras sont utilisées, des appels entrants
multiples peuvent être reçus simultanément. Le cas
échéant, la priorité est donnée à l’appel entrant le plus
récent qui est alors enregistré.
R Lorsqu’un appel entrant depuis une autre caméra a lieu
pendant une conversation ou une surveillance avec une
caméra (® page 31, 32), vous devez interrompre la
conversation ou la surveillance pour afficher et enregistrer
l’image de l’appel entrant.
R S’il y a plusieurs caméras et si le capteur d’une autre
caméra est déclenché pendant la réception d’un appel
entrant, la durée d’enregistrement des images de la caméra
(environ 30 secondes maximum) peut être réduite.
6.5.2 Enregistrement d’images et de données
audio jusqu’à la fin des appels (Enreg. appels)
Pour pouvoir utiliser cette fonction, une carte SD doit être
insérée dans le moniteur principal et le paramètre [Enreg.
appels] doit être réglé sur [Activer] (® page 37). Avec cette
fonction, les appels peuvent être enregistrés dans leur
intégralité en 1 fichier vidéo contenant des données audio
(durée max. de 120 secondes environ).
6.5.3 Enregistrement manuel d’images de
surveillance et lecture d’images enregistrées
6.5 Enregistrement des images de la
caméra et des conversations
Les images de la caméra avec données audio peuvent être
enregistrées sur une carte SD. (En incluant les images de
l’interphone, 3 000 images maximum peuvent être
enregistrées.)
26
La procédure est identique pour les images de l’interphone.
– Enregistrement manuel d’images de surveillance. (®
page 21)
– Lecture d’images enregistrées. (® page 21)
Page 81

6. Utilisation d’une caméra
6.6 Modification des réglages de la caméra
Vous pouvez modifier les réglages pour les adapter à la façon dont la caméra est utilisée.
Comment modifier les réglages (via le moniteur principal)
1. Dans le menu supérieur du moniteur principal, effleurez
2. Sélectionnez le numéro (1 - 4) de la caméra à configurer.
3. Effleurez le nom de l’élément, le nom de la fonction et le contenu du réglage.
R Selon la fonction, il peut être nécessaire de répéter la procédure.
4. Pour mettre fin à l’opération, appuyez sur le bouton
Remarques :
R L’écran de fonction de réglage disparaît automatiquement en cas de réception d’un appel entrant ou si aucune opération n’a
lieu pendant environ 90 secondes.
R Dans le tableau suivant, < > indique les réglages par défaut.
Nom de l’élément : Réglages du capteur
Nom de la fonction Réglage de contenu et autres informations
Sélection du capteur Capteur thermique uniquement, <Capteur thermique+mouvement>, Capteur externe unique-
ment, Tous les capteurs, Désactivé (désactivation de tous les capteurs)
Mode détect. capteur ther-
*1
mique
Détection de mouvement
Permutation entre jour et
nuit
<Nuit seulement>, Toujours
R Sélectionnez la période temporelle pour la détection par capteur thermique.
– Lorsque [Nuit seulement] est sélectionné, le capteur thermique fonctionne conformément
aux réglages de [Permutation entre jour et nuit] (® page 27).
*1
Jour seulement, <Toujours>
R Sélectionnez la période temporelle pour la détection de mouvement.
– Lorsque [Jour seulement] est sélectionné, la détection de mouvement fonctionne con-
formément aux réglages de [Permutation entre jour et nuit] (® page 27).
<Auto>, Minuterie
R Sélectionnez si la commutation jour et nuit doit être réglée automatiquement ou manuelle-
ment sur une heure choisie.
– Ce réglage est actif lorsque les paramètres [Mode détect. capteur thermique] ou [Dé-
tection de mouvement] sont définis sur [Nuit seulement] ou [Jour seulement].
® ® [Appareils connectés] ® [Caméra].
.
Auto : la caméra bascule automatiquement entre les modes nuit et jour en fonction de la luminosité
de la zone environnante.
Minuterie : permet de configurer l’heure pour la nuit.
(Après avoir sélectionné [Minuterie], réglez l’heure avec [+] et [–], puis effleurez [Ok].)
Durée sans détection <10 secondes>, 30 secondes, 60 secondes
R Sélectionnez le laps de temps devant s’écouler entre le moment où une image est détectée
par un capteur ou une image de surveillance est affichée et le moment où le capteur peut à
nouveau effectuer des détections.
– Sélectionnez un laps de temps important si vous ne souhaitez pas que le capteur réalise
des détections fréquentes.
Sensibilité du capteur thermique
Sensibilité détect. de mouvement
Sensibilité élevée, <Normal>, Faible sensibilité, Très faible sensibilité, Ne pas détecter
R Si le capteur réalise difficilement des détections, sélectionnez [Sensibilité élevée]. Si les
détections sont réalisées de façon trop fréquente, sélectionnez [Faible sensibilité] ou [Très
faible sensibilité].
Sensibilité élevée, <Normal>, Faible sensibilité, Très faible sensibilité
R Si vous souhaitez détecter des mouvements réduits, sélectionnez [Sensibilité élevée]. Si
vous ne souhaitez pas détecter des mouvements réduits, sélectionnez [Faible sensibilité] ou
[Très faible sensibilité].
27
Page 82

6. Utilisation d’une caméra
Nom de la fonction Réglage de contenu et autres informations
Plage de détection de
mouvement
Enregistrement avant détection
Vérifier les capteurs Capteur thermique, Détection de mouvement, Capteur externe
Test d’enregistrement R Vérifiez si les images sont correctement enregistrées avant et après l’enregistrement d’ima-
Capteur externe <Faire contact>, Contact de rupture
R Sélectionnez la plage (zone) de détection de mouvement.
– En définissant sur X les zones dans lesquelles vous ne souhaitez pas que le mouvement
soit détecté, vous pouvez réduire les zones dans lesquelles le mouvement peut être
détecté.
Configuration
1. Effleurez les zones dans lesquelles vous ne souhaitez pas que le
mouvement soit détecté, de façon à y afficher X. (Effleurez une nouvelle fois les zones pour supprimer les X.)
2. Effleurez [Configurer].
<1 seconde avant>, 2 secondes avant
R Sélectionnez le début d’enregistrement 1 ou 2 secondes avant la réalisation d’une détection
par capteur.
Reportez-vous à la page 24 pour des informations sur les intervalles d’enregistrement et les
enregistrements de détections par capteurs.
R Vous pouvez vérifier le fonctionnement de chaque capteur lors du réglage de la caméra ou
à tout autre moment.
– Sélectionnez le type de capteur à contrôler, déclenchez-le, puis vérifiez si les détections
ont été correctement réalisées. (Reportez-vous au Guide d’installation de la caméra pour
en savoir plus sur le contrôle des capteurs.)
ges pour les détections par capteurs. (Pour en savoir plus, reportez-vous au Guide d’installation de la caméra.)
R Lors de l’utilisation de capteurs externes disponibles dans le commerce, sélectionnez le type
de points de contact utilisé par le capteur.
– Sélectionnez le type de point de contact en fonction du capteur externe utilisé et de sa
fonction.
*1 Lorsque [Permutation entre jour et nuit] est défini sur [Minuterie], les périodes temporelles configurées sont affichées
au-dessus des boutons de réglage [Nuit seulement] et [Jour seulement].
Nom de l’élément : Réglages de l’écran
Nom de la fonction Réglage de contenu et autres informations
Luminosité -3, -2, -1, <0>, +1, +2, +3
R Réglez la luminosité des images de la caméra. (Plus le réglage de la luminosité est élevé,
plus l’image est lumineuse.)
– Effectuez des réglages lorsque les images sont très sombres ou très lumineuses.
Compensation du rétroéclairage
Éclairage automatique Lorsque le capteur est déclenché : Activer, <Uniquement lorsqu’il fait sombre>, Désactiver
Prévention couleurs irrégulières
Activé, <Désactivé>
R Lorsque [Activé] est sélectionné, une compensation de contre-jour est réalisée. Cependant,
en fonction de l’arrière-plan, il est possible que la compensation de contre-jour ne soit pas
efficace.
Pendant la surveillance : Activer, <Uniquement lorsqu’il fait sombre>, Désactiver
Activé, <Désactivé>
R Utilisez normalement ce paramètre défini sur [Désactivé]. Réglez ce paramètre sur [Activé]
uniquement si la couleur des images de la caméra est inégale. (Lorsque ce paramètre est
défini sur [Activé], la qualité de l’image peut être réduite dans la pénombre.)
28
Page 83

6. Utilisation d’une caméra
Nom de l’élément : Réglages du son
Nom de la fonction Réglage de contenu et autres informations
Son de déclenchement du
capteur
Son d’avertissement Type de son : <Son a>, Son b, Son c
Volume vocal du propriétaire
Sensibilité du micro de la
caméra
Nom de l’élément : Autres réglages
Nom de la fonction Réglage de contenu et autres informations
Lampe du témoin <Toujours>, Pendant la transmission, Désactivé
Historique de détection de
la caméra
Initialiser les réglages Oui, Non
Type de son : <Son a>, Son b, Son c
Volume : <Fort>, Normal, Silencieux, Muet
R Sélectionnez le type et le volume du son devant être émis par la caméra en cas de détection
par capteur.
Volume : <Fort>, Normal, Silencieux
R En faisant fonctionner le moniteur principal ou le moniteur secondaire pendant la surveillance
ou la réalisation d’autres actions, vous pouvez provoquer l’émission d’un son d’alerte par la
caméra. Sélectionnez le type et le volume du son.
Fort, <Normal>, Silencieux
R Sélectionnez le volume du son émis par la caméra lorsque vous parlez à des visiteurs ou
que vous les interpellez.
<Élevé>, Normal, Faible
R Si les sons capturés sont trop nombreux, sélectionnez [Normal] ou [Faible].
R Sélectionnez comment la lampe du témoin s’allume.
– Lorsque [Pendant la transmission] est sélectionné, la lampe s’allume uniquement lors-
qu’une conversation ou une surveillance a lieu avec le moniteur principal ou le moniteur
secondaire via la caméra.
R Affiche l’historique de détection par capteur. (Affiche les 24 dernières entrées.)
R Rétablit les réglages usine par défaut de la caméra.
– La caméra reste enregistrée auprès du moniteur principal même en cas de réinitialisation
des réglages de la caméra. (Les informations relatives à l’enregistrement ne sont pas
effacées.)
29
Page 84

7. Utilisation de verrous électriques
7.1 Connexion de verrous électriques
Lorsqu’un verrou électrique disponible dans le commerce est
7. . Utilisation de verrous électriques
connecté au moniteur principal, vous pouvez ouvrir une porte
ou une barrière à l’aide du moniteur principal ou du moniteur
secondaire. Vous pouvez également sélectionner la durée
d’ouverture de la porte ou de la barrière.
Si vous utilisez des verrous électriques, vous devez les
configurer sur le moniteur principal.
R Il est possible de connecter un maximum de 4 verrous
électriques au moniteur principal.
R Pour en savoir plus sur les connexions, reportez-vous au
manuel accompagnant le verrou électrique et au Guide
d’installation de ce produit.
7.1.1 Configuration des verrous électriques
– Cette opération peut uniquement être réalisée sur le
moniteur principal.
R En cas d’utilisation de plusieurs verrous électriques avec
différents interphones :
Vous pouvez uniquement ouvrir les verrous électriques
depuis l’interphone auquel ils sont connectés.
1 Dans le menu supérieur, effleurez
® [Appareils connectés] ® [Verrou électrique] ®
interphone à configurer.
R [Déverr. sonnerie] peut également être configuré. (®
page 38)
®
2 Effleurez le verrou électrique à configurer, puis effleurez la
durée de déblocage.
3 Pour mettre fin à l’opération, appuyez sur le bouton
.
7.1.2 Déblocage des verrous électriques
1 Pendant une conversation ou une surveillance avec
l’interphone :
: Effleurez ou .
: ( )
R Lorsque 2 verrous électriques sont connectés au
même interphone :
: Sélectionnez le verrou électrique à débloquer. ®
( )
Ouverture d’une autre porte ou barrière :
R Après avoir ouvert la porte ou la barrière, vous pouvez
ouvrir une autre porte ou barrière en effleurant
ou (moniteur secondaire :
).
Remarques :
R Vous pouvez uniquement ouvrir la porte ou la barrière
pendant une conversation ou une surveillance.
30
Page 85

A
B
ヒ
ヒヒヒ
C D
A
ヒ
Volume récepteur
Appel d'intercommunication
E
8. Opérations en cas d’appel entrant
8.1 En cas de réception d’un autre appel entrant - moniteur principal
Lorsqu’un autre appel entrant est reçu depuis un interphone ou une caméra pendant une conversation, une surveillance ou la
8. . Opérations en cas d’appel entrant
réception d’un appel entrant avec le moniteur principal, la sonnerie retentit et des notifications sont reçues comme suit.
Exemple : En cas d’appel entrant depuis l’interphone 2 pendant une conversation avec l’interphone 1.
Exemple : En cas d’appels entrants depuis l’interphone 1 et la caméra 2 pendant une surveillance avec la caméra 1.
Exemple : En cas d’appel entrant depuis un interphone ou une caméra pendant des appels intercom.
Ecran principal
Bouton d’interphone indiquant un nouvel appel entrant (l’exemple illustre un appel entrant depuis l’interphone 2)
– En effleurant ce bouton, vous pouvez afficher l’image de l’appel entrant sur l’écran principal.
Bouton de caméra indiquant un nouvel appel entrant (l’exemple illustre un appel entrant depuis la caméra 2)
– En effleurant ce bouton, vous pouvez afficher l’image de l’appel entrant sur l’écran principal.
Ecran secondaire indiquant un nouvel appel entrant (l’exemple illustre un appel entrant depuis l’interphone 1)
– Un effleurement de l’écran secondaire permet d’afficher l’image de l’écran secondaire sur l’écran principal.
Bouton de notification d’appel entrant
Action en cours
Réception d’un appel
entrant en provenance
d’un interphone
Nouvel appel en-
trant depuis
Action suivante
Interphone L’affichage bascule vers le nouvel appel entrant, et l’appel entrant précédent
est interrompu.
Caméra L’appel entrant en cours en provenance de l’interphone s’affiche sur l’écran
principal, et le nouvel appel entrant en provenance de la caméra s’affiche sur
l’écran secondaire*1.
R Un effleurement de l’écran secondaire permet de commuter les images
affichées sur l’écran principal et l’écran secondaire.
Conversation ou surveillance via un interphone
Interphone Le numéro de l’interphone à l’origine de l’appel entrant s’affiche sur le bouton
tactile (B).
R Lorsque le bouton B est effleuré, le nouvel appel entrant s’affiche à
l’écran, et l’appel ou la surveillance en cours est interrompu(e).
Caméra L’appel entrant en provenance de la caméra s’affiche sur l’écran secondai-
re*1.
R Pendant une conversation avec l’interphone :
– Un effleurement de l’écran secondaire permet de commuter les ima-
ges affichées sur l’écran principal et l’écran secondaire. (Vous pouvez continuer la conversation avec l’appel initial après la commutation des images.)
R Pendant une surveillance avec l’interphone :
– Lorsque l’écran secondaire est effleuré, le nouvel appel entrant de-
puis la caméra s’affiche et la surveillance en cours est interrompue.
31
Page 86

8. Opérations en cas d’appel entrant
Action en cours
Réception d’un appel
entrant en provenance
d’une caméra
Conversation ou surveillance via une caméra
Transfert des appels de
l’interphone
Pendant un appel intercom
Nouvel appel en-
trant depuis
Interphone L’appel entrant existant en provenance de la caméra s’affiche sur l’écran
secondaire, et le nouvel appel entrant en provenance de l’interphone s’affiche
sur l’écran principal.
R Un effleurement de l’écran secondaire permet de commuter les images
affichées sur l’écran principal et l’écran secondaire.
Caméra L’affichage bascule vers le nouvel appel entrant, et l’appel entrant précédent
est interrompu.
Interphone L’appel entrant en provenance de l’interphone s’affiche sur l’écran secon-
daire (D).
R Pendant une conversation avec la caméra :
– Un effleurement du bouton D permet de commuter les images affi-
chées sur l’écran principal et sur l’écran secondaire. (Vous pouvez
continuer la conversation avec l’appel initial après la commutation
des images.)
R Pendant une surveillance avec la caméra :
– Lorsque le bouton D est effleuré, l’écran affiche le nouvel appel en-
trant en provenance de l’interphone, et la surveillance en cours est
interrompue.
Caméra L’appel entrant peut être affiché via l’effleurement du bouton de caméra
(C)*2.
R Lorsque le bouton C est effleuré, le nouvel appel entrant s’affiche à
l’écran, et l’appel ou la surveillance en cours est interrompu(e).
Interphone Le bouton de notification d’appel entrant (E) s’affiche.
R Lorsque le bouton E est effleuré, le transfert est annulé et l’écran initial
de l’interphone est à nouveau affiché. Le numéro de l’interphone en provenance duquel l’appel est réalisé s’affiche sur un bouton tactile tel que
B.
R Lorsque le bouton B est effleuré, le nouvel appel entrant s’affiche à
l’écran, et l’appel ou la surveillance en cours est interrompu(e).
Caméra Le bouton de notification d’appel entrant (E) s’affiche.
R Lorsque le bouton E est effleuré, le transfert est annulé et l’écran initial
de l’interphone est à nouveau affiché. L’appel entrant en provenance de
la caméra s’affiche sur l’écran secondaire*1.
R Un effleurement de l’écran secondaire permet de commuter les images
affichées sur l’écran principal et l’écran secondaire. (Vous pouvez continuer la conversation avec l’appel initial après la commutation des images.)
Interphone ou ca-
méra
Le bouton de notification d’appel entrant (E) s’affiche.
R Lorsque le bouton E est effleuré, le nouvel appel entrant s’affiche à
l’écran, et l’appel intercom en cours est interrompu.
Action suivante
*1 Lorsque plusieurs appels entrants de caméra sont reçus, le dernier appel entrant reçu est prioritaire et s’affiche sur l’écran
secondaire.
*2 Lorsque plusieurs appels entrants de caméra sont reçus, le dernier appel entrant reçu est prioritaire et s’affiche sur le bouton
de caméra.
Remarques :
R L’affichage de l’écran secondaire peut être désactivé via un effleurement du bouton
.
8.2 En cas de réception d’un autre appel entrant - moniteur secondaire
Lorsqu’un autre appel entrant est reçu depuis l’interphone ou la caméra pendant une conversation, une surveillance ou la réception
d’un appel entrant avec le moniteur secondaire, des notifications sont reçues comme suit.
32
Page 87

8. Opérations en cas d’appel entrant
Action en cours
Réception d’un appel
entrant en provenance
d’un interphone ou
d’une caméra
Conversation ou surveillance via un interphone
ou une caméra, ou pendant un appel intercom
Nouvel appel en-
trant depuis
Interphone ou ca-
méra
Interphone ou ca-
méra
Action suivante
La sonnerie de l’interphone ou de la caméra retentit, et
clignote. (Reportez-vous à la page 13 pour en savoir plus sur l’écran.)
R Lorsque plusieurs appels entrants en provenance d’interphones sont re-
çus, l’appel entrant initial est interrompu et la priorité est accordée au
nouvel appel entrant qui s’affiche alors.
R Lorsqu’un appel entrant en provenance de l’interphone et de la caméra
est reçu, la priorité est accordée à l’appel entrant en provenance de
l’interphone qui s’affiche alors.
R Lorsque plusieurs appels entrants en provenance de caméras sont reçus,
l’appel entrant initial est interrompu et la priorité est accordée au nouvel
appel entrant qui s’affiche alors.
Pour parler au visiteur via l’interphone :
R Appuyez sur le bouton
Pour effectuer une surveillance avec l’interphone ou la caméra :
R
La sonnerie de l’interphone ou de la caméra retentit, et l’icône de l’appareil
à partir duquel l’appel entrant est réalisé s’affiche.
(Reportez-vous à la page 13 pour en savoir plus sur l’écran.)
Pour répondre à l’appel entrant :
® : Sélectionnez l’appareil. ® ( )
.
ou
R Appuyez sur le bouton .
– L’appel ou la surveillance initial(e) est interrompu(e), et l’image affi-
chée est modifiée.
– Appuyez sur le bouton
phone ou la caméra.
pour parler au visiteur via l’inter-
33
Page 88

9. Fonctions supplémentaires
9.1 Modification de l’affichage des images (réglages écran large/affichage
zoom et panoramique/inclinaison)
9. . Fonctions supplémentaires
Lors de l’affichage des images de l’interphone et de la caméra, il est possible de commuter entre l’écran large et l’affichage zoom,
et la position du zoom peut être modifiée à l’aide des fonctions panoramique et inclinaison.
Opération
Ecran large ® affichage zoom
Affichage de l’image entière ® affichage
zoom
Affichage zoom ® écran large
Affichage de l’image entière ® écran large
Ecran large ® affichage de l’image entière
Panoramique/inclinaison Effleurez la section à visualiser.
– Reportez-vous à la page 15 pour obtenir un aperçu de l’écran large, de l’affichage zoom et de l’affichage de l’image entière.
Remarques :
R En raison de l’utilisation d’un zoom numérique, la qualité d’image de l’affichage zoom est inférieure à celle de l’écran large ou
de l’affichage de l’image entière.
R Lorsque les images sont enregistrées en mode affichage zoom, seules les zones affichées sont enregistrées.
R Lorsque le moniteur principal est utilisé, les fonctions panoramique et inclinaison ainsi que les modes écran large, affichage
zoom et affichage de l’image entière peuvent être activés même pendant la lecture d’images enregistrées.
R Même si l’affichage est modifié, les réglages configurés sont rétablis lorsque l’image suivante est affichée.
– Pour modifier l’affichage initial des images de surveillance et des appels interphone, modifiez le réglage du paramètre
[Réglages écran large/zoom] ou [Param. position zoom]. (® page 15)
– Les images des appels entrants, les images de surveillance et les images enregistrées depuis la caméra peuvent
uniquement être affichées en mode écran large initialement.
Effleurez la section à élargir.
( )
–
( )
–
–
9.2 Réglages audio et vidéo pour la conversation et la surveillance
Les réglages audio et vidéo peuvent être configurés pour la conversation et la surveillance avec des interphones et des caméras.
Etat Réglages sonores modifiables Réglages vidéo modifiables
Conversation ou surveillance via un interphone
Conversation ou surveillance via une
caméra
*1 Il s’agit du volume sonore audible à l’extérieur, au niveau de l’interphone, pendant une conversation via l’interphone. (Ce
réglage peut uniquement être modifié par le moniteur principal.)
*2 Peut également être modifié en cas d’appel entrant en provenance de l’interphone.
*3 Peut également être modifié en cas d’appel entrant en provenance de la caméra.
34
R Volume de réception des appels en-
trants
R Volume vocal du propriétaire (voix
en sortie sur l’interphone)
R Fonction de masque vocal (permet
de rendre la voix en sortie de l’interphone plus grave)
R Volume de réception des appels en-
trants
*1
R Eclairage des voyants LED de l’in-
terphone (activation/désactivation
manuelle)
R Compensation de contre-jour de
l’interphone
R Réglages de luminosité
R Réglages de luminosité
*2
*2
*2
*3
Page 89

9. Fonctions supplémentaires
Configuration (configurez les paramètres comme suit pendant une conversation ou une surveillance.)
: Effleurez ® [Son] ou [Affichage]*1 ® configurez les paramètres à modifier (reportez-vous au tableau suivant).
*1 [Son] et [Affichage] ne s’affichent pas pendant une conversation ou une surveillance via caméra.
: ( ) ® configurez les paramètres à modifier (reportez-vous au tableau suivant).
Effleurez [Volume récepteur], puis réglez le volume en effleurant [–] (Moins fort) ou [+]
Modification du volume
de réception des appels
entrants
(Plus fort).
: "Volume" ® ( ) ® : Réglez le volume.
Modification du volume
de la voix du propriétaire
(voix en sortie sur l’inter-
*1
phone)
Utilisation du masque
*1
vocal
Activation ou désactivation des voyants LED de
l’interphone
Utilisation de la compensation de contre-jour
pour les images de l’in-
terphone
Modification de la luminosité de l’écran
*1
*1
Effleurez [Volume vocal du propriétaire] puis réglez le volume en effleurant [Silencieux] ou [Normal].
Effleurez [Modificateur de voix] ® [Activé].
: "Modificateur voix" ® ( )
Effleurez [Éclairage], puis effleurez [Activé] ou [Désactivé].
: "Éclairage" ® ( ) ® : Sélectionnez le réglage souhaité.
Effleurez [Compensation du rétroéclairage], puis
réglez la compensation de contre-jour à l’aide du
bouton [–], [Désactivé] ou [+].
: "Rétroécl." ® ( ) ® :
Réglez la correction de rétroéclairage.
Effleurez [Luminosité], puis réglez la luminosité en effleurant [–] (Plus sombre) ou [+]
(Plus lumineux).
: "Luminosité" ® ( ) ® : Réglez la luminosité.
R [–] : à utiliser lorsque les visa-
ges sont trop clairs (assombrit
les images)
R [Désactivé] : désactive la
compensation de contre-jour
R [+] : à utiliser lorsque les visa-
ges sont trop sombres (éclaircit les images)
*1 Peut uniquement être configuré pendant une conversation ou une surveillance avec l’interphone.
9.3 Réglages de sonnerie
9.3.1 Réglages de type de sonnerie
Vous pouvez modifier la sonnerie émise lors de la réception d’appels en provenance de l’interphone ou de la caméra. (La sonnerie
de l’appel intercom ne peut pas être modifiée.)
– Pour en savoir plus sur la configuration des réglages, reportez-vous à la page 37 pour le moniteur principal, et à la
page 39 pour le moniteur secondaire.
35
Page 90

9. Fonctions supplémentaires
9.3.2 Réglages de volume de sonnerie
Le volume de la sonnerie des appels interphone, des appels de caméra et du bipage peuvent être modifiés.
: Reportez-vous à la page 37.
: Effectuez la procédure suivante.
1 Lorsque l’écran d’information s’affiche, sélectionnez l’élément pour lequel le volume doit être modifié à l’aide du bouton
, puis appuyez sur le bouton ( ).
2
: Réglez le volume.
3 Pour mettre fin à l’opération, appuyez sur le bouton
*1
Pour couper le son, appuyez sur le bouton
bipage ne peut pas être désactivé.)
– Pour réactiver le son, appuyez sur le bouton
*1
.
et maintenez-le enfoncé jusqu’à ce que s’affiche. (Le volume du
.
9.4 Liste des réglages de fonctions - moniteur principal
Vous pouvez modifier les réglages pour les adapter à la façon dont le moniteur principal est utilisé.
Comment modifier les réglages
1. Dans le menu supérieur, effleurez
2. Effleurez le nom de l’élément, le nom de la fonction et le contenu du réglage.
R Selon la fonction, il peut être nécessaire de répéter la procédure.
3. Pour mettre fin à l’opération, appuyez sur le bouton
Remarques :
R L’écran de fonction de réglage disparaît automatiquement en cas de réception d’un appel entrant ou si aucune opération n’a
lieu pendant environ 90 secondes.
R Dans le tableau suivant, < > indique les réglages par défaut.
Nom de l’élément : Réglages initiaux
® .
.
Sous-menu
1 2 3
Réglages d’heure et de
*1
date
Format affich. heure – – <12h>, 24h
Définir jr pour 1er jr se-
maine
Param. position zoom Interphone 1 - 2 – –
Réglages écran large/
zoom
Interphone 1 - 2 Si des visiteurs se
– – 2013-1-1 0:00
– – Dimanche, <Lundi>
Zoom, <Large>, Tout
présentent/Pendant la surveillance
36
Réglages
Pour obtenir
des informations détaillées,
reportez-vous à
la page 15.
Page 91

9. Fonctions supplémentaires
Sous-menu
Réglages
1 2 3
Fréquence d’alimentation – – <50 Hz>, 60 Hz
R Pour éviter l’affichage de colorations mouchetées
ou inégales, choisissez la fréquence d’alimentation électrique appropriée pour votre région.
Sélection langue
*1
Lors de la première utilisation du produit, suivez les instructions qui s’affichent à l’écran pour configurer ce paramètre. (®
page 15)
Nom de l’élément : Sonnerie
Volume de la sonnerie Interphone <Fort>, Normal, Silencieux, Muet
Sonnerie Interphone 1 <Son 1>, Son 2, Son 3, Son 4 <Normal>, Répéter
*1
Sous-menu
1 2
Caméra <Fort>, Normal, Silencieux, Muet
Page <Fort>, Normal, Silencieux
Interphone 2 Son 1, <Son 2>, Son 3, Son 4 <Normal>, Répéter
Caméra 1 - 4 <Son A>, Son B, Son C, Son D
– – <English>, Français, Deutsch, Italiano, Español, Ne-
derlands
Réglages
Nom de l’élément : Enregistrement/lecture
Sous-menu
Réglages
1 2
Enreg. appels Interphone 1 - 2/
Caméra 1 - 4
Supprimer toutes les images
Nom de l’élément : Carte SD
Sous-menu
1 2
Formater – Oui, Non
Copier sur carte SD – Oui, Non
Nom de l’élément : Appareils connectés
1 2 3
Caméra – – Pour obtenir des informations détaillées, repor-
Connexion de l’interpho-
*1
ne
Mémoire interne Oui, Non
Carte SD Oui, Non
Sous-menu
Interphone 1 – <Périphérique connecté>, Détection automatique,
Interphone 2 – Périphérique connecté, <Détection automatique>,
Activer, <Désactiver>
R Si vous souhaitez enregistrer les images et le son jusqu’à la fin des
appels (® page 21, 26), sélectionnez [Activer].
Réglages
Pour obtenir des informations détail-
lées, reportez-vous à la page 42.
Réglages
tez-vous à la page 27.
Appareil non connecté
Appareil non connecté
37
Page 92

9. Fonctions supplémentaires
Sous-menu
1 2 3
Réglages
Verrou électrique Interphone 1 - 2 Verrou porte élect/
Verrou portail
élect
Déverr. sonnerie – <Activé>, Désactivé
Connexions du répétiteur Les répétiteurs
sont connectés
séparément :
Répétiteur 1 - 2
Les répétiteurs
sont connectés
ensemble :
Répétiteur(connectés ensemble)
Éclairage automatique Interphone 1 - 2 Si des visiteurs se
présentent/Pendant la surveillance
*1 Sélectionnez [Appareil non connecté] pour les interphones qui ne sont plus utilisés.
Nom de l’élément : Enregistrer/annuler
Sous-menu
1 2
– <Station d’écran secondaire>,
<Pas de connexion>, Déverr. pdt
1 s - Déverr. 7 sec
Caméra
<Activer>, Désactiver
R Ce paramètre vous permet de définir si les voyants
LED doivent ou non être automatiquement activés
lorsque la zone autour de l’interphone est sombre.
Réglages
Pour obtenir
des informa-
tions détaillées,
reportez-vous à
la page 30.
Pour en savoir
plus sur la connexion des répétiteurs, reportez-vous à
la page 40.
Enregistrer Station d’écran
secondaire/Ca-
Annuler Méthode d’annulation : Station d’écran secondaire, Caméra et Répétiteur
Nom de l’élément : Autre
Sous-menu
1 2
Son au toucher – <Activé>, Désactivé
Initialiser les réglages
Mode démo – Utilisez ce réglage uniquement si le produit est utilisé dans le cadre d’une
*1 Les réglages suivants ne sont pas initialisés.
– Réglages [Fréquence d’alimentation], [Sélection langue], [Verrou électrique], [Connexions du répétiteur] et [Caméra].
– Informations relatives à l’enregistrement des appareils enregistrés auprès du moniteur principal. (Tous les appareils
restent enregistrés auprès du moniteur principal, même après réinitialisation.)
méra/Répétiteur
*1
– Initialiser param.+ Suppr. images, Initialiser uniquement les réglages
Méthode d’enregistrement : Station d’écran secondaire et Répétiteur ®
page 40 et 41, Caméra ® page 24
® page 41
Réglages
R Sélectionnez [Initialiser param.+ Suppr. images] en cas de mise au re-
but, de cession ou de retour du produit.
présentation commerciale.
Activé, Carte SD spéciale requise, <Désactivé>
9.5 Liste des réglages de fonctions - moniteur secondaire
Vous pouvez modifier les réglages pour les adapter à la façon dont le moniteur secondaire est utilisé.
38
Page 93

Comment modifier les réglages
1. Sur l’écran d’information, appuyez sur le bouton ( ).
9. Fonctions supplémentaires
2.
3.
4. Pour mettre fin à l’opération, appuyez sur le bouton
Remarques :
R L’écran de fonction de réglage disparaît automatiquement en cas de réception d’un appel entrant ou si aucune opération n’a
R Dans le tableau suivant, < > indique les réglages par défaut.
: Sélectionnez le nom de la fonction. ® ( )
: Sélectionnez le contenu du réglage. ® ( )
R Pour régler "Contraste", utilisez
R Pour exécuter "Initialiser", appuyez sur le bouton (Oui). (L’initialisation est terminée lorsque l’écran s’éteint.)
lieu pendant environ 60 secondes.
Sous-menu
1 2
Sonnerie Interphone 1 <Son 1>, Son 2, Son 3, Son 4 <Normal>, Répéter
Interphone 2 Son 1, <Son 2>, Son 3, Son 4 <Normal>, Répéter
Caméra 1 - 4 <Son A>, Son B, Son C, Son D
Son des touches – <Activé>, Désactivé
Contraste – Le contraste peut être ajusté sur 5 niveaux différents (niveau de réglage :
Enregistrer – Oui, Non
Initialiser – Oui, Non
puis appuyez sur ( ).
.
Réglages
niveau 3). Lorsque la visualisation de l’écran du moniteur s’avère difficile,
réglez le contraste comme nécessaire.
R Utilisé lors de l’enregistrement de moniteurs secondaires auprès du mo-
niteur principal.
– Le moniteur secondaire fourni est pré-enregistré auprès du moniteur
principal.
– Reportez-vous à la page 40 pour en savoir plus sur le ré-enregis-
trement de moniteurs secondaires annulés.
R Le moniteur secondaire reste enregistré auprès du moniteur principal
même en cas de réinitialisation de ses réglages. (Les informations relatives à l’enregistrement ne sont pas effacées.)
39
Page 94

10. Informations générales
10.1 Enregistrement de moniteurs
secondaires
10. . Informations générales
Des moniteurs secondaires supplémentaires (accessoires
supplémentaires, ® page 4) peuvent être enregistrés et utilisés
avec ce produit.
10.1.1 Enregistrement d’un moniteur secondaire
auprès du moniteur principal
répétiteur ne peut cependant pas envoyer des signaux à la
fois aux moniteurs secondaires et aux caméras.
R La portée du signal varie en fonction de facteurs tels que
la structure des pièces ou le type de cloisons. Après avoir
enregistré les appareils auprès du moniteur principal (®
page 41), reportez-vous au Guide de démarrage du
répétiteur pour en savoir plus sur les lieux d’installation
appropriés.
Exemple d’installation de répétiteurs et de portée du signal
1
2
: Dans le menu supérieur, effleurez
® [Enregistrer/annuler] ® [Enregistrer] ® [Station
d’écran secondaire] ® sélectionnez le numéro du moniteur
secondaire à enregistrer.
R Une fois cette opération terminée, utilisez le moniteur
secondaire et effectuez la procédure ci-après dans un
délai de 2 minutes environ.
*1
: Lorsque le message "Enregistrez le périphérique."
s’affiche sur l’écran du moniteur secondaire, appuyez sur
( ) ® (Oui).
R "Enregistrement terminé" s’affiche.
®
3 : Appuyez sur le bouton .
*1 Pour ré-enregistrer des moniteurs secondaires annulés :
( ) ® : "Enregistrer" ®
( ) ® (Oui)
Utilisation de répétiteurs connectés séparément
Une telle installation permet d’augmenter la portée des signaux
émis par le moniteur principal. Les signaux étant émis via le
moniteur principal, différents types d’appareils peuvent être
connectés à chaque répétiteur. (Par exemple, les moniteurs
secondaires peuvent être connectés à un répétiteur, et les
caméras à un autre répétiteur.) Ceci s’avère utile pour
connecter différents types d’appareils sur des distances
réduites.
Sans répétiteur :
Avec répétiteurs :
10.2 Utilisation de répétiteurs
Si le moniteur secondaire ou la caméra sont utilisés loin du
moniteur principal, ou en cas de présence d’obstacles (®
page 7) entre le moniteur secondaire ou la caméra et le
moniteur principal, les problèmes suivants sont susceptibles de
se produire. Dans les cas suivants, l’utilisation d’un répétiteur
(accessoire supplémentaire, ® page 4) peut améliorer les
transmissions entre les appareils.
– les appels avec le moniteur secondaire sont interrompus
et les images sont déformées
– les images de la caméra sont déformées ou les notifications
des capteurs de caméras ne sont pas reçues
– lorsque
la lampe du témoin de la caméra clignote en rouge, le
moniteur principal ne peut pas se connecter au moniteur
secondaire ou à la caméra
Remarques :
R Jusqu’à 2 répétiteurs peuvent être utilisés. Un même
répétiteur peut être utilisé pour envoyer des signaux à
plusieurs moniteurs secondaires ou caméras. Un même
40
s’affiche pour le moniteur secondaire ou que
Utilisation de 2 répétiteurs interconnectés
Une telle installation permet d’augmenter la portée des signaux
émis par le moniteur principal via l’envoi de signaux
directement entre les répétiteurs. Les signaux étant envoyés
entre les répétiteurs, le même type d’appareil doit être connecté
aux deux répétiteurs (uniquement des moniteurs secondaires
ou uniquement des caméras). Ceci s’avère utile lorsque vous
voulez connecter un même type d’appareils sur des distances
importantes.
Page 95

10. Informations générales
Sans répétiteur :
Avec répétiteurs :
10.2.1 Enregistrement d’un répétiteur auprès du
moniteur principal
1 : Dans le menu supérieur, effleurez ®
® [Enregistrer/annuler] ® [Enregistrer] ®
[Répétiteur] ® sélectionnez le numéro du répétiteur à
enregistrer.
2 Enregistrement du premier répétiteur :
Passez à l’étape 3.
Enregistrement du deuxième répétiteur :
Sélectionnez la méthode de connexion en fonction de
l’utilisation souhaitée du répétiteur. (® page 40)
R Si la méthode [Connecté ensemble] est sélectionnée,
passez à l’étape 5.
3 Effleurez [Suivant].
4 Sélectionnez l’appareil auquel le répétiteur doit se
connecter.
R Une fois cette opération terminée, utilisez le répétiteur
et effectuez la procédure ci-après dans un délai de
2 minutes environ.
5 : Connectez l’alimentation électrique du répétiteur à
enregistrer, puis appuyez sur le bouton PROGRAM (A)
pendant 3 secondes environ.
R Le voyant
B
R Le voyant s’allume une fois l’enregistrement terminé.
(En fonction de l’état du signal, il est possible que le
voyant ne s’allume pas en vert. Le cas échéant,
reportez-vous au Guide de démarrage du répétiteur.)
(B) clignote en vert.
ID
A
6 : Appuyez sur le bouton .
Remarques :
R En cas d’utilisation d’appareils dans des bâtiments séparés
ou sur des distances importantes, il est possible qu’un
répétiteur ne permette pas d’améliorer les coupures et les
déformations des images.
10.3 Annulation de moniteurs
secondaires, de caméras et de
répétiteurs
– L’annulation peut uniquement être réalisée sur le moniteur
principal.
1 Dans le menu supérieur, effleurez ®
® [Enregistrer/annuler] ® [Annuler] ® sélectionnez le type
d’appareil à annuler.
2 Sélectionnez l’appareil à annuler dans la liste qui s’affiche.
R Annulation de répétiteurs :
Lorsque 2 répétiteurs sont connectés l’un à l’autre, seul
l’appareil installé le plus loin du moniteur principal peut
être annulé.
3 Vérifiez le message, puis effleurez [Oui].
R Un signal sonore retentit et "Annulation terminée"
s’affiche.
4 Pour mettre fin à l’opération, appuyez sur le bouton
.
Important :
R Pour éviter des opérations incorrectes, retirez les piles
des moniteurs secondaires annulés.
41
Page 96

DCIM/100_D501
A
DRI_0001.JPEG
A B
10. Informations générales
10.4 Utilisation de cartes SD
(formatage/copie de données/lecture
d’images)
Formatage :
Les cartes SD formatées à l’aide d’ordinateurs ou d’autres
appareils doivent être reformatées à l’aide du moniteur principal
avant de pouvoir être utilisées.
Copies d’images enregistrées (mémoire interne ® cartes
SD)
Un maximum de 50 images enregistrées sur le moniteur
principal peut être copié en une même opération.
R Les données copiées sont enregistrées dans le dossier
"BACKUP" du dossier "PRIVATE" sur la carte SD (®
page 43). Si les données sont à nouveau copiées sur la
même carte SD, toutes les données enregistrées déjà
sauvegardées dans le dossier "BACKUP" sont écrasées.
R Les données copiées peuvent uniquement être lues sur un
ordinateur, et non sur le moniteur principal.
Procédure (moniteur principal uniquement)
1 Insérez la carte SD à formater ou dont vous voulez copier
les données enregistrées dans la fente de carte SD. (®
page 10)
2 Dans le menu supérieur, effleurez
® [Carte SD].
3 Pendant le formatage :
Effleurez [Formater], vérifiez le message, puis effleurez
[Oui].
Pendant la copie des données enregistrées :
Effleurez [Copier sur carte SD], vérifiez le message, puis
effleurez [Oui].
Important :
R Le voyant de carte SD clignote pendant le
formatage ou la copie. Ne retirez pas la carte SD et
n’appuyez pas sur le bouton RESET (® page 11)
pendant le clignotement du voyant.
4 Pour mettre fin à l’opération, appuyez sur le bouton
.
R Retirez la carte SD selon le besoin.
10.4.1 Lecture des images sur un ordinateur
®
– Les vidéos (au format Motion JPEG) peuvent être lues à
l’aide de l’application QuickTime Player. (Sur les
ordinateurs exécutés sous Windows® 7 ou Windows® 8,
les vidéos peuvent également être lues à l’aide de
l’application Windows Media® Player.)
Systèmes d’exploitation pris en charge*1 :
Windows® XP/Windows Vista®/Windows® 7/Windows® 8/Mac
OS® X
*1 Il est possible que les images et les vidéos ne puissent
pas être correctement visualisées, en fonction de la
compatibilité du visualiseur ou du logiciel vidéo et du
système d’exploitation.
Comment visualiser des images :
Reportez-vous au mode d’emploi de l’ordinateur.
10.4.2 Structure de dossier de carte SD et formats
de fichiers
Lorsqu’une carte SD est insérée dans le moniteur principal, les
dossiers sont créés sur la carte SD. Les données directement
enregistrées sur la carte SD et les données copiées sur la carte
SD depuis la mémoire interne sont enregistrées dans des
dossiers distincts.
R Ne modifiez pas le nom des dossiers et ne supprimez pas
les dossiers à l’aide d’un ordinateur. (Le cas échéant, les
données ne peuvent pas être lues avec le moniteur
principal.)
R Les 3 types de fichiers suivants sont enregistrés sur la carte
SD.
– JPG : images fixes (format JPEG)
– MOV : vidéos (format Motion JPEG)
– TXT : données d’enregistrement (format texte)
Structure du dossier d’images enregistrées et formats de
fichiers en cas d’enregistrement direct des données sur
des cartes SD
Structure de dossier
Exemple :
Numéro de dossier (100 - 129)
R En cas d’utilisation de cartes SD avec des données
enregistrées à partir d’autres appareils, les numéros de
dossiers 100 - 999 sont disponibles.
Format de fichier
Exemple :
Lorsqu’une carte SD est insérée dans la fente de carte SD d’un
ordinateur ou d’un lecteur de cartes SD connecté à un
ordinateur, les images enregistrées sur la carte SD (images
fixes et vidéos) peuvent être lues sur l’ordinateur.
– Les images fixes (au format JPEG) peuvent être
visualisées à l’aide d’un logiciel de visualisation prenant en
charge le format JPEG.
42
Nom de l’appareil depuis lequel l’image a été enregistrée
R DR1 - DR2 : Interphone 1 - 2
R CM1 - CM4 : Caméra 1 - 4
Page 97

PRIVATE/PANA_GRP/DOOR/BACKUP/20141013
A
13450000.TXT
A C
B
10. Informations générales
Numéro de fichier
R 1 image est enregistrée sous chaque numéro.
R Les numéros de fichier 0001 à 0100 sont créés dans
chaque dossier.
La structure de dossier et les types de fichier des données
copiées sur la carte SD depuis la mémoire interne du
moniteur principal
Structure de dossier
Exemple :
Date d’enregistrement (Exemple : 13 octobre 2014)
Format de fichier
Exemple :
Heure d’enregistrement (Exemple : 13:45)
Compteur (00 - 49)
Numéro d’enregistrement de chaque fichier enregistré
R 00 : indique les fichiers contenant des informations sur
l’enregistrement
R 01 - 08 : indique le numéro de l’image sur un total de
8 images
nettoyer le moniteur principal. (Appuyez sur
une fois l’opération terminée.)
– Utilisez un chiffon doux et sec pour nettoyer le panneau
tactile, en veillant à ne pas en rayer la surface.
10.6 Spécifications
Moniteur principal (VL-MWD501EX)
Source d’alimentation
Consommation
électrique
Dimensions (mm)
(hauteur ´ largeur
´ profondeur)
Masse (Poids) 470 g environ
Environnement de
fonctionnement
Affichage Ecran large couleur de 5 pouces en-
Méthode de conversation
Méthode d’installation
Plage de fréquen-ce1,88 GHz à 1,90 GHz
Module d’alimentation (VL-PS240)
24 V cc, 0,5 A
En mode de veille : 1,4 W environ
En cours de fonctionnement : 10 W
environ
180´165´21 environ
(parties saillantes exclues)
Température ambiante : de 0 °C à
+40 °C environ
Humidité relative (sans condensation) : jusqu’à 90 %
viron
Mains libres
Montage mural (support de montage fourni)
10.5 Nettoyage
Essuyez le produit à l’aide d’un chiffon doux et sec.
En cas d’encrassement excessif, essuyez le produit avec un
chiffon légèrement humidifié.
Important :
R N’utilisez aucun produit de nettoyage contenant de
l’alcool, de la poudre de polissage, du savon en
poudre, du benzène, du diluant, de la cire, du pétrole,
ni d’eau bouillante. Ne vaporisez pas non plus
d’insecticide, de lave-vitres ou de laque capillaire sur
le produit. Un changement de couleur ou de qualité du
produit risquerait en effet de se produire.
Nettoyage du chargeur :
Par sécurité, débranchez le chargeur de l’alimentation
électrique avant de le nettoyer.
Nettoyage du moniteur secondaire :
Pour éviter une activation accidentelle du moniteur secondaire,
retirez ses piles avant de le nettoyer.
Nettoyage du panneau tactile du moniteur principal :
Dans le menu supérieur, effleurez
– L’écran "Nettoyage du panneau tactile" s’affiche pendant
90 secondes environ. Pendant ce temps, vous pouvez
® .
Sortie optionnelle
(contact en A)
R Cartes SD compatibles
Il est possible d’utiliser les cartes SD suivantes conformes
aux normes SD (nous recommandons les cartes SD
fabriquées par Panasonic).
– Types de cartes SD prises en charge
Carte mémoire SD*2 : 2 Go
Carte mémoire SDHC*3 : 4 Go - 32 Go
Carte mémoire SDXC : 48 Go et 64 Go
– Format
Carte mémoire SD : FAT16
Carte mémoire SDHC : FAT32
Carte mémoire SDXC : exFAT
*1 Reportez-vous à la page 20 pour obtenir un guide sur les
capacités des cartes SD et sur le nombre
d’enregistrements possibles sur ces cartes.
Charge nominale :
24 V ca/cc, 0,3 A maximum
Charge minimale applicable :
5 V cc, 0,001 A
(Sortie réalisée en cas d’appel par
interphone (® page 17).)
*1
43
Page 98

10. Informations générales
*2 Les cartes mémoire miniSD et microSD peuvent
également être utilisées. Un adaptateur est cependant
requis.
*3 Les cartes mémoire miniSDHC et microSDHC peuvent
également être utilisées. Un adaptateur est cependant
requis.
Module d’alimentation (VL-PS240) (utilisation à l’intérieur
uniquement)
Source d’alimentation
Entrée : 220-240 V ca, 0,2 A,
50/60 Hz
Sortie : 24 V cc, 0,6 A
Dimensions (mm)
(hauteur ´ largeur
Environ 116´100´54 (parties saillantes exclues)
´ profondeur)
Masse (Poids) 230 g environ
Environnement de
fonctionnement
Température ambiante : de 0 °C à
+40 °C environ
Humidité relative (sans condensation) : jusqu’à 90 %
Méthode d’instal-
Fixation à un rail DIN
lation
Interphone (VL-V554EX/VL-V554UEX)
Source d’alimentation
Alimentation électrique fournie par
le moniteur principal
20 V cc, 0,23 A
Dimensions (mm)
(hauteur ´ largeur
´ profondeur)
VL-V554EX : 169´118´30 environ
(parties saillantes exclues)
VL-V554UEX : 169´118´16,5 envi-
ron (à l’exclusion des parties saillantes incorporées dans le mur)
Masse (Poids) VL-V554EX : environ 405 g
VL-V554UEX : environ 345 g
Environnement de
fonctionnement
Température ambiante : de -10 °C à
+50 °C environ
Humidité relative (sans condensation) : jusqu’à 90 %
Angle de prise de
vue
Méthode d’installation
Horizontal : 170° environ
Vertical : 115° environ
VL-V554EX : montage apparent
(base de montage fournie)
VL-V554UEX : montage encastré
(boîtier encastré fourni)
Eclairage minimal
requis
1 lx
(à environ 50 cm de l’objectif de la
caméra)
Méthode d’éclaira-geVoyants LED
Classement IP
IP54
*1
Classement IK Conforme à la norme IK07
*1 La résistance à l’eau est assurée uniquement si
l’interphone est correctement installé, conformément aux
instructions figurant dans le Guide d’installation, et si des
mesures appropriées de protection contre l’eau sont en
place.
Moniteur secondaire (VL-WD613EX)
n Boîtier principal
Source d’alimentation
Dimensions (mm)
(hauteur ´ largeur
Piles Ni-MH rechargeables (AAA ´
2)
173´52´30 environ
(parties saillantes exclues)
´ profondeur)
Masse (Poids) 160 g environ (piles incluses)
Environnement de
fonctionnement
Température ambiante : de 0 °C à
+40 °C environ
Humidité relative (sans condensation) : jusqu’à 90 %
Affichage Affichage couleur 2,2 po environ
Plage de fréquen-ce1,88 GHz à 1,90 GHz
Méthode de con-
Mains libres
versation
Durée de fonction-
*1
nement
Temps de char-
*2
ge
Plage de transmis-
sion
En mode de veille : 80 heures environ
8 heures environ
100 m environ (distance en ligne
droite depuis le moniteur principal)
*1 En cas d’utilisation complètement chargé par température
de fonctionnement de 20 °C.
*2 Avec une température de fonctionnement de 20 °C. Le
temps de charge peut être supérieur avec une
température de fonctionnement inférieure à cette valeur.
n Chargeur
Source d’alimentation
Adaptateur secteur (PNLV226CE/
PNLV226E)
Entrée : 220-240 V ca, 0,1 A,
50/60 Hz
Sortie : 5,5 V cc, 0,5 A
Consommation
électrique
En mode de veille : 0,4 W environ
(lorsque le moniteur secondaire
n’est pas placé sur le chargeur)
Pendant la charge : 1,4 W environ
Dimensions (mm)
(hauteur ´ largeur
43´81´76 environ
(parties saillantes exclues)
´ profondeur)
Masse (Poids) Environ 70 g (hors adaptateur sec-
teur)
Environnement de
fonctionnement
Température ambiante : de 0 °C à
+40 °C environ
Humidité relative (sans condensation) : jusqu’à 90 %
44
Page 99

Remarques :
R La conception et les spécifications du produit sont
susceptibles d’être modifiées sans préavis.
10. Informations générales
45
Page 100

11. Dépannage
11.1 Dépannage
Ecran du moniteur (images de l’interphone)
11. . Dépannage
Problème Cause et solution Page
Les images semblent déformées.
L’arrière-plan est verdâtre. R La nuit ou lorsque la luminosité est faible dans la zone située autour de
La nuit, les images sont
sombres et les visages ne
sont pas identifiables.
Les images des visages des
personnes sont sombres.
Les images sont sales ou ne
sont pas nettes.
R Les images sont floues.
Les images sont blanches
ou noires.
Les images sont blanches,
ou des lignes ou des cercles
blancs apparaissent à
l’écran.
Les images scintillent. R Un éclairage CA (courant alternatif) tel que des lumières fluorescentes est
Les images de la zone que
vous souhaitez visualiser
dans l’écran de zoom ne
s’affichent pas correctement.
Les images affichées par le
moniteur secondaire sont
déformées ou sont affichées
lentement. (5 secondes ou
plus sont nécessaires pour
leur affichage.)
R Les images peuvent sembler déformées en raison des caractéristiques de
l’objectif de la caméra. Ceci n’est pas un dysfonctionnement.
l’interphone, les lumières ou les objets blancs à proximité de l’interphone peuvent avoir une apparence verdâtre. Ceci n’est pas un dysfonctionnement.
R [Éclairage automatique] est réglé sur [Désactiver].
→ Modifiez le réglage en le définissant sur [Activer].
R Même lorsque les voyants LED de l’interphone sont allumés, il est possible
que les visages des personnes ne soient pas identifiables même lorsque ces
personnes sont proches de l’interphone, car la lumière des voyants LED
n’éclaire pas les bords de la zone visible (les zones situées directement à côté
de l’interphone).
→ Nous vous recommandons d’installer un éclairage supplémentaire dans
la zone autour de l’interphone.
R Les images des visages des personnes sont sombres en cas d’ensoleillement
ou de contre-jour important dans la zone autour de l’interphone.
→ Utilisez la fonction de compensation de contre-jour.
R L’objectif de l’interphone est sale.
→ Essuyez l’objectif avec un chiffon doux et sec.
R De la condensation d’eau est présente sur l’objectif de l’interphone.
→ Attendez l’évaporation de la condensation.
R La luminosité de l’écran n’est pas correctement réglée.
→ Réglez la luminosité pendant l’affichage des images.
R Une lumière forte, comme la lumière directe du soleil, se reflète dans l’objectif
de l’interphone, rendant ainsi difficile la visualisation des images à l’écran.
(Ceci n’est pas un dysfonctionnement.)
→ Le positionnement de l’interphone à l’abri de la lumière directe du soleil
ou la modification de l’angle d’installation de l’interphone peut permettre
de réduire le problème.
utilisé à proximité de l’interphone.
→ L’éclairage CA (courant alternatif), tel que les lumières fluorescentes, peut
provoquer un scintillement dans les environnements sombres. (Ceci n’est
pas un dysfonctionnement.)
R Modifiez le réglage de position de zoom jusqu’à une position appropriée.
→ Configurez les paramètres [Param. position zoom].
R L’antenne du moniteur secondaire est couverte par votre main.
→ Ne la couvrez pas.
R Le moniteur secondaire est trop éloigné du moniteur principal, ou le signal est
bloqué par un objet tel qu’un mur en béton.
→ Approchez le moniteur secondaire du moniteur principal ou placez-le dans
une zone sans obstruction.
-
-
38
-
35
43
-
35
-
-
15
12
7
46
 Loading...