

Page 1
U/V Tuner Board for Asia
Operating Instructions
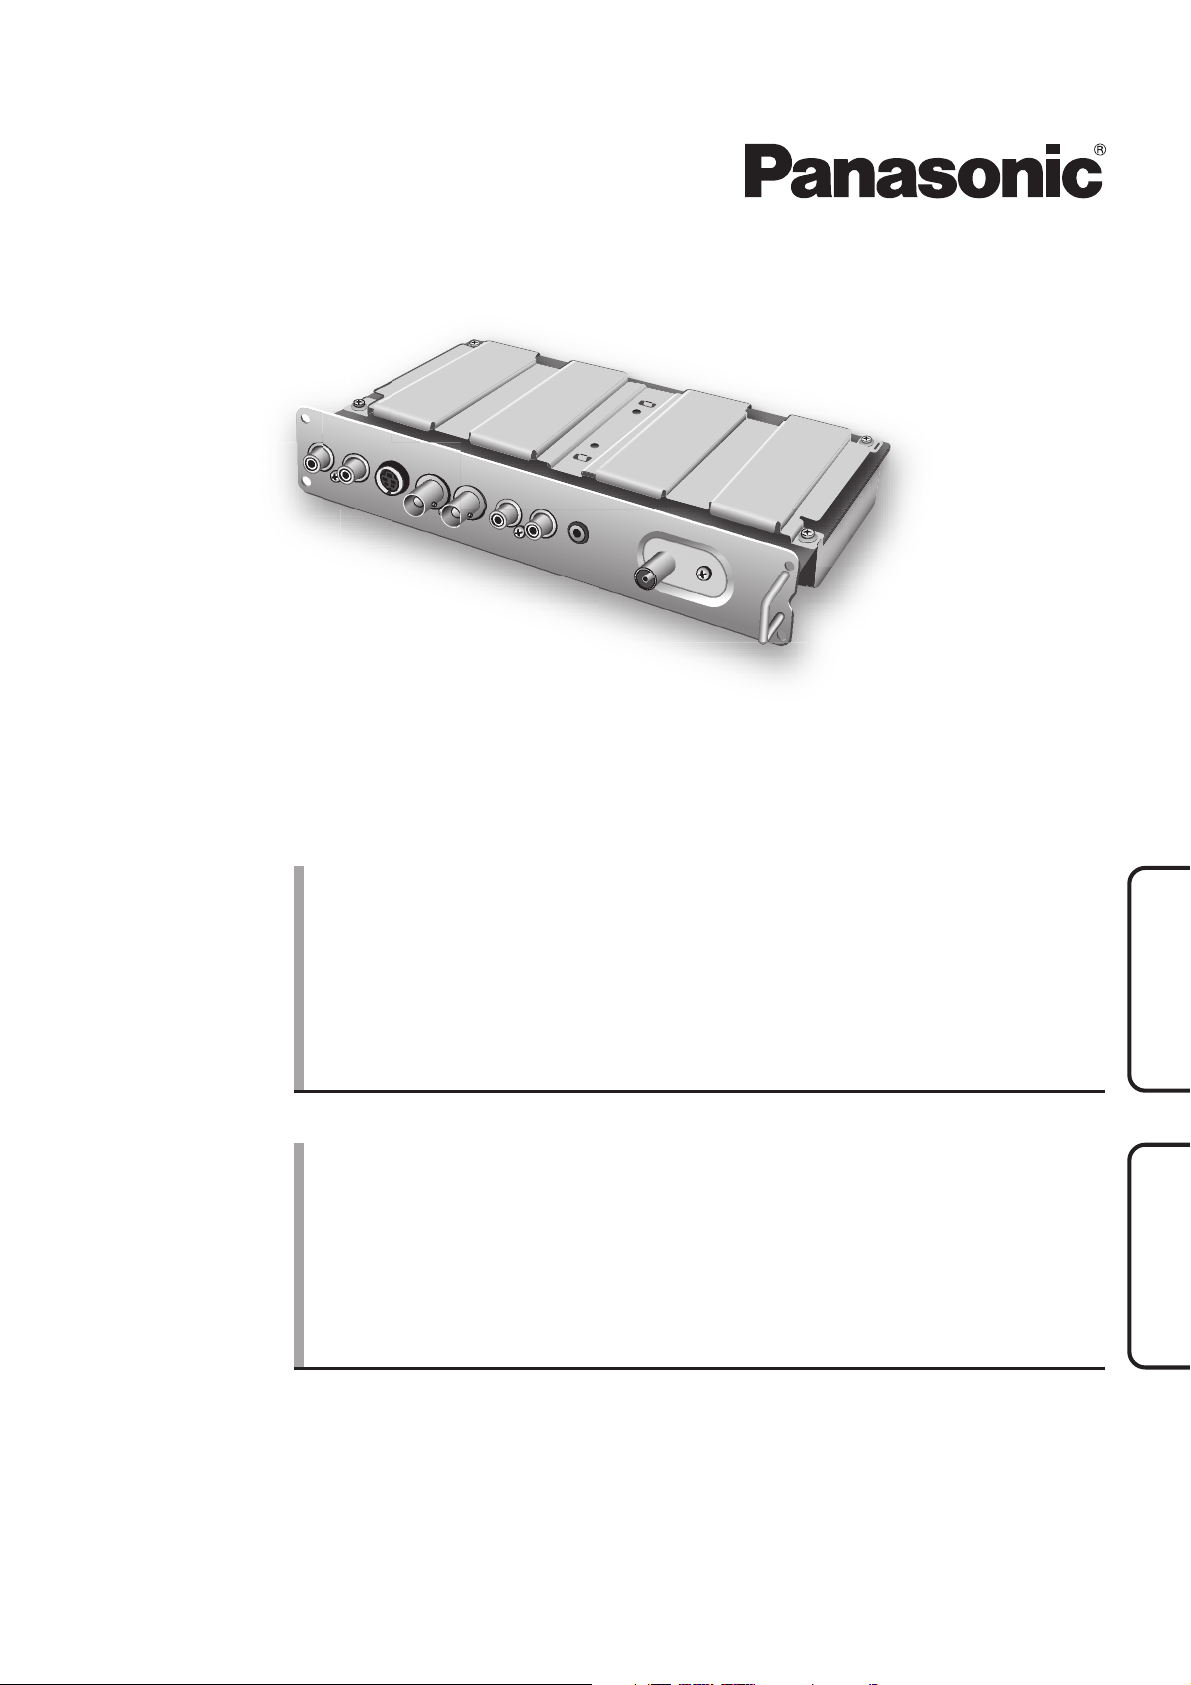
TY-FB7TA
Before connecting, operating or adjusting this product, please read these
instructions completely. Please keep this manual for future reference.
U/V Tuner Board for Asia
Operating Instructions
Before connecting, operating or adjusting this product, please read these
instructions completely. Please keep this manual for future reference.
English
English
TQZH581
Page 2

Contents
Features ..................................................................... 2
Safety Precautions ..................................................... 3
Handling Cautions ...................................................... 3
Accessories ................................................................ 3
Remote Control Batteries ........................................ 3
Installation .................................................................. 4
Antenna connection ................................................... 5
Power On / Off ........................................................... 5
Connections of external equipment............................ 6
Basic controls ............................................................. 7
Using the On Screen Displays ................................... 8
Tuning ........................................................................ 9
TUNING MENU ....................................................... 9
Channel Selection ................................................. 10
AUTO TUNE ......................................................... 11
MANUAL TUNE .................................................... 11
Channel Allocation ................................................ 12
Set up ....................................................................... 13
Owner ID .................................................................. 14
Aspect Controls ........................................................ 15
Still ........................................................................... 15
Multi window............................................................. 16
Teletext operation ..................................................... 17
Stereo / Bilingual Sound Selection ........................... 19
Troubleshooting ....................................................... 20
Specifications ........................................................... 20
Features
Can receive terrestrial analog broadcasting
English
You can install the U/V Tuner Board TY-FB7TA in the slot of the plasma display* and receive terrestrial
analog broadcasting.
Can connect various kinds of video equipment
You can connect a VCR or DVD to enjoy input video on the display, or transmit video to enjoy on a
connected monitor.
* Applicable models : TH-37PWD7∗, TH-42PWD7∗, TH-42PHD7∗, TH-50PHD7∗, TH-65PHD7
“∗” mark depends on the destination.
∗
2
Page 3

Safety Precautions
WARNING
• Never attempt to disassemble or modify this product.
To avoid fire, shock, or failure.
• If you sense smoke, an odd odor, or unusual noises while in operation, immediately unplug the display.
Switch off and unplug the plasma display from the supply outlet.
To avoid fire or shock, do not leave the power of the display turned on.
• To avoid shock or other problems, do not leave the display plugged into the supply outlet.
• Please contact our designated service department for installation or change of this product.
To Service personnel:
Before removing or installing the Terminal Board, be sure to turn the power of the display off and unplug
it from the supply outlet.
Handling Cautions
• Do not touch the connector contacts directly with hands.
To avoid electrostatic damage to internal parts, before handling this product, touch a large metallic object such as a
steel cabinet to discharge yourself before handling this product.
• Be sure to use the supplied cable or specified parts for interconnection.
To avoid malfunction or failure, do not use parts other than those recommended.
Accessories
Please check and identify the supplied accessories.
• Remote control
N2QAKB000053
• Screw ( × 4)
Remote Control Batteries
1. Open the cover.
2. Insert batteries. Note the correct
polarity (+ and -).
• Remote control
batteries
(2 × R6(AA) size)
• Operating Instructions
Precautions
Mishandling of batteries can cause electrolyte leakage which can
damage items the fluid contacts and may cause a fire.
• Do not mix old and new batteries.
• Do not use different types at the same time. (ex. zinc carbon and
alkaline)
• Do not heat or expose to flame.
• Do not take apart or short circuit.
• Do not attempt to recharge, short-circuit, disassemble, heat or burn
used alkaline or manganese batteries.
• Replace the batteries if the remote control does not work properly.
• Terminal function label (1 sheet)
Ir System
(Affix this label to the rear panel of the display.)
English
R6(AA) size
For your reference
Use alkaline batteries for longer life.
3
Page 4

Installation
Precautions
• Before installation
T
urn the power switch off and disconnect the power supply plug of the display. Disconnect all other plugs
connected to the display.
• Before removing, turn the power off with the tuner board’s remote control and then turn the main power of
the display off.
• When installing or removing the terminal board, exercise care to avoid injury.
There may be some sharp-pointed solder joints on the rear side of the board that could cause unexpected injury.
• When installing the board, fully insert the Board into the slot horizontally until it is firmly plugged into the
connector.
N
ote that incomplete insertion may damage the internal components.
Compatible slot Nos. are SLOT1 and SLOT2.
37 inch model
English
Foam mat or thick soft cloth
To remove
• Terminal function label
SLOT3 is not compatible.
SLOT1
42 / 50 / 65 inch model
SLOT1
To install
1.Remove the slot cover.
Securing screw
SLOT2
AUDIO
SLOT3
SLOT2
SLOT3
2.Insert the terminal board
until it is firmly plugged
into the connector.
Tighten screws in the
order 1 - 4 .
SERIALPC IN
AUDIO
SERIALPC IN
3.Affix the terminal
function label
(included).
Remove the slot cover. Grip
the handle of the terminal
board, and slowly pull out in
the direction of the arrow.
4
Ir System
• Make sure that the Board does not ride on the two lower claws.
• Be sure to fasten all screws tightly.
• Have the customer keep the removed Terminal Board for future servicing needs.
Page 5

Antenna connection
For proper reception of VHF / UHF channels, an external antenna is required. For best reception, an outdoor antenna
is recommended.
VHF Aerial UHF Aerial
VCR
Mixer
ANT INPUTANT OUTPUT
OR
75 Ω Coaxial cable
Notes:
• Do not put the Coaxial cable close to the Power cable to avoid noise.
• Do not place the Coaxial cable under the Display.
• Additional equipment, cables and adapter plugs shown are not supplied with this set.
• To obtain optimum quality picture and sound, an Aerial, the correct cable (75 Ω coaxial) and the correct terminating
plug are required.
• If a communal Aerial system is used, you may require the correct connection cable and plug between the wall Aerial
socket and your set.
• Your local Television Service Centre or Dealer may be able to assist you in obtaining the correct Aerial system for
your particular area and the accessories required.
• Any matters regarding Aerial installation, upgrading of existing systems or accessories required, and the costs
incurred, are the responsibility of you, the Customer.
Handling the antenna cable
To avoid noise in the video, hold the antenna cable correctly.
Back Back Front
Route away from
the display.
Do not route close
to the display.
Do not pass
around the front
of the display.
English
Power On / Off
Preparation
Connect the mains lead.
Press the
Owner ID setting screen is displayed. See page 14.
To switch the Display to Standby mode, press the
button on the remote control.
The Display can be switched on by pressing the
button again if it was switched to Standby mode.
Input signal selection
Press INPUT to select INPUT1 (Tuner Board).
switch on the Display to turn the set on.
switch
VOL
INPUTMENU
ENTER
+
R - STANDBY
G POWER ON
R - STANDBY
G POWER ON
Remote control
signal sensor
TUNER
5
Page 6

Connections of external equipment
It is possible to connect a variety of additional equipment to this set. The following pages detail how to connect
external equipment to the set.
Once your equipment is connected, use the following procedure to view the input:
Press the TV/AV button.
TV / AV1
Notes:
• Additional equipment and cables shown are not supplied with this set.
• This Video out terminal is available for S-Video signal.
Example of input signal source
VCR
S-VIDEO VCR
DVD PLAYER
CAMCORDER
VIDEO
OUT
S-VIDEO
OUT
AUDIO
OUT
Connect the S-VIDEO or VIDEO terminal.
L
R
TV/AV
S-VIDEO 4 pin terminal
Chrominance in
Chrominance earth
Luminance earth
TUNER
Luminance in
English
Example of output signal source
VCR
MONITOR
Amplifier to
speaker system
VIDEO
IN
AUDIO
IN
RCA-BNC adapter plug
Remote Control through out
L
terminal
When connecting the optional Ir
R
System (K2ZZ02C00006),
additional Panasonic equipment
can be operated with the remote
control turned to the Display.
The remote control of additional
Panasonic equipment also can
be used with it turned to the
Display.
6
Page 7

Basic controls
MENU button
Press to access the setup menu.
(see page 8, 9, 11, 13, 14)
Standby On / Off button
Switches Display On or Off
(Standby mode).
Surround On / Off
Switches on and off each time the
button is pressed.
Stereo / Bilingual Sound
Selection (see page 19)
Off timer button
Switches the set off within a preset
time which you can choose from
between 0 to 90 minutes in 30
minute intervals.
R-TUNE button
Press to switch to previously
viewed channel.
Coloured buttons used for the
selection, navigation and
operation of various functions.
Teletext button (see page 17-19)
Text F.P. button (see page 18)
Recall
Press to display the current system
status, for example, Programme
number, Channel number, Stereo
mode.
ASPECT control button
(see page 15)
Multi Window
(see page 16)
MENU
SURROUND
R-TUNE TV/AV
TV/TEXT INDEX HOLD
ASPECT SWAP SELECT
F. P.
MULT IPIP
INPUT
REC
DVD
OK
STILL
Cursor buttons to make selections and
adjustments.
Press to store settings in Tuning menu and
Teletext.
Sound mute On / Off
Volume up / down button
Programme Number Selection
Press to select the next higher or lower
Programme number.
Switch between viewing TV or AV input.
(see page 6)
Text Hold / Picture Still (see page 15, 17)
Text Index (see page 19)
Direct Programme Number (see page 10)
CH SELECT = POSITION
You can select the numbers directly by pressing
Programme Number button and the two digit
Numbers by pressing “Two Digit” and
Programme Number buttons.
Programme Number 8.......
Programme Number 12..... , ,
CH SELECT = DIRECT
You can select the number directly by pressing
the corresponding Programme Number button.
Channel Number 8.......
Channel Number 36..... ,
Channel Number 124... , ,
English
INPUT button
(see page 5, 16)
VCR / DVD buttons
SELECT button (see page 16)
SWAP button (see page 16)
The Remote Control is capable of operating some functions of selected Panasonic VCR’s and DVD (Digital Versatile
Disc)’s equipment. Some VCR’s and DVD’s equipment have different functions, so to ensure compatibility please
refer to the equipment’s instruction book or consult your dealer for details.
Button Button
Standby
DVD
VCR / DVD selection switch
Play
Stop
Function Function
VCR : Fast Forward / Cue
DVD : Slow / Search
VCR : Rewind / Review
DVD : Slow / Search
Pause / Still
VCR : Programme Number up / down
DVD : Skip
REC
Record
7
Page 8

Using the On Screen Displays
Use the remote control as shown below to access and adjust features as desired via the On Screen Display menu.
The MENU button is used to access and exit the setup menu.
The up and down cursor buttons are used to move the cursor
and select menus.
The left and right cursor buttons are used to access menus,
change levels or to select from a range of options.
The OK button is used with a number of features to store settings
after adjustments have been made or options have been set.
The MENU button is used to exit the menu system and return
to the normal viewing screen.
An On Screen Help box is displayed whenever a menu is
displayed on the display. This Help box indicates which buttons
on the remote control are used to navigate the menu shown,
see above for descriptions of button functions.
Note:
The Help box is not shown in the menu pictures in this
instruction book due to space limitations.
MENU
OK
MENU
ON SCREEN HELP
‘Instructions’ box
MENU
TELETEXT
CH COLOUR SET
CHILD LOCK
D. PNR
MPEG NR
3D-COMB
TEXT SELECT
TUNER
SELECT
CHANGE
FASTEXT
OFF
AUTO
OFF
ON
ENGLISH
EXIT
English
8
Page 9

Tuning
TUNING MENU
OWNER ID
LANGUAGE
MENU
ACCESS
TUNING MENU
Preparation
1. Press INPUT to select INPUT1.
2. Press TV/AV to select TV mode.
Press the MENU button.
Move to choose TUNING MENU.
Access TUNING MENU.
Move to choose menu option.
Adjust chosen option or access chosen menu.
Press the MENU button at any time to go back to watching
TV.
Pressing the OK button after having adjusted some
features will store the setting as the default (replacing
the factory setting).
CH SELECT
(Channel Selection)
SYS SELECT
(System Selection)
MENU
TUNER
MENU
TELETEXT
CH COLOUR SET
CHILD LOCK
D. PNR
MENU
OK
MPEG NR
3D-COMB
TEXT SELECT
TUNING MENU
CH SELECT
SYS SELECT
AUTO TUNE
MANUAL TUNE
SOUND SYS
COLOUR SYS
FINE TUNE
SKIP
Select the most easily viewed channel selection method. See page 10.
POSITION / DIRECT
Select the system. Press the OK button after changing SYS SELECT to store.
CHINA HK/UK ASIA/M.EAST NZ/INDONES AUSTRALIA
JAPAN CATV AMERICA SPECL VER E.EUROPE
SYSTEM SELECT
CHINA
HK/UK
ASIA/M.EAST
NZ/INDONES
AUSTRALIA
E.EUROPE
SPECL VER
AMERICA
CATV
JAPAN
China
Hong Kong, United Kingdom
Malaysia, Singapore, Thailand, Asia countries, Kuwait, Saudi Arabia, United Arab Emirates, Middle East countries, etc.
New Zealand, Indonesia, etc.
Australia
CIS, Poland, etc.
South Africa
USA, Chile, Mexico, Panama, Pelu, Philippines, Taiwan, Venezuela, etc.
USA CATV
Japan
REGION
FASTEXT
OFF
AUTO
OFF
ON
ENGLISH
POSITION
ASIA/M.EAST
5.5MHz
AUTO
OFF
English
AUTO TUNE
MANUAL TUNE
SOUND SYS
(Sound System)
COLOUR SYS
(Colour System)
FINE TUNE
SKIP
Allows you to automatically retune the set. Useful if you move house and wish to retune your set
to the local stations. See page 11.
Allows individual program positions to be tuned, manually. See page 11.
Allows you to change the sound system used for a programme channel.
Choose the required sound system:
4.5MHz / 5.5MHz / 6.0MHz / 6.5MHz
Lets you select the correct transmission standard for the transmission signal being received.
See page 13.
AUTO / PAL / SECAM / NTSC 4.43 / NTSC 3.58
Use to make small adjustments to the tuning of an individual station (useful for example when
weather conditions are affecting reception quality of a program).
To cancel the FINE TUNE, tune again by MANUAL TUNE.
It is possible to skip Program Number on which no TV stations are tuned appearing on the
screen. The function is only effective when pressing the Program Number up or down button on
the remote control. Under the normal viewing, select the Program Number you would like to
skip. Then, access TUNING MENU and set SKIP to ON.
9
Page 10

Tuning
Channel Selection
Select the most easily viewed channel selection method.
2ch
4ch
6ch
8ch
10ch
12ch
14ch
16ch
18ch
20ch
VOL
INPUTMENU
ENTER
+
R - STANDBY
G POWER ON
Example
Programme
Example
English
Programme
Number
1
2
3
4
5
6
7
8
9
10
Number
1
2
3
4
5
6
7
8
9
10
Channel
Display
2
4
6
8
10
12
14
16
18
20
Channel
Display
–
2
–
4
–
6
–
8
–
10
Received
Channel
2
4
6
8
10
12
14
16
18
20
Received
Channel
–
2
–
4
–
6
–
8
–
10
POSITION
When the CH SELECT is on POSITION, and AUTO TUNE
is performed, the unit memorises the channels tuned in order
from Programme No.1.
Press the
Press the
Press the
button to view channel 2.
button to view channel 4.
button to view channel 6.
During Position mode various reception channels can be
viewed.
DIRECT
When the CH SELECT is on DIRECT, and AUTO TUNE is
performed, the unit memorises the Programme Number
which is the same as the channel tuned.
This method allows you to select the desired channel by
pressing the Channel Display number directly on the remote
control to select the station. The Channel Display numbers
for the broadcast stations in each region are listed on page
12.
10
20
20
20
Page 11

Tuning
AUTO TUNE
AUTO TUNE automatically retunes your set. This feature is useful if, e.g., you move house and wish to retune
your set to receive the local stations.
Press the MENU button.
Move to choose TUNING MENU.
Access TUNING MENU.
Move to choose AUTO TUNE.
Access AUTO TUNE.
Notes:
• If you proceed with the next step all tuning data will be erased (all stations and their programme
positions stored in your set’s memory will be wiped out so the new settings can be stored).
• If you exit the procedure after this point and before AUTO TUNE is complete, no station information will be
stored. Restart and complete the AUTO TUNE procedure so that the set is retuned.
Press to start AUTO TUNE.
The set will search for, locate, store and then sort
into order your local stations.
Once this operation is completed the
the programme now stored on programme position 1.
Press the MENU button at any time to go back to watching
TV (please read the Notes in the above procedure).
set
will display
MENU
MENU
12
CH 12
AUTO SETUP IN PROGRESS
SEARCHING : PLEASE WAIT
STORED CH 12
MENU : TO EXIT
MANUAL TUNE
It is possible to retune individual programme positions:
Press the MENU button.
Move to choose TUNING MENU.
Access TUNING MENU.
Move to choose MANUAL TUNE.
Access MANUAL TUNE.
Select the programme position to be tuned.
Press repeatedly until required station is found.
When the desired station is found, press the OK button to
store. The programme position will flash.
Press the MENU button at any time to go back to watching
TV.
Notes:
• If a clear picture cannot be obtained even when a Broadcast or AV signal is received, refer to the COLOUR SYS
selection on page 9.
• After the AUTO TUNE or MANUAL TUNE is finished, press the Programme Number up button to confirm the tuning
condition for each Programme Numbers. If some Programme Numbers are unused, it is possible to skip such
Programme Numbers. Please refer to the SKIP function on page 9.
• When using a VCR without video and audio input / output terminals, it is convenient to connect the aerial cable as
indicated in the instruction manual of VCR and to set the designated channel to Programme No.“0”. In that case,
perform MANUAL TUNE after setting the COLOUR SYS and SOUND SYS in advance. Further, in multi-system
VCR, it is more convenient to set the designated channel to several Programme Numbers.
MENU
OK
MENU
1
CH 12
PROGRAMME -
MANUAL TUNE
SEARCH
-/+
EXIT
/+
STORE
English
11
Page 12

Channel Allocation
SYS SELECT
CH DISPLAY
0
1
2
3
4
5
6
7
11
12
13
14
15
16
19
20
21
22
23
24
28
57
58
59
62
63
69
70
73
74
75
76
77
78
79
80
81
English
89
90
91
92
93
94
95
96
97
98
99
100
107
117
118
120
125
CHINA HK/UK
–
1
2
12
13
57
–
–
–
–
–
–
–
–
–
–
–
–
–
–
–
–
–
Z1
Z9
Z10
Z11
Z12
Z13
Z14
Z15
Z16
Z17
Z18
Z19
Z20
Z37
–
–
–
–
–
–
–
–
–
–
–
–
–
–
–
–
–
–
–
–
–
–
–
21
62
63
69
–
–
–
S'1
S'2
S'3
–
–
–
S1
S2
S10
S11
S12
S13
S14
S15
S16
S17
S18
S19
S20
S21
S41
–
–
ASIA/M.EAST
11
12
21
62
63
69
S'1
S'2
S'3
S1
S2
S10
S11
S12
S13
S14
S15
S16
S17
S18
S19
S20
S21
S41
NZ/INDONES
–
–
2
–
–
–
–
–
–
–
–
–
–
–
–
–
–
–
–
1
2
11
–
–
–
–
–
–
–
–
21
62
63
69
–
–
–
S'1
S'2
S'3
–
–
–
S1
S2
S10
S11
S12
S13
S14
S15
S16
S17
S18
S19
S20
S21
S41
–
–
AUSTRALIA
E.EUROPE
RECEIVE CHANNEL
–
0
1
2
3
4
5
S2
S10
6
9
9A
10
11
12
S11
S44
20
21
69
–
–
–
–
–
–
–
–
1
2
11
12
–
–
–
–
–
–
–
21
62
63
69
–
–
–
S'1
–
–
–
–
–
S1
S2
S10
S11
S12
S13
S14
S15
S16
S17
S18
S19
S20
S21
S41
–
–
SPECL VER
11
12
13
S'1
S'2
S'3
S1
S2
S10
S14
S15
S16
S17
S18
S19
S20
S21
S41
AMERICA
–
1
2
–
–
–
–
–
21
62
63
69
–
–
–
–
–
–
–
–
–
–
–
13
14
62
63
69
CATV JAPAN
–
–
2
–
–
–
–
–
–
–
–
–
–
–
–
–
–
–
–
–
–
–
–
–
–
–
–
–
–
–
–
–
–
–
–
–
–
1
2
12
13
62
63
99 C49
100
125
62
C13
–
1
2
–
–
–
–
–
–
–
–
–
–
12
Page 13

Set up
Press the MENU button.
Move to choose menu option.
Adjust chosen option or access chosen menu.
Press the MENU button at any time to go back to watching TV.
TELETEXT
Depending on the area, this operation may not be
available.
Allows you to choose 2 modes. See page 17.
FASTEXT / List
CH COLOUR SET
Colour density varying between broadcast channels
can be adjusted to three levels for each reception
channel.
CHILD LOCK
When ON, picture and sound of the TV/AV mode being
viewed will disappear and a Black screen will appear.
CHILD LOCK can be set for each programme number
and AV mode.
MENU
MENU
TV mode
MENU
TELETEXT
CH COLOUR SET
CHILD LOCK
D. PNR
MPEG NR
3D-COMB
TEXT SELECT
TUNER
FASTEXT
OFF
AUTO
OFF
OFF
ON
ON
ENGLISH
D.PNR
MPEG NR
COLOUR SYS
(Colour System)
3D-COMB
TEXT SELECT
Automatically reduces unwanted picture noise.
Reduces MPEG noise.
MENU
TUNING MENU
OWNER ID
LANGUAGE
ACCESS
ACCESS
ACCESS
OFF / ON
This function is effective in reducing the digital block
noise when viewing DVD, VCD or digital broadcasting.
The effect will be changed based on the scene and
image.
MPEG: Compression technology of the image signal
adopted by DVD, VCD or digital broadcasting.
Displayed during AV mode. If a clear picture with current
colours cannot be obtained when a Broadcast or AV
signal is received, this function is used.
AV mode
MENU
TELETEXT
CH COLOUR SET
CHILD LOCK
D. PNR
MPEG NR
COLOUR SYS
3D-COMB
MENU
TEXT SELECT
OWNER ID
LANGUAGE
FASTEXT
OFF
AUTO
OFF
OFF
ON
AUTO
ON
ENGLISH
ACCESS
ACCESS
AUTO / PAL / SECAM / NTSC 4.43 / NTSC 3.58
PAL, SECAM and NTSC 3.58 are different colour signal broadcast transmission systems
applicable to different countries. NTSC 4.43 is a trick playback mode used in special VCR’s to
playback NTSC recorded video tapes through PAL television equipment.
Occasionally, whilst viewing still or slow moving pictures, colour patterning may be seen. Set
3D-COMB to ON to display sharper and more accurate colours. Displayed only when receiving
PAL or NTSC signals. Not displayed during S-Video input mode.
Depending on the area, this operation may not be available.
Select character set, so that all characters needed are available for text on teletext pages.
ENGLISH / CIS / E.EUROPE / PERSIAN
English
TUNING MENU
OWNER ID
LANGUAGE
Provides access to many other features including SYS SELECT and AUTO TUNE. See page 9.
Not displayed during AV mode.
Allows you to enter a security code and address information. See page 14.
You can select the On Screen Display language.
English / Chinese
13
Page 14

Owner ID
TUNING MENU
OWNER ID
LANGUAGE
MENU
ACCESS
Owner ID allows you to enter a security code(Owner ID) and personal details into its memory, so that in the unfortunate
event of theft it will help the Police to trace the owner.
If you wish to check the personal details already entered
into the set (except your PIN number), press the OK button
and hold for 6 seconds. The details already entered are
displayed on screen and will disappear after a few seconds.
If OWNER ID information was not entered when you switched
on your set for the first time or it is necessary to alter some of
the information, OWNER ID can be re-accessed via the MENU.
Press the MENU button.
Move to choose OWNER ID.
Access OWNER ID.
If the OWNER ID has previously been set, enter the PIN
NUMBER (using 0 to 9 on the remote control) followed by
OK to proceed, this will take you to the NAME option.
OK
MENU
OK
MENU
TELETEXT
CH COLOUR SET
CHILD LOCK
D. PNR
MPEG NR
3D-COMB
TEXT SELECT
TUNER
FASTEXT
OFF
AUTO
OFF
ON
ENGLISH
If no OWNER ID has previously been set, enter the required
4 digit OWNER ID PIN NUMBER (using 0 to 9 on the remote
control).
If a 4 digit PIN NUMBER was entered above, you will be
taken automatically to the NAME line.
If not, move to the NAME line.
English
Change character.
Select character position.
Repeat above until NAME, HOUSE NUMBER and
POSTCODE are entered.
Press the OK button to store the details.
Press again when you are asked, “Are you sure?”.
OK
You now have the opportunity
to enter your details and
help the police crack crime
see instruction book
Change
character
Select
character
Owner ID
PIN NUMBER :
NAME :
HOUSE NO :
POSTCODE :
EXIT
∗ ∗ ∗ ∗
∗ ∗ ∗ ∗ ∗ ∗ ∗ ∗ ∗ ∗ ∗ ∗ ∗ ∗
∗ ∗ ∗ ∗ ∗ ∗ ∗ ∗ ∗ ∗ ∗
∗ ∗ ∗ ∗ ∗ ∗ ∗ ∗ ∗ ∗ ∗
0123456789
For future reference,
write your PIN NUMBER here
Store Owner ID
:
14
Page 15

Aspect Controls
This set allows you to enjoy viewing the picture at its optimum size and aspect, including widescreen cinema format
pictures.
Press the ASPECT button repeatedly to move through the
aspect options:
16:9, Just, 4:3 and Zoom
Mode
4 : 3
Zoom
4
4 : 3
3
4
3
16
Zoom
4:3 will display a 4:3 picture at its standard 4:3 size.
Zoom mode magnifies the central section of the picture.
9
ASPECT
TUNER
ExplanationPicture
16 : 9
Just
4
3
4
3 9
16
16
16 : 9
Just
16:9 will display the picture at its maximum size but with slight
elongation.
9
Just mode will display a 4:3 picture at its maximum size but with
aspect correction applied to the center of the screen so that
elongation is only apparent at the left and right edges of the screen.
The size of the picture will depend on the original signal.
Still
Press the STILL button to freeze the picture.
Press again to return to watching the current programme.
English
HOLD
STILL
TUNER
15
Page 16

Multi window
Press the MULTI PIP button repeatedly.
Each time pressing this button main picture and sub picture will be displayed as follows bellow.
[Picture and Picture] [Picture in Picture]
Main picture Sub picture
Normal
Viewing
Press the SWAP button
to swap main picture and
sub picture.
Press the SELECT button to select the
input mode.
Under main Picture and sub picture
display, select the picture which you
would like to change input modes.
Press the INPUT button to change input
signal.
MULTI PIP MULTI PIP MULTI PIP
AB
SWAP SWAP SWAP
BA
[Example]
[Picture out Picture]
Main picture Sub picture Main picture Sub picture
A
B
A
B
B
A
B
A
Main picture label is bright Sub picture label is bright
PC1
INPUT1
A
Input modes switching is possible
Main picture label is changed Sub picture label is changed
B
INPUT3
INPUT1
SELECT
C
B
A
A
PC1
INPUT1
B
PC1
INPUT3
C
TUNER
Picture is changed
Notes:
• Sound output is from the main picture.
• In 2 screen display, the same input mode cannot be selected for the main picture and sub picture.
English
• The main picture and sub picture are processed by different circuits, resulting in a slight difference in the clarity of the
pictures. There may also be a difference in the picture quality of the sub picture depending on the type of signals
displayed on the main picture and depending on the 2-picture display mode.
• Due to the small dimensions of the sub pictures used for the picture in picture and picture out picture displays, these
sub pictures cannot be shown in detail.
• Two computer screen pictures are displayed in a simplified format, and it may not be possible to discern details on
them satisfactorily.
Changing the channels
Press the Programme Number button on the remote control.
Changing the mode
Press the TV/AV button to switch between the TV and AV mode.
TV/AV
16
Page 17

Teletext operation
• Teletext features may vary depending on the Broadcasting Companies and is only available if the channel selected
is transmitting Teletext.
• Pressing the MENU button whilst in Teletext operation will display the contrast function with a cyan bar, press
to alter the setting as required.
• Pressing the MENU button whilst in Teletext operation will display special function options at the bottom of the
screen.
What is List mode ?
In List mode, four differently coloured page numbers are situated at the bottom of the screen. Each of these numbers
can be altered and stored in the TV’s memory.
What is FASTEXT mode?
In FASTEXT mode, four differently coloured subjects are situated at the bottom of the display. To access more information
about one of these subjects, press the appropriately coloured button. This facility enables fast access to information
on the subjects shown.
Notes:
• If Teletext is in use, the aspect ratio is set to 16:9.
• Depending on the area, this operation may not be available.
• Depending on the receiving signal, the menu may be changed.
MENU
MENU
TV/TEXT
Green
Red
OK
TV / Teletext mode
Press the TV/TEXT button to switch between the current programme.
Page Selection
Pages can be selected in two ways :
a. Press the Up / Down buttons to increase or decrease the page number by one.
b. By entering the page number, using 0 - 9 on the remote control.
Full / Top / Bottom
Press the MENU button to display special functions, followed by the Green button.
Press the Green button again to expand the BOTTOM half.
Press again to return to normal (FULL) size.
Reveal
Press the MENU button to display special functions, followed by the Red button to reveal
hidden words e.g. quiz page answers. Press again to hide.
Red / Green / Yellow / Blue buttons
In FASTEXT mode they correspond to the differently coloured subjects.
In List mode they correspond to the differently coloured page numbers.
List Store
In List mode the four page numbers can be altered (programme positions 1 - 25 only).
To do this, press one of the four coloured buttons and enter the new page number.
Press and hold the OK button, the page numbers will change to white indicating that the
page is stored.
English
HOLD
STILL
HOLD
To hold the Teletext page when viewing multi-page information.
Press again to return to automatic page update.
17
Page 18

Teletext operation
It is not possible to change the programme position when in News flash, Update or Sub Coded Page Access operation.
Favourite Page (F.P.)
OK
Stores a favourite page in memory for instant recall. To store such a page, the TV must be
Blue
MENU
Yellow
in List mode, and the programme position must be from 1 - 25.
Press the Blue button, select the page number, then press and hold the OK button. The
F. P.
page number is now stored.
Press F. P. to recall this page.
Update Display
Press the MENU button to display special functions, followed by the Yellow button to view
the TV picture whilst searching for a Teletext page. When found, the screen will display the
page number at the top left. Press the Yellow button to view the page.
Press the TV/TEXT button again to return to normal TV operation.
News Flash
When a news flash page has been selected, press the MENU, Yellow buttons, to view the
TV picture. When an update is received, the page number will be displayed on screen.
Press the Yellow button to display the News Flash.
Press the TV/TEXT button to return to normal TV operation.
Update
Press the MENU, Yellow buttons to see the update of information on certain pages.
When an update is received, the page number will be displayed at the top left of the
screen.
Press the Yellow button to view the page.
Press the TV/TEXT button to return to normal TV operation.
English
MENU
Yellow
Accessing sub pages
When Teletext information exceeds one page, it may take some time for the automatic
changing of the sub pages to reach the sub page you require. As each sub page is found
its number is displayed at the top of the page so that you may select it; as more sub pages
are picked up, the display at the top of the page changes, so that you are always offered
the most recently transmitted selection of sub pages.
In Teletext operation, use the following procedure to access sub pages:
If the sub page you want to look at is not yet available, press the MENU button (to display
special functions) followed by the Yellow button to view the TV picture whilst waiting for
more sub pages to be found. The sub pages found will be displayed across the top of the
screen.
When the sub page you are waiting for is available press the Yellow button to return to
viewing the Teletext pages, then use the left and right cursor buttons to select the sub page
of your choice.
Notes:
• If you do not want to display the on screen selector keys on the TV picture whilst waiting
for a sub page to be found, press the MENU button to clear the keys from the screen.
Press again to redisplay the keys.
• If you have cleared the special function keys from the screen and then used the left and
right cursor buttons to select a sub page, whilst still viewing the TV picture, you must
press the MENU button then the Yellow button to display the Teletext page again.
• If the top of the page indicates that sub pages are being transmitted but the page displayed
never changes, then the ‘sub page number’ is there to show the page contents have
been updated, there are no sub pages.
18
Page 19

Teletext operation
Alternatively, if you know which sub page you require, press the MENU button (to display
special functions) followed by the Blue button; T**** will be displayed where the page
number is normally found.
Enter desired sub page number before the T**** disappears.
e.g., to select page 6 enter 0, 0, 0 and 6.
MENU
Blue
INDEX
Press the Yellow button to view the TV picture whilst waiting for more sub pages to be
found. The sub pages found will be displayed across the top of the screen.
When the page is available, press the Yellow button to view the page. Regardless of how
many pages are found, pressing the Yellow button will take you to the sub page which you
requested.
Press the TV/TEXT button to return to normal TV operation.
INDEX
When in FASTEXT operation
Press the INDEX button to return to the main index page.
Depending on the way information is transmitted, this may have to be pressed more than
once to return to the main index page.
Stereo / Bilingual Sound Selection
When you receive the stereo / bilingual sound system, sound output modes can be selected by pressing
the Stereo / Bilingual Sound Selection button.
Audio Signal
Mode Indicator
NICAM .......Used in New Zealand, Singapore, Hong Kong etc.
Type of broadcast
Mode Indicator
A2(German) .......Used in Australia, Malaysia etc.
Type of broadcast
Mode Indicator
Notes:
• If the stereo signal is poor or the receiving conditions are not optimum or if STEREO:MONO automatic switching
occurs, it is recommended you switch from STEREO to MONO.
• Even when the contents of the receiving signal undergo changes, selection mode is kept intact.
• When the receiving conditions deteriorate, listening will be easier if the mode is set to the MONO position, using the
stereo / bilingual sound selection button.
• DUAL, also known as DUAL MONO or as BILINGUAL is not currently transmitted in some countries.
STEREO MAIN I SUB II MONO
II
NICAM STEREO
STEREO
Regular broadcast
(Standard Audio)
No Indicator
Regular broadcast
(Standard Audio)
No Indicator
I
Regular + NICAM MONO I
BILINGUAL or DUAL MONO:
(MAIN I )
I
MAIN I / SUB II
I
II
NICAM DUAL MONO
(MAIN I / SUB II )
I
II
English
19
Page 20

Troubleshooting
If there is a problem with your set please refer to the table below to determine the symptoms, then carry out the suggested check.
If this does not solve the problem, please contact your local Panasonic dealer, quoting the model number and serial number.
Symptoms
Picture Sound
Checks
Snowy Picture
Multiple Images
Interference
Normal Picture
No Picture
No Colour
Poor or Distorted
Picture
Normal Picture
Specifications
Noisy Sound
Normal Sound
Noisy Sound
No Sound
No Sound
Normal Sound
Weak or No
Sound
Weak or
Distorted Sound
Aerial location, direction or connection
Aerial location, direction or connection
Electrical appliances
Cars / Motorcycles
Fluorescent lights
Switch on D.PNR in MENU to reduce picture noise.
Volume level
Sound mute switched on.
The set to AV mode.
Not plugged into AC outlet.
Not switched on.
Picture / Sound controls set at minimum levels.
Check if in Standby mode.
Colour controls set at minimum levels.
Colour System
Retune Channel (s).
Sound reception may have deteriorated.
Sound System
Receiving
System
English
Receiving Channels
OUTPUT
INPUT
ANT-IN
Mass (Weight)
AUDIO OUT
VIDEO OUT
Others
AUDIO IN
VIDEO IN
TY-FB7TA
17 Systems Function
PAL B, G, H
1
PAL I
2
PAL D, K
3
SECAM B, G
4
SECAM D, K
5
SECAM K1
6
NTSC M (NTSC 3.58/4.5 MHz)
7
NTSC 4.43/5.5 MHz
8
NTSC 4.43/6.0 MHz
9
NTSC 4.43/6.5 MHz
10
NTSC 3.58/5.5 MHz
11
NTSC 3.58/6.0 MHz
12
NTSC 3.58/6.5 MHz
13
SECAM I
14
PAL 60 Hz/5.5 MHz
15
PAL 60 Hz/6.0 MHz
16
PAL 60 Hz/6.5 MHz
17
Regular TV
VHF BAND
2-12 (PAL/SECAM B, K1)
0-12 (PAL B AUST.)
1-9 (PAL B N.Z)
1-12 (PAL/SECAM D)
1-12 (NTSC M Japan)
2-13 (NTSC M U.S.A.)
AUDIO L-R (RCA Pin Type × 2) 0.5 Vrms
VIDEO (BNC Type) 1.0 Vp-p (75 Ω)
Remote Control through out terminal × 1
AUDIO L-R (RCA Pin Type × 2) 0.5 Vrms
VIDEO (BNC Type) 1.0 Vp-p (75 Ω)
S-VIDEO (MINI DIN 4-pin) Y:1.0 Vp-p (75 Ω) C:0.286 Vp-p (75 Ω)
UHF / VHF
Reception of broadcast transmissions and Playback from Video
Cassette Tape Recorders.
Playback from Special VCR’s or DVD
Playback from Special Disc Players and Special VCR’s or DVD
UHF BAND
21-69 (PAL G, H, I/SECAM G, K, K1)
28-69 (PAL B AUST.)
13-57 (PAL D, K)
13-62 (NTSC M Japan)
14-69 (NTSC M U.S.A.)
0.55 kg
CATV
S1-S20 (OSCAR)
1-125 (U.S.A. CATV)
C13-C49 (JAPAN)
S21-S41 (HYPER)
Z1-Z37 (CHINA)
5A, 9A (AUST.)
Note:
Design and specifications are subject to change without notice. Mass and dimensions shown are approximate.
20
Page 21

Customer’s Record
The model number and serial number of this product can be found on it. You should note this serial number in
the space provided below and retain this book, plus your purchase receipt, as a permanent record of your
purchase to aid in identification in the event of theft or loss, and for Warranty Service purposes.
Model Number Serial Number
Matsushita Electric Industrial Co., Ltd.
Web Site : http://www.panasonic.co.jp/global/
2004 Matsushita Electric Industrial Co., Ltd. All Rights Reserved.
Printed in Japan
MBS1104S0
 Loading...