

Page 1
Panasonic
Stereo Colour Television
With Teietext
TX-80V95Z
■FSr
Stereo Colour Television
TC-80V95A
Operating Instructions
Please read these operating instructions completely before
operating this set and retain the booklet for future reference.
TQB4A0148
Page 2

Dear Panasonic Customer,
Welcome to the Panasonic family. We hope that you will have many years of enjoyment from
your new Colour Television.
Please retain your proof of purchase along with these operating instructions. Space has
been made available on page 5 of this instruction book for recording the Serial Number. The
Serial Number can be found on the back cover of the set and on the packing carton.
Programme Location Numbers
Throughout this booklet "Programme Location Numbers" are referred to. These are
memory locations into which you can tune television broadcast stations. Any television station can
be tuned into any Programme Location Number.
Picture Quality
All televisions are affected by Magnetic Interference.
Magnetic interference may come from such
things as unshielded motors, moving the TV
while it is switched ON, turning off a vacuum
cleaner too close to the TV, lightning strikes
nearby or many other things.
The interference shows up as coloured patches
which appear while the TV is switched ON.
A typical result may look like the picture shown.
Your Panasonic Television is designed to overcome this with the inclusion of a demagnetising
(degaussing) function.
To activate this feature, simply switch your Television OFF with the Power On/Off Switch
(not with the remote control) for 30 minutes and then switch it back ON.
This will ensure that you enjoy the picture clarity as it was meant to be.
Page 3
Getting Started
Connect the Aerial
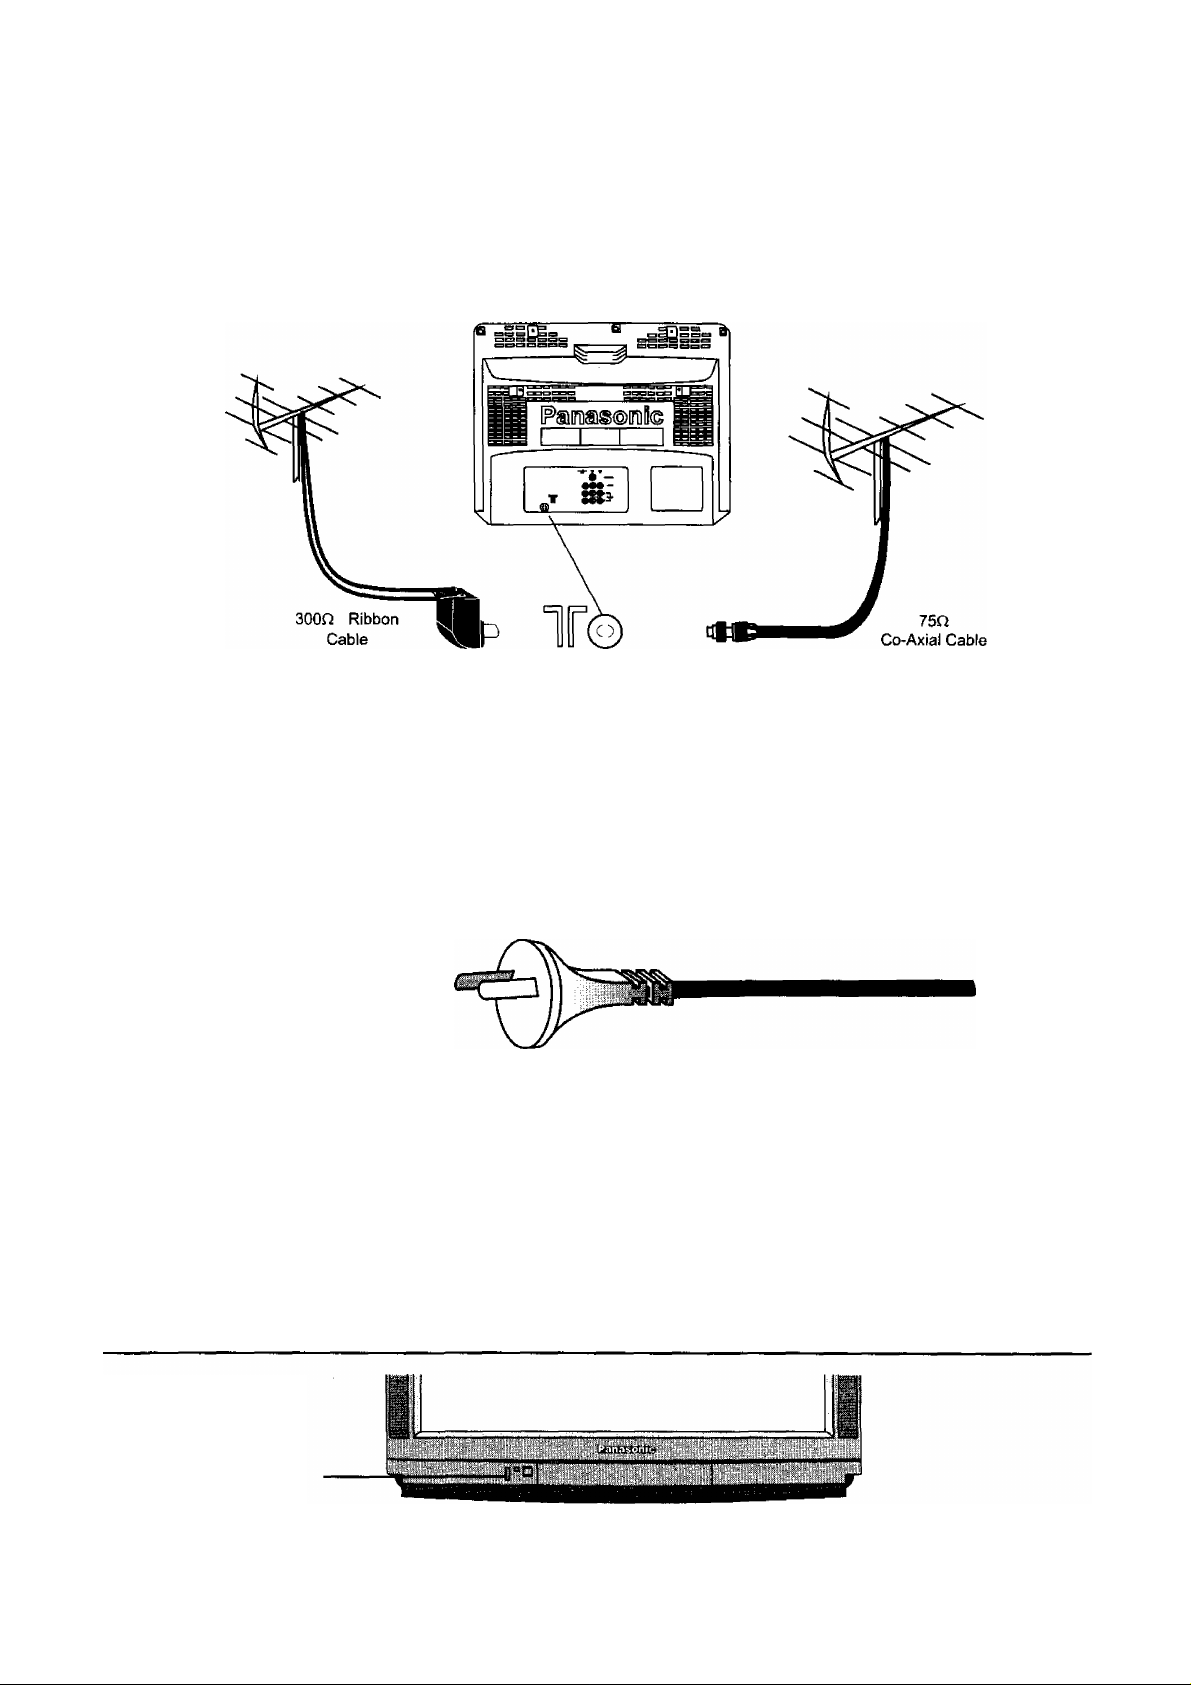
The RF (Aerial) Input impedance of this television is 75Q. If your aerial lead is 300Q ribbon (two
wires separated by a flat plastic sheet) you will require a 300Q/75Q Baiun in order to connect
your aerial to the television.
3000 / 750 Baiun
(Not supplied)
RF-IN
Terminal
For your safety any external aerial should be installed by a reputable qualified installer and
should comply with Australian Standard AS1417.1 or International Standard EIS597-1.
Connect the Power Plug
The TC-80V95A is designed for the Australian Standard Mains Voltage of 240V 50Hz.
The TX-80V95Z is designed for the New Zealand Standard Mains Voltage of 230V 50Hz.
NOTE:
If the television is not going to be used for an extended period, remove the power plug from the
wall outlet.
Turn on the Television
Power Switch
Push the Power Switch to turn the television ON. Sit back and enjoy your new Panasonic
television.
Page 4
Getting Started
Battery Installation and Replacement
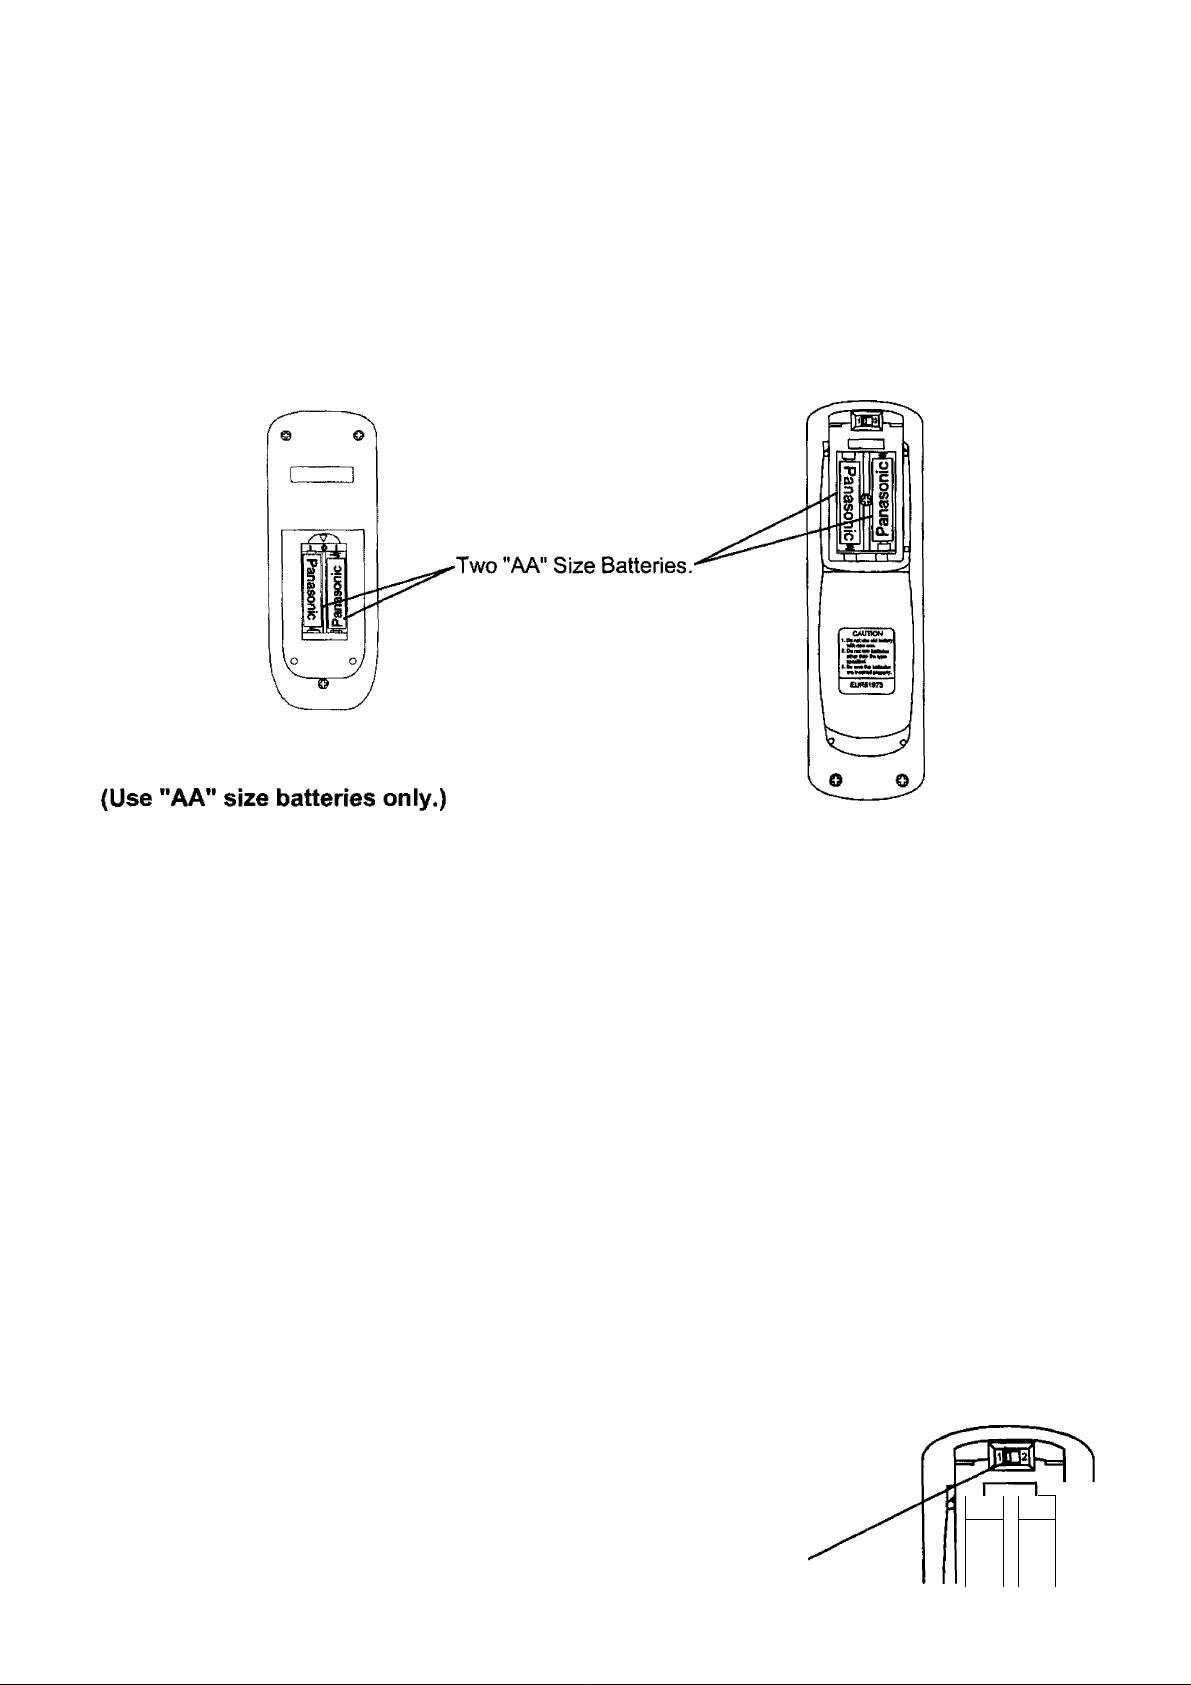
Open the Battery Cover
TC-85V95A
Put your thumbnail under the battery cover
(at the small recess) and lift. The cover will
come away from the remote control.
Insert the batteries according to the corresponding “ + ” and “ -" symbols on both the batteries
and inside the Battery compartment. Replace the Rear Cover.
TX-85V95Z
Place your thumb on the battery cover, apply
slight downward pressure and slide back. The
cover will come away from the remote control.
Battery Precautions
Do Not use rechargeable batteries. Differences in size and performance may cause incorrect
operation.
Do Not mix battery types (Alkaline with zinc-carbon etc.)
Do Not mix old and new batteries. Replace both batteries at the same time.
Do Not attempt to recharge batteries.
Do Not short circuit batteries.
Do Not disassemble batteries.
Do Not heat or burn batteries.
VCR Mode Selection Switch (TX-80V95Z only)
The remote controls have been designed to work with a selected group of Panasonic and National
video recorders. It may not work with some older model VCRs.
With the majority of compatible Panasonic or National VCRs the VCR Mode Selection Switch
(on the remote control for the TX-80V95Z only) should be set to "1". If VCR
control cannot be carried out try setting this switch to position "2". This switch
is located under the battery cover.
To open the battery cover, apply a slight downward pressure and
slide the cover back. This allows the cover to be removed.
VCR Mode Selection Switch
Ü
c
o
z:
“D
D>
3
Page 5

Contents
Control Panel Television Operation.................................................................................6*7
Remote Control Television Buttons..............................................................................8 * 12
VCR Operation........................................................................................................................13
Teietext Operation (TX-80V95Z only).............................................................................14 * 15
Tuning Procedure............................................................................................................16 * 19
Automatic Search.........................................................................................................16
Manual Search.............................................................................................................17
Tuning the Television to a VCR...................................................................................17
Fine Tuning using AFC (Automatic Frequency Control)
Skip..............................................................................................................................19
Connecting Equipment................................................................................................. 20 * 21
Connecting Equipment to the TV Front Terminals.......................................................20
Front Panel Connections.............................................................................................20
Connecting Equipment to the TV Rear Terminals
Monitor Out..................................................................................................................20
Rear Terminals............................................................................................................21
Connecting a Standard VCR to the AV Input..............................................................21
Connecting S-Video Equipment to the AV Input
.........................................................
..............................................
..............................................
18
20 * 21
21
Customer Information...........................................................................................................22 * 23
Warnings and Cautions................................................................................................22
Troubleshooting........................................................................................................... 22
Specifications...............................................................................................................23
Customer's Record
The serial number of this product can be found on its rear cover and on the carton. It is
recommended that you note the serial number and other details in the space provided and retain
this booklet in a safe place as a permanent record of your purchase to aid in identification in the
event of theft or loss.
Model No.
Serial No.
Purchase Date
PA-
Purchased From
Page 6
Television Control Panel Buttons
CONTROL PANEL
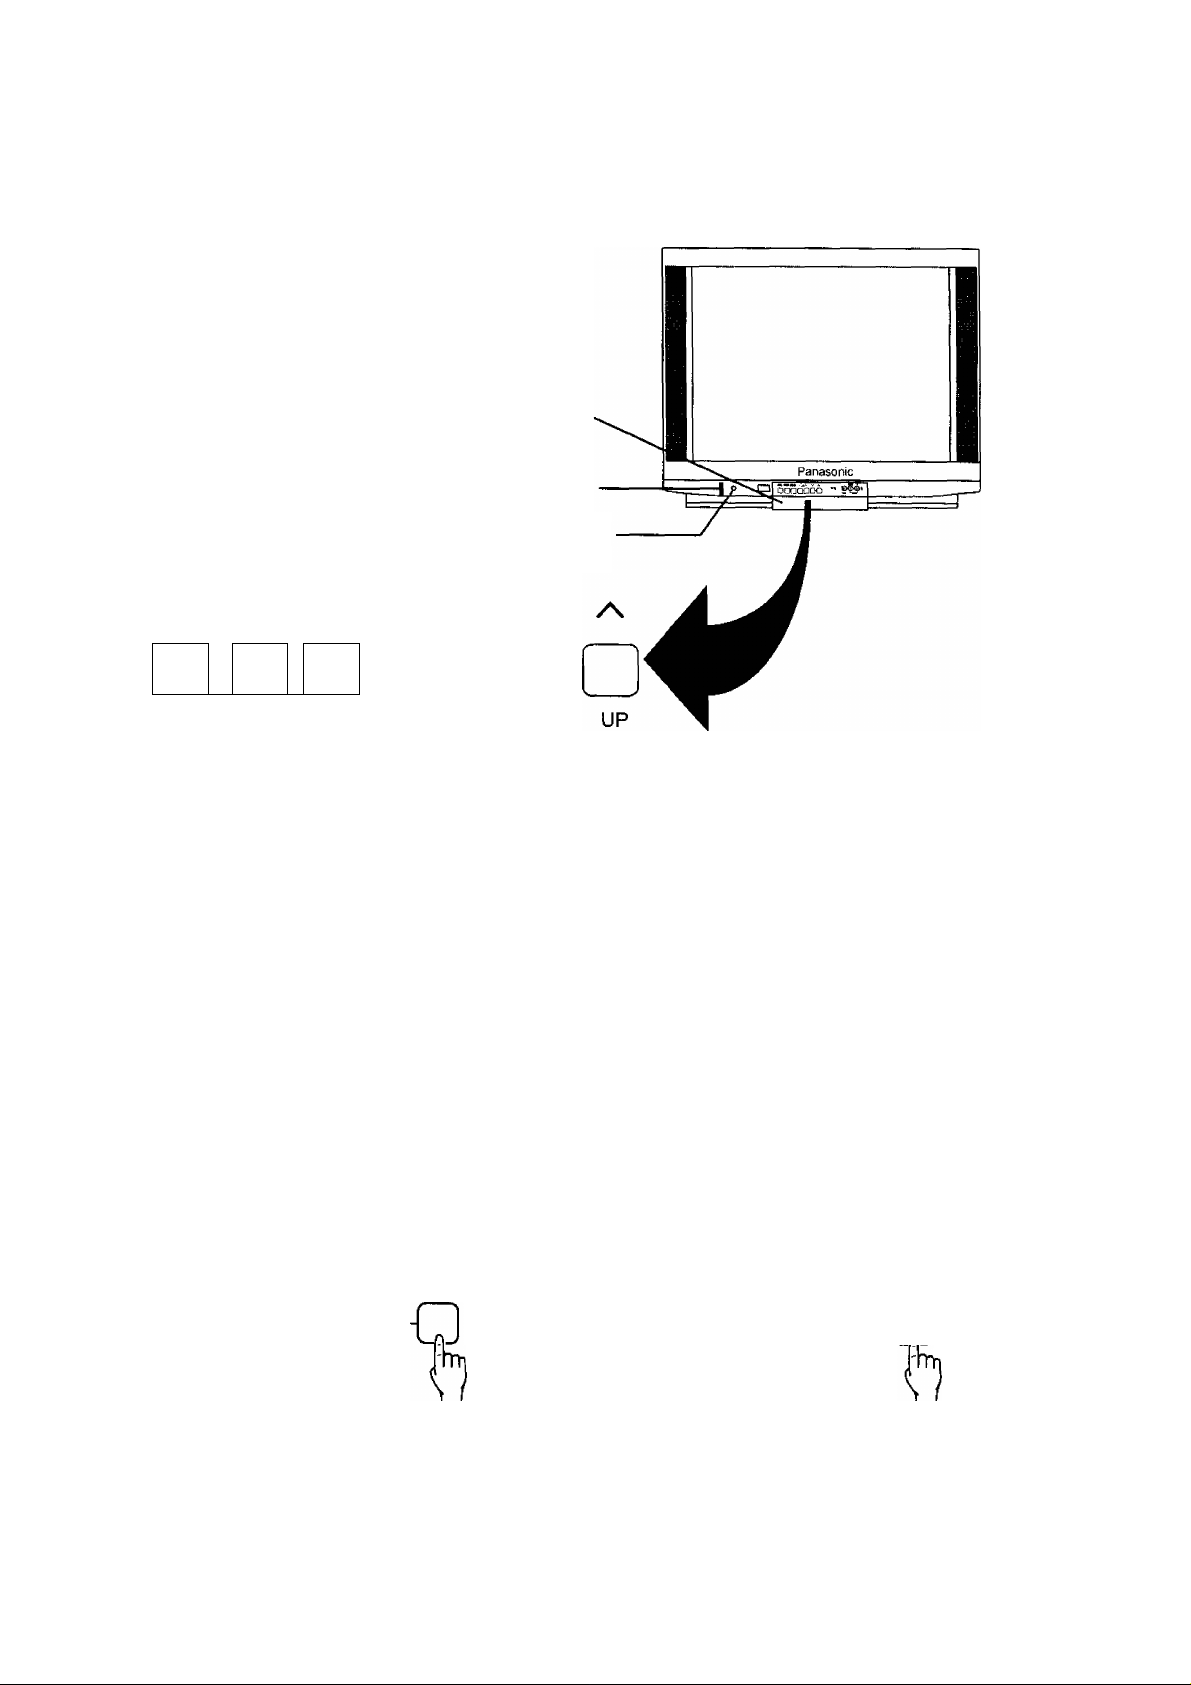
Open the control panel door to gain access to
the Television Controls, the headphone socket
and the front AV Terminals. Push the door at
the point marked "PUSH" to open. Push again
to close.
Door
Power Switch
Power Indicator
PRE. FUNC.
'
------
^
___
PRE.
FUNC.
BUTTON
TV/AV
^
j
TV/AV
V
_
____
.
VOLUME PROGRAMME
WHAT IT DOES
POWER
This button is used to turn the television on and off. The Indicator light (red) will be
on whenever the television is ON or in Stand-By. The light will go out when the
television is turned OFF.
PRE.
f
------
PRE.
PRE. stands for Preset. This button is used for tuning.
^
PRE. PRE. PRE.
AUTO
SEARCH
(Page 19)
PRE. PRE. PRE.
Q-—a-—□-—
MANUAL
SEARCH
(Page 20)
FINE
TUNE
(Page 21)
NORMAL I
I
Page 7
Television Controi Panei Buttons
BUTTON
FUNC.
WHAT IT DOES
FUNC.
FUNC. stands for Function. Pressing this button allows you to make adjustments
to the various functions of the television. Each time the button is pressed the next
function is selected. Each function can be adjusted by using the Volume Up {+) or
the Volume Down { - ) Buttons. The functions are displayed in the following
sequence:-
COLOUR Increase or decrease the colour level.
NTSC-TINT Increase or decrease the colour hue. (Only operates with an NTSC
signal).
BRIGHT Increase or decrease the brightness level.
CONTRAST Increase or decrease the contrast level.
SHARPNESS Increase or decrease the picture sharpness.
BASS Increase or decrease the sound bass level.
TREBLE Increase or decrease the sound treble level.
BALANCE Adjust the sound level balance between the left and right speakers.
COLOUR SYS Switches between the following colour system options:- AUTO,
PAL , NTSC 4.43, (RF only) or
AUTO, PAL , NTSC 4.43, NTSC 3.58 (AV only).
The television Colour System is normally set to the AUTO mode. If the AV picture is
from an NTSC tape choose the Colour-Sys setting which gives the best picture.
TV/AV
TV/AV
This button is used to select the normal broadcast television stations or one of the
AV (Audio/Video) inputs.
TV/AV TV/AV
rQ--—-g>—
i I'pThAVI I'LaV2
VOLUME DOWN
This button is used to reduce the volume output level from the television. The
volume level is indicated on the screen as a green bar and as a number (0 ~ 63).
+
VOLUME UP
This button is used to increase the volume output level from the television.
PROGRAMME NUMBER DOWN
Pressing this button selects the next lower Programme Number in sequence.
Programme Numbers which have been "Skipped" (See page 19) will be bypassed
when this button is used.
TV/AV
PROGRAMME NUMBER UP
Pressing this button selects the next higher Programme Number in sequence.
Programme Numbers which have been "Skipped" (See page 19) will be bypassed
when this button is used.
Page 8

Remote Control Buttons
Page 9
Remote Control Buttons
Number
1
2 Standby
3
4
5 Recall
6 Stereo / Mono / Bilingual
7
8
9 Sound Menu
10 Sound Mute
11 TV/AV
12
13
14
15
16 Game
17
18 Sound Option
19
20
21
22 Play
23 Pause
24 Stop
25
26 VCR Programme Number Up
27
28 VCR Programme Number Down
29
Description
Surround
Direct Access Programme Numbers
Two Digit Programme Number Selection
Off-Timer
Picture Menu
Programme Number Up
Programme Number Down
Volume Up
Volume Down
Normalisation
Picture Option
VCR Standby
Rewind / Review
Record
Fast Forward / Cue
Still Advance
Page
10
10
10
10
10
10
11
11
11
11
11
11
12
12
12
12
12
12
12
13
13
13
13
13
13
13
13
13
13
TX-80V952 Only
30
31
32
33
34 HOLD
35 INDEX
36
37 TIME TEXT
38
Level Up & Down Buttons
TV/VCR
TV/TEXT
F/T/B
Colour Coded Buttons
REVEAL
12
13
14
14
14
14
14
14
14
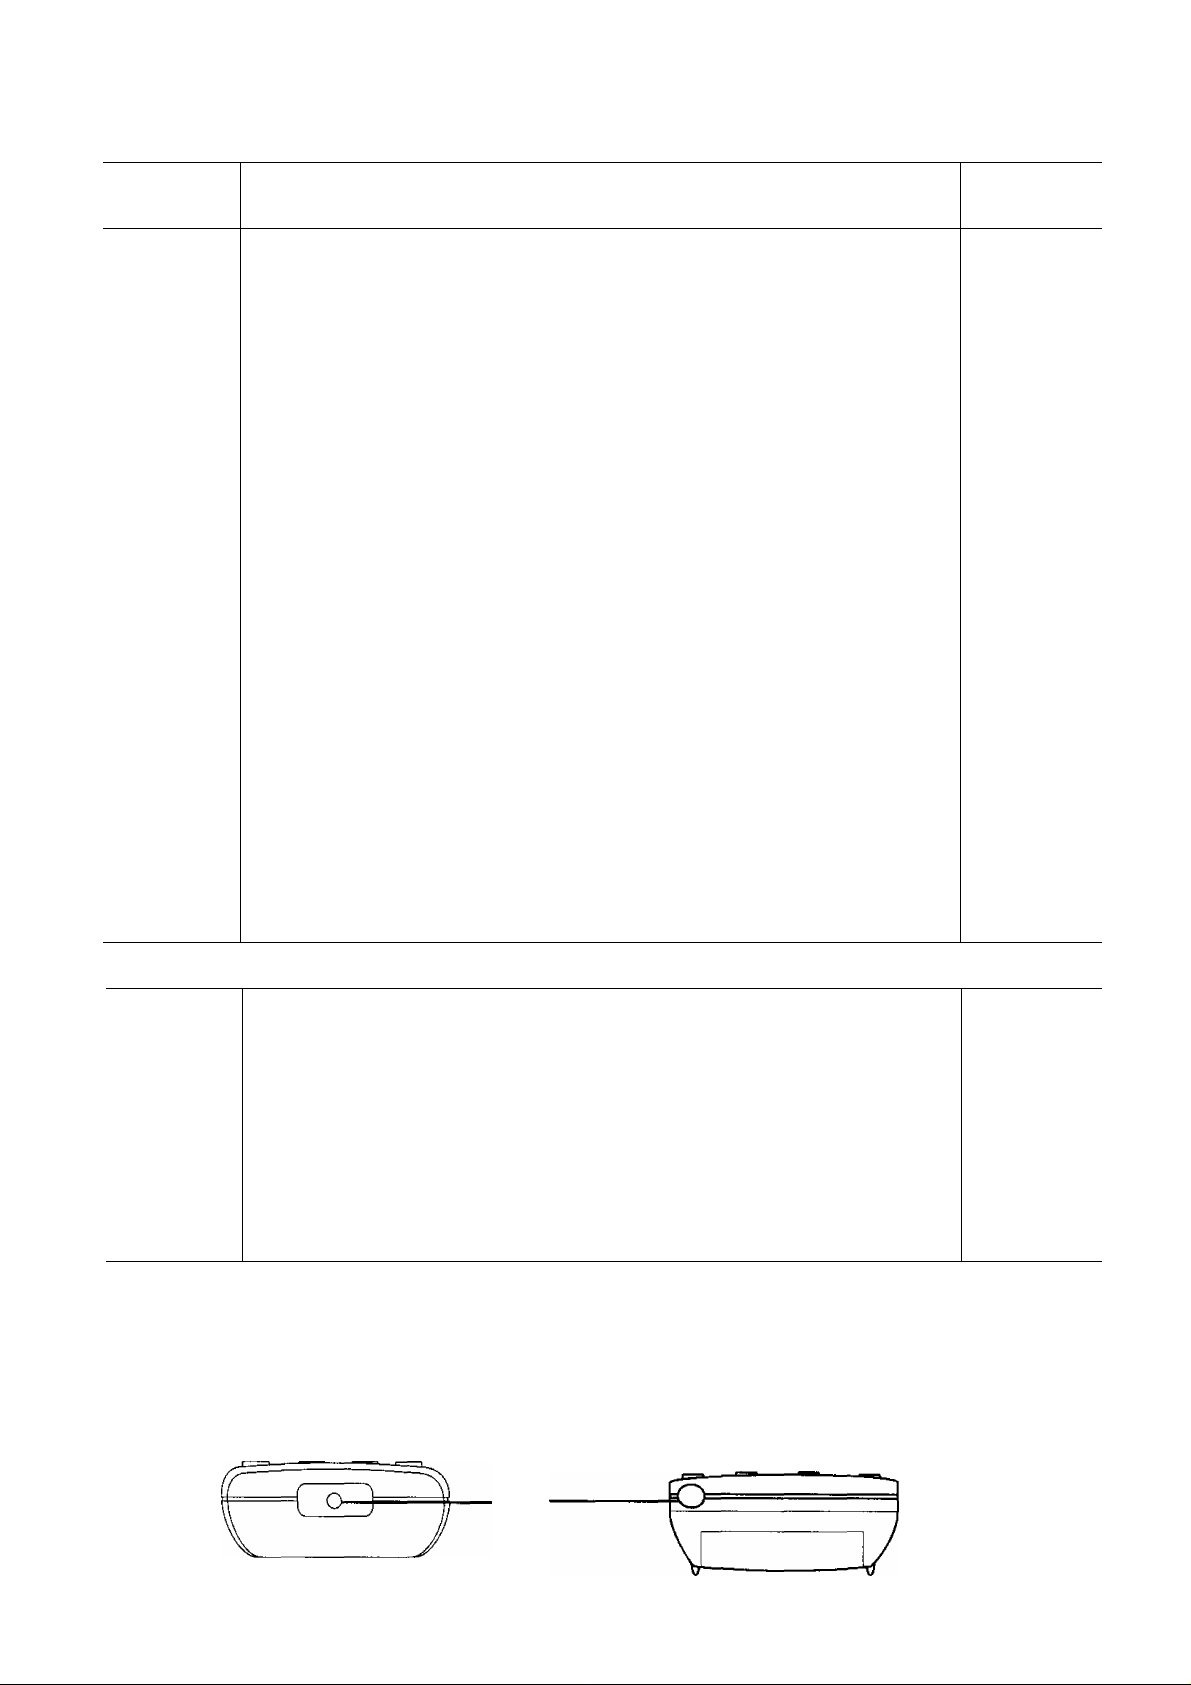
Caring for the Remote Control
The lens of the Remote Control should be kept clean and free of dust and grease. Use a soft cloth, water and
a mild detergent to keep the lens clean.
Lens
Page 10

Remote Control Television Operation
BUTTON
SURROUND
SURROUND
o
WHAT IT DOES
SURROUND SOUND
Surround Sound is designed to recreate the spatial effect of a movie theatre or
concert hall. It brings an added depth to the sound from your television.
During Stereo broadcasts, pressing this button switches between "STEREO
SURROUND" and "SURROUND OFF".
STAND-BY
The remote control button is used to turn the television into Stand-by mode.
When the television is in Stand-By it is possible to turn it back on by pressing
this remote control Power Button, the Programme Number UP Button, the
Programme Number DOWN Button or any of the direct Programme Number
Buttons.
DIRECT PROGRAMME NUMBER SELECTION
Single Digit Programme Numbers (0 to 9) can be accessed directly by pressing
the corresponding number on the Remote Control Transmitter.
TWO DIGIT PROGRAMME NUMBER SELECTION
To directly access Programme Numbers 10 to 99, press the
Button followed by the two digits required.
For example, to select Programme Number 12, press the"- / - Button followed
by the "1" Button and then the "2" Button.
O/V I/II
0)/V
RECALL
This button operates in three stages.
Stage 1 - Pressing this button will display all current active functions. The
functions which can be displayed include AV Number, Programme Number,
Colour System, Sound Menu, Picture Menu, Surround Mode, Stereo or Mono
and Off-Timer setting. After about 2 seconds it automatically switches to stage
2.
Stage 2 - Pressing the button again displays the Programme Number or the
AV Number.
Stage 3 - Pressing for the third time cancels the recall function.
STEREO / MONO
Normally the television will detect whether the broadcast signal is Mono or
Stereo and will set the mode accordingly. If the Stereo signal is weak or the
receiving conditions are not optimum, it is recommended that the Mono mode
be manually selected. Pushing the button changes the mode from Stereo to
Mono and back again.
* BILINGUAL
This system allows two languages to be transmitted on one signal. Switching
between the Main (1) and Sub (II) positions selects the desired language.
* Note: Bilingual sound is not currently available in Australia or New
Zealand.
in
Page 11

Remote Control Television Operation
BUTTON
&
MENU P
PICTURE MENU
WHAT IT DOES
OFF-TIMER
Pressing the Off-Timer allows the television to be preset to turn off after a
period of time. Each time the button is pressed the timer setting will change.
The settings are 30, 60, 90, 0 and AUTO.
The numbers represent the time, in minutes, before the TV turns off.
Setting the Off-Timer to AUTO will cause the television to turn off (to Stand-by)
five minutes after the television broadcast station you are tuned to stops
transmitting.
Setting the OFF-TIMER to 0 will cancel the timer operation.
PICTURE MENU
The Picture Menu Button allows you to select one of three different picture
modes (Standard, Dynamic, Soft).
Dynamic: Used for viewing in brighter environments (daytime viewing). Higher
levels of contrast and brightness setting are selected.
Standard: Used for normal viewing conditions (evening lighting). The contrast
and brightness setting are set to standard.
S MENU
TV/AV
SOUND MENU
TV/AV
Soft: Used for viewing conditions in a darkened room. The contrast and
brightness levels are reduced.
SOUND MENU
The Sound Menu Button allows you to choose between two different sound
modes (Music, Speech).
Music: Used where music is more common than speech such as musicals,
video clips etc.
Speech: Used where speech is more common than music such as talk shows,
news broadcasts etc.
SOUND MUTE
Pressing this button reduces the sound from the television to nil. Pressing the
button again returns the sound to the original setting. Pressing either Volume
Up ( + ) or Down (-) will also restore the volume level setting.
TV/AV
Pressing the TV/AV Button will cycle between the TV, AV1, AV2 and back to
TV.
Ä
PROGRAMME NUMBER UP
Pressing this button selects the next higher Programme Number in sequence.
Programme Numbers which have been "Skipped" (See page 19) will be
bypassed when this button is used.
Page 12

Remote Control Television Operation
GAME
BUTTON
I
■
GAME
WHAT IT DOES
PROGRAMME NUMBER DOWN
Pressing this button selects the next lower Programme Number in sequence.
Programme Numbers which have been "Skipped" (See page 19) will be
bypassed when this button is used.
VOLUME UP
This button is used to increase the volume output level from the television.
The volume level is indicated on the screen as a green bar and as a number
(0 ~ 63).
VOLUME DOWN
This button is used to decrease the volume output level from the television.
GAME
This button is used to switch between the television and AV2. The picture
options can be individually set for AV2 when in the Game mode.
NORMALISATION
The Normalisation Button is used to reset the television to factory preset levels
for Colour, Sharpness, Contrast, Brightness, Treble, Bass and Balance. The
button will only operate if the relevant menu is displayed on the screen.
Pressing this button allows you to make adjustments to the various sound
functions of the television. Each time the button is pressed the next function is
selected. Each function can be adjusted.
TC-80V95A Use the Volume Up ( + ) or Down (-) Buttons.
TX-80V952 Use the Level Up {A ) or Down { ▼ ) Buttons.
The functions are displayed in the following sequence;-
BASS Increase or decrease the sound bass level.
TREBLE increase or decrease the sound treble level.
BALANCE Adjust the sound level balance between the left and right
speakers.
Pressing this button allows you to make adjustments to the various picture
functions of the television. Each time the button is pressed the next function is
selected. Each function can be adjusted.
TC-80V95A Use the Volume Up ( + ) or Down (-) Buttons.
TX-80V95Z Use the Level Up {A ) or Down (▼) Buttons.
The functions are displayed in the following sequence:COLOUR Increase or decrease the colour level.
NTSC-TINT Increase or decrease the huel. (Only operates in the AV Mode
with an NTSC Signal).
BRIGHT Increase or decrease the brightness level.
CONTRAST Increase or decrease the contrast level.
SHARPNESS Increase or decrease the picture sharpness.
19
LEVEL UP & DOWN (TX-80V95Z only)
This button is used with the Picture Function and Sound Function Buttons to
change the level of the function selected.
Page 13

Remote Control VCR Operation
BUTTON WHAT IT DOES
O
II
TV/VCR
a
o
TV / VCR (TX-80V95Z only)
Used to switch the output of the VCR between the video tape / VCR
Programme Number and the aerial input.
VCR POWER (STAND-BY)
This button is used to turn the VCR Off. VCRs are usually left in Stand-By in
order for the Dew detector to work correctly.
REWIND / REVIEW
This button causes the tape to reverse. With some VCRs it is possible to
watch the picture in reverse in order to find a particular place on the tape.
PLAY
Used to start playback of a tape.
PAUSE
This button is used to stop the tape momentarily. Depending on the VCR, the
tape drive may automatically turn off after a preset time.
STOP
Pressing this button stops the tape drive and cancels any recording or playback
activity.
REC
A
V
!!►
RECORD *
Push both Buttons in order to commence recording.
1
PROGRAMME NUMBER UP
Pressing this button selects the next higher VCR Programme Number in
sequence.
FAST FORWARD/CUE
This button causes the tape to increase speed. With some VCRs it is possible
B
flQ
Unauthorised recording of material from Television Broadcasts or from other video
to watch the picture during fast forward in order to find a particular place on
the tape.
PROGRAMME NUMBER DOWN
Pressing this button selects the next lower VCR Programme Number in
sequence.
STILL ADVANCE
When the Pause has been activated, pushing this button will move the tape
forward one frame at a time.
* WARNING:
and/or audio sources may contravene copyright laws.
Page 14

Tuning Procedure (Automatic Search)
Important Information
Use the automatic tuning procedure only if you wish to reset ALL Programme Number
Locations. The numbers on the remote control refer to Programme Location Numbers
and do not necessarily correspond to local television channel numbers. If you want
the local television station numbers and the Programme Location Numbers to agree
DO NOT use this function: refer to "Manual Search" on page 17.
The TV/AV switch should be set to TV for this function to operate. When you start the automatic
search, the television will automatically search for television broadcasts through both VHF bands
and the UHF band. During this process all of the available television broadcast channels will be
automatically allocated to sequential Programme Number locations starting with location 1.
PRE.
1. Press the PRE. (Preset) button. The on-screen display appears
as shown:
Programme Number
as selected by you.
System Indicator
Tuning Indicator
(Only shown while
tuning).
This indicator is the actual
broadcast channel number.
Press the Volume Up Button to start the Auto Search. Auto
Search will automatically allocate each received broadcast
signal to a sequential Programme Number. The operation will
cease when all available channels have been tuned.
3. Return the television to normal operation by pushing the PRE.
Button three times.
NOTE:
A maximum of 100 television channels (0 - 99) can be programmed.
After you have finished with the automatic tuning and returned to normal viewing, push the
Programme Number Up Button to confirm the tuning condition for each Programme Number. If
a Programme Number is unwanted, it is possible to "SKIP" or bypass that Programme Number.
Please refer to "SKIP" setting details on page 19.
Page 15

Remote Control Teletext Operation (TX-80V95Z only)
Teletext Page Selection
TV/TEXT
o ~ o
CD
TV/TEXT
Push the TV/TEXT Button to select Text Mode. If the volume is left on you can hear the
television programme while watching teletext.
The main index wilt be displayed. The main index lists the topics available from teletext.
Each topic may have its own index.
Select the required starting page number. All page numbers consist of three digits; the
lowest page number is 100 and the highest is 899.
Use the Page Number Up & Down buttons to select the next higher or Lower page.
The colour coded buttons will have page numbers allowing quicker access to some
pages.
Press TV/TEXT to return to television viewing.
Teletext Sub-Page Selection
When a Page has more than one screen (sub-page) of information, it takes approximately 30 seconds before
each sub-page is displayed. You may have to wait for some time before the sub-page you require becomes
available.
With this function it is possible to enter the number of the desired sub-page. This sub-page number entered will
be the next one displayed.
o ~ o
TV/TEXT
Select Text Mode and choose a page as described above.
Press the Time Text button
When the page has been received, the sub-pages can be viewed. The sub-page
number must be entered as a four digit number e.g. sub-page 3 would be entered as
0003.
Pushing the red button selects the previous sub-page number.
Pushing the green button selects the next sub-page number.
Press TV/TEXT to return to television viewing.
Page 16

Fine Tuning (Automatic Frequency Control)
Under normal viewing conditions the AFC (Automatic Frequency Control)
remains ’’ON". However in areas of poor reception or constant interfere nee
a slight adjustment to the tuning may improve the picture quality. The
television should be switched ON and the TV/A V Switch set to TV. Refer to
page 16 for details of the on-screen display.
PRE.
r
------
OR
1. Press the PRE. (Preset) button three times.
^
Press the Programme Up or Programme Down button to
select the required Programme Number. The Programme
Number can also be selected directly using Direct Access
Programme Numbers on the remote control.
The on-screen display will appear as shown;
^ 0
xZ_ У
3.
Press the Volume Up or Volume Down button to start the Fine
FINE
Tuning. The On-Screen Tuning Indicator will slowly move in
the direction selected. When the button is released the tuned
position will be automatically memorised,
A small square will appear to the left hand side of the
Programme Number to indicate that the AFC has been turned
OFF.
4,
If more than one Programme Number is to be Fine Tuned
repeat steps 2 and 3.
5.
Press the PRE. Button once to finalise the operation.
Cancelling the Fine Tuning
To cancel the Fine Tuning follow the Manual Search procedure on page 17.
Page 17

Tuning Procedure (Manual Search)
Use this tuning procedure only if you wish to reset individual Programme
Numbers. The television should be switched ON and the TV/AV Switch set
to TV. Refer to page 16 for details of the on-screen display.
PRE.
OR
PRE.
1. Press the PRE. (Preset) button until the on-screen display appears as
shown:
2. Press the Programme Up or Programme Down button to select the
required Programme Number. The Programme Number can also be
selected directly using Direct Access Programme Numbers on the
remote control.
3. Press the Volume Up or Volume Down button to start the Manual
Search. The Search function will automatically search for the next
broadcast channel and will stop when one is found. Press the button
again if the channel is not the desired one.
4. To tune more stations repeat steps 2 and 3 until all channels are tuned.
A maximum of 100 Programme Numbers (0 - 99) can be programmed.
5. Press the PRE. Button twice to finish the tuning procedure.
Tuning the Television to a VCR
1. Turn the VCR On and either start a known tape playing or set the VCR Test Signal, if fitted,
to On (refer to the VCR operating instructions).
2. Repeat steps 2, 3 and 4 of the Manual Tuning procedure above. The television will treat
the VCR as if it was a normal television broadcast station.
NOTES:
1. The antenna lead must be connected to the VCR and the VCR RF-Out must be connected
to the TV RF-ln. Please refer to page 21.
2. The picture and sound quality are usually much better if the VCR is connected using the
AV Terminals. Please refer to page 21.
Page 18

Connecting Equipment to the TV Front Terminals
Front Panel Connections
Behind the front panel door is the headphone socket and the AV2 input.
NOTE: When a headphone plug is inserted into the headphone
Й ®
socket the Internal speakers will be automatically disconnected:
only the headphones will function.
Headphones ll
(Not Included)// Stereo Plug
3.5mm
n
The front input terminals allow quick and easy access for
computer games, video cameras and other equipment which
is not usually permanently connected. When a connection is
made to the front panel terminals, the rear AV2 terminals are
switched off.
VIDEO CAMERA nilT
© 0T
Connecting Equipment to the TV (Rear)
Monitor Out
The Monitor Out terminals reproduce the signals currently on the television screen. The on
screen signals could be a television programme or signals connected to the AV1 input.
The Monitor Out facility can be used to allow one video source (video tape, video disk etc.) to be
connected to more than one television. Connect the Monitor out from this television to the AV
Input of the second television.
If a video recorder is connected to the Monitor Out and video sources (VCR, video disk, camera
etc.) are connected to the AV1 input, the television becomes a visual display for tape editing or
copying.*
The Monitor Out Audio can also be connected to a stereo amplifier or other hi-fi equipment.
NOTE:
STANDARD VIDEO RECORDER Neverconnectthesamevideorecorderorotherdevice to both the VIDEO
on
Page 19
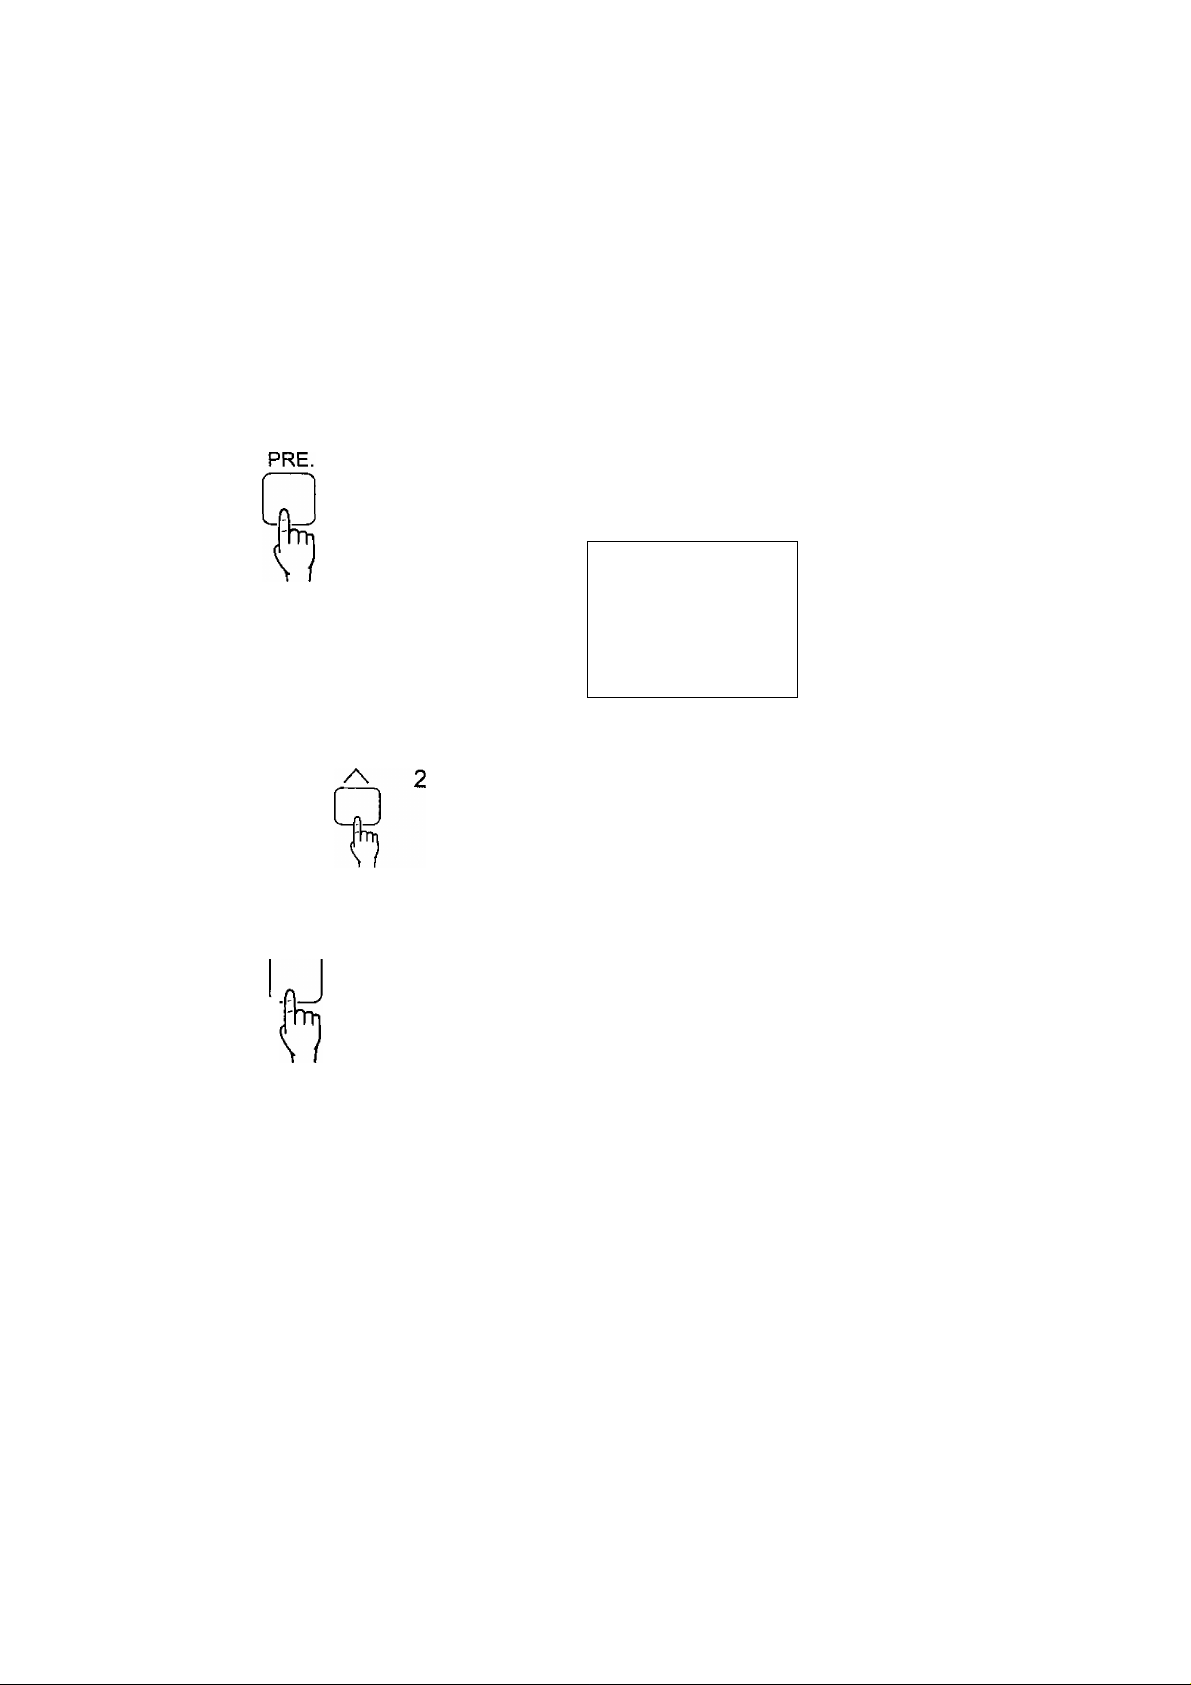
Skip Operation
This option allows you to "SKIP (bypass) the unused or undesired
Programme Numbers. The Function is only applicable when the Programme
Number Up or Down buttons are pressed. The use of the remote control
Direct Programme Number Buttons overrides the Skip function. The
television should be switched ON and the TV/AV Switch set to TV. Refer
to page 16 for details of the on-screen display.
1. Press the PRE. (Preset) button.
The on-screen display appears as shown:
/
--------------------------0 AUTO SRCH
AUTO
V
_______________
#
____
/
TV/AV o
Press the Programme Number Up or Down button
to select the Programme Number you want to skip.
The Programme Number can be selected using the
Direct Access Programme Number buttons on the
remote control.
o.
Press the TV/AV button.
The on-screen display will change as shown :
0 AUTO SRCH #
AUTO SKIP
4. If you wish to skip any more Programme Numbers
repeat steps 2 and 3.
5. Press the PRE. Button three times to return the TV
to normal operating mode.
How to Cancel the Skip Operation
To cancel the Skip function follow the procedure outlined above. Use the "TV/AV" button to
turn the "SKIP" off.
The Skip can also be cancelled by Manually tuning the Programme Number which has been
"SKIPPED".
Page 20

AUSTRALIA
NEW ZEALAND
Panasonic
Customer
care
centre
132600
www.panasonic.com.au
o'®*.#
c<g
QUALITY
MANAfiEMEKT
SYSTEM
/f09DlU ПАТЛ CtATtfJtV
Distributed in New Zealand by
Panasonic New Zealand Limited
350 Te Irirangi Drive
East Tamaki, Auckland
Customer Care Center
Ph: 0800 726 276
Email: [email protected]
www.panasonic.co.nz
Matsushita Electric Co. (Aust) Pty Ltd
P.O. Box 326 Penrith NSW 2751
ABN: 25 000 611 389
Certified to International Environmental Standard ISO14001
Certified to International Quality Standard AS/NZS ISO9001
ENVIRONMENTAl
MANAGEMENT
^Y_S T ,E_M
Printed in Australia
ТЛ64А0148
Page 21
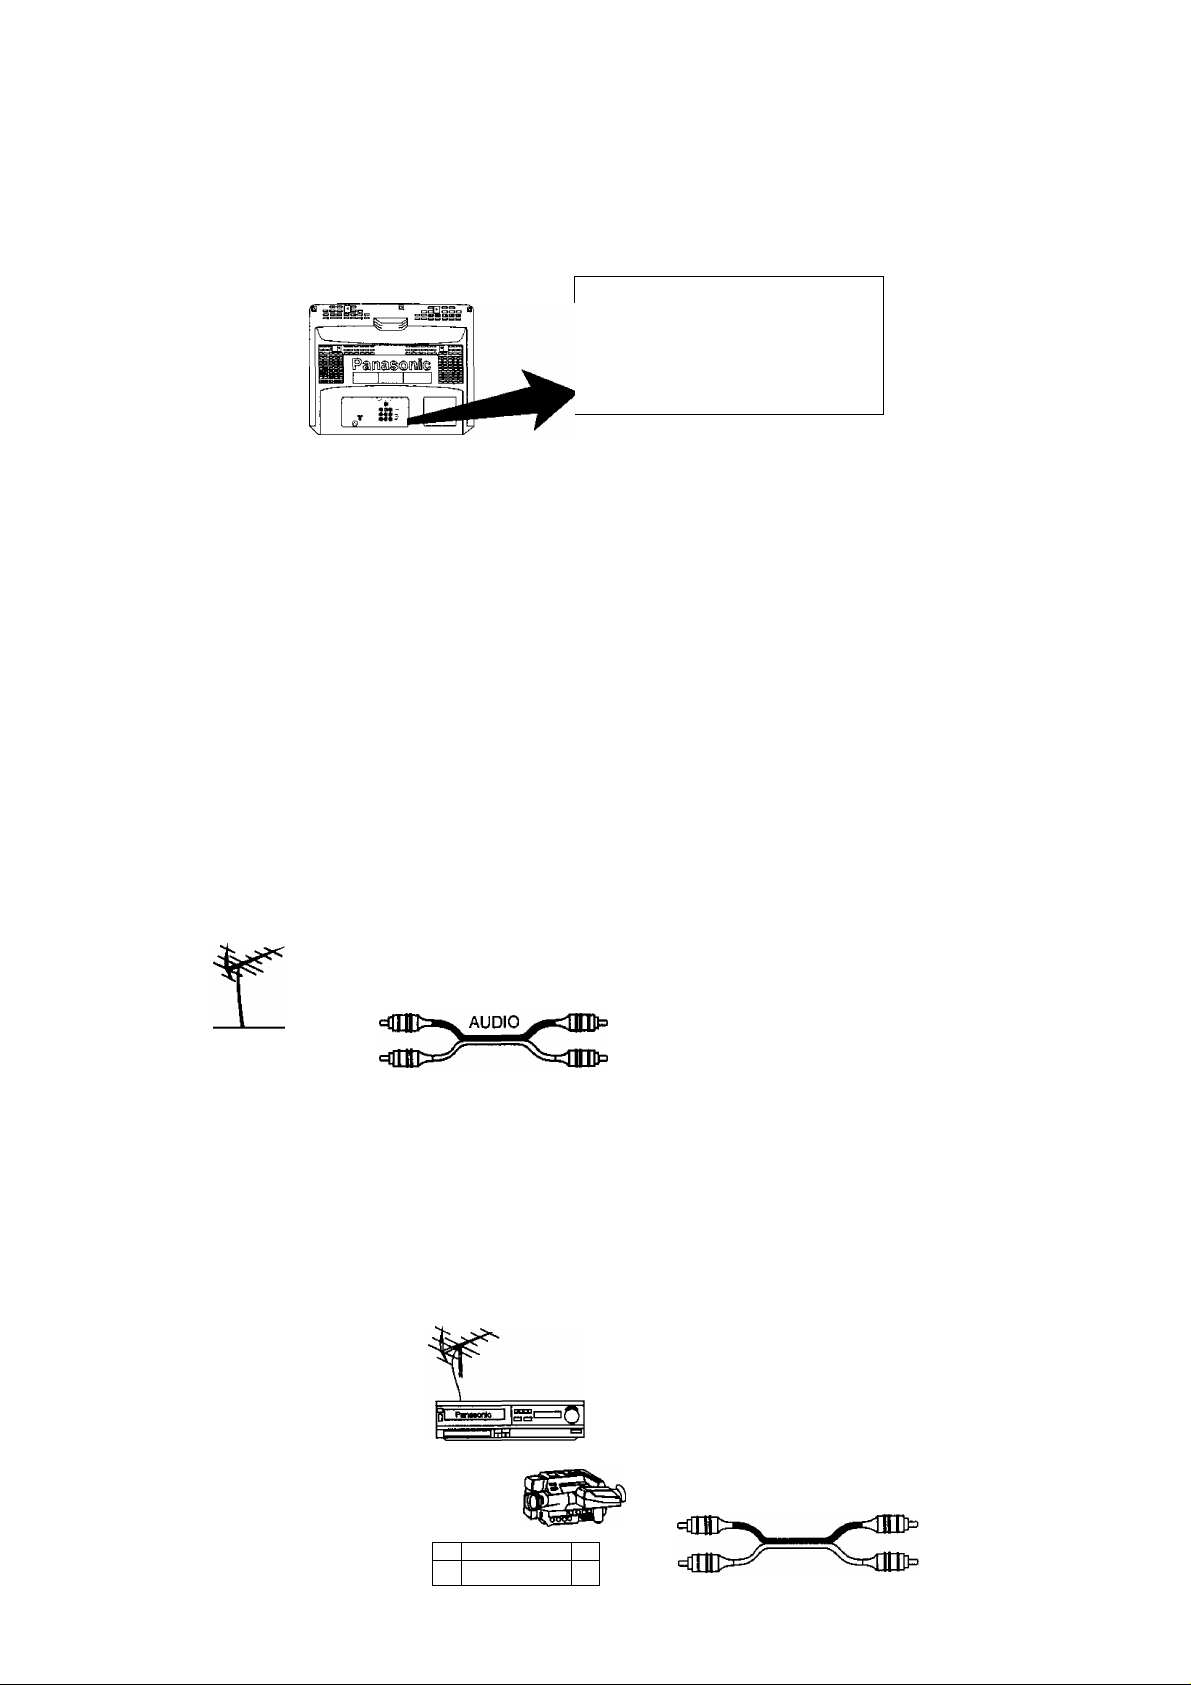
Connecting Equipment to the TV (Rear)
Rear Terminals
/
ir
@
__
„ « “A
00© ™
©oo-
_______
»VDCD
J
When using a VCR with the television always connect the Aerial to the VCR and connect an RF
Cable (not supplied) between the VCR RF-Out and the television RF-ln. You can watch videos
by either tuning the television to the VCR (see page 17) or by connecting the VCR to the rear
AV terminals.
Note: When connecting a VCR through the RF-IN, @ (2)T
please switch the TV to Mono. RF Cable (Not supplied)
Connecting a Standard VCR to the AV Input
Most standard Video Cassette Recorders use RCA type video and audio connectors. If your
VCR has different type connectors please refer to the VCR instruction book for details.
AV2
IN
©
0
NOTE: A mono VCR can be
connected to thistelevision. Connect
the VCR Audio out to the Left Audio
input on the television. The sound
will automatically be directed to both
speakers.
STANDARD VCR
VCR
OUT
©=nnD>
L©
R©
VIDEO
Connecting S-Video Equipment to the AV Input
S-Video equipment uses a 4Pin Mini Din (Male) plug for the video and RCA plugs for the audio.
When an S-Video cable is connected to an S-Video Input terminal, the RCA video terminal for
that AV position will be disconnected.
S-VlDEO
OUT
S-VHSVCR
S-VHS CAMERA
VIDEO DISK PLAYER
LEFT AUDIO OUT
PwaKflIc
n
n
r=i
Q
0
©
RIGHT AUDIO OUT
isO
©
©
©
 Loading...