How it Works
Log In / Sign Up
Buy Points
How it Works
FAQ
Contact Us
Questions and Suggestions
Users
Panasonic
Loading...
T
TX-43FX555E
2
TX-43FX600E
2
TX-43FX603E
3
TX-43FX613E
4
TX-43FX620E
3
TX-43FX623E
2
TX-43FX633E
2
TX-43FXR600
TX-43FXR610
TX-43G320E
TX-43GF85
TX-43GR300
TX-43GX550E
2
TX-43GX555E
TX-43GX600E
2
TX-43GX610E
2
TX-43GX623E
2
TX-43GX625E
2
TX-43GXW654
TX-43HX580E
3
TX-43HX582E
TX-43HX585E
TX-43HX710E
2
TX-43HX900E
4
TX-43HX940B
TX-43HX940E
2
TX-43HXF977
TX-43HXW584
TX-43HXW944
TX-43P15
TX-43P15H
TX-43P250
TX-43P250H
3
TX-43P250HHM
TX-43P250HM
TX-43P250X
2
TX-43P400H
3
TX-43P400HRU
TX-43P400X
2
TX-43P800H
2
TX-43P800HRU
TX-43P800X
TX-46G20E
TX-46G20ES
TX-47AS5750E
TX-47AS650B
2
TX-47AS650E
5
TX-47AS740B
2
TX-47AS740E
4
TX-47AS750E
3
TX-47AS800E
9
TX-47AS800T
4
TX-47ASE650
4
TX-47ASF757
4
TX-47ASM651
4
TX-47ASM655
4
TX-47ASN654
TX-47ASN655
TX-47ASN758
4
TX-47ASR750
2
TX-47AST756
4
TX-47ASW654
4
TX-47ASW754
4
TX-47ASW804
4
TX-47ASX759
4
TX-47P500
TX-47P500H
2
TX-47P500HM
TX-47P500HQ
TX-47P500HZ
TX-47P500X
4
TX-47P600H
2
TX-47P600HZ
TX-47P600X
2
TX-47P800H
TX-47P800HQ
TX-47P800HZ
TX-47P950A
TX-47PT1
TX-47PT1F EURO-5VP
TX-47WG25
2
TX-47WG25C
2
TX-47WG25CHX
TX-47WG25H
TX-47WG25X
TX-48AS640B
TX-48AS640E
5
TX-48ASR650
TX-48AX630B
2
TX-48C300B
2
TX-48C300E
7
TX-48C320E
8
TX-48CW304
7
TX-48CX300E
6
TX-48CX350B
2
TX-48CX400B
2
TX-48CX400E
5
TX-48CX403E
4
TX-48CXR400Z
TX-48CXW404
5
Loading...
Loading...
Nothing found
TX-47AS800E
E help [it]
270 pgs
2.17 Mb
0
E help [nl]
276 pgs
2.2 Mb
0
E help [no]
269 pgs
2.19 Mb
0
E help [pt]
271 pgs
2.18 Mb
0
Operating Instructions
80 pgs
2.37 Mb
0
Operating Instructions
258 pgs
2.15 Mb
0
User Manual
1 pgs
208.69 Kb
0
User Manual
272 pgs
2.19 Mb
0
User Manual [hu]
104 pgs
3.19 Mb
0
Table of contents
Loading...
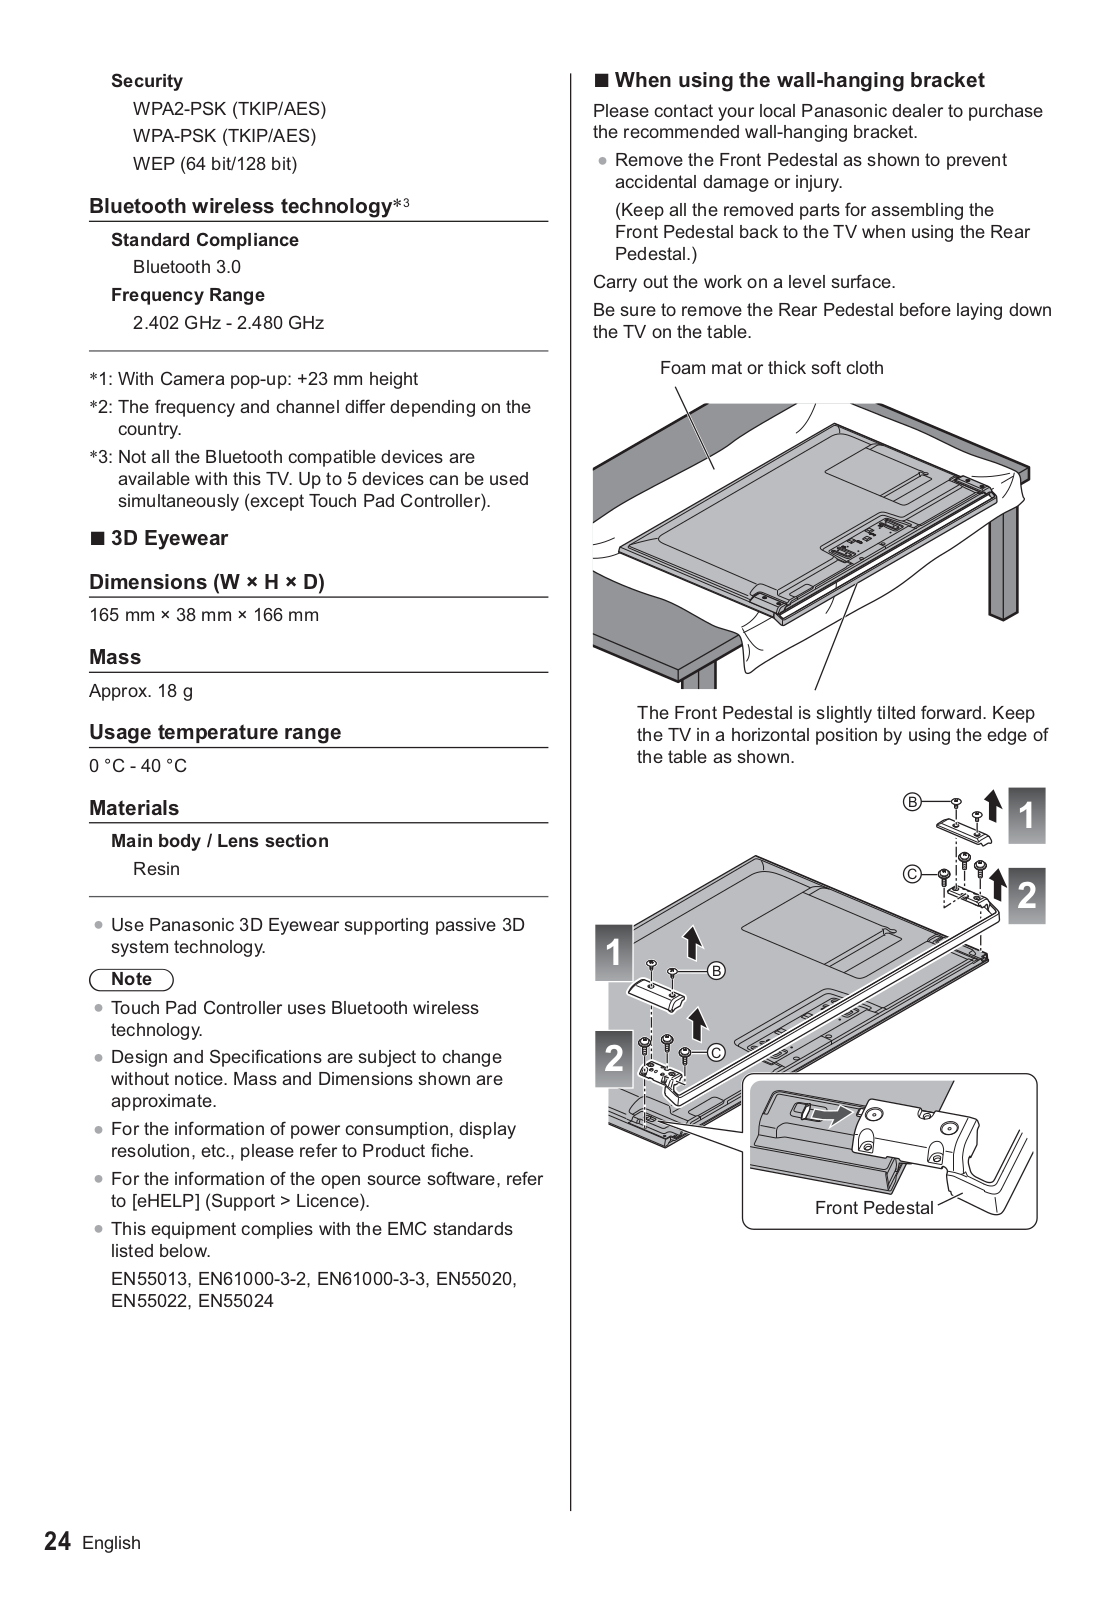
Panasonic TX-47AS800E, TX-55AS800E, TX-60AS800E Operating Instructions
...
Panasonic Operating Instructions
Download
Specifications and Main Features
Frequently Asked Questions
User Manual
Download
Loading...
+
56
hidden pages
Unhide
You need points to download manuals.
1 point = 1 manual.
You can buy points or you can get point for every manual you upload.
Buy points
Upload your manuals