

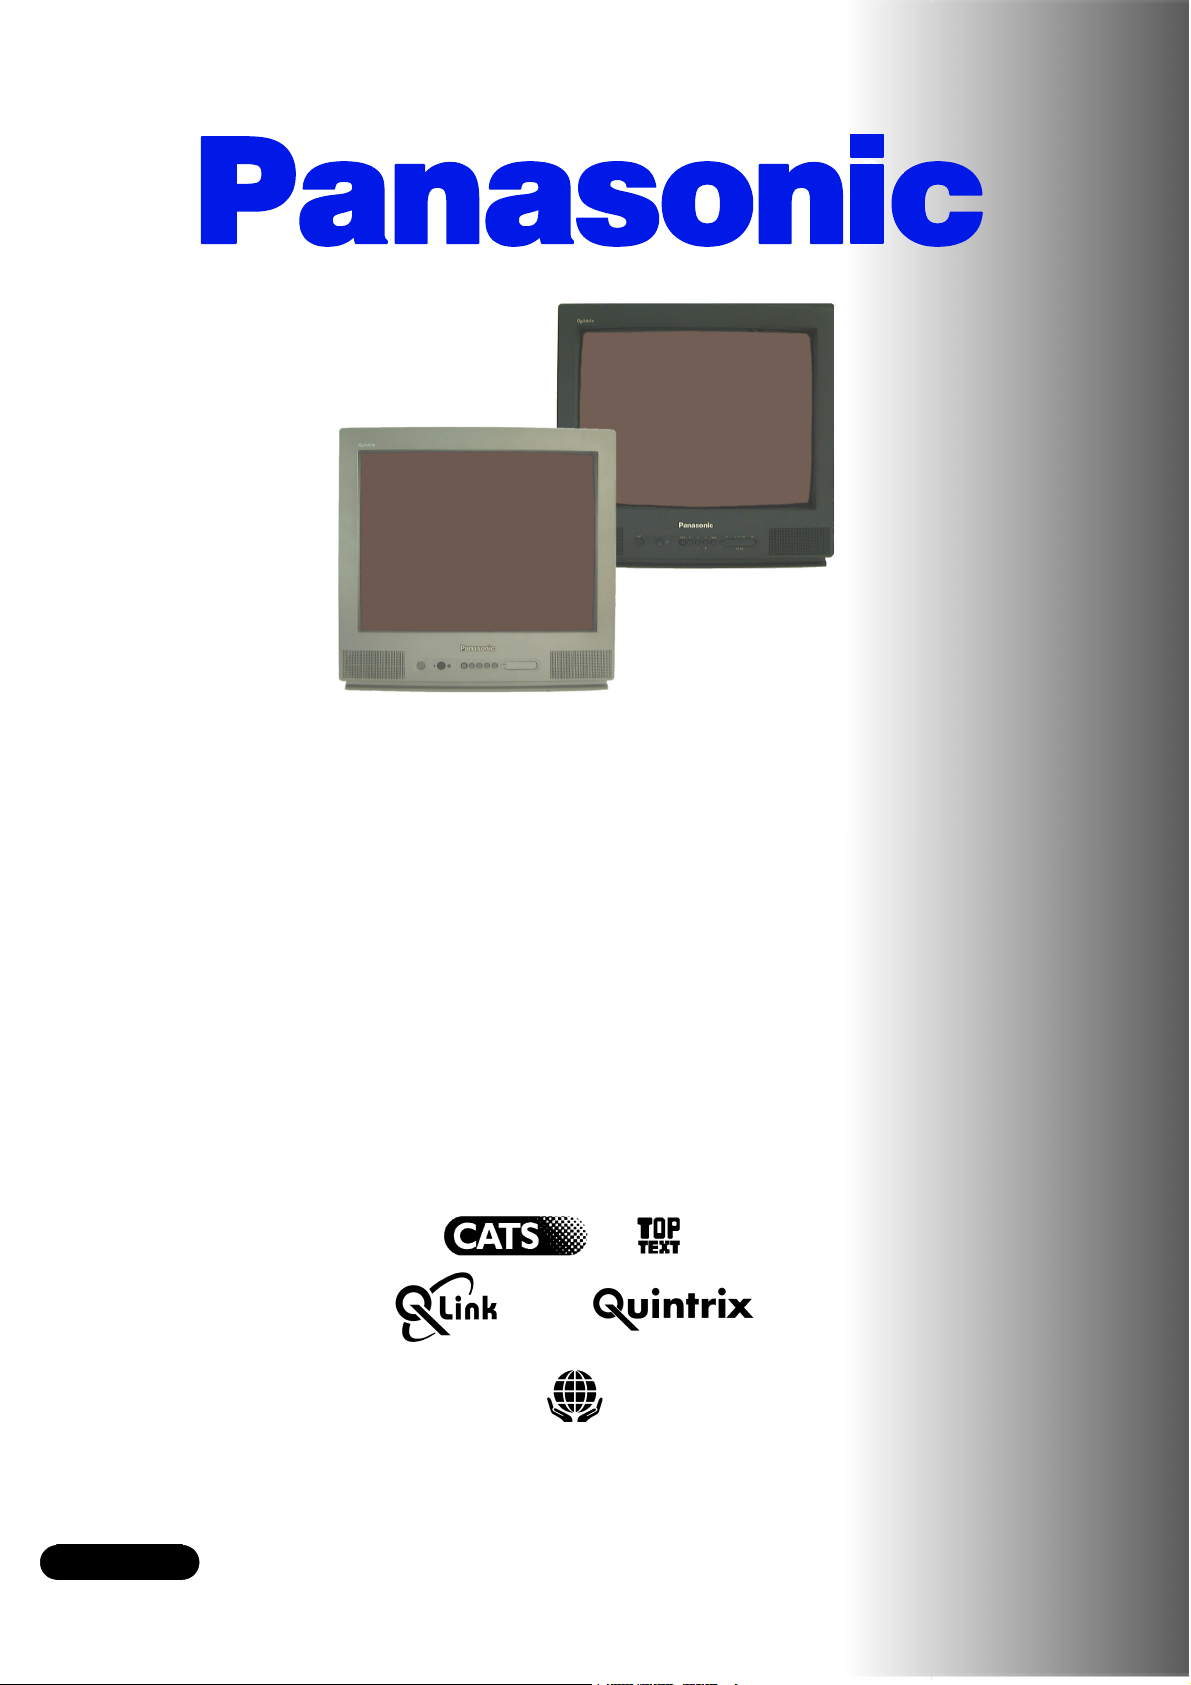
Panasonic TX-25CK1CBM, TX-25CK1CM User Manual
TQB8E3230---eng
English
anasonic¡Panasonic¡Panasonic¡Panasonic¡Panasonic¡Pa
nasonic¡Panasonic¡Panasonic¡Panasonic¡Panasonic¡Pan
asonic¡Panasonic¡Panasonic¡Panasonic¡Panasonic¡Pana
sonic¡Panasonic¡Panasonic¡Panasonic¡Panasonic¡Panas
onic¡Panasonic¡Panasonic¡Panasonic¡Panasonic¡Panaso
nic¡Panasonic¡Panasonic¡Panasonic¡Panasonic¡Panasoni
c¡Panasonic¡Panasonic¡Panasonic¡Panasonic¡Panasonic¡
Panasonic¡Panasonic¡Panasonic¡Panasonic¡Panasonic¡P
anasonic¡Panasonic¡Panasonic¡Panasonic¡Panasonic¡Pa
nasonic
asonic¡Panasonic¡Panasonic¡Panasonic¡Panasonic¡Pana
sonic¡Panasonic¡Panasonic¡Panasonic¡Panasonic¡Panas
onic¡Panasonic¡Panasonic¡Panasonic¡Panasonic¡Panaso
nic¡Panasonic¡Panasonic¡Panasonic¡Panasonic¡Panasoni
c¡Panasonic¡Panasonic¡Panasonic¡Panasonic¡Panasonic¡
Panasonic¡Panasonic¡Panasonic¡Panasonic¡Panasonic¡P
anasonic¡Panasonic¡Panasonic¡Panasonic¡Panasonic¡Pa
nasonic¡Panasonic¡Panasonic¡Panasonic¡Panasonic¡Pan
asonic¡
sonic¡Panasonic¡Panasonic¡Panasonic¡Panasonic¡Panas
onic¡Panasonic¡Panasonic¡Panasonic¡Panasonic¡Panaso
nic¡Panasonic¡Panasonic¡Panasonic¡Panasonic¡Panasoni
c¡Panasonic¡Panasonic¡Panasonic¡Panasonic¡Panasonic¡
Panasonic¡Panasonic¡Panasonic¡Panasonic¡Panasonic¡P
anasonic¡Panasonic¡Panasonic¡Panasonic¡Panasonic¡Pa
nasonic¡Panasonic¡Panasonic¡Panasonic¡Panasonic¡Pan
asonic¡Panasonic¡Panasonic¡Panasonic¡Panasonic¡Pana
sonic¡Panasonic
T X --- 2 5 C K 1 C / M
TX---25CK1C/BM
Please read these instructions before operating your set and retain them for future
onic¡Panasonic¡Panasonic¡Panasonic¡Panasonic¡Panaso
nic¡Panasonic¡Panasonic¡Panasonic¡Panasonic¡Panasoni
c¡Panasonic¡Panasonic¡Panasonic¡Panasonic¡Panasonic¡
Panasonic¡Panasonic¡Panasonic¡Panasonic¡Panasonic¡P
anasonic¡Panasonic¡Panasonic¡Panasonic¡Panasonic¡Pa
nasonic¡Panasonic¡Panasonic¡Panasonic¡Panasonic¡Pan
asonic¡Panasonic¡Panasonic¡Panasonic¡Panasonic¡Pana
sonic¡Panasonic¡Panasonic¡Panasonic¡Panasonic¡Panas
onic¡Panasonic¡
nic¡Panasonic¡Panasonic¡Panasonic¡Panasonic¡Panasoni
c¡Panasonic¡Panasonic¡Panasonic¡Panasonic¡Panasonic¡
Panasonic¡Panasonic¡Panasonic¡Panasonic¡Panasonic¡P
anasonic¡Panasonic¡Panasonic¡Panasonic¡Panasonic¡Pa
nasonic¡Panasonic¡Panasonic¡Panasonic¡Panasonic¡Pan
asonic¡Panasonic¡Panasonic¡Panasonic¡Panasonic¡Pana
sonic¡Panasonic¡Panasonic¡Panasonic¡Panasonic¡Panas
onic¡Panasonic¡Panasonic¡Panasonic¡Panasonic¡Panaso
nic¡Panasonic¡Panasonic
c¡Panasonic¡Panasonic¡Panasonic¡Panasonic¡Panasonic¡
Panasonic¡Panasonic¡Panasonic¡Panasonic¡Panasonic¡P
anasonic¡Panasonic¡Panasonic¡Panasonic¡Panasonic¡Pa
Operating Instructions
nasonic¡Panasonic¡Panasonic¡Panasonic¡Panasonic¡Pan
asonic¡Panasonic¡Panasonic¡Panasonic¡Panasonic¡Pana
sonic¡Panasonic¡Panasonic¡Panasonic¡Panasonic¡Panas
onic¡Panasonic¡Panasonic¡Panasonic¡Panasonic¡Panaso
nic¡Panasonic¡Panasonic¡Panasonic¡Panasonic¡Panasoni
c¡Panasonic¡Panasonic¡
Panasonic¡Panasonic¡Panasonic¡Panasonic¡Panasonic¡P
¡Panasonic¡Panasonic¡Panasonic¡Panasonic¡Pan
Panasonic¡Panasonic¡Panasonic¡Panasonic¡Pana
¡Panasonic¡Panasonic¡Panasonic¡Panas
Colour Television
Panasonic¡Panasonic¡Panasonic¡Panaso
¡Panasonic¡Panasonic¡Panasoni
reference.
Panasonic¡Panasonic¡Panasonic¡

WELCOME
Dear Panasonic Customer
Welcome to thePanasonicfamily of customers. We hope that you will have many years of enjoyment from your new colour
television set. Technically your set is more advanced than the previous models, however the “Quick Start ---Up Guide” will
help you operate your set easily. Later you may read this Manual and use it for further reference.
TABLE OF CONTENTS
D Warnings and Precautions 2..........................
D Quick Start 3........................................
D Main Controls 4.....................................
D Main Menu Flow Chart 5.............................
D O n --- S c r e e n M e n u I n d i c a t i o n s 5.......................
D Main menu 6.....................................
D Sound menu 7...................................
D Setup menu 8....................................
D Tuning menu 9...................................
D Tuning --- Automatic Tuning Process (ATP) 10..........
D Tuning --- Manual Tuning 11.........................
D Swap --- Programme swapping 12....................
D On---Screen Display Language 12...................
D Special Functions
D Q --- L i n k 1 3........................................
D D a t a C o p y i n g I n V C R --- Q --- L i n k 1 4..................
D AV selection --- AV Mode 14.........................
D VCR Controls 15...................................
D Teletext Function 16................................
D Autosort 17.......................................
D External audio/video connections 18....................
D Troubleshooting 1 9....................................
D User Information 20...................................
D Specifications 20......................................
WARNINGS AND PRECAUTIONS
` This television set is designed to be connected to an AC
220---240 V, 50 Hz power source.
` To avoid damage that may result in an electric shock or fire do
not expose the unit to rain or excessive moisture.
` WARNING: HIGH VOLTAGE!!!
Do not remove the rear cover as live parts and high---voltage
components are accessible. No components need any
technical maintenance by the user.
` The power switch does not totally disconnect the set from the
power source. If you are not going to use the unit for an
extended period, unplug the power plug from the socket.
2
` CLEANING THE UNIT AND SCREEN
Unplug the power plug from the socket. To clean the unit and
the screen use a soft cloth slightly soaked in a soap solution.
Do not use solutions containing benzene or other petroleum
products. The unit may generate static electricity, so be
careful when touching the screen.
` Do not expose the unit to direct sunlight or other sources of
direct heat.
` Adequate ventilation is essential to prevent failure of
electrical components; we recommend that a gap of at least 5
cm is left around the unit even when it is placed inside a
cabinet or between shelves.
` WASTE DISPOSAL
The used packaging and batteries should be disposed of in
special containers intended for this purpose.
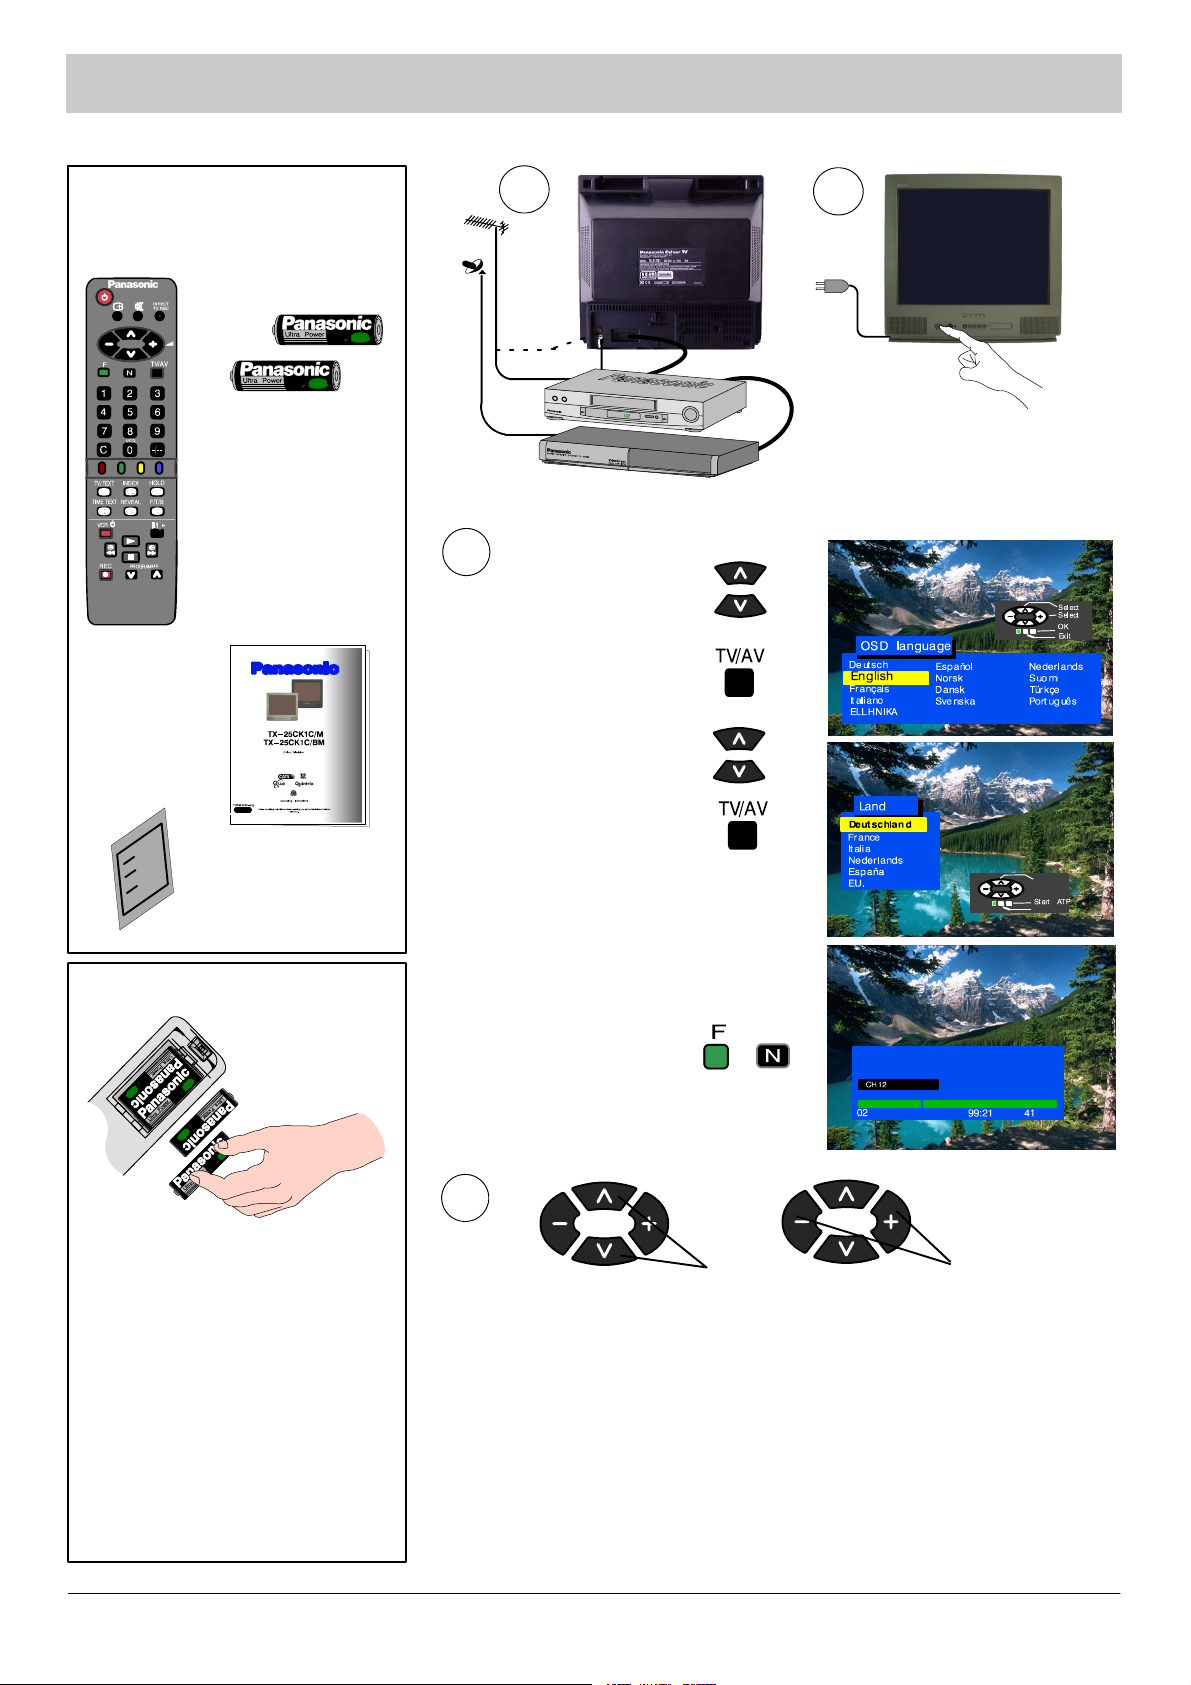
QUICK START
How To Start Up Quickly
Check you have all the
components shown here:
remote control
unit batteries
2xR6(UM3)
EUR511310
remote control
unit
operation
manual
1
OR
Connect the aerial and the additional devices.
Switch on the unit and the connected devices.
3
Select your language.
Press TV/AV button.
Select your country.
2
SCART
Television
guarantee
Remote control unit batteries
S Insert the batteries ensuring
correct polarity.
S Do not use old and new
batteries at the same time.
Used batteries should be
removed at once.
S Do not mix battery types. Do
n o t u s e N i --- C d b a t t e r i e s .
Press TV/AV button.
Automatic tuning will turn on, your
transmitting stations will be found, saved
in memory, and organised.
Press button “F” if you want to stop;
press button “N” if you want to
cancel the ATP sequence.
If the AV connector is connected to a
compatible VCR the programmed data
will be transmitted to the VCR via
Q --- L i n k . Se e p a g e 1 3 .
4
Channel selection
D If the VCR has failed to receive the data transmitted from the television
unit you will probably have to find a way to transmit the data from the VCR
menu.
D If Q--- Link does not work properly, check if the SCART cable is
connected to AV1 connector on the unit and has all the 21 pins, and if the
VCR is compatible with Q--- Link, NEXTVIEWLINK and similar techniques.
D You will find Information regarding Q---Link and connection on pages
13 and 18. Should you need more detailed information, contact your
dealer.
If you install a new Q---Link compatible VCR, you may switch it on. The
transmitted tuning data will match the data in the unit. If you use a new
NEXTVIEWLINK--- compatible VCR, the data will have to be transmitted
manually. See details in the VCR operating manual.
Volume adjustment
3
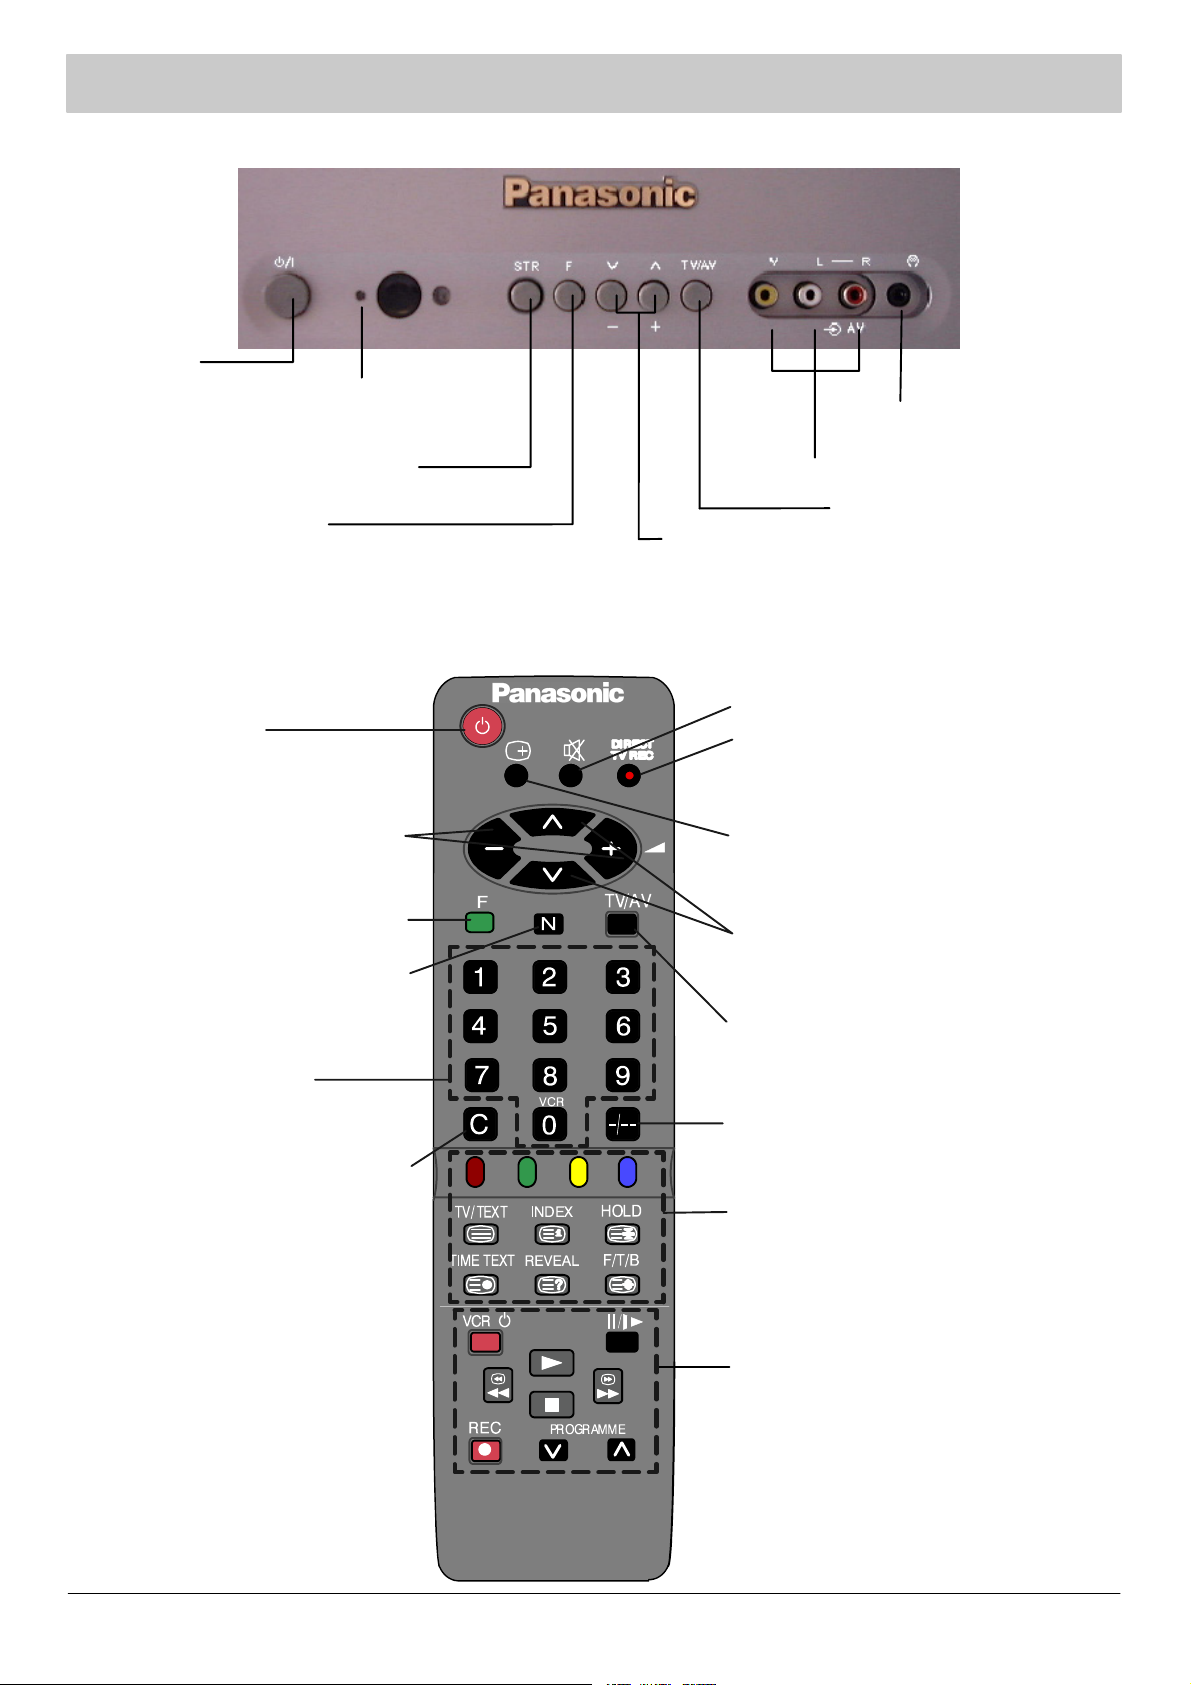
MAIN CONTROLS
Front Panel
Power switch
Red light is a standby mode indicator.
To switch on the unit press the stand ---by mode
button, +/--- button or 0 to 9 buttons.
Saving of the tuning modes and other
function adjustments (STR)
F (Selection of functions)
Functions are displayed on the screen, another press
will select accessible functions such as volume,
contrast, brightness, colour, sharpness, tint (NTSC only),
bass, treble, stereo sound balance, and setup mode.
Remote Control Unit
Headphones jack
(see page 18).
RCA audio/video jack (see page 18).
TV/AV switch (see page 13).
Programme number up and down (pre ---saved). If
the selected function has been displayed on the
screen, increase or decrease the level of the
selected function by pressing the button.
Powerorstand---by.
Adjusts the selected functions. If the
required function has not been
selected, adjusts the volume.
Selects functions. Press to select
menu on the screen (see page 5).
Recalls the levels selected with the
STR button (on the unit front panel).
Cancels t he menu indications on the
screen.
Numbered buttons to:
--- c h a n g e p r o g r a m m e s ;
--- directly select channels;
--- teletext page selection.
Direct channel selection: press and
select the channel on the numbered
buttons.
If you want to select a channel in the
HYPERBAND (cable TV) with the
direct channel selection button,
press the direct channel selection
button, then programme up and
d o w n b u t t o n ( “ C ” a n d “ --- / --- --- ” ) a n d
select the number with the numbered
buttons.
Sound mute
Direct record button (activates
Q --- L i n k )
Recall button to display:
--- programme position;
--- channel number;
--- t i m e ;
--- sound (stereo/mono/M1/M2)
--- teletext station name.
Channel number up and down, menu line
selection, Teletext page selection.
TV/AV mode selection (see pages 13 and
18).
This button is used to save and confirm the
screen menu indications.
Two--- digit (10 to 99) programme number
selection.
Teletext operation buttons (see page 16).
VCR operation buttons (see page 15).
4
MAIN MENU FLOW CHART
Main Menu
Contrast
Brightness
Colour
Sharpness
Tint (NTSC only)
Off timer
Sound Menu
Setup Menu
Off / 15 / 30 / 45 / 60 / 75 / 90
OSD Language
Deutsch
English
Français
Italiano
ELLHNIKA
Español
Norsk
Dansk
Svenska
Nederlands
Suomi
Türk çe
Português
Sound Menu
Volume
Bass
Tre ble
Balance
MPX (TV only)
Mode
Sound AI
Setup Menu
Text Language
Aspect
C --- A --- T --- S
Colour System
(AV only)
Q --- L i n k
Tuning Menu
OSD Language
Tuning Menu
ATP
Manual tuning
Fine tuning
Swap
Decoder (AV)
Q --- L i n k
Volume Correc.
Child Lock
Stereo / Mono / M1 / M2
Music / Speech
Off / On
West / East
Auto / 4:3 / 16:9
AUTO / PAL / NTSC / M.NTSC
Off / On
Auto setup warning
Manual tuning
Swap
Off / On
TV → VCR
Off / On
Country
Deutschland
France
Italia
Español
Nederlands
EU.
Auto setup searching
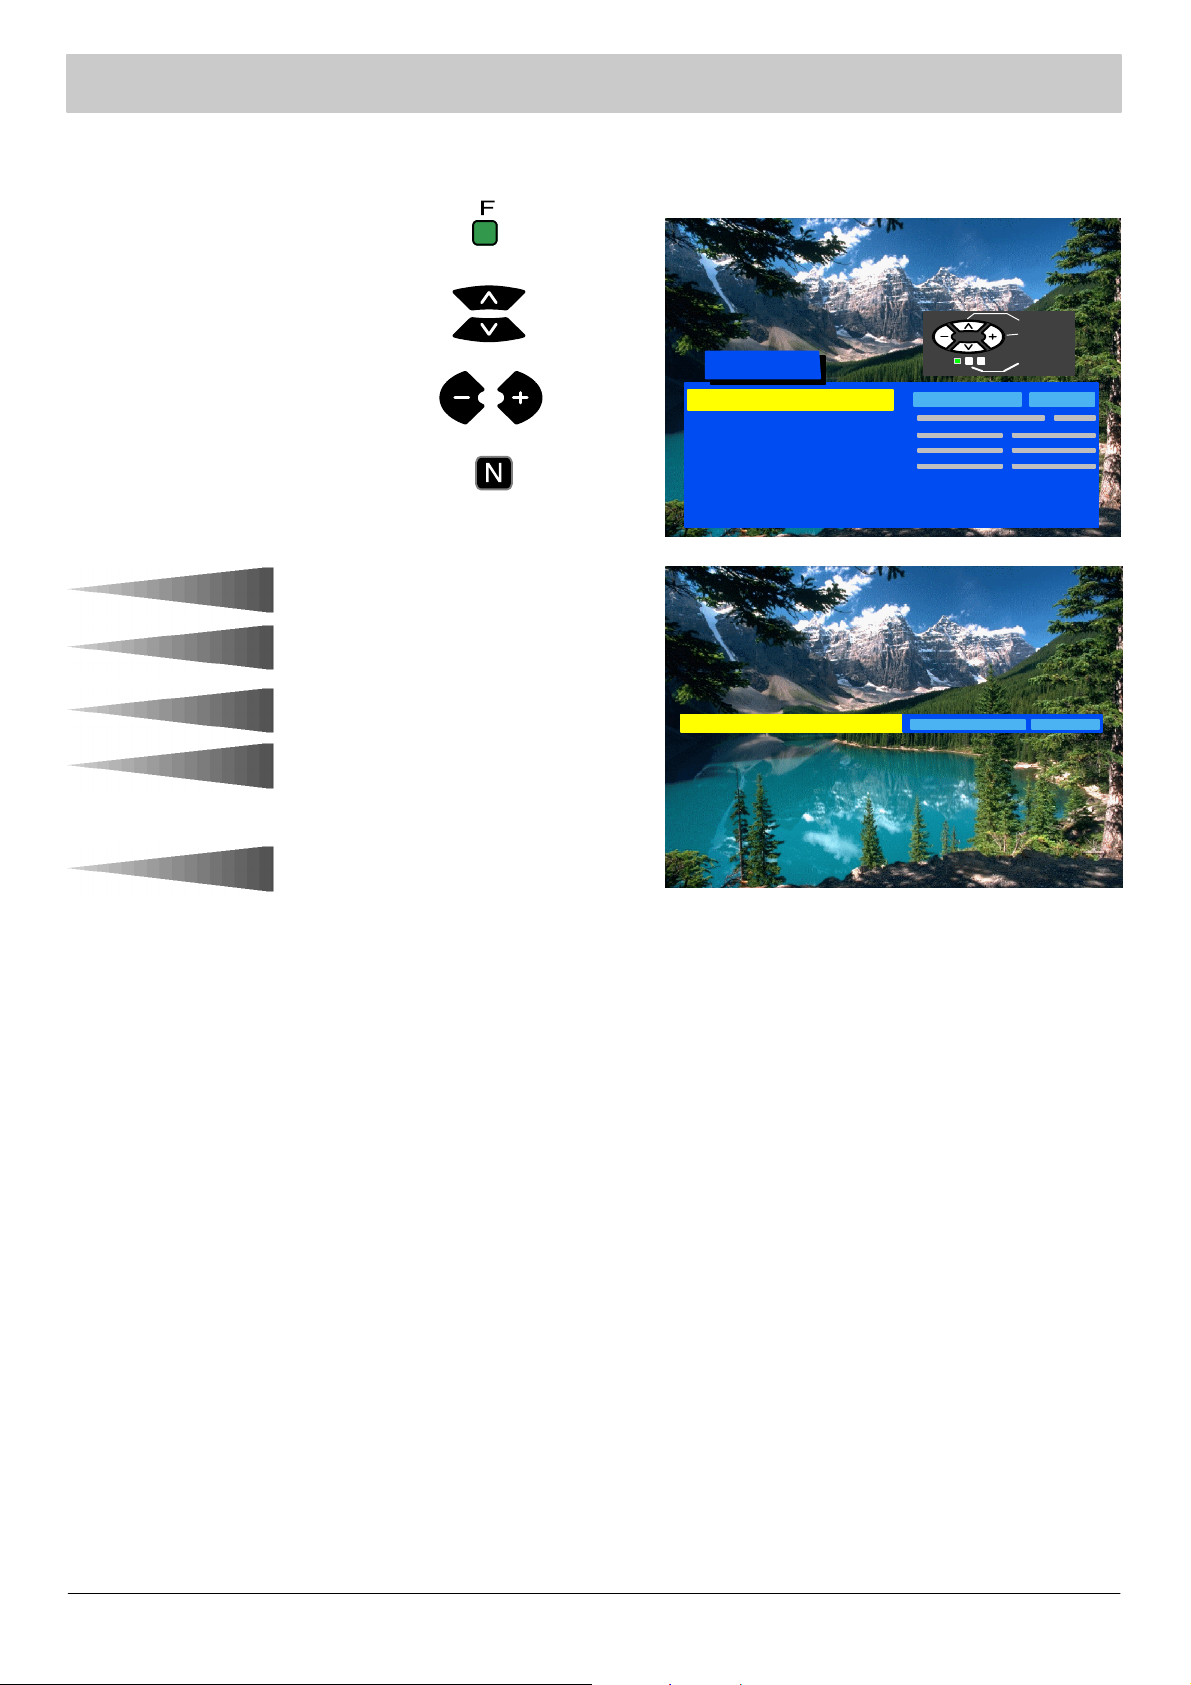
ON---SCREEN MENU INDICATIONS
Your television set is equipped with a comprehensive menu system to be used for tuning and selection of parameters.
Press button “F ” to enter
the menu.
Select
Adjust
Menu headline
Selected line
Menu line
Main Menu
Contrast
Brightness
Colour
Sharpness
Tint (NTSC only)
Off timer
Sound Menu
Setup Menu
Off
Exit
Some parameters such as Contrast, Brightness, Colour and Sharpness may be increased or decreased at your wish.
Selected lines allow to select certain functions such as Off Timer.
Other selected lines such as Setup menu allow you to go to another menu.
By pressing button “F” you either enter the on ---screen indications menu or go back to another menu.
By pressing button “N” you close either the on---screen menu or the selected parameter.
Button “TV/AV” is normally used to confirm the selection.
Buttons to be used to move across
the menu and to select parameters.
Instructions
Parameter indication
Press button “N” to
leave the menu.
5
MAIN MENU
This section shows among others how to adjust the picture quality.
Press button “F”
Select the required parameter
Increase or decrease the level.
Press button “N” to leave the menu.
Contrast
The level of contrast, brightness,
Brightness
Colour
colour and sharpness may be
adjusted so as to meet the
requirements of your sight. You may
go back to the level set by the
manufacturer at any time by pressing
button “N”.
Sharpness
The line “Tint” will appear as a menu
Tint
line only when a NTSC signal is
connected to the unit via the AV input
thus allowing the tints to be adjusted.
Main Menu
Contrast
Brightness
Colour
Sharpness
Tint (NTSC only)
Off timer
Sound Menu
Setup Menu
Contrast
Off
Select
Adjust
Exit
Off timer
Sound menu
Setup menu
Switches off your television at the
timeyousetfrom0to90minuteswith
15--- minute intervals.
The Sound menu allows you to
adjust the sound as you wish.
The Setup menu provides access to
various advanced features and also to
the Tuning menu.
6
 Loading...