

Panasonic SI Version 1.9.0 Installation Manual

Panasonic Arbitrator
SI Installation Manual
SI Version 1.9.0
Arbitrator-SI 1.9 InstallManual-Rev1.doc 2
Installing the Arbitrator SI 1.9.0
In order to simplify the installation process, the new
Arbitrator SI software will automatically install the
required software components during it’s installation.
If those components are already installed, the
application will skip those core required components
and move onto the software installation.
The following steps detail how to install and configure
the Arbitrator SI 1.9.0
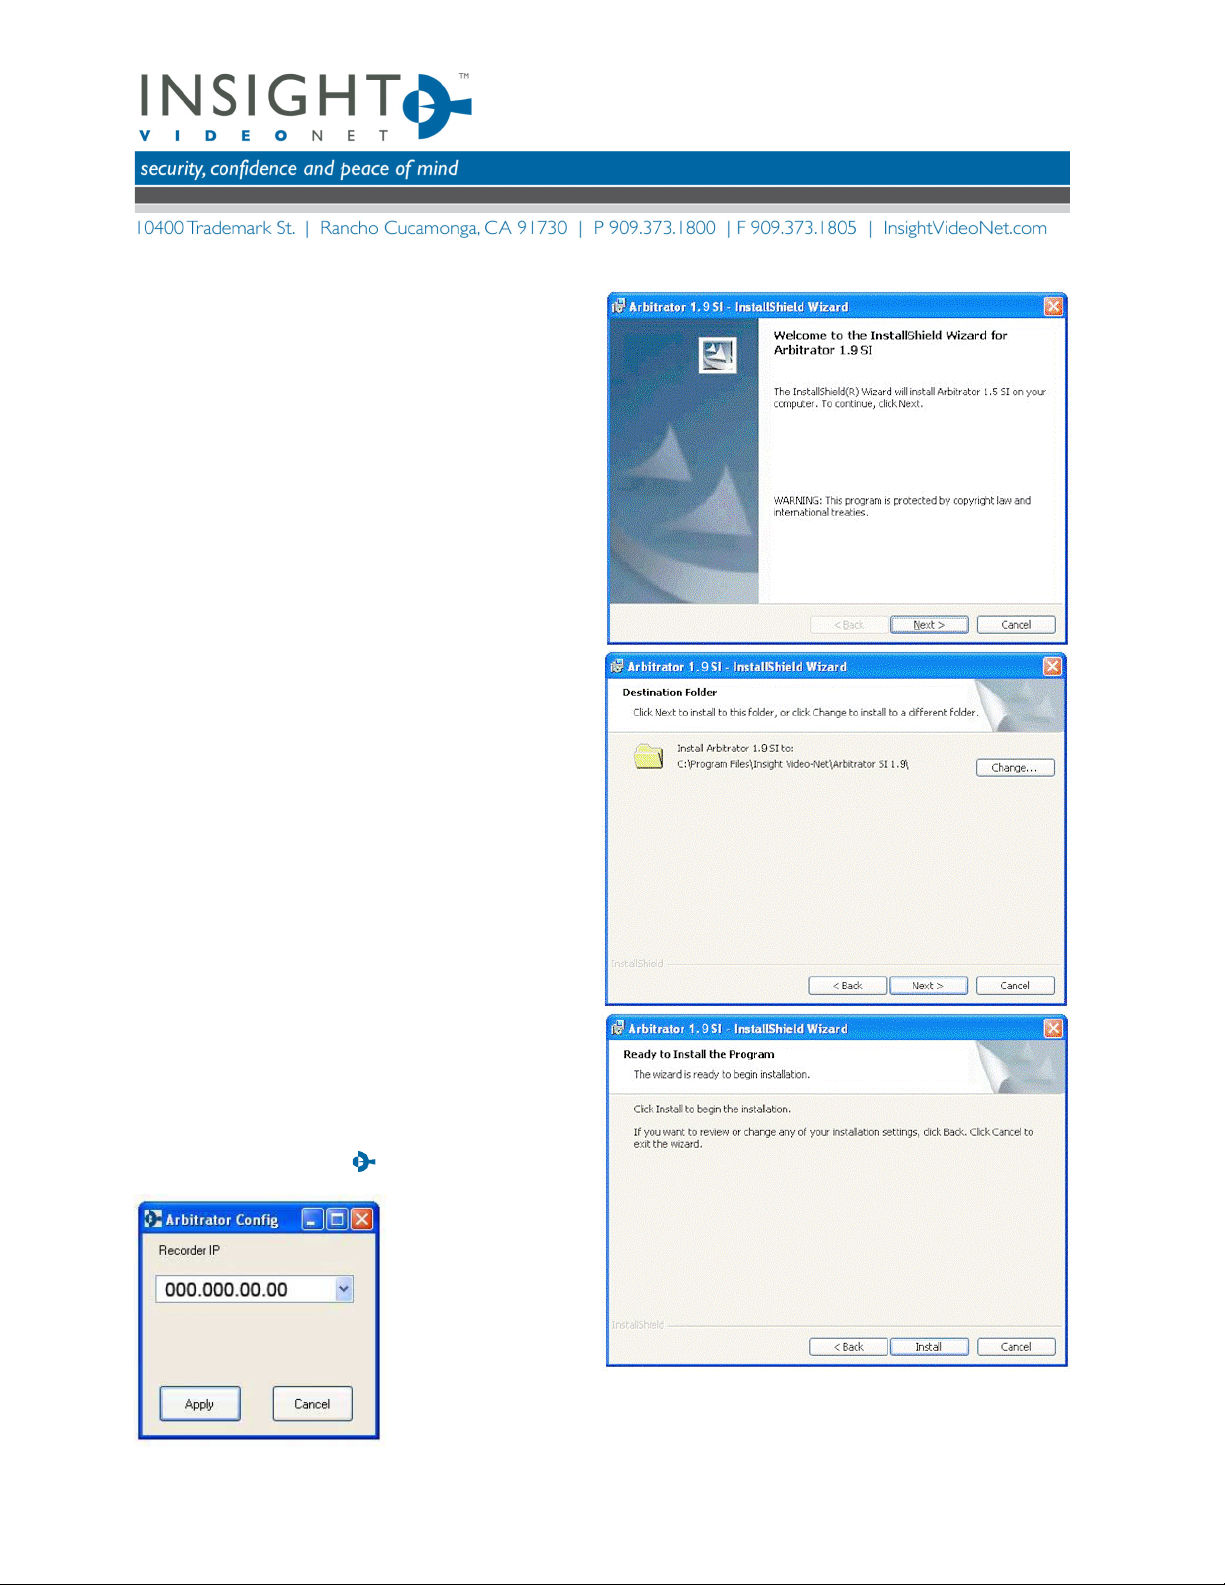
1. Launch the Arbitrator SI 1.9.0 .exe from your
desktop.
2. An InstallShield Wizard will launch initiating the
install process, select “Next” to begin.
3. The next step in the installation process is defining
the destination of the install path. You can manually
change it by selecting the “Change” button, or you
can keep the default path. Select “Next” when
ready to proceed.
4. Once the destination has been set and the user has
moved to the next step you can begin the actual
installation by selecting “Install”. A status bar will
begin to display the state of the installation and the
progress it has made.
5. When the status bar has reached the end, a window
will pop up requiring the IP address of the recorder
unit the software is trying to interface with.
6. After the information has been entered into the IP
window, an InstallShield Wizard completion window
will appear. Select “Finish” to finalize the
installation.
7. A shortcut will be created on the desktop allowing
for quick software access.
Note: The IP address is configured to upload to any
CMS server transmitting a wireless beacon. To upload
video to one specific CMS server, input the IP address
of the desired CMS server.
 Loading...