

Page 1
User Guide
Section 775
900 Mhz DBS Series
Cordless Telephone
545X03001B
DBS 576-DBS 576HD
Version 5.0
Issued September 2001
Page 2
The contents of this manual are subject to change
without notice and do not constitute a commitment on
the part of Panasonic Telecommunication Systems
Company (PTSC). Every effort has been made to
ensure the accuracy of this document. However, due
to ongoing product improvements and revisions,
Panasonic cannot guarantee the accuracy of printed
material after the date of publication nor can it accept
responsibility for errors or omissions. Panasonic will
update and revise this document as needed.
The software and hardware described in this
document may be used or copied only in accordance
with the terms of the license pertaining to said
software or hardware.
Reproduction, publication, or duplication of this
manual, or any part thereof, in any manner,
mechanically, electronically, or photographically, is
prohibited without permission of the Panasonic
Telecommunication Systems Company (PTSC).
© Copyright 2001 by Panasonic Telecommunication
Systems Company (PTSC).
All rights reserved.
Page 3
Checking Your Package
. . . . . . . . . . . . . . . 1
Understanding Your Telephone
Handset Overview . . . . . . . . . . . . . . . . . . . . . . . 3
Base Station Overview . . . . . . . . . . . . . . . . . . . . 5
Liquid Crystal Display (LCD) Overview . . . . . . . . 6
Handset Controls . . . . . . . . . . . . . . . . . . . . . . . . 7
Using Your Telephone
Using Your Handset . . . . . . . . . . . . . . . . . . . . . . 9
Answering An Incoming Call . . . . . . . . . . . . . . . 10
Placing An Outgoing Call . . . . . . . . . . . . . . . . . 10
Switching Calls Between Telephones . . . . . . . . 11
Programming Functions
Troubleshooting
Accessories
Additional Accessories . . . . . . . . . . . . . . . . . . . 19
. . . . . . . . . . . . . . . . . . . . . . 19
. . . . . . . . . . . . . . . . . . . 17
. . . . . . . . . . . . . . . . 9
. . . . . . . . . . . . . . 13
. . . . . . . . . . 3
Precautions
. . . . . . . . . . . . . . . . . . . . . . 21
i
Page 4
ii
Page 5
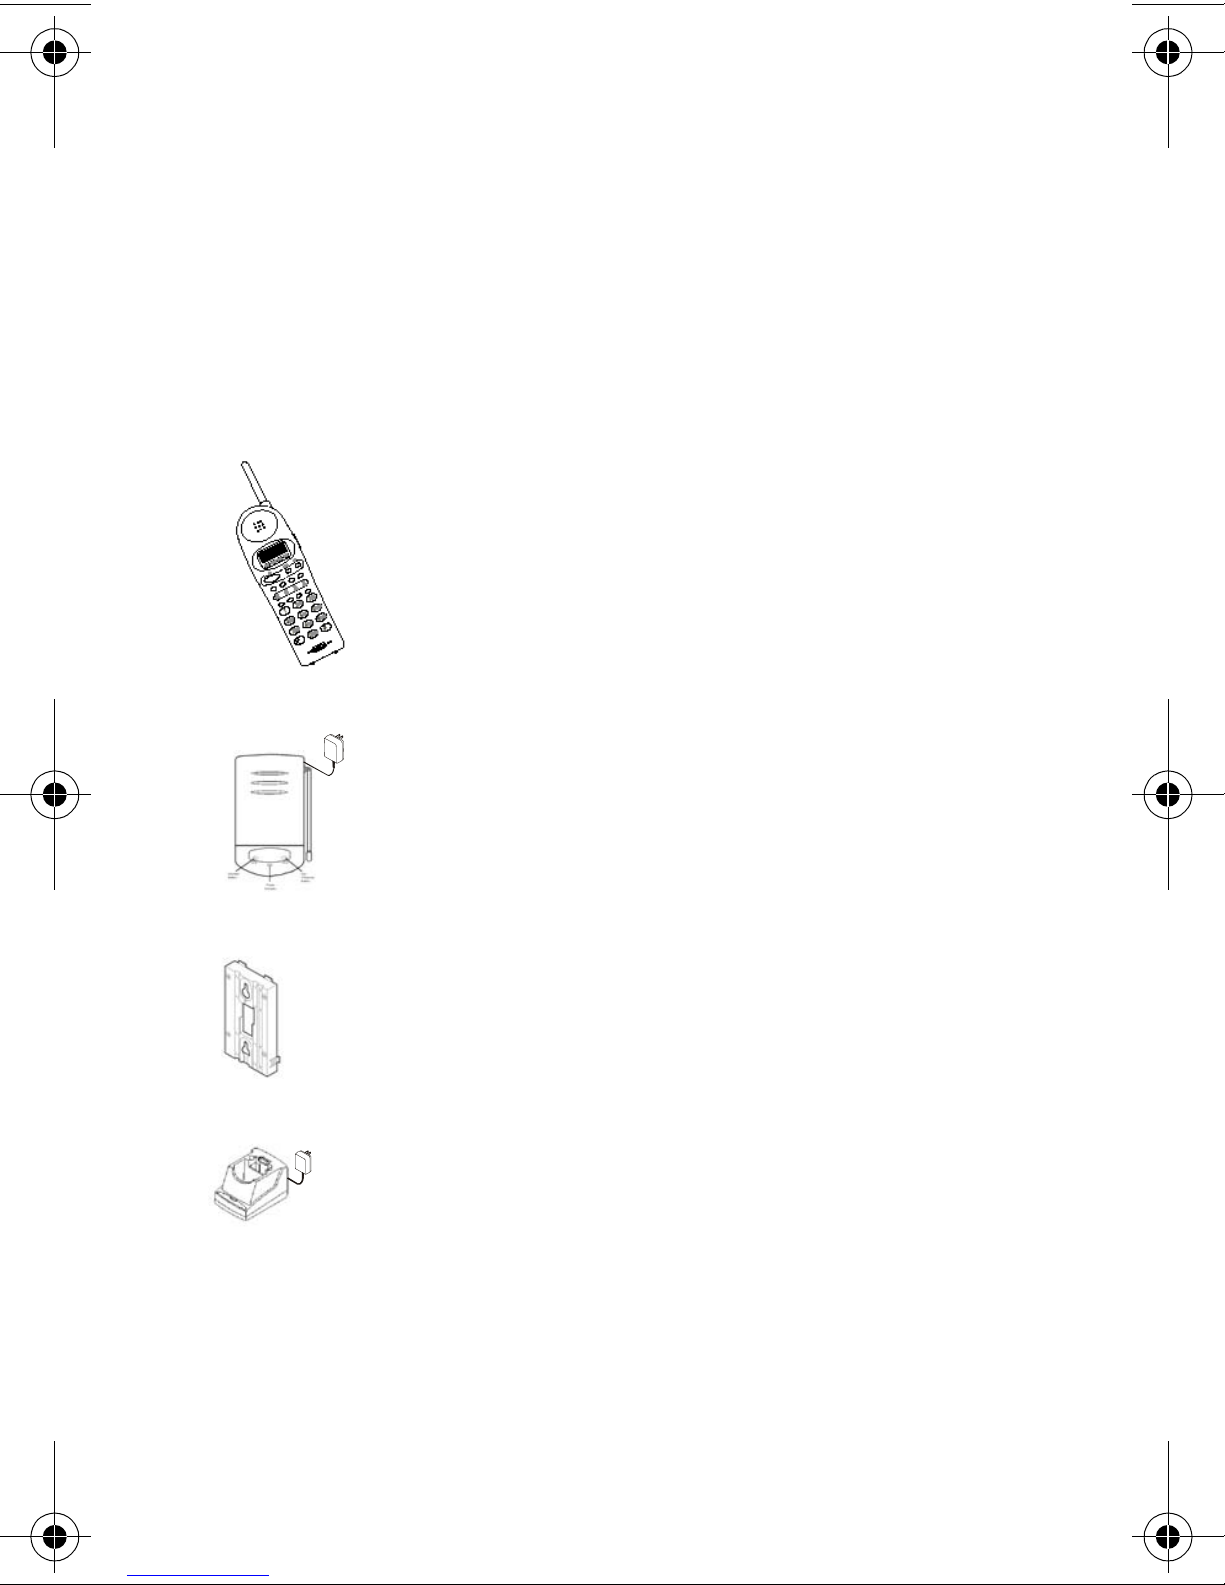
Checking Your Package
Checking Your Package
Before reading the User Guide and using the
Panasonic 900 MHz Cordless Telephone, take a few
minutes to check the contents of your package.
You should have the following:
Handset
Base Station with
AC Adapter
Wall Plate
Charging Unit with
AC Adapter
1
Page 6
Checking Your Package
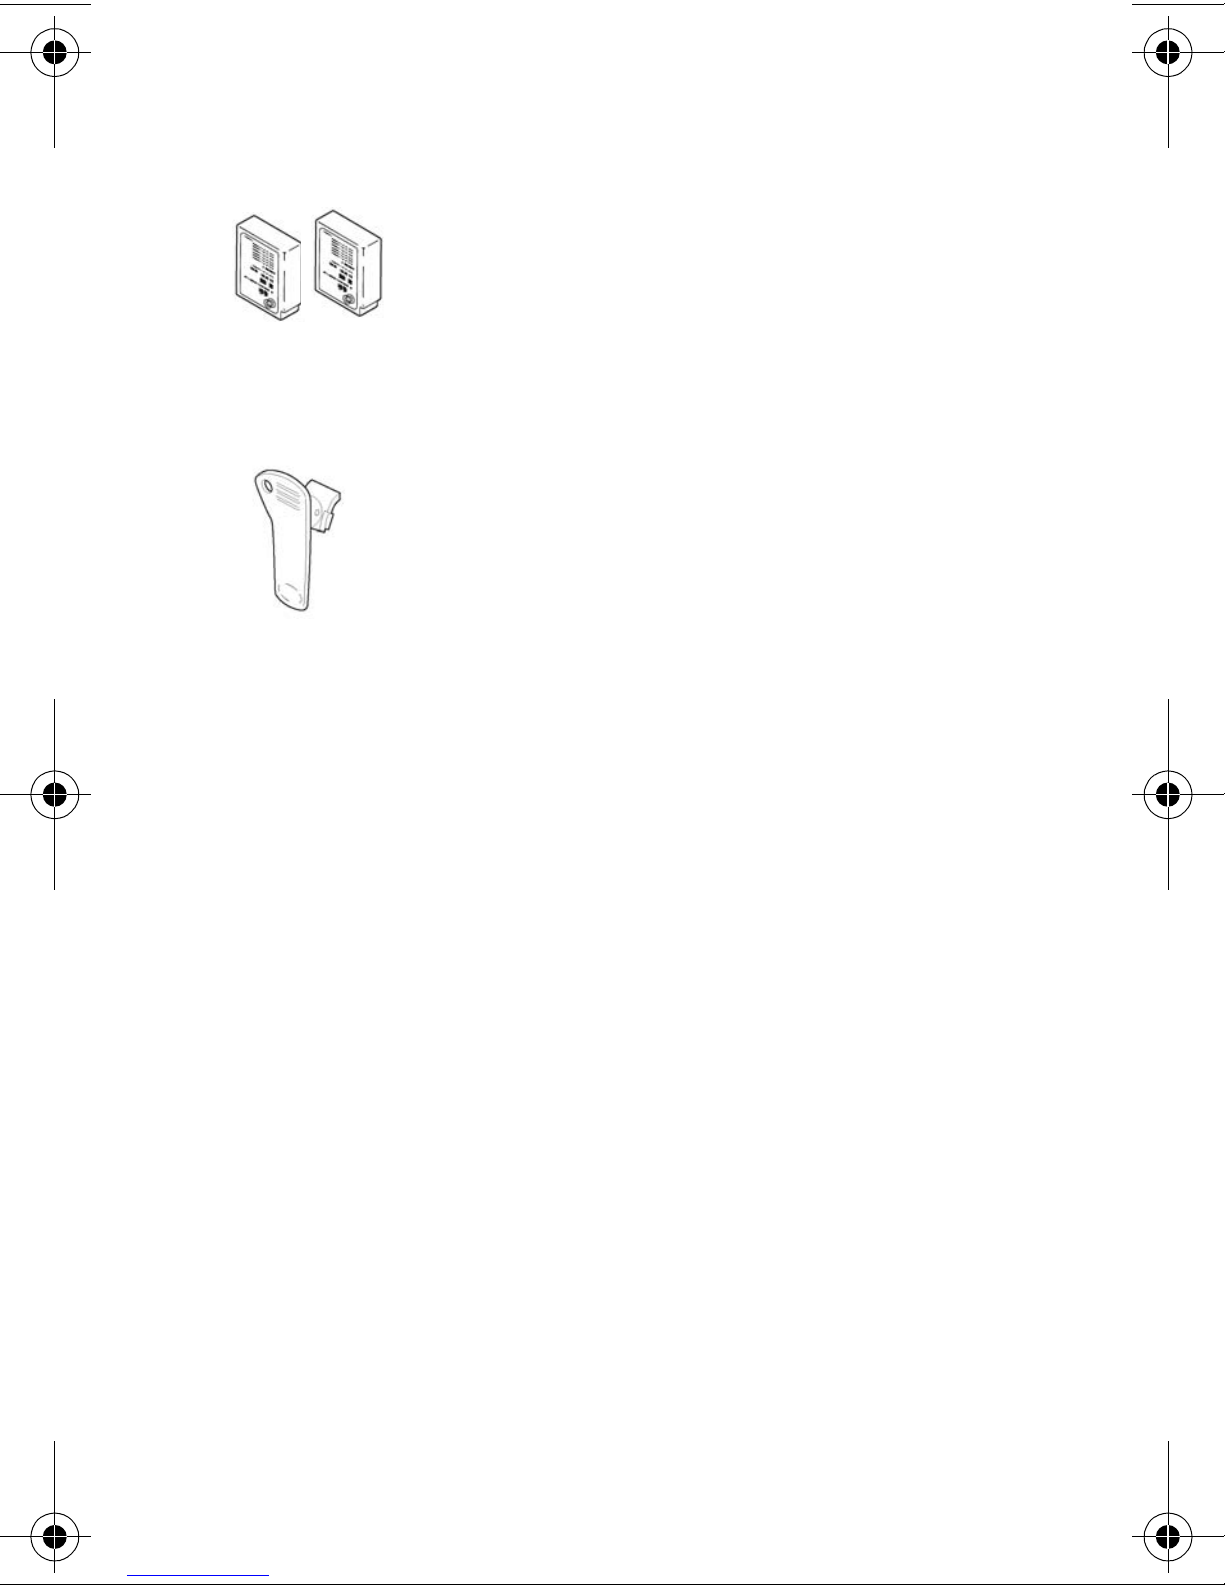
Two 500 mAH
Rechargeable Batteries
Belt Clip
2
Page 7
Understanding Your Telephone
Understanding Your Telephone
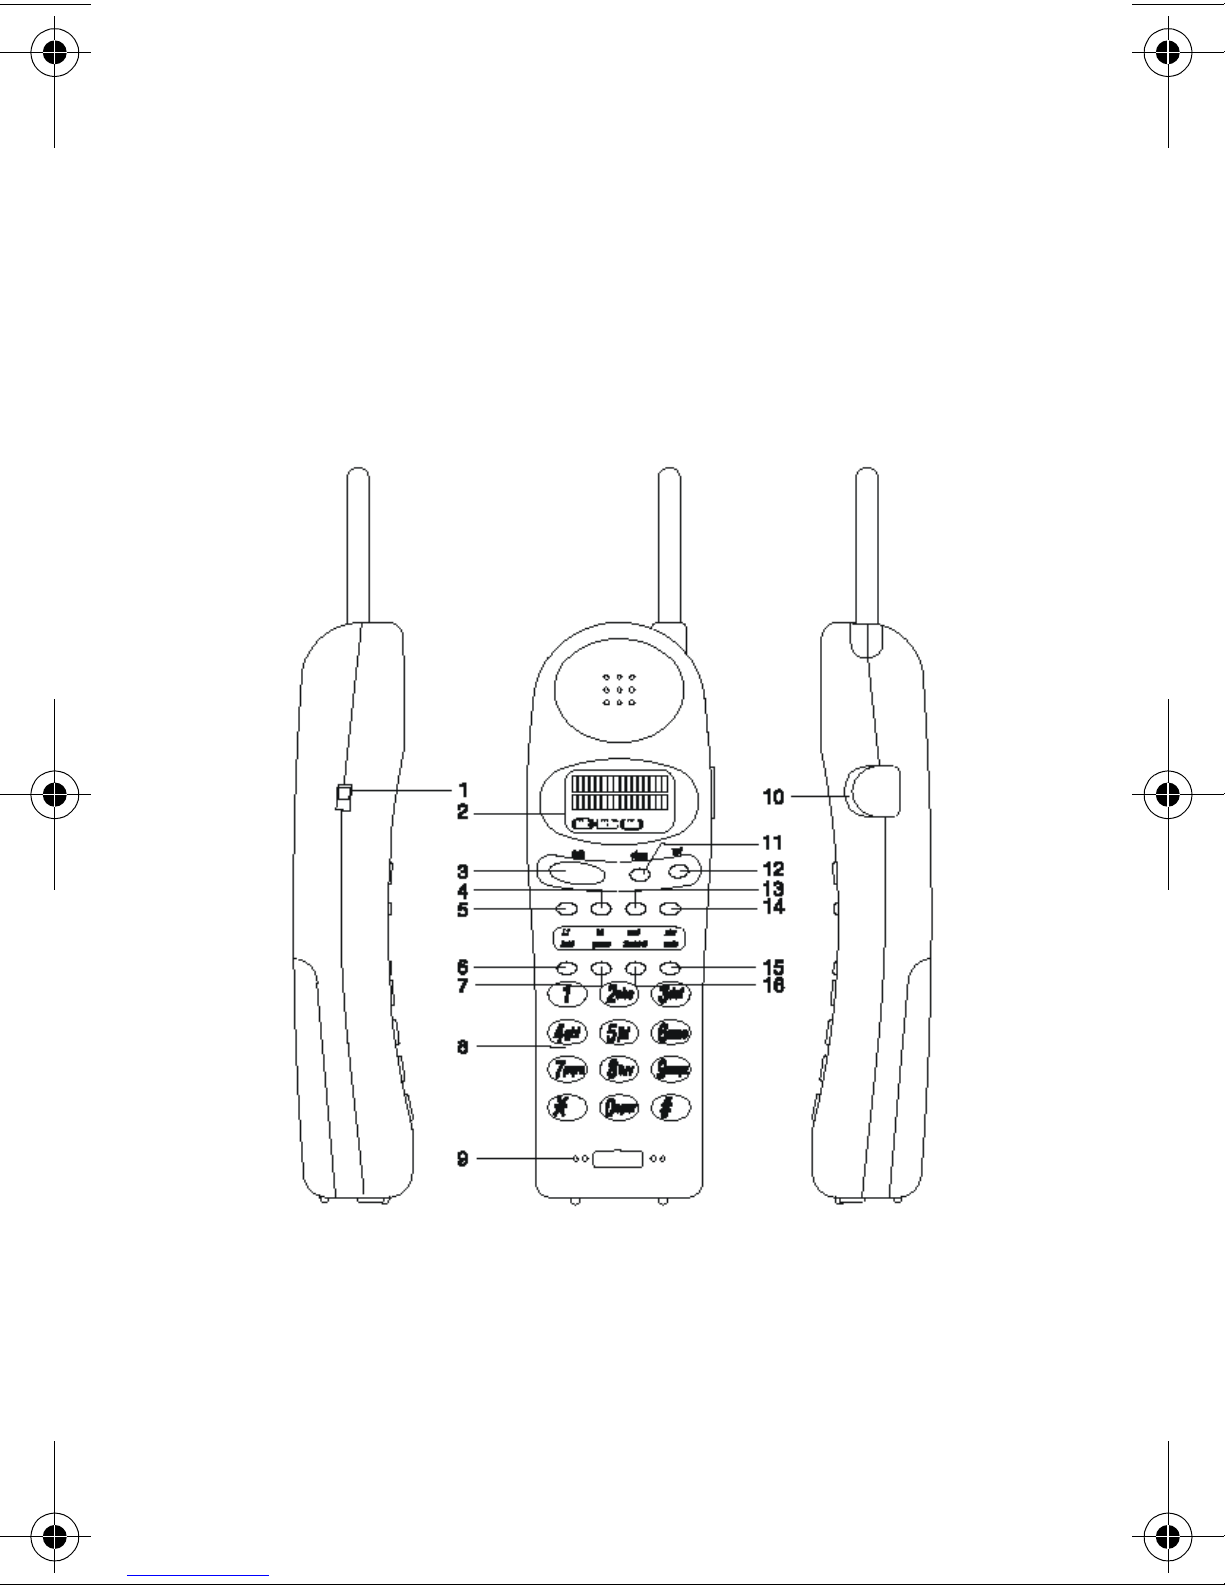
H
ANDSET OVERVIEW
Please see page 4 for a description of your phone’s
features and display keys.
3
Page 8
Understanding Your Telephone
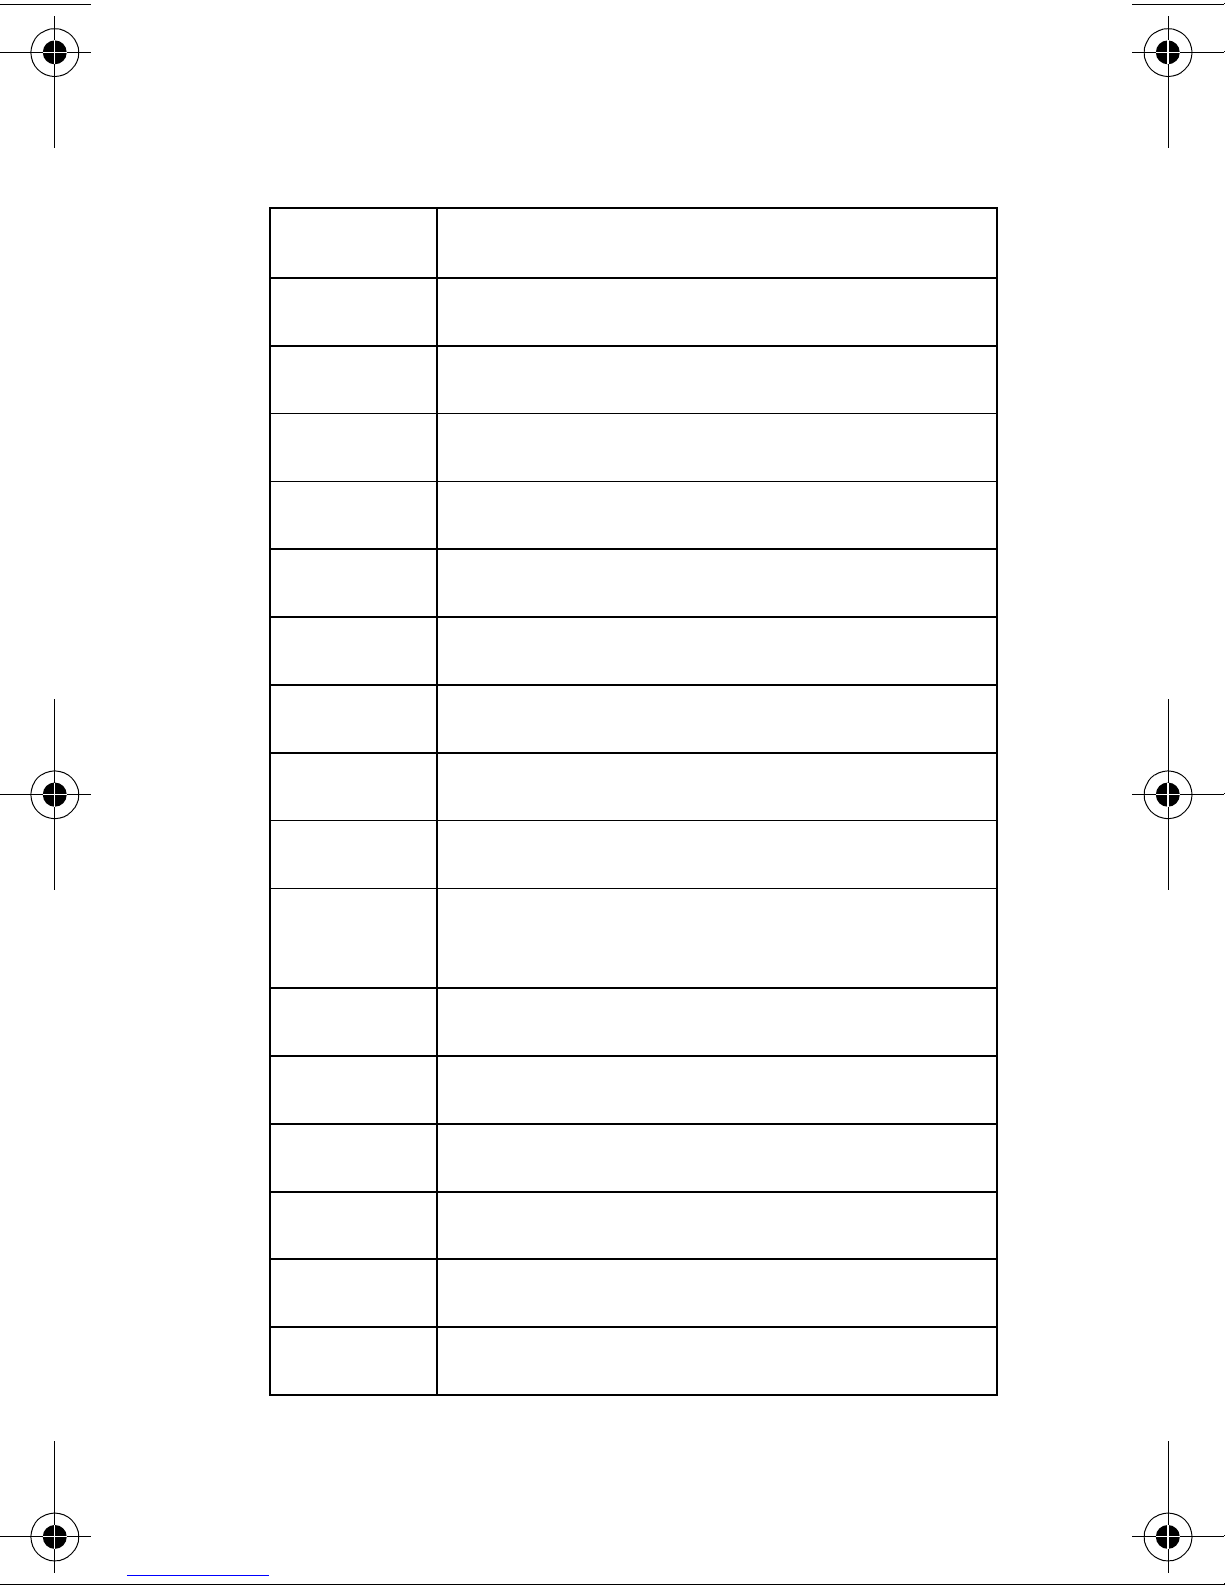
# Function
1 Ringer ON/OFF switch
2 Message display
3 Talk (talk) key
4 FF-2 Key (programmable)
5 FF1- Key (programmable)
6 FF-5 Key (programmable)
7 FF-6 Key (programmable)
8 Numeric keypad
9 Microphone
10
Headset jack (2.5mm standard
jack)
11 Channel (chan) key
12 Volume (vol) key
13 FF-3 key (programmable)
14 FF-4 key (programmable)
15 Mute (MUTE) key
16 Hold (HOLD) key
4
Page 9
Understanding Your Telephone
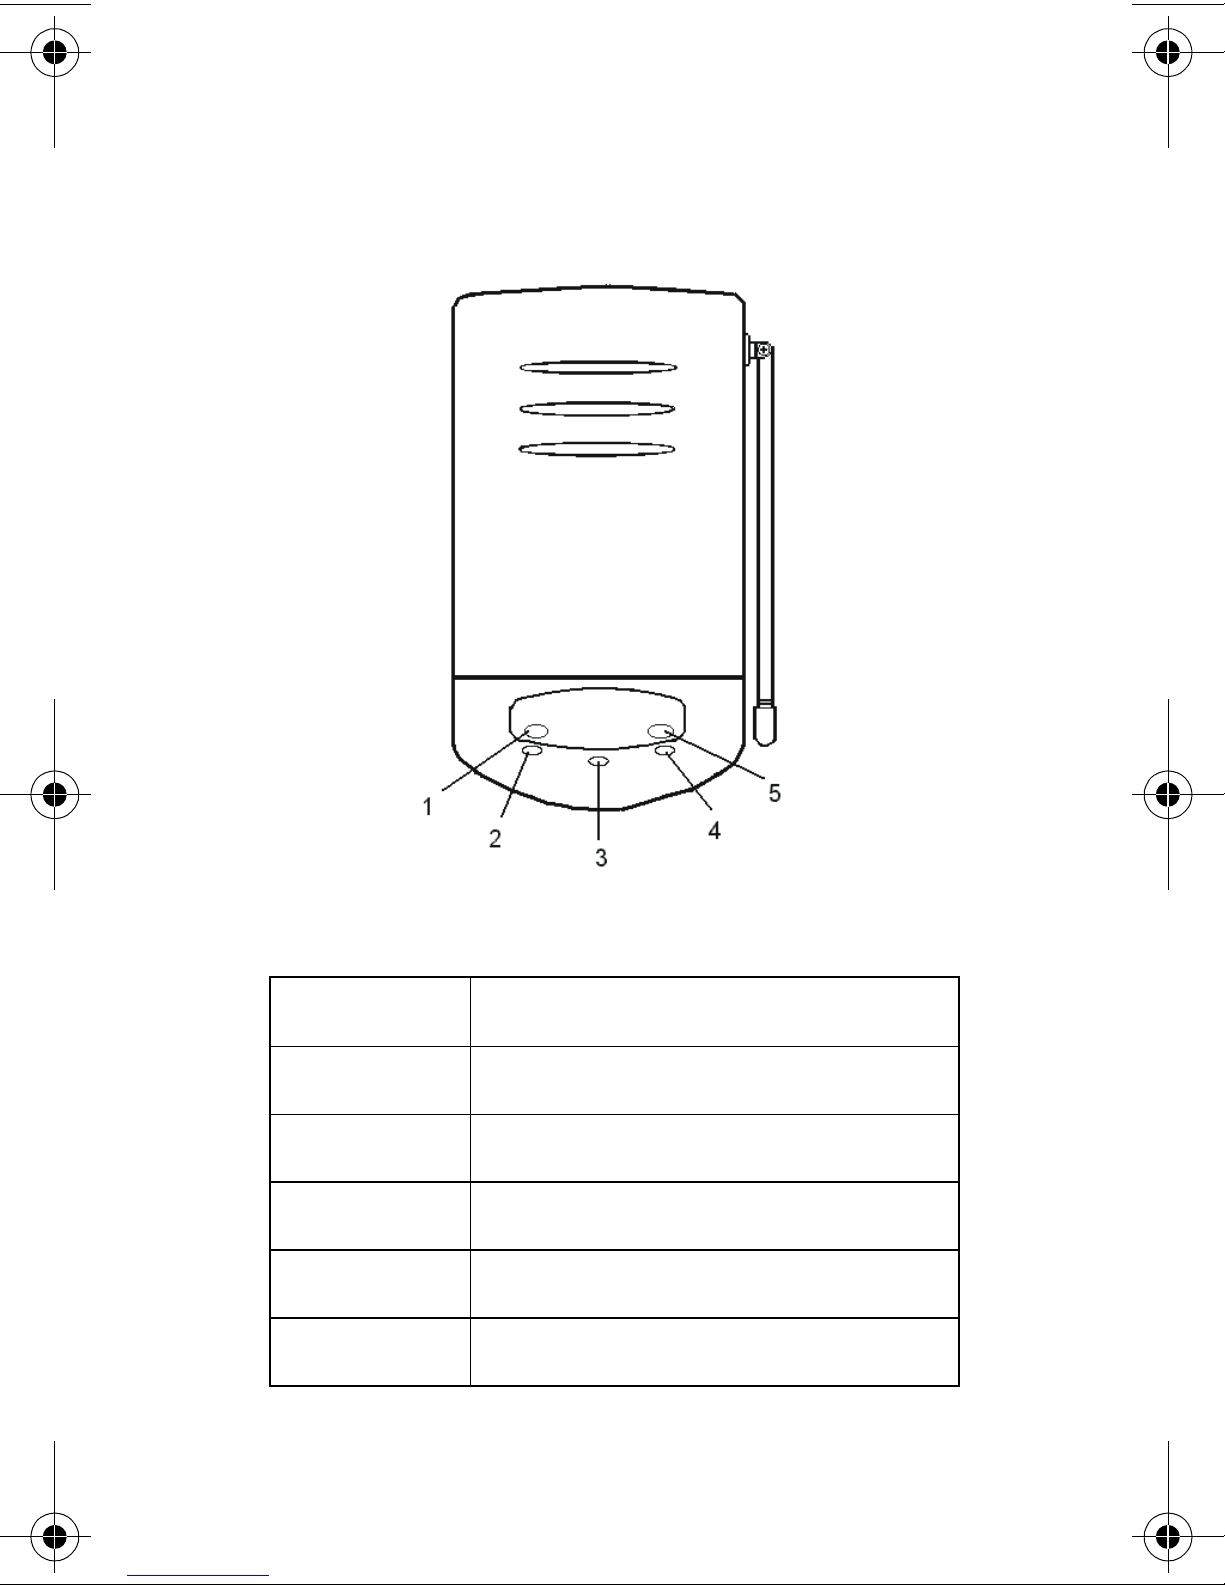
ASE STATION OVERVIEW
B
# Function
1 Cordless Button
2 Cordless LED
3 Status LED
4 Desk LED
5 Desk Button
5
Page 10
Understanding Your Telephone
IQUID CRYSTAL DISPLAY
L
(LCD) O
VERVIEW
The 900 MHz handset has a two line LCD display.
Each line displays up to 16 alphanumeric characters.
While in Battery Save mode the base station does not
send LCD information to the 900 MHz handset while it
is idle, except in the following cases.
• When the 900 Mhz handset has a call holding.
• If the base station detects the key telephone has
a call holding.
If the base station detects either condition above, the
first line of the LCD is idled and the second line
displays the identity of the party on hold. If a holding
call isn’t detected, the LCD is cleared immediately
after the base station is set to IDLE. If the 900 MHz
handset is idle and a holding call is diconnected, the
LCD goes blank.
The base station memorizes the last first and second
lines of the LCD. This feature allows the 900 MHz
handset to re-display information about the last call.
When the base station receives either first or second
lines of information from the DBS while the 900 MHz
handset is in use, it replaces the memory, and sends
both first or second lines of data to the handset.
When placing a call the base station does not send
display updates, it displays the number you are
dialing. When an incoing call is received, the base
station transmits the LCD information to the 900 MHz
Handset.
6
Page 11
Understanding Your Telephone
When the 900 MHz handset goes idle, the handset
LCD is cleared. When the base station updates the
second line of the LCD, the first line is also cleared.
ANDSET CONTROLS
H
Note: Operate this handset only when it is not
in the charging unit.
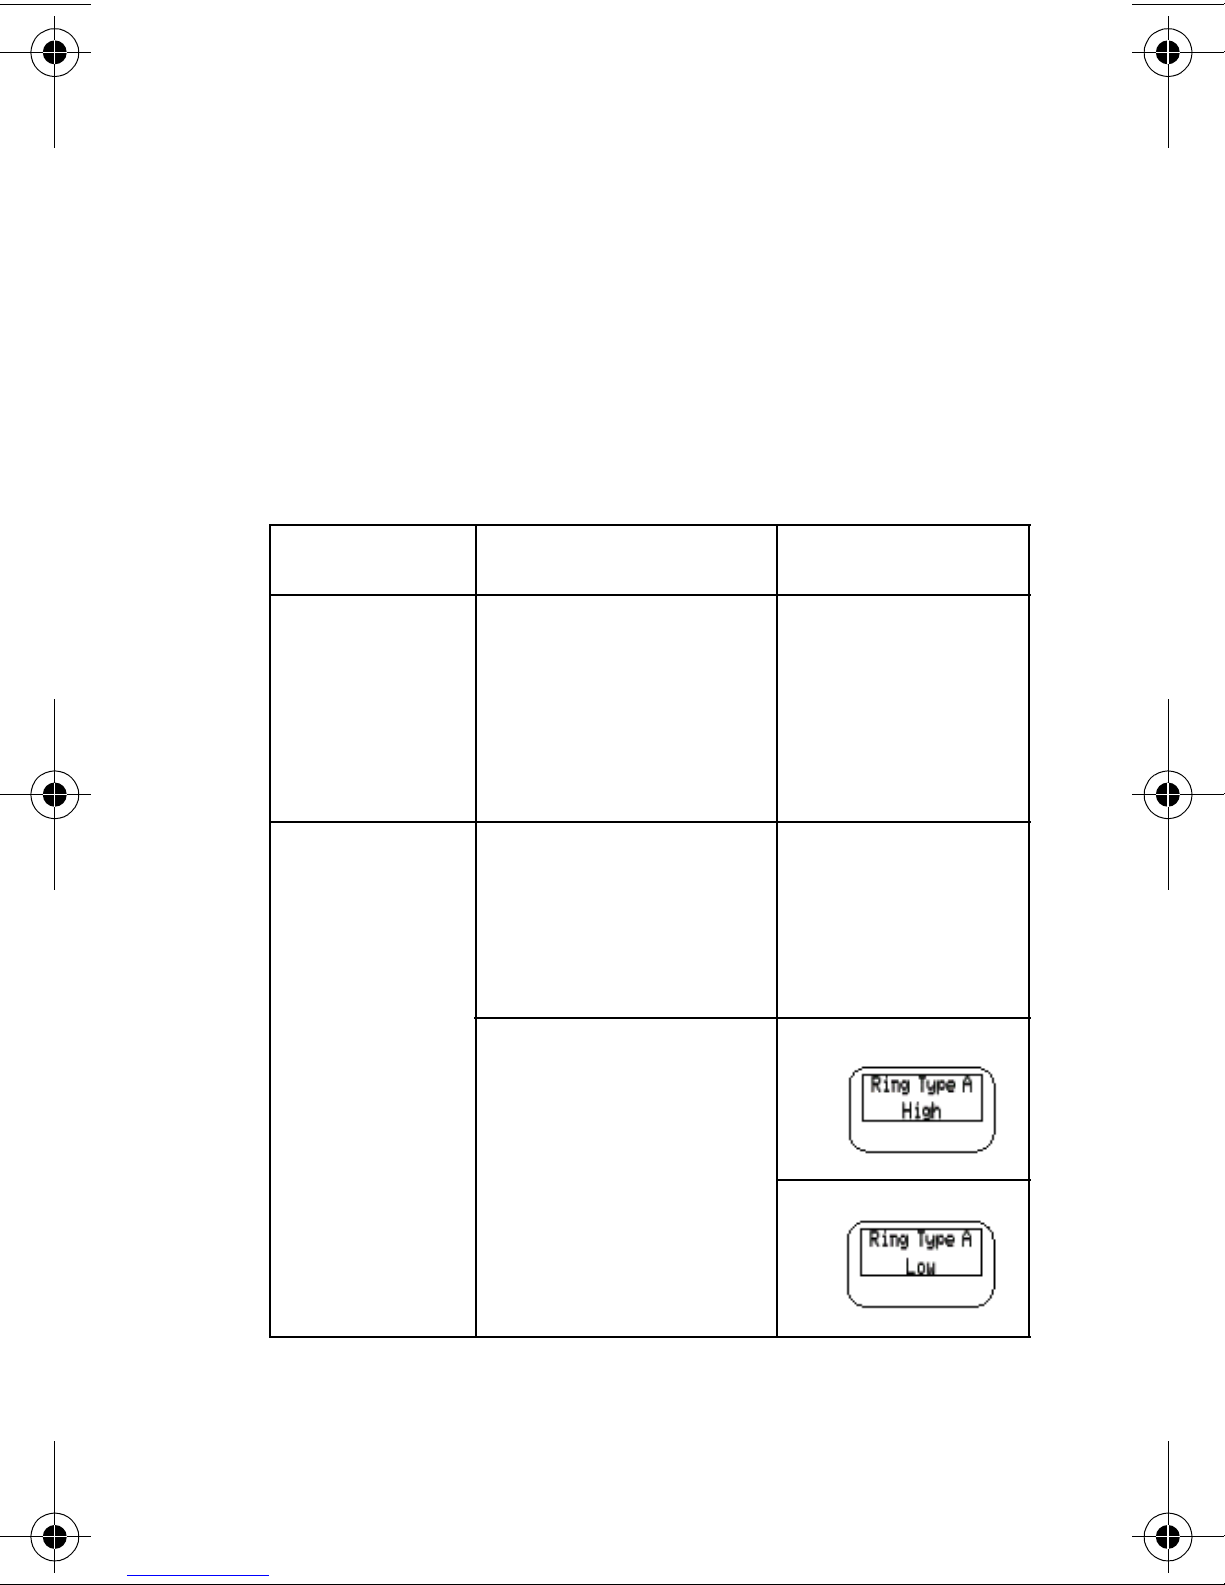
Condition Action LCD Display
Press vol on the
Handset
Active (talk
mode)
front of the
handset to select
a high or low
earpiece volume
level.
Non display
indications
Handset
Inactive
(standby
mode)
Press vol on the
front of the
handset to select
one of the
following settings:
Ring type A (High)
Ring type A (Low)
7
Page 12
Understanding Your Telephone
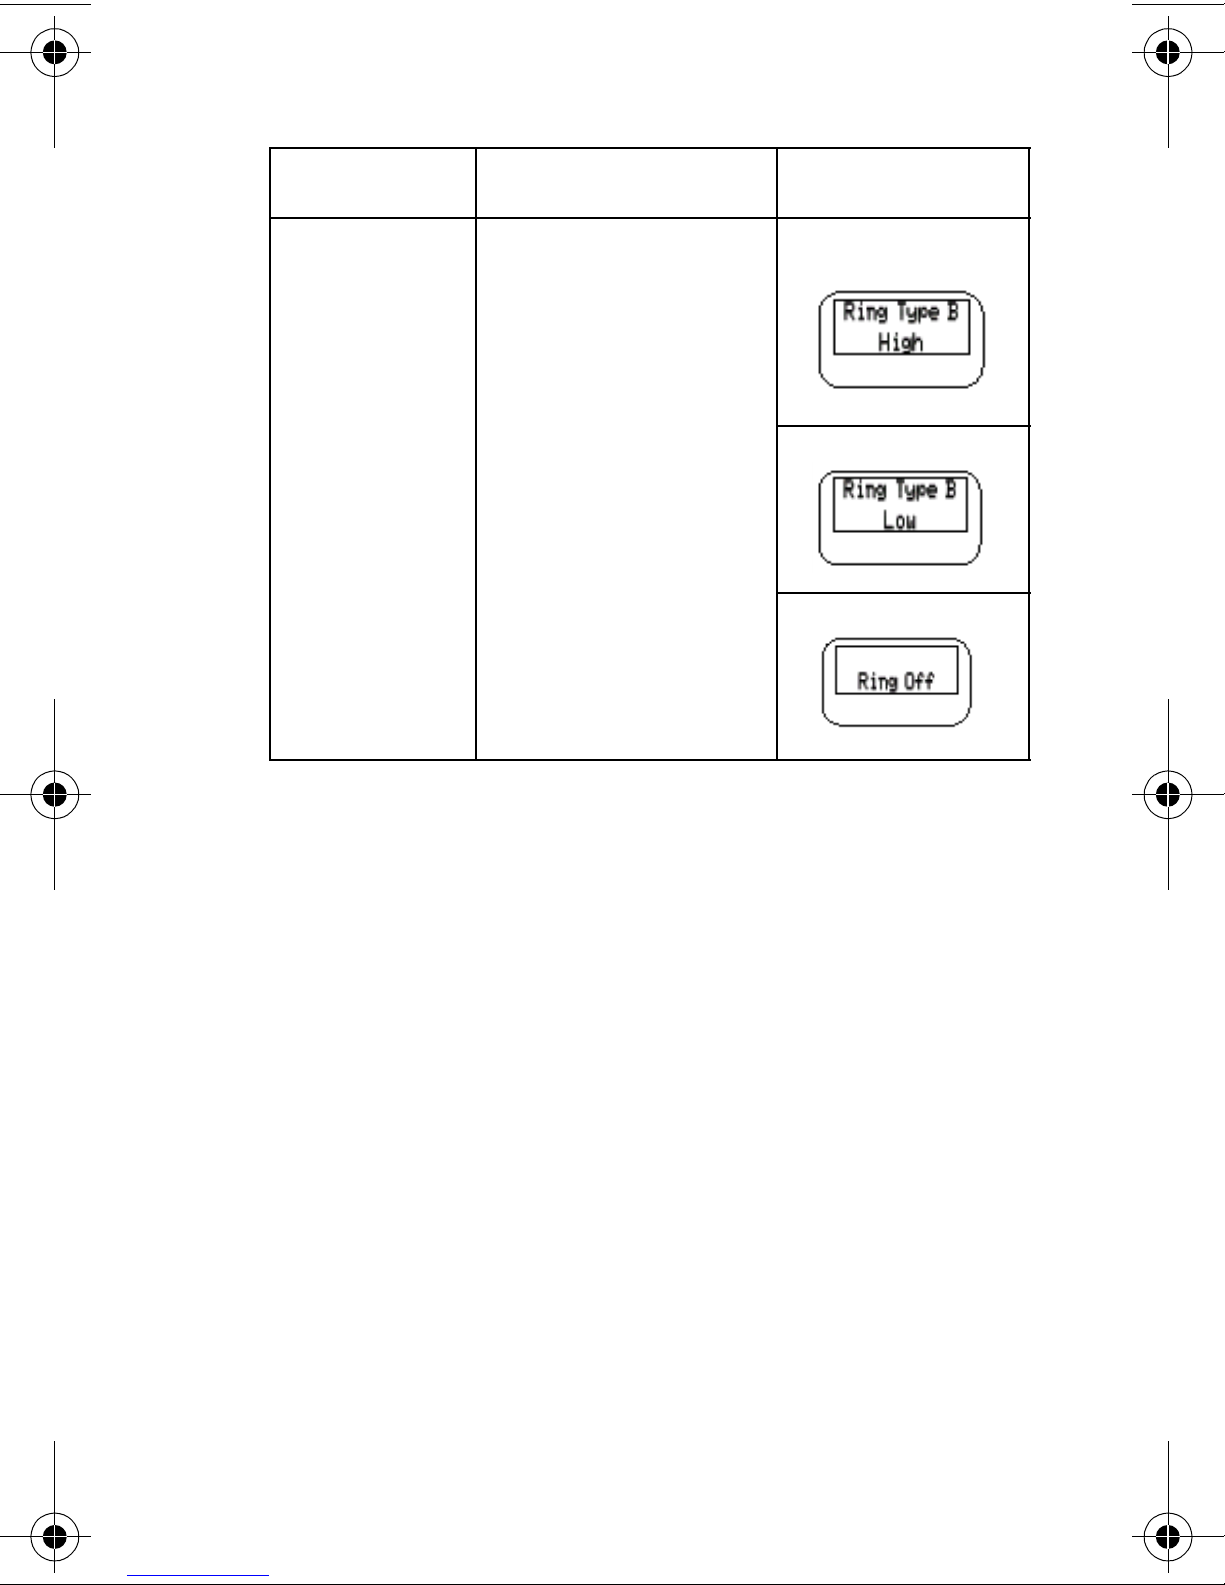
Condition Action LCD Display
Handset
Inactive
(standby
mode)
Ring type B (High)
Ring type B (Low)
Ring Off (Vibrate)
8
Page 13
Using Your Telephone
Using Your Telephone
U
SING YOUR HANDSET
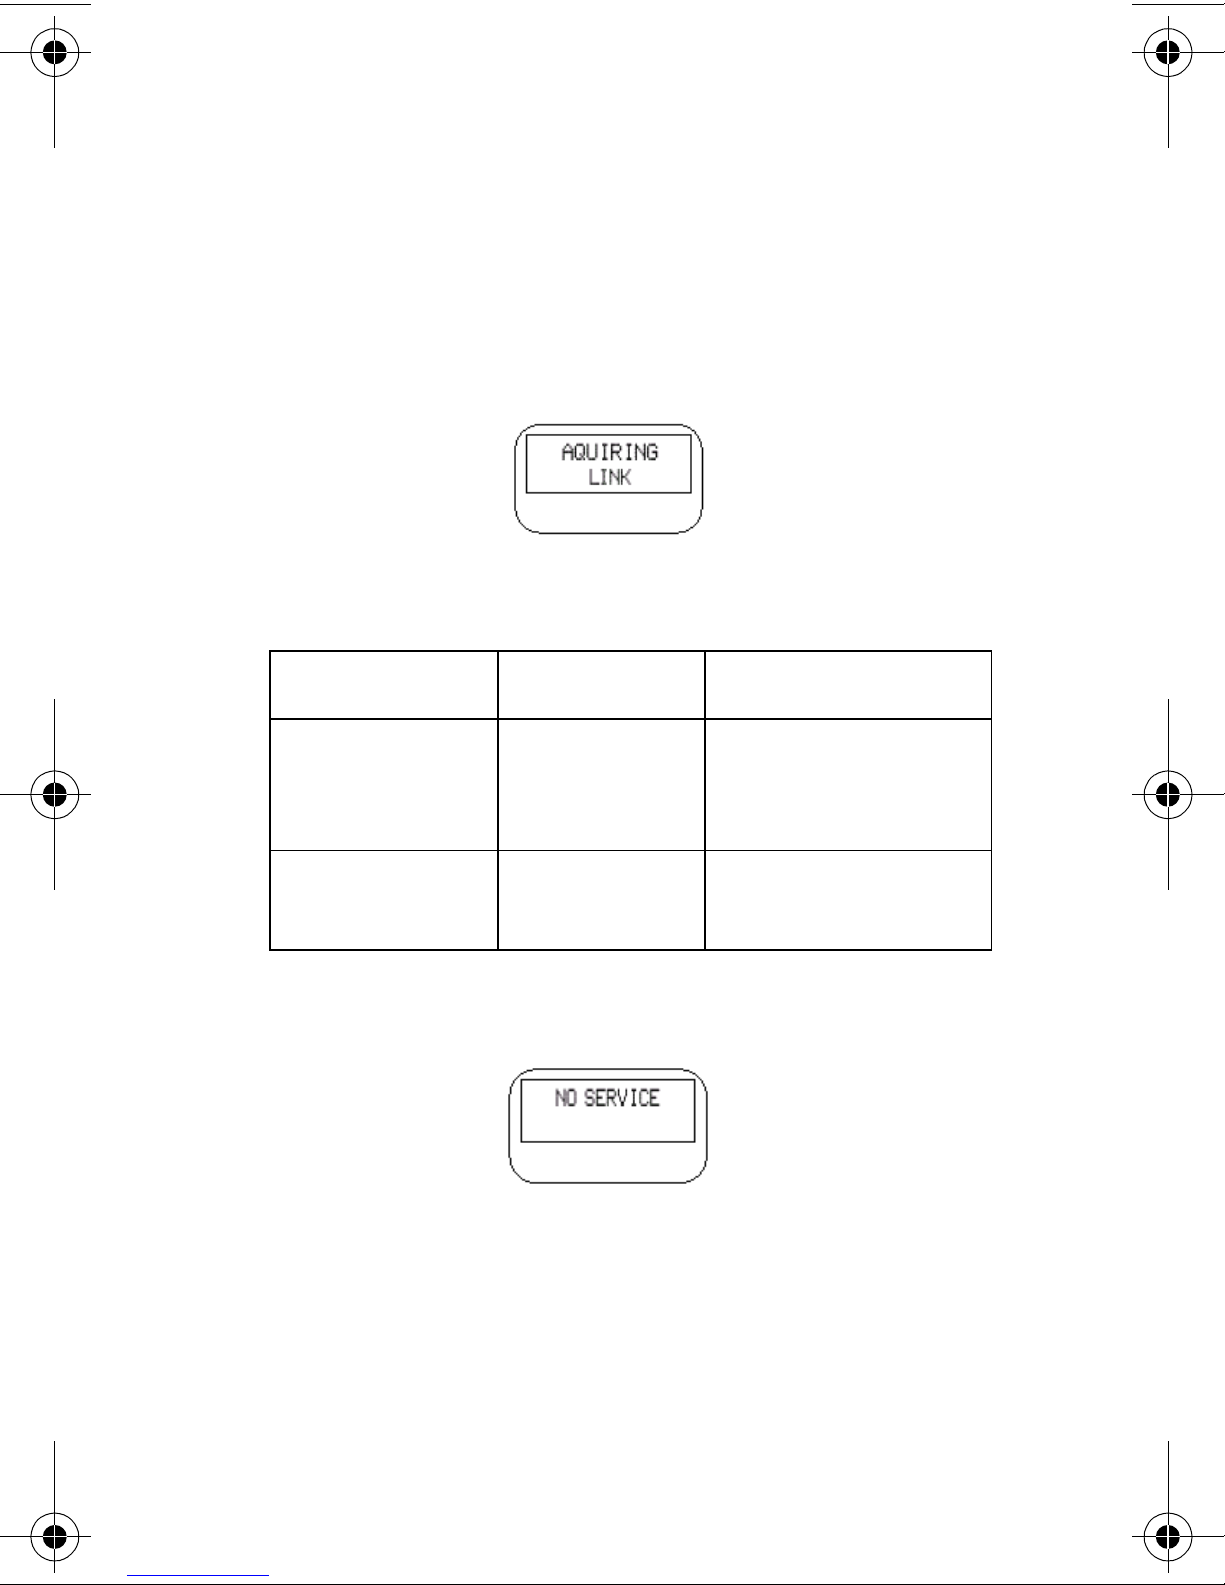
When you pick up the handset and press TALK, you
will see:
Or you may see one of the following:
Condition Indicator LCD Screen
No
connection
to base
Channel
busy
error tone NO SERVICE
error tone
NO DISPLAY
INDICATION
If the base station is powered off, the handset will
display:
9
Page 14
Using Your Telephone
NSWERING AN INCOMING CALL
A
If the handset is in the charging unit when you receive
a call:
• Pick up the handset and remove it from the
charging unit. (The AutoTalk feature allows you
to answer the call immediately.)
• When you finish the call, place the handset back
in the charging unit. (The AutoStandby feature
automatically ends the call.)
If the handset is out of the charging unit when you
receive a call:
• Press TALK or any key on the numeric keypad.
LACING AN OUTGOING CALL
P
When making an outgoing call from the 900 MHz
handset:
• Press TALK. You will hear a dial tone.
• Enter the number you are calling.
• To end the call, press TALK.
10
Page 15
Using Your Telephone
WITCHING CALLS BETWEEN TELEPHONES
S
The 900 MHz cordless telephone base station allows
you to switch calls from either the 900 MHz handset or
the key telephone.
Caution: Do not press the buttons labeled "Desk"
or "Cordless" on the base station when
receiving a call. Doing so may
disconnect the call.
Switching a call from the 900 MHz handset to the key
telephone
To switch a call from the 900 MHz handset to the key
telephone during an active call:
1. Press HOLD on the 900 MHz handset.
2. Press the labeled "desk" button on the base sta-
tion.
3. Pick up the receiver on the key telephone.
Note:
• When the base station is operating with the key
telephone, and you press the 900 MHz handset
TALK button, there is no tone from the 900 MHz
handset. The 900 MHz handset displays LINE IN
USE for 5 seconds.
• When the base station is powered off, the handset
does not function.
Switching a call from the key telephone to the 900 MHz
handset
To switch a call from the key telephone to the 900
MHz handset during an active call:
11
Page 16
Using Your Telephone
1. Press HOLD on the key telephone.
2. Press the labeled "desk" button on the base sta-
tion. (see # "2" above)
3. Press TALK on the 900 MHz handset.
Note:
• If your on a active call on the key telephone and
you press the button labeled "handset" on the
base station without first pressing the HOLD button on the key telephone, your call will be disconnected.
• If you are on a active call on the 900 MHz handset
and you press the desk button on the base station
without first pressing the HOLD button on the key
telephone, the transfer between phones waits until
the call is completed. (Avoid this practice.)
12
Page 17
Programming Functions
Programming Functions
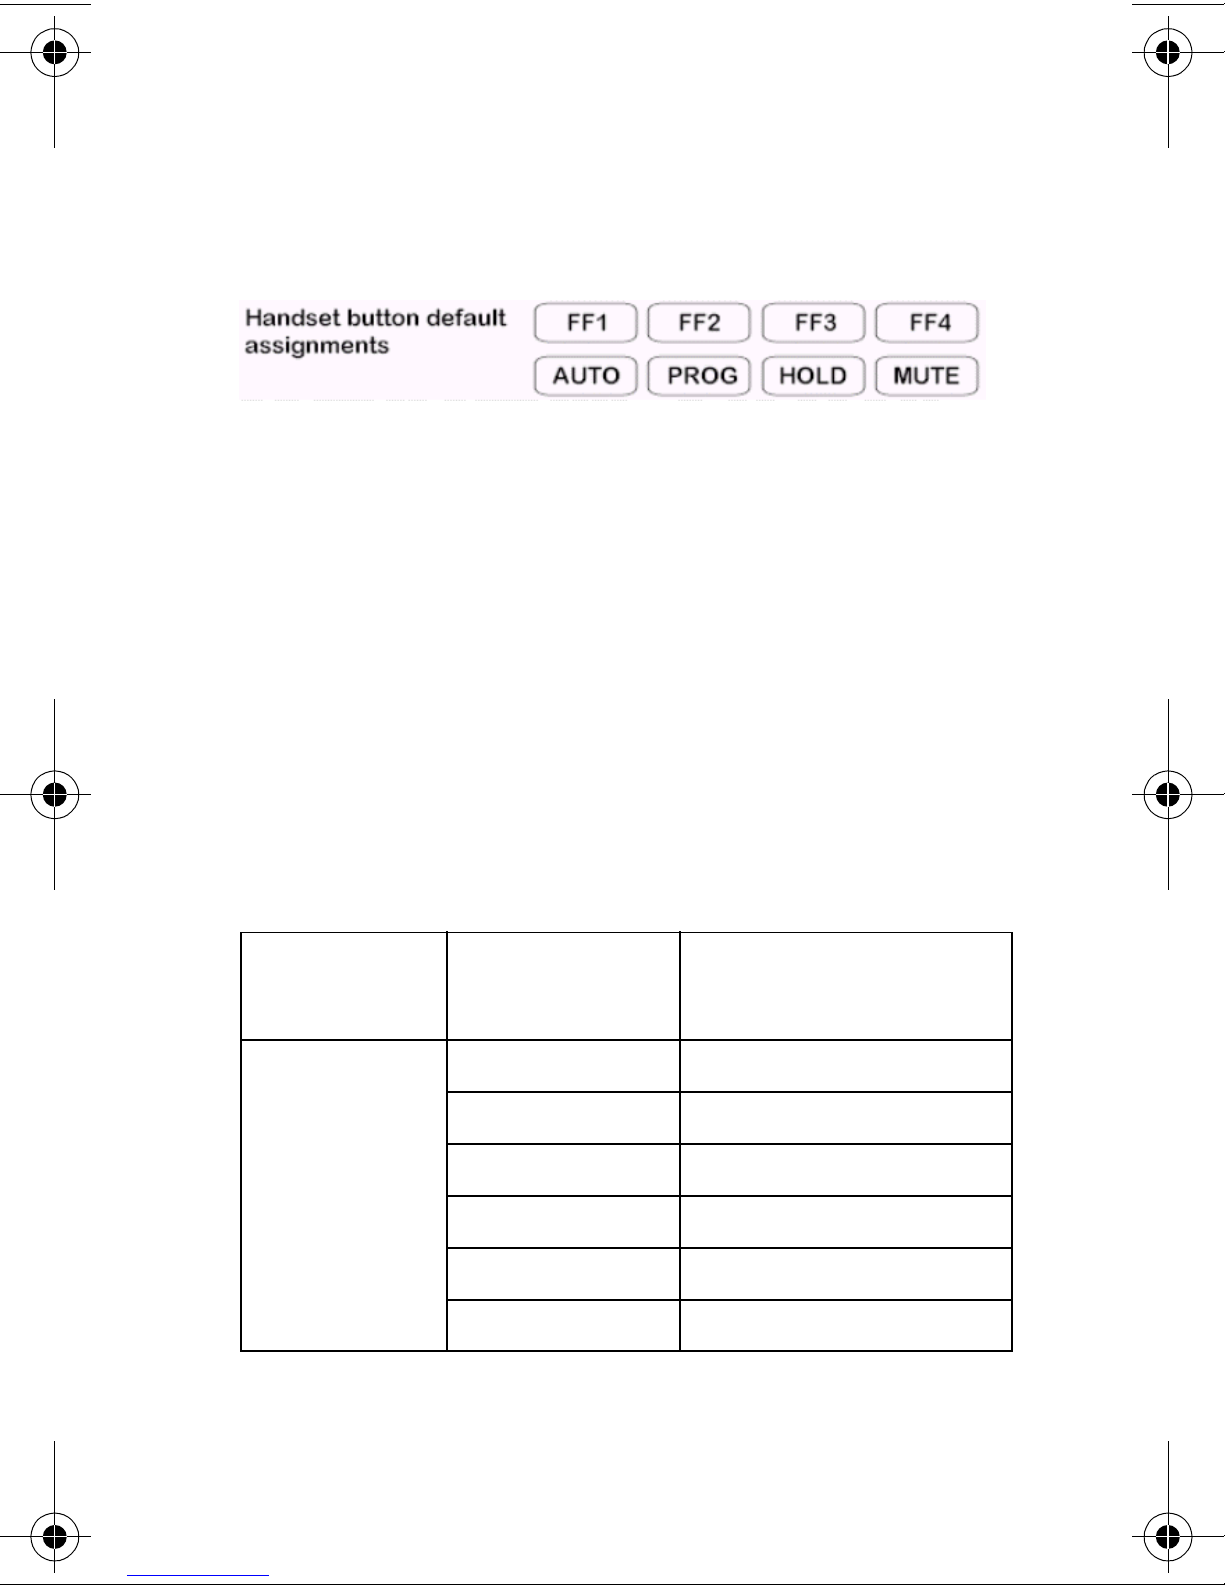
The 900 MHz handset has 6 function keys (FF1~FF6)
that are programmable using the Program mode.
Only 4 keys (FF1~FF4) have the capability of
displaying LED indications therefore, they are the only
keys that can be programmed as Feature Function
(FF) keys.
For the DBS 96/72/90 and the DBS 824, LED
indications of calls are only available if the handset
and desk telephone FF Keys are programmed as CO
keys.
F-Key
Type
**Direct CO
key/FF-key
(Default)
Location
FF1 FF-KEY 01
FF2 FF-KEY 02
FF3 FF-KEY 03
FF4 FF-KEY 04
FF5 AUTO KEY
Display/Complete
message
FF6 PROG KEY
13
Page 18
Programming Functions
F-Key
Display/Complete
Location
Type
One Touch
(OUTCH)
keys 1-10
Flash key FLASH KEY
CONF key CONF KEY
PROG key PROG KEY
AUTO key AUTO KEY
Redial key REDIAL KEY
Soft-key
(mode)
Soft-key
(<EXEC)
Anywhere
(FF1-FF6) OTCH xx(xx=01-10)
message
MODE KEY
EXEC>KEY
Soft-key
(End)
Soft-key
(<EXEC)
No operation
Note: The TALK button on the handset must be
pressed to scroll through System Speed Dial
(SSD) and Personal Speed Dial ( PSD)
addresses using the * and # keys. The TALK
button must also be pressed for the programmed FF keys to function.
END KEY
<EXEC KEY
NO OPERATION
To enter the 900 MHz handset programming mode
#
from idle, press the
Q ,
and the TALK button at the
14
Page 19
Programming Functions
same time and hold for five seconds. You will hear a
beep confirming you are in programming mode.
After you have entered the programming mode, the
handset will default to program the FF1 key.
Note: You can scroll through key selections
by pressing the "chan" key, or move backwards by pressing the "vol" key.
Start
Θ
+ #
PROGRAM MODE
FF1 - KEY
yyyyyyyyyyyyyyyyyy
FFx- key code
and TALK
Press
"0"
Key
Press
"0"
Key
chan
PROGRAM MODE
vol
FF2 - KEY
chan
yyyyyyyyyyyyyyyyyy
vol
FFx - key code
chan
PROGRAM MODE
vol
FF6 - KEY
chan
yyyyyyyyyyyyyyyyy
vol
FFx - key code
FFx - key COMPLETE
yyyyyyyyyyyyyyyyyy
When the desired program is shown on the display,
15
Page 20
Programming Functions
press the "0" key on the keypad to confirm your
selection. Next, select the program function you
would like to assign to the FF key you have just
chosen, by pressing the vol and chan key to move
through the selections. Once you’ve chosen the
desired function, press the "0" key on the keypad to
confirm your selection. Your handset will display
COMPLETE next to the assigned key number and the
function assigned to that key. You can then begin
programming the next FF key.
Note: To exit the programming mode at any
time, press the TALK key.
16
Page 21
Troubleshooting
Troubleshooting
If your 900 MHz cordless telephone is not performing
to your expectations, try these steps. If you are still
unable to resolve the problems, contact your PBX
Administrator.
Note: Do not attempt to service this unit yourself. All service must be performed by qualified
service personnel.
Problem Suggestion
Charge light
won’t come on
when headset is
placed in Charging unit.
Conversation is
interrupted frequently.
• Make sure the AC adapter
is plugged into the base
and wall outlet.
• Make sure handset is properly seated in charging unit.
• Make sure the sealed leadacid battery is properly
placed in the handset.
• Make sure the charging
contacts on the handset
and charging unit are clean.
• Make sure the base
antenna is fully vertical.
• Move closer to the base.
• Check for LOW BATT warn-
ing.
17
Page 22
Troubleshooting
Problem Suggestion
Warning on and
NO SERVICE
message
Warning on and
NO DISPLAY
INDICATION
message
Handset does
not ring
• Move closer to the base.
• Select a different channel
on your handset.
• Sealed lead-acid battery
may be weak. Charge the
battery for 5-6 hours.
• Make sure the base
antenna is fully vertical.
• The handset may be too far
away from the base.
• Ensure the ringer ON/OFF
switch is in the ON position.
18
Page 23
Accessories
A
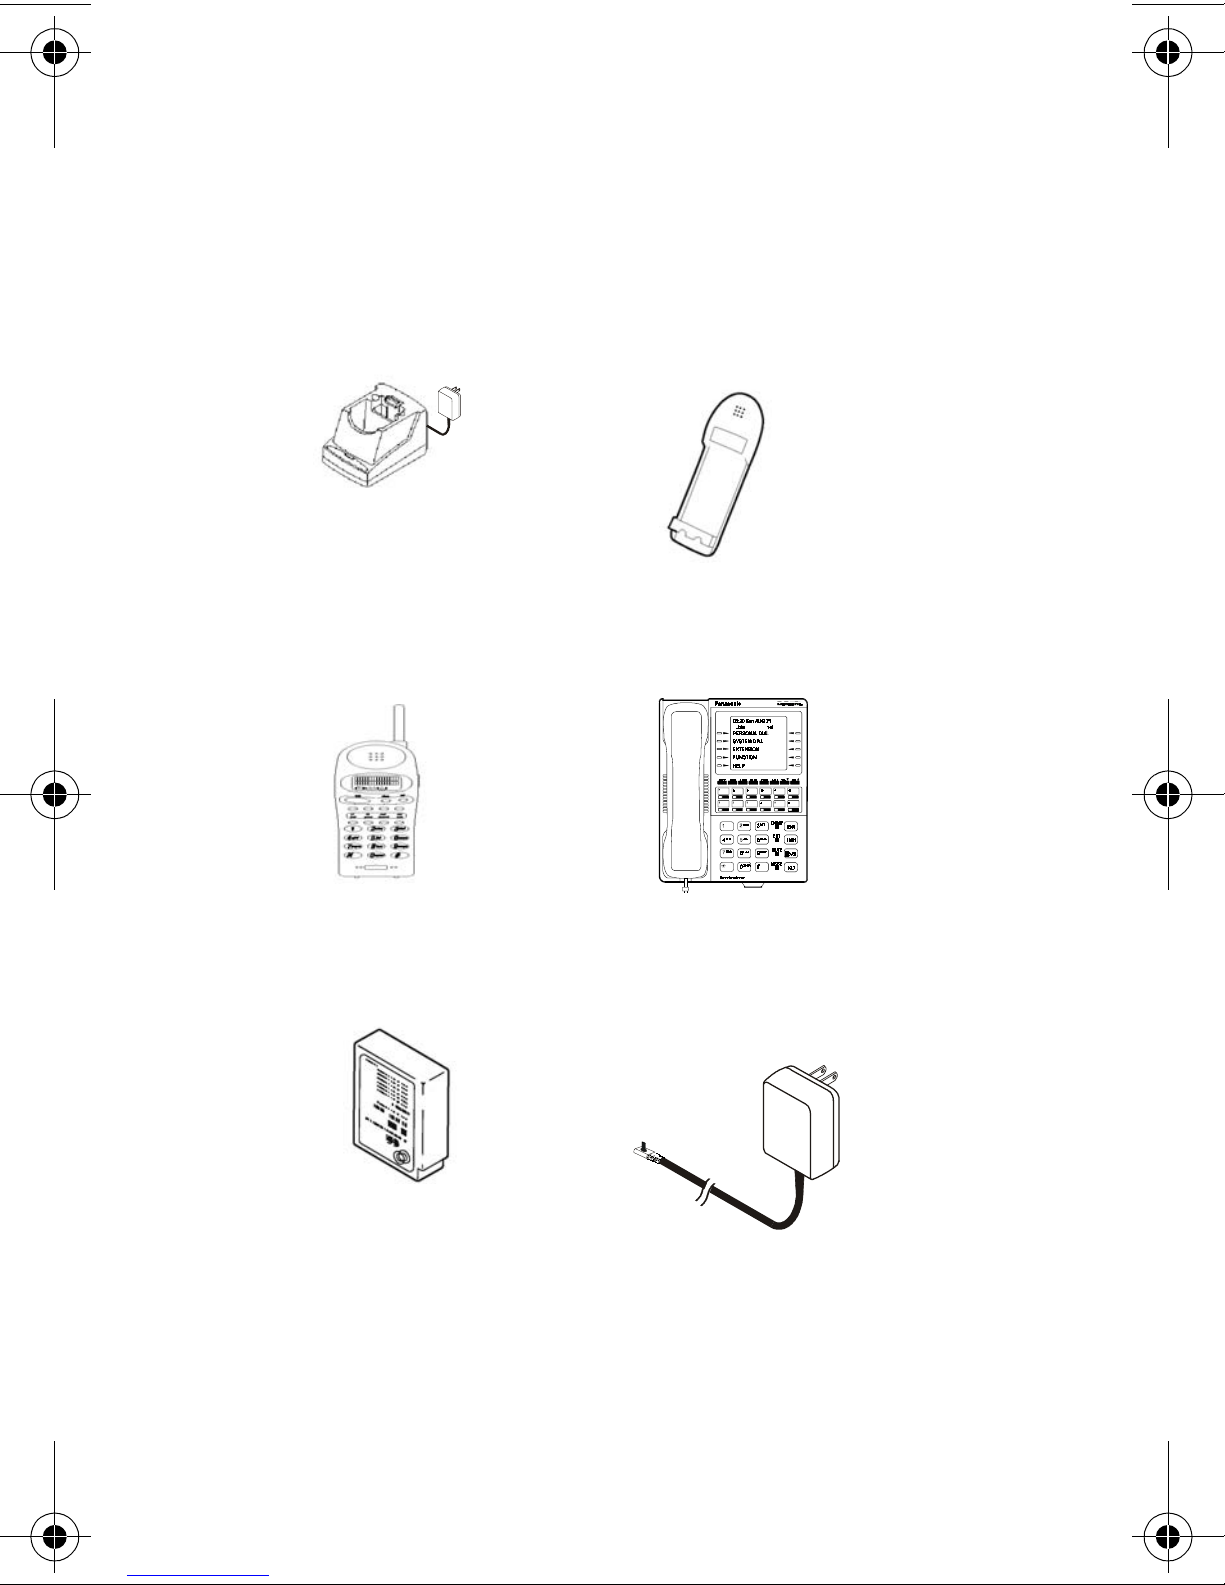
DDITIONAL ACCESSORIES
Charger and AC
Adapter
Accessories
Leather Case
Headset
500 mAH
Rechargeable
Battery
Key Telephone
AC Adapter
19
Page 24
This page intentionally left blank.
20
Page 25
Precautions
Precautions
Warning: This installation information is
designed for experienced technicians only
and is not designed for use by the general
public. It does not contain warnings or
cautions to advise non-technical individuals
of potential dangers in attempting to install a
product. Products powered by electricity
should be installed or serviced only by
experienced professional technicians. Any
attempt to install or service the product or
products dealt with in this installation
information by anyone else could result in
serious injury or death.
Battery Recycling Statement
The following statement applies if you
purchased backup batteries with your
system.
The product you have purchased may
contain sealed lead acid batteries, which
are recyclable. At the end of their useful
life, under various state and local laws, it
is illegal to dispose of these batteries in
your municipal waste stream. Please
call:
1-800-SAV-LEAD for information on how
to recycle these batteries.
21
Page 26
This page intentionally left blank.
22
 Loading...