

Panasonic SA-EN38, SB-EN38 Operating Instructions Manual
RQTV0293-1B
EBE GCSGN
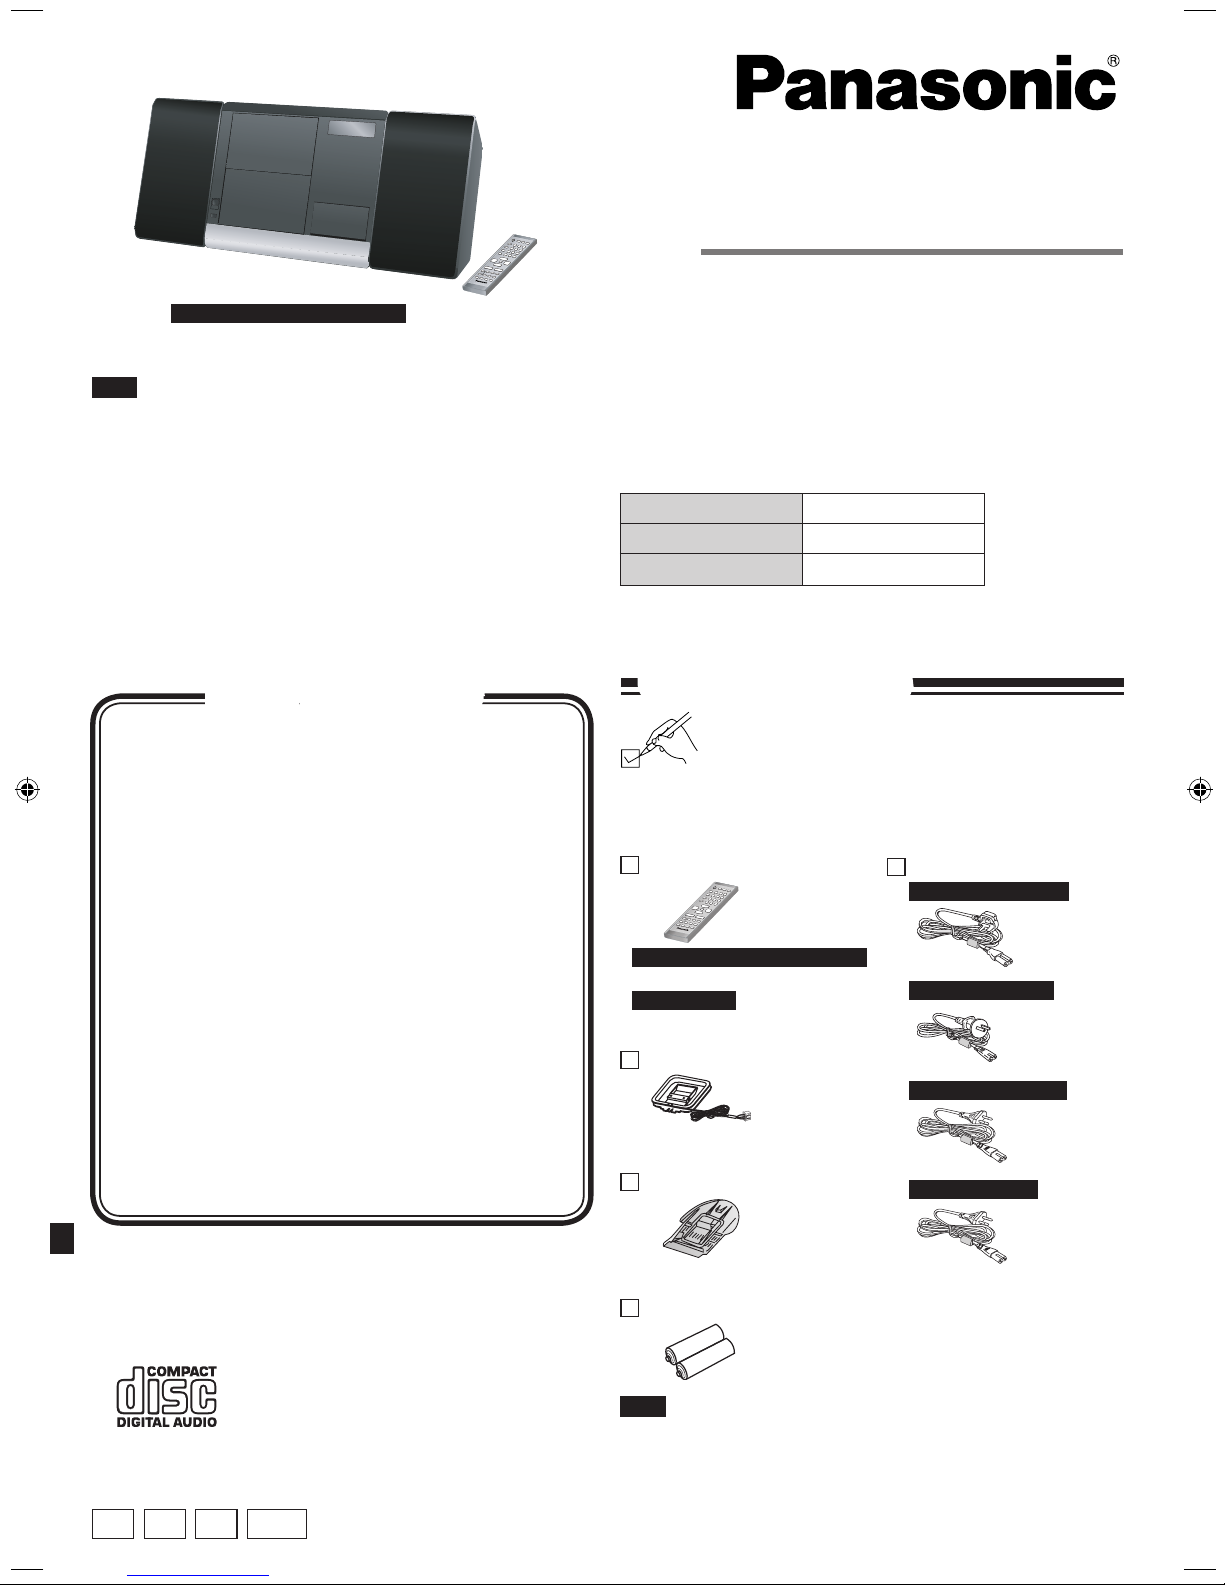
Please check and identify the supplied
accessories.
Use numbers indicated in parentheses when asking
for replacement parts.
(Product numbers correct as of January 2008. These
may be subject to change.)
Operating Instructions
CD Stereo System
Model No. SC-EN38
These instructions are applicable to the following systems.
Dear customer
Thank you for purchasing this product.
Before connecting, operating or adjusting this product, please
read the instructions completely.
Please keep this manual for future reference.
System SC-EN38
Main unit SA-EN38
Speakers SB-EN38
1 Remote control
1 FM/AM antenna
1 Support stand
2 Batteries
1 AC mains lead
(N2QAYB000246)
(RFAX0025)
(N1DADYY00003)
Supplied accessories
The included AC mains lead is for use with this unit only. Do not
use it with other equipment.
Do not use an AC mains lead from other equipment.
•
•
Supplied accessories cover
Safety precautions 2
The remote control 3
Control guide 3
Attach the stand to the unit 4
Placement of speakers 4
Connections 4
Disc operations 5
Radio operations 6
RDS broadcasts 6
External unit 7
Timer 9
Sound adjustment 9
Troubleshooting guide 10
Specifications 11
Caution for AC Mains Lead 11
Maintenance back cover
Table of contents
Note
(RYQX0512-H)
For other areas
For Australia and N.Z.
For the United Kingdom
For continental Europe and the U.K.
For continental Europe
(N2QAYB000248)
(RFAX0026)
(RFAX0027)*
SC-EN38 is used in the
illustrations unless otherwise mentioned.
For continental Europe and the U.K.
“EB” on the packaging indicates the United Kingdom.
Note
(RFAX0024)
For Southeast Asia
(RFAX0024)
* For Thailand only
2
RQTV0293
CAUTION!
DO NOT INSTALL OR PLACE THIS UNIT IN A BOOKCASE,
BUILT-IN CABINET OR IN ANOTHER CONFINED SPACE.
ENSURE THE UNIT IS WELL VENTILATED. TO PREVENT
RISK OF ELECTRIC SHOCK OR FIRE HAZARD DUE
TO OVERHEATING, ENSURE THAT CURTAINS AND
ANY OTHER MATERIALS DO NOT OBSTRUCT THE
VENTILATION VENTS.
DO NOT OBSTRUCT THE UNIT’S VENTILATION
OPENINGS WITH NEWSPAPERS, TABLECLOTHS,
CURTAINS, AND SIMILAR ITEMS.
DO NOT PLACE SOURCES OF NAKED FLAMES, SUCH
AS LIGHTED CANDLES, ON THE UNIT.
DISPOSE OF BATTERIES IN AN ENVIRONMENTALLY
FRIENDLY MANNER.
•
•
•
•
WARNING:
TO REDUCE THE RISK OF FIRE, ELECTRIC SHOCK OR
PRODUCT DAMAGE,
DO NOT EXPOSE THIS APPARATUS TO RAIN,
MOISTURE, DRIPPING OR SPLASHING AND THAT NO
OBJECTS FILLED WITH LIQUIDS, SUCH AS VASES,
SHALL BE PLACED ON THE APPARATUS.
USE ONLY THE RECOMMENDED ACCESSORIES.
DO NOT REMOVE THE COVER (OR BACK); THERE
ARE NO USER SERVICEABLE PARTS INSIDE. REFER
SERVICING TO QUALIFIED SERVICE PERSONNEL.
•
•
•
CAUTION!
THIS PRODUCT UTILIZES A LASER.
USE OF CONTROLS OR ADJUSTMENTS OR
PERFORMANCE OF PROCEDURES OTHER THAN THOSE
SPECIFIED HEREIN MAY RESULT IN HAZARDOUS
RADIATION EXPOSURE.
DO NOT OPEN COVERS AND DO NOT REPAIR YOURSELF.
REFER SERVICING TO QUALIFIED PERSONNEL.
This product may receive radio interference caused by mobile
telephones during use. If such interference is apparent, please
increase separation between the product and the mobile
telephone.
Inside of product
Tuotteen sisällä
Produktets innside
The socket outlet shall be installed near the equipment and
easily accessible.
The mains plug of the power supply cord shall remain readily
operable.
To completely disconnect this apparatus from the AC Mains,
disconnect the power supply cord plug from AC receptable.
Safety precautions
THIS UNIT IS INTENDED FOR USE IN TROPICAL CLIMATES.
THIS UNIT IS INTENDED FOR USE IN MODERATE CLIMATES.
For other areas
For Southeast Asia
Set the unit up on an even surface away from direct sunlight,
high temperature, high humidity, and excessive vibration. These
conditions can damage the cabinet and other components,
thereby shortening the unit’s service life.
Do not place heavy items on the unit.
Do not use high voltage power sources. This can overload the
unit and cause a fire.
Do not use a DC power source. Check the source carefully when
setting the unit up on a ship or other place where DC is used.
Ensure the AC mains lead is connected correctly and not
damaged. Poor connection and lead damage can cause fire or
electric shock. Do not pull, bend, or place heavy items on the lead.
Grasp the plug firmly when unplugging the lead. Pulling the AC
mains lead can cause electric shock.
Do not handle the plug with wet hands. This can cause electric
shock.
Do not let metal objects fall inside the unit. This can cause
electric shock or malfunction.
Do not let liquids get into the unit. This can cause electric shock
or malfunction. If this occurs, immediately disconnect the unit from
the power supply and contact your dealer.
Do not spray insecticides onto or into the unit. They contain
flammable gases which can ignite if sprayed into the unit.
Do not attempt to repair this unit by yourself. If sound is
interrupted, indicators fail to light, smoke appears, or any other
problem that is not covered in these instructions occurs, disconnect
the AC mains lead and contact your dealer or an authorized service
center. Electric shock or damage to the unit can occur if the unit is
repaired, disassembled or reconstructed by unqualified persons.
Extend operating life by disconnecting the unit from the power
source if it is not to be used for a long time.
Placement
Voltage
AC mains lead protection
Foreign matter
Service
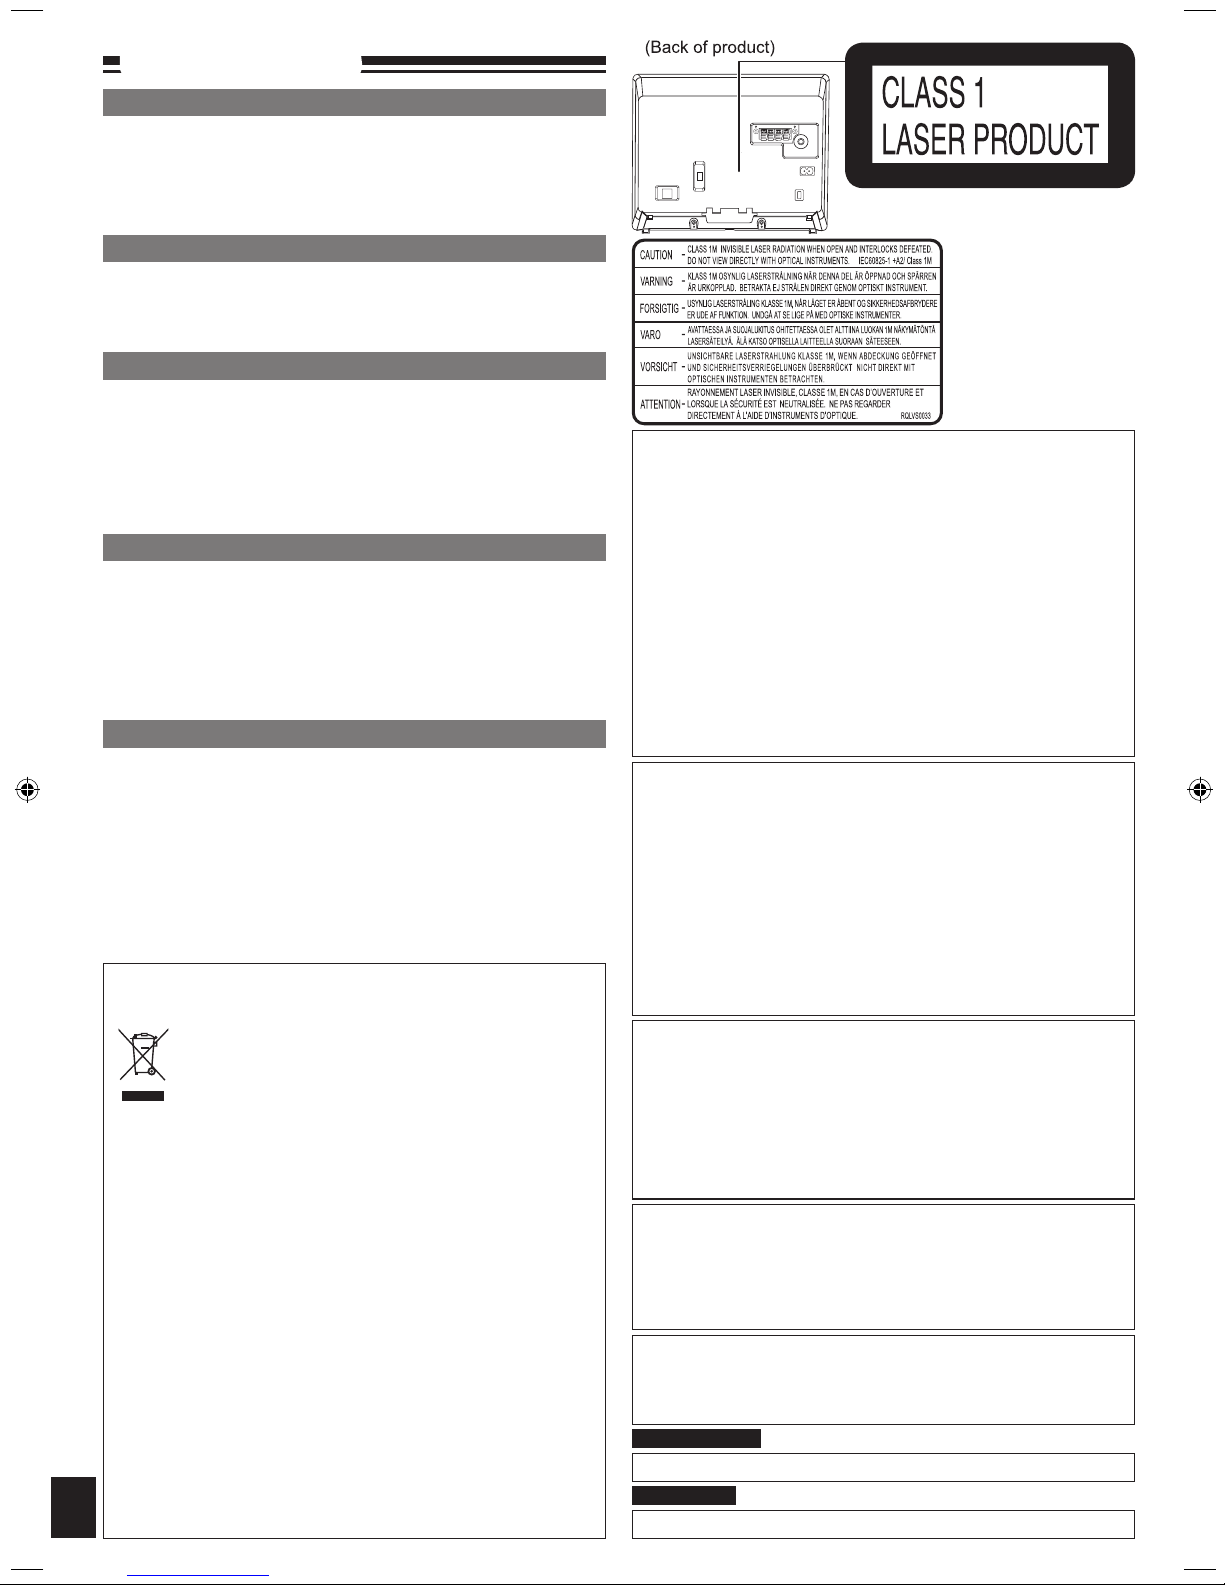
LUOKAN 1 LASERLAITE
KLASS 1 LASER APPARAT
-If you see this symbol-
Information on Disposal for Users of Waste Electrical
& Electronic Equipment (private households)
This symbol on the products and/or accompanying
documents means that used electrical and electronic
products should not be mixed with general household
waste.
For proper treatment, recovery and recycling, please
take these products to designated collection points, where they
will be accepted on a free of charge basis. Alternatively, in some
countries you may be able to return your products to your local
retailer upon the purchase of an equivalent new product.
Disposing of this product correctly will help to save valuable
resources and prevent any potential negative effects on human
health and the environment which could otherwise arise from
inappropriate waste handling. Please contact your local authority
for further details of your nearest designated collection point.
Penalties may be applicable for incorrect disposal of this waste,
in accordance with national legislation.
For business users in the European Union
If you wish to discard electrical and electronic equipment,
please contact your dealer or supplier for further information.
Information on Disposal in other Countries outside the
European Union
This symbol is only valid in the European Union.
If you wish to discard this product, please contact your local
authorities or dealer and ask for the correct method of disposal.
3
RQTV0293
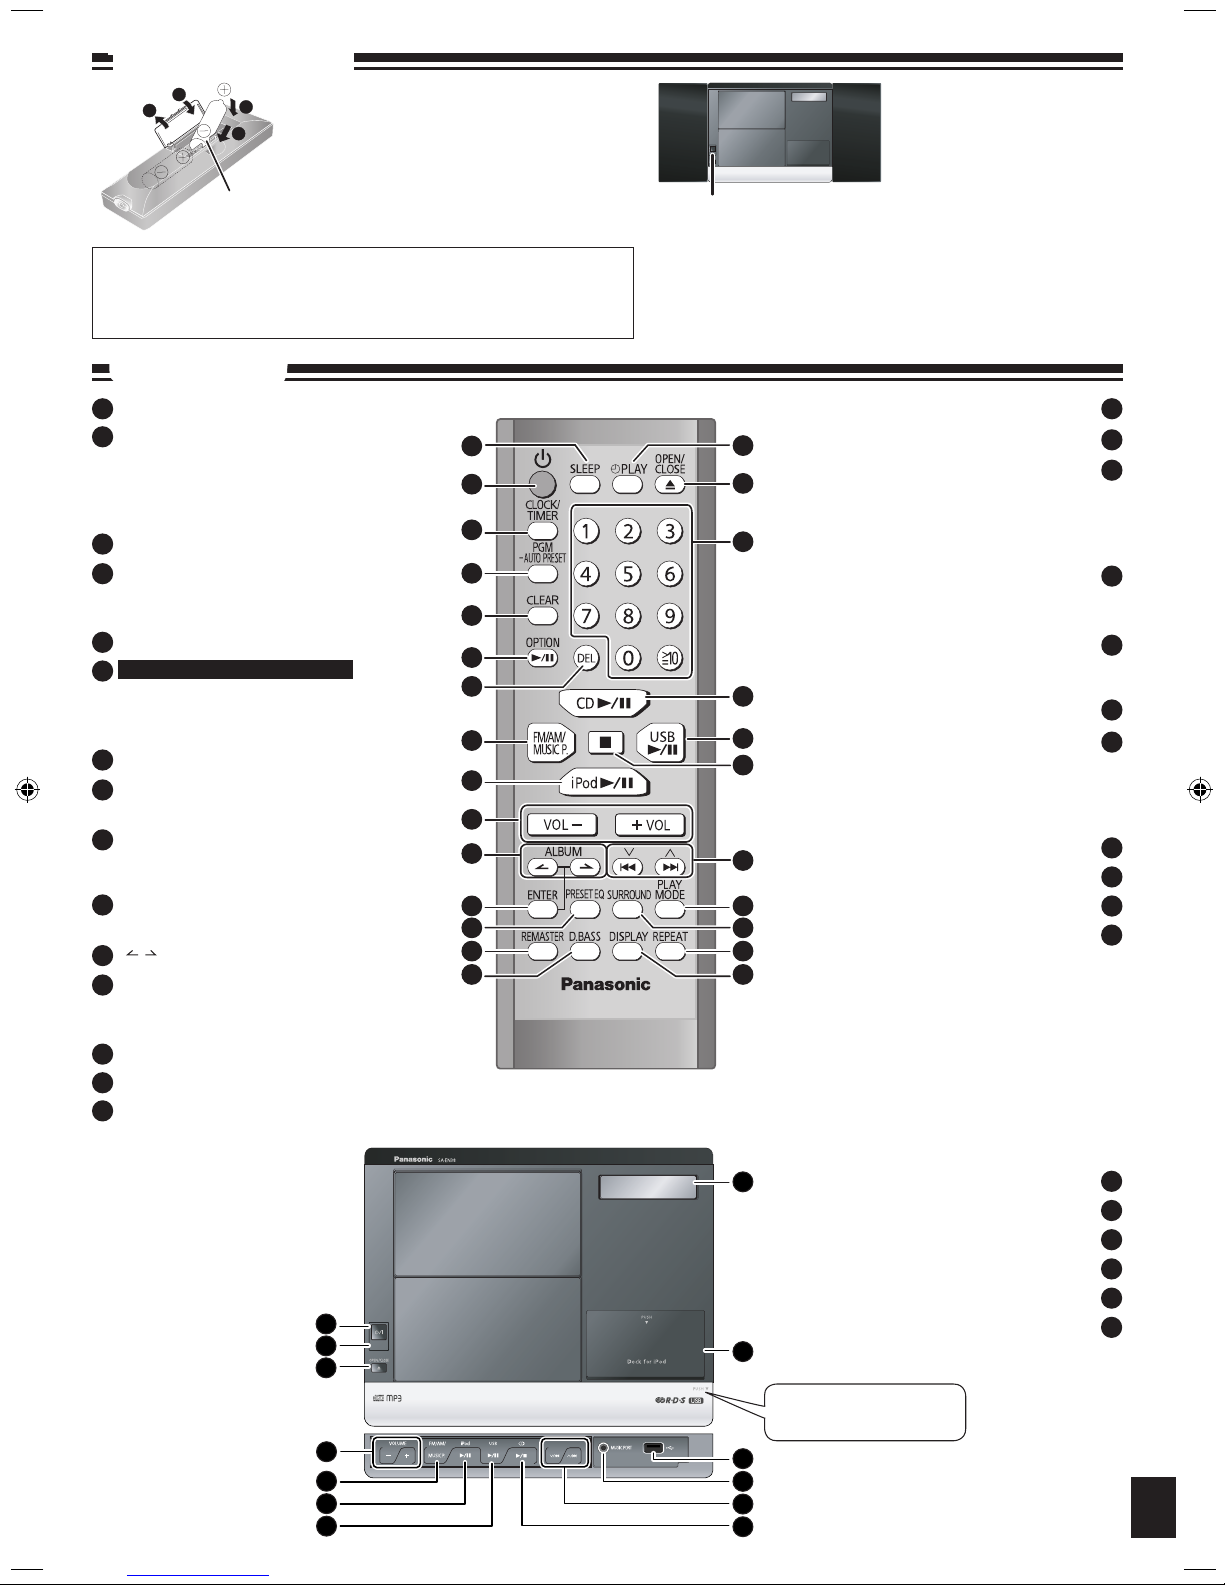
Control guide
29
28
10
22
8
9
31
32
20
30
2
17
27
1
2
3
8
7
6
5
4
10
14
13
12
11
15
19
18
17
16
20
22
23
24
25
26
9
21
3
2
1
4
R6/LR6, AA
■ Use
Aim at the sensor, avoiding
obstacles, at a maximum range
of 7 m directly in front of the
unit.
Operation can be affected by
strong light sources, such as
direct sunlight, and the glass
doors on cabinets.
•
•
■ Batteries
Insert so the poles (+ and – ) match those in
the remote control.
Do not use rechargeable type batteries.
Do not heat or expose to flame.
Do not leave the battery(ies) in an automobile
exposed to direct sunlight for a long period of
time with doors and windows closed.
•
•
•
•
Remote control signal sensor
The remote control
Push to open the lid.
[SLEEP] Sleep timer setting (9)
Standby/on switch [^], [8] (5, 9)
Press to switch the unit from on to standby mode
or vice versa.
In standby mode, the unit is still consuming a
small amount of power.
[CLOCK/TIMER] Clock and Timer setting (9)
[PGM, -AUTO PRESET] (5, 6)
CD/MP3 Program, Tuner Preset (Manual)
[Long press] Tuner Preset (Auto)
[CLEAR] CD/MP3/USB: Delete all programs (5)
[q/h, OPTION] (8)
Selector switch to Bluetooth
Direct Bluetooth Play/Bluetooth Pause
[DEL] Delete last programmed track (5)
[FM/AM/MUSIC P.] (4, 6, 8)
FM/AM/MUSIC PORT select button
[iPod q/h] (7)
Selector switch to iPod
Direct iPod Play/iPod Pause
[VOL-], [+VOL], [VOLUME -, +] (5, 7, 8, 9)
To adjust the volume
[ , , ALBUM] MP3:
Previous/Next Album (5, 8)
[ENTER] (5)
MP3/USB: Confirm track selection during
Program Mode
[PRESET EQ] Preset EQ mode selector (9)
[REMASTER] Remaster on/off (9)
[D.BASS] D.BASS on/off (9)
1
2
9
8
7
6
5
4
3
10
11
12
13
14
For continental Europe and the U.K.
15
16
17
18
19
20
21
22
23
24
25
Remote control signal sensor
Display
Built-in iPod Dock
USB port
Music port jack
(5) [CD q/g]
Selector switch to CD
CD Play/Stop button
(9) Play timer on/off [z PLAY]
(5) Open and Close CD lid [;, OPEN/CLOSE]
(5, 6, 8) Numbered buttons [1-9, 0, ≧10]
To select a 2-digit number
e.g. 16: [≧10] [1] [6]
To select a 3-digit number
e.g. 226: [≧10] [≧10] [2] [2] [6]
(5) [CD q/h]
Selector switch to CD
Direct CD Play/CD Pause
(8) [USB q/h]
Selector switch to USB
Direct USB Play/USB Pause
(5, 7, 8) Stop button [g]
(5, 6, 7, 8, 9) [
u, 2], [i, 1], [2/u], [1/i]
CD: Skip/Search
MP3/USB: Track Skip
Tuner: Tune up/down
[Long press] Auto tuning
(5) Play mode button [PLAY MODE]
(9) Surround mode on/off [SURROUND]
(5) Repeat on/off [REPEAT]
(5, 6, 8) [DISPLAY]
CD: CD Display (Elapsed play time/Remaining
play time)
MP3: MP3 Display [Elapsed time/Album name/
Track name/ID3 (Album)/ID3 (Track)/ID3 (Artist)]
USB: USB Display [Elapsed time/Remaining
time/Album name/Track name/ID3 (Album)/ID3
(Track)/ID3 (Artist)]
RDS: RDS Display (Station Name/Program
Type/Frequency)
26
27
28
29
30
32
31
CAUTION
Danger of explosion if battery is incorrectly replaced. Replace only with
the same or equivalent type recommended by the manufacturer.
Dispose of used batteries according to the manufacturer’s instructions.

4
RQTV0293
Speakers
Stop
Pause
Skip/Search
Skip album Press [ or , ALBUM] in the play mode.
Direct access
play
(Play starts with
the track you
select.)
Keep your speakers at least 10 mm away from
the system for proper ventilation.
These speakers do not have magnetic
shielding. Do not place them near televisions,
personal computers or other devices easily
influenced by magnetism.
You cannot take the front net off the speakers.
•
•
•
Note
Caution
Use the speakers only with the recommended
system. Failure to do so may lead to damage
to the amplifier and/or speakers, and may
result in the risk of fire. Consult a qualified
service person if damage has occurred or if you
experience a sudden change in performance.
Do not attach these speakers to walls or
ceilings.
•
•
1
2
3
FM/AM antenna
Taped part
FM
antenna
AM antenna
Headphones (not included)
Reduce the volume level and connect the
headphones.
Plug type: 3.5 mm stereo.
Note
1
2
Red (+)Black (-)
AC mains lead
To household AC mains socket
If the unit is left unplugged for longer than approximately
two weeks, all settings will revert to the factory settings.
Remember to reset the radio stations and any other
memory items before using the unit again.
Connect the AC mains lead after all other connections
are complete.
Note
Red Black
Portable audio equipment (Cords and equipment not included)
Portable audio player Plug type: 3.5 mm stereo
➡
Start playback from the
portable audio source.
Note
MAIN UNIT REMOTE CONTROL
iPod connection
Insert your iPod into the Built-in iPod
Dock.
➡ Refer to page 7 for further information.
Unplug the antenna connector by holding the
taped part.
Stand the antenna up on its base.
To prevent hearing damage, avoid
listening for prolonged periods of time.
Excessive sound pressure from
earphones and headphones can cause
hearing loss.
•
•
Adjust the volume and sound quality of this unit and the other equipment.
For details, refer to the instruction manual of the other equipment.
•
•
Attach the stand to the unit
➡ Page 3 for the buttons position of remote control and main unit.
Connections
Support stand
(included)
Rear of the main unit
PC Sync
Connect your PC to the PC Sync port.
➡ Refer to page 7 for further information.
1 2 3
Placement of speakers
Ensure the stand is securely attached to the main unit
for stabilization.
Insert the stand fully until
a click sound is heard.
The supplied stand is specially designed for use
with this unit.
Only use as indicated in this setup.
•
•
Speakers are designed identically so that no
left or right channel orientation is necessary.
Note
USB connection
Connect your USB enabled device to the USB port.
➡ Refer to page 8 for further information.
Bluetooth connection
Connect the Bluetooth Receiver to the option port.
➡ Refer to page 8 for further information.
For continental Europe and the U.K.
FOR THE UNITED KINGDOM
ONLY READ THE CAUTION FOR
THE AC MAINS LEAD ON PAGE
11 BEFORE CONNECTION.
 Loading...