

Panasonic SA-EN35DB, SB-EN35DBl, SB-EN35ADB Operating Instructions Manual
Operating Instructions
CD Stereo System
Model No. SC-EN35DB
Dear customer
Thank you for purchasing this product.
Before connecting, operating or adjusting this product, please read the instructions
completely.
Please keep this manual for future reference.
System SC-EN35DB
Main unit SA-EN35DB
Speakers
SB-EN35DB
SB-EN35ADB
These instructions are applicable to the following systems.
“EB” on the packaging indicates the United Kingdom.
Note
RQTV0168-1B
EB
Table of contents
Supplied accessories......................................................................................................2
The remote control.........................................................................................................2
Control guide.................................................................................................................2
Placement of speakers..................................................................................................2
Connections...................................................................................................................3
Discs operations..........................................................................................................3-4
Radio operations...........................................................................................................4
DAB.............................................................................................................................5-7
Changing the main unit and remote control mode..........................................................7
Timers and others..........................................................................................................8
Specifications................................................................................................................8
Troubleshooting guide....................................................................................................9
Maintenance..................................................................................................................9
Safety precautions........................................................................................................10
Caution for AC Mains Lead...........................................................................................11
RQTV0168
R
L
3
2
1
4
R6/LR6, AA
Aim at the sensor, avoiding obstacles, at a
maximum range of 7 m directly in front of
the unit.
Operation can be affected by strong light
sources, such as direct sunlight, and the
glass doors on cabinets.
•
•
Keep your speakers at least 10 mm away from the
system for proper ventilation.
These speakers do not have magnetic shielding. Do
not place them near televisions, personal computers
or other devices easily influenced by magnetism.
You cannot take the front net off the speakers.
•
•
•
Note
Left and right speakers are different.
Insert so the poles (+ and – ) match those
in the remote control.
Do not use rechargeable type batteries.
•
•
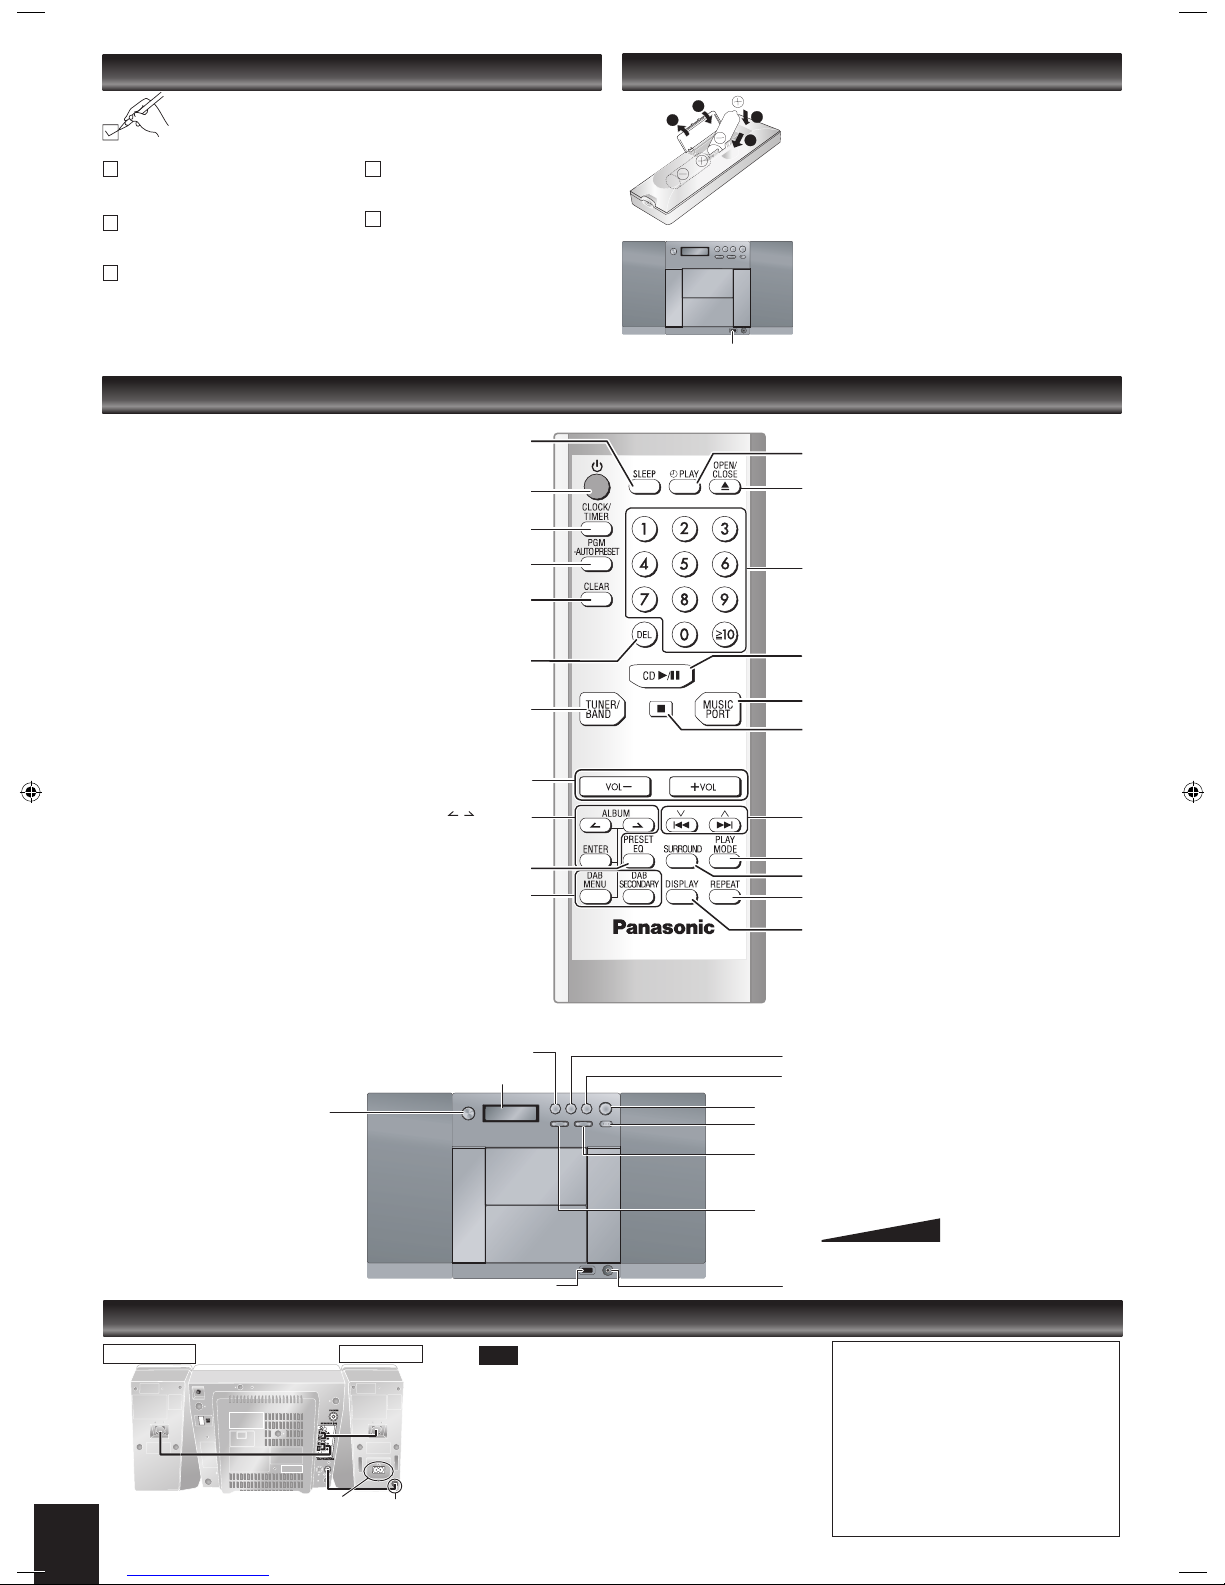
Standby/on switch [8]
Press to switch the unit from on
to standby mode or vice versa.
In standby mode, the unit is still
consuming a small amount of
power.
[SLEEP]
SLEEP timer operation ON/OFF or SLEEP time setting
CD/MP3 Program, Tuner Preset (Manual) [PGM, -AUTO PRESET]
[Long press] Tuner Preset (Auto)
CD/MP3: Delete all programs [CLEAR]
[PLAY MODE] Play mode button
[CD q/h] Selector switch to CD
Direct CD Play/CD Pause
Selector switch to Tuner for FM and DAB [TUNER/BAND]
Turn the volume up/down [VOL-], [+VOL]
[z PLAY] Timer PLAY ON/OFF
Clock and Timer setting [CLOCK/TIMER]
[1-9, 0, ≧10] Numbered buttons
To select a 2-digit number
e.g. 16: [≧10] [1] [6]
To select a 3-digit number
e.g. 226: [≧10] [≧10] [2] [2] [6]
[MUSIC PORT] Selector switch to MUSIC PORT
[g] Stop button
[2/u, 1\i] CD: Skip/Search
MP3: Track Skip
TUNER: Tune up/down, [Long press] Auto tuning
SA-EN35
[REPEAT] Repeat ON/OFF
[SURROUND] SURROUND mode ON/OFF
Delete programmed track [DEL]
[DISPLAY]
CD: CD Display (Elapsed play time/Remaining play time)
MP3: MP3 Display (Elapsed time/Album name/Track
name/ID3 [Album]/ID3 [Track]/ID3 [Artist])
DAB: DAB Display (Dynamic label/PTY display/
Ensemble label/Frequency display/Time display)
Preset EQ mode selector [PRESET EQ]
SA-EN35
Remote control signal sensor
■ Use
■ Batteries
The remote control
Control guide
Display
Standby/on switch
[^]
Remote control signal sensor
Placement of speakers
Caution
Use the speakers only with the
recommended system. Failure to do so
may lead to damage to the amplifier and/or
speakers, and may result in the risk of
fire. Consult a qualified service person if
damage has occurred or if you experience
a sudden change in performance.
Do not attach these speakers to walls or
ceilings.
•
•
Music port jack
[- VOLUME +] To adjust the volume
[2/u, 1\i] CD: Skip/Search
MP3: Track Skip
TUNER: Tune up/down, [Long press] Auto tuning
[g] Stop button
[CD q/h] Selector switch to CD. Direct CD Play/CD Pause
[MUSIC PORT] Selector switch to MUSIC PORT
[; OPEN/CLOSE] Open and Close CD lid
FM/DAB select button [TUNER/BAND]
2
[;, OPEN/CLOSE] Open and Close CD lid
Previous/Next Album / DAB Menu Selection [ , ALBUM]
Confirm track selection during MP3 Program Mode
[ENTER]
Confirm DAB Menu Selection
0
(Minimum)
50
(Maximum)
Use the numbers indicated in parentheses when asking for replacement
parts.
Supplied accessories
(As of March 2007)
1 Remote control [➡ page 2]
1 DAB “T” antenna [➡ page 3]
2 Batteries [➡ page 2]
1 AC mains lead [➡ page 3]
1 Music port cable [➡ page 3]
(N2QAYB000106)
AC mains lead
Right Speaker
Left Speaker
DC in cord to connect to main set
Red
Red
Black
Black
The included AC mains lead is for use with this unit only. Do not use it with other
equipment.
Do not use an AC mains lead from other equipment.
•
•
Enter/cancel DAB Menu mode [DAB MENU]
Select the secondary service [DAB SECONDARY]
(N1EADY000001)
(K2CT3CA00004)
(K2KC39A00002)
RQTV0168
3
Press [8] to turn the unit on.
Press [; OPEN/CLOSE] to open the CD lid and then set the CD in place.
Press [; OPEN/CLOSE] again to close the lid.
Keep fingers away from the CD lid when it is closing to avoid possible minor injury.
Label must face outward.
Press until you hear it click into place.
Press [CD q/h] to start play.
Adjust the volume.
Be sure to press the [; OPEN/CLOSE] button to open and close the CD lid.
Damage may occur if the lid is forced closed.
During standby, if the CD is ready in the unit, the unit comes on and play begins.
(One touch play)
•
•
•
Basic play
Discs operations
Connections
R
L
SA-EN35
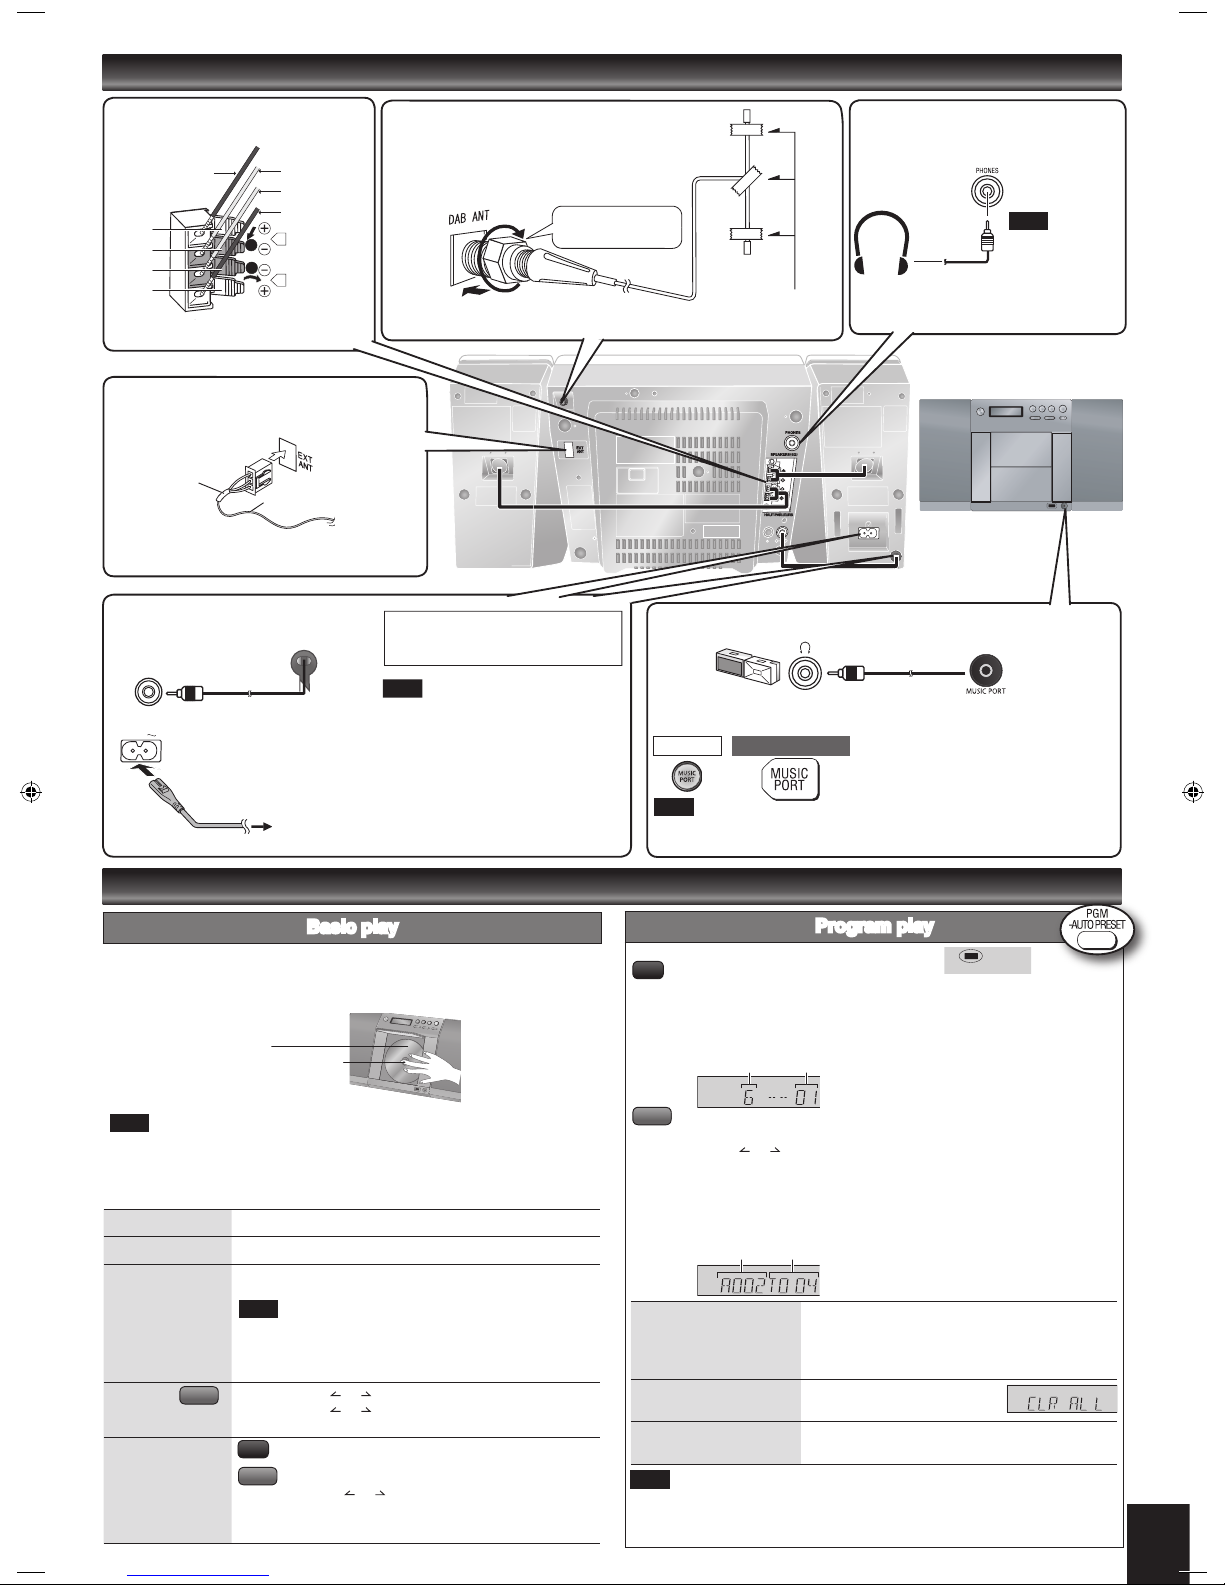
3. FM antenna
Stand the antenna up on its base.
Taped part
FM antenna
Headphones
(not included)
Reduce the volume
level and connect
the headphones.
Plug type:
3.5 mm stereo.
To prevent hearing
damage, avoid
listening for
prolonged periods
of time .
Note
Portable audio equipment
(Cords and equipment not included)
Use
Adjust the volume and sound quality of this unit and the other equipment.
For details, refer to the instruction manual of the other equipment.
•
•
Portable audio player Plug type:
3.5 mm stereo
➡
Start Playback from the
Portable audio source.
Stop
Press [g].
Pause
Press [CD q/h]. Press again to resume play.
Skip/Search
Press [2/u] or [1/i] to skip/
Press and hold [2/u] or [1/i] to search.
You can search during play or while paused.
You cannot search through MP3 files.
You can only search within the current track during
program play, one track repeat, and random play.
•
•
•
Skip album Press [ALBUM or ] in the play mode.
Press [ALBUM or ] once and then the numbered buttons
in the stop mode.
Direct access play
(Play starts with the
track you select.)
Press the numbered buttons to select the desired track.
Press [ALBUM or ] to select the album.
Press [1/i] once and then press the numbered buttons
to
select the desired track.
Note
Note
1. Speakers
R
L
1
2
Copper (+)
Silver (-)
Silver (-)
Copper (+)
➡
Page 2 for the position of remote control and
main unit buttons.
The function allows you to program up to 24 tracks.
Press [PGM, -AUTO PRESET] while stopped.
Press the numbered buttons to select tracks. (Maximum 24 tracks)
Repeat this step to program other tracks.
Press [CD q/h] to start play.
Press [PGM, -AUTO PRESET] while stopped.
Press [ALBUM or ] to select your desired album.
Press [1/i] once and then press the numbered buttons to select tracks.
(Maximum 24 tracks)
Press [ENTER].
Repeat step 2 to 4 to program other tracks.
Press [CD q/h] to start play.
g Confirm a programmed
track
Press [2/u] or [1/i] when “PGM” is displayed
in the stop mode. To check while programming,
press [PGM, -AUTO PRESET] twice after “PGM”
appears, then press [2/u] or [1/i] .
g Delete all programs
Press [CLEAR] in the stop mode.
“CLR ALL” is displayed.
g Cancel program mode
Press [PGM, -AUTO PRESET] in the stop mode to
clear “PGM” indicator from the display.
Program contents are stored in the unit’s memory even after changing to a different
function or turning the unit off. All program contents are erased by pressing [CLEAR]
or by opening the CD lid.
Program play
Track number
Program number
Note
PGM
Album number Track number
MP3
CD
MP3
CD
MP3
Note
Red
Red
Black
Black
Unplug the antenna connector by holding the taped
part.
MAIN UNIT REMOTE CONTROL
2. DAB “T” antenna
The cross bar of the T should be kept firmly stretched.
Find a position with good reception.
There is a function on the unit to check signal quality.
Be sure to fully
tighten the screw.
Adhesive tape
For best reception
A DAB outdoor antenna is recommended (refer to page 5).
4. AC mains lead
AC IN
To household
mains socket
If the unit is left unplugged for longer
than approximately two weeks, all
settings will revert to the factory settings.
Remember to reset the radio stations
and any other memory items before
using the unit again.
Connect the AC mains lead
after all other connections
are complete.
Note
Connect the DC in cord from
left speaker to main set.
Connect the AC mains lead.
READ THE CAUTION FOR THE AC
MAINS LEAD ON PAGE 11 BEFORE
CONNECTION.
RQTV0168
This function allows you to display the information of the current track.
Press [DISPLAY] repeatedly during play or pause.
Elapsed play time Remaining play time
Elapsed time Album name Track name
ID3 (Artist) ID3 (Track) ID3 (Album)
Maximum number of displayable characters: approximately 30
This unit supports ver. 1.0 & 1.1 ID3 tags. Text data that is not supported will not
be displayed.
ID3 is a tag embedded in MP3 tracks to provide information about the track.
•
•
•
Display function
The unit can play MP3, a method of compressing audio without overly hurting audio
quality.
When creating MP3 files to play on this unit
Maximum number of tracks and albums: 999 tracks and 256 albums.
Compatible compression rate: Between 64 kbps and 320 kbps (stereo).
128 kbps (stereo) is recommended.
Disc formats: ISO9660 level 1 and level 2 (except for extended formats).
The time for reading TOC depends on the number of the tracks, the folders or folder
structures.
Limitations on MP3
This unit is compatible with multi-session but if there are a lot of sessions it takes
more time for play to start. Keep the number of sessions to a minimum to avoid this.
This unit cannot play files recorded using packet write.
If the disc includes both MP3 and normal audio data (CD-DA), the unit plays the
type recorded in the inner part of the disc.
If the disc includes both MP3 and other types of audio data (e.g. WMA or WAV), the
unit plays only the MP3.
Depending on how you create MP3 files, they may not play in the order you
numbered them or may not play at all.
•
•
•
•
•
•
•
•
Memory preset
You can preset up to 20 FM channels.
Preparation: Press [TUNER/BAND] to select “FM”.
Automatic presetting
Press and hold [PGM, -AUTO PRESET] to start presetting.
Manual presetting
Press [PLAY MODE] to select “MANUAL”.
Press [2/u] or [1/i] to tune to the required station.
Press [PGM, -AUTO PRESET].
Press the numbered buttons to select a channel.
The station occupying a channel is erased if another station is preset in that
channel.
Repeat steps 2 to 4 to preset more stations.
Selecting a preset station
Press the numbered buttons to select the channel.
For channels 10 to 20 press [≧10], then the two digits.
OR
Press [PLAY MODE] to select “PRESET”.
Press [2/u] or [1/i] to select the channel.
Discs operations (continued)
Radio operations
➡
Page 2 for the position of remote control buttons.
4
Manual tuning
Press [TUNER/BAND] to select “FM”.
Press [PLAY MODE] to select “MANUAL”.
Press [2/u] or [1/i] to select the frequency of the required station.
To tune automatically
Press [TUNER/BAND] to select “FM”.
Press [PLAY MODE] to select “MANUAL”.
Press and hold [2/u] or [1/i] until the frequency starts changing rapidly.
Auto tuning stops when it finds a station.
To cancel auto tuning, press [2/u] or [1/i] once again.
Auto tuning may not function when there is excessive interference.
•
•
•
Note on CD-R and CD-RW
This unit can play CD-R and CD-RW recorded with CD-DA or MP3. Use an audio
recording disc for CD-DA and finalize* it when you finish recording.
The unit may not be able to play some discs due to the condition of the recording.
* A process performed after recording that enables CD-R/CD-RW players to play audio
CD-R and CD-RW.
Caution
Choose discs with this mark:
Do not:
use irregularly shaped CDs.
attach extra labels and stickers.
use CDs with labels and stickers that are coming off or with adhesive exuding from
under labels and stickers.
attach scratch-proof covers or any other kind of accessory.
write anything on the CD.
clean CDs with liquids (Wipe with a soft, dry cloth.).
•
•
•
•
•
•
Press [PLAY MODE] to select the desired mode.
During random play, you cannot skip to previous track.•
Play Mode function
You can repeat program play or other selected play mode.
Press [REPEAT] before or during play.
“REPEAT ON” and “ & ” are displayed.
To cancel
Press [REPEAT] again.
“REPEAT OFF” is displayed and “ & ” is cleared.
Repeat play
Mode To play
1-TRACK
1TR
one selected track on the disc.
Press the numbered buttons to select the track.
1-ALBUM
1ALBUM
one selected album on the disc.
Press [ALBUM or ] to select the album.
RANDOM
RND
a disc randomly.
1-ALBUM RANDOM
1ALBUM RND
all tracks in one selected album randomly.
Press [ALBUM or ] to select the album.
MP3
MP3
CD
MP3
MP3
Note
Note
Note
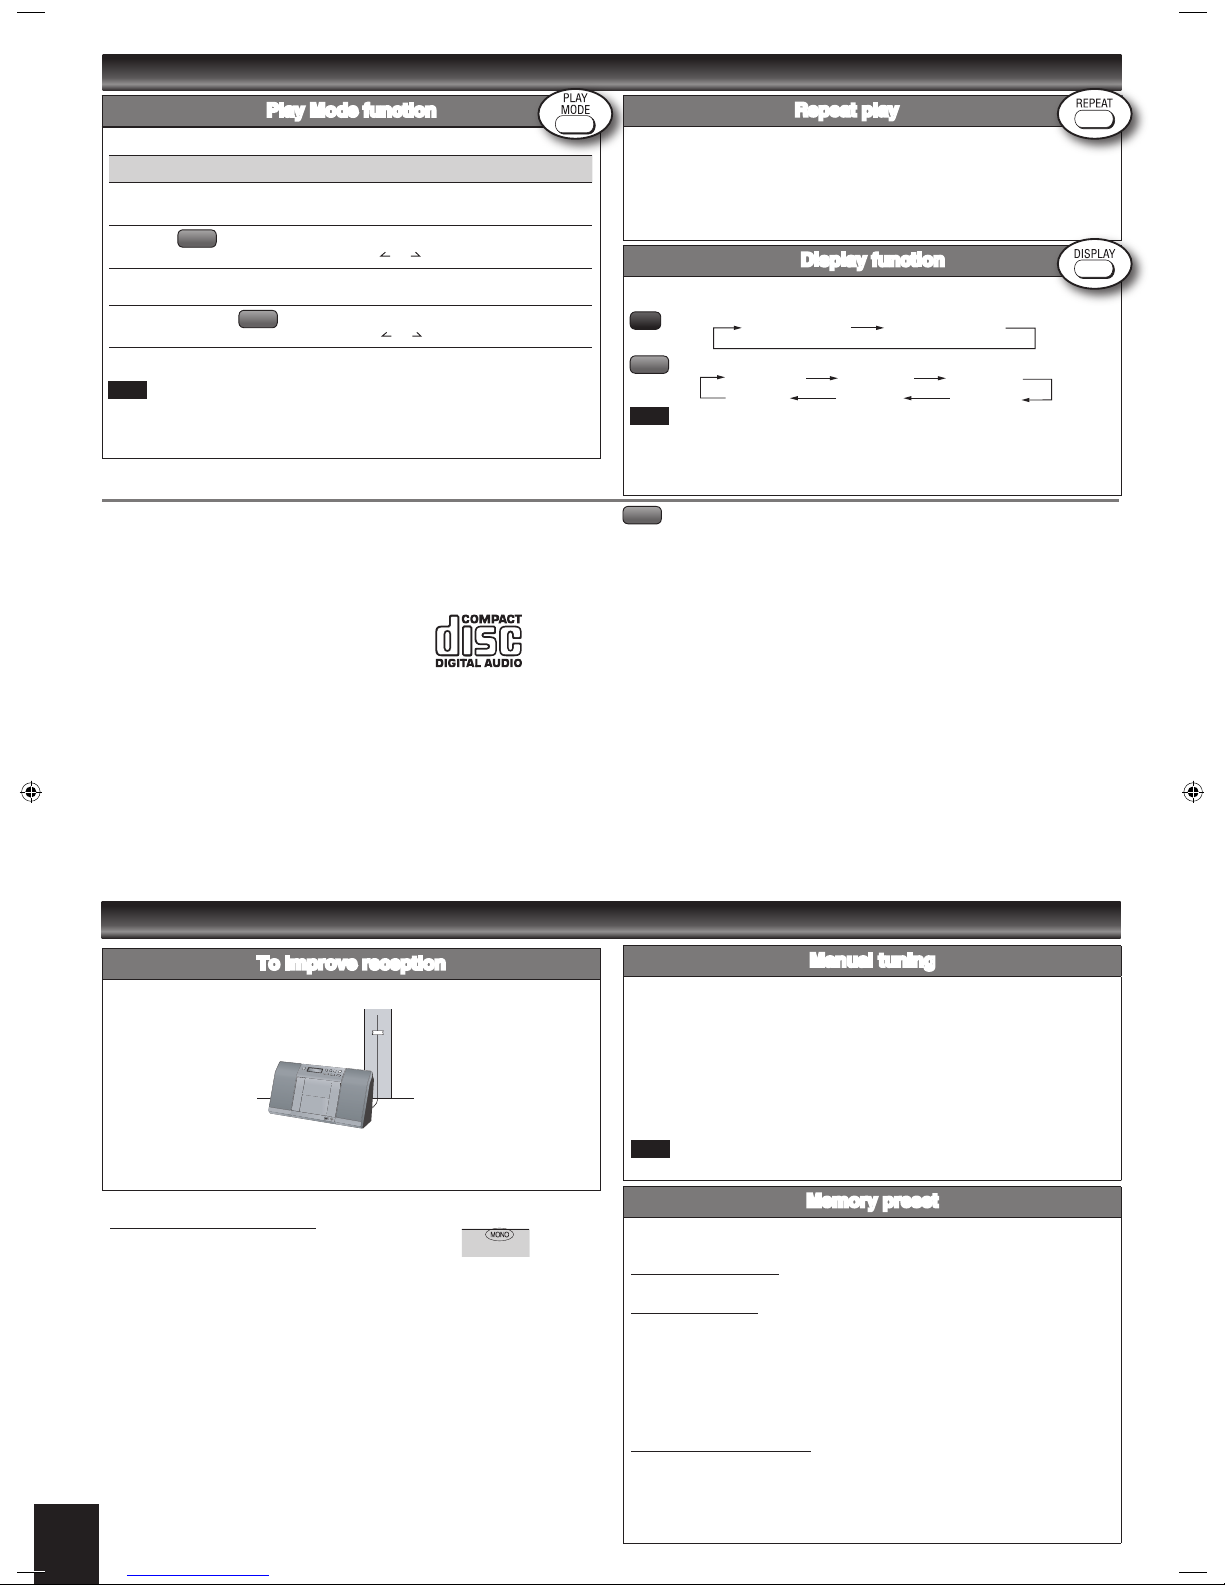
To improve reception
FM
Receive the radio stations after connecting the antenna. Then attach the antenna
cord to a wall or pillar where there is good reception.
To improve FM sound quality
Press and hold [PLAY MODE] to display “MONO”.
To cancel
Press and hold [PLAY MODE] again until “MONO” disappears.
MONO is also canceled if the frequency is changed.
Turn off “MONO” for normal listening.
•
•
 Loading...