

PANASONIC S60MU1E51, S90MU1E51, S73MU1E51, S73MF2E5, S56MF2E5 User Manual
...
* Shows U1 type
(4-Way Cassette)
Operating Instructions
Air Conditioner
Model No.
Indoor Units
4-Way Cassette
(U1 type)
S-22MU1E51
S-28MU1E51
S-36MU1E51
S-45MU1E51
S-56MU1E51
S-73MU1E51
S-90MU1E51
S-106MU1E51
S-140MU1E51
S-160MU1E51
S-60MU1E51
FRANÇAIS
Avant d’utiliser l’appareil, lisez ce mode d’emploi dans son intégralité et conservez-le pour toute référence ultérieure.
ESPAÑOL
Antes de operar la unidad, lea atentamente estas instrucciones de funcionamiento y guárdelas para futuras consultas.
DEUTSCH
Bevor Sie das Gerät in Betrieb nehmen, lesen Sie bitte diese Bedienungsanleitung aufmerksam durch und
bewahren Sie sie für die künftige Verwendung auf.
ITALIANO
Prima di utilizzare l’unità, leggere a fondo queste istruzioni per l’uso e conservarle come riferimento futuro.
NEDERLANDS
Lees deze gebruiksinstructies goed door voor u het apparaat gebruikt en bewaar ze voor toekomstig gebruik.
PORTUGUÊS
Antes de utilizar o aparelho, leia completamente este manual de instruções e guarde-o para futuras referências.
EΛΛΗΝΙΚΆ
Πριν θέσετε τη μονάδα σε λειτουργία, διαβάστε πολύ καλά αυτές τις οδηγίες χρήσης και διατηρήστε τις για
μελλοντική αναφορά.
БЪЛГАРСКИ
Преди да започнете експлоатация на този уред, прочетете внимателно тези инструкции и ги запазете, за
да можете да правите справки с тях и в бъдеще.
РУССКИЙ
Перед использованием этого устройства внимательно прочитайте настоящую инструкцию по
эксплуатации и сохраните ее для дальнейших справок.
УКРАЇНСЬКА
Уважно прочитайте цю інструкцію з експлуатації перед тим, як увімкнути пристрій, та збережіть її на
майбутнє.
B.INDONESIA 136 ~ 147
Sebelum mengoperasikan unit, baca petunjuk pengoperasian ini secara menyeluruh dan simpan untuk referensi
mendatang.
Indoor Units
Low Silhouette Ducted
(F2 type)
S-22MF2E5
S-28MF2E5
S-36MF2E5
S-45MF2E5
S-56MF2E5
S-73MF2E5
S-90MF2E5
S-106MF2E5
S-140MF2E5
S-160MF2E5
S-60MF2E5
ENGLISH 2 ~ 13
Before operating the unit, read these operating instructions thoroughly and keep them for future reference.
Outdoor Units
mini
(LE1 type)
U-4LE1E5
U-5LE1E5
U-6LE1E5
U-4LE1E8
U-5LE1E8
U-6LE1E8
Outdoor Units
2WΑΥ
(ME1 type)
U-8ME1E81
U-10ME1E81
U-12ME1E81
U-14ME1E81
U-16ME1E81
U-18ME1E81
U-20ME1E81
Outdoor Units
3WΑΥ
(MF1 type)
U-8ME1E8(E)
U-10ME1E8(E)
U-12ME1E8(E)
U-14ME1E8(E)
U-16ME1E8(E)
U-8MF1E8
U-10MF1E8
U-12MF1E8
U-14MF1E8
U-16MF1E8
U-18ME1E8(E)
U-20ME1E8(E)
14 ~ 25
26 ~ 37
38 ~ 49
50 ~ 61
62 ~ 73
74 ~ 85
86 ~ 97
98 ~ 109
110 ~ 121
122 ~ 134
© Panasonic Corporation 2012
Unauthorized copying and distribution is a
violation of law.
F568275
CONTENTS
PRODUCT INFORMATION...........................................................................................................2
SAFETY PRECAUTIONS..............................................................................................................2
INSTALLATION LOCATION...........................................................................................................3
ELECTRICAL REQUIREMENTS ..................................................................................................3
SAFETY INSTRUCTIONS.............................................................................................................4
INFORMATION..............................................................................................................................6
OPERATION..................................................................................................................................7
ADJUSTING AIRFLOW DIRECTION............................................................................................8
ADJUSTING AIRFLOW DIRECTION FOR MULTIPLE INDOOR UNITS USING SINGLE
REMOTE CONTROLLER (WIRED) ............................................................................................10
SPECIAL REMARKS ..................................................................................................................11
CARE AND CLEANING ..............................................................................................................11
TROUBLESHOOTING ................................................................................................................12
CHECK BEFORE REQUIRING SERVICES................................................................................13
TIPS FOR ENERGY SAVING.....................................................................................................13
SPECIFICATIONS.....................................................................................................................135
Page
PRODUCT INFORMATION
If you have problems or questions concerning your Air Conditioner, you will need the following
information. Model and serial numbers are on the nameplate on the bottom of the cabinet.
Model No. _________________________________ Serial No. _______________________
Date of purchase ______________________________________________________________
Dealer’s address ______________________________________________________________
Phone number________________________________________________________________
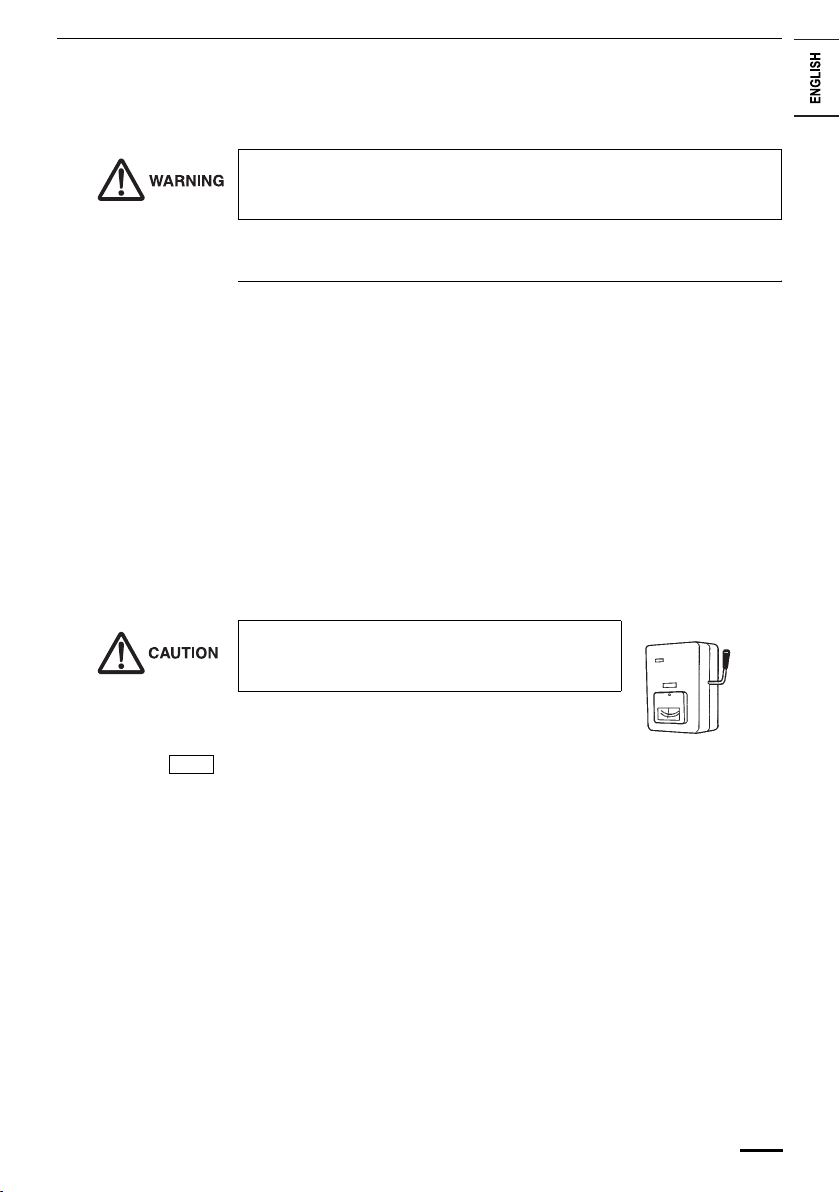
SAFETY PRECAUTIONS
The following symbols used in this manual, alert you to potentially dangerous conditions
to users, service personnel or the appliance:
This symbol refers to a hazard or unsafe practice
which can result in severe personal injury or
death.
This symbol refers to a hazard or unsafe practice
which can result in personal injury or product or
property damage.
2
INSTALLATION LOCATION
• We recommend that this air conditioner be installed properly by qualified installation
technicians in accordance with the Installation Instructions provided with the unit.
• Before installation, check that the voltage of the electric supply in your home or office is the
same as the voltage shown on the nameplate.
• Do not install this air conditioner where there are fumes or flammable gases, or in an
extremely humid space such as a greenhouse.
• Do not install the air conditioner where excessively high heat-generating objects
are placed.
Avoid: To protect the air conditioner from heavy corrosion, avoid installing the outdoor unit where
salty sea water can splash directly onto it or in sulphurous air near a spa.
ELECTRICAL REQUIREMENTS
1. All wiring must conform to the local electrical codes. Consult your dealer or a qualified
electrician for details.
2. Each unit must be properly grounded with a ground (or earth) wire or through the supply
wiring.
3. Wiring must be done by a qualified electrician.
The wires in this mains lead are colored in accordance with the following code:
Green-and-Yellow: Earth
Blue: Neutral
Brown: Live
As the colors of the wires in the mains lead of this appliance may not correspond with the colored
markings identifying the terminals in your plugs, proceed as follows:
The wire which is colored green and yellow must be connected to the terminal in the plug which
is marked by the letter E or by the safety earth symbol or colored green or green-and-yellow.
The wire which is colored blue must be connected to the terminal which is marked with letter N or
colored black.
The wire which is colored brown must be connected to the terminal which is marked with the
letter L or colored red.
To warm up the system, the power mains must be turned on
at least five (5) hours before operation. Leave the power
mains ON unless you will not be using this appliance for an
extended period.
Power mains
ON
NOTE
Pull off the power plug from a receptacle, or switch off the breaker, or switch off the power
disconnecting mean to isolate the air conditioner from the main power supply when not in use
for a long time.
3
SAFETY INSTRUCTIONS
• Read these Operating Instructions carefully before using this air conditioner. If you still have any difficulties or problems,
consult your dealer for help.
• This air conditioner is designed to give you comfortable room conditions. Use this only for its intended purpose as described in
these Operating Instructions.
Confirm to authorized dealer or specialist on usage of
specified refrigerant type. Using of refrigerant other than
the specified type may cause product damage, burst and
injury etc.
Never touch the unit with wet hands.
Never use or store gasoline or other flammable vapor or
liquid near the air conditioner — it is very dangerous.
Do not use this appliance in a potentially explosive
atmosphere.
This air conditioner has no ventilator for intaking fresh air
from outdoors. You must open doors or windows frequently
when you use gas or oil heating appliances in the same
room, which consume a lot of oxygen from the air.
Otherwise there is a risk of suffocation in an extreme case.
Provide a power outlet to be used exclusively for each unit,
and a power supply disconnect, circuit breaker and earth
leakage breaker for overcurrent protection should be
provided in the exclusive line.
Provide a power outlet exclusively for each unit, and full
disconnection means having a contact separation in all
poles must be incorporated in the fixed wiring in
accordance with the wiring rules.
To prevent possible hazards from insulation failure,
the unit must be grounded.
Do not clean inside the indoor and outdoor units by users.
Engage authorized dealer or specialist for cleaning.
In case of malfunction of this appliance, do not repair by
yourself. Contact to the sales dealer or service dealer for a
repair.
Refrigerant gas leakage may cause fire.
For safety, be sure to turn the air conditioner off and
also to disconnect the power before cleaning or
servicing.
Pull off the power plug from a receptacle, or switch off the
breaker, or switch off the power disconnecting mean to
isolate the air conditioner from the main power supply in
case of emergency.
Do not insert your fingers or other objects into the air
conditioner indoor or outdoor unit, rotating parts may
cause injury.
Do not use modified cord, joint cord, extension
cord or unspecified cord to prevent overheating
and fire.
Stop using the product when any abnormality/failure occurs
and disconnect the power plug or turn off the power switch
and breaker.
(Risk of smoke/fire/electric shock)
Examples of abnormality/failure
• The ELCB trips frequently.
• Burning smell is observed.
• Abnormal noise or vibration of the unit is observed.
• Water leaks from the indoor unit.
• Power cord or plug becomes abnormally hot.
• Fan speed cannot be controlled.
• The unit stops running immediately even if it is switched
on for operation.
• The fan does not stop even if the operation is stopped.
Contact immediately your local dealer for maintenance/
repair.
Do not turn the air conditioner on and off from the power
mains switch. Use the ON/OFF operation button.
Do not stick anything into the air outlet of the outdoor
unit. This is dangerous because the fan is rotating at
high speed.
Do not touch the air inlet or the sharp aluminum fins
of the outdoor unit. You may get injured.
Keep the fire alarm and the air outlet at least 1.5m away
from the unit.
This appliance is not intended for use by persons(including
children) with reduced physical, sensory or mental
capabilities, or lack of experience and knowledge, unless
they have been given supervision or instruction concerning
use of the appliance by a person responsible for their
safety. Children should be supervised to ensure that do not
play with the appliance.
Do not cool or heat the room too much if babies or invalids
are present.
Do not sit or step on the unit. You may fall down
accidentally.
Do not stick any object into the FAN CASE.
You may be injured and the unit may be
damaged.
4
Examples of
abnormality/
failure
NOTICE
• The compressor may occasionally stop during thunderstorms.
This is not a mechanical failure. The unit automatically recovers after a few minutes.
• The English text is the original instructions. Other languages are translation of the
original instructions.
Stop using the product when any abnormality/failure occurs and
disconnect the power plug.
(Risk of smoke/fire/electric shock)
- The product sometimes does not start when turned on.
- The power is sometimes disconnected when the cord is moved.
- Burnt odor or abnormal noise is detected during operation.
- The body is deformed or abnormally hot.
Contact immediately your local dealer for maintenance/repair.
5

INFORMATION
Operation Condition
Use this air conditioner under the following temperature range.
Indoor temperature range:
Cooling mode 14°C ~ 25°C (*WBT) / 18°C ~ 32°C (*DBT)
Heating mode 16°C ~ 30°C (*DBT)
mini
Outdoor temperature range:
Cooling mode -15°C ~ 46°C (*DBT)
Heating mode -20°C ~ 18°C (*WBT) / -20°C ~ 24°C (*DBT)
Outdoor temperature range:
2WAY
Cooling mode -10°C ~ 43°C (*DBT)
Heating mode -25°C ~ 20°C (*WBT)
Outdoor temperature range:
3WAY
Cooling & Heating mode -10°C ~ 43°C (*DBT)
Cooling mode -10°C ~ 43°C (*DBT)
Heating mode -25°C ~ 15°C (*WBT)
*DBT: Dry bulb temperature
*WBT: Wet bulb temperature
Information for Users on Collection and Disposal of Old Equipment and Used Batteries
These symbols on the products, packaging, and/or accompanying documents mean that used electrical and
electronic products and batteries should not be mixed with general household waste.
For proper treatment, recovery and recycling of old products and used batteries, please take them to
applicable collection points, in accordance with your national legislation and the Directives 2002/96/EC and
2006/66/EC.
By disposing of these products and batteries correctly, you will help to save valuable resources and prevent
any potential negative effects on human health and the environment which could otherwise arise from
inappropriate waste handling.
For more information about collection and recycling of old products and batteries, please contact your local
municipality, your waste disposal service or the point of sale where you purchased the items.
Penalties may be applicable for incorrect disposal of this waste, in accordance with national legislation.
For business users in the European Union
If you wish to discard electrical and electronic equipment, please contact your dealer or supplier for further
information.
[Information on Disposal in other Countries outside the European Union]
These symbols are only valid in the European Union. If you wish to discard these items, please contact your
local authorities or dealer and ask for the correct method of disposal.
Note for the battery symbol (bottom two symbol examples):
This symbol might be used in combination with a chemical symbol. In this case it complies with the requirement
Pb
set by the Directive for the chemical involved.
6

OPERATION
Names of Parts
INDOOR UNIT
U1 Type (4-WAY CASSETTE) F2 Type (LOW SILHOUETTE DUCTED)
Water drain
Ceiling panel
(optional)
Air outlet duct
Suspension
bolt
Bolt anchor
Air outlet
(4 locations)
Air intake grille
(air intake)
Air-outlet grille
Wireless Remote Controller (Optional parts)
NOTE
Refer to the Operating Instructions attached to the
optional Wireless Remote Controller.
Timer Remote Controller (Optional parts)
NOTE
Refer to the Operating Instructions attached to the
optional Timer Remote Controller.
Indoor unit
Ceiling material
(Wireless type: available
for all indoor units)
(Wired type: available
for all indoor units)
7
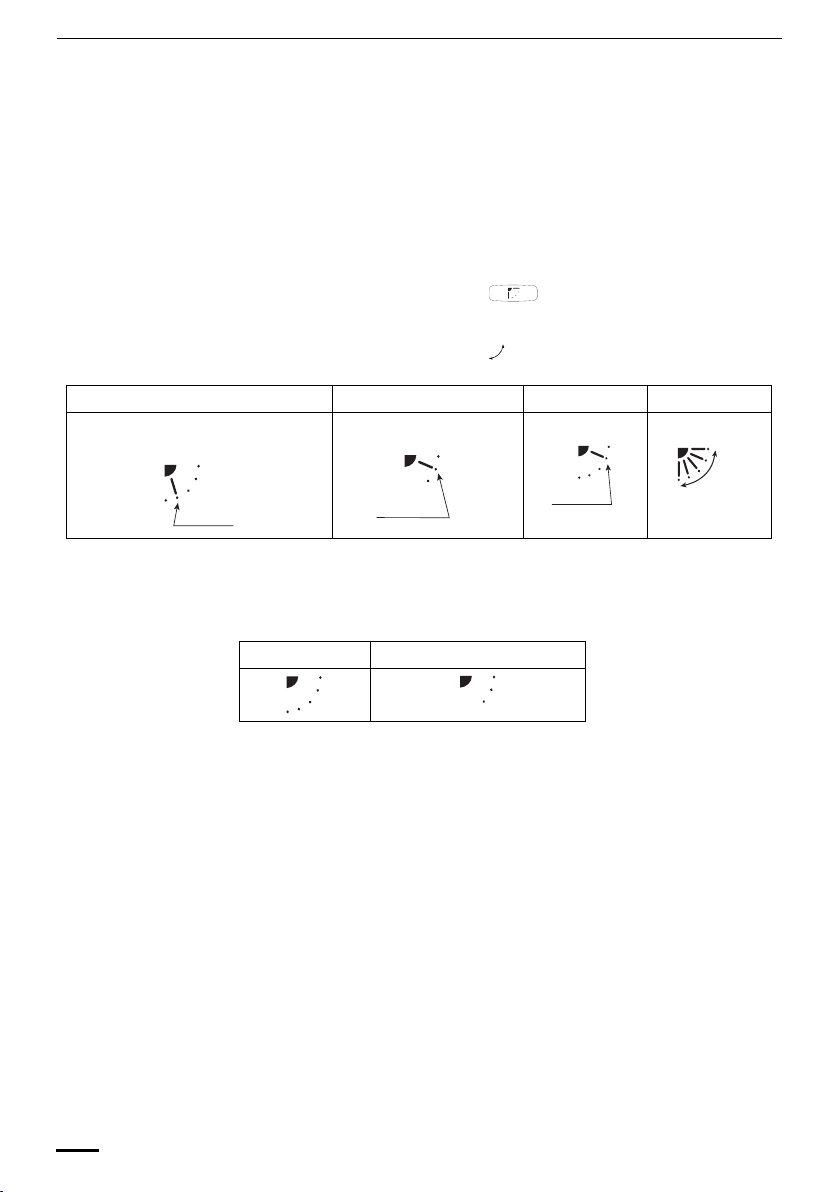
ADJUSTING AIRFLOW DIRECTION
The functions differ depending on the indoor unit used. The airflow direction cannot be set
using the remote controller for any unit which is not listed below.
U1 type.
• Never use your hands to move the flap (vertical airflow flap) that is controlled using the
remote controller.
• When the air conditioner is turned off, the flap (vertical airflow flap) automatically moves to
the downward position.
• The flap (vertical airflow flap) moves to the upward position when performing the standby
operation for heating. The swing operation is made after the standby operation for heating is
released, but swing is indicated on the remote controller even during the standby operation
for heating.
Setting the airflow
direction
To activate the swing
operation
Heating Cooling and drying Fan operation All operations
Set the flap (vertical airflow flap) to the downward
position. If the flap is set to the upward position,
the warm air may not reach the floor.
The airflow direction changes each time the FLAP button is pressed during operation.
Press the FLAP button to set the flap (vertical airflow flap) to the downward position, and then
press the FLAP button again. This displays , and the airflow automatically swings up and
down.
The flap (vertical airflow flap) can
be set to one of three positions.
Initial setting
Initial setting
Initial setting
Continuous
operation
To stop the swing
operation
Press the FLAP button again during the flap swing operation to stop the flap at the desired
position. Then, the airflow can be set from the top position by pressing the FLAP button again.
Indicator when swing operation is stopped
Fan and heating Cooling and drying
During cooling or drying operation, the flap will not stop at the downward position. Even if the
flap is stopped at the downward position during the swing operation, it will not stop until it
moves to the third position from the top.
8
 Loading...