

Panasonic PT-L711XU, PT-L712E, PT-L702E, PT-L701XU, PT-L511XU Service Manual
...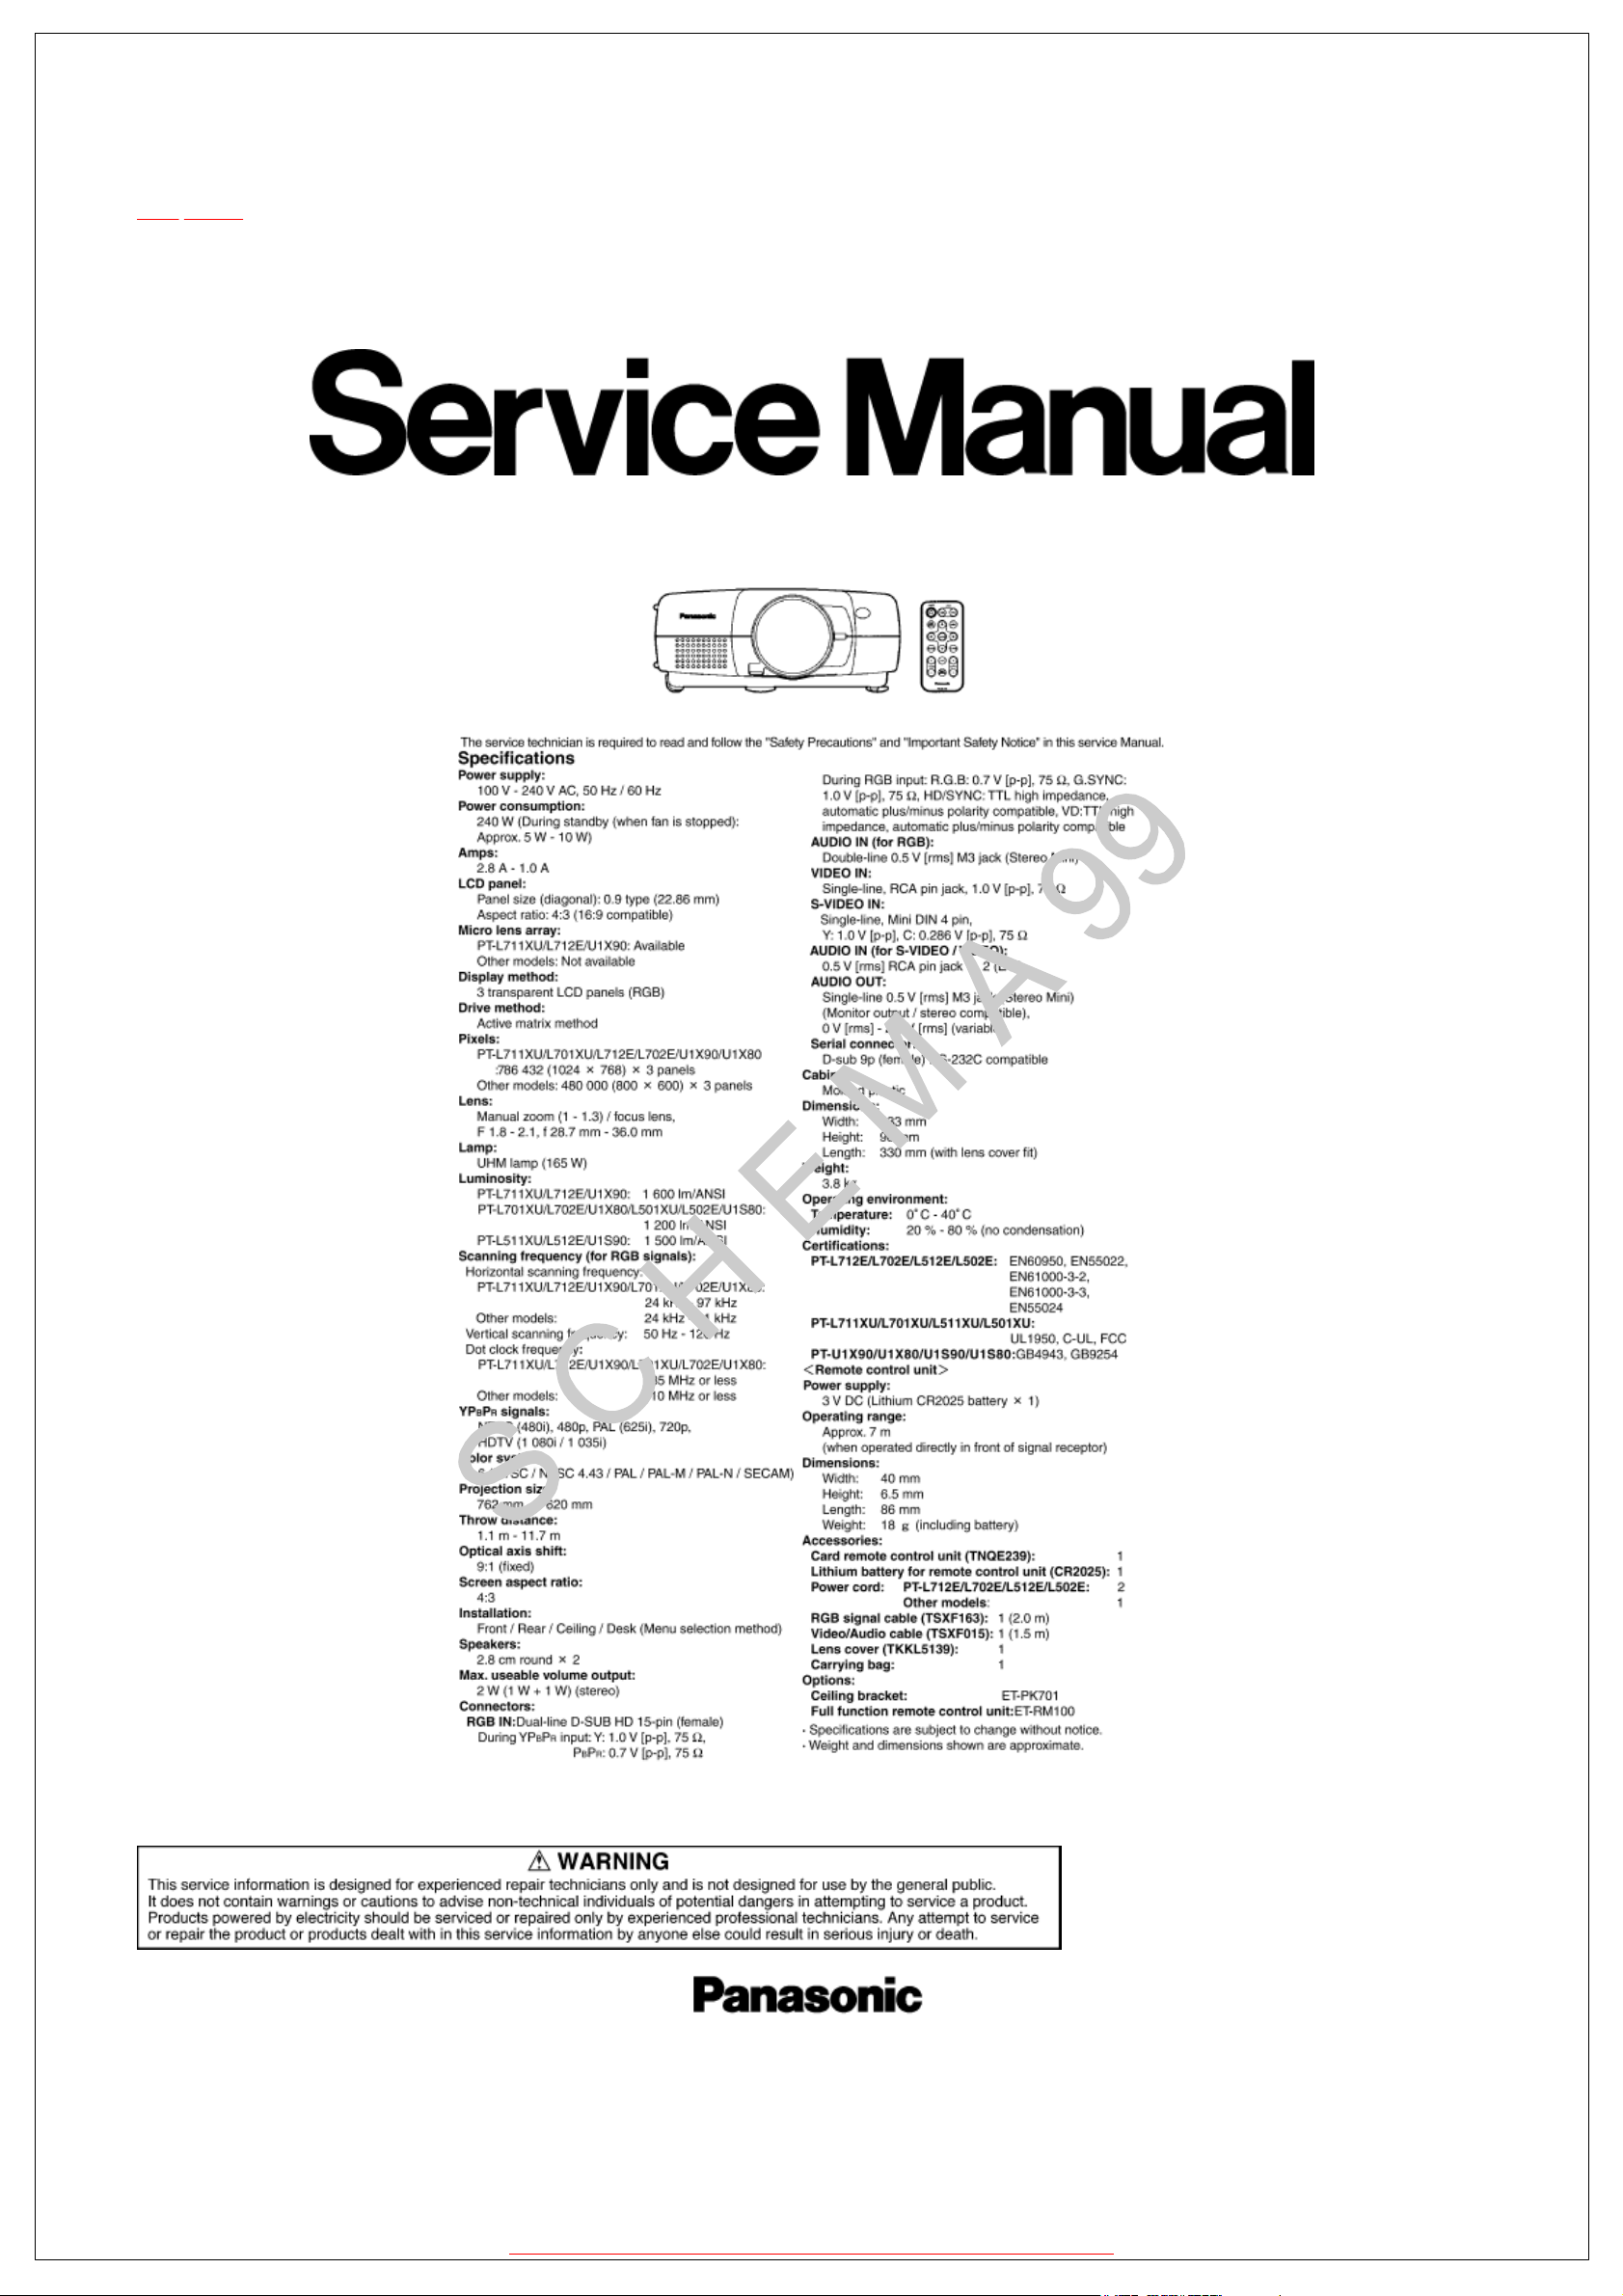
Service Manual
TOP NEXT
ORDER NO. VED0106313C0
D10
LCD Projector
l
PT-L711XU/PT-L712E/PT-L701XU/PT-L702E/PT-L511XU/PT-L512E/PT-L501XU/PT-L502E/PT-U1X90/PT-U1X80/PT-U1S90/PT-U1S80
© 2001 Matsushita Electric Industrial Co., Ltd. All rights reserved. Unauthorized copying and distribution is a violation of law.
http://servis-manual.com/
4.1 Procedure to enter the service mode
TOP PREVIOUS NEXT
1.Select "FRONT/REAR" on the OPTION menu.
MENU → OPTION → FRONT/REAR
2.While pressing the VOLUME "+" button on the remote control unit, press the left-arrow "
" button on the main unit 3 seconds or longer to enter the service mode.
3.In the service mode, pressing the up-arrow "
" or down-arrow "
" button on the remote control unit allows the testpattern selection [Horizontal Lines /
Vertical Lines / Dots / White (No pattern)] and the left-arrow "
" or right-arrow "
" button the color selection (White / Red / Green / Blue).
TOP PREVIOUS NEXT
http://servis-manual.com/
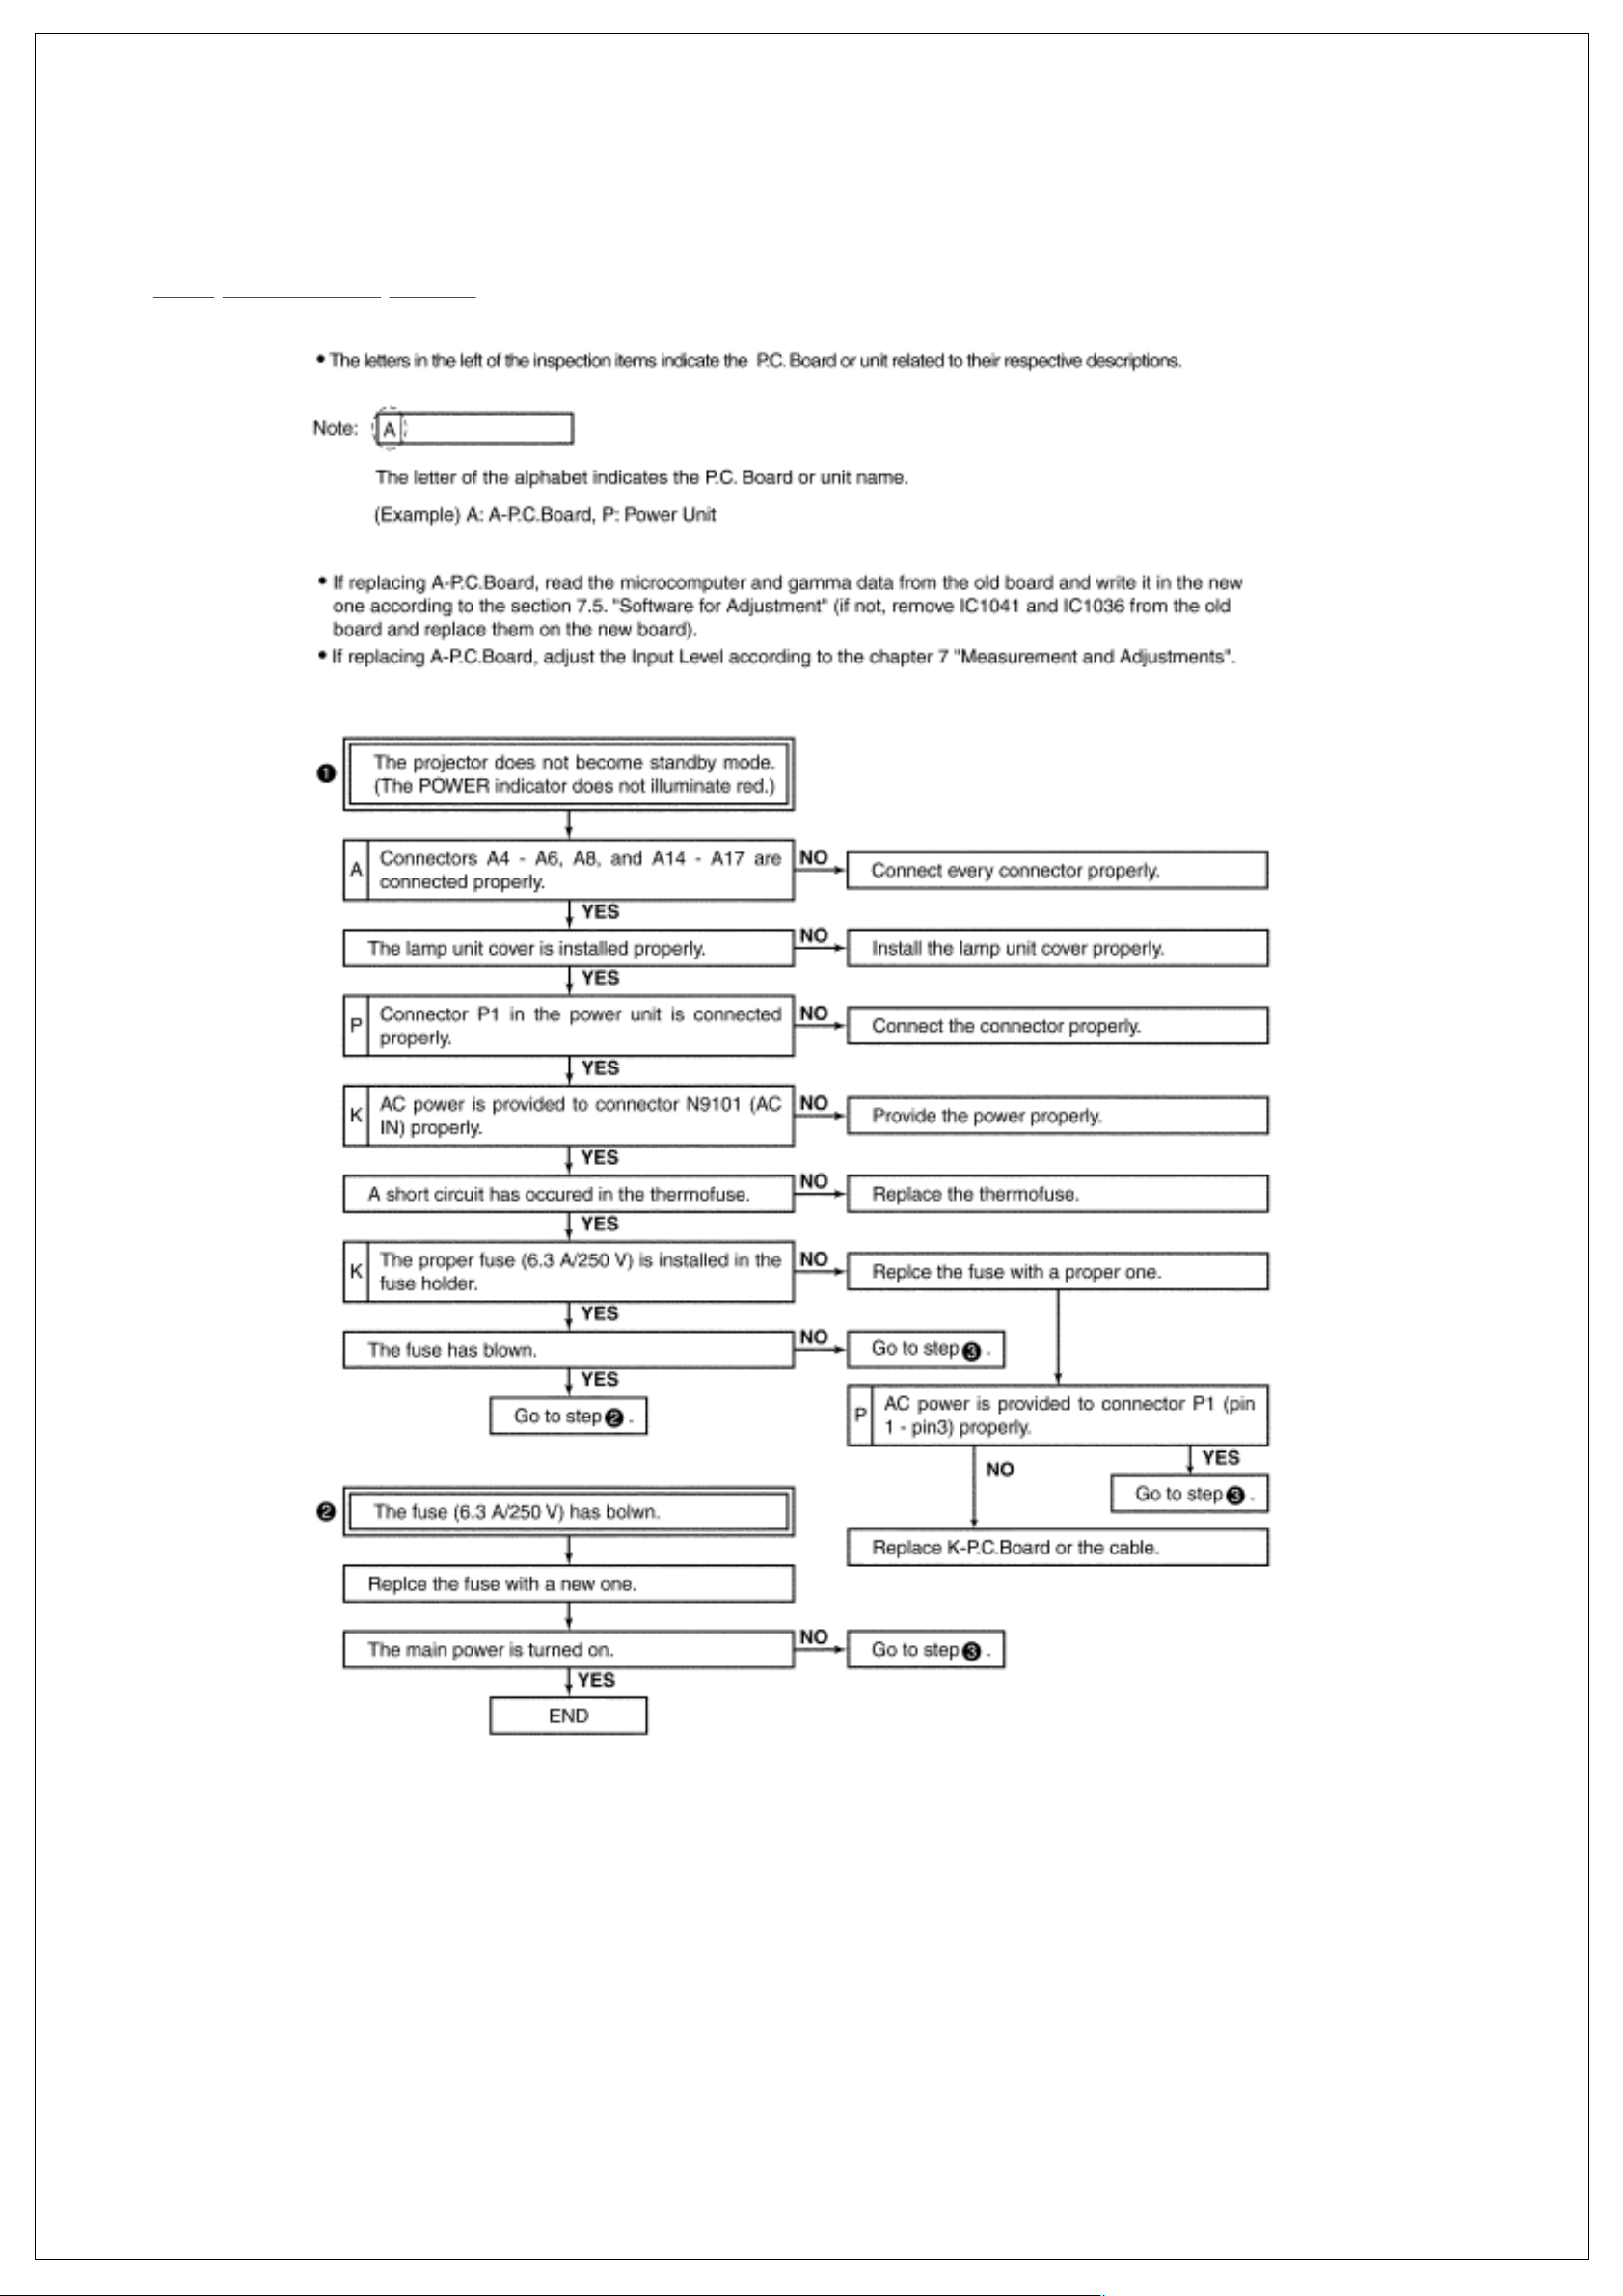
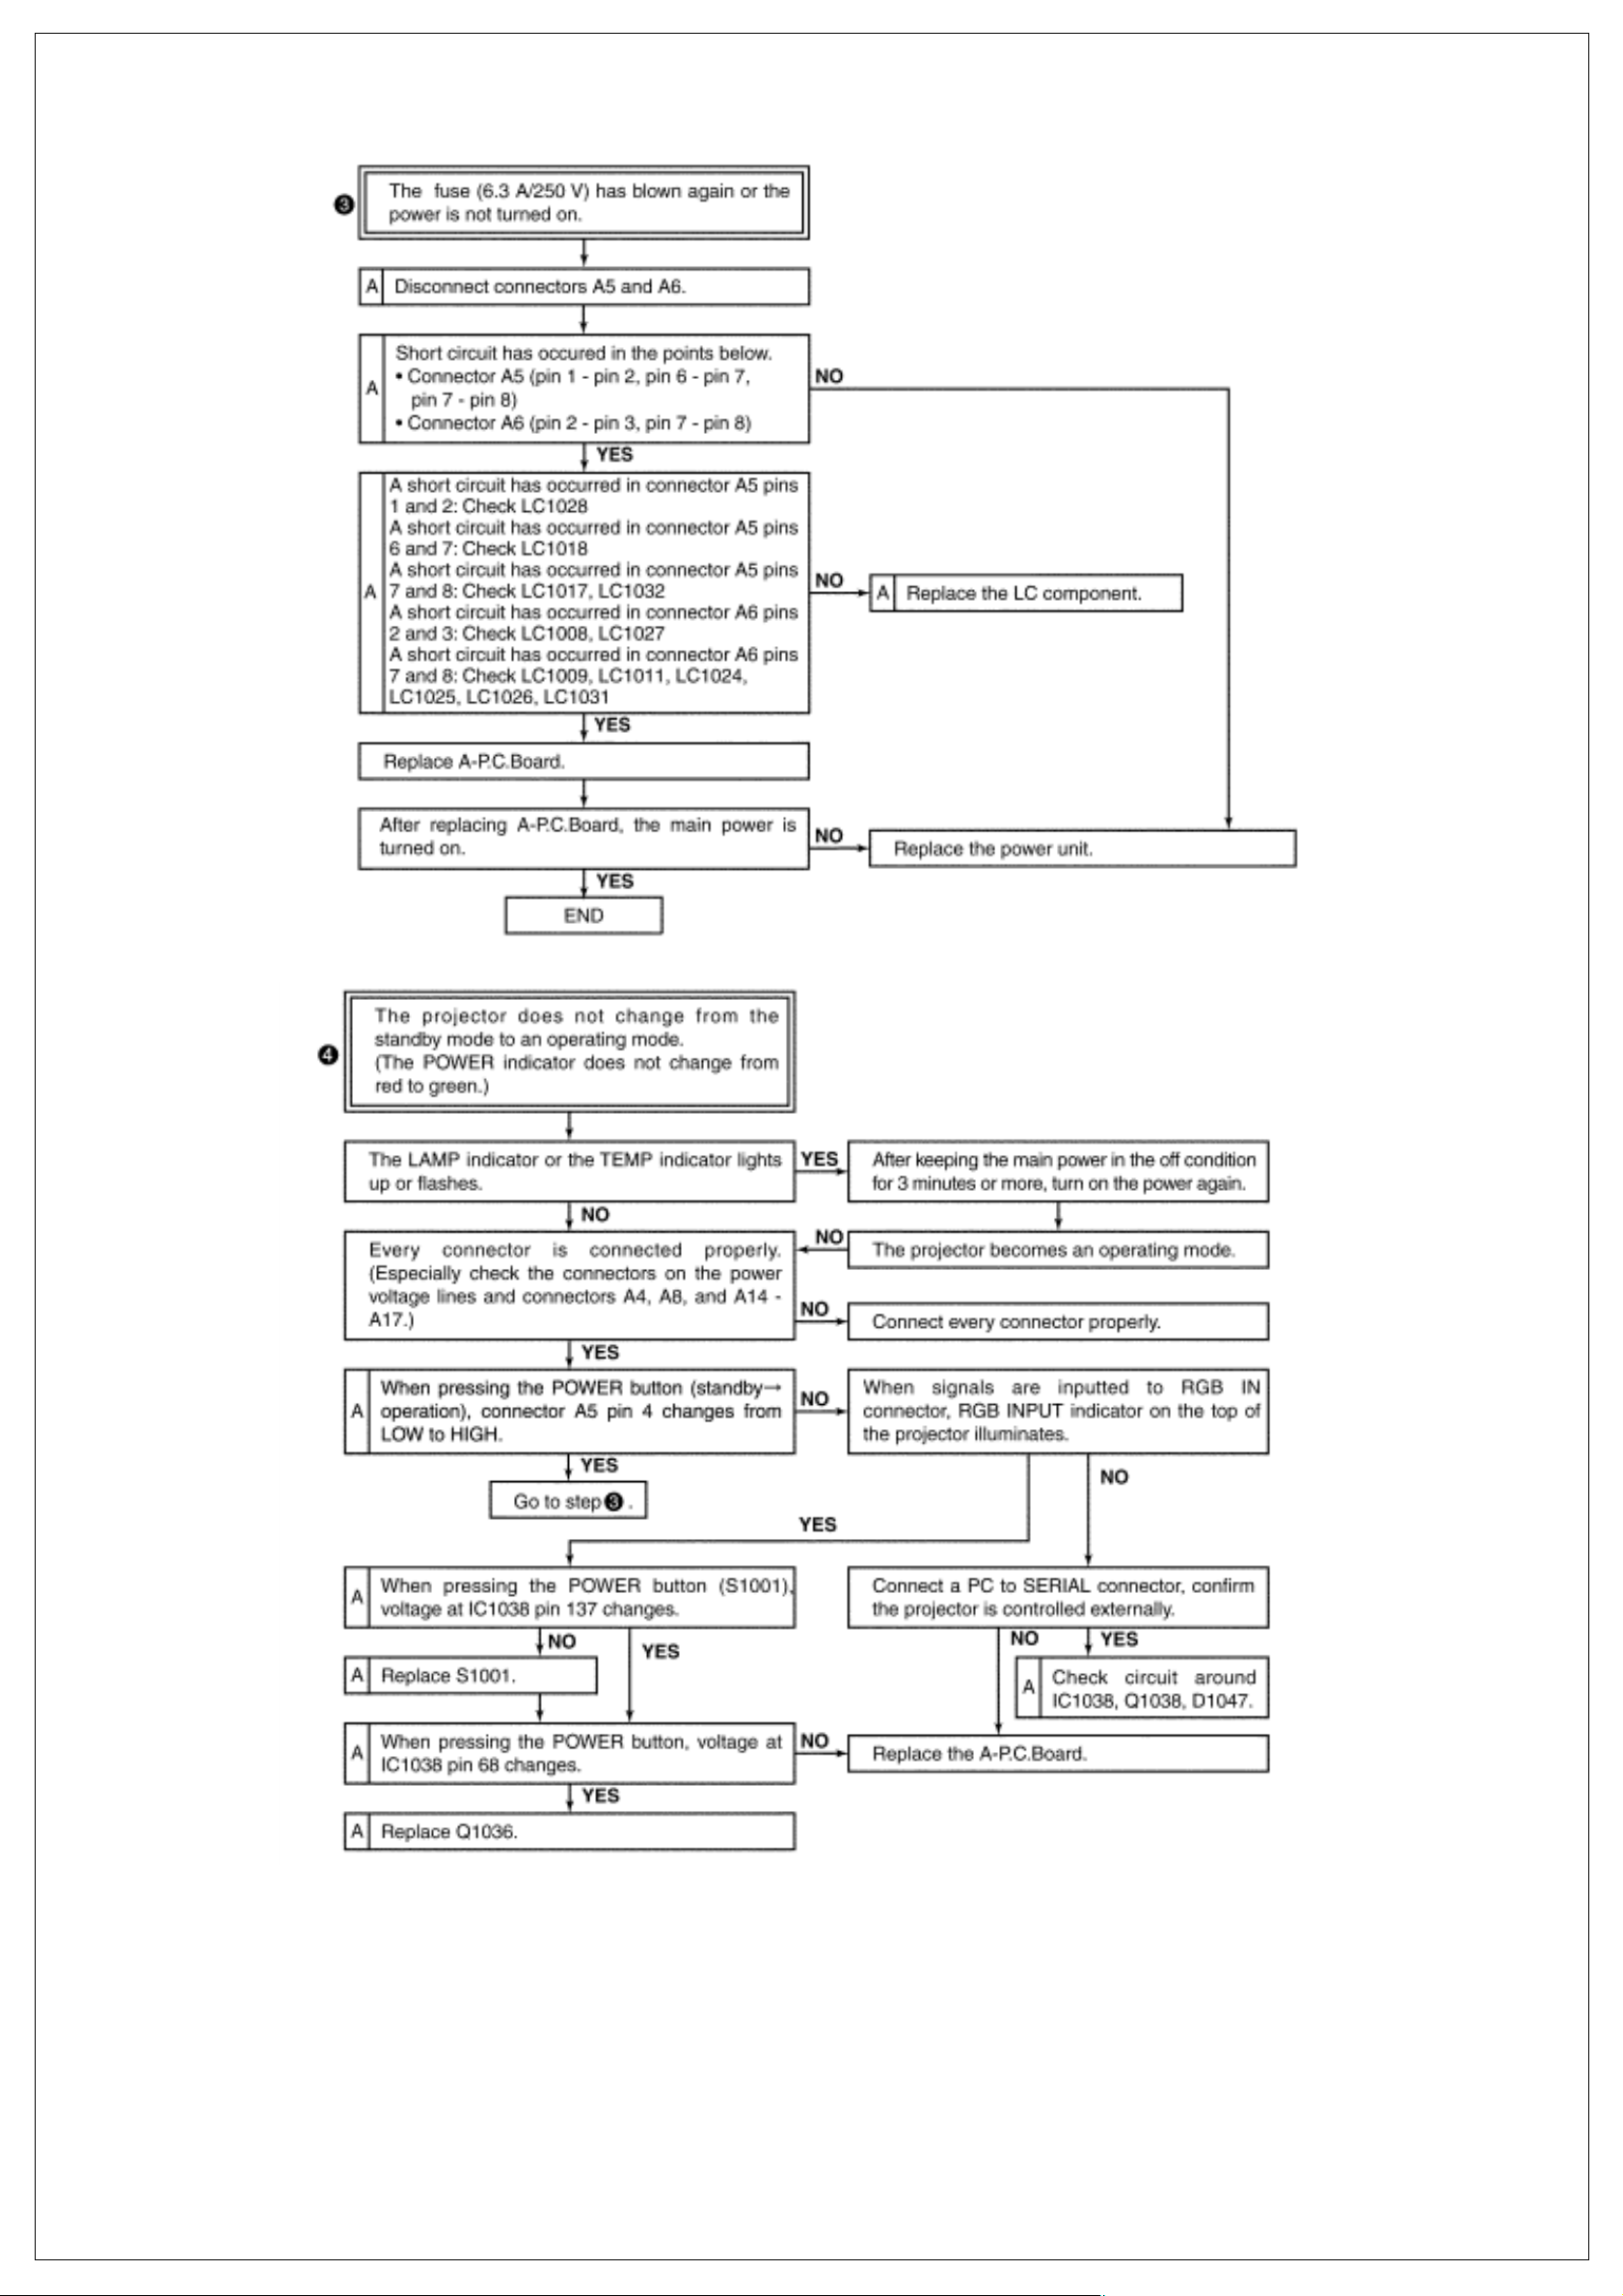
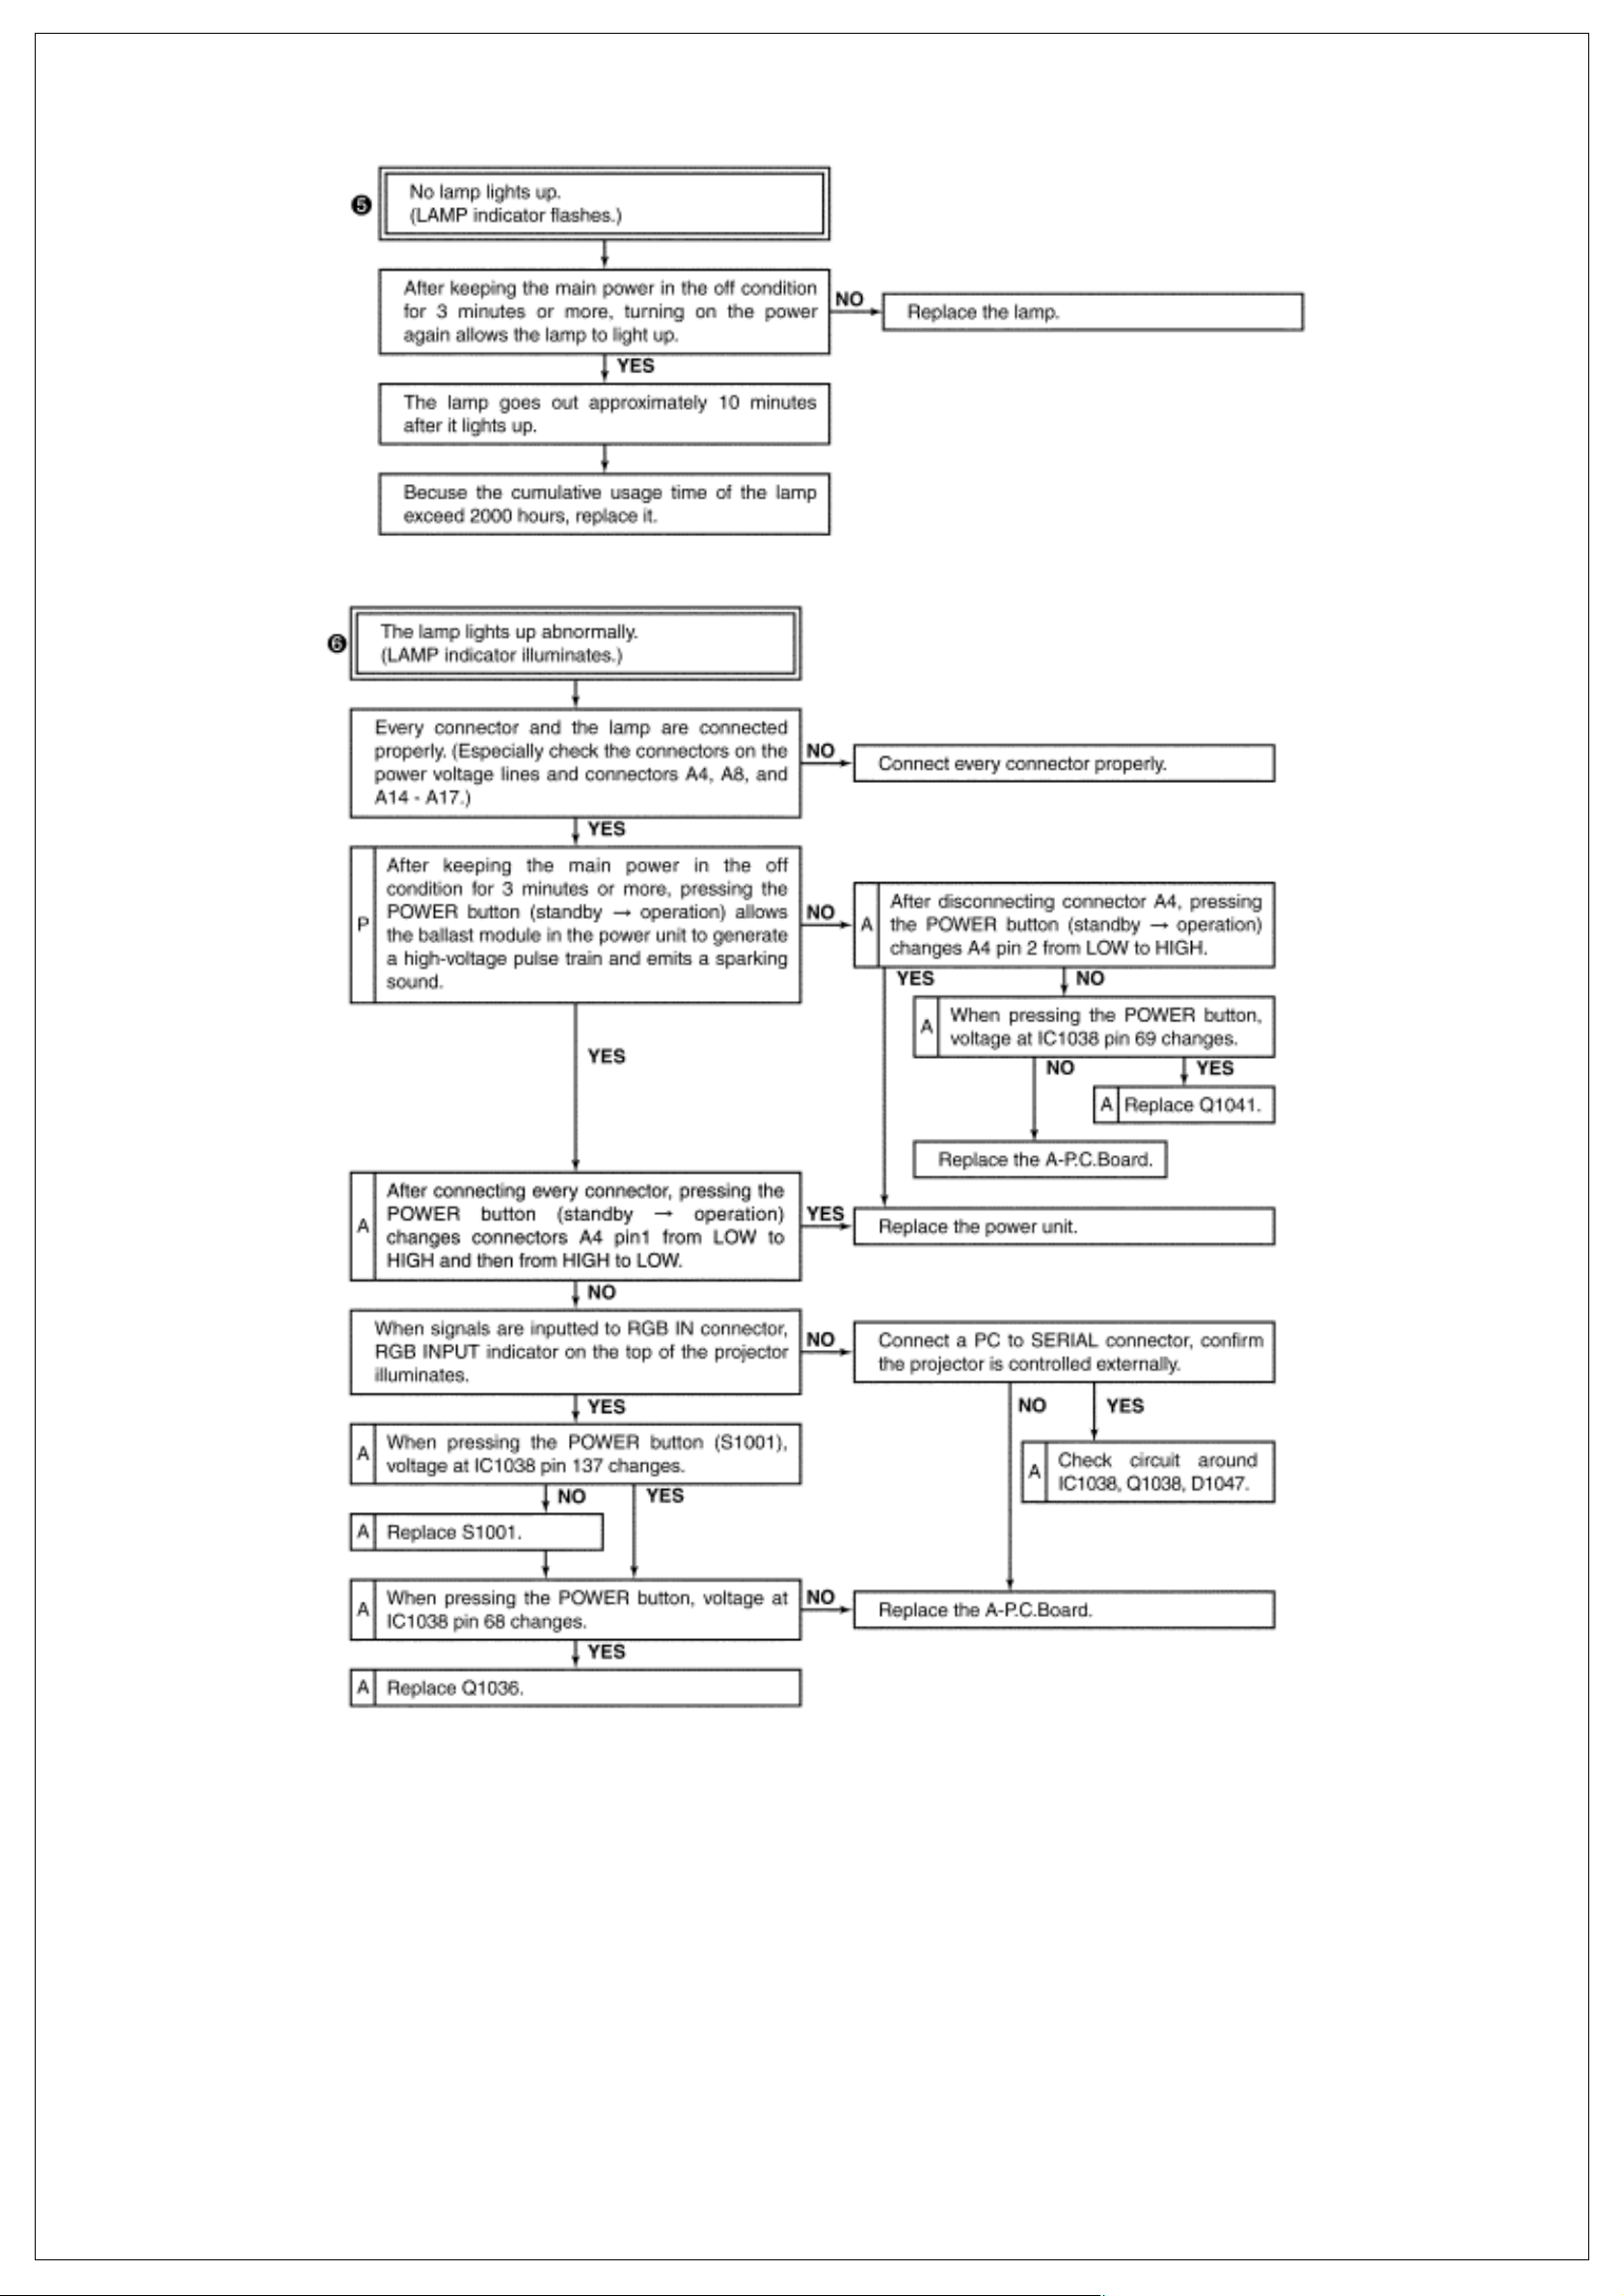
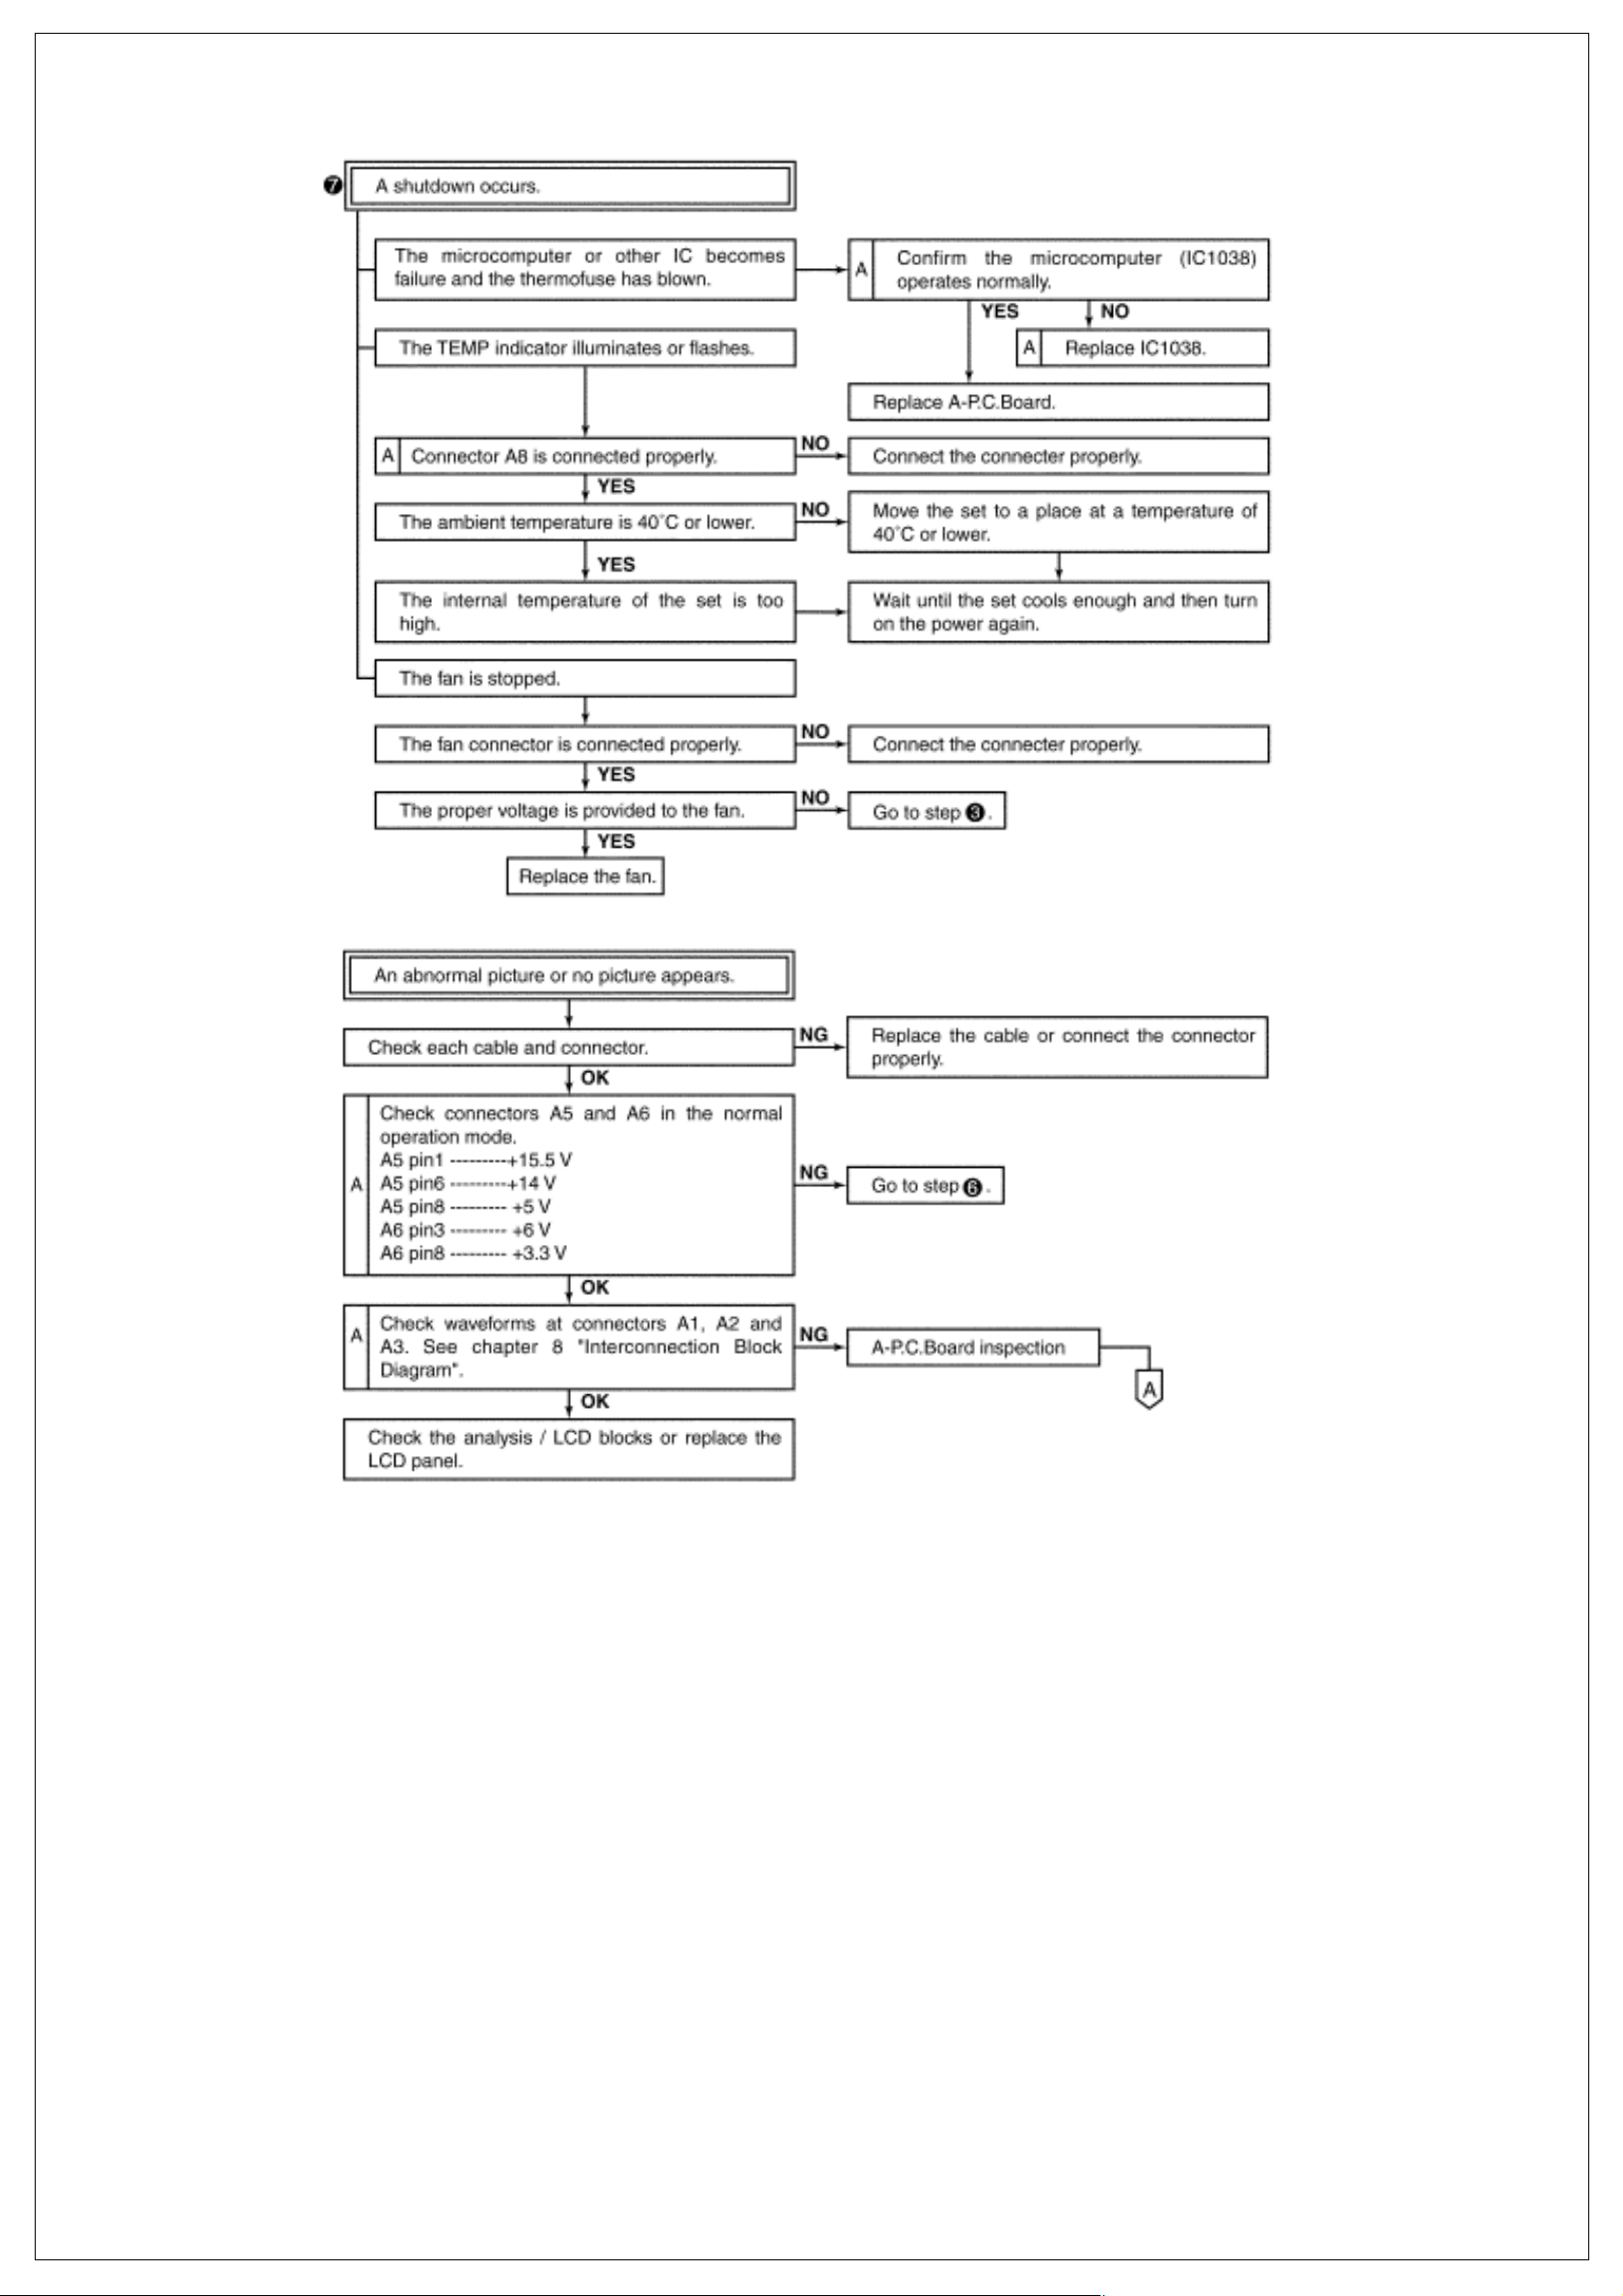
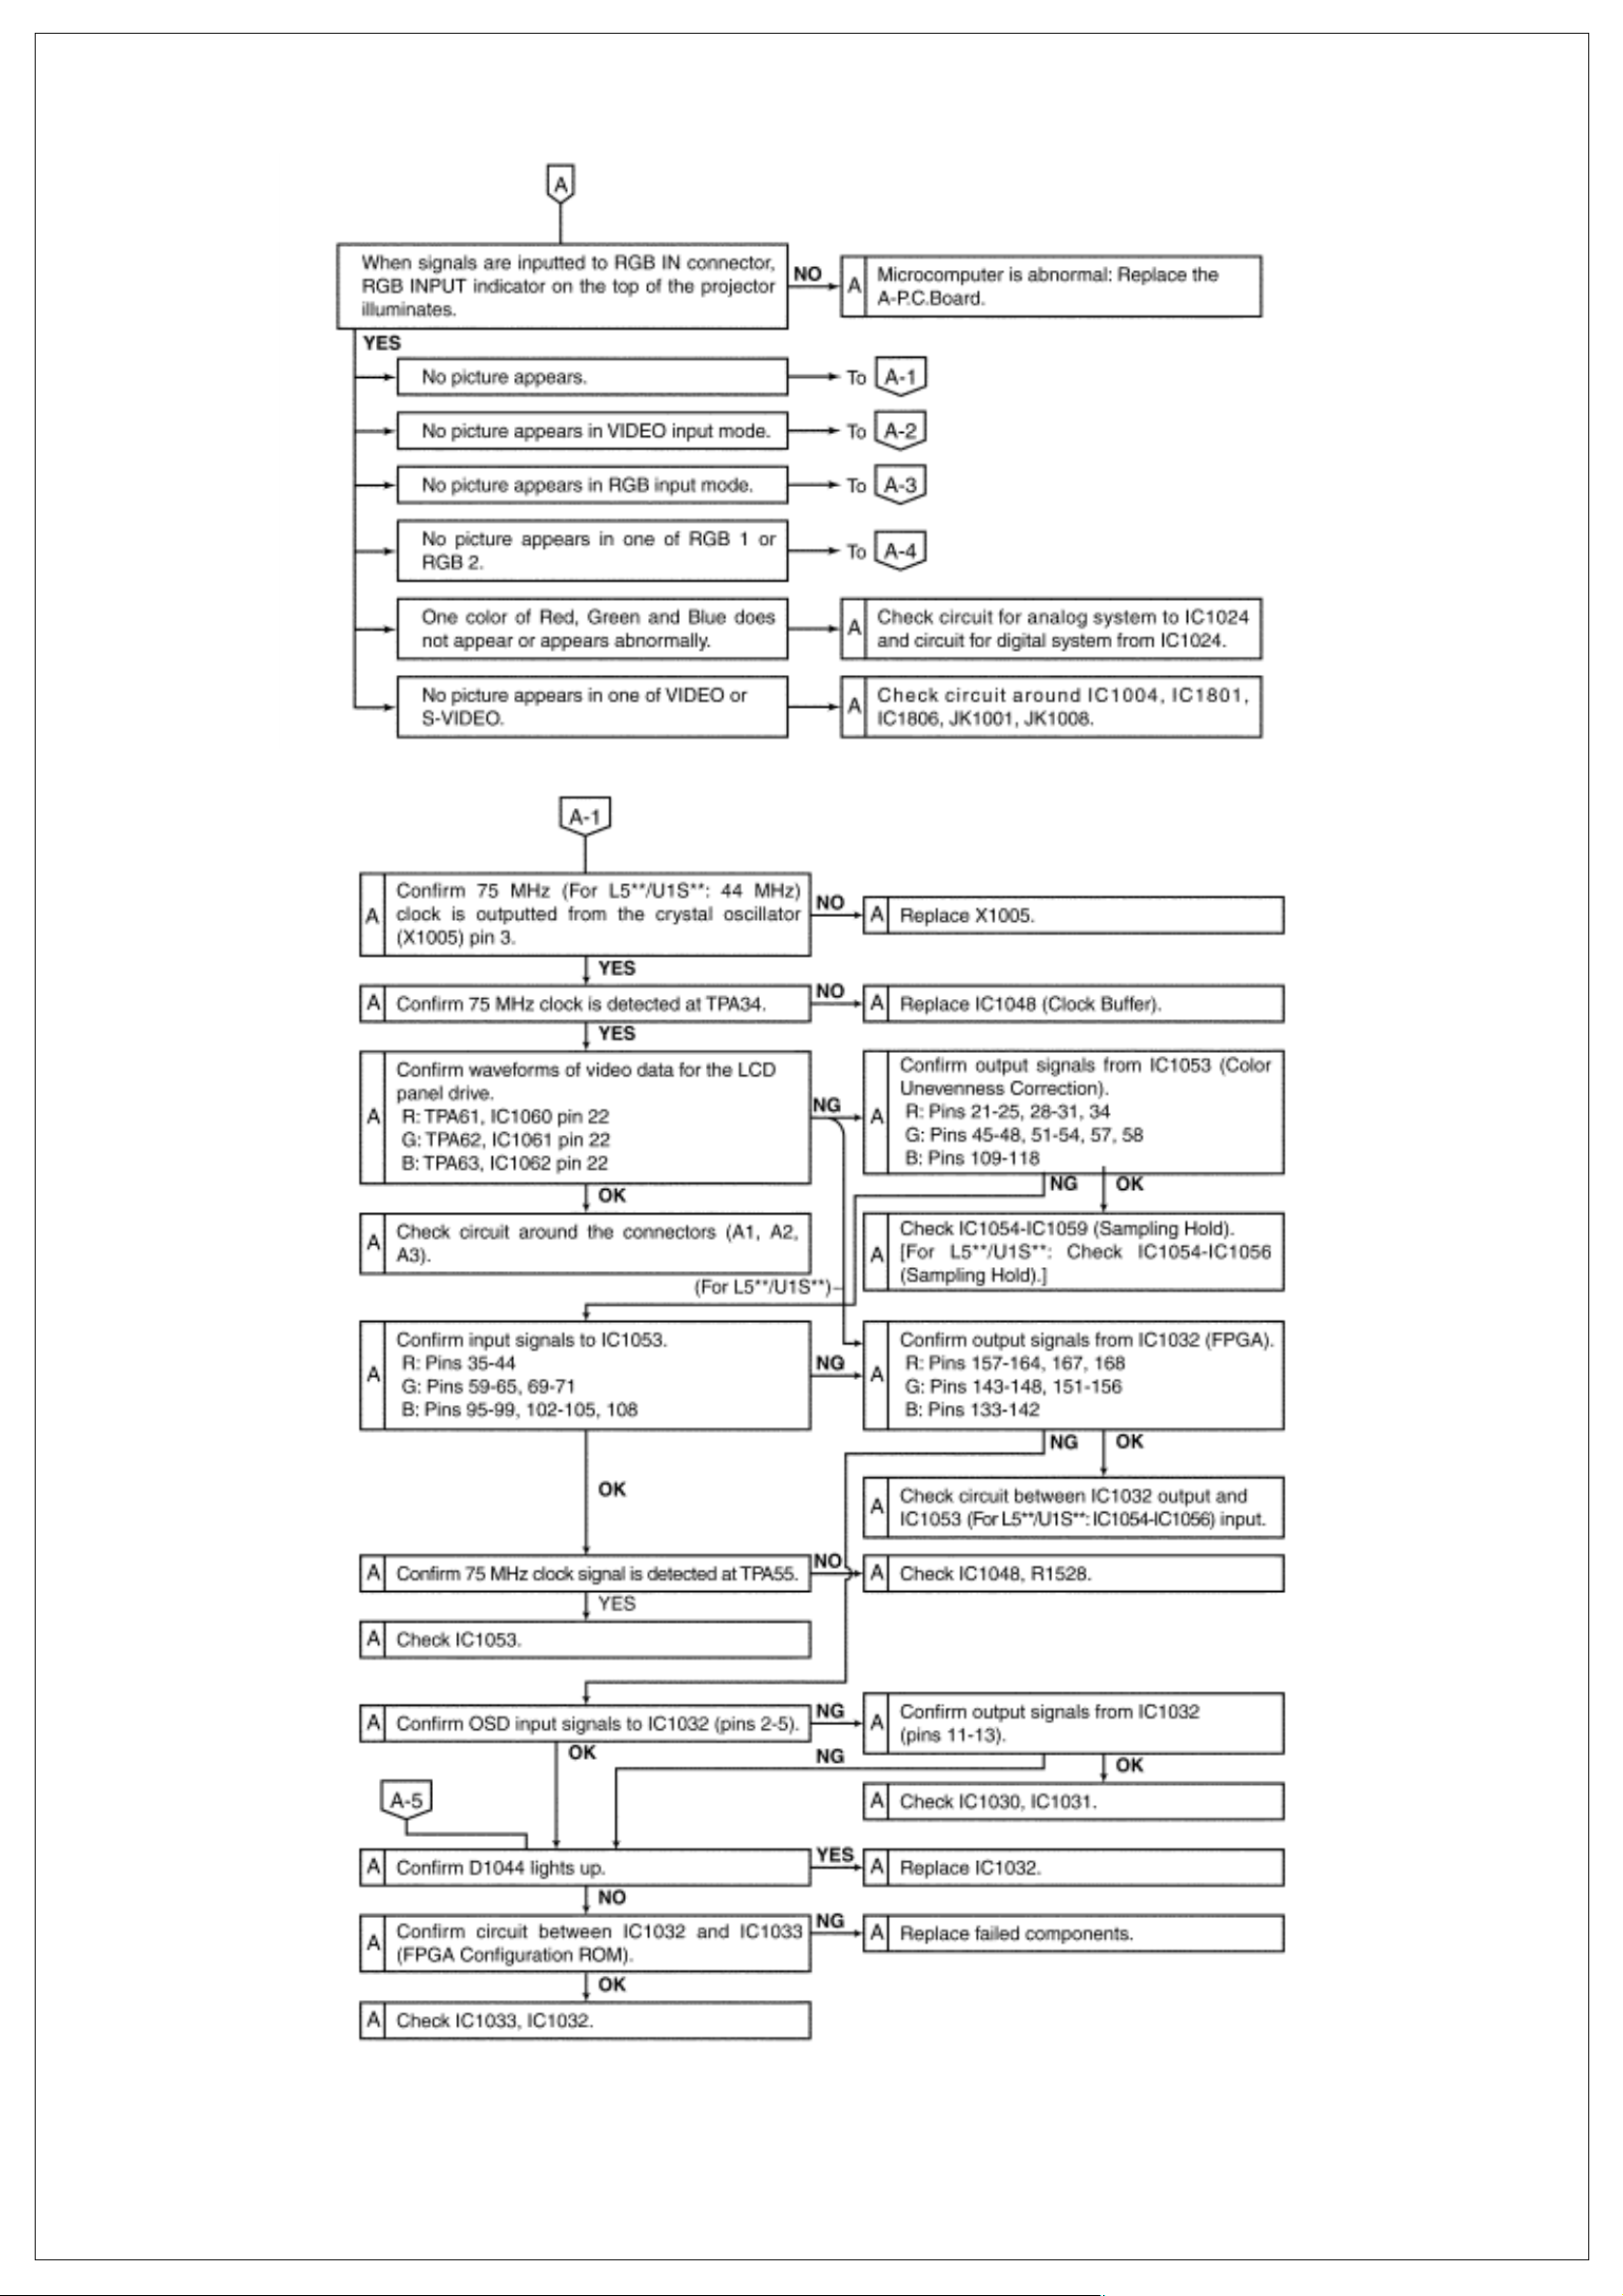
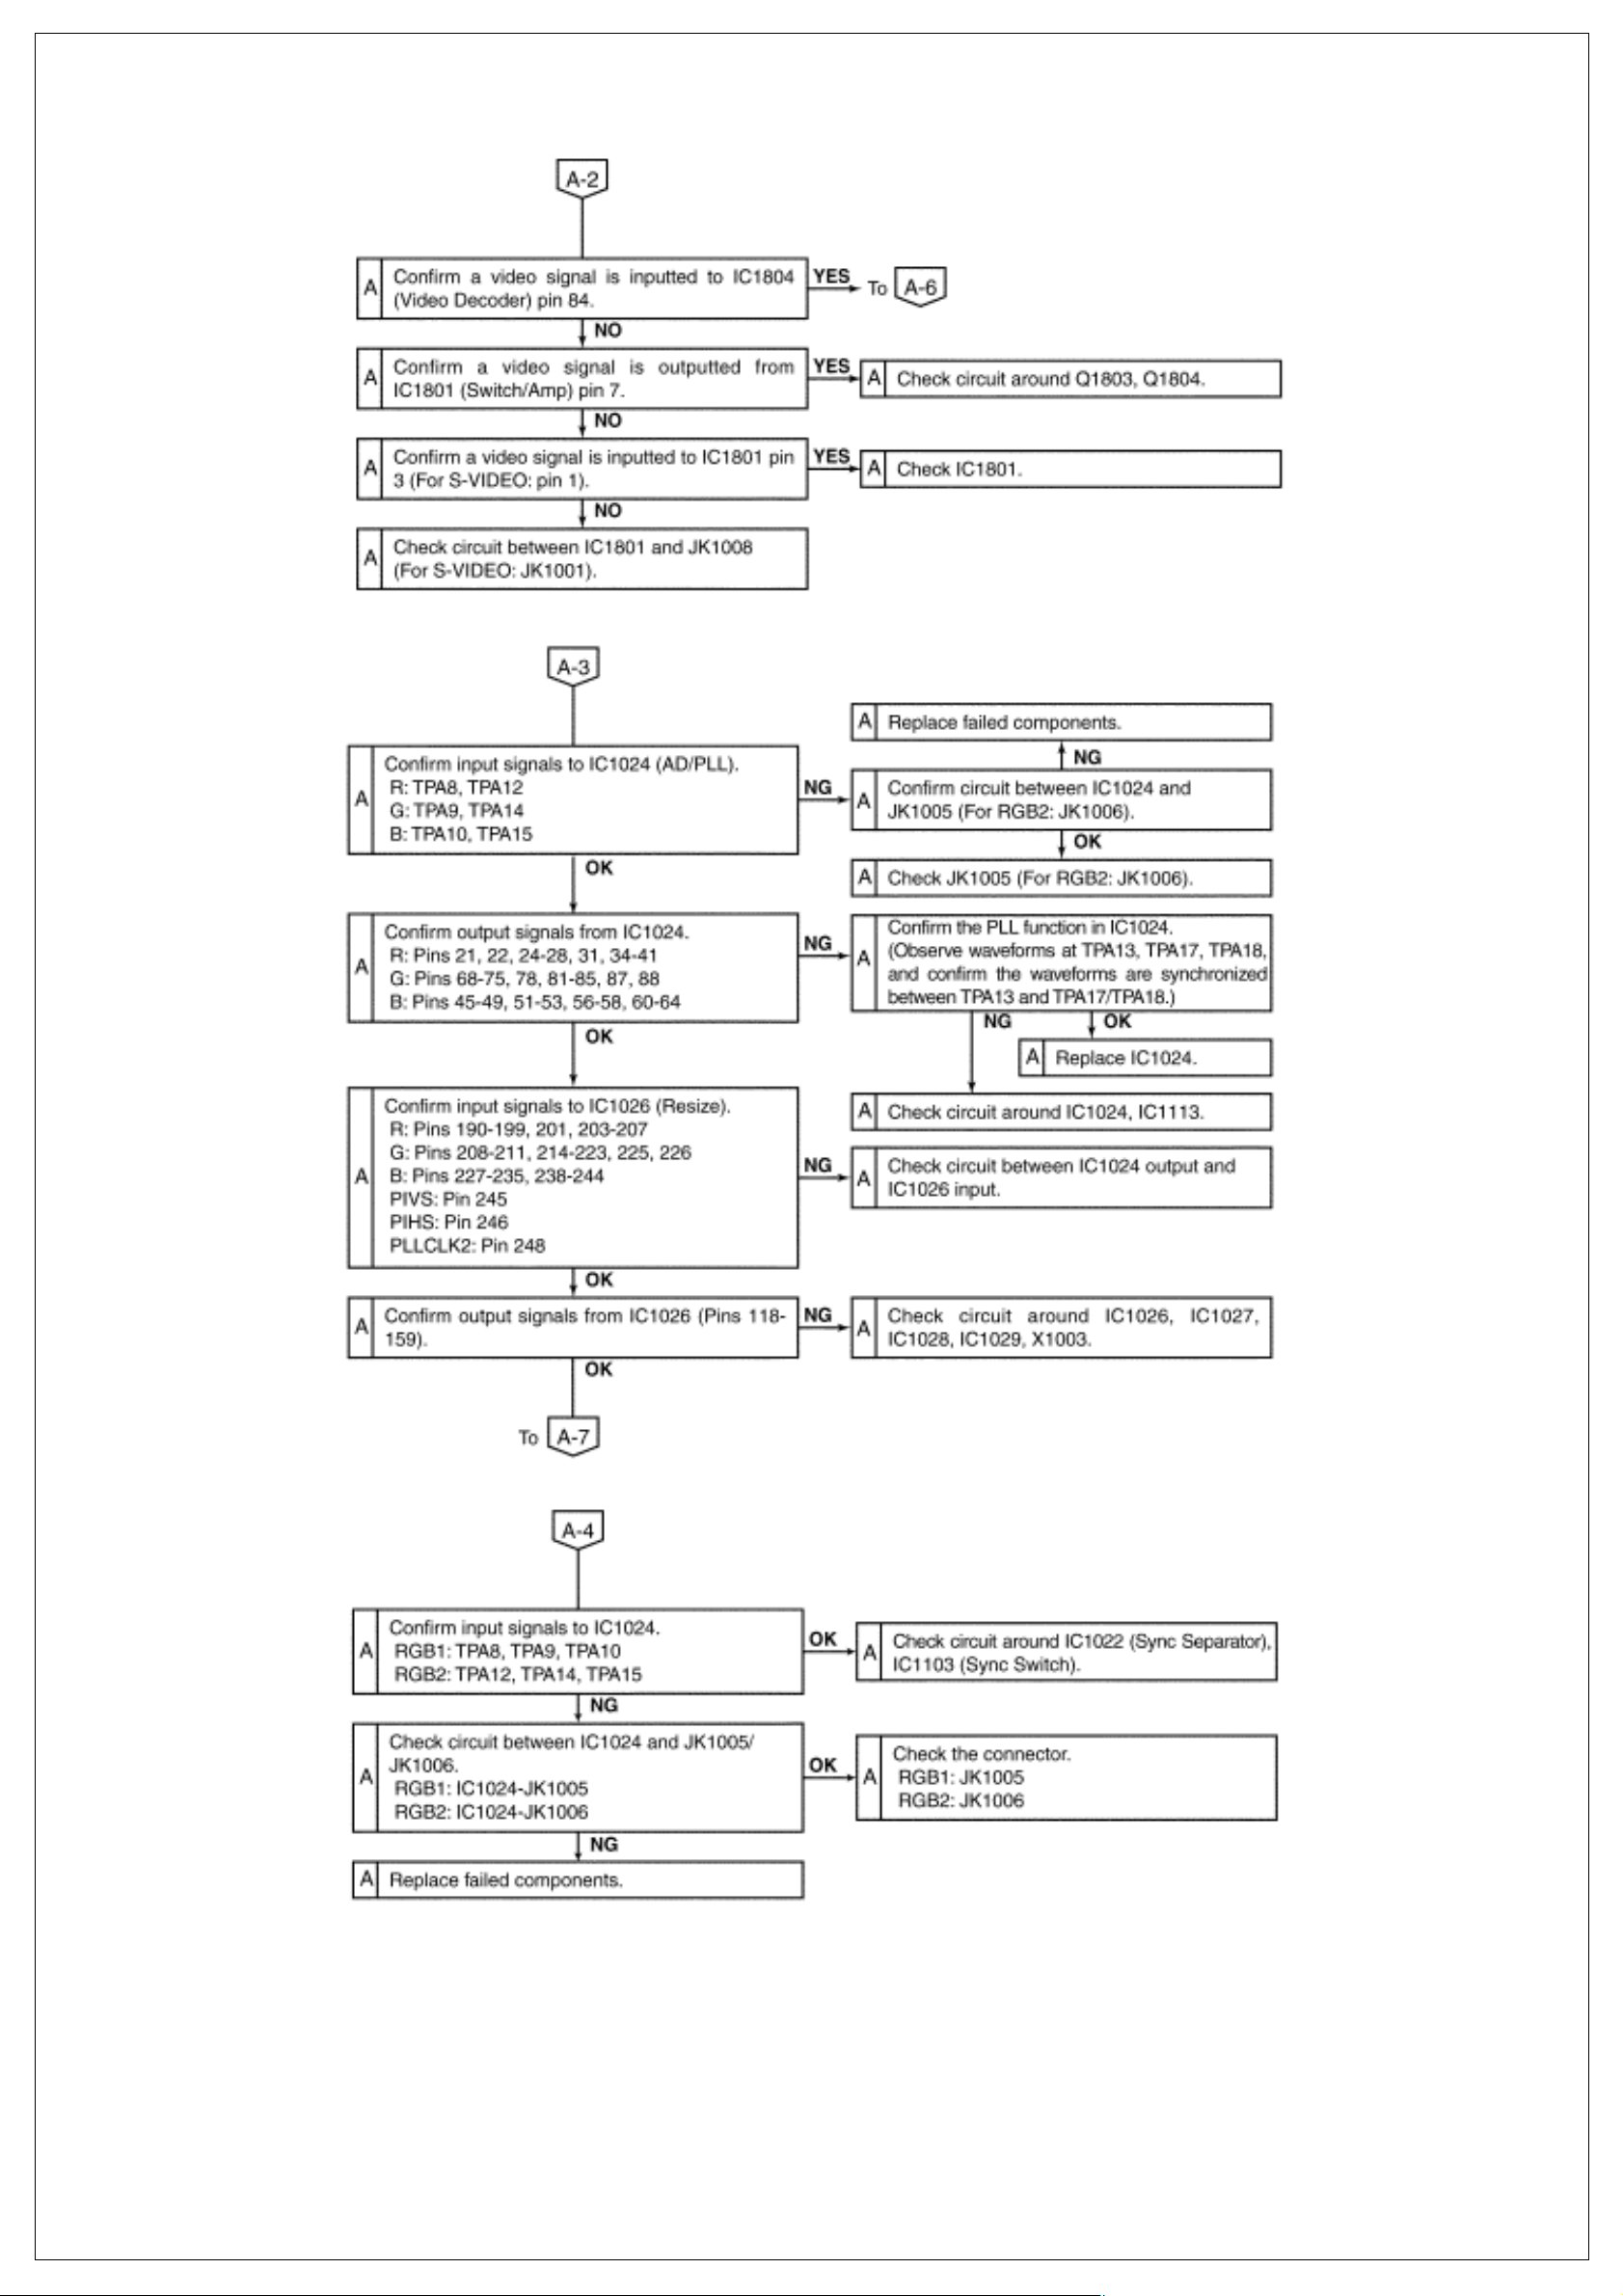
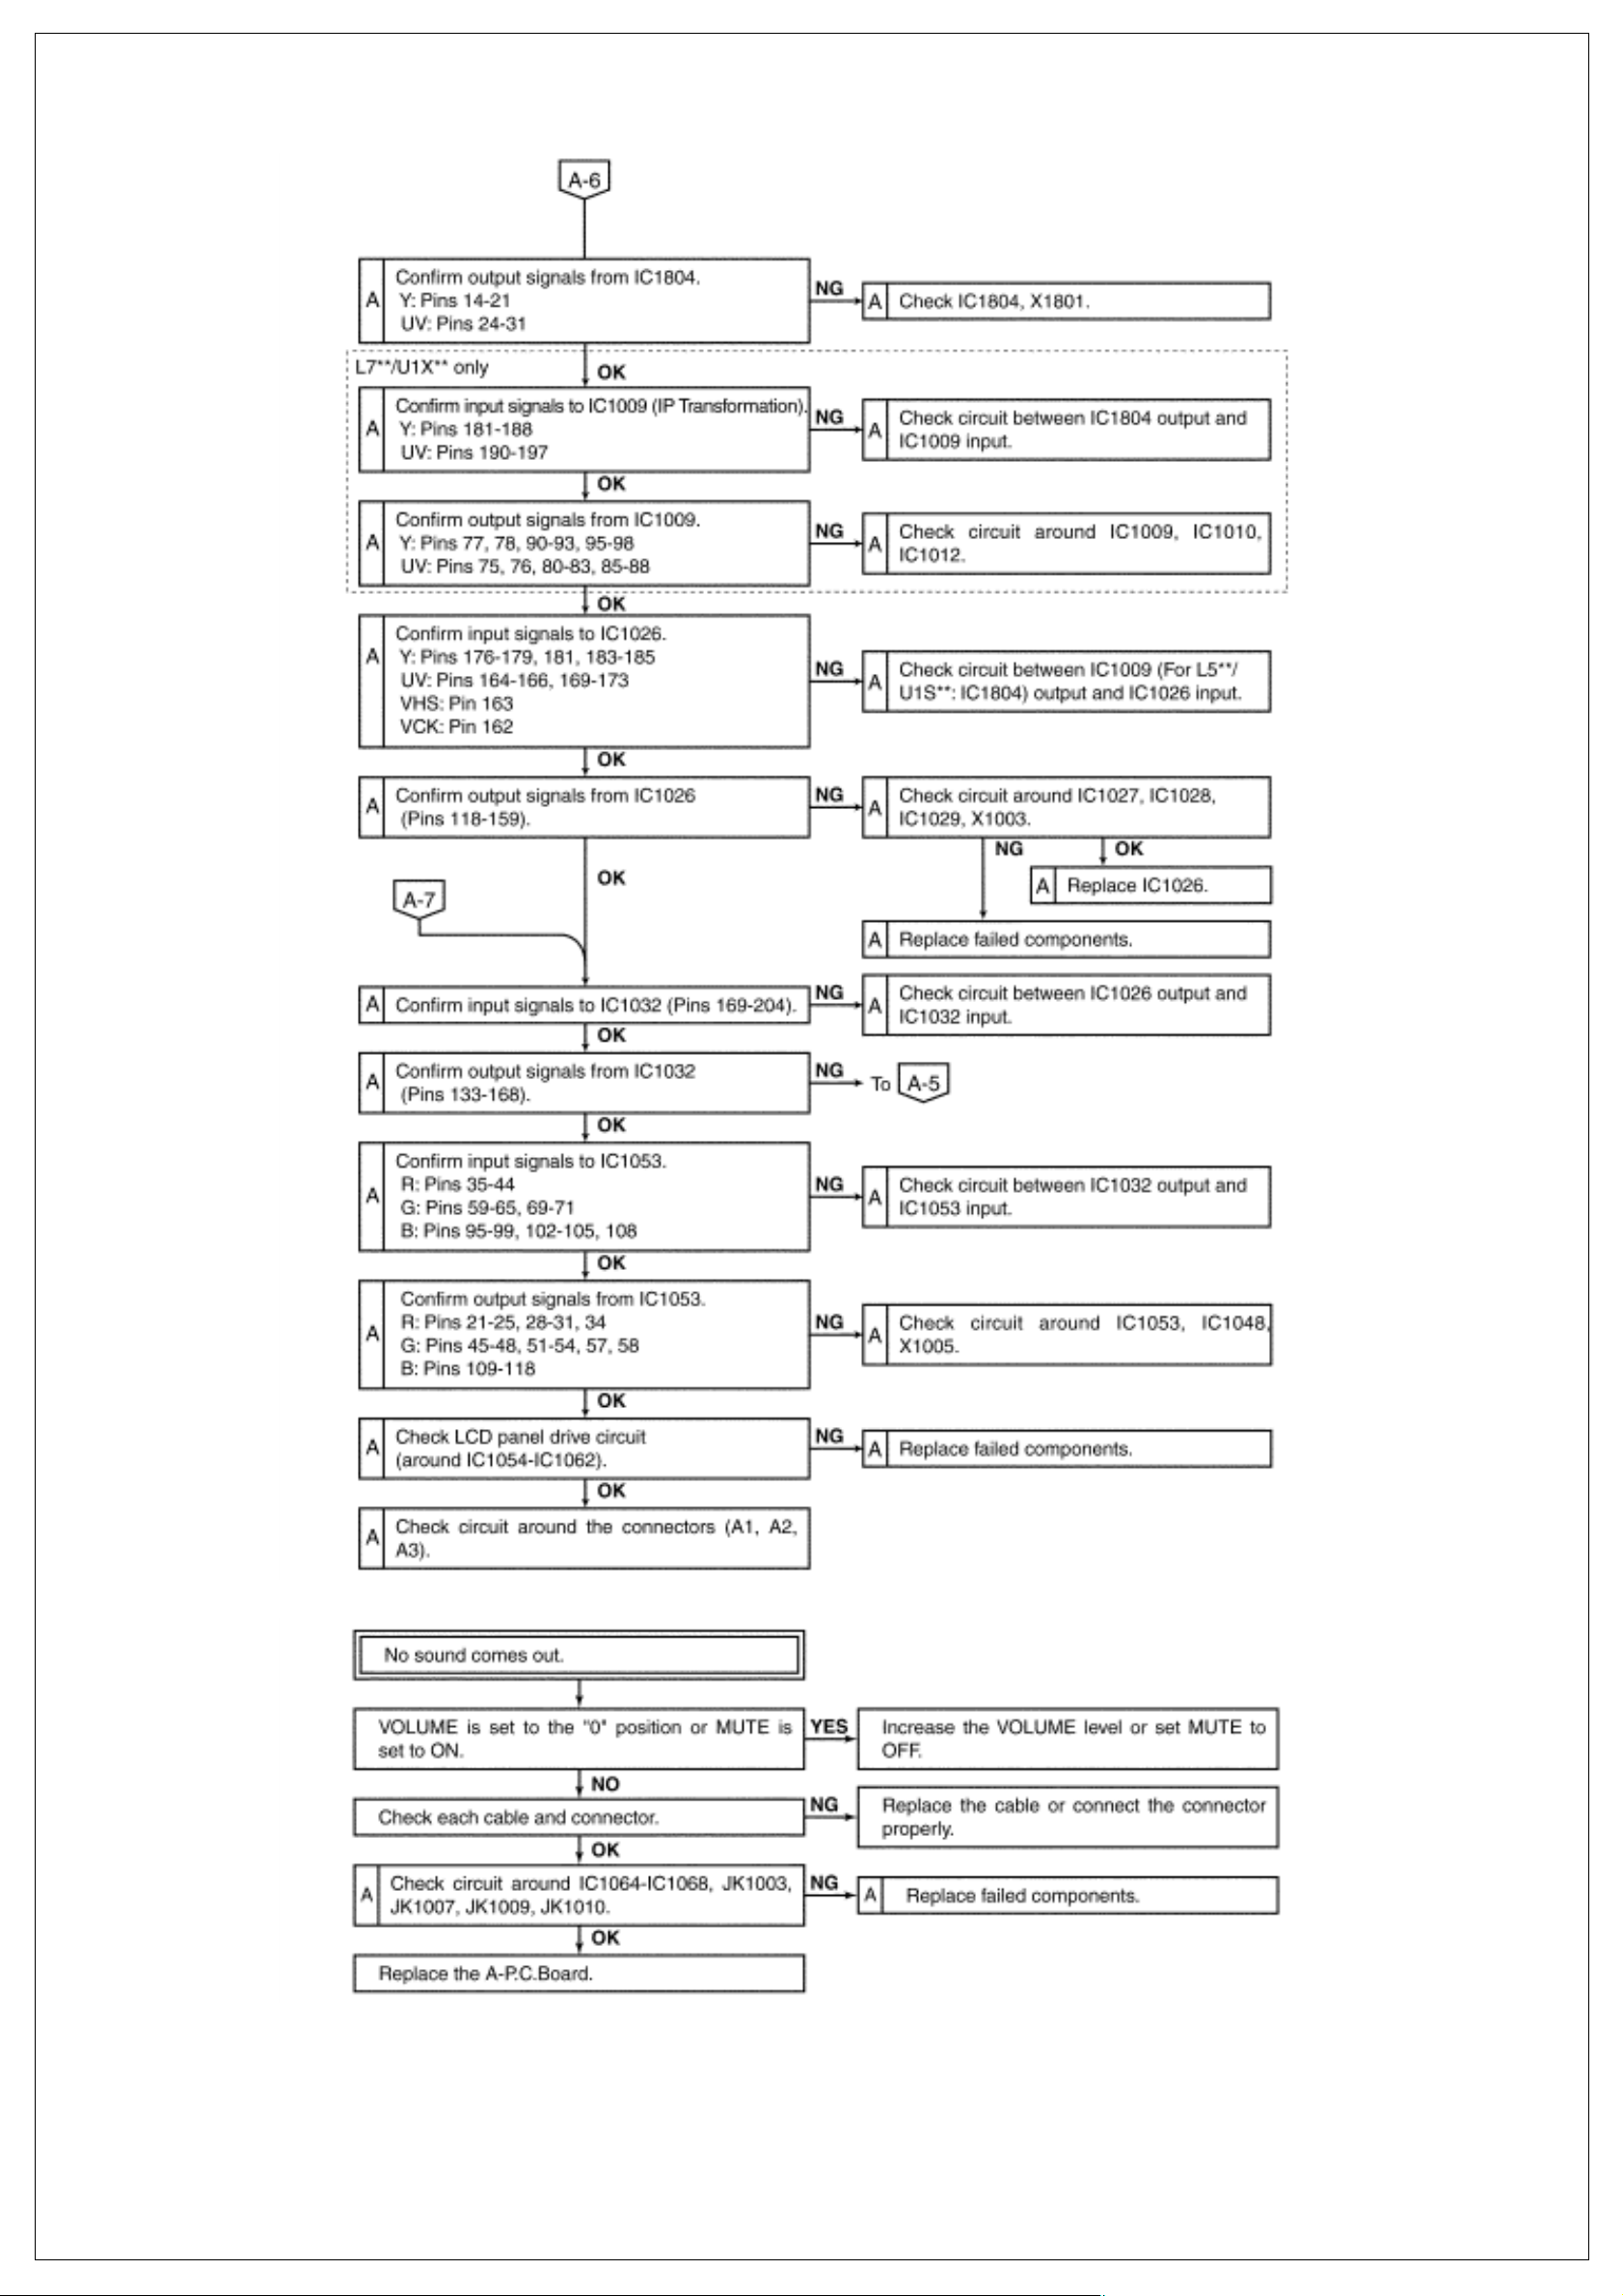
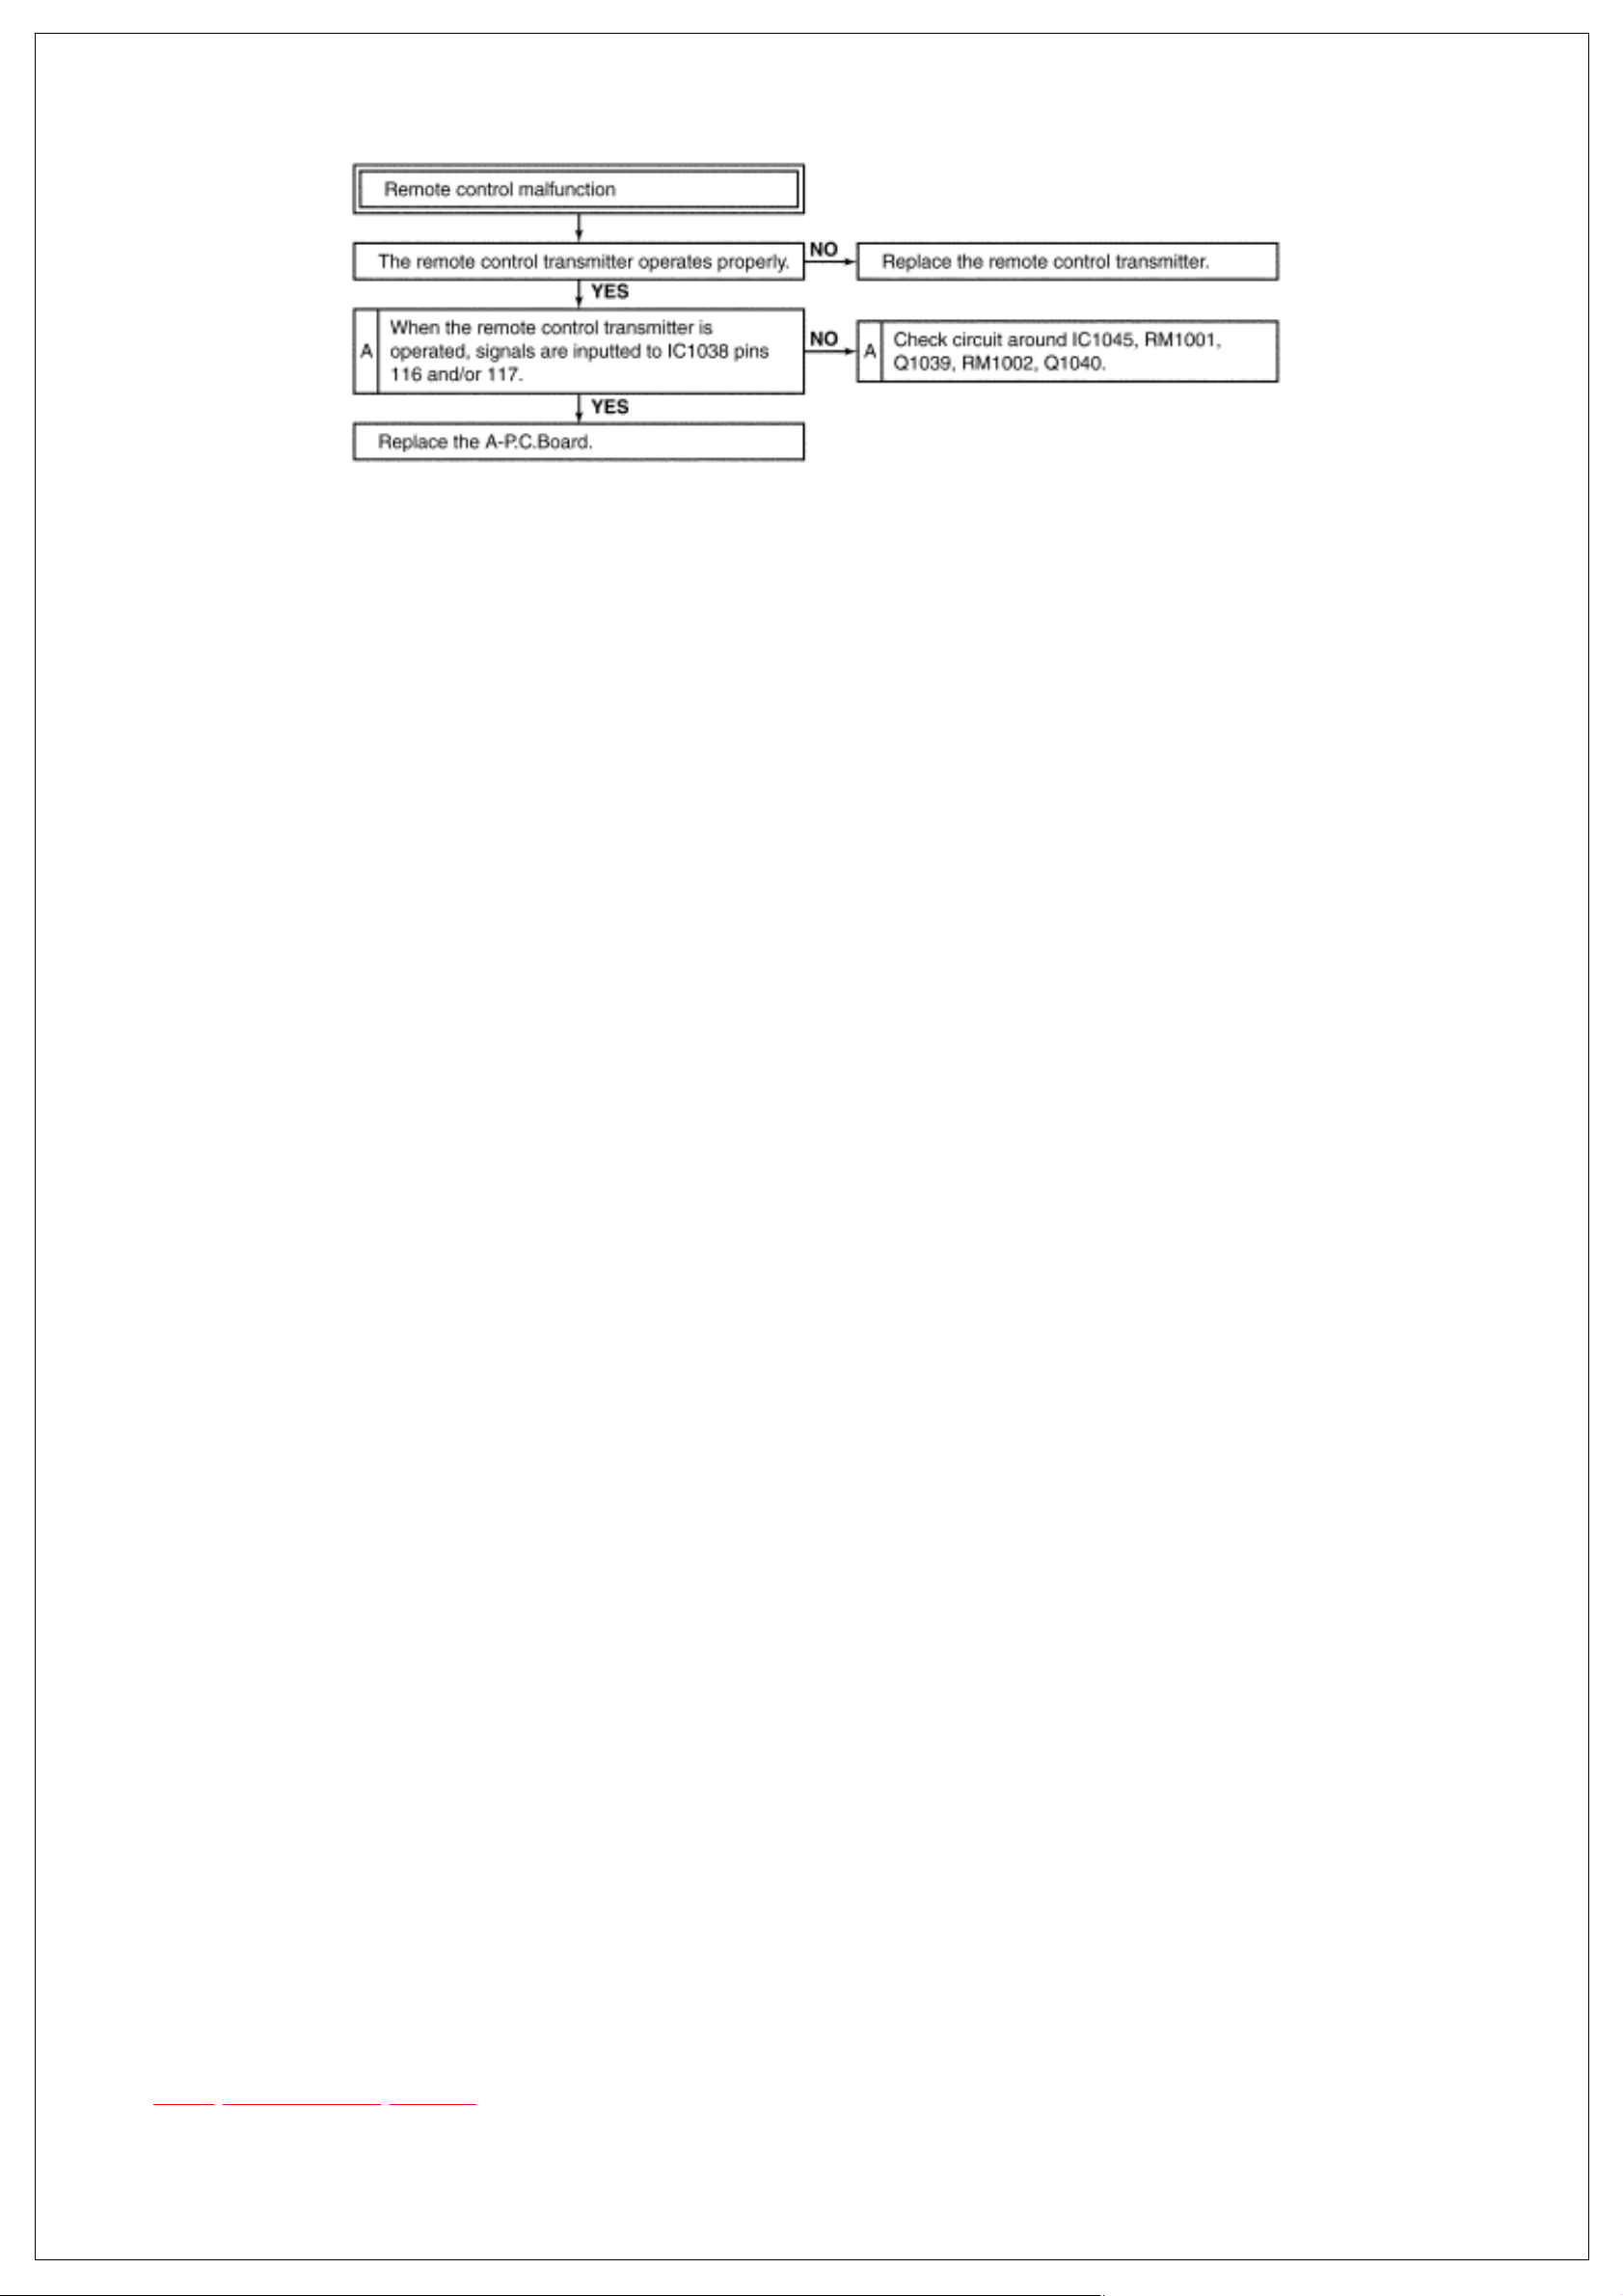
8 Troubleshooting
TOP PREVIOUS NEXT
TOP
PREVIOUS NEXT
PT-L711XU / PT-L712E / PT-L701XU / PT-L702E / PT-L5 11XU / PT-L512E / PT-L501XU / PT-L502E / PT-U1X90 / PT-U1X80 / PT-U1S90 / PT-U1S80
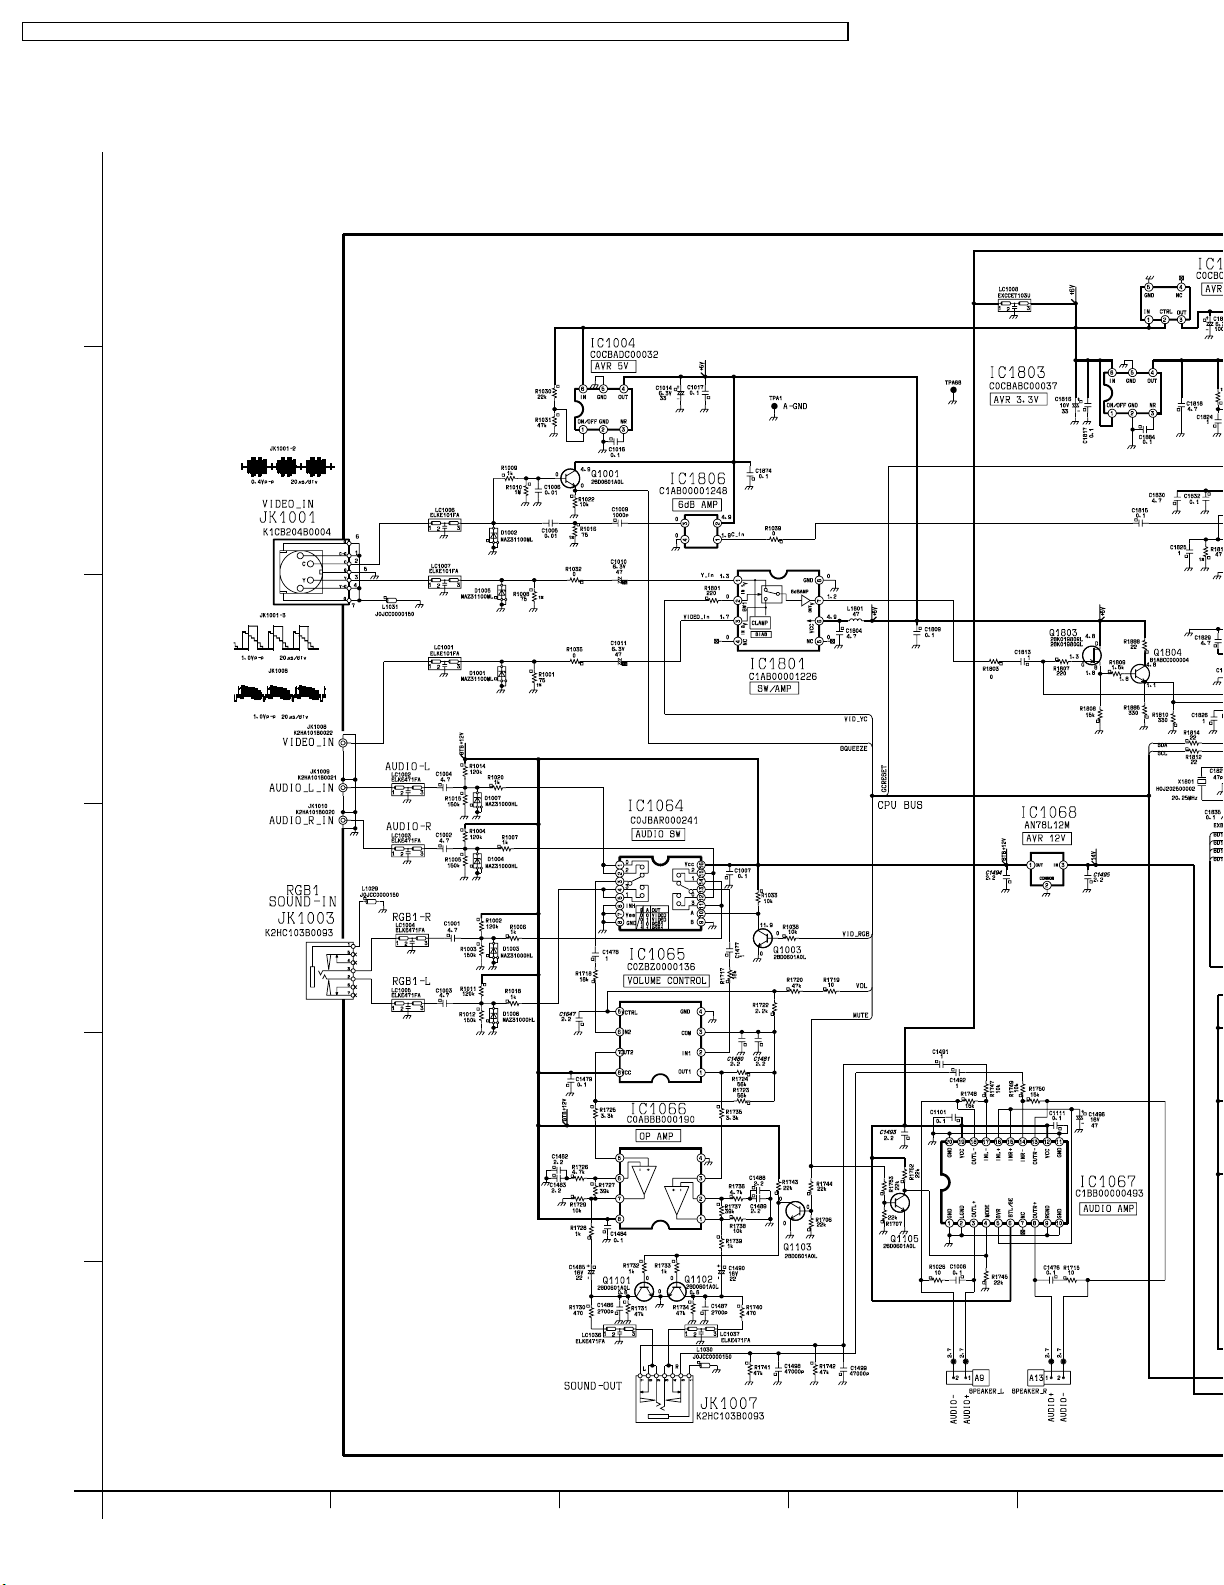
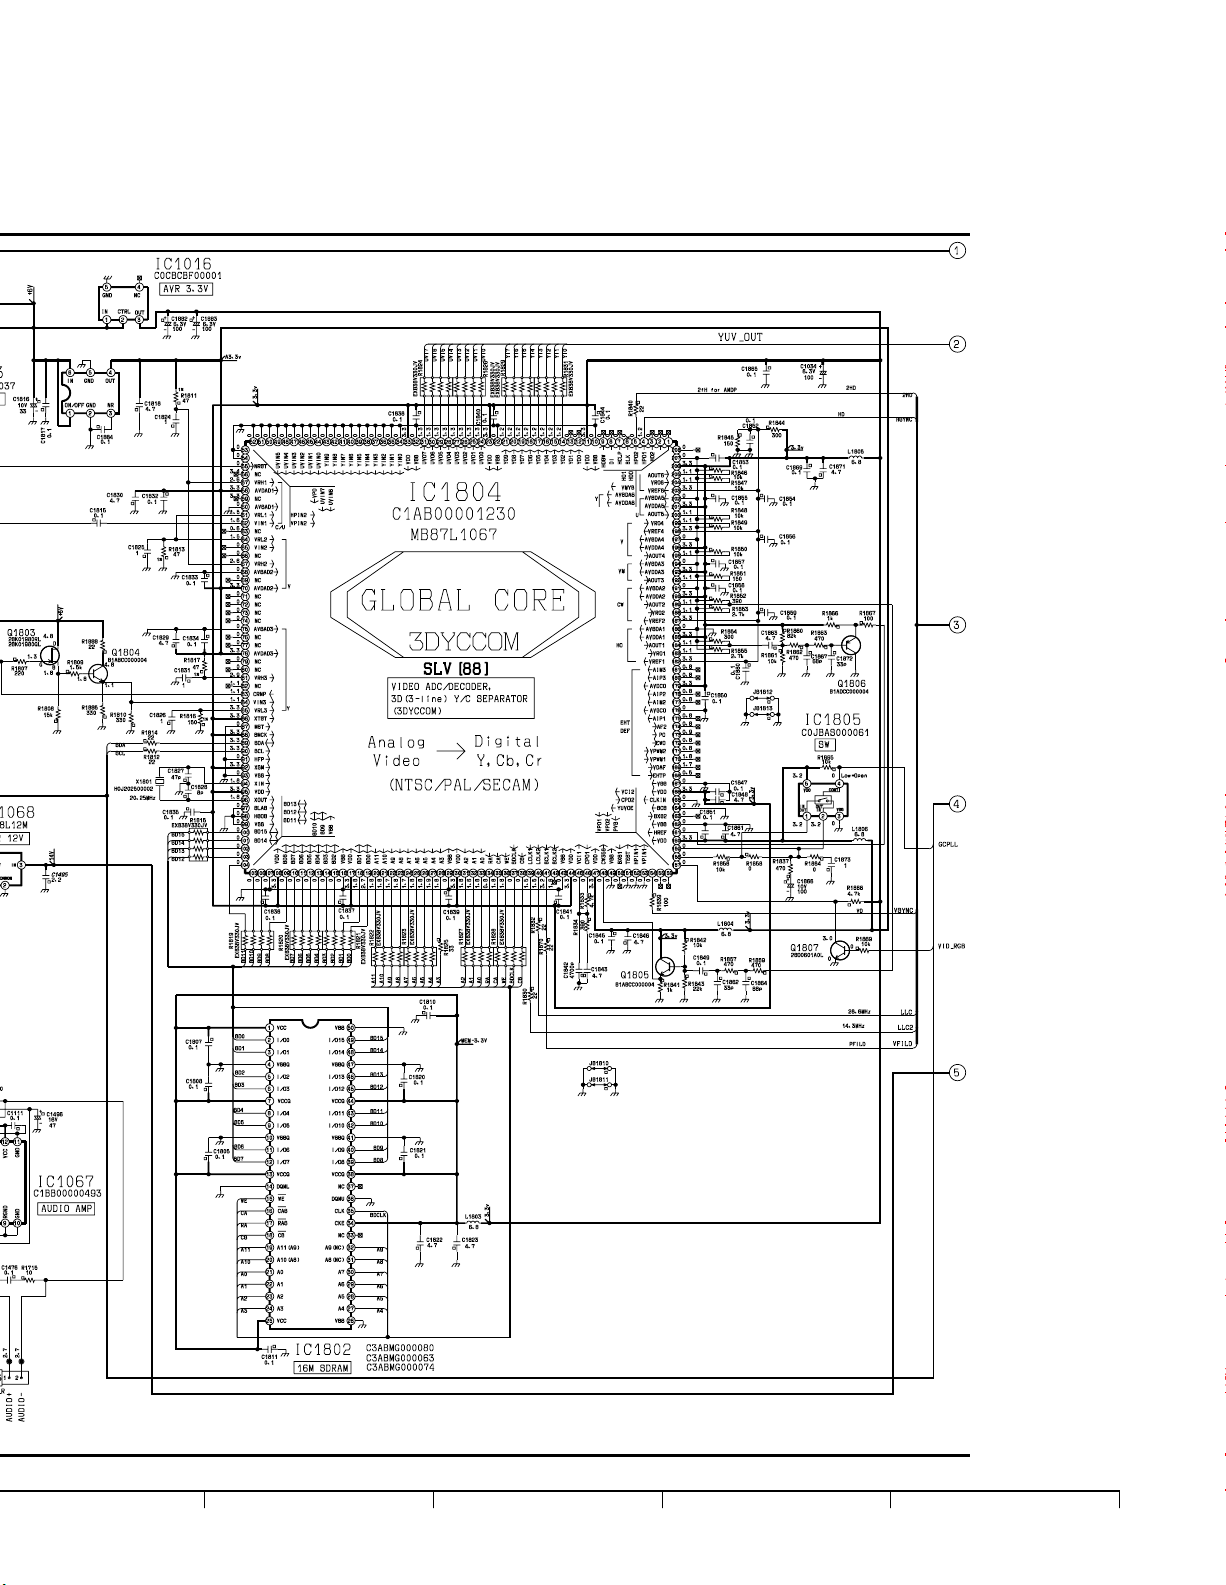
11.1. A-P.C.Board (PT-L7****/L7***/U1X**SERIES) (1/6)
A-P.C.Board TNPH0372AB (PT-L7****/L7***/U1X** SERIES) (1/6)
F
E
D
C
B
A
1
2 3 4 5 6 7 8 9
76
76
A-P.C.Board TNPH0372AB (PT-L7****/L7***/U1X** SERIES) (1/6)
 Loading...