

Panasonic Omnivision VHS PV-M2035, Omnivision VHS PV-M2045 Operating Instructions Manual
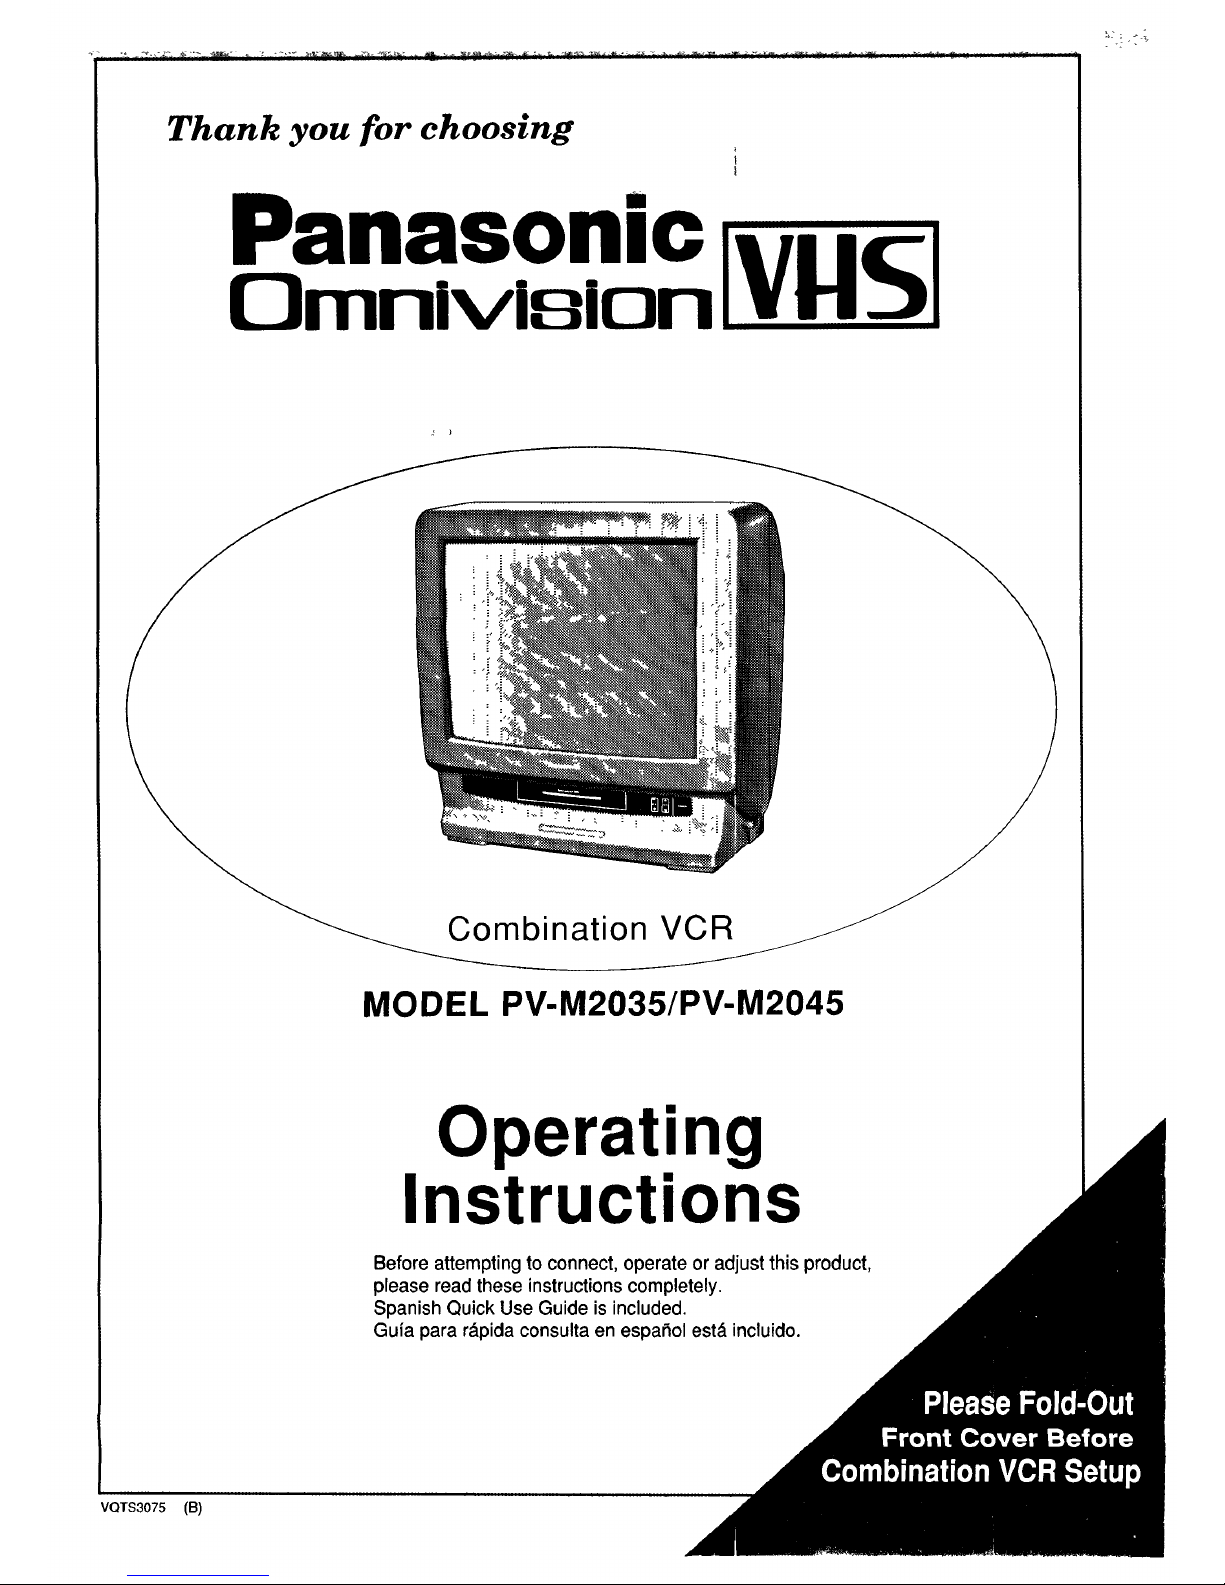
Thank you for choosing
Panasonic " '
o. .lvl o, vlISI
Combination VCR
MODEL PV-M2035/PV-M2045
Operating
Instructions
Before attempting to connect, operate or adjust this product,
please read these instructions completely.
Spanish Quick Use Guide is included.
Guia para r_.pida consulta en espaSol est_ incluido.
VQTS3075 (B)
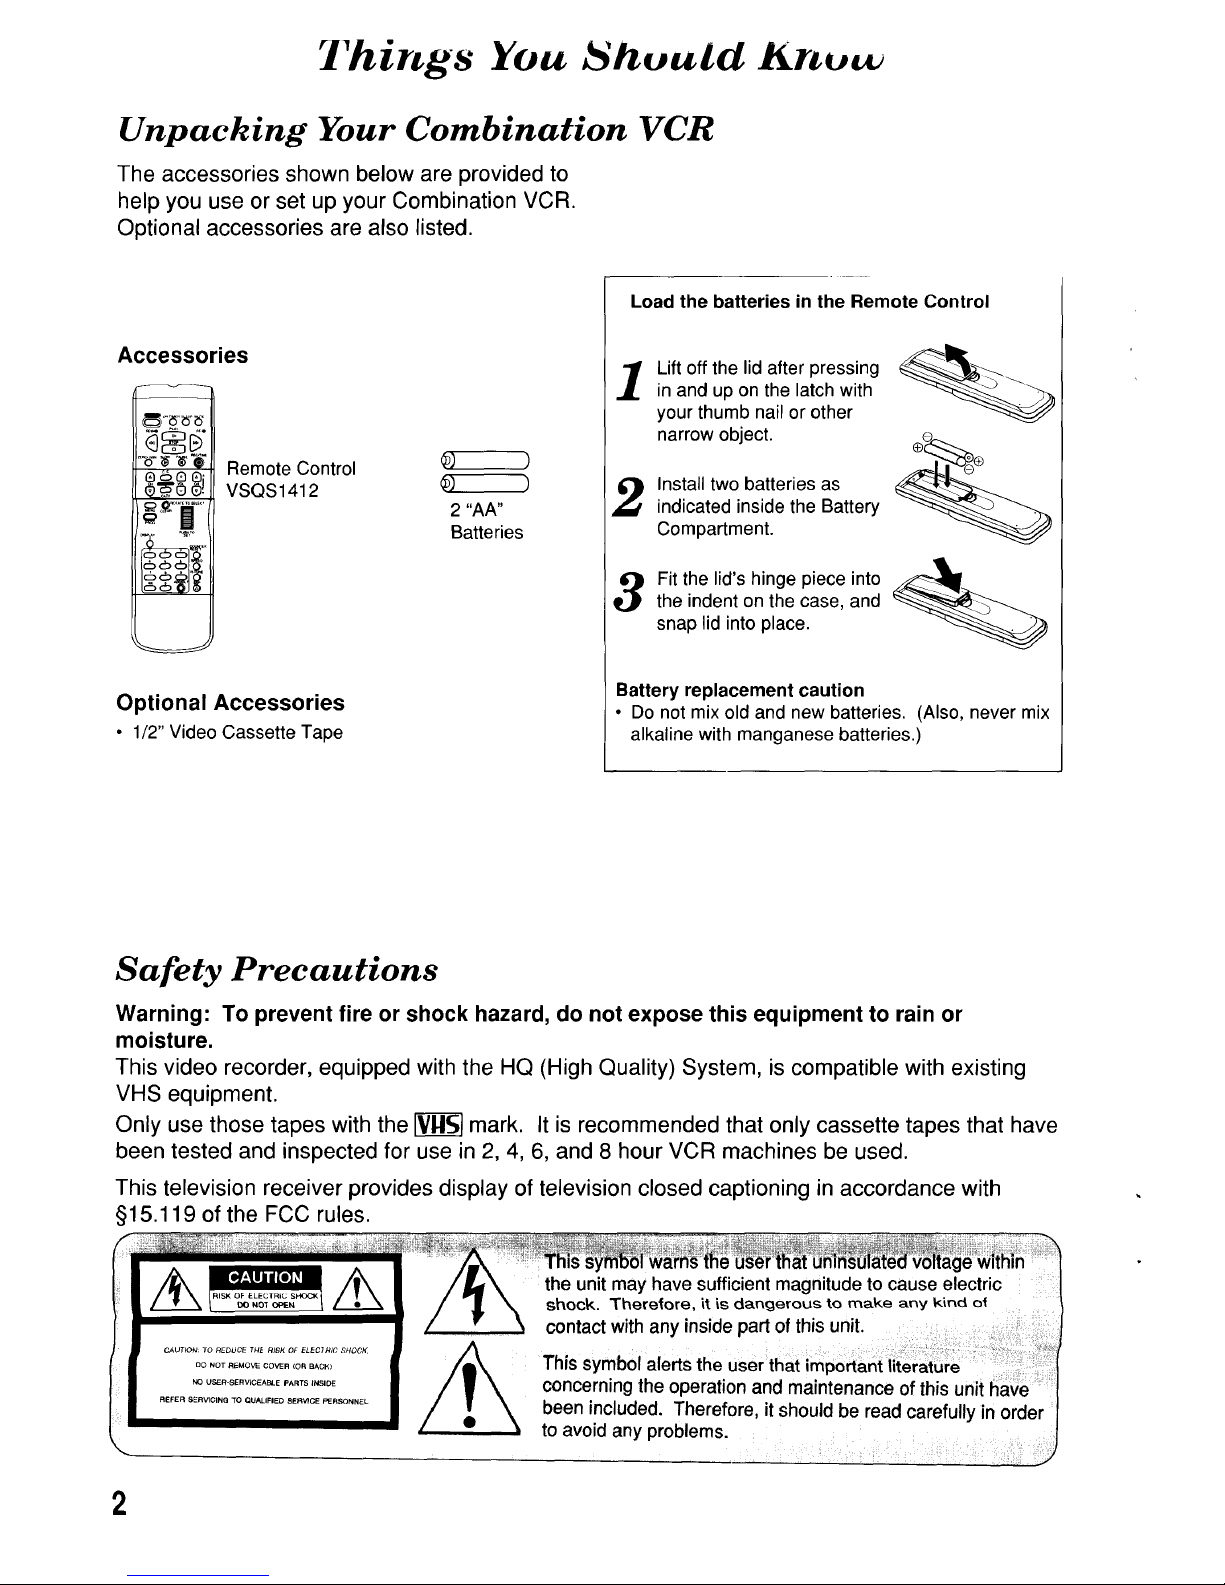
Things You hould Knuw
Unpacking Your Combination VCR
The accessories shown below are provided to
help you use or set up your Combination VCR.
Optional accessories are also listed.
Accessories
N
Remote Control
VSQS 1412
Optional Accessories
• 1/2" Video Cassette Tape
(D) )
_) )
2 "AA"
Batteries
Load the batteries in the Remote Control
1
Lift off the lid after pressing
in and up on the latch with
your thumb nail or other
narrow object.
Install two batteries as
indicated inside the Battery
Compartment.
3
Fit the lid's hinge piece into _11_
the indent on the case, and
snap lid into place.
Battery replacement caution
• Do not mix old and new batteries. (Also, never mix
alkaline with manganese batteries.)
Safety Precautions
Warning: To prevent fire or shock hazard, do not expose this equipment to rain or
moisture.
This video recorder, equipped withthe HQ (High Quality) System, is compatible with existing
VHS equipment.
Only use those tapes with the _ mark. It is recommended that only cassette tapes that have
been tested and inspected for use in 2, 4, 6, and 8 hour VCR machines be used.
This television receiver provides display of television closed captioning in accordance with
§15.119 of the FCC rules.
the unit may have sufficient magnitude to cause electric
shock. Therefore, it is dangerous to make arty kirtd o{
contact with any inside part of this unit.
This symbol alerts the user that important literature
concerning the operation and maintenance of this unit have
been included. Therefore, it should be read carefully in order
to avoid any problems.
2

ottg t'atu iCttto, _o
on your purchase of one of the most sophisticated and reliat31e
products on the market today. Used properly, we're sure it will bnng
you and your family years of enjoyment. Please take time to fill in the
information below. The serial number is on the tag located on the
back of your Combination VCR. You'll want to keep this manual
handy as your convenient Combination VCR information source.
Date of Purchase
Dealer Purchased From
Dealer Address
Dealer Phone No.
Model No.
Serial No.
Open this flap to
reveal the Control
Reference Gu=de
(,;ontrol Referenct= uiae
PROGRAM
_11_ TIMER
indicator
ON TIMER
Indicator
VOLUME
UP/DOWN
REPEAT
Indicator
Built In
Speaker
CHANNEL UP/DOWN _1_
' TRACKING UP/DOWNW
' Remote
Sensor
1_ udio/Video
In Jacks
(PV-M2045 only)
POWER H
Phones Jack
(PV-M2045
only)
STOP/
EJECT
REWIND/ PLAY/ FAST REC and
SEARCH REPEAT FORWARD/ REC Indicator
SEARCH
Note: Model PV-M2045 combination VCR is shown here.
IoN TIMER
POWER
_IsToP
REWIND/
SEARCH
D SLOW/
FRAME ADVANCE
ZERO SEARCH/
1MINUTESKIP
_ CLOSED
CAPTION
CATV
CHANNEL
UP/DOWN
111 CATVPOWER
MENU
_1 PROGRAM-
DISPLAY
NUMBERED
keys
ADD/ _L_DELETE
SLEEP
m MUTE
PLAY
FAST FORWARD/SEARCH
PAUSE/ _/_STILL
_r_ ECORD/TIME
CHANNELUP/DOWN_;KING UP/DOWN
/_ VOLUMEUP/DOWN
_SELECT/SET_II_wHEEL
/_CLEAR
COUNTER
RESET
SPEED
RAPID TUNE
The numbers and letters above correspond with those used in the operating instructions.
Please keep this page folded out when using the manual.
Table of Contents
Product Information (,Front Panel Indications, VHF/UHF Antenna Jack) ............................................... 4
Cassette Information (Record Tab, Tape Speed, Tape Cleaning) .................................................................. 5
Basic and Cable Connections (Outdoor Antenna, Cable Box, Scrambled/Unscrambled Channels) .......... 5
One Time Setup (On-Screen Language, Channel Memory, Auto Clock Set) ...................................... 6, 7
Change or Re-enter One Time Setup Items (Refers to Items on page 6 and 7) ................................ 8
On Screen Displays (OSD) (Function, Channel, Menu, VCR Status/Clock, Warning, Instruction) ............. 9
TV Operation (Main Operation, Using the 100 key, Rapid Tune, Audio Mute, Phones) .................................. 10
Picture Adjustment (Color, Tint, Bright, Picture, Sharpness, Reset) ............................................................ 10
TV Timer Features (On Timer, Sleep Timer) ................................................................................................. 11
Closed Caption System (Main Operation, Caption On Mute) ........................................................... 12
Play back a Tape/Playback Features (Special Effects, Quality Picture Features) ............................. 13
Record On a Tape (Main Operation, One Touch Record, Input Select) ............................................... 14
Copy Your Tapes (Dubbing) (Connection, Main Operation) ........................................................... 15
Set Up a Timer Recording (Main Operation, Cancel-Clear-Replace Program) .............................. 16, 17
Setting at the Unit ................................................................................................................... 17
MTS Broadcast SystemiTV Stereo System (Stereo/SAP/Mono Broadcast, Select Audio Mode) ............... 18
Cable Box Universal Remote Control Operation (Main Operation, Cable Box Code List) ................ 19
Tape Operation (Repeat Play, One Minute Skip, Zero Search, Auto Functions) .................................... 20
Before Requesting Service (Self-check Items) ............................................................................ 21
Helpful Notes on Operations (Cable Connection, Basic Function, Daylight Saving Time, Specifications) ...... 22
Spanish Quick Use Guide/Guia para r_.pida consulta .................................... 23, 24, 25, 26, 27
Product Features
Auto Clock Set ......................................................................................................................... 6, 7
Auto Daylight Saving Time ........................................................................................................ 22
Auto Operation Functions (Auto Playback, Rewind, Tape Eject, Power Off) ................................................. 20
Auto Repeat Function ................................................................................................................ 20
Cable Box Universal Remote Control Feature .......................................................................... 19
Closed Caption System ............................................................................................................. 12
Easy-to-Read On Screen Displays .............................................................................. 6, 7, 16, 17
Front-mounted A/V In Terminals (Model PV-M2045 only) ......................................................... 15
MTS Broadcast System ............................................................................................................. 18
One Minute Skip ........................................................................................................................ 20
One Month, 8 Program Auto Timer Recording .................................................................... 16, 17
One Touch Recording (OTR) .................................................................................................... 14
PanaBlack TM Picture Tube ........................................................................................................ 13
Program Director Remote Control ....................................................................................... 16, 17
Quick Play Mechanism .............................................................................................................. 21
Rapid Tune ................................................................................................................................ 10
Special Effects Playback .......................................................................................................... 13
• 20
Zero Search ...............................................................................................................................
181-CH TV/CATV Tuner/All Channel Auto Set ........................................................................... 6
3
i
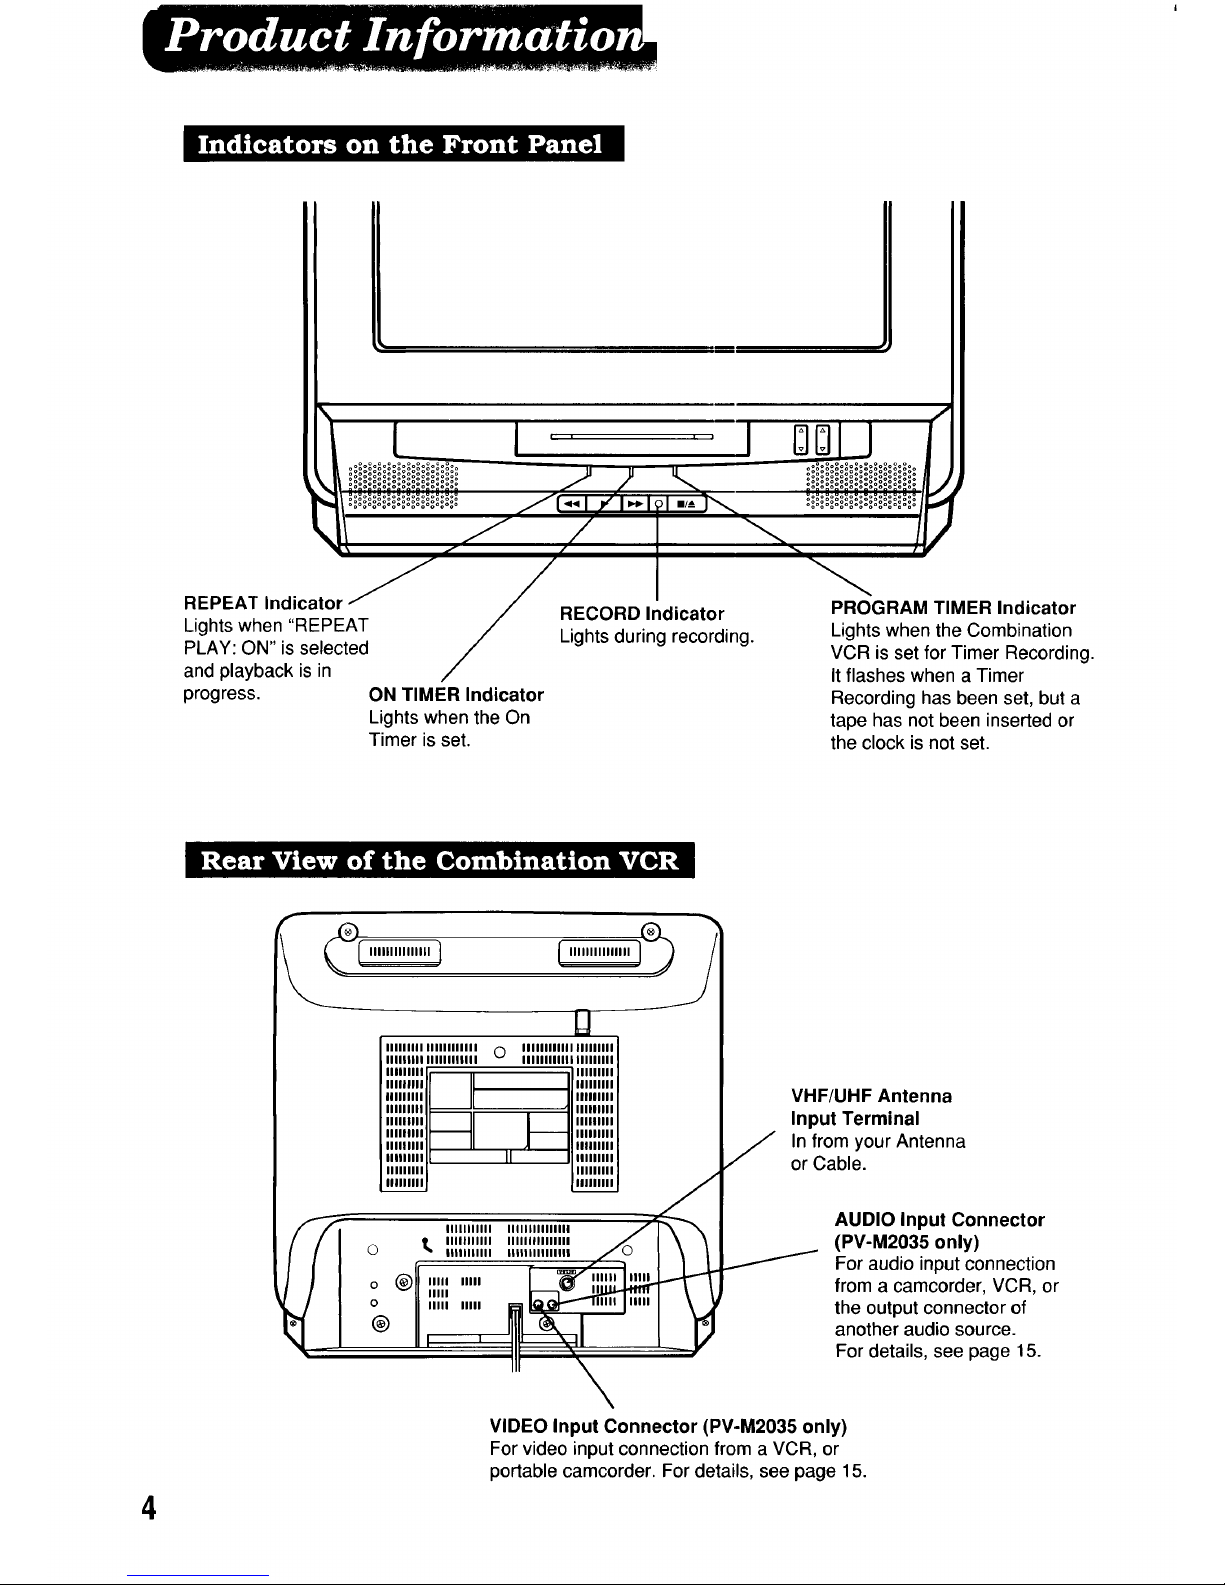
REPEAT Indicator
Lightswhen "REPEAT
PLAY: ON" is selected
and playback is in
progress. ON TIMER Indicator
Lights when the On
Timer is set.
RECORD Indicator
Lights during recording.
PROGRAM TIMER Indicator
Lights when the Combination
VCR is set for Timer Recording.
Itflashes when a Timer
Recording has been set, but a
tape has not been inserted or
the clock is not set.
4
{lllllllllllllll ]
IIIIIIlil IIIIIIIIIIII
IIII1|111 IIIIIIIlUll
0 IIIIIIIIIIIIIIIIIIIII
IIIIIIIIIIIIIIIIIIIII
IIIIIIIII I I
"'"'"'if II If"'"'"'
iilllllll J I|IIIIIII
I II " I I II
"""'"I I I I'""'"'
IIIIIIIII ri1 _ lllnllll
IIIIIIIII I II rl I IIIIIIIII
lllliilil [ II I lllilllli
IIIIIIIII i Illlllllll
i!
IIIIIIIIIII IIIIlllllllllll
1[ IIIIInllll IllUlIIIIIIIII
(_) _ IIIIIIIIIII lllllllllllllll
o @ '"" '""
IIIII IrI1 _t_'
0 lilli illll _---I_ illil
_' I _ . -.
'\
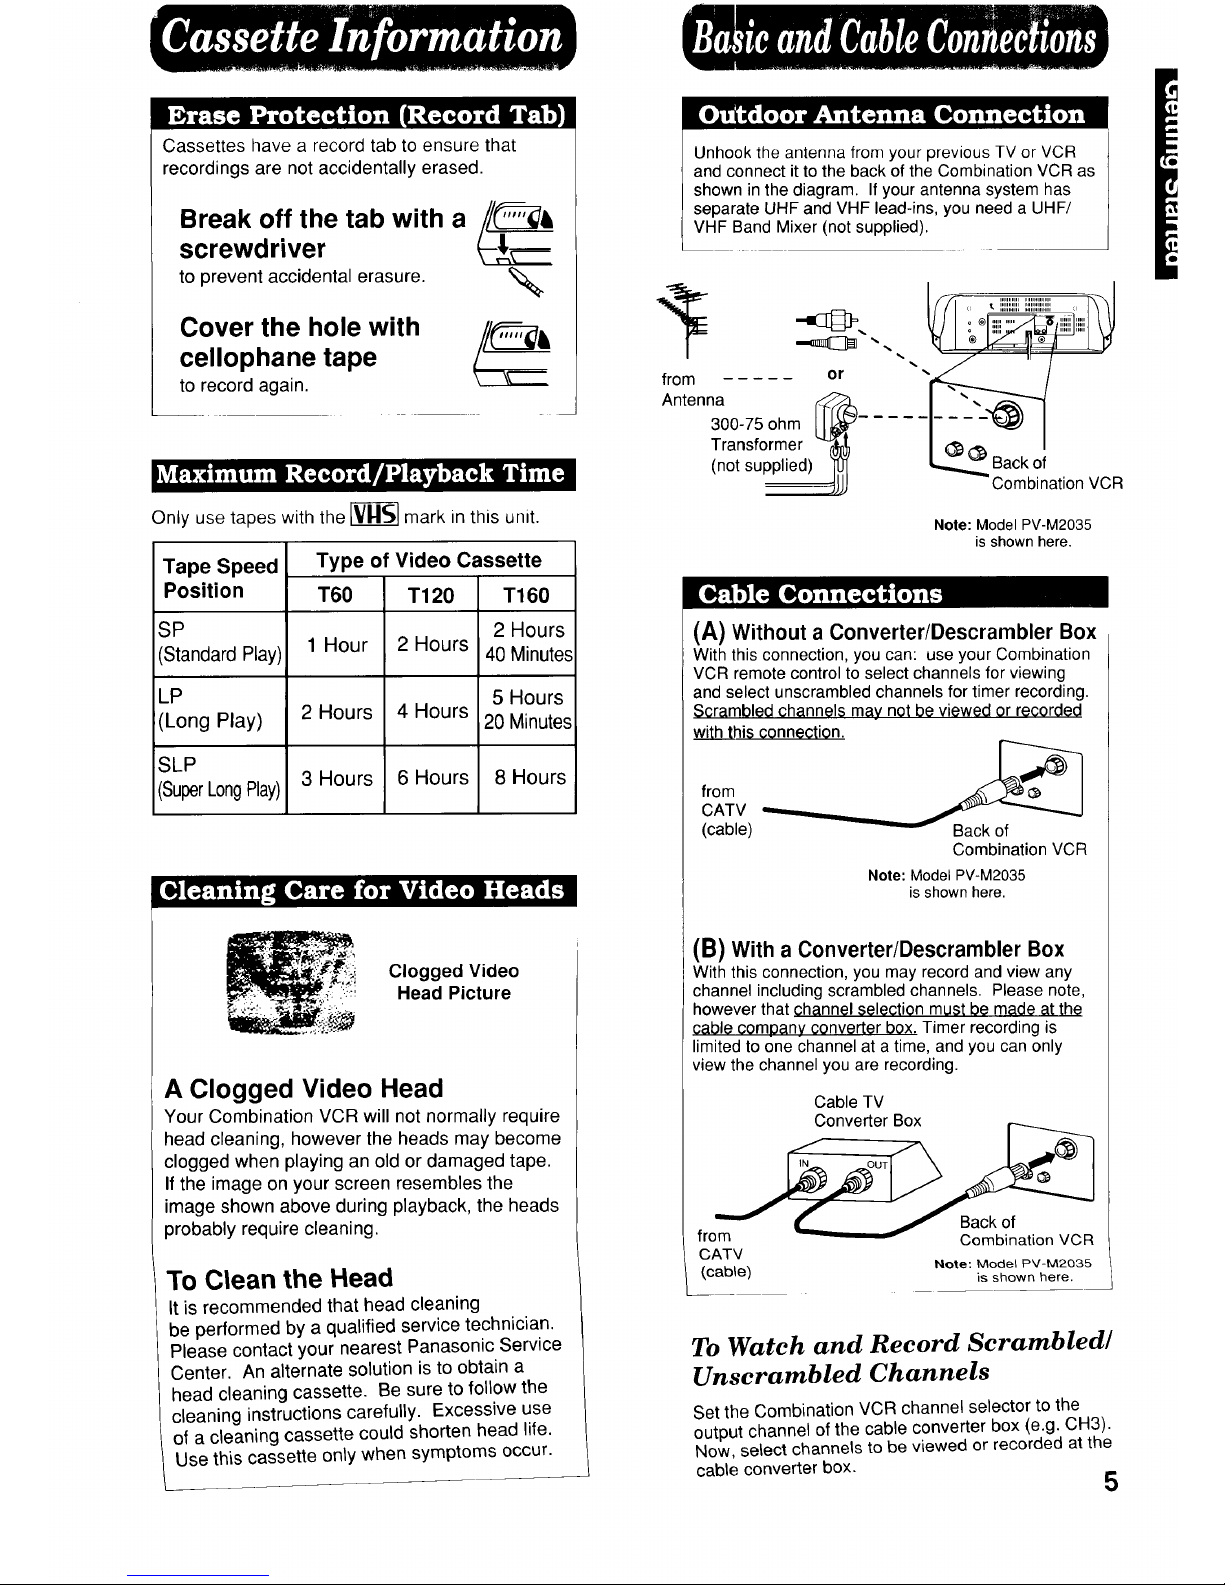
VHF/UHF Antenna
Input Terminal
In from your Antenna
or Cable.
AUDIO Input Connector
(PV-M2035 only)
For audio input connection
from a camcorder, VCR, or
the output connector of
another audio source.
For details, see page 15.
VIDEO Input Connector (PV-M2035 only)
For video input connection from a VCR, or
portable camcorder. For details, see page 15.
Cassettes have a record tab to ensure that
recordings are not accidentally erased.
Break off the tab with a //_&
screwdriver _-_
to prevent accidental erasure. _.
Cover the hole with
cellophane tape
to record again.
Only use tapes with the _ mark in this unit.
Tape Speed
Position
SP
(Standard Play)
LP
(Long Play)
SLP
(SuperLongPlay)
Type of Video Cassette
T60
1 Hour
2 Hours
3 Hours
T120
2 Hours
4 Hours
6 Hours
T160
2 Hours
40 Minutes
5 Hours
20 Minutes
8 Hours
Clogged Video
Head Picture
A Clogged Video Head
Your Combination VCR will not normally require
head cleaning, however the heads may become
clogged when playing an old or damaged tape.
If the image on your screen resembles the
image shown above during playback, the heads
_robably require cleaning.
To Clean the Head
It is recommended that head cleaning
be performed by a qualified service technician.
Please contact your nearest Panasonic Service
Center. An alternate solution isto obtain a
head cleaning cassette. Be sure to follow the
cleaning instructions carefully. Excessive use
of a cleaning cassette could shorten head life.
Use this cassette only when symptoms occur.
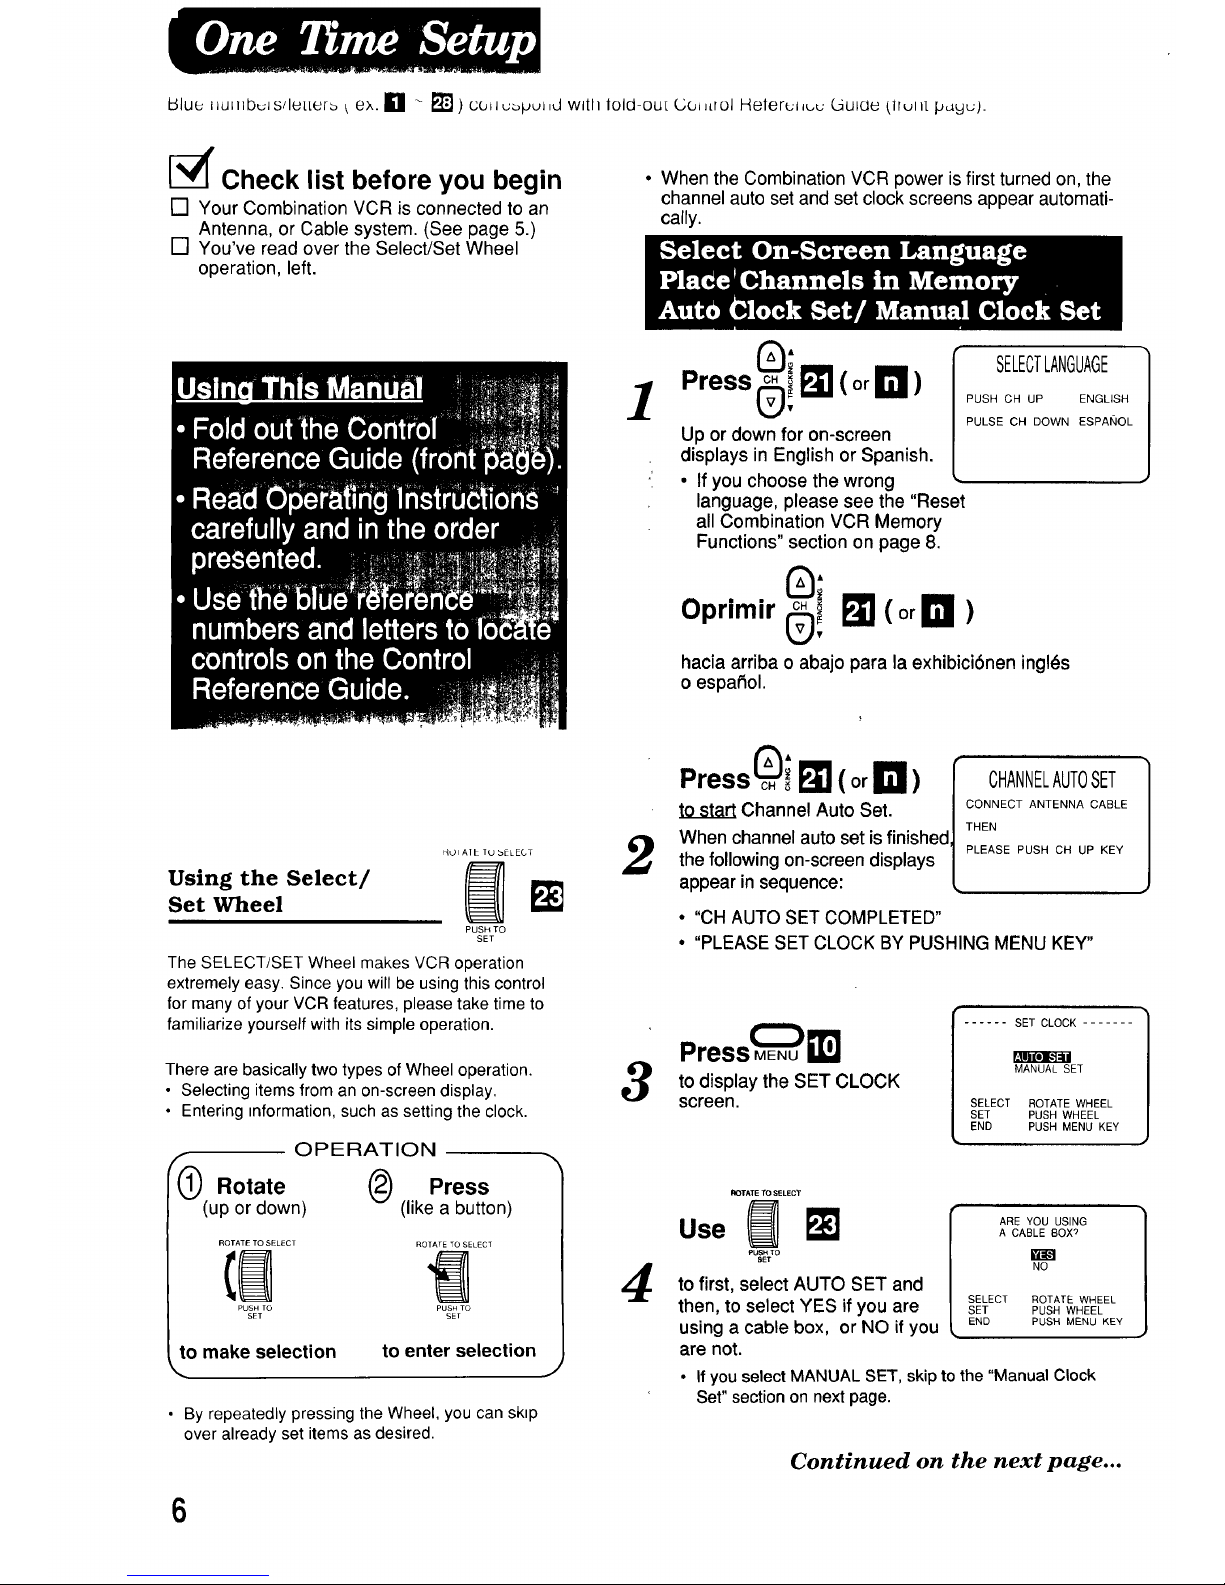
Unhook the antenna from your previous TV or VCR
and connect it to the back of the Combination VCR as
shown in the diagram. If your antenna system has
separate UHF and VHF lead-ins, you need a UHF/
VHF Band Mixer (not supplied).
from or
Antenna
300-75 ohm
Transformer
(not supplied)
...... _.1 :_iilli,_,!!il!Eilli[LIIIIEIIIE[IIEI_,
Note: Model PV-M2035
is shown here.
(A) Without a Converter/Descrambler Box
Withthisconnection,youcan: use yourCombination
VCR remote control to select channelsfor viewing
andselect unscrambledchannelsfortimerrecording.
Scrambled channelsmay notbe viewedor recorded
withthisconnection.
from _
CATV
(cable)
Combination VCR
Note: Model PV-M2035
is shown here.
(B) With a Converter/Descrambler Box
Withthisconnection,you may record andviewany
channelincludingscrambled channels• Pleasenote,
howeverthatchannelselection must be made at the
cablecompany converterbox. Timerrecordingis
limitedtoone channelat a time,andyou canonly
viewthechannelyouare recording.
Cable TV
Converter Box
I IN_ OUT]_
from Combination VCR
CATV
(cable) Note: Model PV-M2035
is shown here.
To Watch and Record Scrambled/
Unscrambled Channels
Set the Combination VCR channel selector to the
output channel of the cable converter box (e.g. CH3).
Now, select channels to be viewed or recorded at the
cable converter box. 5
ii
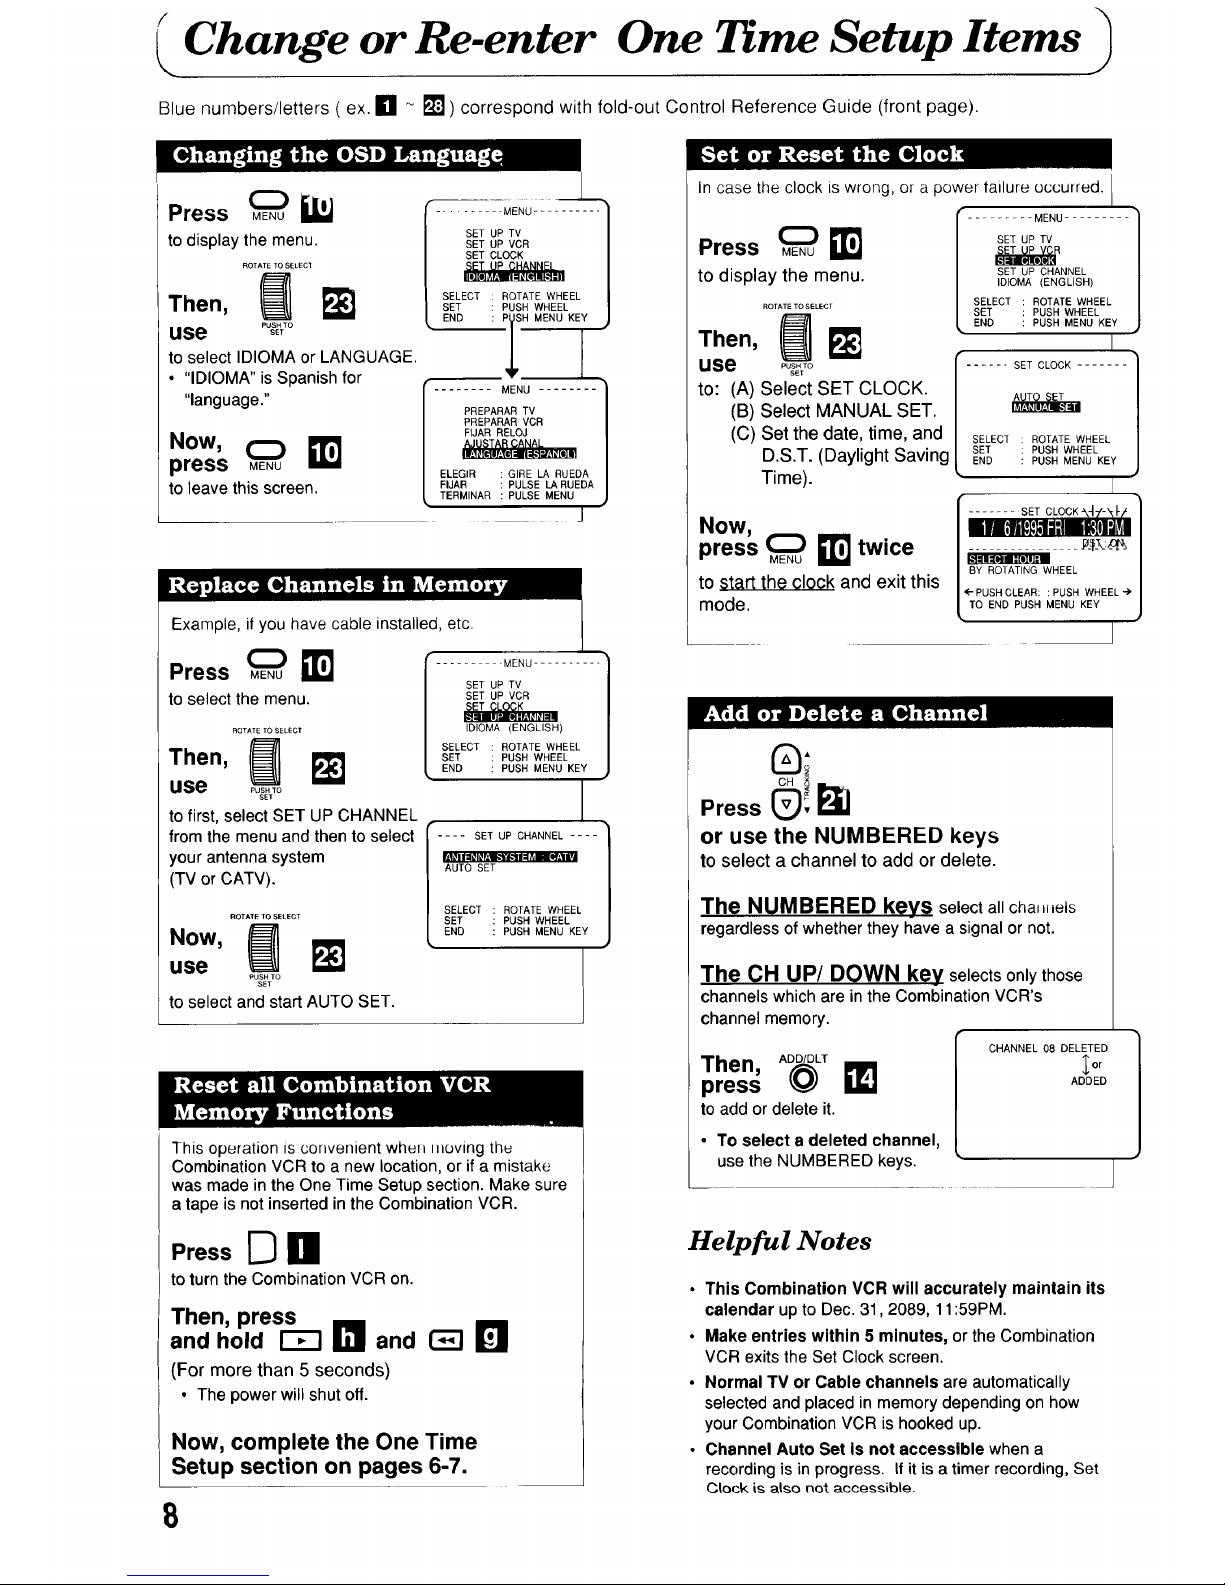
Blue llul Nb_ls/letLer_ [ ex. [] - [] ) co_l_puJ ,d wltll lold-ou[ L;o,_Lrol Helerul,_,c L4ulae (lrul _tpagu).
_" Check list before you begin
[] Your Combination VCR is connected to an
Antenna, or Cable system. (See page 5.)
[] You've read over the Select/Set Wheel
operation, left.
• When the Combination VCR power is first turned on, the
channel auto set and set clock screens appear automati-
cally.
Using the Select/
Set Wheel
HOI AlE TU bELECT
PUSH TO
SET
The SELECT/SET Wheel makes VCR operation
extremely easy. Since you will be using this control
for many of your VCR features, please take time to
familiarize yourself with its simple operation.
There are basically two types of Wheel operation.
• Selecting items from an on-screen display.
• Entering _nformation, such as setting the clock.
OPERATION
(_) Rotate Q Press
(up or down) (like a button)
ROTATE TO SELECT ROTATE TO SELECT
PUSH TO PUSH TO
SET SET
to make selection
to enter selection
• By repeatedly pressing the Wheel, you can skip
over already set items as desired.
1
SELECTLANGUAGE
PUSH CH UP ENGLISH
PULSE CH DOWN ESPANOL
Up or down for on-screen
displays in English or Spanish.
• If you choose the wrong
language, please see the "Reset
all Combination VCR Memory
Functions" section on page 8.
0;
CHi I_ (or I_11 )
Oprimir 0,
hacia arriba o abajo para la exhibici6nen ingles
o espafiol.
2
Press _(_.i I_ (or _)
to sta_ Channel Auto Set.
When channel auto set is finished
the following on-screen displays
appear in sequence:
CHANNELAUTOSET
CONNECT ANTENNA CABLE
THEN
PLEASE PUSH CH UP KEY
• "CH AUTO SET COMPLETED"
• "PLEASE SET CLOCK BY PUSHING MENU KEY"
.ress C:2uE
to display the SET CLOCK
screen.
...... SET CLOCK .......
MANUAL SET
SELECT ROTATE WHEEL
SET PUSH WHEEL
END PUSH MENU KEY
4
ROTATE TO SELECT
PUSH TO
SET
to first, select AUTO SET and
then, to select YES if you are
using a cable box, or NO if you
are not.
ARE YOU USING
A CABLE 80X_
NO
SELECT ROTATE WHEEL
SET PUSH WHEEL
END PUSH MENU KEY
• If you selectMANUAL SET, skip tothe "Manual Clock
Set"section on next page.
Continued on the next page..•
1
6

...Continued from page 6
If YOUSelected YES in Step 4
Set your cable box
to PBS station and then,
press the Wheel to go to
the next step.
ROTATE TO 6ELECT
.ow,u.e@m
PLEASE SET YOUR CABLE
BOX TO YOUR LOCAL PBS
CHANNEL
NEXT . PUSH WHEEL
PUSH TO
_-r _ ..... SET CLOCK ........
to select and enter the l PLEASEENTERCABLEBOX
cable box output channel OUTPUTCHANNEL
number, re=,a
(the channel you tune the SELECTROTATEWHEEL
combination VCR to in SET PUSHWHEEL
order to watch cable END PUSHMENUKEY
station.)
if You Selected NO in Step 4
ROTATE TO SELECT
,u,, to select and enter your
PBS channel number.
...... SET CLOCK ........
PLEASE ENTER YOUR LOCAL
PBS CHANNEL
/
SELECT ROTATE WHEEL
SET PUSH WHEEL
END PUSH MENU KEY
These on-screen displays will appear in sequence.
• AUTO CLOCK SET PROCEEDING
• AUTO CLOCK SET COMPLETED
• The lowest numbered channel OR
+
-+
+;
NOTE:
This screen appears If: AUTOCLOCKSET
• An entry error was made. ,s INCOMPLETE
• AUtOClock Set is not
available for the PBS PUSH WHEEL TO SET CLOCK
channel selected.
Try entering another PBS channel.
If Auto Clock Set cannotbe performed, please
set the clock manually as described at right.
Helpful Note:
• It takes about 10 seconds for the Combination VCR to
determine whether or not Auto Clock Set is available.
Then, depending on your local broadcasting company,
it takes from about 1 minute to 10 minutes to set the
clock. If you would rather not wait, please press the
STOP button and set the clock manually.
Manual Clock Set
ROTATETO _LJ_CT
Press _ _']
PUSH TO
SET
to display the set clock
screen.
SET )K .......
--/-L\- b_i ON
BY ROTATING WHEEL
PUSH WHEEL "}'
TO END PUSH MENU KEY
to select and enter the month, date, year,
time, and D.S.T. (Daylight Saving Time).
• The day of the week appearsautomatically.
• "DST: ON" automatically adjusts fordaylight
saving time. (See page 22 for details.)
To Make Corrections, press the
Wheel or CLEAR button repeatedly to
move back or forward to the desired item.
Now,
press _ _j twice
to startthe clock and exit this mode.
See page 8 to change or re-enter
items in this setup.
You will find out how to:
• set or reset the clock.
• change the on-screen display language.
• replace channels in memory.
• add or delete a channel from memory.
7
Change or Re-enter One Time Setup Items
Blue numbers/letters ( ex. [] - [] ) correspond with fold-out Control Reference Guide (front page).
Press _
to display the menu.
ROTATE TO SLLEC_
use P_'7°
to select IDIOMA or LANGUAGE.
• "IDIOMA" is Spanish for
"language ."
Now,
press MENU
to leave this screen.
.......... MENU ..........
SET UP TV
SET UP VCR
SET CLOCK
SELECT ROTATE WHEEL
SET PUSH WHEEL
END : i
P SH MENU KEY
........ MENU ........ 1
PREPARAR TV
PREPARAR VCR
FIJAR RELOJ
ELEGIR GIRE LA RUEDA
FIJAR PULSE LA RUEDA
TERMINAR PULSE MENU
J
Example, it you have cable installed, etc.
Press _ _71
tOselect the menu.
ROTATE TO SELECT
use ......
SET
to first, select SET UP CHANNEL
from the menu and then to select
your antenna system
(TV or CATV).
ROTATE TO SELECT
.°w, N
use
PUSH 10
SET
to select and start AUTO SET.
....... MENU ..........
SET UP TV
SET UP VCR
IDIOMA (ENGLISH)
SELECT : ROTATE WHEEL
SET : PUSH WHEEL
END : PUSH MENU KEY
I ... SET UP CHANNEL .... 1
_L _L_ kJ
AUTO SET
SELECT ROTATE WHEEL
SET PUSH WHEEL
END PUSH MENU KEY
This operation is convenient when moving the
Combination VCR to a new location, or if a mistake
was made in the One Time Setup section. Make sure
a tape is not inserted in the Combination VCR.
PressD nl
to turn the Combination VCR on.
Then, press
and hold I-;7 Ill and _ _'1
(For more than 5 seconds)
• The power will shut off.
Now, complete the One Time
Setup section on pages 6-7.
8
In case the clock is wrong, or a power failure occurred.
I ......... MENU .........
SET UP TV
Press MENU
to display the menu. SETUPCHANNEL
IDIOMA (ENGLISH)
SELECT ROTATE WHEEL
SET PUSH WHEEL
END PUSH MENU KEY
I
...... SET CLOCK .......
ROTATE TO SELECT
•.en,
use o_;;0
to: (A) Select SET CLOCK.
(B) Select MANUAL SET.
(C) Set the date, time, and
D.S.T. (Daylight Saving
Time).
Now,
press _ _ twice
to start the clock and exit this
mode.
SELECT ROTATE WHEEL
SET PUSH WHEEL
END PUSH MENU KEY
• I
r ....... SET CLOCK _47'-'_I- /
/ IiliMlS],lllliBIllli_l
BY ROTATING WHEEL
_ _-PUSHCLEAR: :PUSH WHEEL
t TO END PUSH MENU KEY
I
or use the NUMBERED keys
to select a channel to add or delete.
The NUMBERED keys select all chall,,els
regardless of whether they have a signal or not.
The OH UP/DOWN key selects only those
channels which are in the Combination VCR's
channel memory.
Then, ADD/DLT
press _) _J
to add or delete it.
• To select a deleted channel,
use the NUMBERED keys.
CHANNEL 08 DELETED
_or
ADDED
Helpful Notes
• This Combination VCR will accurately maintain its
calendar up to Dec. 31,2089, 11:59PM.
• Make entries within 5 minutes, or the Combination
VCR exits the Set Clock screen.
• Normal TV or Cable channels are automatically
selected and placed in memory depending on how
your Combination VCR is hooked up.
• Channel Auto Set is not accessible when a
recording is in progress. If it is a timer recording, Set
Clock is also not accessible.

Wheneve_ a lunction button is I_
pressed (PLAY, FF, etc.) or FF
L
the channel is changed, a 4
second OSD will appear first
in large and then small
characters.
• When a recording is started, both REC and the
channel will appear together.
Press
to display the menu.
ROTATE TO* SELECT
use ......
SET
to make your selection.
(See page 6 for details.)
I
......... MLNU-
i
SET UP VCR
SET CLOCK
SET UP CHANNEL
IDIOMA (ENGLISH)
SELECT ROTATE WHEEL
SET PUSH WHEEL
END PUSH MENU KEY
• To get the most from each feature, it is
recommended that you read the Operation Manual
before attempting any operation.
DIbPLAY
Press 0
to display the overlay shown below.
Function Time
Rec Time Status /
Remaining _ / Channel
(OTR mode only \ // /
seepage14.) _ " \ / /
REC 12:00AM CH 08 /
_0:25 0:00:00 /
(I,STEREO <- SLP /
[IcSAP I /
• MONO /
Type of Broadcasts/ /
(Seepage18.) , I J
Time Counter Tape Speed
DISPLAY
Press 0 again
to remove this overlay.
1
These displays will alert you to a missed
operation or provide further instructions.
If no active channels
are found for CHANNEL
MEMORY...
If a Timer Program was not
completed before exiting
the Program mode...
If you press REC on the remote
control or REC and PLAY on
the Combination VCR, and a
cassette is inserted with no
record tab...
If you press STOP during
a Timer Recording...
If you press PLAY,FF,REW,or
RECon the remotecontrolor if
youpress RECand PLAY,FF,
PLAY,or REWonthe Combination
VCRwithoutacassetteinserted...
If you attempt to set or review a
Timer Recording or setthe On
Timer and the Clock is notset...
Two minutes before a
Timer Recording is about
to begin...
NO CH FOUND
PLEASE CHECK ANTENNA
CABLE CONNECTION THEN
PUSH CH UP KEY AGAIN
PROGRAM IS INCOMPLETE
CHECK CASSETTE
RECORD TAB
TO CANCEL TIMER REC
HOLD DOWN STOP KEY
FOR APPROX 3 SEC
NO CASSET[E
PLEASE INSERT A CASSETTE
PLEASE SET CLOCK
BEFORE PROGRAMMING
PLEASE PREPARE
FOR TIMER REC
1
if a blank section of tape is encountered in the
broadcast, the screen will change to a solid blue
field. The screen will remain blue until a
recorded signal is again detected or an active
channel is selected.
9
 Loading...