How it Works
Log In / Sign Up
Buy Points
How it Works
FAQ
Contact Us
Questions and Suggestions
Users
Panasonic
Loading...
N
NN-SD269M
NN-SD271S
13
NN-SD271SEPG
NN-SD277B
NN-SD277B CPH
Nn-sd277br
4
NN-SD277S CPH
NN-SD277SR
5
NN-SD277W
NN-SD277W CPH
NN-SD277WR
5
NN-SD278S
3
NN-SD279S
2
NN-SD27HS
4
NN-SD27HSUPG
2
NN-SD291
NN-SD297
2
NN-SD297BR
2
NN-SD297S CPH
NN-SD297SR
4
NN-SD297W CPH
NN-SD297WR
NN-SD361
NN-SD361M
2
NN-SD366 MZPE
NN-SD36HB
NN-SD36HBZPE
NN-SD372
NN-SD3725
NN-SD372S
7
NN-SD372SZPE
NN-SD376S
NN-SD377
4
NN-SD377S
4
NN-SD381S
4
NN-SD38HS
NN-SD38HSQPQ
2
NN-SD38HSZPE
NN-SD446
2
NN-SD450W
3
NN-SD450WEPG
NN-SD452W
12
NN-SD452WEPG
2
NN-SD456
7
NN-SD459W
7
NN-SD466
2
NN-SD556 MZPE
nn-sd654
NN-SD654B
2
NN-SD654W
2
NN-SD664B
2
NN-SD664W
3
Nn-sd667
5
NN-SD667S
2
NN-SD670S
NN-SD671S
2
NN-SD677S
2
nn-sd681
nn-sd681s
4
nn-sd686s
3
NN-SD688
Nn-sd688s
3
NN-SD688S CPH
NN-SD691S
6
NN-SD691SQPQ
Nn-sd696
6
NN-SD696S
NN-SD696SX
NN-SD697S
4
NN-SD698
Nn-sd698s
8
NN-SD698S CPH
NN-SD755S
3
nn-sd762
nn-sd762s
3
NN-SD763
NN-SD765S
3
Nn-sd767
5
NN-SD767B
3
NN-SD767B CPH
NN-SD767S
5
NN-SD767W
4
NN-SD767W CPH
Nn-sd768b
2
Nn-sd768w
3
nn-sd772
NN-SD772S
3
NN-SD773S
NN-SD775S
3
nn-sd778
3
NN-SD780S
NN-SD786S
3
NN-SD787
2
NN-SD787S
3
NN-SD797
4
NN-SD797S
3
NN-SD797S CPH
NN-SD7**S
nn-sd945s
NN-SD9**S
Loading...
Loading...
Nothing found
NN-SD664B
Operating Instructions
68 pgs
3.14 Mb
0
Operating Instructions Manual
68 pgs
4.29 Mb
0
Table of contents
Loading...
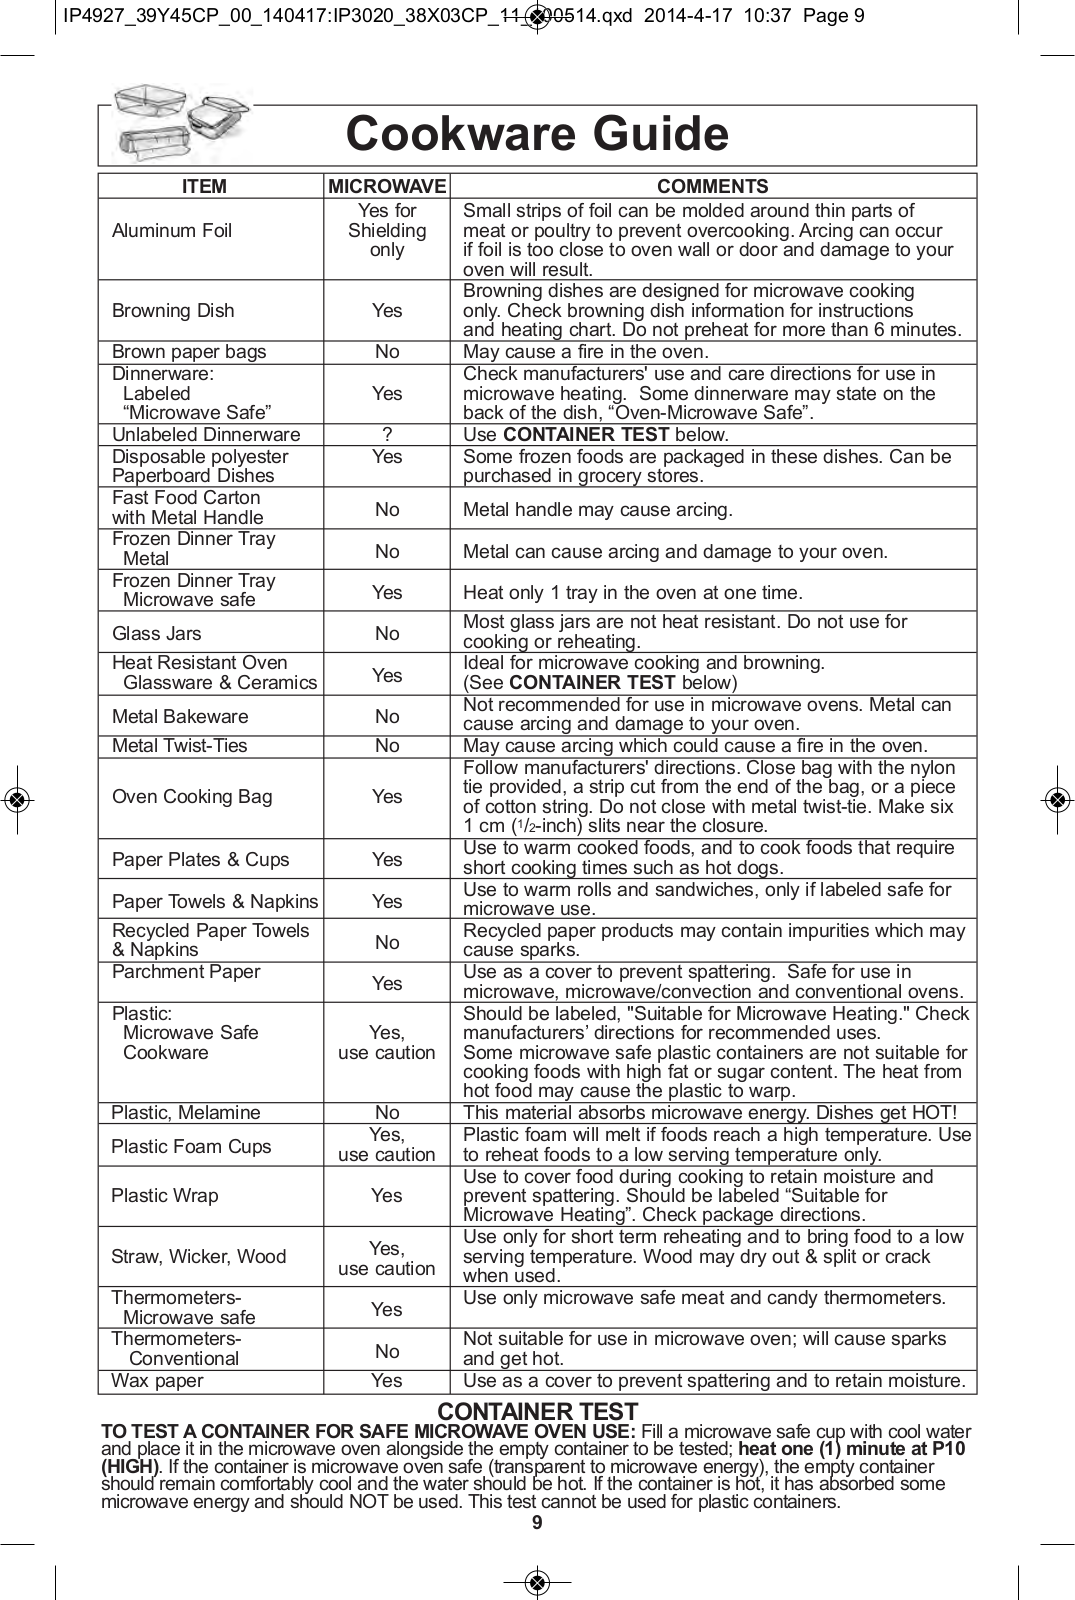
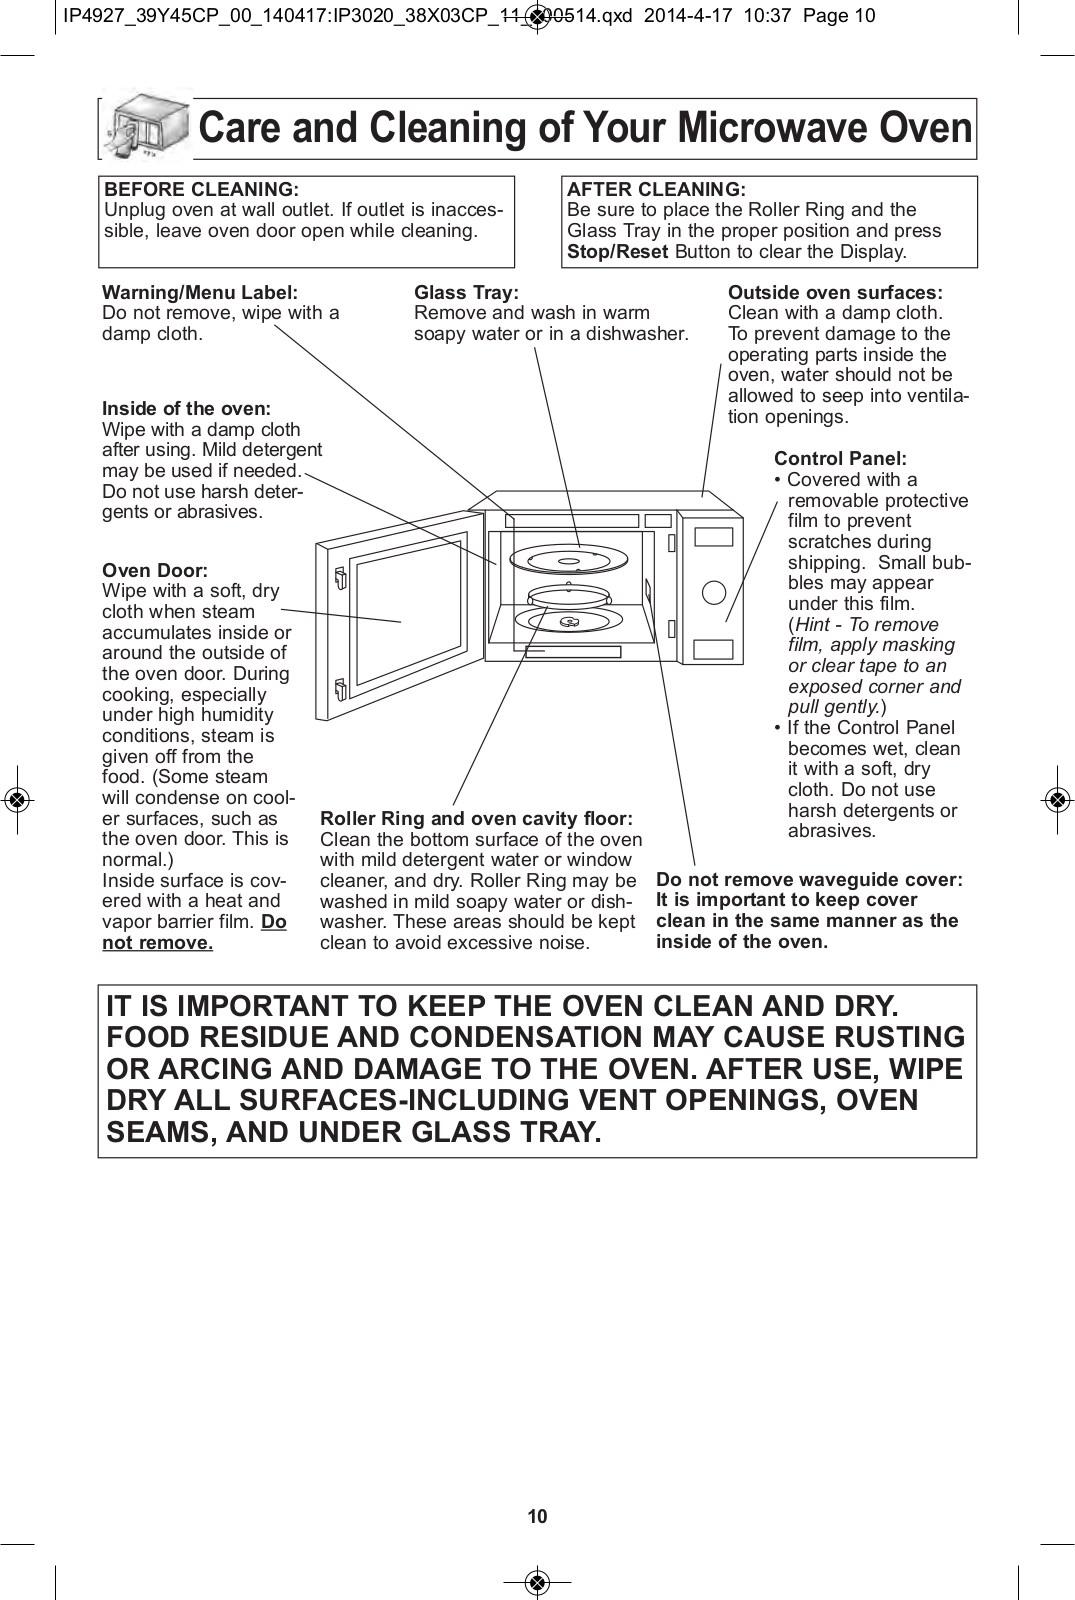
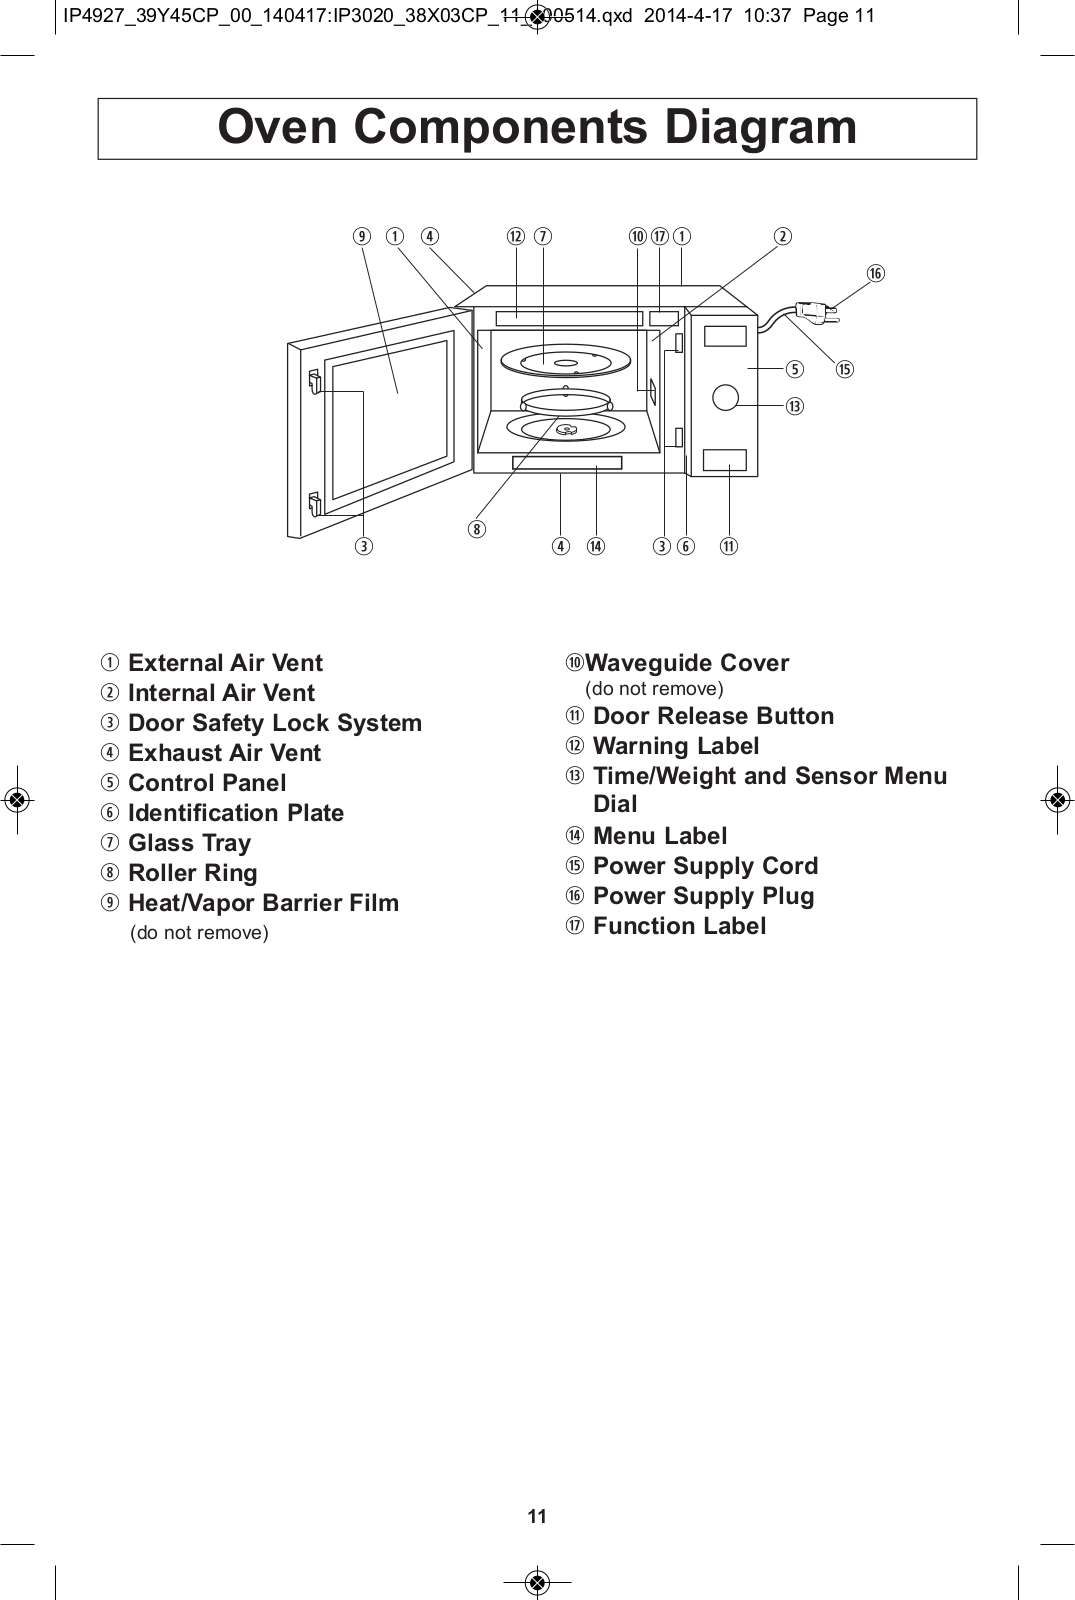
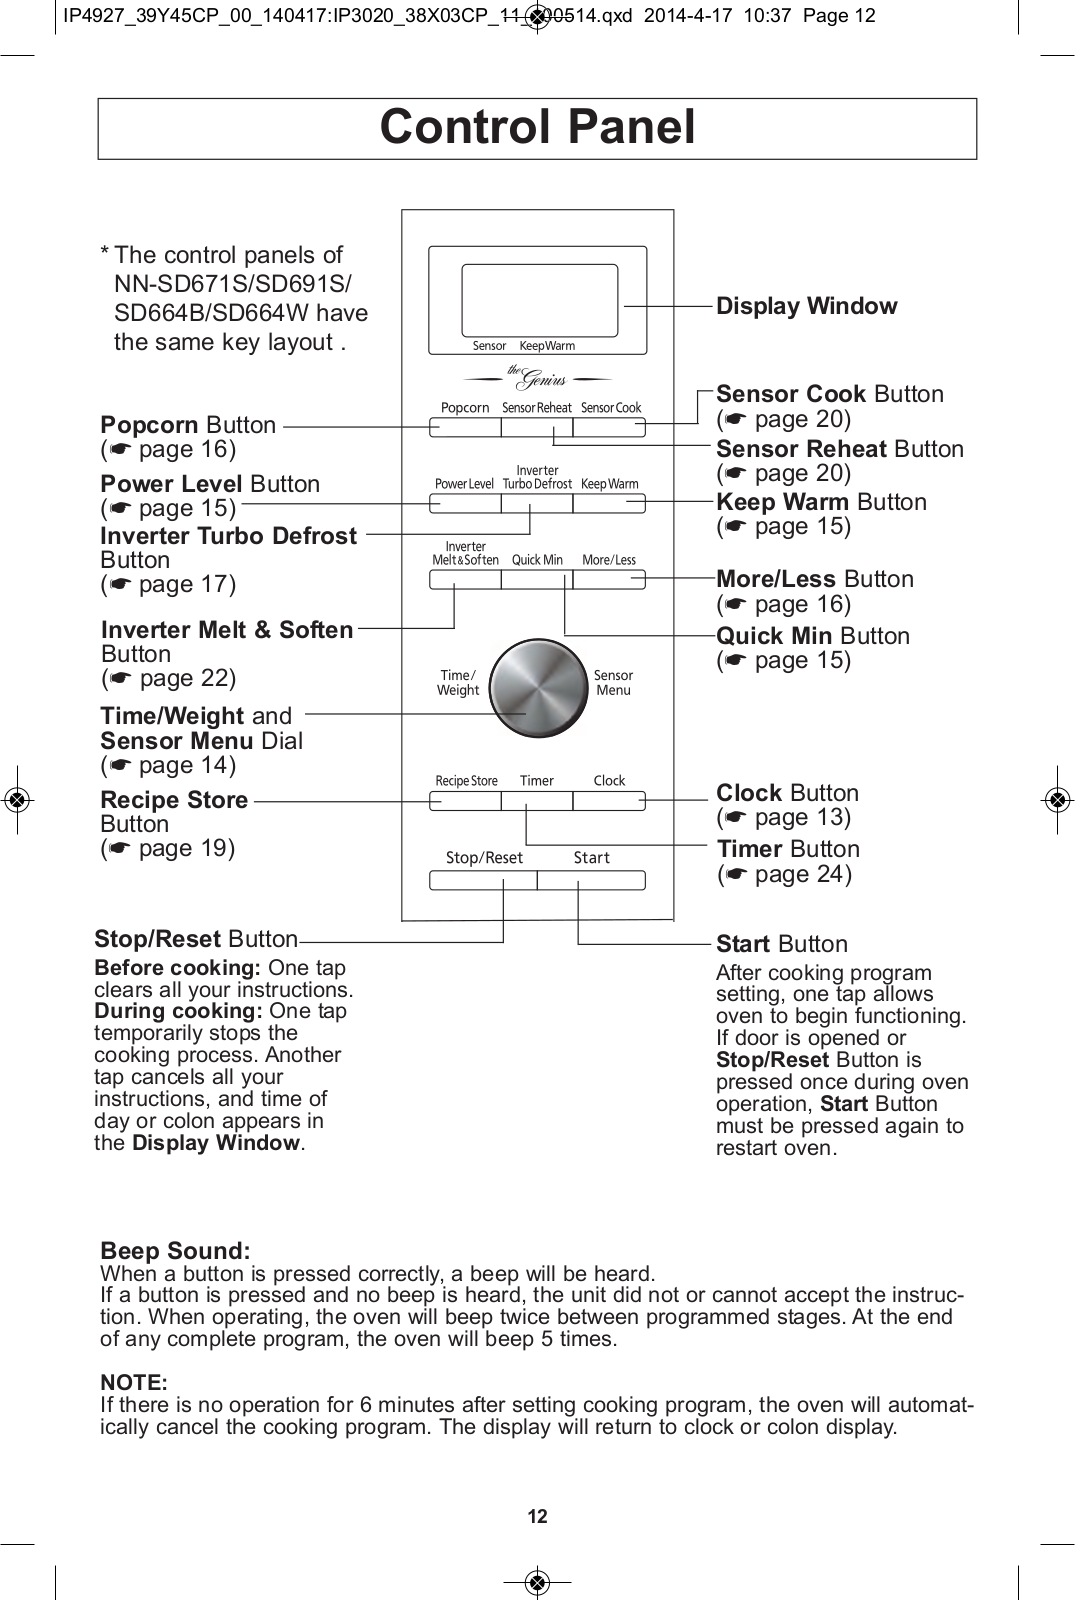
Panasonic NN-SD671S, NN-SD691S, NN-SD664B, NN-SD664W Operating Instructions
...
Panasonic Operating Instructions
Download
Specifications and Main Features
Frequently Asked Questions
User Manual
Download
Loading...
+
47
hidden pages
Unhide
You need points to download manuals.
1 point = 1 manual.
You can buy points or you can get point for every manual you upload.
Buy points
Upload your manuals