

Page 1
Operating Instructions
Mode d’emploi
Gebruiksaanwijzing
Microwave Oven
Four à Micro-ondes
Magnetronoven
Household Use Only
Utilisation Domestique Uniquement
Uitsluitend voor huishoudelijk gebruik
English Français
Nederlands
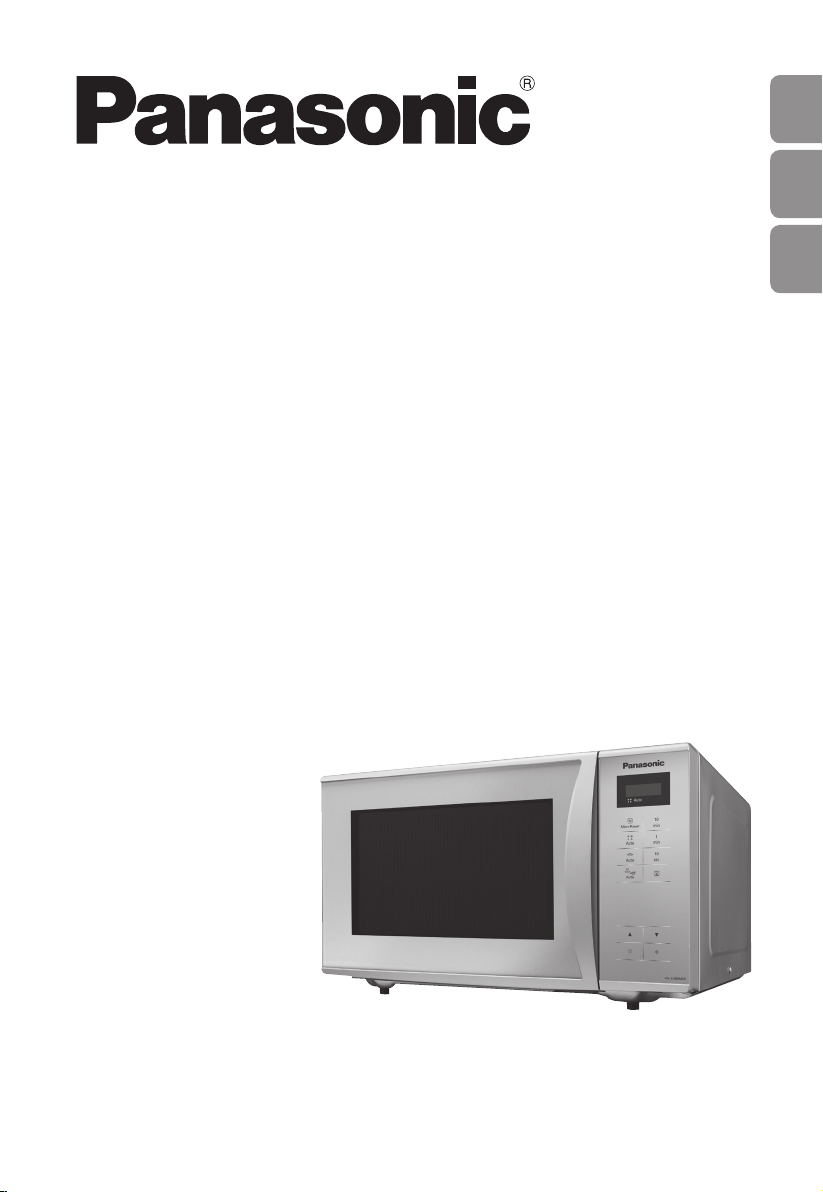
Model No.: NN-E486MM
Page 2

Page 3

Important safety instructions. Before operating this oven,
please read these instructions carefully and keep for future
reference.
Warning! The appliance should be inspected for damage
to the door seals and door seal areas and if these areas
are damaged the appliance should not be operated until
it has been repaired by a service technician trained by the
manufacturer.
Warning! Do not attempt to tamper with or make any
adjustments or repairs to the door, control panel housing,
safety interlock switches or any other part of the oven.
Do not remove the outer panel from the oven which gives
protection against exposure to microwave energy. Repairs
should only be by a qualified service person.
Warning! Liquids and other foods must not be heated in
sealed containers since they are liable to explode.
Warning! Do not place this oven near an electric or gas
cooker range.
English
Warning! Only allow children to use the oven without
supervision when adequate instructions have been given
so that the child is able to use the oven in a safe way and
understands the hazards of improper use.
Warning! When heating liquids, e.g. soup, sauces and
beverages in your oven, overheating the liquid beyond
boiling point can occur without evidence of bubbling. This
could result in a sudden boil over of the hot liquid.
EN
1
Page 4

Warning! The contents of feeding bottles and baby food
jars are to be stirred or shaken. The temperature has to be
checked before consumption to avoid burns.
This appliance can be used by children aged from
8 years and above and persons with reduced physical,
sensory and mental capabilities or lack of experience and
knowledge if they have been given supervision or instruction
by a person responsible for their safety concerning the
use of the appliance in a safe way and understand the
hazards involved. Children shall not play with the appliance.
Cleaning and user maintenance shall not be made by
children without supervision. Keep the appliance and its
cord out of reach of children less than 8 years.
When this oven is installed, it should be easy to isolate
the appliance from the electricity supply by pulling out the
plug or operating a circuit breaker.
If the supply cord is damaged, it must be replaced by
the manufacturer or its service agent or a similarly qualified
person in order to avoid a hazard.
For Countertop use:
Allow 15 cm of space on the top of the oven, 10 cm at
the back, and 5 cm on both sides. If one side of the oven
is placed flush to wall, the other side or top must not be
blocked. Do not remove feet.
This oven is intended for counter-top use only. It is not
intended for Built-in use or for use inside a cupboard.
EN
2 3
Page 5

This appliance is intended to be used in household and
similar applications such as:
- staff kitchen areas in shops, offices and other working
environments;
- farm houses;
- by clients in hotels, motels and other residential
environments;
- bed and breakfast type environments.
When heating food in plastic or paper containers, check
the oven frequently as these types of containers ignite if
overheated.
If smoke is emitted or a fire occurs in the oven, press
Stop/Cancel button and leave the door closed in order to
stifle any flames. Disconnect the power cord, or shut off
power at fuse or circuit breaker panel.
Do not cook eggs in their shells and whole hard-boiled
eggs by MICROWAVE. Pressure may build up and the eggs
may explode, even after the microwave heating has ended.
English
Clean the inside of the oven, door seals and door seal
areas regularly. When food splatters or spilled liquids adhere
to the oven walls, door seals and door seal areas wipe off
with a damp cloth. Mild detergent may be used if they get
very dirty. The use of harsh detergent or abrasive is not
recommended.
DO NOT USE COMMERCIAL OVEN CLEANERS.
Failure to maintain the oven in a clean condition could
lead to deterioration of surfaces that could affect the life of
the appliance and possibly result in a hazardous situation.
EN
Page 6

A steam cleaner is not to be used for cleaning.
Do not use harsh, abrasive cleaners or sharp metal
scrapers to clean the oven door glass since they can
scratch the surface, which may result in shattering of the
glass.
This appliance is not intended to be operated by means
of an external timer or separate remote-control system.
Only use utensils that are suitable for use in microwave
ovens.
The microwave oven is intended for heating food and
beverages only. Take care when heating foods low in
moisture, e.g. bread items, chocolate, biscuits and pastries.
These can easily burn, dry out or catch on fire if cooked
too long. We do not recommend heating foods low in
moisture such as popcorn or poppodums. Drying of food,
newspapers or clothing and heating of warming pads,
slippers, sponges, damp cloth, wheat bags, hot water
bottles and similar may lead to risk of injury, ignition or fire.
The oven lamp must be replaced by a service technician
trained by the manufacturer. DO NOT attempt to remove
the outer casing from the oven.
EN
4 5
Page 7

Contents
Installation and connection ��������������������������������������������������������������������������������������������������������6
Placement of your oven �����������������������������������������������������������������������������������������������������������6-7
Important safety instructions������������������������������������������������������������������������������������������������� 7-10
Parts of your oven �������������������������������������������������������������������������������������������������������������������� 11
Control panel ���������������������������������������������������������������������������������������������������������������������������� 12
Setting the clock����������������������������������������������������������������������������������������������������������������������� 13
Child safety lock ����������������������������������������������������������������������������������������������������������������������� 13
Microwave cooking and defrosting ������������������������������������������������������������������������������������������14
Multi-stage cooking ������������������������������������������������������������������������������������������������������������������ 15
Using the timer ������������������������������������������������������������������������������������������������������������������������� 16
Auto weight defrost ������������������������������������������������������������������������������������������������������������������ 17
Auto weight programs
Auto weight reheat programs �����������������������������������������������������������������������������������������������18
Auto weight cook programs�������������������������������������������������������������������������������������������������� 19
Questions and answers ������������������������������������������������������������������������������������������������������������20
English
Care of your oven ���������������������������������������������������������������������������������������������������������������������21
Specifications ���������������������������������������������������������������������������������������������������������������������������22
Thank you for purchasing a Panasonic Microwave Oven.
EN
Page 8

Installation and connection
Examine your microwave oven
Unpack the oven, remove all packing
material, and examine the oven for any
damage such as dents, broken door
latches or cracks in the door. If you
find any damage, notify your dealer
immediately. Do not install a damaged
microwave oven.
Placement of your oven
This oven is intended for counter-top use
only. It is not intended for Built-in use or
for use inside a cupboard.
1. Place the oven on a flat and stable
surface more than 85 cm above the
floor.
2. When this oven is installed, it should
be easy to isolate the appliance
from the electricity supply by pulling
out the plug or operating a circuit
breaker.
3. For proper operation, ensure a
sufficient air circulation for the oven.
Counter-top use:
Allow 15 cm of space on the top of
the oven, 10 cm at the back, and
5 cm on both sides. If one side of the
oven is placed flush to wall, the other
side or top must not be blocked. Do
not remove feet.
15 cm
Earthing instructions
Important!
THIS UNIT HAS TO BE PROPERLY
EARTHED FOR PERSONAL SAFETY.
If your AC outlet is not earthed, it is the
personal responsibility of the customer to
have it replaced with a properly earthed
wall socket.
Operation voltage
The voltage has to be the same as
specified on the label on the oven. If a
higher voltage than specified is used, it
may cause a fire or other damages.
4. Do not place this oven near an
electric or gas cooker range.
5. The power cord should not touch
the outside of the oven. Keep the
cord away from hot surfaces. Do not
let the cord hang over the edge of a
table or work top. Do not immerse
the cord, plug or oven in water.
6. The feet should not be removed.
7. This appliance is intended to be
used in household and similar
applications such as:
- staff kitchen areas in shops, offices
and other working environments;
- farm houses;
- by clients in hotels, motels and
other residential environments;
- bed and breakfast type
environments.
Do not use outdoors.
8. Avoid using the oven in high
humidity.
counter top
open
10 cm
EN
6 7
Page 9

Placement of your oven
9. Do not block the air vents on the
top, sides and back of the oven. If
these openings are blocked during
operation the oven may overheat. In
this case the oven is protected by a
thermal safety device and resumes
operation only after cooling down.
10. This appliance is not intended to be
Important safety instructions
1. The door seals and seal areas should
be cleaned with a damp cloth. The
appliance should be inspected
for damage to the door seals and
door seal areas and if these areas
are damaged the appliance should
not be operated until it has been
repaired by a service technician
trained by the manufacturer.
2. Do not attempt to tamper with or
make any adjustments or repairs
to the door, control panel housing,
safety interlock switches or any
other part of the oven. Do not
remove the outer panel from the
oven which gives protection against
exposure to microwave energy.
Repairs should only be carried out
by a qualified service person.
3. Do not operate this appliance if it
has a damaged CORD OR PLUG,
if it is not working properly, or if it
has been damaged or dropped. It
is dangerous for anyone other than
a service technician trained by the
manufacturer to perform repair
service.
5. Only allow children to use the oven
6. Liquids and other foods must not be
7. This appliance can be used by
English
operated by means of an external
timer or separate remote-control
system.
without supervision when adequate
instructions have been given so that
the child is able to use the oven in
a safe way and understands the
hazards of improper use.
heated in sealed containers since
they are liable to explode.
children aged from 8 years and
above and persons with reduced
physical, sensory and mental
capabilities or lack of experience
and knowledge if they have been
given supervision or instruction by
a person responsible for their safety
concerning the use of the appliance
in a safe way and understand the
hazards involved. Children shall not
play with the appliance. Cleaning
and user maintenance shall not
be made by children without
supervision. Keep the appliance and
its cord out of reach of children less
than 8 years.
4. If the supply cord is damaged,
it must be replaced by the
manufacturer or its service agent or
a similarly qualified person in order
to avoid a hazard.
EN
Page 10

Important safety instructions
Use of your oven
Do not use the oven for any reason
other than the preparation of food�
This oven is specifically designed to
heat or cook food� Do not use this
oven to heat chemicals or other nonfood products�
Before use, check that utensils/
containers are suitable for use in
microwave ovens�
When the oven is not being used,
do not store any objects inside the
oven in case it is accidentally turned
on�
The appliance must not be operated
WITHOUT FOOD IN THE OVEN�
Operation in this manner may damage
the appliance�
If smoke is emitted or a fire occurs in
the oven, press Stop/Cancel button
and leave the door closed in order
to stifle any flames� Disconnect the
power cord, or shut off power at fuse
or circuit breaker panel�
Fan Motor operation
After using the oven the fan motor
may rotate for a few minutes to cool
the electric components� This is
normal and you can take out food
even though the fan motor operates�
You can continue using the oven
during this time�
Glass tray
Do not operate the oven without the
roller ring and the glass tray in place�
Never use another type of glass tray
than the one specially designed for
this oven�
If the glass tray is hot, let it cool
before cleaning or placing in water�
The glass tray can turn in either
direction�
If the food or cooking vessel on the
glass tray touches the oven walls and
stops the tray rotating, the tray will
automatically rotate in the opposite
direction� This is normal�
Do not cook foods directly on the
glass tray�
Roller ring
The roller ring and the oven floor
should be cleaned frequently to
prevent noise and build-up of
remaining food�
The roller ring must always be used
for cooking together with the glass
tray�
Cooking times
The cooking time depends on the
condition, temperature, amount of
food and on the type of cookware�
Oven light
When it becomes necessary to
replace the oven light, please consult
your dealer�
Accessories
The oven comes equipped with a
variety of accessories� Always follow
the directions given for use of the
accessories�
Begin with the minimum cooking time
to help prevent overcooking� If the
food is not sufficiently cooked you can
always cook it for a little longer�
Important!
If the recommended cooking times are
exceeded the food will be spoiled and
in extreme circumstances could catch
fire and possibly damage the interior
of the oven.
EN
8 9
Page 11

Important safety instructions
English
Small quantities of foods
Small quantities of food or foods with
low moisture content can burn, dry
out or catch on fire if cooked too long�
If materials inside the oven should
ignite, keep the oven door closed, turn
the oven off and remove the plug from
the socket�
Foods low in moisture
The microwave oven is intended for
heating food and beverages only�
Take care when heating foods low in
moisture, e�g� bread items, chocolate,
biscuits and pastries� These can easily
burn, dry out or catch on fire if cooked
too long� We do not recommend
heating foods low in moisture such
as popcorn or poppodums� Drying
of food, newspapers or clothing and
heating of warming pads, slippers,
sponges, damp cloth, wheat bags, hot
water bottles and similar may lead to
risk of injury, ignition or fire�
Eggs
Do not cook eggs in their shells
and whole hard-boiled eggs by
MICROWAVE� Pressure may build up
and the eggs may explode, even after
the microwave heating has ended�
Piercing Skin
Food with non porous skins, such as
potatoes, egg yolks and sausages
must be pierced before cooking by
MICROWAVE to prevent bursting�
Meat thermometer
Use a meat thermometer to check
the degree of cooking of roasts and
poultry only when the meat has been
removed from the oven� Do not use a
conventional meat thermometer in the
microwave oven because it may cause
sparking�
Liquids
When heating liquids, e�g� soup,
sauces and beverages in your
microwave oven, overheating the
liquid beyond boiling point can occur
without evidence of bubbling� This
could result in a sudden boil over of
the hot liquid�
To prevent this possibility the following
steps should be taken:
a Avoid using straight-sided
containers with narrow necks�
b Do not overheat�
c Stir the liquid before placing the
container in the oven and again
halfway through the cooking
time�
d After heating, allow it to stand
in the oven for a short time, stir
again before carefully removing
the container�
Paper/plastic
When heating food in plastic or paper
containers, check the oven frequently
as these types of containers ignite if
overheated�
Do not use recycled paper products
(e�g� Kitchen Roll) unless the paper
product is labelled as safe for
microwave oven use� Recycled paper
products may contain impurities which
may cause sparks and/or fires during
use�
Remove wire twist-ties from roasting
bags before placing the bags in the
oven�
EN
Page 12

Important safety instructions
Utensils/foil
Do not heat any closed cans or bottles
because they might explode�
Metal containers or dishes with
metallic trim should not be used during
microwave cooking� Sparking will
occur�
If you use any aluminium foil, meat
spikes or metalware the distance
between them and the oven walls
and door should be at least 2 cm to
prevent sparking�
Feeding bottles/baby food jars
The top and teat or lid must be
removed from feeding bottles or baby
food jars before placing in the oven�
The contents of feeding bottles and
baby food jars are to be stirred or
shaken�
The temperature has to be checked
before consumption to avoid burns�
EN
10 11
Page 13
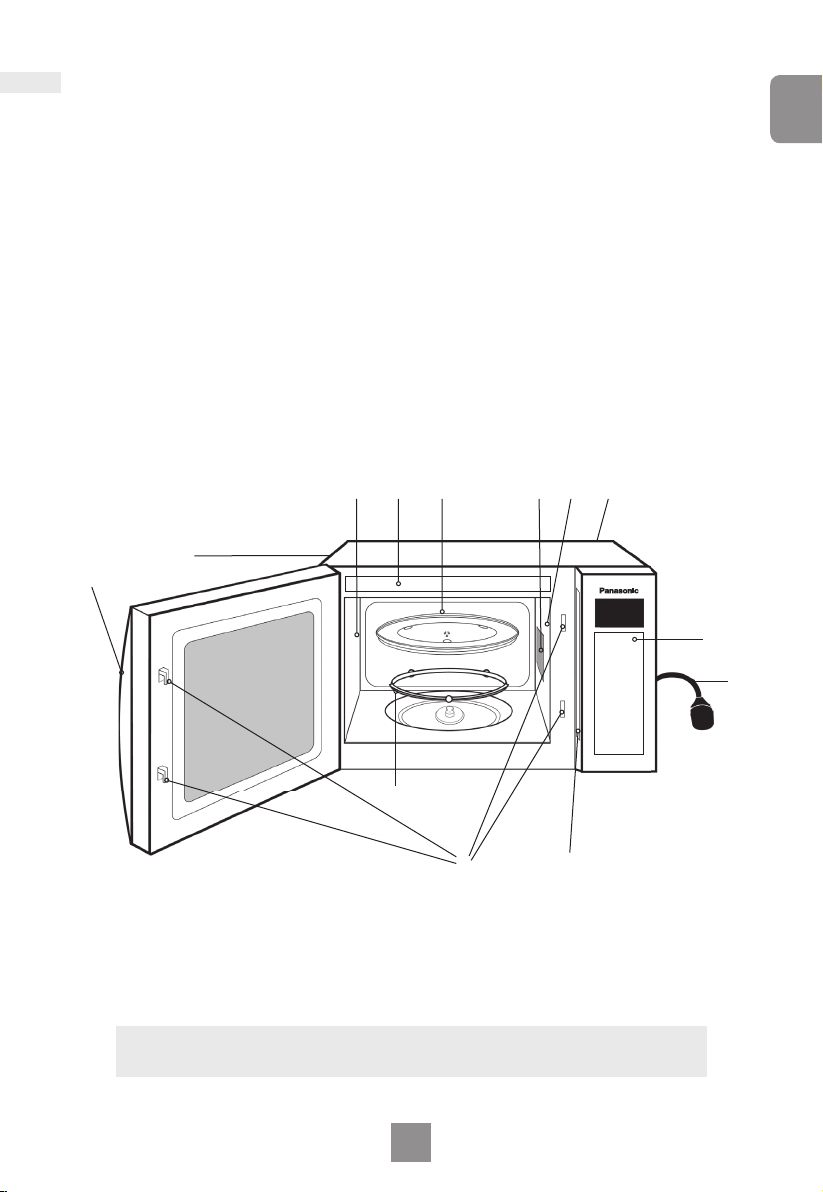
Parts of your oven
1. Door handle
Pull handle to open the door. When
you open the oven door during
cooking, the cooking is stopped
temporarily without clearing earlier
made settings. The cooking is
resumed as soon as the door is
closed and Start is pressed.
2. Oven window
3. Door safety lock system
4. Oven air vent
5. Microwave feed guide
(do not remove)
English
6. External oven air vents
7. Control panel
8. Power supply cord
9. Plug
10. Identifi cation Label
11. Glass tray
12. Roller ring
13. Menu Label
6
1
2
Caution label is attached on the outside surface.
Note
This illustration is for reference only.
12
13
11
3
4
4 6
5
7
8
9
10
EN
Page 14
Control panel
Auto
2
4
5
6
8
Micro Power
Auto
Auto
Auto
10
min
min
10
sec
1. Display window
2. Microwave power levels button
3. Time buttons
4. Auto weight defrost button
1
5. Auto weight reheat button
6. Auto weight cook button
7. Timer button
8. Plus/Minus weight selection
1
3
control buttons
9. Stop/Cancel button:
Before Cooking:
One press clears your instructions.
During Cooking:
7
One press temporarily stops the
cooking program. Another press
cancels all your instructions and the
time of day will appear in the display.
10. Start button
N.B. The design of your control panel may vary
from the panel displayed (depending on colour),
but the functionality will remain the same.
9
10
Beep sound
When a button is pressed correctly a
NN-E486MM
beep will be heard. If a button is pressed
and no beep is heard, the unit has not or
cannot accept the instruction. At the end
of any complete program, the oven will
beep 5 times.
EN
12 13
Page 15

Setting the clock
When the oven is first plugged in “88.88” appears in display window.
Example: 11:25am
Press eleven times
(to set hours.)
Press five times
(to set 1 mins.)
English
min
1
10
sec
Press Timer.
The colon stops blinking.
Time of day is now locked
into the display.
Press Timer twice.
A colon starts to blink.
10
min
Press twice
(to set 10 mins.)
Enter time of day by pressing
appropriate Time buttons.
Notes
1. To reset time of day, repeat step 1 through to step 3, as above.
2. The clock will keep the time of day as long as the oven is plugged in and
electricity is supplied.
3. This is a 24 hour clock, ie 2 pm = 14:00 not 2:00.
Child safety lock
Using this system will make the oven controls inoperable; however, the door can be opened.
Child Lock can be set when the display shows a colon or the time.
To Set: To Cancel:
Press Start three times.
The time of day will disappear. Actual time
will not be lost. ‘L ---’ is indicated in the
display.
Press Stop/Cancel three times.
The time of day will reappear in the
display.
Note
To activate child lock, Start must be pressed 3 times within a 10 second period.
EN
Page 16
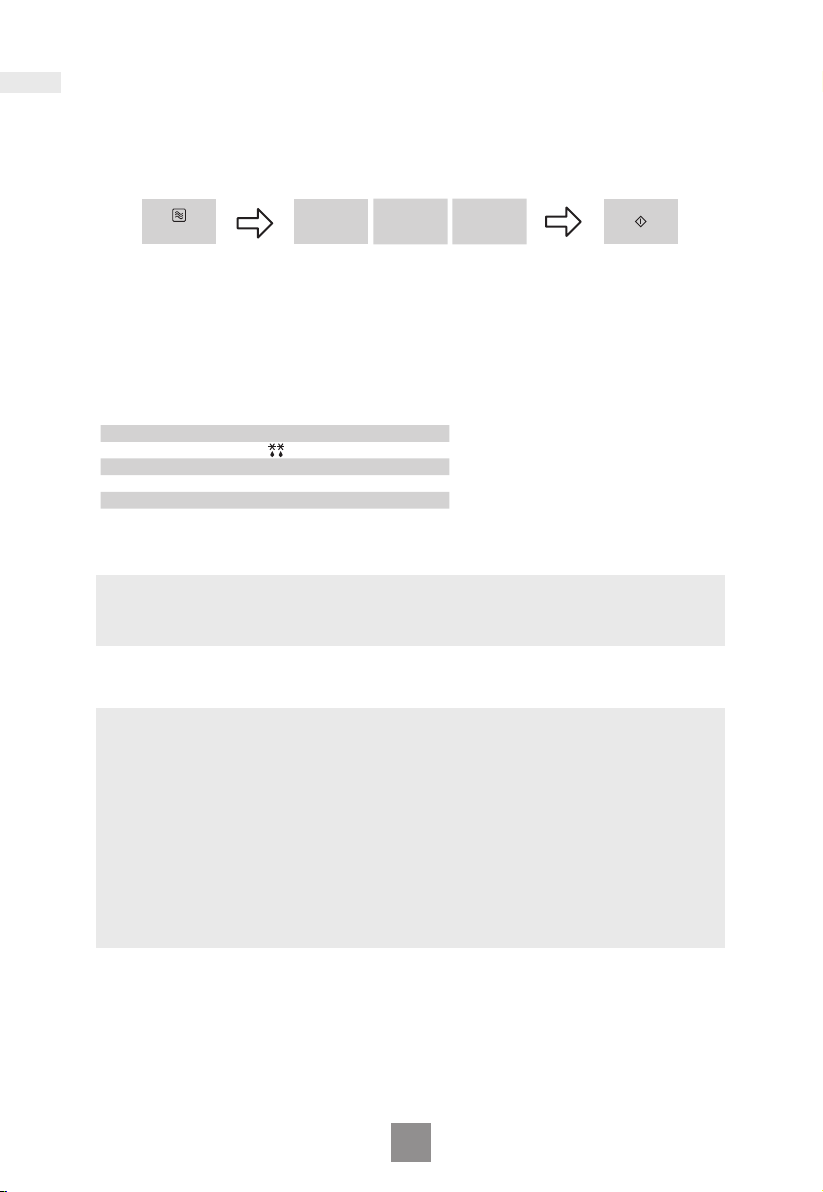
Microwave cooking and defrosting
The glass tray must always be in position when using the oven.
Micro Power
Press Microwave Power.
Select desired power level.
1 Press High 800 Watts
2 Presses
3 Presses
4 Presses
5 Presses 80 Watts
Defrost
Medium High
Medium
Low
10
min
Set the cooking time by pressing
the appropriate buttons. Your
oven can be programmed for up
to 99 minutes 50 secs in Medium,
Low, Simmer and Defrost power.
High power can be programmed for
30 minutes.
240 Watts
560 Watts
440 Watts
min
1
10
sec
Press Start.
The cooking program
will count down.
CAUTION!
The oven will automatically work on MAX microwave power if a cooking time is
entered without the power level previously being selected.
Notes
1. For multi-stage cooking refer to page 15 EN.
2. Standing Time can be programmed after microwave power and time setting.
Refer to using the timer page 16 EN.
3. You can not change the cooking time during cooking.
4. DO NOT attempt to use microwave only with any metal accessory in the oven.
5.
Always check the food during defrosting by opening the door then restarting
the defrosting. It is not necessary to cover food during defrosting. To ensure an
even result, stir, turn or separate several times during defrosting. For large joints
and poultry turn halfway through defrosting and protect ends and tips with foil.
EN
14 15
Page 17
Multi-stage cooking
This feature allows you to program up to 3 stages of cooking continuously.
Example: To set High power for 5 minutes and Low power for 10 minutes.
English
Micro Power Micro Power
Set Microwave
power. Press
once to select
10
min
Set cooking time. Set as
5 minutes by using Time buttons.
High power.
min
10
min
1
Set cooking time. Set as
10 minutes by using Time
buttons.
min
1
10
sec
Set Microwave Power.
Press 5 times to select
Low power.
10
sec
Press Start. The time
will count down at the
first stage in the display
window.
Notes
1. For 3 stage cooking, enter another cooking program before pressing start.
2. During operation, pressing Stop/Cancel once will stop the operation. Pressing Start
will re-start the programmed operation. Pressing Stop/Cancel twice will stop and
clear the programmed operation.
3. Whilst not operating, pressing Stop/Cancel will clear the selected program.
4. Auto programs cannot be used with multi-stage cooking.
5. When operating, three beeps will sound between each stage.
EN
Page 18
Using the timer
Kitchen Timer
Example: To count 5 minutes.
5 times
1
10
min
Press once.
Press 5 times. Set desired amount
of time. (up to 99 min 50 secs)
Standing time
By using the Timer, you can program Standing Time after cooking is completed or use to program
the oven as a minute timer.
Example: To stand for 5 minutes after cooking at 3 minutes at Medium microwave power.
3 times
10
min
sec
Press Start. Time will
count down without
the oven operating.
5 times
Micro Power
Press 3 times.
Set the desired
cooking program.
(See page 14 EN
for instructions.)
1
10
min
min
Press 3 times.
Set the desired
cooking time.
10
sec
Press once.
Press 5 times. Set
the desired amount
of standing time.
(up to 99 min 50
10
min
secs)
1
10
min
sec
Press Start.
Cooking starts.
After cooking,
standing time
will count down
without the
oven operating.
Delay start cooking
By using the Timer, you are able to program Delay Start cooking.
Example: To start cooking 5 minutes later at 3 mins. Medium microwave power.
5 times
1
Press once.
10
min
Press 5 times. Set
the desired amount
of delay time. (up to
99 min 50 secs)
10
min
sec
Micro Power
Press 3 times.
Set the desired
cooking program.
(See page 14 EN
for instructions.)
Notes
1. Multi-stage cooking can be programmed including Delay Start and Standing Time.
2. If the oven door is opened during the Delay Start, Standing Time or Minute Timer,
the time in the display window will continue to count down.
3. Standing Time/Delay Start cannot be programmed before/after an auto program.
4. If the programmed delay time exceeds one hour, the time will count down in units of
minutes. If less than one hour, the time will count down in units of seconds.
3 times
1
10
min
min
Press 3 times.
Set the desired
cooking time.
10
sec
Press Start.
Delayed time
will count
down, then
start cooking.
EN
16 17
Page 19
Auto weight defrost
With this feature you can defrost frozen food according to the weight. Select the category
and set the weight of the food. The weight is programmed in grams. For quick selection, the
weight starts from the most commonly used weight for each category.
Auto
English
Select the desired auto
weight defrost program.
The auto program number
appears in the display.
Program
1. SMALL
PIECES
Auto
1 press
2. BIG PIECE
Auto
2 presses
3. BREAD/CAKE
Auto
3 presses
Set the weight of the frozen food
by using the plus/minus weight
selection control buttons.
The weight counts up/down in
10 g increments.
Min./Max.
Weight
200 g - 1000 g
600 g - 1600 g
100 g - 600 g
Press Start.
Remember to stir or
turn the food during
defrosting.
Instructions
Small pieces of meat, escallop, sausages, minced meat,
steak, chops, fish fillets (each 100 g to 400 g). Turn and
shield at beeps. Allow to stand for 15 min to 30 mins.
Big pieces of meat, whole chickens, meat joints. Whole
chickens and meat joints will require shielding during
defrosting. Protect wings, breast and fat with smooth
pieces of aluminum foil secured with cocktail sticks. Do
not allow the foil to touch the walls of the oven. Standing
time of 1 to 2 hours should be allowed before cooking.
Turn and shield at beeps.
For bread (whole, slices, rolls) and cakes. Cream cakes
and iced cakes are unsuitable for this program. Place the
bread or cake on a large plate or shallow pyrex dish. Press
auto weight defrost three times and turn at beep. Allow
bread to stand for 10 min (white light bread) to 30 min
(dense rye bread). Cut large loaves in half during standing
time.
Notes
1. When defrosting time is over 60 minutes the time will appear as hours and minutes.
2. The shape and size of the food will determine the maximum weight the oven can
accommodate.
3. Allow standing time to ensure the food is completely defrosted.
EN
Page 20
Auto weight programs
This feature allows you to cook your favourite foods by setting the weight only. The oven
determines microwave power level and cooking time automatically. Select the category and
set the weight of the food. The weight is programmed in grams. For quick selection, the weight
starts from the most commonly used weight for each category.
Auto
Select the desired
auto weight reheat/
cook program. The
auto program number
appears in the display.
Set the weight of the food by
using the plus/minus weight
selection control buttons.
The weight counts up/down in
10 g increments.
Press Start.
Notes
1. The Auto Weight Programs must ONLY be used for foods described.
2. Only cook foods within the weight ranges described.
3. Always weigh the food rather than relying on the package information.
4. Most foods benefit from a STANDING time, after cooking with an Auto Program, to
allow heat to continue conducting to the centre.
5. To allow for some variations that occur in food, check that food is thoroughly
cooked and piping hot before serving.
Auto weight reheat programs
Program Weight Instructions
To reheat a fresh pre-cooked meal. All foods must
be pre-cooked. Foods should be at refrigerator
temperature approx. +5 °C. Reheat in container as
1. CHILLED MEAL
200 g - 800 g
Auto
1 press
2. FROZEN MEAL
g - 600 300
Auto
2 presses
purchased. Pierce covering film with a sharp knife
once in the centre and four times around the edge.
If transferring food to a dish, cover with pierced
cling film. Place container on glass tray. Stir at
beeps. Stir again at end of program and allow a
few minutes standing time. Large pieces of meat/
fish in a thin sauce may require longer cooking.
This program is not suitable for starchy foods such
as rice, noodles or potatoes. Meals in irregular
bowl shaped containers may need longer cooking.
To reheat a frozen pre-cooked meal. All foods
must be pre-cooked and frozen (-18 °C). Reheat in
container as purchased. Pierce covering film with
a sharp knife once in the centre and four times
around the edge. If transferring food to a dish,
cover with pierced cling film. Place container on
g
glass tray. Stir at beeps and cut the blocks into
pieces. Stir again at end of program and allow a
few minutes standing time. Large pieces of meat/
fish in a thin sauce may require longer cooking.
This program is not suitable for starchy foods such
as rice, noodles or potatoes. Meals in irregular
bowl shaped containers may need longer cooking.
EN
18 19
Page 21
Auto weight programs
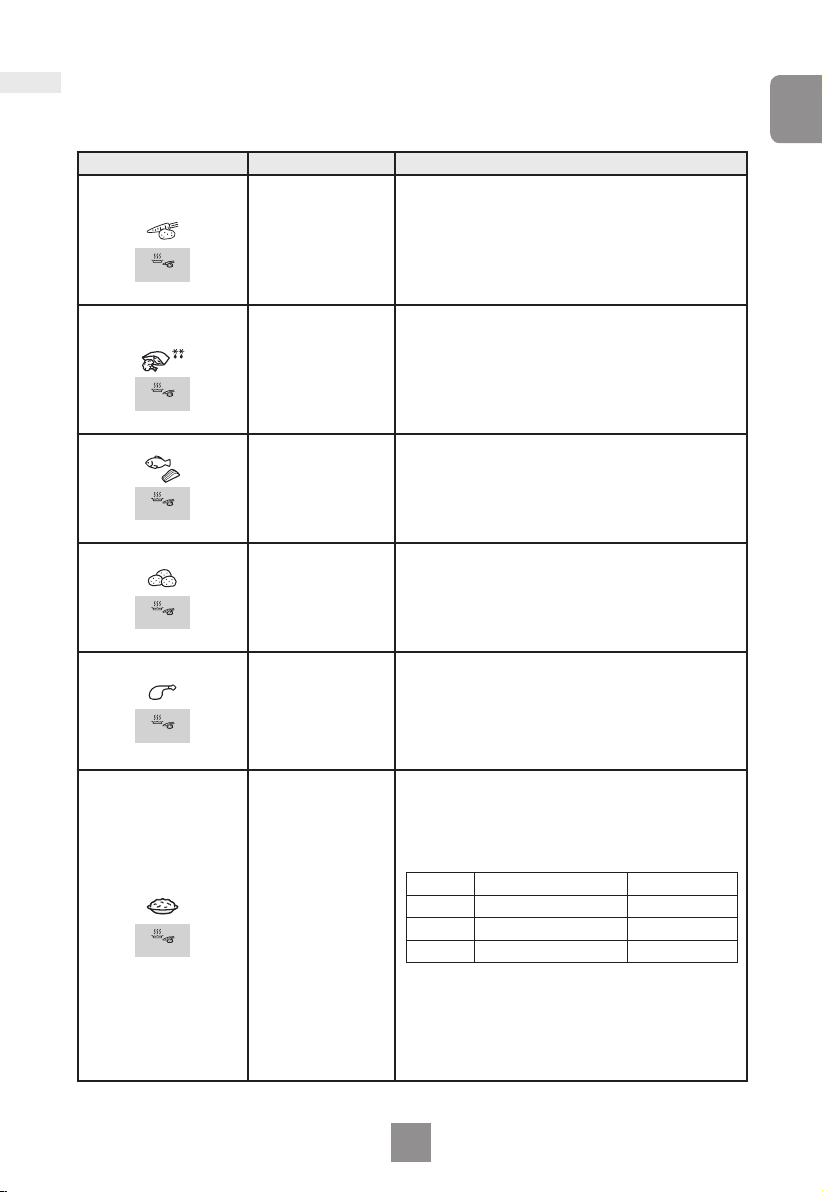
Auto weight cook programs
Program Weight Instructions
1. FRESH
VEGETABLES
Auto
1 press
2. FROZEN
VEGETABLES
Auto
2 presses
3. FRESH FISH
Auto
3 presses
4. POTATOES
Auto
4 presses
5. CHICKEN
Auto
5 presses
6. CASSEROLE RICE
Auto
6 presses
g - 800 g
100
100 g - 800 g
200 g - 700 g
200 g - 600 g
200 g - 800 g
100 g - 300 g
For cooking fresh vegetables like carrots,
broccoli, cauliflower and green beans. Place
prepared vegetables in a suitable sized container.
Sprinkle with 1 tbsp water per 100 g vegetables.
Cover with cling film. Pierce cling film with a knife
once in the centre and four times around the edge.
Stir at beeps.
Suitable for all types of frozen vegetables, like
frozen peas, sweetcorn or mixed vegetables.
Place prepared vegetables into a suitable size
microwave-safe casserole and add 2–6 tbsp of
water for desired. Cover with a well fitting lid. Stir
after the beep sounds. At the end of cooking, let it
covered and stand for 3 to 5 minutes.
For cooking fresh fish filets and steaks. Place
in a suitable sized container. Add 1–3 tbsp liquid.
Cover with cling film. Pierce cling film once in the
centre and four times around the edge. Allow a
few minutes standing time.
Suitable for cooking potatoes. Pare potatoes well
and cut into even size pieces. Place in a suitable
size microwave safe casserole. Cover with a well
fitting lid. Stir after beep sounds.
It is suitable for cooking chicken pieces such
as wings, drumsticks, thighs, half breasts etc.
Pierce the chicken pieces well with fork before
cooking. Place prepared chicken pieces in a
suitable size microwave safe casserole. Add
1–5 tbsp oil if desired. Cover with well fitting lid.
Stir after beep sounds.
Suitable for cooking white rice including short
grain, long grain, Jasmine and Basmati. Place
washed rice with recommended amount of cold
water in a suitable sized casserole. Allow at least
½ depth of volume for evaporation to prevent
boiling over. Use the following as a guide:
Rice Recommended Water Dish Size
100 g 150 ml 3 litre
200 g 300 ml 3 litre
300 g 450 ml 4.5 litre
(It may be necessary to adjust the amount of water
to your personal preference.)
Cover with a well fitting lid. Do not cook in plastic
containers unless suitable for high temperature
cooking. Stand rice for 5 to 10 minutes after
cooking, if necessary. This setting is not suitable
for cooking brown rice.
English
EN
Page 22

Questions and answers
Q: Why won’t my oven turn on?
A: When the oven does not turn on,
check the following:
1. Is the oven plugged in securely?
Remove the plug from the outlet,
wait 10 seconds and reinsert.
2. Check the circuit breaker and the
fuse.
Reset the circuit breaker or replace
the fuse if it is tripped or blown.
3. If the circuit breaker or fuse is all
right, plug another appliance into the
outlet. If the other appliance works,
there probably is a problem with the
oven. If the other appliance does not
work, there probably is a problem
with the outlet.
If it seems that there is a problem
with the oven, contact an authorised
Service Centre.
Q: My oven causes interference with my TV.
Is this normal?
A: Some radio and TV interference
might occur when you cook with
the oven. This interference is similar
to the interference caused by small
appliances such as mixers, vacuums,
blow dryers, etc. It does not indicate
a problem with your oven.
Q: Sometimes warm air comes from the oven
vents. Why?
A: The heat given off from the cooking
food warms the air in the oven cavity.
This warmed air is carried out of the
oven by the air flow pattern in the
oven. There are no microwaves in
the air. The oven vents should never
be blocked during cooking.
Q: Can I use a conventional oven
thermometer in the oven?
A: The metal in some thermometers
may cause arcing in your oven and
should not be used.
Q: The oven won’t accept my program. Why?
A: The oven is designed not to accept
an incorrect program. For example,
the oven will not accept a fourth
stage.
EN
20 21
Page 23

Care of your oven
1. Turn the oven off before cleaning.
2. Clean the inside of the oven, door
seals and door seal areas regularly.
When food splatters or spilled liquids
adhere to the oven walls, door seals
and door seal areas wipe off with a
damp cloth. Mild detergent may be
used if they get very dirty. The use
of harsh detergent or abrasive is not
recommended.
DO NOT USE COMMERCIAL OVEN
CLEANERS.
3. Do not use harsh, abrasive cleaners
or sharp metal scrapers to clean
the oven door glass since they can
scratch the surface, which may
result in shattering of the glass.
4. The outside oven surface should
be cleaned with a damp cloth. To
prevent damage to the operating
parts inside the oven, water should
not be allowed to seep into the
ventilation openings.
5. If the Control Panel becomes dirty,
clean it with a soft, dry cloth. Do not
use harsh detergents or abrasives
on the Control Panel. When cleaning
the Control Panel leave the oven
door open to prevent the oven
from accidentally turning on. After
cleaning touch STOP/CANCEL
button to clear display window.
6. If steam accumulates inside or
around the outside of the oven door,
wipe with a soft cloth. This may
occur when the oven is operated
under high humidity conditions and
in no way indicates a malfunction of
the unit.
English
8. The roller ring and oven cavity floor
should be cleaned regularly to avoid
excessive noise. Simply wipe the
bottom surface of the oven with
mild detergent and hot water then
dry with a clean cloth. The roller ring
may be washed in mild soapy water.
Cooking vapours collect during
repeated use but in no way affects
the bottom surface or roller ring
wheels. After removing the roller ring
from the cavity floor for cleaning,
be sure to replace it in the proper
position.
9. A steam cleaner is not to be used for
cleaning.
10. This oven should only be serviced by
qualified personnel. For maintenance
and repair of the oven contact the
nearest authorised dealer.
11. Failure to maintain the oven in
a clean condition could lead to
deterioration of surfaces that could
affect the life of the appliance and
possibly result in a hazardous
situation.
12. Keep air vents clean at all times.
Check that no dust or other material
is blocking any of the air vents on
the top, bottom or rear of the oven. If
air vents become blocked this could
cause overheating which would
affect the operation of the oven
and possibly result in a hazardous
situation.
7. It is occasionally necessary to
remove the glass tray for cleaning.
Wash the tray in warm soapy water
or in a dishwasher.
EN
Page 24

Specifications
Power Source: 230 V, 50 Hz
Power Consumption: Maximum 1270 W
Output: 800 W (IEC-60705)
Outside Dimensions:
485 mm (W) x 400 mm (D) x 287 mm (H)
Oven Cavity Dimensions:
315 mm (W) x 349 mm (D) x 227 mm (H)
Overall Cavity Volume: 25 L
Glass Tray Diameter: Ø288 mm
Operating Frequency: 2450 MHz
Net Weight: 12.7 kg
Noise: LWA 63 dB
Weight and Dimensions shown are
approximate.
This product is an equipment that
fulfills the European standard for EMC
disturbances
(EMC = Electromagnetic Compatibility)
EN 55011. According to this standard this
product is an equipment of group 2, class
B and is within required limits. Group 2
means that radio-frequency energy is
intentionally generated in the form of
electromagnetic radiation for purpose of
warming or cooking food. Class B means
that this product may be used in normal
household areas.
Information on Disposal for
Users of Waste Electrical &
Electronic Equipment
(private households)
This symbol on the products
and/or accompanying
documents means that used electrical and
electronic products should not be mixed
with general household waste.
For proper treatment, recovery and
recycling, please take these products to
designated collection points, where they
will be accepted on a free of charge basis.
Alternatively, in some countries you may
be able to return your products to your
local retailer upon the purchase of an
equivalent new product.
Disposing of this product correctly will
help to save valuable resources and
prevent any potential negative effects on
human health and the environment which
could otherwise arise from inappropriate
waste handling. Please contact your local
authority for further details of your nearest
designated collection point.
Penalties may be applicable for incorrect
disposal of this waste, in accordance with
national legislation.
For business users in the
European Union
If you wish to discard electrical and
electronic equipment, please contact your
dealer or supplier for further information.
Information on Disposal in other
Countries outside the European
Union
This symbol is only valid in the European
Union.
If you wish to discard this product,
please contact your local authorities or
dealer and ask for the correct method of
disposal.
Panasonic Corporation
Osaka, Japan
Imported by: Panasonic Marketing
Europe GmbH
Panasonic Testing Centre
Winsbergring 15, 22525 Hamburg,
Germany
22
EN
Page 25

INSTRUCTIONS DE SÛRETÉ IMPORTANTES. Avant
d’utiliser le four à micro-ondes, lisez attentivement les
recommandations d’utilisation et conservez-les soigneusement.
Attention! Nettoyez les joints d’étanchéité de la porte à
l’aide d’un linge humide. Vérifiez si l’appareil ne présente
pas de défaut au niveau des joints d’étanchéité. Si c’est le
cas, ne l’utilisez plus avant que ceux-ci aient été réparés
par un technicien agréé par le fabricant.
Attention! Ne tentez jamais de modifier, d’ajuster ou de
réparer la porte, le boîtier du panneau de commandes, les
commutateurs de verrouillage de sécurité ou tout autre
élément du four. Ne retirez pas le capot du four, car il sert de
protection contre les micro-ondes émises par le four. Confiez
exclusivement les réparations à du personnel qualifié.
Attention! Les aliments et les liquides ne doivent pas être
chauffés dans des récipients fermés hermétiquement car
ceux-ci risquent d’exploser.
Français
Attention! Ne placez pas le four à proximité d’une
cuisinière au gaz ou électrique.
Attention! Il ne faut laisser les enfants utiliser le four qu’à
la seule condition qu’ils en connaissent le fonctionnement
et soient à même de comprendre les dangers d’une
utilisation inappropriée.
Attention! Si on chauffe un liquide épais qui n’a pas
été remué, il risque de déborder et d’occasionner des
projections brûlantes pendant et après le réchauffage.
FR
1
Page 26

Attention! Mélangez ou agitez le contenu des biberons
et des petits pots. Vérifiez toujours la température des
aliments avant de les proposer à l’enfant afin d’éviter qu’il
se brûle.
Cet appareil peut être utilisé par les enfants à partir de
8 ans et par les personnes présentant des handicaps
moteurs, sensoriels et mentaux ou ayant un manque
d’expérience ou de connaissances lorsqu’elles sont
supervisées ou instruites par une personne responsable
de leur sécurité relative à l’utilisation de l’appareil de
manière sûre et lorsqu’elles comprennent les risques que
cela présente. Cet appareil n’est pas un jouet. L’appareil
ne peut être ni nettoyé ni entretenu par des enfants sans
supervision. Gardez l’appareil et son cordon hors de portée
des enfants de moins de 8 ans.
Une fois le four installé, il faut pouvoir facilement couper
son alimentation électrique, soit en retirant la prise murale
soit en actionnant un disjoncteur ou un fusible.
N’utilisez pas l’appareil si la PRISE ou le CORDON
D’ALIMENTATION est endommagé, s’il ne fonctionne
pas correctement, s’il est abîmé ou s’il est tombé. Il est
dangereux de confier la réparation de l’appareil à une
personne autre qu’un technicien formé par le fabricant.
Utilisation sur un plan de travail:
Laisser un espace de 15 cm en haut du four, de 10 cm
à l’arrière, de 5 cm sur les deux côtés. Si l’un des côtés du
four est placé à même le mur, l’autre côté ou le dessus du
four ne doit pas être bloqué. Ne pas enlever les pieds.
Ce four est prévu uniquement pour une utilisation sur
un plan de travail. Il n’est pas conçu pour une utilisation
intégrée ou à l’intérieur d’un placard.
FR
2 3
Page 27

Cet appareil est conçu pour être utilisé uniquement dans
des applications domestiques et similaires telles que :
- coins cuisines pour le personnel dans des magasins, des
bureaux et autres environnements de travail;
- fermes;
- par les clients dans des hôtels, des motels et d’autres
environnements résidentiels;
- environnements de type gîte touristique.
Si vous réchauffez des aliments dans des barquettes en
plastique ou en papier, surveillez régulièrement la cuisson,
car ces matériaux ont tendance à s’enflammer en cas de
surchauffe.
Si vous constatez la présence de fumée ou de flammes
dans le four, appuyez sur le bouton d’Arrêt/Annulation et
laissez la porte fermée de manière à étouffer les flammes.
Débranchez le cordon d’alimentation ou coupez le courant
au niveau du coupe-circuit ou du disjoncteur.
Ne cherchez pas à cuire des oeufs coques ou des oeufs
durs dans votre four à micro-ondes. Ils risquent d’exploser
sous l’effet de la pression, que ce soit pendant ou même
après la cuisson.
Français
Veillez à ce que l’intérieur du four et les joints de la porte
soient toujours propres. En cas de salissures tenaces
sur les parois, la sole céramique, les joints ou les zones
de joints de la porte, essuyez-les avec un linge humide.
Si le four est très sale, nettoyez-le à l’aide d’un produit
de nettoyage non décapant. L’utilisation de détergents
puissants ou abrasifs est vivement déconseillée.
NE PAS UTILISER DE PRODUITS NETTOYANTS POUR
FOURS TRADITIONNELS.
FR
Page 28

Il est indispensable de maintenir propre l’intérieur du
four. Le non respect de cette consigne peut entraîner
une détérioration notable des revêtements susceptible de
réduire la durée de vie de votre appareil et pourrait même
présenter un danger.
Ne pas utiliser de nettoyeur-vapeur pour le nettoyage de
votre four.
Ne pas utiliser de produits de nettoyage abrasifs ou ni de
racloirs métalliques pointus pour nettoyer la vitre de la porte
du four afin de ne pas rayer la surface et de ne pas briser la
vitre.
Ce four ne doit pas être commandé par un minuteur
externe ni par un système de télécommande à distance.
Utilisez uniquement des ustensiles et plats convenant aux
fours à micro-ondes.
Le four à micro-ondes est prévu uniquement pour le
réchauffage d’aliments et de boissons. Prendre garde lors
de la cuisson d’aliments peu riches en eau, par ex. du pain,
du chocolat, des biscuits et des pâtisseries. Ces derniers
peuvent facilement brûler, se dessécher ou prendre feu s’ils
cuisent trop longtemps. Nous déconseillons de réchauffer
des éléments peu riches en eau tels que du popcorn ou
des poppadums. Le séchage d’aliments, de journaux ou
de vêtements et le réchauffage de coussins chauffants,
de pantoufles, d’éponges, de chiffons humides, de
chaufferettes, de bouteilles d’eau chaude et similaire risque
de conduire à des blessures, à une ignition ou à un feu.
La lampe du four doit être remplacée par un technicien
de maintenance formé par le fabricant. NE PAS tenter de
déposer le boîtier extérieur du four.
FR
4 5
Page 29

Sommaire
Installation et connexion �������������������������������������������������������������������������������������������������������������6
Placement de votre four ����������������������������������������������������������������������������������������������������������6-7
Consignes de sécurité importantes �������������������������������������������������������������������������������������� 7- 10
Pièces de votre four������������������������������������������������������������������������������������������������������������������11
Panneau de commande ����������������������������������������������������������������������������������������������������������� 12
Réglage de l’horloge ����������������������������������������������������������������������������������������������������������������13
Verrouillage de sécurité enfant ������������������������������������������������������������������������������������������������� 13
Cuisson et décongélation aux micro-ondes����������������������������������������������������������������������������� 14
Cuisson à étapes multiples ������������������������������������������������������������������������������������������������������ 15
Utilisation de la minuterie ��������������������������������������������������������������������������������������������������������� 16
Décongélation de masse auto �������������������������������������������������������������������������������������������������� 17
Programmes de masse auto
Programmes de réchauffement de masse auto �������������������������������������������������������������������� 18
Programmes de cuisson de masse auto ������������������������������������������������������������������������������ 19
Questions et réponses �������������������������������������������������������������������������������������������������������������20
Entretien de votre four �������������������������������������������������������������������������������������������������������������� 21
Spécifications ���������������������������������������������������������������������������������������������������������������������������22
Français
Merci d’avoir acheté un four à micro-ondes Panasonic.
FR
Page 30

Installation et connexion
Examen de votre four à micro-ondes
Déballer le four, retirer tout le matériel
d’emballage, et rechercher sur le four
d’éventuels dommages tels que des
bosselures, des fermoirs de portes brisés
ou des fentes dans la porte. Si vous trouvez
des dommages quelconques, notifiez
immédiatement votre revendeur. Ne pas
installer un four à micro-ondes endommagé.
Placement de votre four
Ce four est prévu uniquement pour une
utilisation sur un plan de travail. Il n’est
pas conçu pour une utilisation intégrée ou
à l’intérieur d’un placard.
1. Placer le four sur une surface plate
et stable, à 85 cm au dessus du sol.
2. Lors de l’installation de ce four,
il est facile d’isoler l’appareil de
l’alimentation électrique en retirant la
prise ou en utilisant un disjoncteur.
3. Pour un bon fonctionnement, assurer
une circulation d’air suffisante pour
le four.
Utilisation sur un plan de travail :
Laisser un espace de 15 cm en haut
du four, de 10 cm à l’arrière, de 5 cm
sur les deux côtés. Si l’un des côtés du
four est placé à même le mur, l’autre
côté ou le dessus du four ne doit pas
être bloqué. Ne pas enlever les pieds.
15 cm
10 cm
plan de travail
ouverture
Instructions de mise à la terre
Important!
CET APPAREIL DOIT ÊTRE
CONVENABLEMENT MIS À LA TERRE
POUR LA SÉCURITÉ PERSONNELLE.
Si votre prise CA n’est pas mise à la
terre, il est de la responsabilité du client
de la remplacer par une prise murale
convenablement mise à la terre.
Tension de fonctionnement
La tension doit être la même que celle
indiquée sur l’étiquette du four. Si une
tension supérieure à celle indiquée est
utilisée, ceci peut cause un incendie ou
d’autres dégâts.
4. Ne pas placer ce four à proximité
d’une cuisinière électrique ou à gaz.
5.
Le cordon d’alimentation ne doit pas
toucher l’extérieur du four. Maintenir le
cordon à l’écart des surfaces chaudes.
Ne pas laisser le cordon pendre au
dessus du bord d’une table ou d’une
surface de travail. Ne pas immerger le
cordon, la prise ou le four dans de l’eau.
6. Le pied ne doit pas être enlevé.
7. Cet appareil est conçu pour être
utilisé uniquement dans des
applications domestiques et
similaires telles que :
- coins cuisines pour le personnel
dans des magasins, des bureaux et
autres environnements de travail;
- fermes;
- par les clients dans des hôtels, des
motels et d’autres environnements
résidentiels;
- environnements de type gîte
touristique.
Ne pas utiliser à l’extérieur.
8. Éviter d’utiliser le four dans une
humidité élevée.
FR
6 7
Page 31

Placement de votre four
9.
Ne pas obstruer les ouvertures
d’aération sur le haut, les côtés et
l’arrière du four. Si ces ouvertures sont
bloquées durant le fonctionnement,
le four risque de surchauffer. Dans
un tel cas, le four est protégé par un
dispositif de sécurité thermique et
reprend le fonctionnement uniquement
après avoir refroidi.
10. Cet appareil n’est pas conçu pour
être utilisé au moyen d’une minuterie
externe ou d’un système de
commande à distance séparé.
Consignes de sécurité importantes
1. Les joints de la porte et les zones de
joint de la porte doivent être nettoyés
avec un chiffon humide. Inspecter
l’appareil pour vérifier que les joints
de la porte et les zones de joint de la
porte ne sont pas endommagés; si
c’est le cas l’appareil ne doit pas être
utilisé avant d’avoir été réparé par un
technicien formé par le fabricant.
2. Ne pas tenter de bricoler ni
d’effectuer de réglages ou de
réparations quelconques sur la
porte, le boîtier du panneau de
commande, les interrupteurs de
verrouillage de sécurité ou toute
autre pièce du four. Ne pas retirer
le panneau extérieur du four qui
apporte une protection contre
l’exposition à l’énergie microondes. Les réparations doivent
être effectuées uniquement par un
technicien qualifié.
3. Ne pas utiliser cet appareil si
le CORDON ou la PRISE sont
endommagés, s’il ne fonctionne
pas correctement ou s’il a été
endommagé ou s’il a chuté. Il est
dangereux pour toute personne
autre qu’un technicien de service
formé par le fabricant d’effectuer une
réparation.
5. Permettre aux enfants d’utiliser le
four sans supervision uniquement
lorsque des instructions ont été
données de façon à ce que l’enfant
puisse utiliser le four de façon
sécurisée et comprenne les risques
d’une utilisation inappropriée.
6. Les liquides et autres aliments ne
doivent pas être chauffés dans des
récipients scellés car ils risquent
d’exploser.
7. Cet appareil peut être utilisé par
des enfants âgés de 8 ans et plus
ainsi que des personnes ayant des
capacités physiques, sensorielles
et mentales réduites ou un manque
d’expérience ou de connaissance si
elles ont été encadrées ou instruites
par une personne responsable de
leur sécurité concernant l’utilisation
sécurisée de l’appareil et qu’elles
comprennent les risques encourus.
Les enfants ne doivent pas jouer
avec l’appareil. Le nettoyage et
l’entretien par l’utilisateur ne doivent
pas être effectués par des enfants
sans supervision. Maintenir l’appareil
et son cordon hors de portée des
enfants de moins de 8 ans.
Français
4. Si le cordon d’alimentation est
endommagé, il doit être remplacé
par le fabricant ou un agent de
maintenance similairement qualifié
afin d’éviter tout danger.
FR
Page 32

Consignes de sécurité importantes
Utilisation de votre four
Ne pas utiliser le four pour toute autre
fin que la préparation d’aliments� Ce
four est spécifiquement conçu pour
réchauffer ou cuisiner des aliments�
Ne pas utiliser ce four pour réchauffer
des produits chimiques ou d’autres
produits non-alimentaires�
Avant utilisation, vérifier que les
accessoires/récipients sont adaptés à
l’utilisation dans des fours à microondes�
Lorsque le four n’est pas utilisé, n’y
ranger aucun objet à l’intérieur au cas
où il est accidentellement mis sous
tension�
L’appareil ne doit pas être utilisé SANS
ALIMENT DANS LE FOUR� Un tel
fonctionnement risque d’endommager
l’appareil�
Si de la fumée est émise ou qu’un
feu se produit dans le four, appuyer
sur le bouton Arrêt/Annuler et laisser
la porte fermée afin d’étouffer
toute flamme� Débrancher le
cordon d’alimentation, ou couper
l’alimentation au niveau du fusible ou
du panneau du disjoncteur�
Fonctionnement du moteur de
ventilation
Après utilisation du four, le moteur
du ventilateur peut tourner
quelques minutes afin de refroidir
les composants électriques� Ceci
est normal et vous pouvez retirer
les aliments même si le moteur du
ventilateur fonctionne�
Vous pouvez continuer à utiliser le four
durant ce temps�
Éclairage du four
Lorsqu’il s’avère nécessaire de
remplacer l’éclairage du four, veuillez
consulter votre revendeur�
Accessoires
Le four est équipé de toute une
série d’accessoires� Toujours suivre
les instructions données quant à
l’utilisation des accessoires�
Plateau de verre
Ne pas utiliser le four sans la couronne
de galets et le plateau de verre en place�
Ne jamais utiliser un autre type
de plateau de verre que celui
spécifiquement conçu pour ce four�
Quand le plateau en verre est chaud,
attendre qu’il refroidisse avant de le
laver ou de le plonger dans l’eau�
Le plateau de verre peut tourner dans
n’importe quel sens�
Si l’aliment ou le plat de cuisson sur
le plateau de verre touche les parois
du four et arrête la rotation du plateau,
ce dernier tournera automatiquement
dans le sens opposé� Ceci est normal�
Ne placez pas d’aliments directement
sur le plateau de verre�
Couronne de galets
La couronne de galets et le bas
du four doivent être nettoyés
fréquemment afin de réduire le bruit et
l’accumulation de restes d’aliments�
La couronne de galets doit toujours
être utilisée avec le plateau de verre
pour la cuisson�
FR
8 9
Page 33

Consignes de sécurité importantes
Temps de cuisson
Le temps de cuisson dépend de l’état,
de la température, de la quantité
d’aliments et du type de récipient�
Commencer avec le temps de
cuisson minimum afin d’éviter toute
surcuisson� Si la nourriture n’est pas
assez cuite, vous pourrez toujours la
cuire un peu plus longtemps�
Important!
Si les temps de cuisson recommandés
sont dépassés, les aliments risquent
d’être gâchés et, dans des cas
extrêmes, de prendre feu et
d’endommager l’intérieur du four.
Petites quantités de nourriture
De petites quantités de nourriture ou
des aliments peu riches en eau peuvent
brûler, se dessécher ou s’enflammer si
cuits trop longtemps� Si des aliments
prennent feu dans le four, maintenir
la porte du four fermée, mettre le four
hors tension et débrancher le cordon
d’alimentation de la prise�
Aliments peu riches en eau
Le four à micro-ondes est prévu
uniquement pour le réchauffage
d’aliments et de boissons� Prendre
garde lors de la cuisson d’aliments
peu riches en eau, par ex� du pain,
du chocolat, des biscuits et des
pâtisseries� Ceux-ci peuvent brûler,
se dessécher ou s’enflammer s’ils
sont cuits trop longtemps� Nous
déconseillons de réchauffer des
éléments peu riches en eau tels que
du popcorn ou des poppadums� Le
séchage d’aliments, de journaux ou de
vêtements et le réchauffage de coussins
chauffants, de pantoufles, d’éponges,
de chiffons humides, de chaufferettes,
de bouteilles d’eau chaude et similaire
risque de conduire à des blessures, à
une ignition ou à un feu�
Œufs
Ne pas cuire d’œufs à la coque ni
d’œufs durs par MICRO-ONDES� La
pression peut s’accumuler et les œufs
peuvent exploser, même une fois la
cuisson par micro-ondes terminée�
Perçage de la peau
Les aliments à peau ou à enveloppe
imperméable tels que les pommes
de terre, les jaunes d’œufs et les
saucisses doivent être piqués avant
d’être cuits par MICRO-ONDES afin
d’éviter qu’ils n’éclatent�
Thermomètre à viande
Utiliser un thermomètre à viande
pour vérifier le degré de cuisson
des rôtis et des volailles uniquement
lorsque ceux-ci ont été retirés du
four� Ne pas utiliser un thermomètre
à viande conventionnel dans le four
à micro-ondes parce qu’il risque de
provoquer des étincelles�
Liquides
Lors du réchauffage de liquides,
par ex� soupe, des sauces et
des boissons dans votre four à
micro-ondes, ils peuvent dépasser
le point d’ébullition sans que vous
remarquiez l’apparition des bulles�
Cela peut entraîner un débordement
soudain du liquide chaud�
Pour éviter cet inconvénient, respecter
les règles suivantes:
a Éviter d’utiliser des récipients à
bords droits avec des goulots
étroits�
b Ne pas surchauffer�
c Mélanger le liquide avant de
placer le récipient dans le four
et répéter cette opération à
mi-cuisson�
d Une fois le liquide réchauffé, le
laisser reposer un court instant
dans le four, puis le mélanger
à nouveau avant de retirer
précautionneusement le récipient�
Français
FR
Page 34

Consignes de sécurité importantes
Papier/plastique
Lors de la cuisson d’aliments dans
des récipients en plastique ou en
papier, surveiller régulièrement la
cuisson, car ces types de récipient
ont tendance à s’enflammer en cas de
surchauffe�
N’utiliser aucun papier recyclé (par
exemple du papier essuie-tout), sauf
s’il est stipulé qu’il convient aux
fours à micro-ondes� Les produits en
papier recyclé peuvent contenir des
impuretés qui risquent de provoquer
des étincelles ou de s’enflammer en
cours de d’utilisation�
Retirez les liens métalliques de
fermeture des sacs de cuisson avant
de les placer dans le four�
Ustensiles/Papier aluminium
Ne pas réchauffer des canettes ou
des bouteilles fermées, car celles-ci
risquent d’exploser�
Les récipients métalliques ou les plats
avec des bordures métalliques ne
doivent pas être utilisés durant une
cuisson à micro-ondes� Des étincelles
se produiront�
Biberons/petits pots pour bébés
La partie supérieure, la tétine ou le
couvercle des biberons ou des petits
pots pour bébés doivent être retirés
avant de les placer dans le four�
Le contenu des biberons et des petits
pots doit être mélangé ou agité�
La température doit en être vérifiée
avant consommation afin d’éviter
toute brûlure�
Si vous utilisez du papier aluminium,
une pique à viande ou des objets
métalliques, la distance entre ces
matériaux et les parois du four doit
être d’au moins 2 cm afin d’éviter les
étincelles�
FR
10 11
Page 35

Pièces de votre four
1. Poignée de porte
Tirer sur la poignée pour ouvrir la
porte. Lorsque vous ouvrez la porte
du four durant son fonctionnement,
la cuisson s’arrête temporairement
sans annuler les paramètres réglés
précédemment. La cuisson reprend
dès que la porte est fermée et que
Démarrage est pressé.
2. Hublot de four
3. Système de verrouillage sécurisé
de la porte
4. Prise d’air du four
5. Guide d’alimentation micro-ondes
(ne pas enlever)
6. Prise d’air externe du four
7. Panneau de commande
8. Cordon d’alimentation
9. Prise
10. Étiquette d’identifi cation
11. Plateau de verre
12. Couronne de galets
13. Étiquette de Menu
Français
4
6
1
2
L’étiquette de mise en garde est fi xée sur la surface externe.
Remarque
Cette illustration est à seule fi n de référence.
12
13
11
3
4 6
5
7
8
9
10
FR
Page 36

Panneau de commande
Auto
2
4
5
6
Micro Power
Auto
Auto
Auto
8
10
min
1
min
10
sec
1. Fenêtre d’affichage
2. Bouton de niveau d’alimentation du
micro-ondes
3. Boutons d’heures
1
4. Bouton de décongélation de masse
auto
5. Bouton de réchauffage de masse
auto
6. Bouton de cuisson de masse auto
7. Bouton de minuterie
3
8. Boutons de commande de sélection
de masse plus/moins
9. Bouton d’arrêt/annulation :
7
Avant cuisson :
Une pression annule vos
instructions.
Pendant la cuisson :
Une pression interrompt
momentanément le programme
de cuisson. Une nouvelle pression
annule toutes vos instructions et
affiche l’heure.
10. Bouton de démarrage
9
NN-E486MM
N.B. La conception de votre panneau de
10
commandes peut varier par rapport à celui
affiché (suivant la couleur), mais la fonctionnalité
reste identique.
Bip sonore
Lorsqu’un bouton est correctement
pressé, un bip se fait entendre. Si un
bouton est pressé et qu’aucun bip n’est
entendu, l’appareil n’a pas accepté
l’instruction ou ne le peut pas. Au terme
d’un programme terminé quelconque, le
four émettra 5 bips.
FR
12 13
Page 37

Réglage de l’horloge
Lorsque le four est branché pour la première fois, « 88.88 » apparaît dans la fenêtre d’affichage.
Exemple : 11h25
Presser onze fois
(pour régler les heures.)
Presser cinq fois
(pour régler 1 min.)
Français
min
1
10
sec
Presser minuterie.
Le signe deux-points cesse
de clignoter. L’heure est
maintenant fixée dans
l’affichage.
Presser deux fois sur
minuterie.
Un signe deux-points
commence à clignoter.
10
min
Presser deux fois
(pour régler 10 minutes.)
Entrer l’heure en pressant les
boutons d’heures appropriés.
Remarques
1. Pour remettre l’horloge à l’heure, répétez les étapes 1 à 3 ci-dessus.
2. L’horloge restera à l’heure tant que le four est branché et que l’électricité n’est
pas coupée.
3. Cette horloge s’affiche sur 24 heures, c.-à-d. 14h00 = 14:00 et non 2:00.
Verrouillage de sécurité enfant
Ce système rend les commandes du four inutilisables, à l’exception de la porte qui peut
toujours être ouverte.
Le verrou pour enfants peut être réglé lorsque le signe deux-points ou que l’heure sont
affichés.
Pour l
’
activer :
Pour le désactiver :
Presser trois fois sur Démarrage.
L’heure disparaît. L’heure courante n’est pas
perdue. « L --- » est indiqué dans l’affichage.
Presser trois fois la touche
Arrêt/Annulation.
L’heure apparaît de nouveau à l’affichage.
Remarque
Pour activer le verrou pour enfants, Démarrage doit être pressé 3 fois durant une
période de 10 secondes.
FR
Page 38

Cuisson et décongélation aux micro-ondes
Le plateau de verre doit toujours être en place lors de l’utilisation du four.
Micro Power
Presser Puissance microondes.
Choisir le niveau de
puissance désirée.
1 pression Fort 800 Watts
2 pressions
3 pressions
4 pressions
5 pressions Chaud 80 Watts
Décongélation
Moyen 560 Watts
Doux 440 Watts
10
min
Régler la durée de cuisson en
pressant les boutons appropriés.
Votre four peut être programmé
jusqu’à 99 minutes 50 secs en
puissance Moyenne, Basse,
Mijotage et Décongélation.
La puissance élevée peut être
programmée durant 30 minutes.
240 Watts
min
1
10
sec
Presser de démarrage.
Le compte à rebours du
programme de cuisson
commence.
ATTENTION!
Le four fonctionne automatiquement à la puissance MAX si une durée de cuisson
est sélectionnée sans choix de puissance préalable.
Remarques
1. Pour une cuisson à étapes multiples, se reporter à la page 15 FR.
2. Le temps de repos peut être programmé après la puissance de micro-ondes et
le réglage de l’heure. Se référer à l’utilisation de la minuterie page 16 FR.
3. Vous ne pouvez pas changer la durée de cuisson durant la cuisson.
4. NE PAS essayer d’utiliser le mode micro-ondes seul avec un quelconque
accessoire en métal dans le four.
5. Toujours vérifier la nourriture durant la décongélation en ouvrant la porte puis
en redémarrant la décongélation. Il n’est pas nécessaire de couvrir les aliments
durant la décongélation. Pour obtenir un résultat équilibré, mélanger, retourner
ou séparer plusieurs fois au cours de la décongélation. Pour de grosses pièces
et de la volaille, retourner à mi-temps durant la décongélation, puis protéger
les extrémités et les pointes avec du papier en aluminium.
FR
14 15
Page 39

Cuisson à étapes multiples
Cette fonction vous permet de programmer jusqu’à 3 étapes de cuisson en continu.
Exemple : Pour régler à puissance élevée pendant 5 minutes et à température chaude pendant 10
minutes.
Français
Micro Power Micro Power
Régler la
puissance
micro-ondes.
Presser une fois
10
min
Régler le temps de cuisson.
Régler sur 5 minutes en
utilisant les boutons d’heure.
pour sélectionner
la puissance
min
1
10
sec
Régler la puissance
micro-ondes.
Presser 5 fois pour
sélectionner la
température chaude.
élevée.
10
min
Réglage du temps de
cuisson.
Régler sur 10 minutes en
utilisant les boutons d’heure.
min
1
10
sec
Presser Démarrage.
La durée diminue pour
la première étape dans
la fenêtre d’affichage.
Remarques
1. Pour une cuisson en trois étapes, saisir un autre programme de cuisson avant de
presser démarrage.
2. Durant le fonctionnement, presser Arrêt/Annulation arrêtera le fonctionnement.
Presser démarrage relancera le fonctionnement programmé. Presser deux fois
Arrêt/Annulation arrêtera et effacera le fonctionnement programmé.
3. Hors fonctionnement, presser Arrêt/Annulation effacera le programme sélectionné.
4. Les programmes auto ne peuvent pas être utilisés avec la cuisson à étapes multiples.
5. Lors du fonctionnement, trois bips se feront entendre entre chaque étape.
FR
Page 40

Utilisation de la minuterie
Minuterie de cuisine
Exemple : Pour compter 5 minutes.
Presser une
fois.
Presser 5 fois.
Régler la durée désirée.
(jusqu’à 99 min 50 secs)
Temps de repos
Par l’utilisation de la minuterie, vous pouvez programmer le temps de repos désiré une fois que la
cuisson est terminée ou programmer le four comme un compte-minute.
Exemple : Pour un délai de repos de 5 minutes après cuisson de 3 minutes à puissance micro-ondes moyenne.
3 fois
5 fois
1
10
min
10
min
sec
Presser Démarrage.
La durée diminue sans
que le four ne fonctionne.
5 fois
Micro Power
Presser 3 fois.
Régler le
programme de
cuisson désiré.
(Voir page 14 FR
pour les
instructions.)
1
10
min
min
Presser 3 fois.
Régler le temps
de cuisson
désiré.
10
sec
Presser une
fois.
Presser 5 fois.
Régler le temps de
repos désiré.
(jusqu’à 99 min
50 secs)
1
10
min
10
min
sec
Presser
Démarrage.
La cuisson
commence.
Après cuisson,
la durée de
repos diminue
sans que
le four ne
fonctionne.
Cuisson à démarrage différé
En utilisant la minuterie, vous êtes en mesure de programmer une cuisson à démarrage différé.
Exemple : Pour commencer la cuisson 5 minutes plus tard durant 3 minutes. Puissance micro-ondes moyenne.
Presser une
fois.
Remarques
1. La cuisson à étapes multiples peut être programmée en incluant un démarrage
différé et temps de repos.
2.
Si la porte du four est ouverte durant le démarrage différé, le temps de repos ou le
compte-minutes, la durée indiquée dans la fenêtre d’affichage continuera de décroître.
3. Le Temps de repos/Démarrage différé ne peut pas être programmé avant/après un
programme auto.
4.
Si le démarrage différé programmé dépasse une heure, le délai sera décompté en unités
de minutes. Si inférieur à une heure, le délai sera décompté en unités de secondes.
5 fois
1
10
min
min
Presser 5 fois.
Régler le délai
désiré. (jusqu’à
99 min 50 secs)
10
sec
Presser 3 fois.
Régler le
programme de
cuisson désiré. (Voir
page 14 FR pour les
instructions.)
Micro Power
3 fois
1
10
min
min
Presser 3 fois.
Régler le temps
de cuisson
désiré.
10
sec
Presser
Démarrage.
Le délai
diminuera,
puis la cuisson
débutera.
FR
16 17
Page 41

Décongélation de masse auto
Cette fonction vous permet de décongeler des aliments congelés en fonction du poids.
Sélectionner la catégorie et régler le poids de nourriture. Le poids est programmé
en grammes. Pour une sélection rapide, le poids commence à partir du poids le plus
communément utilisé pour chaque catégorie.
Auto
Français
Sélectionner le programme de
décongélation de masse auto
désiré.
Le numéro de programme auto
s’affiche.
Programme
Min./Max.
1. PETITES
PIÈCES
200 g - 1000 g
Auto
1 pression
2. GROSSE
PIÈCE
600 g - 1600 g
Auto
2 pressions
3. PAIN/GÂTEAU
100 g - 600 g
Auto
3 pressions
Régler le poids des aliments
congelés en utilisant les boutons
de commande de sélection de
masse plus/moins.
Le poids est incrémenté/
décrémenté par 10 g.
Poids
Petits morceaux de viande, escalope, saucisses, viande
hachée, steak, côtelettes, filets de poisson (chacun de
100 g à 400 g). Retourner et protéger lors des bips. Laisser
reposer 15 à 30 min.
Gros morceaux de viande, poulets entiers, pièces
de viande. Les poulets entiers et les pièces de viande
nécessiteront d’être protégées durant la décongélation.
Protéger les ailes, les poitrines et les corps gras avec des
feuilles lisses d’aluminium fixées avec des bâtonnets à
cocktail. Ne pas laisser la feuille d’aluminium toucher les
parois du four. Laisser un temps de repos de 1 à 2 heures
avant cuisson. Retourner et protéger lors des bips.
Pour le pain (entier, en tranches, petits pains) et les
gâteaux. Les gâteaux à la crème et les gâteaux glacés
ne conviennent pas à ce programme. Placer le pain ou le
gâteau dans une grande assiette ou un plat en pyrex peu
profond. Presser décongélation de masse auto trois fois
et retourner lors du bip sonore. Laisser le pain reposer de
10 min (pain blanc léger) à 30 min (pain de seigle dense).
Couper en deux les grandes miches de pain durant le
temps de repos.
Presser
Démarrage.
Ne pas oublier
de mélanger ou
de retourner la
nourriture durant la
décongélation.
Instructions
Remarques
1. Si le temps de décongélation dépasse 60 minutes, le temps s’affichera en heures et
minutes.
2. La forme et la taille des aliments détermineront le poids maximum que le four peut
accueillir.
3.
Laisser un temps de repos pour assurer que la nourriture est complètement décongelée.
FR
Page 42

Programmes de masse auto
Cette fonction vous permet de cuire vos aliments préférés en réglant seulement le
poids. Le four détermine le niveau d’alimentation du micro-ondes et le temps de cuisson
automatiquement. Sélectionner la catégorie et régler le poids de nourriture. Le poids est
programmé en grammes. Pour une sélection rapide, le poids commence à partir du poids le
plus communément utilisé pour chaque catégorie.
Auto
Sélectionner le programme
de réchauffage/cuisson de
masse auto.
Le numéro de programme
auto s’affiche.
Remarques
1. Les programmes de masse auto doivent être utilisés UNIQUEMENT pour les
aliments décrits.
2. Cuire des aliments uniquement dans les plages de poids décrites.
3. Toujours peser les aliments au lieu de compter sur les informations d’emballage.
4.
La plupart des aliments bénéficient d’un temps de REPOS après la cuisson avec un programme
automatique, pour permettre à la chaleur de continuer à se conduire vers le centre.
5. Pour permettre des variations qui se produisent dans les aliments, vérifier que les
aliments sont bien cuits et bien chaud avant de servir.
Programmes de réchauffement de masse auto
Programme Poids Instructions
1. PLAT
SURGELÉ
200 g - 800 g
Auto
1 pression
2. REPAS
CONGELÉ
300 g - 600 g
Auto
2 pressions
Réglez le poids des aliments en
utilisant les boutons de commande
de sélection plus/moins.
Le poids est incrémenté/décrémenté
par 10 g.
Pour réchauffer un repas précuit frais. Tous les aliments
doivent être précuits. Les aliments doivent être à la
température du réfrigérateur, approx. +5 °C. Réchauffer dans
le récipient tel qu’acheté. Percer le film de couverture avec
un couteau pointu une fois au centre et quatre fois autour du
bord. En cas de transfert des aliments dans un plat, couvrir
avec un film extensible percé. Placer le récipient sur le plateau
de verre. Mélanger lors des bips sonores. Mélanger à nouveau
à la fin du programme et laisser reposer quelques minutes. De
gros morceaux de viande ou de poisson dans une sauce fine
peuvent nécessiter une cuisson plus longue. Ce programme
n’est pas adapté à des aliments riches en féculents tels que
du riz des nouilles ou des pommes de terre. Les aliments dans
des récipients en forme de bol irrégulier peuvent nécessiter
une cuisson plus longue.
Pour réchauffer un repas précuit congelé. Tous les aliments
doivent être précuits et congelés (-18 °C). Réchauffer dans
le récipient tel qu’acheté. Percer le film de couverture avec
un couteau pointu une fois au centre et quatre fois autour du
bord. En cas de transfert des aliments dans un plat, couvrir
avec un film extensible percé. Placer le récipient sur le plateau
de verre. Mélanger lors des bips sonores et couper les blocs
en morceaux. Mélanger à nouveau à la fin du programme et
laisser reposer quelques minutes. De gros morceaux de viande
ou de poisson dans une sauce fine peuvent nécessiter une
cuisson plus longue. Ce programme n’est pas adapté à des
aliments riches en féculents tels que du riz des nouilles ou des
pommes de terre. Les aliments dans des récipients en forme
de bol irrégulier peuvent nécessiter une cuisson plus longue.
Presser Démarrage.
FR
18 19
Page 43

Programmes de masse auto
Programmes de cuisson de masse auto
Programme Poids Instructions
1. LÉGUMES FRAIS
Auto
1 pression
2.
LÉGUMES SURGELÉS
Auto
2 pressions
3. POISSON FRAIS
Auto
3 pressions
4.
POMMES DE TERRE
Auto
4 pressions
5. POULET
Auto
5 pressions
6. RIZ EN
CASSEROLE
Auto
6 pressions
100 g - 800 g
100 g - 800 g
200 g - 700 g
200 g - 600 g
200 g - 800 g
100 g - 300 g
Pour la cuisson de légumes frais tels que des carottes,
des brocolis, des choux-fleurs et des haricots verts.
Placer les légumes préparés dans un récipient de taille
adaptée. Saupoudrer avec 1 cuillère à soupe d’eau pour
100 g de légumes. Couvrir de film extensible. Percer le film
extensible avec un couteau une fois au centre et quatre
fois autour du bord. Mélanger lors des bips sonores.
Convient à toutes sortes de légumes surgelés, comme
les petits pois, le maïs ou un mélange de légumes
surgelés. Placer les légumes préparés dans une
casserole de taille adaptée allant au micro-ondes, puis
ajouter 2 à 6 cuillères d’eau. Couvrir avec un couvercle
bien adapté. Mélanger une fois que le bip a retenti. À la
fin de la cuisson, laisser la casserole couverte reposer
pendant 3 à 5 minutes.
Pour la cuisson de filets de poisson frais et de steaks.
Placer dans un récipient de taille adaptée. Ajouter 1 à
3 cuillères à soupe de liquide. Couvrir de film extensible.
Percer le film extensible une fois au centre et quatre fois
autour du bord. Laisser reposer quelques minutes.
Convient à la cuisson des pommes de terre. Bien peler
les pommes de terre et les couper en morceaux de même
taille. Les placer dans une casserole de taille adaptée
allant au micro-ondes. Couvrir avec un couvercle bien
adapté. Mélanger une fois que le bip a retenti.
Convient à la cuisson des morceaux de poulet, comme
les ailes, les pilons, les cuisses et les escalopes, etc.
Bien percer les morceaux de poulet avec une fourchette
avant de les faire cuire. Placer les morceaux de poulet
préparés dans une casserole de taille adaptée allant
au micro-ondes. Ajouter 1 à 5 cuillères d’huile le cas
échéant. Couvrir avec un couvercle bien adapté.
Mélanger une fois que le bip a retenti.
Convient à la cuisson du riz blanc, notamment le riz
à grains courts, longs grains, le riz jasmin et basmati.
Placer le riz rincé accompagné de la quantité nécessaire
d’eau dans une casserole de taille adaptée. Prévoir au
moins ½ profondeur du volume pour l’évaporation et
pour éviter tout débordement d’eau bouillante. Servezvous des éléments suivants en tant que guide :
Riz
100 g 150 ml 3 litres
200 g 300 ml 3 litres
300 g 450 ml 4,5 litres
(Il pourrait s’avérer nécessaire d’adapter la quantité
d’eau à vos préférences personnelles.)
Couvrir avec un couvercle bien adapté. Ne pas cuire
dans des récipients en plastique à moins qu’ils soient
prévus pour la cuisson à haute température. Laisser
reposer le riz pendant 5 à 10 minutes après sa cuisson,
le cas échéant. Ce réglage n’est pas prévu pour la
cuisson du riz complet.
Quantité d’eau
recommandée
FR
Taille du
récipient
Français
Page 44

Questions et réponses
Q : Pourquoi mon four ne s’allume-t-il pas ?
R : Lorsque le four ne s’allume, vérifier
ce qui suit :
1. Le four est-il solidement branché ?
Retirer la fiche de la prise, attendre
10 secondes et la réinsérer.
2.
Vérifier le disjoncteur et le fusible.
Réarmer le disjoncteur ou remplacer le
fusible s’il s’est déclenché ou a grillé.
3. Si le disjoncteur ou le fusible sont
en état de marche, brancher un
autre appareil dans la prise. Si
l’autre appareil fonctionne, il existe
probablement un problème au
niveau du four. Si l’autre appareil
ne fonctionne pas, il existe
probablement un problème au
niveau de la prise.
S’il semble qu’il existe un problème
au niveau du four, contacter un
centre d’entretien agréé.
Q : Mon four provoque des interférences sur
ma télévision.
Est-ce normal ?
R :
Certaines interférences radio et TV
peuvent se produire lorsque vous
cuisinez avec le four. Ces interférences
sont similaires aux interférences
provoquées par de petits appareils tels
que des mixeurs, des aspirateurs, des
sèche-cheveux, etc. Ceci n’indique
pas un problème avec votre four.
Q : Parfois de l’air chaud sort des prises d’air
du four. Pourquoi ?
R :
La chaleur dégagée des aliments en
cours de cuisson réchauffe l’air du
compartiment du four. L’air réchauffé
est emporté hors du four par la
circulation d’air dans le four. Il ne se
trouve pas de micro-ondes dans l’air.
Les prises d’air du four ne doivent
jamais être bloquées durant la cuisson.
Q : Puis-je utiliser un thermomètre pour four
conventionnel dans le four ?
R : Le métal dans certains thermomètres
peut provoquer un arc électrique
dans votre four et ces thermomètres
ne doivent pas être utilisés.
Q : Le four n’accepte pas mon programme.
Pourquoi ?
R : Le four est conçu pour ne pas
accepter un programme incorrect.
Par exemple, le four n’acceptera pas
une quatrième étape.
FR
20 21
Page 45

Entretien de votre four
1. Mettre le four hors tension avant le
nettoyage.
Nettoyer régulièrement l’intérieur du
2.
four, les joints de la porte et les zones
de joint de la porte. Lorsque des
éclaboussures de nourriture ou d’autres
liquides renversés adhèrent aux parois
du four, aux joints de la porte et aux
zones de joint de la porte, essuyer avec
un chiffon humide. Un détergent doux
peut être utilisé s’ils deviennent très
sales. L’utilisation de détergents durs
ou abrasifs est déconseillée.
NE PAS UTILISER DE NETTOYANTS
COMMERCIAUX POUR FOUR.
3. Ne pas utiliser de produits de
nettoyage abrasifs ou ni de racloirs
métalliques pointus pour nettoyer
la vitre de la porte du four afin de
ne pas rayer la surface et de ne pas
briser la vitre.
La surface extérieure du four doit être
4.
nettoyée avec un chiffon humide. Afin
de ne pas endommager les pièces de
fonctionnement à l’intérieur du four,
ne pas laisser d’eau couler dans les
ouvertures de ventilation.
5.
Si le panneau de commande devient
sale, le nettoyer à l’aide d’un chiffon
doux et sec. Ne pas utiliser de
nettoyeurs durs ou abrasifs sur le
panneau de commande. Lors du
nettoyage du panneau de commande,
laisser la porte ouverte pour éviter
toute mise en route accidentelle.
Après le nettoyage, toucher le bouton
d’arrêt/annulation pour réinitialiser la
fenêtre d’affichage.
6.
Si de la vapeur s’accumule à l’intérieur
ou autour de l’extérieur de la porte du
four, essuyer avec un chiffon doux.
Ceci peut se produire lorsque le four
est utilisé dans un environnement
fortement humide et n’indique en rien
un dysfonctionnement de l’appareil.
7. Il est nécessaire à l’occasion de
retirer le plateau de verre pour le
nettoyage. Laver le plateau dans de
l’eau savonneuse chaude ou dans un
lave-vaisselle.
La couronne de galets et la sole
8.
du compartiment du four doivent
être nettoyées régulièrement pour
éviter un bruit excessif. Essuyer
simplement la surface inférieure
du four avec un détergent doux et
de l’eau chaude puis sécher avec
un chiffon propre. La couronne de
galets peut être lavée dans de l’eau
légèrement savonneuse. Les vapeurs
de cuisson s’accumulent durant une
utilisation répétée mais n’affectent en
aucun cas la surface inférieure ou la
couronne de galets. Après dépose de
la couronne de galets de la sole du
compartiment pour nettoyage, veiller
à la replacer dans la bonne position.
9. Un nettoyeur à vapeur ne doit pas
être utilisé pour le nettoyage.
10. Ce four doit être entretenu
uniquement par du personnel
qualifié. Pour l’entretien ou la
réparation du four, contacter le
revendeur agréé le plus proche.
Ne pas maintenir propre le four peut
11.
conduire à la détérioration des surfaces
pouvant affecter la durée de vie de
l’appareil et risque potentiellement de
créer une situation dangereuse.
12. Maintenir propres les prises d’air en
permanence.
Vérifier qu’aucune poussière ou autres
matériaux n’obstruent les prises d’air
en haut, en bas et à l’arrière du four.
Si les prises d’air sont obstruées, ceci
risque de causer une surchauffe qui
peut affecter le fonctionnement du
four et aboutir potentiellement à une
situation dangereuse.
Français
FR
Page 46

Spécifications
Source d’alimentation : 230 V, 50 Hz
Consommation électrique :
Maximum 1 270 W
Sortie : 800 W (CEI-60705)
Dimensions extérieures :
485 mm (L) x 400 mm (P) x 287 mm (H)
Dimensions du compartiment de cuisson :
315 mm (L) x 349 mm (P) x 227 mm (H)
Volume Total de la Cavité : 25 L
Diamètre du Plateau de Verre: Ø288 mm
Fréquence de Fonctionnement :
Poids net : 12,7 kg
Niveau sonore : LWA 63 dB
Le poids et les dimensions indiqués
sont approximatifs.
Cet équipement se conforme à la norme
européenne de perturbations CEM
(CEM = compatibilité électromagnétique)
EN 55011. Selon cette norme ce produit
est un équipement de groupe 2, classe
B et se trouve à l’intérieur des limites
requises. Groupe 2 signifie que l’énergie de
radiofréquence est produite volontairement,
sous la forme d’un rayonnement
électromagnétique à des fins de
réchauffement ou de cuisson des aliments.
Classe B signifie que ce produit peut être
utilisé dans des zones d’habitation normales.
2 450 MHz
Informations utilisateur sur
l’élimination des déchets
d’équipements électriques
et électroniques (appareils
ménagers domestiques)
Ce symbole sur les produits et/
ou les documents d’accompagnement
signifie que les produits électriques et
électroniques usagés ne doivent pas être
mélangés avec les ordures ménagères.
Pour un traitement, une récupération et un
recyclage appropriés, veuillez déposer ces
produits aux points de collecte désignés, où
ils seront acceptés sur une base gratuite.
Sinon, dans certains pays, vous pouvez
renvoyer vos produits à votre revendeur
local lors de l’achat d’un produit neuf
équivalent.
La mise au rebut de ce produit permettra
d’économiser des ressources précieuses
ainsi que de prévenir d’éventuels
effets négatifs sur la santé humaine et
l’environnement qui pourraient sinon
résulter d’une manipulation inappropriée
des déchets. Veuillez contacter les
autorités locales pour plus de détails sur
votre point de collecte le plus proche.
Des sanctions peuvent être appliquées en
cas d’élimination incorrecte de ces déchets,
conformément à la législation nationale.
Pour les utilisateurs professionnels
de l’Union européenne
Si vous souhaitez vous défaire
d’équipements électriques et
électroniques, veuillez contacter votre
revendeur ou votre fournisseur pour plus
d’informations.
Informations sur la mise au rebut
pour d’autres pays en dehors de
l’Union européenne
Ce symbole est valide uniquement dans
l’Union européenne.
Si vous souhaitez éliminer ce produit,
veuillez contacter les autorités locales ou
votre revendeur et demander la méthode
d’élimination appropriée.
Panasonic Corporation
Osaka, Japon
Importé par : Panasonic Marketing
Europe GmbH
Panasonic Testing Centre
Winsbergring 15, 22525 Hambourg,
Allemagne
22
FR
Page 47

Belangrijke veilIgheidsinstructies. Lees ze a.u.b.
zorgvuldig door en bewaar ze zodat u ze opnieuw kunt
raadplegen wanneer nodig.
WAARSCHUWING! De deurafdichtingen en de plaatsen
hieromheen moeten worden schoongemaakt met een
vochtige doek. Het apparaat moet gecontroleerd worden
op beschadigingen aan de deurafdichtingen en de plaatsen
rondom deze afdichtingen; indien er sprake van beschadiging
is, mag het apparaat niet gebruikt worden totdat het door een
door de fabrikant erkende onderhoudstechnicus is gerepareerd.
WAARSCHUWING! Probeer niet zelf reparaties uit
te voeren aan de ovendeur, het bedieningspaneel, de
veiligheidsvergrendelingsschakelaars of welk ander deel van de
magnetronoven dan ook.
Verwijder de behuizing van de magnetronoven niet; deze biedt
bescherming tegen blootstelling aan magnetron (microgolf)
energie. Reparaties mogen uitsluitend door een door de
fabrikant erkende onderhoudstechnicus worden uitgevoerd.
Nederlands
WAARSCHUWING! Ontploffingsgevaar bestaat indien
voedsel of dranken in een gesloten blik of fles worden
verwarmd.
WAARSCHUWING! Plaats de magnetronoven niet vlak
naast andere elektrische apparatuur of een gasfornuis.
WAARSCHUWING! Kinderen mogen de magnetronoven
uitsluitend onder toezicht gebruiken wanneer ze goed zijn
ingelicht zodat ze de oven op veilige wijze kunnen bedienen
en zich bewust zijn van de gevaren van onjuist gebruik.
WAARSCHUWING! Indien vloeistoffen, zoals
soep, sauzen en dranken opgewarmd worden in uw
magnetronoven, kunnen deze zonder te gaan borrelen
heter worden dan het kookpunt. Hierdoor kan de hete
vloeistof plotseling gaan overkoken.
NL
1
Page 48

WAARSCHUWING! Schud zuigflessen goed en roer
de inhoud van de potjes met babyvoeding een paar maal
om. Controleer de temperatuur, voor het nuttigen van het
voedsel zorgvuldig, om verbranden te voorkomen.
Dit apparaat mag gebruikt worden door kinderen in de
leeftijd van 8 jaar en ouder en mensen met verminderde
fysieke, zintuiglijke en mentale vermogens of gebrek aan
ervaring en kennis mits zij onder toezicht staan of instructies
hebben gekregen van iemand die verantwoordelijk is
voor hun veiligheid bij het gebruik van het apparaat op
een veilige wijze en zij de relevante risico’s begrijpen.
Kinderen mogen niet met het apparaat spelen. Reiniging
en gebruikersonderhoud mogen zonder toezicht niet door
kinderen uitgevoerd worden. Houd het apparaat en zijn
snoer buiten bereik van kinderen jonger dan 8 jaar.
Wanneer de oven is geïnstalleerd dan moet op een
eenvoudige wijze de stroom middels een schakelaar
kunnen worden onderbroken of de stekker uit het
stopcontact worden gehaald.
Gebruik dit apparaat niet, indien het NETSNOER en/of de
STEKKER beschadigd zijn. Indien het apparaat niet goed
functioneert, beschadigd of gevallen is, mogen in verband
met de veiligheid reparaties uitsluitend door een door de
fabrikant erkende onderhoudstechnicus worden uitgevoerd.
Voor gebruik op een kast:
Zorg voor 15 cm vrije ruimte aan de bovenkant van
de oven, 10 cm aan de achterkant en 5 cm aan beide
zijkanten. Als de ene kant van de oven aan de wand is
opgesteld, dan mag de andere kant of de bovenkant niet
geblokkeerd zijn. De pootjes niet verwijderen.
Deze oven is uitsluitend bedoeld voor gebruik op een
aanrechtblad. De oven is niet bedoeld voor inbouw of
plaatsing in een kast.
NL
2 3
Page 49

Dit apparaat is bedoeld voor huishoudelijke en
vergelijkbare toepassingen, zoals:
- keukens voor winkelpersoneel, kantoren en andere
werkomgevingen;
- boerderijen;
- door gasten van hotels, motels en andere
verblijfsomgevingen;
- Bed & breakfast.
Als u voedsel gaat verwarmen in kunststof of papieren
bakjes, dient u de oven regelmatig te controleren omdat
deze bakjes bij oververhitting vlam kunnen vatten.
Als er rook uit de oven komt of er brand ontstaat, druk
dan op de knop Stoppen/Annuleren en laat de deur dicht om
eventuele vlammen te smoren. Verwijder de netkabel of schakel
de stroom uit met de stroomschakelaar of door de zekering te
verwijderen.
Kook geen ongepelde eieren en verwarm geen hardgekookte
eieren met de MAGNETRON functie. Er kan een te hoge druk in
de eieren ontstaan, waardoor ze exploderen, zelfs na bereiding/
verwarmen.
Nederlands
Houd de deurafdichtingen en de plaatsen hieromheen schoon.
Wanneer er spetters voedsel of vloeistof tegen de ovenwand,
keramische plaat, de deurafdichtingen of het gebied eromheen
zijn gekomen, veeg dit dan af met een vochtige doek. Als zij zeer
vuil zijn geworden mag gebruik gemaakt worden van een mild
reinigingsmiddel. Het gebruik van agressieve reinigings-middelen
of schuursponsjes wordt niet aanbevolen.
GEBRUIK GEEN COMMERCIËLE OVENREINIGERS.
Als u de oven niet schoonhoudt, is het mogelijk dat de kwaliteit
van de oppervlakken vermindert waardoor de levensduur van het
toestel verkort en er mogelijk gevaarlijke situaties ontstaan.
NL
Page 50

Gebruik geen stoomreiniger voor het reinigen.
Gebruik geen ruwe, schurende reinigingsmiddelen of
scherpe metalen schrapers om de ruit van de ovendeur te
reinigen, aangezien deze het oppervlak kunnen krassen en
het glas kunnen doen barsten.
Dit apparaat is niet geschikt voor gebruik met een
externe timer of met een afzonderlijk systeem voor
afstandsbediening.
Gebruik alleen vaatwerk dat geschikt is voor gebruik in
een magnetronoven.
De magnetronoven is uitsluitend bedoeld voor het
opwarmen van voedingswaren en dranken. Wees
voorzichtig met het opwarmen van voedingswaren met een
laag vochtgehalte, zoals broodartikelen, chocolade, koekjes
en gebakjes. Deze voedingswaren kunnen gemakkelijk
verbranden, verdrogen of vlam vatten als het opwarmen
ervan te lang duurt. We raden het af om voedingswaren
met een laag vochtgehalte, zoals popcorn of poppadums,
op te warmen. Het drogen van voedingswaren, kranten of
kleding, het opwarmen van kussens, slippers, sponsen,
vochtige doeken, tarwezakken, warmwaterflessen en
vergelijkbaar kan leiden tot letsel, ontbranding of brand.
De ovenlamp moet vervangen worden door een
servicemonteur die daarvoor door de fabrikant is opgeleid.
Probeer NIET zelf de behuizing van de oven te verwijderen.
NL
4 5
Page 51

Inhoud
Installeren en aansluiten �������������������������������������������������������������������������������������������������������������6
Plaatsen van uw oven ��������������������������������������������������������������������������������������������������������������6-7
Belangrijke veiligheidsinstructies ������������������������������������������������������������������������������������������7-10
Onderdelen van uw oven ���������������������������������������������������������������������������������������������������������� 11
Bedieningspaneel ��������������������������������������������������������������������������������������������������������������������� 12
De klok instellen �����������������������������������������������������������������������������������������������������������������������13
Kinderslot ���������������������������������������������������������������������������������������������������������������������������������13
Koken en ontdooien in de magnetron �������������������������������������������������������������������������������������� 14
Koken in meerdere fasen ���������������������������������������������������������������������������������������������������������� 15
Het gebruik van de tijdschakelaar �������������������������������������������������������������������������������������������� 16
Automatisch op gewicht ontdooien������������������������������������������������������������������������������������������ 17
Programma’s voor automatisch op gewicht
Programma’s voor automatisch op gewicht opwarmen ������������������������������������������������������� 18
Programma’s voor automatisch op gewicht koken ���������������������������������������������������������������19
Vragen en antwoorden ������������������������������������������������������������������������������������������������������������� 20
Verzorging van uw oven ������������������������������������������������������������������������������������������������������������ 21
Specificaties ����������������������������������������������������������������������������������������������������������������������������� 22
Nederlands
Dank u dat u voor de aanschaf van een magnetronoven
van Panasonic heeft gekozen.
NL
Page 52

Installeren en aansluiten
Controleer uw magnetronoven
Pak de oven uit, verwijder alle
verpakkingsmaterialen, en controleer de
oven op eventuele schade zoals deuken,
gebroken deurklinken of barsten in de
deur. Breng uw dealer meteen op de
hoogte als u schade constateert. Ga
niet verder met het installeren van een
beschadigde magnetronoven.
Plaatsen van uw oven
Deze oven is uitsluitend bedoeld voor gebruik
op een aanrechtblad. De oven is niet bedoeld
voor inbouw of plaatsing in een kast.
1. Plaats de oven op een vlakke en
stabiele ondergrond op een hoogte
van meer dan 85 cm boven de vloer.
2.
Wanneer de oven is geïnstalleerd dan
moet op een eenvoudige wijze de
stroom middels een schakelaar kunnen
worden onderbroken of de stekker uit
het stopcontact worden gehaald.
3.
Zorg voor voldoende luchtcirculatie
om de oven goed te laten functioneren.
Plaatsing op een aanrecht:
Zorg voor 15 cm vrije ruimte aan de
bovenkant van de oven, 10 cm aan de
achterkant en 5 cm aan beide zijkanten.
Als de ene kant van de oven aan de
wand is opgesteld, dan mag de andere
kant of de bovenkant niet geblokkeerd
zijn. De pootjes niet verwijderen.
15 cm
10 cm
aanrechtblad
open
Instructies voor aansluiten op de aarde
Belangrijk!
DIT APPARAAT MOET VOOR
PERSOONLIJKE VEILIGHEID OP DE
JUISTE MANIER WORDEN GEAARD.
Als uw stopcontact niet geaard is, dan is het uw
verantwoordelijkheid als klant om het stopcontact
te laten vervangen door een geaard stopcontact.
Bedrijfsspanning
De spanning moet gelijk zijn aan de waarde op het
typeplaatje van de oven. Als een hogere spanning
wordt toegepast dan op het typeplaatje vermeld
staat, dan kan dat tot brand of andere schade leiden.
4. Plaats de magnetronoven niet vlak
naast andere elektrische apparatuur
of een gasfornuis.
5. Het netsnoer mag niet in aanraking
komen met de buitenkant van de
oven. Houd het snoer uit de buurt
van hete oppervlakken. Laat het
snoer niet over de rand van het
aanrechtblad of werkblad hangen.
Dompel het snoer, de stekker of de
oven niet onder in water.
6. De pootjes mogen niet worden
verwijderd.
7. Dit apparaat is bedoeld voor
huishoudelijke en vergelijkbare
toepassingen, zoals:
- keukens voor winkelpersoneel,
kantoren en andere
werkomgevingen;
- boerderijen;
- door gasten van hotels, motels en
andere verblijfsomgevingen;
- Bed & breakfast.
Niet buiten gebruiken.
8. Vermijd het gebruik van de
oven in ruimtes met een hoge
luchtvochtigheid.
NL
6 7
Page 53

Plaatsen van uw oven
9.
Zorg ervoor dat de ventilatiegaten aan de
bovenkant, de zijkanten en de achterkant
van de oven niet geblokkeerd worden.
Als deze openingen worden geblokkeerd
wanneer de oven in gebruik is, dan
kan de oven oververhit raken. Als dat
gebeurt, dan wordt de oven beschermd
door een thermische beveiliging die de
oven uitschakelt en de werking van de
oven pas hervat als de oven voldoende
is afgekoeld.
10. Dit apparaat is niet geschikt voor
gebruik met een externe timer of
met een afzonderlijk systeem voor
afstandsbediening.
Belangrijke veiligheidsinstructies
1.
De deurafdichtingen en de gebieden
er omheen moeten met een vochtige
doek worden schoongemaakt.
Het apparaat moet gecontroleerd
worden op beschadigingen aan de
deurafdichtingen en de plaatsen
rondom deze afdichtingen; indien er
sprake vanbeschadiging is, mag het
apparaat niet gebruikt worden totdat
het door een door de fabrikant erkende
onderhoudstechnicus is gerepareerd.
2.
Probeer niet zelf reparaties uit te voeren
aan de ovendeur, het bedieningspaneel,
de veiligheidsvergrendelingsschakelaars
of welk ander deel van de
magnetronoven dan ook.
Verwijder de behuizing van de
magnetron-oven niet; deze biedt
bescherming tegen blootstelling
aan magnetron (microgolf) energie.
Reparaties mogen uitsluitend door
een door de fabrikant erkende
onderhoudstechnicus worden
uitgevoerd.
3. Gebruik dit apparaat niet als het
NETSNOER OF de STEKKER
beschadigd is, als het apparaat
niet goed functioneert, of als het
apparaat beschadigd is of als u
het apparaat heeft laten vallen. Het
repareren van het apparaat is voor
iedereen gevaarlijk, behalve voor de
servicemonteur die daarvoor door de
fabrikant is opgeleid.
4. Als het netsnoer beschadigd is, moet
dit door de fabrikant, de verkoper of
een vakman worden vervangen om
gevaar te voorkomen.
5. Kinderen mogen de magnetronoven
uitsluitend onder toezicht gebruiken
wanneer ze goed zijn ingelicht zodat
ze de oven op veilige wijze kunnen
bedienen en zich bewust zijn van de
gevaren van onjuist gebruik.
6. Ontploffingsgevaar bestaat indien
voedsel of dranken in een gesloten
blik of fles worden verwarmd.
7.
Dit apparaat mag gebruikt worden
door kinderen in de leeftijd van
8 jaar en ouder en mensen met
verminderde fysieke, zintuiglijke
en mentale vermogens of gebrek
aan ervaring en kennis mits zij
onder toezicht staan of instructies
hebben gekregen van iemand
die verantwoordelijk is voor hun
veiligheid bij het gebruik van het
apparaat op een veilige wijze en
zij de relevante risico’s begrijpen.
Kinderen mogen niet met het
apparaat spelen. Reiniging en
gebruikersonderhoud mogen
zonder toezicht niet door kinderen
uitgevoerd worden. Houd het
apparaat en zijn snoer buiten bereik
van kinderen jonger dan 8 jaar.
Nederlands
NL
Page 54

Belangrijke veiligheidsinstructies
Gebruik van uw oven
Gebruik uw oven niet voor andere
doeleinden dan het bereiden van
voedingswaren� Deze oven is speciaal
gemaakt voor het opwarmen of koken
van voedingswaren� Gebruik deze oven
niet voor het opwarmen van chemicaliën
of andere, niet-voedingsproducten�
Controleer vóór gebruik of het
keukengerei/de bakjes geschikt zijn
voor gebruik in magnetronovens�
Wanneer de oven niet gebruikt wordt,
mag u deze niet als opslagruimte
gebruiken voor het geval dat de oven
onbedoeld wordt aangezet�
Het apparaat mag niet worden
gebruikt ZONDER VOEDINGSWAREN
IN DE OVEN� Hierdoor kan het
apparaat beschadigd raken�
Als er rook uit de oven komt of er
brand ontstaat, druk dan op de knop
Stop/Cancel en laat de deur dicht
om eventuele vlammen te smoren�
Verwijder de netkabel of schakel de
stroom uit met de stroomschakelaar
of door de zekering te verwijderen�
Werking van de ventilator
Na het gebruik van de oven kan de
ventilator nog een paar minuten actief
blijven om de elektrische onderdelen
af te koelen� Dit is normaal, waarbij u
zelfs tijdens een werkende ventilator
veilig uw voedingswaren uit de oven
kunt verwijderen� U kunt de oven
tijdens de werking van de ventilator
gewoon blijven gebruiken�
Ovenlamp
Raadpleeg uw dealer als de ovenlamp
vervangen moet worden�
Toebehoren
De oven is voorzien van diverse
toebehoren� Volg altijd de aanwijzingen
voor het gebruik van de toebehoren�
Glasplaat
Gebruik de oven niet zonder de ring
met rolwieltjes met de glasplaat�
Gebruik nooit een ander type
glasplaat dan de glasplaat die
speciaal voor deze oven ontworpen is�
Als de glasplaat te heet is, moet u
deze eerst laten afkoelen voordat u
het in water onderdompelt�
De glasplaat kan in beide richtingen
draaien�
Als de voedingswaren of het bakje/het bord
enz� op de glasplaat de binnenwanden
van de oven raakt en het ronddraaien van
de glasplaat tegenhoudt, dan begint de
glasplaat automatisch de andere richting
op te draaien� Dat is normaal�
Plaats voedingswaren niet rechtstreeks
op de glasplaat�
Ring met rolwieltjes
De ring met rolwieltjes en de ovenbodem
moeten regelmatig gereinigd worden om
te voorkomen dat er obstakels ontstaan
en voedingsresten zich ophopen�
De ring met rolwieltjes moet altijd in
combinatie met de glasplaat worden
gebruikt�
Kooktijden
De kooktijd is afhankelijk van de toestand,
de temperatuur, de hoeveelheid voedsel
en het type kookgerei�
Begin met de minimale kooktijd om
doorkoken te voorkomen� Als het voedsel
niet voldoende gekookt is, dan kunt u
deze altijd nog iets langer laten koken�
Belangrijk!
Als de aanbevolen kooktijden worden
overschreden, dan verpest dat het
voedsel en kan deze in extreme
omstandigheden zelfs vlam vatten en de
binnenkant van de oven beschadigen.
NL
8 9
Page 55

Belangrijke veiligheidsinstructies
Kleine hoeveelheden voedsel
Kleine hoeveelheden voedsel of voedsel
met een laag vochtgehalte kunnen
verbranden, uitdrogen of zelfs vlam
vatten als ze te lang gekookt worden� Als
materialen in de oven vlam vatten, houd
dan de deur van de magnetron gesloten
en trek de stekker uit het stopcontact�
Voedsel met een laag vochtgehalte
De magnetronoven is uitsluitend bedoeld
voor het opwarmen van voedingswaren
en dranken� Wees voorzichtig met het
opwarmen van voedingswaren met een
laag vochtgehalte, zoals broodartikelen,
chocolade, koekjes en gebakjes� Deze
voedingswaren kunnen gemakkelijk
verbranden, verdrogen of vlam vatten
als het opwarmen ervan te lang duurt�
We raden het af om voedingswaren met
een laag vochtgehalte, zoals popcorn of
poppadums, op te warmen� Het drogen
van voedingswaren, kranten of kleding,
het opwarmen van kussens, slippers,
sponsen, vochtige doeken, tarwezakken,
warmwaterflessen en vergelijkbaar kan
leiden tot letsel, ontbranding of brand�
Eieren
Kook geen ongepelde eieren en
verwarm geen hardgekookte eieren
met de MAGNETRON functie� Er
kan een te hoge druk in de eieren
ontstaan, waardoor ze exploderen,
zelfs na bereiding/verwarmen�
Doorprikken van de buitenkant
Voedsel met een niet-poreuze buitenkant,
zoals aardappelen, eierdooiers en worstjes
moeten worden doorgeprikt voordat ze
in de MAGNETRON worden bereid om te
voorkomen dat ze openbarsten�
Vloeistoffen
Bij het opwarmen van vloeistoffen
zoals soep, sauzen en dranken in uw
magnetronoven kan de vloeistof tot
boven het kookpunt worden verhit
zonder te borrelen� Dit kan resulteren
in het plotseling overkoken van de
hete vloeistof�
Om deze mogelijkheid te voorkomen,
moeten de volgende stappen worden
ondernomen:
a Vermijd het gebruik van rechte
flessen met nauwe halzen�
b Niet oververhitten�
c Roer de vloeistof om alvorens de
fles in de oven te plaatsen en roer
halverwege de kooktijd nogmaals om�
d Na het opwarmen de fles een
korte tijd in de oven laten staan
en opnieuw roeren alvorens de
fles voorzichtig te openen�
Papier/plastic
Als u voedsel gaat verwarmen in
kunststof of papieren bakjes, dient
u de oven regelmatig te controleren
omdat deze bakjes bij oververhitting
vlam kunnen vatten�
Gebruik geen producten van gerecycled
papier (bijv� keukenrol), tenzij het
papieren product goedgekeurd is voor
gebruik in de magnetronoven� Producten
van gerecycled papier kunnen materialen
bevatten die tijdens gebruik vonken en/
of brand kunnen veroorzaken�
Verwijder de draadknopen van
braadrollen voordat u de braadrollen
in de oven plaatst�
Nederlands
Vleesthermometer
Gebruik een vleesthermometer om het
garen van braadvlees en gevogelte
te controleren, maar pas nadat het
vlees uit de oven gehaald is� Gebruik
geen conventionele thermometer in
de magnetronoven, omdat hierdoor
vonken kunnen ontstaan�
NL
Page 56

Belangrijke veiligheidsinstructies
Keukengerei/folie
Verwarm geen afgesloten bakjes of
flessen omdat ze kunnen exploderen�
Bakjes van metaal of borden met een
rand van metaal mogen niet in de
magnetron worden gebruikt� Hierdoor
kunnen vonken ontstaan�
Als u aluminiumfolie, vleesprikkers
of metalen onderdelen gebruikt, dan
moet de afstand daartussen en de
ovenwanden tenminste 2 cm zijn om
te voorkomen dat vonken ontstaan�
Voedingsflesjes/-potjes voor baby’s
De bovenkant en de speen of het
deksel van voedingsflesjes/-potjes
voor baby’s moeten verwijderd zijn
voordat ze in de oven geplaatst
worden�
Schud zuigflessen goed en roer
de inhoud van de potjes met
babyvoeding een paar maal om�
Controleer de temperatuur, voor het
nuttigen van het voedsel zorgvuldig,
om verbranden te voorkomen�
NL
10 11
Page 57

Onderdelen van uw oven
1. Deurhandvat
Trek aan de hendel om de deur
te openen. Wanneer u de deur
tijdens het koken opent, wordt het
koken tijdelijk gestopt zonder de
instellingen van daarvoor te wissen.
Het koken wordt hervat zodra de
deur gesloten is en op Starten
gedrukt is.
2. Ovenvenster
3. Deurvergrendeling
4. Oven luchtventilatie
5. Magnetron golfgeleider
(niet verwijderen)
6. Ventilatiegaten aan de buitenkant
van de oven
7. Bedieningspaneel
8. Netsnoer
9. Stekker
10. Typeplaatje
11. Glasplaat
12. Ring met rolwieltjes
13. Menu-etiket
Nederlands
12
13
11
3
4
6
1
2
Het waarschuwingslabel is op het oppervlak aan de buitenkant aangebracht.
Opmerking
Deze afbeelding dient uitsluitend voor illustratieve doeleinden.
4 6
5
7
8
9
10
NL
Page 58

Bedieningspaneel
Auto
2
4
5
6
Micro Power
Auto
Auto
Auto
8
9
10
min
min
10
sec
1
NN-E486MM
1. Weergavevenster
2. Niveautoetsen voor
magnetronvermogen
3. Toetsen voor het instellen van de
1
tijd
4. Toets voor automatisch op gewicht
ontdooien
5. Toets voor automatisch op gewicht
opwarmen
6. Toets voor automatisch op gewicht
3
koken
7. Toets voor tijdschakelaar
8. Gewicht plus/minus
bedieningstoetsen
7
9. Toets voor stoppen/annuleren:
Vóór het koken:
Eén keer drukken wist uw instructies.
Tijdens het koken:
Eén keer drukken, stopt het
kookprogramma tijdelijk. Opnieuw
drukken annuleert al uw instructies
en de klok met de huidige tijd
verschijnt in het venster.
10. Starttoets
Opmerking: Het ontwerp van uw
10
bedieningspaneel kan afwijken van het
afgebeelde bedieningspaneel (afhankelijk van
kleur), maar de functionaliteit blijft dezelfde.
Piepgeluid
Wanneer een toets goed wordt
ingedrukt, is een piepgeluid hoorbaar.
Als een toets wordt ingedrukt en er is
geen piepgeluid hoorbaar, dan heeft het
apparaat de instructie niet geaccepteerd
of is de instructie niet toegelaten. Aan
het einde van elk volledig doorlopen
programma maakt de oven 5 keer een
piepgeluid.
NL
Page 59

De klok instellen
Wanneer de stekker van de oven voor de eerste keer in het stopcontact wordt gestoken, verschijnt
“88.88” in het weergavevenster.
Bijvoorbeeld: 11:25am
Druk elf keer op de tijdschakelaar
(om de uren in te stellen.)
Druk vijf keer op de tijdschakelaar
(om 1 minuut in te stellen.)
min
1
10
sec
Druk op de tijdschakelaar.
De dubbele punt stopt met
knipperen. Het ingestelde tijdstip
van de dag is nu zichtbaar in het
weergavevenster.
Druk twee keer op de
tijdschakelaar.
Een dubbele punt begint te
knipperen.
10
min
Druk twee keer op de tijdschakelaar
(om 10 minuten in te stellen.)
Vul het tijdstip van de dag in door
op de juiste toetsen voor het
instellen van de tijd te drukken.
Opmerkingen
1. Om het tijdstip te resetten, herhaalt u de stappen 1 t/m 3 van hierboven.
2. De klok blijft ingesteld zolang de stekker van de oven in het stopcontact blijft
en de oven van stroom voorzien blijft.
3. Dit is een klok met 24 uur aanduiding, d.w.z. 2 Pm = 14:00 en niet 2:00.
Kinderslot
Als het kinderslot actief is, kan de oven niet bediend worden, maar de deur kan wel worden geopend.
Het kinderslot kan worden ingesteld wanneer het venster een dubbele punt of de tijd weergeeft.
Doe het volgende
om in te stellen:
Doe het volgende om
te annuleren:
Nederlands
Druk drie keer op Starten.
De klok verdwijnt. Het tijdstip is niet gewist.
‘L ---’ wordt in het venster aangegeven.
Druk drie keer op Stoppen/Annuleren.
De klok verschijnt weer met het juiste
tijdstip van de dag.
Opmerking
Om het kinderslot te activeren, moet binnen 10 seconden 3 keer achter elkaar op
Starten worden gedrukt.
NL
13
Page 60

Koken en ontdooien in de magnetron
De glasplaat moet altijd goed geplaatst zijn wanneer de oven gebruikt wordt.
Micro Power
Druk op de knop
Magnetronvermogen.
Kies het gewenste
vermogen.
1x indrukken Hoog 800 Watt
2x indrukken
3x indrukken
4x indrukken
5x indrukken Warm 80 Watts
Ontdooien 240 Watt
Midden 560 Watts
Laag 440 Watts
10
min
Stel de kooktijd door op de juiste
toetsen te drukken.
Uw oven kan ingesteld worden
voor een maximale periode van 99
minuten en 50 seconden op Midden,
Laag, Sudderen en Ontdooien.
Uw oven kan 30 minuten op hoog
vermogen worden ingesteld.
min
1
10
sec
Druk op Starten.
Het kookprogramma
telt af.
OPGELET!
De oven werkt automatisch op MAX. magnetronvermogen als een kooktijd wordt
ingevuld zonder dat eerst het vermogen geselecteerd is.
Opmerkingen
1. Raadpleeg pagina 15 NL voor koken in meerdere fasen.
2. Nadat het vermogen en de kooktijd zijn ingesteld, kan ook de tijdsduur worden
ingesteld die de voedselwaren na magnetronvermogen onaangeroerd moeten
blijven staan. Raadpleeg pagina 16 NL voor het gebruik van de tijdschakelaar.
3. Tijdens het koken kunt u de kooktijd niet aanpassen.
4. Probeer de magnetron NIET te gebruiken met metalen toebehoren in de oven.
5.
Controleer de toestand van het voedsel tijdens het ontdooien altijd na het
openen van de deur en start het ontdooien opnieuw als het voedsel nog niet
volledig ontdooid is. Tijdens het ontdooien hoeft het voedsel niet te worden
afgedekt. Voor een gelijkmatig resultaat raden wij u aan om het voedsel tijdens
het ontdooien op verschillende momenten door te roeren, om te keren of te
scheiden. Voor grote stukken vlees en gevogelte is het raadzaam om het vlees
halverwege om te keren en ter bescherming de uitstekende delen en uiteinden
met folie af te dekken.
NL
14 15
Page 61

Koken in meerdere fasen
Met deze functie kunt u een aaneengesloten kookprogramma instellen dat uit maximaal drie
fasen bestaat.
Bijvoorbeeld: Instellen van hoog vermogen gedurende 5 minuten en warm vermogen gedurende
10 minuten.
Nederlands
Micro Power Micro Power
Stel het
magnetronvermogen in.
Druk 1x voor het
selecteren van Hoog
vermogen.
10
min
Stel de kooktijd in.
Stel de tijd in op 10 minuten met
behulp van de toetsen voor het
instellen van de tijd.
10
min
Stel de kooktijd in.
Stel de tijd in op 5 minuten met
behulp van de toetsen voor het
instellen van de tijd.
1
min
min
1
10
sec
10
sec
Stel het
magnetronvermogen in.
Druk 5x voor het
selecteren van Warm
vermogen.
Druk op Starten.
De tijd telt af vanaf
de eerste fase in het
weergavevenster.
Opmerkingen
1. Voor een kookprogramma dat uit drie fasen bestaat, vult nog een kookprogramma
in voordat u op Starten drukt.
2. Door tijdens het kookprogramma 1x op Stoppen/Annuleren te drukken, wordt
het programma onderbroken. Door opnieuw op Starten te drukken, wordt het
ingestelde kookprogramma hervat. Door tijdens het kookprogramma 2x op
Stoppen/Annuleren te drukken, wordt het ingestelde kookprogramma gestopt en
de instellingen ervan gewist.
3. Door op Stoppen/Annuleren te drukken zonder dat het kookprogramma actief is,
worden de instellingen ervan gewist.
4. Automatische programma’s kunnen niet gebruikt worden in kookprogramma’s met
meerdere stappen.
5. Tijdens een actief kookprogramma is bij elke faseovergang drie keer een piepgeluid
hoorbaar.
NL
Page 62

Het gebruik van de tijdschakelaar
Keukentimer
Bijvoorbeeld: Voor het aftellen van 5 minuten.
5 keer
1
10
min
1x indrukken.
5x indrukken.
Stel de gewenste tijdsduur in.
(max. 99 min. en 50 sec.)
Rusttijd
Met behulp van de tijdschakelaar kunt u de tijd instellen dat voedsel na het koken onaangeroerd
moeten blijven of om de oven in te stellen als een minutenteller.
Bijvoorbeeld: Voor een rusttijd van 5 minuten na 3 minuten op magnetronvermogen Midden.
3 keer
10
min
sec
Druk op Starten.
De tijd telt af zonder
dat de oven aan is.
5 keer
Micro Power
3x indrukken.
Stel het gewenste
kookprogramma in.
(Zie pagina 14 NL
voor instructies.)
1
10
min
min
3x indrukken.
Stel de gewenste
kooktijd in.
10
sec
1x indrukken.
1
10
min
min
5x indrukken.
Stel de gewenste
rusttijd in.
(max. 99 min. en
50 sec.)
10
sec
Druk op Starten.
Het
kookprogramma
begint. Na het
kookprogramma
wordt de tijd
afgeteld zonder
dat de oven
aan is.
Het starten van het kookprogramma vertragen
Met behulp van de tijdschakelaar kunt u het starten van het kookprogramma vertragen.
Bijvoorbeeld:
1x indrukken.
Opmerkingen
1. Een kookprogramma dat uit meerdere fasen bestaat, kan worden ingesteld met
2. Als de ovendeur geopend wordt tijdens de Startvertraging, de Rusttijd, of
3. Rusttijd/Startvertraging kunnen niet worden ingesteld vóór of na een automatisch
4. Als de ingestelde vertragingstijd langer dan een uur is, dan wordt de tijd in minuten
Om het kookprogramma van 3 minuten 5 minuten later te starten op magnetronvermogen
Midden.
5x indrukken.
Stel de gewenste
vertragingstijd in. (max. 99
min. en 50 sec.)
5 keer
1
10
min
10
min
sec
Micro Power
3x indrukken.
Stel het gewenste
kookprogramma in.
(Zie pagina 14 NL
voor instructies.)
3 keer
1
10
min
min
3x indrukken.
Stel de gewenste
kooktijd in.
10
sec
Druk op Starten.
De vertragingstijd
begint met aftellen
voordat het
kookprogramma
gestart wordt.
behulp van Startvertraging en Rusttijd.
Minutenteller, dan gaat het aftellen in het weergavevenster door.
programma.
afgeteld. Als de ingestelde vertragingstijd korter dan een uur is, dan wordt de tijd in
seconden afgeteld.
NL
16 17
Page 63

Automatisch op gewicht ontdooien
Met deze functie kunt u voedingswaren ontdooien op basis van het gewicht. Selecteer de
categorie en stel het gewicht van de voedingswaren in. Het gewicht wordt ingesteld in grammen.
Voor een snelle selectie begint het gewicht bij het meest gangbare gewicht per categorie.
Auto
Selecteer het gewenste
programma voor het
automatisch op gewicht
ontdooien.
Het nummer van het
automatische programma
verschijnt in het venster.
Programma
1. KLEINE
PORTIES
Auto
1x indrukken
2. GROTE
PORTIES
Auto
2x indrukken
3. BROOD/KOEK
Auto
3x indrukken
Stel het gewicht van het bevroren
voedsel in met behulp van de
driehoekige bedieningstoetsen
voor het instellen van meer of
minder gewicht.
Het gewicht kan in stapjes van
10 g omhoog of omlaag worden
ingesteld.
Min./Max.
Gewicht
200 g - 1000 g
600 g - 1600 g
100 g - 600 g
Nederlands
Druk op Starten.
Denk eraan dat u
de voedingswaren
tijdens het
ontdooien
regelmatig doorroert
of omkeert.
Instructies
Kleine porties vlees, schnitzels, worstjes, dun vlees,
steak, karbonades, visfilets (elk 100 g t/m 400 g).
Omkeren en afdekken na elk piepgeluid. Laat de porties
15 min tot 30 min staan.
Grote porties vlees, hele kippen, vlees met been.
Hele kippen en vlees met been moeten tijdens het
ontdooien worden afgedekt. Bescherm vleugels,
kippenborst en vet met gladde stukken aluminiumfolie
die met cocktailprikkers zijn vastgeprikt. Laat het folie
niet in aanraking komen met de binnenwanden van de
oven. Laat grote porties 1 tot 2 uur staan voordat een
kookprogramma gestart wordt. Omkeren en afdekken na
elk piepgeluid.
Voor brood (heel, sneetjes, broodjes) en cakes.
Roomkoekjes en koekjes met glazuur zijn niet geschikt
voor dit programma. Plaats het brood of de koek op
een grote plaat of een ondiep, Pyrex bord. Druk 3x op
Automatisch op gewicht ontdooien en keer het brood bij
elk piepgeluid om. Laat het brood 10 min (wit licht brood)
tot 30 min (dik roggebrood) staan. Snijd grote broden
tijdens de rusttijd door de helft.
Opmerkingen
1. Wanneer het ontdooien langer duurt dan 60 minuten, verschijnt de tijd als uren en
minuten.
2. De vorm en de grootte van het voedsel bepaalt het maximale gewicht dat de oven
aankan.
3. Laat voedsel lang genoeg rusten om er zeker van te zijn dat het in zijn geheel is
ontdooid.
NL
Page 64

Programma’s voor automatisch op gewicht
Met deze functie kunt u uw favoriete voedingswaren koken door alleen het gewicht in te stellen.
De oven bepaalt het magnetronvermogen en de kooktijd automatisch. Selecteer de categorie
en stel het gewicht van de voedingswaren in. Het gewicht wordt ingesteld in grammen. Voor
een snelle selectie begint het gewicht bij het meest gangbare gewicht per categorie.
Auto
Selecteer het gewenste
programma voor het automatisch
op gewicht opwarmen/koken.
Het nummer van het automatische
programma verschijnt in het
venster.
Stel het gewicht van de voedingswaren
in met behulp van de driehoekige
bedieningstoetsen voor het instellen
van meer of minder gewicht.
Het gewicht kan in stapjes van 10 g
omhoog of omlaag worden ingesteld.
Druk op Starten.
Opmerkingen
1. Het programma voor automatisch op gewicht mag UITSLUITEND worden gebruikt
voor het beschreven voedsel.
2. Kook alleen voedingswaren die binnen de beschreven gewichtsklassen vallen.
3. Weeg het voedsel liever zelf dan op de informatie op de verpakking te vertrouwen.
4. De RUSTTIJD komt het meeste voedsel, na een automatisch kookprogramma, ten
goede om de hitte tot in de kern ervan te laten doordringen.
5. Voor eventuele variaties in voedsel is het raadzaam om te controleren of ze goed
gekookt zijn en stoom afblazen voordat u ze opdient.
Programma’s voor automatisch op gewicht opwarmen
Programma Gewicht Instructies
Het opwarmen van verse, voorgekookte maaltijd. Al het voedsel
moet voorgekookt zijn. Voedsel moet in de koelkast op een
1. AFGEKOELDE
MAALTIJD
200 g - 800 g
Auto
1x indrukken
2. BEVROREN
MAALTIJD
300 g - 600 g
Auto
2x indrukken
temperatuur van ongeveer +5 °C worden bewaard. Opwarmen in de
verpakking waarin de maaltijd is aangeschaft. Prik met een scherp
mes een gaatje in het midden van de afdekfolie en langs elke rand
nog een gaatje. Bedek het voedsel bij het overscheppen op een bord
met vershoudfolie. Plaats het bakje op de glasplaat. Roer het eten
door na elk piepgeluid. Roer het eten nogmaals door aan het einde
van het programma en laat het eten een paar minuten staan. Grote
porties vlees/vis in een dunne saus vragen mogelijk om een langere
kooktijd. Dit programma is niet geschikt voor zetmeelrijk eten,
zoals rijst, noedels of aardappelen. Maaltijden in een kom met een
onregelmatige vormgeving vragen mogelijk om een langere kooktijd.
Het opwarmen van een voorgekookte diepvriesmaaltijd. Alle
voedsel moet voorgekookt en bevroren zijn (-18 °C). Opwarmen
in de opwarmverpakking waarin de maaltijd is aangeschaft.
Prik met een scherp mes een gaatje in het midden van de
afdekfolie en langs elke rand nog een gaatje. Bedek het
voedsel bij het overscheppen op een bord met vershoudfolie.
Plaats het bakje op de glasplaat. Roer door na elk piepgeluid
en snijd blokken in kleinere porties. Roer het eten nogmaals
door aan het einde van het programma en laat het eten een
paar minuten staan. Grote porties vlees/vis in een dunne saus
vragen mogelijk om een langere kooktijd. Dit programma
is niet geschikt voor zetmeelrijk eten, zoals rijst, noedels of
aardappelen. Maaltijden in een kom met een onregelmatige
vormgeving vragen mogelijk om een langere kooktijd.
NL
18 19
Page 65

Programma’s voor automatisch op gewicht
Programma’s voor automatisch op gewicht koken
Programma Gewicht Instructies
1.
VERSE GROENTEN
Auto
1x indrukken
2.
DIEPVRIESGROENTEN
Auto
2x indrukken
3. VERSE VIS
Auto
3x indrukken
4. AARDAPPELEN
Auto
4x indrukken
5. KIP
Auto
5x indrukken
6. RIJSTSCHOTEL
Auto
6x indrukken
100 g - 800 g
100 g - 800 g
200 g - 700 g
200 g - 600 g
200 g - 800 g
100 g - 300 g
Voor het koken van verse groenten, zoals wortels, broccoli,
bloemkool en groene bonen. Plaats de geprepareerde
groente in een kom of houder van geschikt formaat.
Besprenkel de groente met 1 eetlepel water per 100 g groente.
Dek de groente af met vershoudfolie. Prik met een scherp
mes een gaatje in het midden van de folie en langs elke rand
nog een gaatje. Roer het eten door na elk piepgeluid.
Geschikt voor alle soorten diepvriesgroenten, zoals erwten,
maïs of gemengde groenten. Plaats de geprepareerde
groente in een magnetronveilige ovenschotel en voeg daar
naar voorkeur 2-6 eetlepels water aan toe. Dek de groente
af met een goed afsluitend deksel. Roer de groente door
na elk piepgeluid. Laat de groente na het kookprogramma
gedurende 3 tot 5 minuten afgedekt staan.
Voor het koken van verse visfilets en steaks. Plaats de
vis of het vlees in een kom of houder van geschikt formaat.
Voeg daar 1-3 eetlepels vloeistof aan toe. Dek de vis of het
vlees af met vershoudfolie. Prik met een scherp mes een
gaatje in het midden van de folie en langs elke rand nog
een gaatje. Laat de vis of het vlees een paar minuten staan.
Geschikt voor het koken van aardappelen. Schil de
aardappelen goed en snijd ze in stukken van gelijke
grootte. Plaats de aardappelen in een magnetronveilige
ovenschaal van de juiste grootte. Dek de groente af
met een goed afsluitend deksel. Roer de aardappelen
door na elk piepgeluid.
De oven is geschikt voor het koken van stukjes kip
zoals vleugels, drumsticks, dijen, halve borsten, enz.
Prik de kipstukjes goed met een vork door voordat u
ze kookt. Plaats de geprepareerde kipstukjes in een
magnetronveilige ovenschaal van de juiste grootte.
Voeg naar voorkeur 1-5 eetlepels olie toe. Dek de kip af
met een goed afsluitend deksel.
Roer de kip door na elk piepgeluid.
De oven is geschikt voor het koken van witte rijst, waaronder
korte korrel, lange korrel, Jasmine en Basmati. Plaats de
gewassen rijst met de aanbevolen hoeveelheid koud water
in een ovenschotel van de juiste grootte. Zorg ervoor dat de
ovenschotel minstens voor de helft met water gevuld is om te
kunnen verdampen en om te voorkomen dat de rijst overkookt.
Hanteer het volgende als een leidraad:
Rijst
100 g 150 ml 3 liter
200 g 300 ml 3 liter
300 g 450 ml 4,5 liter
(U kunt de hoeveelheid water naar eigen voorkeur aanpassen.)
Dek de rijst af met een goed afsluitend deksel. Kook niet in
plastic bakjes tenzij ze geschikt zijn om op hoge temperaturen
in te koken. Laat de rijst na het koken zo nodig 5 tot 10
minuten ongemoeid. Deze instelling is niet geschikt voor het
koken van bruine rijst.
Aanbevolen
hoeveelheid water
Schotelgrootte
Nederlands
NL
Page 66

Vragen en antwoorden
V: Waarom gaat mijn oven niet aan?
A: Als de oven niet aan gaat, controleer
dan het volgende:
1. Zit de stekker stevig in het
stopcontact?
Trek de stekker uit het stopcontact,
wacht 10 seconden en steek de
stekker weer in het stopcontact.
2. Controleer de stop of de zekering
waarop het stopcontact is
aangesloten.
Reset de schakelaar in de
stoppenkast of vervang de zekering
als die is geklapt of doorgebrand.
3. Als de stop of de zekering in orde
zijn, steek dan de stekker van een
ander apparaat in het stopcontact.
Als dat apparaat wel werkt, dan is
er waarschijnlijk een probleem met
de oven. Als dat apparaat ook niet
werkt, dan is er waarschijnlijk een
probleem met het stopcontact.
Als blijkt dat er een probleem met de
oven is, neem dan contact op met
een erkend servicecentrum.
V: Mijn oven zorgt voor storingen in de
ontvangst van mijn tv-signaal.
Is dat normaal?
A: Tijdens het koken met de oven kan
er enige verstoring in de ontvangst
van het radio- en tv-signaal
plaatsvinden. Deze verstoring is
vergelijkbaar met verstoringen die
veroorzaakt worden door kleine
apparaten, zoals mixers, stofzuigers,
blaasdrogers, enz. Dit duidt niet op
een probleem met uw oven.
V: Soms komt er warme lucht uit de
ventilatiegaten. Waarom is dat?
A: De hitte die afkomstig is van het
koken van de voedingswaren
verwarmt de lucht in de oven. Deze
verwarmde lucht wordt door de oven
via de ventilatiegaten naar buiten
afgevoerd. Er zijn geen microgolven
in de lucht. De ventilatiegaten van de
oven mogen tijdens het koken nooit
geblokkeerd worden.
V: Kan ik in de oven een conventionele
thermometer gebruiken?
A: Nee. Het metaal in sommige
thermometers kan zorgen voor
vlambogen.
V: De oven accepteert mijn programma niet.
Waarom is dat?
A: De oven is gemaakt om onjuiste
programma’s niet te accepteren. De
oven accepteert bijvoorbeeld niet
een 4e fase.
NL
20 21
Page 67

Verzorging van uw oven
1.
Zet de oven uit voordat u deze reinigt.
2.
Houd de deurafdichtingen en de
plaatsen hieromheen schoon. Wanneer
er spetters voedsel of vloeistof tegen
de ovenwand, keramische plaat,
de deurafdichtingen of het gebied
eromheen zijn gekomen, veeg dit
dan af met een vochtige doek. Als
zij zeer vuil zijn geworden mag
gebruik gemaakt worden van een
mild reinigingsmiddel. Het gebruik
van agressieve reinigingsmiddelen of
schuursponsjes wordt niet aanbevolen.
GEBRUIK GEEN COMMERCIËLE
OVENREINIGERS.
3. Gebruik geen ruwe, schurende
reinigingsmiddelen of scherpe
metalen schrapers om de ruit van
de ovendeur te reinigen, aangezien
deze het oppervlak kunnen krassen
en het glas kunnen doen barsten.
4.
De buitenkant van de oven dient
gereinigd te worden met een vochtige
doek. Om schade aan werkende
onderdelen aan de binnenkant van de
oven te voorkomen, mag er geen water
in de ventilatiegaten terecht komen.
7. De glasplaat dient regelmatig te
worden verwijderd om te worden
gereinigd. Spoel de glasplaat af
onder warm zeepwater of in een
vaatwasser.
8.
De ring met rolwieltjes en de bodem
van de oven dienen regelmatig te
worden gereinigd om overmatig geluid
te voorkomen. Veeg de bodem van
de binnenkant schoon met een mild
reinigingsmiddel en heet water, en droog
de bodem daarna droog met een schone
doek. De ring met rolwieltjes mag met
mild zeepwater worden gereinigd.
Na herhaaldelijk gebruik ontstaan
kookdampen die de bodem aan de
binnenkant en de ring met rolwieltjes
niet aantasten. Zorg ervoor dat de ring
met rolwieltjes na het schoonmaken op
de juiste manier wordt teruggeplaatst.
9. Gebruik geen stoomreiniger voor het
reinigen.
10.
Onderhoud aan deze oven mag alleen
worden uitgevoerd door erkende
monteurs. Neem voor onderhoud
en reparaties contact op met de
dichtstbijzijnde dealer.
Nederlands
5.
Als het bedieningspaneel vuil wordt, moet
het worden gereinigd met een zachte,
droge doek. Gebruik geen agressieve
of schurende schoonmaakmiddelen op
het bedieningspaneel. Laat tijdens het
reinigen van het bedieningspaneel de deur
open om te voorkomen dat u de oven per
ongeluk aanzet. Druk na het reinigen op
de toets voor STOPPEN/ANNULEREN om
het weergavevenster te wissen.
6.
Als stoom zich aan de binnenkant of de
buitenkant van de deur heeft opgehoopt,
dient u deze af te nemen met een zachte
doek. Dit kan ontstaan wanneer de oven
in werking is onder zeer luchtvochtige
omstandigheden en duidt in geen geval
op een storing of defect van het apparaat.
11. Als u de oven niet schoonhoudt, is
het mogelijk dat de kwaliteit van de
oppervlakken vermindert waardoor
de levensduur van het toestel verkort
en er mogelijk gevaarlijke situaties
ontstaan.
12. Houd ventilatiegaten ten allen tijde
schoon.
Controleer of alle ventilatiegaten
boven, onder en achter vrij zijn van
verstoppingen door bijvoorbeeld
opgehoopt stof. Als ventilatiegaten
verstopt raken, dan kan dat
oververhitting veroorzaken, wat de
werking van de oven aantast en tot
gevaarlijke situaties leiden.
NL
Page 68

Specificaties
Stroomtoevoer: 230 V, 50 Hz
Stroomverbruik: Maximaal 1270 W
Uitgang: 800 W (IEC-60705)
Afmetingen buitenkant:
485 mm (B) x 400 mm (D) x 287 mm (H)
Afmetingen binnenkant:
315 mm (B) x 349 mm (D) x 227 mm (H)
Inhoud binnenkant: 25 L
Doorsnede glasplaat: Ø288 mm
Bedrijfsfrequentie: 2450 MHz
Netto gewicht: 12,7 kg
Geluid: LWA 63 dB
Het gewicht en de afmetingen zijn bij
benadering.
Dit produkt voldoet aan de Europese
standaard (EN 55011) voor EMC interferentie ’s
(EMC = Elektromagnetische
Compabiliteit). Overeenkomstig deze
standaard behoord dit produkt tot
de groep 2 apparatuur, klasse B en
voldoet deze aan alle normeringseisen.
Groep 2 houdt in dat de Frequentie
energie wordt opgewekt in de vorm van
elektromagnetische straling bedoeld voor
het verwarmen en koken van voedsel.
Klasse B informeerd dat dit produkt
toegepast kan worden voor normaal
huishoudelijk gebruik.
Informatie over het
weggooien van elektrische
en elektronische
apparatuur (particulieren)
Dit symbool op de producten en/
of de bijbehorende documenten
betekent dat gebruikte elektrische en
elektronische producten niet bij het
normale huishoudelijke afval mogen.
Lever deze producten in bij de aangewezen
inzamelingspunten, waar ze gratis worden
geaccepteerd en op de juiste manier
worden verwerkt, teruggewonnen en
hergebruikt.
In sommige landen kunt u uw producten
bij een lokale winkelier inleveren bij de
aanschaf van een equivalent nieuw product.
Wanneer u dit product op de juiste
manier als afval inlevert, spaart u
waardevolle hulpbronnen en voorkomt
u potentiële negatieve gevolgen voor
de volksgezondheid en het milieu, die
anders kunnen ontstaan door een onjuiste
verwerking van afval. Neem contact op
met uw gemeente voor meer informatie
over het dichtstbijzijnde inzamelingspunt.
Er kunnen boetes gelden voor een
onjuiste verwijdering van dit afval, in
overeenstemming met de nationale
wetgeving.
Voor zakelijke gebruikers in de
Europese Unie
Neem voor het weggooien van elektrische
en elektronische apparatuur contact
op met uw leverancier voor verdere
informatie.
Informatie over verwijdering van afval
in landen buiten de Europese Unie
Dit symbool is alleen geldig in de
Europese Unie.
Neem wanneer u dit product wilt
weggooien, contact op met de lokale
overheid of uw leverancier en vraag wat
de juiste verwijderingsmethode is.
Panasonic Corporation
Osaka, Japan
Geïmporteerd door: Panasonic
Marketing Europe GmbH
Panasonic Testing Centre
Winsbergring 15, 22525 Hamburg,
Duitsland
22
NL
Page 69

Page 70

Page 71

Page 72

Panasonic Corporation
Website: http://www�panasonic�com
© Panasonic Corporation 2016
PN:16170000A31655
Printed in China
 Loading...