

Page 1
Operating Instructions
Multimedia Audio System
Model No. MW-10
Getting startedReference Operations
Table of contents
Getting started
IMPORTANT SAFETY INSTRUCTIONS .................... 2
About the internal memor
Read this page fi rst ................................................... 5
Control guide ............................................................. 6
Connecting antennas and power source ................ 8
Setting the clock ........................................................ 9
Selecting the standard screen ................................. 9
Operations
Listening to a CD ..................................................... 10
Listening to an iP
Listening to the radio .............................................. 12
Setting the sound quality/sound fi eld, etc. ........... 14
Selecting photos to view ........................................ 14
Editing photos ......................................................... 16
Photo playback settings ......................................... 17
Using the setup menu ............................................. 18
Changing the dimmer .............................................. 18
Using the timer ........................................................ 19
Using with your PC .................................................. 20
Reference
Installation of this unit ............................................ 20
T
roubleshooting guide ............................................ 21
Error message ......................................................... 22
Product Service ....................................................... 22
Limited Warranty ...................................................... 23
Specifi cations ........................................... Back cover
Maintenance .............................................. Back cover
od ................................................ 11
y, CDs and SDs ............... 4
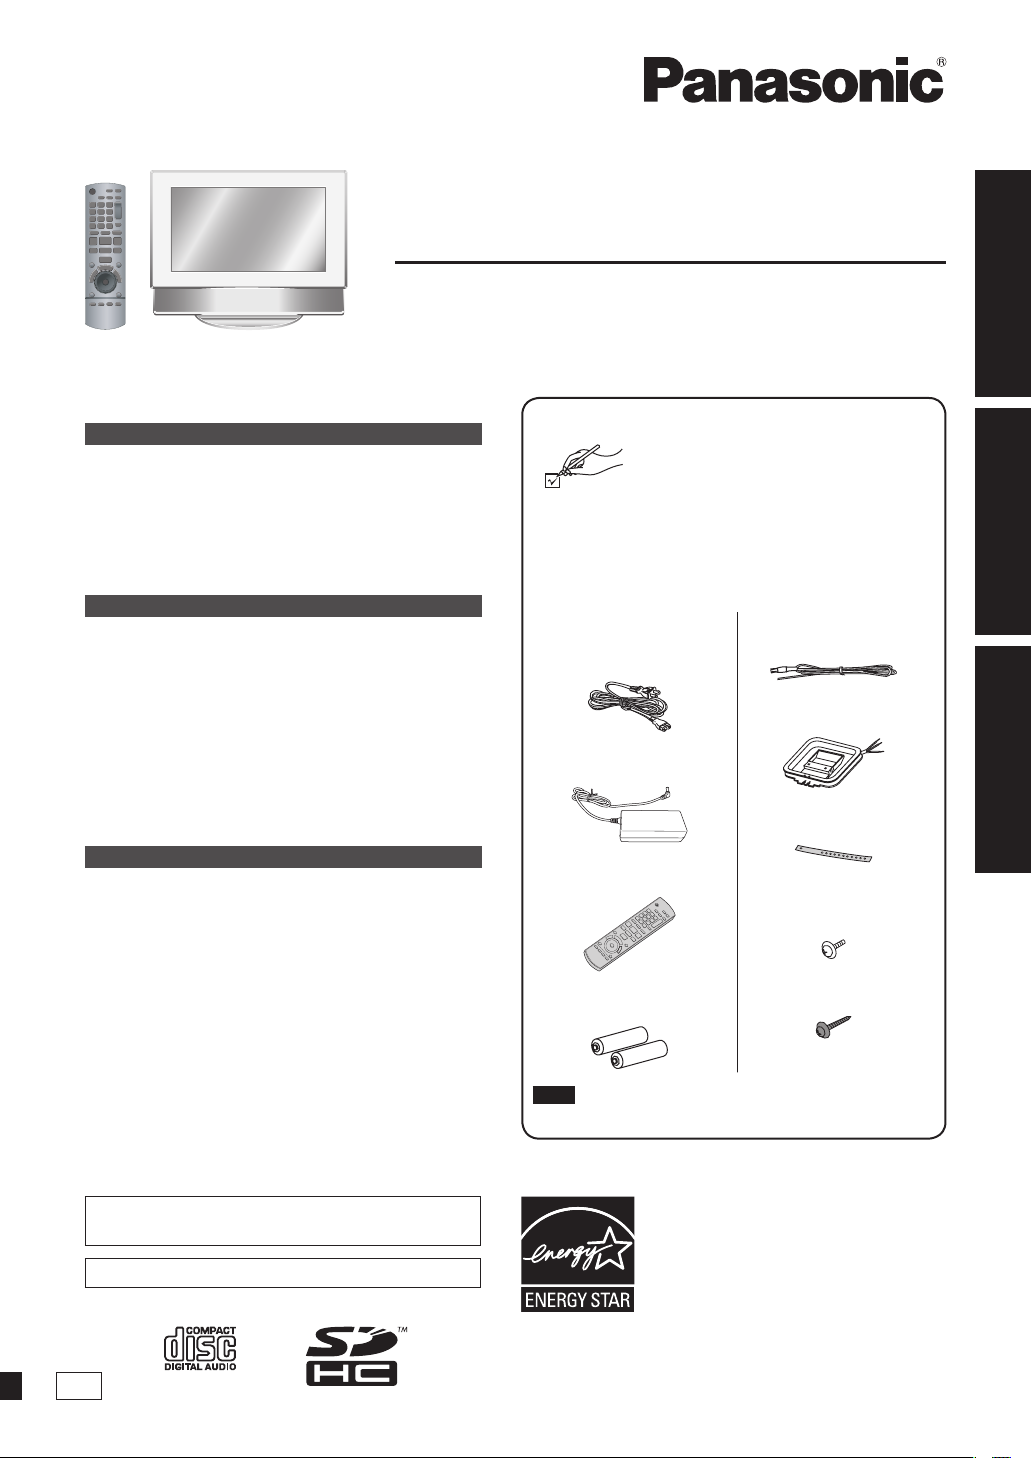
Supplied Accessories
Please check and identify the supplied
accessories.
Use numbers indicated in parentheses when asking
for replacement parts. (Product numbers correct as of
September 2009. These may be subject to change.)
To order accessories, refer to “Accessory Purchases
(United States and Puerto Rico)” on page 23.
1 AC power supply
cord
(K2CB2CB00021)
1 AC adaptor
(RFEA220W)
1 Remote control
(N2QAYB000452)
2 Batteries for remote
control
1 FM indoor antenna
(RSAX0002)
1 AM loop antenna
(N1DYYYY00009)
1 Fall-prevention belt
(TKLA3401)
1 Screw for fallprevention belt
(RHD30090-1)
1 Wood screw
(XTW4+16AFJK)
Dear customer
Thank you for purchasing this product.
For optimum performance and safety, please read these
instructions carefully.
Before connecting, operating or adjusting this product,
please read the instructions completely. Please keep
this manual for future reference.
If you have any questions contact
1-800-211-PANA (7262)
The warranty can be found on page 23.
P
Note
The actual shapes of accessories may be different.•
As an ENERGY STAR® Partner,
Panasonic has determined that this
product meets the ENERGY STAR
guidelines for energy efficiency.
RQT9522-P
®
Page 2
IMPORTANT SAFETY INSTRUCTIONS
Read these operating instructions carefully before using the unit. Follow the safety instructions on the unit and the applicable
safety instructions listed below. Keep these operating instructions handy for future reference.
1) Read these instructions.
2) Keep these instructions.
3) Heed all warnings.
4) Follow all instructions.
5) Do not use this apparatus near water.
6) Clean only with dry cloth.
7) Do not block any ventilation openings. Install in
accordance with the manufacturer’s instructions.
8) Do not install near any heat sources such as radiators,
heat registers, stoves, or other apparatus (including
amplifi ers) that produce heat.
9) Do not defeat the safety purpose of the polarized or
grounding-type plug. A polarized plug has two blades
with one wider than the other. A grounding-type plug
has two blades and a third grounding prong. The wide
blade or the third prong are provided for your safety. If
the provided plug does not fi t into your outlet, consult an
electrician for replacement of the obsolete outlet.
10) Protect the power cord from being walked on or pinched
particularly at plugs, convenience receptacles, and the
point where they exit from the apparatus.
11) Only use attachments/accessories specifi ed by the
manufacturer.
12) Use only with the cart, stand, tripod,
bracket, or table specifi ed by the
manufacturer, or sold with the
apparatus. When a cart is used, use
caution when moving the cart/apparatus
combination to avoid injury from tip-over.
13) Unplug this apparatus during lightning
storms or when unused for long periods of time.
14) Refer all servicing to qualifi ed service personnel.
Servicing is required when the apparatus has been
damaged in any way, such as power-supply cord or
plug is damaged, liquid has been spilled or objects
have fallen into the apparatus, the apparatus has been
exposed to rain or moisture, does not operate normally,
or has been dropped.
CAUTION!
THIS PRODUCT UTILIZES A LASER.
USE OF CONTROLS OR ADJUSTMENTS OR
PERFORMANCE OF PROCEDURES OTHER THAN
THOSE SPECIFIED HEREIN MAY RESULT IN
HAZARDOUS RADIATION EXPOSURE.
DO NOT OPEN COVERS AND DO NOT REPAIR YOURSELF.
REFER SERVICING TO QUALIFIED PERSONNEL.
WARNING:
TO REDUCE THE RISK OF FIRE, ELECTRIC SHOCK
OR PRODUCT DAMAGE,
DO NOT EXPOSE THIS APPARATUS TO RAIN,
z
MOISTURE, DRIPPING OR SPLASHING AND THAT
NO OBJECTS FILLED WITH LIQUIDS, SUCH AS
VASES, SHALL BE PLACED ON THE APPARATUS.
USE ONLY THE RECOMMENDED ACCESSORIES.
z
DO NOT REMOVE THE COVER (OR BACK); THERE
z
ARE NO USER SERVICEABLE PARTS INSIDE. REFER
SERVICING TO QUALIFIED SERVICE PERSONNEL.
CAUTION!
DO NOT INSTALL OR PLACE THIS UNIT IN A
BOOKCASE, BUILT-IN CABINET OR IN ANOTHER
CONFINED SPACE. ENSURE THE UNIT IS WELL
VENTILATED. TO PREVENT RISK OF ELECTRIC SHOCK
OR FIRE HAZARD DUE TO OVERHEATING, ENSURE
THAT CURTAINS AND ANY OTHER MATERIALS DO
NOT OBSTRUCT THE VENTILATION VENTS.
The socket outlet shall be installed near the equipment
and easily accessible.
The mains plug of the power supply cord shall remain
readily operable.
To completely disconnect this apparatus from the AC
Mains, disconnect the power supply cord plug from AC
receptacle.
AC adaptor
This AC adaptor operates on AC between 110V and 240V.
But
In the U.S.A. and Canada, the AC adaptor must be
•
connected to a 120V AC power supply only.
When connecting to an AC supply outside of the U.S.A.
•
or Canada, use a plug adaptor to suit the AC outlet
confi guration.
When connecting to a supply of greater than AC 125V,
•
ensure the cord you use is suited to the voltage of the AC
supply and the rated current of the AC adaptor.
Contact an electrical parts distributor for assistance in
•
selecting a suitable AC plug adaptor or AC cord set.
-If you see this symbol-
Information on Disposal in other Countries outside the
European Union
This symbol is only valid in the European
Union.
If you wish to discard this product, please
contact your local authorities or dealer and
ask for the correct method of disposal.
CAUTION
Danger of explosion if battery is incorrectly replaced.
Replace only with the same or equivalent type
recommended by the manufacturer. Dispose of used
RQT9522
batteries according to the manufacturer’s instructions.
2
Page 3

FCC Note:
This equipment has been tested and found to comply with
the limits for a Class B digital device, pursuant to Part 15
of the FCC Rules. These limits are designed to provide
reasonable protection against harmful interference in a
residential installation. This equipment generates, uses,
and can radiate radio frequency energy and, if not installed
and used in accordance with the instructions, may cause
harmful interference to radio communications. However,
there is no guarantee that interference will not occur in a
particular installation. If this equipment does cause harmful
interference to radio or television reception, which can be
determined by turning the equipment off and on, the user
is encouraged to try to correct the interference by one or
more of the following measures:
Reorient or relocate the receiving antenna.
•
Increase the separation between the equipment and
•
receiver.
Connect the equipment into an outlet on a circuit different
•
from that to which the receiver is connected.
Consult the dealer or an experienced radio/TV technician
•
for help.
FCC Caution: To assure continued compliance, follow the
attached installation instructions and use only shielded
interface cables with ferrite core when connecting to
computer or peripheral devices.
Any changes or modifi cations not expressly approved by
the party responsible for compliance could void the user’s
authority to operate this equipment.
Declaration of Conformity
Trade Name: Panasonic
Model No.: MW-10
Responsible Party:
Panasonic Corporation of North America
One Panasonic Way, Secaucus, NJ 07094
Support Contact:
Panasonic Consumer Electronics Company
1-800-211-PANA (7262)
This device complies with Part 15 of the FCC Rules.
Operation is subject to the following two conditions: (1)
This device may not cause harmful interference, and
(2) this device must accept any interference received,
including interference that may cause undesired operation.
Listening caution
EST. 1924
Selecting fi ne audio equipment such as the unit you’ve just
purchased is only the start of your musical enjoyment. Now
it’s time to consider how you can maximize the fun and
excitement your equipment offers. This manufacturer and the
Electronic Industries Association’s
Consumer Electronics Group want you to get the most out of
your equipment by playing it at a safe level. One that lets the
sound come through loud and clear without annoying blaring
or distortion-and, most importantly, without affecting your
sensitive hearing.
We recommend that you avoid prolonged exposure to
excessive noise.
Sound can be deceiving. Over time your hearing “comfort
level” adapts to higher volumes of sound. So what sounds
“normal” can actually be loud and harmful to your hearing.
Guard against this by setting your equipment at a safe level
BEFORE your hearing adapts.
To establish a safe level:
Start your volume control at a low setting.
•
Slowly increase the sound until you can hear it comfortably
•
and clearly, and without distortion.
Once you have established a comfortable sound level:
Leave it there.
•
Taking a minute to do this now will help to prevent hearing
damage or loss in the future. After all, we want you listening
for a lifetime.
SDHC Logo is a trademark.
•
Macintosh and Mac OS are registered trademarks or
•
trademarks of Apple Inc.
Other names, company names and product names
•
appearing in this document are the registered trademarks
or trademarks of the respective developer companies.
Note that TM or ® mark do not appear in this document is
some cases.
Please note that Panasonic assumes no liability for
indemnifi cation for loss of contents (data) due to some
failures, and direct or indirect damage while this unit is
used.
Getting started
IMPORTANT SAFETY INSTRUCTIONS
MW-10
User memo:
DATE OF PURCHASE
DEALER NAME
DEALER ADDRESS
TELEPHONE NUMBER
The model number and serial number of this product can
be found on either the back or the bottom of the unit.
Please note them in the space provided below and keep
for future reference.
MODEL NUMBER MW-10
SERIAL NUMBER
RQT9522
3
Page 4
About the internal memory, CDs and SDs
About the internal memory
Back up the internal memory periodically.
It is recommended that you back up the internal memory
to your PC or an SD card periodically to prevent the data
from being lost due to static electricity, electromagnetic
wave, malfunctions, etc.
•
Note that Panasonic assumes no liability for indemnifi cation
for any damage of the internal memory contents caused by
use of this product, failures, malfunctions, etc.
If this unit is repaired, the internal memory may be
•
restored to the factory default conditions.
About CDs
Use CDs with this mark. (8cm/12cm)
Do not use irregularly shaped CDs such as a heart-shaped
CD. (Malfunction may occur.)
Use discs that meet standard including discs with the above
mark. Playback of illegally copied discs and nonstandard
discs is not guaranteed.
Note about using a DualDisc
The digital audio content side of a DualDisc does not meet
the technical specifi cations of the Compact Disc Digital
Audio (CD-DA) format so play may not be possible.
CD-R and CD-RW
This unit is compatible with playback of CD-R and CD-RW discs
recorded in the CD-DA and JPEG format. Finalizing
necessary when the recording fi nishes. However, playback may
not be possible depending on the recording conditions.
¼
Process data so it can be played on CD-R/CD-RW
playback compatible devices.
Restrictions on this unit
Usable formats are ISO9660 level 1, level 2 (excluding
•
extended formats), and Joliet.
This unit is compatible with the multi-session. However,
•
with too many sessions, it may take time for playback to
start and data may not be loaded. Reducing the number of
sessions is recommended.
Discs recorded in the packet write format cannot be played back.
•
•
Files in folders located at up to sixth hierarchy in the disc
can be played back.
Maximum of 1000 fi les are guaranteed for playback.
•
If one disc contains both JPEG and CD-DA format data,
•
only the format recorded in the fi rst session is played back.
How to hold a disc
Do not touch the recorded surface.
Handling precautions
Do not write on the label side with a ball-point pen or other
•
writing instrument.
Do not use record cleaning sprays, benzine, thinner or
•
other solvent.
Do not attach labels or stickers to discs.
•
Do not use scratch-proof protectors or covers.
•
Do not use CDs with the seal or label peeled off or the
•
glue running over.
Do not use CDs whose disc sides are printed using a
•
commercially available label printer.
For dirt
Wipe with a soft cloth moistened with water, and then wipe
•
with a dried cloth.
For dew
RQT9522
Wipe with a soft and dried cloth.
•
¼
the disc is
4
About SDs
Usable cards (¼P5)
•
The usable area will be less than the indicated capacity.
•
Multimedia cards (MMC) cannot be used.
•
This unit (SDHC compliant equipment) supports both
SD cards and SDHC cards. You can use SDHC cards on
equipment that supports them. You cannot use SDHC
cards on equipment that supports SD cards only. When
you use SDHC cards on other equipment, make sure to
read the equipment’s operating instructions.
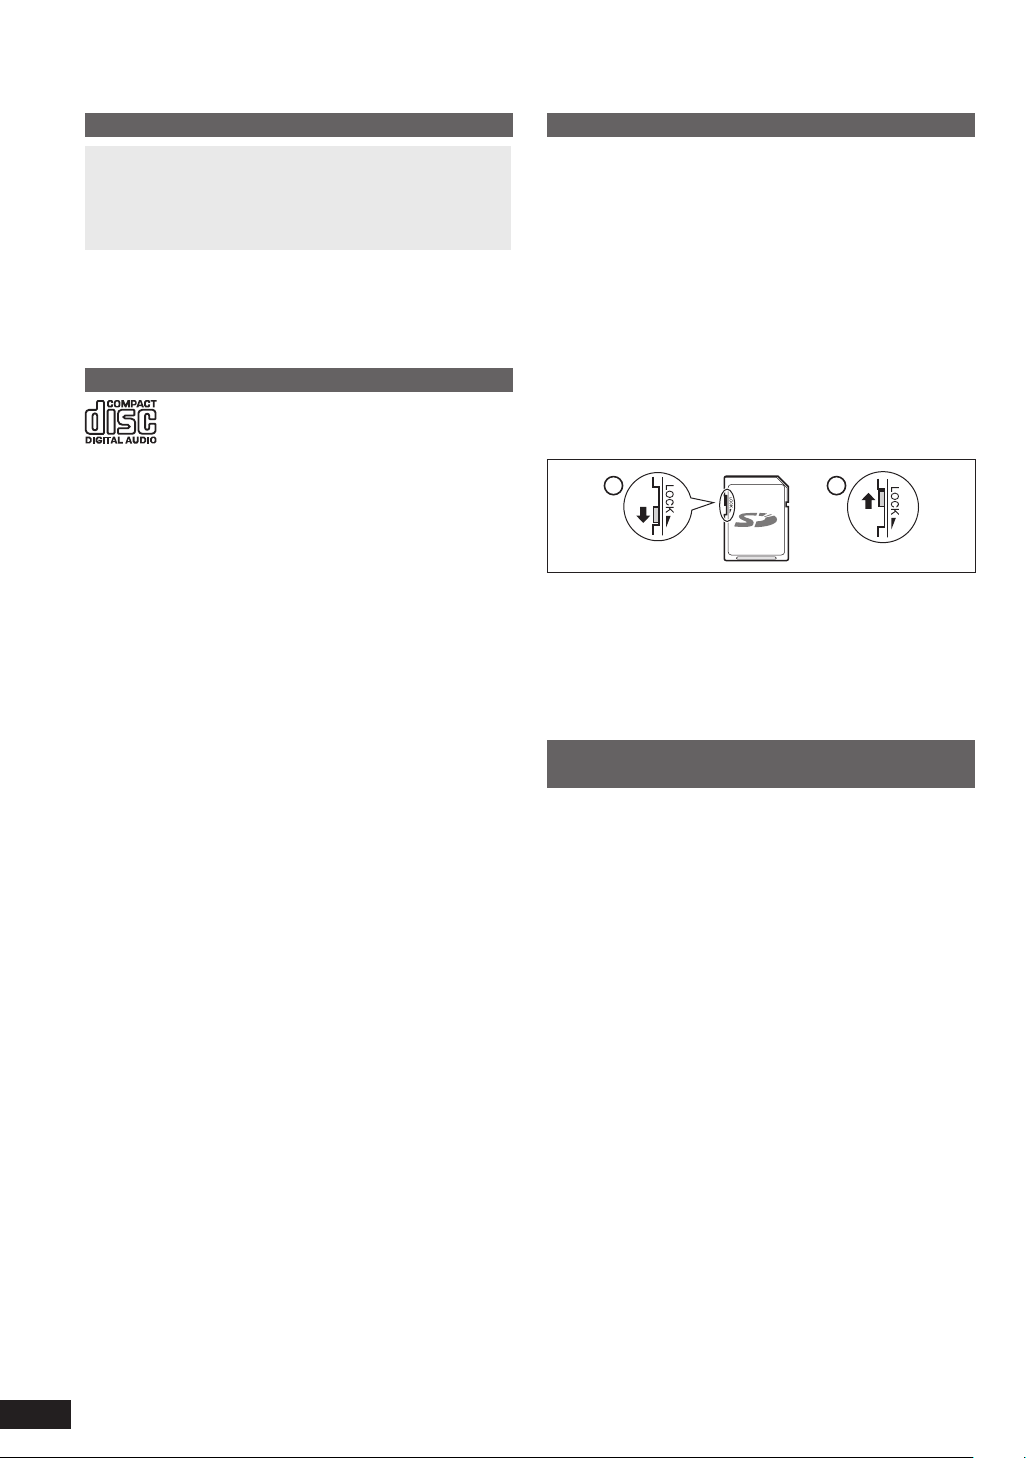
Write-Protect switch
When the switch is slid to the “LOCK” side, it is not possible
to write or delete data on the card and format it. When the
switch is unlocked, these functions become available.
A Write-protect
B When recording/editing
A
Handling cautions
Be sure to store the card when not in use.
•
Do not disassemble or modify the card.
•
Do not remove the attached label.
•
Do not attach a new label or seal.
•
Do not touch the metal terminal on the back side with hand
•
or metal.
B
Cautions when disposing of/transferring SD
cards and the unit
Format and Delete functions of this unit or a PC only change
the fi le management information and cannot completely
erase data stored on the SD card or in the internal memory
of this unit.
When disposing of/transferring SD cards, it is recommended
that you physically destroy the SD card itself or completely
erase the data on the SD card using a commercially
available data erasing software for PCs.
When disposing of/transferring the unit, perform physical
format. (¼below)
Manage data on the SD card and in the internal memory
under your responsibility.
To completely delete data in the internal
memory using the physical format (approx.
22 minutes)
1. Press and hold [DEL] for 3 seconds or more when
“Photos set as protected will also be deleted. Do you
really want to perform this operation?” is displayed at
“Format Internal Memory” (¼P18) in “Settings Menu”.
2. Press [w, q] to select “Yes” and press [OK].
Page 5

Read this page fi rst
What you can do on this unit
Simultaneous playback of music and pictures
•
You can enjoy high-quality audio of CD, iPod or radio on
this compact body.
•
While listening, you can play back pictures recorded onto
a CD/SD or the internal memory using the digital photo
frame.
CD
1
Track
1/22 60:12
Total Time
CDDA
CD
7 types of display mode + 12 types of clock/calendar
screen
•
The screen design can be changed according to your
preference. The clock and calendar can be displayed as
well as pictures and audio information.
12
9 3
6
Descriptions in these operating instructions
CD (music CD), CD-R and CD-RW
CD or disc
SD memory card, SDHC memory card, miniSD card,
microSD card, miniSDHC card and microSDHC card
SD or SD card
Playable media and fi le formats
Media
Internal memory – JPEG
Commercially
available music
CD
CDs
CD-R/CD-RW CD-DA
¼1
SD
¼1
iPod
¼1
See the descriptions at right for details.
¼2
File format used for commercially available music CDs
WMA and MP3 fi les copied onto CD-R or CD-RW cannot
be played back.
2:20
2009
Sep
Sun Mon Tue Wed Thu Fri Sat
File format
Audio Photo
¼1
z
z –
z JPEG
¼2
CD-DA
¼2
– JPEG
¼1
z
¼1
z
Audio and motion picture fi les
playable on your iPod
Playable JPEG fi les
(Playback may not be possible in some cases.)
Number of pixels
Max. 5120 × 3840 pixels
Min. 64 × 64 pixels
Maximum fi le size 10 MB
Approximate number of folders
practically usable
SD: 1000 folders
CD: 100 folders
SD: 40000 fi les (1000 fi les
Approximate number of fi les
practically usable
per folder)
CD: 1000 fi les (1000 fi les
per folder)
Files in folders lower than the sixth hierarchy cannot
be played back. Also, fi les in folder “SD_VIDEO” and
“SD_AUDIO” cannot be played back.
Usable SD cards
Panasonic SD cards are recommended.
SD memory card
(8 MB to 2 GB)
SDHC memory card
(4 GB to 32 GB)
miniSD/
miniSDHC card
microSD/
Formatted in FAT12 or FAT16 format
compliant with the SD standard
Formatted in FAT32 format
compliant with the SD standard
Be sure to attach the dedicated
adaptor when using on this unit.
(¼P6)
microSDHC card
Types of iPod that can be used on this unit (as
of August, 2009)
iPod touch second generation 8 GB, 16 GB, 32 GB
iPod nano fourth generation
(video)
iPod classic 120 GB
iPod touch fi rst generation 8 GB, 16 GB, 32 GB
iPod nano third generation (video) 4 GB, 8 GB
iPod classic 80 GB, 160 GB
iPod nano second generation
(aluminum)
iPod fi fth generation (video) 60 GB, 80 GB
iPod fi fth generation (video) 30 GB
iPod nano fi rst generation 1 GB, 2 GB, 4 GB
iPod fourth generation (color
display)
iPod fourth generation (color
display)
iPod fourth generation 40 GB
iPod fourth generation 20 GB
iPod mini 4 GB, 6 GB
•
Depending on the iPod in use or its version, operations or
displays may differ from the normal ones, but this will not
affect the basic playback. Use the latest version if possible.
•
You cannot save data onto the iPod using this unit.
8 GB, 16 GB
2 GB, 4 GB, 8 GB
40 GB, 60 GB
20 GB, 30 GB
Getting started
About the internal memory, CDs and SDs / Read this page fi rst
RQT9522
5
Page 6

Control guide
C
Main unit
1 Display
2 SD cover (¼below)
3 Speaker
4 SD card slot/SD indicator
Lights on: When an SD card is inserted
Blinks: When data is being written onto an SD card
5 USB port (¼P20)
6 Adjusting the volume
7 Switching the display mode (¼P9)
8 CD open button (¼below)
9 Exhaust hole
bk [POWER8] Standby/on switch
bl Power indicator
bm iPod insertion part (¼P11)
bn AC adaptor terminal (¼P8)
bo W (Headphone) jack (¼below)
bp FM/AM antenna terminals
bq [ u/t, y/i] Skipping/Searching a track, tuning of radio
br [ q/h] Audio play/pause
bs [AUDIO SELECTOR] Switching the audio selector (¼P10, 11, 12)
Note
When the display is opened, do not place your hand or any other
•
objects on it.
18
17
16
15
14
4
1
2
3
5
7
6
8
9
10
11
12
13
To use a headphone Inserting a CD
A Headphone (not included)
Plug type: 3.5 mm stereo mini plug
B Right side
A
1. Press the CD open button to
open the display part.
2. Insert the CD.
C Label side
Insert the center hole of the CD
fi rmly.
Do not touch the CD lens.
•
3. Press the upper part of the display by hand and close it.
To remove the CD, stop the playback, and then press the CD open
button to remove.
B
Note
Reduce the volume level and connect the
•
headphones.
Avoid listening for prolonged periods of time to
•
prevent hearing damage.
Note for the display part
Using this unit with the display open is not
recommended.
If the display is open, functions that can be used
•
will be restricted.
If you do not operate the unit with the display open
•
for approx. 10 minutes, the unit is automatically
turned off.
When you open the display, the inside may be hot.
•
This is not a malfunction.
RQT9522
6
Inserting an SD card
1. Open the SD cover.
2. Insert the SD card.
Face (with the corner cut) (D) up
and insert straight to the end.
When using a miniSD or microSD,
•
the dedicated adaptors (E) are
necessary.
3. Close the SD cover.
To remove an SD card
Stop the playback, and press the center
of the SD card. When the card slightly
pops out, pull it out with your fi ngers.
Never remove the SD card while the
•
SD indicator is blinking. Otherwise, the
data may be destroyed.
Keep the Memory Card out of reach of
•
children to prevent swallowing.
D
E
Page 7

This manual explains the remote control operations in most sections.
B
B
Remote control
1
2
3
DEL
4
5
PROGRAM
6
iPod
7
8
PHOTO
MEDIA
9
10
H
P
11
12
13
14
15
T
C
E
L
E
S
SLIDE
SHOW
ZOOM ROTATE INFO MENU
O
T
O
S
AUDIO
INFO
REPEAT
CD
RADIO OFF
AM
Y
A
L
P
S
I
D
OK
PHOTO
TIMER
SOUND
M
O
D
E
SETUP
DIMMER
VOL
MUTE
PLAY MODE
FM
CLOCK
S
E
L
E
C
RETURN
1 Standby/on switch
2 Displaying audio information
3 Selecting numbers (¼P9, 10, 13, 19)
4 Canceling programed tracks/preset
16
17
18
19
20
registrations (¼P10, 13)
5 Program play of CD/Setting radio
(¼P10, 13)
6 CD play/pause
7 iPod play/pause
8 Skipping/Searching a track/Tuning of
radio
9 Switching photo media (¼P14, 15)
bk Switching the display mode (¼P9)
21
bl Selecting photos (¼P14, 15)
22
bm Selecting to confi rm
23
bn Viewing the slideshow
24
bo Zooming in/out photos
bp Rotating photos
bq Setting the timer (¼P19)
25
br Displaying the setup menu (¼P18)
26
bs Setting the dimmer
27
bt Setting the sound fi eld/sound quality
T
28
T
R
A
C
K
S
29
30
31
effect (¼P14)
ck Adjusting the volume
cl Muting the sound
To use the remote control
Insert batteries
1. Open by pressing the lid edge. (A)
2. Insert the batteries (B: R6/LR6, AA) and
close the cover.
cm Repeating music (¼P10, 12)
cn Setting the audio playback mode
(¼P10, 12, 13)
co Listening to FM broadcast
cp Stopping the audio/Turning off the
radio
cq Listening to AM broadcast
cr Displaying the clock/calendar
cs Selecting a track/broadcasting station
(¼P10, 11, 13)
ct Returning to the previous screen/
Displaying photos with thumbnails
dk Displaying the photo setting menu
dl Displaying the photo information
One-touch playback
If you press [CD q/h], [iPod q/h],
[FM] or [AM] while the unit is off, the
unit is automatically turned on and
the audio playback or radio reception
starts. (Only when the media such as
CD and iPod has already been set.)
A
A
Getting started
Control guide
C Place this side in before the other side
when you close.
Use a manganese dry battery or an
•
alkali dry battery.
Insert so the poles (+ and –) match those in the remote control.
•
Do not heat or expose to fl ame.
•
Do not leave the battery(ies) in an automobile exposed to direct sunlight for a long
•
C
C
period of time with doors and windows closed.
Use
Caution
D
Do not place an object between the
•
signal sensor and the remote control.
Do not place the signal sensor under
•
direct sunlight or the strong light of an
inverter fl uorescent lamp.
Keep the transmission window and the
•
unit’s sensor free from dust.
When you set the unit in a
cabinet
F
E
G
The remote controlling range may
D Remote control signal sensor
E Approx. 7 meters
decrease depending on the thickness or
colors of glass cabinet doors.
F Approx. 30º
G Transmission window
RQT9522
7
Page 8

Connecting antennas and power source
1
A
Back of
product
2
C
F
1. Connect the FM indoor antenna.
Insert fi rmly to the end.
•
Receive broadcast signals (¼P12) after connection
•
and fi x the end of the antenna using a tape (A) at the
least noisy position.
2. Connect the AM loop antenna.
B Insert into the groove. Insert fi rmly until it clicks.
C Red D White E Black
F Use a Phillips-head screwdriver, etc. Do not screw
too tightly. Otherwise, the screwdriver goes around in
circle and cannot be fi xed.
Receive broadcast signals (¼P12) after connection
•
and place the antenna at the least noisy position.
Do not use any other AM loop antennas except the
•
supplied one.
3. Connect the AC power supply cord.
G AC adaptor
H AC power supply cord
I To household AC outlet (Connect last.)
Note
While using this unit, the AC adaptor may become a little
•
hot. This is not a malfunction.
The included AC power supply cord and AC adaptor
•
are for use with this unit only. Do not use it with other
equipment.
Do not use AC power supply cord and AC adaptor from
•
other equipment with this unit.
E
B
D
3
I
When the Demo function (¼P18) is activated
When connecting the AC
power supply cord, the unit
is automatically turned on
and the screen shown at
right appears.
When not using the demo function¼, press [e, r] on the
remote control to select the setting to disable it, and then
press [OK].
¼
With the demo function, simple explanations about the
unit’s functions are displayed on the display part.
If it is set to Enable or operation is not performed for
•
more than 2 minutes, the demo function is activated. If
the unit is operated, the demo function is canceled and
the standard screen appears.
You can switch the demo function to Enable/Disable by
•
pressing [DISPLAY MODE] on the main unit for approx. 2
seconds while audio is stopped.
To remove the AC power supply cord
Turn the unit off.
After the screen completely turns off, pull out the AC power
supply cord.
About speakers
These speakers do not have magnetic shielding. Do not
•
place them near televisions, personal computers or other
devices easily infl uenced by magnetism.
You can damage your speakers and shorten their useful
•
life if you play sound at high levels over extended periods.
When the sound is distorted or the sound quality is
•
adjusted, turn down the volume even in the normal use.
(Failure to do so may cause the speakers to be damaged.)
The speaker nets cannot be removed.
•
H
G
Start Demo
Disable the Demo function
8
RQT9522
Page 9

Setting the clock
Selecting the standard screen
This unit is equipped with the calendar and timer functions.
Set the time fi rst.
1. Press Standby/on switch to turn on the unit.
2. Press [SETUP].
3. Press [e, r] to select “Clock/
Calendar Settings” and press
[OK].
4. Press [e, r] to select “Set
Clock” and press [OK].
5. Press [w, q] to select the
items (Month, Day, Year, Hour,
Minute and AM/PM¼), and
press [e, r] to set.
¼
Only for the 12-hour display (¼P18)
You can also use the numbered buttons.
•
Settings Menu
Image Quality Settings
Clock/Calendar Settings
Demo Mode
Remote Control Mode
Clock/Calendar Settings
Select Design
Set Clock
Set Date Indication
Set Clock Indication
Month Day Year Hour Minute
:
2080924 10 24 AM
e.g.) 9: [0] [9]
10: [1] [0]
6. Press [OK].
The clock starts from 00 second and the standard
screen (¼right) appears.
To return to the previous screen, press [
When the introduction screen for the time
RETURN].•
setting appears
If you attempt to operate a function that requires time setting
while the time is not set, the introduction screen for the time
setting appears.
1. Press [e, r] to select “Set time” and press [OK].
2. Perform the above steps 5 and 6.
Note
Period that can be set: January 2000 to December 2099
•
There is a small precision error of the clock. Periodical time
•
correction is recommended.
If the AC power supply cord is removed or blackout occurs,
•
check the time.
You can select the standard screen normally displayed
among 7 types of audio/photo screen or 12 types of clock/
calendar screen.
Audio/photo screen
Press [DISPLAY
MODE
] to select the screen.
Each time you press the button, the screen changes as
follows.
A Audio + photo (factory setting)
B Photo
C Clock + photo
D Calendar + photo
¼
E Audio
F Audio + clock
G Audio + calendar
A
CD
1
Track
1/22 60:12
Total Time
CDDA
CD
1
Track
Total Time
1/22 60:12
CDDA
¼
After the photo operation is performed, the screen B
2009
Sep
Sun Mon Tue Wed Thu Fri Sat
¼
¼
CD
1
Track
Total Time
1/22 60:12
CDDA
C
9 3
Sep. 30. 2009 Wed
12
9 3
6
Sep. 30. 2009 Wed
D
2009
Sep
12
6
2:20
10:08 AM
Sun Mon Tue Wed Thu Fri Sat
EFG
CD
1
Track
1/22 60:12
Total Time
CDDA
1 2 3 4 5
6 7 8 9 10
11 12 13 14 15
16 17 18 19 20
21 22
2:20
B
2:20
10:08 AM
2:20
appears.
Press [CLOCK].
Press [CLOCK].
Clock/calendar screen
You can select the clock/calendar
screen for your preference among
12 types of layout.
1. Press [SETUP].
2. Press [e, r] to select “Clock/
Calendar Settings” and press
[OK].
3. Press [e, r] to select “Select
Design” and press [OK].
Settings Menu
Clock/Calendar Settings
12
93
6
Sep. 30. 2009 Wed
Image Quality Settings
Clock/Calendar Settings
Demo Mode
Remote Control Mode
Select Design
Set Clock
Set Date Indication
Set Clock Indication
4. Press [e, r, w, q] to select the screen and press
[OK].
To return to the previous screen, press [
•
To view a calendar of different month, press [w, q] while
•
RETURN].
the calendar is displayed.
Getting started
Note
When pressing [e] while the photo is displayed, you can
•
view the photo playback information.
When the audio screen is not displayed during audio
•
playback and [r] is pressed, you can view the audio
playback information.
The design change of the clock/calendar is refl ected on
•
the audio/photo screen as well.
Connecting antennas and power source / Setting the clock / Selecting the standard screen
RQT9522
9
Page 10

Listening to a CD
BC
•
Playable CDs ¼P5
1. Insert the CD containing audio data (¼P6)
2. Press [CD q/h].
For the main unit, press
•
[AUDIO SELECTOR] to
select “CD” and press
[q/h].
Playback will start.
e.g.) Audio screen
A Playing track
B Playback status
C Track number/Number of
tracks
D Elapsed playing time
Stop
Pause
Skip
[g]
[CD q/h]
Press again to resume.•
[u/t, y/i]
[u/t, y/i]
Fast backward/Fast
forward (Search)
While playing or paused, press
and hold the button until it
reaches the desired position.
Adjusting the volume [+ VOL –]
Viewing audio
[AUDIO INFO]
information
Various playback methods
1. Press [SELECT TRACKS].
Searching for the
track to listen
Direct playback
1 Track/
Random
Repeat
Normal/1 Track/
Random/Program
playback is repeated.
2. Press [e, r] to select the
On the standard screen
Select with the numbered
buttons.
To select the number above 9
•
While stopped or during playback
Press [PLAY MODE].
Each time you press, the play
mode is switched as below.
While stopped or during playback
Press [REPEAT].
“&” is displayed during the
•
Repeat play.
To cancel, press [REPEAT]
•
again.
CD
1
Track
1/22
Total Time
CDDA
The track list is displayed.
track and press [OK].
The playback starts with the
selected track.
e.g.) 16: [ 10] [1] [6]
Normal: Normal playback
1 Track: Only the selected 1
track is played.
Random: Tracks are played
at random.
60:12
A
1 2 3 4 5
6 7 8 9 10
11 12 13 14 15
16 17 18 19 20
21 22
2:20
D
While stopped
1. Press [PROGRAM].
The program screen appears.
2. Press the numbered buttons
to select tracks.
To select the number above
•
Program
You can select desired
tracks (up to 24 tracks)
and listen in your
preferred order.
9
e.g.) 16: [ 10] [1] [6]
3. Repeat step 2 and select
more tracks.
If you attempt to select 25
or more tracks, the error
message appears.
4. Press [CD q/h].
The program playback starts
and the standard screen is
restored.
Various operations for the program playback
To stop
Press [g].
The programed contents are saved.
•
To return to the normal playback mode
Press [PLAY MODE] while stopped.
The programed contents are saved.
•
To set the program playback mode again, press
•
[PROGRAM] while stopped.
To add tracks for the program playback
While stopped, press [PROGRAM] and then the numbered
buttons to select tracks.
To cancel the last selected track for program
Press [PROGRAM] and then [DEL] while stopped.
You cannot select tracks to delete.
•
To cancel all programs
1. While stopped, press [PROGRAM] and then [g].
2. Press [w, q] to select “Yes” and press [OK].
Note
•
During the random playback
–
Cannot skip to the track once played.
–
Searching is available within the track being played only.
•
During the program playback
–
The direct playback is not available.
–
Searching is available within the track being played only.
•
The programed contents are saved even if the unit is
turned off or the selector is switched. However, it is
canceled when the display is opened.
•
No sound is heard during Search.
RQT9522
10
Page 11

Listening to an iPod
Usable iPods ¼P5
Attaching/Recharging the iPod
Turn off the iPod before attaching.
•
Remove the iPod if it is in the iPod case.
•
1. Attach the Dock adaptor supplied with the iPod.
Insert until it clicks.
•
A MW-10 top view
B Dock adaptor C Hook
2. Attach the iPod (D).
Insert and remove the iPod slowly.
•
Do not insert the iPod back to front.
•
D
B
C
A
Recharging starts when the iPod is connected.
When the unit is off, the recharging indicator appears on the
unit’s screen.
The recharging indicator may not disappear even if the
•
recharging is complete.
Note
Disconnect the iPod from the unit after recharging is
•
complete when you will not use it for a long period of time.
Even if the battery is discharged naturally after recharging,
the battery is not additionally charged.
When the Dock adaptor is not supplied with the iPod,
•
purchase it from Apple Inc.
Please read the operating instructions supplied with the
•
iPod.
No warranty is provided against any trouble about the iPod
•
data management.
iPod track selection menu
Playlists Searching from all playlists
Artists
Albums Searching from album titles
Songs
Podcasts
Audiobooks
Searching from artist names
Searching from all tracks
registered to the iPod
Searching from episodes of radio
program obtained at iTunes store
Searching from titles in
Audiobooks purchased at iTunes
store or “audible.com”
Playing music and video on the iPod
Turn down the volume of this unit.
1. Attach the iPod. (¼left)
2. Press [iPod q/h].
•
For the main unit, press
[AUDIO SELECTOR] to
select “iPod” and press
[q/h].
Playback will start.
e.g.) Audio screen
Playlist name
A
Artist name
Album name
Track name
B Playback status
C Track number/Number of
tracks
D Elapsed playing time
Pause
Skip
[iPod q/h] or [g]
Press [iPod q/h] to resume.•
While playing or paused
[u/t, y/i]
[u/t, y/i]
Fast backward/Fast
forward (Search)
While playing or paused, press
and hold the button until it
reaches the desired position.
Adjusting the volume [+ VOL –]
Viewing audio
[AUDIO INFO]
information
Note
Depending on the display specifi cations, the iPod video is
•
displayed slightly horizontally long.
If you open the display during the video playback, the
•
display becomes dark, however, the video playback
continues.
For iPod, video playback may not be available depending
•
on the version.
Photos on the iPod cannot be played on this unit.
•
Searching for the track/video to play
1. Press [SELECT TRACKS].
2. Press [e, r] to select “Music”, “Videos” or “List of
Currently Playing Tracks” and press [OK].
When you select “Music”, the track selection menu
•
appears. (¼left)
3. Press [e, r] and [OK] to search for the track and play.
When you press [w, q] on the screen that displays the
•
selection tab ( , ), you can switch the list.
iPod
Andes
Los Panas
Al Partir
1/22
BC
A
Al Final
Al Partir
Ave de Cristal
Condor Malcu
Cutimuy
El Arbol de mi Destino
El ultimo Amanecer
Ingratitud
La Ventana
Mi Pecado
2:20
D
Operations
Listening to a CD / Listening to an iPod
RQT9522
11
Page 12

Listening to an iPod
Listening to the radio
Shuffl e
(only for music)
Tracks or albums are
played at random.
Repeat
Normal/Shuffl e
playback can be
repeated.
Note
For the album shuffl e, the tracks in the album are played
•
back in the proper order.
If video is played back, the Shuffl e setting may become
•
“OFF”.
When a play mode is switched, the track list display on the
•
audio playback screen may be different from the tracks
played back. If this occurs, select tracks from the track
selection menu again.
If the iPod with Shuffl e/Repeat set is attached
Press [PLAY MODE].
Each time you press
Songs Albums Off
Press [REPEAT].
Each time you press
One All Off
to this unit:
Playback is performed with the same playback method.
Also, even if the iPod is removed after the playback method
is set on this unit, the iPod still keeps the same playback
method.
“Made for iPod” means that an electronic accessory
has been designed to connect specifi cally to iPod and
has been certifi ed by the developer to meet Apple
performance standards.
Apple is not responsible for the operation of this device or
its compliance with safety and regulatory standards.
iPod is a trademark of Apple Inc., registered in the U.S.
and other countries.
Adjust the frequency to listen (Manual Tuning)
1. Press [FM] or [AM].
For the main unit, press [AUDIO SELECTOR] to
•
select “FM” or “AM”.
2. Press [PLAY MODE] to select “Manual Tuning”.
3. Press [u/t, y/i] to
tune in the station you like.
A Lights up when signals are
received.
B Lights up when the FM
stereo broadcast is
received.
FM
88.1
Manual Stereo
A
MHz
B
Press and hold [u/t, y/i]
until the frequency indicator starts
to run.
Stops when the broadcast is
•
received.
If jamming is present in the
Automatic tuning
Stopping the radio
sound
FM frequency step
The step is factory-set to 200 kHz, but you can change it to
receive broadcasts allocated to 100 kHz steps.
1. Press [FM].
2. Press [PROGRAM].
3.
Press [e, r] to select the “Frequency Step” and press
[OK].
4. Press [e, r] to select the “100 kHz” or “200 kHz” and
press [OK].
•
surroundings during the
automatic tuning, the broadcast
may not be received and the
frequency may stop.
To stop the automatic tuning,
•
press [u/t, y/i] again.
[g]
To listen to the radio again, press
[FM] or [AM]. (For the main unit,
press [AUDIO SELECTOR].)
12
RQT9522
Page 13

Memorizing broadcast stations to listen (Preset
Tuning)
Memorizing broadcast stations
Up to 30 FM stations and 15 AM stations can be memorized.
2 methods are available for this.
You can select either the
minimum frequency level or any
frequency level as a memory
starting position.
1. Press [FM] or [AM].
To start memorizing from
•
an arbitrary frequency,
Auto Memory
Memorizing broadcast
stations automatically,
starting with the
frequency memorized
fi rst and memorizing
the upper stations.
Registering preset
channels
Memorizing your
favorite broadcast
stations manually
adjust to the frequency level
beforehand.
2. Press [PROGRAM].
3. Press [e, r] to select the
“Auto Memory” and press
[OK].
4. Press [e, r] to select the
“Minimum Frequency” or
“Current Frequency” and
press [OK].
The Auto memory starts.
When it fi nishes, the unit
receives the broadcast station
last memorized.
1. Receive the broadcast
station to memorize. (¼P12)
The monaural setting
•
(¼right) can be registered
for FM.
2. Press [PROGRAM].
3. Press [e, r] to select
“Register/Delete Preset” and
press [OK].
4. Press [e, r] to select the
channel and press [OK].
To cancel the memorized broadcast stations
1. Press [PROGRAM].
2. Press [e, r] to select “Register/Delete Preset” and press
[OK].
3. Press [e, r] to select the channel to delete and press
[DEL].
The message for deletion appears.
•
If noise is excessive when receiving FM stereo
signals
1. Press and hold [PLAY MODE] approx. 2 seconds or more
to select “Mono”.
Each time you press and hold
Auto (Stereo) Mono
“Mono” is displayed.
When the reception frequency is changed with the manual
•
tuning, the setting returns to “Auto (Stereo)”. Normally, set
“Auto (Stereo)”.
If noise is excessive when receiving AM
broadcast signals (BP: Beat-proof)
1. Press [PROGRAM].
2. Press [e, r] to select “Beat-proof ”.
3. Press [w, q] to select the least noisy setting among “BP1”
to “BP4”.
4. Press [
•
Keep distance as far as possible among the AM loop
antenna, AC adaptor and the main unit.
When radio reception is poor
Use an outdoor antenna if radio reception is poor.
FM outdoor antenna (using a television antenna)
Remove the included FM indoor antenna.
Connect a coaxial cable (commercially available) (A) to
the FM antenna terminal (B) of this unit and TV antenna
terminal (Type F) (C).
RETURN] to return to the standard screen.
B
A
C
Operations
Listening to the channel memorized
beforehand
1. Press [FM] or [AM].
2. Press [PLAY MODE] to
select “Preset Tuning”.
3. Press [u/t, y/i] to
select the channel.
Preset Tuning
You can also select with the
•
numbered buttons.
Also, you can press
•
[SELECT TRACKS], press
[e, r] to select the channel
and press [OK].
If the reception is still poor with the above connection,
an FM dedicated antenna (commercially available) or
a booster (amplifi er, commercially available) may be
necessary. Consult your dealer for details.
Listening to an iPod / Listening to the radio
RQT9522
13
Page 14

Setting the sound quality/
Selecting photos to view
sound fi eld, etc.
Changing the sound quality/sound fi eld
1. Press [SOUND].
2. Press [e, r] to select the
effect (¼below), and press
[w, q] to select a setting.
When [
RETURN] is pressed,
the standard screen is restored.
Sound setting items
Factory settings are indicated with underlines.
Manual
Adjusts the level of high range
and low range separately.
(¼below)
Flat
When the sound quality effect is
not used
Heavy
Equalizer
You can select the
sound quality for your
preference according
to audio sources.
Adds punch to rock
Clear
Clarifi es higher range for jazz
Soft
For background music
Vocal
Adds gloss to vocal
When “Manual” is selected
Press [e, r] to select “Bass”
(Low range) or “Treble” (High
range) and press [w, q] to select
the level (-4 to +4).
Surround
On / Off
You can enjoy broader
sounds.
D.BASS
You can enjoy rich
bass sounds.
On / Off
This effect may be less achieved
•
according to the sound sources
for playback.
Muting the volume
Press [MUTE].
Press again to resume.
This is also canceled by adjusting
•
the volume or operating the
power source.
Sound Settings
Equalizer
Bass
Treble
Surround
D.BASS
You can play back photos on the SD, CD or in the internal
memory.
•
To view photos in the internal memory, make copies of
those photos beforehand. (¼P16)
•
Playable photos (JPEG) ¼P5
When inserting the SD card or CD containing photo
fi les
The photo playback menu
appears.
Press [e, r] to select the menu
and press [OK].
View Most Recent Photos
SD Card Menu
View Most Recent Photos
Select Photo to View
Copy Photo
Cancel
(Only for the SD)
Select Photo to View (¼below, P15)
Copy Photo (¼P16)
If “Cancel” is selected, the standard screen is restored.•
The following explains the method of how to select and play
photos among all photos on the all selected media when the
SD or CD is already inserted.
1. Press [PHOTO MEDIA] to
select “Internal Memory”,
“SD” or “CD”.
Each time you press, the media
Select Photo Media
Internal Memory
SD
CD
is switched.
You can also use [e, r].•
2. Press [SELECT PHOTOS].
3. Press [e, r] to select “All
Photos” and press [OK].
4. Press [e, r, w, q] to select
the photo and press [OK].
Internal Memory Photo Selection Menu
All Photos
Recently Imported Photos
Date Search
Folder Search
The photo is displayed.
Performing the slideshow
Press [SLIDE SHOW] or [OK].
The slideshow starts with the displayed photo.
When [OK] is pressed again, the single view is restored.
•
You can set the order, effect and interval of slideshow.
•
(¼P17)
Note
•
Displaying photos may take time. Displaying photos on
a CD in particular may take several tens of seconds.
Because of this, the photos may be displayed later than
the slideshow interval (¼P17).
•
Slideshows of the internal memory and SD card are
repeatedly played back.
14
RQT9522
Page 15

Operations during photo playback
Viewing categorized photos
Selecting photos from
the thumbnail
¼1
view
1. Press [
The photo thumbnail screen
appears.
2. Press [e, r, w, q] to select
RETURN].
photos and press [OK].
(Only for the SD/internal
memory)
Press and hold [w, q].
When you release your fi nger,
•
Scrolling photos
scrolling stops and the photo
displayed in the center is
displayed with the single view.
The thumbnail screen can be
•
scrolled as well.
Press [ZOOM (PHOTO)].
Each time you press
×1 ×1.5 ×2
Zooming pictures
While zoomed, you can move
•
to preferred position using
[e, r, w, q].
Press [ROTATE (PHOTO)].
Each time you press, the photo
Rotating pictures
•
rotates anticlockwise by 90°.
Press [INFO (PHOTO)].
The fi le name, number of pixels,
•
date of capture, etc. of photo
Viewing photo
information
are displayed.
When the scroll bar is displayed,
•
you can move across the screen
using [e, r].
To return to the original screen,
•
press [
¼1
Thumbnail is a reduced image of multiple pictures to view
RETURN].
them as a list.
Note
If some images cannot be displayed with the thumbnail
•
view, “ ” is displayed. Also, depending on the photo or
media, the scrolling thumbnail images may be displayed
as “ ”.
Scrolling is not possible during the random playback of
•
photos. Also, you cannot return to the previous photo even
if you press [w].
When the photo is zoomed or its information is displayed
•
during the slideshow, if the previous screen is not restored,
the screen is not switched to the next photo.
When the display part is opened during the slideshow
•
playback, the slideshow is paused.
If the unit is turned off or media are removed, the image
•
rotation setting for SD/CD is canceled.
1. Press [PHOTO MEDIA] to select “Internal
Memory”, “SD” or “CD”.
2. Press [SELECT PHOTOS].
3. Press [e, r] to select the photo categories
(¼below) and press [OK].
The type of category differs depending on the
•
media.
4. Select photos according to the on-screen
instructions.
Photo categories
All Photos
(¼P14)
(Only for the internal memory)
Recently Imported
Photos
Select from photos imported to
the internal memory recently.
Photos directly copied from a
•
computer are not included.
(Only for the SD/internal
Date Search
memory)
Photos are selected by date.
Folder Search Select from the folder.
(Only for the SD)
Select from photos registered as
“Favorite” on the Panasonic digital
SD Favorite
(1 to 10)
¼2
camera LUMIX, etc.
LUMIX: SD Favorite 4
For details on how to register
•
“Favorite” on the LUMIX, etc.,
see those operating instructions.
(Only for the internal memory)
Favorite (1 to 3)
Select from photos registered as
“Favorite” on this unit. (¼P16)
¼2
Displayed only if photos are present.
Note
The slideshow is performed only within the selected
•
category.
The “SD Favorite” is classifi ed based on the DPOF setting
•
information, which means the Favorite set on units other
than Panasonic products may not be classifi ed as “SD
Favorite”.
A date for Date Search can be selected from January 2000
•
to December 2099.
Operations
Setting the sound quality/sound fi eld, etc. / Selecting photos to view
RQT9522
15
Page 16

Editing photos
Copying photos
You can copy photos from the SD or CD to the internal
memory (4 GB).
Select the photo category. (¼P15)
•
Stop audio beforehand.
•
1. Press [MENU (PHOTO)].
2. Press [e, r] to select “Copy
Photo” and press [OK].
3. Press [e, r] to select “Import
from SD” or “Import from CD”
and press [OK].
4. Press [e, r, w, q] to select the photo and press
[OK].
is displayed on the selected photos. To cancel,
press [OK] again.
If you press [MENU (PHOTO)], you can select
•
“Select All” or “Clear All” of photos, or switch to
single view.
5. Press [MENU (PHOTO)], press [e, r] to select
“Copy” and press [OK].
6. Press [w, q] to select “Yes” and press [OK].
To stop copying
Press [ RETURN].
Photos already copied remain in the internal memory.
•
The number of photos that can be
copied can be increased.
Factory setting: Off
Compressing data
when imported
1. Press [MENU (PHOTO)].
2. Press [e, r] to select “Copy
Photo” and press [OK].
3. Press [e, r] to select
“Compression when Importing”.
4. Press [w, q] to select “On”.
Note
•
If copied, the fi le names and folder names of photo are
named as below.
Example: If copied on August 24, 2009
Folder name: 090824_1
File name: 08240001.JPG
•
The size of the compressed photo cannot be recovered to
the original data size.
•
If you open the display while copying from CD to the
internal memory, the copy is interrupted. (Photos already
copied remain in the internal memory.)
•
Even if photos are set to Favorite or protected, the
information is not copied.
•
Due to the restriction of the fi le system, the displayed
internal memory capacity does not accord to the amount
of fi le data that can be copied.
Backing up the photos in the internal memory to the SD
•
card ¼P18
Copying photos from a computer ¼P20
•
Photo Menu
Copy Photo
Edit Photo
Photo Playback Settings
Copy Photo
Import from SD
Import from CD
Compression when Importing
Registering the photo as “Favorite”
(Only for the internal memory)
Photos can be registered with any of “Favorite (1 to 3)”.
Select “Internal Memory” among photo media. (¼P14)
•
Select the photo category. (¼P15)
•
Stop audio beforehand.
•
1. Press [MENU (PHOTO)].
2. Press [e, r] to select “Edit
Photo” and press [OK].
3. Press [e, r] to select “Edit
Favorites” and press [OK].
4. Press [e, r] to select
“Favorite 1”, “Favorite 2” or
“Favorite 3” and press [OK].
5. Press [e, r, w, q] to select the photo and press
[OK].
is displayed on the selected photo (If it is
“Favorite 1”). To cancel, press [OK] again.
If you press [MENU (PHOTO)], you can select
•
“Select All” or “Clear All” of photos, or switch to
single view.
6. Press [MENU (PHOTO)], press [e, r] to select
“End Editing of Favorites” and press [OK].
Viewing registered
photos
See “Viewing categorized photos”
(¼P15)
1. Press [MENU (PHOTO)].
2. Press [e, r] to select “Edit
Photo” and press [OK].
Resetting the
registration
3. Press [e, r] to select “Reset
Favorites” and press [OK].
4. Press [e, r] to select Favorite
to reset and press [OK].
5. Press [w, q] to select “Yes” and
press [OK].
Note
Up to 999 photos can be registered with “Favorite (1 to 3)”
•
respectively.
Some photos may not be registered.
•
Photo Menu
Copy Photo
Edit Photo
Photo Playback Settings
Edit Photo
Edit Favorites
Reset Favorites
Delete Files
Set Protection
Favorite 1
Favorite 2
Favorite 3
16
RQT9522
Page 17

Deleting photos
(Only for the internal memory)
•
Select “Internal Memory” among photo media. (¼P14)
•
Select the photo category. (¼P15)
•
Stop audio beforehand.
1. Press [MENU (PHOTO)].
2. Press [e, r] to select “Edit Photo” and press
[OK].
3. Press [e, r] to select “Delete Files” and press
[OK].
4. Press [e, r, w, q] to select the photo and press
[OK].
is displayed on the selected photos. To cancel,
press [OK] again.
If you press [MENU (PHOTO)], you can select
•
“Select All” or “Clear All” of photos, or switch to
single view.
5. Press [MENU (PHOTO)], press [e, r] to select
“Delete” and press [OK].
6. Press [w, q] to select “Yes” and press [OK].
Note
•
The deleted photos cannot be recovered.
•
To delete completely, perform “Format Internal Memory”.
(¼P18)
Protecting photos
(Only for the internal memory)
You can protect photos to prevent them from being deleted
by mistake.
•
Select “Internal Memory” among photo media. (¼P14)
•
Select the photo category. (¼P15)
•
Stop audio beforehand.
1. Press [MENU (PHOTO)].
2. Press [e, r] to select “Edit Photo” and press
[OK].
3. Press [e, r] to select “Set Protection” and press
[OK].
4. Press [e, r, w, q] to select the photo and press
[OK].
is displayed on the selected photos. To cancel,
press [OK] again.
If you press [MENU (PHOTO)], you can select
•
“Select All” or “Clear All” of photos, or switch to
single view.
5. Press [MENU (PHOTO)], press [e, r] to select
“End Protection Setting” and press [OK].
Note
•
Even if protection is set to photos, they can be deleted if
the internal memory is formatted.
Photo playback settings
Basic operation
1. Press [MENU (PHOTO)].
2. Press [e, r] to select “Photo
Playback Settings” and press
[OK].
3. Press [e, r] to select the item (¼below).
4. Press [w, q] to select the setting.
To return to the standard screen, press [
few times.
Setting items for photo playback
Factory settings are indicated with underlines.
Date Indication On / Off
Color/Black and White/Sepia
When photos are displayed with the
Color Effects
Slideshow Order
Slideshow Effects
Slideshow Interval
•
thumbnail view, they are displayed
with the original color tone.
Normal:
Plays in the order of fi le names.
Random:
Photos in the category are played
at random.
The settings are saved even
•
if the unit is turned off or the
media is switched.
Fade:
The next photo is gradually displayed
and played while switching photos.
Motion:
Plays while enlarging and moving
the photo up and down, right and
left, and in the diagonal direction.
Slide-in:
Plays switching photos with fl owing
movement from right to left.
When “Motion” is set, the
•
“Slideshow Interval” setting is
disabled.
5 sec/10 sec/30 sec/
5 min/10 min/30 min/
1 hour/3 hours/12 hours/24 hours
Change On The Hour:
Photos are switched on the hour
every hour.
Change Daily:
Photos are switched when the
calendar date is changed.
Sync Music:
Photos are switched every time
the CD/iPod track is switched.
If [u/t, y/i] is pressed
and skipped, photos are switched
as well. (Not switched while
stopped or paused.)
When the slideshow playback is
•
performed for the small number
of photos with a short interval,
the photos may not be normally
displayed.
Photo Menu
Copy Photo
Edit Photo
Photo Playback Settings
RETURN] a
Operations
Editing photos / Photo playback settings
RQT9522
17
Page 18

Using the setup menu
Basic operation
1. Press [SETUP].
2. Press [e, r] to select the
item (¼below) and press
[OK].
3. Make the setting according to the on-screen
instructions.
To return to the standard screen, press [
few times.
Setting items
Factory settings are indicated with underlines.
Select “Image Quality Mode” or
“Adjust Brightness” in step 3 in
the basic operation. And then
make each setting.
Image Quality Mode
Standard:
Standard image quality
Image Quality
Settings
Clock/Calendar
Settings
Demo Mode
Remote Control
Mode
Initialize Settings
RQT9522
18
Soft:
Eye-friendly image quality
Dynamic:
Vivid image quality with clear
distinction of bright and dark
Adjust Brightness
(Only when Dimmer is “Off”)
Brightness is adjusted with the
range from “1” to “10”. The default
setting is “10”.
Select Design ¼P9
Set Clock ¼P9
Set Date Indication:
Select Month/Day/Year or Day/
Month/Year.
Set Clock Indication:
Select “12-hour System” or
“24-hour System”.
Disable/Enable
For the Demo function ¼P8
Change the remote control mode
of this unit and remote control
when malfunction occurs on
this unit while using the remote
control of other devices.
Example: When setting the
remote control mode to 2
1. Select “Remote Control 2” in
step 3 in the basic operation
and press [OK].
2.
Press and hold [OK] on the
remote control without aiming it
at this unit, and press and hold
the numbered button [2] for more
than 2 seconds.
3.
Press [OK].
This unit’s settings are returned to
the factory defaults.
1. Select “Yes” in step 3 in the
basic operation and press [OK].
2. Select “Yes” again and press
[OK].
•
The clock setting and photo fi les
in the internal memory remain
the same.
Settings Menu
Image Quality Settings
Clock/Calendar Settings
Demo Mode
Remote Control Mode
RETURN] a
1. Select “Yes” in step 3 in the
basic operation and press [OK].
Format Card
Back Up Internal
Memory
Format Internal
Memory
System Software Info
Update System
Software
2. Select “Yes” again and press
[OK].
All the data on the SD card is
•
deleted.
Photo data in the internal memory
is backed up to the SD card.
Select “Yes” in step 3 in the basic
operation and press [OK].
•
If [
RETURN] is pressed
during backup and stopped,
photo data already backed up
remains on the SD card.
•
The “Favorite” settings, rotation
or protection information of
photos cannot be backed up.
•
Backup time will be longer
depending on the number
of photos to be saved or the
amount of data. (Approx.
10 minutes per 1000 fi les)
1. Select “Yes” in step 3 in the
basic operation and press [OK].
2. Select “Yes” again and press
[OK].
•
Protected photos are also
deleted.
•
Even if you format the internal
memory or delete all photos
(¼P17), the size of used area
of the internal memory will not
become zero since the system
uses some area.
You can confi rm the system
software information (version) of
this unit.
•
For the latest version of
information, see the following
homepage.
http://panasonic.jp/support/global/
cs/audio/
This is a function when updating
the system software is necessary
in the future to improve the
performance.
Please make sure to complete
user registration which is
necessary to receive information
related to the system software
update.
For details, see the following
homepage.
http://panasonic.jp/support/global/
cs/audio/
Changing the dimmer
Press [DIMMER].
Each time you press the button:
Off (normal) On
Factory setting: Off
•
The setting is saved even if the unit is turned off.
•
Page 19

Using the timer
r
Photos or audio are automatically played at the set time.
“Timer 1”, “Timer 2” and “Timer 3” can be set.
Set the clock beforehand (¼P9)
•
To listen to the radio, tune in to channels beforehand.
•
In the timer setting, set only audio source and volume for audio playback. For Random, Repeat play, etc. make the settings
before the timer playback starts.
The following explains the case when setting “Timer 1” as
an example.
1. Press [zTIMER].
2. Press [w, q] to select “Timer
1 Settings” and press [OK].
3. Set the standby setting to
Enable.
1. Press [e, r] to select
“Standby” and press [OK].
Timer Setting Menu
Timer 1 Settings Time
3AM12 6 9
Sun
Timer 1 Settings
Standby
Day
Time
Enable
Unset
12:00 A
2. Press [e, r] to select
“Enable This Timer” and
press [OK].
4. Set the day.
1. Press [e, r] to select “Day”
and press [OK].
2. Press [e, r] to select the
day, add the check mark with
Timer 1 Day Settings
Sunday
Monday
Tuesday
Wednesday
[w, q] and press [OK].
5. Set the time.
1. Press [e, r] to select “Time”
and press [OK].
Start Time End Time
Ʒ7⿉00
AM⿉Ʒ800
AM
2. Press [w, q, e, r] to set
the start/end time and press
[OK].
You can also use the numbered buttons.
•
e.g.) 9: [0] [9]
10: [1] [0]
6. Select Audio Playback ON/
OFF.
1. Press [e, r] to select “Audio
Playback” and press [OK].
2. Press [e, r] to select “Audio
Timer 1 Audio Settings
Audio Playback
Playback Time
Update Source/Volume
On
30 minutes
Source: CD
Playback”, press [w, q] to
select “On” or “Off”.
Only when audio playback is set
7. Press [e, r] to select
“Playback Time” and press
[w, q] to select the playback
time.
10 minutes/30 minutes/1 hour/
Timer 1 Audio Settings
Audio Playback
Playback Time
Update Source/Volume
On
1 hour
Source: CD
2 hours/3 hours/No Limit
8. Press [e, r] to select
“Update Source/Volume” and
press [OK].
Playback Time
Update Source/Volume
Confirm
1 hour
Source:CD
Volume:25
The sound source and volume are displayed.
When you do not change, press [w, q] to select
•
“No” and press [OK].
When you change, make the setting using the
•
audio selection button or volume button, press
[w, q] to select “Yes” and press [OK].
As a test, the sound source can be played.
9. Press [e, r] to select “Confi rm” and press [OK].
10. Press [e, r] to select “Confi rm” and press [OK].
If the operation time overlaps other timer settings, the
confi rmation message appears.
If “Yes” is selected, other timers with the overlapped
•
time are disabled.
If “No” is selected, the original screen is restored with
•
the contents of timer setting reserved.
11. Press [
RETURN].
The standard screen is restored.
Operations
To return to the previous screen
Press [ RETURN].
To return to the timer setting menu
Press [zTIMER].
To disable the set timer
Select “Disable This Timer” in step 3 -2 and press [OK].
To delete the timer setting
Select “Initialize This Timer” in step 3 -2 and press [OK].
When the timer is set
When the unit is turned on, if the audio playback is “On”,
•
“z” is displayed one minute before the timer start time.
At the timer start time, the sound is faded in to the set
•
volume and the audio is played back. (z blinks)
Note
The timer operates at the set time unless you set it to
•
“Disable”.
The timer less than 10 minutes may not be displayed on
•
the timer setting screen. (When the audio playback is “On”,
only “ ” is displayed.)
When the Setup Menu, etc. is displayed, audio playback
•
with the timer does not start.
Audio playback with the timer may not start if the audio
•
media selected for “Audio Playback” is the same as the
one selected when the timer starts.
During CD playback, pause or search
–
During iPod playback or search
–
When the radio frequency being received is the same,
–
and the Auto/Monaural setting is the same
Using the setup menu / Changing the dimmer / Using the timer
RQT9522
19
Page 20

Using with your PC
Photo fi les can be exchanged among this unit’s internal
memory, SD and computer.
Do not use any other cables except a genuine Panasonic
USB connection cable (K2KZ4CB00015; optional).
System confi gurations required
OS for PC
•
Windows Vista
Windows® XP
•
Mac OS X
•
Por t
USB port
•
Turn the unit off beforehand.
•
Start up the computer beforehand.
•
®
You cannot operate this unit while connecting with the
•
computer.
If the USB connection cable is removed, this unit is turned
•
off.
Data exchange with iPod is not possible.
•
If you make multiple USB connections or use hubs with 1
•
computer, malfunction may occur.
If you are using the 10.2 or older version of Mac OS X,
•
set the write-protect switch of SDHC memory card to the
“LOCK” side when importing photos from the SDHC card
to the computer.
When this unit is connected, do not use the format function
•
of the computer to format this unit’s internal memory or SD
card.
Operations are not necessarily guaranteed for all
•
computers.
Installation of this unit
1. Confi rm the direction of the USB connection
cable (optional) and insert it to the USB port of
this unit.
2. Insert the USB connection cable to the computer.
3. Turn this unit on.
4. Press [e, r] to select the USB connection
memory (“Internal Memory” or “SD Card”) and
press [OK].
This unit functions as a reader/writer and is
recognised as an external device of computer.
To remove the USB connection cable
Double-click the icon (Windows XP: , Windows Vista: )
on the task tray of computer and remove it according to the
on-screen instruction. (The above may not be displayed
depending on the OS setting. In this case, make sure to
confi rm that the message indicating communication is in
process is not displayed on this unit’s display, and then
remove the cable.)
For Macintosh, follow the removal method for Mac OS
•
device.
To switch the USB connection memory
Remove the USB connection cable once, then reconnect it
and perform the above steps 3 and 4.
To exchange photo fi les with a computer
1. Open the folder to exchange photo fi les on the computer.
2. Perform the above steps 1 to 4.
3. Open this unit’s drive icon in “My Computer” or
“Computer” of your PC.
For Macintosh, this unit’s drive is displayed on the
•
desktop.
4. Open the photo folder on this unit.
5. Exchange fi les between the folders.
Folders and fi les can be dragged and dropped.
•
Note
If you remove and insert the USB connection cable or SD
•
card while “Accessing. Do not remove the card or cable.”
message is displayed, the data on the SD card may be lost
RQT9522
or damaged.
20
When installing the unit on the table, etc., make sure the
display part does not protrude from the table when it is
opened. The unit may fall down and drop.
To fi x the unit
When installing the unit on the table with narrow depth, use
the included fall-prevention belt to fi x the unit to the wall or
pillar. (The following illustration is a setting example.)
A Wall, pillar, etc.
B Fall-prevention belt (included)
C Wood screw (included) (Black), etc.
D Bottom face of this unit
E Screw for fall-prevention belt (included) (Silver)
A
B
C
D
E
Note
Be sure to use the screw for fall-prevention belt to attach to
•
the bottom face of this unit.
If you tighten the screw for fall-prevention belt too tightly, it
•
goes around in circle and cannot be fi xed.
Keep the screws out of reach of children to prevent
•
swallowing.
Page 21

Troubleshooting guide
Before requesting service, make the following checks. If you are in doubt about some of the check points, or if the remedies
indicated in the chart do not solve the problem, refer to “Customer Services Directory (United States and Puerto Rico)” on page 23.
This unit may become hot if used for a long period of time, however, this is not a problem for use.
Common problems with the whole system
All operations are ignored.
When the unit is turned on,
“Please wait.” is displayed for a
long period of time.
Booming noise occurs during
audio playback.
CD
The display does not change even
after the CD is inserted.
Playback does not start even after
the play button is pressed.
Specifi c parts are not played normally.
The display part is not closed properly.
Press [POWER8] of the main unit for more than 10 seconds to turn the unit off. If the
problem persists, do the following operations and return the settings to the factory defaults.
1. Remove the AC power supply cord once. Then connect the AC power supply cord
while pressing down [POWER8] of the main unit.
2. Press and hold [POWER8] of the main unit until “The settings have been reset.”
appears on the display.
When photos are present in the internal memory or the SD card has been inserted, it
may take long time for the unit to become operable after it is turned on.
There may be the AC power supply cord of another device or fl uorescent light near this unit.
Keep the electric appliances as far away as possible from this unit.
A nonstandard disc was inserted. (¼P4)
There was extreme temperature difference, such as when carrying the unit from the cold
place to the warm place. Dew condensation might have occurred on the lens.
Wait approx. 1 hour before use.
Wipe the CD with a soft cloth. (¼P4)
Check if the CD is set at the correct position. (¼P6)
SD
Data on the SD card cannot be read.
Photos cannot be played or
edited.
iPod
The iPod is not recognised even if
connected.
Video playback becomes
impossible on the iPod.
The display of the iPod video
playback shows an unexpected one.
iPod videos cannot be played back.
Radio
FM and AM broadcasts cannot be
received properly.
Noise and sound distortion are
excessive.
“ ” does not light up.
Remote control
Cannot operate the remote
control.
Another device does not operate
properly when using the remote
control of this unit.
The unit does not operate
properly when using the remote
control of another device.
Use the SD card, fi le format and folder hierarchy compatible with this unit. (¼P5)
Insert the SD card compatible with this unit. (¼P5)
Insert the SD card correctly. (¼P6)
Cancel the write protection switch if it is on the “LOCK” side. (¼P4)
Check if the iPod is compatible with this unit. (¼P5)
Confi rm the iPod video settings.
Check your iPod version.
Connect the FM indoor antenna or AM loop antenna. (¼P8)
Change the setting location or direction of antennas.
Separate the antenna wire and AC adaptor as far as possible.
If the transmitting location is far or there is a big building or mountain near the unit,
use an outdoor antenna. (¼P13)
TV, VCR, PC or BS tuner may be on. Or the mobile phone may be charged near the unit.
Turn each device off or keep those devices as far away as possible from this unit.
Insert (+, –) of battery correctly. (¼P7)
Replace with the new battery. (¼P7)
If the remote control mode on the main unit does not match the one on the remote
control, match the mode of the remote control to the one of the main unit. (¼P18)
If the display is opened, close it.
Change the remote control mode of this unit so another device does not interfere with
this unit’s operation. (¼P18)
Reference Operations
Installation of this unit / Troubleshooting guide Using with your PC
RQT9522
21
Page 22

Troubleshooting guide
Photo
Photos are not displayed on the
thumbnail screen.
The date displayed using the Date
Search differs from the shooting date.
Editing (copying, etc.) takes long time.
Photos edited on the computer, etc. may not be displayed.
A date when a fi le was updated may be displayed for photos edited on the computer,
etc.
When there are many fi les and folders, editing may take long time.
Error message
No card. The SD card is not inserted.
Insert the SD card.
This card cannot be played. This SD card cannot be played on this unit.
This card cannot be read.
The write protection switch of the
SD card is set to “LOCK.”
No disc. The CD is not inserted.
This disc cannot be played. This CD cannot be played on this unit.
This disc cannot be read.
No compatible device is
connected.
A communication error occurred. The iPod is not connected.
No photo fi les. There are no photo fi les on the selected media.
This photo cannot be played. This photo cannot be played on this unit.
Playback cannot continue
because there was a photo fi le
error.
The clock and calendar cannot be used
because the time has not been set.
Timer audio playback could not be
started.
Set the mode on your remote
control to “Mode 1” (or “Mode 2”).
Insert the playable SD card. (¼P5)
The SD card is write-protected.
Cancel the write protection switch. (¼P4)
Insert the playable CD.
The iPod is not connected.
Connect the iPod correctly. (¼P11)
The iPod incompatible with this unit is connected.
Use the iPod compatible with this unit. (¼P5)
Connect the iPod correctly. (¼P11)
Select the media containing photos. (¼P14)
Abnormality occurred during the playback of photo fi les.
Remove the media once and check if the photo fi les are compatible with this unit
(¼P5). Then, insert the media again.
To use the clock/calendar, clock setting is necessary.
Press [e, r] to select “Set time” and set clock. (¼P9)
Timer cannot start on this screen.
Restore the standard screen before the start time of the timer.
The remote control mode settings do not match the main unit settings.
Press the displayed numbered button and [OK] for more than 2 seconds and switch the
remote control mode of the remote control.
Product Service
1. Damage requiring service — The unit should be
serviced by qualifi ed service personnel if:
(a) The AC Adaptor, AC power supply cord or the plug
has been damaged; or
(b) Objects or liquids have gotten into the unit; or
(c) The unit has been exposed to rain; or
(d) The unit does not operate normally or exhibits a
marked change in performance; or
(e) The unit has been dropped or the cabinet damaged.
2. Servicing — Do not attempt to service the unit beyond
that described in these operating instructions. Refer all
other servicing to authorized servicing personnel.
3. Replacement parts — When parts need replacing
ensure the servicer uses parts specifi ed by the
manufacturer or parts that have the same characteristics
as the original parts. Unauthorized substitutes may result
RQT9522
in fi re, electric shock, or other hazards.
22
4. Safety check — After repairs or service, ask the servicer
to perform safety checks to confi rm that the unit is in
proper working condition.
The servicer will require all components to service your
system.
Therefore, should service ever be necessary, be sure to
bring the entire system.
Product information
For product information or assistance with product
operation:
Refer to “Customer Services Directory (United States and
Puerto Rico)” on page 23.
Page 23

Limited Warranty
Panasonic Consumer Electronics Company,
Division of Panasonic Corporation of North America
One Panasonic Way, Secaucus, New Jersey 07094
Panasonic Audio Products
Limited Warranty
Limited Warranty Coverage (For USA and Puerto Rico Only)
If your product does not work properly because of a defect in materials or workmanship,
Panasonic Consumer Electronics Company (referred to as “the warrantor”) will, for
the length of the period indicated on the chart below, which starts with the date of
original purchase (“warranty period”), at its option either (a) repair your product with
new or refurbished parts, or (b) replace it with a new or a refurbished product. The
decision to repair or replace will be made by the warrantor.
Product or Part Name Parts Labor
Audio Products (except items listed below) One (1) year One (1) year
USB Reader-Writer, Personal Computer
Card Adapters
(in exchange for defective item)
Accessories: Headphones, Cartridges,
Microphones, Adapters
Rechargeable Batteries DVD-R/-RAM
Discs (in exchange for defective item)
SD Memory Cards, Rechargeable Battery
Packs (in exchange for defective item)
During the “Labor” warranty period there will be no charge for labor. During the “Parts”
warranty period, there will be no charge for parts. You must carry-in or mail-in your
pro duct during the warranty period. If non-rechargeable batteries are included, they
are not warranted. This warranty only applies to products purchased and serviced
in the United States or Puerto Rico. This warranty is extended only to the original
purchaser of a new product which was not sold “as is”. A purchase receipt or other
proof of the original pur chase date is required for warranty service.
One (1) year Not Applicable
Ninety (90) days Ninety (90) days
Ten (10) days Not Applicable
Ninety (90) days Not Applicable
Carry-In or Mail-In Service
For Carry-In or Mail-In Service in the United States and Puerto Rico call 1-800211-PANA (7262) or visit Panasonic Web Site: http://www.panasonic.com
Limited Warranty Limits And Exclusions
This warranty ONLY COVERS failures due to defects in materials or workmanship,
and DOES NOT COVER normal wear and tear or cosmetic damage. The warranty
ALSO DOES NOT COVER damages which occurred in shipment, or failures which
are caused by products not supplied by the warrantor, or failures which result from
accidents, misuse, abuse, neglect, mishandling, misapplication, alteration, faulty
installation, set-up adjust ments, misadjustment of consumer controls, improper
maintenance, power line surge, lightning damage, modifi cation, or commercial
use (such as in a hotel, offi ce, restaurant, or other business), rental use of
the product, service by anyone other than a Factory Service Center or other
Authorized Servicer, or damage that is attributable to acts of God.
THERE ARE NO EXPRESS WARRANTIES EXCEPT AS LISTED UNDER
“LIMITED WARRANTY COVERAGE”. THE WARRANTOR IS NOT LIABLE
FOR INCIDENTAL OR CONSEQUENTIAL DAMAGES RESULTING FROM
THE USE OF THIS PRODUCT, OR ARISING OUT OF ANY BREACH OF THIS
WARRANTY. (As examples, this ex cludes damages for lost time, travel to and
from the servicer, loss of media or images, data or other memory content. The
items listed are not exclusive, but are for illustration only.)
ALL EXPRESS AND IMPLIED WARRANTIES, INCLUDING THE WARRANTY
OF MERCHANTABILITY, ARE LIMITED TO THE PERIOD OF THE LIMITED
WARRANTY.
Some states do not allow the exclusion or limitation of incidental or consequential
damages, or limitations on how long an implied warranty lasts, so the exclusions
may not apply to you.
This warranty gives you specifi c legal rights and you may also have other rights
which vary from state to state. If a problem with this product develops during or
after the warranty period, you may contact your dealer or Service Center. If the
problem is not handled to your satisfaction, then write to the warrantor’s Consumer
Affairs Department at the addresses listed for the warrantor.
PARTS AND SERVICE WHICH ARE NOT COVERED BY THIS LIMITED
WARRANTY ARE YOUR RESPONSIBILITY.
Customer Services Directory (United States and Puerto Rico)
Reference
Obtain Product Information and Operating Assistance; locate your nearest Dealer or Service Center; purchase Parts
and Accessories; or make Customer Service and Literature requests by visiting our Web Site at:
h p://www.panasonic.com/help
or, contact us via the web at:
h p://www.panasonic.com/contactinfo
You may also contact us directly at:
1-800-211-PANA (7262),
Monday-Friday 9 am-9 pm; Saturday-Sunday 10 am-7 pm, EST.
For hearing or speech impaired TTY users, TTY: 1-877-833-8855
Accessory Purchases (United States and Puerto Rico)
Purchase Parts, Accessories and Instruction Books online for all Panasonic Products by visiting our Web Site at:
h p://www.pstc.panasonic.com
or, send your request by E-mail to:
npcparts@us.panasonic.com
You may also contact us directly at:
1-800-332-5368 (Phone) 1-800-237-9080 (Fax Only) (Monday – Friday 9 am to 9 pm, EST.)
Panasonic Service and Technology Company
20421 84th Avenue South, Kent, WA 98032
(We Accept Visa, MasterCard, Discover Card, American Express, and Personal Checks)
For hearing or speech impaired TTY users, TTY: 1-866-605-1277
As of October 2008
Product Service / Limited Warranty
Troubleshooting guide / Error message /
RQT9522
23
Page 24

Specifi cations
AMPLIFIER SECTION
RMS Output Power
Stereo mode
FTC Output Power
Stereo mode
Input and Output
terminal
Both ch driven 5 W Per channel
6 Ω, 1 kHz, 10 % THD
Total RMS Stereo mode power: 10 W
Both ch driven 5 W Per channel
6 Ω, 90 Hz - 20 kHz, 10% THD
Total FTC Stereo mode power: 10 W
Headphone: stereo mini plug (3.5 mm)
Used Headphone impedance: 16 to 64 Ω
iPod: iPod special terminal
USB: USB 2.0 High speed
FM TUNER SECTION
Preset Memory 30 stations
Frequency range 87.9 to 107.9 MHz (200 kHz steps)
Sensitivity 16.3 dBf (1.8 μV, IHF’58)
Antenna terminal
87.5 to 108.0 MHz (100 kHz steps)
75 Ω (unbalanced)
AM TUNER SECTION
Preset Memory 15 stations
Frequency range 520 to 1710 kHz (10 kHz steps)
Sensitivity (S/N 20 dB)
500 μV/m
CD SECTION
Beam source Semiconductor laser
Wavelength 795 nm
Number of channels
Wow and fl utter Below measurable limit
Playable disc CD, CD-R, CD-RW
Playable format disc
2 channels (Stereo)
CD-DA
INTERNAL MEMORY SECTION
Mounted capacity 4 GB
AC ADAPTOR SECTION
Input AC 110 V to 240 V, 36 W, 50/60 Hz
Output DC 12 V, 2000 mA
PHOTO SECTION
LCD size 9 inch
Aspect ratio 16:9
Use File format
(CD/SD/Internal
memory)
Maximum number of
pixels
Minimum number of
pixels
Maximum decode
fi le size
JPEG: Exif 2.2, JFIF
Progressive JPEG No Support
•
¼
4:2:0, 4:2:2, 4:4:4 type base line JPEG
5120 × 3840
64 × 64
10 MB
¼
SPEAKER SECTION
Type 1 way, 1 speaker system
Impedance
Input power (IEC) 10 W (Max)
Magnetic-shield design
Playback frequency
range
Full range: 4 cm × 2 cone type
6 Ω
No
70 Hz to 25 kHz (-16 dB)
120 Hz to 22 kHz (-10 dB)
GENERAL
Dimensions
(W x H x D)
Mass Approx. 1.9 kg (4.2 lbs)
Permissible operating
temperature
Permissible relative
humidity
252 mm × 201 mm × 150 mm
(9-15/16" × 7-15/16" × 5-29/32")
0 ºC to + 35 ºC
(32 ºF to + 95 ºF)
35 % to 80 % RH (No condensation)
Power consumption in standby mode¼: Approx. 0.3 W
¼
Without iPod charge
•
Specifi cations are subject to change without notice.
•
Some characters are not displayed on this unit due to the
restrictions of font data.
Since the internal memory includes area that contains management
•
information such as fi le system, the actual capacity that can be
used is less. Also, the memory capacity in general is calculated as
1 GB =1,000,000,000 bytes, however, on this unit, it is calculated as
1 GB = 1,024 × 1,024 × 1,024= 1,073,741,824 bytes. Therefore, the
displayed capacity is less than the general value.
Auto power save: This unit is equipped with the Auto power save
function that automatically reduces the power consumption when
operations such as audio playback, media insertion/removal, etc.
are not performed approx. 10 minutes.
The LCD display on the display part is made with high-precision
technology employed, but black dots may sometimes appear on the
LCD display or the display may always light (with red, blue and green
dots). This is not a malfunction. The pixels on the LCD display are
managed with more than 99.99% of high accuracy, however, the pixel
defi ciency may occur within 0.01% of probability. We assure you that
these dots are not recorded on the SD card or internal memory.
Maintenance
Unplug the AC power supply cord from the household AC outlet
and wipe it using a soft and dry cloth.
•
When the dirt is heavy, wring water out of a wet cloth to wipe the
dirt and then wipe with a dry cloth.
•
Do not use solvents including benzine, thinner, alcohol, kitchen
detergent, etc. This might cause the exterior case to be deformed
or the coating to come off.
•
Before using chemically treated cloth, read the instructions that
come with the cloth carefully.
Panasonic Consumer Electronics
Company, Division of Panasonic
Corporation of North America
One Panasonic Way, Secaucus,
New Jersey 07094
http://www.panasonic.com
© Panasonic Corporation 2009
Printed in Malaysia
En
RQT9522-P
H0809WM0
 Loading...