

Panasonic KXTGA651B, KX-TGA651 User Manual
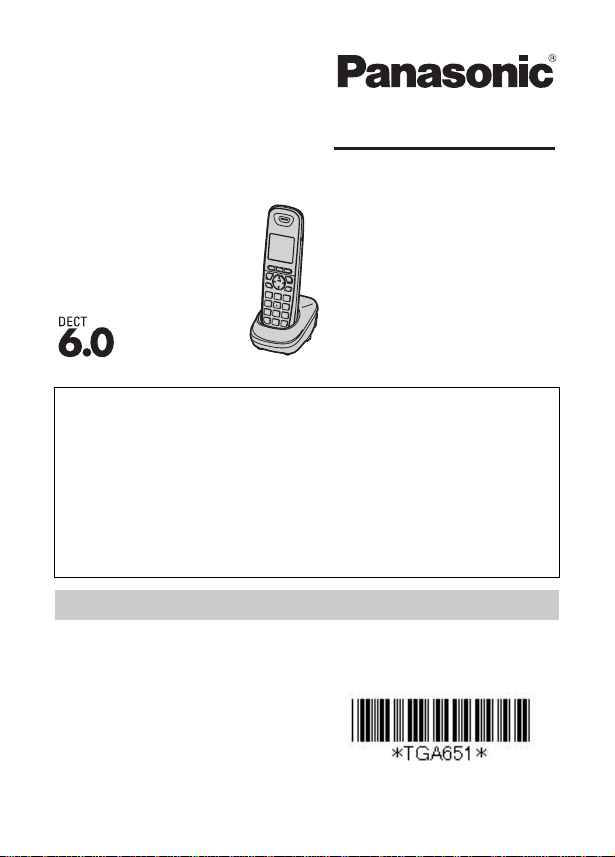
Installation Manual
Additional Digital Cordless Handset
Model No.
Thank you for purchasing a Panasonic product.
This unit is an additional handset compatible with the following
series of Panasonic Digital Cordless Phone:
KX-TG4011/KX-TG4021/KX-TG4031/KX-TG4051/
KX-TG6511/KX-TG6521/KX-TG6531/KX-TG6541/
KX-TG6581/KX-TG7531
Y ou must register this handset with your base unit before it can
be used. This installation manual describes only the steps
needed to register and begin using the handset. Please read
the base unit’s operating instructions for further details.
Charge the batteries for about 7 hours before initial use.
Please read this installa ti on man u al be fo re using the unit and
save it for future reference.
For assistance, visit our Web site:
http://www.panasonic.com/help
for customers in the U.S.A. or
Puerto Rico.
KX-TGA651
Printed in Malaysia
PNQX2405ZA DM0410DM0
Accessory information
Supplied accessories
Accessory item/Order number Quantity
Charger/PNLC1010ZB 1
AC adaptor/PQLV219Y 1
Rechargeable batteries/HHR-4DPA
(Part No. HHR-55AAABU or N4DHYYY00004)
*1
Handset cover
Belt clip/PNKE1054Z1 1
*1 The handset cover comes attached to the handset.
Note:
LPlease read the base unit’s operating instructions for additional/
replacement accessories.
– Optional headsets: KX-TCA60, KX-TCA93, KX-TCA94,
KX-TCA400, KX-TCA430
/PNYNTGA652BR 1
2
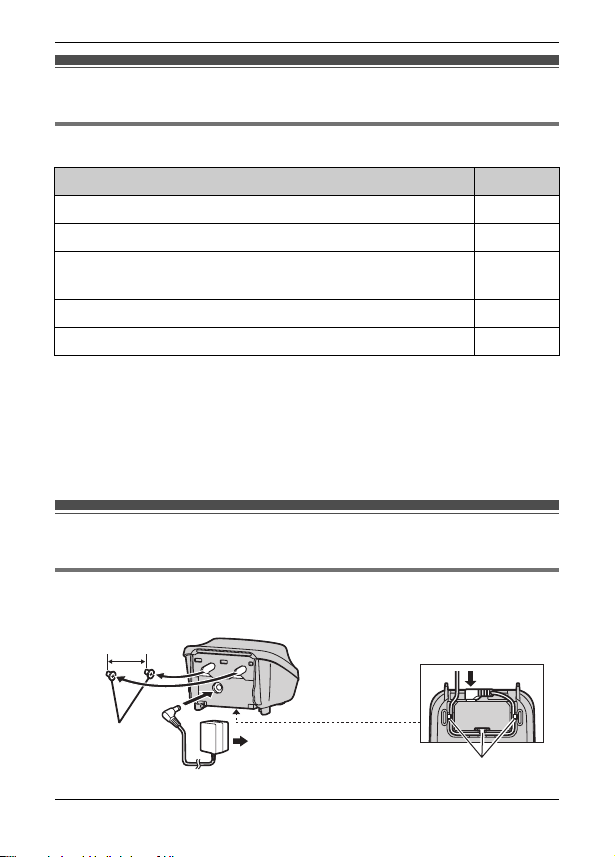
Setting up
Connections/Wall mounting
25.4 mm
(1 inch)
Screws
(Not supplied)
(120 V AC, 60 Hz)
Hooks
2 For assistance, please visit http://www.panasonic.com/help

Note:
LUse only the supplied Panasonic AC adaptor PQLV219.
LThe AC adaptor must remain connected at all times. (It is normal for
the adaptor to feel warm during use.)
LMake sure that the wall is strong enough to support the weight of the
unit.
Battery installation/Battery charge
Important:
LUse the supplied rechargeable batteries. For replacement, we
recommend using the Panasonic rechargeable batteries noted on
page 2.
LWipe the battery ends (S, T) with a dry cloth.
LAvoid touching the battery ends (S, T) or the unit contacts.
LConfirm correct polarities (S, T).
LUSE ONLY Ni-MH batteries AAA (R03) size.
LDo NOT use Alkaline/Manganese/Ni-Cd batteries.
Charge for about 7 hours.
LWhen the batteries are fully charged, the charge indicator goes off and
“Fully charged” is displayed.
Rechargeable
Ni-MH ONLY
Note:
LIf the batteries are fully charged, but the operating time seems to be
shorter, clean the battery ends (S, T) and the charge cont acts with a
dry cloth and charge again.
For assistance, please visit http://www.panasonic.com/help 3
Charge indicator
Confirm
“Charging”
is displayed.
Panasonic Ni-MH battery performance (supplied batteries)
Operation Operating time
In continuous use 13 hours max. (If Eco mode is on.)
Not in use (standby) 11 days max. (If Eco mode is on.)
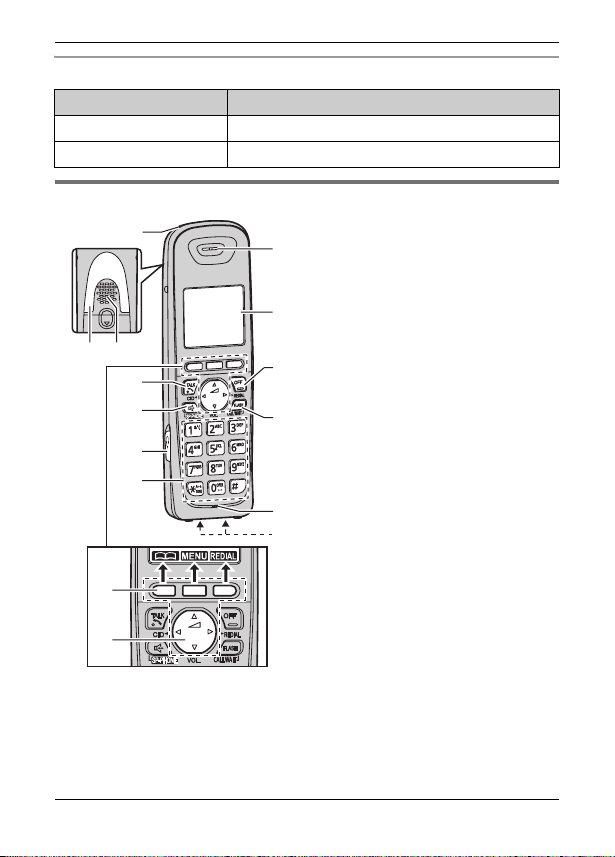
Controls
A
B C
D
E
F
G
A
B
A Charge indicator
H
I
J
K
L
M
Ringer indicator
Message indicator
B Nonslip pad
LNonslip pad offers support
when you cradle the
handset between your
shoulder and ear.
C Speaker
D {C} (TALK)
E {s} (SP-PHONE:
Speakerphone)
F Headset jack
G Dial keypad ({*}: TONE)
H Receiver
I Display
J {OFF}
K {FLASH} {CALL WAIT}
L Microphone
M Charge contacts
NControl type
A Soft keys
The handset features 3 soft keys. By pressing a soft key, you can
select the feature shown directly above it on the display.
4 For assistance, please visit http://www.panasonic.com/help

B Navigator key
– {^}, {V}, {<}, or {>}: Scroll through various lists and items.
– ? VOL. (Volume: {^} or {V}): Adjust the receiver or speaker
volume while talking.
– {<} CID (Caller ID): View the caller list.
– {>} REDIAL: View the redial list.
Note:
LThe preset melodies used for the ringer tone in this product are used
with permission of © 2009 Copyrights Vision Inc.
For KX-TG4011/KX-TG4021 series users
NUsing the soft keys (operational differences between handsets)
KX-TGA651 features 3 soft keys, different to your original handset
which features keys with printed function names.
Press the soft key corresponding to the desired operation
(page 4: A).
Example: When selecting/setting the desired item in programming
Original handset (printed key name) KX-TGA651 soft keys
{OK}{SELECT}{SAVE}
LSome KX-TGA651 soft key names are different to the button names
described in your base unit’s operating instructions.
Registering a handset to a base unit
Base unit:
1
NKX-TG4011/KX-TG6511 series
Press and hold {LOCATOR} for about 5 seconds. (No registration
tone)
NKX-TG4021/KX-TG4031/KX-TG4051/KX-TG6521/KX-TG6531/
KX-TG6541/KX-TG6581/KX-TG7531 series
Press and hold {LOCATOR} for about 5 seconds until the
registration tone sounds.
LIf all registered handsets start ringing, press the same button to
stop. Then repeat this step.
For assistance, please visit http://www.panasonic.com/help 5
2 Handset:
Place the handset on the base unit or charger, then wait until a long
beep sounds and w is displayed.
Note:
LIf an error tone sounds, or if _ is displayed, register the handset
according to the base unit’s operating instructions.
Display language
{MENU} i {#}{1}{1}{0}
1
2 {V}/{^}: Select the desired setting.
3 {SAVE} i {OFF}
Date and time
{MENU} i {#}{1}{0}{1} i Enter the current month, date, and
1
year by selecting 2 digits for each. i {OK}
Example: For July 15, 2010, enter {0}{7}{1}{5}{1}{0}.:
2 Enter the current hour and minute (12-hour clock format) by selecting
2 digits for each.
Example: For 9:30, enter {0}{9}{3}{0}.
3 {AM/PM} : Select “AM” or “PM”. i {SAVE} i {OFF}
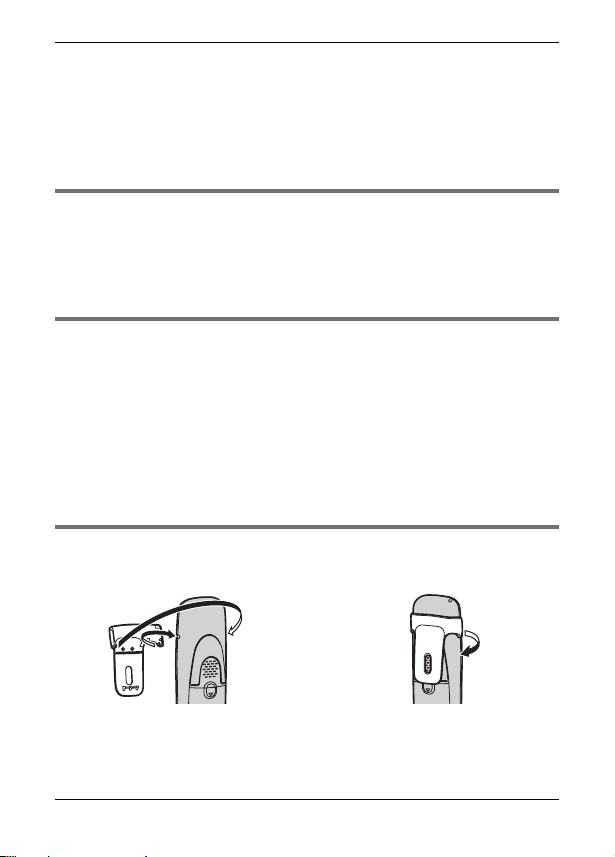
Belt clip
NTo attach NTo remove
6 For assistance, please visit http://www.panasonic.com/help
 Loading...