

Panasonic KXTGA401 Operating Instructions
TGA401(e).fm Page 1 Tuesday, December 22, 2009 12:10 PM
Installation Manual
Additional Digital Cordless Handset
Model No.
Thank you for purchasing a Panasonic product.
This unit is an additional handset compatible with the following
series of Panasonic Digital Cordless Phone:
KX-TG4011/KX-TG4021/KX-TG4031/KX-TG4051/
KX-TG4071/KX-TG6511/KX-TG6521/KX-TG6531/
KX-TG6541/KX-TG7531
You must register this handset with your base unit before it can
be used. This installation manual describes only the steps
needed to register and begin using the handset. Please read
the base unit’s operating instructions for further details.
KX-TGA401
Charge the batteries for about 7 hours before initial use.
Please read this installation manual before using the unit and
save it for future reference.
For assistance, visit our Web site:
http://www.panasonic.com/help
for customers in the U.S.A. or
Puerto Rico.
Printed in China
PNQX2390ZA DC1209SN0 (A)
TGA401(e).fm Page 2 Tuesday, December 22, 2009 12:10 PM
Accessory information
Supplied accessories
Accessory item/Order number Quantity
Charger/PNLC1010ZB 1
AC adaptor/PQLV219Y 1
Rechargeable batteries/HHR-4DPA
(Part No. HHR-55AAABU or N4DHYYY00004)
*1
Handset cover
Belt clip/PNKE1054Z1 1
*1 The handset cover comes attached to the handset.
Note:
LPlease read the base unit’s operating instructions for additional/
replacement accessories.
– Optional headsets: KX-TCA60, KX-TCA93, KX-TCA94,
KX-TCA400, KX-TCA430
/PNYNTGA652BR 1
2
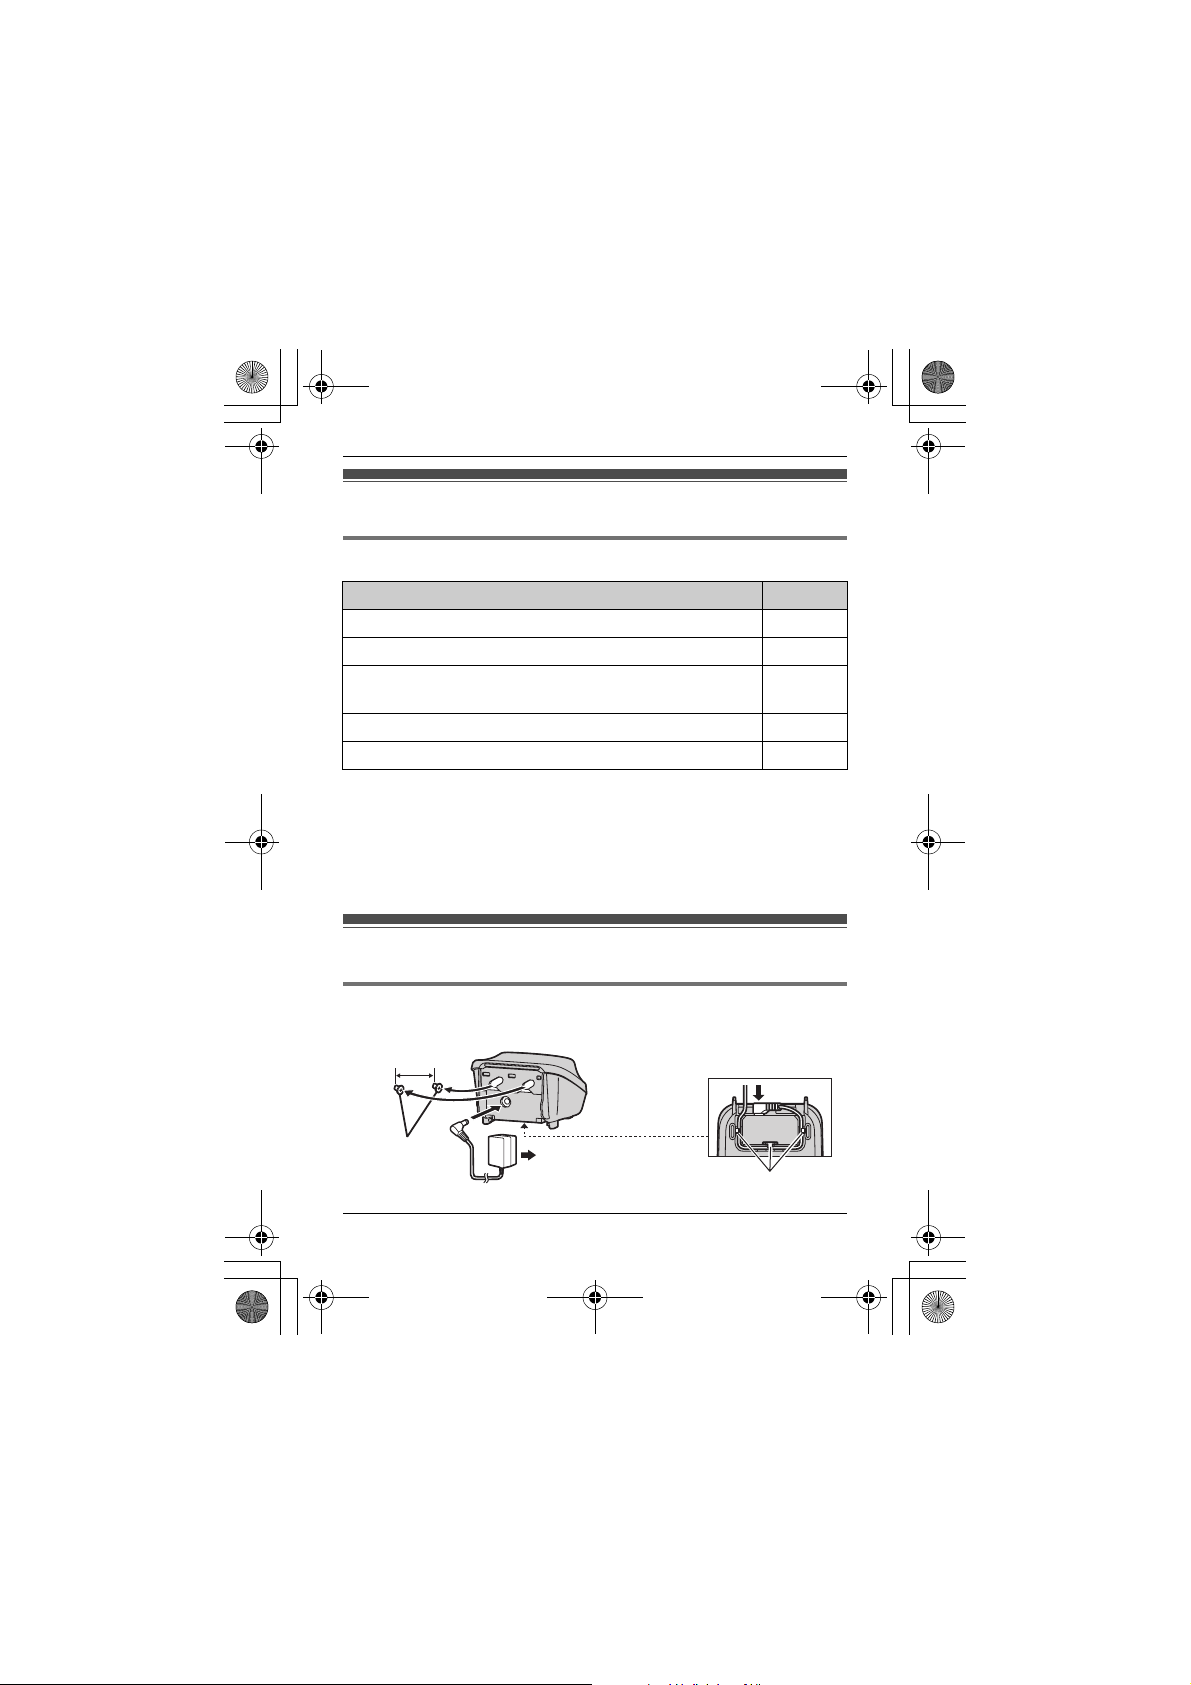
Setting up
Connections/Wall mounting
25.4 mm
(1 inch)
Screws
(Not supplied)
2 For assistance, please visit http://www.panasonic.com/help
(120 V AC, 60 Hz)
Hooks
TGA401(e).fm Page 3 Tuesday, December 22, 2009 12:10 PM
Note:
LUse only the supplied Panasonic AC adaptor PQLV219.
LThe AC adaptor must remain connected at all times. (It is normal for
the adaptor to feel warm during use.)
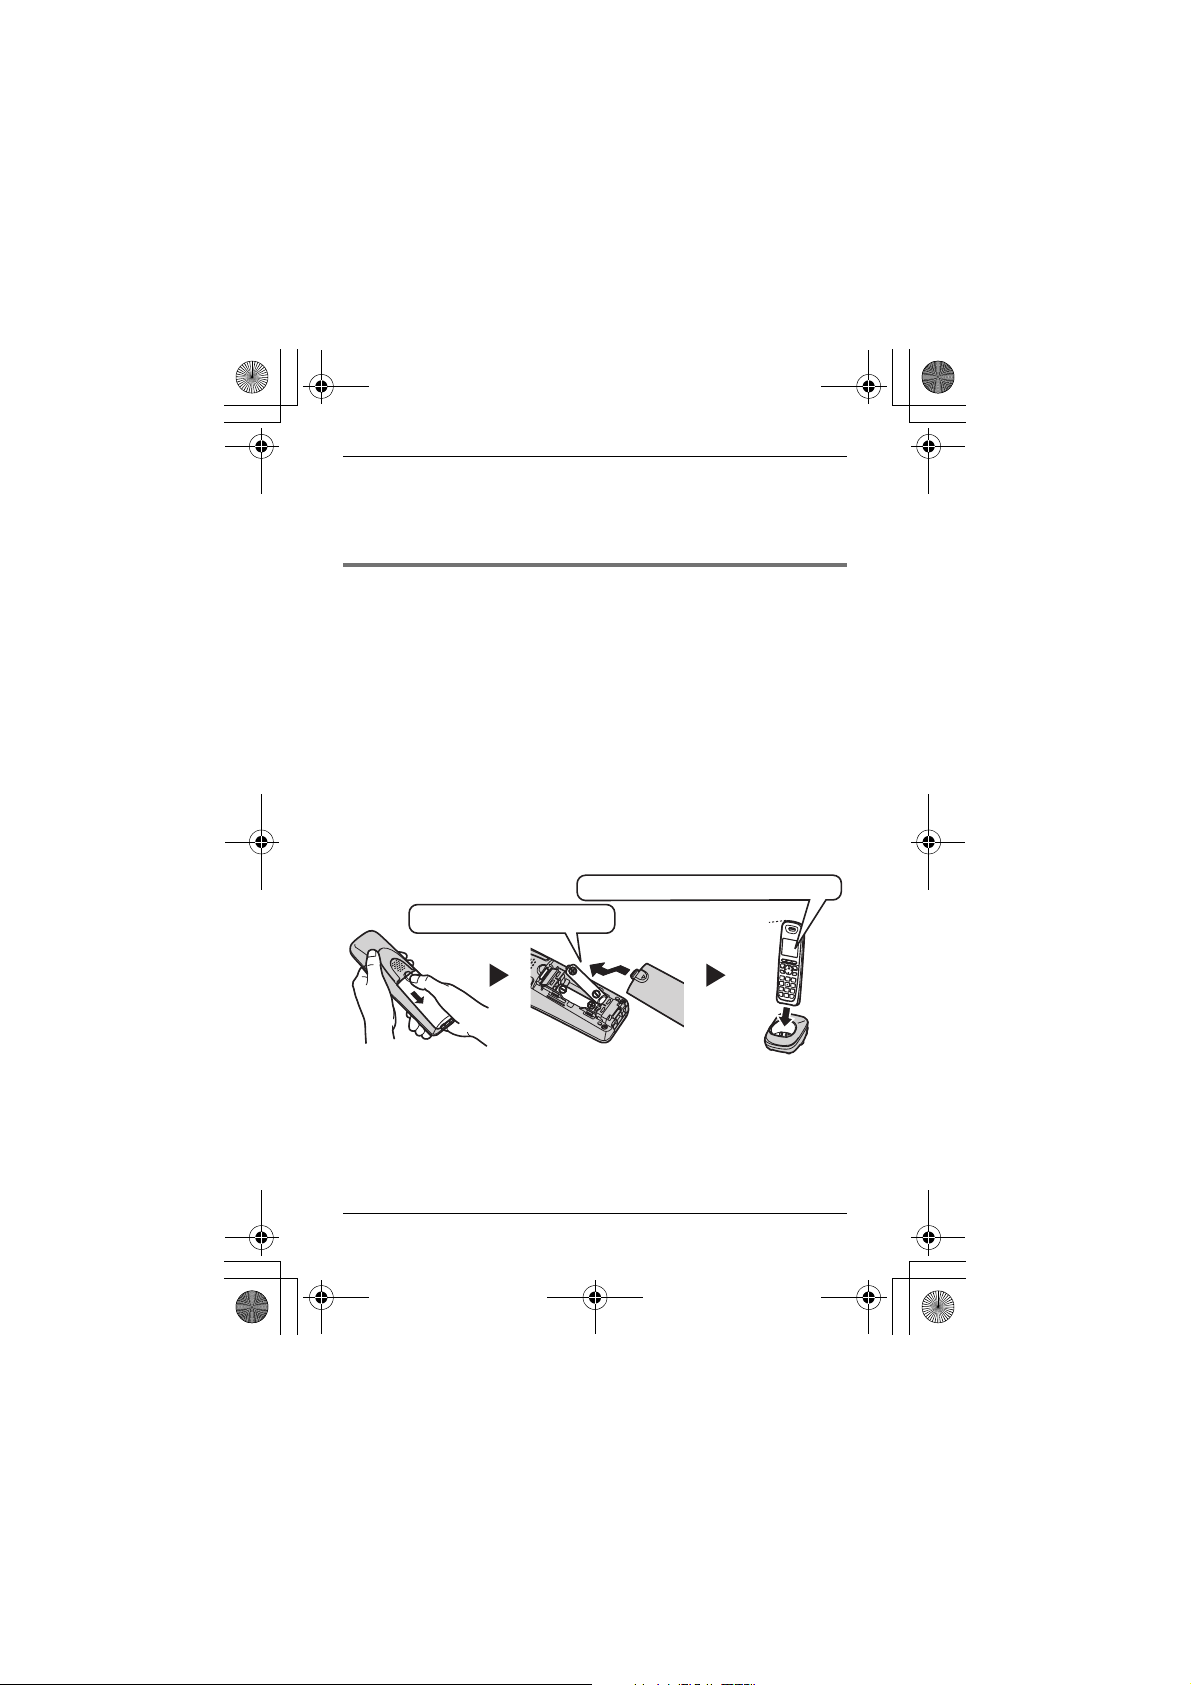
Battery installation/Battery charge
Important:
LUse the supplied rechargeable batteries. For replacement, we
recommend using the Panasonic rechargeable batteries noted on
page 2.
LWipe the battery ends (S, T) with a dry cloth.
LAvoid touching the battery ends (S, T) or the unit contacts.
LConfirm correct polarities (S, T).
LUSE ONLY Ni-MH batteries AAA (R03) size.
LDo NOT use Alkaline/Manganese/Ni-Cd batteries.
Charge for about 7 hours.
LWhen the batteries are fully charged, the charge indicator goes off and
“Fully charged” is displayed.
Confirm “Charging” is displayed.
Rechargeable Ni-MH ONLY
Charge indicator
Note:
LIf the batteries are fully charged, but the operating time seems to be
shorter, clean the battery ends (S, T) and the charge contacts with a
dry cloth and charge again.
For assistance, please visit http://www.panasonic.com/help 3
TGA401(e).fm Page 4 Tuesday, December 22, 2009 12:10 PM
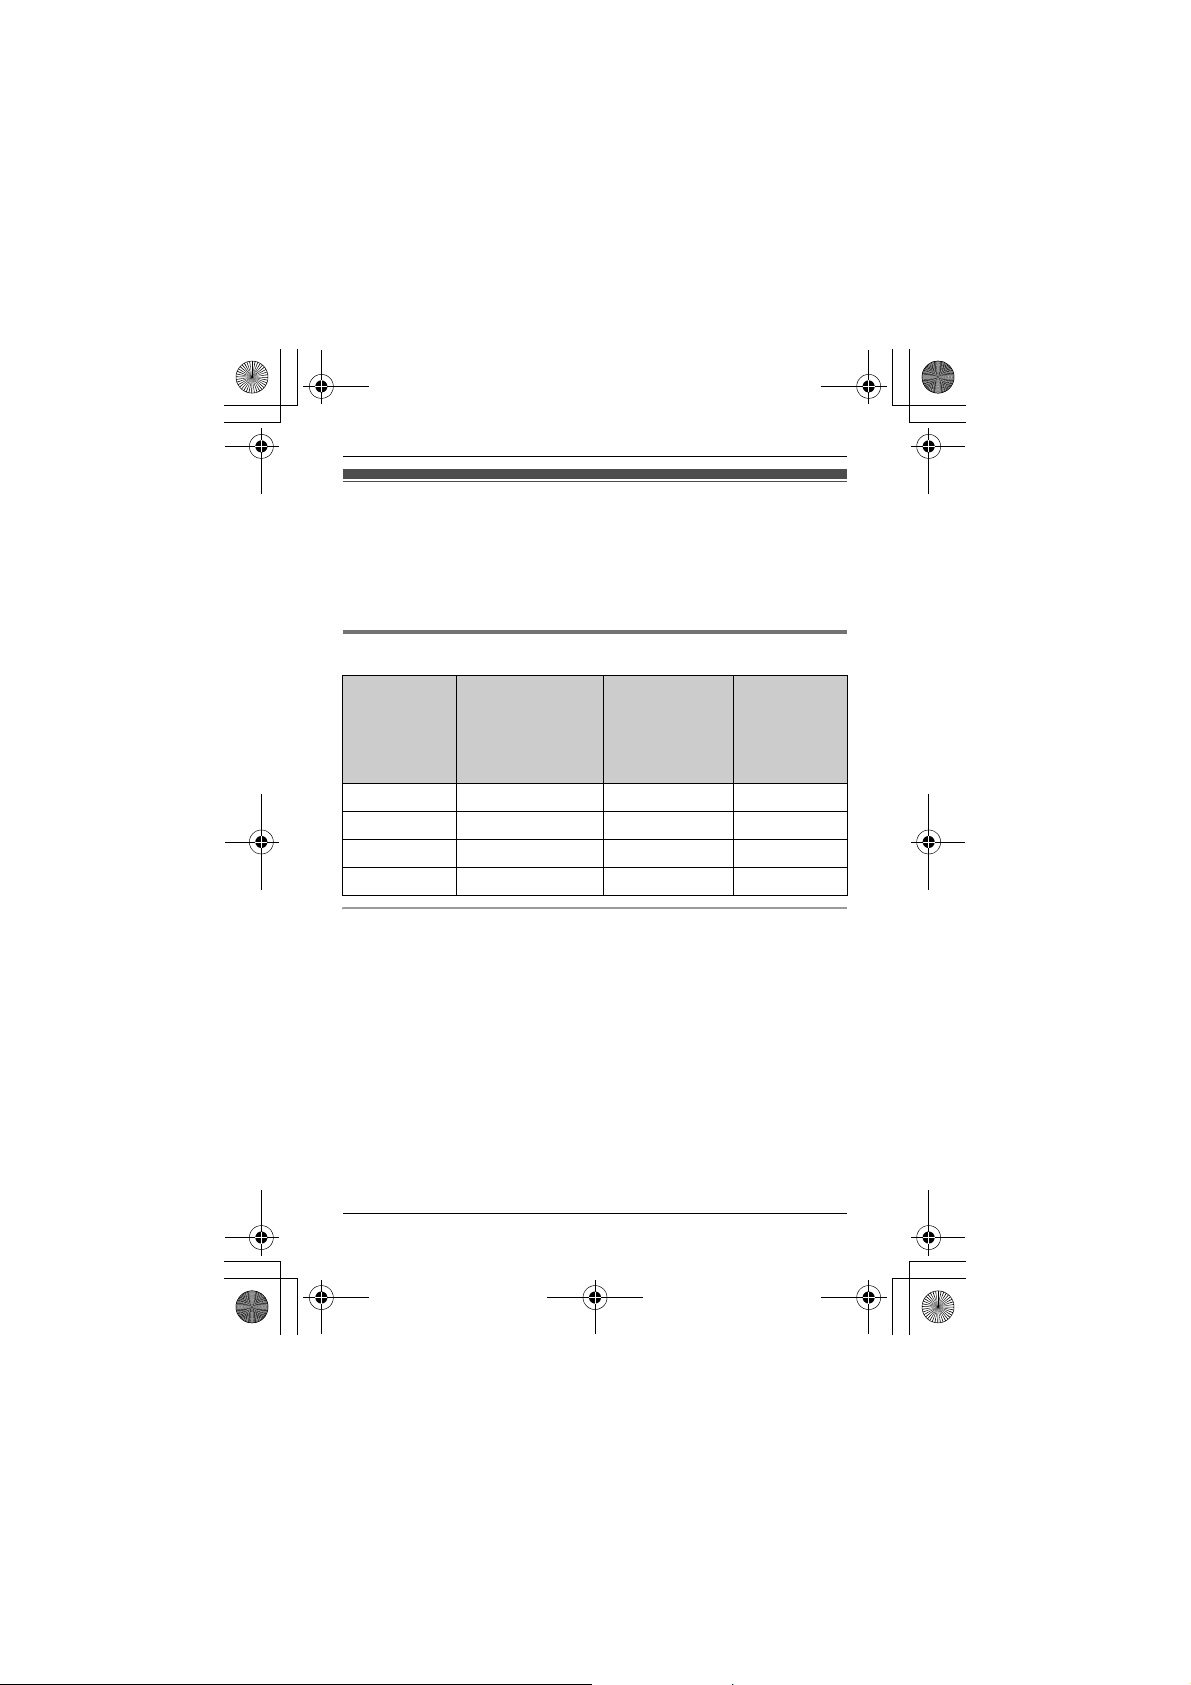
Panasonic Ni-MH battery performance (supplied batteries)
Operation Operating time
In continuous use 13 hours max. (If Eco mode is on.)
Not in use (standby) 11 days max. (If Eco mode is on.)
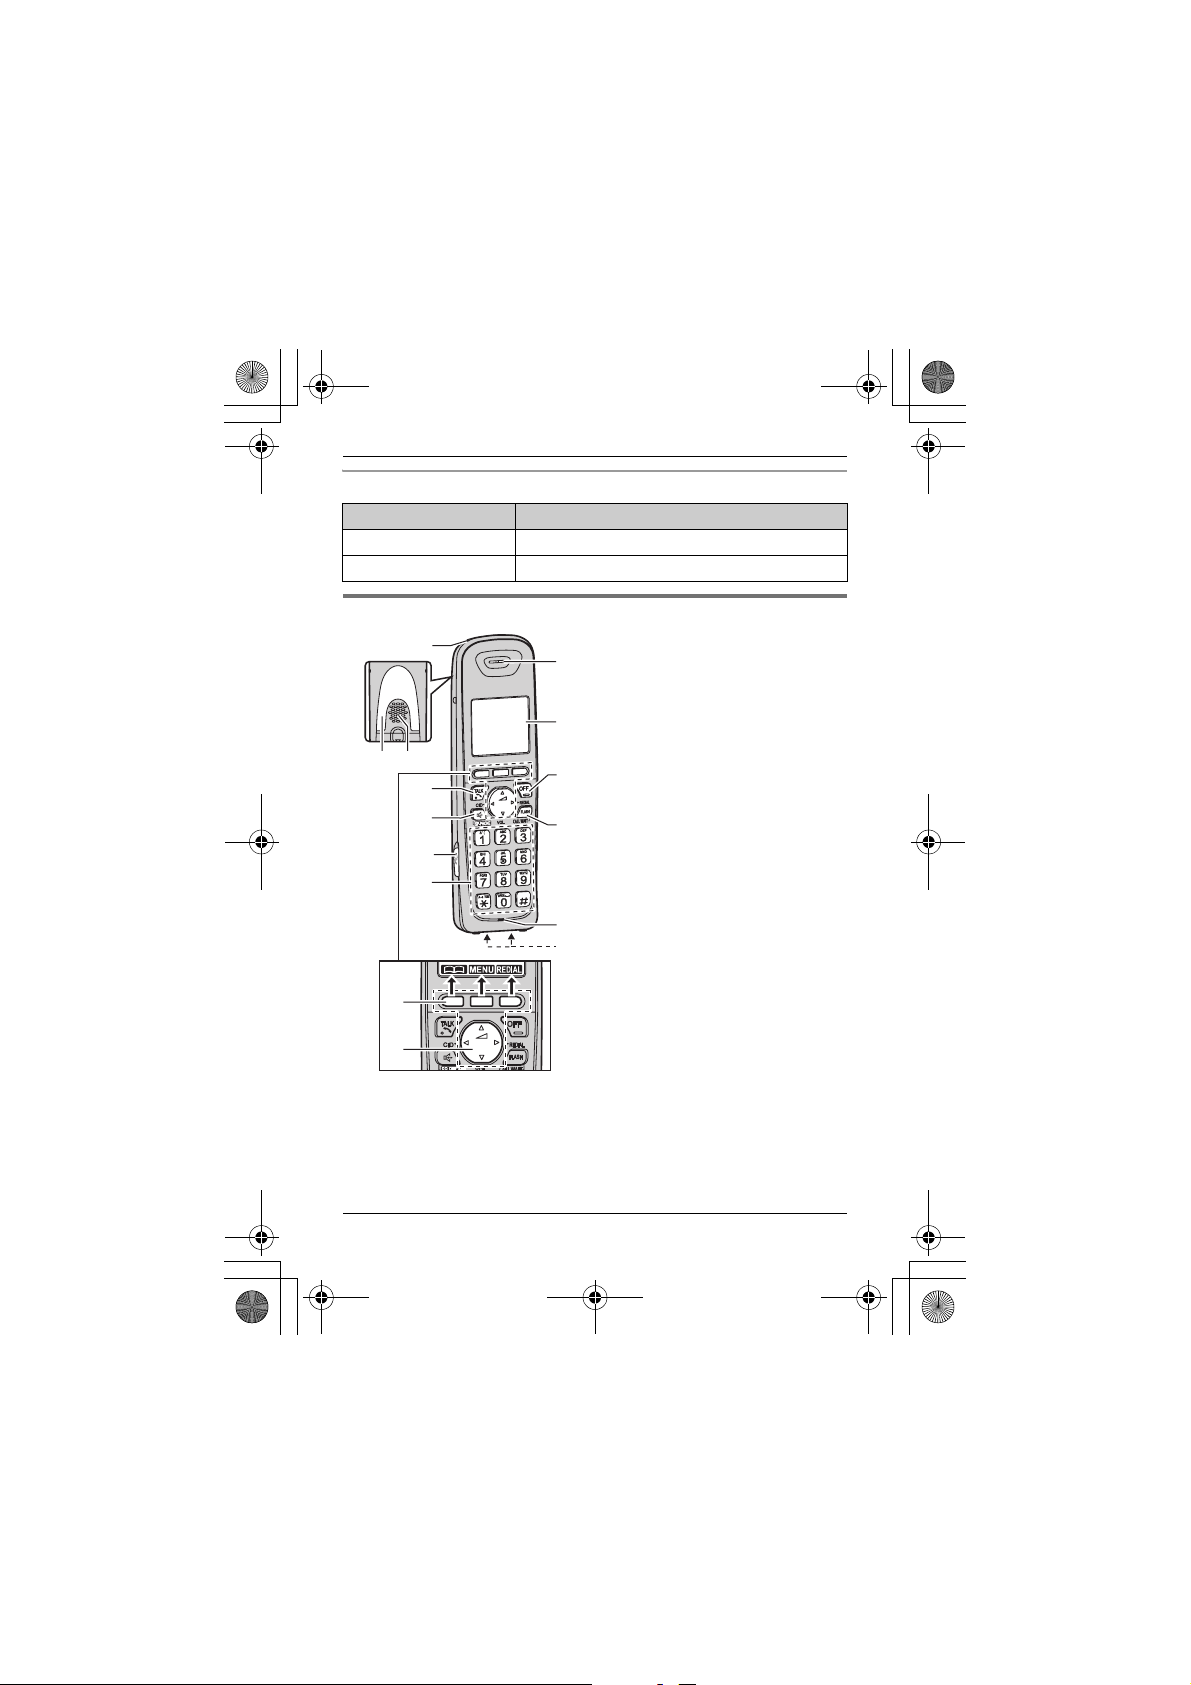
Controls
A
B C
D
E
F
G
A
B
A Charge indicator
H
I
J
K
L
M
Ringer indicator
Message indicator
B Nonslip pad
LNonslip pad offers support
when you cradle the
handset between your
shoulder and ear.
C Speaker
D {C} (TALK)
E {s} (SP-PHONE:
Speakerphone)
F Headset jack
G Dial keypad ({*}: TONE)
H Receiver
I Display
J {OFF}
K {FLASH} {CALL WAIT}
L Microphone
M Charge contacts
NControl type
A Soft keys
The handset features 3 soft keys. By pressing a soft key, you can
select the feature shown directly above it on the display.
4 For assistance, please visit http://www.panasonic.com/help

TGA401(e).fm Page 5 Tuesday, December 22, 2009 12:10 PM
B Navigator key
– {^}, {V}, {<}, or {>}: Scroll through various lists and items.
– ? VOL. (Volume: {^} or {V}): Adjust the receiver or speaker
volume while talking.
– {<} CID (Caller ID): View the caller list.
– {>} REDIAL: View the redial list.
Note:
LThe preset melodies used for the ringer tone in this product are used
with permission of © 2009 Copyrights Vision Inc.
For KX-TG4011/KX-TG4021/KX-TG4071 series users
NUsing the soft keys (operational differences between handsets)
KX-TGA401 features 3 soft keys, different to your original handset
which features keys with printed function names.
Press the soft key corresponding to the desired operation
(page 4: A).
Example: When selecting/setting the desired item in programming
Original handset (printed key name) KX-TGA401 soft keys
{OK}{SELECT}{SAVE}
LSome KX-TGA401 soft key names are different to the button names
described in your base unit’s operating instructions.
Registering a handset to a base unit
Base unit:
1
NKX-TG4011/KX-TG6511 series
Press and hold {LOCATOR} for about 5 seconds. (No registration
tone)
NKX-TG4021/KX-TG4031/KX-TG4051/KX-TG4071/KX-TG6521/
KX-TG6531/KX-TG6541/KX-TG7531 series
Press and hold {LOCATOR} for about 5 seconds until the
registration tone sounds.
LIf all registered handsets start ringing, press the same button to
stop. Then repeat this step.
For assistance, please visit http://www.panasonic.com/help 5

TGA401(e).fm Page 6 Tuesday, December 22, 2009 12:10 PM
2 Handset:
Place the handset on the base unit or charger, then wait until a long
beep sounds and w is displayed.
Note:
LIf an error tone sounds, or if _ is displayed, register the handset
according to the base unit’s operating instructions.
Display language
1
{MENU} i {#}{1}{1}{0}
2 {V}/{^}: Select the desired setting.
3 {SAVE} i {OFF}
Date and time
{MENU} i {#}{1}{0}{1} i Enter the current month, date, and
1
year by selecting 2 digits for each. i {OK}
Example: For July 15, 2010, enter {0}{7}{1}{5}{1}{0}.:
2 Enter the current hour and minute (12-hour clock format) by selecting
2 digits for each.
Example: For 9:30, enter {0}{9}{3}{0}.
3 {AM/PM}: Select “AM” or “PM”. i {SAVE} i {OFF}
Belt clip
NTo attach NTo r emo ve
6 For assistance, please visit http://www.panasonic.com/help
TGA401(e).fm Page 7 Tuesday, December 22, 2009 12:10 PM
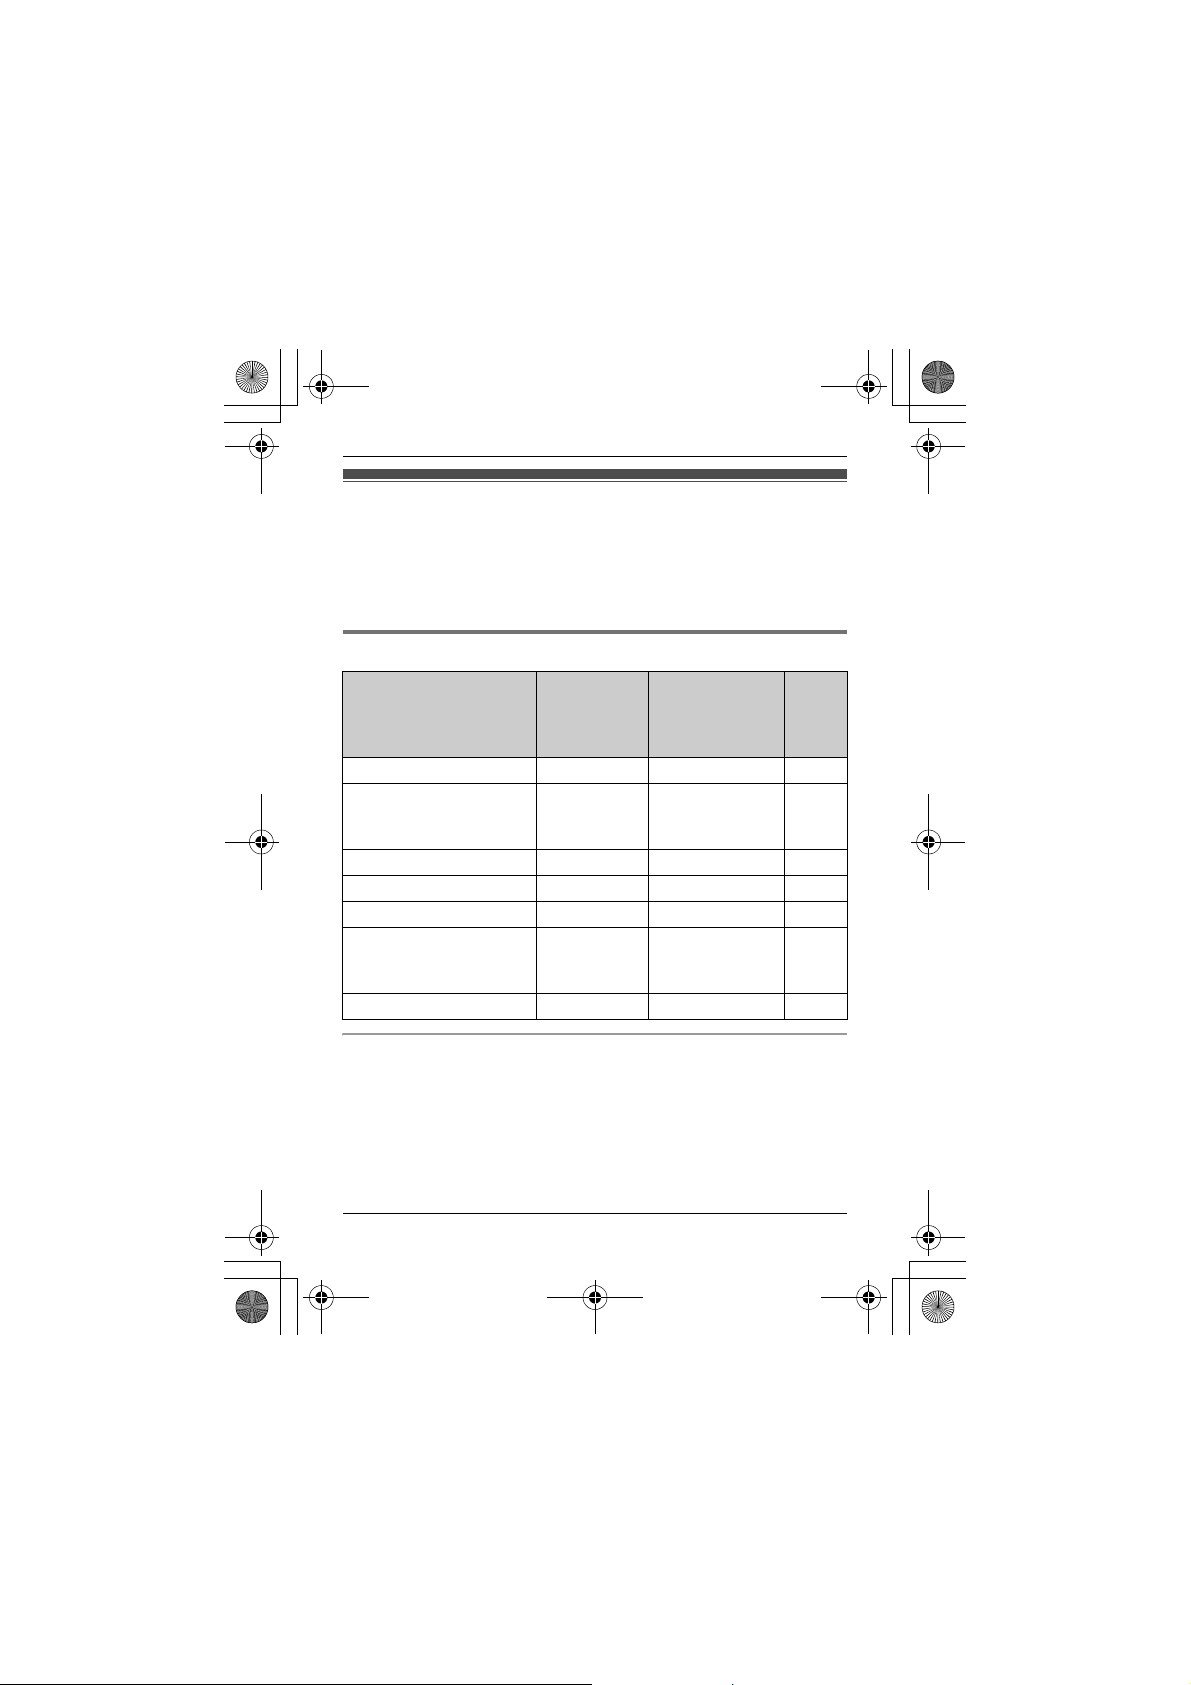
For KX-TG6511/KX-TG6521/KX-TG6531/
KX-TG6541/KX-TG7531 series users
There are some differences in the specification of your original handset
and the KX-TGA401. The feature differences are described in the chart
below.
Main feature differences
KX-TG6511/
KX-TG6521/
Feature KX-TGA401
Display size 1.8 inches 1.8 inches 2.1 inches
Button size Extra large Large Large
Display mode — — r
Message list — — r
Operational differences in other features
NChanging group names in the shared phonebook
See “Changing group names” (page 9).
NEditing entries in the shared phonebook
See “Editing entries” (page 10).
KX-TG6531/
KX-TG6541
series handset
KX-TG7531
series
handset
For assistance, please visit http://www.panasonic.com/help 7
TGA401(e).fm Page 8 Tuesday, December 22, 2009 12:10 PM
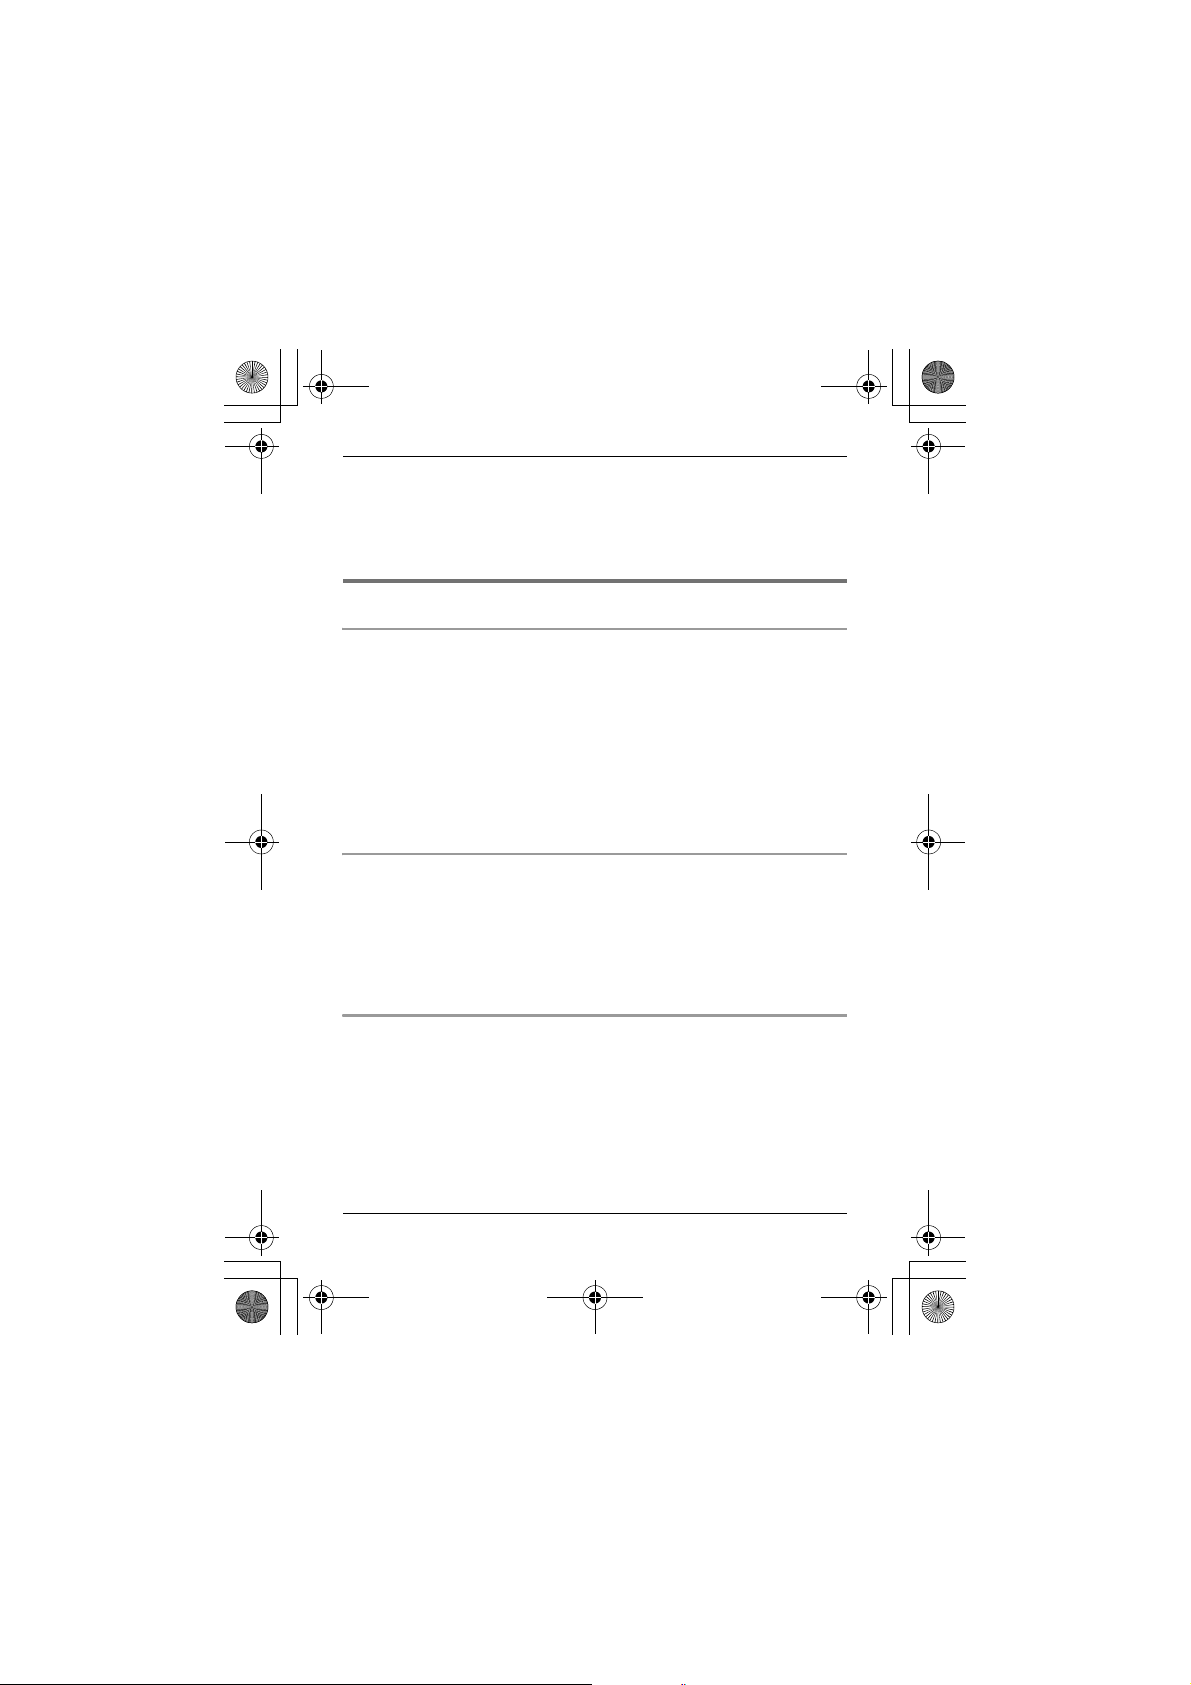
For KX-TG4011/KX-TG4021/KX-TG4071
series users
There are some differences in the specification of your original handset
and the KX-TGA401. The feature differences are described in the
following chart.
Main feature differences
KX-TG4011/
Feature KX-TGA401
Display size 1.8 inches 1.4 inches —
Phonebook settings
– Group
– All erase
Message alert r — 11, 15
Alarm r —13
Silent mode r —13
Voice mail settings
– Voice mail access no.
– VM tone detection
Time adjustment setting r —15
r — 9, 10
r —14
KX-TG4021/
KX-TG4071
series handset
Page
Operational differences in other features
– Date and time (page 6)
– Chain dial (page 10)
– Voice guidance language (page 10)
– Selecting “Greeting only” (page 11)
– Calling back during playback (Caller ID subscribers only) (page 11)
– Caller list operations (Caller ID subscribers only):
8 For assistance, please visit http://www.panasonic.com/help
TGA401(e).fm Page 9 Tuesday, December 22, 2009 12:10 PM
Editing a caller’s phone number before calling back (page 12)
Erasing all caller information (page 12)
Storing caller information to the phonebook (page 12)
– Transferring calls, conference calls (page 12)
– Deregistering a handset (page 12)
Differences in the shared phonebook operations
Adding entries
When adding an entry to the phonebook, you can assign it to one of 9
groups.
1 {C} i {ADD}
2 Enter the party’s name (16 characters max.). i {OK}
3 Enter the party’s phone number (24 digits max.). i {OK}
4 {V}/{^}: Select the desired group. i {SELECT} 2 times
LTo add other entries, repeat from step 2.
5 {OFF}
Changing group names
The default group name is “Group 1” to “Group 9”.
1 {C} i {MENU} i {V}/{^}: “Group” i {SELECT}
2 {V}/{^}: Select the desired group. i {SELECT}
3 {V}/{^}: “Group name” i {SELECT}
4 Edit the name (10 characters max.). i {SAVE} i {OFF}
Finding and calling a phonebook entry: Searching by group
1 {C} i {GROUP}
2 {V}/{^}: Select the group you want to search. i {SELECT}
LIf you select “All groups”, the unit ends the group search.
3 {V}/{^}: Select the desired entry. i {C}
For assistance, please visit http://www.panasonic.com/help 9

TGA401(e).fm Page 10 Tuesday, December 22, 2009 12:10 PM
Group ringer tone (Caller ID subscribers only)
You can assign a different ringer tone to the desired group.
If you select “Current ringer” (default), the unit uses the same
ringer tone as for other incoming calls when calls from this group are
received.
1 {C} i {MENU} i {V}/{^}: “Group” i {SELECT}
2 {V}/{^}: Select the desired group. i {SELECT}
3 {V}/{^}: Select the current setting of the group ringer tone. i
{SELECT}
4 {V}/{^}: Select the desired ringer tone. i {SAVE} i {OFF}
Editing entries
1 {C} i {V}/{^}: Select the desired entry. i {EDIT}
2 Edit the name if necessary (16 characters max.). i {OK}
3 Edit the phone number if necessary (24 digits max.). i {OK}
4 {V}/{^}: Select the desired group. i {SELECT} 2 times i {OFF}
Erasing all entries
1 {C} i {MENU} i {V}/{^}: “Erase all” i {SELECT}
2 {V}/{^}: “Yes” i {SELECT}
3 {V}/{^}: “Yes” i {SELECT} i {OFF}
Chain dial
1 During an outside call, press {MENU}.
2 {V}/{^}: “Phonebook” i {SELECT}
3 {V}/{^}: Select the desired entry. i {CALL}
Differences in the answering system operations
(KX-TG4021/KX-TG4071 series only)
Voice guidance language
1 {MENU} i {#}{1}{1}{2}
10 For assistance, please visit http://www.panasonic.com/help
TGA401(e).fm Page 11 Tuesday, December 22, 2009 12:10 PM
2 {V}/{^}: Select the desired setting. i {SAVE} i {OFF}
Selecting “Greeting only”
The unit announces a greeting message to callers but not record
messages.
{MENU} i {#}{3}{0}{5} i {V}/{^}: “Greeting only” i
{SAVE} i {OFF}
Note:
LWhen you select “Greeting only”:
If you do not record your own message, the unit will play the prerecorded greeting-only message asking callers to call again later.
Calling back (Caller ID subscribers only)
While caller information is displayed during playback, press {PAUSE}.
i {V}/{^}: “Call back” i {SELECT}
NEditing the number before calling back
Press {PAUSE} during playback. i {V}/{^}: “Edit & Call” i
{SELECT} i Press {EDIT} repeatedly until the phone number is
shown in the desired format. i {C}
Message alert (default: on)
You can select whether or not the message indicator on the handset
flashes slowly when new messages are recorded.
Important:
LIf you stored the voice mail access number (page 14), the message
indicator also flashes for newly recorded voice mail messages.
1 {MENU} i {#}{3}{4}{0}
2 {V}/{^}: Select the desired setting. i {SAVE} i {OFF}
Note:
LWhile message alert is on, battery operating time is shortened
(page 4).
For assistance, please visit http://www.panasonic.com/help 11
 Loading...