

Page 1
Operating Instructions
Model No.
Digital Cordless Phone
KX-TCD952EB
1
ABC
2
DEF
3
GHI
4
JKL
5
MNO
6
PQRS
7
TUV
8
0
WXYZ
9
RCL
PWR
INT'
OK
PROG
C
RDL
CALLER ID
PLEASE READ BEFORE USE
AND SAVE.
Charge the batteries for about 4 hours before initial use.
This equipment is not designed for making emergency
telephony calls when the power fails. Alternative arrangements
should be made for access to emergency services.
Caller ID Compatible
Page 2

Important Information
Do not connect the AC adaptor to any
AC outlet other than the standard AC
230–240 V, 50 Hz.
• Outlet voltage DC1 8 V, 300 mA
Outlet voltage DC2 9 V, 200 mA
• The apparatus is approved for use with
the KX-TCA9E or KX-TCA11E power
supply.
• CAUTION: Do not remove cover. Live
parts inside.
This apparatus may make use of the
following facilities:
1) Storage of telephone numbers for
retrieval by a predetermined code
2) Last number redial
3) Simple telephone facility
4) PBX earth register recall (option)
PBX timed break register recall
5) MF signalling
6) LD signalling
7) Pause
8) 1 way paging
9) Call prohibition
10) Call restriction
11) Direct call
12) Intercom between handsets
13) Transferring a call from one handset
to another
14) Conference
15) Setting the call waiting tone
16) Accessing the base unit
17) Caller ID Service compatible
Any other usage may result in
misoperation.
Ringer Equivalence Number (REN):
This relates to the performance of the
apparatus when used in combination with
other items of apparatus. It enables the
calculation of the maximum number of
items of apparatus that may be
connected simultaneously to the line by
summing the REN values of each item. A
BT supplied instrument has a REN value
of 1 unless otherwise marked.
A maximum REN value of 4 should not
be exceeded. The REN value of this
apparatus is 1.
Method of connection
This is connected to the exchange line or
PABX/PMBX (Private Automatic/Manual
Branch Exchange) extension by the new
standard British Telecom plug and socket.
Arrangements for provision of this type of
termination can be made through the
nearest British Telecom Sales Office. The
apparatus may be connected to the
following types of installation. The
apparatus has been approved for use
under the following conditions:
a) This apparatus may be used on
telecommunication systems employing
LD and MF signalling. It is intended for
connection to a direct exchange line
on the PSTN (Public Switched
Telephone Network) or via a
compatible PBX (Private Branch
Exchange). (Contact the supplier for
an up to date list of compatible PBX’s.)
b) This apparatus is not suitable as an
extension to a payphone or for use on
a party line with shared service.
2
Page 3

This cordless telephone has been
designed to operate on radio frequencies
which have been assigned to the
exclusive use of cordless telephones. As
the use of cordless telephones becomes
more widespread users may experience a
reduction in the quality of service
obtainable from this apparatus.
Although this equipment can use either
loop disconnected or DTMF signalling,
only the performance of the DTMF
signalling is subject to regulatory
requirements for correct operation. It is
therefore strongly recommended that the
equipment is set to use DTMF signalling
for access to public or private emergency
services. DTMF signalling also provides
faster call set up.
999 or 112 can be dialled on the
apparatus for the purposes of making
outgoing calls to the BT Emergency (999
or 112) Service.
WARNING:
The apparatus may be unable to make
emergency 999 or 112 telephone calls,
under certain conditions, e.g.
• Radio interference caused by another
cordless telephone operating on the
same radio frequency.
• The portable handset battery needs
recharging, or has failed.
• The portable handset cannot be used
while charging.
NOTE:
If you experience any problems with the
normal use of your apparatus, you should
unplug it from the telephone outlet and
connect a known working telephone in its
place. If the known working telephone still
gives problems, then please contact the
customer service department of your
PSTN operator. If it operates properly,
then the problem is likely to be a fault in
your apparatus. In this case, contact your
supplier for advice. Your PSTN operator
may charge you if they attend a service
call that is not due to apparatus supplied
by them.
Any cases of difficulty should be referred
in the first instance to the supplier of the
apparatus.
3
Page 4

Before Initial Use
Thank you for purchasing your new Panasonic digital
cordless telephone.
If you require assistance please contact our customer care
helpline on Tel. No. : 08701 578577
Caller ID, where available, is a telephone company service. After subscr ibing to Caller ID, this
phone will display the caller’s phone number.A second caller’s phone number displays while the
user is on another call, requires a subscription to both Caller ID and Call Waiting.
For your future reference
Serial No. Date of purchase
(found on the bottom of the unit)
Name and address of dealer
Included with this unit
AC Adaptor (p.10)
Part No.KX-TCA9E or
KX-TCA11E
one
Handset Cover (p. 9)
Part No.PQKK10091Z1
one one
Telephone Line Cord (p.10)
Part No.PQJA87S
one three
Belt Clip (p.44)
Part No.PQKE10071Z1
Optional accessories
Please contact your nearest Panasonic dealer for the following options.
Model No. Description
KX-A102EB
KX-TCA110EB
HHR-P03H Ni-MH batteries
Batteries (p. 9)
Part No.Panasonic P-03H
(BYD PQP25AAA)
Operating Instructions
Part No.PQQX12707Z
one
Handset
Charger
4
Page 5

For Best Performance
Away from electrical appliances such as a TV,
radio, personal computer or another telephone.
In a HIGH and CENTRAL location with
no obstructions such as walls.
Battery Charge
Rechargeable Ni-Cd batteries power the handset.
Install the batteries (p. 9) and charge them for
about 4 hours before initial use (p.11).
Base Unit Location
Calls are transmitted between the base unit and the handset using wireless radio waves. For
maximum distance and noise-free operation, the recommended base unit location is:
5
Page 6

Contents
Chapter 1
Preparation
Location of Controls ......................8
Display .............................................9
Settings ............................................9
Installing the Batteries in the
Handset .........................................9
Connections ................................10
Battery Charge..............................11
Turning the Power ON..................12
Selecting the Dialling Mode..........13
Selecting the Handset Ringer
Volume/Pattern .............................14
Selecting the Base Unit
Ringer Volume..............................15
Setting the Auto Talk Feature.......15
Chapter 2
Basic Operations
Making Calls ..................................16
Answering Calls ............................17
Caller ID Service ...........................18
Using the Caller List .....................19
Viewing the Caller List .................19
Calling Back from the Caller List
Editing the Caller’s Phone
Number ........................................20
Clearing a Caller’s Phone Number
in the Caller List ...........................21
Speed Dialling ...............................22
Storing Phone Numbers
in Memory ....................................22
Dialling a Stored Number.............22
..20
Special Features ...........................23
How to Use the Pause Feature
(For Analog PBX Line/Long
Distance Service Users) ..............23
Handset Locator...........................23
Temporary Tone Dialling (For
Rotary or Pulse Service Users) ...24
Setting the Key Lock ....................24
Call Waiting and Caller ID
Compatible ...................................24
Using the Recall Feature..............25
Chapter 3
Advanced Operations (Special
Programming Features)
Summary of Programmable
Functions........................................26
Setting the Password....................27
Direct Call.......................................28
Setting the Direct Call Mode ........28
Dialling the Stored Number..........28
Call Prohibition..............................29
Call Restriction ..............................30
Other Programmable Settings......31
Setting the Key Tones..................31
Setting the Range Warning
Alarm............................................31
Setting the Battery Low Alarm......31
Selecting the Talk Mode Display..32
Clearing the Settings
in Memory ......................................33
6
Page 7

Chapter 4
Multi-Unit User Operations
Chapter 5
Useful Information
Chapter 1 Chapter 2 Chapter 3 Chapter 4 Chapter 5
For Optional Multi-Unit Users.......34
Operating More than One
Handset........................................34
Operating More than One Base
Unit...............................................34
Registration....................................35
Registering a Handset in the
Base Unit......................................35
Selecting the Base Unit Access...36
Cancelling a Handset...................37
Selecting the Stand-by Mode
Display............................................38
Bell Selection.................................38
Paging/Intercom.............................40
Paging All Handsets from
the Base Unit ................................40
Intercom between Handsets.........40
Transferring a Call from One
Handset to Another.......................41
Conference ..................................42
Setting the Call Waiting Tone.......42
Replacing the Batteries.................43
Using the Belt Clip .......................44
Before Requesting Help ...............45
Safety Instructions ........................48
Adding Another Phone..................49
Important Notice Concerning the
Correct Use and Charging of
Ni-Cd (Ni-MH) Batteries.................49
Term Definitions............................50
7
Page 8

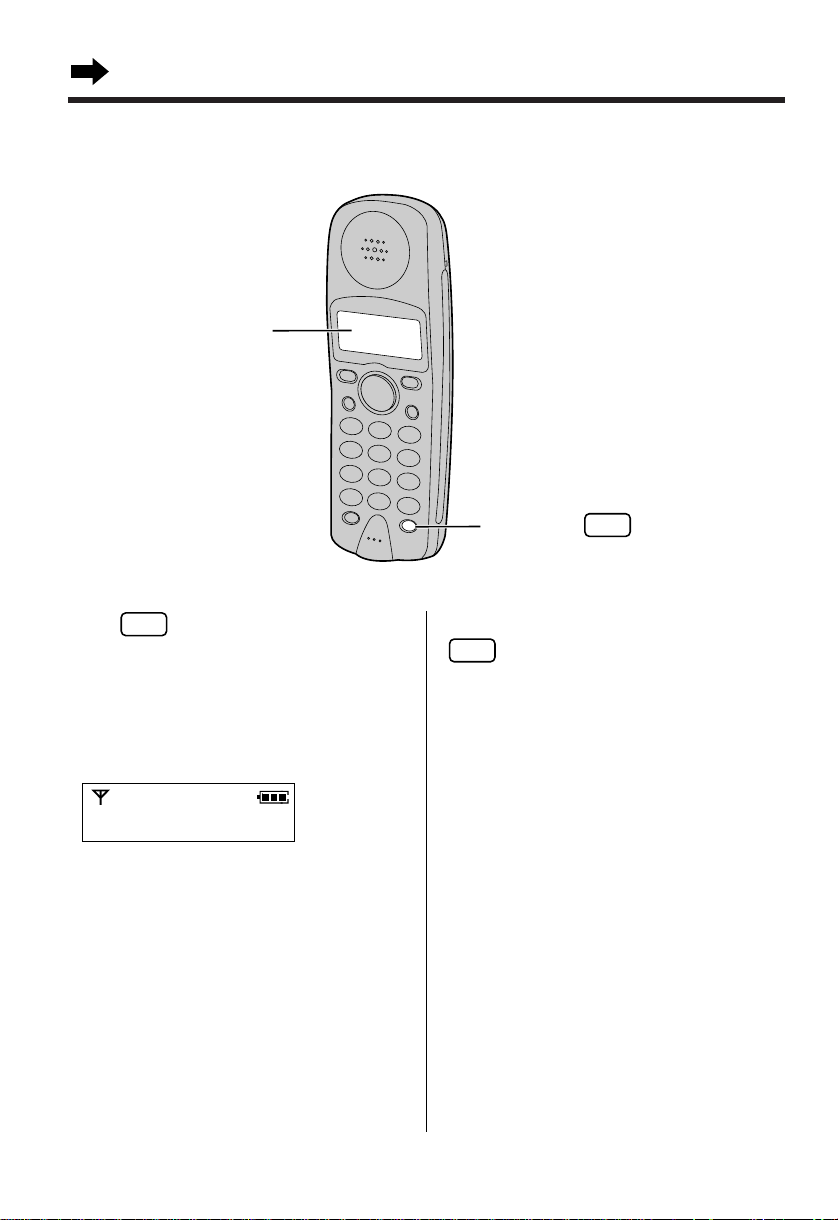
Location of Controls
Charge Contacts (p. 11)
Page Button (p. 23, 35, 40)
In Use Indicator ( ) (p. 23, 35)
Charge Indicator ( ) (p. 11)
CALLER ID Indicator (p. 18)
Antenna
CALLER ID
1
ABC
2
DEF
3
GHI
4
JKL
5
MNO
6
PQRS
7
TUV
8
0
WXYZ
9
INT'
OK
OK
C
PWR
RCL
PROG
RDL
Display (p. 9)
Talk Button (p. 16, 17)
Program Button
(p. 13, 22, 24, 26)
Recall Button (p. 25)
Tone Button (p. 24)
Charge Contacts (p. 11)
Intercom Button
(p. 13, 26, 40)
OK Button (p. 14, 26)
Navigator Key
F, G
(p. 14, 16, 17, 22, 26)
Redial/Pause Button
(p. 17, 23)
Power Button (p. 12)
INT
Cancel Button
(p. 16, 17, 22, 26, 27)
C
OK
RCL
PROG
RDL
PWR
Base unit
Handset
8
Page 9
Display
RCL
RDL
4
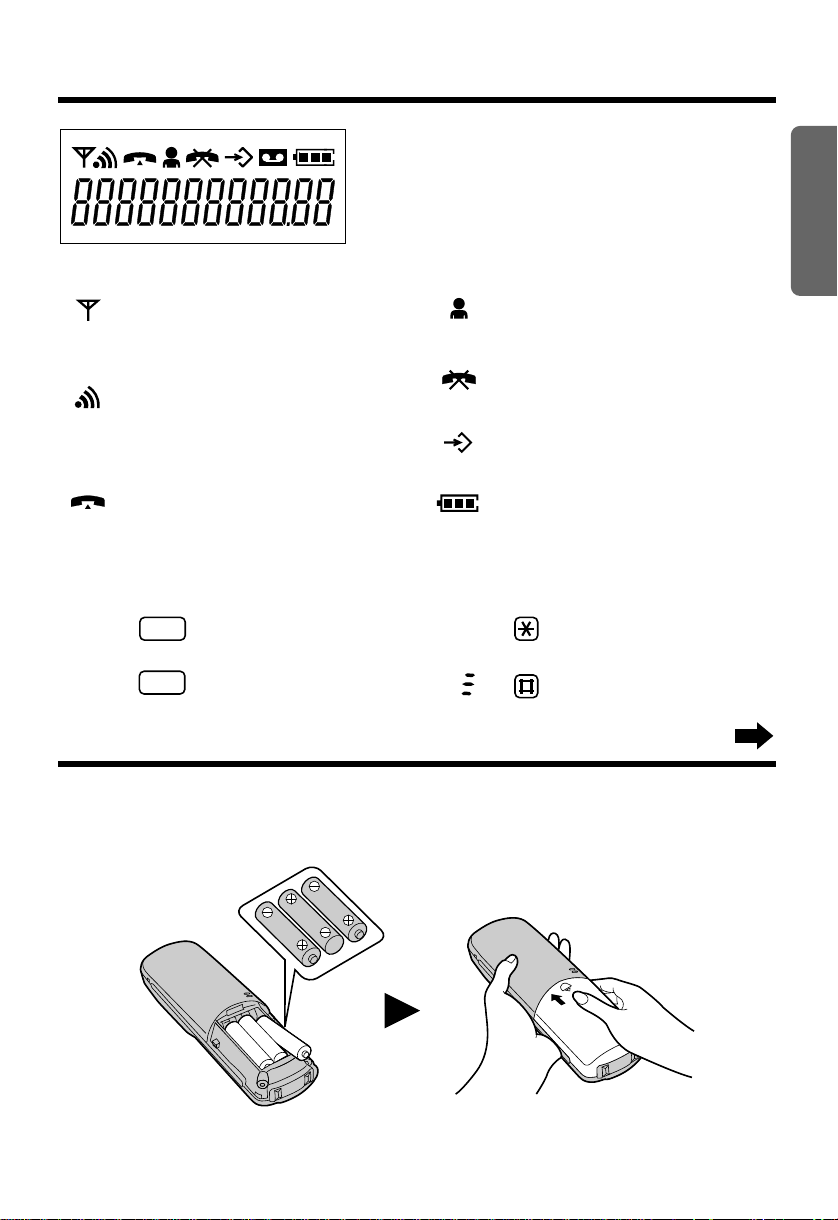
Icons
The in range icon indicates that the
handset is in range of the base unit. It
flashes when the handset is out of range.
The page/intercom icon is displayed
when paging or using the intercom. It
flashes when another unit pages the
handset.
(The display shows all possible configurations.)
The direct call icon is displayed when
this mode is turned on (p. 28).
The call prohibition icon is displayed
when this mode is turned on (p. 29).
The program icon indicates that the unit
is in the programming mode.
Chapter 1
Preparation
The talk icon is displayed when making or
answering calls.It flashes when an
outside call is being received.
The battery icon indicates the battery
strength (p.11).
Characters
P
F
is pressed while dialling.
is pressed while dialling.
is pressed while dialling.
is pressed while dialling.
Settings
Installing the Batteries in the Handset
Install the batteries as shown.Then install the handset cover.
•
If the rechargeable batteries are not inserted correctly, the handset will not work.
9
Page 10
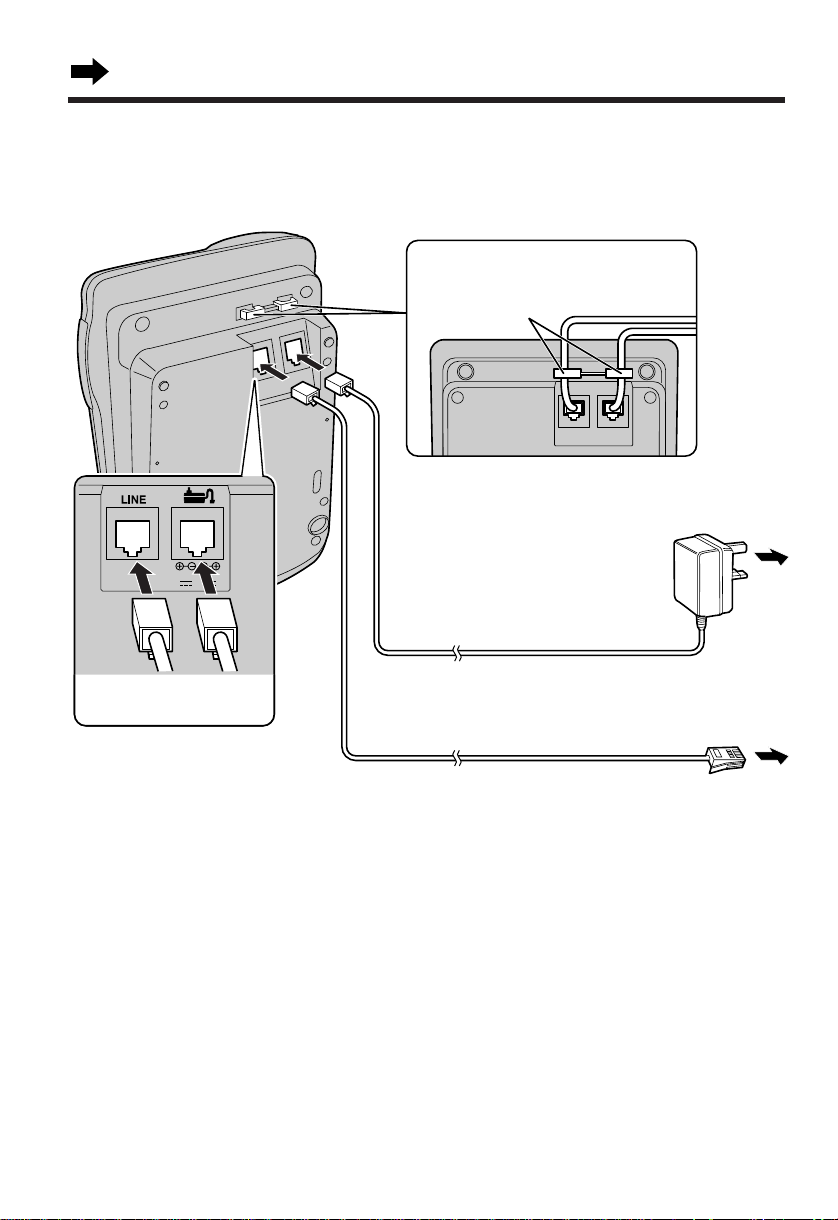
Settings
8V 9V
Fasten the cords to prevent them
from being disconnected.
Hooks
To Mains Outlet
(AC 230–240V, 50 Hz)
To B.T. Socket
AC Adaptor
Telephone Line Cord
TNV*
Telephone
Line Cord
AC
Adaptor
Connections
Plug in the AC adaptor and the telephone line cord to the bottom of the unit.Then connect the
cords as shown.
* The abbreviation TNV means
“Telephone Network Voltage”.
•
USE ONLY WITH Panasonic AC ADAPTOR KX-TCA9E OR KX-TCA11E.
•
Be careful not to confuse the telephone line jack with the AC adaptor jack on the base unit. If
connected improperly, the base unit will not work and damage may occur.
•
The AC adaptor must remain connected at all times.(It is normal for the adaptor to feel warm during
use.)
•
To connect a standard telephone on the same line, see page 49.
•
If your unit is connected to a PBX which does not support Caller ID services, you cannot access
those services.
CONNECTION OF POWER SUPPLY
This apparatus is intended for use when powered by the KX-TCA9E or KX-TCA11E.
Using other power supplies will invalidate any approval given to this apparatus.
10
Page 11
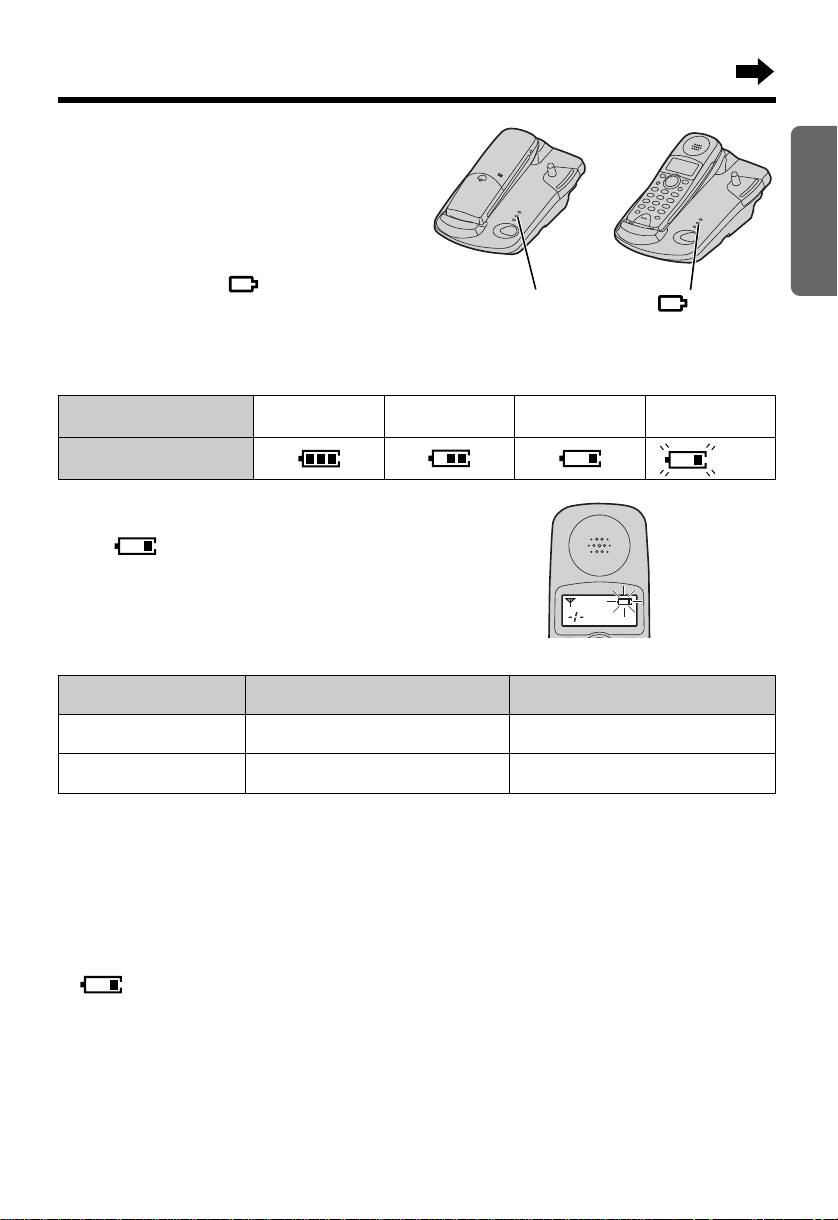
Battery Charge
OR
Charge Indicator ( )
At the time of shipment, the batteries are not
charged.To charge, place the handset on the base
unit. Please charge the batteries for about
4 hours before initial use.
•
The charge indicator ( ) lights.
Battery strength
You can check the present battery strength on the display.
Chapter 1
Preparation
Battery strength
Battery icon
Fully charged Medium Low No power
(Flashing)
Recharge
When “ ” flashes or the unit beeps every
15 seconds, recharge the batteries.
Battery information
After your Panasonic batteries are fully charged:
Operation
While in use (Talk)
While not in use (Stand-By)
•
Battery life may vary depending on usage conditions, such as:
— when viewing the Caller ID Caller List, and
— ambient temperature.
•
Clean the handset and the base unit charge contacts with a soft, dry cloth once a month.
Clean more often if the unit is subject to grease, dust or high humidity. Otherwise the batteries
may not charge properly.
•
If the batteries are fully charged, you do not have to place the handset on the base unit until
“ ” flashes.This will maximise the batter y life.
•
The batteries cannot be overcharged.
Approx. Ni-Cd battery life (included)
Up to about 6 hours
Up to about 65 hours
Approx. Ni-MH battery life (option)*
Up to about 12 hours
Up to about 130 hours
* Nickel metal hydride (Ni-MH) rechargeable batteries (AAA size) are available.
When you replace the batteries, you must program the battery type selection (see page 43).
•
Read “Important Notice Concerning the Correct Use and Charging of Ni-Cd (Ni-MH) Batteries” on
page 49.
11
Page 12
Settings
PWR
PWR
Display
Power Button
PWR
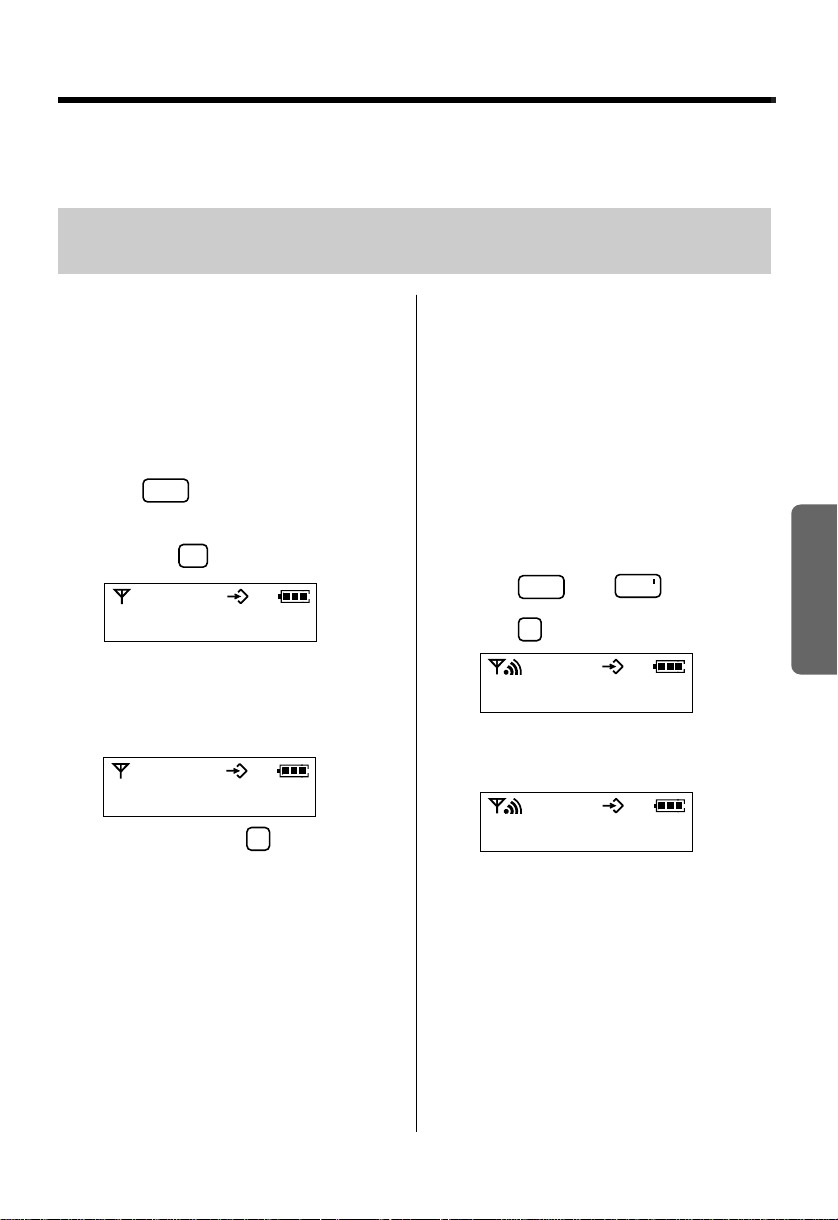
Turning the Power ON
Press firmly.
•
After all possible configurations briefly appear,
the display will change to the following. Then
the handset is in the stand-by mode.
The current connected base unit number is
displayed.
- i -
•
You can choose whether to display the base
unit number, handset number or no display in
the stand-by mode by programming (p. 38).
12
To turn the power OFF, press and hold
until a beep sounds.
•
The display will go blank.
•
The handset will not ring.
•
Depending on the programming mode, you
may not be able to turn the power off. First
make sure the handset is set to the stand-by
mode.
Page 13

Selecting the Dialling Mode
3
INT
PROG
PROG
1
2
1
PROG
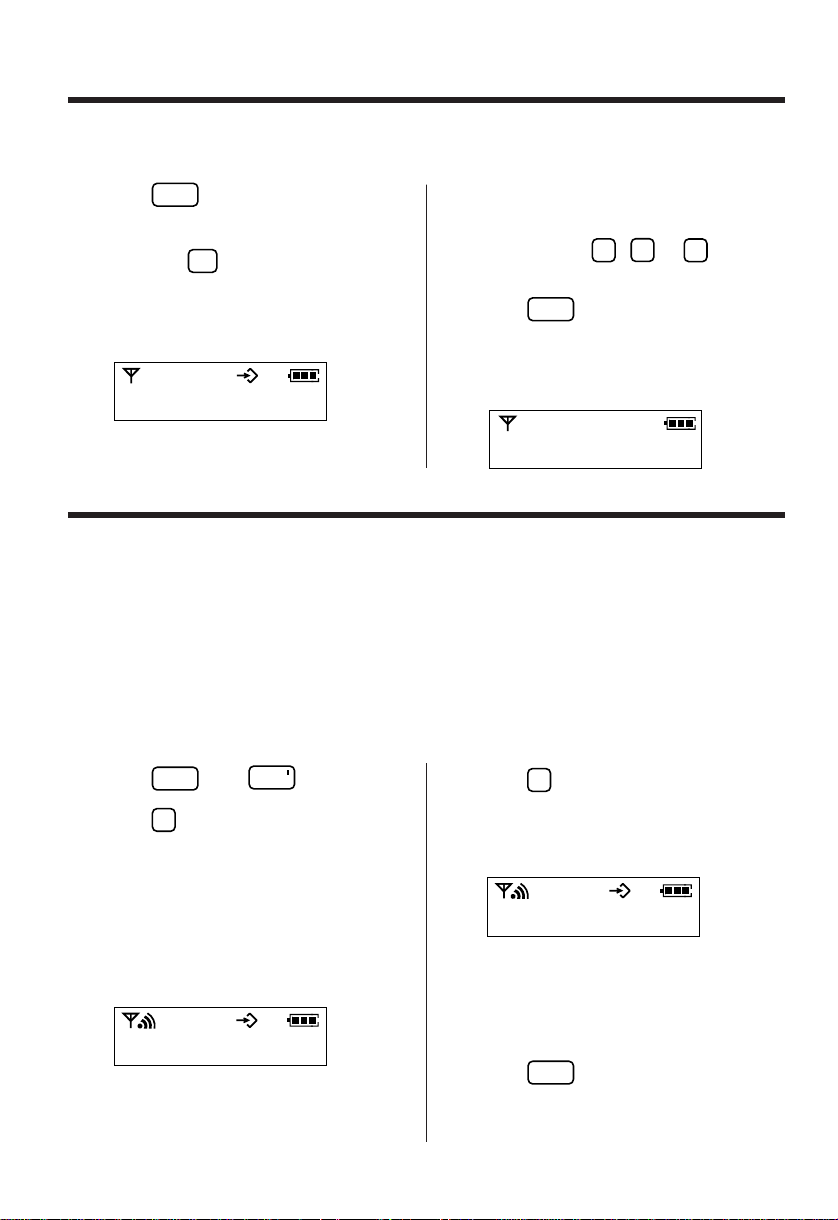
You can program the dialling mode to tone or pulse. If you have touch tone service, set to tone.If
rotary or pulse service is used, set to pulse. The factory preset is tone.
Make sure that the power is ON (p. 12) and the unit is in the stand-by mode.
Chapter 1
1 Press then .
2 Press .
3o
- - - -
3 Enter the base unit password.
•
The factory preset is 0000.To change the
base unit password, see page 27.
4 Press .
•
The current mode is displayed.
1: Tone 2: Pulse
Ex.Tone is selected.
3 iu i
5 To select Pulse, press .
OR
To select Tone, press .
You can determine which type of local BT
exchange you are connected to using the
following procedure.
Preparation
1 Ensure that the dialling mode is selected
tone.
2 Press , then identify the dial tone.
3 Dial a number you are familiar with.
4 If the call is successful, you are
connected to a tone exchange.
Therefore, leave the dialling mode as
tone.
5 If the call is not successful, you are
connected to pulse exchange.
Therefore, set the dialling mode to pulse.
6 Press .
•
A confirmation tone sounds and the
display will return to the stand-by mode.
•
If 5 beeps sound in step 3, the entered
password is incorrect.Enter the correct
password.
•
To cancel during programming, press ,
then start from step 1.
13
Page 14

Settings
PROG
OK
PROG
PROG
6
1
OK
PROG
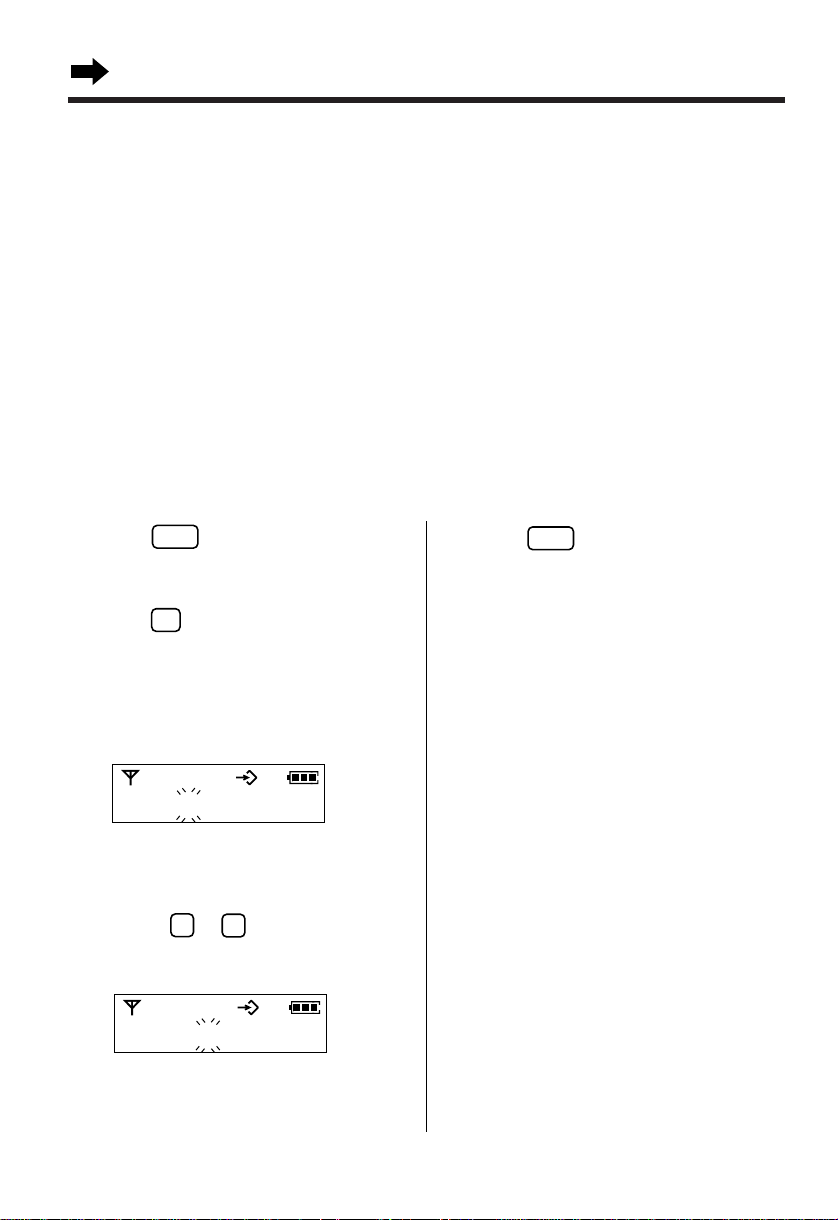
Selecting the Handset Ringer Volume/Pattern
You can program the desired handset ringer volume and pattern.
Make sure that the power is ON (p. 12) and the unit is in the stand-by mode.
Ringer volume
7 levels are available.The lowest level is 1.The
highest level is 6.The factory preset is 3. When
set to OFF, the handset will not ring.
1 Press .
F iU
2 Press
3 Press .
4 Press
5 Press .
G
or Funtil “
•
The current volume is displayed and rings.
Ex. Level 3 is selected.
G
or Fto select the desired
level.
•
Each time you press a button, the selected
volume is displayed and rings.
•
To set to OFF, erase “ ” by pressing
until “ ” is displayed.
•
A confirmation tone sounds and the
display will return to the stand-by mode.
•
When set to OFF, “ ” will be
displayed.
F22
” is displayed.
G
Ringer pattern
You can program the desired handset ringer
pattern (6 patterns). The factory preset is
pattern 1.
1 Press .
2 Press
G
or Funtil “
F23
” is displayed.
3 Press .
•
The current ringer pattern is displayed and
rings.
Ex. Pattern 1 is selected.
F23U i
4 Press
5 Press .
G
or Fto select the desired
pattern.
•
You can press to to select the
pattern.
•
Each time you press a button, the selected
pattern will be displayed and sound.
•
A confirmation tone sounds and the
display will return to the stand-by mode.
14
Page 15
Selecting the Base Unit Ringer Volume
2
INT
PROG
PROG
0
321
OK
PROG
PROG
1
0
4 levels (HIGH, MEDIUM, LOW, OFF) are available.The factory preset is MEDIUM. When set to OFF,
the base unit will not ring.
Make sure that the power is ON (p. 12) and the unit is in the stand-by mode.
Chapter 1
1 Press then .
2 Press TWICE.
•
The current volume is displayed.
1: LOW 2: MEDIUM 3: HIGH
0: OFF
Ex. MEDIUM is selected.
3 Press the desired volume level , ,
or .
•
Each time you press a button, the selected
volume is displayed and rings.
4 Press .
•
A confirmation tone sounds and the display
will return to the stand-by mode.
22u2
Setting the Auto Talk Feature
The Auto Talk feature allows you to answer a call by lifting the handset off the base unit without
pressing . If you want to use this feature, turn the feature ON.The factory preset is OFF.
In order to view caller’s phone number before answering a call, leave the Auto Talk feature OFF.
Make sure that the power is ON (p. 12) and the unit is in the stand-by mode.
1 Press .
2 Press
G
or Funtil “
3 Press .
•
The current setting is displayed.
0: OFF (factory preset) 1: ON
Ex. OFF is selected.
F28
” is displayed.
4 Press
5 Press .
G
or Fto select the desired
setting.
•
You can press to to select the
setting.
•
A confirmation tone sounds and the display
will return to the stand-by mode.
Preparation
F28u0
15
Page 16

PROG
OK
PROG
C
C
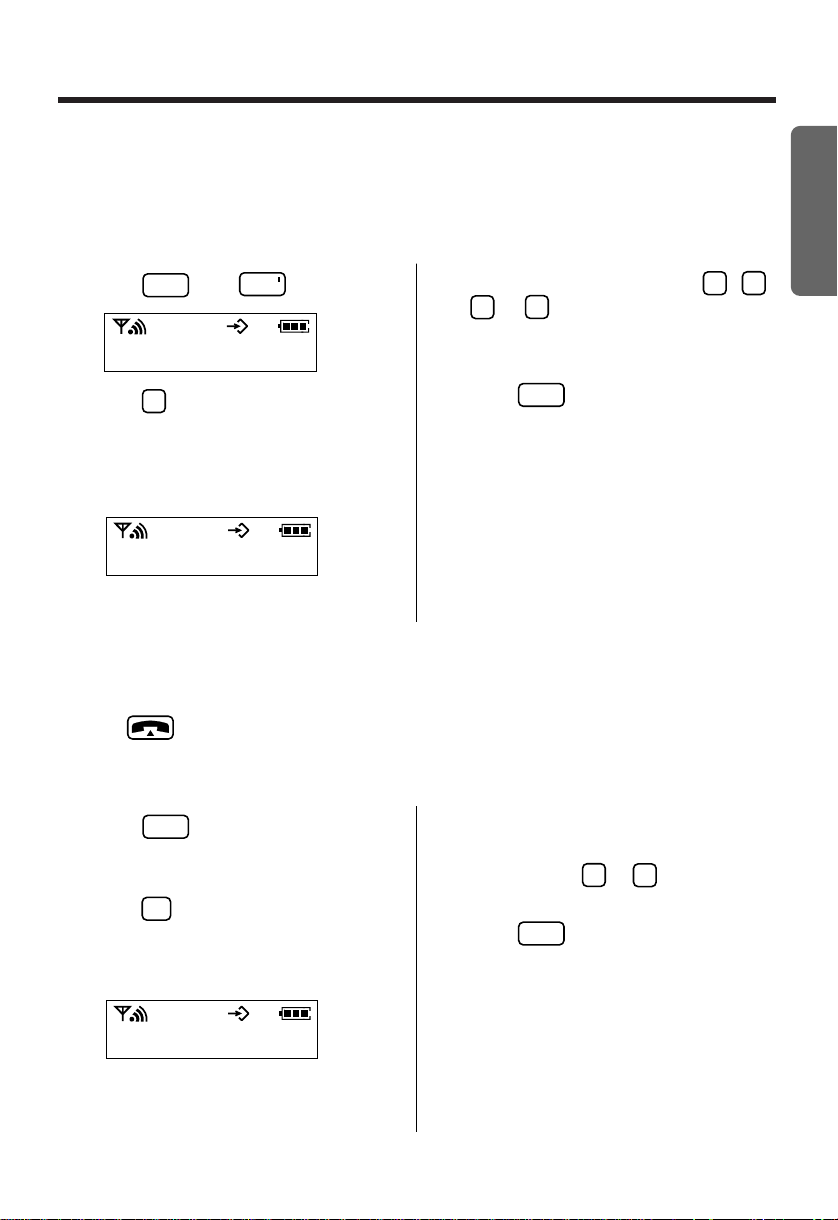
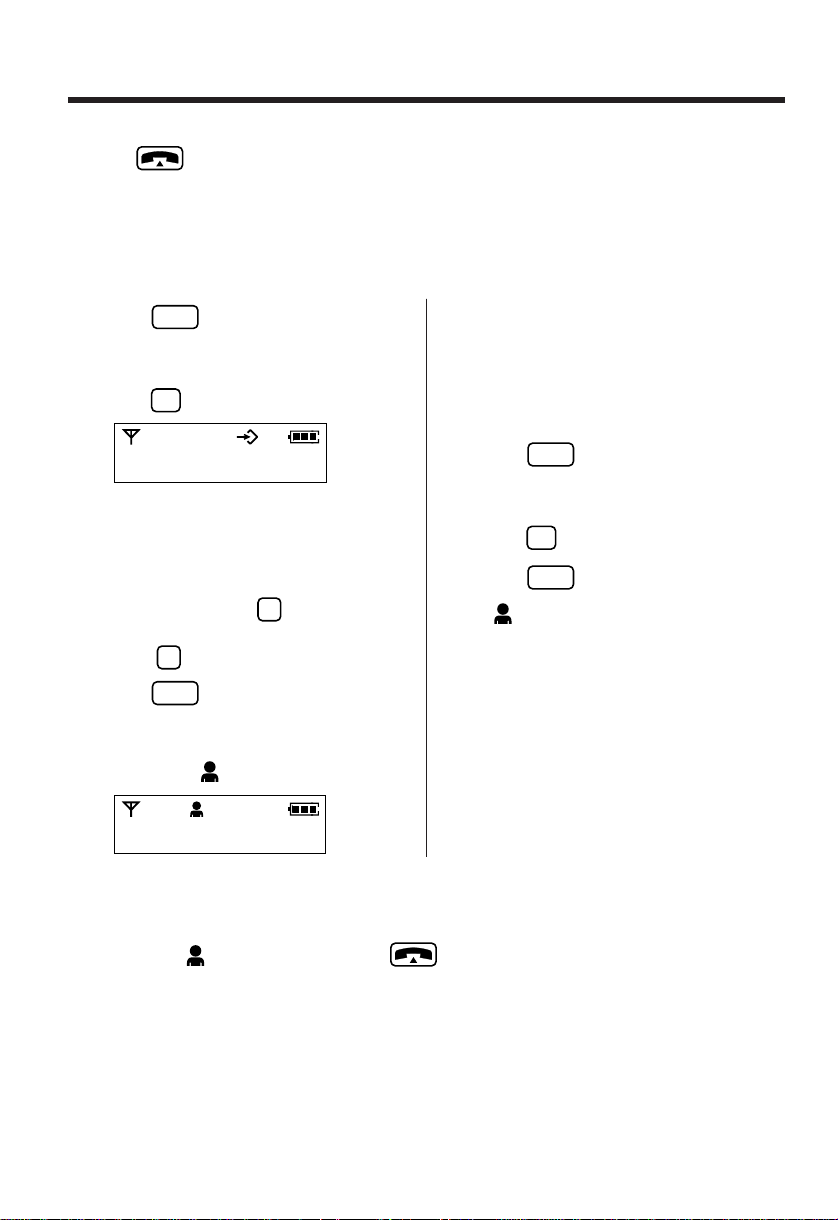
Making Calls
Make sure that the power is ON (p. 12).
1 Press .
2 Dial a phone number.
•
The dialled number is displayed.
i2345678
•
After a few seconds, the display will start
showing the length of the call.
•
If “ ” flashes and an alarm tone sounds
after pressing , move closer to the
base unit.Then try again.
•
You can choose whether to display the length
of the call or phone number in the talk mode
by programming (p.32).
To select the receiver volume
3 levels (HIGH, MEDIUM, LOW) are available.
The factory preset is MEDIUM.
888800-00-00
3 To hang up, press or place the
handset on the base unit.
•
The handset will return to the stand-by
mode.
To dial after confirming the
entered number
1 Enter a phone number.
•
The entered number is displayed.
•
If you misdial, press . Digits are
erased from the right.
•
To cancel, press firmly.
2 Press .
•
After a few seconds, the display will start
showing the length of the call.
3 To hang up, press or place the
handset on the base unit.
•
The handset will return to the stand-by
mode.
F
While talking, press
desired level.
Ex. LOW is selected.
•
After a few seconds, the display will return to
the length of call.
OR
In the stand-by mode, proceed as follows.
or Gto select the
1 Press .
2 Press
G
or
F
until “F6” is displayed,
then press .
•
The current level is displayed.
Ex. LOW is selected.
F6
3 Press
4 Press .
level.
F
or Gto select the desired
16
Page 17

To redial the last number dialled
RDL
C
RDL
RDL
PROG
OK
9
0
Press
•
The last number dialled is automatically
redialled.
➡
.
To redial after confirming the
numbers in redial memory
3 Press .
•
The number is dialled automatically.
•
If your line has rotary or pulse service, any
access numbers entered after pressing
will not be included when redialling.
The unit automatically stores the last
10 numbers dialled into redial memory.
1 Press .
•
The last number dialled is displayed.
2 Select the desired number by pressing
.
•
You can also search from the most recent
to oldest number by pressing
search from the oldest to most recent
number, press
•
“
----------
redial memory.
•
To exit the list, press fir mly.
F
.
” denotes the end of
G
.To
To clear all of the numbers in the
redial memory
1 Press .
2 Press
PROG
G
or Funtil “ ” is displayed,
then press .
3 Press .
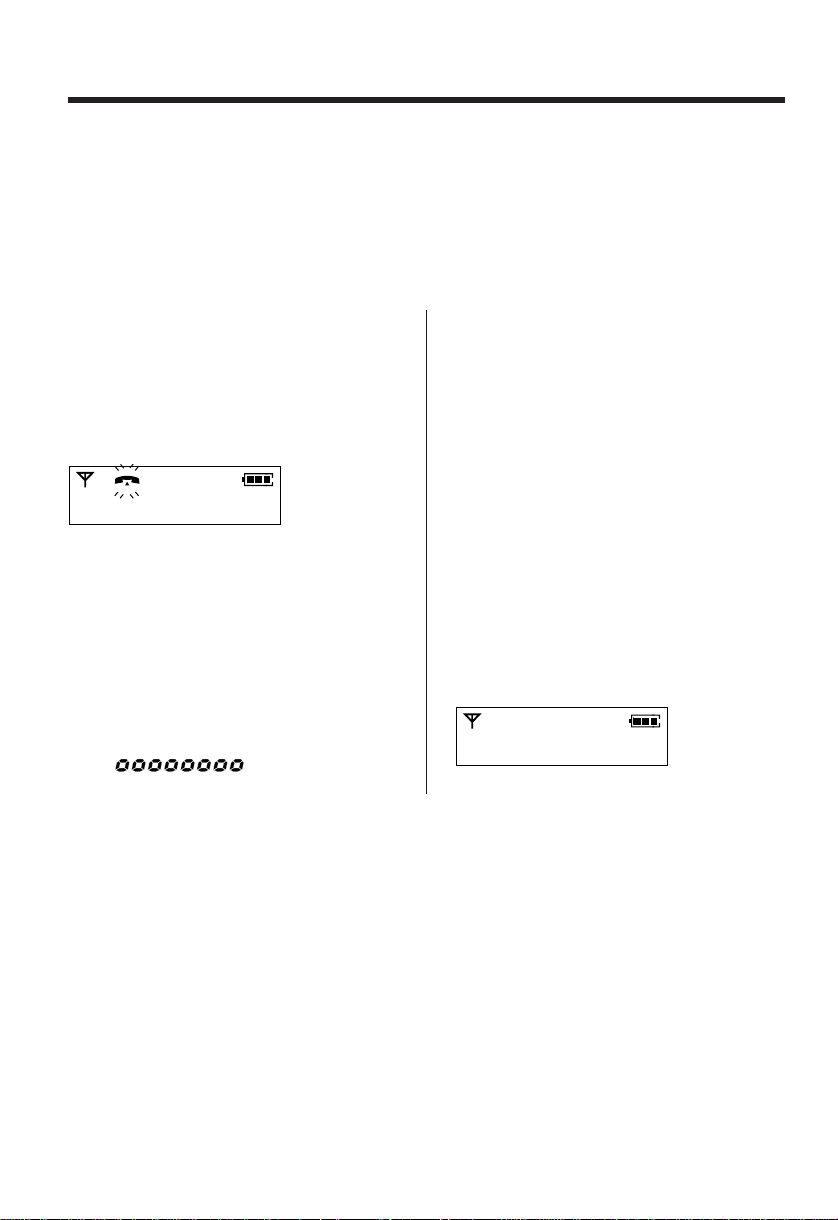
Answering Calls
Make sure that the power is ON (p. 12), otherwise the handset will not ring.
If the handset is off the base unit, press
.
•
You can also answer a call by pressing any
dialling button to , or
(—Any Key Talk).
Auto talk
If you set the Auto Talk feature to ON (p. 15),
you can answer a call by lifting the handset
off the base unit without pressing
•
The handset and base unit will not ring if both
ringer volumes are set to OFF (p.14, 15).
.
To turn the handset ringer off
temporarily
When the handset starts ringing, press
firmly.
•
“ ” is displayed and the handset
stops ringing.
•
The ringer will turn back on for the next call.
•
This function will not work when the handset is
on the base unit.
Chapter 2
Basic Operations
G
17
Page 18
Caller ID Service
This unit is compatible with a Caller ID service offered by your telephone company. After subscribing to
a Caller ID service, the calling party’s phone number will be displayed after the first ring.
The unit can record the phone numbers of up to 50 different callers in the Caller List.Using this list,
you can automatically call back a caller.
If you subscribe to a Caller ID and Call Waiting service, when a second call is received while talking,
the new caller’s phone number will be displayed (p. 24).
•
You can not access the Caller ID service while using the handset and base unit internal call.
•
How caller information is
displayed when a call is
received
The display shows the caller’s phone number
after the first ring.
i2345678
If your unit is connected to a PBX which does
not support Caller ID service, you cannot
access those services.
Checking the number of new
calls
•
After you answer the call, the display will show
the length of the call.
•
Caller’s phone number cannot be displayed in
the following cases:
–
If the caller dialed from an area which does
not provide a Caller ID service, the display
will show “
–
If the caller has requested not to display
his/her phone number, the display will show
“ ”.
--------
”.
When new calls have been received, the caller
ID indicator flashes on the base unit. In the
stand-by mode, the display shows the number of
new calls.
•
For example, if you have received 10 new
calls, the display will show the following.
-i- IO
18
Page 19
Using the Caller List
C
INT
PROG
3
3
Viewing the Caller List
Telephone numbers of up to 50 different callers are stored from the most recent to the oldest call in the
Caller List.When the 51st call is received, the oldest call is deleted.
To check the caller’s phone number, follow the steps below.
Make sure that the power is ON (p. 12) and the unit is in the stand-by mode.
•
1 Press then .
If more than one call is received from the
same caller, only the most recent call will be
recorded.
Chapter 2
2 Press
GorF
•
The most recent caller’s phone number is
displayed.
.
3 To search from the most recent to oldest
call, press
To search from the oldest to most recent
call, press
•
To scroll between callers, press G or F.
G
repeatedly.
F
repeatedly.
4 To exit the list, press .
•
The handset will return to the stand-by
mode.
•
If no number is displayed in step 2, the
Caller List is empty. The display will return
to the stand-by mode.
What “ ” means:
When you have checked new calls, answered
the call or called back the caller, “ ” will be
added to the caller’s number.
•
When the same caller calls again, the call
entry with “ ” will be deleted and replaced
with the new call entry.
When viewing long telephone numbers:
If the caller’s number is greater than 12 digits
the whole telephone number will not be shown.
Press to see the remaining numbers.
Press .
Basic Operations
345
19
Page 20

Using the Caller List
INT
PROG
OK
INT
PROG
C
C
Calling Back from the Caller List
1 Press then .
2 Press
3 Press
F
or G.
•
The most recent caller’s information is
displayed.
G
or F until the desired caller
number is displayed.
4 Press .
•
The displayed phone number is dialed
automatically.
5 To hang up, press or place the
handset on the base unit.
•
The handset will return to the stand-by
mode.
•
If a phone number is not displayed in the caller
information, you cannot call back that caller.
Editing the Caller’s Phone Number
You can edit a phone number in the Caller List. After editing the number, you can continue with the
calling back procedure.
Make sure that the power is ON (p. 12) and the unit is in the stand-by mode.
1 Press then .
2 Press
3 Press
F
or G.
•
The most recent caller’s phone number is
displayed.
G
or F until the desired
number is displayed, and press .
•
The first digit flashes.
4 Add a number to the current number.
•
Pressing erases the digit to the left of
flashing digit.
•
To erase all digits, press and hold
5 To call the number, press .
.
0i2345678
20
Page 21

Clearing a Caller’s Phone Number in the Caller List
INT
PROG
C
PROG
You can clear caller’s phone numbers in the Caller List.
Make sure that the power is ON (p. 12) and the unit is in the stand-by mode.
1 Press then .
2 Press
3 Press
F
or G.
•
The most recent caller’s phone number is
displayed.
G
or F until the caller phone
number you want to clear is displayed.
4 Press .
5 Press and hold .
•
A confirmation tone sounds.
•
The displayed number is cleared and the
next caller’s phone number is displayed.
Chapter 2
Basic Operations
21
Page 22

PROG
C
C
PROG
I
C
I
Speed Dialling
PROG
C
PROG
I
PROG
RDL
RDL
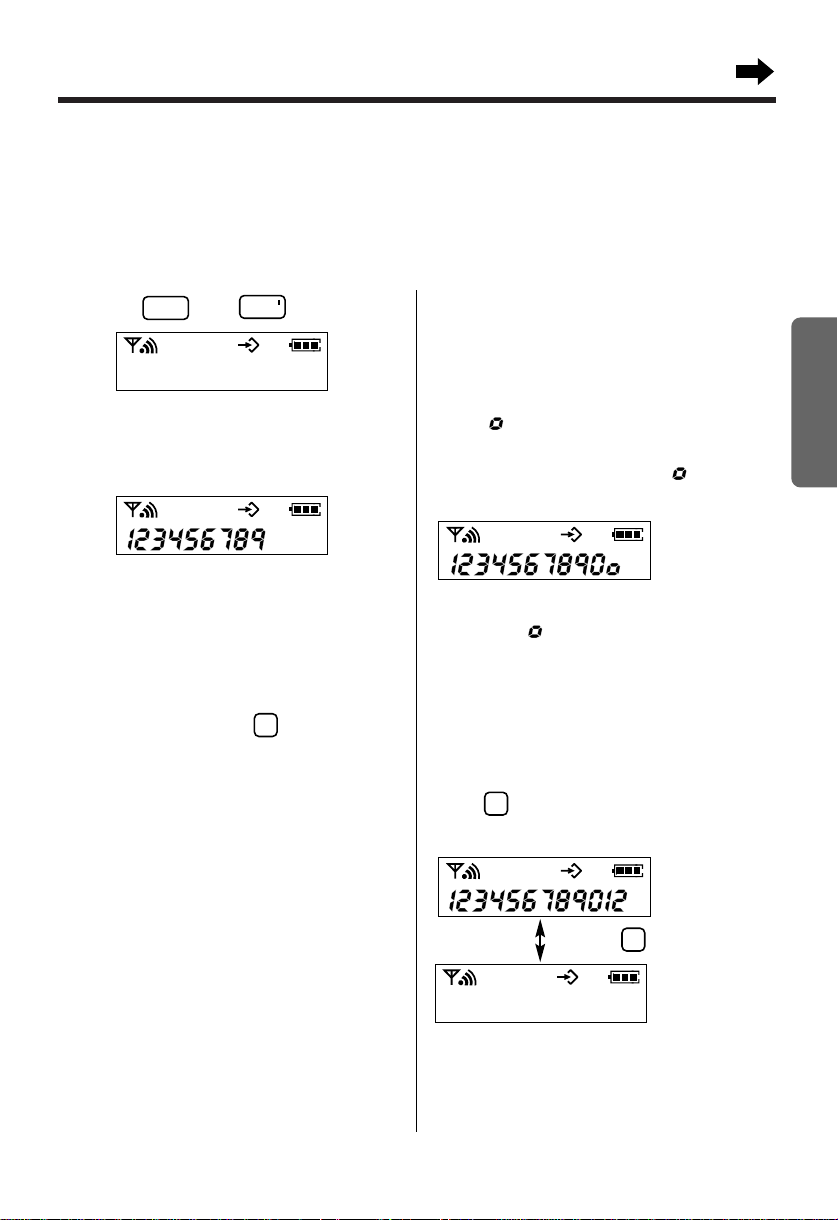
Storing Phone Numbers in Memory
You can store up to 20 telephone numbers in the handset.
Make sure that the power is ON (p. 12) and the unit is in the stand-by mode.
If a pause is required for dialling, press
1 Press
G
or Funtil a desired memory
station number (
•
You can enter the desired memory station
number after pressing
00
to ) is displayed.
G
or F.
•
where needed. Pressing
counts as one digit (p.23).
•
To cancel during programming, press ,
then start from step 1.
00 -
2 Press .
3 Enter a phone number,up to 24 digits.
00 -3334444
•
If you misdial, press . Digits are
erased from the right.To erase all digits,
press firmly.
4 Press .
•
A confirmation tone sounds and the
display will return to the stand-by mode.
•
To store other numbers, repeat steps 1
through 4.
Dialling a Stored Number
1 Press
G
or Funtil the desired phone
number is displayed.
•
You can enter the desired memory station
number (
•
To exit the speed dialler memory, press .
00
to ) after pressing Gor F.
Memory card
Use the memory card on page 47 as a name or
phone number index for speed dialling. Cut out
the card and attach it in a convenient place.
To erase a stored number
1 Press
G
or Funtil the desired phone
number is displayed.
•
You can enter the desired memory station
number (
00
to ) after pressing Gor F.
2 Press .
3 Press .
4 Press .
2 Press .
•
22
The number is automatically dialled.
Page 23

RDL
RDL
RDL
9
9
RDL
Special Features
3
3
INT
PROG
PROG
1
2
How to Use the Pause Feature
(For Analog PBX Line/Long Distance Service Users)
We recommend you press if a pause is required for dialling with a PBX or to access a long
distance service.
Ex: Line access number (PBX)
➡ ➡
•
Pressing once creates a pause.
This prevents misdialling when you redial or dial a stored number.
•
Pressing more than once increases the length of the pause between numbers.
Phone number
Setting the pause timing
You can set the pause timing to 3 seconds or 5 seconds, depending on your PBX requirements.The
factory preset is 3 seconds.
Make sure that the power is ON (p. 12) and the unit is in the stand-by mode.
1 Press then .
2 Press .
3 Enter the base unit password (p. 27).
•
The factory preset is 0000.
4 Press .
•
The current timing is displayed.
1: 3 seconds 2: 5 seconds
Ex. 3 seconds is selected.
33u i
5 To select 5 seconds, press .
OR
To select 3 seconds, press .
6 Press .
•
A confirmation tone sounds and the
display will return to the stand-by mode.
•
If 5 beeps sound in step 3, the entered
password is incorrect.Enter the correct
password.
Chapter 2
Basic Operations
Handset Locator
From the base unit, you can locate the handset or page a person at the handset with ring tones.
Handset 1 display
[ i ] - [ 0 ]
1 Press .
•
The in use indicator ( ) flashes on the base unit.
•
The handset rings for 1 minute and “ ” flashes.
•
The base unit is displayed as “
[0]
”.
2 To stop paging, press again or press on the handset.
23
Page 24

PROG
PROG
Special Features
Temporary Tone Dialling
(For Rotary or Pulse Service Users)
Press before entering access numbers which require tone dialling.
•
The dialling mode changes to tone.You can enter numbers to access an answering service,
electronic banking service, etc. When you hang up, the mode will return to pulse.
Setting the Key Lock
You can lock the handset dialling buttons. Only incoming calls are accepted until the key lock is
cancelled.
When the unit is in the stand-by mode, press and hold
until a beep sounds.
•
“ ” is displayed and all dialling buttons are locked.
To cancel the key lock
When the unit is in the stand-by mode, press and hold for about 2 seconds.
•
“ ” will disappear and the key lock will be cancelled.
•
The key lock will also be cancelled when the power is turned OFF (p. 12).
•
When the handset is in “Key lock” mode emergency calls can not be made until the key lock is
cancelled.
Call Waiting and Caller ID Compatible
If you subscribe to Caller ID and Call Waiting service, your handset displays a second caller’s
information while talking. After you hear a second caller waiting tone, the caller’s phone number will be
displayed.
You can answer the second call, keeping the first call on hold.
•
Please consult your telephone company for details and available in your area.
24
Page 25

Using the Recall Feature
RCL
RCL
RCL
RCL
RCL
2
3
INT
PROG
PROG
2
1
2
is used to access special telephone services (optional) such as call waiting. Contact your
telephone company business office for details.
Example: British Telecom call waiting
When a call waiting tone is heard during a conversation:
a)
To hold the existing call and accept the waiting call
Press .
• Each time you press , you can switch between the first and second call.
• Depending on the provider, you may need to enter a code after pressing . Follow the
instructions given by your provider.
b)
To accept the waiting call and hang up the existing call
Press .When the unit rings, press to answer the new call.
c)
To reject the waiting call
Wait for the call waiting to time out.This will take about 40 seconds.
If your unit is connected to a PBX, pressing allows you to access some features of your host
PBX such as transferring an extension call.
Selecting the earth (option)/time break recall mode
The earth relay can be installed as an option depending on your PBX requirements.Please consult
your nearest Panasonic Service Centre for installation.Then you can select the time break recall or
earth mode. The factory preset is time break recall.
Make sure that the power is ON (p. 12) and the unit is in the stand-by mode.
Chapter 2
Basic Operations
1 Press then .
2 Press .
3 Enter the base unit password (p. 27).
•
The factory preset is 0000.
4 Press .
•
The current mode is displayed.
1:Time break recall 2: Earth
Ex.Time break recall is selected.
32u i
5 To select “Earth”, press .
OR
To select “Time break recall”,press
then .
6 Press .
•
A confirmation tone sounds and the
display will return to the stand-by mode.
•
If 5 beeps sound in step 3, the entered
password is incorrect.Enter the correct
password.
25
Page 26

Summary of Programmable Functions
OK
INT
PROG
PROG
PROG
C
You can program the following function items using the handset near the base unit.See the
corresponding pages for function details.
Make sure that the power is ON (p. 12) and the unit is in the stand-by mode.
<Stand-by mode>
Press Gor Funtil a desired function code is
-i-
Press then .
Press .
displayed, then press .
Code
F1 To select the base unit access (p.36)
F21 To set the key tone (p.31)
F22 To select the handset ringer volume (p. 14)
F23 To select the handset ringer pattern (p.14)
F24 To set the call waiting tone (p. 42)
F25 To set the range warning alarm (p. 31)
F26 To set the battery low alarm (p.31)
F28 To set the auto talk feature (p.15)
F31 To select the stand-by mode display (p.38)
F32 To select the talk mode display (p.32)
F33 To select the battery type (p. 43)
F41 To set the call prohibition mode (p. 29)
F42 To set the direct call number (p. 28)
F5 To set the handset password (p. 27)
F6 To select the receiver volume (p. 16)
F70 To cancel the base unit (p. 37)
F71 To register to the base unit (p. 35)
F9 To clear the redial memor y (p.17)
F0 To clear the handset settings (p. 33)
Function item
26
Enter a desired function command as shown below.
Command
1 To set the bell selection (p. 38)
2 To select the base unit ringer volume
(p. 15)
To select the dialling mode (p. 13)
3
To select the pause time (p. 23)
To select the ear th/time break recall
mode (p. 25)
•
To cancel during programming, press , then star t from the beginning.
•
To retur n to the previous step during programming, press .
Function item
Command
5 To set the base unit password (p.27)
6 To set the call restricted handset(s) and
restriction number(s) (p. 30)
7 To cancel a handset (p. 37)
0
To clear the base unit settings (p. 33)
Function item
Page 27
5
INT
PROG
Setting the Password
C
OK
PROG
You can program a 4-digit password for both the handset and base unit individually. Each factory
preset is 0000. Changing the password may prevent the unauthorised use of your unit by another
person.
Once you have programmed the password, you cannot confirm it.We recommend you write down
the password.If you forget it, please consult your nearest Panasonic Service Centre.
On the handset
You need to enter the password when using the
functions, such as “Setting the call prohibition”
(p. 29), “Clearing the settings in handset
memory” (p. 33) and “Cancelling a base unit”
(p. 37).
1 Press .
2 Press
G
or Funtil “F5” is displayed,
then press .
F5o
- - - -
3 Enter the current handset password.
•
The factory preset is 0000.
4 Enter the new 4-digit password TWICE.
F5o
- - - -o- - - -
•
If you misdial, press . Digits are
erased from the right.
•
A confirmation tone sounds and the
display will return to the stand-by mode.
On the base unit
You need to enter the password when using the
functions, such as “Setting the dialling mode”
(p. 13), “Setting the pause timing” (p. 23),
“Setting the earth/time break recall mode”
(p. 25), “Setting the call restriction” (p. 30),
“Clearing the settings of the base unit memory”
(p. 33), “Registering a handset in the base unit”
(p. 35), “Cancelling a handset” (p. 37) and
“Setting the bell selection” (p. 38).
1 Press then .
2 Press .
5o
- - - -
3 Enter the current base unit password.
•
The factory preset is 0000.
5o
- - - -o- - - -
4 Enter the new 4-digit password TWICE.
•
A confirmation tone sounds and the
display will return to the stand-by mode.
Chapter 3
Advanced Operations
•
If 5 beeps sound in step 3, the entered
password is incorrect.Enter the correct
password.
27
Page 28
Direct Call
PROG
C
C
OK
PROG
PROG
OK
PROG
You can store a number in the direct call memory.This feature allows you to make a call easily by
pressing . Incoming calls are accepted.
Setting the Direct Call Mode
After storing the direct call number, the unit will automatically switch to the direct call mode.
When the direct call mode is on, you can ONLY dial the number stored in the direct call memory.
1 Press .
2 Press
G
or Funtil “
F42
” is displayed.
3 Press .
F42 -
•
If the current stored number is the same
as the number you wish to set, skip to step
5.
4 Enter the phone number,up to 24 digits.
•
If you misdial, press . The digits are
erased from the right.To erase all digits,
press firmly.
5 Press .
•
A confirmation tone sounds.
•
The display will return to the stand-by
mode, then “ ” is displayed.
- i -
To change the direct call number:
Enter the new direct call number in step 4.
To turn OFF the direct call
mode
1 Press .
2 Press
G
or Funtil “
F42
” is displayed.
3 Press .
4 Press .
•
“ ” will go out.
Dialling the Stored Number
Make sure that “ ” is displayed, then press .
•
The number stored in the direct call memory is dialled automatically.
•
When the handset is in “direct call” mode emergency calls can not be made until direct call is
cancelled.
28
Page 29

Call Prohibition
0
PROG
1
OK
PROG
You can prohibit anyone from making a call with your handset except for emergency calls (999, 112).
Incoming calls are accepted.To use this feature, turn on the call prohibition mode by programming.
The factory preset is OFF.
1 Press .
2 Press
G
or Funtil “
F4 i
” is displayed.
3 Press .
F4 Io
- - - -
4 Enter the handset password (p. 27).
•
The current mode is displayed.
1: ON 0: OFF
Ex. OFF
F4 IO0
5 Press
6 Press .
G
or Fto select ON.
•
You can press to select ON.
•
A confirmation tone sounds.
•
The display will return to the stand-by
mode, then “ ” is displayed.
To turn OFF the call prohibition
mode
Press Gor Fto select OFF in step 5.
•
You can press to select OFF.
•
“ ” will go out.
If you forget your handset password, please
consult your nearest Panasonic Service
Centre.
Chapter 3
Advanced Operations
- i -
29
Page 30

C
PROG
PROG
Call Restriction
PROG
PROG
PROG
C
C
PROG
6
INT
PROG
PROG
You can restrict desired handset(s) from dialling selected phone numbers. Phone numbers beginning
with the restricted digits cannot be dialled out. For example, if “00” is assigned as the call restr iction
number, international calls cannot be made.
For selected handset(s), you can assign up to 6 call restriction numbers (up to 8 digits).Set the call
restricted handset(s) and the restriction number(s) by programming.The factory preset is OFF.
1 Press then .
2 Press .
3 Enter the base unit password (p. 27).
•
The current registered handset number(s)
is/are displayed.
Ex. Handset 1, 2, 3, 4, 5 and 6 are registered.
6O I23456
4 Enter the desired handset number(s).
•
The selected handset number(s) flash(es).
Ex. Handset 2 and 6 are restricted.
6O I23456
•
If you misdial, press the number(s) again.
5 Press .
•
“I” is displayed.
6O I -
6 Enter a call restriction number, up to
8 digits.
•
If you misdial, press . The digits are
erased from the right.To erase all digits,
press firmly.
7 Press .
•
A confirmation tone sounds.
•
“2” is displayed.To continue entering a
number, enter the next number, then press
.
8 Press .
•
A confirmation tone sounds and the
display will return to the stand-by mode.
When you dial a restricted number,
the call is disconnected, and the dialled number
flashes.
Ex.The restricted number is “00”.
00
To cancel the call restricted
handset(s)
Follow steps 1 to 3, then enter the handset
number(s) you want to cancel.When
finished, press repeatedly until the
handset returns to the stand-by mode.
To cancel the call restriction
number(s)
Follow steps 1 to 4, then select the call
restriction number you want to cancel by
pressing .Then press .When
finished, press repeatedly until the
handset returns to the stand-by mode.
30
Page 31
Other Programmable Settings
PROG
1
0
OK
PROG
OK
PROG
PROG
1
0
PROG
0
1
OK
PROG
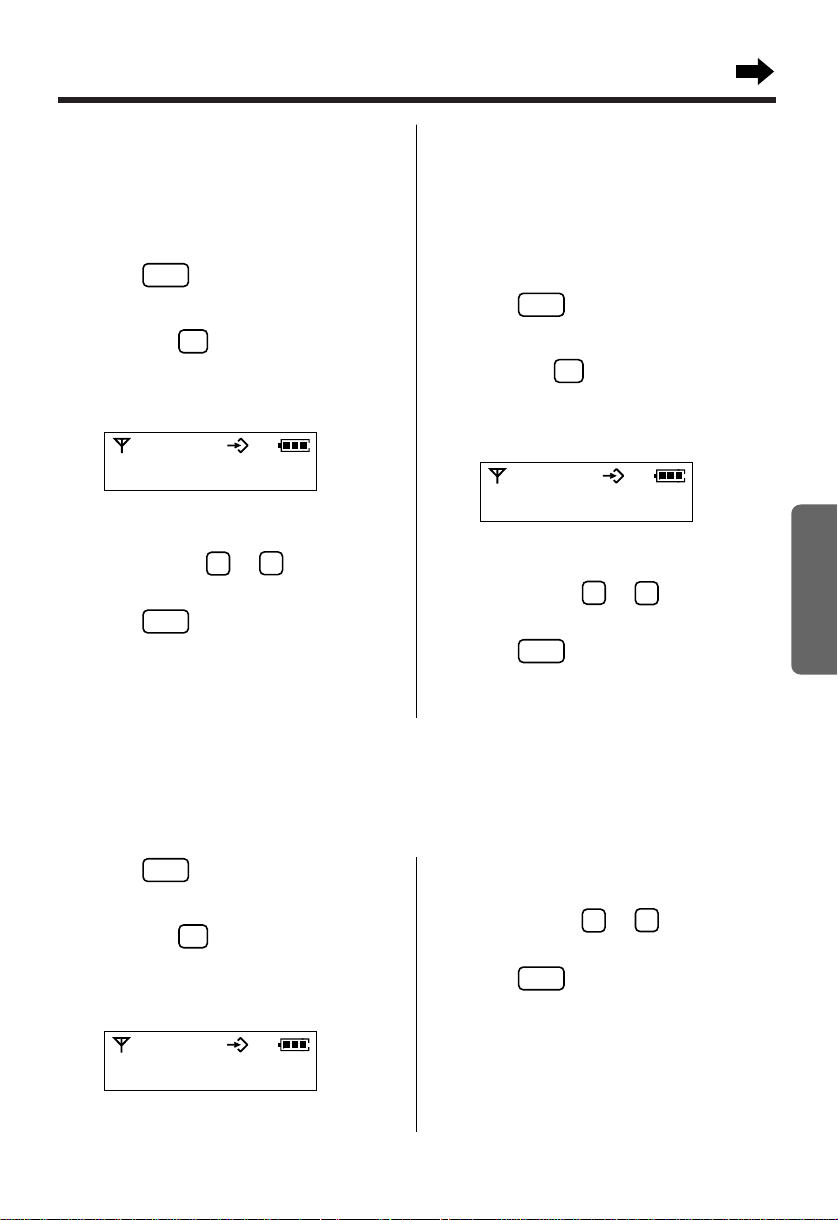
Setting the Key Tones
You can choose whether or not the handset
keys will sound tones (key tone, confirmation
tone, error tone).The factory preset is ON.
1 Press .
2 Press
G
or Funtil “
then press .
•
The current setting is displayed.
1: ON 0: OFF
Ex. ON is selected.
F2 i
” is displayed,
F2 iU i
3 Press
4 Press .
G
or Fto select the desired
setting.
•
You can press or to select OFF
or ON.
•
If ON is selected, a confirmation tone
sounds.The display will return to the
stand-by mode.
Setting the Range
Warning Alarm
You can choose whether or not the handset will
sound a range warning alarm. The factory
preset is OFF.
1 Press .
2 Press
G
or Funtil “
then press .
•
The current setting is displayed.
1: ON 0: OFF
Ex. OFF is selected.
F25
” is displayed,
F25U0
3 Press
G
or Fto select the desired
setting.
•
You can press or to select ON or
OFF.
4 Press .
•
A confirmation tone sounds and the
display will return to the stand-by mode.
Chapter 3
Advanced Operations
Setting the Battery Low Alarm
You can choose whether or not the handset will sound a battery low alarm. The factory preset is ON.
1 Press .
2 Press
G
or Funtil “
then press .
•
The current setting is displayed.
1: ON 0: OFF
Ex. ON is selected.
F26
” is displayed,
3 Press
4 Press .
G
or Fto select the desired
setting.
•
You can press or to select OFF
or ON.
•
A confirmation tone sounds and the
display will return to the stand-by mode.
F26U i
31
Page 32

Other Programmable Settings
OK
PROG
PROG
1
0
Selecting the Talk Mode Display
You can choose whether to display the length of the call or the dialled telephone number while in the
talk mode.The factory preset is the length of the call.
1 Press .
2 Press
G
or Funtil “
then press .
•
The current setting is displayed.
1: Length of the call
0: Dialled phone number
Ex. Length of the call is selected.
F32
” is displayed,
F32U i
3 Press
4 Press .
G
or Fto select to select the
desired setting.
•
You can press or to select the
setting.
•
A confirmation tone sounds and the
display will return to the stand-by mode.
During a conversation, the display will be as
follows.
Length of the call
(Ex: 1 h., 30 min., 40 sec.)
88880 i -30 - 40
Dialled phone number
(Ex: 123-456-7890)
32
Page 33
Clearing the Settings in Memory
PROG
OK
PROG
PROG
0
INT
PROG
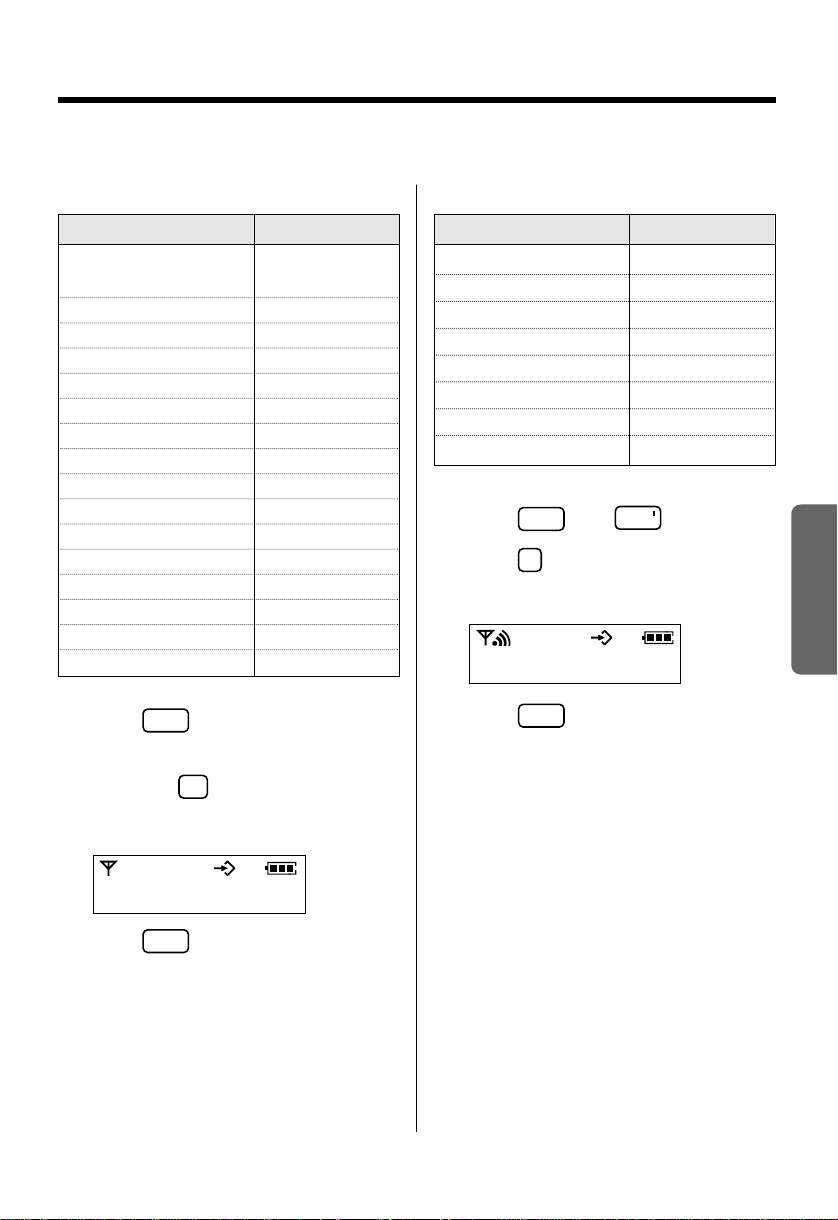
This function enables the handset or base unit to clear the following settings at one time.They will
return to their initial settings.
On the handset
Function
Base unit access Automatic base
Key tones ON
Handset ringer volume 3 (MEDIUM)
Handset ringer pattern 1
Call waiting tone ON
Range warning alarm OFF
Battery low alarm ON
Stand-by mode display Base unit number
Talk mode display Length of the call
Call prohibition OFF
Direct call mode OFF
Direct call number Clear
Handset password 0000
Handset receiver volume MEDIUM
Redial memory All clear
Auto talk OFF
Initial setting
unit access
1 Press .
2 Press
G
or Funtil “F0” is displayed,
then press .
On the base unit
Function
Bell selection All handsets
Dialling mode Tone
Earth/time break recall Time break recall
Pause timing 3 seconds
Call restricted handset(s) All clear
Call restriction number(s) All clear
Base unit password 0000
Base unit ringer volume 2 (MEDIUM)
Initial setting
1 Press then .
2 Press .
3 Enter the base unit password (p. 27).
- - - - - - - - - - - -
4 Press .
•
A confirmation tone sounds and the
display will return to the stand-by mode.
Chapter 3
Advanced Operations
3 Enter the handset password (p. 27).
- - - - - - - - - - - -
4 Press .
•
A confirmation tone sounds and the
display will return to the stand-by mode.
33
Page 34

For Optional Multi-Unit Users
Base Unit
H: Handset
Radio Range
H 2
H 3
H 1
H 4
H 5
H 6
H
1
B 1
B 2
H
2
H
3
H
4
H
5
B: Base Unit
Operating More than One Handset
You can register and operate up to 6
handsets at the base unit. Operating
more than one handset allows you to
have an internal call while
simultaneously conducting an
external phone call using another
handset.
Ex. 6 optional handsets are added to a
base unit. Handset 1 is engaged in an
internal call with handset 3. Handset 2
is engaged in an external call.
•
The optional handset model number is KX-A102EB.The functions of the optional handset are the
same as the those of KX-TCD952EB handset.
•
An optional charger, KX-TCA110EB, is available from your Panasonic dealer.
Operating More than One Base Unit
You can register and operate your handset at up to 4 base units.
Since each base unit forms a radio cell, you can extend the range or area in which you can
make/answer calls with the same handset by placing the base units in suitable locations. For example,
you can use a handset in different radio areas, such as at home or the office. However, calls in
progress are cancelled when the unit moves to another radio area.
Ex. 3 optional KX-A102EB handsets are
added to 2 base units.
34
Page 35

Registration
4
1
OK
PROG
PROG
PROG
Registering a Handset in the Base Unit
You must register the handset in the base unit before use.
•
Charge the optional handset batteries for about 4 hours before initial use.
•
Make sure that the power is ON (p. 12) and the unit is in the stand-by mode.
•
Register the handset number within 1 minute.If not registered within 1 minute, press on
the handset to cancel the programming mode.Then star t again from step 1.
1 Base unit where handset is to be
registered:
Press and hold on the base unit
for more than 10 seconds until the in
use indicator ( ) lights and a
confirmation tone sounds.
2 Handset:
Press .
3 Press
G
or Funtil “
F7 i
” is displayed.
4 Press .
•
The available base unit numbers are
displayed.
F7 iU i234
5 Press the desired base unit number
to .
•
The number is assigned as the base unit
number for the handset.
•
While the handset is searching for the
base unit, “
display.
” flashes across on the
-
6 Enter the base unit password (p. 27).
F7 io
- - - -
Multi-Unit User Operations
7 Press .
•
A confirmation tone sounds and the
display will return to the stand-by mode.
•
The in use indicator ( ) on the base
unit will go out.
•
To register the handset in more than one
base unit, repeat from step 1 with the
other base unit(s).
Chapter 4
•
The base unit number which the handset is
currently in contact with can be displayed in
the stand-by mode (p.38). Calls (both
incoming and outgoing) can be conducted only
via the displayed base unit (even if the radio
areas overlap with neighbouring base units).
-
35
Page 36
Registration
PROG
4
1
OK
PROG
Selecting the Base Unit Access
Automatic base unit access
The handset automatically selects a registered base unit.
•
When the handset moves to another base unit radio area, it loses contact with the previous base unit
and automatically accesses the new base unit.
•
If the handset is in the overlap area between several base unit radio areas, the handset will access a
base unit in the order of the base unit numbers.
Specified base unit access
You can only select one registered base unit (1 to 4) you want to operate.
•
You can choose the base unit/telephone line where you can make/receive calls.
The factory preset is “Automatic base unit access”.To select the desired base unit, program as follows.
1 Press .
2 Press
G
or Funtil “
F i
” is displayed.
3 Press .
•
The current setting is flashing.
0: Automatic base unit access
1 to 4 (The registered base unit number):
Specified base unit access
Ex. Automatic base unit access is selected.
F i000 i234
4 Press
G
or Fto select the desired
base unit number (1 to 4).
•
You can press the desired base unit
number to .
•
The selected base unit number flashes.
Ex. Base unit 1 is selected.
F i000 i234
5 Press .
•
A confirmation tone sounds and the
display will return to the stand-by mode.
36
Page 37

Cancelling a Handset
PROG
7
INT
PROG
PROG
4
1
OK
PROG
Cancelling a base unit
Each handset can cancel itself or another
handset.
1 Press then .
2 Press .
3 Enter the base unit password (p. 27).
•
The current registered handset number(s)
is/are displayed.
Ex. Handset 1, 2, 3, 4, 5 and 6 are registered.
70 i23456
4 Enter the handset number(s) you want to
cancel.
•
The selected handset number(s) flash(es).
Ex. Handset 6 is cancelled.
70 i23456
•
If you misdial, press the number(s) again.
5 Press .
•
A confirmation tone sounds and the
display will return to the stand-by mode.
If another handset is out of range and/or its
power is OFF when “Cancelling a Handset”, the
previous base unit number will still remain in the
cancelled handset.Therefore, you need to
cancel the base unit registered in the cancelled
handset.
1 Press .
2 Press
G
or Funtil “
F70
” is displayed.
3 Press .
4 Enter the handset password (p. 27).
•
Registered base number(s) is(are)
displayed.
Ex. Registered base units: 1, 2 and 4
F70U i234
5 Press the cancelling base unit number
to .
•
The selected base unit number flashes.
6 Press .
•
A confirmation tone sounds and the
display will return to the stand-by mode.
Multi-Unit User Operations
Chapter 4
37
Page 38
Selecting the Stand-by Mode Display
1
INT
PROG
PROG
2
OK
PROG
PROG
0
2
1
You can choose whether to display the currently connected base unit number, handset number or no
display while in the stand-by mode.The factory preset is the base unit number.
1 Press .
2 Press
G
or Funtil “
then press .
•
The current setting is displayed.
1: Base unit number
2: Handset number 0: No display
F3 i
F3 i0 i
” is displayed,
3 Press
G
or Fto select the desired
setting.
•
You can press , or to select
the setting.
4 Press .
•
A confirmation tone sounds and the
display will return to the stand-by mode.
Ex. Handset number is selected.
[ 2 ]
Bell Selection
There are three choices for bell selection.When a call is being received:
— all handsets ring. “All handsets”
— the selected handset(s) ring(s). “Specified handset(s)”
— the selected handset rings first, then if it does not answer, all other handsets will ring.“First
handset”
The factory preset is “All handsets”.To change the bell selection, program as follows.
Selecting specified handset(s)
You can choose which handset(s) you want to ring.
1 Press then .
2 Press .
3 Enter the base unit password (p. 27).
•
The current setting is displayed.
1: All handsets
2: Specified handset(s)
3: First handset
Ex. All handsets is selected.
iu i
38
4 Press .
•
The current registered handset number(s)
is/are displayed.
Ex. Handset 1, 2, 3, 4, 5 and 6 are registered.
iu2 - i23456
5 Enter the handset number(s) you want to
ring.
•
The selected handset number(s) flash(es).
•
If you misdial, press the number(s) again.
6 Press .
•
A confirmation tone sounds and the
display will return to the stand-by mode.
Page 39

PROG
1
1
INT
PROG
Selecting first handset
PROG
6
1
PROG
3
1
INT
PROG
One handset will ring first, then all other
handsets will ring if the first handset is not
answered.You can choose which handset will
ring first and the ring count (1 to 6) until all
handsets ring.The factory preset is 3 rings.
1 Press then .
2 Press .
3 Enter the base unit password (p. 27).
•
The current setting is displayed.
1: All handsets
2: Specified handset(s)
3: First handset
4 Press .
•
The current registered handset number(s)
is/are displayed.
5 Enter the handset number you want to
ring.
•
The selected handset number flashes.
Ex. Handset 4 is selected.
iu3 - i23456
•
If you misdial, press the number again.
Press a dialling button to to
7
select the ring count.
8 Press .
•
A confirmation tone sounds and the
display will return to the stand-by mode.
•
Even if you select “Specified handset(s)” or
“First handset”, calls can also be received on
the handsets which do not ring.
Selecting all handsets
When a call is received, all handsets will ring at
the same time.
1 Press then .
2 Press .
3 Enter the base unit password (p. 27).
4 Press .
5 Press .
•
A confirmation tone sounds and the
display will return to the stand-by mode.
Multi-Unit User Operations
Chapter 4
6 Press .
•
The handset number is stored.
•
The current ring count is displayed.
Ex. Ring count 3 is selected.
i03 - i23456 - 3
39
Page 40

INT
Paging/Intercom
Paging All Handsets from the Base Unit
The base unit user can page all handsets.
1 Press .
•
All handsets will ring for 1 minute.
2 To stop paging, press again or press on one of the handsets.
Intercom between Handsets
A 2-way intercom is available between handsets.
Ex. Handset 1 is paging Handset 2.
1 Handset 1:
Press .
2 Handset 1:
Enter the desired handset number.
•
“ ” is displayed and the paged handset
rings.
[ i] - [ 2 ]
3 Handset 2:
When the unit rings, press to
answer.
•
The intercom duration is displayed.
888800-00-0 i
4 Handsets 1 and 2:
To end the intercom, press .
•
Intercom calls can be conducted within the
radio area of the current base unit, but not with
units in neighbouring radio areas.
40
Page 41
Transferring a Call from One Handset to Another
INT
INT
INT
INT
The intercom can be used during a call, enablings you to transfer a call between handsets registered
to the same base unit.
Transferring a call using the
intercom
Transferring a call without the
intercom
Ex. Handset 1 is transferring a call to
Handset 2.
1 Handset 1:
During a call, press . Then enter
the desired handset number.
•
The call is put on hold.
•
You will hear an internal ring back tone
until the other handset is answered.
•
If there is no answer, press to
return to the call.
2 Handset 2:
When the unit rings, press to
answer.
3 Transferring a call:
Handset 1:
Press .
•
The transfer is completed.
Handset 2 can answer the call.
OR
Ending the intercom:
Handset 1:
Press .
•
Handset 1 returns to the call.
This feature enables you to transfer the call to
another handset without waiting for the paged
handset to answer.
Ex. Handset 1 is transferring a call to
Handset 2.
1 Handset 1:
During a call, press and enter the
desired handset number. Then press
to transfer the call.
•
The call is put on hold.
2 Handset 2:
When the unit rings, press to
answer the call.
•
The transfer is completed.
•
If the paged handset is not answered within 30
seconds, a ring tone sounds at the paging
handset.The paging handset can return to the
call by pressing .
Multi-Unit User Operations
Chapter 4
41
Page 42

Paging/Intercom
3
INT
INT
1
0
OK
PROG
PROG
Conference
During a call using the handset, you can make an intercom call to another handset and then combine
the calls together to establish a conference call between handsets registered to the same base unit.
1 Handset 1:
During a call, press . Then enter
the desired handset number.
•
The call is put on hold.
•
If there is no answer, press to
return to the call.
3 Handset 1:
Press to establish a conference call.
4 Handset 1 or 2:
Press to hang up the conference
call.
2 Handset 2:
When the unit rings, press to
answer.
Setting the Call Waiting Tone
If an incoming call has been received during an intercom between handsets, a call waiting tone
sounds.You can choose whether or not this tone will sound.The factory preset is ON.
1 Press .
2 Press
G
or Funtil “
3 Press .
•
The current setting is displayed.
1: ON 0: OFF
Ex. ON
F24
” is displayed.
5 Press .
•
A confirmation tone sounds and the
display will return to the stand-by mode.
42
F24U i
4 Press
G
or Fto select the desired
setting.
•
You can press or to select OFF
or ON.
Page 43

Replacing the Batteries
PROG
0
1
OK
PROG
Selecting the battery type
Three Nickel cadmium (Ni-Cd) batteries are included with this unit. Nickel metal hydride (Ni-MH)
rechargeable batteries can also be used. If you replace the batteries with Ni-MH batteries, you must
set the battery type selection to “1”, or the battery strength will not be displayed correctly. The factory
preset is “0” (Ni-Cd).
1 Press .
2 Press
G
or Funtil “
F33
” is displayed.
3 Press .
4 To select Ni-MH batteries, press .
OR
To select Ni-Cd batteries, press .
5 Press .
•
A confirmation tone sunds and the display will return to the stand-by mode.
•
Incorrect battery type selection may shorten battery life.
Battery replacement
If “ ” flashes after a few telephone calls even when the handset batteries have been fully
charged, it is time to replace the batteries with new ones. Remember to charge the new batteries
after replacement.
1 Turn the power OFF to prevent memory loss (p. 12).
Remove the cover by sliding while pressing in the
direction of the arrow, then take out the batteries.
2 Replace the batteries with new ones as shown.
•
When you finish, close the handset cover and turn
the power ON (p.12).
3 Be sure to charge the new batteries fully in order to
display the battery icon correctly (p.11).
Ni-Cd battery: For about 4 hours.
Ni-MH battery: For about 8 hours.
Useful Information
Chapter 5
•
Discard defective batteries as soon as possible. Defective batteries may leak into the unit.
•
Please use only Panasonic P-03H or P-P03S batteries.
•
If the rechargeable batteries are not inserted correctly, the handset will not work.
•
Nickel metal hydride (Ni-MH) rechargeable batteries (AAA size) are available.Please use only
Panasonic HHR-P03H batteries.
•
Please return the rechargeable batteries to your sales shop at the end of their useful life.
43
Page 44

Replacing the Batteries
Caution:
To reduce the risk of fire or injur y to persons, read and follow these instructions.
1. Use only the batteries specified.
2. Do not use non-rechargeable batteries.
3. Do not mix old and new batteries.
4. Do not dispose of the batteries in a fire.They may explode. Check with local waste management
codes for special disposal instructions.
5. Do not open or mutilate the batteries.Released electrolyte is corrosive and may cause burns or
injury to the eyes or skin.The electrolyte may be toxic if swallowed.
6. Exercise care in handling the batteries in order not to short the batteries with conductive materials
such as rings, bracelets, and keys. The batteries and/or conductor may overheat and cause burns.
7. Charge the batteries provided with or identified for use with this product only in accordance with the
instructions and limitations specified in this manual.
•
Read “Important Notice Concerning the Correct Use and Charging of Ni-Cd (Ni-MH) Batteries” on
page 49.
Using the Belt Clip
You can hang the handset on your belt or pocket using the belt clip.
44
To remove the belt clip
Page 45

Before Requesting Help
Problem
The unit does not work.
“ ” flashes and an alar m tone sounds
when you press .
A busy tone sounds when you
press .
You cannot dial.
Remedy
•
Turn the power ON (p. 12).
•
Check the settings (p.9–15).
•
Charge the batteries fully (p. 11).
•
Clean the charge contacts and charge again (p.11).
•
Unplug the AC adaptor and turn the power OFF to
reset. Plug in the AC adaptor and turn the power ON.
Then try again.
•
The handset has been cancelled or has not been
registered. Register the handset (p. 35).
•
Re-install the handset batteries and try again.
•
You are too far from the base unit. Move closer and
try again.
•
Plug in the AC adaptor.
•
Another handset is in use.
•
Check that the dialling mode selection is correct
(p. 13).
•
The unit is in call prohibition mode. Cancel the mode
(p. 29).
•
The dialled number is restricted. Cancel the number
(p. 30).
•
Key lock mode is set. Cancel the mode (p. 24).
Useful Information
“ ” flashes dur ing a conversation and
the call is disconnected.
Static, sound cuts in/out, fades.
Interference from other electrical units.
The handset does not ring.
The base unit does not ring.
•
The handset is out of range. Move closer to the base
unit and make the call again.
•
Plug in the AC adaptor.
•
Locate the handset and base unit away from other
electrical appliances (p. 5).
•
Move closer to the base unit.
•
Tur n the power ON (p. 12).
•
The ringer is set to OFF. Select the desired volume
level (p. 14).
•
The ringer is set to OFF. Set to HIGH, MEDIUM or
LOW (p.15).
Chapter 5
45
Page 46

Before Requesting Help
Problem
You cannot program function items such
as the dialling mode.
You cannot store a phone number in
memory.
While programming function items or
storing numbers, the unit starts to ring.
The unit does not display the caller’s
phone numbers.
does not function.
You cannot redial.
Remedy
•
Programming is not possible while the unit is in the
talk or intercom mode.
•
Do not pause for over 60 seconds while
programming.
•
You cannot store a phone number while the unit is in
the talk or intercom mode.
•
Do not pause for over 60 seconds while storing.
•
To answer the call, lift the handset or press .
Start again from the beginning after hanging up.
•
Other telephone equipment may be interfering with
your phone. Disconnect them and. try again.
•
Other electrical appliances connected to the same
outlet may be interfering with the Caller ID
information.Telephone line noise may be affecting
the Caller ID information.
•
The handset is too far from the base unit.
•
The handset is engaged in an outside call.Wait until
the in use indicator ( ) light goes out.
•
Access numbers entered after pressing will not
be included when redialling.
•
If the last number dialled was more than 24 digits
long, the number will not be redialled.
The paged handset does not answer.
While using the intercom, two tones
sound.
The unit misdials when connected to a
PBX.
46
•
The handset is not in the same radio area.
•
The handset is engaged in an outside call.
•
The handset has been cancelled or has not been
registered. Register the handset in the base unit
(p. 35).
•
A call is being received.To answer, press
twice.
•
Check the pause function (p.23).
Page 47

00
01
02
03
04
05
06
07
08
09
10
11
12
13
14
15
16
17
18
19
✂
Problem
Remedy
You cannot register the handset in the
base unit.
The battery strength is not displayed
correctly.
“ ” flashes or the unit beeps every
15 seconds.
You charged the batteries fully, but
“ ” flashes.
The charge indicator ( ) light never
goes out while charging.
•
The base unit has registered a maximum of
6 handsets or the handset has registered a
maximum of 4 base units.
•
A wrong base unit password was entered.Enter the
correct password.
•
There is interference from other electrical units.
Locate the handset and base unit away from them.
•
You must finish registration within 1 minute after the
ringer tone sounds, or programming will be cancelled
(p. 35).
•
Check that the battery type selection is correct
(p. 43)
•
Charge the batteries fully (p. 11).
•
Clean the charge contacts and charge again (p.11).
•
Install new batteries (p.43, 49).
•
This is normal.
47
Page 48

Safety Instructions
Take special care to follow the safety suggestions listed below.
Safety
1) The unit should be connected to a power supply only of the type described in the operating
instructions or as marked on the unit.
2) When the unit is not used, turn the power off.When left unused for a long period of time, the base
unit should be unplugged from the household AC outlet.
Installations
Environment
1) Do not use this unit near water—for example, near a bathtub, washbowl, sink, etc.Damp
basements should also be avoided.
2) The unit should be kept away from heat sources such as radiators, cookers, etc. It also should not
be placed in rooms where the temperature is less than 5°C or greater than 40°C.
Placement
1) Do not place heavy objects on top of this unit.
2) Care should be taken so that objects do not fall onto, and liquids are not spilled into, the unit. Do
not subject this unit to excessive smoke, dust, mechanical vibration or shock.
3) Place the unit on a flat surface.
For best performance
1) If noise prevents the conversation from being understood at the handset, move toward the base
unit to reduce the noise.
2) The handset should be used at the HIGH volume setting when it is difficult to hear the other party.
3) The handset should be fully recharged on the base unit when “ ” on the display flashes.
4) The maximum calling distance may be shortened when the unit is used in the following places:
Near obstacles such as hills, tunnels, underground, near metal objects such as wire fences, etc.
WARNING:
TO PREVENT THE RISK OF FIRE OR ELECTRICAL SHOCK, DO NOT
EXPOSE THIS PRODUCT TO RAIN OR ANY TYPE OF MOISTURE.
48
Page 49

Adding Another Phone
This unit will not function during a power failure.To connect a standard telephone on the same line,
use a T-adaptor.
To B. T. Socket
T-Adaptor
Telephone Line Cord
Standard Telephone
Important Notice Concerning the Correct Use
Useful Information
and Charging of Ni-Cd (Ni-MH) Batteries
Batteries, due to their construction, undergo some wear and tear.The lifetime of a battery also
depends on correct maintenance. Charging and discharging are the most important factors.You
should take notice of the following to maintain the life of the battery as long as possible.
Ni-Cd (Ni-MH) batteries may experience a memory effect. If fully charged batteries are used
several times only for 15 minutes in the handset and then recharged, the capacity of the batteries
will be reduced to 15 minutes due to the memory effect.Therefore you should discharge the
batteries completely, i.e. use them in the handset until “ ” on the display starts flashing.
Then recharge them as described in the manual. After the memor y effect has occurred, it is
possible to achieve almost complete capacity of the Ni-Cd (Ni-MH) batteries by charging and
discharging several times one after another.
Ni-Cd (Ni-MH) batteries can also self-discharge.This self-discharge depends on the ambient
temperature. At temperatures under 0°C, the self-discharge will be the lowest.High humidity and
high temperatures support the self-discharge. Also long-ter m storage will lead to self-discharge. A
dead Ni-Cd (Ni-MH) battery should not be disposed of normally.They contain toxic heavy
cadmium (metal hydride) and therefore should be recycled.
Chapter 5
49
Page 50

Dear purchaser,
You have acquired a KX-TCD952EB, which is a product made in regard with
the European Standards for Cordless Telephones (DECT). DECT technology
is characterised by high-security protection against interceptions as well as
high-quality digital transmission.
This telephone was designed for a wide range of applications.
For example, this telephone can be used within a network of base units and
handsets, constituting a telephone system which:
• operates up to 6 handsets at one base unit
• allows an intercom between 2 handsets
• allows the operation of a handset at up to 4 base units, expanding the
communication radio area.
This telephone may be used for:
• operating several handsets
• operating at several base units
• connecting the base unit to a PBX.
Term Definitions
DECT
The abbreviation DECT means “Digital Enhanced Cordless
Telecommunications”.
Advantages of DECT
Excellent voice quality: Through sampling of digital signals DECT units
obtain nearly noiseless transmission.
High grade taping security: Based on digital transmission, DECT
conversations are well protected against unapproved monitoring.
Multi-Handset operation: To operate several handsets at the base unit, no
cable installation is required.
Interlink: Intercom conversation can be held free of charge between the
registered handsets.
Functions like a PBX: More than one operation can be performed at the
same time, like a PBX. eg., during an external call, an internal call or outside
call can be transferred to another handset.
Multi-Base station operation: More than one handset can be registered to
several base units, e.g., for private and office applications.
Equipment Manufacturer’s Code (EMC)
For identification, this unit is prepared with an EM Code, which can be
50
applied to future operators in mobile networks.
Page 51

GUARANTEE
CONDITIONS OF GUARANTEE
This guarantee is in addition to and does not in any way affect any statutory or other
rights of consumer purchasers. If within the applicable guarantee period, the appliance
proves to be defective by reason of faulty design, workmanship or materials, we
undertake subject to the following conditions to have the defective appliance (or any part
or parts there of) repaired or replaced free of charge.
1. The appliance shall have been purchased and used solely within the UK and in
accordance with standard operating instructions and the technical and/or Safety
Standards required in the UK.
2. The appliance should be returned together with this guarantee and proof of date of
purchase promptly on being found defective at the purchaser’s risk and expense to
the authorised dealer from whom the appliance was purchased or to the nearest
authorised dealer. All enquires must be through such dealers.
3. This guarantee shall not apply to damage caused through fire, accident, lightning,
misuse, wear and tear, neglect, incorrect adjustment or repair, to damage caused
through installation, adaption, modification or use in an improper manner or
inconsistent with the technical and/or safety standards required in the country where
this appliance is used, or to damage occurred during transit to or from the purchaser.
4. If at any time during the guarantee period any part or parts of the appliance are
replaced with a part or parts not supplied or approved by us or of an objective quality
safe and suitable for the appliance, or the appliance has been dismantled or repaired
by any person not authorised by us, we shall have the right to terminate this
guarantee in whole or in part immediately without further notice.
5. The purchaser’s sole and exclusive remedy under this guarantee against us is for the
repair or replacement of the appliance or any defective part or parts and no other
remedy, including, but not limited to, incidental or consequential damage or loss of
whatsoever nature shall be available to the purchaser.
6. This guarantee shall not apply to cassette tapes, batteries and any other items of
limited natural life.
7. Our decision on all matters relating to complaints shall be final. Any appliance or
defective part which has been replaced shall become our property.
8. The guarantee period applicable to this product shall be 12 months.
Please keep these Operating Instructions with your receipt.
Panasonic Business Systems U.K.
Receipt No. Date of Purchase
Model No. KX-TCD952EB Serial No.
51
Page 52

1999/5/EC
Manufacturers Declaration:
This product is in conformity with the essential requirements of the ‘R&TTE
Directive 1999/5/EC’.
Customer Care Helpline Tel. No.: 08701 578577
Sales Department:
Panasonic Business Systems U.K.
Panasonic House, Willoughby Road, Bracknell, Berkshire, RG12 8FP
Manufacturer:
Kyushu Matsushita Electric (U.K.) Ltd.
Pencarn Way, Duffryn, Newport, South Wales, NP10 8YE, United Kingdom
Printed in the United Kingdom PQQX12707ZA WU0300NR0
 Loading...