


Panasonic KX-TC1200NZB, KX-TC1200NZW, KX-TC1200ALS, KX-TC1200ALF, KX-TC1200ALW User Manual
...
PLEASE READ BEFORE USE
AND SAVE.
Cordless Phone
Model No. KX-TC1200ALB
KX-TC1200ALW/KX-TC1200ALS
KX-TC1200ALF/KX-TC1200NZB
KX-TC1200NZW/KX-TC1200NZF
Operating Instructions
Charge the battery for about
15 hours before initial use.
1 Getting Started
2 Making/Answering Calls
3 Speed Dialler
4 One-Touch Dialler
5 Special Features
6 Things You Should Know
Contents by Section
WARNING:
TO PREVENT FIRE OR SHOCK HAZARD, DO NOT EXPOSE THIS PRODUCT
TO LIQUID OR ANY TYPE OF MOISTURE.
When a failure occurs which results in the internal parts becoming accessible, disconnect
AC adaptor immediately and return this unit to the place of purchase or service centre.
If there is any trouble, disconnect the unit from the telephone line and connect a
known working phone. If the known working phone operates properly, do not
reconnect the unit to the telephone line until the fault has been repaired. If the
known working phone does not operate properly, consult your telephone company.
This equipment has been tested and found to comply with AS/NZS 3548:1995 limits
for electromagnetic interference. Any modifications to any part of the system or to any
peripherals may void the EMC compliance of the system or the peripherals.
This equipment will be inoperable if mains power fails.
WARNING:
The earcap on the handset is magnetised and may retain metallic objects.
KX-TC1200ALB
Kyushu Matsushita Electric Co., Ltd.
1-62, 4-chome, Minoshima, Hakata-ku, Fukuoka 812-8531, Japan
PQQX13174ZA-BM F0801-1091 D
For your future reference
Serial No. Date of purchase
(found on the bottom of the unit)
Name and address of dealer
For New Zealand Users Only
The grant of a Telepermit for any item of terminal equipment indicates only that Telecom
has accepted that the item complies with minimum conditions for connection to its
network. It indicates no endorsement of the product by Telecom, nor does it provide any
sort of warranty. Above all, it provides no assurance that any item will work correctly in
all respects with another item of Telepermitted equipment of a different make or model,
nor does it imply that any product is compatible with all of Telecom’s network services.
WARNING NOTICE:
No “111” or other calls can be made from this device during a mains power failure.
This equipment shall not be set to make automatic calls to the Telecom “111”
Emergency Service.
≥We recommend that a standard phone which can be used in the case of a power failure
be connected to the telephone line at all times.
Attach or keep original receipt to assist with any repair under warranty.
1-C Settings
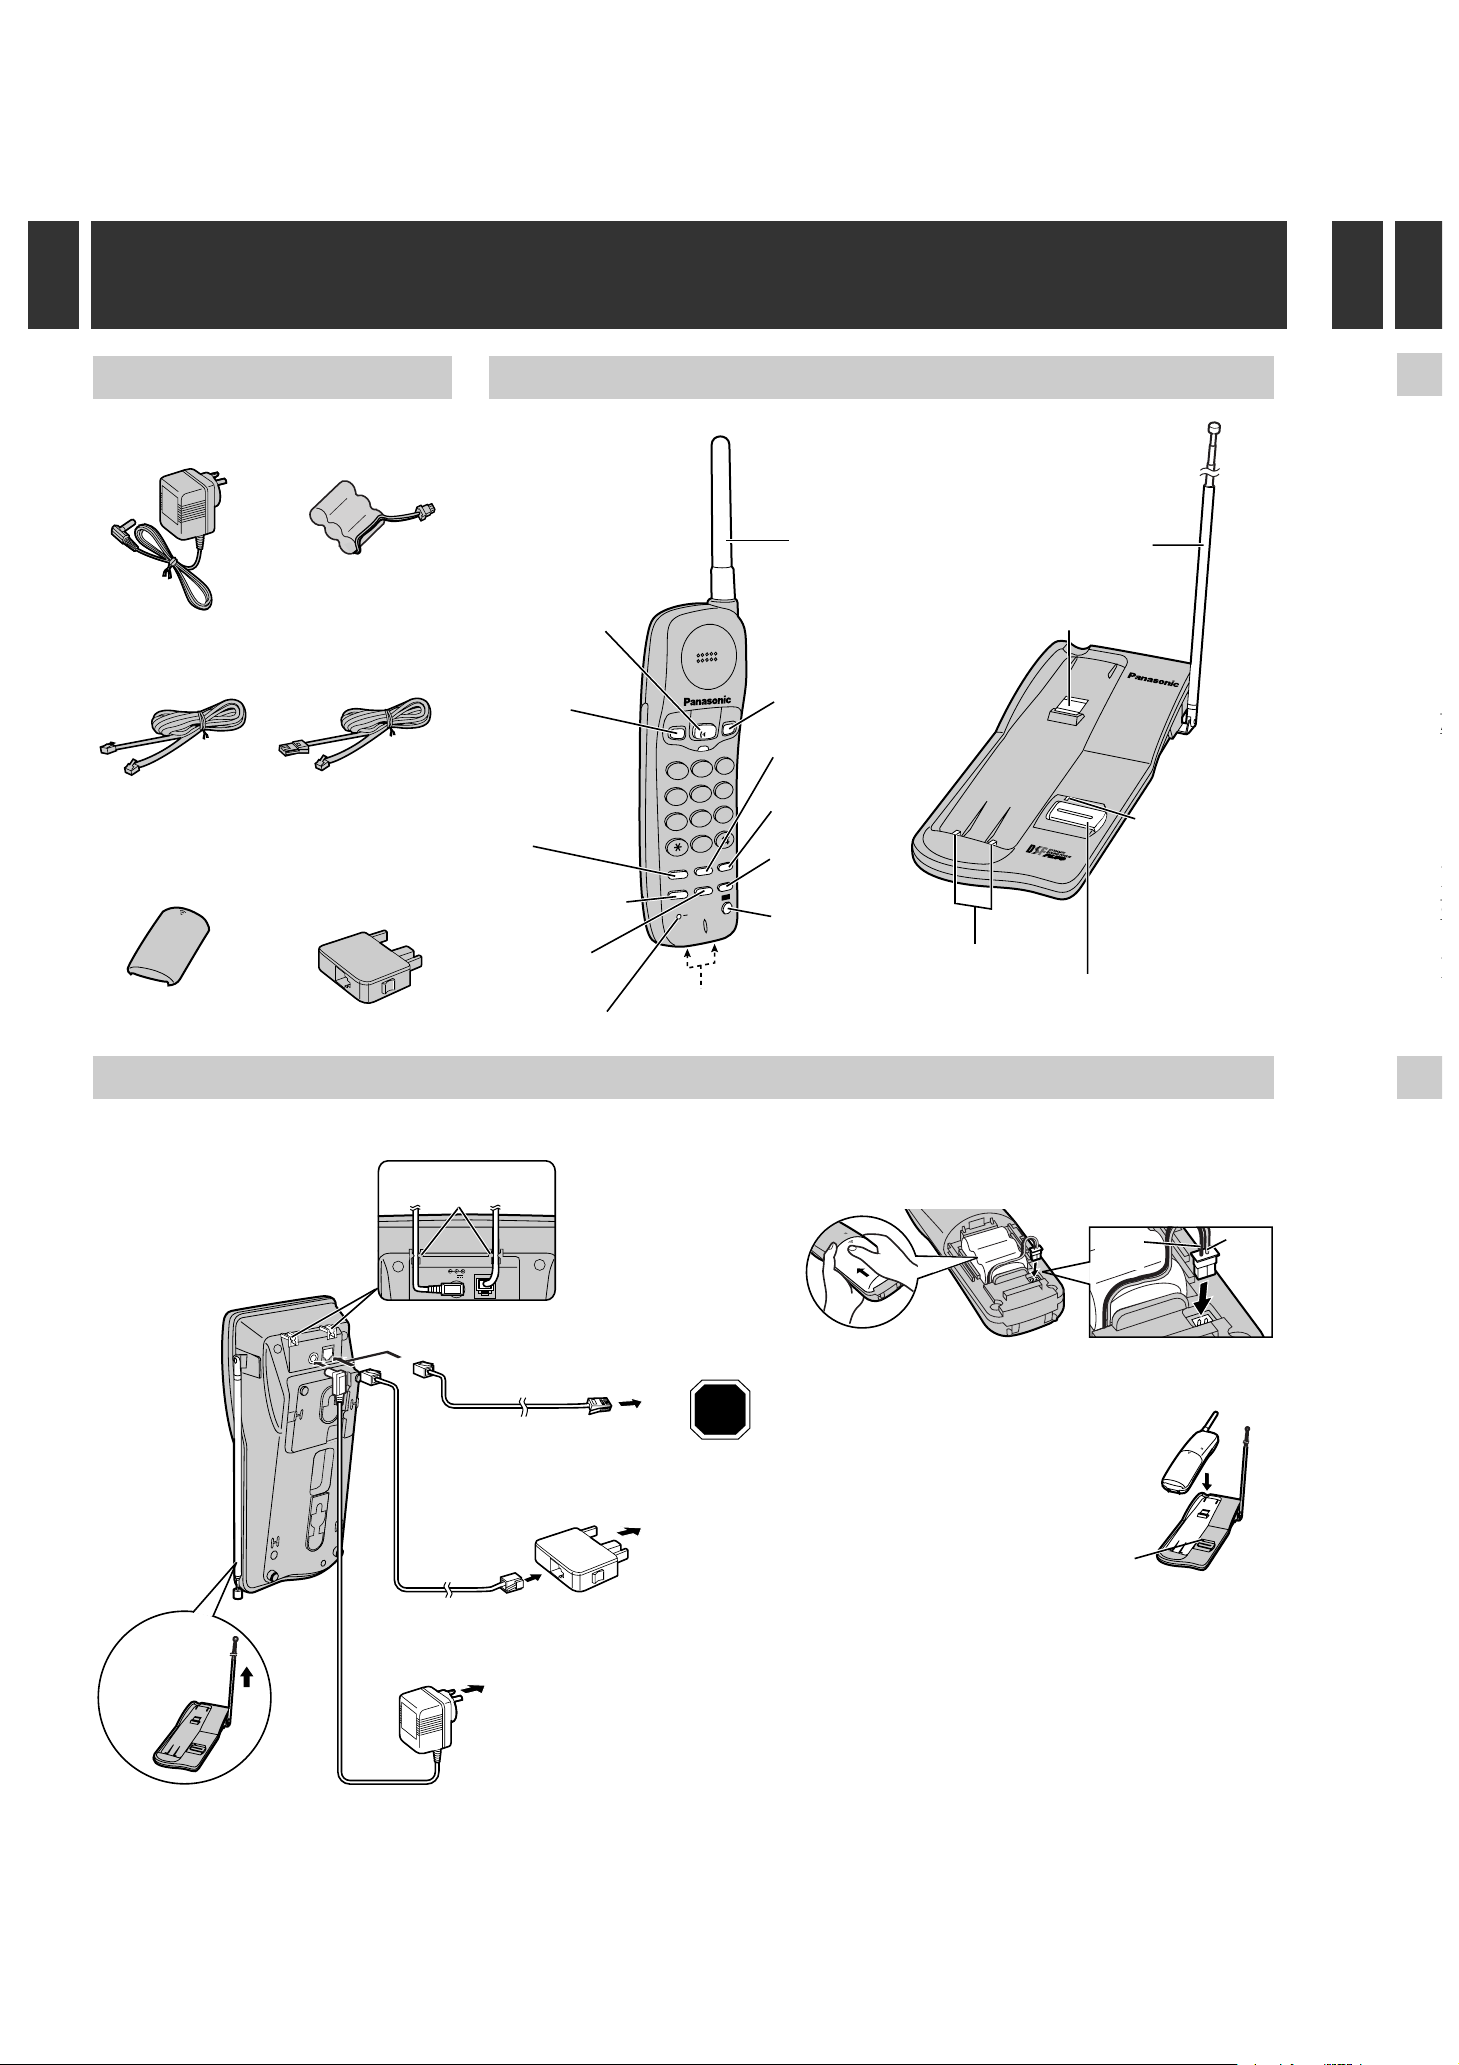
1-A Accessories 1-B Location of Controls
Handset Base unit
∑
AC Adaptor
.......................one
∑
Telephone Line Cord..........................one
IN USE/CHARGE
HANDEST LOCATOR
Handset Hook (6-D)
Charge
Contacts (6-A)
IN USE/CHARGE
Indicator
(1-C, 5-A)
Antenna (1-C)
(HANDSET\LOCATOR)
Button (5-A)
RECHARGE
Indicator (6-A)
(TALK) Button and
Indicator (2-A)
(RECALL)
Button (5-D)
(RINGER) Button
(2-B)
(PROGRAM)
Button (3-A, 5-D)
(LOUD)
Button (2-A)
(REDIAL)
Button (2-A)
(AUTO) Button
(3-A, 5-D)
(PAUSE)
Button (5-C)
(DIRECT)
Button (4-A)
Antenna
(CH) (Channel)
Button (2-A)
Charge Contacts (6-A)
ABC
2
1
DEF
3
JKL
5
GHI
4
MNO
6
TUV
RECALL
8
PQRS
7
WXYZ
9
0
RINGER
REDIAL
DIRECT
CH
LOUD
PROGRAM
RECHARGE
PAUSE
AUTO
TALK
ON
OFF
≥USE ONLY WITH Panasonic AC ADAPTOR PQLV16AL.
≥The AC adaptor must remain connected at all times.
(It is normal for the adaptor to feel warm during use.)
≥
To connect a standard telephone on the same line, see section 6-F.
≥KX-TC1200AL and KX-TC1200NZ are not designed to be used with
rotary (pulse dialling) services.
STOP
AC Adaptor
Fasten the cords.
Hooks
LINE
12V
Extend the
antenna fully.
Telephone
Line Cord
To Socket
Telephone Plug
For New Zealand
To Single-Line
Telephone Jack
For Australia
To Power Outlet
(AC 230 V–240 V,
50/60 Hz)
Telephone
Line Cord
OR
1
Connect as shown.
(TA
Ind
(CH
(LO
(RE
(RI
2-
2-
1
Getting Started Section 1
2
M
For Australia For New Zealand
For Australia only
∑
Telephone
Plug...............one
∑
Battery............one
∑
Handset Cover
.......................one
2
Install the battery in the handset, and close
the handset cover, locking it into place.
3
Charge the battery for
about 15 hours.
≥See section 6-A for more details.
≥The IN USE/CHARGE indicator lights.
IN USE/CHARGE Indicator
Red
Lead
Black
Lead
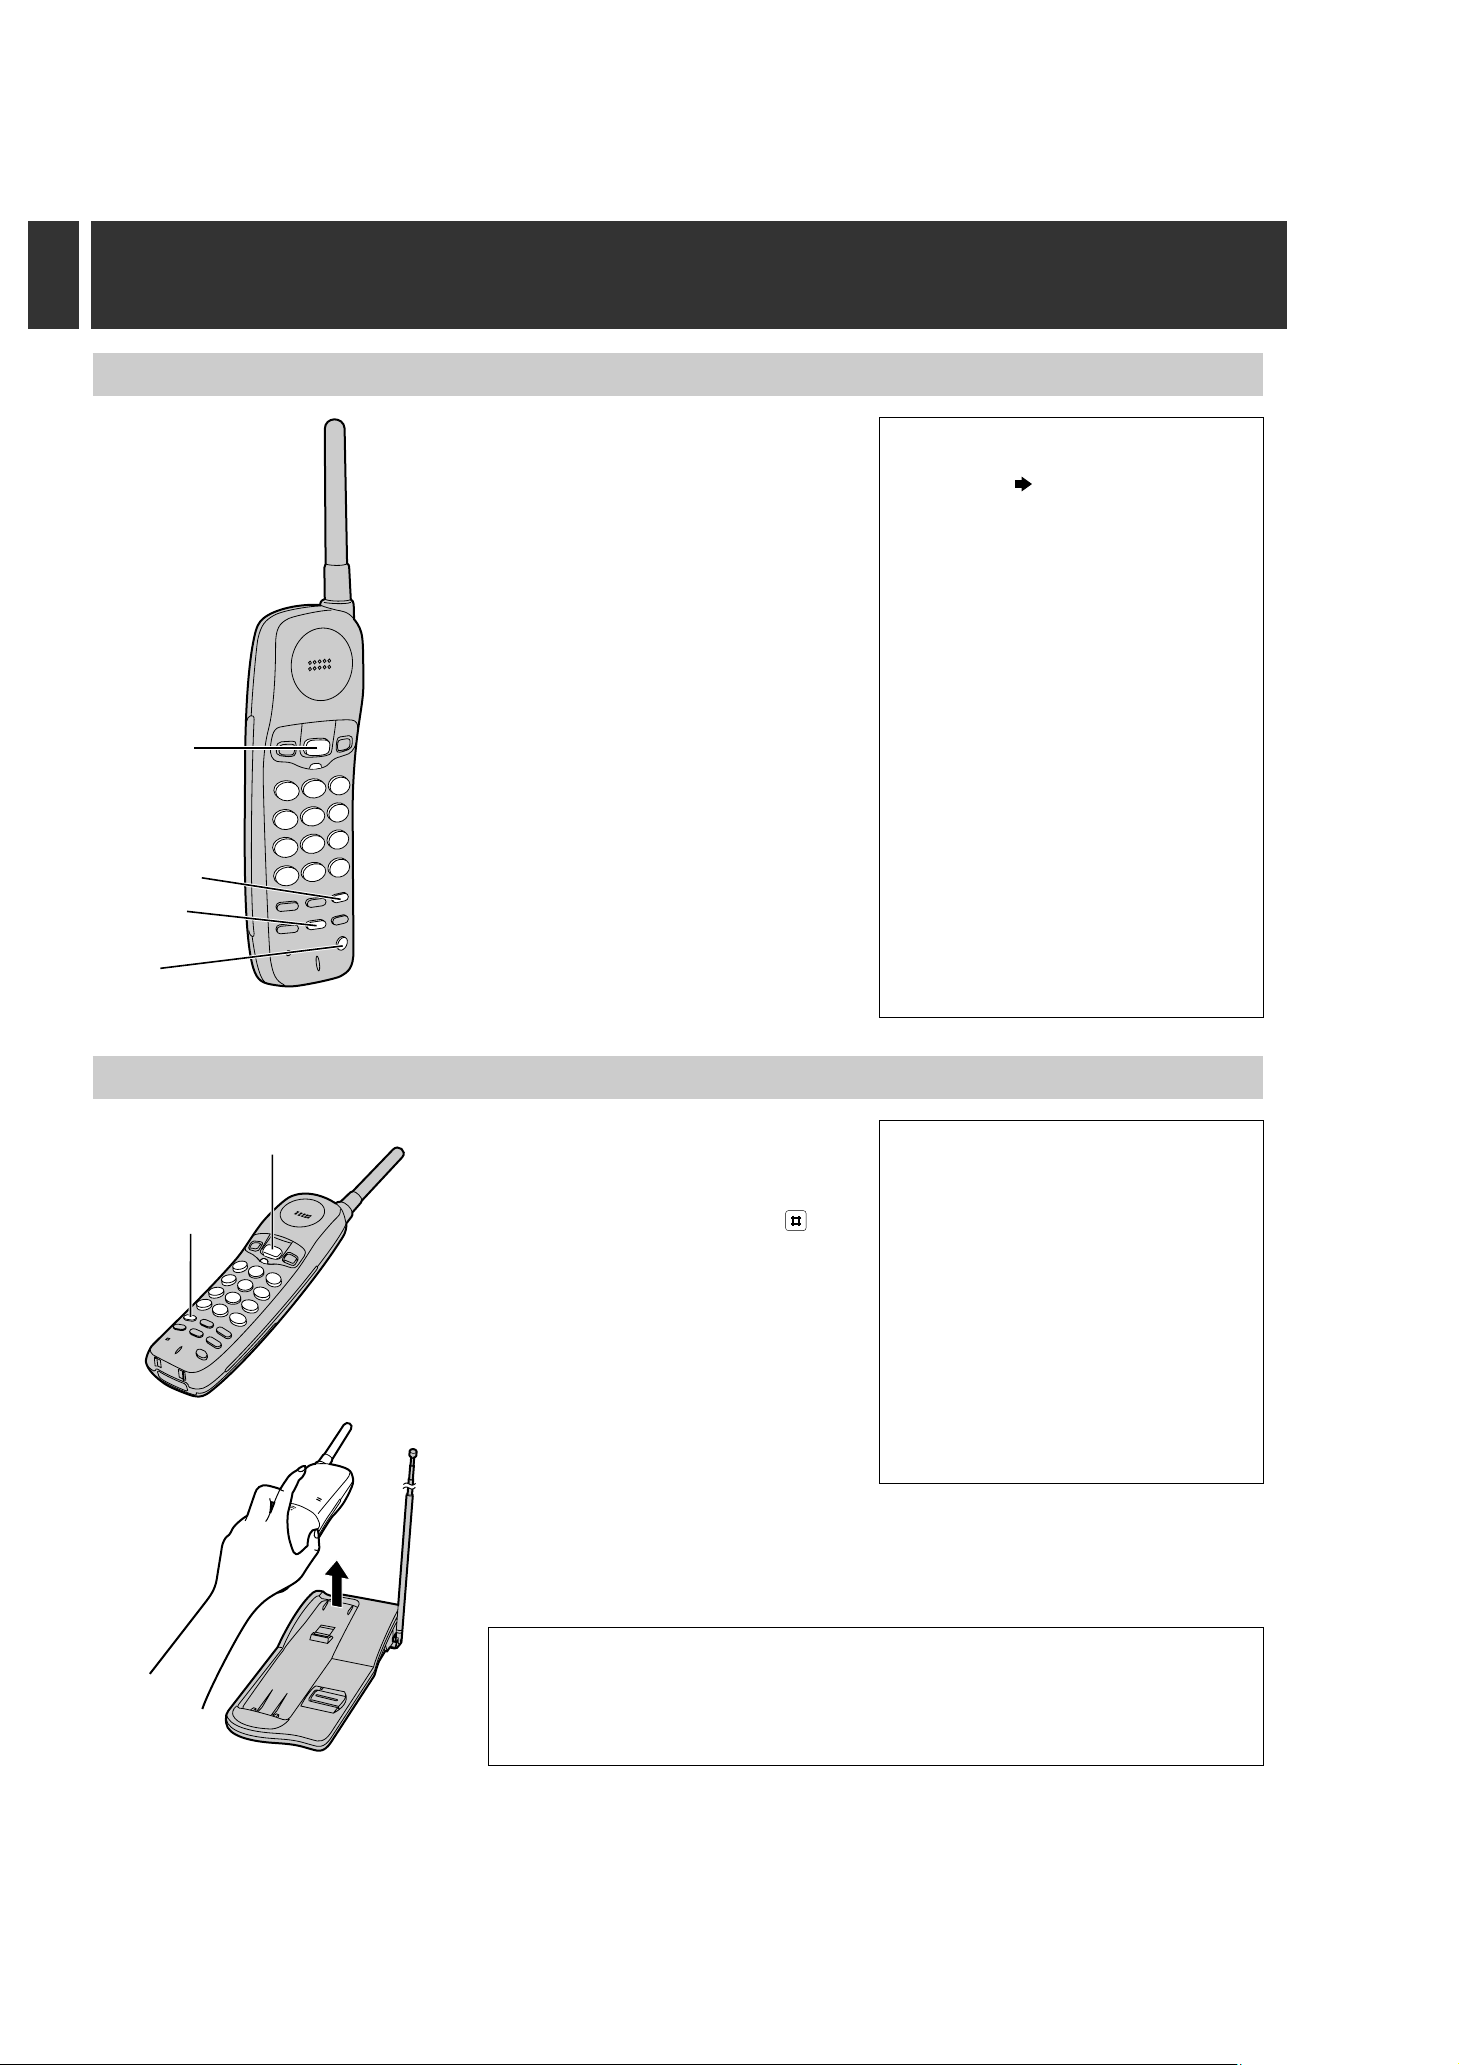
(TALK) and
Indicator
(CH)
(LOUD)
(REDIAL)
To redial the last number dialled
Press (TALK) (REDIAL).
To select the handset receiver
volume
Press (LOUD) while talking.
≥Each time you press the button, the
volume level will change from LOW
(preset) to HIGH.
If noise interferes with the
conversation
Press (CH) to select a clearer channel or
move closer to the base unit.
Backlit handset keypad
The handset dialling buttons will light when
you press a button or lift the handset off the
base unit, or when a call is received. The
lights will go out a few seconds after
pressing a button, lifting the handset or
answering a call.
1
Press (TALK).
≥The TALK indicator lights.
≥If an alarm tone sounds, see 6-E.
2
Dial a phone number.
3
To hang up,
press (TALK) or place the
handset on the base unit.
≥The indicator light goes out.
≥For best operating performance, see
section 6-C.
≥When dialling additional numbers after
speed dialling [eg, AUTO (3-B), DIRECT
(4-B) or REDIAL], make sure that speed
dialling is finished before entering
additional digits.
Otherwise, the unit may not dial correctly.
Selecting the ringer volume
The TALK indicator light must be off.
≥To select HIGH (preset) or LOW,
press (RINGER).
Each time you press the button, the
ringer volume will change and the
selected volume will ring.
≥To turn the ringer OFF,
press and hold (RINGER) until a beep
sounds.
≥To turn the ringer ON,
press (RINGER).
If the handset is off the base unit,
press (TALK).
≥You can also answer a call by pressing
any dialling button (0) to (9),
($)
or
(—Any Key Talk).
OR
If on the base unit,
just lift up.
(TALK) and Indicator
(RINGER)
2-A Making Calls
2-B Answering Calls
2
Making/Answering Calls
Section 2
For New Zealand Users Only:Additional Security Feature
In the event that a call cannot be made from the handset following a power interruption,
disconnect the base unit from the line momentarily then reconnect it. Turn the handset off, and
replace it on the base unit.
This will re-establish the security system and the handset can be used as before.