

Page 1
This unit cannot be used to connect to a public wireless LAN
ENGLISH
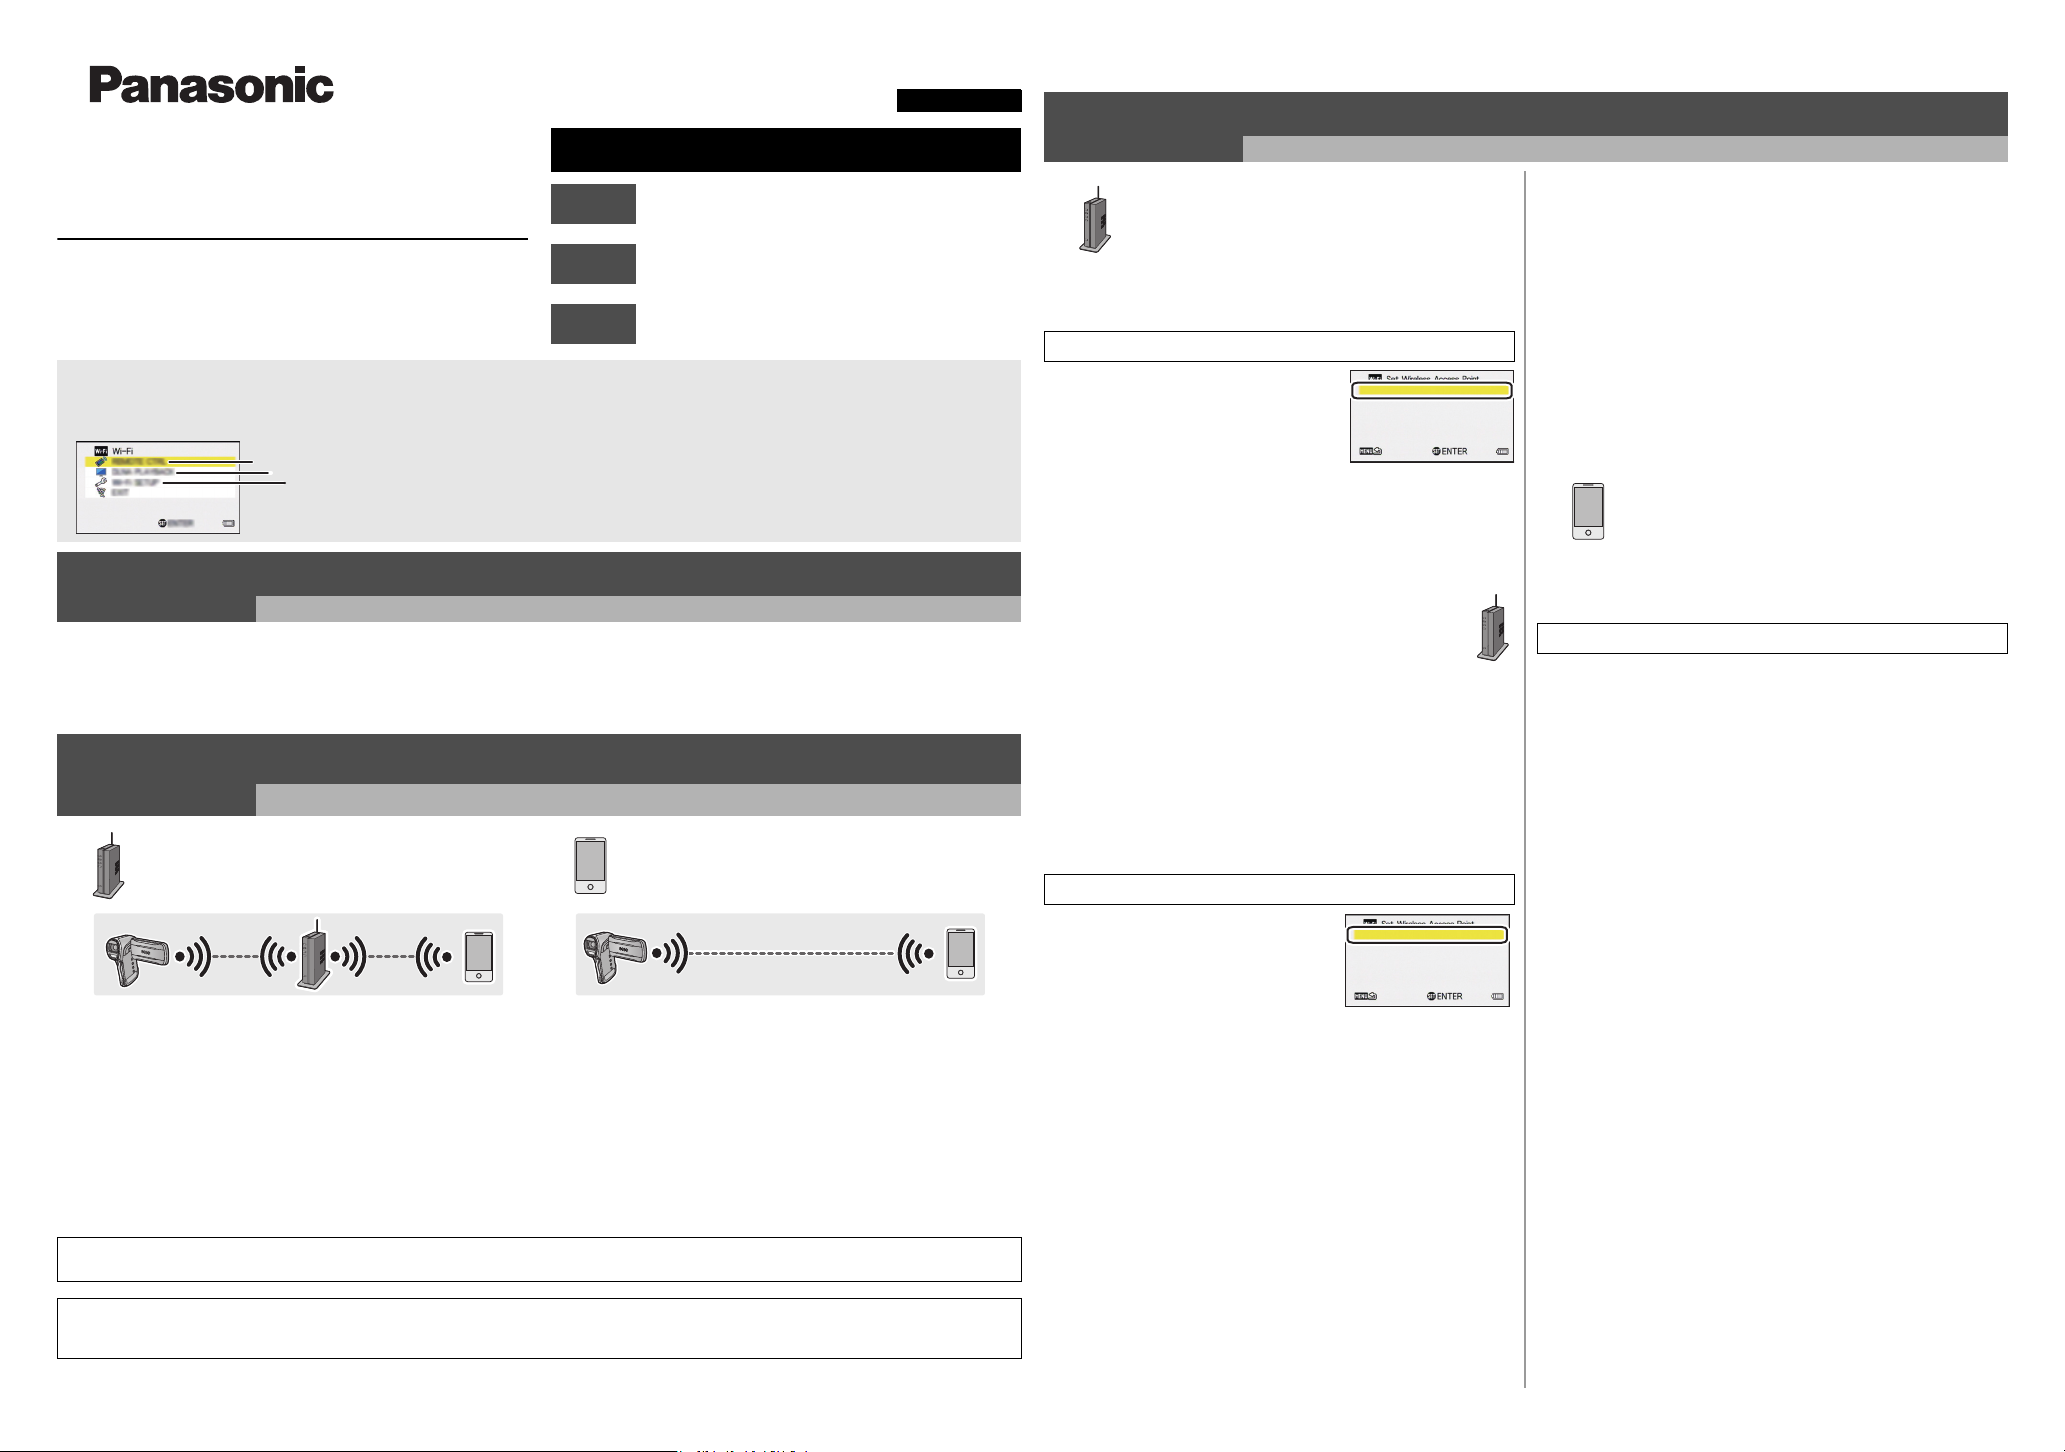
Wi-Fi connection guide
Dual Camera
Model No. HX-WA30
1AG6P1P6680--(S)
To use the Wi-Fi® function, it is required to connect this unit to a wireless access point or smartphone via Wi-Fi.
≥ This guide explains with Wi-Fi connection that allows using the [REMOTE CTRL].
A [REMOTE CTRL]
B [DLNA PLAYBACK]
C [Wi-Fi SETUP]
VQC9443
connection.
Step.1
Step.2
Step.3
≥ Please refer to the operating instructions (PDF format) of this unit for
details about the setting/operating of this unit.
≥ Please refer to the operating instructions of the device in use for
details about the setting/operating of the wireless access point or
smartphone.
Install the “Image App”
Confirm the Wi-Fi® connecting method
Connect to Wi-Fi
Install the “Image App”
Step.1
To connect this unit with the smartphone, it is required to install “Image App” in the smartphone to be used.
1 [Android™]: Select “Google Play™ Store”.
[iOS]: Select “App Store
An environment that can connect to the network is required.
2 Enter “Panasonic Image App” into the search box.
SM
”.
3 Select “Image App” and install it.
Confirm the Wi-Fi® connecting method
Step.2
Confirm the wireless access point and smartphone used.
When connecting to a wireless
access point (wireless LAN router)
When connecting to a smartphone
Step.3
When connecting to a wireless
access point (wireless LAN router)
A [Easy Connection (WPS)]
1 Press the Wi-Fi button on this unit and setup the Wi-Fi.
[Wi-Fi SETUP] # [Set Wireless Access Point]
2 Select the part where no
wireless access point is
displayed using the SET button
and then press the SET button.
3 Select [SET] using the SET
button and then press the SET button.
4 Select [Easy Connection (WPS)] using the SET button
and then press the SET button.
5 Set the wireless access point to waiting for WPS.
≥ A message is displayed on this unit screen when the connection
is complete.
≥ Press the MENU button twice.
6 Select [REMOTE CTRL] using the SET button
and then press the SET button.
7 Start up the smartphone application “Image App”.
≥ When the connection is complete, images of this unit is displayed on the
smartphone screen.
B [Manual Connection]
≥ Please refer to the operating instruction of the device in use for details
about the setting and display of the wireless access point.
1 Press the Wi-Fi button on this unit and setup the Wi-Fi.
[Wi-Fi SETUP] # [Set Wireless Access Point]
The setting screen for the wireless access point is displayed when the Wi-Fi button is pressed for the first time.
Connect to Wi-Fi
≥ For details on how to enter characters, refer to the operating instructions
(PDF format).
≥ When the entry is complete, select [ENTER] using the SET button and
then press the SET button.
9 (When there is an Encryption key (Password))
Select [NEXT] using the SET button and then press the
SET button.
≥ A message is displayed when the connection is complete.
≥ Press the MENU button twice.
10 Select [REMOTE CTRL] using the SET button and
then press the SET button.
11 Start up the smartphone application “Image App”.
≥ When the connection is complete, images of this unit are displayed on the
smartphone screen.
When connecting to a smartphone
C [Direct Connection]
1 Press the Wi-Fi button on this unit and setup the Wi-Fi.
[Wi-Fi SETUP] # [Direct Connection]
2 Select the SSID displayed on this unit in the Wi-Fi
setting of the smartphone.
3 Enter the Password displayed on this unit into a
smartphone.
4 Start up the smartphone application “Image App”.
≥ When the connection is complete, images of this unit is displayed on the
smartphone screen.
1 Check if the wireless access point is compatible with
IEEE802.11b/g/n.
≥ Proceed to 2 once the compatibility is confirmed.
Proceed to C [Direct Connection] of Step.3
2 Check if the wireless access point is compatible with
WPS*.
Compatible with WPS:
Proceed to A [Easy Connection (WPS)] of Step.3
Not compatible with WPS:
Proceed to B [Manual Connection] of Step.3
* WPS is an abbreviation for Wi-Fi Protected Setup™.
Operation cannot be guaranteed for all devices. For compatible devices, see the following support site.
http://panasonic.jp/support/global/cs/e_cam/index.html (This Site is English only.)
≥ Android and Google Play are trademarks or registered trademarks of Google Inc.
≥ App Store is a service mark of Apple Inc.
≥ “Wi-Fi”, “Wi-Fi Protected Setup”, “WPA” and “WPA2” are marks or registered marks of the Wi-Fi Alliance.
2 Select the part where no
wireless access point is
displayed using the SET button
and then press the SET button.
3 Select [SET] using the SET
button and then press the SET button.
4 Select [Manual Connection] using the SET button and
then press the SET button.
5 Select [Search] using the SET button and then press
the SET button.
≥ Please refer to the operating instructions (PDF format) of this unit for
details about the setting when the [Set Manually] is selected.
6 Select the wireless access point to be connected using
the SET button and then press the SET button.
≥ If an Encryption key (Password) is not set, the connection is complete and
a message is displayed.
7 (When there is an Encryption key (Password))
Select [INPUT] using the SET button and then press
the SET button.
8 Enter the Password using the SET button.
 Loading...