

Page 1
Operating Instructions EB-GD76
Digital Cellular Phone
Before operating this equipment please read these instructions
completely.
Page 2

Page 3
Important Information
Important Information
We, Matsushita Mobile Communications Development of Europe Ltd,
declare, that the EB-GD76 conforms with the essential and other relevant
requirements of the directive 1999/5/EC. A declaration of conformity to
this effect can be found at http://www.panasonicmobile.com/support
Safety Considerations
The following information should be read and understood as it provides
details which will enable you to operate your phone in a manner which is
both safe to you and your environment, and conforms to any legal
requirements regarding the use of cellular phones.
This equipment should only be charged with approved charging
equipment. Other usage will invalidate any approval given to this
apparatus and may be dangerous. The use of approved charging
equipment is recommended to ensure optimum performance
and avoid damage to your phone. Ensure the voltage rating of
the Travel Charger is compatible with the area of use when
travelling abroad.
A Travel Charger (EB-CAD95xx*) is supplied with the Main Kit.
Other recommended equipment for charging -Car Charger
(EB-CDD95),Handsfree Car Kit (EB-HFD75Z).
Note* xx identifies the Charger region, e.g. CN, EU, HK, UK.
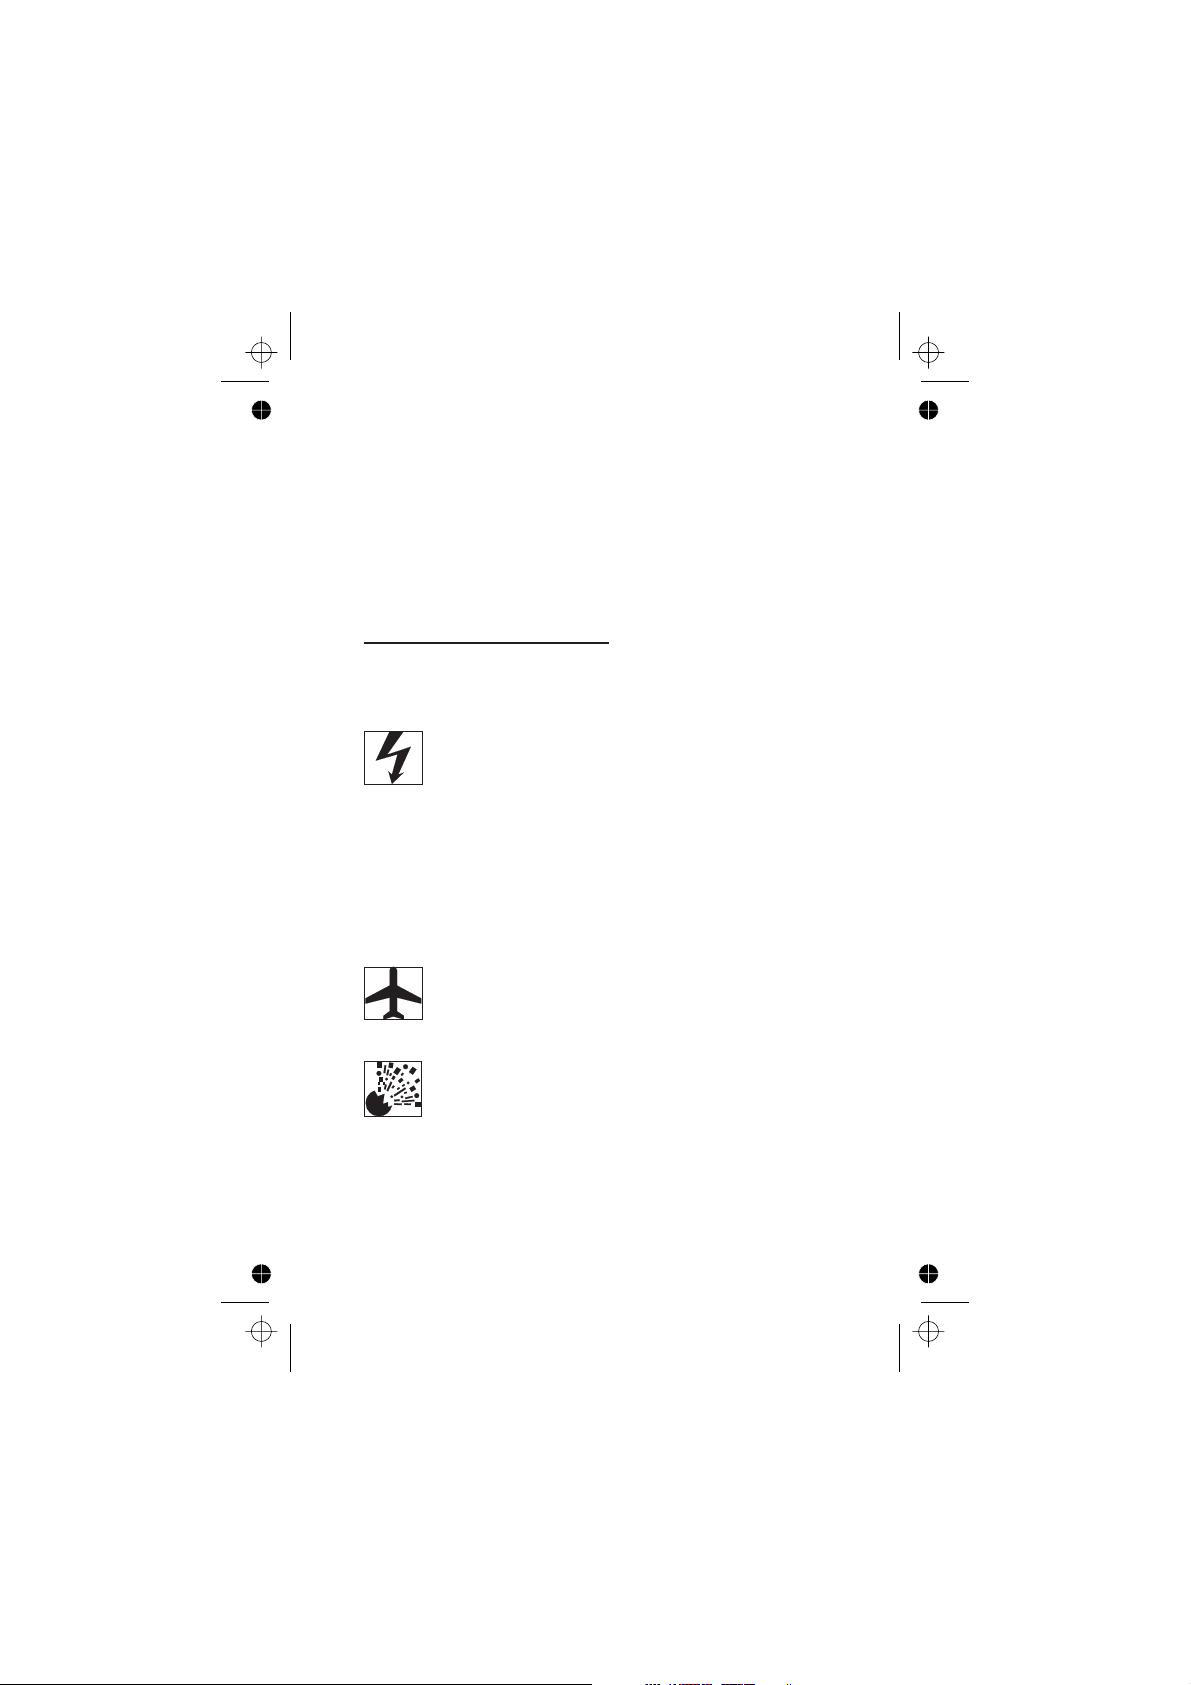
Switch off your cellular phone when in an aircraft. The use of
cellular phones in an aircraft may be dangerous to the operation
of the aircraft, disrupt the cellular network and may be illegal.
Failure to observe this instruction may lead to the suspension or
denial of cellular phone services to the offender, or legal action
or both.
It is advised not to use the equipment at a refuelling point. Users
are reminded to observe restrictions on the use of radio
equipment in fuel depots, chemical plants or where blasting
operations are in progress. Never expose the battery to
extreme temperatures (in excess of 60°C).
i
Page 4
Important Information
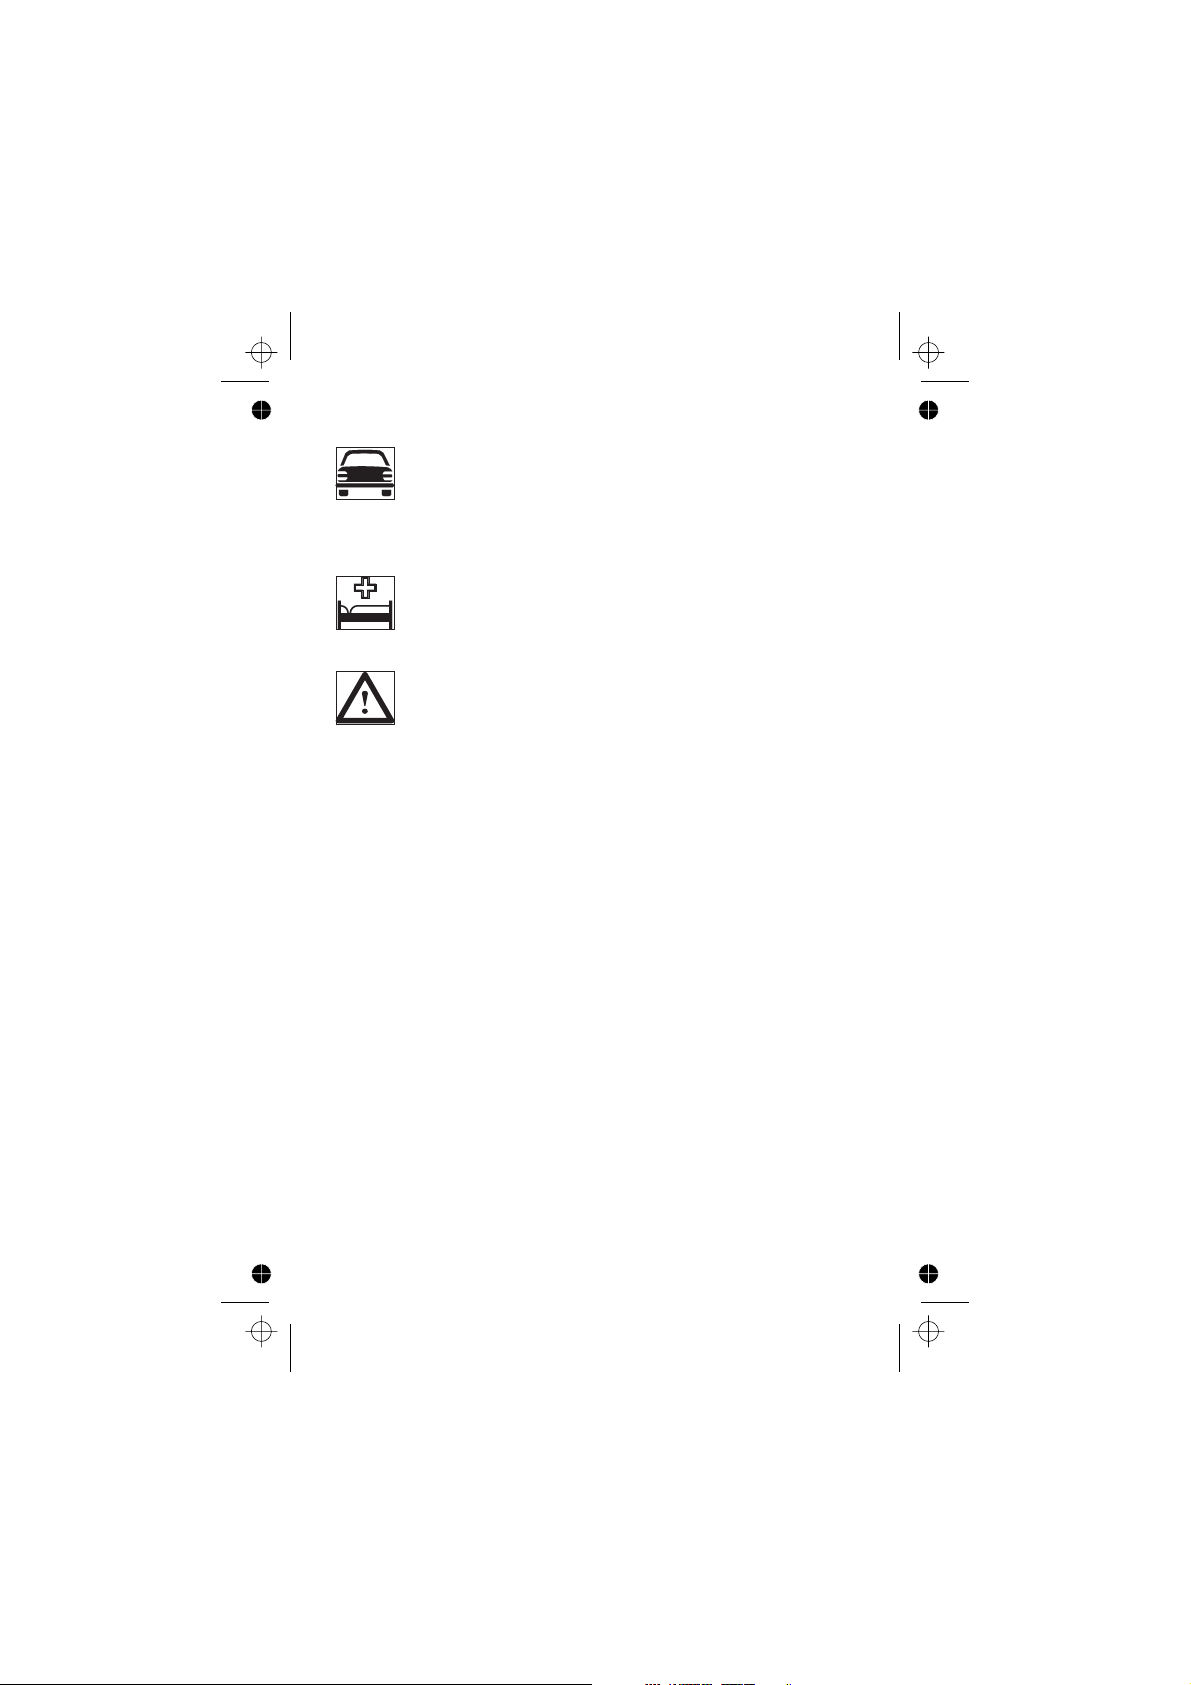
It is imperative that the user exercises proper control of your
vehicle at all times. Do not hold a phone while you are driving;
find a safe place to stop first. Do not speak into a Handsfree
microphone if it will take your mind off the road. Always
acquaint yourself thoroughly with restrictions concerning the use
of cellular phones within the area you are driving and observe
them at all times.
Care must be taken when using the phone in close proximity to
personal medical devices, such as pacemakers and hearing aids.
For most efficient use hold the phone as you would any normal
phone. Your GD76 cellular phone is fitted with an internal
antenna, located in the upper portion of the phone, above the
display screen. To avoid deterioration of signal quality or
antenna performance, do not touch the antenna area while the
phone is switched on. Unauthorized modifications or
attachments may damage the phone and violate applicable
regulations. The use of an unapproved modification or
attachment may result in the invalidation of your guarantee –
this does not affect your statutory rights.
This Panasonic mobile phone is designed, manufactured and
tested to ensure that it complies with the specifications covering
RF exposure guidelines applicable at the time of manufacture, in
accordance with EU, USA FCC, and Australian ACA regulations;
or as specifically stated in the separate declaration leaflet
enclosed with this product.
Please refer to our website for latest information/standards
compliance in your country/region of use.
www.panasonicmobile.com/health
ii
Page 5
Care and Maintenance
Care and Maintenance
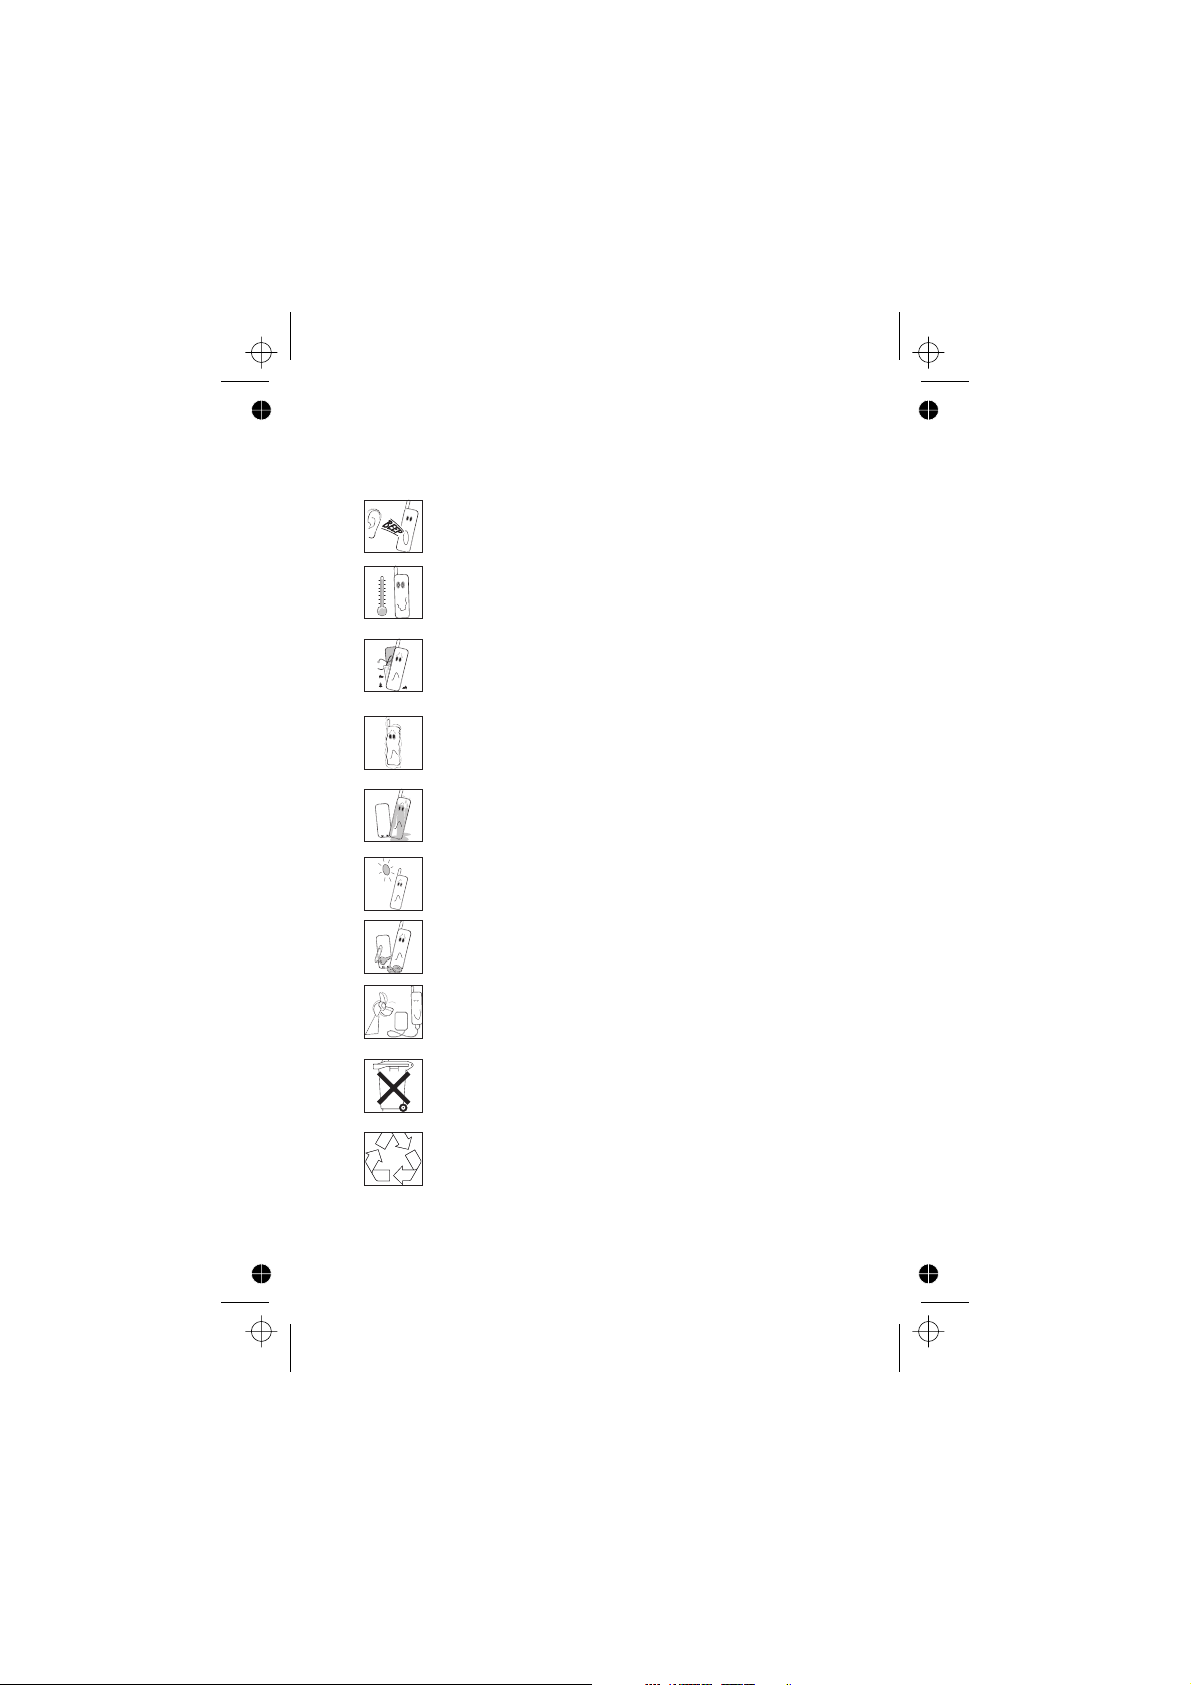
Pressing any of the keys may produce a loud tone. Avoid holding
the phone close to the ear while pressing the keys.
Extreme temperatures may have a temporary effect on the
operation of your phone. This is normal and does not indicate a
fault.
Do not modify or disassemble the equipment. There are no user
serviceable parts.
Do not subject the equipment to excessive vibration or shock.
Avoid contact with liquids. If the equipment becomes wet
immediately remove the power and contact your dealer.
Do not leave the equipment in direct sunlight or a humid, dusty
or hot area.
Keep metallic items that may accidentally touch the terminals
away from the equipment.
Always charge the battery in a well ventilated area, not in direct
sunlight, between +5°C and +35°C. It is not possible to
recharge the battery if it is outside this temperature range.
Do not incinerate or dispose of the battery as ordinary rubbish.
The battery must be disposed of in accordance with local
legislation and may be recycled.
When disposing of any packing materials or old equipment
check with your local authorities for information on recycling.
iii
Page 6

Quick Reference
Quick Reference
Q
abcd
Z
+Hold
Z
Menu
A
B
1 - 0
D
E
Q
R
#
"Press (Z) to select".
Direction which the user can move around the display
screen using the Navigation key.
Press a key once for a particular phone operation.
“Press and hold” a key for a particular phone function.
Representation of screen menu option.
Phonebook key.
Right hand Option Key.
Numeric key pads.
Answer a call or call a dialled number.
To end a call or return to Idle screen or
to switch the phone off.
Indicates that a function is SIM Dependent.
Indicates that a function is Network Dependent.
Switches Discreet Mode on and off.
Z
+Hold
iv
Page 7

Important Information ................................i
Contents
Safety Considerations .................................i
Care and Maintenance ................................iii
Quick Reference ...................................iv
Getting Started ....................................1
Fitting the SIM ....................................1
Removing the SIM ..................................2
Fitting the Battery ..................................2
Removing the Battery ................................2
Charging the Battery .................................3
Operation of Battery Level Indicator.........................3
Disconnecting the Travel Charger ..........................3
Low Battery Warning.................................4
Getting to Know Your Phone ............................4
The Menu System ..................................5
Display Icons .....................................5
Information ......................................6
Navigation Prompt ..................................6
Using the Menu System ...............................6
To Select a Function .................................7
Basic Operation ....................................8
Switching the Phone On/Off .............................8
Making a Call .....................................8
International Dialling .................................8
Emergency Calls ...................................9
Automatic Redial ...................................9
Ending a Call .....................................9
Answering a Call ...................................9
Caller Identification..................................9
Earpiece Volume Control ..............................10
Locking the Phone .................................10
Using the PIN ....................................10
Setting Vibration Alert................................11
Setting Discreet Mode ...............................11
Setting Ring and Key Volume ............................12
Phonebook ......................................13
Store a Number ...................................13
Overwrite Protection ................................14
Browsing Phonebook ................................14
Retrieve a Number .................................14
Editing Phonebook Entries .............................15
Grouping Phonebook Entries ............................16
My Numbers .....................................18
Personalising Your Phone ..............................19
Add a Start-up Greeting...............................19
Displaying Animations ................................19
Changing the Ring Tone...............................19
Download Melody..................................21
Download Logo ..................................21
Setting the Backlight Time .............................22
Using Voice Commands...............................22
v
Page 8

Voice Dial Entry Setup ...............................22
Recalling Voice Dial Entries .............................23
Dialling Voice Dial Entries..............................23
Editing the Voice Dial Entries ............................23
Changing the Language ...............................24
Restoring the Default Phone Settings ........................24
Phone Security....................................25
Using Key Guard ..................................25
Disabling Key Guard.................................25
Changing the Security Codes ............................25
Restricting Calls ...................................26
Applications .....................................28
Clock ........................................28
Initially Setting the Home Time ...........................28
Setting the Clock Format ..............................28
Altering the Time/Date ...............................28
Setting the Clock for Summer Time ........................29
Setting the Alarm ..................................29
Muting the Alarm ..................................29
Setting a Power On/Off Time............................30
Calculator ......................................30
Currency Convertor ................................31
Text Messages ....................................32
Setting the Phone for Short Text Messages.....................32
Setting the Message Centre Number ........................32
Creating a Text Message ..............................32
User Messages ...................................33
Receiving Text Messages ..............................33
Message Options ..................................33
Cut / Copy & Paste Message Text .........................34
Manage Messages Lists ...............................34
Chat SMS ......................................35
Parameters .....................................36
Call Information ...................................38
Recent Numbers ..................................38
Call Duration ....................................39
Call Charges.....................................40
Setting the Unit Price ................................40
Setting the Maximum Unit Level ..........................40
Setting a Warning Level ...............................40
Call Identification ..................................41
Advanced Operation.................................42
Diverting Calls....................................42
Holding Calls and Call Waiting ...........................42
Making a Second Call ................................42
Receiving a Second Call ...............................43
Accept a Second Call ................................43
Reject a Second Call.................................43
End Current Call and Receive Second Call .....................43
Operation During Two Calls ............................43
Call Transfer ....................................44
Multi-party Calls...................................44
Changing to a New Network ............................46
vi
Page 9

Schedule .......................................47
Creating a Reminder ................................47
Viewing Reminders .................................47
Deleting Reminders .................................47
Setting a Holiday Reminder .............................48
Deleting Holiday Reminders ............................48
Jump to Future Date ................................48
Games ........................................49
Racing Game ....................................49
Ball Game ......................................49
WAP Browser ....................................50
Browser Settings ..................................50
Activating the Browser ...............................51
Navigating Content .................................51
The Browser Menu .................................51
Using Bookmarks ..................................52
Deactivating the Browser ..............................53
Setting the Linger Time ...............................53
Last Error ......................................53
Additional Features .................................54
Desktop Handsfree .................................54
Voice Memo.....................................54
DTMF Tones ....................................55
Note Pad ......................................56
Second Clock ....................................56
Setting Clock Display ................................56
Accessory Related Features .............................57
Text Entry ......................................58
®
T9
Text Input ...................................59
Other Text Modes .................................59
Editing Text .....................................59
Menu Structure ...................................60
Trouble Shooting ..................................61
Important Error Messages .............................63
Glossary of Terms ..................................65
Specifications ....................................67
Phone (Including Battery)
Personal Settings ..................................68
*
.............................67
SAR..........................................69
Notes.........................................70
vii
Page 10

viii
Page 11
Getting Started
Getting Started
Thank you for purchasing this Panasonic digital cellular phone. This phone is
designed to operate on the Global System for Mobile Communications
(GSM), GSM900 or GSM1800. Ensure the battery is fully charged before
use.
Before operating this phone please read the “Important Information”
section - see page i.
These operating instructions detail use of the equipment contained in the
Main Kit.
Some services detailed, are network dependent and are indicated by
(R)or may only be available on a subscription basis. Some functions are
SIM dependent and are indicated by (Q). For more information contact
the Service Provider.
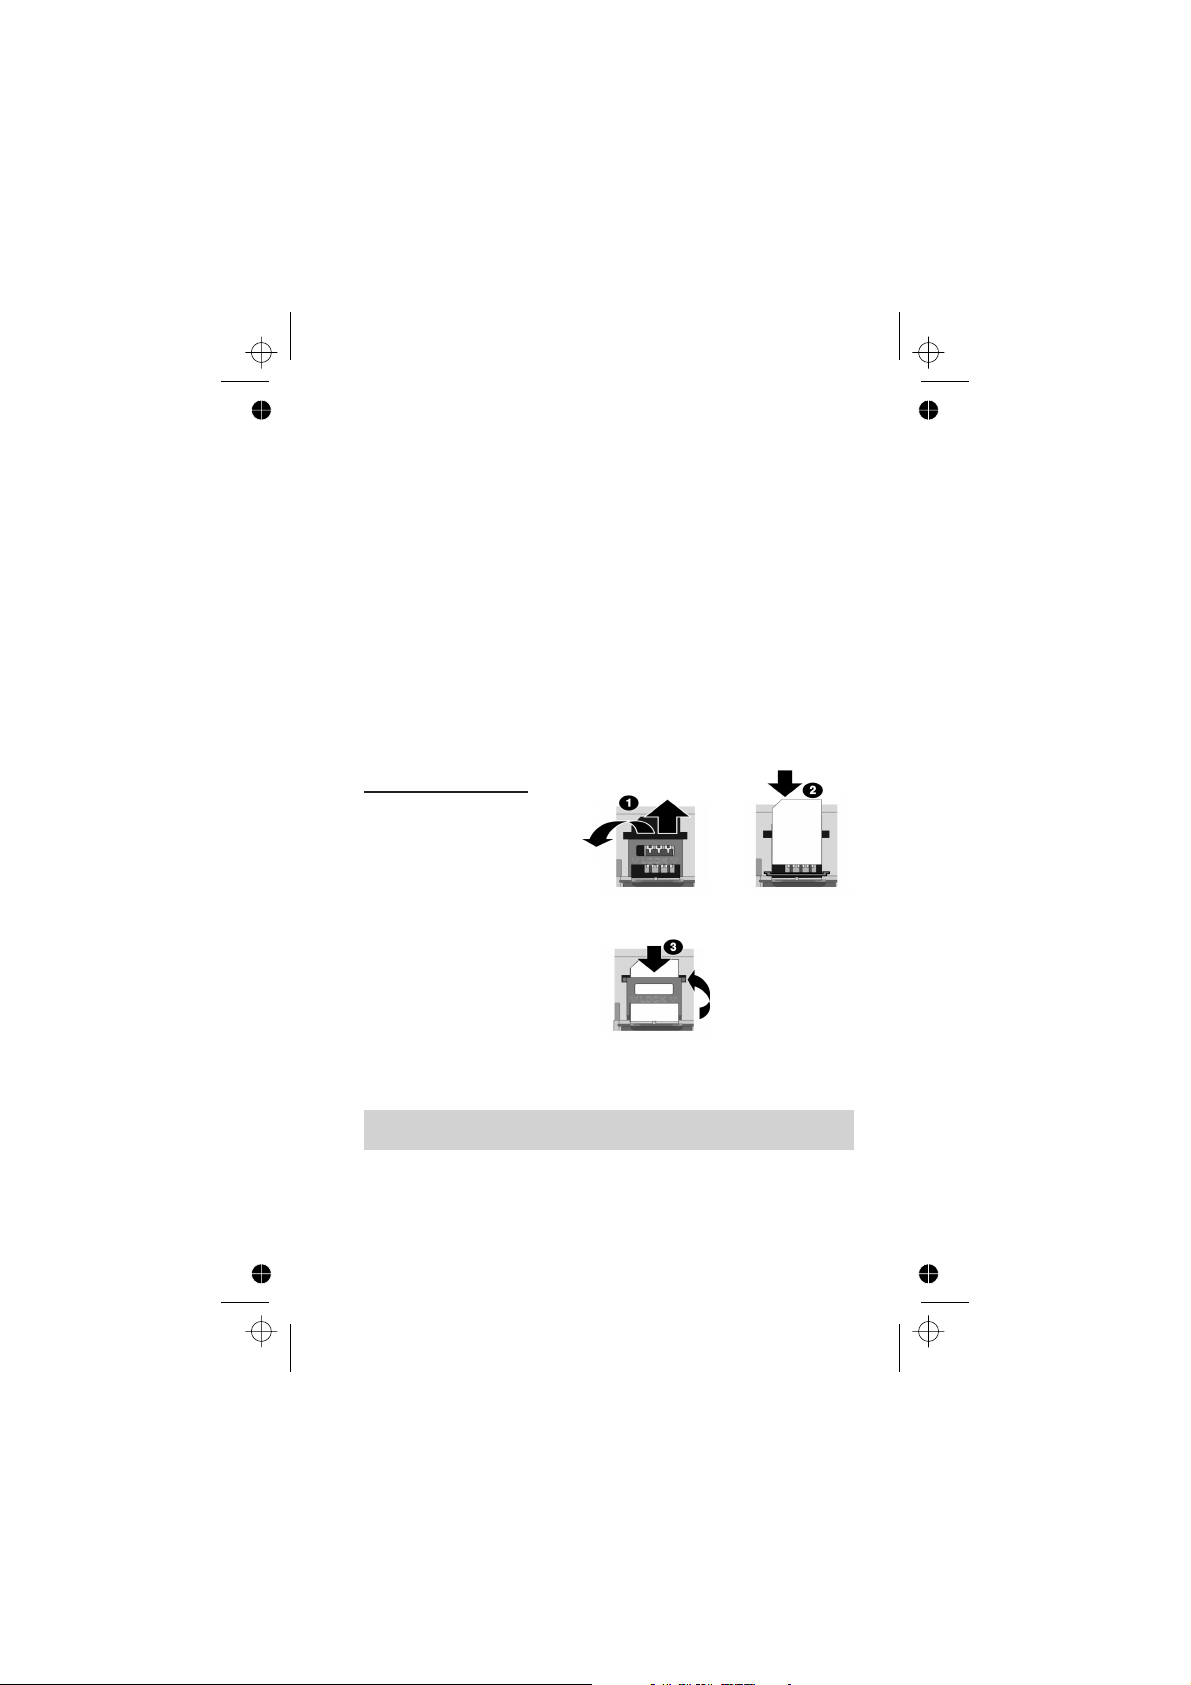
Fitting the SIM
The SIM is inserted into the
back of the phone underneath
the battery. Remove the
battery - see “Removing the
Battery” page 2. Unlock the
SIM retainer by sliding it up
towards the top of the phone
(1). Gently lower the SIM
retainer. Place the SIM into its
recess, ensuring the bevelled
corner is positioned in the top
left corner (2). Move the SIM
retainer back into position and
secure by sliding downwards.
The SIM retainer is properly
locked when it has clicked into
position (3).
Note: Ensure the SIM retainer is properly locked into position. Failure to
do so will inhibit the fitting of the battery and the battery cover.
1
Page 12
Getting Started
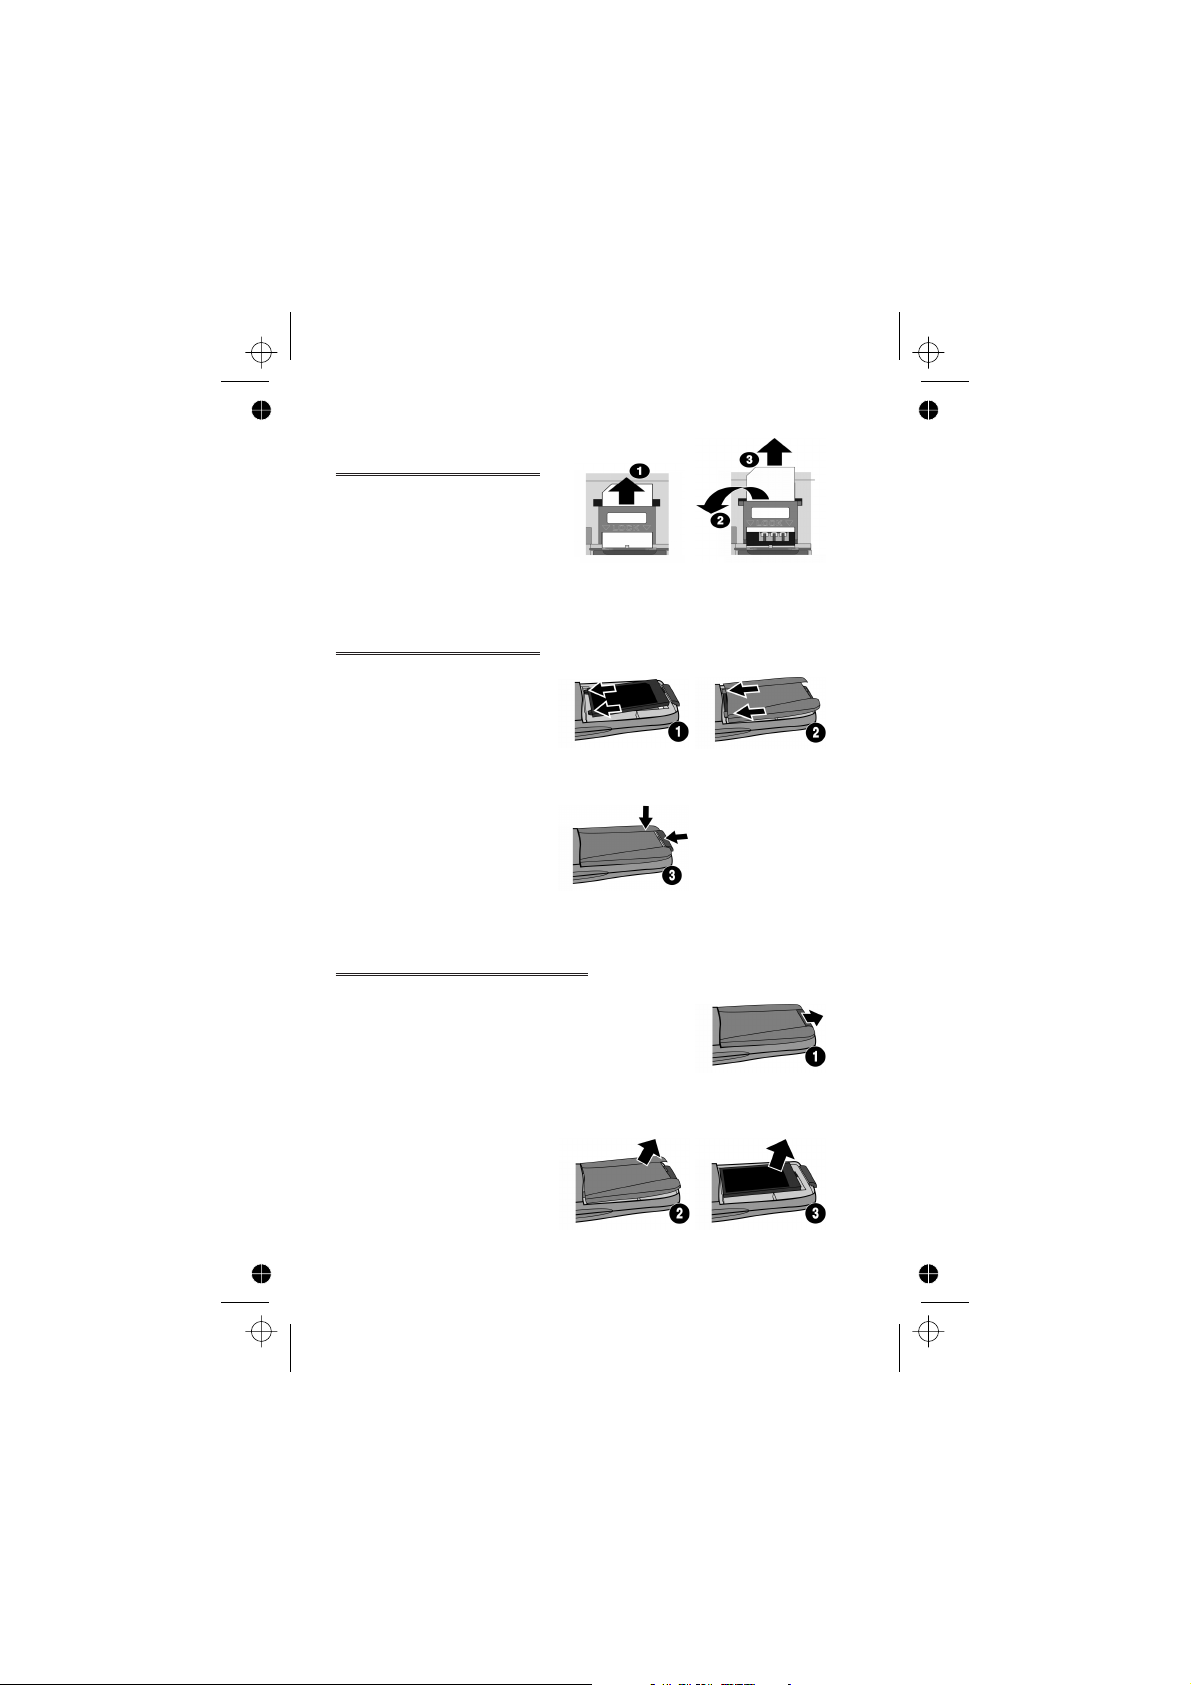
Removing the SIM
Unlock the SIM retainer by gently
pushing towards the top of the
phone (1). Gently lower the SIM
retainer (2) and remove the SIM
(3). Ensure the SIM retainer is
correctly locked before re-fitting
the battery and battery cover.
Fitting the Battery
Ensuring the label is uppermost,
locate the two lugs at the top of
the battery into the rear of the
phone (1). (The base of the
battery will stay slightly raised at
this point). Locate the two lugs at
the top of the battery cover into
the rear of the phone (2). Using
light pressure, push the bottom of
the battery cover into place and
lock by pushing up on the battery
cover release clip (3).
Removing the Battery
Push the battery cover release clip down (1). The base
of the battery cover will raise out of the recess (2).
Remove the battery cover. The battery can now be
removed from the phone (3).
2
Page 13
Getting Started
Charging the Battery
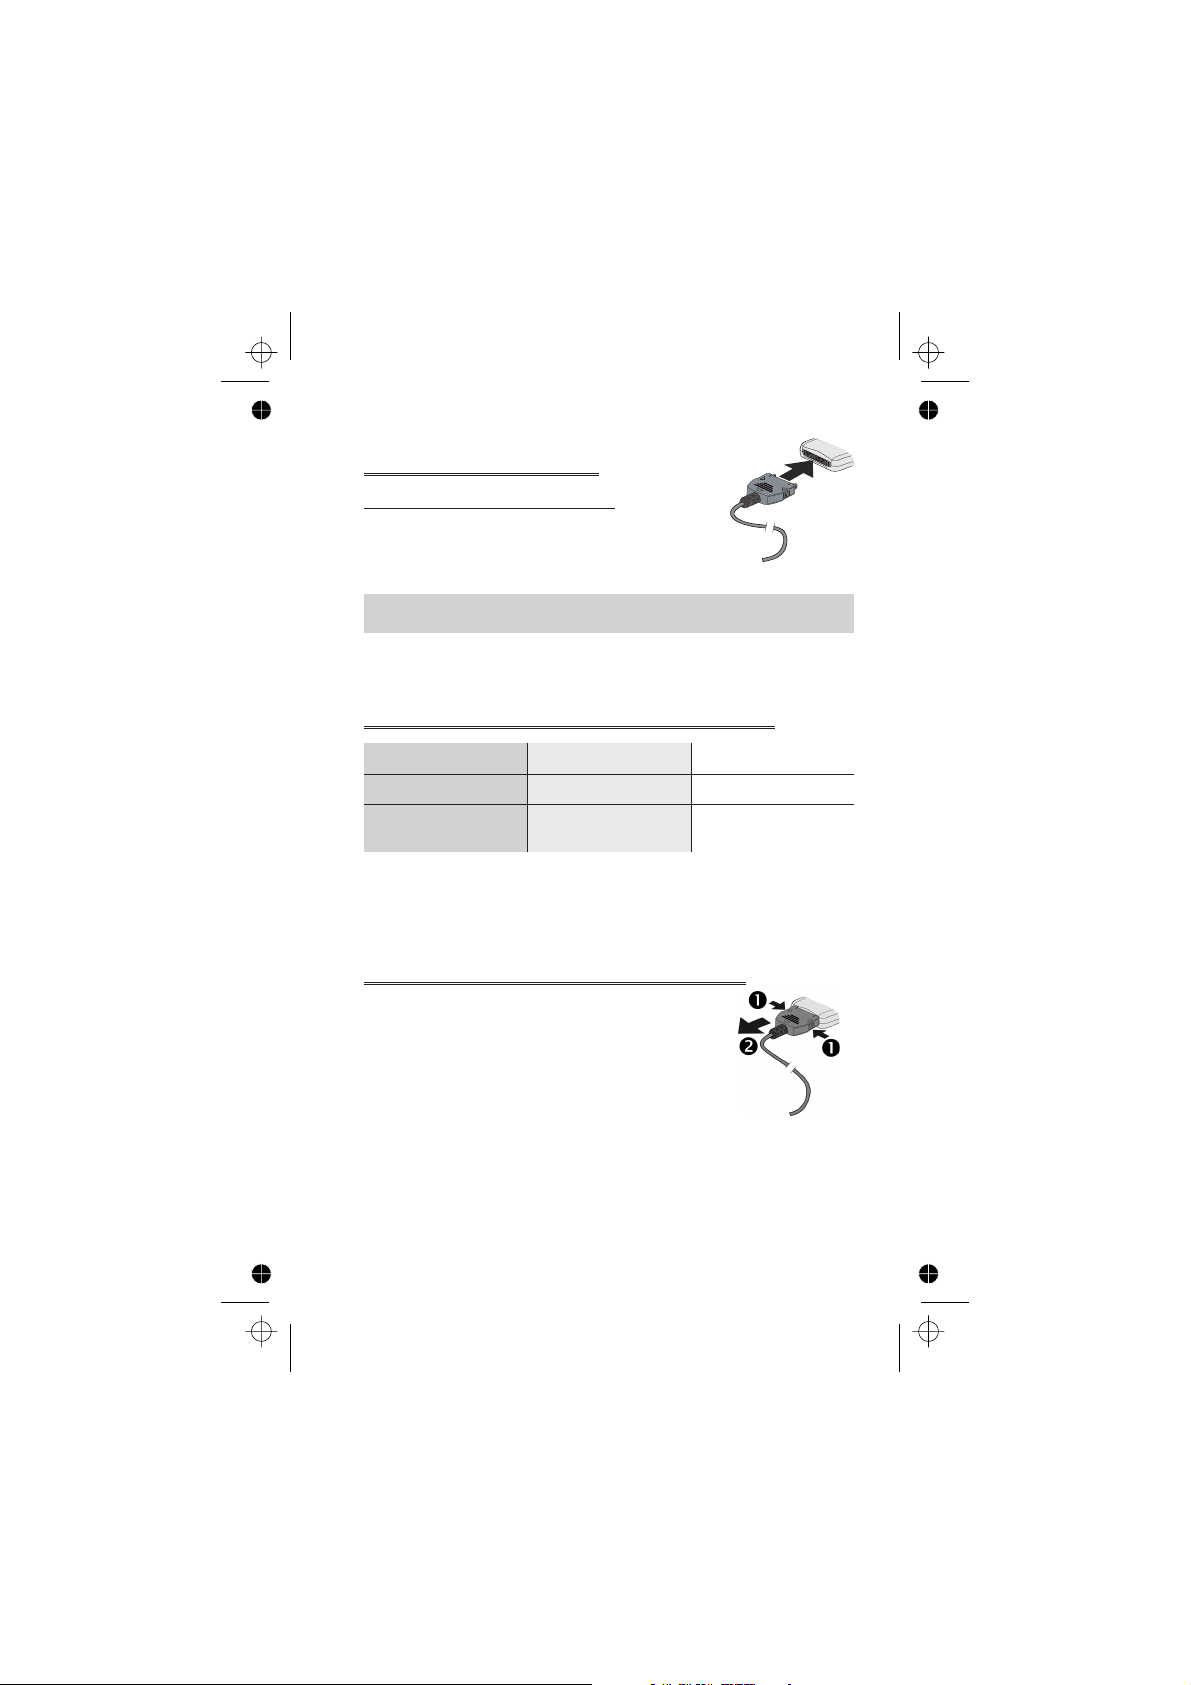
Connecting the Travel Charger
The battery must be fitted in the phone before
the charger is connected. Ensuring the arrows on
the plug are to the front of the phone. Insert the
charger into the base of the phone.
Note: DO NOT force the connector as this may damage the phone and/or
the charger.
Connect the charger to the mains power supply. The charging indicator will
light and the battery level indicator will scroll right to left when charging.
Operation of Battery Level Indicator
While charging Charging complete
Phone on
Phone off
When charging is complete turn off the mains power supply and disconnect
the charger from the phone. See “Disconnecting the Travel Charger”page
3.
KH
K
LCD Battery
Indicator off
Disconnecting the Travel Charger
Disconnect the charger from the mains power supply.
Squeeze together the two buttons on the plug of the
charger (1) and while maintaining pressure extract the
plug from the base of the phone (2).
3
Page 14
Getting Started
Low Battery Warning
When the battery power is low a warning tone will sound and a flashing
LOW BATTERY message will be displayed. If this occurs during
conversation, finish your call immediately. The power will automatically
shut off after the warning tone. Fully recharge the battery. See “Charging
the Battery” page 3. (Calls can be made and received while the phone is
charging)
It is recommended that the battery is fully discharged between charges to
maintain optimum battery life and performance.
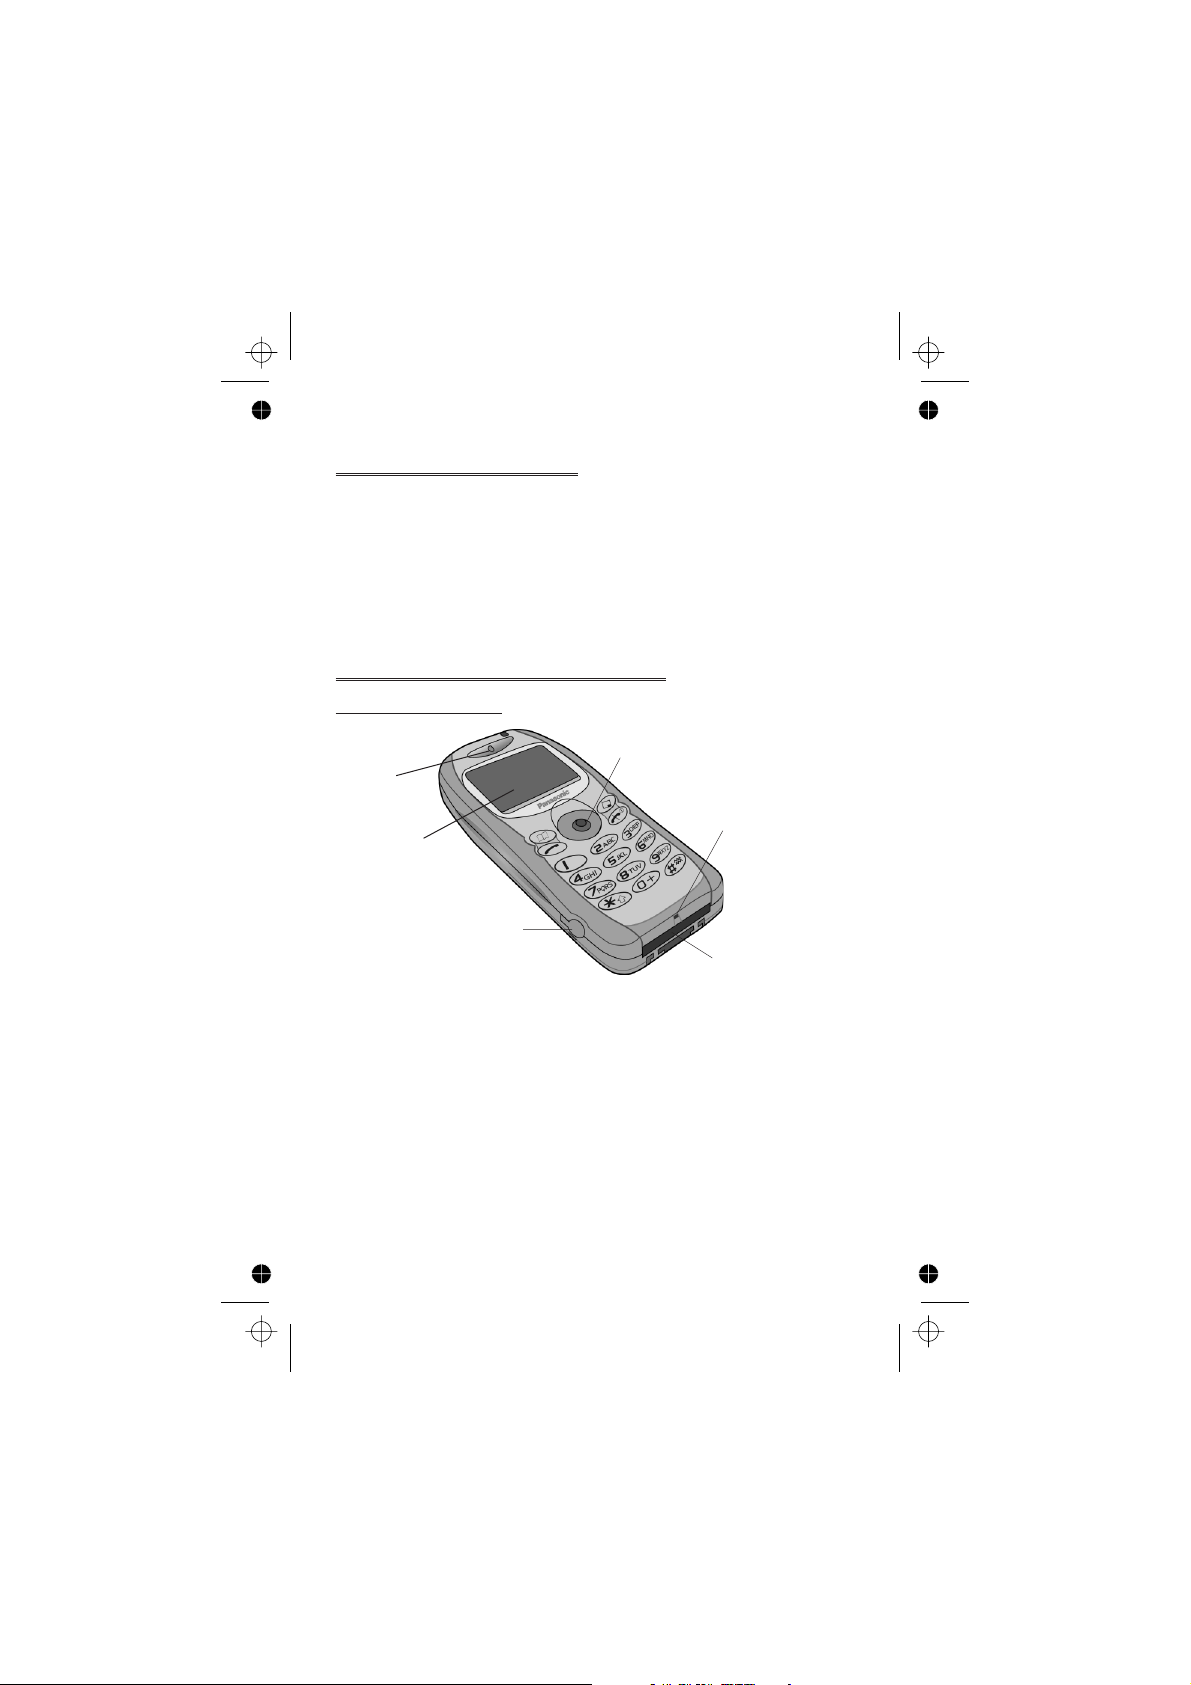
Getting to Know Your Phone
Location of Controls
Navigation Key
Earpiece
Display
Earpiece/Microphone
Socket
External Connector
Navigation key - moving up/down/left/right navigates through the
g
options in the Main Display area. Pressing this key activates the
function currently displayed in the Main Option area
Cancel key - this key is mainly used to cancel the current
B
operation and return to the previous menu level. In certain menus
it has other functions
Primarily used for accessing the Phonebook or switching character
A
types
Makes a call or recalls recently dialled phone numbers
D
E
4
Ends a call or
on/off
+ Hold enables the user to switch the phone
Z
Microphone
Page 15
Getting Started
Digit keys0to9,*and#–
1
Discreet Mode
will switch on and off
#
The Menu System
The menu system allows the user to access all the functions of the phone
that are not accessible purely by key strokes.
Display Icons
Following some operations the display will automatically clear after three
seconds or after pressing any key.
Information Area
Main Display
Status Icons
Secondary
Option Area
Main Option
Area
Status Icons
The status icons are displayed according to the currently activated
functions. The Antenna, Signal and Battery icons are displayed when the
handset is switched on and connected to a network.
is displayed when you are registered to a non-home network -
Y
roaming
is displayed when call divert is enabled
t
is displayed when vibration alert is enabled
]
is displayed when Discreet Mode is enabled
P
is displayed when all tones or ring volume is off
[
Navigation Prompt
5
Page 16

Getting Started
flashes when an unread message is stored or lights when
N
message area is full
is displayed when phone lock is enabled
O
indicates that it is possible to make emergency calls
S
T indicates the received signal strength:\- weak signal,T-
strong signal
T indicates the received GPRS signal strength: \ - weak signal,
H
- strong signal
T
indicates the battery level:H- full,G(flashing) - low battery
Information
Icons are used to indicate the current top level menu, the sub-menu
number, text entry mode, Phonebook source, Phonebook location number,
or the alarm set icon depending on the current mode of operation.
indicates alarm is set
?
indicates current Phonebook entry is sourced from the Mobile
>
Phonebook
indicates current Phonebook entry is sourced from the SIM
<
Phonebook
Navigation Prompt
This area indicates the available directions in which the
p
Navigation key can be pressed according to the current mode of
operation
Using the Menu System
The menu system provides the means for accessing all the functions which
do not have their own dedicated buttons on the keypad.
The menu functions are selected using the five-way Navigation key.
6
Page 17

Getting Started
To Select a Function
ZQ
on the screen in any of the four directions (a,b,c,d). When a particular
menu is highlighted,
submenu, useeuntil the required item is highlighted,
Example:
From Idle
Animation
In detail:
Following some operations the display will automatically clear after three
seconds, if this is not the case
Shortcuts
When familiar with the layout of the menu, use the keypad to enter the
Menu Number. This will allow the user to obtain the required function
without having to navigate through the display menus. For example,
Qorg
the Animation menu.
then use the navigation key as a joystick to move around the icons
ZQ
ZQ
1
ZQ
2 Usedbto highlight the Personalise menu
3
ZQ
4 Useathree times to highlight the Display Setting menu
5
ZQ
6 Useatwice to highlight Animation menu
7
ZQ
8 Useabto select Off, Theme 1 or Theme 2
to enter the menu and then
, select Personalise > Display Setting >
ZQ
to enter the menu system
to enter the menu
to enter the menu
to enter the menu
, and a submenu is displayed. From any
ZQ
ZQ
ZE
to return to Idle.
143
to take you directly to
Z
7
Page 18
Basic Operation
Basic Operation
Switching the Phone On/Off
To switch the phone on or off
When the phone is switched on a greeting will be displayed and then the
phone will go into Idle.
Making a Call
Ensure that the phone is switched on, the network operator logo is
displayed and the signal strength meter shows network coverage is available
in the current area.
1 Enter area code and phone number
2
ZD
Z
+Hold
E
International Dialling
Using the automatic international access code (+)
you will be able to dial international numbers
without having to know the code for the
international exchange.
If the international number is known then it can be
entered in the normal fashion followed by the area
code and phone number.
1 From Idle
displayed
2 Useeto cycle through the abbreviated
international names
3 Enter area code and phone number
4
ZD
Note: Many countries / regions include an initial “0” in the area code. This
should, in most cases, be omitted when dialling international numbers. If
you have difficulties making international calls, contact your Service
Provider.
8
+ Hold0until “+” is
Z
ZQ
to choose the required code
List:
UK
UKR
URY
Ok
Page 19

Basic Operation
Emergency Calls
To make an emergency call the antenna symbol (S) must be present.
Enter 112
ZD
or if no SIM is fitted to the phone
Z QaQ
Automatic Redial
When a call is unsuccessful you may want the phone to redial the number
again automatically.
When your connection is unsuccessful,
a timer will countdown in seconds to the next redial.
To stop redialling, pressQwhen
area orBwhenCis displayed in the secondary option area.
When a call is connected a beep will be emitted.
If a call is repeatedly unsuccessful you will not be able to automatically redial
the phone number. In this case you must redial the phone number
manually.
ZQ
Cancel
whenOkis displayed and
is displayed in the main option
Ending a Call
Press
E
Answering a Call
To receive a call the phone must be switched on and the signal strength
meter must be displayed.
any key exceptEto answer a call
Z
ZE
ZQ
Accept or Reject the call. Useeto select an option and
If a call is not answered, or is rejected, the number of incoming calls missed
will be displayed.
Z
to reject the call
during an incoming call, and you will be given the option to
ZQ
any key to clear the display
Caller Identification
This feature allows you to identify incoming calls and accept or reject them.
The caller’s phone number, and name if stored in Phonebook, will be
displayed.
Note: Caller Identification may not always be available.
9
Page 20

Basic Operation
Earpiece Volume Control
The volume level may be adjusted during a call:
Useato decrease the volume, usebto increase the volume
Note: Volume control for Personal Handsfree accessory is adjusted in the
same manner.
Locking the Phone
With the Phone Lock enabled you will be restricted
to answer incoming calls and make emergency calls
only. The Phone Lock Code is factory set to “0000”.
1 From Idle
> Security > Phone Lock
2 Select Enable
3 Enter the 4-digit code,
The phone will be locked and the lock icon (O) will
be displayed.
ZQ
Unlocking the Phone
To restore normal operation, enter your Lock Code
icon will be removed from the display. However, once you turn the phone
off and on again the Lock Code will need to be re-entered. When the
correct code has been entered
Disabling Phone Lock
The phone must be unlocked before the phone lock can be disabled.
1 From Idle
Lock
2 Select Disable
3 Enter the 4-digit code
ZQ
ZQ
, select Phone Menu
ZQ
ZQ
ZQ
ZQ
ZQ
, select Phone Menu > Security > Phone
ZQ
ZQ
.
. The lock
Using the PIN
The PIN (Personal Identification Number) protects your SIM against
unauthorized use. If you enable the PIN, every time the phone is turned on
you will be prompted to enter the PIN.
The PIN2 controls security for the Fixed Dial Store, Call Charge metering
and Barred Dial.
10
Page 21

Basic Operation
Enabling/Disabling the PIN
1 From Idle
ZQ
2 Useaselect Enable / Disable or Change PIN
3 Enter PIN (Between 4 and 8 digits)
ZQ
, select Phone Menu > Security > PIN
ZQ
ZQ
Setting Vibration Alert
When required, the phone can be set up to vibrate when a call is received.
Vibration alert enables the user to choose between Continuous,
Intermittent vibration alerts when a call is received.
From Idle
Choose the vibration setting required, Continuous, Intermittent
or Disable,
When activated, the phone will vibrate briefly.
Note: When Discreet Mode is enabled, it’s profiles will supercede those of
the Vibration alert.
ZQ
, select Personalise > Vibration Alert.
ZQ
Setting Discreet Mode
Discreet Mode will allow the user to choose between “Vibrate only”, “ring
tone only” or both.
1 From Idle
ZQ
2 Useeto select Ring Volume or Vibration
3 Useeto select the required vibration type or ring tone volume
4
ZQ
5 From Idle
Note: If the ring tone volume is increased beyond “Max” volume it will set
an escalating ring tone.
ZQ
to select the required vibration type or ring tone volume
Z
select Personalise > Discreet Mode
ZQ
+ Hold
#
11
Page 22

Basic Operation
Setting Ring and Key Volume
Changing either the ring volume/key volume is done in the same manner. If
you increase the ring volume above maximum it will set an escalating ring
tone. If you turn the ring volume off, the silent indicator icon ([) will be
displayed.
1 From Idle
2 Select Ring Volume or Key Volume
3 Useeto set the volume level
ZQ
, select Personalise > Tones
ZQ
ZQ
ZQ
12
Page 23
Phonebook
Phonebook
It is possible to store phone numbers in two locations:
In the SIM Phonebook (Q)
In the Mobile Phonebook. This means that if you change the SIM, the
numbers in the phone are not lost
The Mobile Phonebook has the advantage that you can group your
phonebook entries together.
Store a Number
To Store a Number in the SIM Phonebook
1 From Idle enter the phone number and
ZA
2 To select SIM Phonebook
3 Enter the name – see “Text Entry” page 58,
ZQ
4 Enter location number
You can choose not to enter a location number
and the entry will be placed in the next available location. Simply
when
Q
is displayed.
Any
twice
ZQ
ZQ
To Store a Number in the Mobile Phonebook
1 From Idle enter the phone number and
ZA
2 Useato select Mobile Phonebook and
ZQ
3 Enter the name - see “Text Entry” page 58,
Za
4 Confirm phone number
5 Useeto select a group - see “Grouping
Phonebook Entries” page 16 - into which to
place the entry
6 Enter location number
A location number does not have to be specified, in this case the entry will
be placed in the next available location. Simply
displayed.
ZQ
ZQ
ZQ
twice
ZQ
Location:
(1-100)
0-9
Any
Group Name:
<1>
<2>
<3>
1
Select
when
Any
Z
is
13
Page 24

Phonebook
Overwrite Protection
If a location is occupied, a prompt will be displayed to confirm that the
current information is to be overwritten.
ZQ
ZB
Note: If you amend an entry stored in your phonebook that has a Voice
Dial Command assigned to it, you will need to delete and reassign that
Voice Dial Command - see “Editing the Voice Dial Entries” page 23.
to overwrite the selected location
to choose another location number
Browsing Phonebook
You can search the Phonebook by either Name or Location. The default
setting for browsing is by name. When browsing by name pressing a
lettered key will take you to the first entry starting with that letter.
1 From Idle
2 Useeto toggle between Names or Loc. Nos. display mode
ZQ
3 Useeto select the Phonebook you wish to browse
ZQ
, select Phonebook > Browse
ZQ
ZQ
Retrieve a Number
1 From Idle
2 Useeto browse through the Phonebook
Once you have selected a phone number or name, there are a number
of actions that you can perform. To dial the selected number
.
D
Note: The Phonebook you last viewed will be the default when you next
pressA. To change the default, use the Phonebook menu to select a
particular phonebook.
Speed Dial a Number Stored in SIM Phonebook
1 From Idle Enter location number – leading zeros may be left out
2
Z#
3
ZD
ZA
Z
14
Page 25

Phonebook
Editing Phonebook Entries
It is possible to Detail, View, Recall, Edit, Delete or Create
information in the Phonebook. To access any of these functions follow the
same procedure for each one. With a phone number or name displayed:
1 Useeto cycle through Detail, View, Recall, Edit, Delete or
Create
2
ZQ
Detail
Displays each element of the selected Phonebook entry. Useeto display
the next/previous element of the entry. Each element may be edited -
Z QaQ
View
Displays an individual name and phone number in the names list.
If an e-mail address is present in the Mobile Phonebook this will be
displayed along with the name and number.
Recall
Displays the phone number, enabling you to either change it or call the
number.
Edit
Displays the entry allowing you to make changes as required.
twice to save any changes.
to select an option
, edit as required
ZQ
twice to save any changes.
ZQ
Delete
Deletes the entry from the Phonebook.
Create
Creates a new entry in the Phonebook
15
Page 26

Phonebook
Grouping Phonebook Entries
The ability to group phonebook entries together is an extra function of the
Mobile Phonebook.
Retrieving a Number from a Group
Groups are used to collect together types of Phonebook entries, for
example business and personal. Each group can be suitably titled for quick
access to the entries contained within.
An alert profile can be attributed to groups, or a phone number, thus
allowing incoming calls to be tailored to indicate the type of caller. See
“Using Alert Profiles” page 16.
1 From Idle
ZQ
2 Useeto select the group
3 Useeto select the entry required
number
ZQ
or from Idle
Retitling Group Names
1 From Idle
ZQ
2 Useeto select the group required
3 Useeto select Edit
Clear the current title and re-enter - see “Text Entry” page 58
4
ZQ
ZQ
twice to save any changes
Using Alert Profiles
Alert Profile enables you to identify callers with a particular ring tone,
display picture, making it easier to distinguish between callers or groups of
callers.
, select Phonebook > Group Setting and
ZA
ZQ
, select Phonebook > Group Setting
ZQ
twice
twice
ZQ
ZQ
twice to recall the
Creating an Alert Profile
1 From Idle
Q
2
ZQ
3 Useeto select Personal or Group
4 Recall the phone number / select group from the Phonebook – see
“Retrieve a Number” page 14
5
ZQ
16
ZQ
twice to insert a new profile
, select Phonebook > Alert Profile
ZQ
ZQ
Z
Page 27

Phonebook
6 Useeto select the ring tone that you wish to use for this profile
ZQ
7 Useeto select the picture
ZQ
Hot Key Phone Numbers
It is possible to dial phone numbers from the Phonebook or Service Dial
part of Phonebook very quickly. Some Hot Key Phone numbers may be
reserved by the Service Provider, for example the first three Hot Key
Phone numbers may be linked to Service Dial (R).
1
2
+ Hold a Digit key1-
Z
ZD
9
Setting the Hot Key Dial Source
1 From Idle
Q
2 Useeto select SIM Phonebook or Mobile Phonebook and
ZQ
ZQ
, select Phonebook > Hot Key Dial
Z
Service Dial Numbers
Your Service Provider may program some special phone numbers into your
SIM (R). It is not possible to modify the Service Dial numbers.
1
2
The phone number pointed to can only be recalled or dialled.
+ Hold
Z
Ze
A
to browse through the Service Dial list of phone numbers
Review the Phonebook
The Review function in the Phonebook menu shows how many locations
are available in the Phonebook.
1 From Idle
2 Useeto select SIM Phonebook or Mobile Phonebook
ZQ
A summary of the selected Phonebook will be displayed.
3 Useeto gain a detailed view of the Phonebook locations.
Occupied locations are shown with “w”
ZQ
, select Phonebook > Review
ZQ
17
Page 28

My Numbers
My Numbers
My Numbers is a convenient part of Phonebook where voice, fax and data
phone number(s) can be stored and viewed. (Q)
Adding Numbers
1 From Idle
Q
2 Useeuntil Create is displayed
3 Enter the name - see “Text Entry” page 58, and use
Note: If using T9®text input then movecbefore movingaotherwise an
alternative word will be selected.
4 Enter the phone number
Enter location number or select
5
ZQ
twice
Viewing Stored Numbers
1 From Idle
Q
2 If more than one number is available then useeto cycle through
the listed numbers
ZQ
, select Phonebook > My Numbers
ZQ
a
Any
twice
ZQ
ZQ
, select Phonebook > My Numbers
Z
Z
18
Page 29

Personalising Your Phone
Personalising Your Phone
Add a Start-up Greeting
A personalised greeting can be programmed for when the phone is
switched on.
1 From Idle
Greeting
2 Use the text entry facility to add a greeting
“Text Entry” page 58
ZQ
ZQ
Displaying Animations
Animations can be displayed when the phone is switched on.
1 From Idle
Animation
2 Useeto cycle through the animated themes available
3
ZQ
animation
ZQ
to select either the desired theme, or switch off the
Changing the Ring Tone
The ring tones of the phone can be changed to one of many pre-defined
sounds or to a voice ringer. (a voice recording used as a ring tone)
Each voice, fax, data and message can have a different ring tone.
Alternatively you can use the Melody Composer to generate a custom ring
tone. See “Composing a Melody" page 20.
, select Personalise > Display Setting >
ZQ
, select Personalise > Display Setting >
ZQ
twice - see
Setting up a Pre-defined Ring Tone
It is possible to choose from a selection of tones and melodies.
1 From Idle
Type
2 Useeto select the appropriate call type to be changed
3 Useeto select the desired ring tone
ZQ
ZQ
, select Personalise > Tones > Ring
ZQ
Recording a Voice Ringer
1 From Idle
Ringer
ZQ
ZQ
, select Personalise > Tones > Voice
ZQ
19
Page 30

Personalising Your Phone
2 Useeto select the appropriate voice ringer to be changed
Q
3
ZQ
stop automatically, or before ifQis selected
4 To playback the recording useeto select the appropriate voice
ringer
, start speaking into the microphone. The recording will
ZQ
, select Playback
ZQ
Z
Composing a Melody
From Idle
Composer
Using the following table as reference, enter the notes (from the choice of
low, middle and high), rests, and the durations of each, to generate your
composition.
Note: At any time during composing
melody.
When the composition is complete
Key 1st
1
2
3
4
5
6
7
8
9
0
*
#
ZQ
press
C C# low C low C# high C high C#
D D# low D low D# high D high D#
E low E high E
F F# low F low F# high F high F#
G G# low G low G# high G high G#
A A# low A low A# high A high A#
B low B
rest
1/8 1/16 1/1 1/2 1/4
1/2 1/1 1/16 1/8 1/4
, select Personalise > Tones > Melody
ZQ
to play back the current
twice to save it.
4th
press
2nd
press
ZA
ZQ
3rd
press
5th
press
6th
press
20
Page 31

Personalising Your Phone
Editing your Melody
Once the melody has been saved the following operations can be used for
re-editing purposes:
ZB
Usegto navigate the cursor around the screen
Use the relevant keys to insert new notes/rests
to delete the character to the left of the cursor
Disabling all Tones
1 From Idle
2
ZQ
indicator icon ([) will be displayed
Repeat the process to enable all tones
ZQ
to disable all tones. When Idle is resumed the silent
, select Personalise > Tones
ZQ
Download Melody
Melodies may be downloaded to the phone from the Internet, via a short
text messages service supplied by a third party. Details of this service are
available on our website.
These services are network dependent.(R)
For further information see:
http://www.panasonicmobile.com/support/ringtones
The service may not be available in all countries due to regulatory
restrictions so please check the above site for availability.
Downloaded melodies overwrite pre-defined ring tone numbers 16-20
When a message has been received containing a melody:
1
ZQ
2 Useeto select the ring tone number to overwrite
twice
The melody is now stored and can be selected as a pre-defined ring tone.
to acknowledge receipt of the melody
ZQ
Download Logo
Logos may be downloaded to the phone from the Internet, via short text
messages. (R)
For further information see:
http://www.panasonicmobile.com/support/logo
Downloaded logos overwrite 5 pre-defined logos in the logo menu.
21
Page 32

Personalising Your Phone
When a message has been received containing a logo:
1
ZQ
2 Useeto select the logo location
The logo is now stored and can be selected as an idle screen option from
the Personalise menu.
to acknowledge receipt of the logo
ZQ
twice
Setting the Backlight Time
1 From Idle
Backlight Time
2 Useeto cycle through the times available
3
ZQ
ZQ
to select the desired time
, select Personalise > Display Setting >
ZQ
Using Voice Commands
Before any of the phone’s voice activated functions can be used, it is
necessary to configure the phone so that it will recognize a particular voice
and intonation.
Voice Dial Entry Setup
This function allows the user to recall and dial numbers from the
Phonebook using voice commands.
1 From Idle
> Voice Dial
2
ZQ
3 Browse through the Phonebook to select an entry which is to be
attributed with a voice command,
Note: Each recording is short in length, so be prepared to speak soon after
initiating the recording.
4 When ready, the user should hold the phone approximately 20cm
from his/her mouth,
microphone to record the name of the selected Phonebook entry
When the recording has stopped, it will be necessary to repeat the name.
5 When prompted,
When recording is completed for a second time, the display will indicate if
the recording was successful or not. If unsuccessful, repeat from step 4.
ZQ
to add a new Voice Dial entry to the list
, select Personalise > Voice Command
ZQ
twice
ZQ
ZQ
ZQ
and speak clearly into the
and repeat the name
22
Page 33

Personalising Your Phone
Recalling Voice Dial Entries
From Idle move and hold the navigation key (g) in any one of the four
directionsa,b,cord. Speak clearly the name you wish to recall (exactly
as recorded) and wait.
The above procedure will recall the phone number and the recorded Voice
Dial entry is repeated; to initiate the call
ZD
.
Dialling Voice Dial Entries
Using Permission
From Idle
Permission
With this function enabled a recalled phone number is automatically dialled
without further intervention.
Repeat this process to disable the Permission function returning to Voice
Dial recall only.
ZQ
, select Personalise > Voice Command >
ZQ
Editing the Voice Dial Entries
It is possible to add to, play or delete any of the Voice Dial entries. With a
Voice Dial entry displayed:
ZQ
select the desired option
and useeto select Add, Play or Delete
Add
To add a new Voice Dial entry.
ZQ
to
Play
To listen to the recording of a Voice Dial entry.
Delete
To delete an entry.
23
Page 34

Personalising Your Phone
Changing the Language
It is possible to change the language that the phone uses for either display
messages and/or text entry.
1 From Idle
Q
2 Useeto select Display Language or Tegic Language (text
entry) that you wish to change
3 Useeto select the desired language
ZQ
, select Personalise > Language
ZQ
ZQ
Z
Restoring the Default Phone Settings
Any personal settings can be returned to their factory default, with the
exception of some features, such as the Phone Lock code and the
Language.
1 From Idle
2
ZQ
ZQ
to restore the default settings
, select Personalise > Defaults
ZQ
24
Page 35

Phone Security
Phone Security
The phone features a number of security functions that protect against
unauthorized use, and enable the user to restrict access to certain features see “Using the PIN” page 10. It is recommended that all security codes are
memorized. If it is necessary to make a note of any security codes, never
write them in a way that they can be recognized by another person. If
forgotten, contact the dealer for the Phone Lock Code or the Service
Provider for PIN and PIN2.
Using Key Guard
The Key Guard function is used to prevent any keys
from being accidentally pressed e.g. when the phone
is being carried.
From Idle
twice to enable Key Guard or
select Key Guard,
When a call is received Key Guard will be disabled
temporarily, allowing the user to press any key
exceptEto answer the call. Emergency calls can
still be made - see “Emergency Calls” page 9.
Note: When making emergency calls with the “Key Guard” enabled, there
will be no audible or visual indication that the number is being dialled
ZQ
, select Key Guard
Z
ZQ
twice.
ZQ
+ HoldQ,
Guard
Keypad?
Ok
Disabling Key Guard
ZQ
When Free Keypad: is displayed,
ZQ
Changing the Security Codes
1 From Idle
2 Useeto select Phone Lock, PIN or PIN2
3 Useeto select Change
4 Enter the current code
5 Enter the new code
6 Verify the new code
ZQ
, select Phone Menu > Security
ZQ
ZQ
ZQ
ZQ
ZQ
ZQ
25
Page 36

Phone Security
Restricting Calls
Call Barring
The Call Bar function is used to restrict certain outgoing and/or incoming
calls. Call Bar is controlled by a security password that is supplied by the
Service Provider. When updating or checking the status of Call Bar the
phone must be registered with a network. Different Call Bar restrictions
can be used for voice, fax and data calls. Any combination of call restrictions
can be set.
1 From Idle
Bar
2 Usee, select Bar Voice, Bar Fax or Bar Data
twice
3 Useeto select the level of call barring that needs to be applied
and
4 Enter Call Bar password and
ZQ
ZQ
ZQ
Barred Dialling
The Barred Dial function enables the user to bar all phone numbers
pre-programmed in the SIM from being dialled on the phone. To use this
function PIN2 is required.
1 From Idle
Dial
2 Enter PIN2
ZQ
ZQ
Fixed Dial
The Fixed Dial Store is part of Phonebook, but with additional security.
When the security feature Fixed Dial is enabled it is only possible to make
calls with phone numbers that are in the Fixed Dial Store.
When Fixed Dial is enabled any manually dialled phone numbers must
match a phone number in the Fixed Dial Store.
To store, edit or delete a phone number in the Fixed Dial Store the Fixed
Dial function must be enabled. With Fixed Dial enabled, all phone numbers
can be added, edited or deleted as normal, but you will be prompted for
PIN2.
, select Phone Menu > Security > Call
ZQ
ZQ
, select Phone Menu > Security > Barred
ZQ
26
Page 37

Phone Security
“Wild” Numbers
Wild numbers are spaces that can be stored in a phone number. The “wild”
numbers must be filled before the phone number is dialled. Used in
conjunction with Fixed Dial calls can be restricted, for example, to a specific
area by storing the area code of a phone and when recalled the remainder
can be added. The “wild” numbers can be anywhere within a stored phone
number.
1
2 When the phone number is recalled pressing a numeric key will fill
+ Hold0until_is displayed to enter a wild number
Z
in a “wild” number
27
Page 38

Applications
Applications
Clock
This phone incorporates a clock with date/time, an alarm and a power
on/off feature.
A second clock for dual time is also included - see “Second Clock” page 56.
Initially Setting the Home Time
1 From Idle
> Clock Function > Clock Set >
Home > Time Set
2 Useeto select whether you require
Summer Time setting on or off and
Q
3 Enter the digits for the date in the format
day/month/year
4 Enter the digits for the time using 24 hour
clock
ZQ
ZQ
Setting the Clock Format
1 From Idle
> Clock Format > Display Format
2 Useeto cycle through the different clock and/or date formats
3
ZQ
to select the desired clock display type
, select Applications
ZQ
ZQ
ZQ
, select Applications > Clock Function
Z
Time:
H:MM
0-9
ZQ
Altering the Time/Date
1 From Idle
Clock Set > Home > Time Set
2
Z
3 Enter the digits in the format day/month/year
4
ZQ
5
Z
6 Enter the digits using 24 hour clock
28
ZQ
+ HoldBto remove the current date
to accept the date
+ HoldBto remove the current time
, select Applications > Clock Function >
ZQ
ZQ
Page 39

Setting the Clock for Summer Time
1 From Idle
Clock Set > Home > Summer Time
2
ZQ
ZQ
to set Summer Time On or Off
, select Applications > Clock Function >
Applications
Setting the Alarm
If the clock hasn’t been set, the user will be
prompted to do so prior to setting the alarm.
There are four separate alarms, each of which may
be set independently.
1 From Idle
> Clock Function > Alarm Set
Q
2 Useeto select the alarm to be set
3 Enter the digits for the time
4 Useeto select the frequency of the alarm
5 Useeto select the ring type
When the alarm has been set,?will be displayed when the phone is in
Idle.
The alarm is activated in accordance with the current clock (Home or
Second).
ZQ
, select Applications
Z
ZQ
ZQ
ZQ
1. --:--
2. --:--
3. --:--
4. --:--
1
ZQ
Set
Muting the Alarm
When the set time is reached the alarm will sound and the display will flash
with an alarm message. The alarm will sound for 30 seconds. If the alarm is
due during a call, it will activate vibration alert.
To end the alarm:
any key
Z
Disabling the Alarm
1 From Idle
Alarm Set
2 Useeto select the alarm to be disabled
3 Useeto select Disabled
When disabled, following the same procedure will re-enable the alarm.
ZQ
, select Applications > Clock Function >
ZQ
ZQ
ZQ
twice
29
Page 40

Applications
Adjusting the Alarm Time
1 From Idle
Alarm Set
2 Useeto select the alarm to be adjusted
3
Z
4 Enter the digits for the time
5 Useeto select the frequency of the alarm
6 Useeto select the ring type
ZQ
+ Hold
, select Applications > Clock Function >
ZQ
to remove the current alarm time
B
ZQ
ZQ
ZQ
ZQ
Setting a Power On/Off Time
The phone can be set to turn itself on or off automatically at a specified
time using the Power On/Off feature. The procedure for setting/adjusting
the Power On/Off automatically is similar to that for setting the time on the
clock. For either setting or adjusting the time needed to select Power On
Time or Power Off Time in the Clock Function menu.
Caution: Ensure that the setting of the Alarm or Power On function will
not contravene any regulations whereby it may automatically power on
when in an aircraft or medical facility etc. - see “Important Information”
page i.
Calculator
The four function calculator will enable the user to perform simple
arithmetic calculations (addition/subtraction/multiplication and division).
1 From Idle
Q
2 Enter a number (maximum 10 digits) and it will be displayed on the
upper right of the display. If a decimal point is required,
Hold
3 Usegto select the arithmetic operation you wish to perform (
to multiply,cto add,ato divide,dto subtract)
4 Enter a number (maximum 10 digits) and it will be displayed next to
the operation symbol
Ifgis used to select another arithmetical operation to perform, an
intermediate calculation will be performed and the result displayed on the
top line.
5
ZQ
centre of the operation field
ZQ
1
to complete the calculation when = is displayed in the
, select Applications > Calculator
Z
Z
+
b
30
Page 41

Applications
Currency Convertor
The currency convertor enables the user to convert from/to a home
currency using a conversion rate that you enter.
From Idle
ZQ
Entering an Initial Conversion Rate
1
ZQ
2 Enter an abbreviation for the home currency (up to 3 characters)
ZQ
3 Enter an abbreviation for the foreign currency (up to 3 characters)
ZQ
4 Enter the currency conversion rate
Converting a Value
1 Check the conversion rate is the one you require
2 Enter the value to be converted
The conversion rate will be retained in the phone once entered. The next
time the convertor is used, the conversion rate / currency abbreviation can
be edited while in the Currency /rate display.
select
Edit
ZQ
Swapping the Currency Conversion
When you have accepted the conversion rate and are ready to enter the
value to be converted, you can swap the currencies to convert from the
foreign currency into the home currency.
1
ZQ
2 Enter the value for conversion
, useeto select
, select Applications > Currency
twice
twice
ZQ
ZQ
.
Swap
ZQ
ZQ
twice
ZQ
twice
ZQ
twice
ZQ
, then useeto
twice
31
Page 42

Text Messages
Text Messages
It is possible to receive, display, edit and/or send text messages of up to 459
characters, (Dependant on the language being used) to mobile phones on
the same network or any network that has a roaming agreement. Messages
will be sent as one message, but will be received as (up to) three messages.
(Dependant on the recipients phone parameters).
Setting the Phone for Short Text Messages
Before a message can be sent, it is necessary to enter the Message Centre
number into Parameters (the Service Provider will supply the Message
Centre number).
The Message Centre number may have been preprogrammed on the SIM.
Setting the Message Centre Number
From Idle
Message Centre
Enter message centre number in international dial format – see
“International Dialling” page 8 .
ZQ
, select Messages > Parameters >
ZQ
Creating a Text Message
1 From Idle
Create
Create a text message (up to 459 characters) see “Text Entry” page 58
The Character menu is not available in “Numeric
mode” and may only be accessed by
access the character menu in other text modes
ZB
2 Usegto navigate through the message and add or delete text
3
ZQ
The user may be prompted to send the message, if the message is not to
be sent
Z
4
ZQ
number from the Phonebook) - see “Retrieve a Number” page 14
ZQ
32
ZQ
ZQ
to exit the character menu
twice
, the message will be stored.
C
and enter the destination phone number (or recall a
twice
, select Messages >
ZQe
Hello
when using T9. To
+ Hold1-
Z
Menu
0
Page 43

Text Messages
5 The user may be asked if delivery confirmation is required. If not
required useeto select No
ZQ
The default setting for delivery confirmation can be enabled/disabled using
the Report parameter in the Parameters menu.
ZQ
. If yes, useeto select Yes
User Messages
When creating a text message, it is possible to use short messages stored in
the phone.
1 From Idle
2
ZQ
3 Useeto select a saved message
The text message can now be sent. See "Creating a Text Message" page 32.
ZQ
, usee, select User Msg.
, select Messages > Create
ZQ
ZQ
ZQ
Receiving Text Messages
When a Short Text Message is sent to the phone the message indicator
(N) will flash in the display, with an audible tone or vibration. This indicates
that a new message has been received.
When Read is displayed
navigate through the message and to identify the sender and the time
the message was sent.
Note: If the message indicator is displayed constantly (does not flash) this
indicates that the message area is full and you will need to delete old
messages in order to be able to receive new messages in the future.
ZQ
to read the message. Usegto
Message Options
Reply to a Message
When a message is received and read the option to reply to the sender may
be selected.
ZQ
Delete a Message
To enable the auto-deletion of messages - see “Parameters” page 36.
twice. This will allow the user to create a reply message
1
ZQ
2 Useeto select Delete
ZQ
to delete the message
33
Page 44

Text Messages
Edit a Message
1
ZQ
2 Useeto select Edit
ZQ
“Creating a Text Message” page 32.
the message and it will be stored in the Send List.
, this will give the option to send the edited message - see
ZQ
to edit the message
ZB
if it is not necessary to send
Cut / Copy & Paste Message Text
This function allows the user to cut or copy message text from a user
defined message or a user created message, into a new or existing message.
It can also be used to paste text to a previously sent message - See “Edit a
Message” page 34.
1 When message text is displayed,
ZQ
2 Usegto position the cursor at the beginning of the text to be cut
or copied
3 Usegto highlight the required text
The cut or copied text will remain in the phone memory until other text is
cut or copied.
4 Select the required text screen for cut or copied text to be pasted
into
5 Select Paste
To cut or copy text from a received message, select Forw’d and repeat
steps1-3.
ZQ
ZQ
ZQ
ZQ
, select Cut or Copy
ZQ
Manage Messages Lists
All messages, whether sent or received, will be stored on the SIM until they
are deleted. Selecting a stored message allows it to be replied to, edited or
deleted.
Receive List
Messages received will be stored in the Receive List. ANin the receive
list, indicates an unread message.
When reading a message the sender’s information is displayed below the
text. Presseto show the sender’s ID (if available), the time the message
was sent and the message centre number.
to reply to the message.
34
ZQ
twice allows the user
Page 45

Text Messages
Send List
When a message has been sent or edited it will be stored in the Send List.
Create
This allows the user to create a new message or reply to a received
message.
Review
Review allows you to check usage of the message area.
Chat SMS
Chat, will enable the user to read sent and received messages on one
screen when in Chat SMS mode with another party.
1 When reading a previously sent or received message,
2 Enter the destination phone number,
3 Enter your Nick name (up to 18 characters) - see "Text Entry" page
It is now possible to Chat with the other party, providing they have the chat
SMS facility on their phone. Enter you message - see "Text Entry" page 58.
When receiving a message in chat mode, the text will appear automatically
above your previous message.
4
If the phone is not in chat mode when receiving a reply to a chat message, it
will be received as a normal sms. If a voice call is received when in chat
mode, the phone will allow the user to accept the incoming call and return
to chat mode at the end of the call.
5 To exit chat mode
The last sent message will be stored in the Send List.
The last received message will be stored in the received List.
All other messages from the latest chat, will automatically be deleted from
the phone.
It is also possible to initiate chat mode from the Messages menu.
to select chat
Q
58
ZQQ
ZQ
ZQQ
, selectOKto continue the chat
ZQeQ
ZQe
35
Page 46

Text Messages
Parameters
From Idle
The following parameters can be set:
ZQ
Recipient Group
There are 5 different recipient groups, allowing you to store up to ten
destinations in each.
Recipient Group enables the user to pre-define the destination of text
messages.
Setting Recipient Group
1 From Idle
Recipient Group
To enter a new name,
the recipient. See "Text Entry" page 58,
2
ZQ
from the phone book,
add the name to the group,
3 Useeto chose an existing entry in the group,
the group required
Auto Delete
When set will erase messages automatically:
Received Read - will overwrite the oldest read message.
Received Any - will overwrite the oldest message, even though it may
not have been read.
, select Messages > Parameters
ZQ
, select Messages >Parameters >
select
ZQ
twice select
ZQ
Rename
ZQ
, useeto select the required name
Entry
select
Ok
Z
Menu>Recall>Ok
ZQ
and enter the name of
Save
ZQ
to select
to
Lifetime
This is the duration that your message is stored at the Message Centre.
Delivery attempts will be repeated until the message has been delivered or
the Lifetime expires.
Message Centre
Allows the Message Centre phone number to be edited - see “Setting the
Phone for Short Text Messages” page 32.
Report
When your message has been delivered a confirmation will be received if
Report is set to Yes.
36
Page 47

Text Messages
Protocol
The Message Centre may be able to convert the message to the format
specified by the selected protocol.
Broadcast
You need to specify the topic(s) of information that you wish to receive as
broadcasts before you can receive them.
1 From Idle
Topics
2
ZQ
3 Useeto cycle through the available topics
4
ZQ
list
ZQ
ZQ
twice to insert a new topic
to insert the currently displayed topic into your broadcast
, select Messages > Broadcasts >
Enabling/Disabling Broadcasts
1 From Idle
Q
2 Select Receive
When enabled, following the same procedure will disable broadcasts.
ZQ
, select Messages > Broadcasts
ZQ
Z
Message List
This is a store for the last received broadcast messages. Messages can be
deleted from here.
Language
The language in which broadcast messages are displayed can be changed
(R).
37
Page 48

Call Information
Call Information
Recent Numbers
Recently dialled phone numbers will be stored in Last Dialled.
If Caller Identification is available the caller’s phone number, for an
answered call will be stored in the Answered menu and an unanswered
call will be stored in the Unanswered menu.
If Caller Identification is not available then calls will still be stored but will
have the date and time attributed to them.
When the store is full the next phone number will overwrite the oldest.
1 From Idle
2 Useeto select Last Dialled, Answered or Unanswered
ZQ
3 Useeto select the phone number (or name) you wish to redial
ZD
You can edit or delete the phone number before dialling – see “Editing
Phonebook Entries” page 15.
If you wish to store the selected number in Phonebook,
the number is displayed – see “Store a Number” page 13.
Calling the Last Dialled Number
To redial your last called phone number
Returning an Unanswered Call
When the display shows that you have received calls but not answered
them.
1
ZQ
The last caller’s phone number will be displayed if it is available.
2 Useeto select the phone number you wish to dial
3
ZD
ZD
ZD
ZA
twice.
while
38
Page 49

Call Information
Call Duration
1 From Idle
Calls
Note: The Calls function is SIM dependent (Q). If the SIM does not
support this function then items under Calls menu will be found directly
under Call Service menu.
2 Useeto select one of the functions described below, and
Q
The Last Call function will display the duration and call charge if available, of
the last call. Times are indicated as: hours (0-99), minutes (0-59), seconds
(0-59) - HH:MM:SS.
The All Calls function displays the accumulated duration and call charge, if
available, of Incoming and Outgoing calls. The lock code or PIN2 is required
to reset the timer and call charge.
ZQ
ZQ
GPRS Call Duration
1 From Idle
Connections
Note: The Connections function is SIM dependent (Q).
2 Useeto select one of the functions described below, and
Q
The Last Connection function will display the duration and amount of data
transfer of the last call. Times are indicated as: hours (0-99), minutes (0-59),
seconds (0-59) - HH:MM:SS.
The All Connections function displays the accumulated duration and
amount of data transfer. The lock code or PIN2 is required to reset the
timer.
The Call Priority function is used to determine whether or not an incoming
voice call should interrupt a data call.
ZQ
, select Phone Menu > Call Service >
Z
, select Phone Menu > Call Service >
ZQ
Z
39
Page 50

Call Information
Call Charges
To maintain control over the cost of calls that are made, the phone can be
set to restrict use to a finite number of units overall. (Q)
Setting the Unit Price
Firstly, a price per unit must be entered. This is the cost that the Service
Provider charges for one unit of call time. (Q)
1 From Idle
Service Charges > Price/Unit
2
ZQ
At this point you will be asked to enter your PIN2 or Lock code
3 Enter a currency unit (up to three characters) e.g. GBP
twice
4 Enter a price
ZQ
to edit the values
, select Phone Menu > Call Service >
ZQ
ZQ
twice
ZQ
ZQ
Setting the Maximum Unit Level
This function allows the user to pre - determine the maximum cost of calls
made. (Q)
1 From Idle
Service Charges > Max Cost
2
ZQ
At this point you will be asked to enter your PIN2 or lock code
3 Enter a value (number of units) which is to be the maximum
permitted, and the corresponding cost will be displayed
4
ZQ
Note: The duration of one unit may vary during the day, peak and off-peak
times. Therefore, the call charge can be calculated accordingly. However,
call charge information may not give an accurate reflection of the tariffs
charged by your Service Provider.
ZQ
twice to edit the values
twice to accept
, select Phone Menu > Call Service >
ZQ
ZQ
.
.
Setting a Warning Level
A warning can be set as an indication that the maximum cost is about to be
reached. This function is SIM dependent.
1 From Idle
Service Charges > Warning at
2
ZQ
40
ZQ
twice to edit the value
, select Phone Menu > Call Service >
ZQ
Page 51

Call Information
3 Enter a value (in units) at which time you would like the warning to
sound
ZQ
twice
Call Identification
In the Call Service menu, the Caller’s ID and Withhold ID functions allow
you to check the status of whether a Caller’s Identification is sent or can be
received. (Withhold IDR)
Note: When checking the status the phone must be registered with a
network.
41
Page 52

Advanced Operation
Advanced Operation
Diverting Calls
Voice, fax and data calls can be diverted using different circumstances and
to different numbers. For example you may wish voice calls to be diverted
to Voicemail in the event that the phone is switched off.
1 From Idle
Q
2 Useeto select the type of calls to divert,
3 Useeto select the circumstances to initiate the divert
4 Enter phone number to divert to
When a divert situation is enabled the divert icon (t) is displayed.
When updating or checking the status of Call Divert the phone must be
registered with a network. (Q)
ZQ
Holding Calls and Call Waiting
Holding a Call
During a call:
1
ZQ
2 Useeto select Hold
Resuming a Call
1
ZQ
2 Useeto select Resume
select Phone Menu > Call Divert
ZQ
ZQ
ZQ
ZQ
twice
ZQ
twice
Z
Making a Second Call
1 Enter phone number (or recall from Phonebook – see “Retrieve a
Number” page 14)
2
ZD
The first call will be placed on hold.
42
Page 53

Advanced Operation
Receiving a Second Call
A second call can be received, if Call Waiting is switched on. This is enabled
from the Phone Menu > Call Service menu. It is not possible to have
more than one fax or data call. All voice calls must be ended before you can
make or receive a fax or data call. (Q)
Accept a Second Call
1
ZQ
2
Useeto select
The current call will be placed on hold.
Accept
ZQ
Reject a Second Call
1
ZQ
2
Useeto select
Reject
ZQ
End Current Call and Receive Second Call
1
2
ZE
Z
with a waiting call
any key exceptEor
g
Operation During Two Calls
Swapping Between Calls
The
1
2
End Current Call
1
2
The held call will remain held.
prompt in the display screen, indicates the current call
!
ZQ
Useeselect
ZQ
Useeto select
Swap
End
ZQ
ZQ
End Both Calls
ZE
43
Page 54

Advanced Operation
Call Transfer
With two calls connected, Call Transfer enables the user to connect them
together ending your connection, leaving the other parties to talk together.
(Q)
When two calls are in use:
1
ZQ
2
Useeto select
The two calls will be connected to each other and your call will be ended.
Note: Two call transfer cannot be utilized while in Multi-party mode.
Trans.
ZQ
Multi-party Calls
A Multi-party call enables three to five people to be in conversation at the
same time. It is possible to swap between a Multi-party call and another call
in the same way as with two separate calls. (Q)
Enabling Multi-party
With two calls connected (one active, one on hold):
1
ZQ
2
Useeto select
A Multi-party call has been enabled, all three people will be able to talk to
each other.
Adding to Multi-party
It is possible to add to the Multi-party call (up to a maximum of five). Either
by making a call or accepting an incoming call. The call can then be merged
into the Multi-party.
Note: When making a call or accepting an incoming call the Multi-party call
will be placed on hold. The callers in the Multi-party call can continue to
communicate with each other while on hold.
Merge
ZQ
Splitting a Multi-party
The user can select an individual from the Multi-party and remove their
connection. This enables you to talk privately without the participation of
the rest of the Multi-party.
44
Page 55

Advanced Operation
During a Multi-party call:
1
ZQ
2
Useeto select
3 Useeto select a caller in the Multi-party
4
ZQ
5
Useeto select
The selected caller will be split from the Multi-party call and the Multi-party
call will be placed on hold (the remaining Multi-party call callers can still
communicate).
Option
Split
ZQ
ZQ
Ending Multi-party Calls
The user can either select an individual in the Multi-party and end the call or
end the entire Multi-party call. If a call is held, or an other call is incoming
then an individual call cannot be ended.
Ending a Single Connection
During a Multi-party call
1
ZQ
2
Useeto select
3 Useeto select a caller in the Multi-party
4
ZQ
5
Useeto select
Option
End
ZQ
ZQ
Ending all Connections
During a Multi-party call:
ZE
to end all the calls at once
45
Page 56

Advanced Operation
Changing to a New Network
When not in your home Country / Region, the user may use a network that
is not directly subscribed to, this is called ROAMING. National Law may not
permit roaming in your home region.
The New Network function is used to manually select a network that is
available in your current location.
1 From Idle
Network
2 Useeto select one from the list of available networks
An X will be displayed in the information area if you cannot register with
the selected network.
When the Search Mode is set to Automatic the phone will automatically
reselect a new network in order to maintain optimum network availability.
With the Search Mode set to Manual the phone will only use a selected
network. If coverage is lost another network should be selected.
The Network List is used when the Search Mode has been set to
Automatic. The location numbers in the Preferred Network List show the
search priority.
Selecting Insert stores a new network in the currently displayed location
and then moves other networks down, Edit overwrites the old network
with a new one, and Add stores a new network at the end of the list.
ZQ
ZQ
, select Phone Menu > Network > New
ZQ
46
Page 57

Schedule
Schedule
The Scheduler can be used to register reminders for personal events as well
as planning holiday periods.
Caution: Ensure that any settings made in the Scheduler will not
contravene any regulations whereby the phone may automatically power
on when in an aircraft or medical facility etc. - see “Important Information”
page i.
Creating a Reminder
From Idle
When selecting Daily, Weekly or Yearly you will be given the option of
using the “Repeat Count”, which allows you to set the frequency of the
alarm.
To indicate that a reminder has been set, the date will appear as a white
number on a dark background.
ZQ
1 Use the Navigation key (g) to select the date for your reminder
2
ZQ
highlighted,
3 Enter the digits for the time using 24 hour clock
4 Useeto select the frequency of the reminder
5 Enter the memo for the reminder – see “Text Entry” page 58,
ZQ
6 Useeto select a ring type for the reminder
, select Schedule
twice to create a new entry when the required date is
ZQ
twice
twice
ZQ
ZQ
ZQ
ZQ
twice
Viewing Reminders
When in the Schedule menu, select the required date using the
Navigation key (g)
ZA
to view reminders for that date
Deleting Reminders
1 From Idle
2 Usegto select the required date of the reminder
3 Useeto select the reminder to be deleted
4 Useeto select Delete
ZQ
, select Schedule
ZQ
twice
ZQ
ZA
ZQ
47
Page 58

Schedule
Setting a Holiday Reminder
1 From Idle
2 Use the Navigation key (g) to select the day of your holiday
Q
3 Useeto select Function
4 Useeto select Holiday Set
5 Useeto select Day, Day of the week
update the Holiday List
Repeat process for each day of holiday as required.
Note: To indicate that a holiday reminder has been set, the date/s will be
emboldened
ZQ
, select Schedule
ZQ
ZQ
ZQ
ZQ
three times to
Deleting Holiday Reminders
To delete holiday reminders:
1 From Idle
2 Use the Navigation key (g) to select the day of your holiday to be
deleted
3 Useeto select Function
4 Useeto select Holiday Set
5 Useeto select Holiday List,
ZQ
Clear
ZQ
ZQ
twice or to delete all holiday Reminders usee, select All
ZQ
, select Schedule
ZQ
twice
ZQ
ZQ
ZQ
to select date for deletion
Jump to Future Date
1 From Idle
2
ZQ
3 Useeto select Jump
4
Z
5 Using0-
which you want to ‘jump’ to
ZQ
+ HoldBto remove the current date
, select Schedule
ZQ
enter the date (using chosen date format) to
9
ZQ
ZQ
twice
Z
48
Page 59

Games
Games
Racing Game
The object of the game is to control a racing car around a circuit avoiding
other cars in the fastest time possible & avoiding obstacles on the track i.e.
Oil spillages.
Each time a new game is started, the player is credited with three “lives”.
Play the Game
1 From Idle
twice
2 Useeto select a skill level
Approximately three seconds after entering the game screen, the timer will
begin.
3 Useeto change the gears enabling the car to accelerate and slow
down/stop. (bto accelerate orato slow down or stop)
There is a gear change indicator on the right hand side of the display,
showing current gear position.
4 Usefto change lateral direction of the car during the race
ZQ
Ball Game
The object of the game is to control a character between elevating
platforms and achieve a high score without allowing the character to fall to
the bottom of the screen or to get hit by a fireball.
A life will also be lost if the character is allowed to the top of the screen.
Play the Game
1 From Idle
2 Useeselect GAME START
3 Usefselect difficulty level
After a short demonstration, the game will begin.
4 Usefto control the character between the platforms
The current score is displayed on the right hand side of the screen.
ZQ
select Games > Racing Game
ZQ
select Games > Ball Game
to enter the game screen
ZQ
ZQ
ZQ
ZQ
,
49
Page 60

WAP Browser
WAP Browser
The phone’s WAP (Wireless Application Protocol) Browser enables the
user to access Internet services supported by the network, such as news,
weather reports, sport etc.
Browser Settings
Before Internet services can be accessed, the SIM must be data enabled and
the relevant configuration information, entered into the phone.
These settings may have been pre-programmed by the network operator.
Note: Modifying previously entered settings can cause failure of the
Browser.
1 From Idle
ZQ
2 Two servers may be setup on the phone. Useeto select one or
other of the server settings
3 Useeto select Edit
A list of configuration parameters will be displayed. The parameter Name
will be highlighted and
4
ZQ
5 Enter the name of the WAP server
6 Useeto select each of the other parameters in turn, edit the
information
7 After all parameters have been entered,
the previous menu level
8 Select the server setting that you have just edited
to select Set
ZQ
, select Browser > Browser Setting
ZQ
ZQ
will be displayed.
Edit
ZQ
ZQ
twice
ZB
ZQ
twice
ZQ
to return to
. Use
e
Record your WAP settings in the table at the rear of this booklet for
easy reference.
50
Page 61

WAP Browser
Activating the Browser
To activate the Browser:
From Idle
The first time that the browser is activated there will be no content stored
so the Home URL content will be displayed (as defined by the network
operator). The Home URL will be recalled from the cash, each time the
browser is activated. (Cache is the phone’s memory that stores content
downloaded in the past). When recalling content from cache the phone
remains off-line (not connected to a WAP server).
ZQ
, select Browser > Start Browser
ZQ
Navigating Content
Use the Navigation key (g) to scroll through the content on the screen as
follows:
Useeto scroll up/down on the current page
Usedto return to the previous page
Usecto return to the next page (only applicable if returned to
previous page)
When linked text (underlined text) is highlighted
represented by the link.
indicates a table - with View displayed
(
of table
Indicates an image which cannot be displayed
)
Indicates on-line browsing (Non Secure)
~
Indicates on-line browsing (Secure)
'
ZQ
ZQ
to load the page
to view contents
The Browser Menu
The Browser also contains its own menu which is applicable when content
is currently being displayed (either on-line or off-line).
To access the Browser menu
bottom left of the display.
This menu is used as follows:
ZA
Home Deck
Displays the Home URL content as defined by the network operator.
when
is displayed at the
Menu
51
Page 62

WAP Browser
Bookmark
Use, add, delete and rename bookmarks.
Enter URL
Type in a URL directly to go to a known site .
Reload
Will reload and update the current page.
Reset
Deletes the content in cache and displays the Home URL content.
Exit
Deactivates the Browser.
Using Bookmarks
Frequently accessed pages may be bookmarked to save time. This prevents
the need to re-enter the URL each time.
Adding a Bookmark
1 While viewing content
2 Useeto select Bookmark
3
ZQ
twice to register the bookmark
Recalling Pages Using Bookmarks
1 With content displayed
2 Useeto select Bookmark
3 Useeto select the relevant bookmark from the list,
Renaming a Bookmark
1 With content displayed
2 Useeto select Bookmark
3 Useeto select the relevant bookmark from the list,
4
ZQ
5
+ HoldBto remove the bookmark name, then re-type
Z
the name required
ZA
ZA
ZA
ZQ
ZQ
ZQ
ZQ
ZA
twice
52
Page 63

WAP Browser
Deleting Bookmarks
1 With content displayed
2 Useeto select Bookmark
3 Useeto select the relevant bookmark from the list,
4 Useeto select Delete
ZA
ZQ
ZQ
twice
ZA
Deactivating the Browser
The Browser can be deactivated as follows:
When browsing on-line
When browsing off-line
ZE
ZE
to review cache off line.
to return to Idle mode.
Setting the Linger Time
The phone will be automatically disconnected from the WAP server after a
set period of non-interaction. This period is defined in seconds by the
Linger Time setting.
1 From Idle
ZQ
2 Useeselect one of the server settings
3
Useeselect
4 Useeselect Bearer Type
5 Useeselect Circuit Switch
6
Useeselect
7 Useeselect Linger Time
8
Z
re-enter the value required
Note: This function is not required when using GPRS
Z
+ HoldBto remove the current linger time, then
, select Browser > Browser Setting
Q
ZQ
Edit
ZQ
ZQ
ZQ
Edit
ZQ
ZQ
ZQ
twice
Last Error
If an error should occur when using the Browser, use this function to
inform the network operator of the last error which occurred with the
phone, to assist with a diagnosis of the problem.
From Idle
ZQ
, select Browser > Last Error
ZQ
53
Page 64

Additional Features
Additional Features
Desktop Handsfree
Desktop Handsfree enables you to hold a conversation without having to
hold the phone to your ear.
Note: Do NOT hold the phone to your ear in Handsfree mode.
Swapping Between Handsfree and Handheld Calls
During a Handheld call:
1
ZQ
2 Useeto select H’free
During a Handsfree call:
ZQ
Answering a Call Handsfree:
To answer a call using Handsfree
twice to revert for Handheld operation
Voice Memo
You can record a two-way conversation during a call. If a different SIM is
installed any voice memos will be lost.
Caution: Security of a recorded message is your responsibility. You MUST
ask for the other party’s consent before recording.
Record a Voice Memo
ZQ
Useeto select Memo
A tone will sound when recording starts. When the recording stops a tone
will sound.
If you
ZQ
tone will sound to either party.
while recording a voice memo, recording will stop but no
ZQ
ZQ
Z
+ Hold
D
54
Page 65

Additional Features
Play Back a Voice Memo
From Idle
> Playback
To stop playing,
The Note Pad function is available during playback - see “Note Pad” page
56.
ZQ
, select Applications > Voice Memo Play
ZQ
ZQ
twice
Volume Control During Playback
While playing back:
Useeto adjust the volume of the voice memo
Delete Memo
From Idle
> Delete
ZQ
ZQ
, select Applications > Voice Memo Play
twice
DTMF Tones
DTMF tones can be sent during conversation. These are often used to
access voice mail, paging and computerized home banking. For example,
you may need to input a number to remotely access voice mail messages. A
phone number may be stored in the Phonebook with DTMF tones, allowing
the number to be dialled upon recall and the DTMF number to be sent
automatically.
Send DTMF Tones During a Call
Enter digits (0to9,#and*)
Pause Dial
Using pauses allows you to send DTMF tones automatically.
1 Enter phone number
2 Press and hold0until a P is displayed at the end of the phone
number entered
3 Enter DTMF digits after the pause, e.g. enter the number to access
voice mail messages.
4
ZD
When the call is successful DTMF tones will be sent after 3 seconds or
ZD
If the DTMF tones are unsuccessful then the destination of your call may
require that the length of the tones be increased.
to send the DTMF tones manually.
55
Page 66

Additional Features
5 From Idle
ZQ
6 Useeto select Long
ZQ
, select Personalise > DTMF Length
ZQ
Note Pad
During a call numbers can be entered which you may wish to dial when the
call has ended.
During a call:
1 Enter phone number
2 When the call has ended
To store in Phonebook,
“Store a Number” page 13.
Z
ZD
A
to call that number
while the number is displayed – see
Second Clock
The Second Clock can either be set to auto-adjusting, whereby the second
time will be automatically set from the code of the current network, or a
specified time difference can be set manually.
Setting Clock Display
1 From Idle
> Clock Format > Display Pattern
2 Useeto select Second Time or Home Time
ZQ
Setting Auto Adjustment
If travelling to a country / region which has a roaming agreement with the
users’ home network, the Second Clock will be automatically adjusted.
However, for countries / regions which have several time zones in the same
area manual adjustment is required.
1 From Idle
> Clock Set > Second > Auto Adjustment>Home area
ZQ
2 Useeto select your home area
ZQ
, select Applications > Clock Function
ZQ
ZQ
, select Applications > Clock Function
ZQ
56
Page 67

Additional Features
Enabling Auto Adjustment
From Idle
Clock Set > Second > Auto Adjustment > Auto
Adjustment
Repeat to disable Auto Adjustment.
ZQ
, select Applications > Clock Function >
ZQ
Setting Manual Adjustment
1 From Idle
> Clock Set > Second > Time Difference
2 Useeto select the time difference required
value
ZQ
, select Applications > Clock Function
ZQ
ZQ
to set the
Setting Summer Time
From Idle
Clock Set > Second > Summer Time
Once enabled, following the same procedure will disable Summer Time.
ZQ
, select Applications > Clock Function >
ZQ
Accessory Related Features
When Auto Answer is switched on, and Personal Handsfree is connected, a
call will be answered without pressing any keys. Any call waiting should be
answered in the normal way.
This is also applicable to the Handsfree Car Kit accessory.
See the documentation provided with the relevant Accessory for
operation details.
57
Page 68

Text Entry
Text Entry
The phone provides a means for entering alphanumeric characters to enter
details into the Phonebook, to create text and e-mail messages etc. This
section details the characters that can be entered and the relevant keys to
press.
Text Mode
Key T9
0
1
2
3
4
5
6
7
8
9
*
#
®
Alternatives +_ +_ +_ 0+P
Punctuation
abc ABCabc ABÃ AÄÅÆBCÇaäåæàbc 2
def DEFdef ÄÅÆ DEÉFdeéèf 3
ghi GHIghi ÇÈÉ GHIghiì 4
jkl JKLjkl ÊËÌ JKLjkl 5
mno MNOmno ÍÎÏ MNÑOÖØmnñoöøò 6
pqrs PQRSpqrs ÐÑÓ PQRSpqrsß 7
tuv TUVtuv ÔÕÖ TUÜVtuüùv 8
wxyz WXYZwxyz ×ØÙ WXYZwxyz 9
Shift/Lock
Space Space Space Space
Normal
(ABC)
.@/:;*#+-”,!¡?¿_()[]{}’&%\^~|<>=_£$¥¤§ 1
*
Shift/Lock
Greek
(ÁÂÃ)
*
Extended
(AÄÅ)
Shift/Lock
*
Numeric
(0-9)
_
@
#
*
Z*
will be lower case).
function and subsequent characters will be uppercase.
time, to return to lowercase character entry.
Alternatively,
menu, which allows the user to navigate around the menu (g) until the
required character is highlighted.
Z
once to enter a single capital letter (subsequent characters
Z*
twice acts as a keyboard CAPS LOCK
Z*
+ Hold any of the numeric keys to enter the character
Z
ZQ
to return to the message screen.
C
to select.
a third
58
Page 69

Text Entry
T9®Text Input
Using this mode of text entry dramatically reduces the number of key
presses required:
Press a key once for any letter you require on that key. The desired letter
may not be displayed. Continue pressing other keys until the end of a word
is reached; then check that the word has been typed correctly before
continuing on to the next word.
If the combination of letters typed has produced a word which is not the
one you require, press0repeatedly until the correct word is displayed.
Continue to the next word.
If the word you require is not in the internal dictionary (i.e. It is a proper
noun or a rarely used word) then it should be entered using the Normal
(U) mode.
Other Text Modes
To access any of the other text entry modes useAto cycle through until
the desired mode is displayed in the Information Area.
When using Normal (U), Greek (V) or Extended (W) text entry
modes, each time a key is pressed in quick succession it will display the next
character available on that key. Releasing the key, or pressing another key
will enter the currently displayed character and the cursor will move to the
next position.
Editing Text
Pressingewill move you up or down one text line (or field in Phonebook).
Pressingfwill move you left or right one character. When the cursor is
moved over a character and another key pressed this will insert the new
character immediately before the selected character. PressingBwill
delete the character to the left of the cursor or delete the current line
when pressed and held.
T9®is a trademark of Tegic Communications Inc.T9®Text Input is licensed under one
or more of the following: U.S. Pat. Nos. 5,818,437, 5,953,541, 5,187,480, 5,945,928,
and 6,011,554; Canadian Pat. No. 1,331,057; United Kingdom Pat. No. 2238414B;
Hong Kong Standard Pat. No.HK0940329; Republic of Singapore Pat. No. 51383;
Euro.Pat. No. 0 842 463 (96927260.8) DE/DK, FI, FR, IT, NL, PT.ES, SE, GB; and
additional patents are pending worldwide.
59
Page 70

Menu Structure
Menu Structure
From Idle
feature, usegto navigate to the icon of the feature you require.
ZQ
ZQ
when the icon is highlighted.
To exit the current menu and return to the previous level
exit completely out of the menu structure,
(except during a call).
to display a menu of phone features. To select a
ZB
+HoldB,or
Z
During a call a restricted menu will be available.
1
Personalise
Language
Tones
All Tones
Ring Volume
Ring Type
Melody Composer
Voice Ringer
Key Volume
Key Tone Type
Warning Tone
Voice Command
Voice Dial
Permission
Display Setting
Idle Screen
Greeting
Animation
Contrast
Backlight Time
Vibration Alert
Continuous
Intermittent
Disable
Discreet Mode
Ring Volume
Vibration
Continuous
Intermittent
Disable
User Msg.
Auto Answer
DTMF Length
Defaults
2 Games
Racing Game
Ball Game
1
Function is Network Dependent (R)
2
Function is SIM Dependent (M)
* Will move up a level if the SIM does not support Calls function
3 Phonebook
Browse
Create
Alert Profile
Group Setting
Review
My Numbers
Hot Key Dial
4 Key Guard
5 Browser
Start Browser
Browser Setting
Last Error
6 Messages
Receive List
Send List
Create
Chat SMS
Review
Parameters
Broadcasts
7 Phone Menu
Call Service
Calls
*Last Call
*All calls
*Call Waiting
*Caller's ID
*Withhold ID
*My number
*Service Charges
Connections
Last Connections
All Connections
Call Priority
Call Divert
Voice Calls
Fax Calls
2
2
1
Data Calls
Cancel All
Status
Security
Phone Lock
Call Bar
2
PIN
2
PIN2
Fixed Dial
Barred Dial
Network
New Network
Search Mode
Network List
8 Applications
Games
Voice Memo Play
Download Data
Melody
Logo
Clock Function
Clock Set
Clock Format
Alarm Set
Power On Time
Power Off Time
Calculator
Currency
9 Schedule
1
E
2
.To
2
1
60
Page 71

Trouble Shooting
Should any problem persist contact your dealer.
Problem Cause Remedy
Phone will not
switch on
Extremely short
battery life for a
new battery
Short battery life
for an old battery
The charging
indicator does
not light, the
battery level
indicator does
not appear and
the phone cannot
be switched on
when charging
Battery fails to
charge
The network you are
using and the
condition of the
battery can affect
battery life
The battery has worn
out
The battery is not
attached to the phone
or when the battery
has been deeply
discharged the phone
will take a short time
until the indicator
lights
The battery is not
attached to the phone
Battery has been
connected to the
phone after the
Travel Charger has
been switched on
Check that the battery is fully
charged and correctly
connected to the phone
Replace with a new fully
Leave the phone charging the
battery for a few minutes
before the indicator is lit and
attempting to switch it on
Ensure the battery is fitted to
commencing charging.
Trouble Shooting
charged battery
the phone prior to
61
Page 72

Trouble Shooting
Calls cannot be
made
Calls cannot be
made from Fixed
Dial Store
Calls cannot be
received
Emergency calls
cannot be made
Phone numbers
cannot be
recalled from
Phonebook
The phone is
locked
Outgoing calls are
barred
The phone is not
registered to a
network
The phone is not
switched on
Incoming calls are
barred
The phone is not
registered to a
network
You are not in a
GSM coverage
area
The phone is
locked
Phone number has
been restricted
Unlock the phone
Disable the outgoing call barring,
or barred dial
Move to a coverage area and
operate your phone after it has
registered with a network.
Check your SIM supports Fixed
Dial
Check if the Fixed Dial is
switched on
Check the phone number is
stored in the Fixed Dial
Switch the phone on
Disable the incoming call barring
Move to a coverage area and
operate your phone after it has
registered with a network.
Check that the antenna symbol
is displayed - move to a coverage
area and operate your phone
when the antenna symbol is
displayed
Unlock the phone
Switch off restriction
S
62
Page 73

Trouble Shooting
Important Error Messages
These are some of the most important error messages which may be
displayed:
Area Not
Allowed
Network Not
Allowed
Security Failure The network has detected an authentication failure
SIM Blocked /
Contact Service
provider
SIM Error The phone has detected a problem with the SIM -
SIM Invalid The SIM has failed one or more of the SIM
Function
Unavailable
PIN2 Invalidated The PIN2 is blocked permanently because the wrong
Message Rejected
Store Full
Phone Number
Too Long
(Max:20)
Warning Store
Full Continue?
Roaming in the selected area is not allowed
Roaming with the selected network is not allowed
because your SIM is not registered with that network
- contact your Service Provider
The SIM is blocked because one of the PIN/PIN2
unblocking keys (PUK/PUK2) has been entered
incorrectly ten times - contact your Service Provider
switch the phone off and then back on; if the message
is still displayed contact your Service Provider
personalisation checks - contact your Service Provider
The selected feature is either not supported by the
SIM or is not available with the current subscription -
contact your Service Provider
PUK2 has been entered ten times, services controlled
by PIN2 cannot be used - contact your Service
Provider
A message has been received but the message store is
full - to receive messages, delete some of the
currently stored messages or set messages to Auto
Delete
The edited or newly created Phonebook number is
too long for the SIM
The message area is full. Your messages cannot be
stored until some of the currently stored messages
are deleted
63
Page 74

Trouble Shooting
Verification
Failure
Incorrect Lock
Code
Incorrect PIN /
PIN2 / PUK /
PUK2
Auto Redial List
Full
On changing the phone lock code, verification of the
new code is incorrect - retry changing the lock code
with correct verification
Disabling or enabling the lock code has failed due to
incorrect entry of the lock code - re-enter lock code
The entered code is incorrect - re-enter code
correctly
Redial list of unsuccessfully dialled numbers is full -
switch the phone off and then on again
64
Page 75

Glossary of Terms
Glossary of Terms
APN Access Point Name. Directs the user to the gateway
Cut Permanently removes selected text from short text
Copy Copies selected text from short text message without
CHAP Challenge Handshake Authentication Protocol. A
DTMF Tones Dual Tone Multi-Frequency tones allow you to
GPRS General Packet Radio Service. The Technology the
GSM Global System for Mobile Communications. The name
Network
Operator
PAP Password Authentication Protocol. A security feature
Password Used for the control of the Call Bar. Supplied by your
PIN Personal Identification Number used for SIM security.
PIN2 Personal Identification Number used for the control of
communicate with computerized phone systems,
given to the advanced digital technology that your
phone uses.
The organization responsible for operating a GSM
Supplied by your Service Provider. If the PIN is
entered incorrectly 3 times, the PIN will be blocked.
Fixed Dial Store and Call Charge metering. Supplied
by your Service Provider. If the PIN2 is entered
incorrectly 3 times, the PIN2 will be blocked.
or the required service.
message
removing it from the original message
security feature for the GPRS network.
voice mailboxes etc.
phone uses.
network.
for the GPRS network.
Service Provider.
65
Page 76

Glossary of Terms
PUK/PUK2 PIN/PIN2 Unblocking Key. Used to unblock the
PIN/PIN2. Supplied by your Service Provider. If the
PUK/PUK2 is entered incorrectly 10 times, the
PUK/PUK2 will be blocked.
Registration The act of locking on to a GSM network. This is
usually performed automatically by your phone.
Roaming The ability to use your phone on networks other than
your Home network.
Service
Provider
The organization responsible for providing access to
the GSM network.
SIM Subscriber Identity Module. A small smart-card which
stores unique subscriber and user-entered information
such as Phonebook and Short Messages. Supplied by
your Service Provider.
WAP Wireless Application Protocol. The communication
standard which enables you to download resources
from the Internet to your phone
66
Page 77

Specifications
Specifications
Phone (Including Battery)
Type
Temperature Range
Charging
Storage
Weight 82g
Dimensions (mm)
Height x Width x Depth 106 x 46 x 16
Supply Voltage 3.7V DC, 650mAh Li-ion
Standby Time (hrs)
Talk Time (Min)
Charge Time (Phone off) Up to 90m (Travel Charger)
Antenna Internal
SIM Type 3V only
phonebook Memory 200 + SIM
Animation Themes 2
Voice Memo 1 x 16 seconds
User Composed Melody One
Download Melody Up to 5
Download Logo Up to 5
Recordable Ringer 2 x 10 seconds
Games 2
Back light colours 1 (Light Blue)
Ring tones 23 Fixed & Variable
Scheduler Up to 100 Entries
Alarms 4
*
GSM900 Class 4
GSM1800 Class 1
+5ºC - +35ºC
-20ºC - +60ºC
*
Up to 150
Up to 360
Up to 120m (Car Charger)
Note: Charge time will be longer when the phone is turned on. Battery life
is affected by the network being used and the condition of the battery.
67
Page 78

Personal Settings
Personal Settings
Use the table below to record your GSM/GPRS WAP settings.
Item Provisioning
Information Setting
No 1
Name
Home URL
Gateway IP
Security Non secure / Secure
(Delete One)
Bearer Type
Circuit Switched (GSM)
Digital Dial #
Analogue Dial #
Circuit Type
User Name
Password
Linger time
Packet Switched (GPRS)
Access Point Name
User Name
Password
Authentication Normal/Encrypted/
None
(PAP) (Chap)
Provisioning
Information Setting
No 2
68
Page 79

SAR
SAR
INTERNATIONAL - ICNIRP
THIS PANASONIC PHONE (MODEL EB-GD76) MEETS REQUIREMENTS FOR
EXPOSURE TO RADIO WAVES
Your mobile phone is a radio transmitter and receiver. It is designed and manufactured
not to exceed the limits for exposure to radio frequency (RF) recommended by
international guidelines (ICNIRP). These limits are part of comprehensive guidelines
and establish permitted levels of RF energy for the general population. The guidelines
were developed by independent scientific organisations through periodic and thorough
evaluation of scientific studies. The guidelines include a substantial safety margin
designed to assure the safety of all persons, regardless of age and health.
The exposure standard for mobile phones employs a unit of measurement known as
the Specific Absorption Rate, or SAR. The SAR limit stated in the international
guidelines is 2.0 W/kg.* Tests for SAR are conducted using standard operating
positions with the phone transmitting at its highest certified power level in all tested
frequency bands. Although the SAR is determined at the highest certified power level,
the actual SAR of the phone while operating can be well below the maximum value.
This is because the phone is designed to operate at multiple power levels so as to use
only the power required to reach the network. In general, the closer you are to a base
station, the lower the power output of the phone.
The SAR value for this model phone, when tested for use at the ear, for compliance
with the guidelines was 0.669 W/kg. While there may be differences between the SAR
levels of various phones and at various positions, they all meet the relevant
international guidelines for RF exposure.
* The SAR limit for mobile phones used by the public is 2.0 watts/kilogram (W/kg)
averaged over ten grams of body tissue. The guidelines incorporate a substantial
margin of safety to give additional protection for the public and to account for any
variations in measurements. SAR values may vary depending on national reporting
requirements and the network band. For SAR information in other regions please look
under product information at www.panasonicmobile.com/health
69
Page 80

Notes
Notes
70
Page 81

Notes
71
Page 82

The Serial Number can be found on the outside of the phone under the
battery. For your convenience we recommend that you note the
following details as a record of your purchase.
Part Number
Serial Number
Dealer Name
Purchase Date
CP8 PATENT
© Matsushita Mobile Communications Development of Europe Ltd 2002
Information in this document is subject to change without notice. No part of these
instructions may be reproduced or transmitted in any form or by any means without
obtaining express permission from Matsushita Mobile Communications Development
of Europe Ltd
Page 83

Page 84

Printed in Czech Republic
www.panasonicmobile.com
GD76DPK12B
Matsushita Communication Industrial Czech s.r.o
Pardubice, Czech Republic
 Loading...