

Page 1
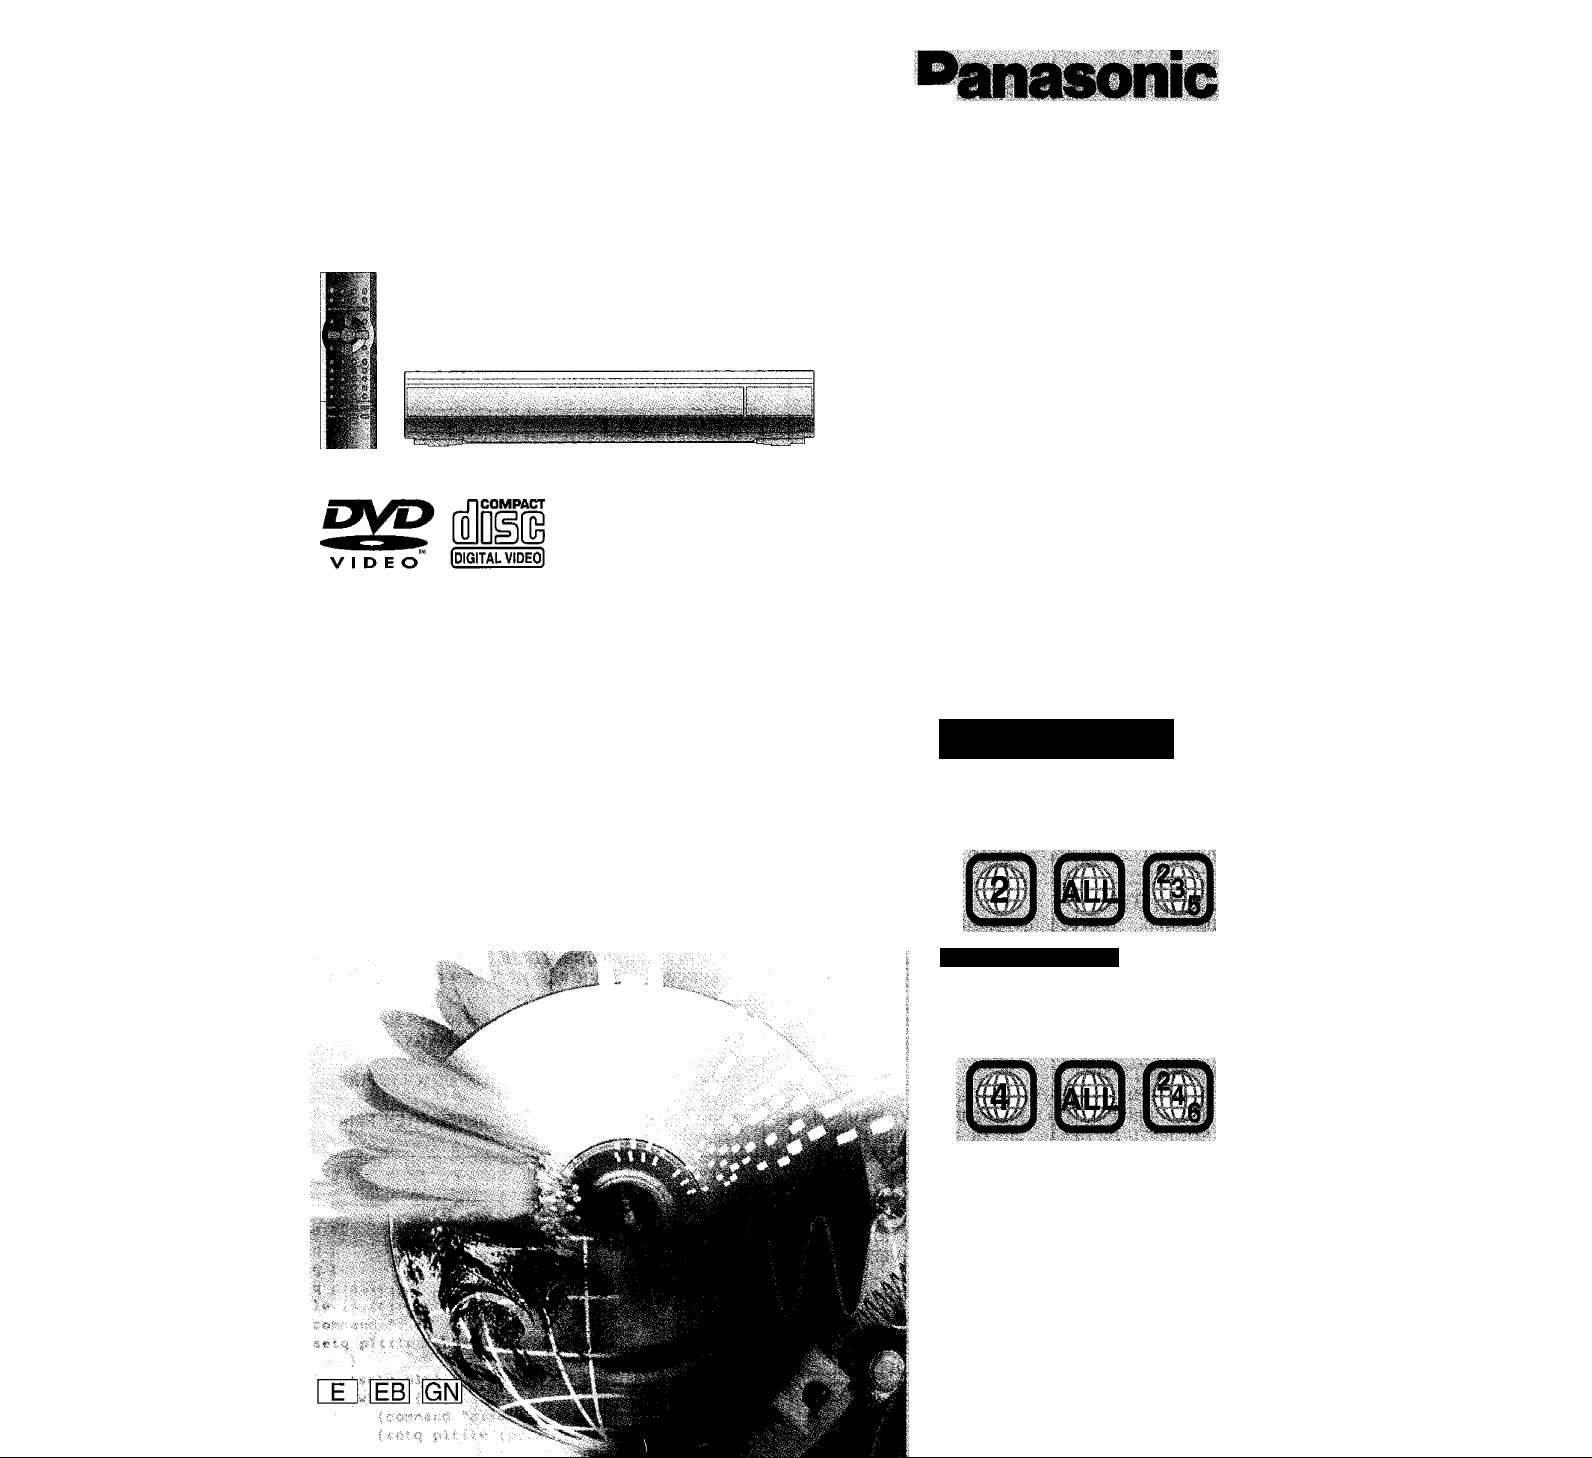
DVD/CD PLAYER
Operating Instructions
Model No. DVD-CV52
Region rium|ef su^
thisiflayer- .
Region ^timbers CiVC pfayers and
; s6fi^^.e ihty argi sold,
For the United Kingdom and
Continental Europe
•The rogipri nu.rnber of thjo pl^Or
•the^pia^r w№ pii^:0yb-^^^ .rtiaflied with
>--tdb9f#^ohtafe dr-ALL''.-"’ ■ ■
i';■■■ ;-.E)iimpIe; ■ T- ■ . ' >:' ■ :v ■
For Australia and N.Z.
>Wa;^idyof wiir-piay;^^ marked with
.::-la^eiio№tRrflg.A -ivp.,
thahk you ! for pgiOhasihg;: this; prodpct; For
optimum;: performance Ohd: fafety,;'please , read
these#structions: carefully. : - :
'before;. CPhn#fih9? .epeMlPP oi^ .adjuring ithis
: p^pdfj;|!e|ee read theses
'TPfease: keep \hts martUai ftif future tefereriOe,
of this player Is '‘4".
w;; Oh; the
Kingdom,
pacKa|{ng indicates : the United
RQT6439-B
Page 2

CAUTION!
THIS PRODUCT UTILIZES A LASER.
USE OF CONTROLS OR ADJUSTMENTS OR
performance of PROCEDURES OTHER THAN
THOSE SPECIFIED HEREIN MAY RESULT IN
HAZARDOUS RADIATION EXPOSURE.
DO NOT OPEN COVERS AND DO NOT REPAIR
YOURSELF. REFER SERVICING TO QUALIFIED
■O
PERSONNEL.
f
s
WARNING;
w>
TO REDUCE THE RISK OF FIRE, ELECTRIC SHOCK
OR PRODUCT DAMAGE, DO NOT EXPOSE THIS
S
APPARATUS TO RAIN, MOISTURE, DRIPPING OR
CD
SPLASHING AND THAT NO OBJECTS FILLED WITH
LIQUIDS, SUCH AS VASES, SHALL BE PLACED ON
THE APPARATUS.
This product may receive radio interference caused by rhobile
teiephones during use. If such interference is apparent, please
increase separation between the product and the mobiie
teiephone.
- VISIBLE ANDINVISIBLE LASER RADIATION WHEN OPEN.
AVOID DIRECT EXPOSURE TO BEAM.______________tFDA 21 CFR)
CAUTION!
• 00 NOT INSTALL, OR PLACE THIS UNIT, IN A BOOK
CASE, BUILT-IN CABINET OR IN ANOTHER CONl-INED SPACE. ENSURE THE UNIT IS WELL VENTI
LATED. TO PREVENT RISK OF ELECTRIC SHOCK OR
TIRE HAZARD DUE TO OVERHEATING, ENSURE
THAT CURTAINS AND ANY OTHER MATERIALS DO
NOT OBSTRUCT THE VENTILATION VENTS.
• IDO NOT OBSTRUCT THE UNIT’S VENTILATION
iDPENINGS WITH NEWSPAPERS, TABLECLOTHS,
CURTAINS, AND SIMILAR ITEMS.
•DO NOT PLACE SOURCES OF NAKED FLAMES,
^UCH AS LIGHTED CANDLES, ON THE UNIT.
HSPOSE OF BATTERIES IN AN ENVIRONMENTAL-
-Y FRIENDLY MANNER.
THIS UNIT IS INTENDED FOR USE IN MODERATE CLIMATES.
NORSK
DVARSEL!
D^TE PRODUKTET ANVENDER EN LASER.
BETJENING AV KONTROLLER, JUSTERINGER
ELLER ANDRE INNGREP ENN DE SOM ER
BESKREVENT 1 DENNE BRUKSANVISNING, KAN
FÒRE TIL FARLIG BESTRÀLING.
DÉKSLER MÀ IKKE ÀPNES, OG FORS0K ALDRI À
REPARERE APPARATET PÀ EGENHÀND. ALT
SÉRVICE OG REPARASJONSARBEID MÀ UTF0RES
AV KVALIFISERT PERSONELL.
(inside of product)
iSntOI/Sl'r<fiîU,
(Produktets innside)
(Tuotteen sisäiiä)
SUOMI
VAROITUS!
LAITTEEN KÄYTTÄMINEN MUULLA KUIN TÄSSÄ
KÄYTTÖOHJEESSA MAINITULLA TA VALLA SAATTAA
ALTISTAA KÄYTTÄJÄN TURVALLISUUSLUOKAN 1
YLITTÄVÄLLE NÄKYMÄTTÖMÄLLE LASERSÄTEILVLLE.
VAROITUS:
TULIPALO-, SÄHKÖISKUVAARAN TAI TUOTETTA
KOHTAAVAN MUUN VAHINGON VÄHENTÄMISEKSI El
LAITETTA SAA ALTISTAA SATEELLE, KOSTEUDELLE,
VESIPISAROILLE TAI ROISKEELLE, EIKÄ NESTETTÄ
SISÄLTÄVIÄ ESINEITÄ, KUTEN ESIMERKIKSI
MALJAKOITA, SAA ASETTAA LAITTEEN PÄÄLLE.
VAROITUS!
•ÄLÄ ASENNA TAI LAITA TÄTÄ LAITETTA KABINETTITYYPPISEEN KIRJAKAAPPIIN TAI MUÜHUN
SULJETTUUN TILAAN, JOTTA TUULETUS Ot^NISTUtSI. VARMISTA, ETTA VERHO TAI MIKÄÄN ÌMUU
MATERIAALI El HUONONNA TUULETUSTA, JCÌÌTTA
VÄLTETTÄISIIN YLIKUUMENEMISESTA JOHTUVA
SÄHKÖISKU- TAI TULIPALOVAARA.
•ÄLÄ PEITÄ LAITTEEN TUULETUSAUKKOJAi SANOMALEHDELLÄ, PÖYTÄLIINALLA, VERH^LLA
TAI MUULLA VASTAAVALLA ESINEELLÄ. i
•ÄLÄ ASETA PALAVAA KYNTTILÄÄ TAI MÛUTA
AVOTULEN LÄHDETTÄ LAITTEEN PÄÄLLE.
• HÄVITÄ PARISTOT LUONTOA VAHINGOITTAIvIATTOMALLA TAVALLA.
TAMA LAiTE ON TARKOITETTU KAYTETTAVAKSl LEUPOSSA
iLMASTOSSA.
ADVARSEL:
FOR A REDUSERE FAREN FOR BRANN, ELEKTRISK
ST0T ELLER SKADER PA PRODUKTET, MA DETTE
APPARATET IKKE UTSETTES FOR REGN,
FIJKTIGHET, VANNDRAPER ELLER VANNSPRUT.
DET MA HELLER IKKE PLASSERES GJENSTANDER
FYLT MED VANN, SLIK SOM BLOMSTERVASER,
OPPA APPARATET.
DVARSEL!
tPPARATET mA IKKE PLASSERES I EN
IBOKHYLLE, ET INNEBYGGET KABINETT ELLER ET
tNNET LUKKET STED HVOR VENTILASJONSFOR-
lOLDENE ER UTILSTREKKELIGE. S0RG FOR AT
.JARDINER ELLER EIGNENDE IKKE FORVERRER
VENTILASJONSFORHOLDENE, SA RISIKO FOR
'eLEKTRISK SJOKK ELLER BRANN FORArSAKET
tV OVERHETING unngAs.
tPPARATETS VENTILASJONSAPNINGER MA IKKE
»EKKES TIL MED AVISER, BORDDUKER , GARDINJR OG EIGNENDE.
•PLASSER IKKE APEN ILD, SLIK SOM LEVENDE
LYS, OPPA APPARATET.
•BRUKTE BATTERIER mA KASSERES UTEN FARE
FOR MILJ0ET.
DET
TE APPARATET ER BEREGNET TIL BRUK UNDER
MO
DERATE KLIMAFORHOLD.
illustration shows
lodel for the United
iom and Continental
.)
LUOKAN 1 LASERLAITE
(Back of product)
KLASS 1 LASER APPARAT
Page 3
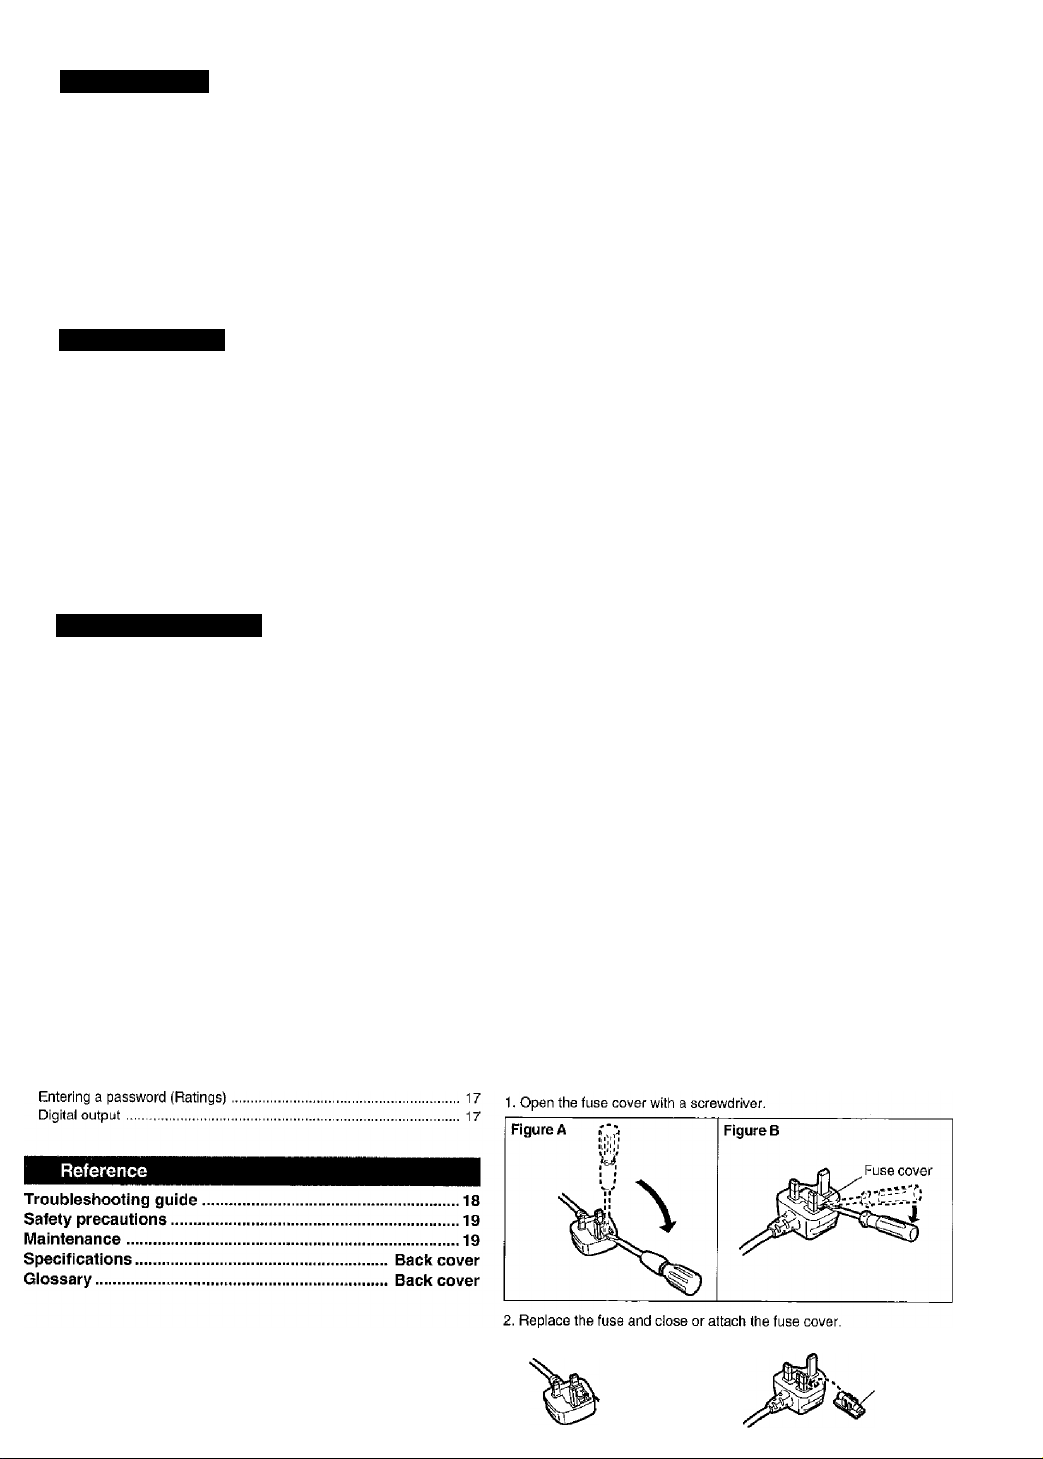
Table of contents
Caution for AC Mains Lead
Getting started
(For United Kingdom)
Caution for AC Mains Lead.........................................................3 (“EB” area code model only)
Accessories.................................................................................4 por your safety, please read the following text carefully.
Q Connection.vv.""——"-...................................................
.............4 jfiis appliance is supplied with a moulded three pin mains piuq for your
Basic connection.......................................................................4 safety and convenience.
Home Theater - Enloy.ng more powerful sound
QThfi remote control —...
Q Quick setup
Control reference guide..............................................................7 BS1362
Disc information.............................. 7 Check for the ASIA mark
..............
...........................
..................................................g fuse has a rating of 5-ampere and that it is approved by ASIA or BSI to
Basic operations
Basic play..................................................................................B
Disc type information screen.........................................................8
When a menu screen appears on the television...........................8
Resume function
Changing the display on the main unit..........................................9
Sequential mode
Replaying a scene — QUICK REPLAY
Skipping chapters or tracks...........................................................9
Fast forward and rewind—SEARCH.............................................9
Slow-motion play...........................................................................9
Frame-by-frame viewing
Starting play from a selected title or track.....................................9
...........................................................................
...........................................................................
........................................
...............................................................
Advanced operations
Convenient features..............................................................10
Repeat play.................................................................................10
A-B repeat play.......................................................................... 10
Program play.............................................................................. 10
Random play................................................................................11
Using menus to play MP3 discs.................................................. 11
Changing other discs during play................................................12
Changing the disc in the play position
Setting the unit to turn off — SLEEP timer
Increasing your enjoyment of movies
H ADVANCED SURROUND ..................................................... 12
□ BASS PLUS .......................................................................... 13
□ CINEMA................................................................................. 13
□ DIALOGUE ENHANCER ...................................................... 13
Soundtracks.................................................................................13
Subtitles.......................................................................................13
Angles......................................................................................... 13
Using Graphical User Interface (GUI) screens
Common procedures...................................................................14
Disc information...........................................................................14
Unit information...........................................................................15
Progress indicator........................................................................ 15
Changing settings............................................................. 16
Common procedures...................................................................17
.......................................
...............
................................
......
.
.......
should the fuse need to be replaced please ensure that the replacement
................................
...................
5 ^ 5-ampere fuse is fitted in this plug.
<%■
or the BSI mark ^ on the body of the fuse.
If the plug contains a removable fuse cover you must ensure that it is
refitted when the fuse is replaced.
If you lose the fuse cover the plug must not be used until a replacement
cover is obtained.
A replacement fuse cover can be purchased from your local dealer.
CAUTION!
8
IF THE FITTED MOULDED PLUG IS UNSUITABLE FOR
THE SOCKET OUTLET IN YOUR HOME THEN THE FUSE
9
SHOULD BE REMOVED AND THE PLUG CUT OFF AND
9
DISPOSED OF SAFELY.
THERE IS A DANGER OF SEVERE ELECTRICAL SHOCK
IF THE CUT OFF PLUG IS INSERTED INTO ANY
9
13-AMPERE SOCKET.
If a new plug is to be fitted please observe the wiring code as stated below.
If in any doubt please consult a qualified electrician.
IMPORTANT
The wires in this mains lead are coloured in accordance with the following
code:
Blue: Neutral, Brown: Live.
As these colours may not correspond with the coloured markings
identifying the terminals in your plug, proceed as follows:
The wire which is coloured Blue must be connected to the terminal which is
marked with the letter N or coloured Black or Blue.
The wire which is coloured Brown must be connected to the terminal which
12
is marked with the letter L or coloured Browh or Red.
12
12
WARNING; DO NOT CONNECT EITHER WIRE TO THE
EARTH TERMINAL WHICH IS MARKED WITH THE LETTER E,
BY THE EARTH SYMBOL i OR COLOURED GREEN OR
GREEN/YELLOW.
THIS PLUG IS NOT WATERPROOF—KEEP DRY.
Before use
14
Remove the connector cover.
How to replace the fuse
The location of the fuse differ according to the type of AC mains plug
(figures A and B). Confirm the AC mains plug fitted and follow the
instructions below.
Illustrations may differ from actual AC mains plug.
■Q
.s
(0
I
<3
Figure A
, Fuse
(5 ampere)
Figure B
Fuse
{5 ampere)
5
IT
Page 4
Accessories
□ 1 Audio/video cable
(K2KA6CA00001)
I
0)
I
P
O
□ 2 Batteries
for remote control
check and identify the suppiied accessories.
Use numbers indicated in parentheses when asking
for repiacement parts.
For Australia and N.Z.
(RJA0035-1X)
The included AC mains lead is for use with this unit
only. Do not use it with other equipment.
Connection
Basic connection
This page explains how to connect the unit to a television and set it up so you hear tpe audio through the television’s speakers. To get the full benefit from
the powerful 5.1-channel audio found on DVDs, you should connect an amplifier ar^d six speakers {* page 5).
Before connection /
•Disconnect the AC mains lead.
• Refer to the television’s operating instructions.
nnect your unit directly to your tetevlsion,
Dq not connect the unit through your video cassette recorder when
setting up your home entertainment system, because the picture may
noi be played correctly due to tfie copy guard.
S VIDEO OUT terminal
The S-video terminal achieves a more vivid picture than the VIDEO
OljJT terminal by separating the chrominance (C) and luminance (Y)
nals. (Actual results depend on the television.)
Television
For Australia and N.Z.
COMPONENT VIDEO OUT terminal
Connection using these terminals outputs the color difference signals
(Pb/Pr) and luminance signal (Y) separately in order to achieve high
fidelity in reproducing colors.
•The description of the component video input terminals depends
on the television or monitor (e.g. Y/Pb/Pr, Y/B-Y/R-Y, Y/Cb/Cr).
Connect to terminals of the same color.
Video cable
(not included)
qp' Q>= =<E> ^
=<£>
When making this connection, ensure you connect the audio cables
^ to the corresponding audio input terminals on the teievision.
Television
^ COMPONENT '
VIDEO IN
ifo) Y
Pp.
►vy; re
__
S video cable
X.
When making this connection, ensure you connect the audio cables
the corresponding audio input terminals on the television.
-■■■■.■•■■■x-'T ■■■■■■
;iri:iiinH'-]:□ Ï1' i.*: ' ■ ...-v
or the United Kingdom and Continental Europe
(not included)
EQsr
■4:C.-V
(The illustration shows the model
for the United Kingdom and
Continental Europe.)
SCABT terminal
To improve picture quality, you can change the video signal output
from the AV terminal from “Video” to either “S-Video” or “RGB” to suit
the type of television you are using («• page 16, Video-AV Output).
Television
SCART terminal
VCR
mannanaGOD
ÙDDaanüGQDD
21-pin SCART cable
(not included)
-----------f?------------
Page 5
Cbnri00tiQn
Home Theater—Enjoying more powerful sound
This model can play Dolby Digital, but only in two channels. This model does not have a DTS decoder. You must connect a unit with a Dolby Digital or
DTS decoder to enjoy surround sound.
•The equipment connections described are examples.
• Peripheral equipment and optional cables sold separately unless otherwise indicated.
• Before connection, turn off all equipment and read the appropriate operating instructions,
Digital connection
To enjoy 5.1-ch surround sound
Connect an amplifier with a built-in decoder
or a decoder-amplifier combination.
•Change the settings in “Digital output” to
suit the equipment you connect page 17).
To enjoy stereo or Dolby Pro Logic
Connect a digital amplifier or
system component.
• Change the settings in ‘‘Digital
output” ("► page 17).
ijwg
You cannot use DTS Digital Surround
decoders not suited to DVD.
Analog connection
To enjoy stereo or Dolby Pro Logic
Connect an analog amplifier or system component.
*D
a
(0
.1
CD
Speakers (Example)
You can enjoy surround sound
by connecting from three to six
speakers.
Optical digital audio cable
Do not bend sharply when connecting
(The illustration shows the model for the United Kingdom and Continental Europe.)
Connecting an active subwoofer
You can enjoy more powerful bass by connecting an active subwoofer.
• Place the subwoofer as close as possible to the front center.
•Turn BASS PLUS on to boost the output from the subwoofer (-» page 13).
•Adjust the volume on the subwoofer to suit your preference.
To the subwoofer’s input terminal
■ Recording to digital recording equipment or cassette tapes
•Digital recording
You can record the digital signal directly to digital recording equipment.
Connect the recording equipment with an optical digital audio cable
(“» Q above).
nBffii
•With DVD, the following conditions must be met; (a) the disc doesn’t have
protection preventing digital recording, and ® the recording equipment
can handle signals with a sampling frequency of 48 kHz.
• You cannot record DTS signals.
•You cannot record MP3.
When recording DVDs, make the following settings.
ADVANCED SURROUND: OFF (^ page 12)
PCM Down Conversion: Yes (■* page 17)
Dolby Digital: PCM (** page 17)
DTS Digital Surround: Off («* page 17)
MPEG: PCM (^ page 17)
Audio cable
\
•Analog recording
You can record to a cassette deck or other recording equipment,
Connect the recording equipment with an audio cable {■• Q above).
There are no limitations on recording analog signals as there are with
digital signals.
Page 6
B The remote control
Batteries
•Insert so the poles (+ and -) match those in the remote control.
«
• Do not use rechargeable type batteries.
Qiifck setup
2-6
Do rot:
•mix old and new batteries.
• use different types at the same time.
•hea or expose to flame.
•take apart or short circuit.
• atte Tipt to recharge alkaline or manganese batteries.
•usebatteries if the covering has been peeled off.
Mishcindling of batteries can cause electrolyte leakage which can damage
the fluid contacts and may cause a fire.
items
'Ve if the remote control is not going to be used for a long period of
Rem4’
time.
Store in a cool, dark place.
se
Aim £t the sensor, avoiding obstacles, at a maximum range of 7 m directly
in front of the unit.
1 Press [(i)] to turn on the unit.
2 Press [SETUP] to show the QUICK SETUP screen.
! SETUP
Sd'aot!.-mnunuIiiiawtj|o.
p
3*4*5‘6
RETURN
:ÜSi-
.'-.'/Vi.-.';'.'-'. .
Remote control only
The QUICK SETUP screen appears when you press [SETUP] the first
time after purchase and assists you to make necessary settings. You can
access this screen again later if you need to (^ page 16, Others—QUICK
SETUP).
Preparation
Turn on the television and select the appropriate video input on the
television to suit the connections for the player.
Press [À, T, ►] to select the menu language
3
and press [ENTER].
Press [A, T] to select “Yes” to continue and
4
press [ENTER].
Press [A, ▼, ◄, ►] to select the item and press
5
[ENTER].
•Audio Language (For setting details «♦ page 16)
•Subtitle Language (For setting details page 16)
•TV Aspect (For setting details “TV Aspect", below)
Press [ENTER] and then [SETUP] to end the
6
settings.
To ri
^turn to the previous screen
[RETURN].
Pres
TV Aspect
Selept “4:3” (regular) or “16:9” (widescreen) to suit your television.
If you have a regular 4:3 television, you can also select how video on some
disci is shown (^ page 16, Video—TV Aspect).
•4:3 Pan&Scan (Factory preset)
The pan and scan (the original widescreen images
are c onverted for viewing on a regular television)
version of the video is automatically selected if
recorded on the disc.
Letterbox
•4:3
letterbox (the original widescreen images
The
ar with black bands above and below) version
appp
video is automatically selected if recorded on
of thè
isc.
the c
i
Page 7
Control reference guide
Operation^ tn ln$tfUCtlop With the
0 Standby/on switch (cb/l)
remote ^ oan do th^Ldl^W^ >^«*1^ «nit if
the contfirtê-ere.thé eamêrv:.
(2) Skip buttons (!◄◄, SKIP).........................................................9
(3) Stop button (■ STOP)
@ Pause button (I I PAUSE)...........................................................8
© Top menu button (TOP MENU)
© Cursor buttons (A, ▼, ◄, ►)/Enter button (ENTER)...............6
® Display button (DISPLAY)........................................................14
@ Audio button (AUDIO).............................................................. 13 S
@ Disc select button (DISC), Disc buttons (DISC1 - DISCS).................8 ^
© Program button (PROGRAM)
@ Sequential button (SEQUENTIAL)......................................................9 ^
@ FL select button (FL SELECT)..................................................9
@ Cancel button (CANCEL)
© Advanced Surround button (Q A.SRD)
@ Bass plus button (Q BASS)................................................... 13
® i
Buttons such as Q function the same as the controls on the remote control.
© Random play button (RANDOM)
@ Repeat button (REPEAT).........................................................10
® Sleep button (SLEEP)...............................................................12
@ Setup button (SETUP)...........................................................6,17
© Drawer open/close button (A OPEN/CLOSE)...........................8
@ Slow/Search buttons (◄◄, ►► SLOW/SEARCH)
@ Play button (► PLAY)................................................................8
@ Menu button (MENU)
@ Return button (RETURN)...........................................................6
@ Angle button (ANGLE).............................................................13
@ Quick replay button (QUICK REPLAY).....................................9
<§) Numbered buttons (1~9, 0, ^10)..............................................8
© Cinema button (Q CINEMA).....................................................13
% Dialogue Enhancer button (|>| D.ENH)
© Position memory button (POSITION MEMORY)
© A-B repeat button (A-B REPEAT)
® Drawer
@ Skip, Search buttons (\ « , ◄◄ ►► )
@ Display
® Advanced Surround Indicator
@ CD sequential indicator..............................................................9
® Disc exchange button (DISC EXCHANGE)..............................
@ Disc skip button (DISC SKIP)...................................................12
© Remote control signal sensor
8,11
11
.................
8,11
Page
6
8
10 £
12
11
9
13
9
10
8
8
12
Press to switch the unit from on to standby mode or vice versa.
In standby mode, the unit is still consuming a small amount of power.
......................................................................................
Standby indicator ((b)
When the unit is connected to the AC mains supply, this indicator lights
up in standby mode and goes out when the unit is turned on.
..............................................................
.............................................................
.............................................
.............................................................
..................................................
..........................................................
.........
.........................
.............................................
..................................
..........................................
......................
...............................
Disc infornnation
■ Discs that can be played
DVD-Video ’ DVD-R Audio CD Video CD
nCOMRftCT
oyo '
video" I
“Including CD-R/RW and discs recorded with MP3.
Do not use irregularly shaped discs (e.g. heart-shaped), as these can
damage the unit.
■ Discs that cannot be played
DVD-Audio, DVD-ROM, DVD-RAM, CD-ROM, CDV, CD-G, -l-RW,
DVD-RW, CVD, SVCD, SACD, Divx Video Discs and Photo CD.
1 R4.Z
Indication used in instructions
(o1d§[@
DIGITAL AUDIO
1 El-
■ DVDs that can be played
This unit has a Dolby Digital decoder so you can play
DVDs with this mark.
This unit does not have a DTS decoder. Connect this
unit to equipment that has a DTS decoder to enjoy
DVDs with this mark.
■ Playing DVDs and Video CDs
The producer of these discs can control how they are played so you may
not always be able to control play as described in these operating
instructions. Read the disc’s instructions carefully,
ncOMBftCT
(o]d§[@
{DIGITAL VIDEO]
rVCDl
□ □ I DOLBY I
DIGITAL
SURROUND
■ Video systems
This unit can play both the PAL and NTSC video systems.
To view PAL or NTSC, however, your television must match the system
used on the disc.
PAL discs cannot be correctly viewed on an NTSC television.
NTSC can be correctly viewed on a PAL television by converting the video
signal to PAL 60 page 16, Video- NTSC Disc Output).
■ CD-R and CD-RW discs
This unit can play CD-DA (digital audio) and video CD format audio CD-R
and CD-RW that have been finalized (a process that enables CD-R/
CD-RW players to play audio CD-R and CD-RW) upon completion of
recording. It may not be able to play some CD-R or CD-RW due to the
condition of the recording.
■ DVD-R discs
Panasonic DVD-R recorded and finalized on a Panasonic DVD video
recorder are played as DVD-Video on this unit.
It may not be possible to play these discs in all cases due to the type of
disc or condition of the recording.
■ Handling precautions
• Do not write on the label side with a bail-point pen or other writing
instrument.
• Do not use record cleaning sprays, benzine, thinner, static electricity
prevention liquids or any other solvent. ^
• Do not attach labels or stickers to discs. (Do not use discs with exposed S
adhesive from tape or left over peeled-off stickers.) ^
• Do not use scratch-proof protectors or covers, ^
• Do not use discs printed with label printers available on the market. ■
Page 8

Basic play
•If “C5” appears on the television
The operation is prohibited by the unit or disc.
•The disc continues to rotate while the menu Is displayed even after you
finish playing an item, Press [■] when you finish to preserve the unit’s
motDr and your television screen.
• Volume may be lower when playing DVDs than when playing other discs
or during television broadcasts.
If yc u turn the volume up on the television or amplifier, be sure to reduce
the volume again before playing other sources so that a sudden increase
in output does not occur.
SUBTITLE
DISC
SEQUENTIAL-
FL SELECT
® @
&
w
POSITION
MEMORY
QUICK
REPLAY
DISC1 - DISCS
Numbered
buttons
OQ
1 Drawer
m DISC SKIP
7
CD SEQUENTIAL
button/indicator
Preparation
Turn on the television and select the appropriate video input on the
television to suit the connections for the player.
Press [c!)] to turn on the unit.
Press [^] to open the drawer.
Place the disc(s) on the disc tray(s).
You can load discs on the other trays by
pressing [DISC SKIP] on the main unit.
•The label of the disc must face up\ward. (With double-sided discs,
load so the label for the side you want to play is facing up.)
Press [^] to close the drawer.
The disc indicator will go out when the unit reads a tray as empty.
>lf a menu screen is shown,
see right.
Disc No. in the
play position
Disc indicator
display
O Press [► ] (PLAY).
Play starts from the disc in the front-left position.
{MP3 discs}
Group and track names are displayed on the television.
Press [SUBTITLE] to turn the display on or off.
When the disc finishes playing
If the sequential mode page 9) is off, select the disc using the disc
type information screen (^ right).
Disc type information screen
You can check the kinds of discs loaded on the trays, and start playing the
prefefred disc.
Remote control only
Press [DISC],
jDisc type information screen appears.
(s2 <33 ^
■wa BiiiM iMiBi B
—; The unit has not determined the kind of the disc,
NoDisc: There is no disc on the tray.
Press the disc button ([DISC1] - [DISCS]).
The disc on the selected tray starts playing.
lar the disc type information screen
To cle
[DISC].
Presi
The cjther numbered buttons {[6] - [9],
type information screen is displayed.
When a menu screen appears on the television
fv^
Remote control only
Pre^s the numbered buttons to select an item.
To select a 2-digit number
Example: To select item 23, press [^10] ^ [2] ^ [3].
•When playing DVDs, you can also use [A, ▼, ◄, ►] to select items.
Prep [ENTER] to confirm your selection.
Play pt the selected item now begins.
Other buttons used to operate menus
Read! the disc’s instructions for further details about operation.
[►►Il: Shows the next menu.
[h^l: Shows the previous menu.
[RETURN]: Shows the menu screen.
[TOP MENU): Shows the first menu screen.
[MENU]: Shows the menu screen. IsHsH
Resume function
liVJgyj I
liVJ*
n the elapsed play time is displayed)
(Wh4
Dosition you stopped play at is recorded by the unit when "l>”
The
flash!
ng on the display.
[^10]) do not work while the disc
I
vcd]
____
To stop play
Press [■] {■► right, Resume function).
To pause play
Press [II] during play,
oj Press [►] (PLAY) to restart play.
S To prevent damage
B Do not; »load more than one disc per tray.
■
•touch the drawer or the carousel while they are in motion.
•rotate the carousel by hand.
•close the drawer by hand.
I I -I I M • I
L( -L( )„( ■ [
While “l>” is flashing, press [►] (PLAY) to start play from where you
stopped it. (When playing DVD page 9, Chapter Review)
•The position is cleared when the disc is changed or the unit is switched to
standby.
• Press [■] to clear the position.
(Continued on next page)
Page 9

Position Memory function
Remote control only
This function allows you to memorize a position to start from even after
switching the unit to standby or changing discs. You can memorize
positions on up to five different discs at a time. When you memorize
another position, the earliest position is replaced.
•This function doesn’t work if the sequential mode is on.
1. During play, press (POSITION MEMORY], .aposition memorized|
2. Press [(!)] to switch the unit to standby, or change the disc.
3. When you are ready to play the disc again, press [►] (PLAY).
Play starts from the memorized position and the position is cleared.
(When playing DVD ^ Chapter Review below)
Skipping chapters or tracks
I^PvcpI
During play or while paused
Press [W^] or [►>!].
• Press [^◄] or [►►)] on the main unit.
•Each press increases the number of skips.
Fast forward and rewind—SEARCH
шдд irarvcpi
During play
Press [◄◄] or [►►].
To clear the position
Press [■] before recalling the memorized position.
Chapter Review [¡Q3
The message appears immediately
after you press [►] (PLAY).
Pj-eds PU\Y to Ciiaptor Rftview
Press [►] (PLAY) while the message is displayed and the beginning
portions of each chapter up to the current one are played. Full play
resumes from the point where you pressed [■] or [POSITION MEMORY].
(This feature works only within a title.)
If you do not press [►] (PLAY), the message disappears and play starts
from where you pressed [■] or [POSITION MEMORY].
Changing the display on the main unit
Remote control only
Press [FL SELECT].
Each time you press the button:
TItte/Chapter/Group/Track display Time display
Sequential mode
fVCD I
During play or while stopped
Press [SEQUENTIAL] ([CD SEQUENTIAL]).
Each time you press the button:
SEQ on: Plays all the CDs (including MP3 discs) and Video CDs once
each (The CD SEQUENTIAL indicator lights).
•The playback control function on Video CDs is canceled.
SEQ off: Plays only one disc in the play position (This mode is on
whenever you turn the unit on.)
IJfBfi
This feature doesn’t work during program/random play.
Replaying a scene — QUICK REPLAY
Skip back a few seconds within the current item (track or title).
Remote control only
During play
Press [QUICK REPLAY].
►Press and hold or [►►] on the main unit.
•Audio will be heard during search. You can turn this audio off if you want
to ("* page 16, Audio—Audio during Search).
Slow-motion play
fVCDl
While paused
Press [◄◄] or [►►].
►Press and hold [◄◄] or [►►] on the main unit.
Frame-by-frame viewing
Ivc^
Remote control^ly
While paused
Press [◄] or [►].
The frame changes each time you press the button.
•The frames change in succession if you press and hold the button.
•Pressing [I I] also activates forward frame-by-frame.
Notes
•The speed of search and slow-motion increases up to 5 steps.
• Press [►] (PLAY) to restart play.
•You cannot move backwards with Video CD during slow-motion
and frame-by-frame.
When playing Video CDs with playback control
Pressing buttons to perform skip, search or slow-motion may take you
to a menu screen.
Starting play from a selected title or track
[VCDl
Remote control ш1у
Press the numbered buttons to select the item.
To select a 2-digit number
Example: To select track 23, press [ёЮ] ^ [2] ^ [3].
cm (MP3 discs)
Press [ENTER] after pressing the numbered buttons.
(You do not have to press [^10].)
Play starts from the selected item.
I
•§
This feature may not work while playing some parts of a disc or at all with
some discs.
This works only when stopped with some discs.
Page 10

Convenient features
Program play
Remote control only
in select up to 32 tracks to play in the order you choose,
You
the elapsed play time is displayed)
(Wheh
When the sequential mode is on
You can program all the items on discs.
White stopped
1 iPress [PROGRAM].
Disc No.
msimm}
to
(When the elapsed play time is displayed)
c
Remote control only
,o
•is
Repeat play
1
During play
Press [REPEAT].
8
Each time you press the button:
c
2
Chapter (C)^
■O
^
_______
BTaivcDi
Track Entire disc (D)®^-^AII discs (S)* *
^-------------------OFF<
Eg (MP3 discs)
Track (T)^^-^Group (G)'*^-^AII discs (S)*"®
1_
^■'"Chapter (1)” or “Track (1)” during program play.
"All (A)” during program and random play.
*^Only when the sequential mode is on (DVDs are skipped).
If the Video CD has playback control
1. Press [■] during play until "PBC” is cleared from the display.
2. Press the numbered buttons to select a track to start play
3. Press [REPEAT] above).
You cannot use repeat play to repeat an entire DVD or an entire MP3 disc.
>Title (T)^^^OFF
----------------
-OFF<—
-------------
-----------
e.g. DVD-Video
—I
i
■ To repeat only your favorite tracks/chapters
start program play right) and press [REPEAT] to display "A”.
A-8 repeat play
You can repeat a section between points A and B within a title or track.
During play
1 Press [A-B REPEAT] at the starting point (A).
2 Press [A-B REPEAT] at the finishing poinj (B).
j Group (MP3
discs) No.
Track (CD,
VCD) No.
2-Q Press the numbered buttons to select a disc.
LMP3discsonly] Press the numbered buttons to
select a group.
•Some items cannot be selected.
IPress the numbered buttons to select a track
I
(and, for MP3 discs press [ENTER]).
■•Repeat steps 2 and 3 to program other items.
Press [►] (PLAY).
Play now begins in the programmed sequence.
Yol can enter DVDs, empty trays, and item numbers for items not
reciirded on discs, but they are not played,
the chapter or track number flashes after entering it with the numbered
• If
buttons,
When the sequential mode is off
urn I
Can program all the items on a disc in the play position.
You
Whil i stopped
[ENTER] to continue to the next item.
m\m}
1 Press [PROGRAM].
2 iDVD, MP3 discs only I Press the numbered buttons to
select a title (DVD) or group (MP3 discs).
• Some items cannot be selected.
• Different titles have different soundtracks and subtitles.
Press the numbered buttons to select a track (CD
or VCD) or chapter (DVD) (and, for MP3 discs
press [ENTER]).
• Repeat steps 2 and 3 to program other items.
Press [►] (PLAY).
Play now begins in the programmed sequence.
• Some items cannot be played even if you programmed them.
EHII
annot program if there is no disc on the tray in the play posrtion.
You
(Continued on next page)
To cancel
Press [A-B REPEAT] until “t) * Y” is displayed.
^ • Some subtitles recorded around point A or B may fail to appear, iflaa
^ • The unit automatically determines the end of a title/track as point B when
the end of the title/track is reached.
• A-B repeat is canceled when you press [QUICK REPLAY].
■
Page 11

To select an Item using the cursor buttons
Press [ENTER] and [A , T] to select an item, then press [ENTER]
again to register the number.
All the items on a disc, a title or a group are selected when you select
“ALL”,
To add or change Items
Press [A , ▼] to select an available item, then repeat steps 2 and 3.
To move to the page before or after the one shown
Press
[ ^ < ]
or [►►].
To clear the programmed items one by one
Press [A , ▼] to select the item number (No) and press [CANCEL].
(Alternatively, you can select "Clear” with [A , ▼ , ’^ , ►] and press
[ENTER].)
To clear the whole program
Move to "Clear ai!" with [A . ▼ , -^ , ►] and press [ENTER]. The whole
program is also cleared when the disc is moved out of the play position
while the sequential mode is off or if you turn the unit off.
To exit the program mode
Press [PROGRAM] while stopped. (The program is retained in
memory.)
Random play
Remote control only
(When the elapsed play time is dispiayed)
When the sequential mode is on
mmi
You can play all discs in random order
While stopped
1 Press [RANDOM],
Using menus to play MP3 discs
gl3l (MP3 discs)
This unit can play MP3 files recorded on CD-R/RW with a computer.
Files are treated as tracks and folders are treated as groups.
R.emote control only
Group name
Press [TOP MENU]
or [MENU].
A file list appears.
¡Blffiliil.i I liiliiJIriliTfinr ‘
2 Press [A, ▼] to select the track and press
[ENTER].
Play starts and continues to the last track in the last group.
“LF” indicates the track currently playing.
To show other pages
Press [A, ▼, ◄. ►Jto select “Prev” or “Next" and press [ENTER],
After listing all the tracks in one group, the list for the next group appears.
To close the file list screen
Press [TOP MENU] or [MENU],
Using the tree screen to find a group
1 Press [^] while a track is highlighted to display
the tree screen.
Q>
&
0
c
1
2 Press [►] (PLAY).
Play now begins in random order.
To exit the random mode
Press [RANDOM] while stopped.
rgnsi
• DVDs and empty trays are skipped during random play.
•The playback control function on Video CDs is canceled.
When the sequential mode is off
latTigg tsiti I VCD I
You can play all the items on a disc in the play position in random order.
While stopped
1 Press [RANDOM].
2 Press the numbered buttons to select a title (DVD
only) and press [►] (PLAY).
• Some titles cannot be selected, fimi!
Play now begins in random order,
To exit the random mode
Press [RANDOM] while stopped.
The playback control function on Video CDs is canceled.
You cannot select groups that
contain no compatible files.
2 Press [A, ▼] to select a group and press
[ENTER].
The file list for the group appears.
For your reference
Press [◄, ►] to jump layers in the tree screen.
To return to the file list screen
[RETURN].
•Discs must conform to ISO9660 level 1 or 2 (except for extended
formats). MP3 files must have the extension “.MP3" or ".mp3”,
•This unit is compatible with multi-session but if there are a lot of sessions
it takes more time for play to start. Keep the number of sessions to a
minimum to avoid this.
•This unit is not compatible with ID3 tags.
•This unit is not compatible with files with a sampling rate of 32 kHz.
Naming folders and files
At the time of recording, prefix folder and file
names with 3-digit numbers in the order you
want to play them (this may not work at times).
Example:
-001. mp3
-002.mp3
-003. mp3
teji
------
001 .mp3
------
002.mp3
------
003.mp3
------
004.mp3
-001 .mp3
■002.mp3
■003.mp3
Page 12

Convenient features
Changing other discs during play
You can change the other discs without interrupting play.
Main unit only
1 Press [^] to open the drawer.
2 Press [Disc SKIP] to rotate the disc tray to the
desired position.
The carousel will move clockwise by one disc tray. Then, each press
moves the carousel in the opposite direction by two disc trays.
3 Change the disc and press [^] to close the
drawer.
Changing the disc in the play position
rnnan gra rvcbi
Main unit only
During play or while stopped
Press [DISC EXCHANGE].
1
Play is stopped (if pressed during play), the drawer opens arid the disc
tray that was in the play position comes to the front-left position.
Q>
&
U
c
§
■O
Change the disc in the front-left position.
Press [DISC EXCHANGE].
The drawer closes and play begins from the new disc.
Setting the unit to turn off SLEEP timer
EsasnsM
Remote control only
Press [SLEEP] to select
the setting.
Each time you press the button:
OFF^AUTO**=-^60 min ^90 min->120 min
*The unit turns off 5 minutes after play
finishes.
To cancel the SLEEP timer
Press [SLEEP] to select “OFF”.
To confirm the remaining time
Press [SLEEP],
•AUTO also works with DVDs that show a menu after play finishes.
•AUTO does not work if you press [■], [MENU], or [TOP MENU], it is
activated again when you restart play.
• AUTO does not work correctly with some discs (e.g., if menus appear
after playing video CDs).
; I ■ I I
L( ■ ( L
The unit turris off after
60 minutes.
■ Auto standby
The unit switches to standby mode after about 30 minutes in the stop
mode, irrespective of the SLEEP setting.
Logicj Dolby Pro Logic wil! not work correctly if they are on.
i
En™ (Dolby Digital, 2-channel or over only)
Use ADVANCED SURROUND V.S.S. (Virtual Surround Sound) to enjoy a
surroiind-like effect if you are using 2 front speakers.
are playing a disc with surround effects recorded on it, the effect is
If you
broacened and sound
Durir
gplay
s[QA.SRD].
Pres
time you press the button:
Each
1: Natural effect
2: Emphasized effect
to come from virtual speakers on either side.
i ■
OFF: Cancel (Factory preset)
Optim
urn seating position
<Wh(i
n using the television’s speakers>
ice A=Television’s width
Dista K
-.rt
speaker
Seating postton
Speaker
3 to 4 times distance A
•ADVANCED SURROUND will not work, or will have less effect with some discs.
•Turn off the surround sound effects on the equipment you have
connected when using this effect.
•Turh ADVANCED SURROUND off if it causes distortion.
Page 13

B BASS PLUS
EBEBI ESI |v^
Remote control pnly
Turn BASS PLUS on when you have connected an active subwoofer to the
SUBWOOFER terminal on the rear of the unit (•* page 5).
liWIl
Remote control only
Some DVDs have multiple soundtracks, subtitle languages and camera
angles, and you can change these during play.
Press [ Q BASS].
Each time you press the button:
OFF
i
1: Natural bass effect (Factory preset)
i
— 2: Emphasized bass effect
I I -M M Ui
i_i ■(_( ui -u
During play
I
Press [AUDIO].
The number changes each
time you press the button.
c CINEMA
or is displayed instead of the language number in circumstances
such as when no languages is recorded on the disc.
Soundtracks
Indicates that a multi-channel soundtrack
can be down-mixed to two channels.
DD Digital
il English 3/2.1 ch
Remote control only
You can change the picture quality for movie viewing.
• You can also use this button to turn the vocals on and off on karaoke
•Refer to |0 on page 15 for audio signal type details.
Press [Q CINEMA].
Each time you press the button:
Cin.1: Mellows images and enhances detail in dark scenes,
i
Cin.2: Sharpens images and enhances detail in dark scenes.
4
— Nor.: Normal mode (Factory preset)
For your reference
You can make finer adjustments to the picture if desired (■♦ page 15, Video
menu, Digital picture mode-User mode),
D DIALOGUE ENHANCER
ftVJM (Dolby Digital, 3-channel or over, where the dialogue is
recorded in the center channel)
Remote control only
During play
Press [SUBTITLE].
The number changes each time you press the button.
► In some cases, the subtitle language is not changed to the selected one
To clear/display the subtitles
1. Press [SUBTITLE],
2. Press [►].
3. Press [A, T] to select “OFF” or “ON”.
During play
Press [ANGLE].
The number changes each time you press the button.
discs. Read the disc’s instruction for details.
Subtitles
immediately.
Angles
This mode makes the dialogue in movies easier to hear.
Press [QD.ENH].
Each time you press the button:
ON <
----------
>OFF (Factory preset)
DIALOGUE ENHANCER will not work or will have less effect with some
discs.
Page 14

Using Graphical User Interface
|qui)
RETURN
Numbered
buttons
screons
For yjur reference
•Depsnding on the condition of the unit (playing, stopped, etc.) and the
type of software you are playing, there are some items that you cannot
selector change.
•When numbers are displayed (e.g. title No.), the numbered buttons are
also effective for setting. After entering numbers, press [ENTER] to
register the setting.
To elèi
ar the icons
[RETURN] until the menus disappear.
Press
■ To change the position of the icons
1. Press [◄, ►] to select the rightmost icon.
2. Press [A, T] to move the icons.
(Tjhere are 5 positions.)
B
i
Disc information
.g. dvD-Video
I
I
GUI screens are menus that contain information about the disc or unit.
I
These menus allow you to perform operations by changing this
I
information.
Common procedures
iWJiMigillVCDl
Remote control only
1 Press [DISPLAY].
Each time you press the button:
Disc information—^Progress indicator
Original display ^--Unit information step 2)
I
Unit information onTyl
While the leftmost icon is highlighted
Press [A,V] to select the menu.
Each time you press the button:
Play menu <
Display menu > Audio menu
Press [◄, ►] to select the item.
Press [A,T ] to select the setting.
• Items with “A” or"T” above and below can be changed by [A, T].
• Press [ENTER] if the setting does not change after pressing
[A. T],
• Some items require different operations. Read the following
explanations.
T 1
---
-h. Video menu
® ■©tal ® .
lEII ■BlOn
e.g. Video CD
EBi" :№É|vÌ3 ^
T
Disc number I
Title number |
Track number QE] [vcb i
Group number QSi (MP3 discs)
Chapter number liraaTj
Track number in group I3EI (MP3 discs)
Tijne
f’ress [A, ▼] to show the elapsed play time or remaining time for the
title (or chapter during program and random play).
•Select a position to start play by specifying a time with the numbered
tiultons and press [ENTER].
Ctianging the time display |3E| [vcb|
Prsss [A, T] to show the elapsed play time, remaining time for the
tr£ ck, or remaining time for the disc.
Ei ipsed play time Q>| (MP3 discs)
(display only, cannot be changed)
Sc undtrack language (^ page 13)
©
(Sse Qj on page 15 for language abbreviations.)
Ai dio signal type [iQiSI (■* page 13)
©
(Sse Q on page 15 for details.)
Ki raoke vocal on/off (Karaoke DVD only) iiMtsTi
Sc lo: OFF or ON
Diet: OFF, VI + V2, VI or V2
Si btitle language ■»mwj page 13)
(S3eO on page 15 for language abbreviations.)
Si btitles on/off 1*050
ON ^ OFF
Gtoup/Track name display on/off Qi] (MP3 discs)
orj ^ OFF
Ar gle number biH*ay (^ page 13)
Tr ick number in disc (MP3 discs)
Total number of tracks on disc 133 (MP3 discs)
Ai dio mode | vcd|
LF ^ L ^ R
t
____
i
© M^nu play rveb] (with playback control only)
int^icates whether menu play (playback control) is on or off.
[vc^
Page 15
Unit information
Play menu
Ô È3 0 /
R
A-B repeat imiflTi | VCD| page 10)
@
[ENTER] (start point) ■* [ENTER] (finish point)
To cancel: [ENTER]
Repeat play («^ page 10)
■wiiaTj |gg| (MP3 discs)
Chapter (C)^^<
t—
--------
BlliVCDi
Track (T)^i<
Il^OFF^ All discs (3)^3,—t
“Chapter (1)" or “Track (1)” during program play.
^^'“All (A)” during program and random play.
*3 0nly when the sequential mode is on (DVDs are skipped).
Play mode display isuisui IHSII vcd I
©
—: Normal play PGM: Program play RND; Random play
Marker liMtaTj ffgHI |VCD|
You can mark up to 5 positions to play again.
[ENTER] (The unit is now ready to accept markers.)
To mark a position: [ENTER] (at the desired point)
To mark another position: [◄, ►] ^ [ENTER]
To recall a marker: [◄,►]■* [ENTER]
To erase a marker: [◄, ►] ^ [CANCEL]
----
^ OFF <
>Title (T)^® Track (T)^^<
----------
---
—> Entire disc (D)^=
123**
---------
^ ^ OFF<—^ All discs (S)*^^
Group {G)=*
Video menu
Digital picture mode [jQjQ [vcd| (* page 13, CINEMA)
Nor.: Normal mode
Cin. 1: Mellows images and enhances detail in dark scenes
Cin.2: Sharpens images and enhances detail in dark scenes
User: User mode
The following items are also displayed when you select “User”
I la
BSi
@ Contrast (-7 to +7)
© Brightness (0 to+15)
© Color (-7 to +7)
Audio menu
OFF ■“
® ® ©
@ ADVANCED SURROUND page 12)
1 ^2 ^OFF
-t_
______
t
® BASS PLUS PWiM WSSi Pv^ page 131
1 ^2 ^OFF
t
________
© DIALOGUE ENHANCER maaai* page 13)
ON
4:3 TV ZOOM
@
ON ^OFF
Expand a letterbox picture {•* page 6) to fill more of a regular 4:3 aspect
television (The sides of the picture are cut off when you select ON).
•4:3 TV ZOOM is cleared when you change discs or switch the unit to
standby.
• Depending on the video format of the disc and current play status,
this feature may not work as described.
•Menus may act or appear differently while 4:3 TV ZOOM is on.
IPB display IÏQÏQ (■* Back cover, Glossary)
ON ^OFF
Displays the picture type (l/P/B) in the still picture mode.
Display dimmer EnÎQ rvcDl
©
Changes the brightness of the unit’s display.
Bright <—>Dim <—>Auto® (EHSH [vcp|}
t
_________
^The display is dimmed during play, but brightens when you perform
operations such as slow-motion, search, and pause.
t
-OFF
^^
0)
&
u
c
I
Progress indicator
Indicates how far you have played through an item,
e.g. DVD'Video
tiOO)
Current position |g>i [vcp |
T: Title number lnffliStl
T: Track number ||^ [v^
G: Group number (MP3 discs)
C; Chapter number iiMiaTi
T: Track number in group ^| (MP3 discs)
Condition - play, pause, or stow/search ggoa [vcb]
Time EQ33
• Press [A, ▼] to show the elapsed play time or remaining time for the
title (or chapter during program and random play).
•Select a position to start play by specifying a time with the numbered
buttons and press [ENTER],
Changing the time display [vc^
Press [A, ▼] to show the elapsed play time or remaining time for the
track.
Elapsed play time ||^ (MP3 discs)
(display only, cannot be changed)
Q Audio/Subtitle language
English SVE: Swedish CHI: Chinese
ENG:
FRA: French NOR: Norwegian KOR: Korean
DEU: German
ITA; Italian POR: Portuguese VIE: Vietnamese
ESP: Spanish
NLD: Dutch JPN: Japanese
Q| Signal type/data
LPCM/DQDigital/DTS/MPEG: Signal type
k (kHz): Sampling frequency
b (bit): Number of bits
ch (channel): Number of channels
Example: 3/2 ^ch
DAN: Danish MAL: Malay
RUS: Russian
L,l: Subwoofer signal
(not displayed if there is no subwoofer signal)
No surround
Mono surround
Stereo surround (left/right)
Center
Front left+Front right
Front left+Front right+Center
THA: Thai
+ : Others
Page 16

Changing settings
This chart shows the settings for this unit. Change the settings to suit your preferences and to suit the unit to the environment in which it is being
used. These settings are retained in memory until they are changed, even if the
Menus
Disc
Audio mviaTi
Items
Choose the preferred audio language.
Subtitle iwiiaTi
Choose the preferred subtitle language.
junit is turned off. See page 17 for details on menu operation.
Options (Underlined items are the factory preset.)
English French German Italian
Spanish Portuguese Swedish Dutch
Original*’’ Other
Automatic*^ Enalish French German
Italian Spanish Portuguese Swedish
Dutch Other *>k**®2
Menus niTiiaTj
Choose the preferred language for disc menus.
Enalish French German Italian
Spanish Portuguese Swedish Dutch
Other + +
Setting ratings (When level 8 Is selected)
8 No Limit 1 to 7*“ 0 Lock All
Changing ratings (When level 0-7 is selected)
Unlock Player Change Password
Change Level Temporary Unlock
4:3 Pan&Scan 4:3 Letterbox 16:9
Video S-Video RGB
Automatic Field Frame
Video
Ratings hiifraM
Set a ratings level to limit DVD-Video play.
•The password screen is shown if you choose levels 0 to 7 or if you
i 1
i !
choose “Ratings” when levels 0 to 7 have been selected page
•Select “Level 0" to prevent play of discs that do not have ratings le
Ss ■
recorded on them.
TV Aspect (•• page 6)
Choose the setting to suit your television and preference.
AV Output (-► page 4)
Choose the video signal format to be output from the SCART termin
Still Mode (■► Back cover, Glossary)
i
j
aL
1
f '
Specify the type of picture shown when paused.
Audio
Display
NTSC Disc Output
Choose whether PAL 60 or NTSC signals are output during playbac
k of
NTSC discs (■• page 7).
PCM Down Conversion liiViaTj (-» page 17)
Dolby Digital (-^ page 17)
DTS Digital Surround [¡QiQ page 17)
MPEG liMiaTi page 17)
D. Range Compression [¡QiQ Dolby Digital only (^ Back cover, G
gssary)
Change the dynamic range for late night viewing.
Audio during Search
Choose whether to have sound during search.
Menu Language
Choose Ihe preferred language for these menus and the on-screen me;
isages.
PAL 60: when connected to a PAL television.
NTSC: when connected to an NTSC television.
No Yes
Bitstream PCM
Off Bitstream
PCM Bitstream
Off On
On Off
Enalish Français Deutsch Italiano
Español Portugués Svenska
Nederlands
Others
On-Screen Messages
Choose whether to show on-screen messages or not.
Demo
A demonstration of the unit’s on-screen displays starts when you se
“On”. The demonstration stops when you press a button and the set
ect
ting
On Off
Off On
reverts to “Off".
QUICK SETUP (^ page 6)
Answer questions to make basic settings.
Yes No
The originai language of each disc will be selected.
input a code number with the numbered buttons (see below).
If the language selected for “Audio" is not available, subtitles of that language wil
automatically appear if available on that disc.
Prohibits play of DVD-Video with corresponding ratings recorded on them.
Language code list
Abkhazian: 6566
Afar: 6565
Afrikaans:
Albanian: 8381 Chinese:
Ameharic: 6577 Corsican: 6779
Arabic: 6582 Croatian:
Armenian: 7289 Czech;
Assamese: 6583
Aymara;
Azerbaijani: 6590 English: 6970
Bashkir: 6665 Esperanto: 6979
Basque;
Bengali; Bangla: 6678
Bhutan!: 6890 Fiji:
Bihari:
Breton: 6682 French; 7082
Bulgarian: 6671 Frisian; 7089
Burmese:
Byelorussian:
Cambodian: 7577 German: 6869 Kazakh:
6570 Catalan: 6765 Greek: 6976
Danish: 6865 Hebrew: 7387
6588 Dutch: 7876 Hindi: 7273 Ungala:
6985 Estonian: 6984 Indonesian: 7378 Malagasy:
Faroese: 7079 interlingua: 7365 Malay:
6672 Finnish: 7073 Italian: 7384
7789 Galician; 7176 Kannada: 7578
---------r
Georgian; 7565 Kashmiri:
6669
9072 Greenlandic: 7576 . Korean: 7579
Guarani: 7178 Kurdish: 7589
7282 Gujarati: 7185 Laotian:
6783 Flausa: 7265 Latin:
Hungarian: 7285 Lithuanian: 7684
Icelandic: 7383 Macedonian: 777^
7074 Irish: 7165 Malayalam; 7776
Japanese: 7465 Maori; 7773
Javanese: 7487 Marathi:
Kirghiz:
Latvian, Lettish:7680
Maltese: 778^
Moldavian: 7779
7583
7579
7589
7679
7669
7678
7783
7782
1
Mongolian: 7778 Serbo-Croatian: 8372 Tigrinya: 8473
Nauru:
Nepali: 7869
Norwegian: 7879 Singhalese: 8373 Turkmen: 8475
Oriya: 7982 Slovak: 8375 Twi: 8487
Pashto, Pushto:8083 Slovenian:
Persian; 7065 Somali: 8379 Urdu: 8582
Polish: 8076 Spanish: 6983 Uzbek: 8590
Portuguese: 8084 Sundanese: 8385 Vietnamese: 8673
Punjabi: 8065 Swahili: 8387 Volapuk: 8679
Quechua: 8185 Swedish: 8386 Welsh: 6789
Rhaeto-Romance: 8277Tagalog: 8476 Wolof: 8779
Romanian: 8279 Tajik: 8471 Xhosa: 8872
Russian: 8285 Tamil: 8465 Yiddish: 7473
Samoan: 8377 Tatar: 8484 Yoruba: 8979
Sanskrit: 8365 Telugu: 8469 Zulu; 9085
Scots Gaelic: 7168 Thai: 8472
Serbian: 8382 Tibetan: 6679
7865 Shona: 8378 Tonga: 8479
Sindhi: 8368 Turkish: 8482
8376
Ukrainian: 8575
\
J
Page 17

Entering a password (Ratings)
i ííHUís
ENTER
CANCEL—llitl
Common procedures
Remote control only
See page 16 for menu and option details.
1 Press [SETUP] to show the menus.
SETUP
RETURN
Numbered
buttons
The password screen is shown when you select levels 0 to 7.
1. Input a 4-dlgit password with the numbered buttons and press
[ENTER],
• If you enter a wrong number, press [CANCEL] to erase it before you
press [ENTER],
•The lock symbol appears closed to show the rating is locked.
•Do not forget your password.
2, Press [ENTER] to confirm the 4 digits.
Now, when you insert a DVD-Video that exceeds the ratings limit
you set, a message appears on the television.
Follow the on-screen instructions.
Digital output
Change the settings when you have connected equipment through this
unit’s DIGITAL AUDIO OUT terminal (OPTICAL).
PCM Down Conversion
Select how to output audio with a sampling frequency of 96 kHz.
Select “Yes" if the equipment you connect cannot process signals with a
sampling frequency of 96 kHz.
•Select “No" if you use analog connection irrespective of the type of
equipment.
No (Factory preset):
Output as 96 kHz. There is no output if the disc has copy protection. Select
“Yes" in this case.
Yes:
Converted to 48 kHz for output.
Doiby Digitai, DTS Digitai Surround and MPEG
(0
I
s
0)
§■
■D
s
c
I
•The QUICK SETUP screen appears when you press [SETUP] the
first time after purchase (■* page 6).
2 Press [◄, ►] to select the menu’s tab.
The screen changes to display the menu.
Disc
Others
Video Audio
Display
3 Press [A, T] to select the item you want to
change and press [ENTER].
4 Press [Á, ▼, ◄, ►] to select the option and press
[ENTER].
The screen now shows the menu again.
To return to the previous screen
Press [RETURN],
When you are finished
Press [SETUP],
Bitstream: (Factory preset for Dolby Digital)
Select if the equipment you connected can decode the signal.
PCM: (Factory preset for MPEG)
Select if the equipment you connected cannot decode the signal.
Off: (Factory preset for DTS Digital Surround)
Select if the equipment you connected cannot decode the signal,
IMPORTANT
If the equipment you connected cannot decode the signal, the
setting must be changed to PCM or Off. if not, signais the equipment
cannot process will be output by this unit, causing high levels of
noise which can damage your hearing and the speakers.
This product incorporates copyright protection technology that is
protected by method claims of certain U.S. patents and other
intellectual property rights owned by Macrovision Corporation and
other rights owners. Use of this copyright protection technology must
be authorized by Macrovision Corporation, and is intended for home
and other limited viewing uses only unless otherwise authorized by
Macrovision Corporation, Re'^erse engineering or disassembly is
prohibited.
Manufactured under license from Dolby Laboratories.
“Dolby”, "Pro Logic” and the double-D symbol are trademarks of Dolby
Laboratories,
“DTS", “DTS Digital Surround” and “DTS Digital Out” are
registered trademarks of Digital Theater Systems, Inc.
Page 18

Specifications
Signal system:
Operating temperature range:
Operating humidity range:
Discs piayed [8 cm or 12 cm]:
{1 ) DVD-Video, DVD-R (DVD-Video compatible)
(2) CD-Audio (CD-DA)
(3) Video CD
(4) CD-R/CD-RW {CD-DA, Video CD formatted discs)
(5) MP3
•Maximum number of tracks and groups recognizable: 999 tracks
and 99 groups
•Compatible compression rate: between 32 kbps and 32Ct;kbps
Video output:
Output level: 1 Vp-p (75 Q)
Output terminal: i.
For the United Kingdom and Continental Europe
For Australia and N.Z.
S video output:
Y output level:
C output level:
Output terminal:
For the United Kingdom and Continental Europe
For Australia and N.Z.
Component video output;
Y output level:
Pb output level:
Pr output level:
Output terminal:
RGB video output; j
R output level:
G output level:
B output level:
Output terminal:
For Australia and N.Z.
For the United Kingdom and Continental Europi
PAL625/50, PAL525/6P, NTSC
+ 5 to +35 °C
5 to 90 % RH {no condensation)
Pin jack {1 system)/AVi;
Pin jack (1 system) ^
1 Vp-p (75 O)
NTSC; 0.286 Vp-p (7a O)
PAL; 0,300 Vp-p (7£ÌO)
S terminal (1 system)/AV
S terminal (1 system)
1 Vp-p (75 Q)
0.7 Vp-p (75 0)
0.7 Vp-p (75 0)
Pin jack (1 system)
(Y: green, Pb: blue, PR:jred)
0.7 Vp-p (75 O)
0.7 Vp-p (75 O)
0,7 Vp-p (75 O)
AV (1 system)
Audi
3 output;
put level:
Out
Out
put terminals:
For the United Kingdom and Continental Europe
For Australia and N.Z.
Nujmber of terminals:
2ch:
Subwoofer output (0.1ch):
Audib performance:
(1) Frequency response:
• DVD (linear audio):
•CD audio:
S/N ratio:
•CD audio;
Dynamic range:
• DVD (linear audio):
• CD audio:
Total harmonic distortion:
•CD audio;
Digit It
audio output;
ical digital output:
Op
Pickti
NORSK
ip:
Pickii
Pow( r supply:
Pow€ r consumption:
Dimensions;
Mass
Power consumption in standby mode: approx. 3.8 W
Spec
Mass
Wave length:
P:
Laser power:
Bolgelengde:
Laser-styrke:
fications are subject to change without notice,
and dimensions are approximate.
Pin jack
2 Vrms (1 kHz, 0 dB)
Pin jack/AV
1 system
1 system
4 Hz-22 kHz (48 kHz sampling)
4 Hz-44 kHz (96 kHz sampling)
4 Hz-20 kHz
115dB
102 dB
98 dB
0.0025 %
Cptical terminal
058 nm/790 nm
CLASS 2/CLASS 1
658 nm/790 nm
Ingen farlig straining sendee ut
KLASSE 2/KLASSE 1
AC 220-240 V, 50 Hz
14 W
430 (W)X406.5 (D)x75.8 (H) mm
4.5 kg
Glossary
Bitstream
This is the digital form of multiple channel audio data (e.i
before it is decoded into its various channels.
., S.tiChannel)
Decoder
A decoder restores the coded audio signals on DVDs to normal. This is
called decoding.
Dolby Digital i
This is a method of coding digital signals developed by Dolby Laboratories.
Apart from stereo (2-channel) audio, these signals can also be 5.|(-channel
audio. A large amount of audio information can be recorded or]ione disc
using this method.
Dolby Pro Logic
A surround system where a 4-channel audio track is recorded as 2
channels and then is restored to 4 channels for play. The surroun:|l channel
is monaural and can reproduce up to 7 kHz.
DTS (Digital Theater Systems)
This surround system is used in many movie theaters around the world.
There is good separation between the channels, so realistic sound effects
are possible, ii
Dynamic range
Dynamic range is the difference between the lowest level of soun
be heard above the noise of the equipment and the highest leve
before distortion occurs.
;lthat can
of sound
Frarr e still and field still
Framus are the still pictures that go together to make a moving picture.
There are about 30 frames shown each second.
One f ame is made up of two fields. A regular television shows these fields
one a ter the other to create frames,
A still is shown when you pause a moving picture. A frame still is made up
of two alternating fields, so the picture may appear blurred, but overall
quaiitji is high. A field still is not blurred, but it has only half the information
of a frame still so picture quality is lower.
I/P/B
MPEG
Video
1: in
P: Pi
B;
Linear PCM (pulse code modulation)
These are uncompressed digital signals, similar to those found on CDs.
Playlj)
If
with
Matsushita Electric Industrial Co., ij.td.
WaKi RitA' httrT'/AA/VA/\A/ nanacnnir* nr\ irt/nlnhal/
2, the video compression standard adopted for use with DVD-
codes frames using these 3 picture types,
ra coded picture (1-picture)
Till,
is the standard picture and is a complete picture in itself. This
ms.
ans it has the best picture quality and is the best to use when
acj
usting the picture,
edictive coded picture (P-picture)
Tfii
picture is calculated based on past I or P-pictures.
Bidi
irectionally-predictive coded picture (B-picture)
Tfiii
picture is calculated by comparing past and future I and P-pictures
it has the lowest volume of information.
sc
ack control (PBC)
Vid
eo CD has playback control, you can select scenes and information
enus (called menu play in these instructions).
 Loading...