

Page 1
Operating Instructions
For Digital Camera
PC Connection
QuickTime and the QuickTime logo are trademarks
or registered trademarks of Apple Computer, Inc.,
used under license.
VQT0R58
Page 2
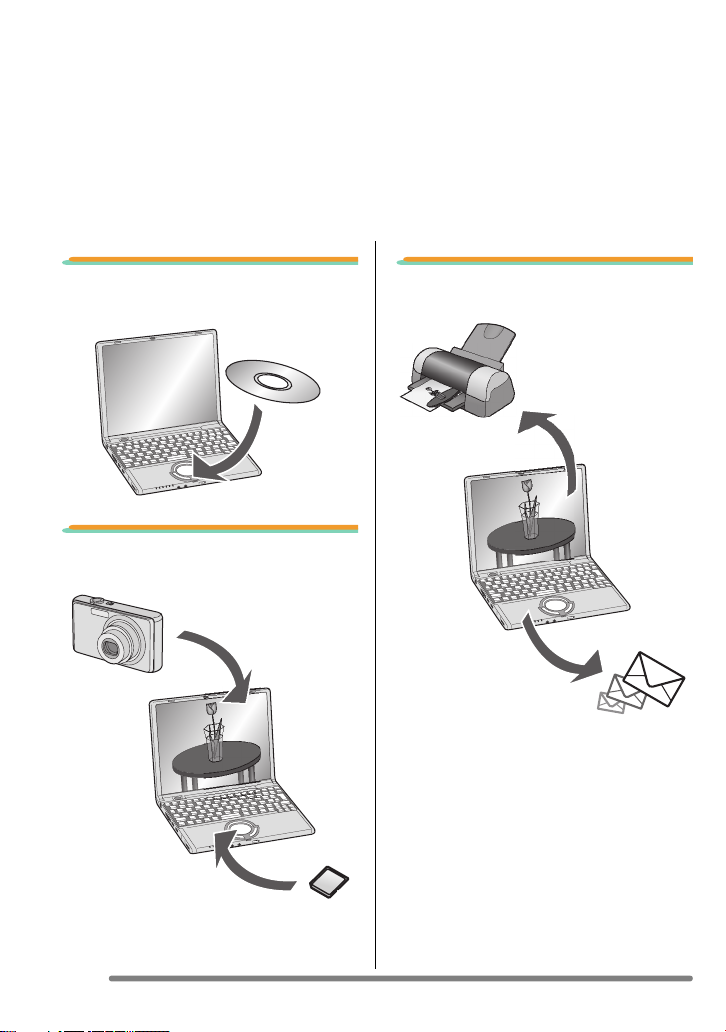
Connection with the PC Offers much more
Enjoyment
Using “LUMIX Simple Viewer” on the supplied CD-ROM, you can easily acquire pictures
to the PC, print them, attach them to e-mails, and so on.
Please use the digital camera more pleasantly with “LUMIX Simple Viewer”.
• In these operating instructions, “LUMIX Simple Viewer” is referred to as “Simple
Viewer”.
1. Installing Simple Viewer,
first of all.
2. Acquiring recorded pictures
to the PC.
3. Printing pictures and
attaching them to e-mails.
2
VQT0R58
Page 3

Contents
Connection with the PC Offers much more Enjoyment ..................................................... 2
Introduction
Read Before Use ...............................................................................................................4
Key terms ....................................................................................................................4
Is Simple Viewer compatible with any PC? .................................................................5
Setting up
Installing the Software 1 ................................................................................................... 6
Installing the USB driver (Windows 98/98SE only) ...................................................... 6
Installing the Software 2 ................................................................................................... 7
Installing Simple Viewer .............................................................................................. 7
Connecting the Digital Camera to PC ................................................................................ 8
Using Simple Viewer
Acquiring pictures to the PC (Acquire to PC) ..................................................................... 9
Viewing pictures (View) ...................................................................................................10
Printing pictures (Print) ....................................................................................................13
Sending pictures by e-mail (Send by e-mail) ...................................................................16
Advance ...........................................................................................................................18
Enabling the pictures stored in the PC to be used on Simple Viewer
(Add pictures) .......................................................................................................... 19
Viewing pictures on the PC with the digital camera
(Export to the card) .................................................................................................20
After Using Simple Viewer ...............................................................................................22
Others
To Acquire Picture without Using Simple Viewer ............................................................. 23
How to Use on Macintosh ................................................................................................ 24
How to Remove the USB Driver and Simple Viewer (Uninstall) ......................................25
When Pictures cannot be Acquired .................................................................................26
Troubleshooting ............................................................................................................... 27
Operating Environment .................................................................................................... 30
VQT0R58
3
Page 4
Introduction
Introduction
Read Before Use
• Please note that some of the explanations and screens covered in these operating
instructions may differ from actual ones depending on the operating environment of the
PC.
• The explanaitons of these operating instructions are subject to change without prior
notification.
• No part of these operating instructions may be reproduced without permission.
• Screen shot(s) reprinted with permission from Microsoft Corporation.
• Explanations about Windows in these operating instructions are based on Windows XP
screens.
• In these operating instructions, a Card refers to an SD memory card, including the built-in
memory.
Key terms
• Key terms you should know at the minimum when using the PC are listed below. Refer to
the operating instructions for the PC too.
Term Explanation
Application software Refers to software programmes to be used for various
Install/Uninstall “Install” refers to incorporating software into the PC and
Drive/Driver A “Drive” refers to a PC peripheral device (CD-ROM drive,
File Refers to a document, picture, or other data.
Folder Refers to a place where a grouping of files are stored.
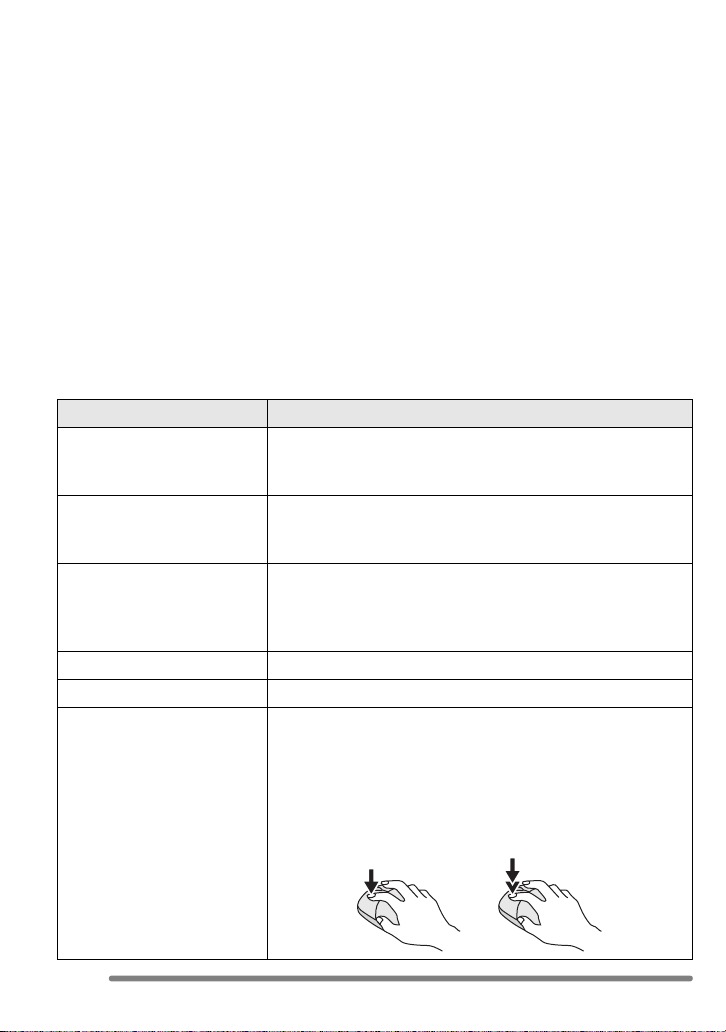
Click/Double-click “Click” refers to pressing and releasing the mouse button.
purposes such as word processing, spread sheet
operation, picture editing, and e-mail sending/receiving.
making it ready for use, and deleting the installed software
is referred to as “Uninstall”.
digital camera, etc.) that files are written in and read from,
and the software to operate such a drive is referred to as a
“Driver”.
Clicking the mouse button twice in rapid succession is
referred to as “Double-click”.
• In these operating instructions, description is made on the
basis of left-click.
• If double-clicking cannot be performed well, change the
interval of the clickings.
4
VQT0R58
Page 5
Introduction
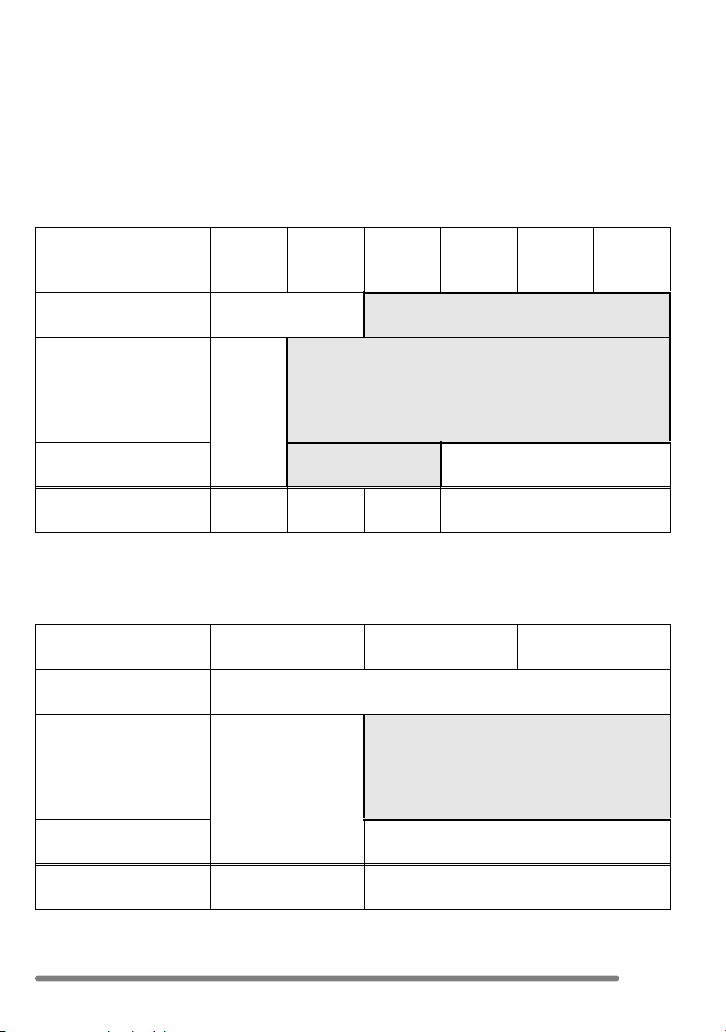
Is Simple Viewer compatible with any PC?
Using a USB connection, you can acquire the pictures held in the digital camera to the PC.
With Simple Viewer, however, you can save them to the PC more easily.
∫ Windows
• To identify the OS (PC type), select [Start] >> ([Setup] >>) [Control Panel]
(>> [Performance and Maintenance]), and then (double-) click [System]. You can see the
OS.
95 and
earlier
versions
Possible to use Simple
Viewer?
Can I acquire the
pictures held in the
digital camera to the
PC using the USB
connection cable?
Necessary to install the
USB driver?
Which page should I
refer to?
¢1: You can acquire them if the PC has a PC card slot.
¢2: To learn how to acquire pictures, refer to P23.
¢1
P27
∫ Macintosh
OS 8.x and earlier
versions
Possible to use Simple
Viewer?
Can I acquire the
pictures held in the
digital camera to the
PC using the USB
connection cable?
Necessary to install the
USB driver?
Which page should I
refer to?
¢3: You can acquire them if the PC has a PC card slot.
98 98SE Me 2000 XP
— ≤
≤
≤ —
P6, 8
¢2
¢3
P27 P24
P6– P7–
OS 9 OS X
—
≤
—
VQT0R58
5
Page 6
Setting up
Setting up
Installing the Software 1
Installing the USB driver (Windows 98/98SE only)
• If Windows 98/98SE is used, install the USB driver (software for operating the digital
camera through a PC) before connecting the digital camera to the PC.
• This installation is not required on the 2nd and later connections.
• If any OS other than Windows 98/98SE is used, this installation is not required.
• Before inserting the CD-ROM, close all running applications.
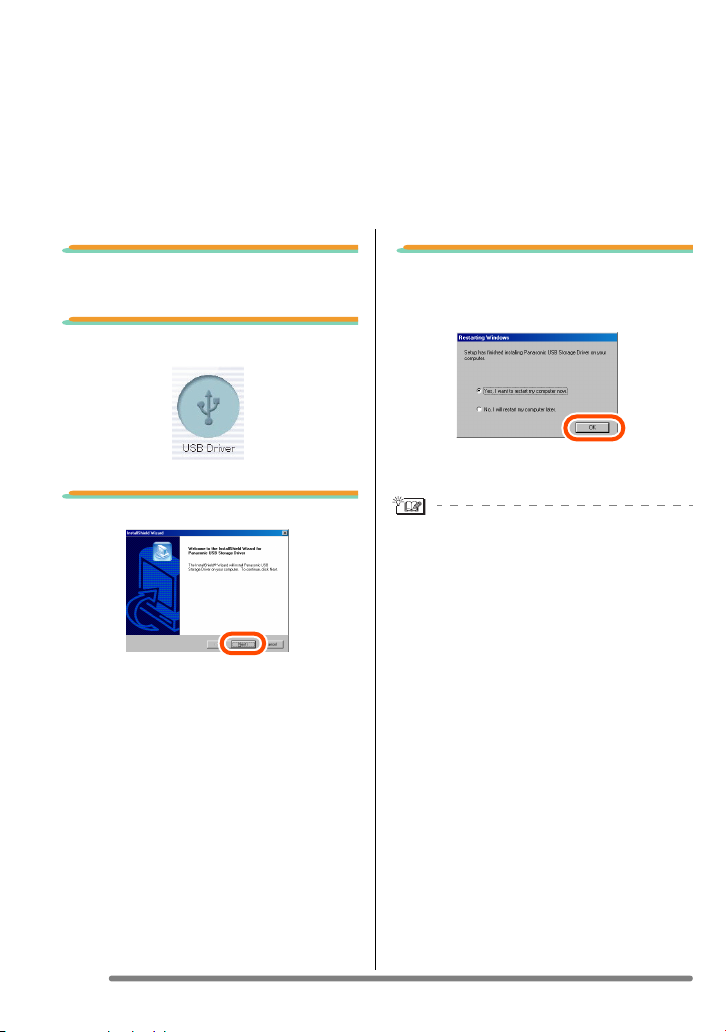
1. Insert the CD-ROM.
The setup menu will start.
2. Click [USB Driver].
3. Click [Next].
• Installation of the USB driver starts.
4. If the [Restarting Windows]
dialogue box appears, click
[OK].
After the PC is restarted, installation of the
USB driver will be completed.
If the setup menu does not start
automatically:
• Double-click [My Computer] on the
desktop, double-click or open
[VFFXXXX] (part No. XXXX varies by
model), and double-click [InstMenu.exe].
6
VQT0R58
Page 7
Setting up
Installing the Software 2
Installing Simple Viewer
• This installation is not required on the 2nd and later connections.
• Before inserting the CD-ROM, close all running applications.
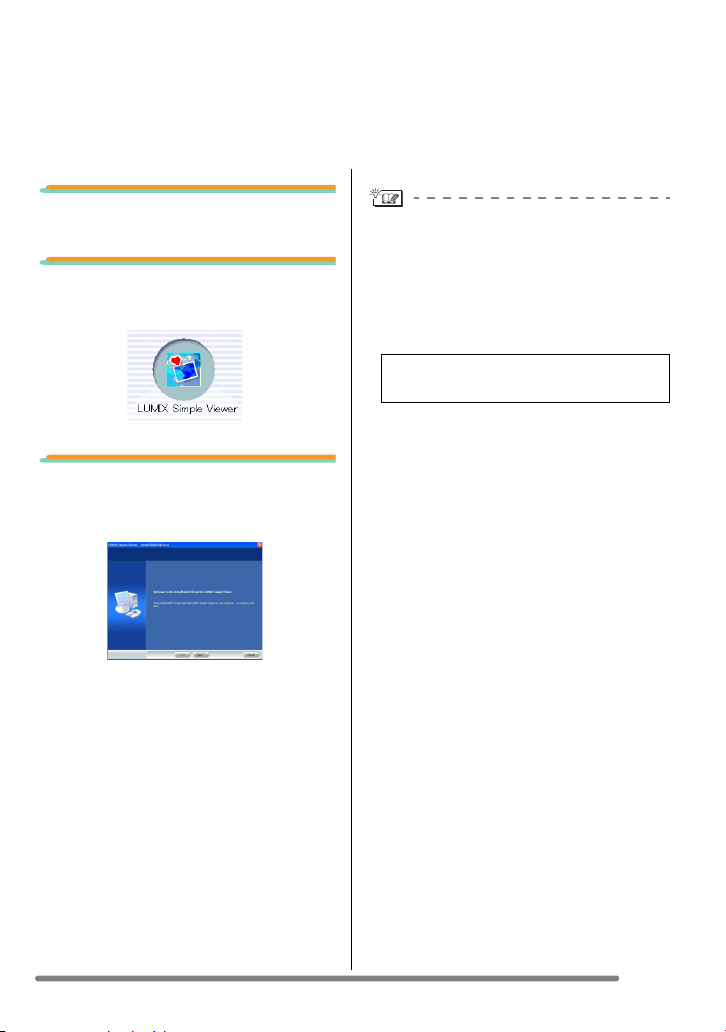
1. Insert the CD-ROM.
The setup menu will start.
2. Click [LUMIX Simple
Viewer].
3. Proceed with installation
according to messages
appearing on the screen.
• Only when Windows 98SE is used,
MDAC2.8 (Microsoft Data Access
Components 2.8) may also be installed.
Install it according to messages shown
on the screen.
• Before first use following the completion
of installation, be sure to select
[Readme] from [Start] >> [All programs]
>> [Panasonic] >> [LUMIX Simple
Viewer] to read additional information.
• Simple Viewer is installed in the following
folder. (It cannot be changed.)
C:\Program Files\Panasonic\
LUMIXSimpleViewer
If the setup menu does not start
automatically:
• Double-click [My Computer] on the
desktop, double-click or open
[VFFXXXX] (part No. XXXX varies by
model), and double-click [InstMenu.exe].
If Simple Viewer cannot be installed:
• If Windows 2000/XP is used, you cannot
install when you have logged on to the
PC as a Limited Account user. Log on as
an Administrator Account user and install
again. For details, refer to the operating
instructions for the PC.
VQT0R58
7
Page 8
Setting up
Connecting the Digital Camera to PC
• When Windows 98/98SE is used, install the USB driver (P6) before connection.
• If the PC has a built-in SD memory card slot, insert a Card into the slot and you can
acquire pictures to the PC by use of Simple Viewer.
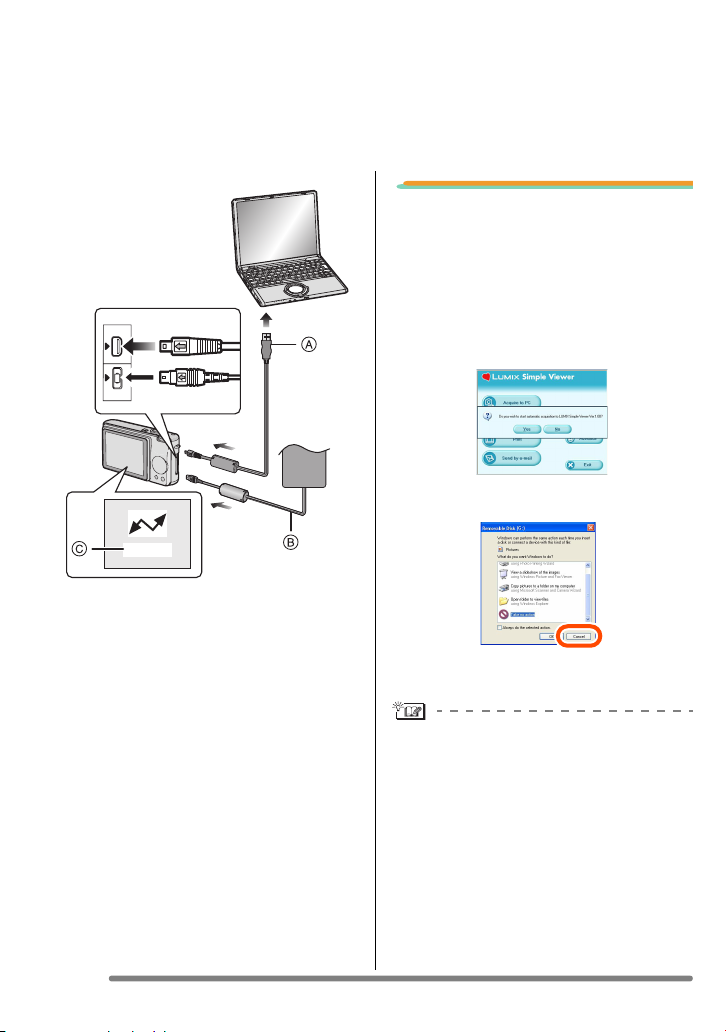
1. Connect the digital camera
to the PC via the supplied
USB connection cable.
• When the connection is established
correctly, Simple Viewer automatically
DIGITAL
AV OUT
DC IN
ACCESS
A: USB connection cable
B: AC adaptor (optional)
C: This message appears during data
transfer.
Preparations on the digital camera side
When you connect the digital camera to
the PC, use batteries with sufficient
battery power or the AC adaptors. If the
remaining battery power is exhausted
during communication, the recorded data
may be damaged.
• If you use the AC adaptor, connect it.
• Turn on the digital camera.
• Set [USB MODE] in the [SETUP] menu
to [PC].
starts to open the screen for starting
acquisition. (P9)
If Windows 98 is used, refer to P23.
• When the following screen appears, click
[Cancel] to close it.
• If Simple Viewer does not start
automatically, refer to P27.
• Do not operate the digital camera or
disconnect the USB connection cable
while transferring data in the digital
camera. The software may not function
correctly and damage the data being
transferred.
• The shape of the terminal varies
depending on the digital camera used.
For details, refer to the operating
instructions for the digital camera.
8
VQT0R58
Page 9
Using Simple Viewer
Using Simple Viewer
Acquiring pictures to the PC ( Acquire to PC)
• When you have once exited Simple Viewer or view the pictures already acquired,
double-click the short-cut icon of the LUMIX Simple Viewer on the desktop to start
Simple Viewer.
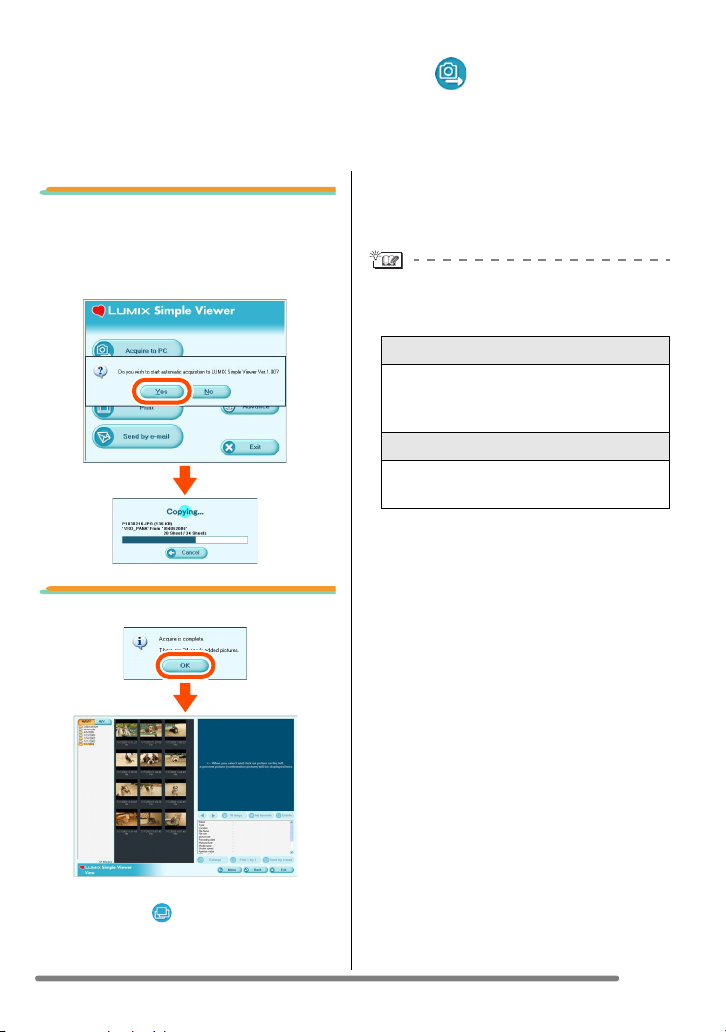
1. When the message for
inquiring whether to start
acquisition is displayed,
click [Yes].
2. Click [OK].
• When there are many pictures to acquire
or the file size of pictures is large, it may
take time to acquire them.
Acquire destination folder:
• The pictures acquired to the PC are
saved in the following folder.
Windows 2000/XP
C:\Documents and Settings\
All Users\Documents\My Pictures\
LUMIXSimpleViewer
Windows 98SE/Me
C:\My Documents\My Pictures\
LUMIXSimpleViewer
• When you wish to change the current
acquire destination folder, refer to P21.
When you click [Cancel] during
acquisition:
• Acquisition will be aborted halfway, and
the pictures already acquired will be
displayed in thumbnail view.
Pictures will be acquired from the card to
the PC and the [ View] screen will be
opened to display the acquired pictures in
thumbnail view.
9
VQT0R58
Page 10
Using Simple Viewer
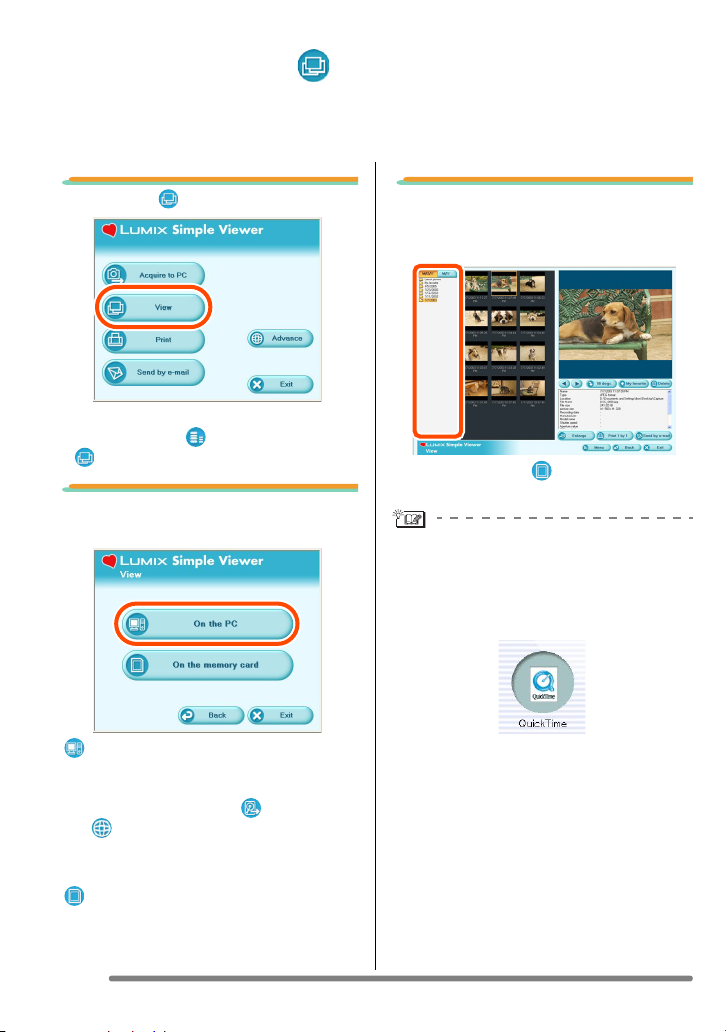
Viewing pictures ( View)
• When you have once exited Simple Viewer or view the pictures already acquired,
double-click the short-cut icon of the LUMIX Simple Viewer on the desktop to start
Simple Viewer.
1. Select [ View].
• When the above main menu is not
displayed, click [ Menu] and then click
[View].
2. Select any location where
pictures are saved.
[On the PC]
Select this option when viewing the
pictures acquired to the PC.
• If pictures are added by [ Add pictures]
in [ Advance], you can view pictures
stored in the PC other than the ones
acquired by Simple Viewer. (P19)
[ On the memory card]
Click this button when viewing pictures on
the Card connected using the USB
connection cable.
10
VQT0R58
3. Select any folder, and in
thumbnail view, select any
picture.
• When you select [ On the memory
card] in step 2, no folders are displayed.
To view motion images:
• QuickTime must be installed in the PC
used. Place the supplied CD-ROM in the
CD-ROM drive and install QuickTime
using the setup menu.
Page 11

Using Simple Viewer
How to use the [ View] screen
12 3
1. Folder display
Folders containing acquired pictures
are displayed. Folders are created on
a date basis.
[M/D/Y]
This option displays by the day of
recording.
[M/Y]
This option displays by the month of
recording.
2. Thumbnail display
The pictures within a selected folder
are displayed in thumbnail view.
For motion images, the mark ( ) is
appears on the top left of its
thumbnail.
Thumbnails are displayed in
descending order of the recording
date from the top of the thumbnail
view.
3. Picture View
The picture selected in the thumbnail
view is displayed a little larger.
When motion image is selected, it is
automatically played back repeatedly
until another picture is selected.
4. [ ]
Click this button to select the previous
picture.
45 6 7 8
9121013 14
5. [ ]
Click this button to select the next
picture.
6. [ 90 degs.]
Each click of this button rotates the
picture 90° clockwise.
7. [ My favorite]
When clicking this button, the mark
( ) is added to the picture, and it is
registered in Favorites. When clicking
the button again, the picture is
excluded from Favorites.
The pictures registered in Favorites
can be viewed by selecting [My
favorite] at the top of the Folder
display.
8. [ Delete]
Click this button to delete a selected
picture.
9. [ Enlarge]
Click this button to enlarged a selected
picture to full screen. (P12)
10. [ Print 1 by 1]
When you click this button, the
selected picture is printed.
When you want to print multiple
pictures, click [ Print] on the main
menu. (P13)
2.48
2560 1920
4:3
5
8
15
11
11
VQT0R58
Page 12

Using Simple Viewer
345621
11. [ Send by e-mail]
Click this button to attach a selected
picture to an e-mail. (P16)
12. [ Menu]
Click this button to return to the main
menu of Simple Viewer.
13. [ Back]
Click this button to return to the
previous menu. (P10)
14. [ Exit]
Click this button to exit Simple Viewer.
15. Picture information
[Name]
Name of the file on Simple Viewer.
[Type]
File format.
[Location]
Place where acquired files are
stored.
[File Name]
Name of the file on the PC.
[File size]
Capacity of the file.
In addition, [picture size], [Recording
date], [Manufacturer], [Model name],
[Shutter speed], [Aperture value], [ISO
sensitivity], [Exposure +/-], [White
balance], [Flash], [Print compensation
information], and [Recording mode]
are displayed.
12
VQT0R58
∫ Full screen display
1. [ ]
Click this button to select the previous
picture.
2. [ ]
Click this button to select the next
picture.
3. Switching the display size of
pictures
•[ Full scale]
Displays the picture in its original
size.
• [ Fit to screen]
Enlarges or reduces the picture to
the PC screen.
Motion images cannot be changed in
the display size of pictures.
4. [ Menu]
Click this button to return to the main
menu of Simple Viewer.
5. [ Back]
Click this button to return to the
[ View] screen. (P10)
6. [ Exit]
Click this button to exit Simple Viewer.
If the operating buttons disappear:
Move the mouse and the operating buttons
appear again.
Page 13

Using Simple Viewer
Printing pictures ( Print)
• When you have once exited Simple Viewer or view the pictures already acquired,
double-click the short-cut icon of the LUMIX Simple Viewer on the desktop to start
Simple Viewer.
1. Select [ Print].
• When the above main menu is not
displayed, click [ Menu] and then click
[ Print].
2. Select any location where
pictures are saved.
[On the PC]
Select this option when printing the
pictures acquired to the PC.
• If pictures are added by [ Add pictures]
in [ Advance], you can print pictures
stored in the PC other than the ones
acquired by Simple Viewer. (P19)
[ On the memory card]
Click this button when printing a picture on
the Card connected using the USB
connection cable.
3. Select any folder to display
the pictures in it in
thumbnail view, and select a
one.
• When you select [ On the memory
card] in step 2, no folders are displayed.
13
VQT0R58
Page 14

Using Simple Viewer
4. Click [ Add] and then click
[ Next].
• The selected picture will be added to
[List of photos to be printed].
• To remove any picture from [List of
photos to be printed], click it in [List of
photos to be printed] and then click
Cancel
[
].
5. Set up printing, and click
[ Next].
[Please select the printing type]
( One sheet)
Used to print one picture on one sheet.
( Two sheets, Four sheets,
Eight sheets)
Used to print pictures on one sheet by the
number of pictures corresponding to the
mode selected.
(Example: [ Two sheets])
(Index)
The selected pictures are printed in list
form.
(Example: When 16 pictures are selected.)
• Depending on the printer you are using,
“Print without borders” cannot be
selected or the sizes and types of paper
you can use may be restricted. In such
cases, click [ Set] and then set up
printing.
14
VQT0R58
• About 36 pictures can be printed one
A4-size sheet of paper.
Page 15

Using Simple Viewer
[Please select the printer]
Set up the printer you are using.
[Please set the printing area]
Select “No” or “Yes”.
[Please select the paper size]
Set the size of paper used for printing.
[Please select the paper type]
Set the type of paper used for printing.
[Detail printer settings are available]
Set up the printer in detail.
(For details, refer to the operating
instructions for the printer.)
6. Check the layout, and set up
printing.
[Date printing]
Used to print the date at the right bottom
of the picture.
• If the digital camera is equipped with the
[BABY] in scene mode, set it to [WITH
AGE] and take pictures, and the pictures
are printed with the age in month/year as
well as the date of recording.
[Trimming]
([ One sheet] only)
Used to print the picture in alignment with
the paper size.
• Without trimming a picture, the entire
picture is printed. If the aspect ratio of
paper is different from that of a picture,
blank spaces are left in the upper and
lower parts or the left and right par ts.
[Position adjustment]
Used to fine-adjust the printing position for
trimming.
[Title]
([ Index] only)
Used to print the name of the picture folder
(e.g., 12/05/2005) at the top of the picture.
[Picture name]
([ Index] only)
Used to print the date and time of
recording the picture at the bottom of the
picture.
[Print correction]
Used to enable the print correction
function of the printer.
• This function is Compatible with “PRINT
Image Matching” and “Exif Print”. Refer
to the operating instructions for your
printer.
7. Click [ Start printing].
02/21/2005
02/21/2005
Printing cannot be cancelled when it is
under way.
15
VQT0R58
Page 16

Using Simple Viewer
Sending pictures by e-mail ( Send by e-mail)
• When you have once exited Simple Viewer or view the pictures already acquired,
double-click the short-cut icon of the LUMIX Simple Viewer on the desktop to start
Simple Viewer.
• Compatible e-mail programmes are Outlook
• Only one picture can be attached to an e-mail.
®
Express and Microsoft® Outlook® only.
1. Select [ Send by e-mail].
• When the above main menu is not
displayed, click [ Menu] and then click
[ Send by e-mail].
2. Select any location where
pictures are saved.
[On the PC]
Select this option when sending by e-mail
the pictures acquired to the PC.
• If pictures are added by [ Add pictures]
in [ Advance], you can attach to
e-mails pictures stored in the PC other
than the ones acquired by Simple
Viewer. (P19)
[ On the memory card]
Click this button when attaching to e-mails
pictures on the Card connected using the
USB connection cable.
3. Select any folder, and in
thumbnail view, select any
picture.
• Each click of [ 90 degs.] rotates the
picture 90° clockwise.
• When you select [ On the memory
card] in step 2, no folders are displayed.
16
VQT0R58
Page 17

Using Simple Viewer
4. Click [ Send by e-mail].
The picture is attached to an e-mail and
the e-mail programme starts automatically.
Enter an address, body text, etc. in the
e-mail and send it.
• Any file larger than the maximum file size
(100 KB at the time of purchase) of
pictures to be attached to e-mails is
decreased in size when attached to an
e-mail.
The e-mail programme does not start
automatically.
Check the settings of the standard e-mail
programme according to the following
procedures.
• The method of checking it varies
depending on the OS you are using.
1 Click [Start] >> ([Setup] >>) [Control
Panel], and click [Internet Options].
2 Click the [Programs] tab, then click
[E-mail] to confirm the e-mail software
in use.
Only the following e-mail programmes are
guaranteed on operation.
• Outlook
•Microsoft
To change the maximum file size of
pictures to be attached to e-mails:
• In the main menu, click [ Advance] >>
®
Express
®
[ Setting...]. You can change the file
size. (P21)
Outlook
®
17
VQT0R58
Page 18

Using Simple Viewer
Advance
• You can add pictures to enable using them on Simple Viewer, write the pictures
acquired to the PC on the Card, and so on.
1. Select [ Advance].
• When the above main menu is not
displayed, click [ Menu] and then click
[ Advance].
2. Select any function to be
used.
[ Add pictures]
Click this button to register pictures
already saved in the PC so that Simple
Viewer can handle them. (P19)
[ Export to the card]
Click this button to write pictures saved in
the PC to the digital camera. (P20)
[ Information]
Click this button to see the web site about
Panasonic software.
(The PC needs connection to Internet.)
[ Setting...]
Click this button to make various settings
of Simple Viewer. (P21)
[ About...]
Click this button to display the version of
Simple Viewer.
18
VQT0R58
Page 19

Using Simple Viewer
Enabling the pictures stored in the PC to be used on
Simple Viewer ( Add pictures)
1. Select [ Add pictures].
2. Select a folder containing
pictures to add, and click
[Next].
• Click [Browse] to open the [Select
Folder] dialogue box, and select a
desired folder.
3. Specify whether or not to
add the pictures stored in
the sub-folders (folders
within the folder).
• After specifying it, click [Next].
4. Click [Start].
• When there are many pictures to add or
the file size of pictures is large, it may
take time to add them.
5. Click [OK], and then click
[Finish] to complete the
addition.
19
VQT0R58
Page 20

Using Simple Viewer
Viewing pictures on the PC with the digital camera
( Export to the card)
• Acquire pictures on the PC to the Card to enable them to be reproduced by the digital
camera.
1. Select [ Export to the
card].
2. Select any folder, and in
thumbnail view, select any
picture.
3. Click [ Add].
4. Click [ Write].
• Writing to the card is carried out.
• The pictures will be converted
automatically to the format that the
Panasonic digital camera can reproduce.
• Use a Card with sufficient free space. In
case of inadequate free space, a part of
the pictures is written.
• The pictures processed on the PC and
the ones recorded with digital cameras
other than the LUMIX may be displayed
coarsely.
The selected picture is added to the list at
the bottom of the screen.
• To remove any picture from the list at the
bottom of the screen, click the picture in
the list at the bottom of the screen, and
then click [
Cancel
].
20
VQT0R58
Page 21

Setting...
Using Simple Viewer
1. Select [ Setting...].
2. Set the settings and click
[OK].
[The folder to be acquired]
Select a desired folder used when
acquiring pictures from the card to the PC.
• Click [Open folder] and you can see the
pictures in the selected folder.
• Click [Browse] to open the [Select
Folder] dialogue box, and select a
desired folder.
larger than the selected size is reduced
when attached to an e-mail.
• Only the pictures with a name of
“XXXX.JPG” can be reduced in size. If
you do not change the size, set this item
to [Not specified].
• Even if you change the size setting, files
of large sizes cannot be sent depending
on Internet service providers.
[Updating for the folder list]
Click [Updating] to delete empty folders in
the Folder display.
[Default]
Clicking this button resets every setting to
the state when you purchased.
[Automatic acquisition]
Specify whether to automatically start
Simple Viewer and acquire pictures when
the digital camera is connected.
[Maximum file size of the picture to be
attached to an e-mail]
Set the maximum file size of the picture to
be attached to an e-mail. Any file of a size
21
VQT0R58
Page 22

Using Simple Viewer
After Using Simple Viewer
∫ To exit Simple Viewer:
1. Click [ Exit].
• When the [ Exit] button is not
displayed, click [ Menu] to return to the
main menu.
• When you try to exit on any screen other
than the main menu screen, the
confirmation message appears.
∫ To disconnect the USB
connection cable safely:
2. Select [USB Mass Storage
Device], and click [Stop].
3. Confirm that [USB Mass
Storage Device] is selected,
and click [OK].
1. Double-click the icon
displayed at the right bottom
(in the task tray) of the PC
screen.
The message for notifying hardware
removal is displayed.
22
VQT0R58
4. Click [OK].
You can remove the USB connection cable
safely.
• Depending on the OS (or OS settings)
such as Windows 98/98SE, the icon for
removing hardware safely is not
displayed in the task tray. In this case,
make sure that [ACCESS] is not shown
on the LCD monitor of the digital camera,
and then disconnect the USB connection
cable.
Page 23

Others
Others
To Acquire Picture without Using Simple
Viewer
• Even if you use Windows 98 on which Simple Viewer cannot run, you can acquire
pictures to your PC by connecting the digital camera and PC using the USB connection
cable.
1. Connect the digital camera
to the PC via the supplied
USB connection cable. (P8)
2. Double-click [Removable
Disk] in [My Computer].
3. Double-click [DCIM] folder.
What is a drag-and-drop operation?
Refers to pressing the mouse button,
moving the mouse with the mouse button
pressed, and releasing the mouse button.
To disconnect the USB connection
cable safely:
Refer to P22.
4. Using a drag-and-drop
operation, move the pictures
you want to acquire or the
folder storing those pictures
to any different folder on the
PC.
23
VQT0R58
Page 24

Others
How to Use on Macintosh
• If you use Mac OS 9/OS X, you cannot use Simple Viewer, but can acquire pictures to
your PC using the USB connection cable.
• If you use Mac OS 8.x or an earlier version, refer to P27.
1. Connect the digital camera
to the PC via the supplied
USB connection cable. (P8)
2. Double-click [NO_NAME] or
[Untitled] displayed on the
desktop.
3. Double-click [DCIM] folder.
4. Using a drag-and-drop
operation, move the pictures
you want to acquire or the
folder storing those pictures
to any different folder on the
PC.
What is a drag-and-drop operation?
Refers to pressing the mouse button,
moving the mouse with the mouse button
pressed, and releasing the mouse button.
To make sure that the digital camera is
connected correctly:
Check that the [NO_NAME] or [Untitled]
disk icon is displayed on the desktop.
To disconnect the USB connection
cable safely:
Drag the [NO_NAME] or [Untitled] disk
icon to the [Trash], and then disconnect
the USB connection cable.
24
VQT0R58
Page 25

Others
How to Remove the USB Driver and Simple
Viewer (Uninstall)
• Usually, it is unnecessary to uninstall these programmes. When these programmes go
out of order, uninstall and install them again (P6).
1. Click [Start] >> ([Setup] >>)
[Control Panel].
2. Double-click [Add or
Remove Programs].
3. Select a software
programme to be remove,
and click [Change/Remove].
• To remove other drivers and software
programmes, repeat these step 3.
• When removing the USB driver, select
[Panasonic USB Storage Driver].
• When removing Simple Viewer, select
[LUMIX Simple Viewer].
• The procedure for uninstalling may vary
depending on the PC. For details, refer to
the operating instructions for the PC you
are using.
25
VQT0R58
Page 26

Others
When Pictures cannot be Acquired
• When pictures cannot be acquired though you connect your digital camera and PC
using the USB connection cable, use the following procedures.
∫ Check the following items
first.
Is [USB MODE] in the [SETUP] menu set
to [PC] on the digital camera side?
When Windows 98/98SE is used, install
the USB driver (P6), then connect the
cable.
If the PC in use has two or more USB
ports, connect the USB connection cable
to other USB ports in turn.
• If you connect the digital camera to a
USB port of the PC’s keyboard, normal
operation may not result.
• If you connect the digital camera using
a USB hub or USB extension cable,
normal operation is not guaranteed.
Is any Card inserted into your digital
camera? Or, are there pictures on it?
Are the pictures already acquired to the
PC?
• You are not allowed to acquire the
same pictures.
∫ Pictures cannot be acquired
even after the above checks.
Make sure that [Removable Disk] is added
in [My Computer].
• Drive letters (e.g., H:) may vary
depending on PC.
If the Removable disk is not added,
perform the following operations.
1 Click [Start] >> ([Setup] >>) [Control
Panel], and double-click [System].
2 Click ([Hardware] >>) [Device
Manager], and check that [Other
Devices] is displayed.
3 If [Other Devices] is displayed, delete it.
• If it is not displayed, check the
connection. (P8)
4 Return to the original screen, and turn
off the PC.
5 Disconnect the USB connection cable
from the PC.
6 Turn on the PC to start it.
7 Install the USB driver again. (For
Windows 98/98SE only)
8 Connect the USB connection cable to
the PC.
• Check that a [Removable Disk] is
added again. If any [Removable Disk]
is not added, repeat the above steps.
26
VQT0R58
Page 27

Troubleshooting
About connection/acquisition
Question Answer
How to acquire pictures on
Windows 95, Mac OS 8.x,
or earlier versions?
Pictures cannot be acquired
from the internal memory of
the digital camera.
About Simple Viewer
Question Answer
Simple Viewer does not
start automatically.
To view acquired pictures
again after exiting Simple
Viewer.
Memory Card
• If the PC has a built-in PC card slot, use the PC card
adaptor (optional) for SD memory card to acquire
pictures.
Internal memory
(This is applicable only to digital cameras having the
internal memory.)
• Copy the pictures stored in the internal memory to the
Card and then acquire them by using the PC card
adaptor (optional) for SD memory card. For the details of
copying, refer to the operating instructions for your digital
camera.
Remove the Card from the digital camera, and reconnect it
with the PC.
Double-click the short-cut icon of the LUMIX Simple
Viewer on the desktop.
If the short-cut icon does not exist on the desktop, click
[Start] >> [All programs] >> [Panasonic] >> [LUMIX Simple
Viewer] >> [LUMIX Simple Viewer].
Only when Simple Viewer does not start automatically:
• Click [ Advance] >> [ Setting...] and set [Automatic
acquisition] to [Yes]. (If you do not wish to allow it to start
automatically, set to [No].)
Others
27
VQT0R58
Page 28

Others
About printing
Question Answer
No picture can be printed. Is the printer set up correctly? Refer to the operating
instructions for your printer.
I wish to change the print
position, character size, or
character colour of the date.
The top and bottom parts or
left- and right-end parts of a
picture are trimmed.
Blank spaces are left in the
top and bottom parts or the
left- and right-end parts.
The date is not printed. If the picture was recorded with the digital camera of which
Others
Question Answer
Pictures added onto the PC
are not normally displayed.
How should I change folder
names or file names?
Although the pictures within
folders have been deleted,
the empty folders are still
displayed.
The print position, character size, or character colour for
date printing are fixed. They cannot be changed.
Set [Trimming] to [No] on the occasion of printing.
A trimmed picture is printed with its edges trimmed off if its
aspect ratio is different from that of printing paper.
Set [Trimming] to [Yes] on the occasion of printing.
If trimming is not applied, the whole picture is printed. If the
aspect ratio of the paper is different from that of the image,
blank spaces are left in the top and bottom parts or the leftand right-end parts.
the clock was not set, or if it was recorded with any digital
camera other than Panasonic ones, its date may not be
printed correctly.
If you change folder names or file names, the pictures
concerned may not be displayed.
• To view on Simple Viewer the pictures associated with a
change in folder name or file name, register those
pictures by use of [ Add pictures] function. (P19)
You can change folder names or file names on the PC.
• The location where folders and files are stored can be
found at [Location] indicated in the picture information.
(P12)
• To view on Simple Viewer the pictures associated with a
change in folder name or file name, register those
pictures by use of [ Add pictures] function. (P19)
Click [ Advance] >> [ Setting...], and click the
[Updating] button in [Updating for the folder list].
(The empty folders in the Folder display are deleted.)
28
VQT0R58
Page 29

Others (continued)
Question Answer
After a motion image is
deleted, the same still
picture as the motion image
remains.
Motion images are not
played back.
When in Full Screen mode,
motion images cannot be
viewed using [ Full
scale].
The PC has come not to
operate when plugging and
unplugging the USB
connection cable.
When you take a motion image with the digital camera, the
motion image (MOV format) and still picture (JPEG format)
are recorded.
When you delete the pictures associated like this on
Simple Viewer, only the selected picture is deleted.
(If you want to delete both, delete their respective
pictures.)
Install QuickTime. (P10)
On Simple Viewer, you cannot view motion images using
[ Full scale].
To view a motion image using [ Full scale], start
QuickTime Player, click [Open Movie in New Player...] on
the File menu, and select the motion image you want to
view.
• The place where the motion image is stored can be given
by [Location] and [File name] indicated in the picture
information. (P12)
By default, Simple Viewer starts automatically when
connecting the digital camera and PC using the USB
connection cable. (Setting at the time of purchase)
Change the setting so that Simple Viewer does not start
automatically and the situation may be improved.
• Select [ Advance] >> [ Setting...] and set [Automatic
acquisition] to [No]. Simple Viewer comes not to start
automatically.
To start Simple Viewer manually, double-click the short-cut
icon of LUMIX Simple Viewer on the desktop.
Others
29
VQT0R58
Page 30

Others
Operating Environment
∫ USB-connectable environment
Compatible OS: Microsoft
Microsoft
Microsoft
Microsoft
Microsoft
Microsoft
and Mac OS 9.x/Mac OS X
(Windows Me/2000/XP and Mac OS 9.x/Mac OS X do not
require the USB driver to be installed.)
∫ LUMIX Simple Viewer
Compatible PC: IBM
Intel
CPU)
Compatible OS: Microsoft
Microsoft
Microsoft
Microsoft
Microsoft
Memory: 128 MB (256 MB or more recommended)
Display: High Colour (16 bit) or more
Desktop resolution of 800k600 pixels or more
(1024k768 or more recommended)
Hard disk: 200 MB or more
Required software: QuickTime 6.1 or later
Sound: Windows compatible sound device
Drive: CD-ROM drive (required to install this program)
Interface: USB port
(When devices are connected through USB hub or by using USB
extension cable, operation is not guaranteed.)
File format: JPEG, TIFF (still picture), RAW (pictures of this format can be
acquired or written, but cannot be displayed.)
MOV (motion image)
• Even if the system requirements mentioned in these operating instructions are fulfilled,
some personal computers can not be used.
• Operation on an upgraded OS is not guaranteed.
• Operation on an OS other than the one pre-installed is not guaranteed.
30
VQT0R58
®
Windows® 98
®
Windows® 98 Second Edition
®
Windows® Millennium Edition
®
Windows® 2000 Professional
®
Windows® XP Home Edition
®
Windows® XP Professional
®
PC/AT compatible PC having Intel® Pentium® III 450 MHz,
®
Celeron® 400 MHz or higher CPU (including compatible
®
Windows® 98 Second Edition
®
Windows® Millennium Edition
®
Windows® 2000 Professional
®
Windows® XP Home Edition
®
Windows® XP Professional
Page 31

Others
• Multi-boot environment is not supported.
• Only available when the user is logged in as the system administrator.
• This software may not run properly on user-built computers.
• If the size of the character is set larger than the standard size on [Appearance] or
[Settings] in [Display Properties], some buttons are displayed beyond the screen and
cannot be operated. In this case, restore the font size to the normal size on [Display
Properties].
• This software can be used on 64-bit OS.
• Microsoft and Windows are either registered trademarks or trademarks of Microsoft
Corporation in the United States and/or other countries.
• IBM and PC/AT are registered trademarks of International Business Machines
Corporation of the U.S.
• Adobe, the Adobe logo, Acrobat, and Acrobat Reader are either registered trademarks
or trademarks of Adobe Systems Incorporated in the United States and other countries.
• Intel, Pentium and Celeron
are registered trademarks or trademarks of Intel Corporation
in the United States and other countries.
• Other names of systems and products mentioned in these instructions are usually the
registered trademarks or trademarks of the manufactures who developed the system or
product concerned.
31
VQT0R58
Page 32

A
VQT0R58
F0505Hy0(01600A)
C
Matsushita Electric Industrial Co., Ltd.
Web Site: http://www.panasonic.co.jp/global/
 Loading...