

Page 1

Color Television
Operating Instructions
Télé-couleur
Manuel d’utilisation
CT-32SL15CT-32SC15
TQB2AA0529 50217
PRINTED IN USA
IMPRESO EN EE.UU
IMPRIMÉ AUX ÉTATS-UNIS
Page 2

ENGLISH
IMPORTANT SAFETY INSTRUCTIONS
The lightning flash with arrow head
WARNING
RISK OF ELECTRIC SHOCK
DO NOT OPEN
WARNING: TO REDUCE THE RISK OF ELECTRIC SHOCK DO NOT
REMOVE COVER OR BACK. NO USER-SERVICEABLE PARTS INSIDE.
REFER SERVICING TO QUALIFIED SERVICE PERSONNEL.
The Class II insulation symbol (square within a square) indicates that this product has been evaluated
and tested to comply with Class II insulation requirements.
within a triangle is intended to tell the
user that parts inside the product are
a risk of electric shock to persons.
The exclamation point within a triangle
is intended to tell the user that
important operating and servicing
instructions are in the papers with the
appliance.
WARNING: TO REDUCE THE RISK OF FIRE OR ELECTRIC SHOCK, DO NOT EXPOSE THIS
APPARATUS TO RAIN OR MOISTURE AND OBJECTS FILLED WITH LIQUIDS, SUCH
AS VASES, SHOULD NOT BE PLACED ON THIS APPARATUS.
1. Read these instructions.
2. Keep these instructions.
3. Heed all warnings.
4. Follow all instructions.
5. Do not use this apparatus near water.
6. Clean only with dry cloth.
7. Do not block any ventilation openings. Install in accordance with the manufacturer’s instructions.
8. Do not install near any heat sources such as radiators, heat registers, stoves, or other apparatus (including
amplifiers) that produce heat.
9. Do not defeat the safety purpose of the polarized or grounding type plug. A polarized plug has two blades with
one wider than the other. A grounding type plug has two blades and a third grounding prong. The wide blade
or the third prong are provided for your safety. If the provided plug does not fit into your outlet, consult an electrician for replacement of the obsolete outlet.
10. Protect the power cord from being walked on or pinched particularly at plugs, convenience
receptacles, and the point where they exit from the apparatus.
11. Only use attachments/accessories specified by the manufacturer.
12. Use only with the cart, stand, tripod, bracket or table specified by the manufacturer, or sold
with the apparatus. When a cart is used, use caution when moving the cart/apparatus combination to avoid injury from tip-over.
13. Unplug this apparatus during lighting storms or when unused for long periods of time.
14. Refer all servicing to qualified service personnel. Servicing is required when the apparatus has been damaged in any way, such as power-supply cord or plug is damaged, liquid has been spilled or objects have fallen
into the apparatus, the apparatus has been exposed to rain or moisture, does not operate normally, or has
been dropped.
Read these instructions completely before operating television.
Contents are subject to change without notice or obligation.
Copyright 2005 by Panasonic Corporation of North America. All rights reserved.
Unauthorized copying and distribution is a violation of law.
Page 3

Table of Contents
TABLE OF CONTENTS
Congratulations ...............................................3
Customer Record ........................................................ 3
Care and Cleaning ...................................................... 3
Specifications.............................................................. 3
Feature Chart.............................................................. 3
Installation ........................................................4
Television Location ..................................................... 4
Optional Cable Connections ....................................... 4
AC Power Supply Cord ............................................... 4
Cable / Antenna Connection ....................................... 4
Remote Control Battery Installation ............................ 4
Inital Set Up Menu............................................5
Optional Equipment Connections .................. 6
VCR Connection ......................................................... 6
Front Control Panel..................................................... 6
Cable Box Connection ................................................ 6
Digital TV - Set-Top Box (DTV-STB) or DVD Player
Connection................................................................ 6
Amplifier (TO AUDIO AMP)......................................... 7
Connection to Front AV jacks...................................... 7
Icon Menu Navigation................................... 8
Icon Menu Operation..................................... 9
Set Up......................................................................... 9
Picture......................................................................... 9
Timer........................................................................... 10
Channels..................................................................... 11
Audio........................................................................... 11
Lock ............................................................................ 12
V-Chip Menu Operation ................................ 12
Manual de instrucciones [ Resumen ]
Felicidades................................................................ 15
Instalación de Pilas en el Control Remotol .................15
Programación Inicial ............................................ 15
Conexiones de Equipo Opcional .......................... 15
Conexión de la Videocasetera .............................. 15
Conexión del Decodificador de Cable ................... 16
Conexión del Decodificador de Señal Digital
ó DVD.................................................................. 16
Conexión del Amplificador de Sonido ................... 16
Panel de Control Frontal ........................................ 16
Conexión a los conectores de A/V frontales .......... 17
Navegación del menu de iconos ........................... 17
ENGLISH
Troubleshooting Chart.................................. 18
Index ............................................................... 19
REMOTE CONTROL SECTION
SECCIÓN DE CONTROL REMOTO
WARRANTY AND SERVICE CENTER SECTION
Remote
Remoto
SECCIÓN DE GARANTÍA Y CENTRO DE SERVICIO
1 z
Warranty
Garantía
Page 4

IMPORTANT INFORMATION
Important Information
FCC CAUTION: ANY CHANGES OR MODIFICATIONS TO THIS TV RECEIVER NOT EXPRESSLY
APPROVED BY PANASONIC CORPORATION OF NORTH AMERICA COULD CAUSE
HARMFUL INTERFERENCE, WHICH WOULD VOID THE USER’S AUTHORITY TO
OPERATE THIS EQUIPMENT.
ENGLISH
Important Information Regarding the Use of Video Games, Computers, or Other Fixed
Image Displays
ENVIRONMENTAL NOTICE:
THIS PRODUCT UTILIZES CATHODE RAY TUBES (CRT) AND OTHER
COMPONENTS THAT CONTAIN LEAD. DISPOSAL OF THESE MATERIALS
MAY BE REGULATED IN YOUR COMMUNITY DUE TO ENVIRONMENTAL
CONSIDERATIONS. FOR DISPOSAL OR RECYCLING INFORMATION
PLEASE CONTACT YOUR LOCAL AUTHORITIES, OR THE ELECTRONICS
INDUSTRIES ALLIANCE: <HTTP://WWW.EIAE.ORG.>
WARNING: The marking or retained image on the picture tube resulting from viewing a fixed image
is not an operating defect and as such is not covered by Warranty.
This television is designed to display constantly moving images on the screen. Continuous viewing of
stationary images such as letterbox pictures on standard screen TVs (with top/bottom bars), nonexpanded standard (4:3) pictures on wide screen TVs (with side bars shown on each side of an image),
stock market report bars (ticker running at the bottom of the screen), video game patterns, fixed
scoreboards, bright station logos, on-line (Internet) or repetitive computer style patterns should be limited.
The extended use of fixed image program material can cause permanent picture tube damage, shown as
a “shadow image” viewable on normal programs. This type of irreversible picture tube deterioration can be
limited by performing the following steps:
• Do not display the fixed image for extended periods of time.
• Turn the power off when not in use.
WARNING: KEEP UNNEEDED SMALL PARTS AND OTHER OBJECTS OUT OF THE REACH OF SMALL CHILDREN.
THESE OBJECTS CAN BE ACCIDENTALLY SWALLOWED. ALSO, BE CAREFUL ABOUT PACKAGING MATERIALS AND
PLASTIC SHEET.
2 z
Page 5
Congratulations
Your new Panasonic Tau Television features state-of-theart technology for high quality picture and sound with
complete audio/video connections for your home theater
system. Your TV is designed to give you many years of
enjoyment. It was thoroughly tested and tuned at the
factory for best performance.
Customer Record
The model and serial number of this product are located on
the back of the TV. You should note the model and serial
number in the space provided and retain as a permanent
record of your purchase. This will aid in identification in the
event of theft or loss. Product registration for U.S. customers
is available at: www.prodreg.com/panasonic.
Model
Number
Serial
Number
Care and Cleaning
Screen (Turn TV Off)
• Use a mild soap solution or window cleaner and a clean
cloth.
• DO NOT USE ABRASIVE CLEANERS.
• Avoid excessive moisture and wipe dry.
Warning: Do not spray any type of cleaning fluid directly on the
screen.
Cabinet and Remote Control
• For cabinets and remote control, use a soft cloth
dampened with water or a mild detergent solution. Avoid
excessive moisture and wipe dry.
• Do not use benzene, thinner or other petroleum based
products.
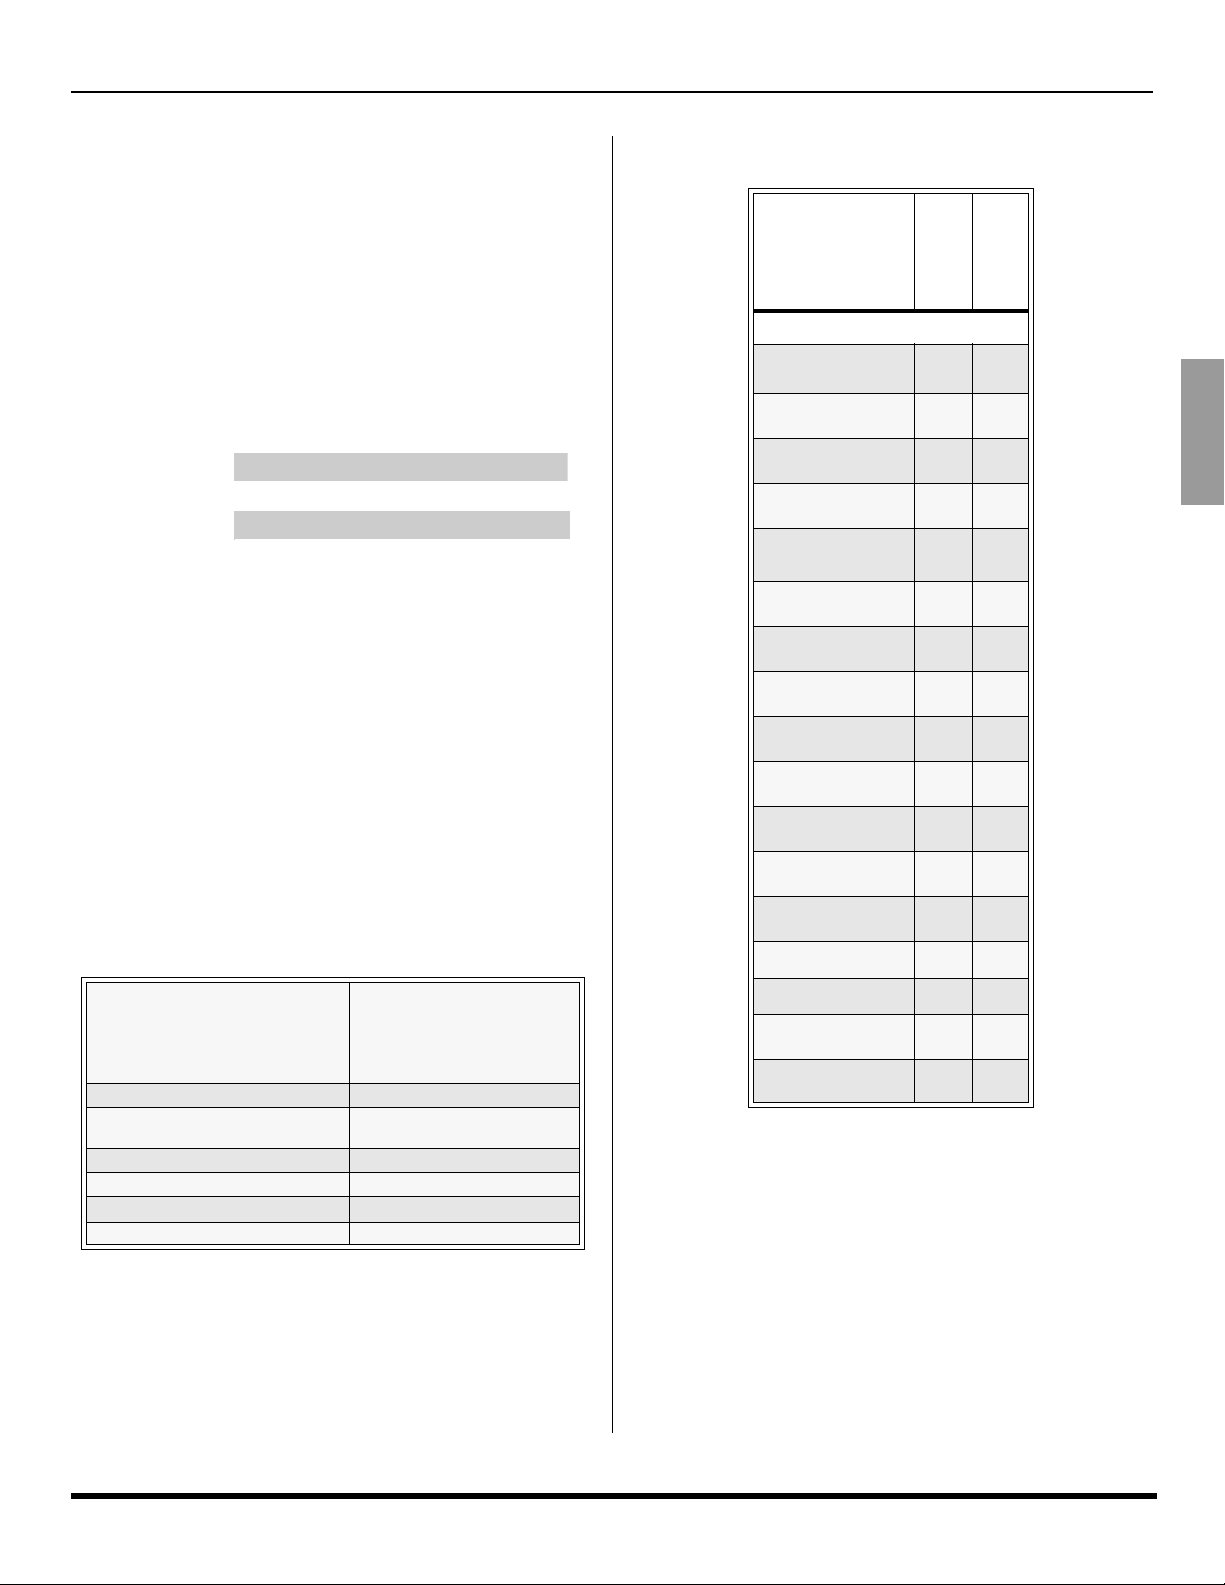
Specifications
Specifications are subject to change without notice or
obligation.
Power Source
CT-32SC15 (2.4A)
CT-32SC15U (2.4A)
CT-32SL15 (2.4A)
CT-32SL15U (2.4A)
Channel Capability - 181 VHF-12; UHF-56; Cable-113
Video Input Jacks
Audio Input Jacks 500mV RMS 47K Ohm
Audio Output Jacks 0-655mV RMS 4.7K Ohm
Component Input (Y / PB / PR)
S-Video Input Jacks S-Video (Y-C) Connector
120V AC, 60Hz
1Vp-p, 75 Ohm, Phono Jack
75 Ohm, Phono Jack Type
Type
Feature Chart
MODELS
FEATURES
MENU LANGUAGE
ENG/SPAN/FR
VIDEO PICTURE
MEMORY
VIDEO INPUT SKIP
VIDEO INPUT
LABELING
VM
VELOCITY
MODULATION
CLOSED CAPTIONING
V-CHIP CAPABILITY
VIDEO NORM
AUDIO NORM
STEREO
AI SOUND
BASS/BALANCE/
TREBLE
SURROUND
A/V IN
(REAR/FRONT)
S-VIDEO INPUT
(REAR/FRONT)
COMPONENT VIDEO
INPUT
AUDIO OUT
CONGRATULATIONS
CT-32SL15
CT-32SC15
• •
• •
• •
• •
• •
• •
• •
• •
• •
• •
• •
• •
• •
3
(2/1) 3(2/1)
(1/0) (1/0)
• •
• •
ENGLISH
3 z
Page 6

INSTALLATION
Installation
Television Location
Follow these recommendations before deciding on the
location of your television.
• Avoid excessive sunlight or bright lights, including
reflections.
• Keep away from excessive heat or moisture. Inadequate
ventilation may cause internal component failure.
• Fluorescent lighting may reduce remote control
transmitting range.
• Keep away from magnetic equipment, including motors,
fans and external speakers.
WARNING: Use this television receiver only with the
cart, stand, tripod, bracket, or table specified by the
manufacturer, or sold with the apparatus. When a cart
ENGLISH
is used, use caution when moving the cart/apparatus
combination to avoid injury from tip-over. In order to
avoid injury to children, never place your television receiver on a
piece of furniture that is capable of being tilted by a child leaning
on it, pulling on it, standing on it, or climbing on it. A falling
television can cause serious injury or even death.
CT-32SC15, CT-32SC15U:
CAUTION:
PANASONIC TY-32SC15T stand. Use with other carts (or
stands) is capable of resulting in instability causing possible
injury.
CT-32SL15, CT-32SL15U:
CAUTION:
PANASONIC TY-32HL15T stand. Use with other carts (or
stands) is capable of resulting in instability causing possible
injury.
These television receivers for use only with
These television receivers for use only with
Cable Connection
Incoming Cable from
Connect the cable supplied by your local
cable company. Tighten with fingers only.
Use of any tool (e.g. pliers) for tightening
may result in tuner damage.
Note: A cable converter box may be
75 Ohm VHF/UHF
required for proper reception.
Check with your local cable
company for compatibility requirements.
Antenna Connections
• For proper reception of VHF/
UHF channels, an external
antenna is required. For best
reception an outdoor antenna
is recommended.
Note: Cable Mode is preset at the
factory. Antenna users must
change to TV Mode in the Set Up menu under Prog
Chan (page 9).
Incoming Cable from
Remote Control Battery Installation
Requires two AA batteries (supplied).
AA / 1.5A
1
2
Cable Company
on back of TV
Home Antenna
Battery Polarity
AA / 1.5A
Optional Cable Connections
Shielded audio and video cables should be used between
components. For best results:
• Use 75-ohm coaxial shielded cables.
• Use appropriate input and output connectors that match
your component connectors.
• Avoid long cables to minimize interference.
AC Power Supply Cord
CAUTION: TO PREVENT ELECTRIC SHOCK,
MATCH WIDE BLADE OF PLUG TO WIDE SLOT
OF AC OUTLET AND FULLY INSERT. DO NOT
USE A PLUG WITH A RECEPTACLE OR OTHER
OUTLET UNLESS THE BLADE CAN BE FULLY INSERTED TO
PREVENT BLADE EXPOSURE.
PROTECT POWER CORDS FROM BEING WALKED ON, ROLLED
OVER, CRIMPED, BENT, OR PINCHED, PARTICULARLY AT PLUGS,
CONVENIENCE RECEPTACLES, AND THE POINT WHERE THEY EXIT
FROM THE APPARATUS.
Polarized plug
Cable / Antenna Connection
For proper reception, either a cable or antenna connection
is required.
AA / 1.5A
AA / 1.5A
3
Procedure
1. Turn the remote control face down. Remove battery
cover by pressing down on the marking on the cover
and sliding it off in the direction indicated.
2. Install batteries matching (+) and (-) polarity signs.
3. Replace the battery cover by sliding it in reverse until
the lock snaps.
Note: Incorrect installation can cause battery leakage and
corrosion that will damage the Remote Control.
Precautions
• Replace batteries in pairs.
• Do not mix battery types (zinc carbon with alkaline).
• Do not recharge, heat, short-circuit, disassemble, or
burn batteries.
4 z
Page 7

Initial Set Up Menu
Note: Menus may vary, depending on model. Please refer to
the FEATURE CHART on page 3 for your model’s
capabilities.
For your convenience, Auto Set up menu will be displayed
on screen when the set is turned on for the first time. If
needed, follow the menus and procedures for setting up the
features.
IDIOMA/LANGUE
To change menu language to ENGLISH, SPANISH or
FRENCH.
Procedure
• Press VOL to select English, Spanish or French.
INITIAL SET UP MENU
FIRST PLEASE
CONNECT THE ANTENNA
INITIAL SET UP
IDIOMA/LANGUE
MODE
AUTO PROGRAM
PRESS ACTION TO EXIT
ENGLISH
CABLE
MODE
To select TV (antenna) or CABLE mode depending on the
signal source.
Procedure
• Press VOL to select TV or CABLE.
FIRST PLEASE
CONNECT THE ANTENNA
INITIAL SET UP
IDIOMA/LANGUE
MODE
AUTO PROGRAM
PRESS ACTION TO EXIT
ENGLISH
CABLE
AUTO PROGRAM
To automatically program all available channels received
through the RF input.
Procedure
• Press VOL to start Auto Programming.
ENGLISH
FIRST PLEASE
CONNECT THE ANTENNA
INITIAL SET UP
IDIOMA/LANGUE
MODE
AUTO PROGRAM
PRESS ACTION TO EXIT
ENGLISH
CABLE
Note: To ensure proper channel programming, wait until AUTO
PROG. automatically stops the scan.
5 z
Page 8

OPTIONAL EQUIPMENT CONNECTIONS
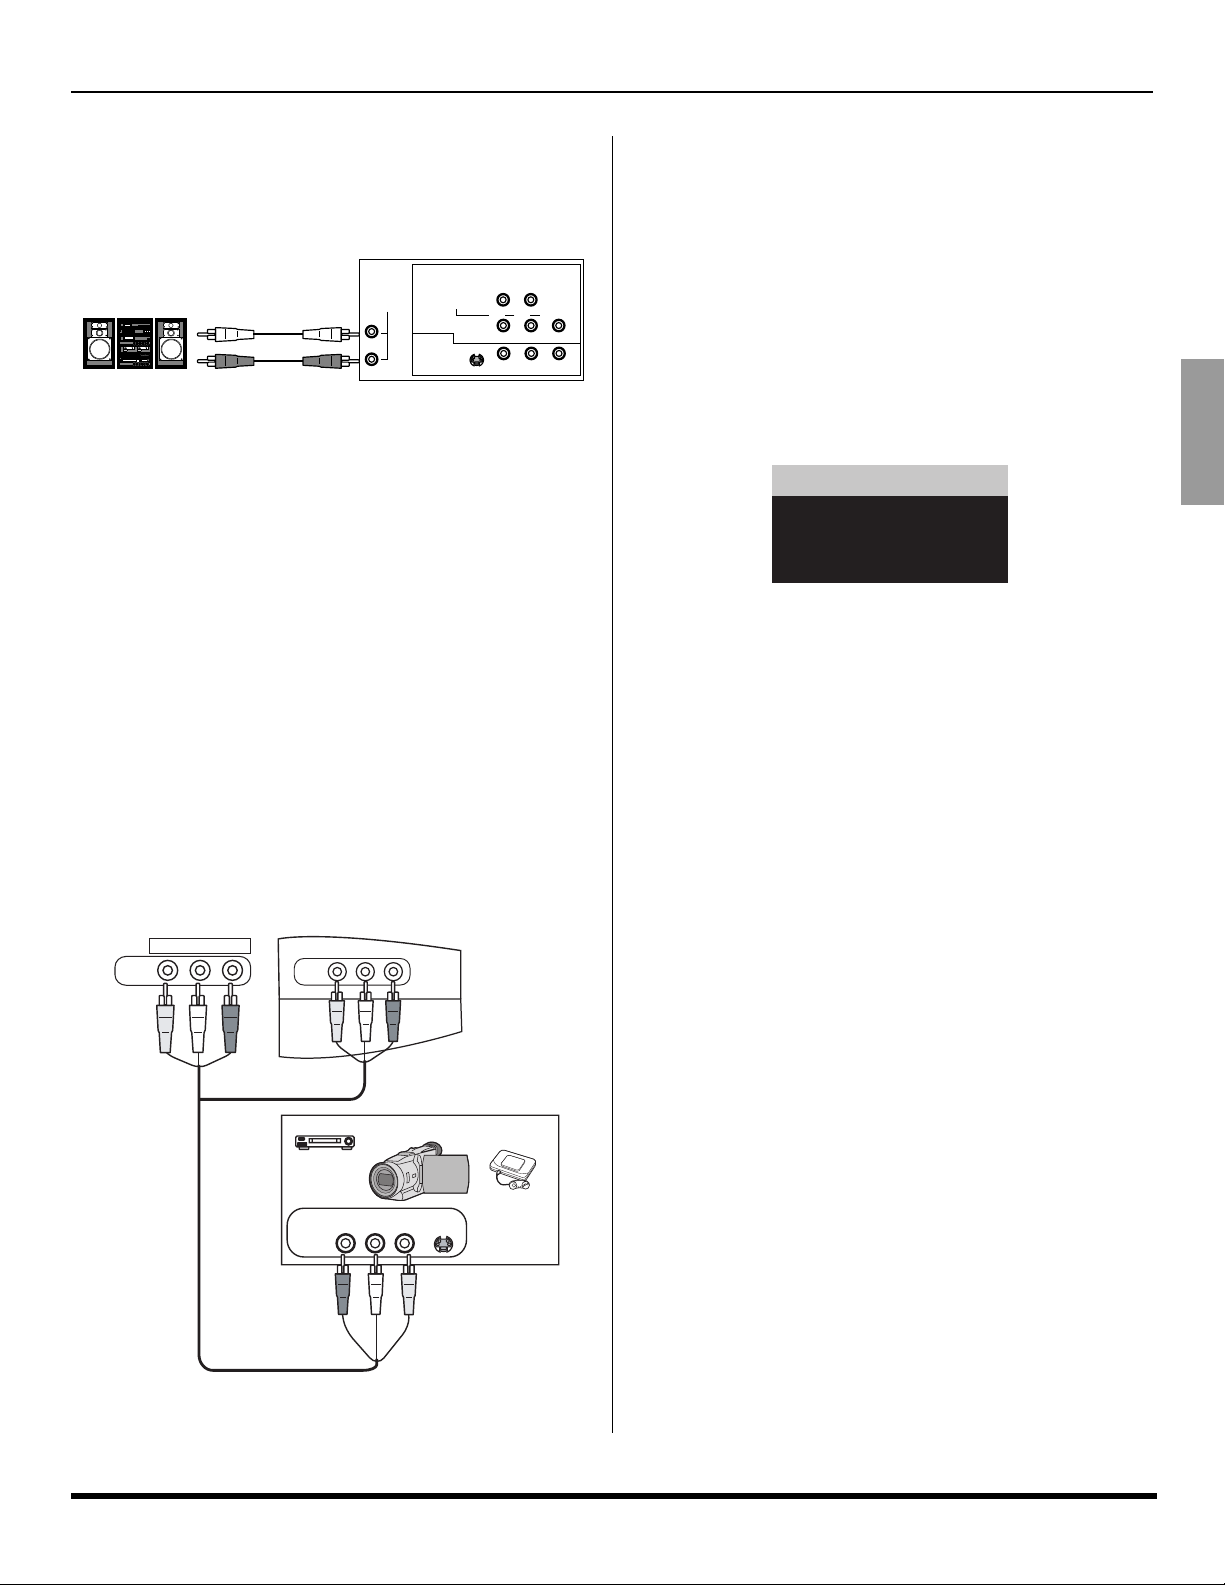
Optional Equipment Connections
Note: The remote control must be programmed with supplied
codes to operate the optional equipment.
VCR Connection
VCRs, video disc players, video game equipment, and
DSS equipment can also be connected to the video inputs.
See the optional equipment manual for more information.
Note: VIDEO 1 input is a dual-purpose input. It is primarily
intended for connection with 480i devices such as a DVD
player using the Y P
Audio L & R jacks. However, it can also be connected to
conventional composite video sources such as a VCR,
using only the Y/Video jack and Audio L & R jacks. The
on-screen label will display Component or Video 1
depending on which source is connected.
ENGLISH
TERMINALS ON BACK OF TELEVISION
INPUT 1
AMP
L
R
COMPONENT
VIDEO INPUT
INPUT 2
S-VIDEO
TO AUDIO
ANT
Use either the S-Video or
Video Connection
CABLES NOT INCLUDED
Note: Rear A/V jacks diagram may vary, depending on model.
Please refer to the FEATURE CHART on page 3 for your
model’s capabilities.
Procedure
• Connect equipment as shown to front or rear Audio/
Video input jacks.
• Select the Video mode by pressing TV/VIDEO button.
• Operate optional equipment as instructed in equipment
manual.
Note: Do not connect S-VIDEO and VIDEO signal to INPUT 2 at the
same time. If both are connected, signal interference will result.
Use either the S-VIDEO or the Video signal only.
Front Control Panel
The front control panel can be used to operate the television
when the remote control is not available
ON/OFF INDICATOR
FRONT AV PANEL FOR CT-32SL15
VIDEO 3 L - AUDIO - R
POWER
FRONT AV PANEL FOR CT-32SC15
Note: The ON/OFF indicator LED (red) will light up (red) when
the set is on.
component video jacks and
B PR
R-AUDIO-L
PRPBY/VIDEO
R-AUDIO-L VIDEO
.
TV/VIDEOPOWER
POWER ON/OFF
CH
VOL
T
I
O
C
N
A
CH
CH
I
O
T
C
N
A
VOL
VOL
CH
INFRARED SENSOR
TV / VIDEO
VOL
EXIT
INPUT 3
VIDEO OUT
AUDIO OUT
ANT OUT
Incoming
Cable
L - AUDIO - RVIDEO
VCR
L
R
ANT IN
connected to the video inputs. See the optional equipment
manual for details
Procedure
• Connect equipment to front Audio/Video input jacks.
• Press TV/VIDEO button to select the desired input.
• Operate optional equipment as instructed in equipment
manual.
Cable Box Connection
Follow this diagram when connecting your television to a
Cable Box.
CABLE BOX
15
ANT IN ANT OUT
PLAY
R
FF
E
W
STOP
ANT
Incoming
Cable
CABLES NOT INCLUDED
TERMINALS ON BACK OF TELEVISION
INPUT 1
AMP
L
R
COMPONENT
VIDEO INPUT
INPUT 2
PRPBY/VIDEO
S-VIDEO
TO AUDIO
R-AUDIO-L
R-AUDIO-L VIDEO
Procedure
• Tune the television to channel 3 or 4 depending on the
RF out setting of the cable box.
• Using the cable box, tune to the premium cable channel
you want to view.
Digital TV - Set-Top Box (DTV-STB) or DVD Player Connection
Use this diagram to connect the Panasonic DTV-STB
(Digital TV-Set-Top Box) to the back of your TV.
Note: Rear A/V jacks diagram may vary, depending on model.
Please refer to the FEATURE CHART on page 3 for your
model’s capabilities.
R-AUDIO-L
Notes:
CABLES NOT SUPPLIED
TERMINALS ON BACK OF
DTV-STB OR DVD PLAYER
DIGITAL TV OUTPUT
P
Y
P
B
R
NTSC OUTPUT
S-VIDEOVIDEOR-AUDIO-L
• There are three video jacks, Y, P
Separate component color inputs provide
luminance and color separation. Use the L (left)
and R (right) audio inputs.
• Select DTV-STB to 480i output mode. TV set can
receive 480i signal only. Picture distortion will result
if any other type of format is selected (i.e. 480p,
720p or 1080i).
COMPONENT VIDEO INPUT
TERMINALS ON BACK OF TV
INPUT 1
AMP
L
R
COMPONENT
VIDEO INPUT
INPUT 2
S-VIDEO
TO AUDIO
R-AUDIO-L
PRPBY/VIDEO
R-AUDIO-L VIDEO
, and PR.
B
A second VCR, Camcorder, DVD player, a video disc player,
video game equipment or DSS equipment can also be
6 z
Page 9
Amplifier Connection (TO AUDIO AMP)
Connect to an external audio amplifier input for listening to a
stereo system.
Note: TO AUDIO AMP terminals cannot be connected directly
to external speakers.
TERMINALS ON BACK OF TELEVISION
INPUT 1
External Amplifier
TO AUDIO
CABLES NOT INCLUDED
AMP
L
R
COMPONENT
VIDEO INPUT
INPUT 2
Note: Rear A/V jacks diagram may vary, depending on model.
Please refer to the FEATURE CHART on page 3 for your
model’s capabilities.
Audio Adjustments
• Select TV SPEAKERS ON from AUDIO menu.
• Set amplifier volume to minimum.
• Adjust television volume to desired level.
• Adjust amplifier volume to match the television.
• Select SPEAKERS OFF & VARIABLE AUDIO OUT from
AUDIO menu.
• Volume, mute, bass, treble and balance are now
controlled through the television.
Note: Select SPEAKERS OFF & FIXED AUDIO OUT to control
audio functions through the external amplifier.
R-AUDIO-L
PRPBY/VIDEO
S-VIDEO
R-AUDIO-L VIDEO
OPTIONAL EQUIPMENT CONNECTIONS
Procedure
• Connect equipment to front Audio/Video input jacks.
• Press TV/VIDEO button to select front VIDEO input
(VIDEO 3).
• Operate optional equipment as instructed in equipment
manual.
Direct Video Input Selection
This feature lets you select video input directly using the TV/
VIDEO button and the numeric keys on the remote control.
Procedure
Note: Press TV/VIDEO button on the remote control to display
the Input selection menu.
1 TV
2 VIDEO1
3 VIDEO2
4 VIDEO3
• Press corresponding number key on the remote control
to select the input of your choice.
Note: Video input can also be selected by pressing the
TV/VIDEO, then the CH buttons.
ENGLISH
Connection to Front AV jacks
A second VCR, Camcorder, DVD player, a video disc player,
video game equipment or DSS equipment can also be
connected to the video inputs. See the optional equipment
manual for details
Front AV jacks for
CT-32SL15
VIDEO 3 L - AUDIO - R
.
Front AV jacks for
CT-32SC15
L - AUDIO - RVIDEO
INPUT 3
VCR
AV OU T
Palmcorder
PLAY
R
FF
E
W
STOP
R - AUDIO - L VIDEO
S-VIDEO
VIDEO GAME
CONSOLE
7 z
Page 10

ICON MENU NAVIGATION
Icon Menu Navigation
Press to display the Icons.
Press to select desired icon.
ENGLISH
L O C K
L O C K
Press to display selected
Icon features.
Press
to select feature, then
press VOL .
Press
to adjust or activate feature.
PICTURE
VIDEO ADJ.
OTHER ADJ.
PICTURE
VIDEO ADJ.
OTHER ADJ.
PIC MODE
PICTURE
BRIGHTNESS
COLOR
TINT
SHARPNESS
NORMAL
PIC MODE
PICTURE
BRIGHTNESS
COLOR
TINT
SHARPNESS
NORMAL
BRIGHTNESS 32
VIVID
- - - - - - - -
- - - - - - - -
- - - - - - - - - - - - - - -
- - - - -
NO
VIVID
- - - - - - - -
- - - - - - - -
- - - - - - - - - - - - - - -
- - - - -
NO
- - - - - - - -
8 z
Press
repeatedly to exit menus.
NORMAL PICTURE
Page 11

Icon Menu Operation
Note: Refer to page 8 for Icon Menu Navigation procedures.
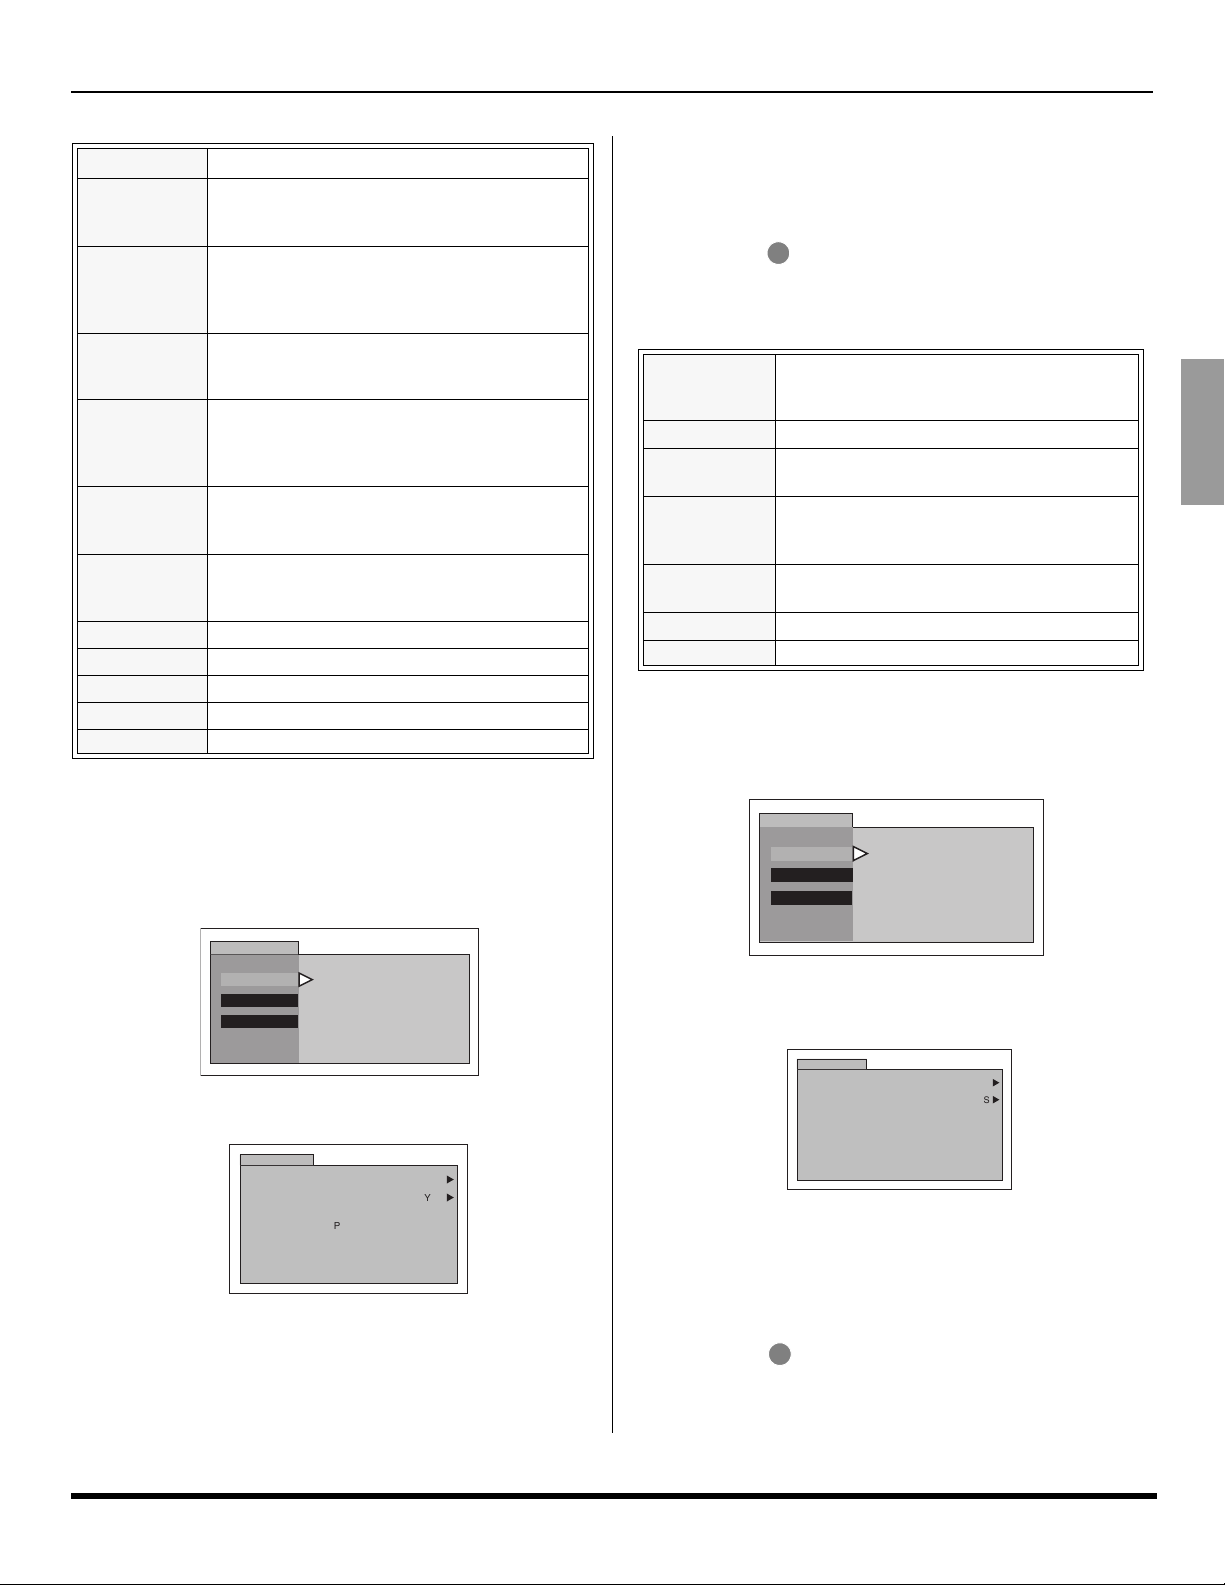
SET UP Press ACTION to display Menu.
IDIOMA/LANGUE
MODE - Select IDIOMA/LANGUE to change menu
language to ENGLISH, ESPAÑOL (Spanish) or
FRANÇAIS (French).
Note: While highlighted, press VOL to select English,
Spanish or French.
SET UP
IDIOMA/
LANGUE
PROG CHAN
CC
OTHER ADJ
MODE
PROG CHAN (Program Channels)
Note: While highlighted, press VOL to select or activate
features.
MODE - To select TV (antenna) or CABLE mode
depending on the signal source.
AUTO PROGRAM - To automatically program all
available channels received through the RF input.
MANUAL PROGRAM - To manually add or delete
channels.
Note: Use Remote numeric keypad to enter channel numbers
in Manual Program sub menu.
SET UP
IDIOMA/
LANGUE
PROG CHAN
CC
OTHER ADJ
(CLOSED CAPTIONING)
CC
AUTO PROGRAM
MANUAL PROGRAM
This television contains a built-in decoder that displays
CC
(Closed Captioned) text across the screen (white or
colored letters on black background). It allows the viewer to
read the dialogue of a television program or other
information. The program viewed must include Closed
Captioning for the feature to work.
Note: While highlighted, press VOL to select modes.
SET UP
IDIOMA/
LANGUE
PROG CHAN
CC
OTHER ADJ
CC
MODE - Activates the onscreen Closed Caption
CC
feature by selecting one of the following modes.
• OFF - When Closed Caption is not desired.
• C1 - For video related information to be displayed, up to
4 lines onscreen at a time. (It does not block relevant
parts of the picture). Text may be in any language.
• C2 - For other modes of video related information.
ENGLISH
CABLEMODE
MODE OFF
ICON MENU OPERATION
Note: C1 mode is recommended for viewing Closed Caption.
OTHER ADJUSTMENTS
Note: While highlighted, press VOL to select or activate
features.
AUTO POWER ON - Select SET to power up the TV at
the same time as the Cable box or other components.
When this feature is On, Timer functions will be
disabled.
SET UP
IDIOMA/
LANGUE
PROG CHAN
CC
OTHER ADJ
OFFAUTO POWER ON
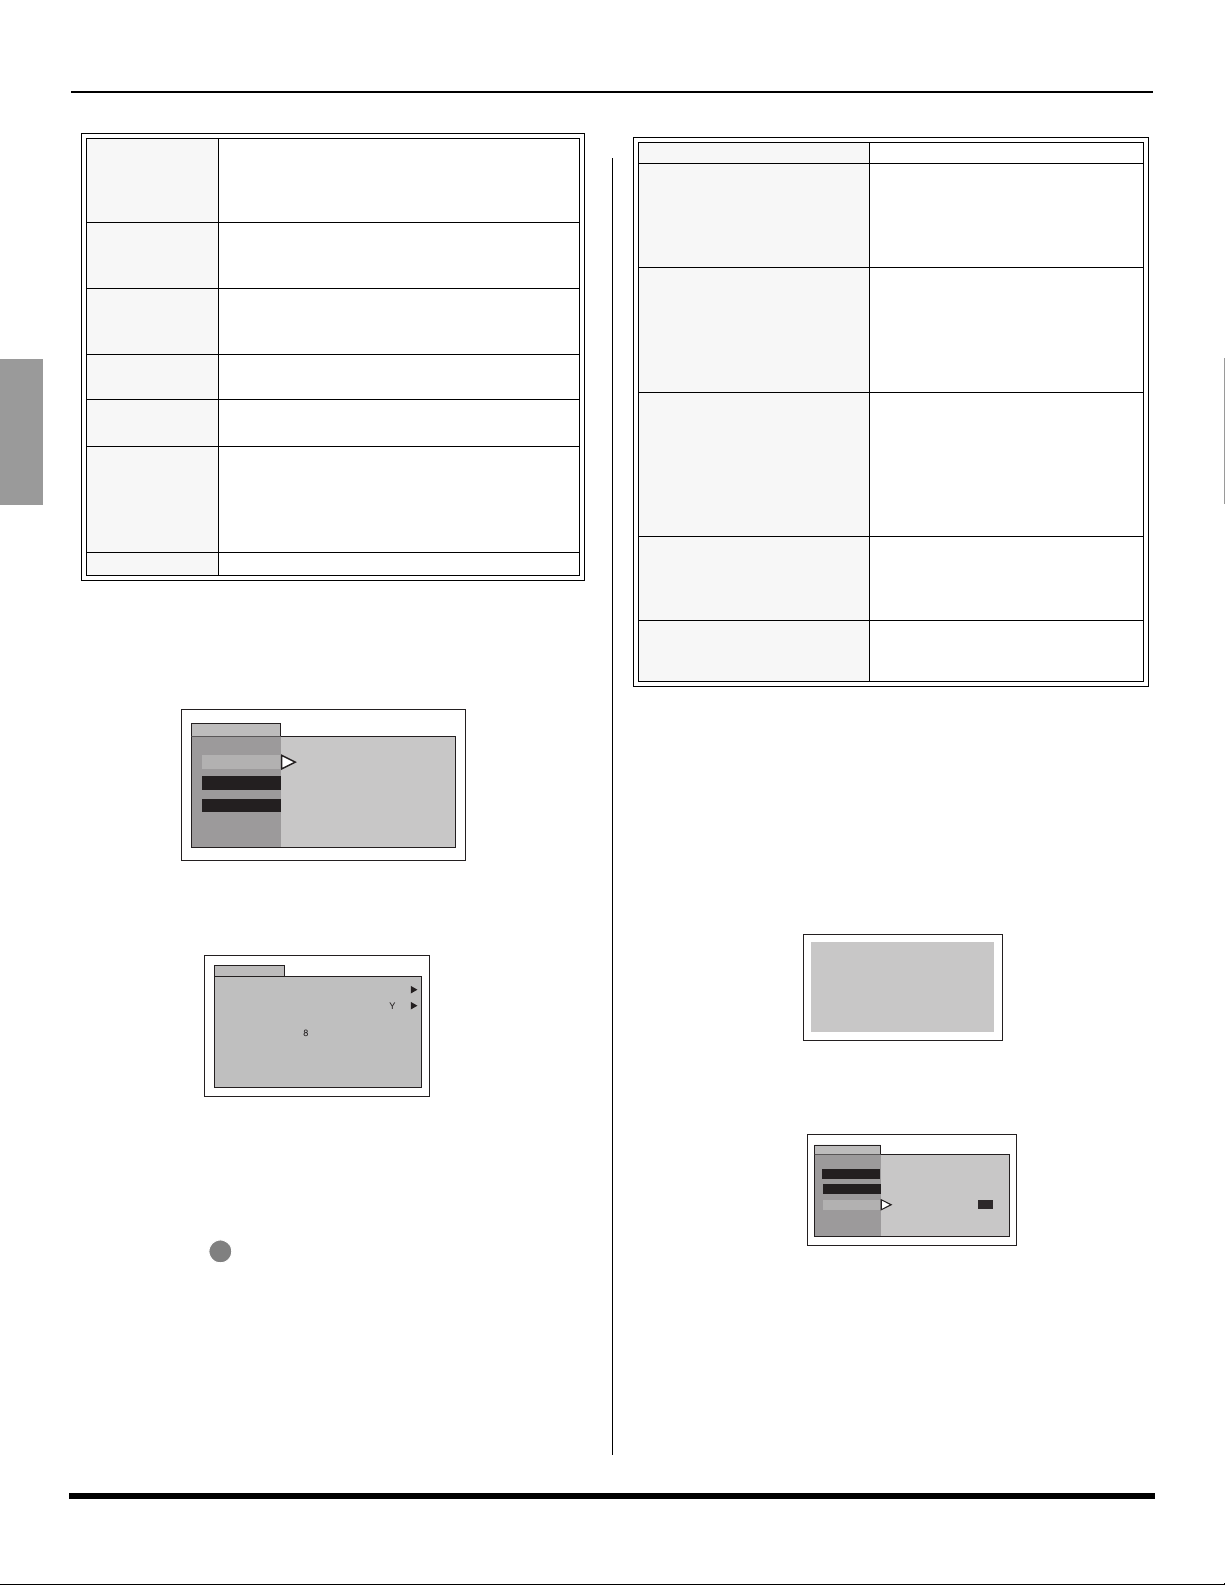
PICTURE Press ACTION to display Menu.
Note: While the sub-menu features are highlighted, press
VOL to adjust or activate.
VIDEO ADJ.
PIC MODE - Lets you choose one of three pre-set
Picture Modes that best suits the program you are
viewing. Selecting this feature will also affect Color
Temperature setting.
PIC MODE - COLOR TEMP DEFAULT SETTINGS
PIC MODE COLOR TEMP
VIVID COOL
STANDARD NORMAL
CINEMA WARM
Note: Each mode has its own picture settings (Color, Tint,
Brightness, Picture, Sharpness and Color Temp).
• VIVID - This is the default mode. It provides enhanced
picture contrast and sharpness for viewing in a welllighted room.
• STANDARD - Recommended for normal viewing
conditions with subdued room lighting.
• CINEMA - Select this mode for watching movies in a
darkened room. It provides a soft, film-like picture.
PICTURE - Adjusts white areas of picture.
BRIGHTNESS - Adjusts dark areas of picture.
COLOR - Adjusts desired color intensity.
TINT - Adjusts natural flesh tones.
SHARPNESS - Adjusts clarity of outline detail.
NORMAL - Reset adjustments to factory default
settings.
PICTURE
VIDEO ADJ.
OTHER ADJ.
PIC MODE
PICTURE
BRIGHTNESS
COLOR
TINT
SHARPNESS
NORMAL
VIVID
- - - - - - - -
- - - - - - - -
- - - - - - - - - - - - - - -
- - - - -
NO
ENGLISH
9 z
Page 12

ICON MENU OPERATION
OTHER ADJ.
Highlight OTHER ADJ. and then press VOL .
Note: While highlighted, press VOL to select or activate
feature.
PICTURE
• COLOR TEMP (temperature) - To increase or decrease
• VM (VELOCITY MODULATION) - Increases picture
ENGLISH
VIDEO ADJ.
OTHER ADJ.
COLOR TEMP
VM
WARM (red) and COOL (blue) colors to suit personal
preferences.
sharpness and provides crisp white to black transitions.
Select from HIGH, OFF or LOW.
COOL
HIGH
CLOCK SET
TIME - Set the time of the day.
Day - Set the day of the week.
Procedure
Note: Use VOL, VOL and CH to set time and day.
TIMER
SLEEP
TIMER
CLOCK SET
CLOCK MODE
TIME
DAY
- - : - SUN
AM
CLOCK MODE
This feature is used to display the on-screen clock in a
larger text size.
Procedure
TIMER
TIMER Press ACTION to display Menu.
SLEEP
How Long? - Select 30, 60 or 90 minutes for TV to turn
off. Select NO to turn off Sleep timer.
TIMER
SLEEP
TIMER
CLOCK SET
CLOCK MODE
HOW LONG?
TIMER
Select timer to turn the television on and off at selected
times, on selected channels, and on selected days. Time
must be entered in CLOCK SET to operate the TIMER
features.
Procedure
• Use VOL and CH to set day, On Time, Off Time
and Channel number, then use VOL to activate.
TIMER
SLEEP
TIMER
CLOCK SET
CLOCK MODE
DAY
ON TIME
OFF TIME
ENTER CHANNEL
SET
MON - FRI
- - : - -
- - : - -
NO
NO
SLEEP
TIMER
CLOCK SET
CLOCK MODE
OFF
• While the TIMER menu is displayed, press CH to
highlight CLOCK MODE.
• Press VOL to enter the sub-menu.
• Press VOL or VOL to select ON.
• Exit the menu. Press the RECALL button twice. The
screen will go blank and the clock will be displayed in
large text size.
12 : 00 AM
Note: The clock will move around the screen to prevent any
image retention.
• Press RECALL again to return to normal picture viewing.
Note: Select NO in menu to disable this feature.
Notes:
• The television automatically turns OFF after 90 minutes
when turned ON by the TIMER. If the OFF time is
selected or if a key is pressed, the automatic OFF after
90 minutes will be cancelled.
• The TIMER is active when the television is OFF or ON.
The television will switch to the selected channel at the
selected time set in the TIMER.
10 z
Page 13

ICON MENU OPERATION
CHANNELS Press ACTION to display Menu.
CAPTION
MANUAL CAPTION - To enter numbers and captions
manually.
Note: Use the remote numeric keypad to select desired
channel (refer to your local TV guide).
CHANNEL
CAPTION
MANUAL CAPTION
INPUT LABEL
CHANNELS
ENTER CHANNEL
ENTER CAPTION
F
TO MOVE CURSOR
J
TO SELECT CHANNEL
MANUAL CAPTION
G
- - - -
K
3
INPUT LABEL - To label video input connections for
onscreen display.
CHANNELS
CAPTION
MANUAL CAPTION
INPUT LABEL
K
K
CHANNELS
INPUT LABEL
VIDEO 1
VIDEO 2
VIDEO 3
TO MOVE CURSOR
TO SELECT LABEL
VCR
SKIP
Procedure
• Press VOL to display next menu.
• Press CH or CH to move cursor.
• Press VOL or VOL to select desired preset input
label (see chart below).
INPUT LABEL CHART
PRESET
LABELS
VCR Select when VCR is connected to video input.
DVD Select when DVD is connected to video input.
SKIP
CABLE
DBS Select when DBS is connected to video input.
DTV STB
PVR (Personal
Video Recorder)
Select when digital TV set-top-box is connected
Select when a personal video recorder is
GAME
AUX Select when other components are connected.
_____ Select to delete input label.
REASON FOR SELECTING
Select to skip unused video input when
pressing TV/VIDEO button.
Select when CABLE box is connected
to video input.
to video input.
connected to video input.
Select when Video GAME is connected
to video input.
AUDIO Press ACTION to display Menu.
AUDIO ADJ.
MODE - Select STEREO, SAP (Second Audio
Program) or MONO (Use MONO when stereo signal is
weak).
BASS - Increase or decrease the bass response.
TREBLE - Increase or decrease the treble response.
BALANCE - Emphasize the left/right speaker volume.
NORMAL - Reset BASS, TREBLE and BALANCE
adjustments to factory default settings.
AUDIO
AUDIO ADJ.
OTHER ADJ.
SURROUND
SPEAKERS
MODE
STEREO SAP MONO
BASS
TREBLE
- - - - - - -
BALANCE
NORMAL
- - - - - - - -
- - - - - - - -
- - - - - - - -
NO
OTHER ADJ.
AI SOUND - Equalize overall volume levels across all
channels.
Procedure
• Press VOL to select On or OFF.
AUDIO
AUDIO ADJ.
OTHER ADJ.
SURROUND
SPEAKERS
AI SOUND
ON
K
SURROUND
MODE - Enhances audio response when listening to
stereo.
Procedure
• Press VOL to select On or OFF.
AUDIO
AUDIO ADJ.
OTHER ADJ.
SURROUND
SPEAKERS
MODE
OFF
K
SPEAKERS
SPEAKERS - This feature is used when connecting to
an external amplifier.
Procedure
• Press VOL to select.
• ON - TV speakers operate normally.
• OFF & Variable Audio Out - TV speakers off - audio
adjustable by television.
• OFF & Fixed Audio Out - TV speakers off - audio
adjustable by the external amplifier only.
AUDIO
AUDIO ADJ.
OTHER ADJ.
SURROUND
SPEAKERS
ON
Note: Before selecting FAO, normalize AUDIO ADJ.
for better audio performance.
K
ENGLISH
11 z
Page 14

ICON MENU OPERATION
LOCK Press ACTION to display Menu.
MODE
LOCK SET - To prevent video games, VCR tapes and
all channels and video modes from being viewed.
Notes:
• Use the remote numeric keypad to enter a four-digit
secret code (Use a code that is easy to remember and
record it in a safe place).
• If you do not remember your code, LOCK will unlock in
12, 24, or 48 hours, depending on the current setup. Be
cautious when selecting ALWAYS. If ALWAYS is
selected, and you forget your secret code, the TV must
be serviced by a qualified technician to clear the LOCK
setup.
• If you select CHANGE CODE, and you change your
ENGLISH
Procedure
code from the one used in the LOCK menu, your new
code becomes the controlling code.
• Press VOL to select.
• OFF - Turns Lock function off.
• GAME - Lock CH 3, 4 and Video inputs.
• CHANNEL - Lock up to four channels.
• ALL - Locks all channels and video inputs.
U.S. TV PROGRAMS
This TV model features the “V-Chip technology” which
allows you to use U.S. TV PROGRAMS Guide ratings to
block various types of TV programs.
LOCK
MODE
HOW LONG?
KEYBOARD
LOCK SET
BLOCK PROGRAMS:
U.S. TV PROGRAMS
STATUS
ENTER CODE
FIRST
Note: By selecting “Yes”, NR programs will be received. By
selecting “NO”, NR programs will be blocked (See
Customer Caution on this page).
LOCK
U.S. TV PROGRAMS
VIEW NR PROGRAMS?
SETTING:
TV-Y
K
TV-Y7 FV
- - - - - - - - - - - - - - - - - -
TV-G
TV-PG V S L D
TV-14 V S L D
TV-MA V S L
OFF
YES
BASIC
OFF
OFF
- - - -
K
K
K
LOCK
MODE
HOW LONG?
KEYBOARD
ACTION
LOCK SET
BLOCK PROGRAMS:
U.S. TV PROGRAMS
STATUS
ENTER CODE
FIRST
OFF
OFF
- - - -
• Press twice.
• Press CH to highlight HOW LONG?
• Press VOL to select 12 Hours, 24 Hours, 48 Hours or
ALWAYS.
Note: If GAME, CHANNEL or ALL is selected, and if a blocked
channel or video input is selected, the message
LOCKED displays in the upper left corner of the TV
screen.
V-Chip Menu Operation
Procedure
• Use the numeric keypad to enter your four digit code.
(Use a code that is easy to remember and record it in
a safe place.)
• Press CH to enter the BLOCK PROGRAMS field.
• Press VOL or VOL to select desired option: U.S.
TV Programs, U.S. Movies, Canadian English or
Canadian French.
• Press CH to highlight STATUS.
• Press VOL or VOL to display desired rating chart:
U.S. TV Programs, U.S. Movies, Canadian English or
Canadian French.
• Press VOL to select ON or OFF.
• Press CH to select VIEW NR PROGRAMS? for U.S.
TV Programs and U.S. Movies or VIEW E PROGRAMS
for Canadian English and Canadian French.
• Press VOL to select YES or NO.
Procedure
• Press CH to select SETTING.
• Press VOL to select BASIC or DETAILED.
BASIC - Allows you to select only general ratings such
as TV-Y, TV-PG, etc.
DETAILED - Allows you to select both general ratings
and content such as V, L, etc.
• Press CH or CH to move between different ratings.
• Use VOL or VOL to select ratings you want to
block (RED) and unblock (GREEN).
• Press twice to return to MODE in Lock menu.
• Press CH to select HOW LONG?.
• Press VOL or VOL to select 12, 24, 48 hours or
The V-Chip system that is used in this set is capable of blocking
“NR” programs (non rated, not applicable, and none) as per
FCC Rules Section 15.120(e)(2). If the option of blocking “NR”
programs is chosen “unexpected and possibly confusing
results may occur, and you may not receive emergency
bulletins or any of the following types of programming:”
• Emergency Bulletins (Such as EAS messages,
• Locally originated programming
•News
• Political programming
• Public Service Announcements
• Religious programming
• Sports
• Weather
ACTION
ALWAYS.
Customer Caution
weather warnings and others)
12 z
Page 15
U.S. TV Programs Rating Chart Description
NR
Not Rated. SEE CUSTOMER CAUTION. (pg. 12)
All children. The themes and elements in this
TV-Y
program are specifically designed for a very young
audience, including children from ages 2-6.
Directed to older children. Themes and elements
TV-Y7
in this program may include mild physical or
comedic violence, or may frighten children under
the age of 7.
General audience. It contains little or no violence,
TV-G
no strong language, and little or no sexual dialogue
or situations.
Parental guidance suggested. The program may
TV-PG
contain infrequent coarse language, limited
violence, some suggestive sexual dialogue and
situations.
Parents strongly cautioned. This program may
TV-14
contain sophisticated themes, sexual content,
strong language and more intense violence.
Mature audiences only. This program may contain
TV-MA
mature themes, profane language, graphic violence,
and explicit sexual content.
FV FANTASY/CARTOON VIOLENCE
V VIOLENCE
SSEX
L OFFENSIVE LANGUAGE
D DIALOGUE WITH SEXUAL CONTENT
U.S. MOVIES
This TV model features the “V-Chip technology” which
allows you to use Motion Picture Ratings when viewing
movies or video tapes. This innovation allows parents to
block various types of movies and video tapes at their
discretion.
LOCK
MODE
HOW LONG?
KEYBOARD
Note: Some movies are not rated for a variety of reasons. Old
movies and foreign films are usually not rated.
LOCK
LOCK SET OFF
BLOCK PROGRAMS:
U.S. MOVIES
STAT US
ENTER CODE
FIRST
U.S. MOVIES
VIEW NR PROGRAMS?
G
PG
PG-13
R
NC-17
X
OFF
YES
OFF
- - - -
K
K
ICON MENU OPERATION
Procedure
• Press CH or CH to move between different ratings.
• Use VOL or VOL to select ratings you want to
block (RED) and unblock (GREEN).
• Press twice to return to MODE in Lock menu.
• Press VOL or VOL to select 12, 24, 48 hours or
NR
PG
PG-13
NC-17 NO ONE 17 AND UNDER ADMITTED.
CANADIAN ENGLISH
The V-CHIP used in this TV model allows you to block
various types of movies and television programs based on
the two rating systems used in Canada.
Note: E (Exempt) programming includes: news, sports,
Procedure
• Press CH or CH to move between different
• Use VOL or VOL to select ratings you want to
• Press twice to return to MODE in Lock menu.
• Press VOL or VOL to select 12, 24, 48 hours or
ACTION
ALWAYS.
U.S. Movies Rating Chart Description
CONTAINS NO RATING (NOT RATED) AND NA
(NOT APPLICABLE) PROGRAMS. Movie has
not been rated or rating does not apply.
G GENERAL AUDIENCES. All ages admitted.
PARENTAL GUIDANCE SUGGESTED. Some
material may not be suitable for children.
PARENTS STRONGLY CAUTIONED. Some
material may be inappropriate for children under
13.
R
RESTRICTED. Under 17 requires accompanying
parent or adult guardian.
XADULTS ONLY.
LOCK
MODE
HOW LONG?
KEYBOARD
LOCK SET OFF
BLOCK PROGRAMS:
CANADIAN ENGLISH
STAT US
ENTER CODE
FIRST
OFF
- - - -
documentaries and other information programming, talk
shows, music videos, and variety programming.
LOCK
CANADIAN ENGLISH
VIEW E PROGRAMS?
C
C8 +
G
PG
14 +
18 +
OFF
YES
K
K
ratings.
block (RED) and unblock (GREEN).
ACTION
ALWAYS.
ENGLISH
13 z
Page 16
ICON MENU OPERATION
.
ENGLISH
CANADIAN FRENCH
The V-CHIP used in this TV model also lets you block or
unblock Canadian French programs according to various
ratings categories.
Note: E (Exempt) programming includes: news, sports,
Canadian English Rating Description
Exempt - Exempt programming includes:
E
news, sports, documentaries and other
information programming, talk shows, music
videos, and variety programming.
Programming intended for children under age
C
8. No offensive language, nudity or sexual
content.
Programming generally considered
C8+
acceptable for children 8 years and over. No
profanity, nudity or sexual content.
G
PG
General programming, suitable for all
audiences.
Parental Guidance suggested. Some material
may not be suitable for children.
Programming contains themes or content
which may not be suitable for viewers under
14+
the age of 14. Parents are strongly cautioned
to exercise discretion in permitting viewing
by pre-teens and early teens.
18 ADULTS ONLY
LOCK
MODE
HOW LONG?
KEYBOARD
LOCK SET OFF
BLOCK PROGRAMS:
CANADIAN FRENCH
STATUS
ENTER CODE
FIRST
OFF
- - - -
documentaries and other information programming, talk
shows, music videos, and variety programming.
E Exempt - Exempt programming.
General - Programming intended
for audience of all ages. Contains
G
no violence, or the violence
content is minimal or is depicted
appropriately.
8+ General - Not recommended for
young children. Programming
8 ans +
intended for a broad audience but
contains light or occasional
violence. Adult supervision
recommended.
Programming may not be suitable
for children under the age of 13 Contains either a few violent
13 ans +
scenes or one or more sufficiently
violent scenes to affect them.
Adult supervision strongly
suggested.
Programming may not be suitable
16 ans +
for children under the age of 16 Contains frequent scenes of
violence or intense violence.
Programming restricted to adults.
18 ans +
Contains constant violence or
scenes of extreme violence.
BLOCKING MESSAGE
If V-Chip is enabled and the program exceeds the rating
limit set by you, the blocking message will appear and the
audio will be muted. Enter your four-digit secret code if you
wish to continue viewing the program. After entering your
code, all locks and rating blocks are disabled until the TV is
turned off or until all settings are off.
Note: If you enter your four-digit secret code to override rating
blocks, you must reset all rating blocks by either
reprogramming or turning the TV off.
Canadian French Rating Description
LOCK
CANADIAN FRENCH
VIEW NR PROGRAMS?
G
8 ANS+
13 ANS+
16 ANS+
18 ANS+
OFF
YES
K
K
Procedure
• Press CH or CH to move between different ratings.
• Use VOL or VOL to select ratings you want to
block (RED) and unblock (GREEN).
• Press twice to return to MODE in Lock menu.
ACTION
• Press VOL or VOL to select 12, 24, 48 hours or
ALWAYS.
14 z
PROGRAM RATING EXCEEDED
ACCESS CODE
_ _ _ _
KEYBOARD
This feature lets you lock out the keyboard. No keyboard
operation is possible. Use remote control to operate the TV.
LOCK
MODE
HOW LONG?
KEYBOARD
NO
Procedure
• Display the LOCK menu and enter the 4-digit code.
• Press ACTION, then press CH to highlight
KEYBOARD.
• Press VOL to enter the sub-menu.
• Press VOL or VOL to select YES. The keyboard is
now locked.
• To unlock the keyboard, select NO in the menu.
Page 17

Manual de Instrucciones [ Resumen ]
Felicidades
Su nuevo Televisor Monitor/Receiver se caracteriza por un
chasis de estado sólido que está diseñado para brindarle
satisfacción por muchose años. Ha sido probada completamente en la fábrica para su mejor desempeño.
Instalación de Pilas en el Control Remoto
Use dos pilas AA: .
Marcas de la polaridad
de la batería
AA / 1.5A
AA / 1.5A
1
3
Procedimiento
1. Voltee el control remoto con los botones hacia abajo.
Remueva la tapa de la batería presionando la marca y
deslizandola en la dirección indicada.
2. Instale las pilas igualando las marcas (+) y (–) de
polaridad.
3. Coloque nuevamente la tapa de las pilas.
Nota: Instalación incorrecta puede causar derrame y corrosión
que dañará al Control Remoto.
Precauciones
• Reemplaze las pilas por pares.
• No mezcle tipos de pilas (carbono de zinc con alcalina).
• No intente cargar, hacer corto circuito, desarmar,
calentar o quemar las pilas.
Programación Inicial
Para su conveniencia, el menú de auto programación será
desplegado en pantalla cuando el set sea encendido por
primera vez. De ser necesario, siga los menús y los
procedimientos para ajustar las caracteristicas.
IDIOMA/LANGUE
Seleccione el idioma del menú ENGLISH (Inglés),
ESPAÑOL o FRANCAIS (Francés).
• Presione VOL para seleccionar menú en Inglés,
Español, o Francés.
LA ANTENA DEBE ESTAR
CONNECTADA
PROGRAMACION INICIAL
IDIOMA/LANGUE
MODO
PROGRAMA AUTO
PRESIONE ACTION PARA SALIR
AA / 1.5A
2
AA / 1.5A
ESPAÑOL
CABLE
MANUAL DE INSTRUCCIONES [RESUMEN ]
MODO
Para seleccionar la modalidad de TV (antena) o CABLE
dependido de la fuente de la señal.
• Presione VOL para seleccionar modo de
TELEVISIÓN o CABLE.
LA ANTENA DEBE ESTAR
CONNECTADA
PROGRAMACION INICIAL
IDIOMA/LANGUE
MODO
PROGRAMA AUTO
PRESIONE ACTION PARA SALIR
ESPAÑOL
CABLE
PROGRAMA AUTO
Para programar automaticamente todos los canales
disponibles a través de la entrada de RF.
• Presione VOL para iniciar la programación automática
de canales.
LA ANTENA DEBE ESTAR
CONNECTADA
PROGRAMACION INICIAL
IDIOMA/LANGUE
MODO
PROGRAMA AUTO
PRESIONE ACTION PARA SALIR
ESPAÑOL
CABLE
Conexiones de Equipo Opcional
Nota: El control remoto Universal debe ser programado con
los códigos que se incluyen para operar el equipo.
Conexión de la Videocasetera
Videocaseteras, equipo de videodiscos, equipo de
videojuegos y teletexto pueden también ser conectados a
la entrada de conexión de vídeo. Vea el manual de su
equipo opcional para más información.
Nota: La entrada de VIDEO 1 es una entrada de propósito dual. Es
para conectar equipos de 480i principalmente, tal como un
reproductor de DVD usando los conectores de video por
componentes Y, P
Pero además pueden conectarse fuentes de video compuesto
convencionales como una videocasetera, usando solo los
conectores de Y/Video y AUDIO L y R. La información en
pantalla mostrará Componente ó Video 1 dependiendo de que
fuente este conectada.
TERMINALES EN LA PARTE POSTERIOR DE LA TV
ANT
INPUT 1
COMPONENT
TO AUDIO
VIDEO INPUT
AMP
L
INPUT 2
R
Use el conector de
S-Vídeo o el de Vídeo
CABLES NO INCLUIDOS
S-VIDEO
y los conectores de audio L y R.
ByPR
R-AUDIO-L
PRPBY/VIDEO
R-AUDIO-L VIDEO
Videocasetera
VIDEO OUT
L
AUDIO OUT
R
ANT OUT
ANT IN
Cable
de Entrada
PLAY
R
FF
E
W
STOP
15 z
Page 18

MANUAL DE INSTRUCCIONES [ RESUMEN ]
Conexión de la Videocasetera (contd.)
Procedimiento
• Conecte el equipo a la entrada de Audio/Vídeo en la
parte posterior del televisor como se muestra en la
figura.
• Seleccione la Modalidad de Video presionando el botón de
TV/VIDEO.
• Opere el equipo opcional tal como se instruye en el manual
del equipo.
Conexión del Decodificador de Cable
Siga este diagrama cuando concecte su televisor
solamente a un decodificador de cable.
Decodificador
de Cable
ANT IN ANT OUT
Cable de
Entrada
15
CABLES NO INCLUIDOS
TERMINALES EN LA PARTE POSTERIOR DE LA TV
INPUT 1
AMP
L
R
COMPONENT
VIDEO INPUT
INPUT 2
S-VIDEO
TO AUDIO
ANT
R-AUDIO-L
PRPBY/VIDEO
R-AUDIO-L VIDEO
Procedimiento
• Sintonize el televisor al canal 3 o 4.
• Usando el decodificador de cable, sintonize el canal de
cable premium que desea ver.
Conexión del Decodificador de Señal Digital
(DTV-STB) ó DVD
Utilice este diagrama para conectar el decodificador de
Señal Digital Panasonic (DTV-STB) ó DVD a su Televisor.
Nota: El diagrama de las entradas A/V posteriores puede variar
dependiendo del modelo. Favor de referirse a la tabla de
caracteristicas en la pagina 3 acerca de las capacidades de su
modelo.
Cables no incluidos
Terminales en la posterior
del Decodificador de Señal
Digital (DTS-STB) o DVD
DIGITAL TV OUTPUT
P
Y
R-AUDIO-L
P
B
R
NTSC OUTPUT
S-VIDEOVIDEOR-AUDIO-L
Entradas para Señal Digital
en la parte posterior del Televisor
Notas:
• El televisor tiene un grupo de entradas de video
compuesto: Y, P
B Y PR
las señales compuestas de color, proveen una mejor
separación de luminancia y color. Utilice las entradas de
audio compuesto: Izquierda (L) y Derecha (R) para
conectar.
• Seleccione el modo de salida para formato 480i del
DTV-STB. El televisor solo puede recibir señales en
formato 480i. La imágen aparecera distorsionada si en el
decodificador se selecciona otro tipo de formato (por
ejem. 480p, 720p ó 1080i).
TO AUDIO
AMP
L
R
INPUT 1
COMPONENT
VIDEO INPUT
INPUT 2
R-AUDIO-L
PRPBY/VIDEO
S-VIDEO
R-AUDIO-L VIDEO
. Las entradas separadas para
Conexión del Amplificador de Sonido
Conecte a la entrada de audio de un amplificador externo para
escuchar el sonido en sistema estéreo.
Nota: Las terminales TO AUDIO AMP no pueden ser usadas
directamente para bocinas externas.
TERMINALES EN LA PARTE POSTERIOR DE LA TV
Amplificador
Externo
CABLES NO INCLUIDOS
TO AUDIO
AMP
L
R
INPUT 1
COMPONENT
VIDEO INPUT
INPUT 2
R-AUDIO-L
PRPBY/VIDEO
S-VIDEO
R-AUDIO-L VIDEO
Nota: El diagrama de las entradas A/V posteriores puede
variar, dependiendo del modelo. Favor de referirse a la
tabla de caracteristicas en la pagina 3 acerca de las
capacidades de su modelo.
Ajustes de Sonido (Audio)
• Seleccione ALTAVOCES SI en el menú de SONIDO
(AUDIO).
• Ajuste el volumen del AMP (amplificador) al mínimo.
• Ajuste el volumen de la Televisión al nivel deseado.
• Ajuste el volumen del AMP hasta igualar el de la
Televisión.
• Seleccione APAGADAS Y SALIDA DE AUDIO
VARIABLE en el menú AUDIO para controlar Altavoces
o bocinas de la televisión o bien seleccione FAO (salida
fija de audio) para controlar Altavoces o bocinas del
amplificador externo.
• El Volumen, el silencio, los bajos, los altos y el balance
ahora son controlados por medio de la Televisión.
Nota: En APAGADAS Y SALIDA DE AUDIO FIJA el audio se
controla mediante el control de volumen del sistema del
amplificador externo.
Panel de Control Frontal
El panel de control frontal puede ser usado para accesar el menú
ó cambiar el modo de video cuando no se disponga del control
remoto.
Indicador
APAGADO /
ENCENDIDO
Panel frontal para CT-32SL15
VIDEO 3 L - AUDIO - R
ENCENDIDO/APAGADO
CH
VOL
POWER
T
I
O
C
N
A
CH
Panel frontal para CT-32SC15
Nota: El indicador de APAGADO/ENCENDIDO (rojo) estará
prendido cuando el televisor esté encendido.
Procedimiento
• Conecte su equipo a las conexiones Audio/Video en la
parte frontal de la televisión.
• Presione TV/VIDEO para seleccionar la entrada de
VIDEO 3.
• Opere el equipo como se instruye en el manual del
equipo.
CH
TV/VIDEOPOWER
TV / VIDEO
VOL
VOL
I
O
T
C
N
A
VOL
CH
Sensor infrarrojo
INPUT 3
EXIT
L - AUDIO - RVIDEO
16 z
Page 19

Conexión a los conectores de A/V frontales
Abra la puerta del panel frontal de la TV para usar estas
conexiones para su equipo opcional (VCR, videocamara, DVD
u otros components de video)
opcional para los detalles.
Entrada INPUT 3 para
CT-32SL15
VIDEO 3 L - AUDIO - R
. Vea el manual del equipo
Entrada INPUT 3
para CT-32SC15
L - AUDIO - RVIDEO
INPUT 3
Videocasetera
Videocámara
PLAY
R
FF
E
W
STOP
Consola de
Videojuegos
MANUAL DE INSTRUCCIONES [RESUMEN ]
IMAGEN
AJ. IMAGEN
OTROS AJ.
MODO
CONTRASTE
BRILLO
COLOR
TINTE
NITIDEZ
NORMAL
VIVIDO
- - - - - - - -
- - - - - - - -
- - - - - - - -- - - - - - -
- - - - -
NO
R - AUDIO - L VIDEO
AV OUT
S-VIDEO
Procedimiento
• Conecte su equipo a los coneciones Audio/Video en la
parte frontal.
• Presione TV/VIDEO para seleccionar la entrada de
VIDEO 3.
• Opere el quipo como se instruye en el manual del eqipo.
Navegación del menu de iconos
Presione para deplegar los iconos.
IMAGEN
CANALES
Presione para seleccionar el icono
deseado.
AUDIO
BLOQUEO
SALIDA
RELOJ
AJUSTE
Presione
para seleccionar la
característica, luego
presione VOL .
IMAGEN
AJ. IMAGEN
OTROS AJ.
MODO
CONTRASTE
BRILLO
COLOR
TINTE
NITIDEZ
NORMAL
VIVIDO
- - - - - - - -
- - - - - - - -
- - - - - - - -- - - - - - -
Presione para ajustar o activar
la caracteristica
- - - - -
NO
Presione
IMAGEN
CANALES
AUDIO
BLOQUEO
SALIDA
para desplegar las
características del
icono seleccionado.
RELOJ
AJUSTE
Presione
BRILLO 32
- - - - - - - -
repetidamente para salir
de los menús.
17 z
Page 20

TROUBLESHOOTING CHART
Troubleshooting Chart
Before calling for service, determine the symptoms and follow suggested solutions.
AUDIO VIDEO Solutions
Noisy Audio
Noisy Audio
Noisy Audio
ENGLISH
No Audio
Noisy Audio
No Audio
Snowy Video
Multiple Image
Interference
Normal Video
No Video with Snow
?
No Video
Adjust Antenna Location and Connection
Check Cable Connection
Adjust Antenna Location and Connection
Check Antenna Lead-in Wire
Check Cable Connection
Move television from Electrical Appliances, Lights,
Vehicles and Medical Equipment
Increase Volume.
Check audio mode setting (Stereo/SAP/Mono)
Check Mute
Check television SPEAKERS on/off
Change Channel
Set TV or Cable Mode Properly
Check Antenna Cables
Check Power Cord is Plugged into Active Outlet
Adjust Brightness and Audio Controls
Change Channel
Check Cable Connections
Program the Remote Control Again
Check Second Video Source Operation
Adjust Color Settings
Normal Audio
Wrong Audio
Normal Audio
Normal Audio
Intermittent Remote Control Operation
No effect of TV front control panel keys Control panel may be locked. To unlock, select NO in Keyboard feature in LOCK
No effect of TV front control panel keys except
the POWER button.
Picture Menu is locked.
No Color
Normal Video
Distorted Video
Normal Video
Change Channel
Check Audio Is Set To Stereo or Mono, Not SAP
Check the format of Component Video input. Change to 480i.
Replace Remote Control Batteries
menu. (refer page 14)
Press ACTION and TV/VIDEO buttons on the TV front simultaneously, then
quickly press ACTION and VOL buttons simultaneously.
Press ACTION and TV/VIDEO buttons on the TV front panel simultaneously,
then quickly press ACTION and VOL to unlock.
18 z
Page 21

Index
INDEX
A
AC Power Supply Cord 4
AI Sound 11
Amplifier Connection
(TO AUDIO AMP) 7
Antenna Connections 4
Audio 11
Auto Power On 9
Auto Program 5, 9
B
Balance 11
Bass 11
Blocking Message 14
Brightness 9
C
Cabinet and Remote Control 3
Cable / Antenna Connection 4
Cable Box Connection 6
Canadian English 13
Canadian English Rating
Description 14
Canadian French 14
Canadian French Rating
Description 14
Caption 11
Care and Cleaning 3
Channels 11
Cinema 9
Clock Mode 10
Clock Set 10
Closed Captioning 9
Color 9
Color Temp 10
Connection to Front AV jacks 7
Customer Record 3
D
Digital TV - Set-Top Box (DTV-STB) or
DVD Player Connection 6
Direct Video Input Selection 7
F
Feature Chart 3
Front Control Panel 6
G
Game 12
I
Icon Menu Navigation 8
Icon Menu Operation 9
Idioma/langue 5, 9
Initial Set Up Menu 5
Input Label 11
Input Label Chart 11
Installation 4
K
Keyboard 14
L
Lock 11, 12
Lock Set 12
M
Manual Caption 11
Manual Program 9
Menu Languages 9
Mode 5, 9
Mono 11
N
Normal 9, 11
O
Optional Cable Connections 4
Optional Equipment Connections 6
P
PIC Mode 9
Picture 9
Prog Chan 9
R
Remote Control Battery Installation 4
S
SAP 11
Screen 3
Set Up 9
Sharpness 9
Sleep 10
Speakers 11
Specifications 3
Standard 9
Stereo 11
Surround 11
T
Table of Contents 1
Television Location 4
Timer 10
Tint 9
Treble 11
Troubleshooting Chart 18
U
U.S. Movies 13
U.S. Movies Rating Chart
Description 13
U.S. TV Programs 12
U.S. TV Programs Rating Chart
Description 13
V
V-Chip Menu Operation 12
VCR Connection 6
Vivid 9
VM (Velocity Modulation) 10
ENGLISH
19 z
Page 22

ATTENTION
RISQUE DE CHOCS ÉLECTRIQUES
NE PAS OUVRIR
Le symbole de l’éclair dans un triangle
équilatéral indique la présence d’une
tension suffisamment élevée pour
engendrer un risque de chocs électriques.
0
ATTENTION: Afin de prévenir tout risque d’incendie ou de chocs électriques, ne pas exposer l’appareil à la
pluie ou à une humidité excessive. Éviter également de placer des contenants avec du liquide, tel un vase,
sur l’appareil.
MESURES DE SÉCURITÉ
1. Lire les mesures de sécurité.
FRANÇAIS
2. Conserver les mesures de sécurité.
3. Respecter toutes les mises en garde.
4. Suivre toutes les directives.
5. Ne pas utiliser cet appareil près de toute source d’eau.
6. Nettoyer l’appareil avec un linge sec.
7. Ne pas bloquer les évents d’aération. Pour installer l’appareil, suivre les recommandations du
8. Ne pas installer l’appareil près d’un appareil de chauffage tel qu’un radiateur, une cuisinière, un registre
9. Ne pas invalider les caractéristiques de sécurité de la fiche polarisée ou avec mise à la terre. Une fiche
10. Le fil d’alimentation doit être placé dans un endroit où il ne risque pas d’être piétiné ou écrasé. Faire
11. N’utiliser que les fils et accessoires recommandés par le fabricant.
12. N’utiliser que les chariots, tables ou supports recommandés par le fabricant, ou ven-
13. Pour une protection accrue pendant un orage, ou si l’appareil n’est pas utilisé pendant
14. Confier l’appareil à un technicien qualifié dans les cas suivants: si l’appareil, le fil d’alimentation ou la
ATTENTION: Afin de prévenir le risque de chocs électriques, ne pas
retirer les vis. Toute réparation devrait être confiée à un personnel qualifié.
Le point d’exclamation dans un triangle
équilatéral indique que le manuel
d’utilisation inclus avec l’appareil contient
d’importantes recommandations quant au
Le symbole d’isolation de Classe II (un carré dans un carré) indique que cet appareil a été
évalué et testé pour être conforme aux exigences d’isolation de Classe II.
fabricant.
de chaleur ou tout dispositif émettant de la chaleur (y compris un amplificateur).
polarisée possède deux lames dont une est plus large que l’autre. Une fiche avec mise à la terre
possède deux lames plus une troisième lame pour la mise à la terre. La lame large ou la lame de mise
à la terre sont conçues pour des raisons de sécurité. Si la fiche fournie ne peut pas être branchée dans
la prise secteur, consulter un électricien pour faire remplacer la prise.
particulièrement attention à ses extrémités de branchement, y compris sa fiche.
dus avec l’appareil. L’appareil et son chariot doivent être déplacés avec soin afin de
prévenir toute chute.
une période prolongée, s’assurer de débrancher le fil d’alimentation.
fiche ont été endommagés ; si un objet est tombé dans l’appareil ou si ce dernier a été mouillé ; si
l’appareil a été exposé à la pluie ou à l’humidité ; s’il a été échappé ou s’il semble ne pas fonctionner
normalement ou que son rendement laisse à désirer.
Lire ces instructions au complet avant d’utiliser l’appareil.
Le contenu du présent manuel peut être modifié sans préavis.
Copyright 2005. Panasonic Corporation of North America. Tous droits réservés.
Toute reproduction ou distribution non autorisée constitue une violation de la loi sur
les droits d’auteur.
Page 23

Table des matières
Félicitations ......................................................3
Dossier du client.......................................................... 3
Entretien et nettoyage................................................. 3
Spécifications.............................................................. 3
Table des caractéristiques .......................................... 3
Installation ........................................................4
Emplacement du téléviseur......................................... 4
Branchement de sources auxiliaires ........................... 4
Cordon d’alimentation ................................................. 4
Câble / antenne........................................................... 4
Installation des piles de la télécommande .................. 4
Réglage initial...................................................5
Branchement d’appareils auxiliaires .............6
Branchement à un magnétoscope .............................. 6
Panneau avant des commandes................................. 6
Branchement à un câblosélecteur............................... 6
Branchement d’un décodeur de télévision numérique
(DTV-STB) / lecteur DVD ........................................ 6
Branchement à un amplificateur audio........................ 7
Branchement aux prises d’entrée avant...................... 7
TABLE DES MATIÈRES
Navigation au menu à icônes......................... 8
Fonctionnement avec menus à icônes ......... 9
Réglage ........................................................................ 9
Image.......................................................................... 9
Minuterie..................................................................... 10
Canaux ....................................................................... 11
Audio........................................................................... 11
Blocage....................................................................... 12
Fonctionnement de la puce antiviolence.... 12
Guide de dépannage..................................... 16
Index............................................................... 17
FRANÇAIS
Section télécommande
Section de garantie et les centres de service
TélécommandeGarantie
1 z
Page 24

RENSEIGNEMENTS IMPORTANTS
Renseignements importants
AVERTISSEMENT DU FCC: TOUTE MODIFICATION APPORTÉE À CE TÉLÉVISEUR QUI N’EST PAS
EXPRESSÉMENT APPROUVÉE PAR PANASONIC CORPORATION OF NORTH AMERICA PEUT
CAUSER DES INTERFÉRENCES NUISIBLES LESQUELLES POURRAIENT ENTRAÎNER L’ANNULATION
DU DROIT DE L’UTILISATEUR D’OPÉRER CET APPAREIL.
Risque pour l’environnement: Ce produit renferme un tube à rayons cathodiques ainsi que d’autres
composants contenant du plomb. L’élimination de ce type de matériaux peut être réglementée dans
certaines localités aux fins de protection de l’environnement. Pour des renseignements sur les modalités de
recyclage ou d’élimination de ces produits, communiquez avec vos autorités locales.
RENSEIGNEMENTS IMPORTANTS À PROPOS DE L’UTILISATION DE JEUX VIDÉO, D’ORDINATEURS ET
DE SOURCES D’IMAGES FIXES
MISE EN GARDE: Le marquage ou la rémanence de l’image causé par l’affichage prolongé d’une
image fixe n’est pas le résultat d’une défectuosité et n’est donc pas couvert par la garantie.
Le téléviseur est conçu pour afficher des images animées. L’affichage prolongé d’images fixes telles que
FRANÇAIS
des images au format “boîte aux lettres” sur un écran de télévision ordinaire (avec des bandes noires
dans le haut et le bas), des images au format ordinaire (4:3) non recadrées sur un grand écran (avec des
bandes sur chaque côté), des bandes de défilement dans le bas de l’écran, des motifs permanents de
certains jeux vidéo, des panneaux de pointage fixes, des logos de canaux ultra lumineux et des motifs en
ligne (Internet) ou répétitifs d’ordinateurs devrait être limité.
L’affichage prolongé d’images fixes peut endommager irrémédiablement le tube image, dommage qui
prend la forme d’une image fantôme. Pour prévenir de tels dommages, il est recommandé de prendre les
mesures suivantes:
• Ne pas afficher une image fixe pendant une période prolongée.
• Après usage, toujours couper le contact sur le téléviseur.
MISE EN GARDE: GARDER LES PETITES PIÈCES ET TOUT AUTRE OBJET HORS DE LA PORTÉE DES ENFANTS.
CES OBJETS POURRAIENT ÊTRE AVALÉS ACCIDENTELLEMENT. PORTER ÉGALEMENT UNE ATTENTION
PARTICULIÈRE AU MATÉRIEL D’EMBALLAGE ET À LA FEUILLE DE PLASTIQUE.
2 z
Page 25

Félicitations
Votre nouveau téléviseur Tau de Panasonic a été conçu pour
vous procurer une image de qualité avant-gardiste et un son de
qualité avec des raccordements audio et vidéo complets pour
votre système de cinéma maison. Ce téléviseur a été conçu pour
vous procurer de longues années d’agrément. Les tests sévères
auxquels il a été soumis et les réglages de précision dont il a fait
l’objet sont garants d’un rendement optimal.
Dossier du client
Les numéros de modèle et de série sont inscrits sur le panneau
arrière de l'appareil. Veuillez les noter dans l'espace ci-dessous
et conserver ce manuel comme registre de votre achat. Cela en
facilitera l'identification en cas de perte ou de vol.
Tables de caractéristiques
MODÈLES
CARACTÉRISTIQUES
LANGUE D’AFFICHAGE DES
RÉGLAGE POUR SIGNAL VIDÉO
MENUS
(ANG/ESP/FR)
FÉLICITATIONS
CT-32SL15
CT-32SC15
• •
• •
Numéro de
modèle
Numéro de
série
Entretien et nettoyage
Écran (couper le contact)
• Nettoyer l’écran avec un chiffon doux humecté d’eau
savonneuse ou de nettoyant à vitres.
• NE JAMAIS UTILISER DE NETTOYANTS ABRASIFS.
• Éviter toute humidité excessive et bien essuyer.
ATTENTION: Ne pas vaporiser de produit nettoyant directement
sur l’écran.
Coffret et télécommande
• Nettoyer le coffret et la télécommande avec un chiffon
humide ou humecté d’eau savonneuse.
• Éviter toute humidité excessive et bien essuyer.
• Ne jamais utiliser de benzène, de solvant ou de produits
à base de pétrole.
Spécifications
Les spécifications peuvent être modifiées sans préavis.
Alimentation
CT-32SC15 (2,4 A)
CT-32SC15U (2,4 A)
CT-32SL15 (2,4 A)
CT-32SL15U (2,4 A)
Bloc d’accord - 181
Prises d’entrée vidéo
Prises d’entrée audio 500 mV eff. 47 kilohms
Prises de sortie audio 0 – 2,0 V eff. 4,7 kilohms
Prise d’entrée vidéo composante
Prise d’entrée S-Vidéo Connecteur S-Vidéo (Y-C)
120 V c.a., 60 Hz
VHF-12; UHF-56;
Câble-113
1 V c.-à-c., 75 ohms, prise
de type phono
75 ohms, prise de type
phono
OMISSION D’ENTRÉE VIDÉO
IDENT. PRISES
(MODULATION DE LA VITESSE)
PUCE ANTIVIOLENCE
NORMALISATION VIDÉO
NORMALISATION AUDIO
GRAVES/AIGUS/ÉQUILIBRE
SON AMBIOPHONIQUE
PRISES D’ENTRÉE A/V
VIDÉO COMPOSANTE
PRISE DE SORTIE AUDIO
MV
SOUS-TITRES
STÉRÉO
SON IA
(ARRIÈRE/AVANT)
PRISE D’ENTRÉE
S-VIDÉO
(ARRIÈRE/AVANT)
PRISE D’ENTRÉE
• •
• •
• •
• •
• •
FRANÇAIS
• •
• •
• •
• •
• •
• •
3
(2/1) 3 (2/1)
(1/0) (1/0)
• •
• •
3 z
Page 26

INSTALLATION
Installation
Emplacement du téléviseur
Suivre ces recommandations avant de déterminer l’emplacement
du téléviseur.
• Protéger l’appareil contre les rayons solaires, un
éclairage intense et les reflets.
• Protéger l’appareil contre la chaleur ou l’humidité. Une
aération insuffisante pourrait provoquer un dérangement
des composantes internes.
• Un éclairage fluorescent peut réduire la portée de la
télécommande.
• Éviter de placer le téléviseur près d’un appareil
dégageant un champ magnétique, notamment des
moteurs, des ventilateurs ou des haut-parleurs externes.
ATTENTION: Ne placer ce téléviseur que sur un
meuble ou support recommandé par le fabricant ou
vendu avec l’appareil. Déplacer avec précaution tout
support à roulettes portant l’appareil afin d’éviter
toute blessure que pourrait causer le basculement
du support et(ou) du téléviseur. Pour la protection des enfants,
s’assurer que le téléviseur est placé sur un meuble stable ne
pouvant être basculé, poussé ou tiré et empêchant tout enfant de
monter ou de s’asseoir dessus. La chute d’un téléviseur peut
causer des blessures graves, voire mortelles.
FRANÇAIS
CT-32SC15, CT-32SC15U:
ATTENTION:
PANASONIC avec ces téléviseurs. L’utilisation d’un autre
meuble (ou chariot) pourrait causer une instabilité
susceptible de provoquer des blessures.
CT-32SL15, CT-32SL15U:
ATTENTION: N’utiliser que le meuble TY-32HL15T de
PANASONIC avec ces téléviseurs. L’utilisation d’un autre
meuble (ou chariot) pourrait causer une instabilité
susceptible de provoquer des blessures.
Branchement de sources auxiliaires
Les branchements à d’autres appareils devraient être faits
avec des câbles audio et vidéo blindés. Pour de meilleurs
résultats:
• Utiliser des câbles coaxiaux blindés de 75 ohms.
• Utiliser les prises d’entrée et de sortie correspondant aux
• Afin de réduire le risque d’interférence, éviter d’utiliser
Cordon d’alimentation
ATTENTION: AFIN DE PRÉVENIR TOUT RISQUE
D’ÉLECTROCUTION, INSÉRER À FOND LA LAME
LA PLUS LARGE DE LA FICHE DANS LA FENTE
LA PLUS LARGE DE LA PRISE. NE PAS UTILISER
UNE PRISE DANS LAQUELLE LA LAME POLARISÉE NE PEUT ÊTRE
INSÉRÉE COMPLÈTEMENT.
PLACER LE CORDON D’ALIMENTATION DANS UN ENDROIT
OÙ IL NE RISQUE PAS D’ÊTRE PIÉTINÉ, COINCÉ, ÉCRASÉ,
PLIÉ, ETC. FAIRE PARTICULIÈREMENT ATTENTION À SES
EXTRÉMITÉS, FICHES ET PRISES COMPRISES.
Câble / antenne
Pour une bonne réception, le branchement à une antenne
ou à la câblodistribution est nécessaire.
N’utiliser que le meuble TY-32SC15T de
appareils auxiliaires.
des câbles longs.
Fiche polarisée
Branchement à la câblodistribution
Brancher le téléviseur au câble de la
Câble de la compagnie
de câblodistribution
compagnie de câblodistribution. Ne
serrer qu’à la main. L’utilisation de tout
outil (une pince, par exemple) pour
serrer peut causer des dommages.
Nota: Il peut être nécessaire d’utiliser un
câblosélecteur pour assurer une
réception de qualité optimale. Pour
des renseignements sur la compatibilité, consulter la
compagnie de câblodistribution.
VHF/UHF 75-ohms
(sur le panneau arrière)
Branchement à une antenne
• Pour une bonne réception des
canaux VHF/UHF, le branchement
à une antenne est nécessaire.
Une antenne extérieure donnera
de meilleurs résultats.
Nota: Le mode câble est implicitement réglé
en usine. Pour sélectionner le signal
de la télédiffusion (antenne), choisir le mode TÉLÉ sous la
rubrique PROG. CANAL du menu RÉGLAGE (page 9).
Câble d’antenne
Installation des piles de la télécommande
Utiliser deux piles AA (fournies):
Les polarités des piles
AA / 1.5A
AA / 1.5A
1
3
Marche à suivre
1. Renverser la télécommande pour qu’elle soit face en
bas. Pour retirer le couvercle du logement des piles,
appuyer sur l’indication et glisser dans la direction de la
flèche.
2. Installer les piles en respectant les polarités (+) et (-).
3. Remettre le couvercle en place et le pousser en sens
inverse jusqu’à ce qu’il s’enclenche.
Nota: Une installation incorrecte peut occasionner une fuite et
endommager la télécommande.
Précautions à prendre
• Remplacer les 2 piles à la fois.
• Ne pas utiliser des piles de types différents (carbone zinc
avec alcalines).
• Ne pas recharger, court-circuiter, démonter, chauffer ou
jeter au feu les piles.
2
AA / 1.5A
AA / 1.5A
4 z
Page 27

Réglage initial
Nota: Les menus varient selon le modèle. Se reporter à la
table des caractéristiques à la page 3 pour se renseigner
sur les fonctions du modèle utilisé.
Pour faciliter l’utilisation, un menu d’auto-réglage initial
apparaît à l’écran lors de la mise en marche initiale de
l’appareil. Selon les besoins, suivre les directives pour
régler les fonctions.
IDIOMA/LANGUE
Pour sélectionner l’affichage des menus en anglais, français ou
espagnol
Marche à suivre
.
• Appuyer sur la touche VOL pour sélectionner
ENGLISH, ESPAÑOL ou FRANÇAIS.
RÉGLAGE INITIAL
FIRST PLEASE
CONNECT THE ANTENNA
IDIOMA/LANGUE
MODE
AUTO PROGRAM
INITIAL SET UP
PRESS ACTION TO EXIT
ENGLISH
CABLE
BRANCHER L'ANTENNE
EN PREMIER
RÉGLAGE INITIAL
IDIOMA/LANGUE
MODE
PROG. AUTO
APPUYER ACTION PR QUITTER
FRANÇAIS
CÂBLE
MODE
Pour sélectionner le mode TÉLÉ (antenne) ou CÂBLE selon la
source du signal.
Marche à suivre
• Appuyer sur la touche VOL pour sélectionner TÉLÉ
ou CÂBLE.
BRANCHER L'ANTENNE
EN PREMIER
RÉGLAGE INITIAL
IDIOMA/LANGUE
MODE
PROG. AUTO
APPUYER ACTION PR QUITTER
FRANÇAIS
CÂBLE
PROG. AUTO (Programmation automatique)
Pour programmer automatiquement tous les canaux avec un
signal.
Marche à suivre
• Appuyer sur la touche VOL pour amorcer la
programmation automatique.
FRANÇAIS
BRANCHER L'ANTENNE
EN PREMIER
RÉGLAGE INITIAL
IDIOMA/LANGUE
MODE
PROG. AUTO
APPUYER ACTION PR QUITTER
FRANÇAIS
CÂBLE
Nota: Afin d’assurer la programmation adéquate des canaux,
attendre que la programmation automatique termine
automatiquement le balayage.
5 z
Page 28

BRANCHEMENT D’APPAREILS AUXILIAIRES
Branchement d’appareils auxiliaires
Nota: La télécommande universelle doit avoir été programmée
avec les codes fournis afin de permettre le
fonctionnement d’un appareil auxiliaire.
Branchement à un magnétoscope
Des magnétoscopes, lecteurs de vidéodisques, consoles de jeu
et récepteurs DSS peuvent également être branchés aux prises
d’entrée vidéo. Se reporter au manuel de l'utilisateur afférent à
l’appareil utilisé
Nota: La prise d’entrée VIDEO 1 est une prise double fonction. Elle
FRANÇAIS
Nota: Les prises A/V arrière varient selon le modèle. Se reporter à la
Marche à suivre
• Brancher l'équipement de la manière indiquée aux prises
• Sélectionner le mode vidéo en appuyant sur la touche
• Faire fonctionner l’appareil branché conformément aux
Nota: Ne pas faire acheminer simultanément le signal S-Vidéo et
.
est surtout destinée au branchement de sources d’images 480i
tel un lecteur DVD avec prises de signal vidéo composante
Y P
et prises audio des canaux gauche et droit. Toutefois,
B PR
elle peut aussi servir pour la connexion de sources vidéo à
signal composite tel un magnétoscope n’utilisant que la prise
Y/Vidéo et les prises audio des canaux gauche et droit. Un
message à l’écran identifie la source: composant ou vidéo.
Magnétoscope
VIDEO OUT
L
AUDIO OUT
R
ANT OUT
ANT IN
Fil
d'antenne
TO AUDIO
AMP
ANT
L
R
Utiliser soit l'entrée vidéo ou
l'entrée S-vidéo
Câbles vendus séparément
Prises à l'arrière du téléviseur
INPUT 1
COMPONENT
VIDEO INPUT
INPUT 2
S-VIDEO
R-AUDIO-L
PRPBY/VIDEO
R-AUDIO-L VIDEO
table des caractéristiques à la page 3 pour se renseigner sur les
fonctions du modèle utilisé.
d'entrée audio/vidéo du panneau avant ou du panneau
arrière.
TV/VIDEO.
instructions du manufacturier.
vidéo vers l’entrée 2. Si les deux prises sont connectées en
même temps, le signal sera brouillé. Utiliser uniquement le
signal S-Vidéo ou vidéo.
Panneau avant des commandes
Le panneau avant des commandes peut être utilisé pour
accéder aux menus et commuter entre les modes vidéo
lorsque la télécommande n’est pas disponible.
Voyant de mise en/hors contact
Panneau avant du CT-32SL15
VIDEO 3 L - AUDIO - R
INTERRUPTEUR
CH
POWER
VOL
T
I
O
C
N
A
CH
Panneau avant du CT-32SC15
Nota: La voyant de mise en/hors contact (rouge) est allumé lorsque
l’appareil est en contact.
CH
TV/VIDEOPOWER
VOL
TV / VIDEO
VOL
I
O
T
C
N
A
VOL
CH
Capteur infrarouge
EXIT
INPUT 3
L - AUDIO - RVIDEO
Les prises d’entrée vidéo peuvent être utilisées pour le
raccordement d’un second magnétoscope, d’un caméscope, d’un
lecteur DVD, d’un lecteur laser, de jeux vidéo ou d’un appareil
DSS. Se reporter au manuel de l’utilisateur afférent à l’appareil
utilisé.
Marche à suivre
• Brancher l’équipement de la manière indiquée aux
prises d’entrée audio/vidéo à l’avant du téléviseur.
• Appuyer sur TV/VIDEO pour sélectionner le mode
d’entrée désiré.
• Faire fonctionner l’équipement branché conformément
aux instructions du manufacturier.
Branchement à un câblosélecteur
Suivre le diagramme ci-dessous lors du branchement d’un
câblosélecteur seulement au téléviseur.
PLAY
R
FF
E
W
STOP
Câblosélecteur
15
ANT IN ANT OUT
ANT
Fil d'antenne
Câbles vendus séparément
Prises à l'arrière du téléviseur
INPUT 1
AMP
L
R
COMPONENT
VIDEO INPUT
INPUT 2
S-VIDEO
TO AUDIO
R-AUDIO-L
PRPBY/VIDEO
R-AUDIO-L VIDEO
Marche à suivre
• Sur le téléviseur, syntoniser le canal 3 ou 4, selon le
réglage sur le câblosélecteur.
• À l’aide du câblosélecteur, syntoniser le canal désiré.
Branchement d’un décodeur de télévision
numérique (DTV-STB) / lecteur DVD
Utiliser ce schéma de raccordement comme référence pour
connecter un décodeur DTV-STB Panasonic au téléviseur.
Nota: Les prises A/V arrière varient selon le modèle. Se reporter à la
Nota:
table des caractéristiques à la page 3 pour se renseigner sur les
fonctions du modèle utilisé.
Câbles vendus séparément
Prises sur panneau arrière
du décodeur DTV /
lecteur DVD
DIGITAL TV OUTPUT
P
R-AUDIO-L
Y
P
B
R
NTSC OUTPUT
S-VIDEOVIDEOR-AUDIO-L
• Il y a trois entrées vidéo : Y, P
Prises vidéo composante
sur panneau arrière
du téléviseur
INPUT 1
AMP
L
R
COMPONENT
VIDEO INPUT
INPUT 2
S-VIDEO
et PR. Les signaux
B
TO AUDIO
R-AUDIO-L
PRPBY/VIDEO
R-AUDIO-L VIDEO
composants séparés de couleur fournissent la
luminance et l'analyse chromatique. Utiliser les
prises d'entrée audio gauche (L) et droite (R).
• Sélectionner le mode de sortie 480i sur le
décodeur DTV-STB. Le téléviseur ne peut recevoir
que les signaux 480i. Il y aura distorsion de l’image
lors de la sélection d’un autre format (ex. 480p,
720p ou 1080i).
6 z
Page 29

Branchement à un amplificateur audio
A
(TO AUDIO AMP)
Pour faire l'écoute sur une chaîne stéréo, relier le téléviseur à la
prise d'entrée d'un amplificateur audio externe.
Nota: Les prises “TO AUDIO AMP” ne peuvent être utilisées pour le
branchement direct de haut-parleurs externes.
Prises à l'arrière du t
INPUT 1
MPLIFICATEUR EXTERNE
90.7 MHZ
TO AUDIO
Câbles vendus séparément
AMP
L
R
COMPONENT
VIDEO INPUT
INPUT 2
Nota: Les prises A/V arrière varient selon le modèle. Se reporter à la
table des caractéristiques à la page 3 pour se renseigner sur les
fonctions du modèle utilisé.
Réglages audio
• Sélectionner H-PARLEURS EF au menu AUDIO.
• Régler le volume sur l'amplificateur à son plus bas
niveau.
• Régler le volume sur le téléviseur au niveau voulu.
• Régler le volume sur l'amplificateur à un niveau
correspondant à celui sur le téléviseur.
• Sélectionner H-PARLEURS H/CIRCUIT-SORTIE AUDIO
VARIABLE au menu AUDIO.
• Le réglage du volume, des graves, des aigus et de
l’équilibre ainsi que la commande de sourdine
(COUPURE SON) sont maintenant contrôlés au moyen
des commandes du téléviseur.
Nota: En mode “H-PARLEURS H/CIRCUIT-SORTIE AUDIO FIXE”, le
volume ne peut se régler que sur l’amplificateur externe.
éléviseur
R-AUDIO-L
PRPBY/VIDEO
S-VIDEO
R-AUDIO-L VIDEO
BRANCHEMENT D’APPAREILS AUXILIAIRES
Marche à suivre
• Brancher l’équipement de la manière indiquée aux
prises d’entrée audio/vidéo à l’avant du téléviseur.
• Appuyer sur la touche TV/VIDEO pour sélectionner le
mode d’entrée vidéo avant VIDÉO 3.
• Faire fonctionner l’équipement branché conformément
aux instructions du manufacturier.
Sélection directe de l’entrée vidéo
Cette fonction permet à l’utilisateur de sélectionner
directement la source vidéo au moyen de la touche
TV/VIDEO et des touches numériques de la
télécommande.
Marche à suivre
Nota: Appuyer sur la touche TV/VIDEO de la télécommande
pour afficher le menu de sélection de l’entrée vidéo.
1 TÉLÉ
2 VIDÉO1
3 VIDÉO2
4 VIDÉO3
• Appuyer sur la touche numérique de la télécommande
correspondant à l’entrée désirée.
Nota: Il est également possible de sélectionner l’entrée vidéo en
appuyant sur les touches TV/VIDEO et CH .
FRANÇAIS
Branchement aux prises d’entrée avant
Les prises d’entrée vidéo peuvent être utilisées pour le
raccordement d’un second magnétoscope, d’un caméscope, d’un
lecteur DVD, d’un lecteur laser, de jeux vidéo ou d’un apareil
DSS. Se reporter au manuel de l’utilisateur afférent à l’appareil
utilisé.
Prises d'entrée A/V avant
pour CT-32SL15
VIDEO 3 L - AUDIO - R
Prises d'entrée A/V avant
pour CT-32SC15
L - AUDIO - RVIDEO
INPUT 3
Magnétoscope
AV OU T
Caméscope
PLAY
R
FF
E
W
STOP
R - AUDIO - L VIDEO
S-VIDEO
Lecteur de
jeux vidéo
7 z
Page 30

NAVIGATION AU MENU À ICÔNES
Navigation au menu à icônes
Appuyer sur pour afficher les icônes.
Appuyer sur
FRANÇAIS
Appuyer sur pour afficher les rubriques de
Appuyer sur pour sélectionner la rubrique, puis
pour sélectionner l’icône désirée.
l’icône sélectionnée.
appuyer sur la touche VOL .
IMAGE
RÉG. VIDÉO
AUTRES RÉG
IMAGE
RÉG. VIDÉO
AUTRES RÉG
MODE
IMAGE
BRILLANCE
COULEUR
NUANCES
NETTETÉ
NORMAL
MODE
IMAGE
BRILLANCE
COULEUR
NUANCES
NETTETÉ
NORMAL
ÉCLATANT
- - - - - - - -
- - - - - - - -
- - - - - - - -- - - - - - -
- - - - -
NON
ÉCLATANT
- - - - - - - -
- - - - - - - -
- - - - - - - -- - - - - - -
- - - - -
NON
Appuyer sur
pour modifier ou activer la fonction.
Appuyer sur à plusieurs reprises pour quitter les
menus.
8 z
BRILLANCE 32
IMAGE NORMALE
- - - - - - - -
Page 31

Fonctionnement avec menus à icônes
Nota: Voir à la page 8 pour la marche à suivre pour la navigation au
menu à icônes.
RÉGLAGE
IDIOMA/LANGUE
MODE -
ESPAÑOL ou ENGLISH pour changer la langue d’affichage.
Nota: Lorsque MODE est en surbrillance, appuyer sur VOL pour
PROG. CANAL (PROGRAMMATION DES CANAUX)
Nota: Lorsque la rubrique désirée est en surbrillance, appuyer sur
MODE - Pour sélectionner télé (antenne) ou le mode câble
selon la source du signal.
PROG AUTO - Pour programmer automatiquement tous les
canaux avec un signal.
PROG MANUELLE -
manuellement les canaux.
Nota: Utiliser les touches numériques de la télécommande pour entrer
(Sous-titres)
CC
Ce téléviseur incorpore un décodeur qui fournit une
description visuelle de la portion audio. Le programme
diffusé doit comporter ce signal afin de permettre
l’affichage des sous-titres. Les sous-titres sont affichés
sous la forme de texte (lettres en couleur ou blanches sur
fond noir). Cela permet la lecture du dialogue de l’émission
ou de toute autre information.
Nota: Lorsque le mode désiré est en surbrillance, appuyer sur
CC
MODE - Mettre les sous-titres en fonction en
sélectionnant un des modes suivants.
• HORS FONCTION - Lorsque les sous-titres ne sont pas
• C1 - Pour afficher l’information vidéo (maximum de 4
• C2 - Autres modes pour afficher l’information vidéo.
Sélectionner IDIOMA/LANGUE et FRANÇAIS,
sélectionner FRANÇAIS, ESPAÑOL ou ENGLISH .
RÉGLAGE
IDIOMA/
LANGUE
PROG. CANAL
CC
AUTRES RÉG
MODE
FRANÇAIS
VOL pour la sélectionner ou l’activer.
Pour ajouter ou supprimer
les chiffres du canal dans le sous-menu de la programmation
manuelle.
RÉGLAGE
IDIOMA/
LANGUE
PROG. CANAL
CC
AUTRES RÉG
PROG AUTO
PROG MANUELLE
VOL pour le sélectionner.
RÉGLAGE
IDIOMA/
LANGUE
PROG. CANAL
CC
AUTRES RÉG
CC
MODE
désirés.
lignes affichées à l’écran afin de ne pas obstruer
l’image). Les sous-titres peuvent être dans n’importe
quelle langue.
CÂBLEMODE
HF
FONCTIONNEMENT AVEC MENUS À ICÔNES
Nota: Le mode C1 est recommandé pour l’affichage des sous-titres.
AUTRES RÉGLAGES
Nota: Lorsque la rubrique désirée est en surbrillance, appuyer sur la
touche VOL pour la sélectionner ou l’activer.
CONTACT AUTO - Sélectionner EF pour que le téléviseur
se mette en fonction en même temps que le câblosélecteur
ou les autres appareils. Lorsque cette fonction est activée,
la fonction de minuterie n’est pas disponible.
RÉGLAGE
IDIOMA/
LANGUE
PROG. CANAL
CC
AUTRES RÉG
CONTACT AUTO
HF
IMAGE
Nota: Lorsque les rubriques du sous-menu sont en surbrillance,
RÉGLAGES VIDÉO
MODE - Permet de choisir un des trois modes
Nota: Chaque mode possède ses propres réglages de l’image
IMAGE - Réglage des parties claires..
BRILLANCE - Réglage des parties sombres pour des
COULEUR - Réglage de la densité chromatique.
NUANCES - Réglage pour l’obtention d’une teinte
NETTETÉ - Réglage pour des détails mieux définis.
NORMAL - Rétablissement des réglages implicites
appuyer sur VOL pour les sélectionner ou les modifier.
préréglés d’image selon le visionnement. Le réglage
de la température de la couleur sera également modifié
lorsque cette fonction est activée.
Mode Image - Réglages implicites de la température couleur
MODE
TEMP. COUL.
ÉCLATANT BLEU
STANDARD NORMAL
CINÉMA ROUGE
(couleur, nuances, brillance, image, netteté et température de
couleur).
• ÉCLATANT - Réglage par défaut. Pour une image à haut
contraste et netteté pour le visionnement dans une pièce
bien éclairée.
• STANDARD - Réglage recommandé lors du
visionnement avec éclairage tamisé.
• CINÉMA - Sélectionner ce mode lors du visionnement
de films dans une pièce sombre pour obtenir l’ambiance
d’une salle de cinéma.
détails mieux démarqués.
naturelle.
.
IMAGE
RÉG. VIDÉO
AUTRES RÉG
MODE
IMAGE
BRILLANCE
COULEUR
NUANCES
NETTETÉ
NORMAL
ÉCLATANT
- - - - - - - -
- - - - - - - -
- - - - - - - -- - - - - - -
- - - - -
NON
FRANÇAIS
9 z
Page 32

FONCTIONNEMENT AVEC MENUS À ICÔNES
AUTRES RÉGLAGES
Lorsque AUTRES RÉG est en surbrillance, appuyer sur
VOL pour afficher les rubriques du sous-menu.
Nota: Lorsque la rubrique désirée est en surbrillance, appuyer sur
VOL pour la sélectionner ou l’activer.
IMAGE
RÉG. VIDÉO
AUTRES RÉG
TEMP. COUL.
MV
BLEU
HAUT
TEMP. COUL. - Pour accentuer ou attenuer au goût la
teinte rouge ou bleue de l’image.
MV (MODULATION DE LA VITESSE) - Augmente la
netteté de l’image pour une meilleure transition du
blanc au noir
. Select from HAUT, HF ou BAS.
MINUTERIE
SOMMEIL
NBRE D’HEURES? - Sélectionner la mise hors contact
après 30, 60, 90 minutes. Sélectionner NON pour
FRANÇAIS
mettre la minuterie hors fonction.
MINUTERIE
SOMMEIL
MNTR
HORLOGE
MODE HORL.
NBRE D'HEURES?
NON
MINUTERIE
Sélectionner la minuterie pour mettre le téléviseur en et
hors marche à une heure préréglée, au canal de son choix,
aux jours voulus. L’horloge doit avoir été réglée pour
utiliser les fonctions de la minuterie.
Marche à suivre
• Utiliser les touches VOL et CH pour régler le jour,
l’heure de mise en et hors marche et le numéro de canal,
puis utiliser VOL pour activer la fonction.
MINUTERIE
SOMMEIL
MNTR
HORLOGE
MODE HORL.
JR
HRE DÉBUT
HRE FIN
ENTRER CANAL
RÉG
LUN - VEN
- - : - -
- - : - -
- - -
NON
HORLOGE
HEURE - Pour régler l’heure du jour.
JOUR - Pour régler le jour de la semaine.
Marche à suivre
Nota: Utiliser les touches VOL , VOL et CH pour régler
l’heure et le jour.
MINUTERIE
SOMMEIL
MNTR
HORLOGE
MODE HORL.
HF
MODE HORL.
Cette fonction est utilisée pour afficher l’horloge à l’écran
en plus grand format.
Marche à suivre
MINUTERIE
SOMMEIL
MNTR
HORLOGE
MODE HORL.
• Pendant l’affichage du menu MINUTERIE, appuyer sur
la touche CH pour mettre MODE HORL. en
surbrillance.
• Appuyer sur VOL pour accéder au sous-menu.
• Appuyer sur les touches VOL ou VOL pour
sélectionner EF.
• Quitter le menu. Appuyer à deux reprises sur la touche
RECALL. L’affichage à l’écran disparaît et l’horloge
apparaît en grand format.
12 : 00 AM
Nota: L’affichage de l’horloge se déplace autour de l’écran afin
de prévenir toute rémanence d’image.
• Appuyer de nouveau sur la touche RECALL pour
retourner au visionnement normal.
Nota: Sélectionner HF au menu pour mettre hors fonction.
HF
Nota:
• Le contact est automatiquement coupé après 90 minutes
si la mise en marche a été activée par la fonction
MINUTERIE. Si l’heure de mise hors fonction a été
programmée ou qu’une touche est pressée, la coupure
automatique après 90 minutes est annulée.
• La fonction MINUTERIE peut fonctionner avec le
téléviseur sous ou hors tension. À l’heure programmée,
le téléviseur syntonise le canal présélectionné.
10 z
Page 33

CANAUX
_ _ _ _
SIGLE
SIGLE MANUEL - Permet d’assigner un sigle et des
chiffres manuellement.
Nota: Utiliser les touches numériques de la télécommande pour
sélectionner les canaux désirés. (Utiliser un guide télé comme
référence.)
CANAUX
SIGLE
SIGLE MANUEL
IDENT. PRISES
K
K
CANAUX
SIGLE MANUEL
ENTRER CANAL
ENTRER SIGLE
POUR DÉPLACER CRSEUR
PR SÉLECT. CANAL
_ _ _ _
3
IDENT. PRISES - Pour identifier les branchements
d’entrées vidéo aux fins d’affichage.
CANAUX
IDENT. PRISES
VIDÉO 1
MAGNÉT.
VIDÉO 2
OMETTRE
VIDÉO 3
POUR DÉPLACER CRSEUR
POUR SÉLECT. CARACT.
SIGLE
CANAUX
SIGLE MANUEL
IDENT. PRISES
K
K
Marche à suivre
• Appuyer sur la touche VOL pour afficher le menu
suivant.
• Appuyer sur les touches CH ou CH pour déplacer
le curseur.
• Appuyer sur les touches VOL ou VOL pour
sélectionner l’identification désirée. (Voir le tableau
ci-dessous.)
Tableau d’identification des prises
IDENTIFICATIONS
MAGNÉT.
DVD
OMETTRE
CÂBLE
DBS
DÉCO. TVN
MAGN.NUM
JEU
AUX.
_____
Sélectionner lors du raccordement d’un
Sélectionner lors du raccordement d’un lecteur
Sélectionner pour sauter une entrée vidéo non
utilisée lors d’une pression sur la touche
Sélectionner lors du raccordement d’un
Sélectionner lors du raccordement d’un appareil
SRD (DBS) (satellite de radiodiffusion directe) à
Sélectionner lors du raccordement d’un
décodeur de télé numérique à l’entrée vidéo.
Sélectionner lors du raccordement d’un
enregistreur vidéo personnel à l’entrée vidéo.
Sélectionner lors du raccordement d’un jeu à
Sélectionner lors du raccordement d’autres
Sélectionner pour supprimer l’identification de la
UTILISATIONS
magnétoscope à l’entrée vidéo.
DVD à l’entrée vidéo.
TV/VIDEO.
câblosélecteur à l’entrée vidéo.
l’entrée vidéo.
l’entrée vidéo.
appareils.
prise.
AUDIO
RÉG. AUDIO
MODE - Sélectionner STÉRÉO, SAP (seconde voie
audio) ou MONO. (Sélectionner MONO si le signal
stéréo est faible.)
GRAVES - Pour accentuer ou atténuer le rendu dans
les graves.
FONCTIONNEMENT AVEC MENUS À ICÔNES
AIGUS - Pour accentuer ou atténuer le rendu dans les
aigus.
ÉQUILIBRE - Pour ajuster le rapport entre les niveaux
de sortie sur les canaux gauche et droit.
NORMAL - Rétablissement des réglages implicites:
GRAVES, AIGUS et ÉQUILIBRE.
AUDIO
MODE
AUDIO
AUDIO
RÉG. AUDIO
AUTRES RÉG
SON AMBIO
H-PARLEURS
AUDIO
RÉG. AUDIO
AUTRES RÉG
SON AMBIO
H-PARLEURS
STÉRÉO SAP MONO
GRAVES
AIGUS
- - - - - - -
ÉQUILIBRE
NORMAL
SON IA EF
MODE
EF
- - - - - - - -
- - - - - - - -
- - - - - - - -
NON
HF
RÉG. AUDIO
AUTRES RÉG
SON AMBIO
H-PARLEURS
AUTRES RÉGLAGES
SON IA - Ajuste automatiquement le volume pour le
maintenir à un niveau constant.
Marche à suivre
• Appuyer sur la touche VOL pour sélectionner EF ou
HF.
RÉG AUDIO
AUTRES RÉG
SON AMBIO
H-PARLEURS
SON AMBIO
MODE - Utiliser cette caractéristique pour rehausser le
rendu sonore des émissions en stéréo.
Marche à suivre
• Appuyer sur la touche VOL pour sélectionner EF ou
HF.
H-PARLEURS
H-PARLEURS
- Cette caractéristique est utilisée lors
du raccordement de l’appareil à un amplificateur
externe.
Marche à suivre
• Appuyer sur la touche VOL pour sélectionner:
• EF - Les haut-parleurs du téléviseur sont en
fonction et fonctionnent normalement.
• H/CIRCUIT-SORTIE AUDIO VARIABLE - Les hautparleurs du téléviseur sont hors circuit et les
réglages audio se font sur le téléviseur.
• H/CIRCUIT-SORTIE AUDIO FIXE - Les hautparleurs du téléviseur sont hors circuit et les
réglages audio se font sur l’amplificateur externe.
Nota: Pour de meilleurs résultats, régler RÉG. AUDIO
à NORMAL avant de sélectionner H/Circuitsortie audio fixe.
FRANÇAIS
11 z
Page 34

FONCTIONNEMENT AVEC MENUS À ICÔNES
BLOCAGE
MODE
VERROUILLER - Pour bloquer l'utilisation de jeux
vidéo, le visionnement d'enregistrements et la
syntonisation de tous les canaux.
Nota:
• Au moyen des touches numériques de la
télécommande, entrer un code à quatre chiffres. (Utiliser
un code facile à mémoriser et le conserver dans un
endroit sûr).
• Si le code a été oublié, la fonction de verrouillage se
libère automatiquement après 12, 24 ou 48 heures selon
le réglage. Faire attention lors de la sélection de
CONTINU. Si CONTINU est sélectionné et que le code
a été oublié, le verrouillage du téléviseur doit être retiré
par un technicien qualifié.
• À la rubrique MODIFIER CODE, si un code différent que
celui utilisé au menu de verrouillage est entré, ce
nouveau code devient le code de contrôle.
Marche à suivre
• Appuyer sur la touche VOL pour sélectionner:
• HF - Pour mettre le verrouillage hors fonction.
FRANÇAIS
Nota: Lorsque la fonction JEU, CANAL ou TOUS est activée
• JEU - Pour bloquer les canaux 3 et 4 et les entrées
vidéo.
• CANAL - Pour bloquer la syntonisation de quatre
canaux de son choix.
• TOUS - Pour verrouiller tous les canaux et les
entrées vidéo.
BLOCAGE
MODE
COMBIEN
D'HEURES?
CLAVIER
VERROUILLER
BLOQUER:
ÉMIS.TÉLÉ. USA
ÉTAT
ENTRER CODE
D'ABORD
HF
HF
- - - -
ACTION
• Appuyer à deux reprises sur la touche .
• Appuyer sur la touche CH pour mettre COMBIEN
D’HEURES? en surbrillance.
• Appuyer sur la touche VOL pour
sélectionner 12, 24, 48 heures ou CONTINU.
et qu’un canal ou une entrée vidéo verrouillé est
sélectionné, le message VERROUILLÉ est affché dans
le coin supérieur gauche de l’écran du téléviseur.
Fonctionnement de la puce antiviolence
Marche à suivre
• Au moyen des touches numériques, entrer le code à
quatre chiffres. (Utiliser un code facile à mémoriser et
le conserver dans un endroit sûr.)
• Appuyer sur la touche CH pour accéder à la rubrique
BLOQUER.
• Appuyer sur les touches VOL ou VOL pour
sélectionner ÉMISSIONS TÉLÉ USA, FILMS USA,
CANADA ou CANADA-QUÉBEC.
• Appuyer sur la touche CH pour mettre ÉTAT en
surbrillance.
• Appuyer sur les touches VOL ou VOL pour
afficher le tableau des cotes.
• Appuyer sur la touche VOL pour sélectionner EF ou
HF.
• Appuyer sur la touche CH pour sélectionner
REGARDER SANS VISA pour ÉMISSIONS TÉLÉ USA
et FILMS USA ou ÉMISSIONS EXEMPTÉES pour
CANADA et CANADA-QUÉBEC.
• Appuyer sur la touche VOL pour sélectionner EF ou
HF.
ÉMISSIONS TÉLÉ USA
Ce téléviseur incorpore la technologie de la “puce
antiviolence” qui vous permet d'utiliser les classifications
des émissions de télévision pour bloquer le visionnement
de certaines émissions.
BLOCAGE
MODE
COMBIEN
D'HEURES?
CLAVIER
Nota: La sélection de “OUI” permet la réception des émissions
non cotées. La sélection de “NON” bloque la réception
des émissions non cotées. Se reporter à la mise en
garde ci-contre.
BLOCAGE
VERROUILLER
BLOQUER:
ÉMIS.TÉLÉ. USA
ÉTAT
ENTRER CODE
D'ABORD
ÉMISSIONS TÉLÉ USA
REGARDER SANS VISA
RÉGLAGE:
TV-Y
TV-Y7 FV
- - - - - - - - - - - - - - - - - -
TV-G
TV-PG V S L D
TV-14 V S L D
TV-MA V S L
DE BASE
OUI
- - - -
HF
HF
HF
Marche à suivre
• Appuyer sur la touche CH pour sélectionner
RÉGLAGE.
• Appuyer sur la touche VOL pour sélectionner DE
BASE ou DÉTAILLÉ.
DE BASE - Permet de sélectionner les réglages
généraux tels que TV-Y, TV-PG, etc.
DÉTAILLÉ - Permet de sélectionner les réglages
généraux et spécifiques tels que V, L, etc.
• Utiliser les touches CH ou CH pour naviguer entre
les différentes classifications.
• Utiliser les touches VOL ou VOL pour
sélectionner les cotes à bloquer (ROUGE) ou à
débloquer (VERT).
• Appuyer à deux reprises sur la touche pour
retourner au menu de verrouillage.
• Appuyer sur la touche CH pour sélectionner
COMBIEN D’HEURES?
• Appuyer sur les touches VOL ou VOL pour
sélectionner 12, 24, 48 heures ou CONTINU.
ACTION
12 z
Page 35

ÉMISSIONS TÉLÉ USA (cont.)
Mise en garde
La " puce antiviolence " intégrée à cet appareil peut bloquer la
réception des émissions non cotées (NR) conformément aux
directives de la section 15.120(e)(2) de la FCC. Il est à noter
toutefois que si le verrouillage des émissions non cotées est
activé, il se pourrait que des résultats inopinés et confus
s'ensuivent et qu'il soit impossible de recevoir des bulletins
d'urgence ou certains des programmes suivants :
• Bulletins d'urgence (tels que messages de la sécurité
civile, avis météorologiques et autres)
• Programmes locaux
• Bulletins d'informations
• Émissions d'affaires publiques
• Avis d'intérêt public
• Émissions religieuses
• Reportages sportifs
• Bulletins météorologiques
TABLEAU DES COTES - ÉMISSIONS TÉLÉ USA
NR
TV-Y
TV-Y7
TV-G
TV-PG
TV-14
TV-MA
FV VIOLENCE-FICTION
V VIOLENCE
SSEXUALITÉ
L LANGAGE VULGAIRE
D SUJET DÉLICAT
Non coté. Voir la “Mise en garde” pour
l’utilisateur ci-dessus.
Enfants. Les sujets de cette émission et leur
traitement ont été spécialement conçus pour un
auditoire d'enfants, y compris ceux entre 2 et 6 ans.
Pour des enfants plus âgés. L’émission peut
comporter des scènes de violence burlesque
pouvant effrayer de jeunes enfants en bas de 7 ans.
Visa général. Comporte peu ou pas de scènes
violentes, ni de propos vulgaires, ni de dialogues à
connotation sexuelle ou d'images suggestives.
Supervision parentale. Cette émission peut
comporter certains propos vulgaires,
d'occasionnelles scènes de violence et certaines
scènes ou certains propos suggestifs.
14 ans +. Cette émission peut présenter des sujets
délicats ou comporter des propos vulgaires, des
scènes de sexualité ou de violence.
Auditoire adulte seulement. Cette émission peut
présenter des sujets délicats et comporter des
propos obscènes, des scènes explicites de violence
ou de sexualité.
FILMS USA
Ce téléviseur incorpore la technologie de la “puce
antiviolence” qui vous permet d'utiliser les classifications
des films. Cette innovation permet ainsi aux parents de
bloquer le visionnement de certains films, et ce, à leur
entière discrétion.
BLOCAGE
MODE
COMBIEN
D'HEURES?
CLAVIER
VERROUILLER
BLOQUER:
FILMS USA
ÉTAT
ENTRER CODE
D'ABORD
- - - -
HF
HF
FONCTIONNEMENT AVEC MENUS À ICÔNES
Nota: Il arrive parfois que certains films ne soient pas cotés. En règle
Marche à suivre
CANADA
Ce téléviseur incorpore la technologie de la “puce
antiviolence” qui vous permet de bloquer certains films et
émissions de télévision selon deux systèmes de
classification utilisés au Canada.
Nota: Les émissions exemptées comprennent : les émissions de
générale, les vieux films et les films étrangers ne sont pas
cotés.
BLOCAGE
FILMS USA
REGARDER SANS VISA
G
PG
PG-13
R
NC-17
X
HF
OUI
• Appuyer sur les touches CH ou CH pour naviguer
entre les différentes classifications.
• Utiliser les touches VOL ou VOL pour sélectionner
les cotes à bloquer (ROUGE) ou à débloquer (VERT).
• Appuyer à deux reprises sur la touche pour
ACTION
retourner à la rubrique MODE au menu de verrouillage.
• Appuyer sur les touches VOL ou VOL pour
sélectionner 12, 24, 48 heures ou CONTINU.
TABLEAU DES COTES - FILMS USA
PROGRAMMES NON COTÉS (NR) ou NON
NR
G
PG
PG-13
R
NC-17
X
nouvelles, de sports, les documentaires et les autres émissions
d’information, les tribunes téléphoniques et les émissions de
variété et de musique vidéo.
SOUMIS À LA CLASSIFICATION (NA). Le film
n'a pas été coté ou les cotes ne s'appliquent
pas.
VISA GÉNÉRAL. Pour tous âges.
SUPERVISION PARENTALE SUGGÉRÉE.
Certaines images pourraient ne pas convenir à
des enfants.
JUGEMENT DES PARENTS. Certaines images
pourraient ne pas convenir à des enfants de
moins de 13 ans.
17 ANS +. Avec des enfants de moins de 17
ans la supervision d'adultes est recommandée.
17 ANS + SEULEMENT.
AUDITOIRE ADULTE.
BLOCAGE
MODE
COMBIEN
D'HEURES?
CLAVIER
BLOCAGE
VERROUILLER
BLOQUER:
CANADA
ÉTAT
ENTRER CODE
D'ABORD
CANADA
ÉMISSIONS EXEMPTÉES?
C
C8 +
G
PG
14 +
18 +
- - - -
OUI
HF
HF
HF
FRANÇAIS
13 z
Page 36

FONCTIONNEMENT AVEC MENUS À ICÔNES
CANADA (cont.)
Marche à suivre
• Appuyer sur les touches CH ou CH pour naviguer
entre les différentes classifications.
• Utiliser les touches VOL ou VOL pour
sélectionner les cotes à bloquer (ROUGE)ouà
débloquer (VERT).
• Appuyer à deux reprises sur la touche pour
retourner à la rubrique MODE au menu de verrouillage.
• Appuyer sur les touches VOL ou VOL pour
séléctionner 12, 24, 48 heures ou CONTINU.
TABLEAU DES COTES - CANADA (ANGLAIS)
.
Émissions exemptées de classification - Sont
exemptes, notamment les émissions suivantes: les
émissions de nouvelles, les émissions de sports,
E
les documentaires et les autres émissions
d’information; les tribunes téléphoniques, les
émissions de variété et de musique vidéo, etc
Émissions à l’intention des enfants de moins de 8
C
ans. Le contenu des émissions ne doit en aucun cas
comporter de jurons, de nudité ou de sexe.
Émissions que les enfants de huit ans et plus
FRANÇAIS
C8+
peuvent généralement regarder seuls. Ne contient
aucun langage grossier, nudité ou sexe.
G
VISA GÉNÉRAL Pour tous âges.
SUPERVISION PARENTALE SUGGÉRÉE. Certaines
PG
images pourraient ne pas convenir à des enfants.
Émissions comportant des thèmes ou des éléments
de contenu qui pourraient ne pas convenir aux
14+
téléspectateurs de moins de 14 ans. Supervision
parentale recommandée.
18
AUDITOIRE ADULTE.
CANADA-QUÉBEC
Ce téléviseur incorpore la technologie de la "puce
antiviolence" qui vous permet de verrouiller ou de
déverrouiller les émissions canadiennes françaises selon
des classifications variées.
ACTION
Marche à suivre
• Appuyer sur les touches CH ou CH pour naviguer
entre les différentes classifications.
• Utiliser les touches VOL ou VOL pour sélectionner
les cotes à bloquer (ROUGE) ou à débloquer (VERT).
• Appuyer à deux reprises sur la touche pour
ACTION
retourner à la rubrique MODE au menu de verrouillage.
• Appuyer sur les touches VOL ou VOL pour
sélectionner 12, 24, 48 heures ou CONTINU.
TABLEAU DES COTES - CANADA - QUÉBEC
E
G
.
8 ans +
13 ans +
16 ans +
18 ans +
Émissions exemptées de classification.
Général - Cette émission convient à un
public de tous âges. Elle ne contient
aucune violence ou la violence qu’elle
contient est minime.
Général - Déconseillé aux jeunes enfants.
Cette émission convient à un public large
mais elle contient une violence légère ou
occasionnelle qui pourrait troubler de
jeunes enfants. L’écoute en compagnie
d’un adulte est donc recommandée.
Jugement des parents. Cette émission
peut ne pas convenir aux enfants de
moins de 13 ans. Elle contient quelques
scènes d’une violence assez marquée
pour les affecter.
Cette émission ne convient pas aux
enfants de moins de 16 ans. Elle contient
de fréquentes scènes d’une violence
intense.
Cette émission est réservée aux adultes.
BLOCAGE
MODE
COMBIEN
D'HEURES?
CLAVIER
VERROUILLER
BLOQUER:
CANADA-QUEBEC
ÉTAT
ENTRER CODE
D'ABORD
HF
HF
- - - -
Nota: Les émissions exemptées comprennent : les émissions de
nouvelles, de sports, les documentaires et les autres émissions
d’information, les tribunes téléphoniques et les émissions de
variété et de musique vidéo.
BLOCAGE
CANADA-QUÉBEC
ÉMISSIONS EXEMPTÉES?
G
8 ANS+
13 ANS+
16 ANS+
18 ANS+
OUI
HF
14 z
Page 37

Message de verrouillage
Si la puce antiviolence est activée et que la cote du
programme excède la limite fixée par l’utilisateur, le
message de verrouillage est affiché et le son est mis en
sourdine. Pour visionner le programme, entrer le code. Une
fois le code entré, tous les blocages sont désactivés
jusqu’à ce que le contact soit coupé sur le téléviseur ou
que les réglages soient annulés.
Nota: Si le code secret est entré pour annuler les cotes réglées, il sera
nécessaire de programmer de nouveau toutes les cotes soit par
programmation soit en coupant le contact sur le téléviseur.
CLASSIFICATION REFUSÉE
CODE D'ACCÈS
CLAVIER
Cette fonction permet de verrouiller le clavier. Le
fonctionnement sans clavier est possible. Utiliser la
télécommande pour contrôler le téléviseur.
BLOCAGE
MODE
COMBIEN
D'HEURES?
CLAVIER
NON
FONCTIONNEMENT AVEC MENUS À ICÔNES
FRANÇAIS
Marche à suivre
• Afficher le menu BLOCAGE et entrer un code à 4
chiffres.
• Appuyer sur la touche ACTION puis appuyer sur la
touche CH pour mettre CLAVIER en surbrillance.
• Appuyer sur VOL pour accéder au sous-menu.
• Appuyer sur les touche VOL ou VOL pour
séctionner OUI. Le clavier est alors verrouillé.
• Pour le déverrouiller, sélectionner NON au menu.
15 z
Page 38

GUIDE DE DÉPANNAGE
Guide de dépannage
Avant de faire appel à un technicien, vérifier les problèmes et apporter les corrections simples décrites ci-dessous.
AUDIO VIDÉO Solutions
Ajuster l’orientation et(ou) le branchement de l’antenne.
Présence de bruit
Présence de bruit
Présence de bruit
Absence de son
Présence de neige
Image dédoublée
Interférence
Image normale
Vérifier le branchement des câbles.
Ajuster l’orientation et(ou) le branchement de
l’antenne.
Vérifier le fil d’amenée de l’antenne.
Vérifier le branchement des câbles.
Éloigner le téléviseur de tout appareil électroménager, dispositif d’éclairage,
véhicule moteur ou équipement médical.
Augmenter le volume.
Vérifier le réglage du mode audio (STÉRÉO/SAP/MONO).
Vérifier la fonction de coupure du son.
Vérifier si les haut-parleurs sont en fonction.
Syntoniser un autre canal.
FRANÇAIS
Présence de bruit
Absence de son
Son normal
Son erroné
Son normal
Son normal
Fonctionnement intermittent de la
Absence d’image/
présence de neige
Absence d’image
Absence de couleur
Image normale
Image déformée
Image normale
télécommande
?
Sélectionner le mode TÉLÉ ou CÂBLE.
Vérifier le branchement des câbles d’antenne.
Vérifier la prise secteur.
Ajuster les commandes de brillance et audio.
Syntoniser un autre canal.
Vérifier les raccordements.
Programmer à nouveau la télécommande.
Vérifier le fonctionnement de la seconde source vidéo.
Régler la couleur.
Syntoniser un autre canal.
Le réglage AUDIO devrait être à STÉRÉO ou MONO et non SAP.
Vérifier le format de l’entrée du signal vidéo composante. Changer à 480i.
Remplacer les piles de la télécommande.
Les touches sur le panneau avant des
commandes du téléviseur n’ont aucun effet.
Les touches sur le panneau avant des
commandes du téléviseur n’ont aucun effet.
Le menu IMAGE est verrouillé.
16 z
Le panneau des commandes peut être verrouillé. Sélectionner NON sous la
rubrique CLAVIER du menu BLOCAGE.
Appuyer simultanément sur les touches ACTION et TV/VIDEO sur le panneau
avant du téléviseur, puis, sans délai, appuyer simultanément sur les touches
ACTION et VOL.
Pour le déverrouiller, appuyer simultanément sur les touches ACTION et TV/
VIDEO sur le panneau avant du téléviseur, puis, sans délai, appuyer
simultanément sur les touches ACTION et VOL.
Page 39

Index
INDEX
A
Aigus 11
Audio 11
Autres réglages 9, 10
B
Blocage 12
Branchement à la câblodistribution 4
Branchement à un amplificateur audio
(AMP) 7
Branchement à un câblosélecteur 6
Branchement à un magnétoscope 6
Branchement à une antenne 4
Branchement aux prises
d’entrée avant 7
Branchement d’appareils auxiliaires 6
Branchement d’un décodeur de
télévision numérique / lecteur DVD 6
Branchement de sources auxiliaires 4
Brillance 9
C
Câble / antenne 4
Canada 13
Canada-Québec 14
Canaux 11
CC Mode 9
Cinéma 9
Clavier 15
Coffret et télécommande 3
Contact auto 9
Cordon d’alimentation 4
Couleur 9
D
Dossier du client 3
E
Éclatant 9
Écran 3
Émissions télé USA 12
Emplacement du téléviseur 4
Entretien et nettoyage 3
Équilibre 11
F
Films USA 13
Fonctionnement avec menus
à icônes 9
Fonctionnement de la puce
antiviolence 12
G
Graves 11
Guide de dépannage 16
H
Heure 10
Horloge 10
H-parleurs 11
I
Ident. prises 11
Idioma/langue 5, 9
Image 9
Installation 4
Installation des piles de la
télécommande 4
J
Jeu 12
Jour 10
M
Message de verrouillage 15
Minuterie 10
Mode 5, 9
Mode horl. 10
Mono 11
MV (modulation de la vitesse) 10
N
Navigation au menu à icônes 8
Netteté 9
Normal 9, 11
Nuances 9
P
Panneau avant des commandes 6
Prog manuelle 9
Prog. auto 9
Prog. auto (Programmation
automatique) 5
Prog. canal 9
R
Réglage 9
Réglage initial 5
Réglages vidéo 9
S
SAP 11
Sélection directe de l’entrée vidéo 7
Sigle 11
Sigle manuel 11
Sommeil 10
Son ambio 11
Son IA 11
Sous-titres 9
Spécifications 3
Standard 9
Stéréo 11
T
Tableau d’identification des prises 11
Tableau des cotes - Canada -
Québec 14
Tableau des cotes - Canada
(Anglais) 14
Tableau des cotes - émissions
télé USA 13
Tableau des cotes - Films USA 13
Tables de caractéristiques 3
Télé ou câble 5
Temp. coul 10
Timer 10
V
Verrouiller 12
FRANÇAIS
17 z
Page 40

REMOTE CONTROL OPERATION/ OPERACIÓN DEL CONTROL REMOTO/ FONCTIONNEMENT DE LA TÉLÉCOMMANDE
Remote Control Operation/
Operación del Control Remoto/
Fonctionnement de la télécommande
1
2
3
4
5
6
7
8
9
10
EUR7613ZB0R
Remote
Remoto
Télécommande
11
12
13
14
15
16
Buttons
Botónes
Touches
1
2
3
4
5
6
7
8
9
10
11
12
13
14
15
16
Description
Descripción
Press to turn ON and OFF.
Presione para ENCENDER y APAGAR.
Appuyer pour établir ou couper le contact.
Presione para seleccionar el funcionamiento del
Appuyer pour sélectionner le fonctionnement télécommandé.
Press to adjust TV sound and navigate in menus.
Presione para ajustar el nivel del audio de la TV y
navegar en los menús.
Appuyer pour régler le niveau sonore et se déplacer au sein
des menus.
Press to select next or previous channel and navigate in
Presione para seleccionar el siguiente canal y navegar
Appuyer pour sélectionner le canal et pour se déplacer au sein
Press to mute sound. Press to display and cancel
Presione para silenciar el sonido. Presione para
Appuyer pour couper le son. Appuyer pour mettre le décodeur
Presione para seleccionar la modalidad de televisión o
Press to select remote operation.
control remoto.
menus.
en los menús.
des menus.
(Closed Caption).
desplegar/cancelar (Subtitulos).
de sous-titres (CC) en ou hors fonction.
CC
Press to select TV or Video mode.
Appuyer pour sélectionner le mode télé ou vidéo.
Press to access DVD or DBS menus.
Presione para accesar el menú de DBS o DVD.
Appuyer pour accéder aux menus DBS ou DVD.
video.
CC
Press numeric keypad to select any channel.
Presione el teclado numérico para seleccionar cualquier
Appuyer sur une touche numérique pour sélectionner un canal.
Press to switch to previously viewed channel or video
Presione para regresar al canal previamente visto o modo
Appuyer pour revenir au canal précédemment capté ou le mode
canal.
mode.
de vídeo.
vidéo.
Component function buttons.
Botones de función Componente.
Touches de fonctions d’appareil auxiliaire.
Press to select audio modes (Stereo, SAP or Mono).
Presione para seleccionar Estereo, SPA (Segundo
Programa de Audio) o Mono).
Appuyer pour capter la piste sonore alternative.
Press to access TV Menu.
Presione para accesar los menús.
Appuyer pour accéder aux menus.
Press to display time, channel, sleep timer, and other
Presione para visualizar la hora, el canal, reloj de
apagado automático, y otras opciones.
Appuyer pour afficher l'heure, le numéro du canal, l'état de la
minuterie-sommeil et d'autres options.
DBS function button.
Botones de función de DBS.
Touche de fonctions pour récepteur DBS.
Press to exit TV and DBS menus.
Presione para salir de los menús de la TV y del
Appuyer pour quitter les menus télé et de diffusion par
Press to enter the minor number in a compound channel
Presione para delimitador entre los canales mayores
Appuyer pour entrer le numéro mineur d’un numéro de
number (DBS mode only).
y menores (para DBS solamente).
canal composé (mode DBS seulement).
options.
DBS.
satellite.
Page 41

REMOTE CONTROL OPERATION/ OPERACIÓN DEL CONTROL REMOTO/ FONCTIONNEMENT DE LA TÉLÉCOMMANDE
Mode Operational Key Chart/Tabla del Modo operacional de las Teclas/Tableau de référence des
fonctions télécommandées.
This chart defines the keys that are operational in the selected component modes (TV, VCR, DBS, CABLE or DVD) after
programming (if needed).
Esta tabla define que teclas funcionan después de programar (si son requeridas) el control remoto, cuando se
seleccciona uno de los modos TV, CABLE, DBS, VCR, DVD.
Ce tableau indique les fonctions pouvant être télécommandées sur les différents appareils (téléviseur, magnétoscope,
récepteur DBS, câblosélecteur ou lecteur DVD) après avoir programmé le code (si nécessaire).
Key Name
Nombre
Touches
POWER
MUTE
MENU
TV/VIDEO
TV MODE
MODO TV
MODE TÉLÉ
Power/Encendido/
Interrupteur
Mute/ Mudo/
Coupure du son
- - Menu/Menú - Menu/Menú
Input Switch/Selección
de fuente de vídeo/
Sélection du mode
d’entrée
CABLE MODE
MODO CABLE
MODE
CÂBLOSÉLECTEUR
Power/Encendido/
Interrupteur
TV Mute/ TV Mudo/
Coupure du son (Télé)
TV Input Switch/
Selección de fuente
de vídeoTelevísión/
Sélection du mode
d’entrée (Télé)
CH S/T Channel/Canal/Canaux Channel/Canal/Canaux
VOLW/X
ACTION
RECALL
SAP
EXIT
GUIDE
PROG
1
2
3
4
5
6
7
8
9
0
R-TUNE
<<REW
PLAY
>>FF
PAUSE
STOP
RECORD
TV/VCR
DVD/VCR
CHS/T
Digit/Dígito/Chiffre 1 Digit/Dígito/Chiffre 1 Digit/Dígito/Chiffre 1 - Chapter/Capitulo/Chapitre 1
Digit/Dígito/Chiffre 2 Digit/Dígito/Chiffre 2 Digit/Dígito/Chiffre 2 - Chapter/Capitulo/Chapitre 2
Digit/Dígito/Chiffre 3 Digit/Dígito/Chiffre 3 Digit/Dígito/Chiffre 3 - Chapter/Capitulo/Chapitre 3
Digit/Dígito/Chiffre 4 Digit/Dígito/Chiffre 4 Digit/Dígito/Chiffre 4 - Chapter/Capitulo/Chapitre 4
Digit/Dígito/Chiffre 5 Digit/Dígito/Chiffre 5 Digit/Dígito/Chiffre 5 - Chapter/Capitulo/Chapitre 5
Digit/Dígito/Chiffre 6 Digit/Dígito/Chiffre 6 Digit/Dígito/Chiffre 6 - Chapter/Capitulo/Chapitre 6
Digit/Dígito/Chiffre 7 Digit/Dígito/Chiffre 7 Digit/Dígito/Chiffre 7 - Chapter/Capitulo/Chapitre 7
Digit/Dígito/Chiffre 8 Digit/Dígito/Chiffre 8 Digit/Dígito/Chiffre 8 - Chapter/Capitulo/Chapitre 8
Digit/Dígito/Chiffre 9 Digit/Dígito/Chiffre 9 Digit/Dígito/Chiffre 9 - Chapter/Capitulo/Chapitre 9
Digit/Dígito/Chiffre 0 Digit/Dígito/Chiffre 0 Digit/Dígito/Chiffre 0 - Chapter/Capitulo/Chapitre 0
Previous Chan or Video Mode
Canal o Modo De Video Previo
Canal précédent ou mode vidéo
Rewind/Regresar/Rebobinage - -
Vol +/- Vol +/-
Menu/Enter
Menú/entrar
Menu/entrée
Display
Desplegar Información
Affichage à l’écran
SAP On/Off
Sap Si/no
Sap en/hors
Exit Menus
Salir del Menús
Sortie Menus
- -
- -
Play/Toc ar/Lecture - - Play/Tocar/Lecture Play/Tocar/Lecture
Fast Forward/Adelantar/
Avance accélérée
Pause/Pausa - - Pause/Pausa Still/Quieto/Arrêt sur image
Stop /Detener/Arrêt - - Stop/Detener/Arrêt Stop/Detener/Arrêt
Record/Grabar/
Enregistrement
Switch/Cambiar/Sélection - - Switch/Cambiar/Sélection
Channel/Canal/Canaux
Desplegar Información
- Menu/Menú -
Display
Affichage à l’écran
-
-
Previous Channel
Canal Previo
Canal précédent
- -
- -
-
DBS MODE
MODO DBS
MODE RÉCEPTEUR
DBS
Power/Encendido/
Interrupteur
TV Mute/ TV Mudo/
Coupure du son (Télé)
TV Input Switch/
Selección de fuente de
vídeoTelevísión /
Sélection du mode
d’entrée (Télé)
Channel and Navigation
Canal y Navegación
Canaux et navigation
Navigation/Navegación
Prog. info
Info. De Programa
Information de programme
STB Audio Track
Audio STB
Piste audio
Exit
Salida
Sortie
Guide
Guia
Program/Programa/
Programme
Previous Channel
Canal Previo
Canal précédent
Page/Página Channel/Canal/Canaux
MAGNÉTOSCOPE
Power/Encendido/
Interrupteur
TV Mute/TV Mudo/
Coupure du son (Télé)
TV Input Switch/
Selección de
fuente de vídeo
Sélection du mode
d’entrée (Télé)
Despliegue En Pantalla
Affichage à l’écran
Rewind/Regresar/
Fast Forward/Adelantar/
VCR MODE
MODO VCR
MODE
Televísión/
-
Vol +/- Navigation/Navegación
Onscreen display
- -
-
- -
- -
-
Rebobinage
Avance accélérée
Record/Grabar/
Enregistrement
DVD MODE
MODO DVD
MODE LECTEUR DVD
Power/Encendido/
Interrupteur
TV Mute/TV Mudo/
Coupure du son (Télé)
TV Input Switch/
Selección de fuente
de vídeo Televísión/
Sélection du mode
d’entrée (Télé)
Navigation/Navegación
Select
Selección
Sélection
Display
Desplegar Información
Affichage à l’écran
Return
Regresar
Retour
Title
Títlo
Titres
Skip Search Rew/Salto Atrás/
Recherche arrière <<
Skip Search/Salto Atrás
Recherche avant
Record/Grabar/
Enregistrement
Open-Close/Abrir-Cerrar/
Ouverture-Fermeture
Channel/Canal/Canaux -/+
>>
Remote
Remoto
Télécommande
Page 42

REMOTE CONTROL OPERATION/ OPERACIÓN DEL CONTROL REMOTO/ FONCTIONNEMENT DE LA TÉLÉCOMMANDE
Programming The Remote Control
Programación del Control Remoto
Programmation de la télécommande
The Universal Remote Control can be programmed to
operate many manufacturers’ components, using the
component function buttons for VCR, DVD, CABLE or
DBS. Follow the procedures for programming your Remote
Control with or without a code for the component.
El Control Remoto Universal puede programarse para
operar componentes de varios fabricantes usando los
botones de función para VCR, DVD, CABLE o DBS.
Siga los procedimientos para programar su Control
Remoto con o sin código para el componente.
La télécommande universelle peut être programmée pour
commander le fonctionnement d'appareils d'autres
marques à l'aide des touches de fonctions VCR, DVD,
CABLE, ou DBS. Suivre l'une des procédures de
programmation données ci-dessous.
Device
Equipo
Appareil
TV
Televisión
Téléviseur
VCR
Videocasetera
Magnétoscope
Videocasetera (predefinido)
DBS/CBL
DVD
Lecteur DVD
Note: Determine the manufacturer of the component and look in the
Nota: Determine el fabricante del componente y busque en la
Nota: Noter la marque de l'appareil et identifier le code dans le
Lecteur DVD et CD (Préréglé)
table for the code.
tabla su código.
tableau des codes.
English Procedures
1. Confirm that the external component is plugged in and
operating.
2. Turn the component off.
3. Press and together, for at least 5
seconds. After 5 seconds, the illuminated mode
(component) buttons will begin to flash. Release the
ACTION and POWER buttons.
4. Press appropriate component button on the Remote
Control VCR, DVD, CABLE or DBS. The component
button will illuminate steadily and all others will go out.
Remote
Remoto
5. Enter the 3-digit component code using the Remote
Télécommande
Control numeric keypad (0 ~ 9 buttons). The component
button will blink twice.
6. Press the Remote Control to test the
component. If the procedure was successful, the
component will turn on and the component key will blink
twice and then go out.
Operates
Funciona
Contrôle
Panasonic Only
Solo Panasonic
Panasonic seulement
VCR (Preset)
Magnétoscope (Préréglé)
DBS STB & CBL STB
(Preset/predefinido/ Préréglé)
DVD (Preset)
DVD/disco Compacto
(predefinido)
ACTION
POWER
Default
Réglage par défaut
Panasonic Code
Código TV Panasonic
Codes Panasonic
Panasonic Code
Código Panasonic
Codes Panasonic
Panasonic DBS Code
Código Panasonic DBS
Codes DBS Panasonic
Panasonic Code
Código Panasonic
Codes Panasonic
POWER
Note: If the component does not operate with the Remote Control,
repeat steps 3 through 6 using another code (some brands
have multiple codes). If an incorrect code is entered, or if the
procedure takes longer than 30 seconds, the programming will
fail.
Programming Without A Code
This procedure searches all codes and is called the
“sequence method.”
1. Confirm that the external component is plugged in and
on.
2. Turn the component off.
3. Press and together, for at least 5
ACTION
seconds. After 5 seconds, the illuminated mode
(component) buttons will begin to flash. Release the
ACTION and POWER buttons.
4. Press the appropriate component button on the Remote
Control. The component button will illuminate steadily
and all others will go out.
5. Press the button to set the remote control into
POWER
the step and set mode.
6. Point the remote control towards the component.
7. Press VOL X (the mode key will blink three times), then
press the Remote Control button to test the
component. Continue this process until the proper code
is found. If the procedure was successful, the component
will turn on.
Note: Each time you press the VOL X button, make sure that the
component key blinks twice before pressing the POWER
button.
8. Once the device responds, press to store the
code. The mode (component) button will blink twice.
Note: It may take many attempts before the correct code is found. If
you miss a code, press W VOL, then press the
button to test the component.
Procedimiento Español
1. Confirme que el componente esté conectado y en
operación.
2. Apague el componente.
3. Presione los botones de y juntos,
cuando menos 5 segundos. Después de este tiempo,
los botones de componentes comenzarán a destellar.
Desoprima los botones ACTION y POWER.
4. Presione el botón de la función apropiada del
componente en el Control Remoto. (VCR, DVD, CABLE
o DBS). El botón seleccionado quedará iluminado y el
resto se apagará.
5. Accese el código del componente de 3 dígitos usando el
teclado numérico (botones 0 ~ 9) del Control Remoto. El
botón del componente destellará dos veces.
6. Presione el botón de el Control Remoto para
probar el componente. Si éste procedimiento ha sido
exitoso, el componente se encenderá.
POWER
POWER
ACTION
ACTION
POWER
POWER
POWER
Page 43

REMOTE CONTROL OPERATION/ OPERACIÓN DEL CONTROL REMOTO/ FONCTIONNEMENT DE LA TÉLÉCOMMANDE
Procedimiento Español (cont.)
Nota: Si el componente no opera con el Control Remoto, repita los
pasos del 3 al 6 usando otro código (Algunas marcas tienen
múltiples códigos). Si un código se ha accesado
incorrectamente, o si el procedimiento toma más de 30
segundos, la programación ha fracasado y se tendra que
repetir el procedimiento.
Programación Sin Código
Este procedimiento busca todos los códigos y se le llama
“método de secuencia”.
1. Confirme que el componente esté conectado y en
operación.
2. Apague el componente.
3. Presione los botones y juntos, cuando
menos 5 segundos. Después de este tiempo, los
botones de componentes comenzarán a destellar.
Desoprima los botones ACTION y POWER.
4. Presione el botón de la función apropiada del
componente en el Control Remoto. El botón
seleccionado quedará iluminado y el resto se apagará.
5. Presione el botón para que el control remoto
entre en modo de programación por pasos.
6. Apunte el control remoto hacia el componente.
7. Presione el botón VOL X (los botones de componentes
destellarán tres veces). Presione el botón
Control Remoto para probar el componente. Si éste
procedimiento ha sido exitoso, el componente
se encenderá.
Nota: Cada vez que presione el botón VOL X, asegurese que el
botón del componente destelle dos veces antes de presionar el
botón .
POWER
8. Después de que el código se ha encontrado, presione el
ACTION
botón para guardar el código. El botón del
componente destellará dos veces.
Nota: Repita los pasos anteriores hasta que el código del
componente se haya encontrado. Puede tomar varios intentos
hasta encontrar el código correcto. Si se salta un código,
presione W VOL y luego el botón de para probar el
código.
Marche à suivre en français
1. S'assurer que l'appareil auxiliaire est branché et que le
contact est établi.
2. Couper le contact sur l'appareil auxiliaire.
3. Appuyer simultanément sur les touches et
POWER
pendant au moins 5 secondes. Après environ
5 secondes, les touches de modes éclairées (identifiant
les appareils) clignotent. Relâcher les touches ACTION
et POWER.
4. Appuyer sur la touche de la télécommande
correspondant à l'appareil auxiliaire utilisé (VCR, DVD,
CABLE ou DBS ). La touche de l’appareil auxiliaire
sélectionné demeure allumée tandis que toutes les
autres s’éteignent.
5. Entrer le code à 3 chiffres à l'aide des touches
numériques de la télécommande (touches 0 ~ 9). La
ACTION
POWER
POWER
POWER
POWER
de el
ACTION
Nota: Si le contact ne peut être établi avec la télécommande,
Sans Code
Cette procédure, nommée “méthode séquentielle”, essaie
tous les codes.
Nota: Sur chaque pression de la touche VOL X, attendre que la
Nota: Plusieurs essais pourraient être nécessaires avant de trouver le
touche correspondant à l’appareil sélectionné clignote
deux fois.
6. Appuyer sur la touche de la télécommande
POWER
pour vérifier le fonctionnement. Si la programmation a
réussi, le contact sera établi sur l’appareil auxiliaire, puis
la touche lui correspondant clignotera deux fois avant de
s’éteindre.
recommencer les étapes 3 à 6 en faisant appel à un autre code
(certaines marques possèdent plus d'un code). Si un mauvais
code est entré ou que l'entrée prenne plus de 30 secondes, la
programmation n'aura pas lieu.
1. S'assurer que l'appareil auxiliaire est branché et que le
contact est établi.
2. Couper le contact sur l'appareil auxiliaire.
3. Appuyer simultanément sur les touches et
POWER
pendant au moins 5 secondes. Après environ
5 secondes, les touches de modes éclairées (identifiant
les appareils) clignotent. Relâcher les touches ACTION
et POWER.
4. Appuyer sur la touche de la télécommande
correspondant à l’appareil auxiliaire utilisé. La touche de
l’appareil auxiliaire sélectionné demeure allumée tandis
que toutes les autres s’éteignent.
5. Appuyer sur la touche pour mettre la
POWER
télécommande dans le mode programmation.
6. Orienter la télécommande vers l’appareil auxiliaire.
7. Appuyer sur la touche VOL X (la touche de mode
clignote trois fois), puis appuyer sur la touche
POWER
de la télécommande pour vérifier si l’appareil
peut être mis en marche. Répéter la procédure jusqu’à
ce que le bon code soit trouvé. Si la programmation a
réussi, le contact sera établi sur l’appareil.
touche correspondant à l’appareil auxiliaire clignote deux fois
avant d’appuyer sur POWER.
8. Après que le contact a pu être établi sur l’appareil,
appuyer sur la touche pour mémoriser le code
ACTION
entré. La touche de mode clignote alors deux fois.
bon code. Si un code a été manqué, appuyer sur W VOL, puis
POWER
sur pour vérifier si le contact peut être établi.
ACTION
Remote
Remoto
Télécommande
Page 44

COMPONENT CODES/CÓDIGOS DE COMPONENTS/CODES DES APPAREILS
Component Codes/Códigos de
Components/Codes des appareils
The Universal Remote Control is capable of operating many
component brands after entering a code. Some components may
not operate because the codes are not available due to limited
memory. The Universal Remote Control does not control all
features found in each model.
El Control Remoto Universal tiene capacidad de operar
varias marcas de componentes después de introducir el
código apropiado. A causa del límite de memoria no se han
incluido todos los códigos existentes, por lo cual es posible
que algunos componentes no operen. El Control Remoto
Universal no controla todas la funciones y características
disponibles en todos los modelos.
La télécommande universelle peut servir à commander le
fonctionnement de nombreux appareils après avoir entré un code.
La mémoire des codes étant limitée, certains appareils peuvent
ne pas être télécommandés. La télécommande universelle n'est
pas conçue pour commander la totalité des fonctions offertes sur
tous les appareils.
Write the code numbers from tables in this space. This will serve
as a reference if you need to program your Remote Control.
Escriba los números del código en este espacio. Esto le servirá
como referencia cuando necesite programar su Control Remoto.
Inscrire les numéros de code des appareils dans ces cases. Ils
serviront de référence si la télécommande devait être
reprogrammée.
VCR
Videocasetera
Magnétoscope
Codes for DVD
Códigos para DVD
Codes pour lecteurs DVD
Brand
Marca
Marque
Denon 100
Ferguson 101
JVC 109
Mitsubishi 105
Nordmende 101
Panasonic 100
Codes for DBS
Códigos para DBS
Codes pour récepteurs DBS
Brand
Remote
Remoto
Marca
Marque
Télécommande
Dish Network
(Echostar)
Echo Star 105
Express VU 105, 115
G. E. 106
G.I. (General
Instrument)
Gradiente 11 4
Hitachi 10 3, 111, 11 2
Sistema de Transmisión digital
10 5, 115, 116
108
CABLE
Decodificador de cable
Câblosélecteur
DBS
Récepteur DBS
Philips
Pioneer 102
RCA 101
Code
Código
Code
Código
Saba 101
Samsung 11 0
Sharp 108
Sony 104
Technics 100
Thomson 101
Toshiba 103
Yamaha 100
Zenith 107
HNS (Hughes) 103
Magnavox 101, 102
Panasonic 104
Philips 101, 102
Primestar 108
Proscan
RCA
Sony 107
Star Choice 103, 108
To sh i ba 100
Uniden 101, 102
Zenith 127
Videodisco Digital
Récepteur DVD
106, 109, 110,
113
106, 109, 110,
113
DVD
103
Códigos para Decodificador
Codes pour câblosélecteurs
Brand
Marca
Marque
ABC
Archer
Cableview
Citizen
Curtis
Diamond
Eagle
Eastern
GC Brand
Gemini
General
Instrument/
Jerrold
Hamlin
Hitachi
Macom
Magnavox
Memorex
Movietime
Oak
Panasonic
Philips
Pioneer
Pulsar
Puser
RCA
Realistic
Regal
Regency
Rembrandt
Samsung
Scientific Atlanta
Slmark
Sprucer
Stargate
Te le v ie w
Texscan
Tocom
Toshiba
Unika
Universal
Videoway
Viewstar
Zenith
Zenith / Drake
Satellite
Códigos para Videocasetera
Codes pour magnétoscopes
Brand
Marca
Marque
Admiral
Aiwa
Akai
Audio Dynamic
Bell & Howell
Broksonic
Canon
CCE
Citizen
Codes for Cable/
Cable/
Code
Código
224
225, 232
205, 232
205, 222
212, 213
224, 225, 232
229
234
205, 232
222
211, 219, 220, 221,
222, 223, 224, 225,
226, 227
212, 218, 240, 241,
242, 245
203, 224
203, 204, 205
233
230
205, 232
202, 237, 239
209, 210, 214
206, 207, 228, 229,
230
201, 216
205, 232
232
215
232
212, 218, 240, 241,
242, 245
234
205, 232, 237
205
211, 212, 213
201, 205
205, 210
205, 232
201, 205
244
235
204
225, 232
222, 232
206
229, 230
200, 217
200
Codes for VCR
Code
Código
335
332
314, 315, 316, 329
311, 339
305, 313
320, 326
323, 325
343
306
Craig
Curtis Mathes
Daewoo
DBX
Dimensia
Emerson
Fisher
Funai
GE
Goldstar
Gradiente
Hitachi
Instant Replay
Jensen
JVC
Kenwood
LXI
Magnavox
Marantz
Marta
Memorex
MGA
Minolta
Mitsubishi
Multitech
NEC
Olympic
Optimus
Orion
Panasonic
J.C. Penney
Pentax
Philco
Philips
Pioneer
Proscan
Quasar
Radio Shack
RCA
Realistic
Samsung
Sansui
Sanyo
Scott
Sears
Sharp
Shintom
Signature 2000
Singer
Sony
Sylvania
Tashiro
Ta tu n g
Teac
Technics
Teknika
Toshiba
Vector Research
Wards
Yamaha
Zenith
305, 306, 329
324, 345
301, 324, 343
310, 311, 339
345
303, 319, 320, 325,
326, 343
305, 307, 308, 309,
313
320, 326, 334
324, 333, 345
306
334
300, 323, 345
323, 324
339
310, 311, 334, 339
306, 310, 311, 339
300, 305, 306, 307,
308, 309
323, 324, 331
310, 311, 339
306
309, 324
338, 340, 341, 347,
348
300, 345
338, 340, 341, 347,
348
304, 347
310, 311, 334, 339
323, 324
306, 321, 328, 335
320, 326
321, 322, 323, 324
300, 305, 310, 311,
324, 339, 345
300, 311, 345
320, 323, 324, 326,
331, 343
323, 324, 331
323
300, 301, 302, 323,
324, 331, 333, 345,
346
321, 322, 323, 324
305, 309, 324, 333,
336, 340
300, 301, 302, 323,
324, 331, 333, 345,
346
305, 309, 324, 336,
340
302, 304, 333
320, 326, 339, 352
305, 309, 313
301, 302, 304, 309,
320, 326, 338, 340,
347, 348
300, 305, 306, 307,
308
335, 336
317
335
337
328, 329, 330
331, 324, 331
306
310, 311, 339
310, 311, 339
321, 322, 323, 324
324
301, 346
311
306, 309, 335, 336,
344
305, 310, 311, 339
306, 344
Page 45

NOTE/NOTA
Remote
Remoto
Télécommande
Page 46

LIMITED WARRANTY (FOR MODELS SOLD IN USA ONLY)
PANASONIC CONSUMER ELECTRONICS COMPANY, PANASONIC SALES COMPANY,
DIVISION OF: DIVISION OF:
PANASONIC CORPORATION OF NORTH AMERICA PANASONIC PUERTO RICO, INC.
One Panasonic Way Ave. 65 de Infanteria, Km. 9.5
Secaucus, New Jersey 07094 San Gabriel Industrial Park
Carolina, Puerto Rico 00985
Panasonic Color Television
Limited Warranty
Limited Warranty Coverage
If your product does not work properly because of a defect in materials or workmanship, Panasonic
Consumer Electronics Company or Panasonic Sales Company (collectively referred to as “the warrantor”) will, for the length of the period indicated on the chart below, which starts with the date of original
purchase ("warranty period"), at its option either (a) repair your product with new or refurbished parts,
or (b) replace it with a new or a refurbished product. The decision to repair or replace will be made by
the warrantor.
TV CATEGORIES ALL PARTS EXCEPT CRT CRT LABOR SERVICE
30”-36” diagonal 1 (ONE) YEAR 2 (TWO) YEARS 1 (ONE) YEAR IN-HOME OR CARRY-IN
During the "Labor" warranty period there will be no charge for labor. During the "Parts" warranty
period, there will be no charge for parts. You must carry-in your product or arrange for in-home
service (in-home service available only for 22” [diagonal] and larger screen), as applicable, during the
warranty period. If non-rechargeable batteries are included, they are not warranted. This warranty
only applies to products purchased and serviced in the United States or Puerto Rico. This warranty is
extended only to the original purchaser of a new product which was not sold "as is". A purchase receipt
or other proof of the original purchase date is required for warranty service.
Carry-in or In-Home Service
For Carry-In or In-Home Service (as applicable) in the United States call 1-800-211-PANA(7262) or
visit Panasonic Web Site: http://www.panasonic.com
For assistance in Puerto Rico call Panasonic Sales Company (787)-750-4300 or fax (787)-768-2910.
In-Home service, if applicable, requires clear, complete and easy access to the product by the authorized servicer and does not include removal or re-installation of an installed product. It is possible that
certain in-home repairs will not be completed in-home, but will require that the product, or parts of the
product, be removed for shop diagnosis and/or repair and then returned.
Garantía
Warranty
Limited Warranty continued on next page
Garantie
Page 47

LIMITED WARRANTY (FOR MODELS SOLD IN USA ONLY)
Limited Warranty continued from previous page
Limited Warranty Limits And Exclusions
This warranty ONLY COVERS failures due to defects in materials or workmanship, and DOES NOT
COVER normal wear and tear or cosmetic damage, nor does it cover markings or retained images on
the picture tube resulting from viewing fixed images (including, among other things, letterbox pictures
on standard 4:3 screen TV’s, or non-expanded standard 4:3 pictures on wide screen TV’s, or onscreen
data in a stationary and fixed location). The warranty ALSO DOES NOT COVER damages which
occurred in shipment, or failures which are caused by products not supplied by the warrantor, or
failures which result from accidents, misuse, abuse, neglect, mishandling, misapplication, alteration,
faulty installation, set-up adjustments, misadjustment of consumer controls, improper maintenance,
power line surge, lightning damage, modification, or commercial use (such as in a hotel, office,
restaurant, or other business), rental use of the product, service by anyone other than a Factory
Servicenter or other Authorized Servicer, or damage that is attributable to acts of God.
THERE ARE NO EXPRESS WARRANTIES EXCEPT AS LISTED UNDER "LIMITED WARRANTY
COVERAGE". THE WARRANTOR IS NOT LIABLE FOR INCIDENTAL OR CONSEQUENTIAL
DAMAGES RESULTING FROM THE USE OF THIS PRODUCT, OR ARISING OUT OF ANY
BREACH OF THIS WARRANTY. (As examples, this excludes damages for lost time, cost of having
someone remove or re-install an installed unit if applicable, or travel to and from the servicer. The
items listed are not exclusive, but are for illustration only.) ALL EXPRESS AND IMPLIED WARRAN-
TIES, INCLUDING THE WARRANTY OF MERCHANTABILITY, ARE LIMITED TO THE PERIOD OF
THE LIMITED WARRANTY.
Some states do not allow the exclusion or limitation of incidental or consequential damages, or limitations on how long an implied warranty lasts, so the exclusions may not apply to you.
This warranty gives you specific legal rights and you may also have others rights which vary from state
to state. If a problem with this product develops during or after the warranty period, you may contact
your dealer or Servicenter. If the problem is not handled to your satisfaction, then write to the
warrantor's Consumer Affairs Department at the addresses listed for the warrantor.
PARTS AND SERVICE (INCLUDING COST OF AN IN-HOME SERVICE CALL, WHERE
APPLICABLE) WHICH ARE NOT COVERED BY THIS LIMITED WARRANTY ARE YOUR
RESPONSIBILITY.
Garantía
Warranty
Garantie
Page 48

CUSTOMER SERVICES DIRECTORY
Customer Services Directory
Obtain Product Information and Operating Assistance; locate your nearest Dealer or
Servicenter; purchase Parts and Accessories; or make Customer Service and
Literature requests by visiting our Web Site at:
http://www.panasonic.com/consumersupport
or, contact us via the web at:
http://www.panasonic.com/contactinfo
You may also contact us directly at:
1-800-211-PANA (7262)
Monday-Friday 9 am-9 pm; Saturday-Sunday 10 am-7 pm, EST.
For hearing or speech impaired TTY users, TTY : 1-877-833-8855
Accessory Purchases
Purchase Parts, Accessories and Instruction Books on line for all Panasonic
Products by visiting our Web Site at:
http://www.pasc.panasonic.com
or, send your request by E-mail to:
npcparts@us.panasonic.com
You may also contact us directly at:
1-800-332-5368 (Phone) 1-800-237-9080 (Fax Only) (Monday - Friday 9 am to 8 pm, EST.)
Panasonic Services Company
20421 84th Avenue South,
Kent, WA 98032
(We Accept Visa, MasterCard, Discover Card, American Express, and Personal Checks)
For hearing or speech impaired TTY users, TTY : 1-866-605-1277
Service in Puerto Rico
Garantía
Warranty
Panasonic Puerto Rico, Inc. Panasonic Sales Company
Factory Servicenter:
Ave. 65 de Infantería, Km. 9.5, San Gabriel Industrial Park,
Carolina, Puerto Rico 00985
Phone (787)750-4300, Fax (787)768-2910
Garantie
Page 49

LIMITED WARRANTY (FOR MODELS SOLD IN CANADA ONLY)
Panasonic Canada Inc.
5770 Ambler Drive, Mississauga, Ontario L4W 2T3
PANASONIC PRODUCT - LIMITED WARRANTY
Panasonic Canada Inc. warrants this product to be free from defects in material and workmanship and agrees to remedy
any such defect for a period as stated below from the date of original purchase.
TELEVISION:
22” and over In-home Service One (1) year, parts (including Picture Tube) and labour
In-home Service will be carried out only to locations accessible by roads and within 50 Km of an authorized Panasonic
service facility.
LIMITATIONS AND EXCLUSIONS
This warranty does not apply to products purchased outside Canada or to any product which has been improperly installed,
subjected to usage for which the product was not designed, misused or abused, damaged during shipping, or which has
been altered or repaired in any way that affects the reliability or detracts from the performance, nor does it cover any
product which is used commercially. Dry cell batteries are also excluded from coverage under this warranty.
This warranty is extended to the original end user purchaser only. A purchase receipt or other proof of date of original
purchase is required before warranty service is performed.
THIS EXPRESS, LIMITED WARRANTY IS IN LIEU OF ALL OTHER WARRANTIES, EXPRESS OR IMPLIED,
INCLUDING ANY IMPLIED WARRANTIES OF MERCHANTABILITY AND FITNESS FOR A PARTICULAR PURPOSE.
IN NO EVENT WILL PANASONIC CANADA INC. BE LIABLE FOR ANY SPECIAL, INDIRECT OR CONSEQUENTIAL
DAMAGES.
In certain instances, some jurisdictions do not allow the exclusion or limitation of incidental or consequential damages, or
the exclusion of implied warranties, so the above limitations and exclusions may not be applicable.
WARRANTY SERVICE
For product operation and information assistance, please contact your Dealer or our Customer Care Centre at:
Telephone #: (905) 624-5505 Fax #: (905) 238-2360 Web: www.panasonic.ca
For product repairs, please contact one of the following:
• Your Dealer who will inform you of an authorized Servicentre nearest you.
• Our Customer Care Centre at (905) 624-5505 or www.panasonic.ca
• A Panasonic Factory Servicentre listed below:
Richmond, British Columbia
Panasonic Canada Inc.
12111 Riverside Way
Richmond, BC V6W 1K8
Tel: (604) 278-4211
Fax: (604) 278-5627
Calgary, Alberta
Panasonic Canada Inc.
6835-8th St. N. E.
Calgary, AB T2E 7H7
Tel: (403) 295-3955
Fax: (403) 274-5493
Mississauga, Ontario
Panasonic Canada Inc.
5770 Ambler Dr.
Mississauga, ON L4W 2T3
Tel: (905) 624-8447
Fax: (905) 238-2418
Lachine, Québec
Panasonic Canada Inc.
3075, rue Louis A. Amos
Lachine, QC H8T 1C4
Tel: (514) 633-8684
Fax: (514) 633-8020
IF YOU SHIP THE PRODUCT TO A SERVICENTRE
Carefully pack and send prepaid, adequately insured and preferably in the original carton.
Include details of the defect claimed, and proof of date of original purchase.
Garantía
Warranty
Garantie
Page 50

GARANTIE LIMITÉE (POUR LES MODÈLES VENDUS AU CANADA SEULEMENT)
Panasonic Canada Inc.
5770 Ambler Drive, Mississauga, Ontario L4W 2T3
Certificat de garantie limitée Panasonic
Panasonic Canada Inc. garantit cet appareil contre tout vice de fabrication et accepte, le cas échéant, de remédier à toute
défectuosité pendant la période indiquée ci-dessous et commençant à partir de la date d'achat original.
TÉLÉVISEURS
22 po et plus Service à domicile Un (1) an, pièces, main-d’oeuvre et lampe-écran comprises
Le service à domicile ne sera offert que dans les régions accessibles par routes et situées dans un rayon 50 km d’un centre
de service agréé Panasonic.
LIMITATIONS ET EXCLUSIONS
Cette garantie n'est valide que pour les appareils achetés au Canada et ne couvre pas les dommages résultant d'une
installation incorrecte, d'un usage abusif ou impropre ainsi que ceux découlant d'un accident en transit ou de manipulation.
De plus, si l'appareil a été altéré ou transformé de façon à modifier l'usage pour lequel il a été conçu ou utilisé à des fins
commerciales, cette garantie devient nulle et sans effet. Les piles sèches ne sont pas couvertes sous cette garantie.
Cette garantie est octroyée à l’utilisateur original seulement. La facture ou autre preuve de la date d’achat original sera
exigée pour toute réparation sous le couvert de cette garantie.
CETTE GARANTIE LIMITÉE ET EXPRESSE REMPLACE TOUTE AUTRE GARANTIE, EXPRESSE OU IMPLICITE,
INCLUANT LES GARANTIES IMPLICITES DU CARACTÈRE ADÉQUAT POUR LA COMMERCIALISATION ET UN
USAGE PARTICULIER.
PANASONIC N’AURA D’OBLIGATION EN AUCUNE CIRCONSTANCE POUR TOUT DOMMAGE DIRECT, INDIRECT
OU CONSÉCUTIF.
Certaines juridictions ne reconnaissent pas les exclusions ou limitations de dommages indirects ou consécutifs, ou les
exclusions de garanties implicites. Dans de tels cas, les limitations stipulées ci-dessus peuvent ne pas être applicables.
RÉPARATION SOUS GARANTIE
Pour de l’aide sur le fonctionnement de l’appareil ou pour toute demande d’information, veuillez contacter votre
détaillant ou notre service à la clientèle au :
N° de téléphone : (905) 624-5505 N° de télécopieur : (905) 238-2360 Site Internet : www.panasonic.ca
Pour la réparation des appareils, veuillez consulter :
• votre détaillant, lequel pourra vous renseigner sur le centre de service agréé le plus près de votre domicile ;
• notre service à la clientèle au (905) 624-5505 ou www.panasonic.ca ;
• un de nos centres de service de la liste ci-dessous :
Richmond, Colombie-Britannique
Panasonic Canada Inc.
12111 Riverside Way
Richmond, BC V6W 1K8
Tél. : (604) 278-4211
Téléc. : (604) 278-5627
Calgary, Alberta
Panasonic Canada Inc.
th
6835-8
Calgary, AB T2E 7H7
Tél. : (403) 295-3955
Téléc. : (403) 274-5493
St. N.E.
Mississauga, Ontario
Panasonic Canada Inc.
5770 Ambler Dr.
Mississauga, ON L4W 2T3
Tél. : (905) 624-8447
Téléc. : (905) 238-2418
Lachine, Québec
Panasonic Canada Inc.
3075, rue Louis A. Amos
Lachine, QC H8T 1C4
Tél. : (514) 633-8684
Téléc. : (514) 633-8020
Expédition de l'appareil à un centre de service
Emballer soigneusement l'appareil, de préférence dans le carton d'origine, et l'expédier port payé et assuré au centre de service.
Inclure la description détaillée de la panne et la preuve de la date d'achat original.
Garantía
Garantie
Warranty
Page 51

NOTE/NOTA
Garantía
Warranty
Garantie
Page 52

NOTE/NOTA
Page 53

NOTE/NOTA
Page 54

NOTE/NOTA
Page 55

NOTE/NOTA
Page 56

Panasonic Consumer Electronics Company,
Division of Panasonic
Corporation of North America
One Panasonic Way
Secaucus, New Jersey 07094
www.panasonic.com
Panasonic Sales Company,
Division of Panasonic Puerto Rico,
Inc. (“PSC”)
Ave. 65 de Infantería, Km 9.5
San Gabriel Industrial Park Carolina,
Puerto Rico 00985
Tel. (787) 750-4300
Fax (787) 768-2910
Panasonic Canada Inc.
5770 Ambler Drive
Mississauga, Ontario
Canada L4W 2T3
Tel./Tél.: (905) 624-5010
Fax/Téléc.: (905) 624-9714
www.panasonic.ca
 Loading...