

Page 1
Before using your air conditioner,
please read this operating instructions
pH!
FS8(»6
Page 2

[CONTENTS]
1. Product Component Identification
2. Air Conditioner Operation..........................................6
3. Forced Operation
4. Care and Maintenance............................................18
5. Operation Tips
6. Caution....................................................................22
7. Before Calling For Service
....................................................
........................................................
......................................
............................
1
17
21
23
Page 3
1. Product Component Identification
(1) Feature
D] Automatic Operation Mode page io
As soon as you select this operation mode by
Operation Mode Selection Button, the temperature
sensor and built-in microcomputer begin working,
controlling the room temperature by choosing
among the Soft Dry, Cooling and Heating modes.
[2] Soft Dry Operation Mode pageg
When the room air conditioner is turned on, the
Cooling mode is activated to dehumidify the room.
A gentle breeze then keeps the room fresh and cool
while minimizing fluctuations in temperature. This
mode is designed to be used when temperature is
rather cool but the humidity is high,
[I]OFF/ON Dual Setting Timer page 14'--15
Before leaving home in the morning, you can
program the room air conditioner to turn itself on just
before you return in the evening. Your home is
comfortable when you get back without wasting
electricity. The room air conditioner can be set in
the same way to ensure your maximum comfort
when sleeping.
3
[S Sleep Mode Auto Control page ie
It creates a comfortable sleeping condition.
(Cooling and Soft Dry Operation)
At the start of Sleep Mode, it raises the room
temperature by halt a degree Centigrade. One
hour later it raises the temperature half a degree
Centigrade,
(Heating Operation)
At the start of Sleep Mode, it drops the room
temperature by 2 degree Centigrade. One hour
later it drops the temperature 3 degree Centigracte.
The built-in microcomputer then maintains the
temperature for eight hours in Cooling and Soft Dry
Operation, or five hours in Heating Operation until
automatically operation ends. The result is a more
comfortable and invigorating sleep that leaves you
feeling fresh and strong in the morning.
[U Airflow Direction Auto-Control page 12-13
(Cooling and Soft Dry Operation)
Vertical airflow direction louver automatically swings
up and down.
Creates the feeling of a refreshing breeze.
(Heating Operation)
The louver will be set to the horizontal position when the
airflow temperature is cool, such as at the start of opera
tion, and then move to downward when it become warmer.
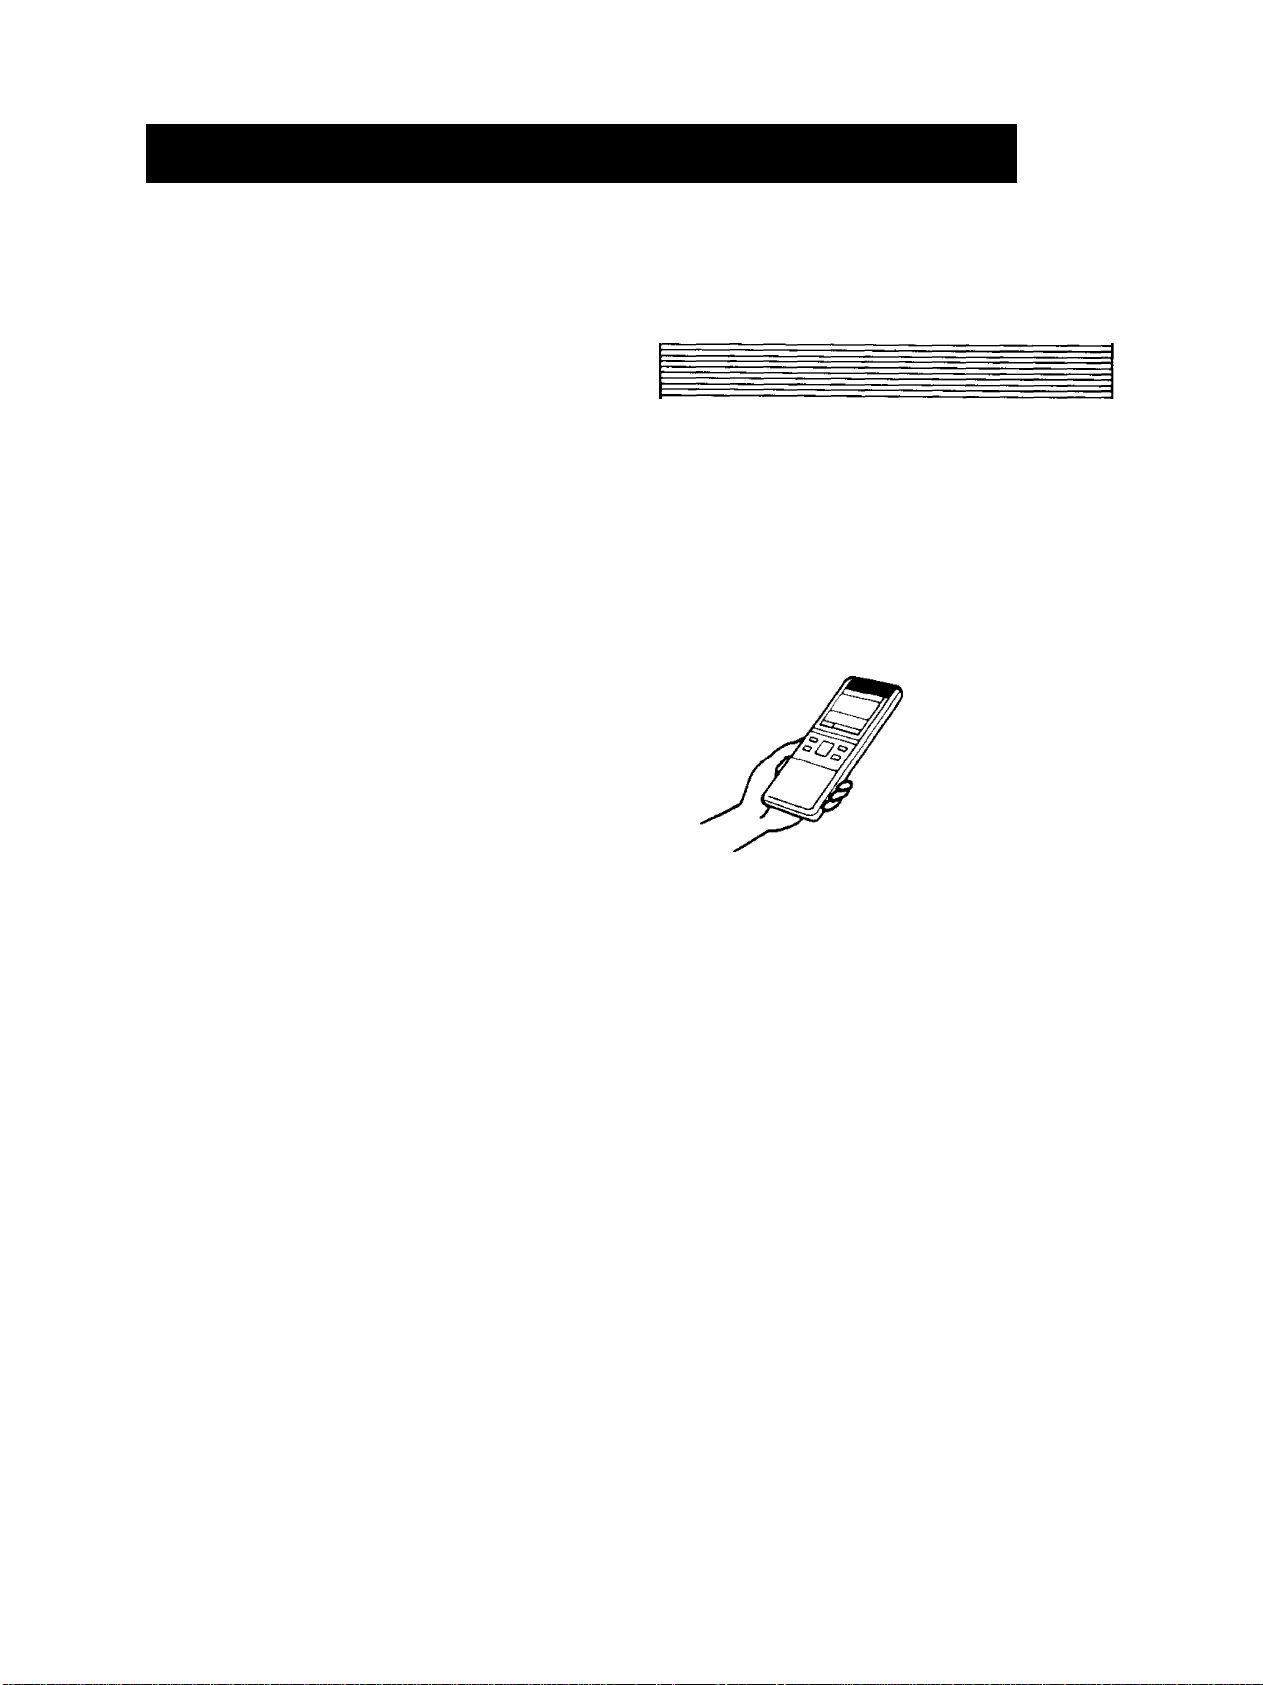
Wireless Remote Control
puts all functions at your
fingertips.
Handling the remote control
• Aim at the signal receptor on the room air
conditioner when operating.
• The remote control signal can be received at
a distance of up to about 10m.
• Be sure that there are no obstructions
between the remote control and the signal
receptor.
• Do not drop or throw the remote control.
• Do not place the remote control in a location
exposed to direct sunlight, or next to a
healing unit, or other heat source.
Page 4
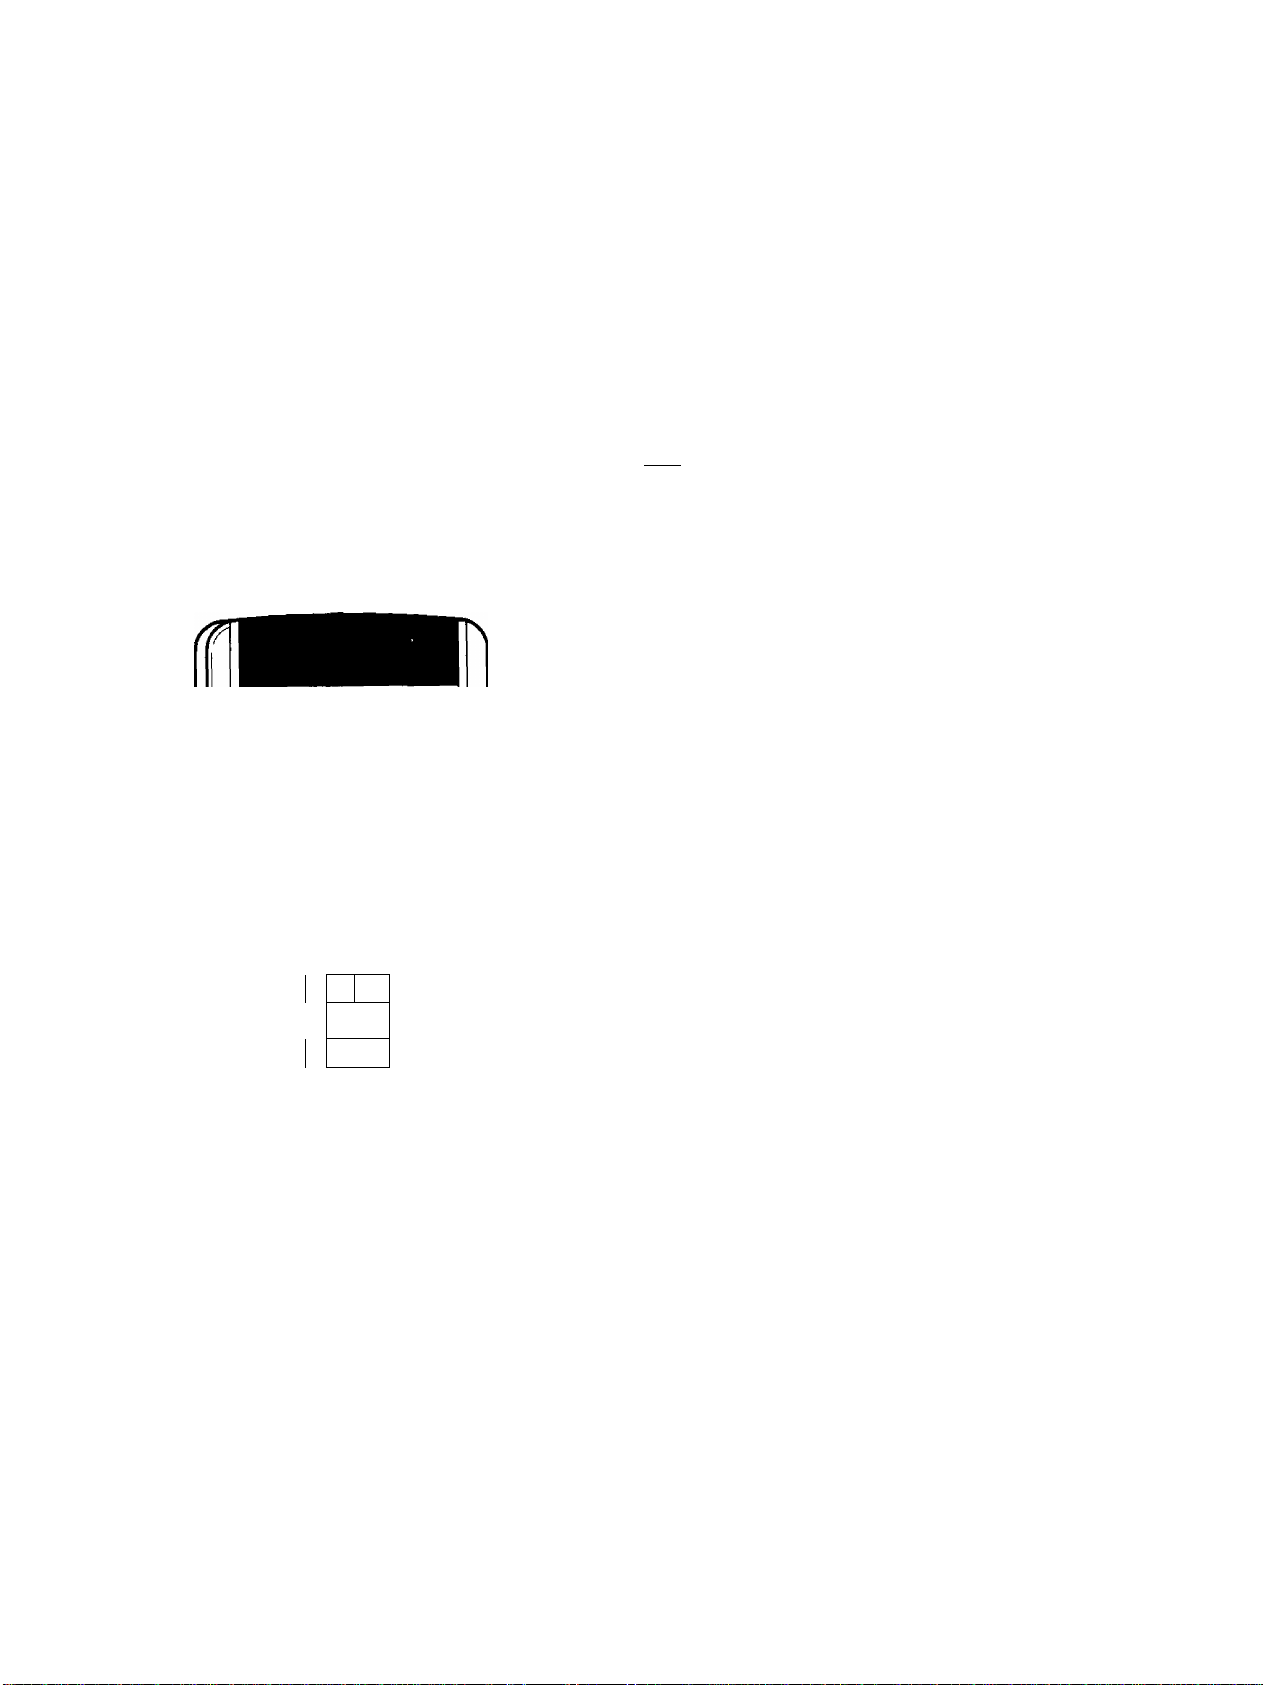
(2) Name and Function-Remote Control
0 Operation Display
Remote Control
Displays the operation conditions.
® Operation Mode Selection Button
Used to select the type of operation mode.
IJTiiil Automatic Operation Mode.......................................................lU
Signal transmitter
Transmit the signals to the room air conditioner.
©
COOL
® ® ®
°c lllll
SLEEP OFF/ON
L
* J
MODE TE\/IP. FAN SPEED
[/i
If
SWING
MANUAL
3
L-AIR swing
HEAf Heating Operation Mode
COOL Cooling Operation Mode
DRY Soft Dry Operation Mode...........................................................|T]
©Room Temperature Setting Button
Use to adjust the temperature.
©Indoor Fan Speed Selection Button
Use to select the desired fan speed in three steps from Low
to High.
©Airflow Direction Manual Control Button
Press to set the desired airflow direction.
©Airflow Direction Auto-control Button
For Automatic Airflow Direction Control.
® Sleep Mode Auto Operation Button
Press this button for Sleep Mode Auto Operation.
]
©Off/On Button
Operation will start when this button is pressed, and stop
when the button is pressed again.
Panasonic
J
Page 5
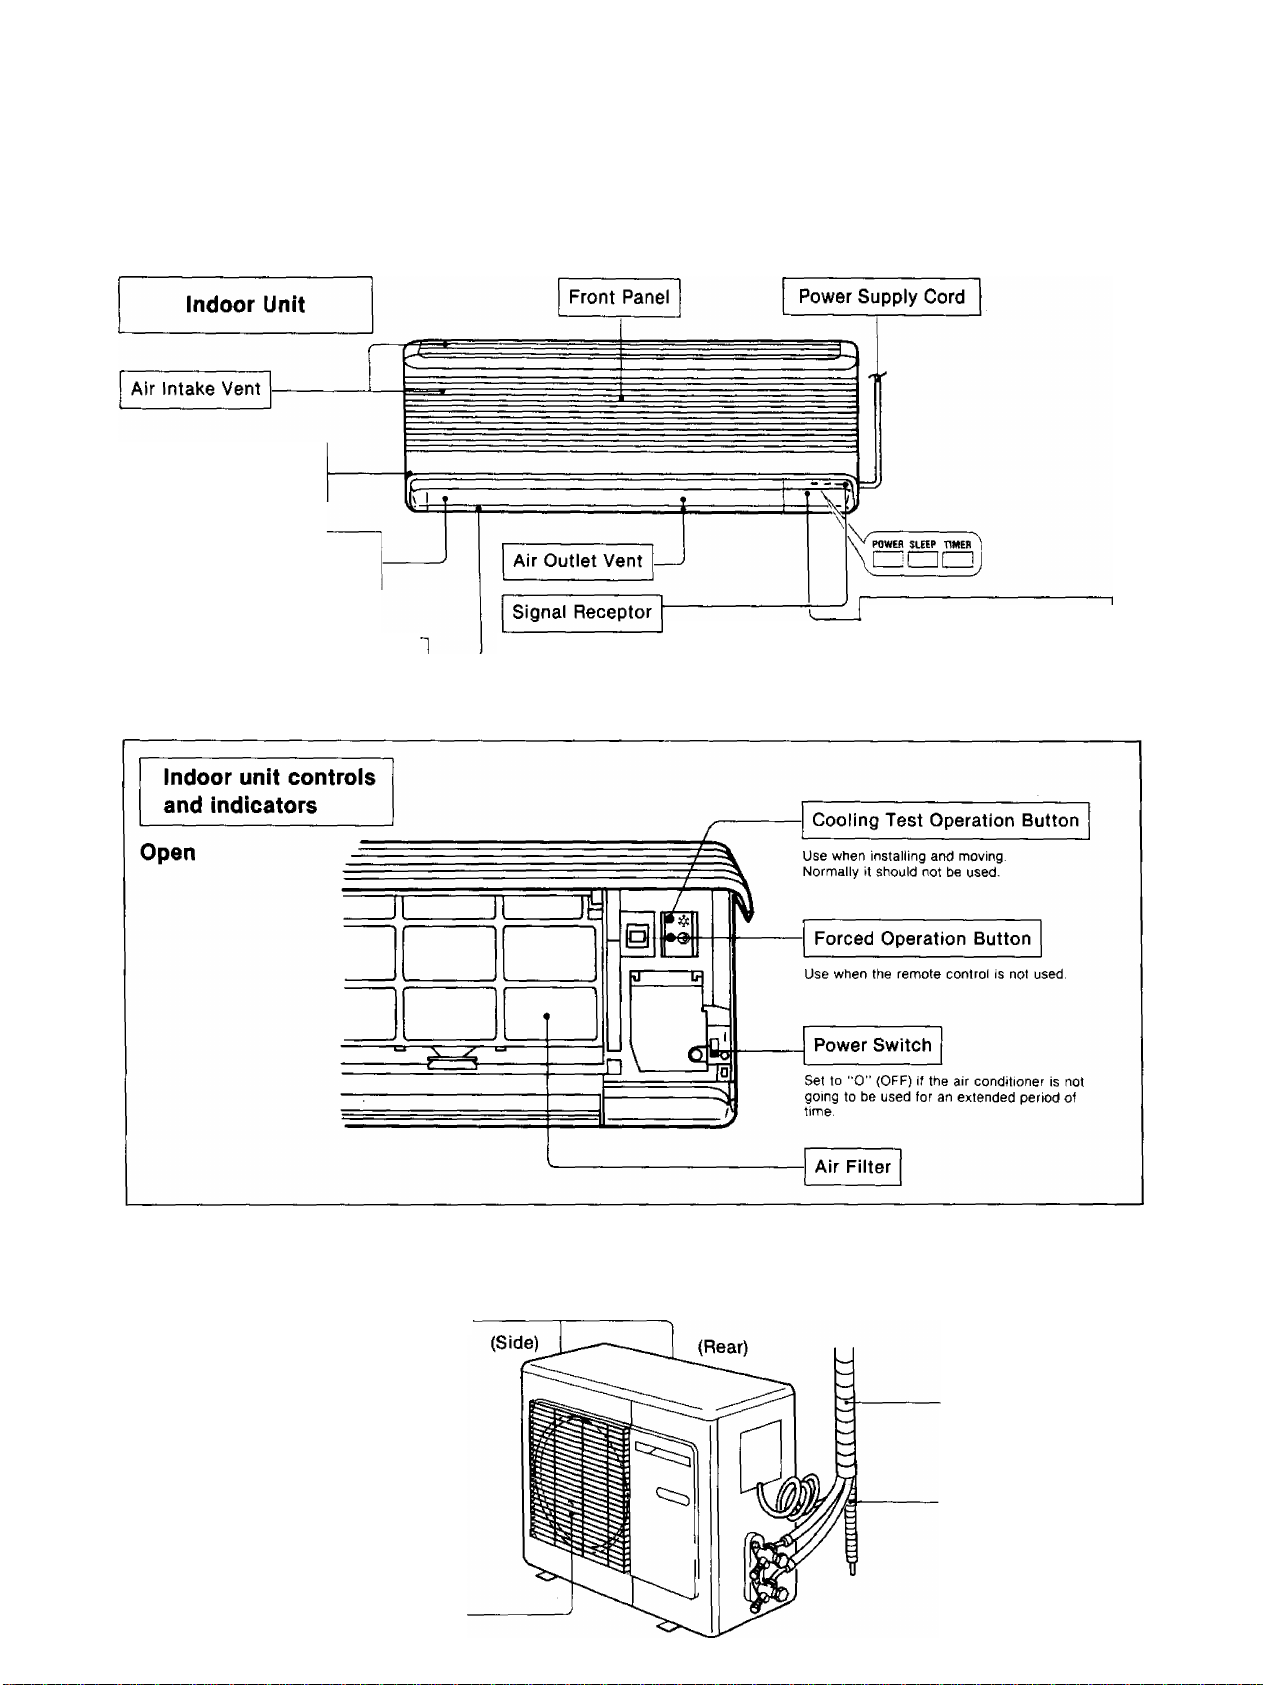
(3) Indoor Unit, Outdoor Unit
Panel Opener
(Left And Right Sides)
Horizontal Airflow Direction
Louver
Vertical Airflow Direction Louver
(TWIN FLAP)
Receives the signals from the remote
control.
(Signal received sound; two short
beeps or one long beep)
Operation Indication Lamp
Illuminates when the air conditioner is
in operation.
(Blinks at the start of automatic
operation or defrosting operation and
hot start operation in heating mode.)
Outdoor Unit
Air Intake Vents
Piping
Drain Hose
Air Outlet Vent
Page 6
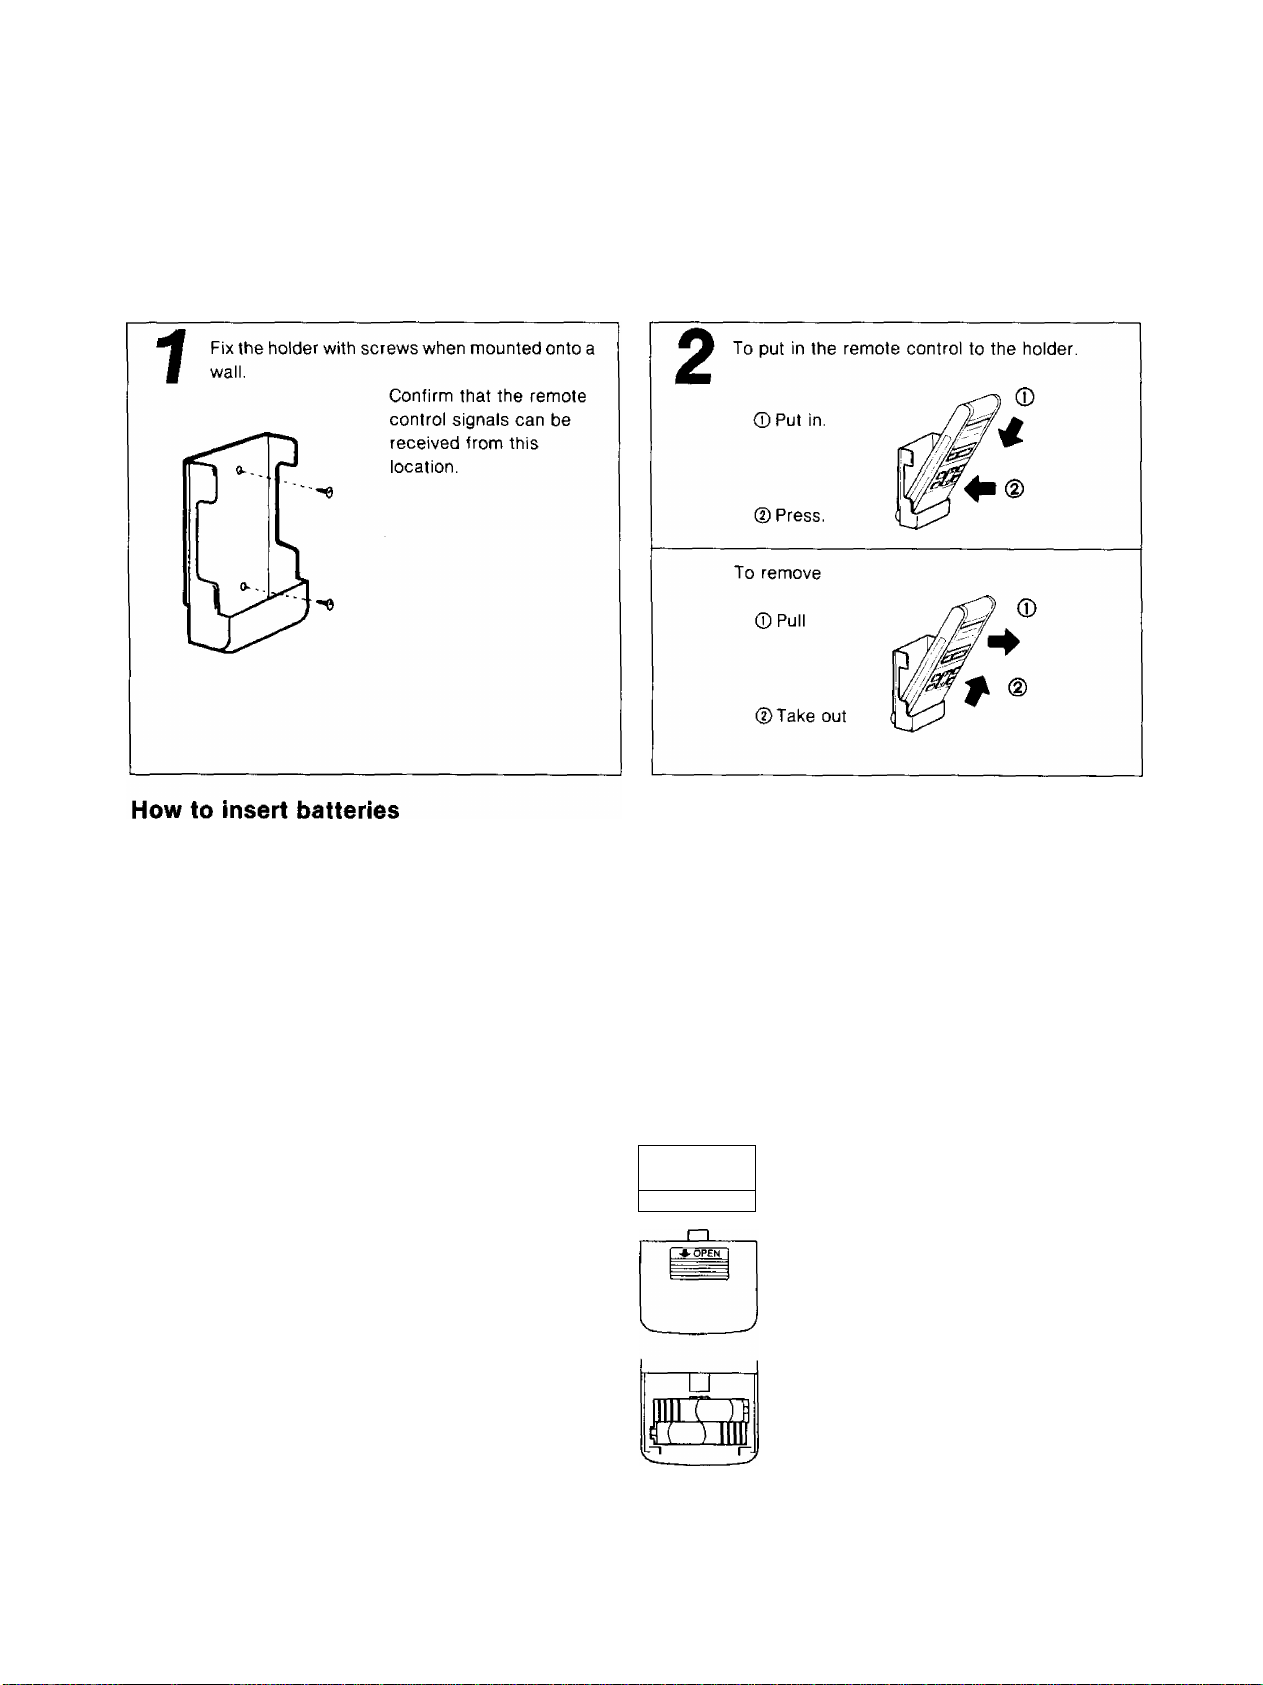
(4) Remote Control Preparation
How to mount onto a wall.
Remove the cover from the back of the
remote control.
1
• Slide the cover according to the arrow
direction.
Insert the two batteries.
(Two R03, UM-4 Panasonic dry-cell
2
batteries or equivalent.)
• Be sure that the ( + ) and (-) directions
are correct.
• Be sure that both batteries are new.
Re-attach the cover.
3
• Slide it back into position.
• Remove the batteries from the remote
control if the air conditioner is not going
to be used for an extended length of
time.
0
i®
u
JIIL
IT
JTL
©i
85B
Do not use rechargeable batteries,
such batteries differ from standard dry
cells in shape, dimensions, and
performance.
t
Page 7
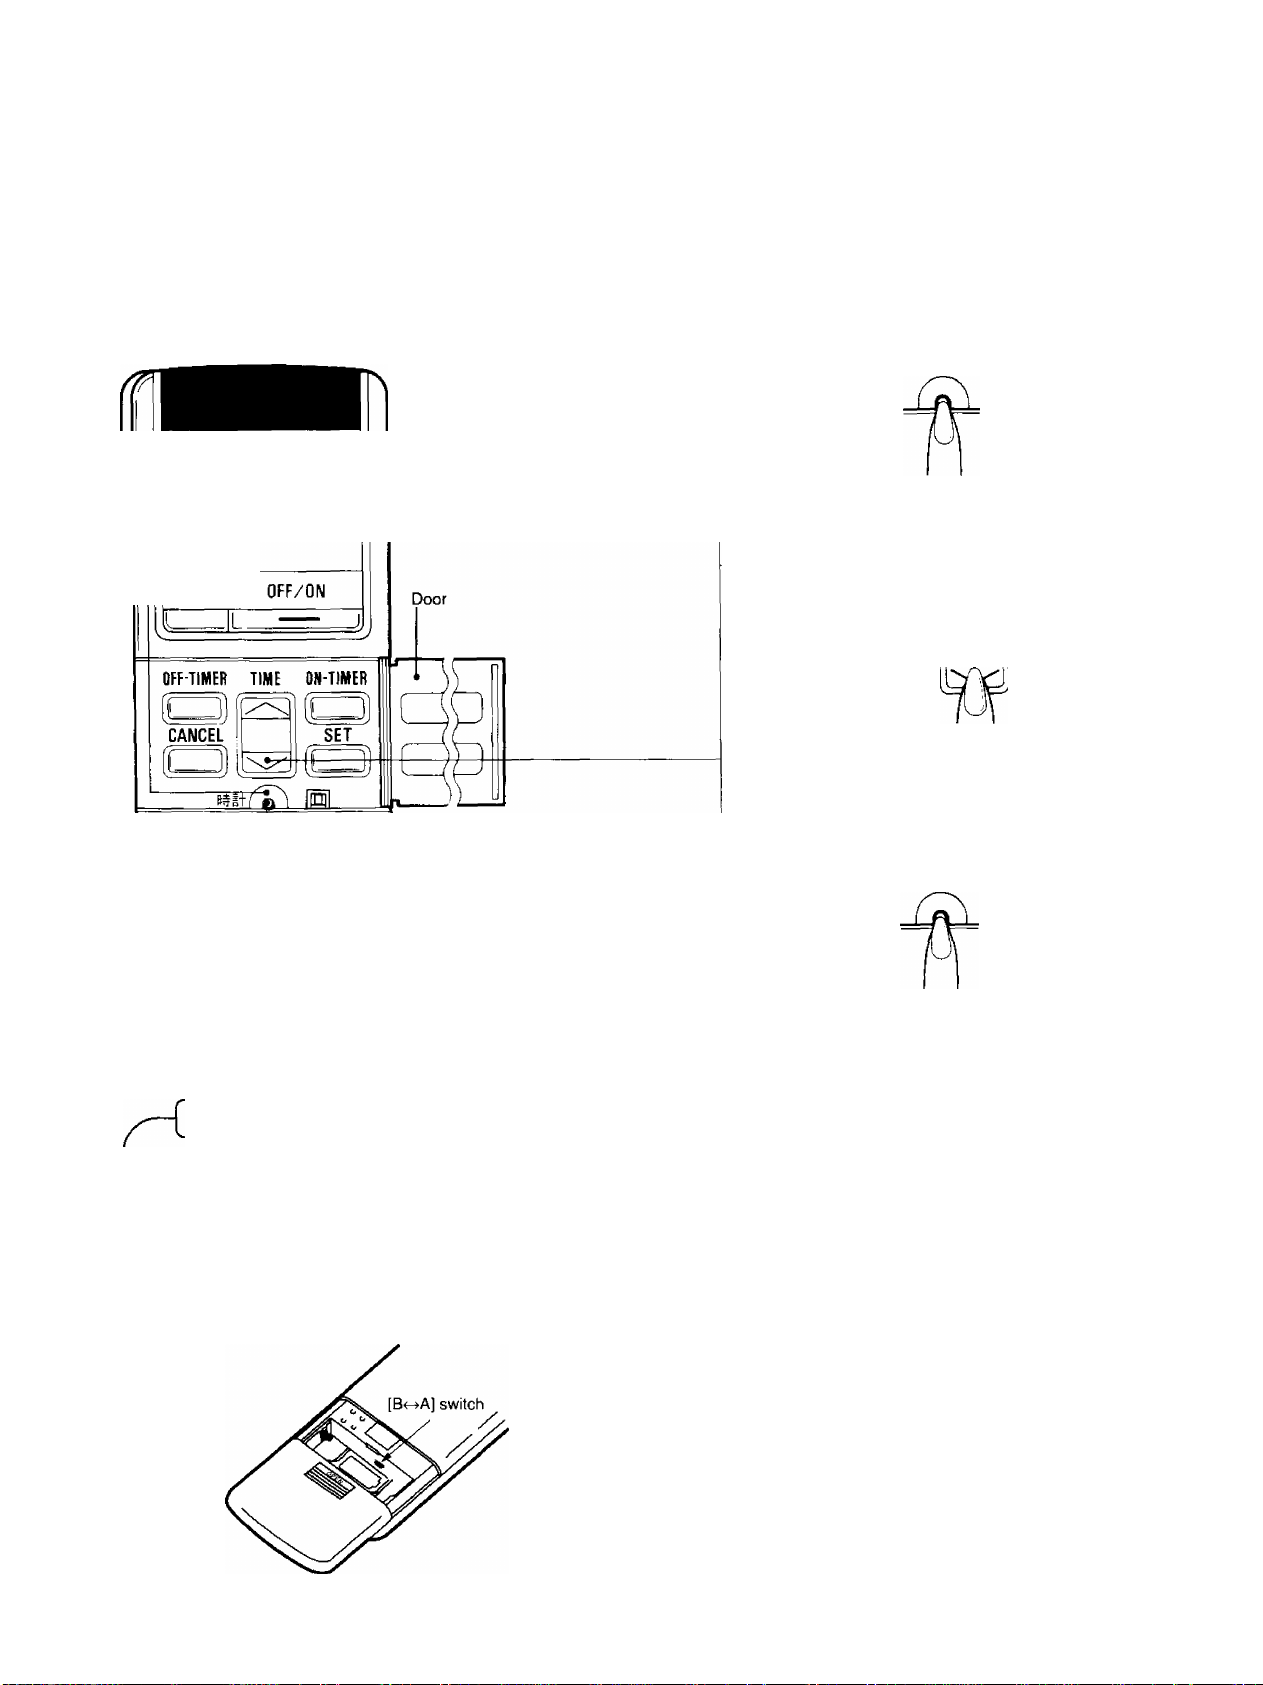
Remote Control
How to set the current time.
AM t non
U-JU
SLEEP
Pans sonic
Open the remote control door.
Press the Clock button
1
^1+
• The letters of AM or PM blinks.
Set the time.
TIME
2
• Press this mark ( ^ ) to advance and this mark
( ^ ) to reverse the time.
(if the current time is not set correctly, the OFF/ON
Dual Setting Timer cannot be set correctly.)
Press the Clock button
3
^ît
j
Caution
• The timer uses the current time as a reference.
If the time is not set correctly, correct timer setting will not be possible.
• When the timer is set
The current time display will be vanished.
• About the Remote Control [B^A] switch
This switch is used when two air conditioner units have
been installed in one room.
When two air conditioners with two remote control
lers are used in one room, set one unit and remote
controller to “A” and the other unit and remote
controller to “B" to avoid mis-transmission of signals.
If two air conditioners have been installed in one
room, please consult with your dealer.
• The letters of AM or PM lights up and the current
time is set,
• Close the door.
Page 8
2. Air Conditioner Operation
(1) Operation Procedure
Indoor Unit
COOL
AUTO FAN
t‘C
-0
Open the front panel
©■
Set the Power Switch to “I” (ON)
0
Operation Mode Selection Button
©Room Temperature Setting Button
©indoor Fan Speed Selection Button
©Off/On Button
SLEEP
L L.
OFF/ON
MODE TEMP. FAN SPEED
D
SVftNG
E
-----
AIR SWING
Panasonic
MAN JAL
}
E2
J
Combination of Air Conditioner Operation
Airflow Direction Auto-Control
(Page 12)
Timer or Sleep Mode
(Page14--16)
Cooling
Operation Mode
(Page 7)
•
• • • •
Heating
Operation Mode
(Page 8)
Soft Dry
Operation Mode
(Page 9)
•
• •
Automatic
Operation Mode
(Page 10)
Page 9

(D Cooling Operation Mode
Select Cooling Operation.
Press the Operation Mode Selection Button.
1
Each time the button is pressed, the operation mode is shifted in the arrow direction.
Operation Display
L
Automatic Operation Heating Operation Cooling Operation Soft Dry Operation
HEAT
COOL
DRY
Set the temperature.
2
Set the fan speed. • Fan speed can be selected in four steps, »For Auto Fan Speed Mode, the speed of the
3
Operation Display
COOL
ori
(- lx
Auto, High, Medium or Low. indoorfanisadjustedautomaticallyto"High"
Operation Display
COOL
AUTO FAN
COOL
T n * ® ®
C i-c ■
• The temperature can be set within a range of
16 to 30 °C by 1 °C each step.
• Usually 26°C'^28“C is a recommended setting
temperature.
if the compressor is in operation, and to
"Medium''speed if the compressor is stopped.
COOL
n T ® ®
C < 'c III
COOL
j *1 «i® ®
c 1 ‘c mil
Press the Off/On Button.
4
Automatic fan speed Low
OFF/ON
Medium High
Page 10
® Heating Operation Mode
Operation Procedure
Indoor Unit
Set the Power Switch to “I" (ON)
Select Heating Operation,
Press the Operation Mode Selection Button.
1
D
Remote control
SLEEP OFF/ON
u..
MODE
1
ii
WING
S
HEAT
I'T'
LLr
L . — <
TE
t
Open the front panel
AUTO FAN
L
MA^UAL
■0
Operation Display
MODE
Set the temperature.
HEAT
I I
L(."C
2
Usually 20-^24°C is a
Operation Display
HEAT
AUTO FAN
it
LCx
• The fan speed can be selected in 3 steps High, Medium or
3
Low in manual operation mode.
• The fan speed is automatically changed to Medium or Low
depend on discharge temperature when automatic fan
speed is selected.
recommended setting
temperature.
■To raise the Temperature
------
To lower the Temperature
AUTO FAN
©■
1
,1:^
-J'
AIR SWING
Panasonic
Press the Off/On Button,
4
0FF/0N-{
Page 11

(D Soft Dry Operation Mode
This mode dehumidifies without overcooling.
Operation Procedure
Indoor Unit
o
m
xJ Lr
Remote control
F
Open the front panel
AUTO FAN
Set the Power Switch to “I" (ON)
Select Soft Dry Operation.
Press the Operation Mode Selection Button.
1
MODE
Set the temperature.
2
Operation Display
DRY
AUTO FAN
a 5 c
—
Operation Display
DRY
AUTO FAN
es-c
TEMP.
-To raise the Temperature
-To lower the Temperature
©-
iS-e
SLEEP OFF/ON
l_L ------------------------- ^
MODE TE tflP. m SPEED
(£
S/VING
MANJAL
C3)
AIR SWING
Panasonic
3
4
OFF/ON
The fan speed is automatically set to Super Low.
Press the Off/On Button.
----
L
Page 12

® Automatic Operation Mode
Operation Procedure
Indoor Unit
open the front panel
EEHD
£ AUTO FAN
-0
SLEEP OFF/ON
.
----------L --------------
^
Set the Power Switch to “I” (ON)
Select Automatic Operation.
Press the Operation Mode Selection Button.
7
MODE
Set the temperature.
EHO
2
Operation Display
Ena
H
Set fan speed.
3
Operation Display
IS
AUTO FAN
® ®
■III!
TEMP. higher | or lower [|
W-
Operation Display
AUm FAN
Depending on your personal
preference, clothing, etc. the
set temperature can be set to
than the standard ^ if
desired.
-----
To raise the Temperature 2°C
To lower the Temperature 2X
• Select the fan speed in three
steps, Low through High.
• The display here shows the
fan speed to "High”.
CD-
MODE TE i/I P. FAN SPEED
A/1NG
AIR SWING —
MAN JAL
Panasonic
Press the Off/On Button.
4
3
OFF/ON—[
(For automatic operation, the operation lamp will first blink
for 20 seconds and then remain lit.)
Page 13
(2) Operation Details
0Soft Dry Operation Mode
• Soft Dry Operation Mode is a gentle cooling operation
that does not lower the room temperature so much.
•The operation will be standard cooling until the
temperature of the room reaches the temperature
set on the remote control, and then operation will
switch to Soft Dry.
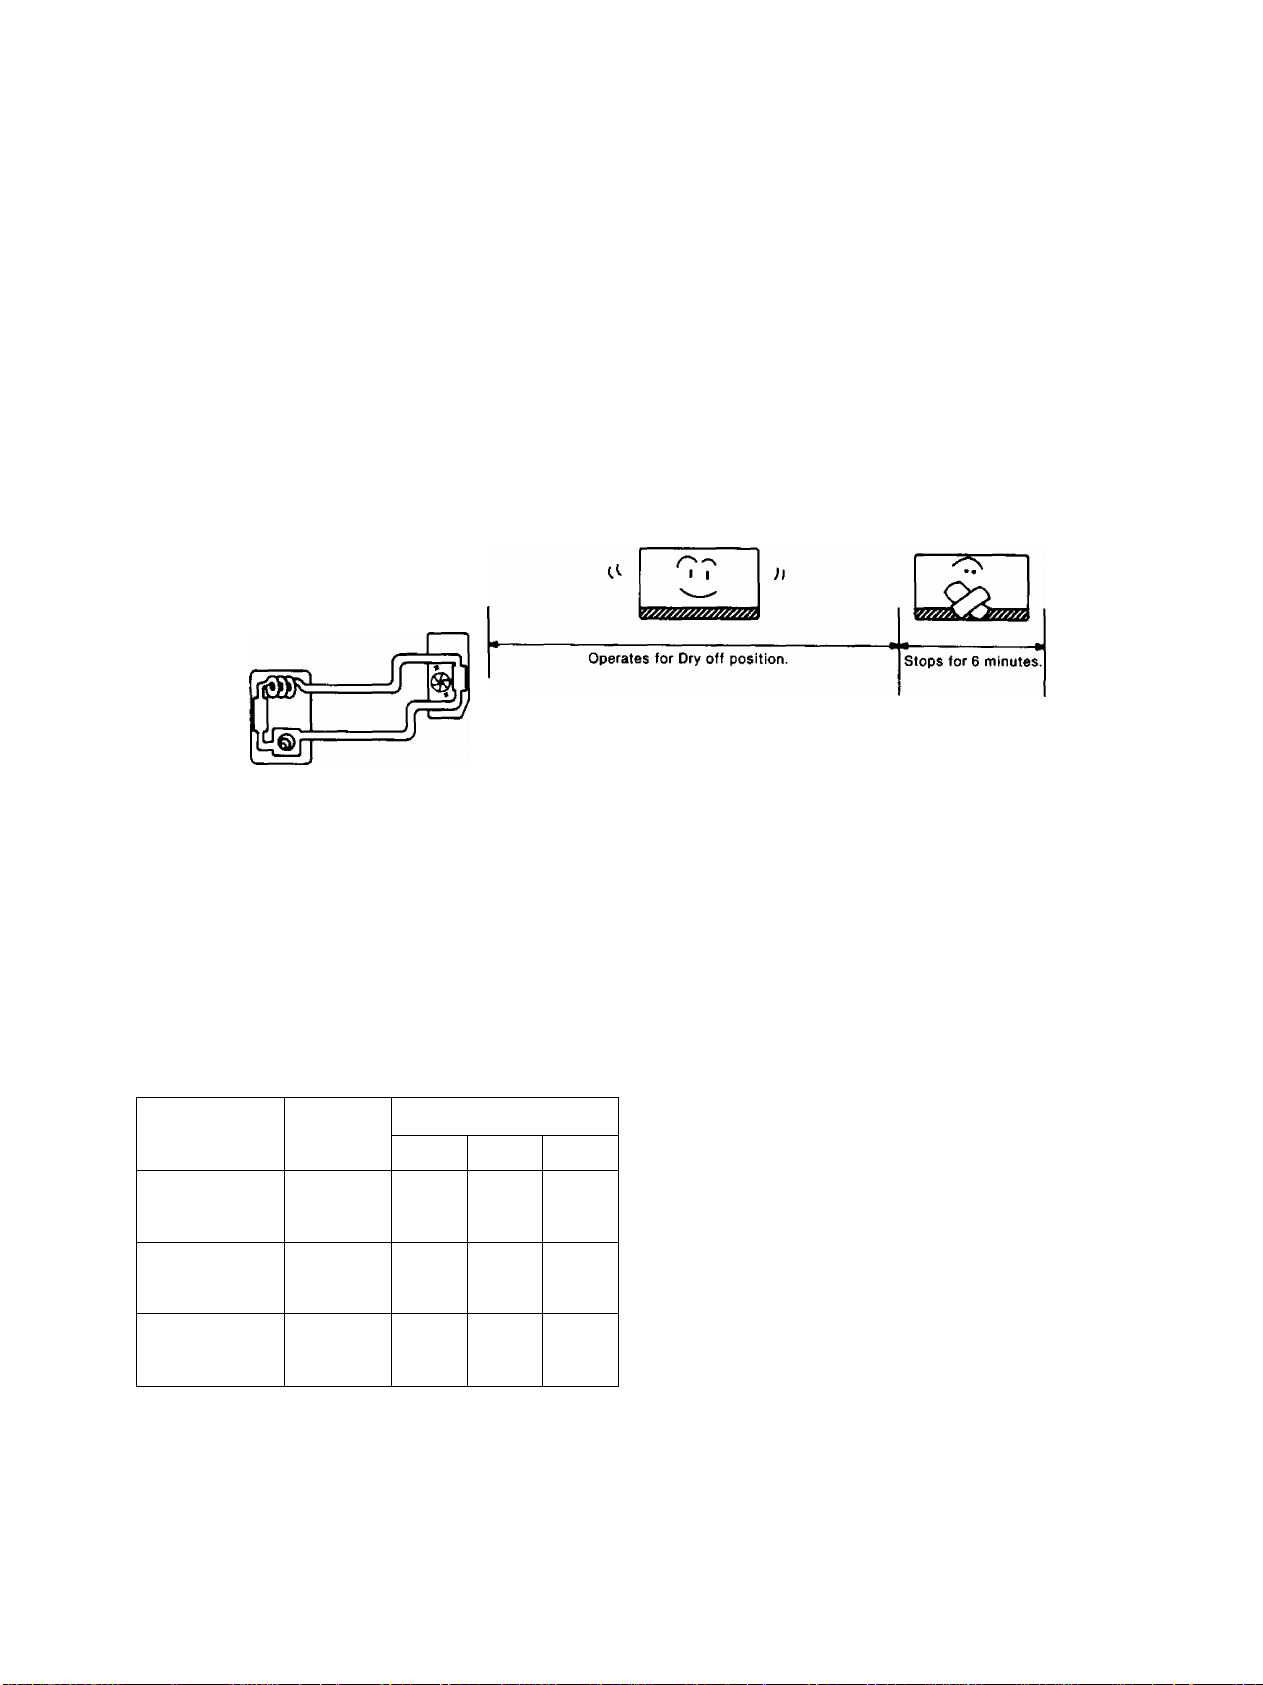
©Automatic Operation Mode
• At the start of operation, the air conditioner will sense
the temperature of the room and automatically select
either Cooling, Soft Dry or Heating.
(The operation lamp will blink for 20 seconds.)
During Soft Dry operation, the fan speed
automatically changes to super low, and the
operation will be dry off position and stop for six
minutes.
• Once the type of operation is set, it will not change.
• Set the fan Speed as desired.
• The setting temperature can be set to “Standard”,
2°C "Higher” or "Lower” than the standard if
desired.
(Press the Room Temperature Setting Button as
desired.)
Room
Temperature
23°Cand
above
20“C ^
Below 23“C
Below 20°C
Type of
Operation
Cooling
Soft Dry
Heating 23X
Setting Temperature
Higher Standard Lower
27“C
24°C
25“C 23°C
22X 20X
21X
19X
© Heating
Hot Start Operation: Airflow begins after the temperature becomes warm to avoid undesired cooling effect.
Defrosting Operation: Depend on the outdoor temperature, the operation occasionally stops to thaw the frost on the
outdoor unit.
Heat is obtained from outdoor air to warm up the room. When the outdoor ambient air temperature falls, the heating
capacity of the unit might be reduced. We recommend that you use an additional heating device when the outdoor
ambient air temperature is low.
Page 14

(3) Airflow Direction Procedure
□ Vertical Airflow Direction Control
0Airflow Direction Manual Control
The airflow direction can be adjusted as desired by using the remote control.
This is effective when you want to cool yourself directly, such as when coming out of the bath.
The louvers can be adjusted within a range between the horizontal and 30 degrees downward at Cooling and Soft
Dry Operation, and between the horizontal and 62 degrees downward at Heating Operation.
©Airflow Direction Auto-Control
Cooling and Soft Dry Operation
The louvers will automatically
swing up and down to create the
feeling of refreshing breeze.
Swings up and down^
Heating Operation
When the airflow
temperature is low
Downward \
___
When the airflow temperature
becomes warm
Press Off/On Button.
(Confirm the unit on operation)
OFF/ON
Press the Airflow Direction Auto-Contro!
Button.
5
SWING
To switch to manual airflow direction setting,
press “MANUAL” button.
automatic airflow
direction
Page 15

Remote Control
0
Airflow Direction Manual Control Button
COOL
® ® ®
I °c lllll
SLEEP
OFF/ON
L.
MODE TEMP. FAN SPEED
□
SWING
(TO
— AIR SWING —
c
MANUAL
£
Panasonic
©
©Airflow Direction Auto-Control Button
'Once the power switch has been set to “O" (OFF) the air
conditioner will be set to automatic airflow direction
operation when it is set back to “1" (ON),
• Always use the remote control to adjust the airflow
direction. Manually moving the vertical airflow direction
louver by hand could cause operation errors. If this
occurs, set the power switch to “O” (OFF) and then back
to T (ON) so that the louver returns to the correct
position.
• When air conditioner operation is stopped, the vertical
airflow direction louver will close the air conditioner’s air
outlet vent.
• During Cooling and Soft Dry operation, do not direct the
vertical airflow louvers downward for hours.
If operation continues in this way, condensation may form
on the louvers and the air outlet vent,which may cause
dripping.
m Horizontal Airflow Direction Control
• Manually adjust the horizontal airflow direction louver to your desired airflow direction.
Page 16

(4) Timer Setting
Once the tinner is set, the same timer operation is automatically operating from the next day.
To cancel the schedule
(Exampie)
Cancei ON-TIMER
Press ON-TlMER button
/ ON-TIMER X
7
(d)
Press CANCEI button
/ CANCEL X
2
to)
(Timer lamp goes out.)
To change the schedule time
(Example)
Change ON-TIMER from 6:20
PM to 7 : 20 PM.
Press ON-TIMER button
ON-TIMER ^
un-iimcn\
1
(
a)
Set to 7 : 20 PM.
2
Note
The operation will start 15 or 30 minutes
before the actual time set withC DH-TIMER ]
setting. This is to allow time to attain your
desired set temperature.
Cooling and Soft Dry: 15 minutes before
Heating : 30 minutes before
/
1 lOn
PMf lou*
SLEEP
PM 5*iil
OFF/ON
:T button
ress SI
SET
^ (
If the schedule is cancelled by
a power failure
(Example)
Electrical power fail when the OFF-TIMER
is set for 11 : 30 PM.
1
,1—1
Press OFF-TIMER button
OFF-TIMER
urr-l IIHEn \
(
a)
Press SET button
2
(q)
U=L
OFF-llMER TIAE
-----
l_lj
XANCEL
K
—J
Panasonic
\
J
-TIMER
In
Page 17

Timer setting procedure
When using the ON-TIMER only: Steps 1-3. (when you reach home)
When using the OFF-TIMER only: Steps 4-6. (when you sleep)
(Example) To begin operation at 6 : 20 PM and stop at 11 : 30 PM,
Page 18

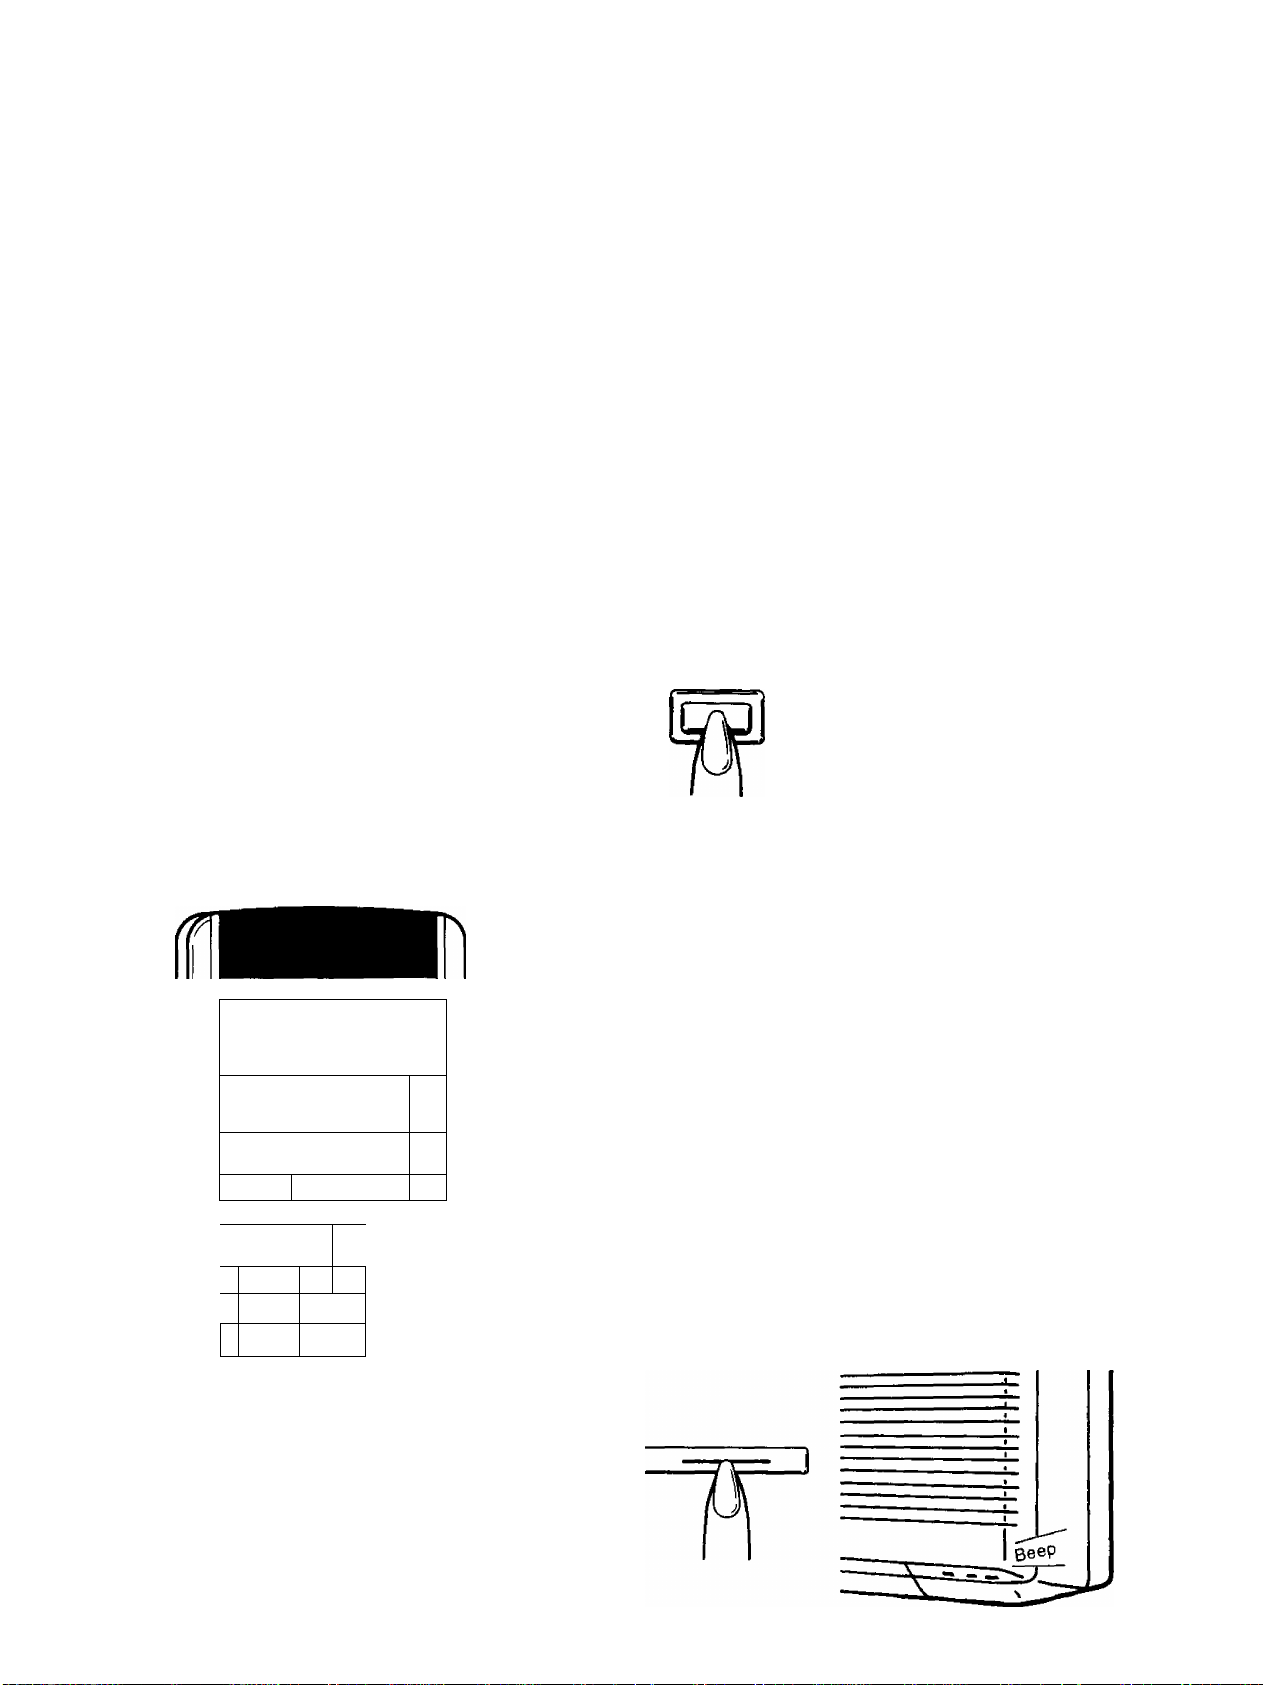
(5) Sleep Mode Auto Control Setting
Sleep Mode operates to match your sleeping condition.
Remote Control
COOL
AUTO FAN
1
rc
Press the Sleep Mode Auto Operation Button.
SLEEP
-----------
----
---
■
SLEEP
OFF/ON
MODE TEMP. FAN SPEED
C3^0)
SWING ' MANUAL
' DQ
AIR SWING
Panasonic
J
Details of Sleep Mode
0Cooling or Soft Dry operation
When you press the SLEEP Mode, the following
movement will start to avoid overcooiing.
The Sleep Mode Auto LED of the room air conditioner
will light up.
• The fan speed is automatically set to Low.
• The setting temperature will be raised by 0.5°C at the
start of operation and by 0.5°C one hour later.
• The operation will stop after 8 hours.
©Heating operation
When you press the SLEEP Mode, the following
movement will start to avoid overheating.
• The fan speed is automatically set to Low or Super
Low.
• The setting temperature will be dropped by 2°C at
the start of operation and by 3'C one hour later,
• The operation will stop after 5 hours.
Page 19

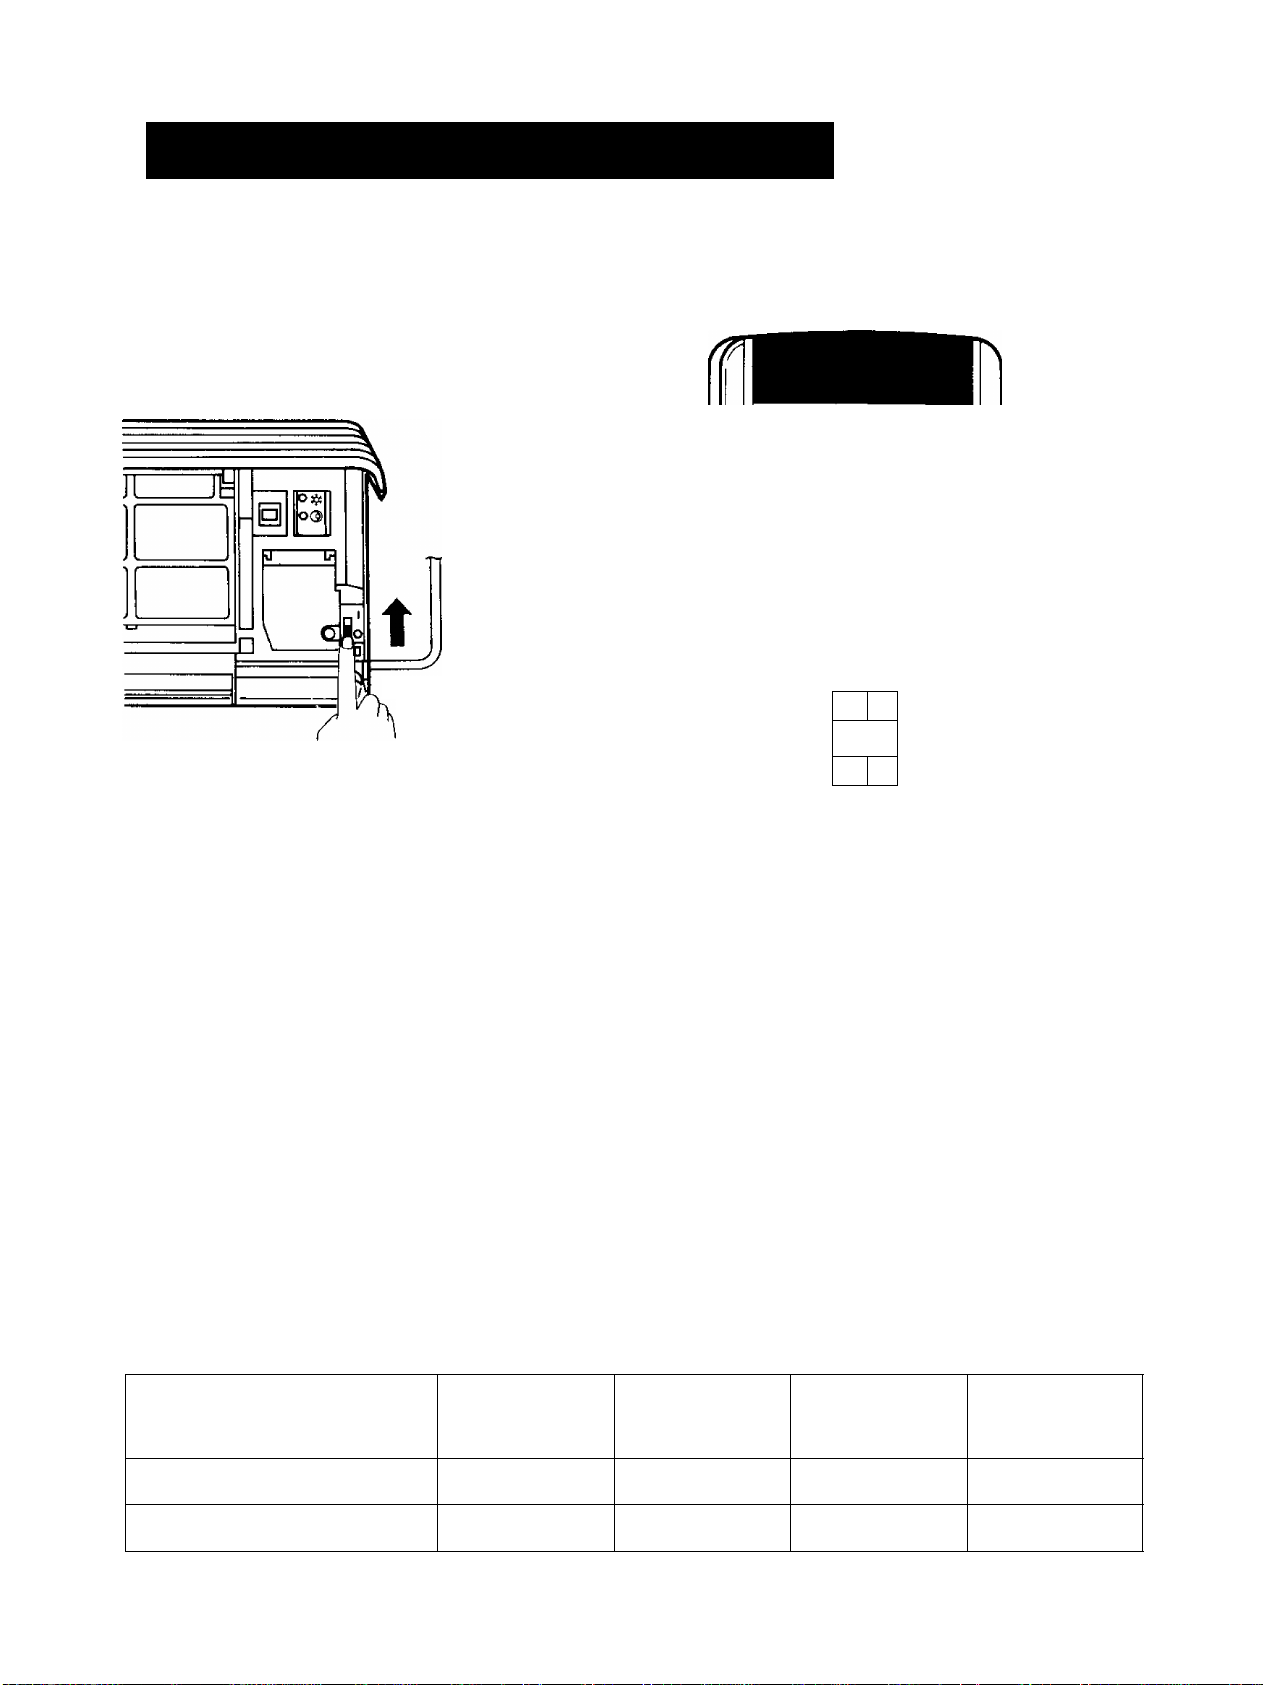
3. Forced Operation
When the remote control can’t be used.
“Operation procedures’"
Forced operation is automatic operation, the vertical
airflow direction setting will be automatic.
yp- [jC
XJ 1
©o
s,
j
Press the Forced Operation Button,
(The operation indication lamp will blink for
20 seconds, and then light up.)
• If the button is pressed once more, the air
conditioner will stop.
(The operation indication lamp will switch
off.)
Page 20

4. Care and Maintenance
Replacement of Air Purifying Filters
(Recommended once every three months)
Remove the Air Filters.
1
Remove the filter from the filter frame
2
Insert new filters.
3
Filters
Remove the Air Purifying Filters.
_
-------
J ®
Pull the tab.
Filter frame
Re-insert the Air Purifying Filters
(One each at right and left).
4
Caution
Information
Re-insert the Air Filters.
Be careful not
to hurt your
hands on metal
parts.
• If Air Purifying Filters turn the same colour as the sample colour
attached to the indoor unit within a three month period, replace the
filters.
• Dusty filters cannot be re-used, even if they are cleaned and washed.
• Re-insert the filters correctly at the left and right, with the side
marked [FRONT] facing forward. (The left and right indications are
shown on the filters.)
• Purchase replacement filters from your air conditioner dealer,
• Part number for Air Purifying Filters: CZ-SFIN
When the air purifying filters are installed, the air flow amount decreases, resulting in a slight loss
of air conditioning performance.
Sample colour
Page 21

Before performing any
maintenance procedure
During the season
Set the Power Switch to "O” (OFF)
Indoor unit
Don’t water to the air conditioner.
Cleaning of the air filters
Recommended once every two weeks.
Remove the Air Filters.
Hold the tab and raise it slightly, and then
1
pull down.
Clean
2
• To remove the dust adhering to the
filters, either use a vacuum cleaner, or
wash them in water and dry in the shade.
• Re-insert the filter with the side marked
“FRONT" facing forward.
Never use any of the followings-.
• Water above 40°C
Could cause deformation and/or discolouration.
• Volatile substances
Could damage the surfaces of the air conditioner.
If the Air Filters become damaged
• Purchase replacement filters from your air
conditioner dealer.
Cleaning of the air conditioner and the remote control
• Wipe gently with a soft, dry cloth.
Page 22

Faults
Cause
Airflow does not begin
immediately during heating
operation.
Operation stops for about 12
minutes during heating.
(The operation lamp blinks.)
• If the airflow begins before its temperature become warm, it will cause an
undesired cooling effect. In order to prevent this, the airflow will not begin until
it is sufficiently warm.
(The operation lamp will blink until the airflow begins.)
• This is to thaw the frost which has accumulated on the outdoor unit (defrosting
operation). This will take no longer than about 12 minutes, so wait for
operation. (Frost accumulates on the outdoor unit when the outdoor
temperature is low and the humidity is high.)
Water comes out of the outdoor unit.
WARNING
(1) REMOVE POWER PLUG OR DISCONNECT FROM THE MAINS BEFORE SERVICING THIS APPLIANCE.
(2) THIS APPLIANCE MUST BE EARTHED.
IMPORTANT
1. WHEN THE POWER CORD IS CONNECTED TO THE MAINS THROUGH ALL-POLE SWITCH
(DISCONNECTING MEANS)
THERE MUST BE AN ALL-POLE SWITCH (DISCONNECTING MEANS) WITH MINIMUM 3 mm CONTACT
GAP IN THE FIXED INSTALLATION CIRCUIT.
2. WHEN THE POWER PLUG IS CONNECTED TO THE RECEPTACLE
The wires in this main lead are coloured in accordance with the following code:
Green-and-yellow: Earth
Blue; Neutral
Brown: Live
As the colours of the wires in the mains lead of this appliance may not correspond with the coloured markings
identifying the terminals in your plug, proceed as follows;
The wire which is coloured green-and-yellow must be connected to the terminal in the plug which is marked with the
letter E or by the earth symbol @ or coloured green or green-and-yellow.
The wire which is coloured blue must be connected to the terminal which is marked with the letter N or coloured
black.
The wire which is coloured brown must be connected to the terminal which is marked with the letter L or coloured
red.
NOTE
IF THE SUPPLY CORD ON THIS APPLIANCE IS DAMAGED, IT MUST BE REPLACED BY A SPECIAL CORD
OBTAINABLE AT AUTHORIZED SERVICE/PARTS CENTRES.
NOTICE
* Before installing the models, check with local
electric authority for approval.
 Loading...