

Page 1
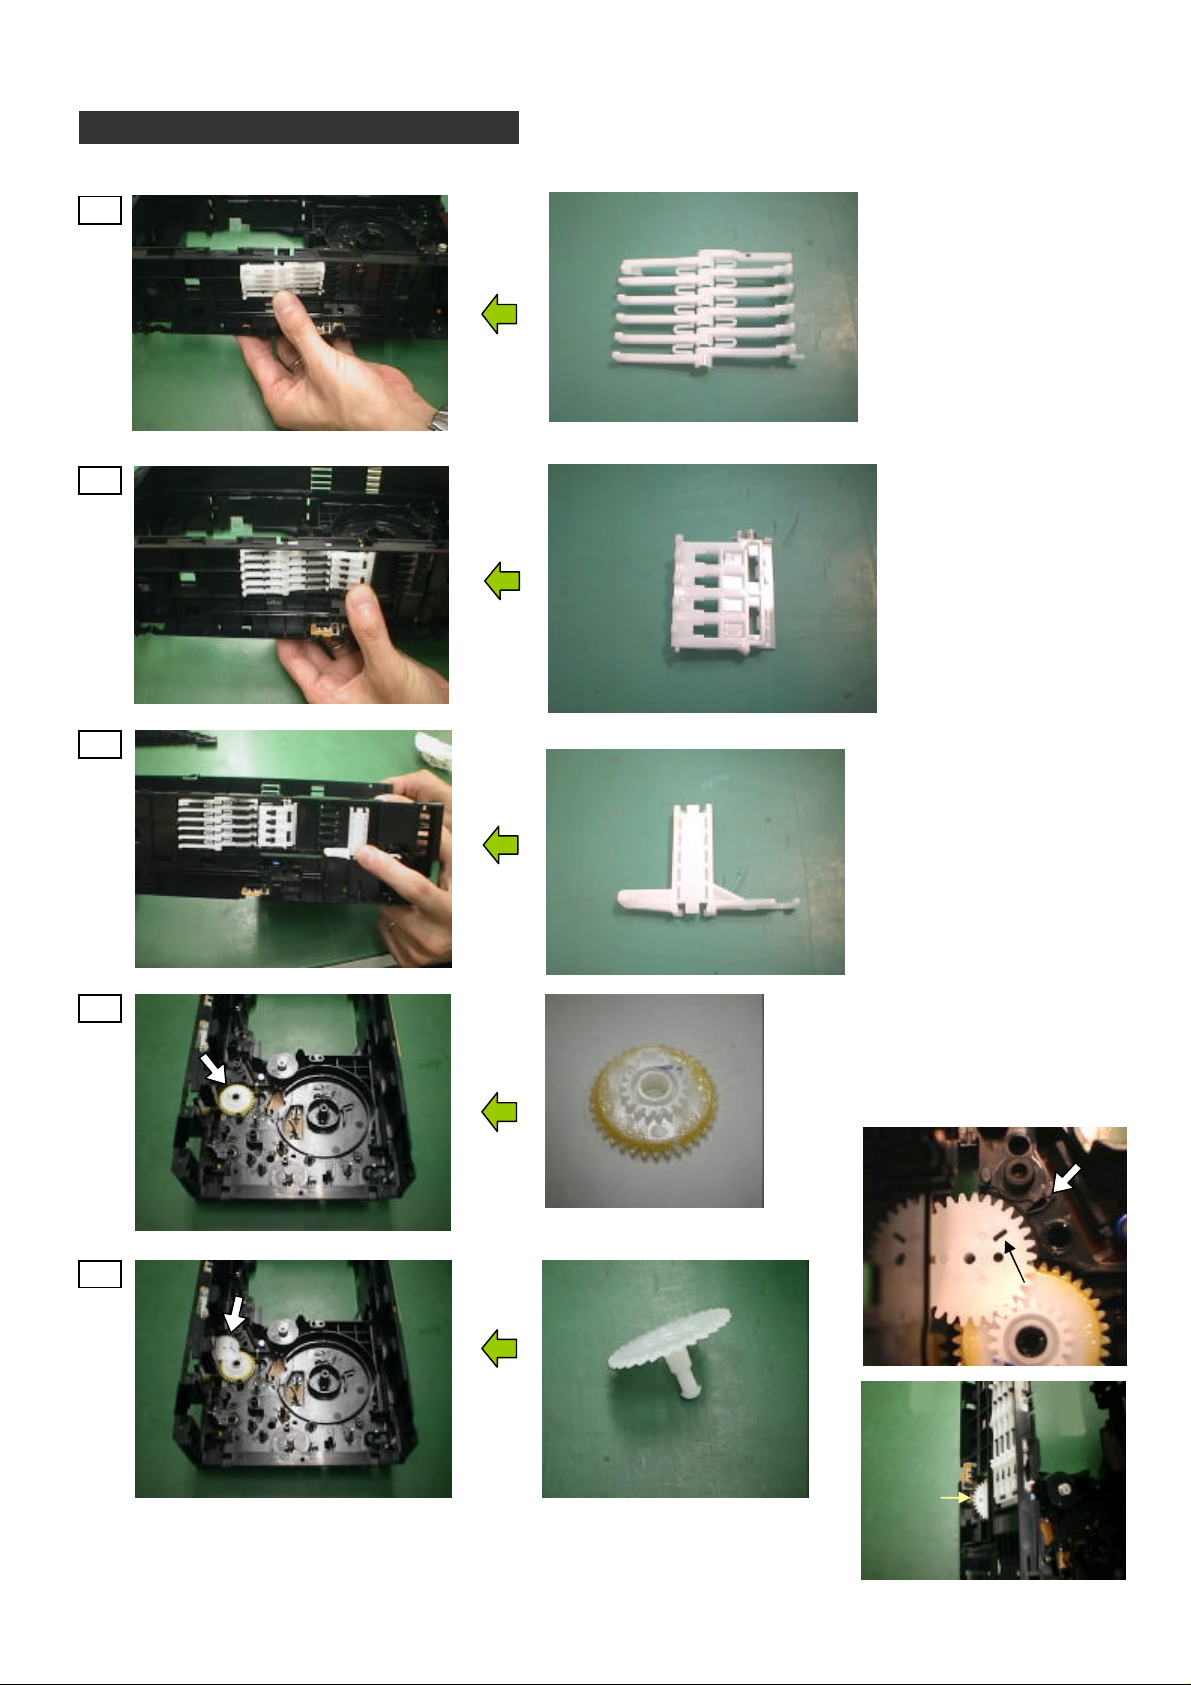
CD Changer CR16 Mechanism
Any further updates or electrical faults can be accessed on Kbase within Technical Support(search on CR16)
in Disassembly so
Assembly Page 1/8
AVC-NBG
Assembly / Adjustment Procedure
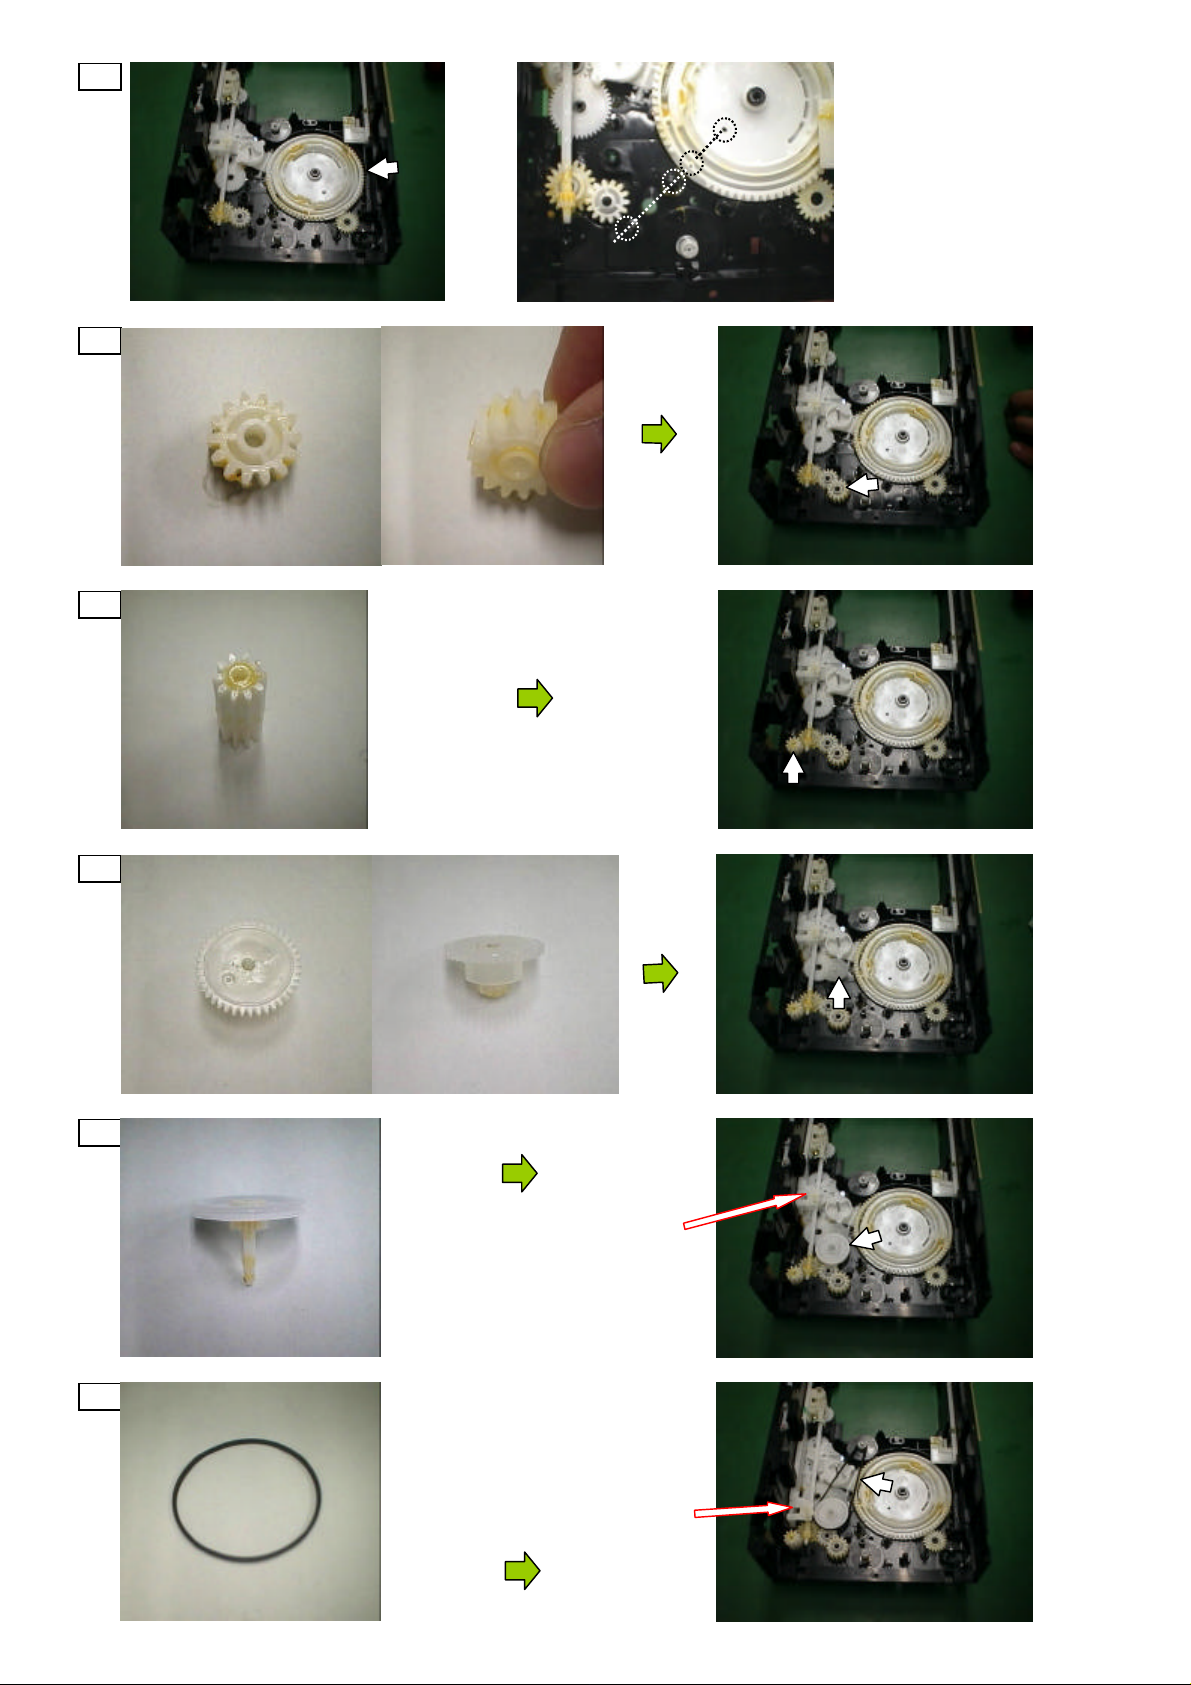
1* * Denotes parts
that did not
require removal
may already be
fitted
2*
3*
4*
5*
Phase
Mark
Phase
Mark
Page 2
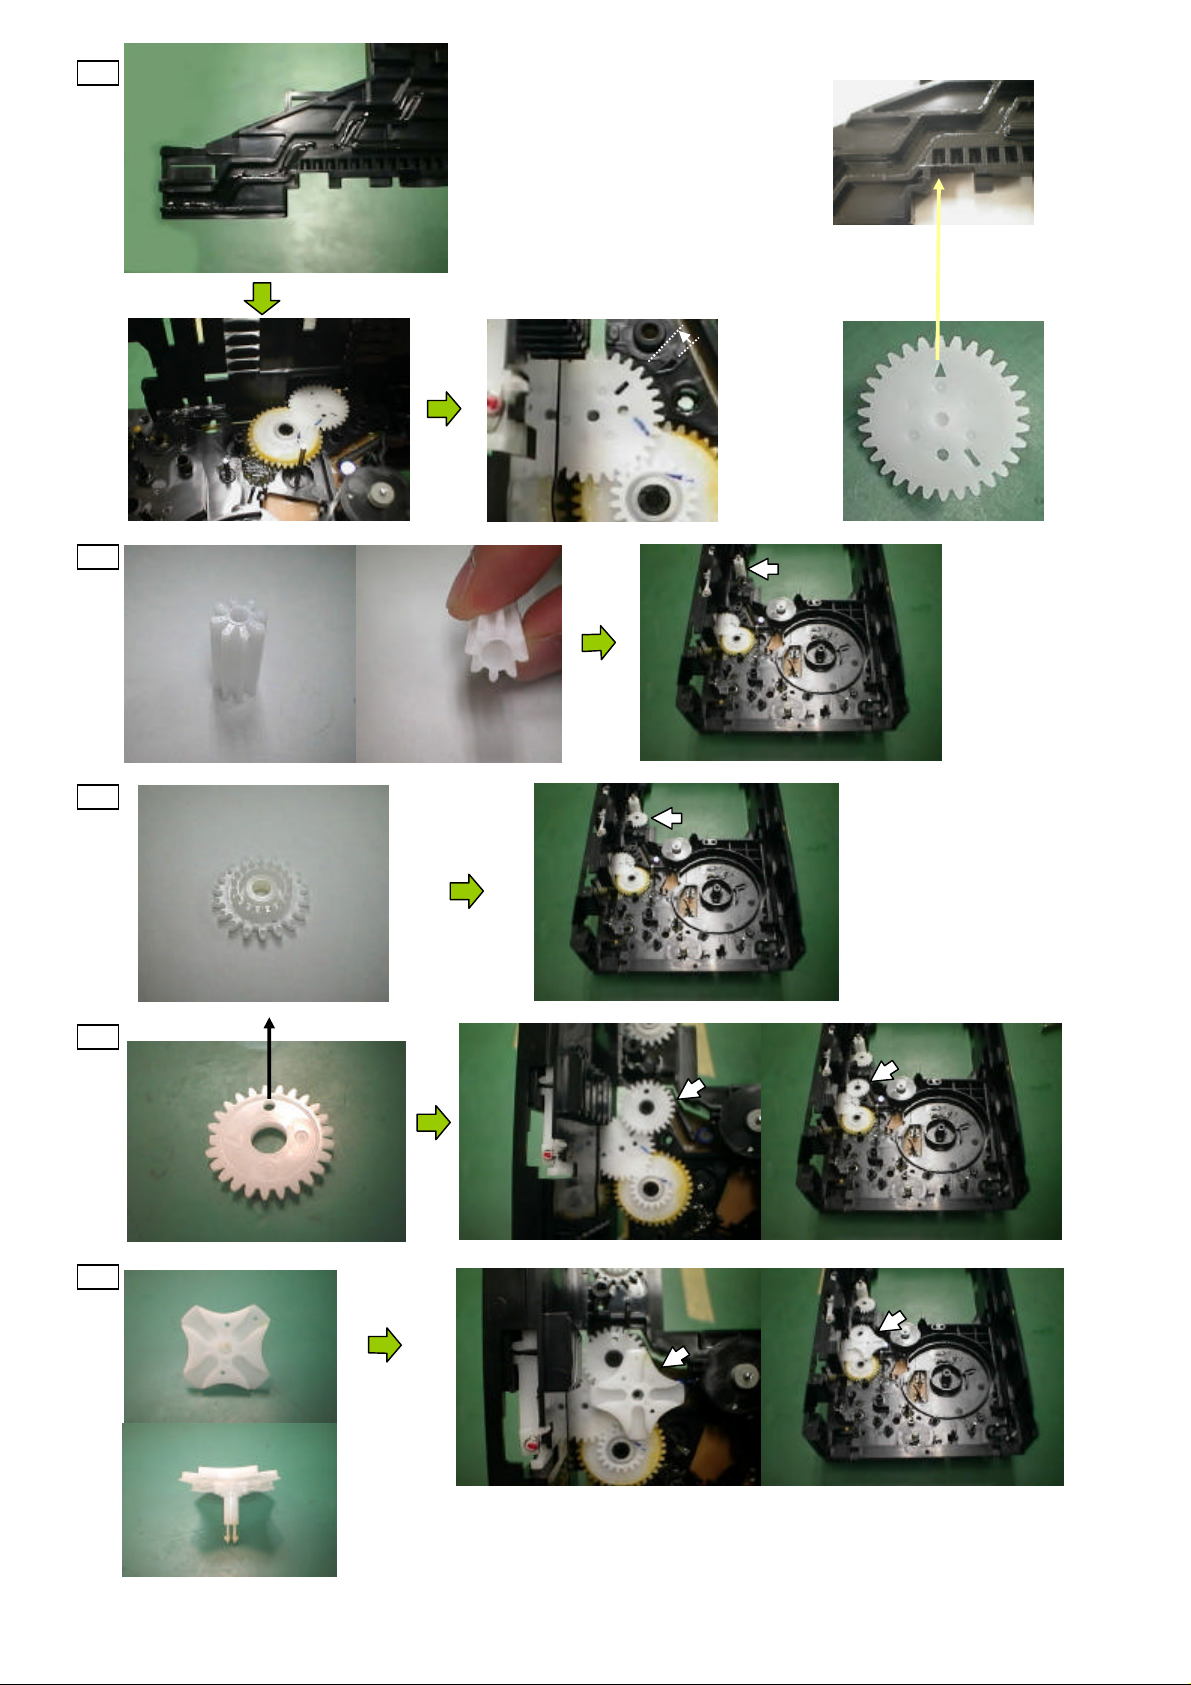
Arrowed tooth must locate
7*
6
This part is critical
Move side plate forward a fraction
when fitting. When it clicks into
position, move side plate back
again.
in first slot of side plate as shown
8*
9*
Hold above gear in position whilst fitting gear below
10
Assembly Page 2/8
Page 3
11*
Assembly Page 3/8
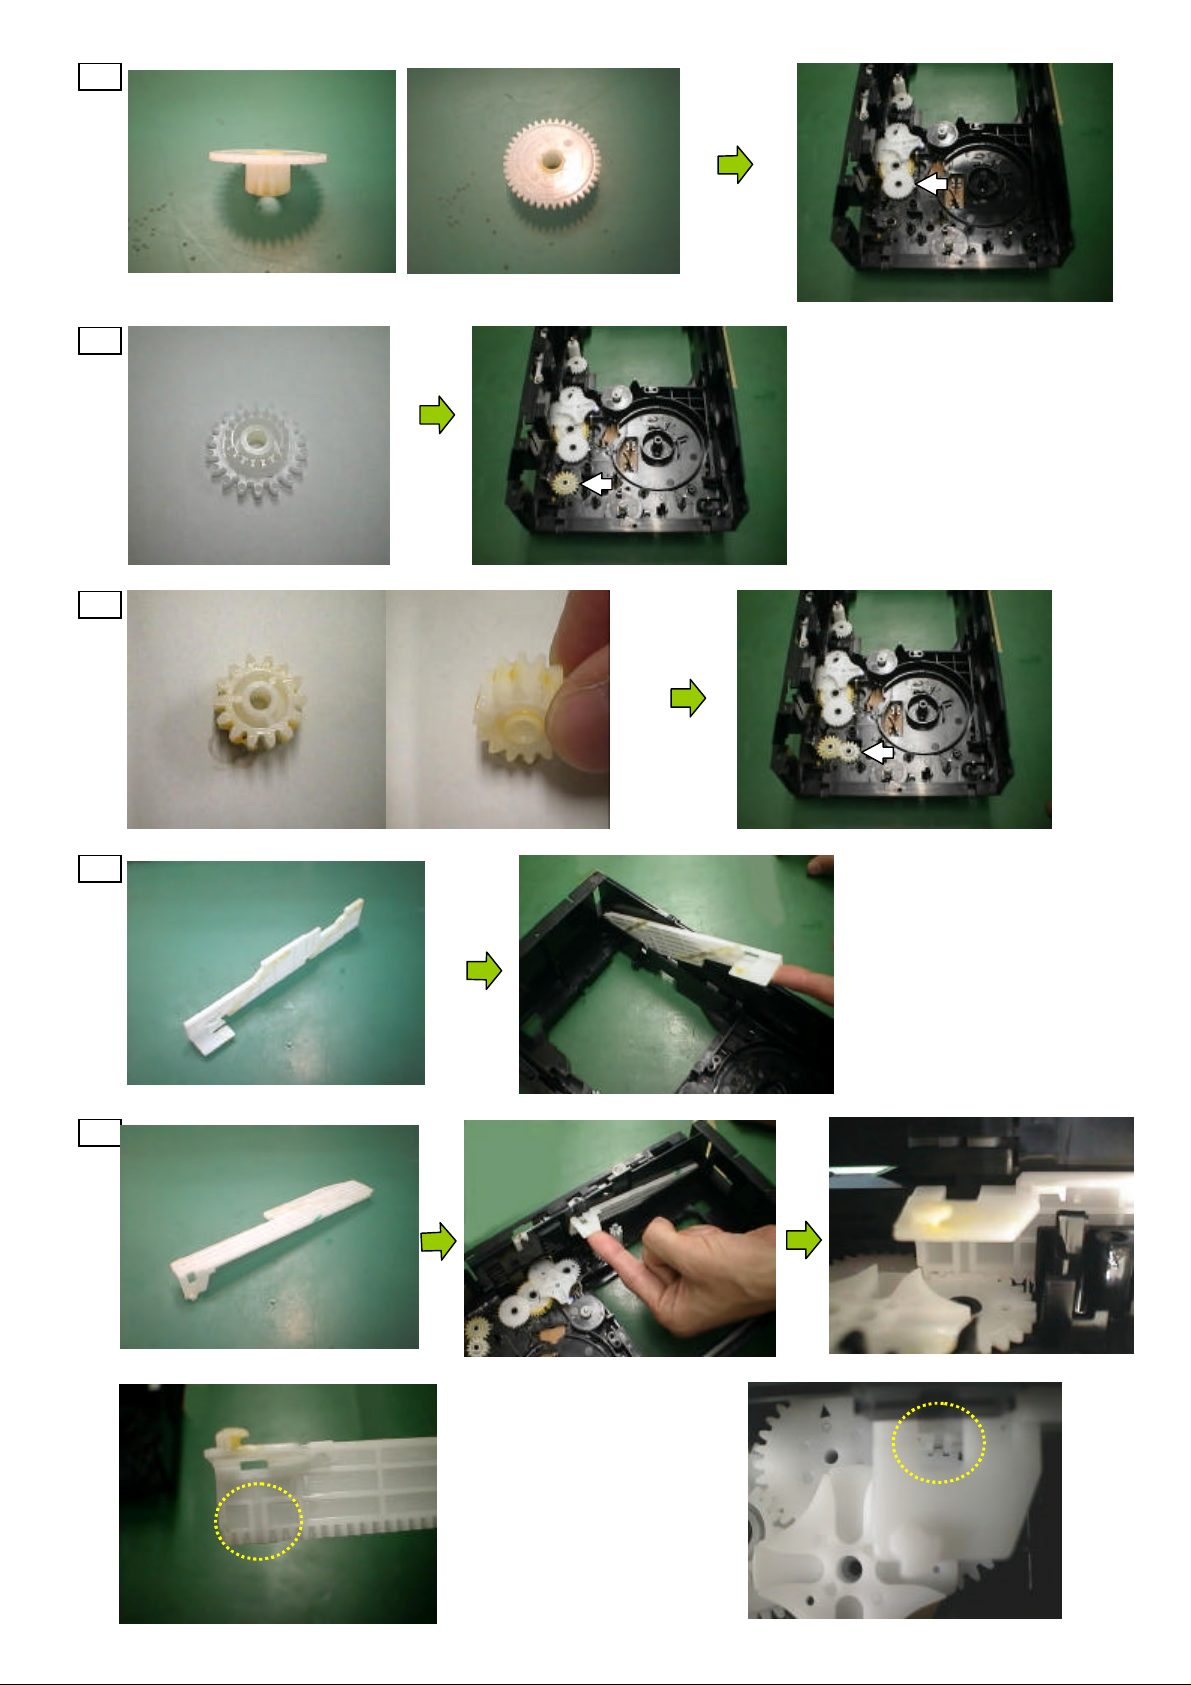
Refit screw if it was originally fitted, part number XTBS26+8J
Be careful not to over-tighten-this gear is not used in mech operation, only used for the jig tool
12*
13*
14
15
Align the long tooth
on the rack (see left)
with the half tooth on
the gear (see right)
Page 4
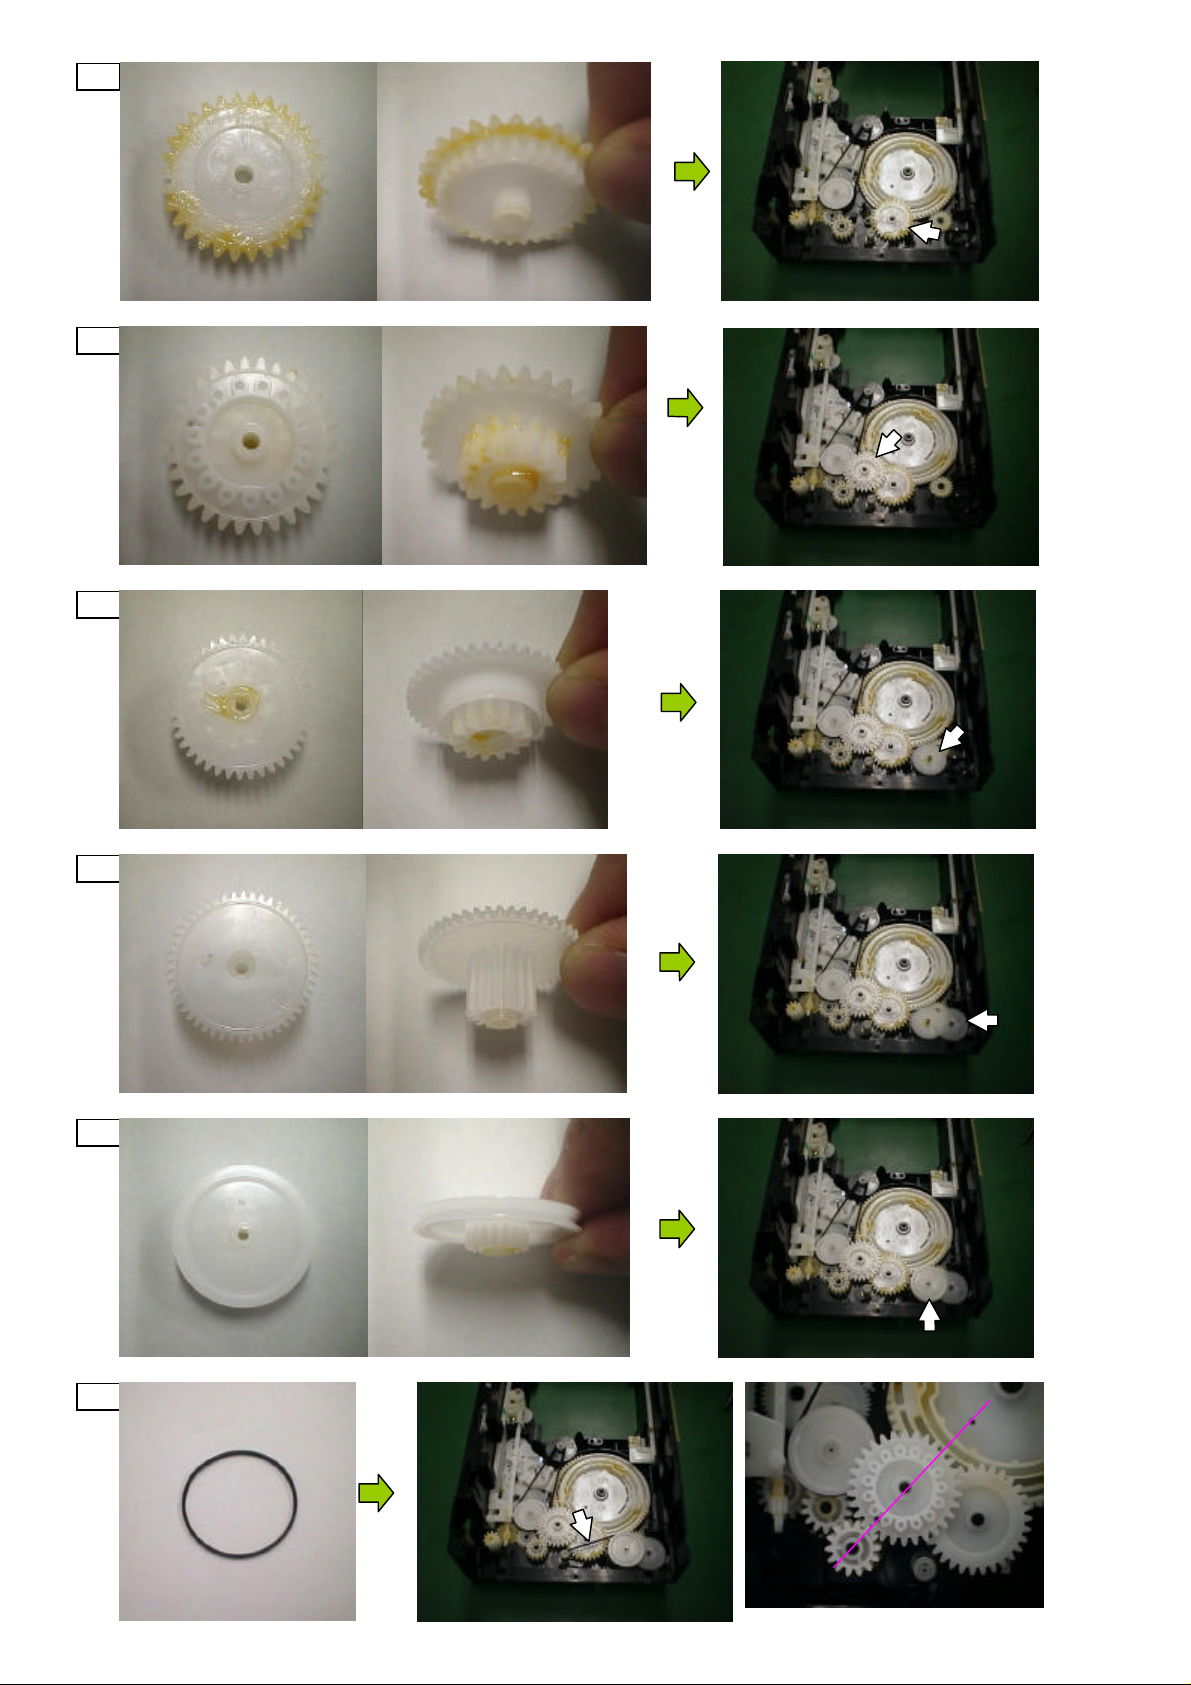
16
Assembly Page 4/8
17
18*
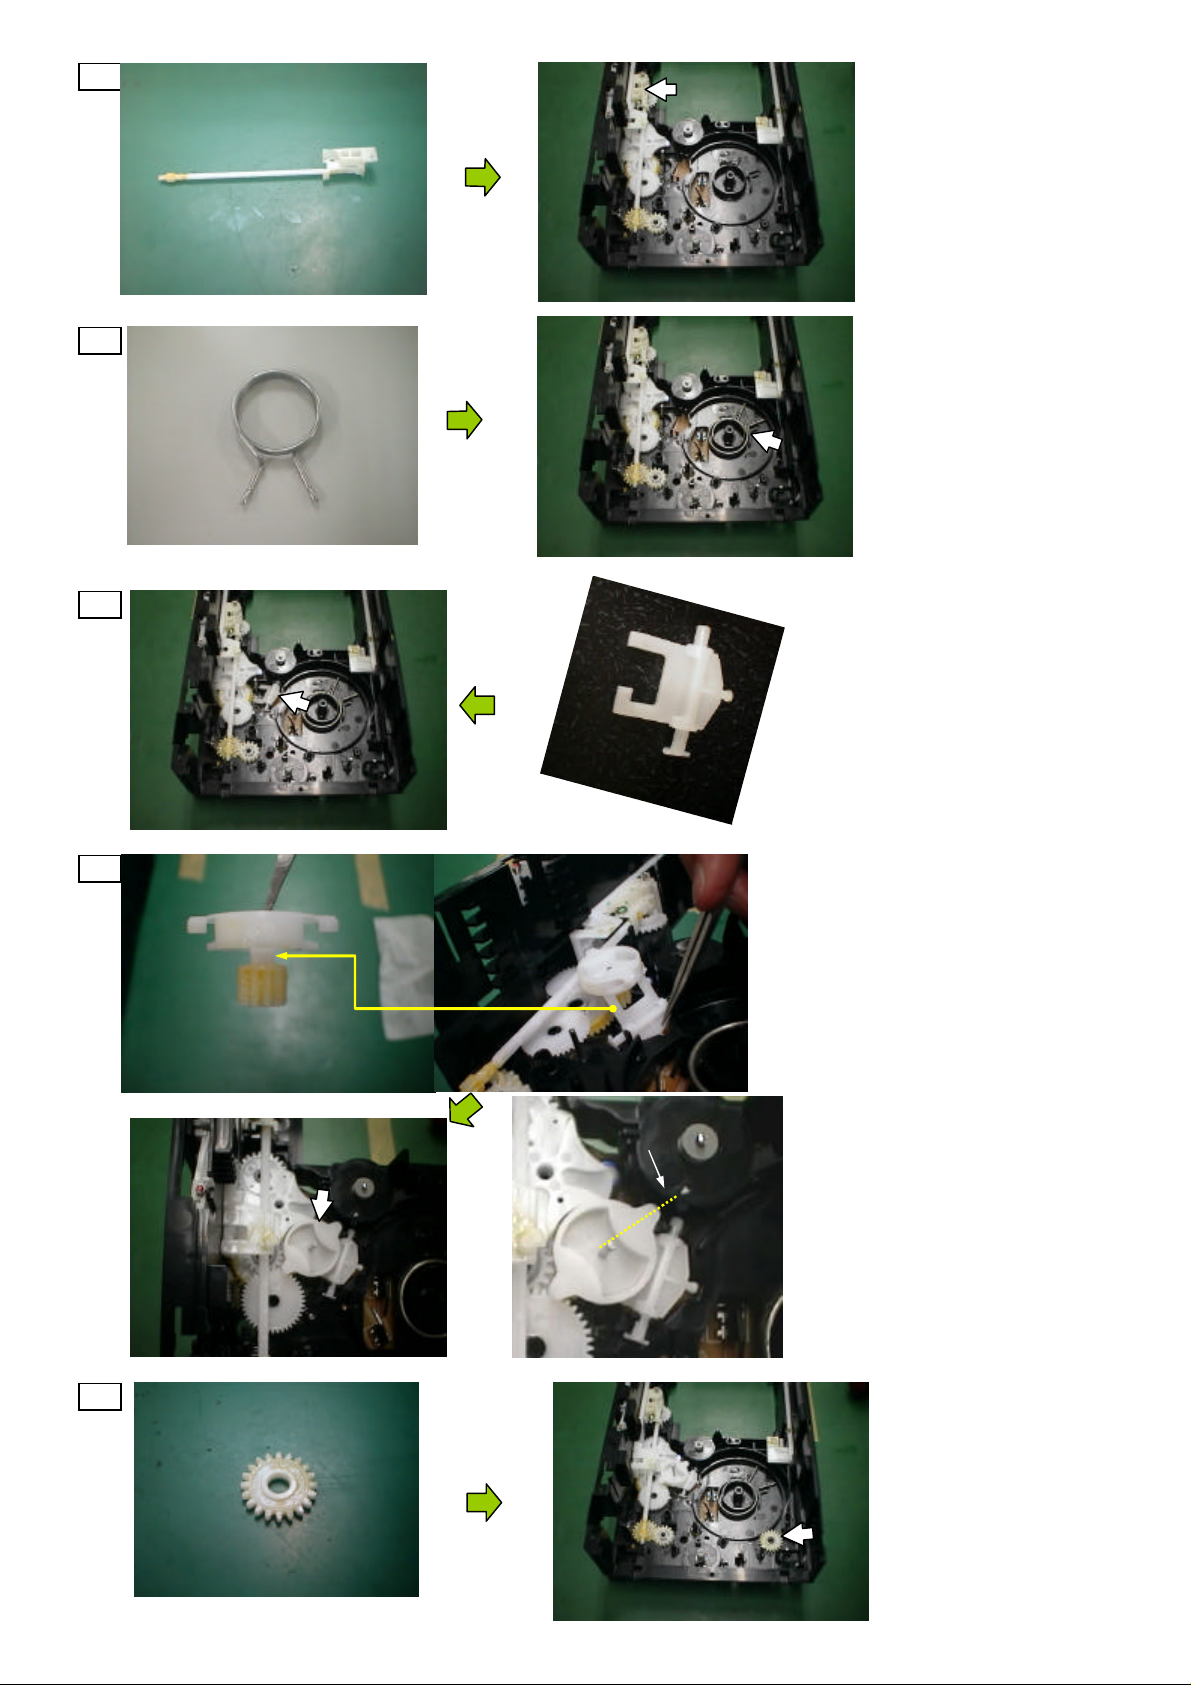
Fit then screw in
Insert this way round
NB Not necessary to
remove this "lifter"
gear in disassembly
19
20*
Phase Adj.
With the left side
plate far back,
this gear should turn
anticlockwise
but only slightly clockwise
Page 5
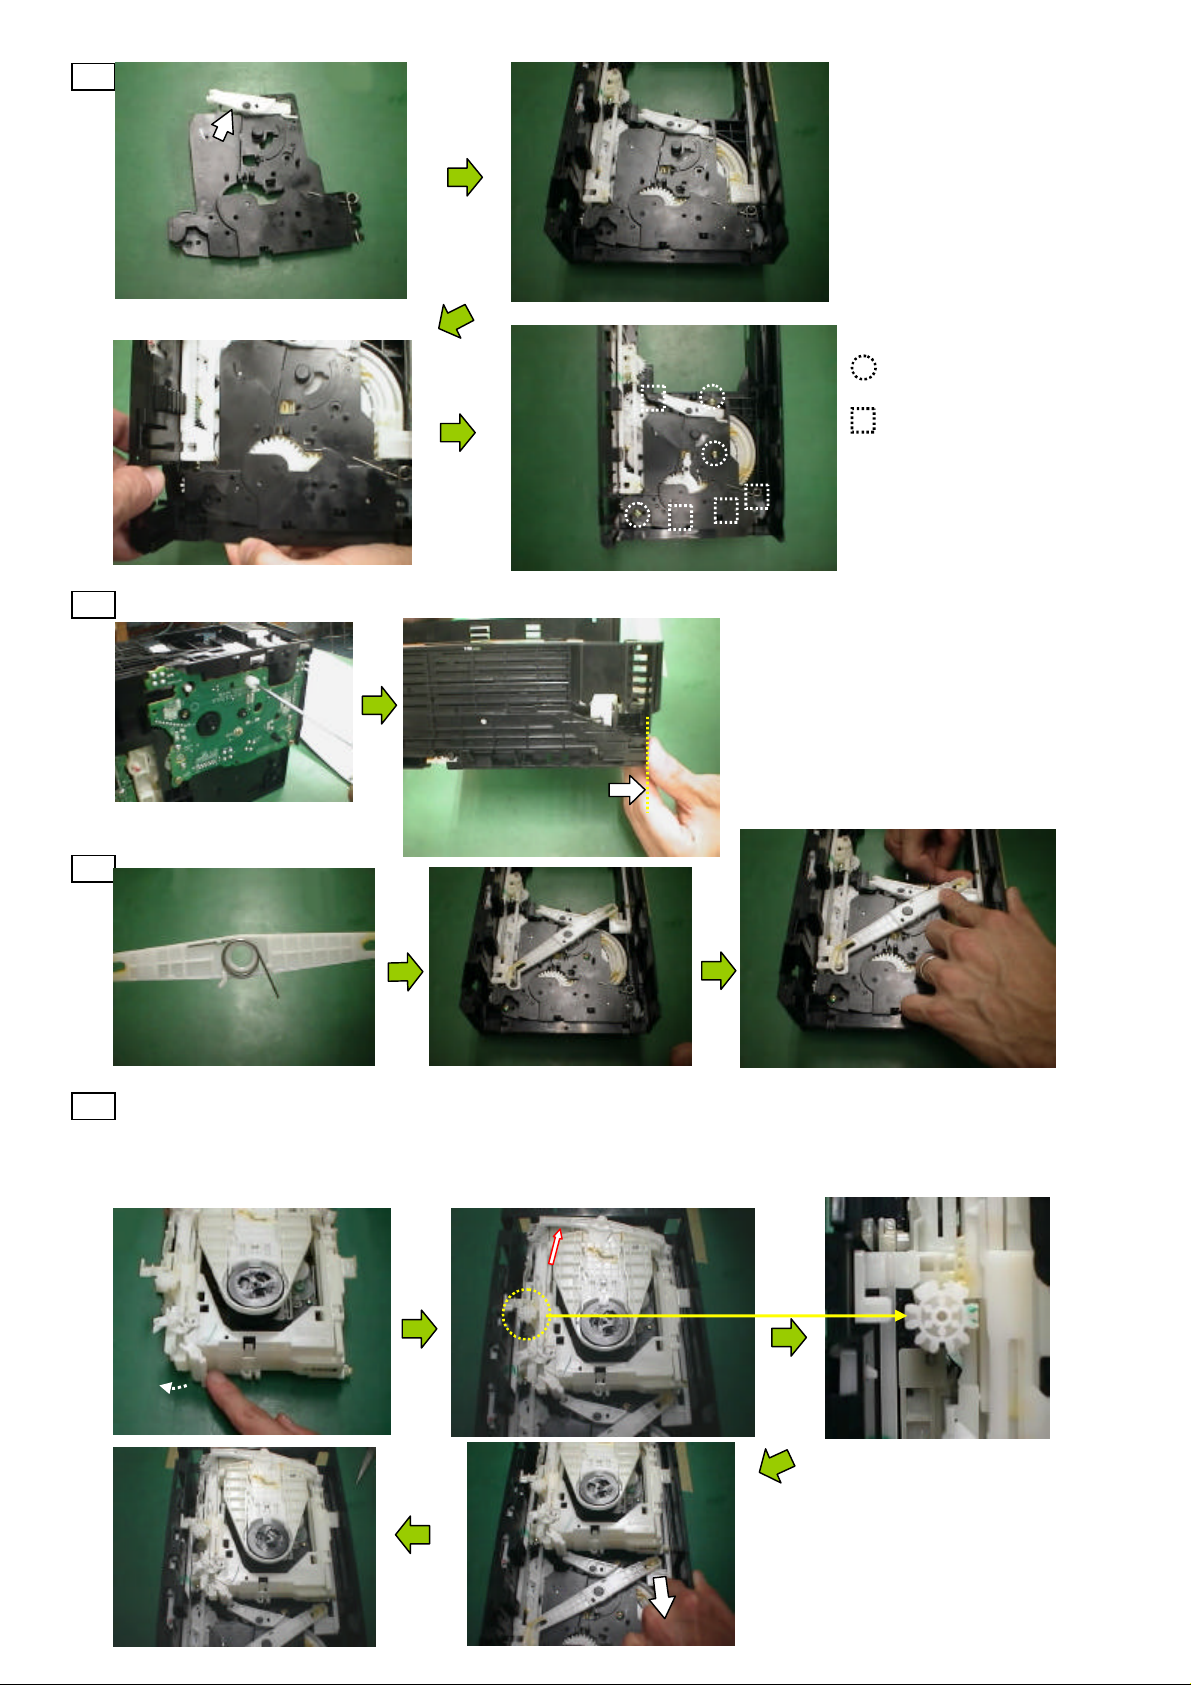
21
Assembly Page 5/8
22*
23*
Phase Adj.
Slot in as shown on far left,
then rotate until phase
aligned. Large gear will then
catch the "pip" of the lifter
below the "lemon" gear.
24*
25
The white rack indicated
by the red arrows, is shown
in the forward position
from 26 onwards. This
is due to us changing the
point of moving side plate
forwards to simplify repair
26 process. This will be
rectified once more photos
have been taken. This
part will naturally move
forward when side plate is
wound forward in section 34
Page 6
27
Assembly Page 6/8
28
29*
30*
31*
32 Align as
shown
on left
Page 7
32
Assembly Page 7/8
Screw
Hook
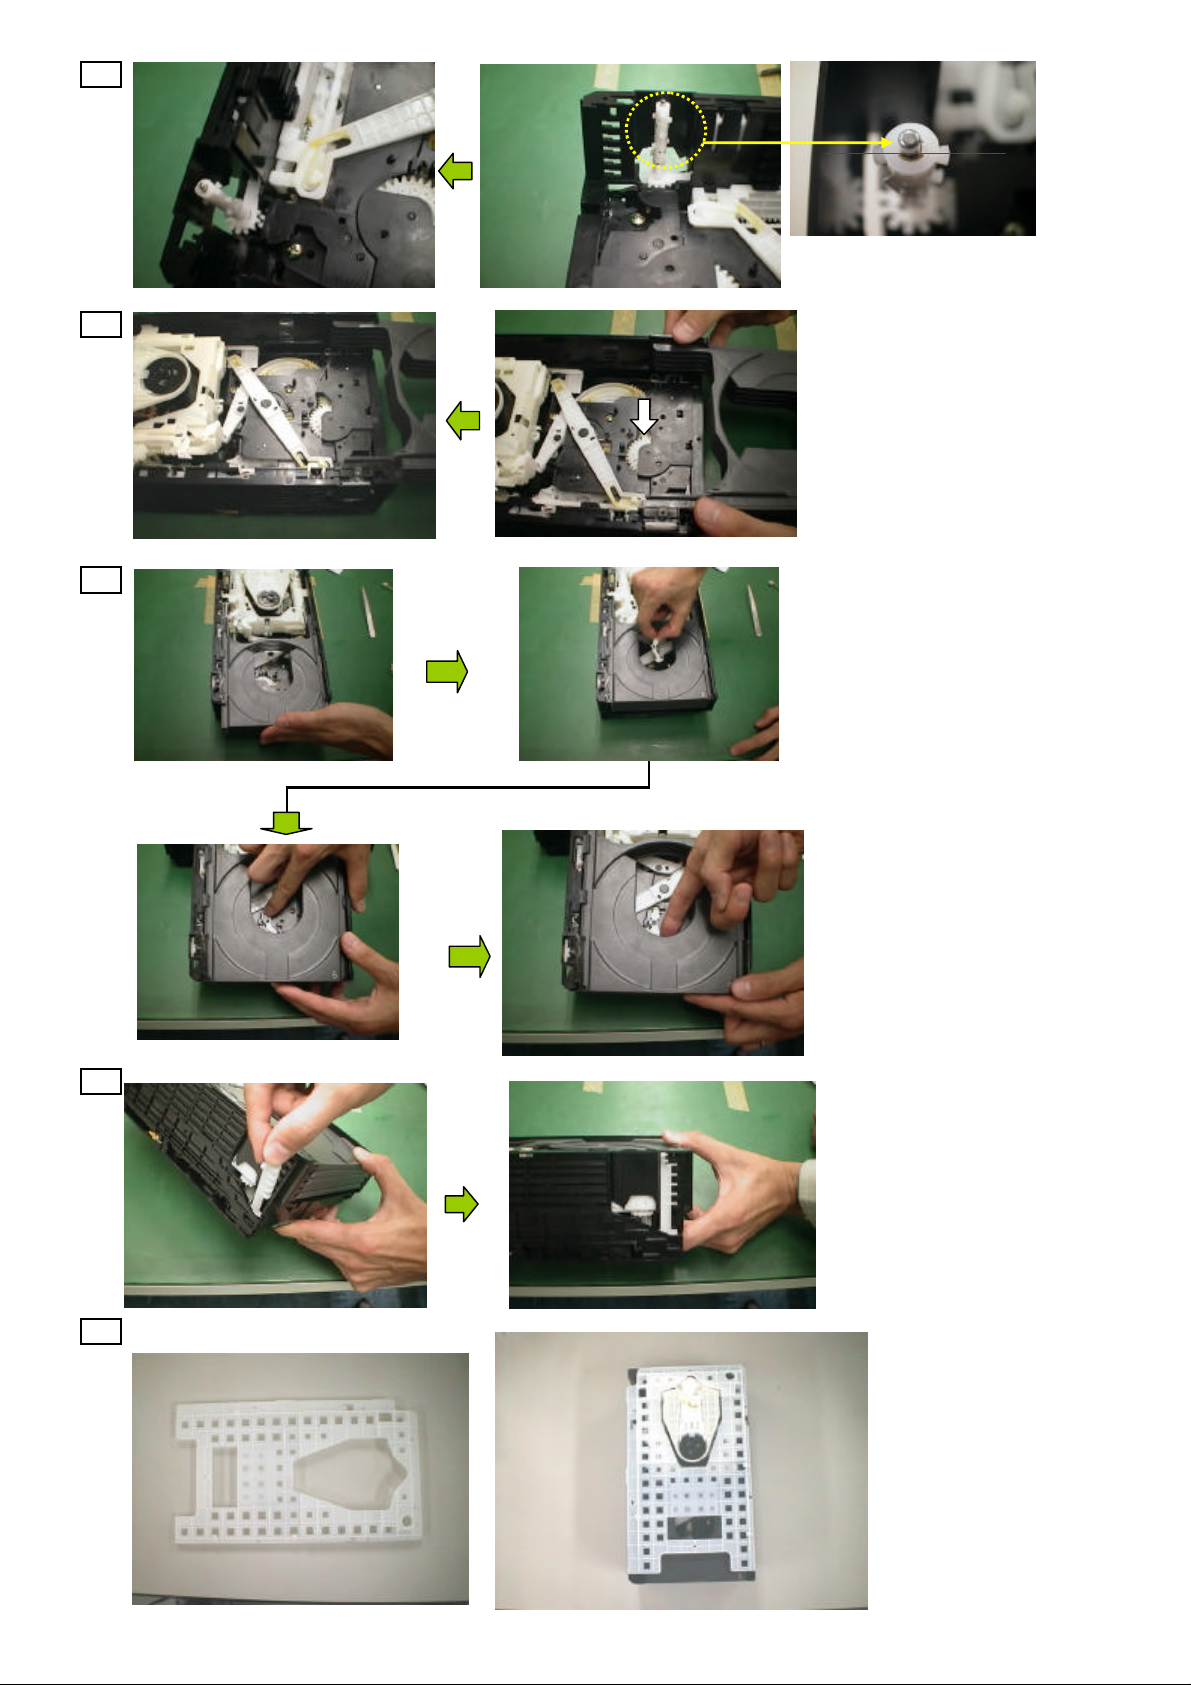
33 At this point bring the side plate forward using the jig tool until level with front of chassis
34
35 Traverse in down position-lever at rear should be as far back as possible on left side. (See red arrow)
Traverse should slot in left side first-may find it easier to use jig tool to move side plate forward further
(33). Slow down as reaching end of travel as complete re-alignment required if it clicks out of position!
After slotting in traverse, side plate should be moved back level to front of chassis using jig tool
*Marking to the right*
Important that this gear
does NOT engage with
drive rack just above.
Pull white
rack slightly as shown on left until
it clicks into position.
Page 8
Insert tray drive loading gear in to position and then insert metal shaft down the centre
37
Top lugs on the tray drive
loading gear should align
horizontally with front of
38 mech and trays should be
as far forward as possible
before slotting down.
The white gear in the centre
of the black plate should
move clockwise slightly
when the trays are inserted-
if it moves anti-clockwise
adjust the tray loading drive
gear slightly and re-attempt.
39
Turning tray drive loading
gear 180 degrees may help
40
Slide all trays back manually
together until front of trays
align with front of mech
then insert lock lever.
We recommend
fitting top cover
41 before powering
up as this provides
additional support
to the side plate.
You are now ready
to operate. Please
use additional info
on CD Test Mode
to check operation.
Assembly Page 8/8
 Loading...