

Page 1
2000
XP
®
Personal Computer
Reference Manual
Model No. CF-50 Series
Contents
Read Me First ..................................................... 2
Key Combinations ............................................. 3
LED Indicators ................................................... 6
Touch Pad .......................................................... 7
Standby/Hibernation Functions ....................... 9
Security Measures.......................................... 13
Computing on the Road ................................. 18
Battery Power ................................................. 20
CD Drive .......................................................... 25
PC Cards ......................................................... 32
RAM Module.................................................... 34
Port Replicator................................................ 35
Printer .............................................................. 36
External Display ............................................. 37
USB Devices ................................................... 39
IEEE 1394 Devices.......................................... 40
Modem ............................................................. 41
LAN .................................................................. 43
Wireless LAN .................................................. 45
Hard Disk Drive............................................... 48
Setup Utility .................................................... 49
Technical Information .................................... 54
DMI Viewer ...................................................... 55
List of Error Codes ......................................... 56
Dealing with Problems (Advanced) .................. 58
When the cursor is moved to an item under [Contents] or to page (green display), the shape of the cursor will
change to . Under this condition, if characters are tapped (or a click is made), the corresponding page in the
Reference Manual will be displayed.
We recommend that this Reference Manual be printed.
Page 2
Read Me First
If the user has logged on without the administrator authority, some functions may not
be executable, and some screens may not be displayed as shown in this manual. If
this happens, log on with the administrator authority to enable these functions.
Confirm the latest information on optional products in catalogs, etc.
Illustrations and Terminology in this Reference Manual
NOTE: NOTE provides a useful fact or helpful information.
CAUTION: CAUTION indicates a condition that may result in minor or moder-
ate injury.
WARNING: WARNING indicates a hazard that may result in moderate or seri-
ous injury.
Windows 2000 : Information for Microsoft Windows
Windows XP : Information for Microsoft Windows
Enter : This illustration means to press the [Enter] key.
Fn + F5 : This illustration means to press and hold the [Fn] key, then press
the [F5] key.
®
®
2
2000 Professional users.
XP Professional users.
[Start]* - [Run]: This illustration means to click [Start]*, then to click [Run].
For some applications, you may need to double-click.
* Windows XP : [start]
: This illustration means to refer to the Operating Instructions.
Windows 2000 screens are used in this manual when no specific OS notes are required.
Some of the illustrations in this manual may differ slightly in shape from the actual
items in order to make the explanation easier to understand.
The following terminology is used in this Reference Manual particularly when notes
are not used.
· Circular media such as CD-ROM and DVD-ROM are described as “discs”.
· The following drives are described as “CD drive”.
DVD-ROM drive, DVD-ROM & CD-R/RW drive, DVD MULTI drive.
Page 3
Key Combinations
CAUTION
Do not press the following key combinations repeatedly in (quick) succession. Also, do not press different key
combinations quickly one after another.
Do not press the following key combinations while using the touch pad (mouse) or other keys.
NOTE
Do not press the following key combinations until you log on to Windows and the hard disk drive indicator turns off.
The key combinations below may not work while some applications are running. Besides, the popup window may
not be displayed depending on the state of the application you are using (e.g., when [Command Prompt] screen
is set to “Full Screen”).
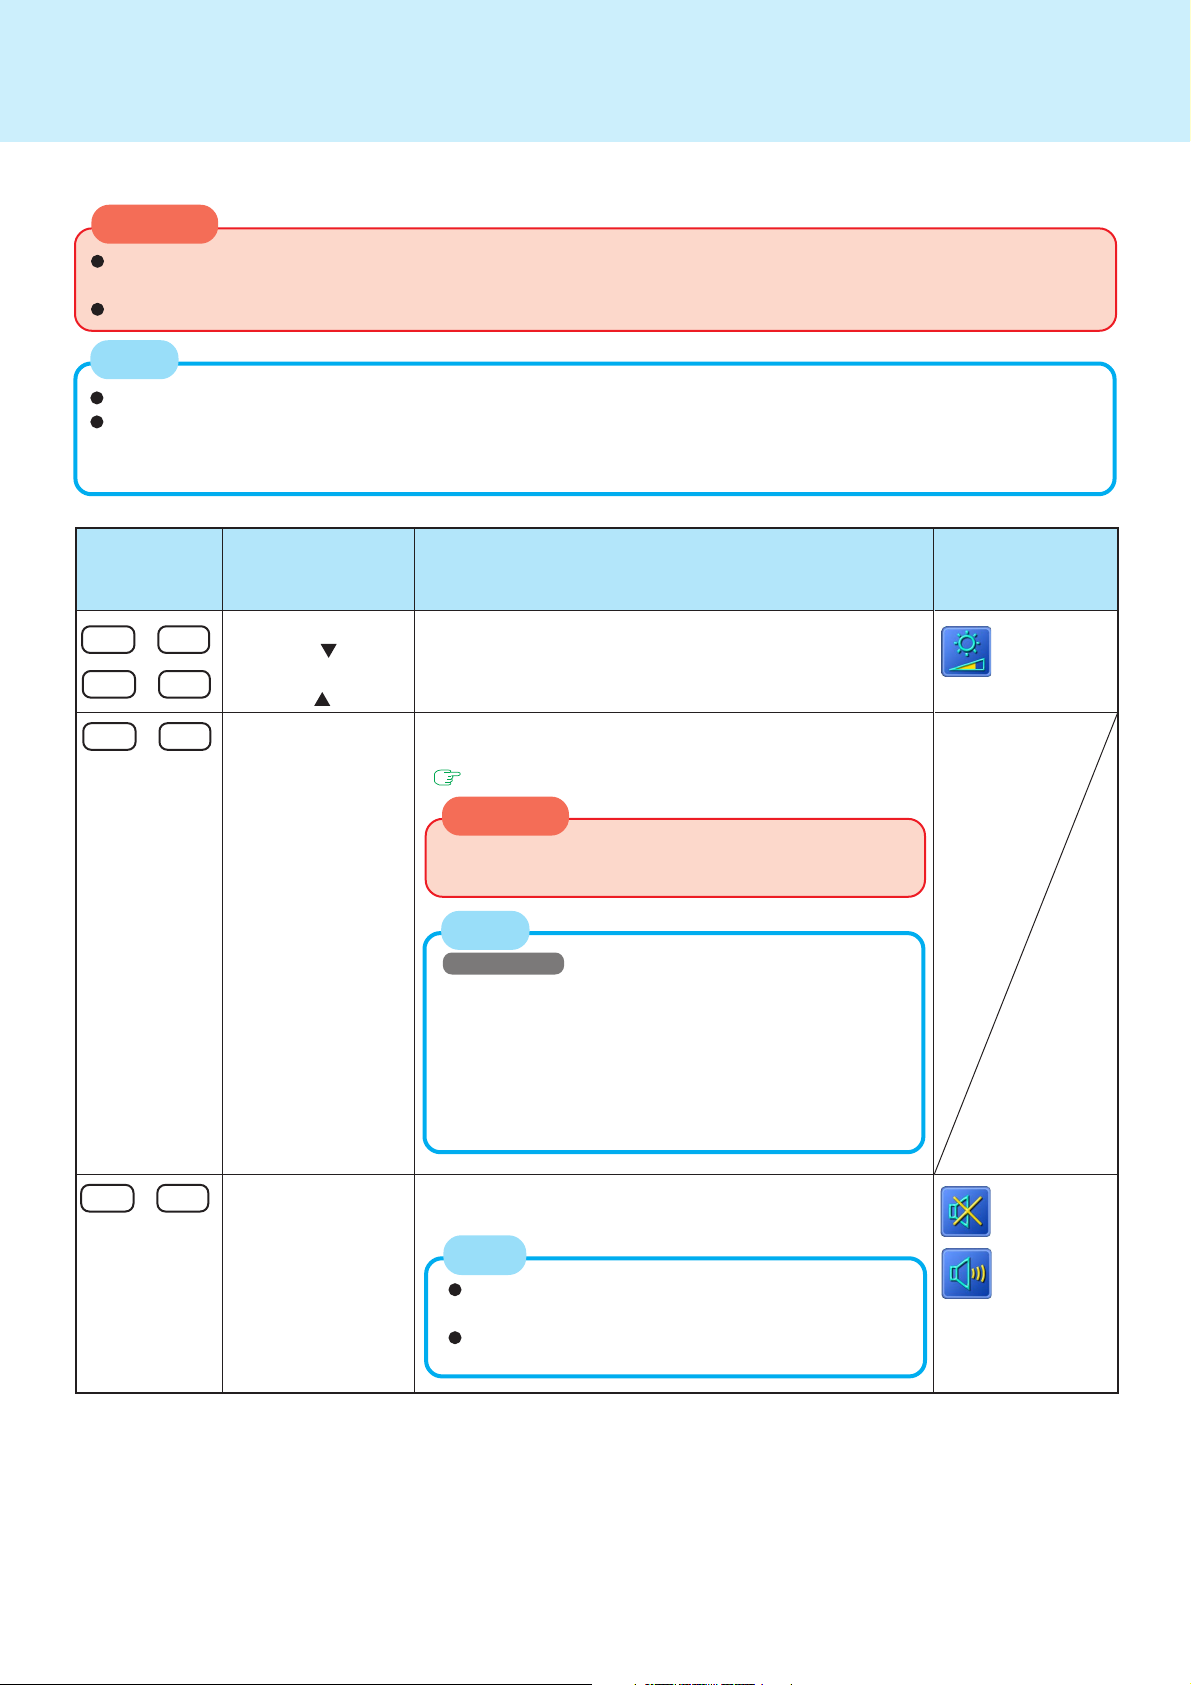
Popup Window
Key Functions
Fn + F1
Fn + F2
Fn + F3
LCD brightness
control ( down)
LCD brightness
control ( up)
Display change
Pressing this key combination adjusts the brightness of LCD.
The brightness setting is stored in memory separately under the condition the AC adaptor is connected and under
the condition the AC adaptor is not connected.
By pressing this key combination, you can select either
an external display, internal LCD or simultaneous.
( page 37)
Function Descriptions
(Displayed after logging on to Windows)
3
Fn + F4
Speaker on/off
switch
CAUTION
Do not press another key until the display destination has been completely switched.
NOTE
Windows XP
When switching to a different user with the Fast User
Switching function, this key combination may not work.
In this case, log off all users, and try the operation
once more. If the problem persists, restart the computer.
The combination does not work when the computer
is in the Dualview mode.
Pressing this key combination turns on/off audio from the
internal speakers and headphone jack.
NOTE
Disabling the speakers will also disable the warning beep.
Speakers connected to the USB port cannot be
muted.
OFF
(MUTE)
ON
Page 4
Key Combinations
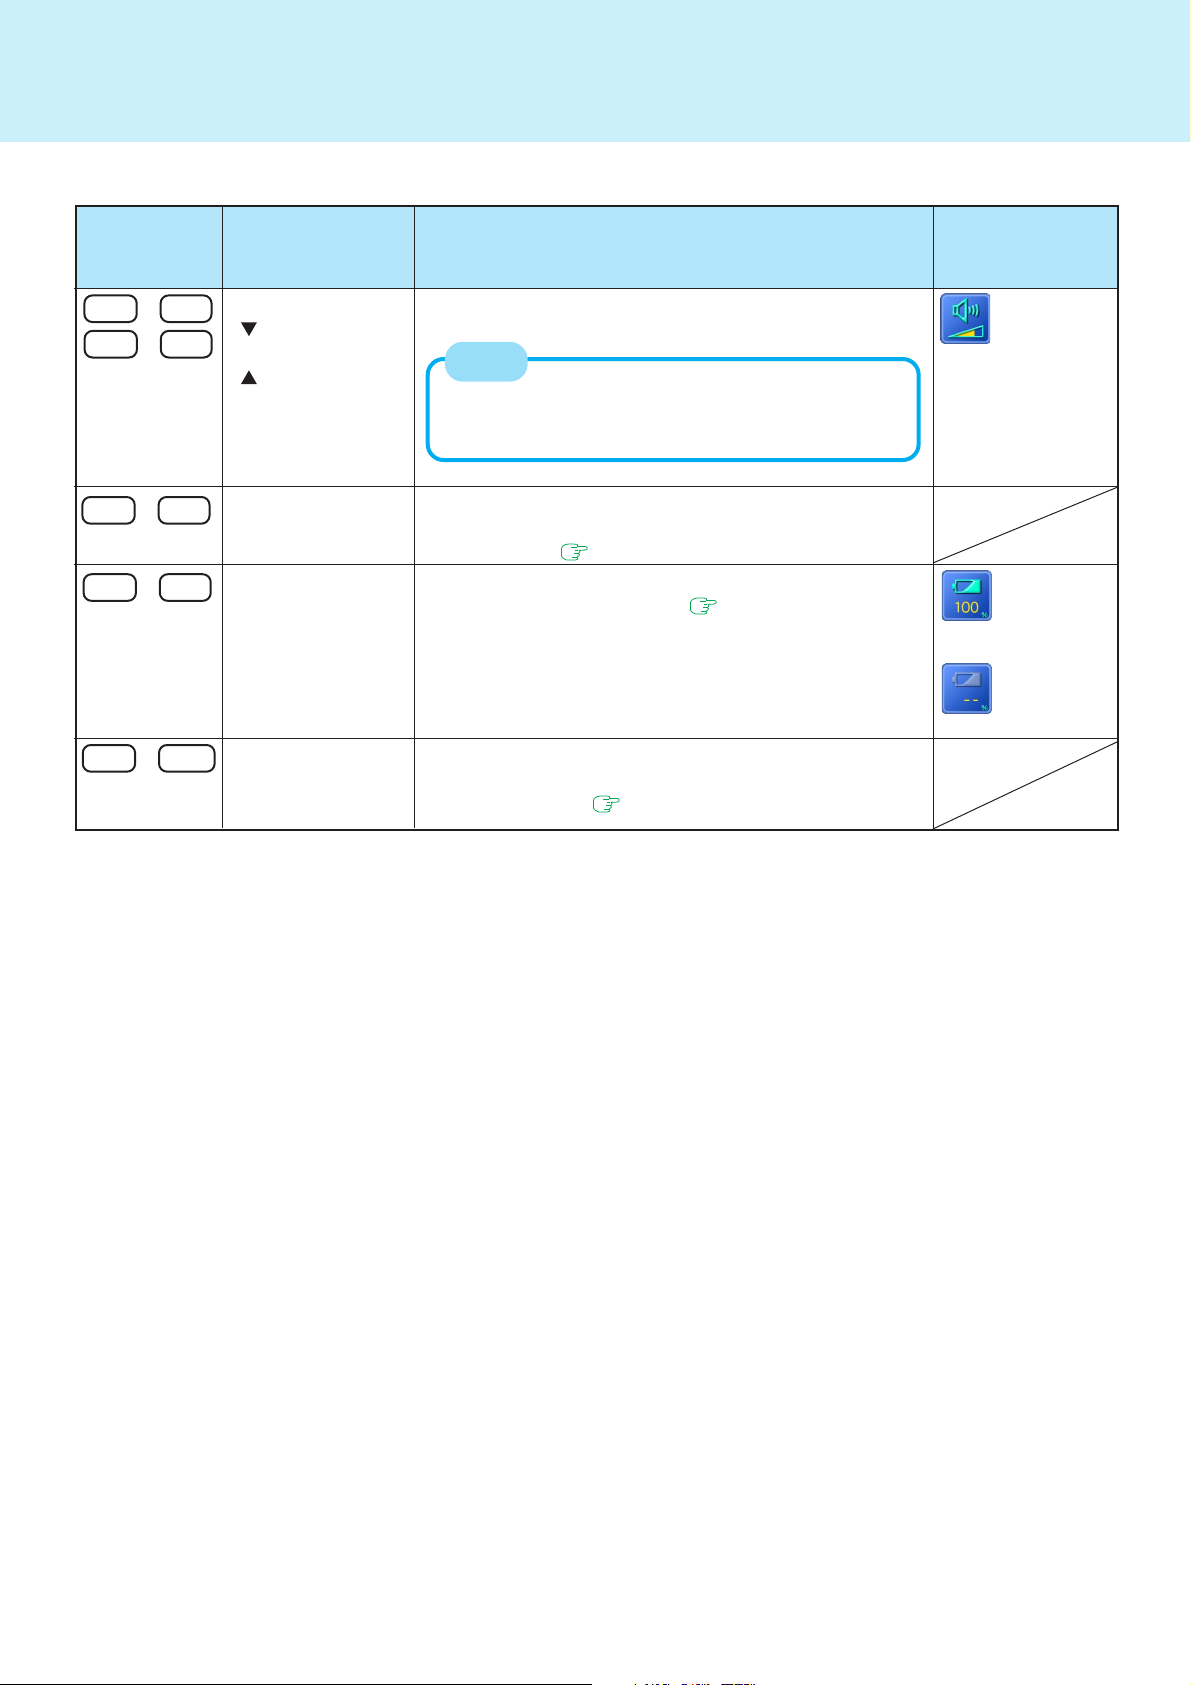
Key
Fn + F5
Fn + F6
Functions
Volume control
( down)
Volume control
( up)
Pressing this key combination adjusts the volume of the
internal speakers and headphone jack.
NOTE
This key combination cannot be used to adjust the
volume of the warning beep or speakers connected
to the USB port.
Function Descriptions
4
Popup Window
(Displayed after logging on to Windows)
Fn + F7
Fn + F9
Fn + F
Power off using
the standby function
Remaining capacity of the battery pack
Power off using
10
the hibernation
function
Pressing this key combination causes the current status
of the computer to be saved to memory, and powers off
the computer. (
Pressing this key combination displays the remaining battery capacity on the screen. (
Pressing this key combination causes the current status
of the computer to be saved to the hard disk, and powers
off the computer. (
page 9)
page 21)
page 9)
(example)
When the battery pack is
inserted in the
computer
When the battery pack is not
inserted in the
computer
Page 5
Key Combinations
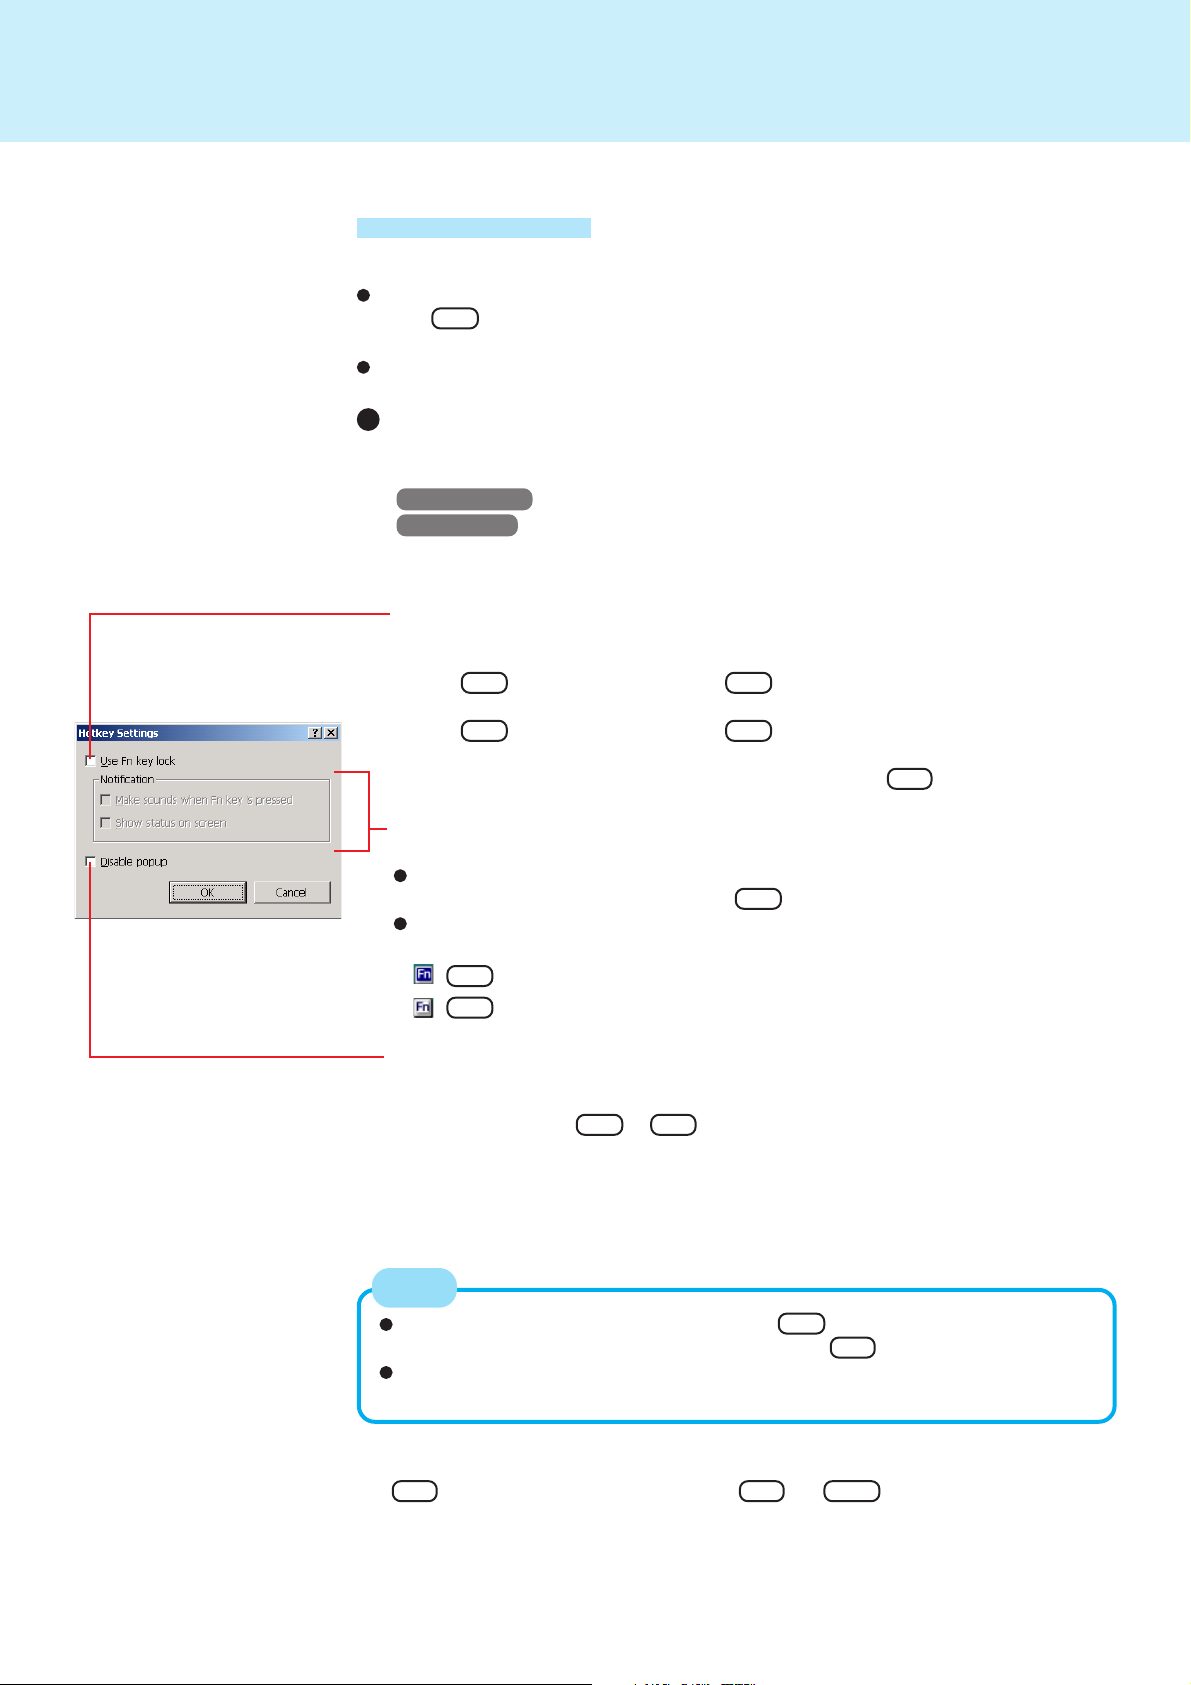
Hotkey Settings
There are two Fn key functions as follows:
Fn key lock function
After Fn is pressed once, it stays in the “pressed” position until another key is
pressed. This is convenient when it is difficult to press two keys simultaneously.
Popup windows display ON/OFF
Settings
1
Run the Hotkey Settings
Windows 2000 Select [Start] - [Programs] - [Panasonic] - [Hotkey Settings].
Windows XP Select [start] - [All Programs] - [Panasonic] - [Hotkey Settings].
2
Set the parameters
Use Fn key lock
Add the check mark if you want to enable the Fn key lock function.
The following Fn key lock function will then be enabled.
To use Fn only once :1Press Fn once. (Locked)
To use Fn successively :1Press Fn twice. (Locked)
2
Press another key for combination. (Lock released)
2
Press another key for combination.
Fn key remains locked until Fn is pressed once more.
5
Notification
This setting is only available when [Use Fn key lock] is checked.
[Make sounds when Fn key is pressed]*1:
Notifies the user with a sound when Fn is locked or released.
[Show status on screen]:
Displays the Fn key status on the taskbar.
: Fn is locked
: Fn is not locked
Disable popup
Add the check mark if you want to turn the popup window display function OFF.
The full-screen display of [Command Prompt] screen or MPEG files may change to
a window display if Fn + Fx *2 are pressed. To prevent this, turn the popup
window display function OFF.
3
Select [OK]
NOTE
The Fn key lock function also works with Fn and other keys (e.g.,keys for
which characters are printed in blue) aside from Fx *2.
Each user can select separate settings for whether or not to use the Hotkey
settings.
*1If MUTE is set, you will not hear a beep.
*2“ Fx ” indicates any function key from F1 to F10 .
Page 6
LED Indicators
6
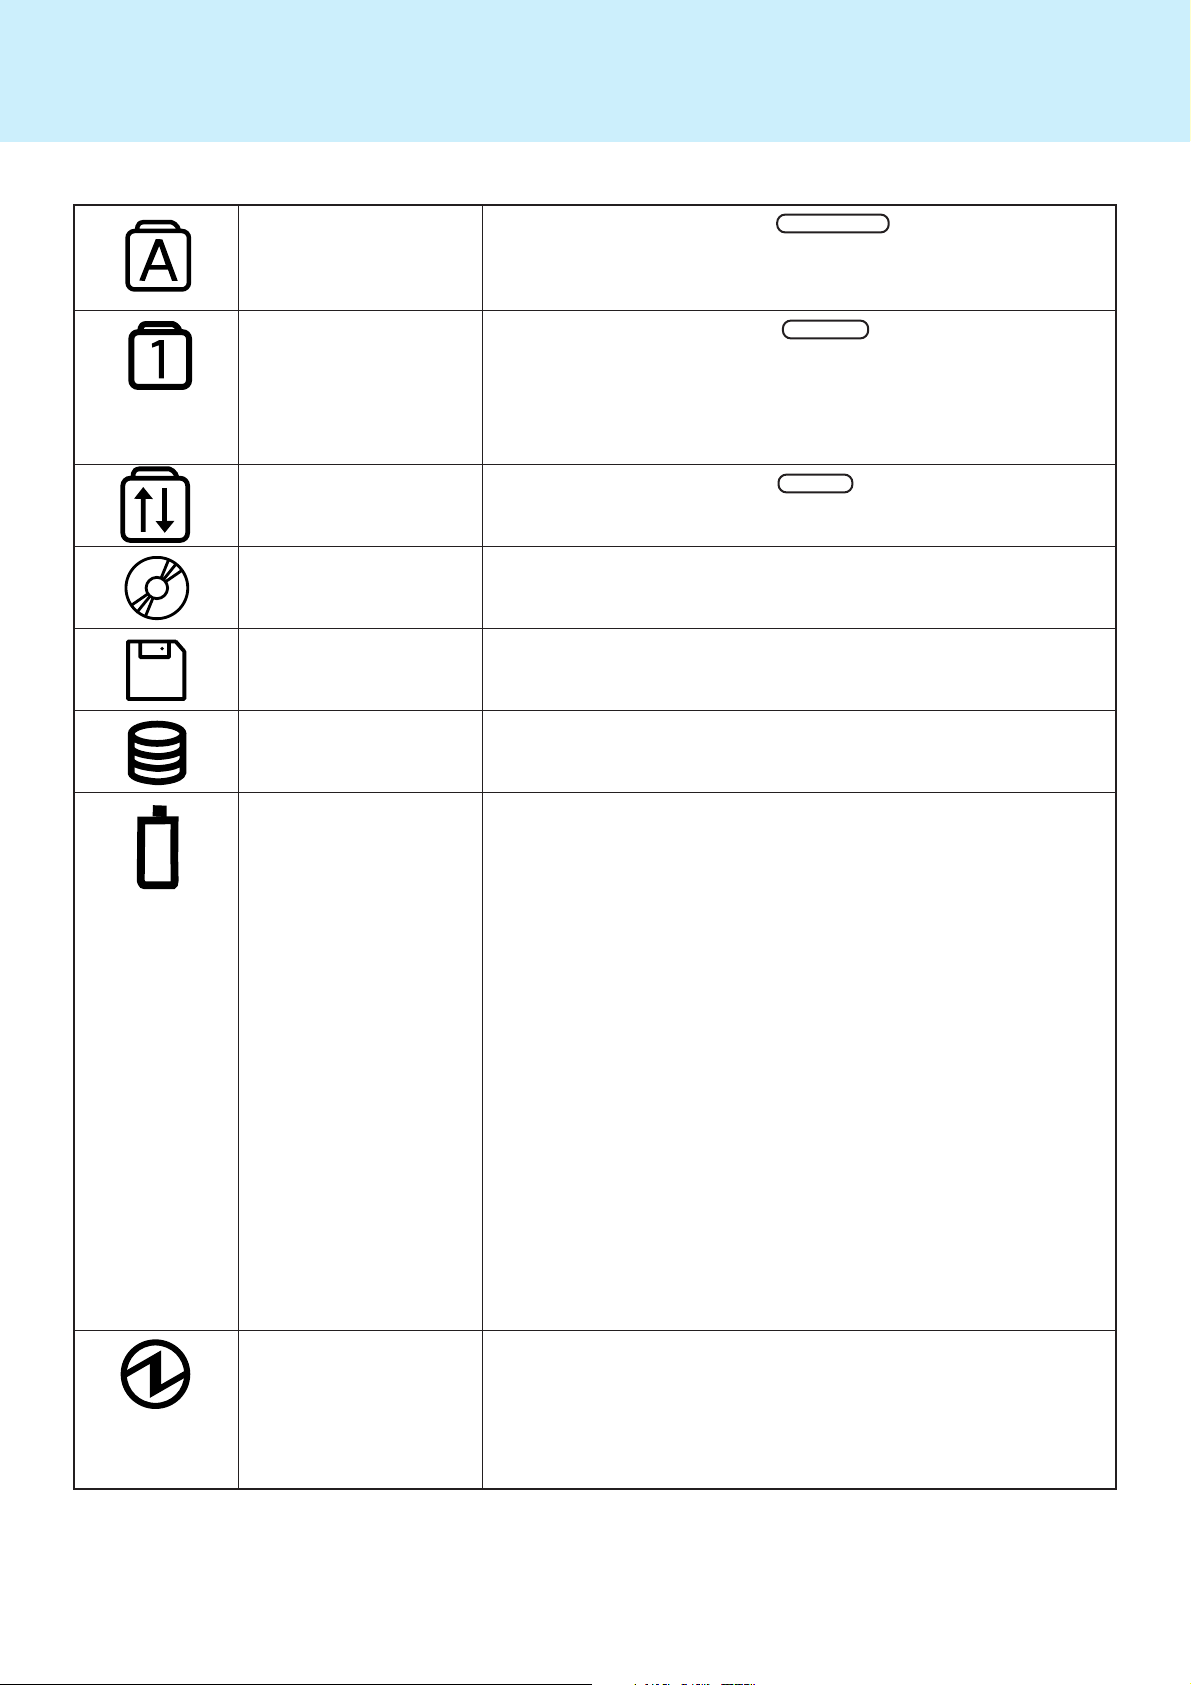
Caps Lock
NumLk
(Numeric key)
ScrLk (Scroll lock)
CD drive status
Floppy disk drive
status
Hard disk drive status
This indicator lights green when Caps Lock is pressed. Subsequent
non-shifted input is capitalized.
This indicator lights green when NumLK is pressed. This causes a
portion of the keyboard to function as a numeric keypad. The [Enter]
key functions differently depending on the application.
(If an external keyboard or ten-keyboard is connected to the external
keyboard/mouse port, the numeric keypad of the internal keyboard will
not operate.)
This indicator lights green when ScrLK is pressed. Scroll lock functions differently depending on the application.
This indicator lights when the CD drive is accessed.
The access lamp on the CD drive lights at the same time as this indicator. (In some cases, only one of them may light.)
This indicator lights when the floppy disk drive is accessed.
This indicator lights when the hard disk drive is accessed.
Battery pack status
Power status
Not lit : Battery pack is not connected or charging not
being performed.
Orange* : Charging in progress.
Green* : Fully-charged.
Red : The battery level is very low (the charge is less
than approx. 9% capacity).
Connect the AC adaptor. You can use the computer when the indicator light is orange. If you do
not have an AC adaptor, save your data and power
off your computer. After replacing the battery pack
with a fully charged one, turn your computer on.
Blinking red* : Battery pack or charging may not be working prop-
erly. Quickly save your data and power off your
computer. Remove the battery pack and disconnect the AC adaptor, then connect them again.
If the problem persists, contact Panasonic Technical Support.
Blinking orange* : Battery cannot be recharged because the inter-
nal temperature of the battery pack is outside of
the acceptable temperature range for recharging.
Once the allowable range requirement is satisfied, charging begins automatically.
Not lit : Power off / Hibernation mode
Green : Power on
Blinking green : Standby mode
Blinking green rapidly : Due to extremely low temperatures, power
cannot be turned on, or computer cannot
resume from standby mode.
* When the AC adaptor is connected.
Page 7
Touch Pad
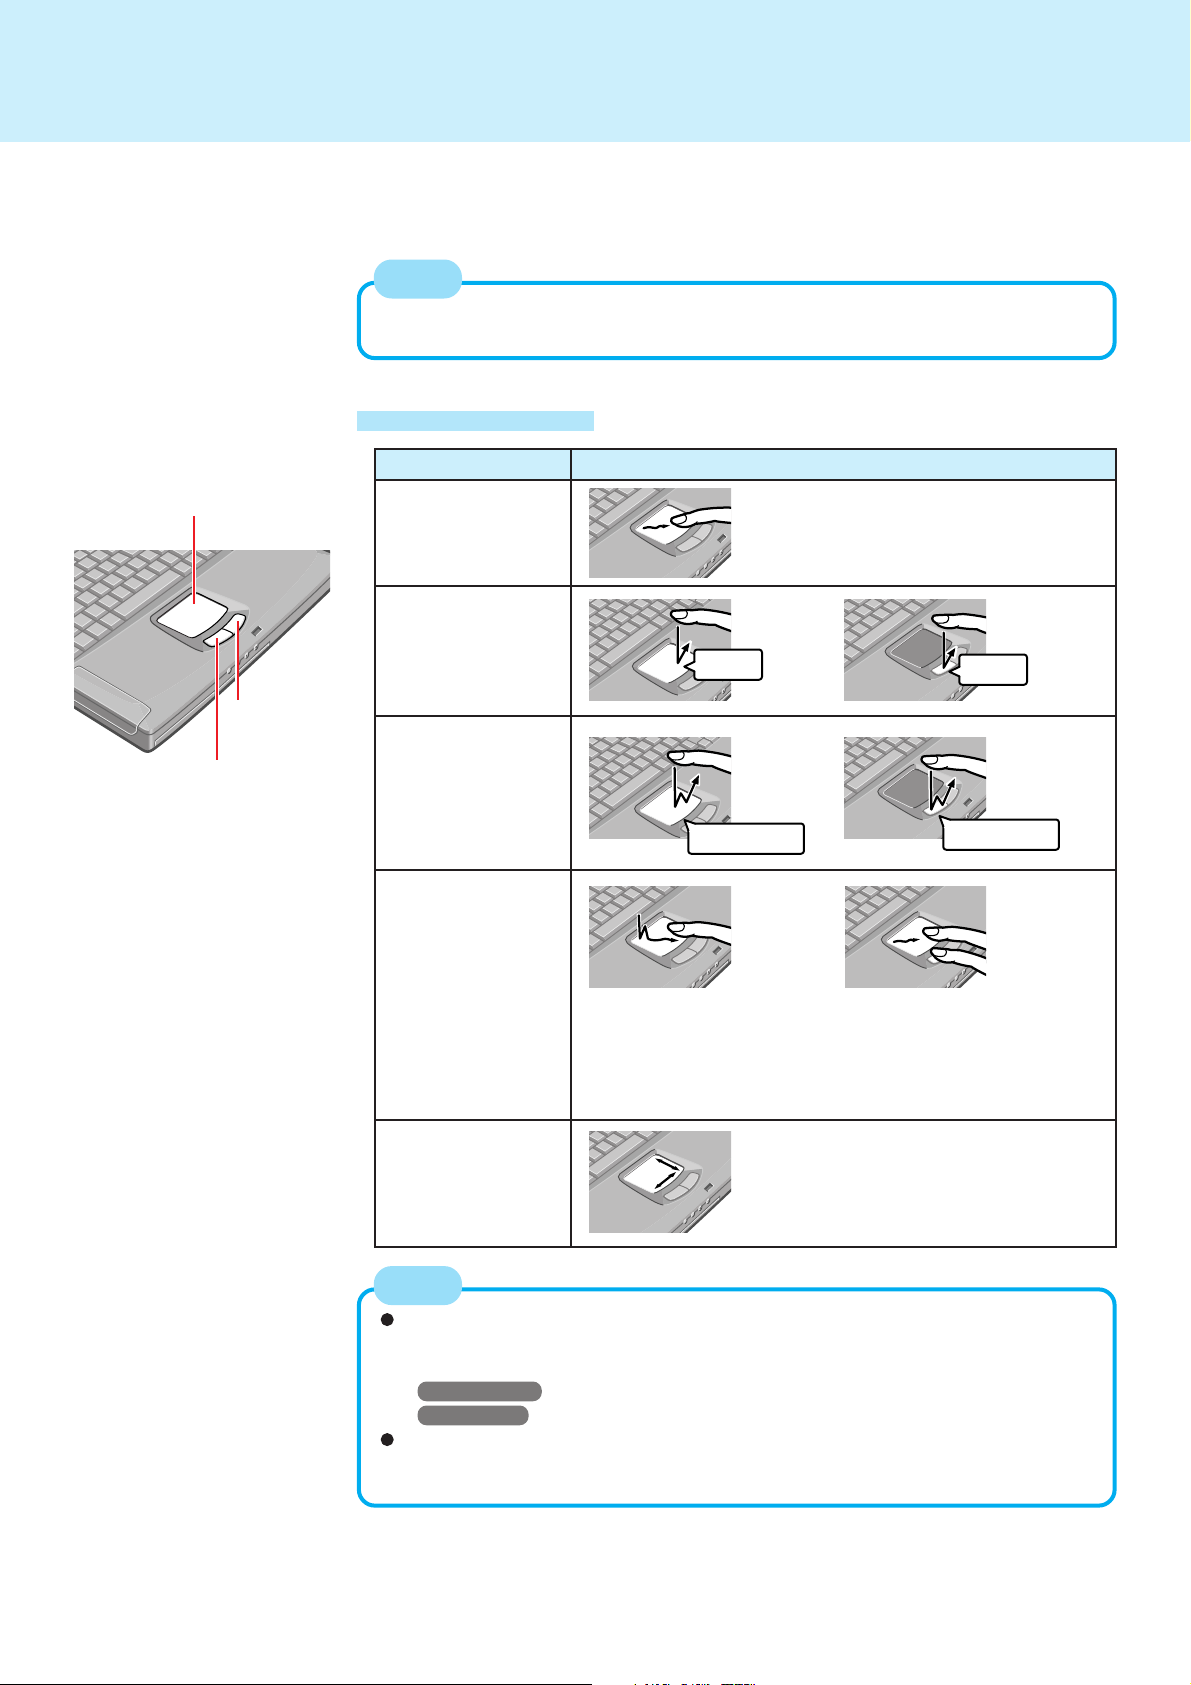
Use the touch pad to move the cursor on the display and perform normal computer
operations.
Basic Operation
Work Surface
NOTE
By design the touch pad is to be used with a finger tip only. Therefore, do not use
any implement which causes damage on the work surface.
Function Operation
Moving the Cursor
Move the tip of your finger
lightly over the surface.
Tapping/Clicking
or
tapping
clicking
7
Right Button
Left Button
Double-Tapping/
Double-Clicking
or
double-clicking
Dragging
Scroll
Scroll a document
(The movements will differ depending on the application.)
double-tapping
or
Two quick taps, but on the
second tap leaving your
finger down (applying
pressure) and moving it
on the work surface.
While holding down the
button, moving your finger
on the work surface.
NOTE
Besides the above operations, operations such as Zoom and Pan are possible
by allocating these functions to the buttons and/or pad. For more details, refer to
[Mouse Properties]*.
* Windows 2000 : In [Control Panel] - [Mouse].
Windows XP : In [Control Panel] - [Printers and Other Hardware] - [Mouse].
The operations of Scroll, Pan or Zoom will differ depending on the application.
There are cases the touch pad will not support these operations even with an
application that supports the functions.
Page 8

Touch Pad
8
Handling the Touch Pad
Do not place any object on the work surface or press down forcefully with sharppointed objects (e.g. nails) or hard objects that can leave marks (e.g. pencils and
ball point pens).
Try to avoid having any harmful substances, such as oil, come in contact with the
touch pad. The cursor may not work properly in such cases.
When the touch pad becomes dirty:
Wipe to remove dirt by using a dry soft cloth such as gauze or a soft cloth first
applied with detergent diluted with water and then thoroughly wrung.
Do not use benzene or thinner, or rubbing alcohol. Doing so may adversely affect
the surface, e.g., discoloration. In addition, do not use commercially-available
household cleaners and cosmetics, as they may contain components harmful to
the surface.
Page 9
Standby/Hibernation Functions
Starting Up Your Computer Quickly
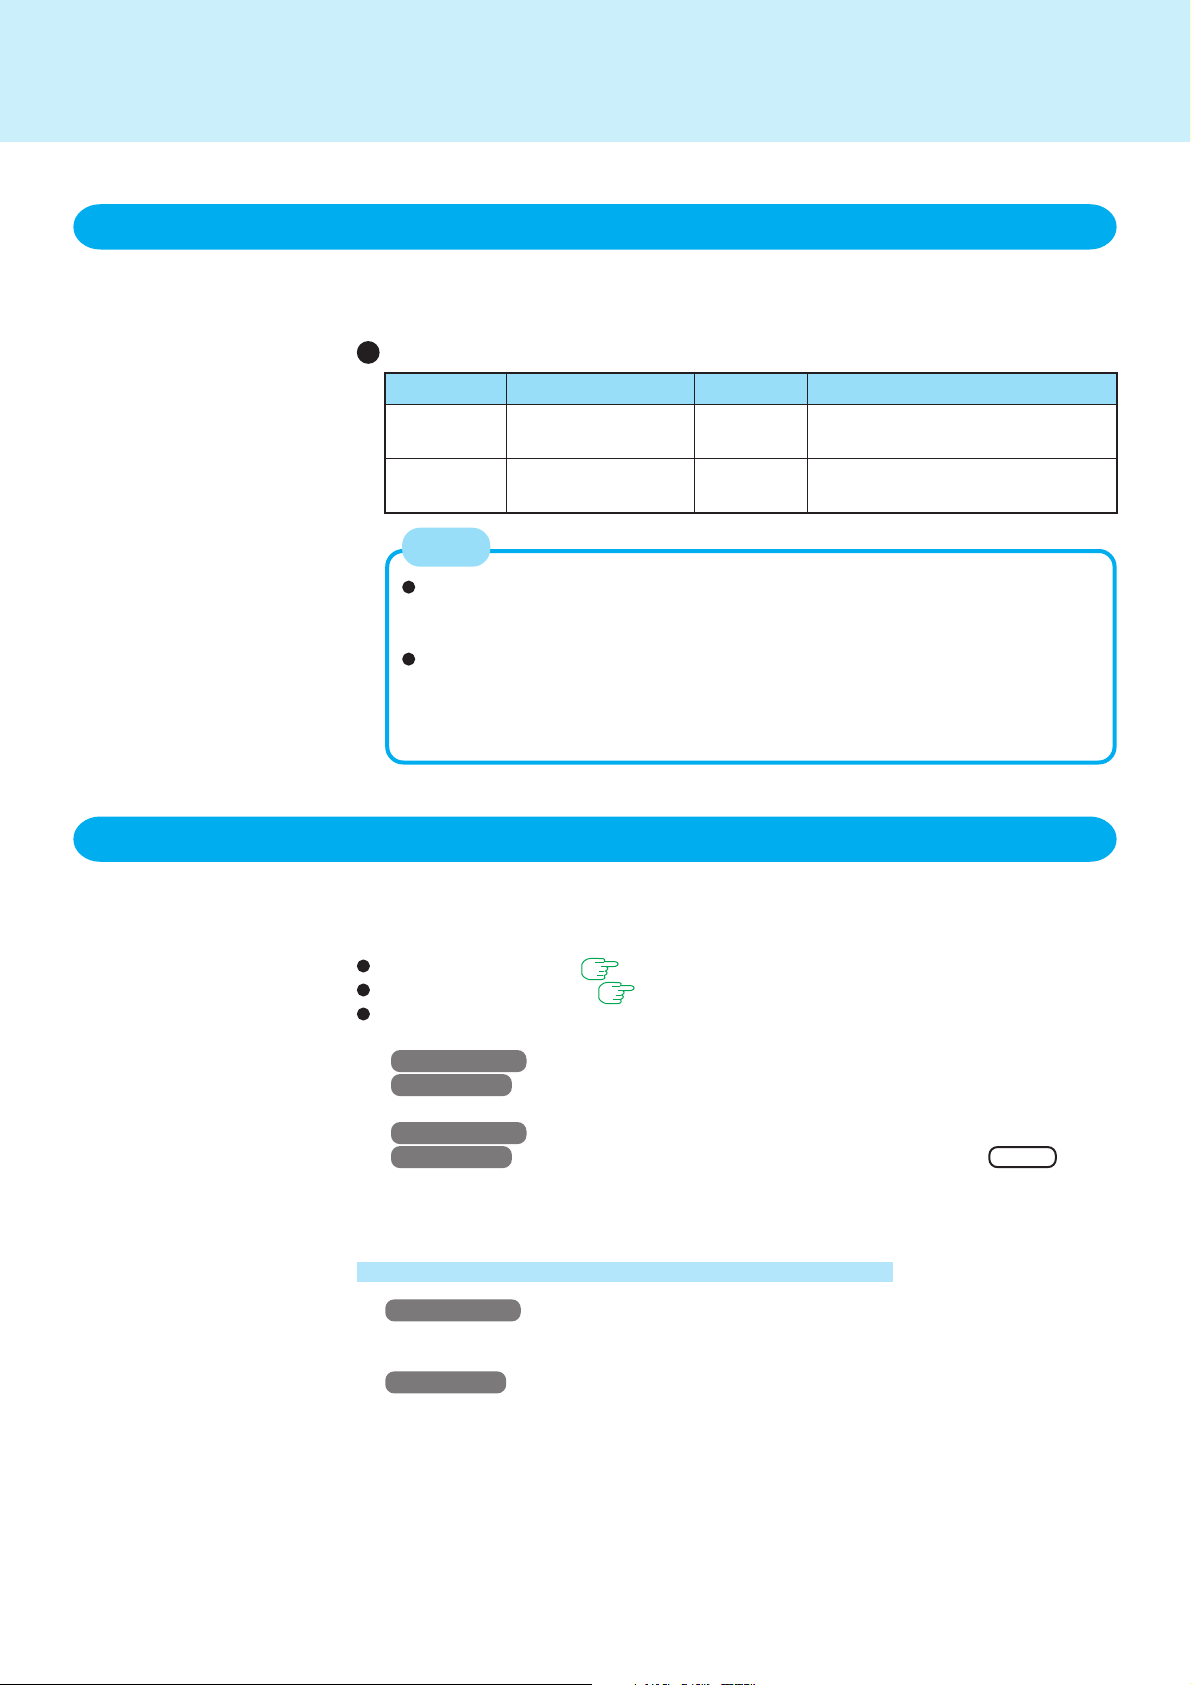
If you want to immediately start up and continue an application after shutting down your
computer, you can do so by using either the standby or hibernation function.
Differences between the standby and hibernation functions
Function Where data is saved to Speed Requires power supply
Standby Memory Fast Yes (if power is cut, all data is lost)
function
Hibernation Hard disk Somewhat Power is not required to maintain data
function slow
NOTE
We recommend plugging in the AC adaptor if the standby function is to be
used for a long period of time. If the AC adaptor cannot be connected, we
recommend that hibernation mode be used instead of the standby mode.
If the standby or hibernation function is used repeatedly, the computer may
not work properly. To stabilize computer operations, we recommend shutting
down Windows on a regular basis (about once a week) without using the
standby or hibernation function.
9
Entering the Standby or Hibernation mode
Use any of the following methods to enter the standby or hibernation mode.
To use the hibernation mode, make the setting below in advance. (Enabled in factory
preset.)
Fn key combinations ( page 3)
Using the power switch ( page 11)
From the shut down screen:
• Standby
Windows 2000 : In [Start] - [Shut Down], select [Stand by].
Windows XP : In [start] - [Turn Off Computer], select [Stand By].
• Hibernation
Windows 2000 : In [Start] - [Shut Down], select [Hibernate].
Windows XP : In [start] - [Turn Off Computer], press and hold Shift , then
select [Hibernate].
Setting for using the hibernation mode
Windows 2000
1
Select [Start] - [Settings] - [Control Panel] - [Power Options].
2
In [Hibernate], add the check mark for [Enable hibernate support] and select [OK].
Windows XP
1
Select [start] - [Control Panel] - [Performance and Maintenance] - [Power Options].
2
In [Hibernate], add the check mark for [Enable hibernation] and select [OK].
(To next page)
Page 10

Standby/Hibernation Functions
Precautions
Before entering the standby or hibernation mode
Be sure to save all data.
When a file in an external device such as a CD drive, external hard disk, or ATA
card is opened, close the file.
Even when a password has been set in the Setup Utility, [Enter Password] does
not appear when the computer resumes from the standby or hibernation mode.
If you want to use the security function when using the standby or hibernation
mode, use the Windows password as follows:
Windows 2000
1
Set the password in [Start] - [Control Panel] - [Users and Passwords].
2
Add the check mark for [Prompt for password when computer goes off standby]
in [Control Panel] - [Power Options] - [Advanced].
Windows XP
1
Select the account to change in [Control Panel] - [User Accounts].
2
Set the password.
3
Add the check mark for [Prompt for password when computer resumes from
standby] in [start] - [Control Panel] - [Performance and Maintenance] - [Power
Options] - [Advanced].
Do not enter either the standby or hibernation mode under the following conditions. You may corrupt your data or file, the standby or hibernation function may
not work, or the computer (or peripherals) may fail to work properly.
• When the floppy disk drive indicator ( ), hard disk drive indicator ( ), CD drive
indicator ( ) or access lamp on the CD drive is on ( page 6).
• When playing/recording audio files and displaying images (such as MPEG files).
• When using the communications software and the network function.
• When using LAN port (cards), SCSI cards and modem port (cards) etc. (If these
cards fail to work properly, restart the computer.)
10
When entering the standby or hibernation mode
Standby mode: until the power indicator blinks green
Hibernation mode: until the power indicator goes off
Avoid the following:
• Using the keyboard, touch pad, or power switch.
• Using external mouse or other peripheral devices.
• Connecting or disconnecting the AC adaptor.
• Closing or opening the display.
In standby or hibernation mode
Do not insert or remove peripherals; abnormal operation may result.
In standby mode, power is consumed. If PC Cards are inserted, more of that
power is consumed. When all power has been consumed, all data saved at standby
is lost since it is retained in memory. We therefore recommend plugging in the AC
adaptor when using the standby function.
Page 11
Standby/Hibernation Functions
Using the Power Switch
Setting
Windows 2000
1
Select [Start] - [Settings] - [Control Panel] - [Power Options] - [Advanced].
2
Select [Standby] or [Hibernate] for [When I press the power button on my computer] and then select [OK].
Windows XP
1
Select [start] - [Control Panel] - [Performance and Maintenance] - [Power Options]
- [Advanced].
2
Select [Stand by] or [Hibernate] for [When I press the power button on my computer], then select [OK].
Shutting down
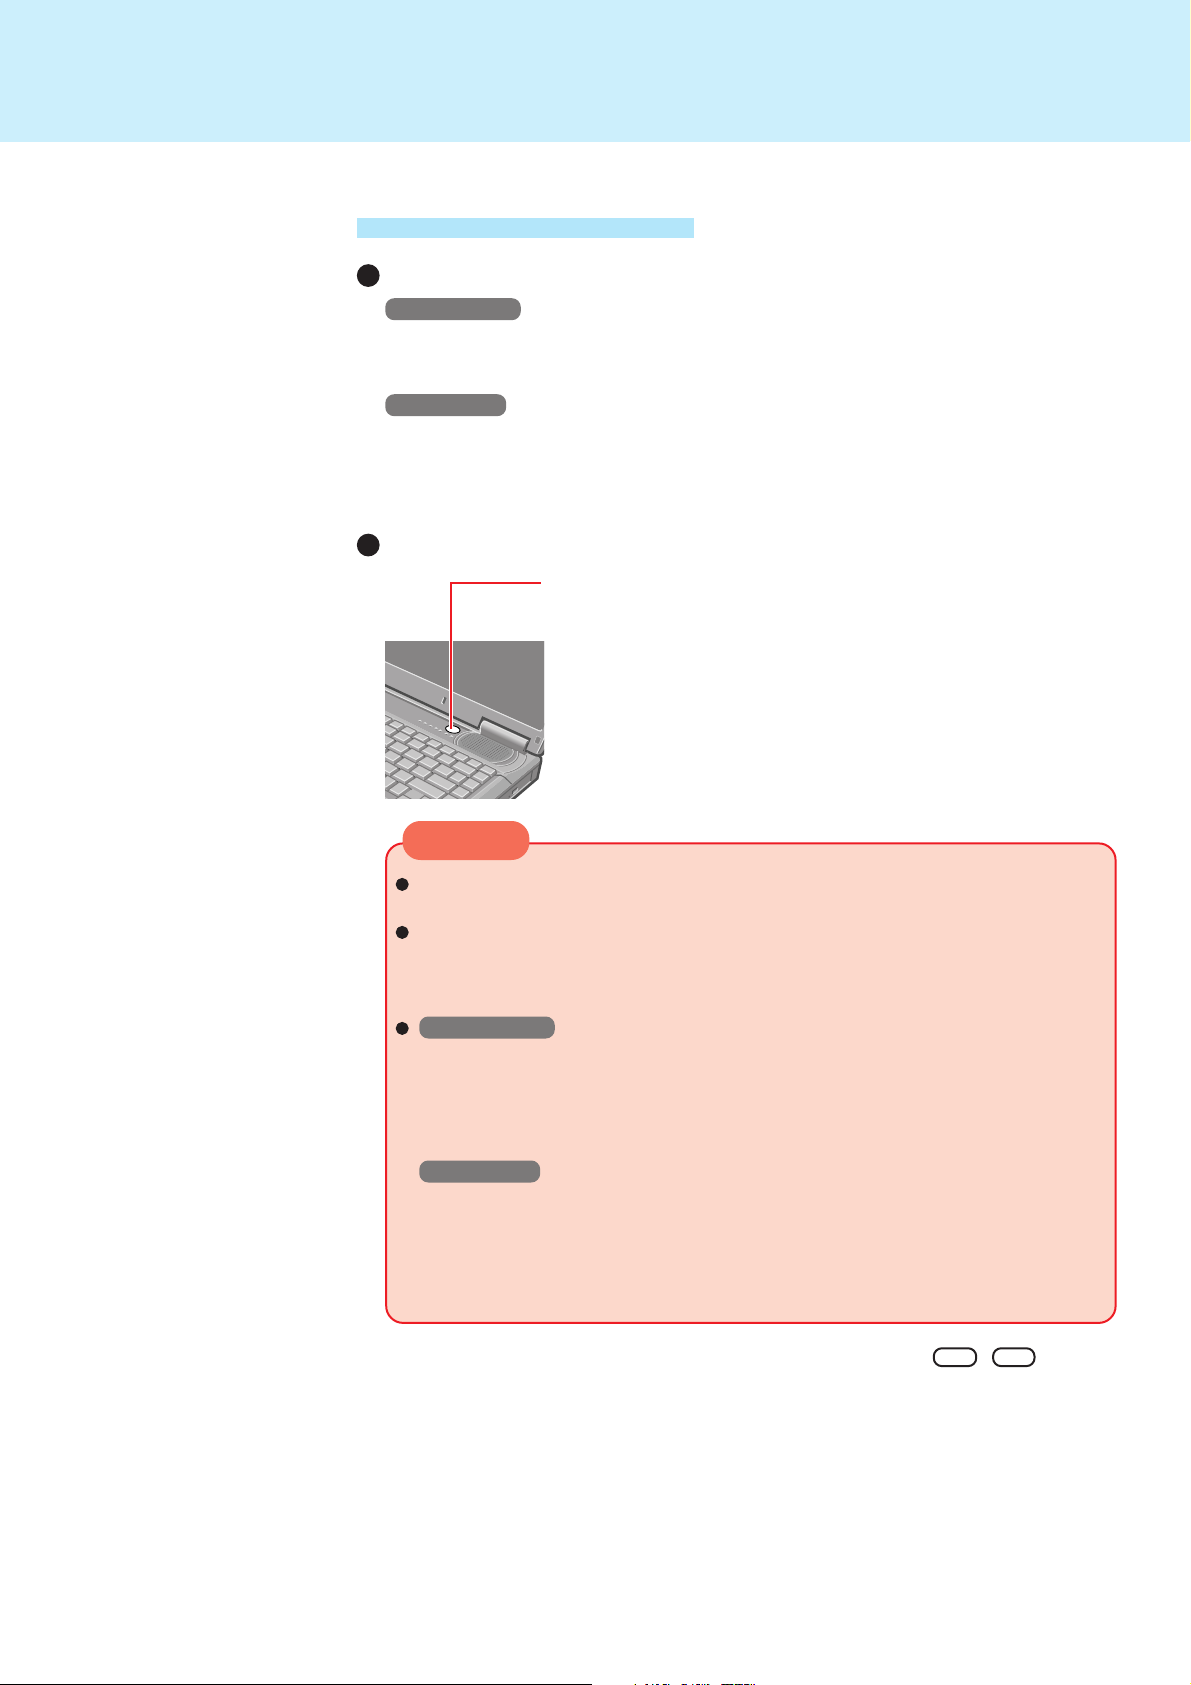
Press the power switch; at the “beep*” sound, release your finger
The computer will enter either the standby or hibernation mode,
depending on the setting.
11
CAUTION
After releasing your finger from the power switch, do not touch the power switch
until the power indicator goes off or blinks.
At the “beep*” sound, release your finger from the power switch. If you continue to press down on the switch and hold it for more than four seconds, the
unit will emit a second “beep*” then power off. Data not previously saved will
be lost.
Windows 2000
Even when [When I press the power button on my computer] is set to [Power
Off] with [Start] - [Settings] - [Control Panel] - [Power Options] - [Advanced], if
you press the power switch for more than four seconds and do not release it, a
second “beep*” will sound and the computer will be turned off forcibly. Data not
previously saved will be lost.
Windows XP
Even when [When I press the power button on my computer] is set to [Shut
down] with [start] - [Control Panel] - [Performance and Maintenance] - [Power
Options] - [Advanced], if you press the power switch for more than four seconds and do not release it, a second “beep” will sound and the computer will
be turned off forcibly. Data not previously saved will be lost.
* When the speaker function is disabled, e.g., by the key combination Fn + F4 , there will
be no beep sound.
Page 12
Standby/Hibernation Functions
Resuming Operation
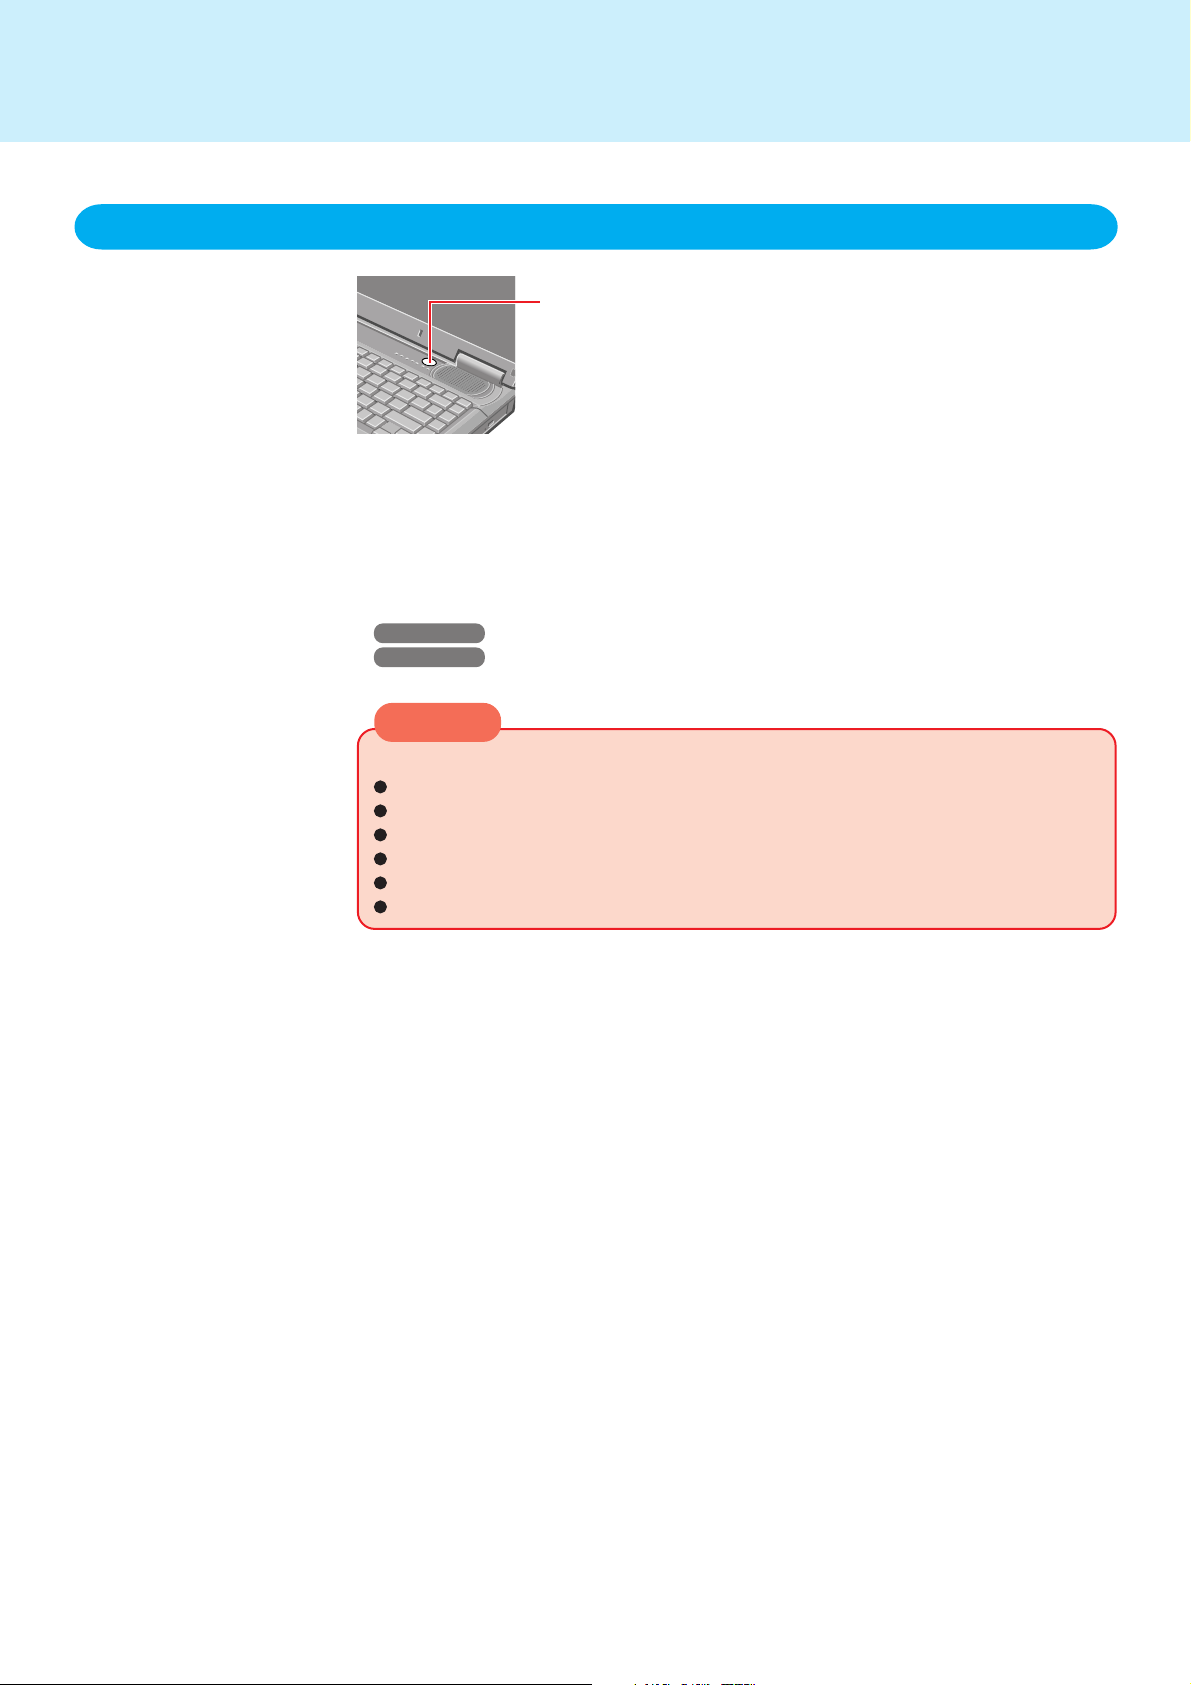
Press the power switch
When [Standby]*1 or [Hibernate] is selected as the setting for [When I close the lid of my
portable computer] in [Control Panel]*2 - [Power Options] - [Advanced], the computer
will enter either the standby or hibernation mode when the LCD panel is closed. Operation will resume when the LCD panel is opened. Even if the display is closed after the
computer has entered either the standby or hibernation mode, operation will resume
when the display is opened. If the computer does not resume when the LCD panel is
opened, press the power switch.
1
*
Windows XP : [Stand by]
2
*
Windows XP : [Control Panel] - [Performance and Maintenance]
12
CAUTION
Until resuming is complete (requires about 15 seconds), avoid the following:
Touching the keyboard (except for password input), touch pad, or power switch.
Using external mouse or other peripheral devices.
Connecting or disconnecting the AC adaptor.
Closing or opening the display.
Shutting down or restarting Windows.
Entering either the standby or hibernation mode again.
Page 13
Security Measures
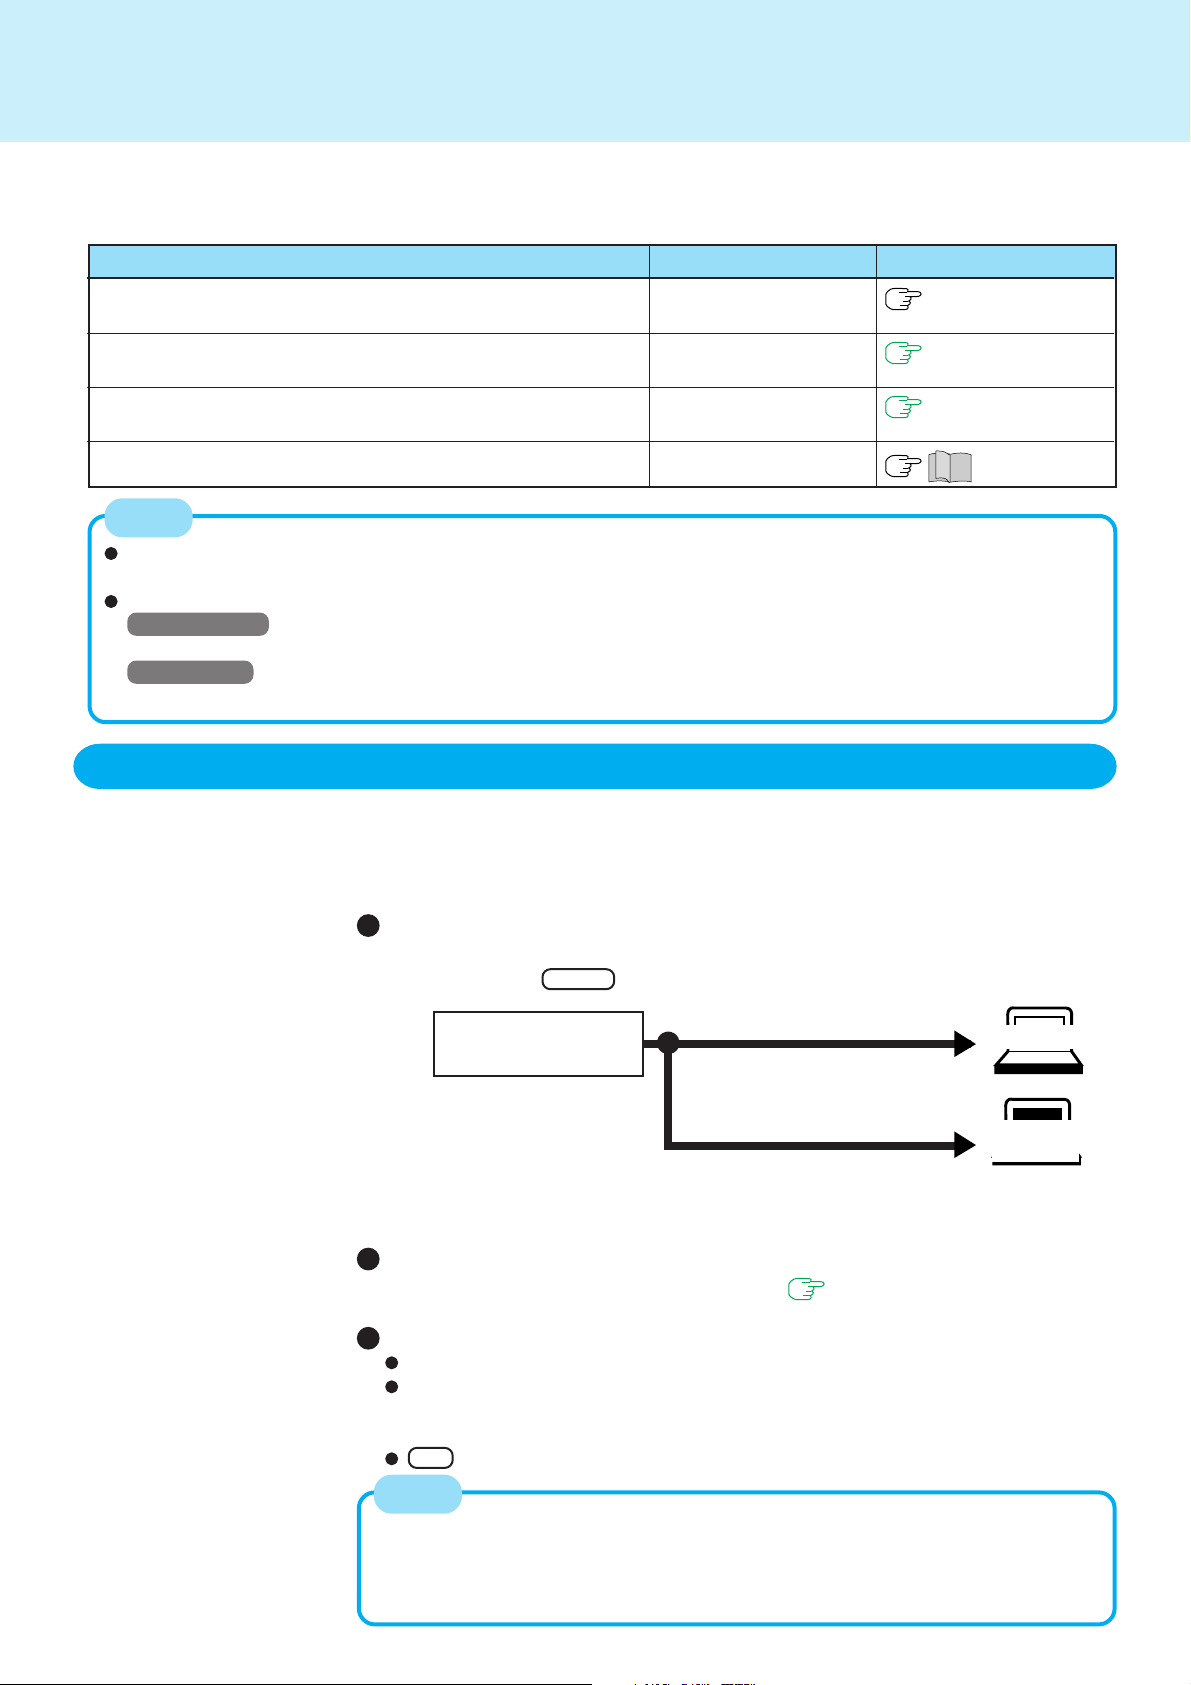
To prevent unauthorized access of your computer, the various security measures are provided below.
13
ReferenceSituation
below
page 16
page 17
“Names and Functions of Parts”
You do not want your computer to be used without permission
You do not want the data on the hard disk to be read, or data to
be written to the hard disk, in cases including theft.
You want to prevent theft or damage to data by using a floppy
disk
You want to prevent theft of your computer
Function to use
Supervisor Password
User Password
Hard Disk Lock
Prevent operation by
using a floppy disk
Security lock
NOTE
Windows has a security function that differs from the above security measures. For detailed information, refer to
the Windows help.
For security functions for the wireless LAN, refer to the following menu.
Windows 2000
Select [Getting Started Guide] or [User’s Guide] in [Start] - [Programs] - [Intel].
Windows XP
Select [Getting Started Guide] or [User’s Guide] in [start] - [All Programs] - [Intel].
When you do not want your computer to be used without permission
You should set your “Supervisor Password” and “User Password” (The User Password
can only be set when the Supervisor Password has been set).
Without the password, access to your computer is impossible.
Starting up when the password is set
When [Password on boot] of [Security] menu is set to [Enable], enter your password*1 and press Enter .
Enter Password [ ]
*1Supervisor Password or User Password set in the Setup Utility (not the Windows password).
2
Even if no password is entered for about a minute when starting up the Setup Utility, the
*
power will not be turned off.
The correct password
Three incorrect attempts
or
No password for about a minute*
Will Start
2
Will Not Start
(Power off)
When the Setup Utility is started with the Supervisor Password
You can register all items of the Setup Utility ( page 49).
When the Setup Utility is started with the User Password
You can not register [Advanced] menu and [Boot] menu.
[Set Supervisor Password] and [Hard Disk Lock] will not be displayed on [Security] menu. The User Password can be changed only when [User Password Protection] has been set to [No Protection]. The User Password cannot be deleted.
F9 does not work.
NOTE
When [Password on boot] in the Setup Utility is set to [Disable], the password is not
necessary when the computer is started up, but the password becomes necessary
when the Setup Utility is started up. This alternative makes it possible to prevent the
contents of the Setup Utility from being changed.
Page 14
Security Measures
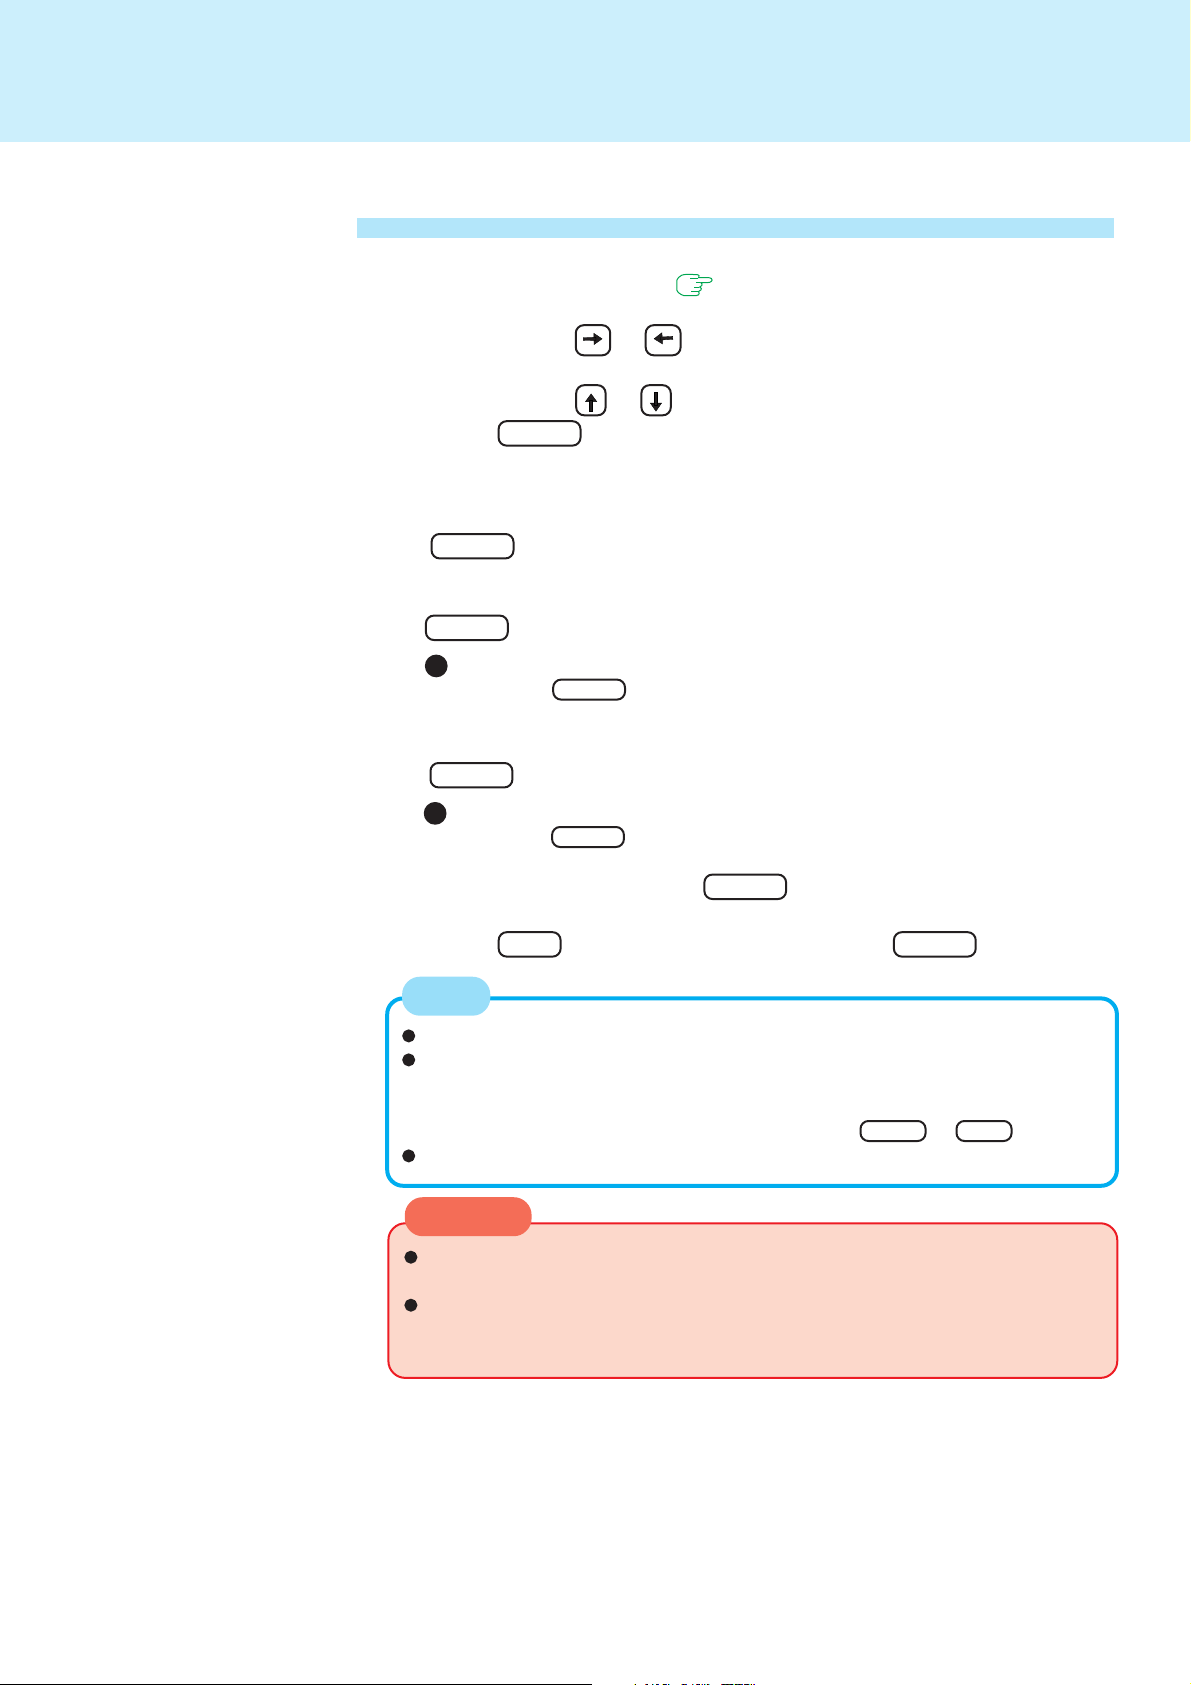
Setting the Supervisor Password (enabling, changing, disabling)
1
Run the Setup Utility ( page 49)
2
Using either or , select [Security]
3
Using either or , select [Set Supervisor Password] and
press Enter
4
<Only when the Supervisor Password has been set>
Enter your password at [Enter Current Password] and press
Enter
5
Enter your password at [Enter New Password] and press
Enter
To disable the Supervisor Password
Press only Enter
14
6
Re-enter your password at [Confirm New Password] and press
Enter
To disable the Supervisor Password
Press only Enter
7
At [Setup Notice], press Enter
8
Press F10 and select [Yes], then press Enter
NOTE
Your password will not be displayed on the screen.
Only up to seven alphanumeric characters can be used.
• There is no distinction between upper and lower case letters.
• Use only the upper horizontal row of numeric keys to input your password.
• Do not input your password while holding down Shift or Ctrl .
Disabling the Supervisor Password also disables the User Password.
CAUTION
Do not forget your password. If your Supervisor Password is forgotten you
will be unable to use your computer. Contact Panasonic Technical Support.
When running the Setup Utility, do not leave your computer even for a short
time, as the possibility exists for the password to be set/changed by another
person.
Page 15
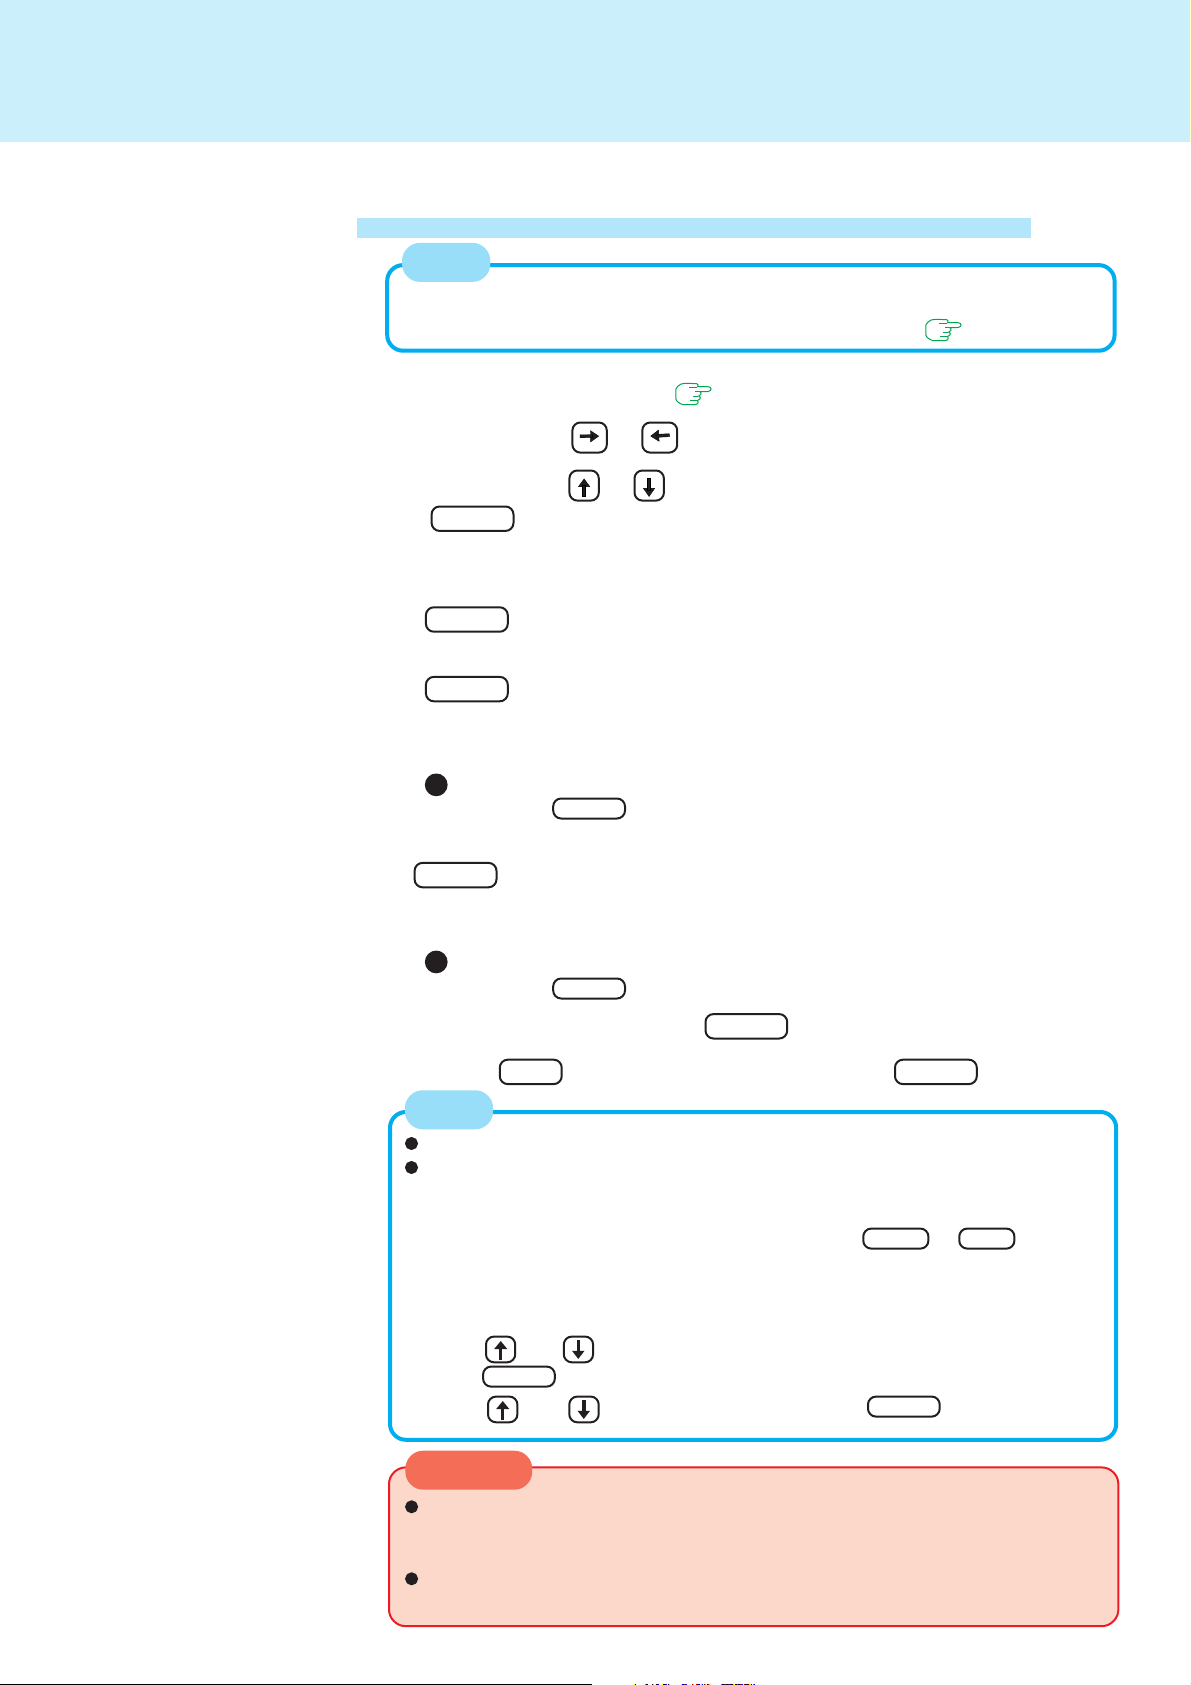
Security Measures
Setting the User Password (enabling, changing, disabling)
NOTE
When the Supervisor Password has not been set, the User Password can not be
set. Set the Supervisor Password if you have not done so. ( page 14)
1
Run the Setup Utility ( page 49)
2
Using either or , select [Security]
3
Using either or , select [Set User Password] and press
Enter
4
<Only when the User Password has been set>
Enter your password at [Enter Current Password] and press
Enter
5
Enter your password at [Enter New Password] and press
Enter
15
<When the Setup Utility is started up with the Supervisor Password>
To disable the User Password
Press only Enter
6
Re-enter your password at [Confirm New Password] and press
Enter
<When the Setup Utility is started up with the Supervisor Password>
To disable the User Password
Press only Enter
7
At [Setup Notice], press Enter
8
Press F10 and select [Yes], then press Enter
NOTE
Your password will not be displayed on the screen.
Only up to seven alphanumeric characters can be used.
• There is no distinction between upper and lower case letters.
• Use only the upper horizontal row of numeric keys to input your password.
• Do not input your password while holding down Shift or Ctrl .
When you do not want the User Password enabled or changed without
permission:
1
Run the Setup Utility and enter the Supervisor Password.
2
Using and , select [User Password Protection] in [Security] menu and
press Enter .
3
Using and , select [Protected] and press Enter .
CAUTION
Do not forget your password. If a password is forgotten, you will be unable to
use your computer. If this happens, log on with the Supervisor Password, or
ask a person who knows the Supervisor Password.
When running the Setup Utility, do not leave your computer even for a short time,
as the possibility exists for the password to be set/changed by another person.
Page 16
Security Measures
When you do not want the data on the hard disk to be read/written
When the Hard Disk Lock is set to [Enable], it is impossible to read/write data from/to
the hard disk when the hard disk is inserted in a different computer, since a password is
also set for the hard disk. When the hard disk is returned to the original computer, you
can read and write data as before. In this case, however, make the settings in the Setup
Utility exactly the same as they were before the hard disk was removed.
It is possible to set the Hard Disk Lock even if [Password on boot] is set to [Disable], but
we recommend that [Password on boot] be set to [Enable] for security reasons.
(Note that this Hard Disk Lock does not guarantee complete protection of data.)
NOTE
In the default setting, [Hard Disk Lock] is set to [Disable].
You cannot set [Hard Disk Lock] without setting the Supervisor Password. Set
the Supervisor Password if you have not done so. ( page 14)
The hard disk protection function only works with the internal hard disk. This
function does not work with the external hard disk.
16
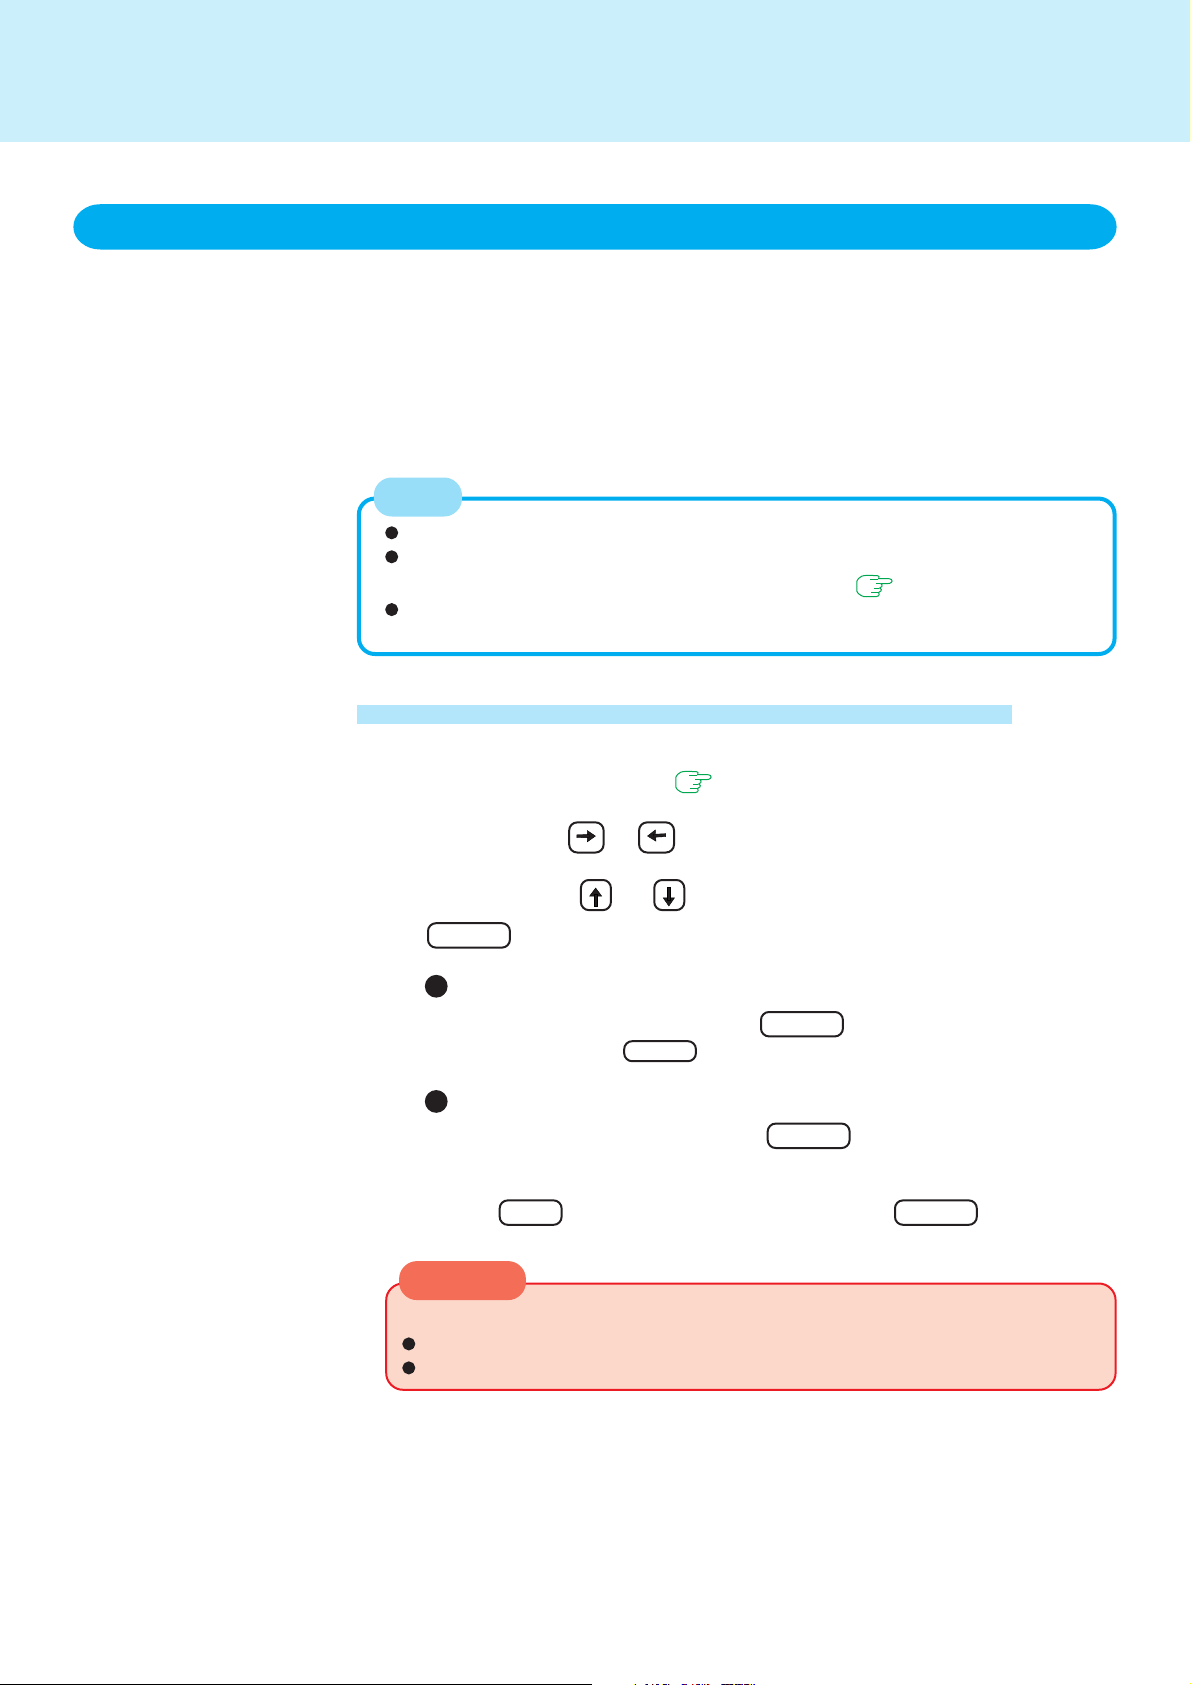
Setting the Hard Disk Lock (enabling, disabling)
1
Run the Setup Utility ( page 49)
2
Using either or , select [Security]
3
Using either or , select [Hard Disk Lock] and press
Enter
4
5
To enable the Hard Disk Lock
Select [Enable] and press Enter
At [Caution], press Enter .
To disable the Hard Disk Lock
Select [Disable] and press Enter
Press F10 and select [Yes], then press Enter
CAUTION
If your computer requires repair
Contact Panasonic Technical Support.
Be sure to set [Hard Disk Lock] to [Disable].
Page 17
Security Measures
Preventing theft or damage to data using a floppy disk
Disabling the floppy disk operation makes it impossible to read and write a floppy disk
and to start the computer from a floppy disk. This can prevent data from being accessed
illegally or overwritten accidentally using a floppy disk.
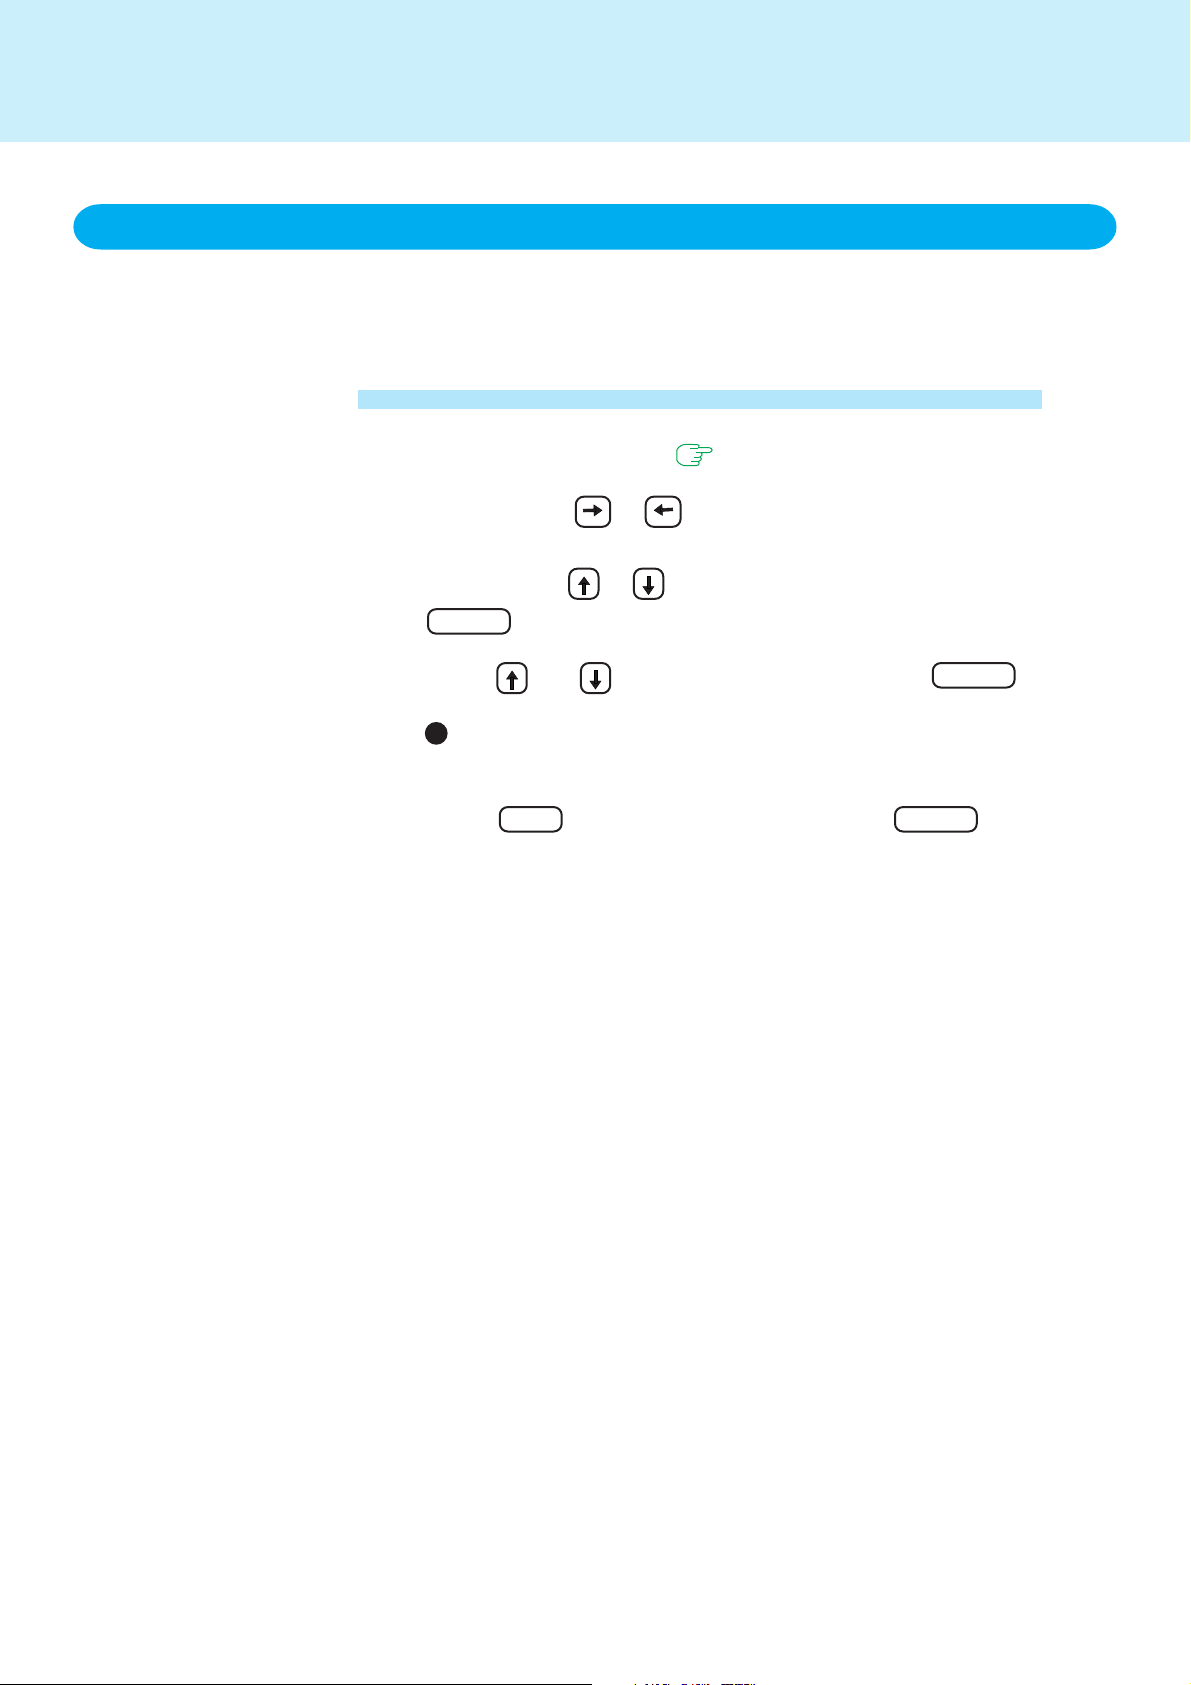
Setting the Floppy Operation (enabling, disabling)
1
Run the Setup Utility ( page 49)
2
Using either or , select [Security]
3
Using either or , select [Floppy Operation] and press
Enter
17
4
Using and , select [Disable] and press Enter
To enable the floppy operation
Select [Enable].
5
Press F10 and select [Yes], then press Enter
Page 18
Computing on the Road
Saving Power
One of the main features of notebook-type computers is that you have the power of
computing away from your home or office. In the following, information is provided on
how to maximize use of the battery pack which is necessary for such computing.
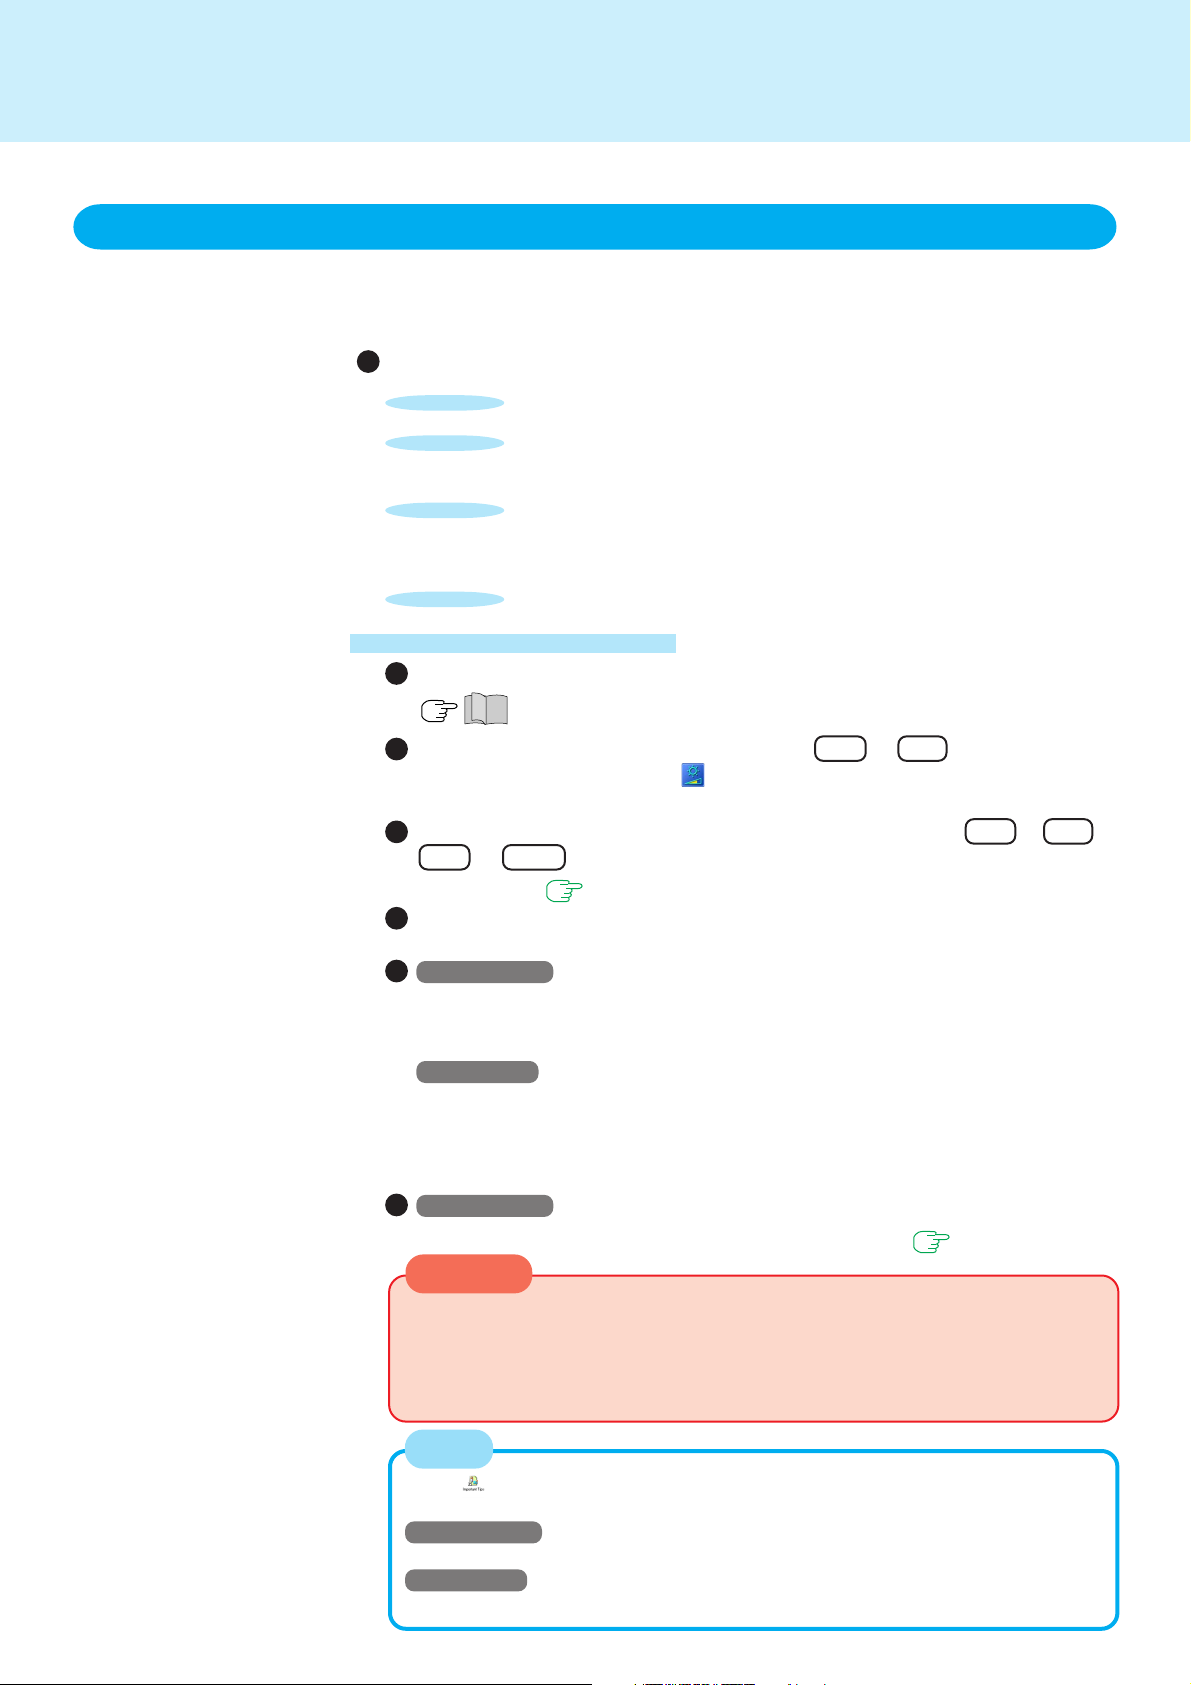
Four Important Points
POINT
POINT
Be sure to charge your battery before and after use.
1
To get the maximum use of your battery, set the power man-
2
agement mode.
18
POINT
POINT
Check to see that you have your AC adaptor with you before
3
leaving your home or office.
Purchasing a spare battery (CF-VZSU18/CF-VZSU18A) is
highly recommended.
Always watch your battery level!
4
Power Saving Methods
Leave your computer off when it is not in use
( “Starting Up/Shutting Down”)
Adjust the brightness (darker) with Fn + F1
By holding down on the keys ( will be displayed), the degree of brightness will
be lowered, thereby lowering the power consumption.
Before stepping away from your computer, press Fn + F7 or
Fn + F10 to put your computer in the standby or hiberna-
tion mode
Remove peripheral devices (USB devices, PC Cards, external
mouse, etc.) when not in use
Windows 2000
In [Control Panel] - [Power Options], make settings in detail
By making settings in detail for the timeout, alarm, etc., it is possible to control
the consumption of power.
Windows XP
In [Control Panel] - [Performance and Maintenance] - [Power Options], make settings in detail
By making settings in detail for the timeout, alarm, etc., it is possible to control
the consumption of power.
Windows 2000
Setting the Intel® SpeedStep™ technology ( page 19)
( page 4)
CAUTION
When installed in a network environment (except when the Wake up from
LAN function is in use).
Do not use the standby or hibernation mode.
After resuming operation from the standby or hibernation mode, the network
connection may be severed or the computer may not work properly.
NOTE
Select to view important tips for using the battery pack. You can also view
important tips using the following procedure.
Windows 2000
Select [Important Tips] in [Start] - [Programs] - [Panasonic] - [On-Line Manuals].
Windows XP
Select [Important Tips] in [start] - [All Programs] - [Panasonic] - [On-Line Manuals].
Page 19
Computing on the Road
19
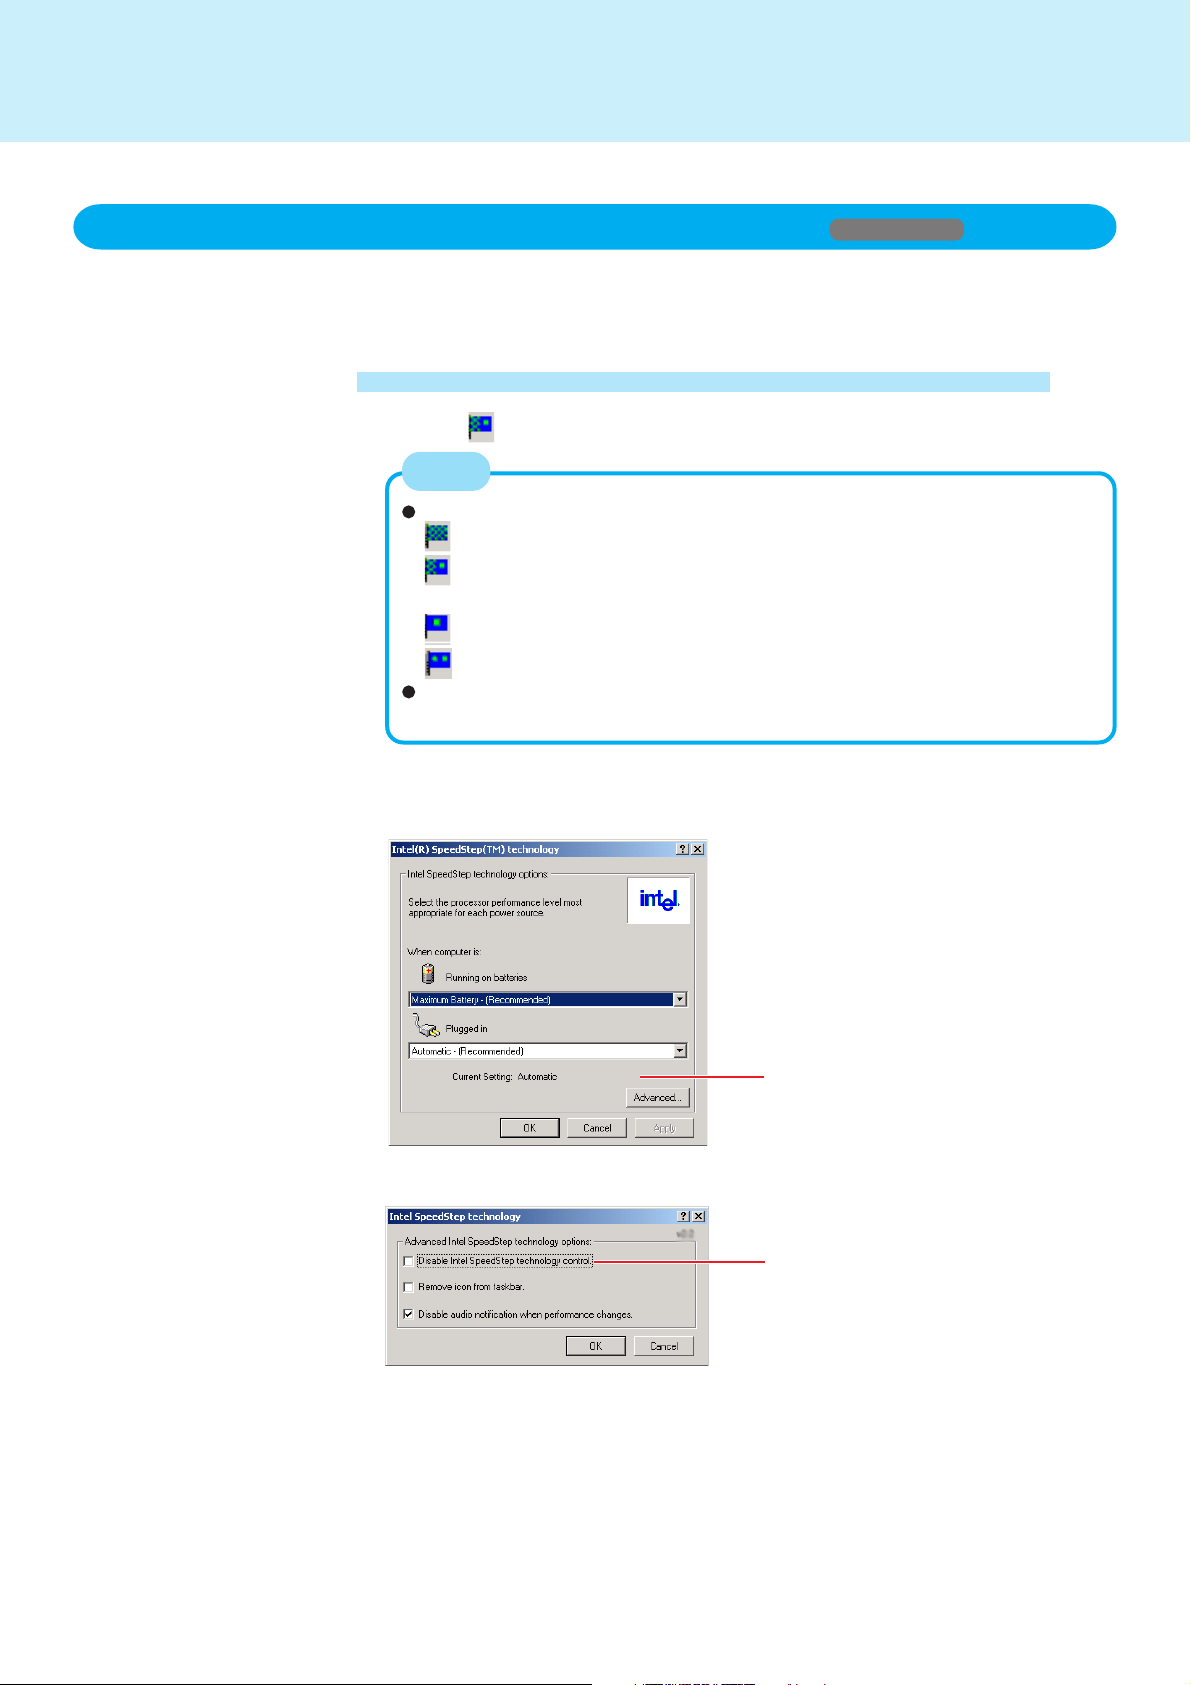
Setting the Intel(R) SpeedStep (TM) technology
By using the Intel(R) SpeedStep(TM) technology applet, you can set the computer’ s
performance to optimize power consumption.
Starting up the Intel(R) SpeedStep(TM) technology
Select on the taskbar
NOTE
The icon differs depending on the current setting.
Maximum Performance (The CPU performance is maximized at all times.)
Automatic (The CPU performance is automatically maximized only when
necessary.)
Battery Optimized Performance
Maximum Battery (Maximum battery life)
You can also start using [Start] - [Settings] - [Control Panel] - [Power Options]
- [Intel(R) SpeedStep(TM) technology].
Windows 2000
Displays settings currently in effect.
Do not add the check mark.
Page 20
Battery Power
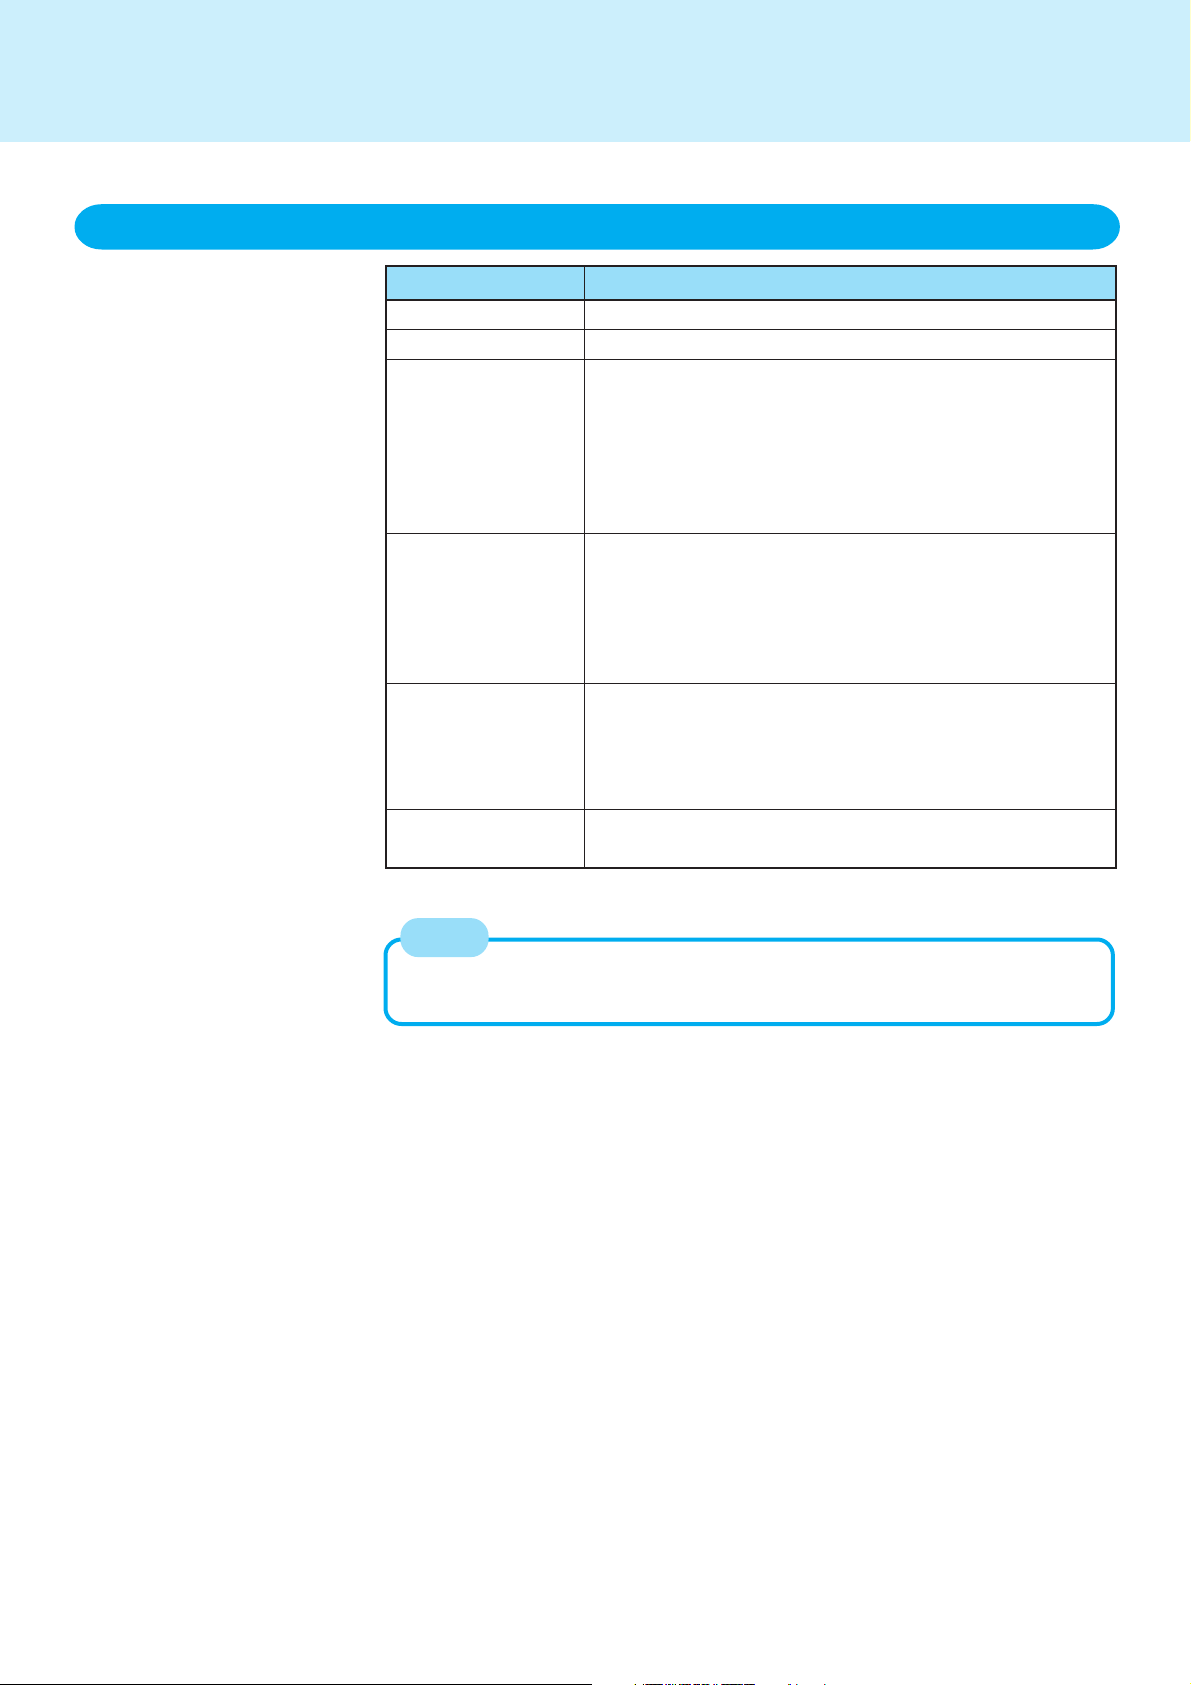
Use the Battery Indicator to Check the Battery Status
20
Battery Indicator
Orange*
Green*
Red
Blinking red*
Blinking orange*
Not lit
Battery Status
Charging in progress
Fully-charged
The battery level is very low (the charge is less than approx.
9% capacity).
Connect the AC adaptor. You can use the computer when
the indicator light is orange. If you do not have an AC adaptor, save your data and power off your computer. After replacing the battery pack with a fully charged one, turn your
computer on.
Battery pack or charging may not be working properly.
Quickly save your data and power off your computer.
Remove the battery pack and disconnect the AC adaptor,
then connect them again.
If the problem persists, contact Panasonic Technical Support.
Battery cannot be recharged temporarily because the internal temperature of the battery pack is outside of the acceptable temperature range for recharging. Once the allowable
range requirement is satisfied, charging begins automatically. Your computer can be used normally in this state.
Battery pack is not connected or charging not being performed.
* When the AC adaptor is connected.
NOTE
This computer prevents overcharging of the battery by recharging only when the
remaining power is less than approx. 95% of capacity after the battery is fully charged.
Page 21
Battery Power
Check the Remaining Battery Power
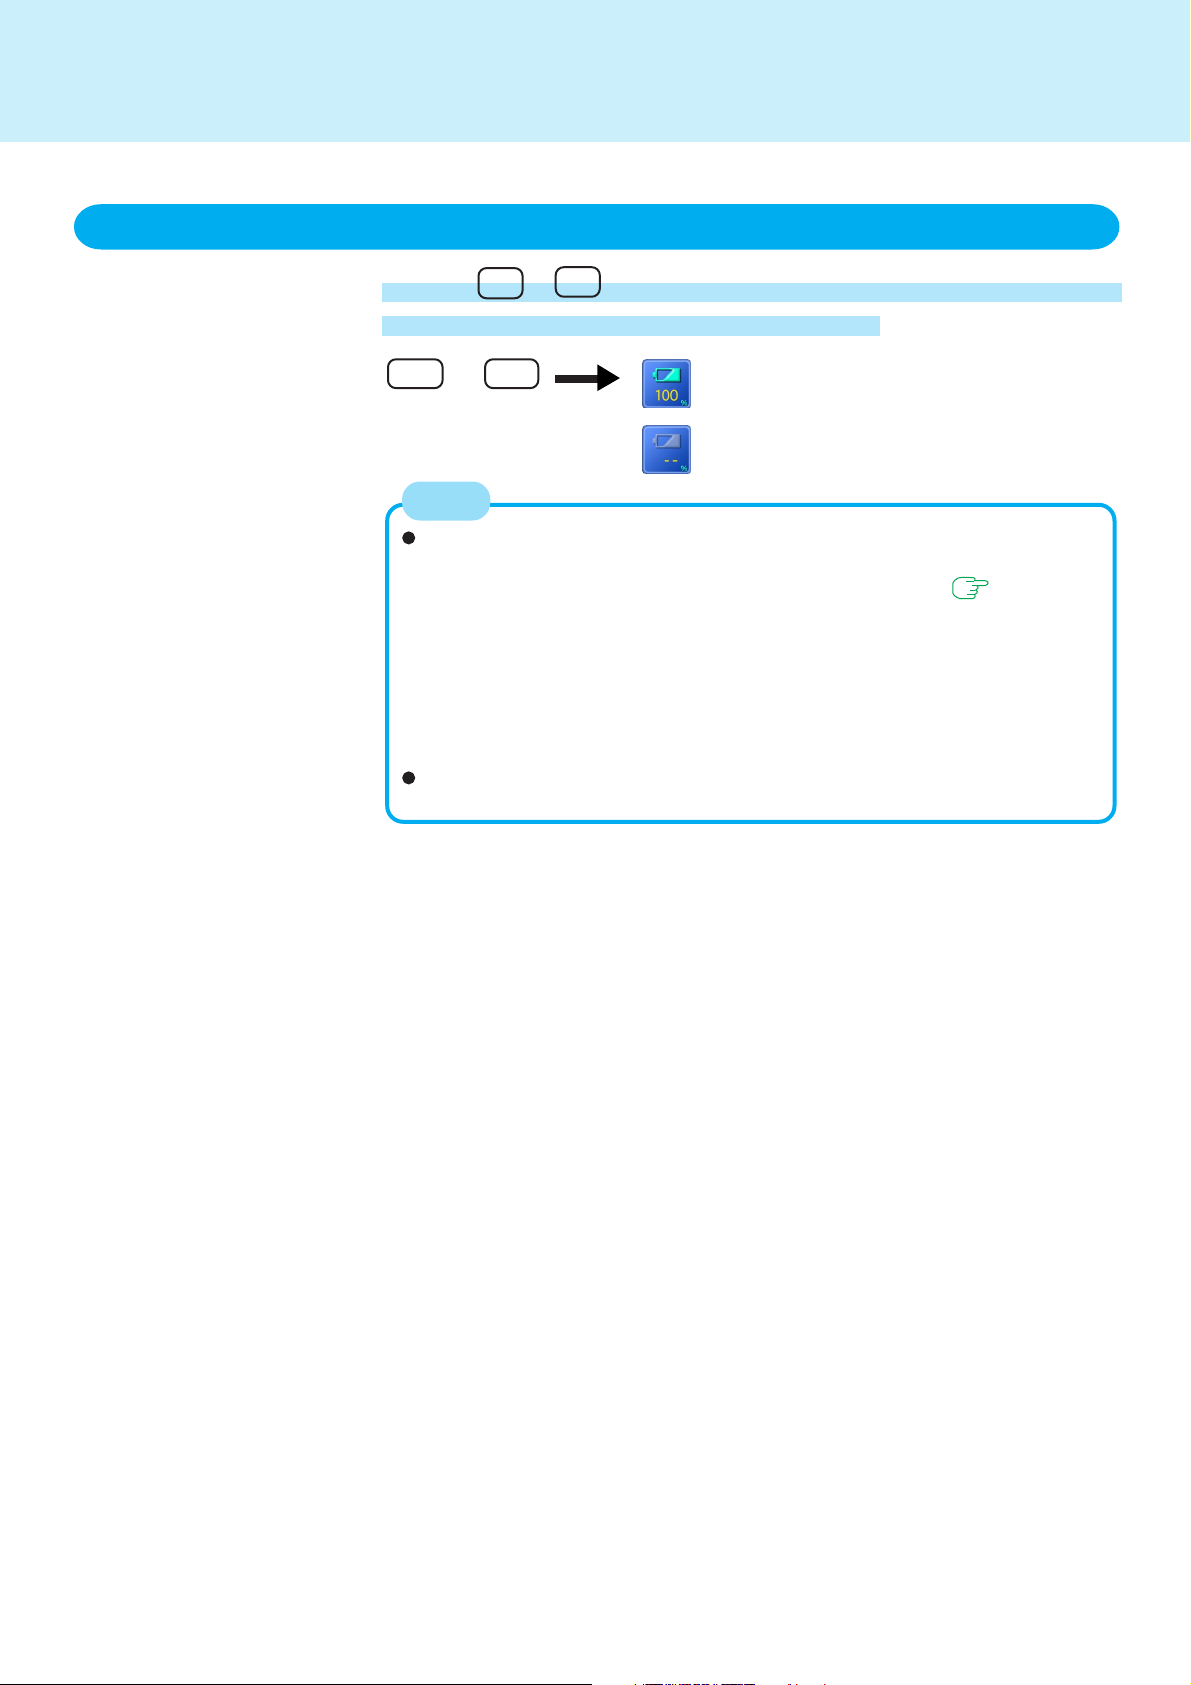
Press Fn + F9 to Check the Remaining Battery Power
on the Screen (After logging on to Windows)
21
Fn + F9
NOTE
In the following cases, there may be a difference between the remaining battery capacity displayed on the indicator and the actual remaining battery capacity. To correct this, execute the “Refresh Battery” utility. ( page 23)
• The battery indicator light remains red.
• The battery remaining displays 99% and the indicator light is orange for a
long period of time.
• Low battery warning appears after a short period of time.
This may be caused by the use of standby mode for long periods of time.
The battery is discharging while the computer is in standby mode when the
AC adaptor is not connected.
There may be a discrepancy with the % value that is displayed on the taskbar
of Windows, but this is not a malfunction.
When the battery pack is inserted in the computer (example)
When the battery pack is not inserted in the
computer
Page 22
Battery Power
When the Remaining Battery Charge Becomes Low
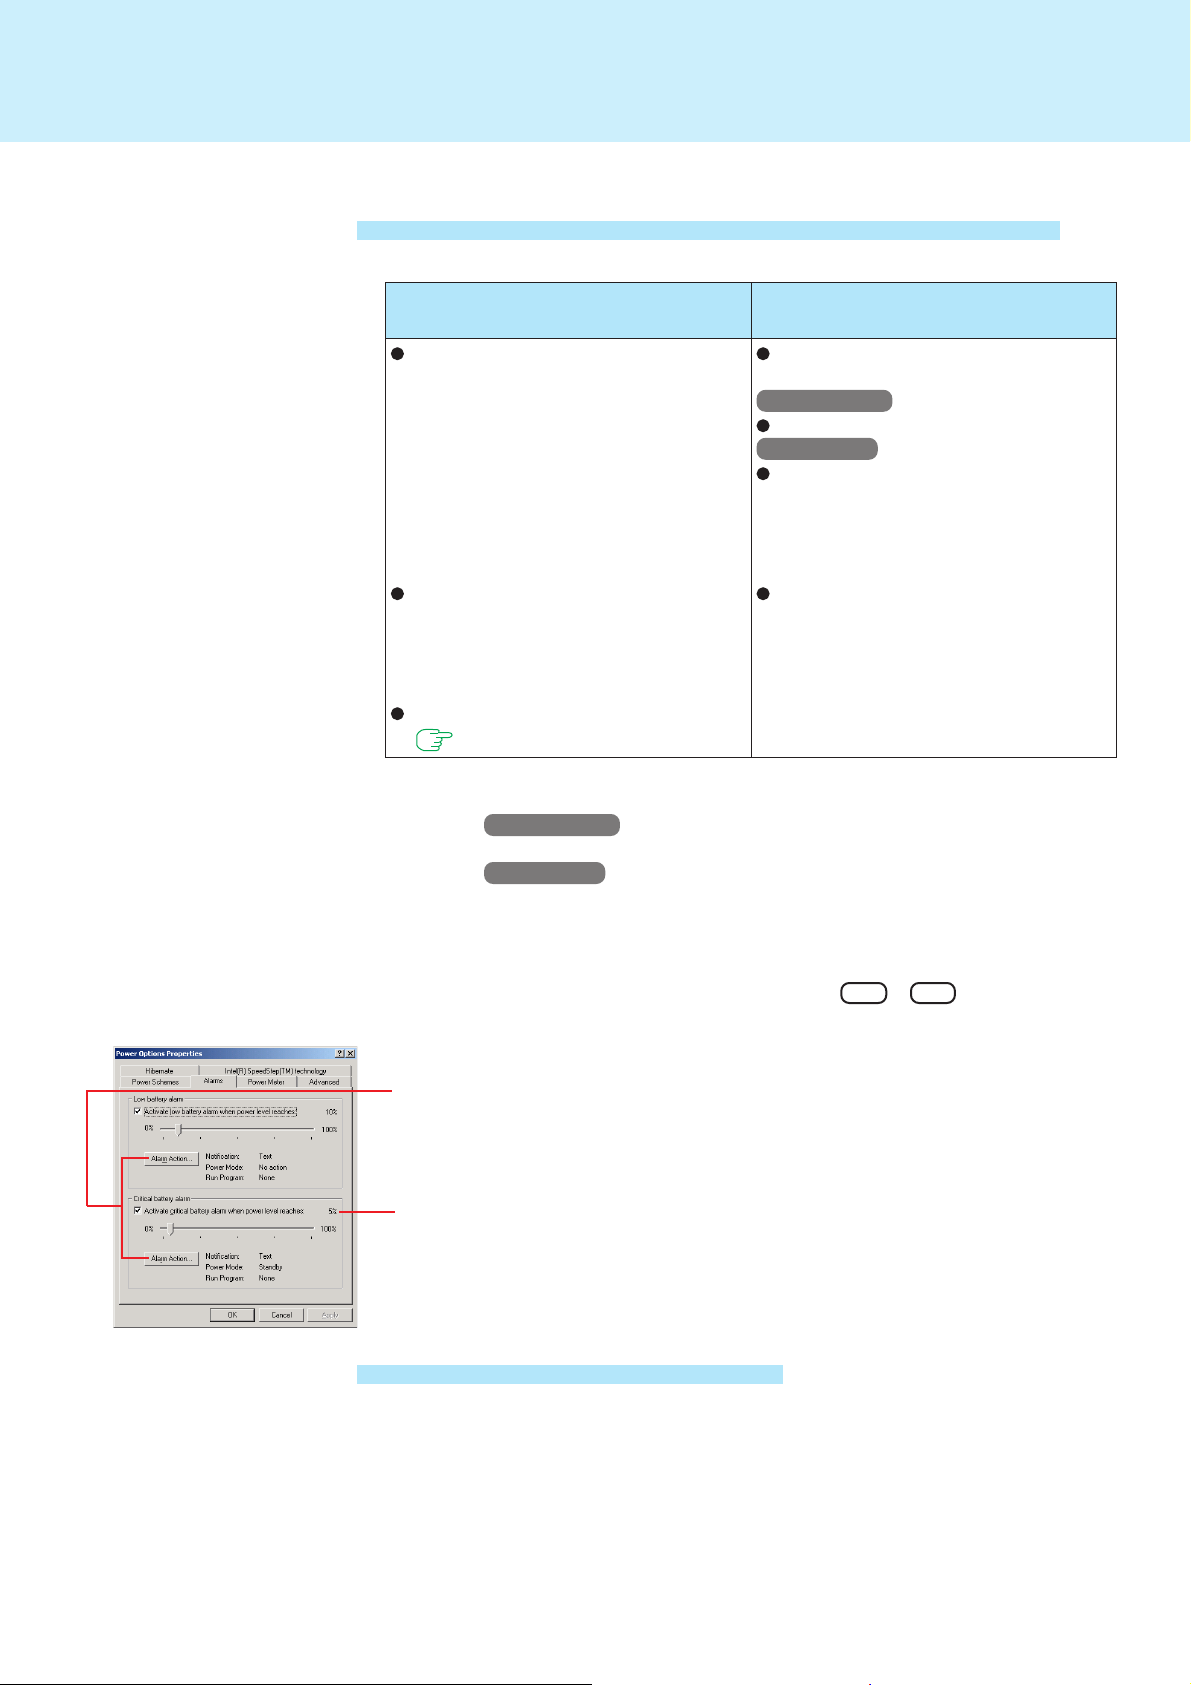
The following is factory default setting.
When remaining battery capacity falls to 10%
[Low battery alarm]
Displays a message indicating the low
battery level.
Ð
Charge your battery.
Connect the AC adaptor immediately.
If you do not have the AC adaptor with
you, exit any programs currently running, then shut down Windows, and
confirm that the power indicator is off.
Use a spare battery if you have one.
( page 24)
22
When remaining battery capacity falls to 5%
[Critical battery alarm]
Displays a message indicating the low
battery level.
Windows 2000
The computer will enter standby mode.
Windows XP
The computer will enter hibernation
mode.
Ð
Connect the AC adaptor before starting up the computer next time.
If the computer starts up or resumes
while the AC adaptor is not connected,
Windows may not operate properly or
alarm operations may not work properly.
Above settings can be changed.
1
Windows 2000
Select [Start] - [Settings] - [Control Panel] - [Power Options] - [Alarms].
Windows XP
Select [Start] - [Control Panel] - [Performance and Maintenance] - [Power
Options] - [Alarms].
2
Set alarm operations and remaining battery level for operating alarm functions.
When disabling the speaker by pressing Fn + F4 , the sound alarm
is also disabled.
When making a setting for [When the alarm goes off, the computer will] in [Alarms]
- [Alarm Action], add a check mark for [Force stand by or shutdown even if a
program stops responding]
Set the value for [Critical battery alarm] to 5% or more. This is necessary for the
standby or hibernation function to be completed (assuring data is saved) when
the battery level is low.
About High Temperature Mode
This computer has a high temperature mode function that prevents the degradation of
the battery in high temperature environments.
We recommend setting the high temperature mode function when installing the computer in a car, etc. To do this, set [Environment] in [Main] menu of the Setup Utility to
[High Temperature]. Note that a 100% remaining battery reading in [High Temperature]
mode is about an 80% reading in [Normal Temperature] mode.
After switching from [Normal Temperature] to [High Temperature], or vice versa, the
remaining battery will not be displayed properly until the battery pack is completely
discharged or fully charged.
Page 23

Battery Power
Accurately Displaying Battery Capacity
The battery pack has a function for measuring, storing and learning about battery capacity. Using this function properly to accurately display remaining battery capacity requires that the battery pack be fully charged (charged to 100%), then fully discharged,
and then fully charged again.
This procedure should be performed once after you purchase the computer. As you use
the battery pack over a long period of time, the remaining capacity display may become
inaccurate due to aging of the battery pack and other factors. The procedure described
below should be performed again.
NOTE
If the computer is turned off while refreshing the battery (electrical power outage,
accidental removal of the AC adaptor or battery pack, etc.), the battery will not be
refreshed correctly.
1
Attach the battery pack and connect the AC adaptor
Remove all peripherals (except for the battery pack and AC adaptor).
23
2
Use the “Refresh Battery” utility to fully discharge the battery
pack
1
Run the Setup Utility. ( page 49)
2
Select [Refresh Battery] from [Exit] menu and press Enter .
3
At the confirmation message, select [Yes] and press Enter .
Once the battery indicator turns green, the battery pack will be completely discharged. It takes approximately 4 hours until the power automatically goes off
through the complete discharge of the battery from the fully charged state.
3
Allow the battery pack to charge until the battery indicator turns
green
Charging Time: Approximately 3.5 hours.
Page 24
Battery Power
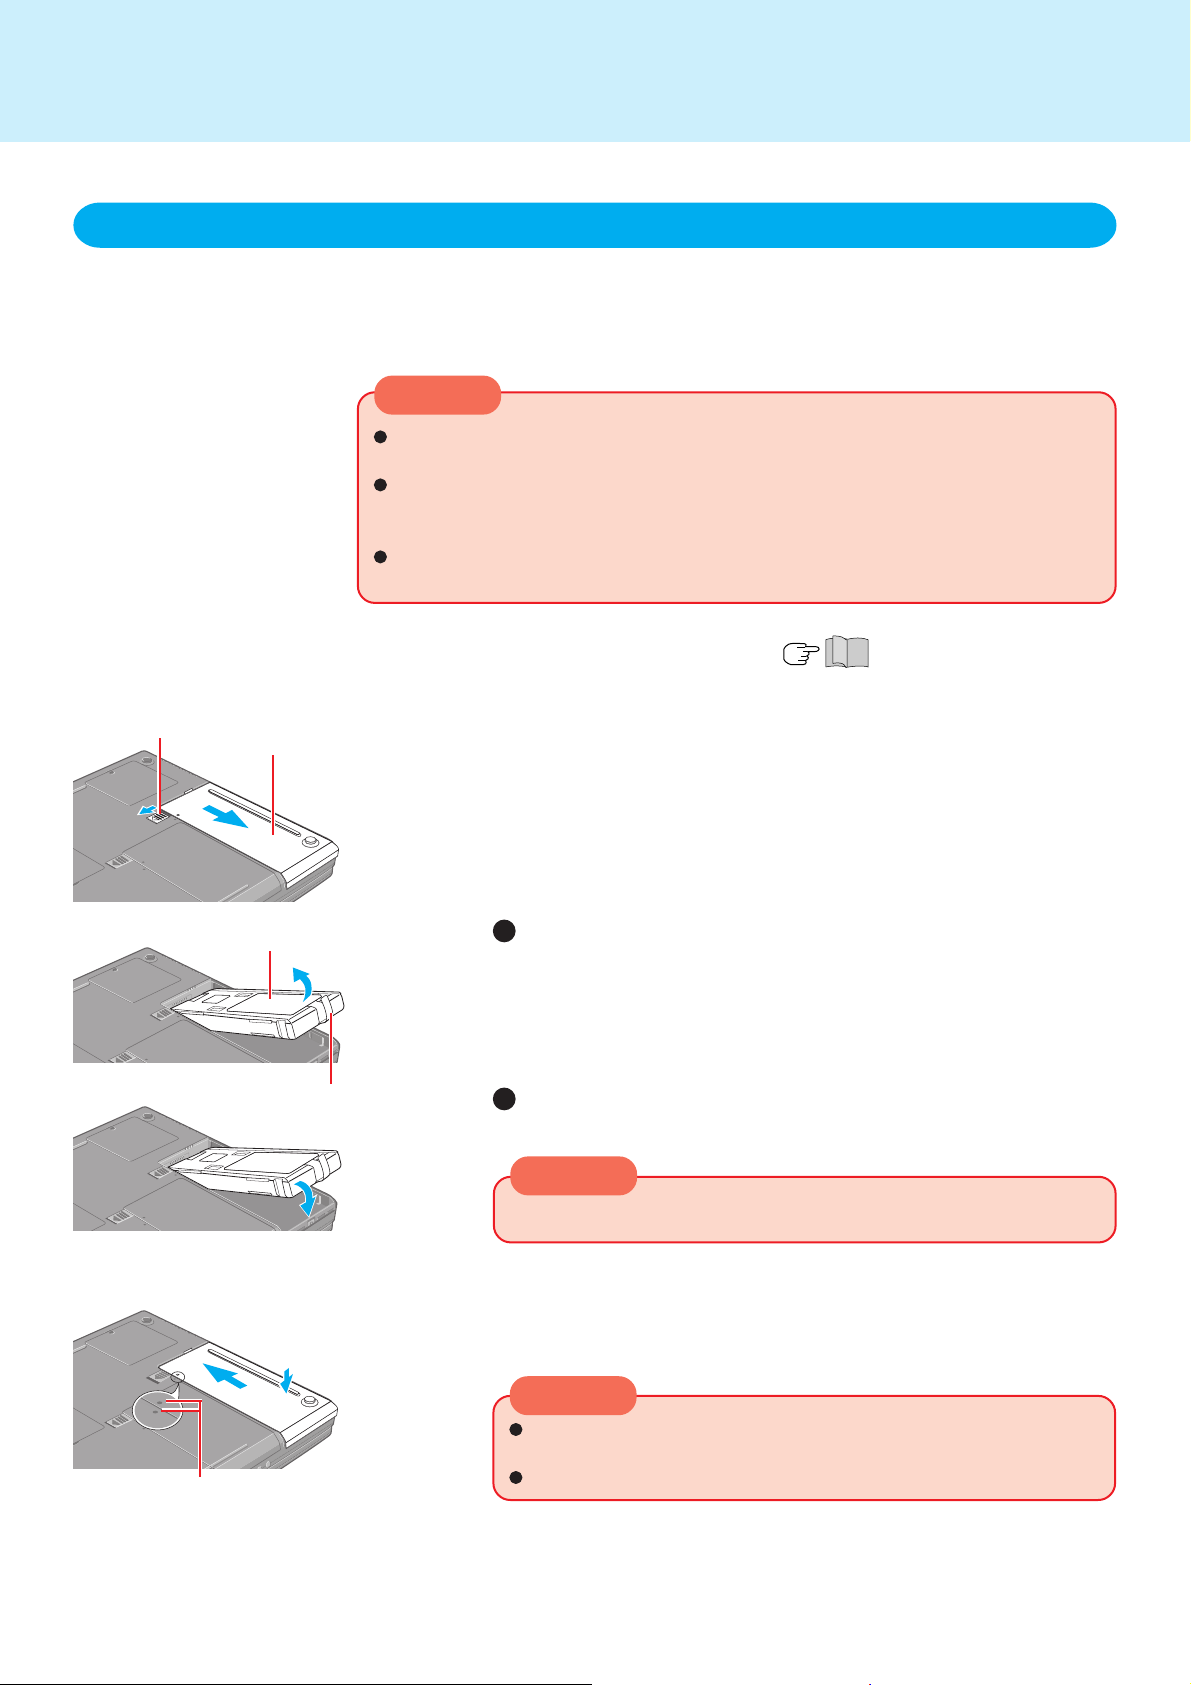
Replacing the Battery Pack
When the charge provided by your battery pack is supplied for only a short period of
time, even after fully charging according to the instructions, it may be time to replace
your battery pack. The battery pack is a consumable item and therefore will require
replacement (CF-VZSU18/CF-VZSU18A).
CAUTION
Do not touch the terminals on the battery pack and the computer. The battery
pack may no longer function properly if the contacts are dirty or damaged.
The battery pack is not charged when the computer is first purchased. Be sure to
charge it before using it for the first time. When the AC adaptor is connected to
the computer, charging begins automatically.
In the standby mode, do not remove/change the battery pack. Removing the
pack in the standby mode will erase your data and may damage the computer.
1
Power off your computer ( “Starting Up/Shutting Down”)
Do not shut down using the standby function.
24
Latch
Battery Pack
Cover
Tab
2
Turn your computer over and remove the cover
Slide the latch, and then without releasing it, slide and remove the cover.
3
Taking out the battery pack
Pull the tab on the battery pack and remove it from the computer.
Inserting a battery pack
Firmly attach the battery pack to the connector.
CAUTION
Be sure the battery pack is properly connected to the connector.
Mark
4
Reattach the cover
Match the mark on the cover to the body of the computer and slide the
cover back into place.
CAUTION
For an improperly attached cover, your battery pack may fall out
while you are carrying around your computer.
Be sure the tab does not get caught when closing the cover.
Page 25
CD Drive
Usage Precautions
25
Do not leave the tray in the open position or touch the lens area. Should the lens
become soiled by dust or dirt, the unit may not read discs properly.
Do not apply excessive force to the tray in the open position, doing so could damage
the tray.
Do not place items other than discs on the tray.
Under some conditions, dust may build up on the optical lens or disc, possibly resulting in malfunction.
Do not expose the CD drive to oily or tobacco smoke. Doing so could shorten the
service l i fe of the lens.
Do not use discs that have become deformed (warped, not completely round, etc.).
Never insert foreign objects such as paper clips into the slot in the CD drive.
Do not open the CD drive or move the computer while the CD drive is being accessed.
Doing so could cause it to malfunction. In addition, after running an application involving access to a disc, do not open the CD drive or remove the disc until after the
application has been closed.
After closing the tray, do not attempt to access a disc until the CD drive indicator ( )
and access lamp on the CD drive goes off ( page 6).
If the CD drive malfunctions, we recommend cleaning it with a blower used for camera
lenses. (Do not use strong, spray-type products.)
To avoid damaging discs:
Do not allow discs to become dirty or scratched.
Do not place or store discs in locations exposed to heat, direct sunlight, humidity or
dust.
If the disc is brought from a cold into a warm environment, moisture may form on the
disc. Wipe this moisture off with a soft, dry, lint-free cloth before using the disc.
Do not touch the data surface (the side opposite the side with the title printed on it) as
it can cause the disc to become dirty or scratched.
Do not write on the surface of the disc with a ball-point pen or other writing instrument.
Do not drop, bend, or place heavy objects on top of discs.
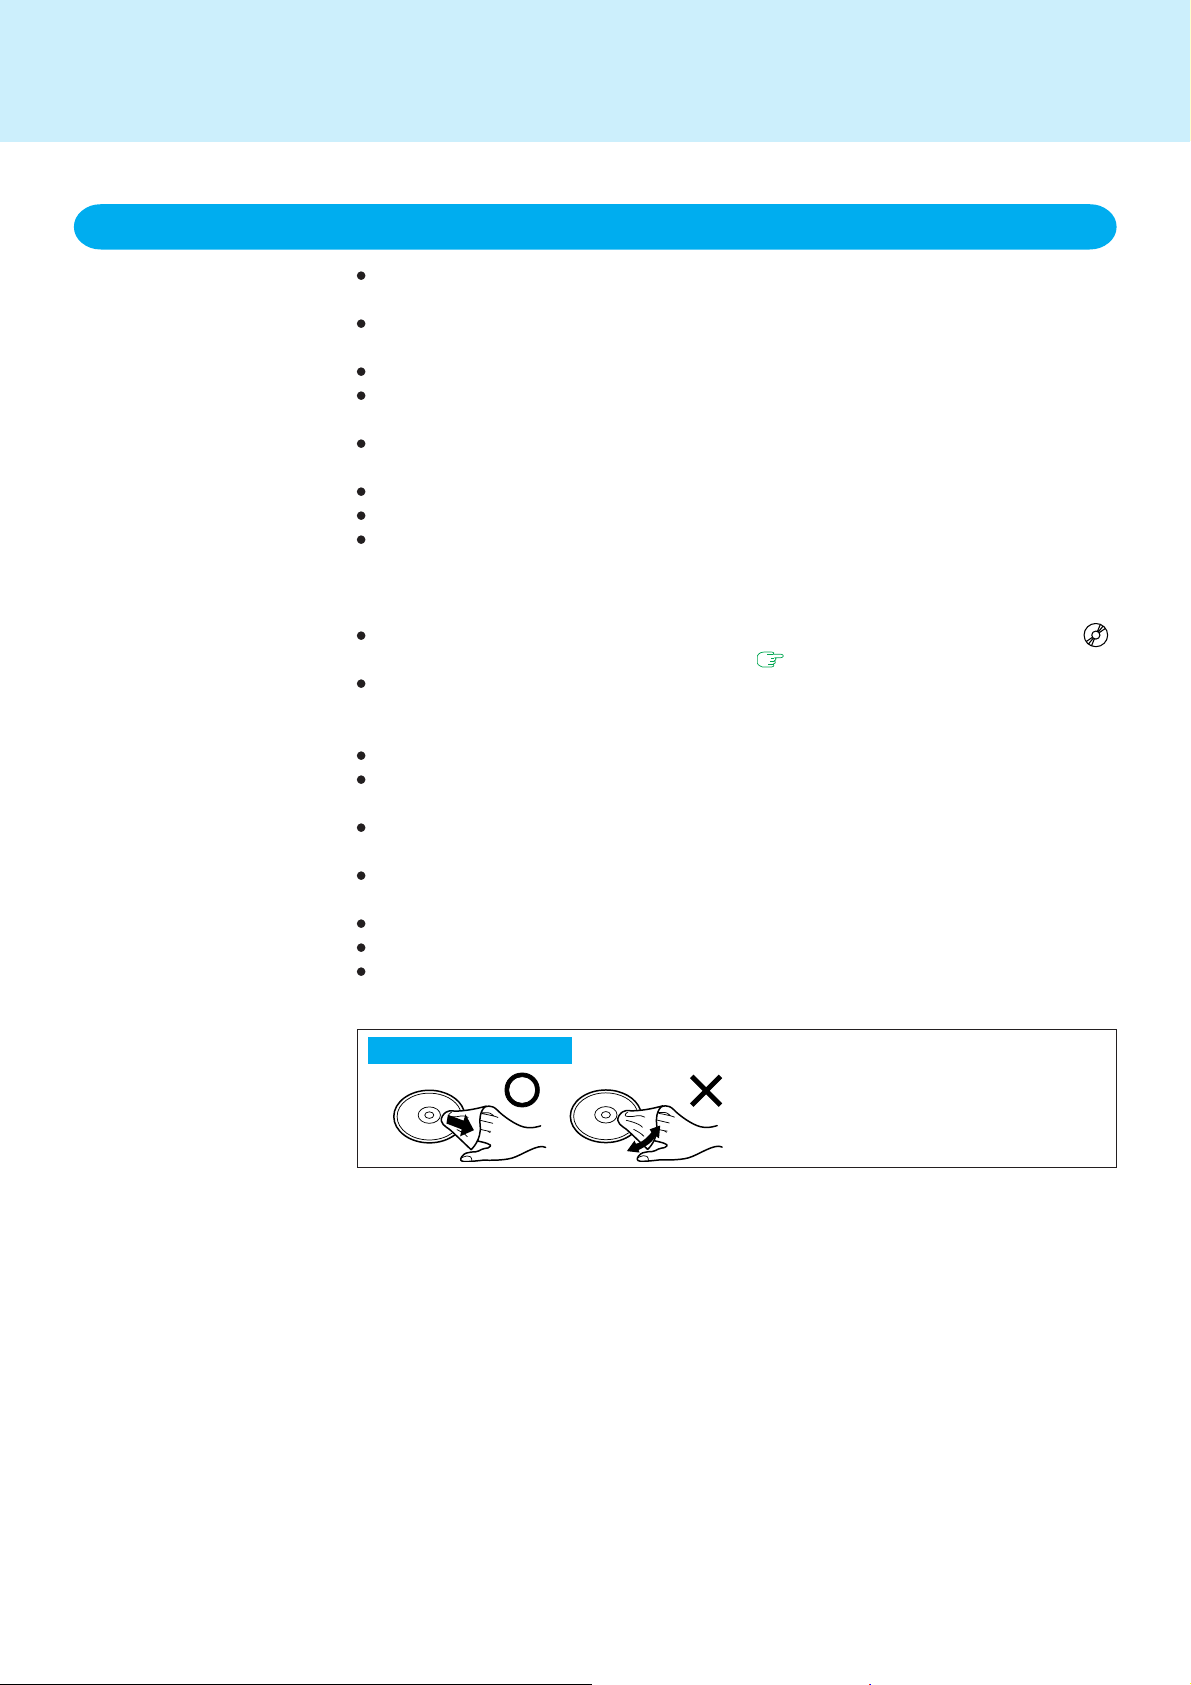
Cleaning the disc using a disc cleaner is recommended once every 2 or 3 months.
If the disc gets dirty
After wiping the disc with a moist, soft
cloth, wipe it with a dry cloth. Always wipe
from the center toward the edge.
Page 26
CD Drive
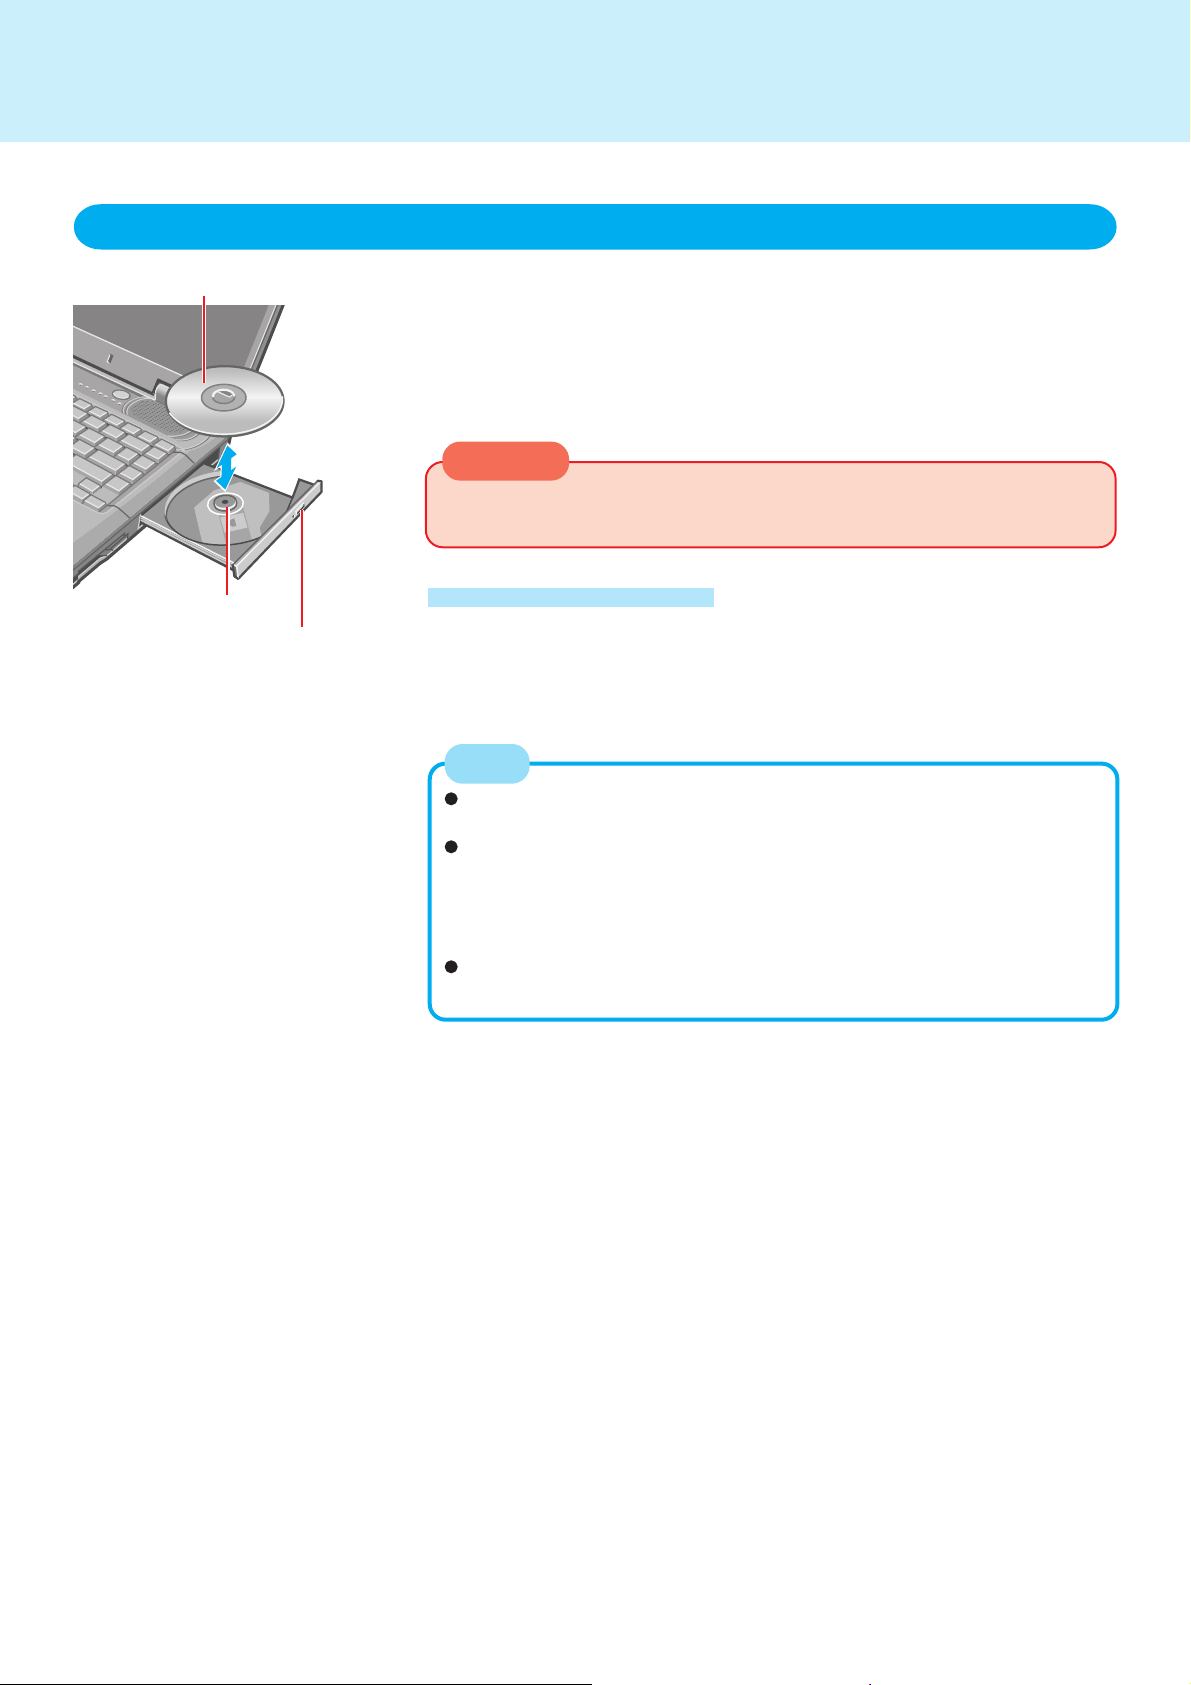
Setting a Disc
26
Title-side up
Center Holder
Eject Button
1
Turn your computer on
2
Press the disc eject button and slowly pull out the tray
3
Place the disc securely on the center holder
4
Close the tray
CAUTION
Do not apply excessive force to the tray in the open position, doing so could
damage the tray.
Power-saving Mode
If the CD drive has not been accessed within 90 seconds, the drive motor will
automatically shut down to reduce the power consumption. When the CD drive
is accessed once again, the power of the drive motor is turned on. However,
approximately 30 seconds are required until data is actually read from the disc.
NOTE
If the vibration of the CD drive is excessive, set [CD Drive Speed] to [Low]
in the Setup Utility.
For AutoPlay CDs:
• If an AutoPlay CD does not start after the computer resumes from the
standby or hibernation mode, we recommend reinser ting the CD again
after a 15-second wait.
• An AutoPlay CD may start during the access of a file.
When playing back movies from a disc, note that smooth playback may
not be possible in some cases.
Page 27
CD Drive
Information for the DVD-ROM Drive (Model with a DVD-ROM Drive)
Before using the drive for the first time, remove the protective sheet from the lens
area. The protective sheet inside the drive delays the opening of the drive by about
ten seconds. This delay is not a problem.
To play DVD-Video or MPEG2 files, install the DVD playback software (included).
For information on how to install the software, refer to the instructions of the software
( “WinDVD”).
<Using PC Cards>
If the PC Card does not work, there may be no interrupt request (IRQ) line available.
Deactivate unnecessary equipment using in the Setup Utility.
When using CD-R or CD-RW discs, read the description on the disc package.
About Regions Setting
The DVD-Video has a region code that is fixed according to the region where it is
sold. In order to play a DVD-Video, the region code of the player software and of the
drive must match that of the DVD-Video.
<Example>
For U.S.A. and Canada: “1”
For Europe: “2”
27
The region code is not set prior to the shipment of this drive. Therefore, operations
will differ depending on the first DVD-Video played.
In the case of a DVD-Video with a specific region code:
The drive will automatically be set with the same region code as the DVD-Video.
In the case of any other DVD-Video:
[Confirm Region] appears. Select region code and select [OK]. Play now begins.
([Confirm Region] may not be displayed for some DVD-Videos. To confirm the
current region code and the number of settings remaining, right-click on the WinDVD
screen and select [Setup] - [Region].)
CAUTION
The region code can be set a total of five times, including the initial setting.
Proceed very carefully, because after the fourth change has been made, the
region code set last is fixed and no further changes can be made.
The user must take responsibility for any trouble that results from illegally changing or altering the region code.
NOTE
[Confirm Region] will also be displayed if a DVD-Video with one region code is
inserted into a drive for which another region code has already been set.
Page 28
CD Drive
28
Information for the DVD-ROM & CD-R/RW Drive
Before using the drive for the first time, remove the protective sheet from the lens
area. The protective sheet inside the drive delays the opening of the drive by about
ten seconds. This delay is not a problem.
To play DVD-Video or MPEG2 files, install the DVD playback software (included).
For information on how to install the software, refer to the instructions of the software
( “WinDVD”).
<Using PC Cards>
If the PC Card does not work, there may be no interrupt request (IRQ) line available.
Deactivate unnecessary equipment using in the Setup Utility.
When using CD-R or CD-RW discs, read the description on the disc package.
About Regions Setting
The DVD-Video has a region code that is fixed according to the region where it is
sold. In order to play a DVD-Video, the region code of the player software and of the
drive must match that of the DVD-Video.
<Example>
For U.S.A. and Canada: “1”
For Europe: “2”
The region code is not set prior to the shipment of this drive. Therefore, operations
will differ depending on the first DVD-Video played.
In the case of a DVD-Video with a specific region code:
The drive will automatically be set with the same region code as the DVD-Video.
In the case of any other DVD-Video:
[Confirm Region] appears. Select region code and select [OK]. Play now begins.
([Confirm Region] may not be displayed for some DVD-Videos. To confirm the
current region code and the number of settings remaining, right-click on the WinDVD
screen and select [Setup] - [Region].)
(Model with a DVD-ROM & CD-R/RW Drive)
CAUTION
The region code can be set a total of five times, including the initial setting.
Proceed very carefully, because after the fourth change has been made, the
region code set last is fixed and no further changes can be made.
The user must take responsibility for any trouble that results from illegally changing or altering the region code.
NOTE
[Confirm Region] will also be displayed if a DVD-Video with one region code is
inserted into a drive for which another region code has already been set.
Page 29
CD Drive
29
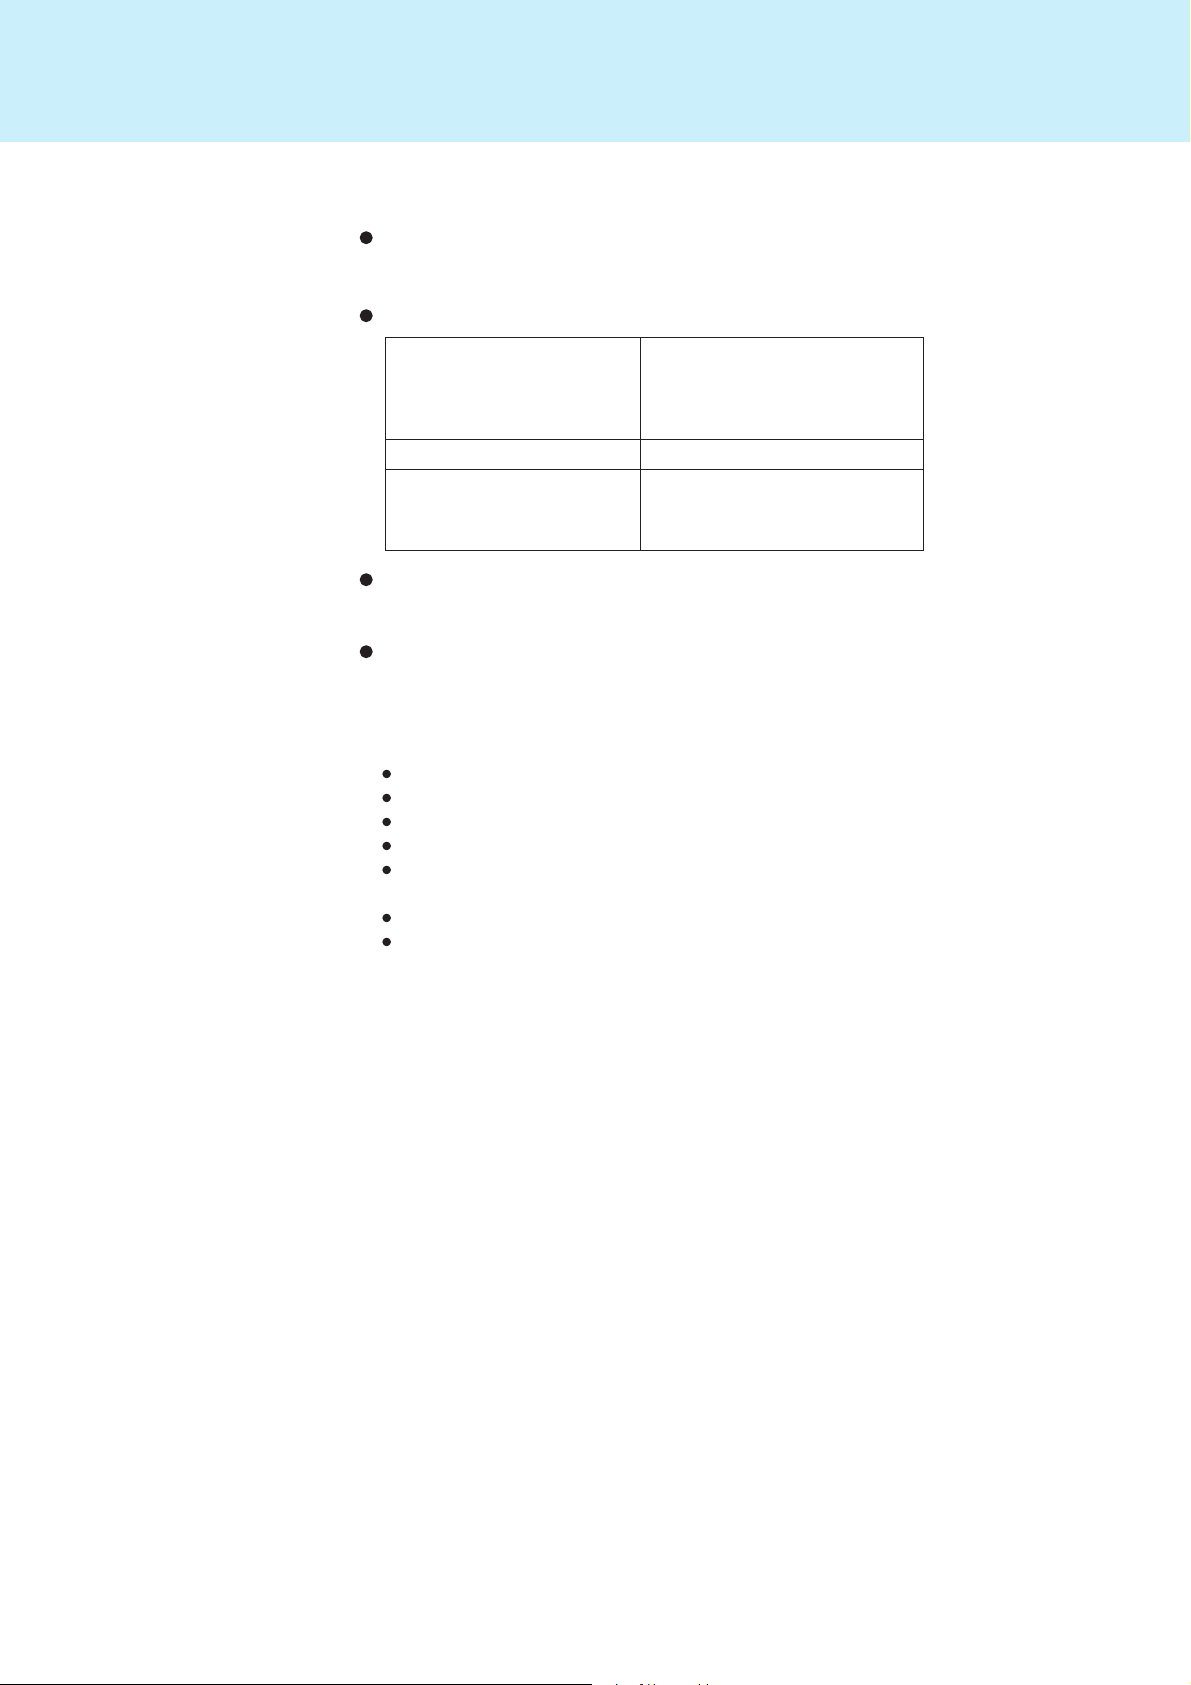
<When writing to CD-R/RW discs>
Using the CD-ROM of the CD-R/RW writer software (included), install the application
software on your computer. For information on how to install the software, refer to the
instructions of the CD-R/RW writer software.
Be sure to use discs conforming to the proper write speeds.
CD-R write speed*
CD-RW write speed
High Speed CD-RW write
speed
If the write operation is to involve a long period of time, be sure to connect the AC
adaptor. If the battery power runs low and the power of the computer is cut, the write
operation may end in failure.
Depending on the disc, the quality of the write operation may not be so good. We
recommend using any of the following discs.
Recommended Discs:
<CD-R>
HITACHI MAXELL, Ltd.
MITSUBISHI CHEMICAL Co., Ltd.
MITSUI CHEMICALS, Inc.
RICOH Co., Ltd.
TAIYOYUDEN Co., Ltd.
<CD-RW/High Speed CD-RW>
MITSUBISHI CHEMICAL Co., Ltd.
RICOH Co., Ltd.
600 KB/s (4X speed)
1200 KB/s (8X speed)
2400 KB/s (16X speed Max.)
3600 KB/s (24X speed Max.)
600 KB/s (4X speed)
600 KB/s (4X speed)
1200 KB/s (8X speed)
1500 KB/s (10X speed)
Page 30
CD Drive
Information for the DVD MULTI Drive (Model with a DVD MULTI Drive)
Before using the drive for the first time, remove the protective sheet from the lens
area. The protective sheet inside the drive delays the opening of the drive by about
ten seconds. This delay is not a problem.
To play DVD-Video or MPEG2 files, install the DVD playback software (included).
For information on how to install the software, refer to the instructions of the software
(
<Using PC Cards>
If the PC Card does not work, there may be no interrupt request (IRQ) line available.
Deactivate unnecessary equipment using in the Setup Utility.
When using CD-R or CD-RW discs, read the description on the disc package.
About Regions Setting
The DVD-Video has a region code that is fixed according to the region where it is
sold. In order to play a DVD-Video, the region code of the player software and of the
drive must match that of the DVD-Video.
<Example>
For U.S.A. and Canada: “1”
For Europe: “2”
“WinDVD”).
30
The region code is not set prior to the shipment of this drive. Therefore, operations
will differ depending on the first DVD-Video played.
In the case of a DVD-Video with a specific region code:
The drive will automatically be set with the same region code as the DVD-Video.
In the case of any other DVD-Video:
[Confirm Region] appears. Select region code and select [OK]. Play now begins.
([Confirm Region] may not be displayed for some DVD-Videos. To confirm the
current region code and the number of settings remaining, right-click on the WinDVD
screen and select [Setup] - [Region].)
CAUTION
The region code can be set a total of five times, including the initial setting.
Proceed very carefully, because after the fourth change has been made, the
region code set last is fixed and no further changes can be made.
The user must take responsibility for any trouble that results from illegally changing or altering the region code.
NOTE
[Confirm Region] will also be displayed if a DVD-Video with one region code is
inserted into a drive for which another region code has already been set.
Page 31
CD Drive
31
<When writing to CD-R/RW discs and DVD-R/RW discs>
Using the CD-ROM of the writer software (included), install the application software
on your computer. For information on how to install the software, refer to the instructions of the writer software.
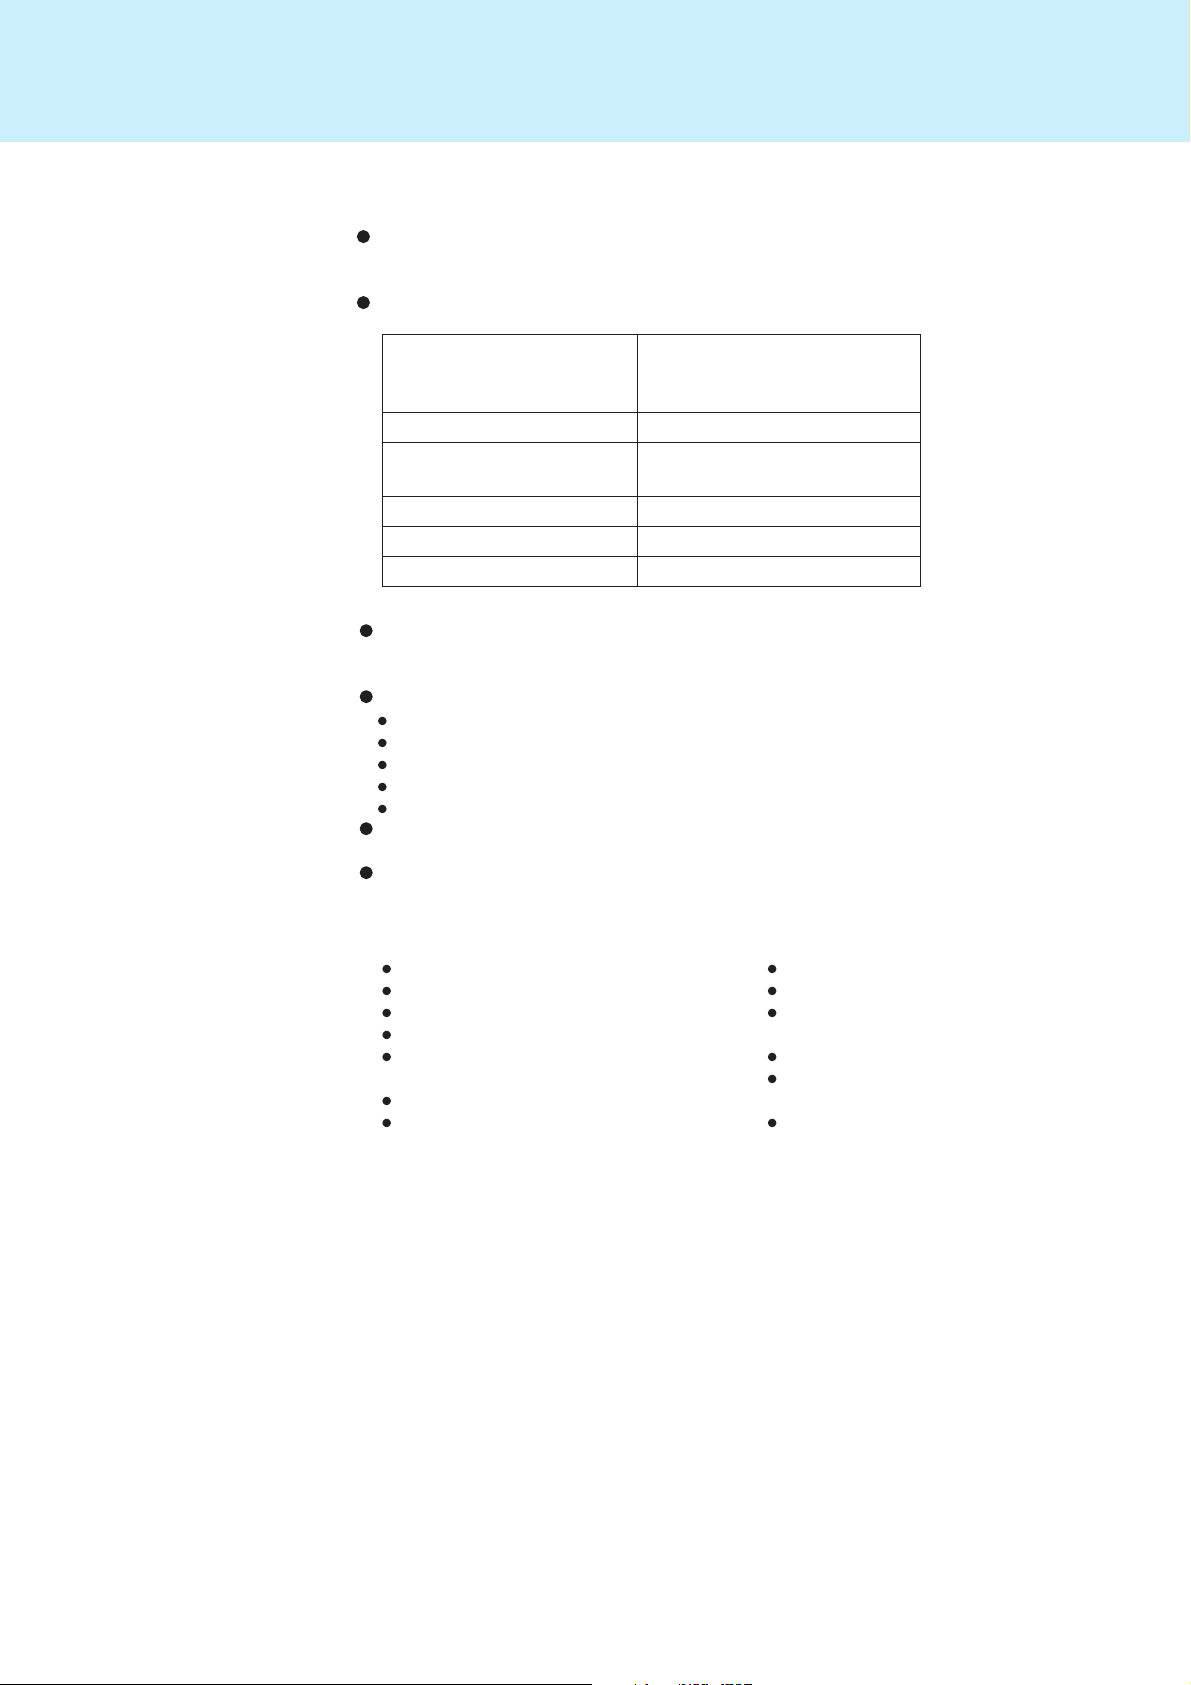
Be sure to use discs conforming to the proper write speeds.
CD-R write speed*
CD-RW write speed
High Speed CD-RW write
speed
DVD-R write speed
DVD-RW write speed
DVD-RAM write speed
* Depending on the disc, the writing speed may become slower.
If the write operation is to involve a long period of time, be sure to connect the AC
adaptor. If the battery power runs low and the power of the computer is cut, the write
operation may end in failure.
Be sure to use discs that meet the following specifications.
DVD-R for General Ver.2.0 (4.7 GB)
DVD-R for General Ver.2.0/4X-SPEED DVD-R REVISION 1.0 (4.7 GB)
DVD-RW Ver.1.1 (4.7 GB)
DVD-RW Ver.1.1/2X-SPEED DVD-R REVISION 1.0 (4.7 GB)
DVD-RAM Ver.2.0 or Ver.2.1 (4.7 GB/9.4 GB)
In the case of DVD-RAM, only non-cartridge discs or removable cartridge discs can
be used.
Depending on the disc, the quality of the write operation may not be so good. We
recommend using any of the following discs.
Recommended Discs:
<CD-R>
HITACHI MAXELL, Ltd.
MITSUBISHI CHEMICAL Co., Ltd.
MITSUI CHEMICALS, Inc.
RICOH Co., Ltd.
TAIYO YUDEN Co., Ltd.
<CD-RW/High Speed CD-RW>
MITSUBISHI CHEMICAL Co., Ltd.
RICOH Co., Ltd.
600 KB/s (4X speed)
1200 KB/s (8X speed)
2400 KB/s (16X speed Max.)
600 KB/s (4X speed)
600 KB/s (4X speed)
1200 KB/s (8X speed)
1,350 KB/s (1X speed)
1,350 KB/s (1X speed)
2,700 KB/s (2X speed)
<DVD-R>
Matsushita Electric Industrial Co., Ltd.
PIONEER VIDEO CORPORATION
TAIYO YUDEN Co., Ltd.
<DVD-RW>
TDK Corporation
Victor Company of Japan, Limited
<DVD-RAM>
Matsushita Electric Industrial Co., Ltd.
Page 32
PC Cards
32
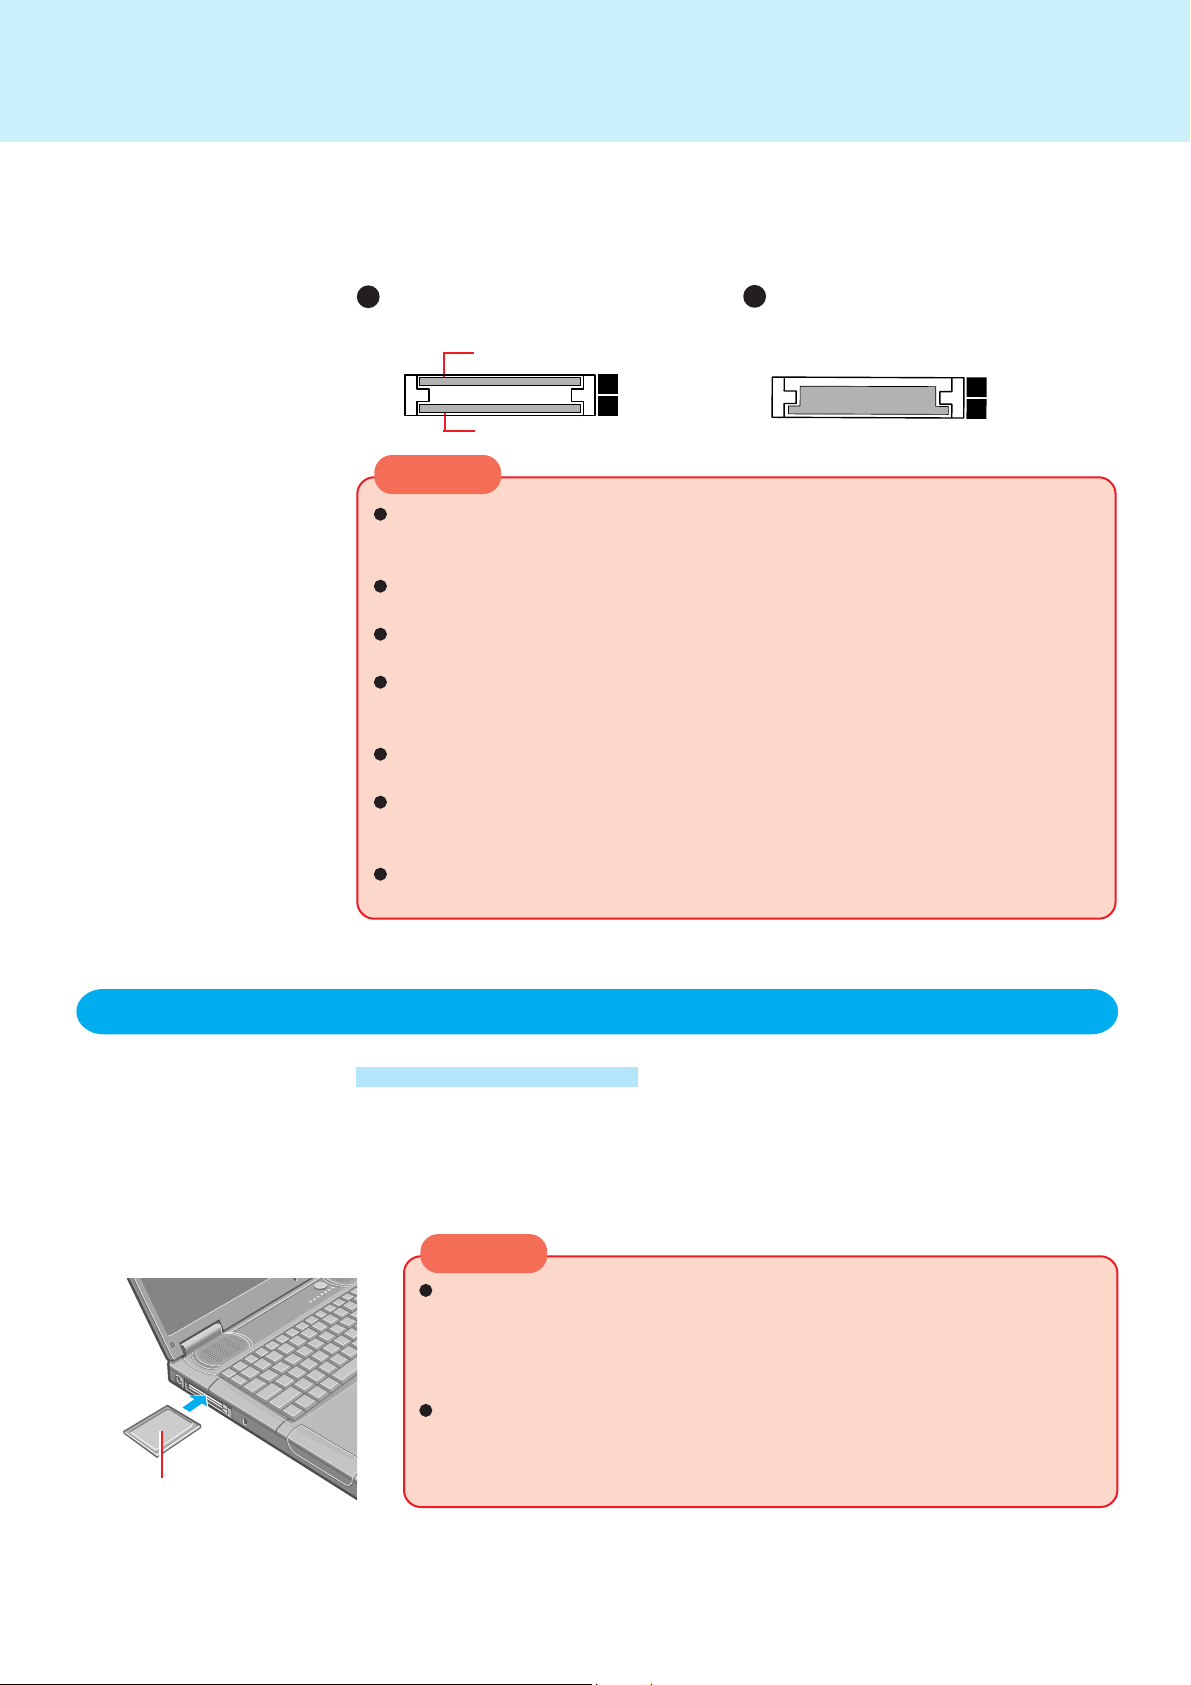
Your computer has two PC Card slots. These slots conform to the PC Card Standard;
therefore, communications or SCSI devices, etc., may be utilized. The slots allow you to
use two Type I or Type II cards (or one Type I and one Type II), or one Type III card.
Type I or II
Two cards can be used simultaneously.
Slot (Socket) 2
Slot (Socket) 1
Type III
One card can be used only in the slot 1.
CAUTION
Check the PC Cards’ specifications. Be sure the total operating current does not
exceed the specified limit. Damage may result otherwise.
Allowable Current (total for two slots) : 3.3 V: 400 mA, 5 V: 400 mA
There are times when both a Type I card and a Type II card will not work at the
same time.
ZV card, SRAM card, FLASH ROM card (except for an ATA interface) and card
requiring 12V are not supported.
With the repeated insertion/removal of a PC Card, the computer may no longer
recognize the PC Card (depending on the type of card).
In such cases, restart the computer.
When inserting one more CardBus type card with one already inserted, after entering the standby or hibernation mode, the computer may not function properly.
If the computer freezes after resuming from the standby or hibernation mode, try
removing and then reinserting the PC Card. If this does not correct the problem,
restart the computer.
When the PC Card is connected, power consumption increases. Remove the PC
Card when not in use, especially when operating on battery power.
Inserting/Removing the PC Card
Inserting a PC Card
Simply slide the PC Card in with label-side up until it snaps into
place
Refer to the operation manual of each card on how to inser t the card (insertion is
typically label-side up).
CAUTION
When using a PC Card to connect a peripheral device (SCSI, IEEE 1394,
etc.):
1
Connect the peripheral device to the card.
2
Turn the device on.
3
Slide the card in until it snaps into place.
When inserting a card, do not force the card in if difficulty is encountered.
Depending on the shape of the card, a segment may remain protruding
from the slot after insertion. Do not try to force the card all the way in. You
Label-side up
may damage the slot, making it impossible to remove the card.
(To next page)
Page 33
PC Cards
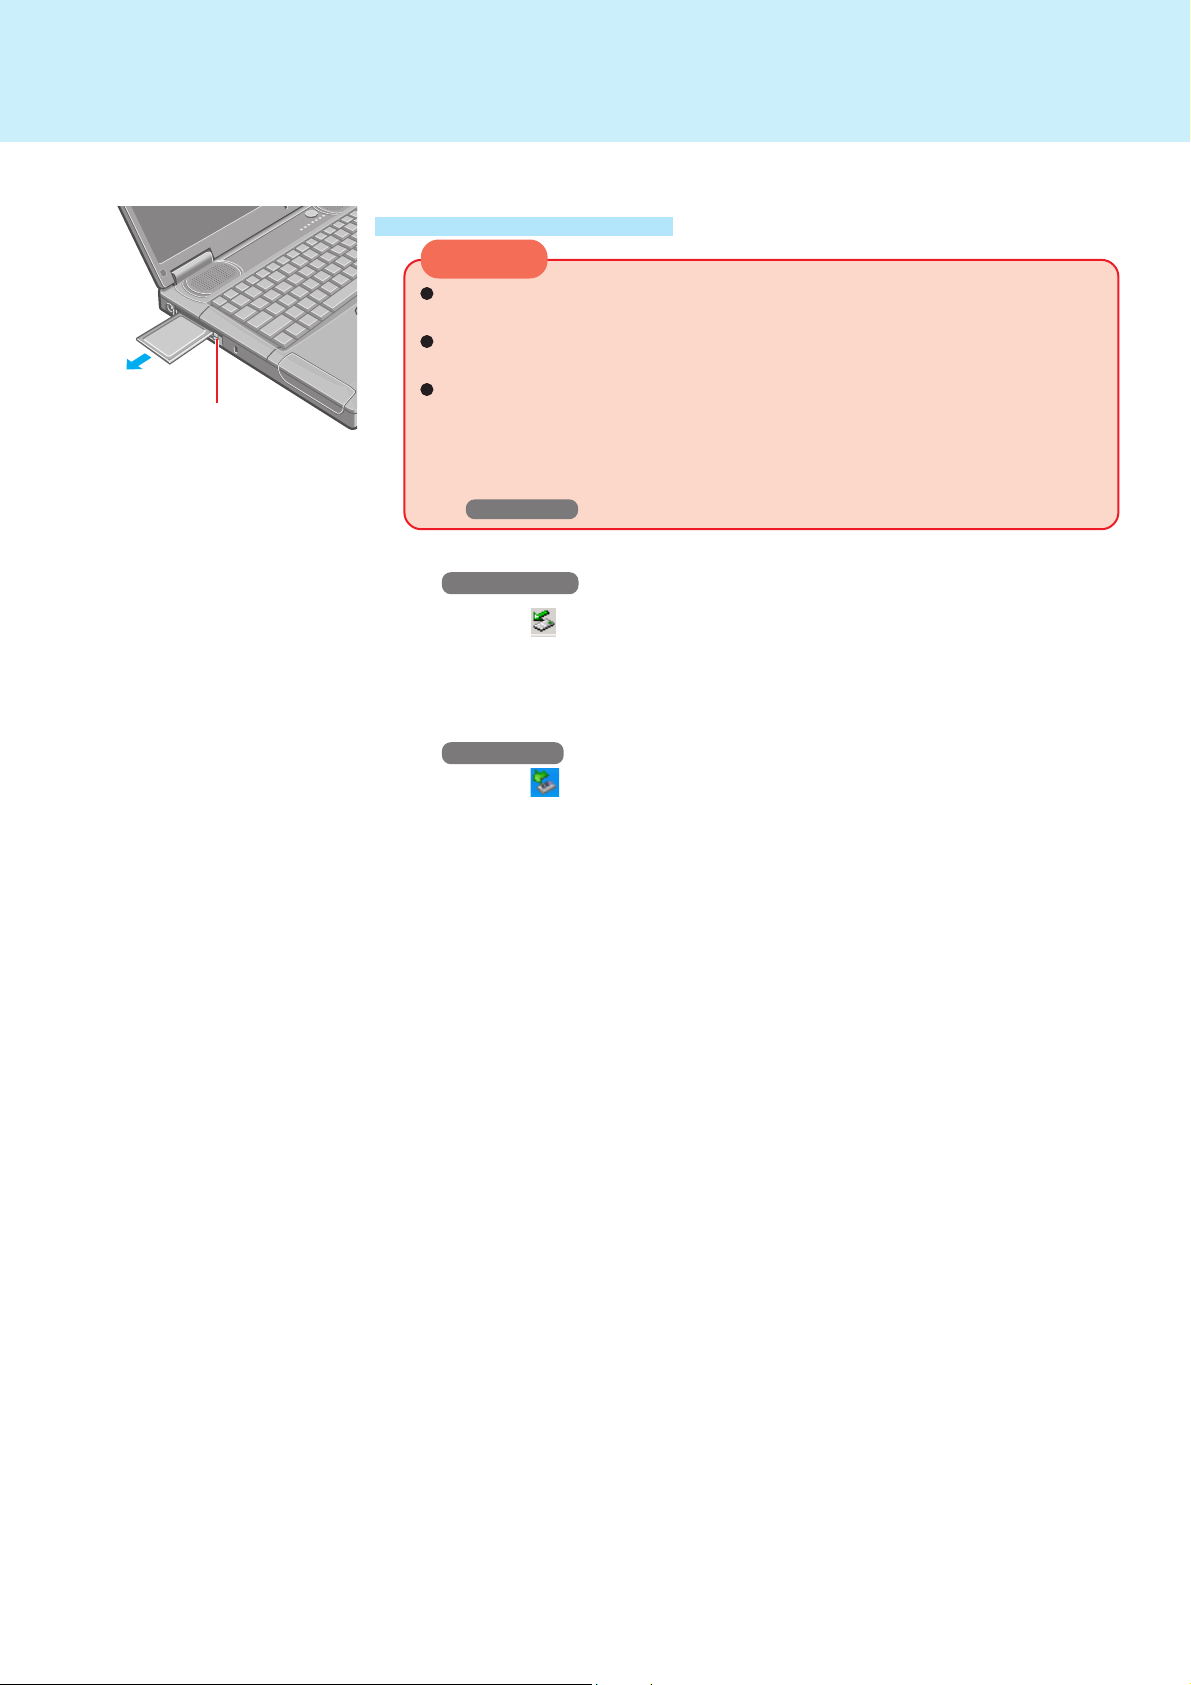
Eject Button
Removing a PC Card
CAUTION
Do not remove a PC Card while your computer is in the standby or hibernation mode.
When two PC Cards are inserted, perform the following procedure (from
Step 1 to Step 3 for each of the two cards.
Note that the operation of removing the PC Card may not be complete,
depending on the status of the PC Card or device connected to the PC
Card, such as when a SCSI card is used to connect an external hard disk to
the computer. In such cases, turn off the power from [Start]* menu, then
remove the card.
* Windows XP : [start]
Windows 2000
1
Select on the taskbar, select the PC Card, then select
[Stop]
Follow the on-screen instructions.
(When the PC Card has been removed after the computer is turned off, this
step is not necessary.)
Windows XP
Select on the taskbar, select the PC Card, then select
[Stop]
Follow the on-screen instructions.
(When the PC Card has been removed after the computer is turned off, this
step is not necessary.)
33
2
Press the button out, then press the button again
3
Slide the PC Card out
Page 34
RAM Module
Use a RAM module meeting the RAM module specifications below. If a module is
used that does not meet the specifications, there are cases in which data may
become unusable or the computer may not operate properly.
200 pins, SO-DIMM, DDR-SDRAM, PC2100 Compliant
Only a RAM module designed for PC2100 can be added.
CAUTION
RAM modules are extremely sensitive to static electricity. There are cases
where static electricity generated by the human body has adversely affected
such modules. When inserting or removing a RAM module, do not touch the
terminals or internal components, insert objects other than the module, or allow foreign particles to enter. Doing so has been known to cause damage, fire
or electric shock.
Inserting/Removing RAM Module
34
RAM module specifications
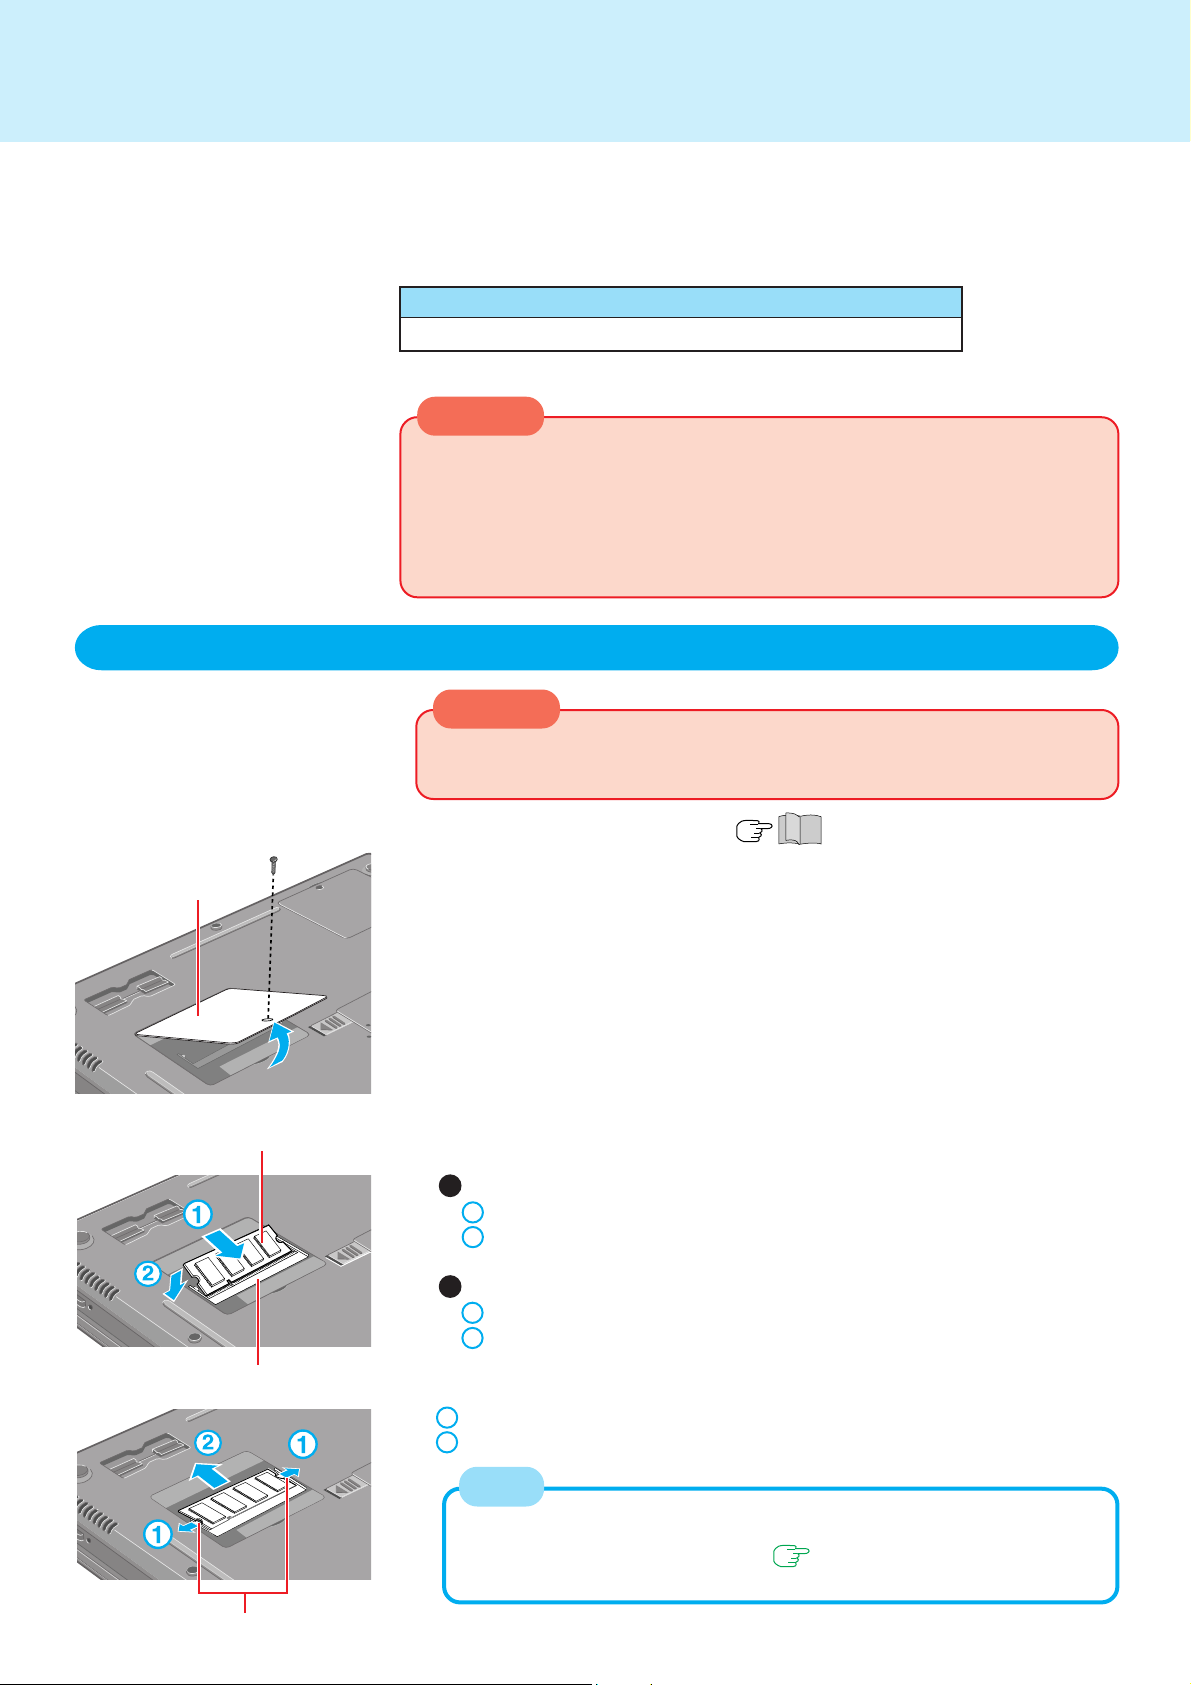
Memory Cover
RAM Module
Screw
CAUTION
If the RAM module is difficult to insert or difficult to press down, do not force
it. Check once more to ensure that the module is positioned correctly.
1
Power off your computer ( "Starting Up/Shutting Down")
Do not shut down using the standby or hibernation function.
Disconnect the AC adaptor, turn the computer over and remove the battery
pack.
2
Remove the memory cover after removing the screw holding
it in place
3
Inserting the RAM module
1 Slide in the module at an angle and firmly attach it to the connector.
2 Snap the module into place by pushing down on it.
Removing the RAM module
1 Open the left and right hooks.
2 Gently remove the RAM module from the slot.
RAM Module Slot
Hooks
4
Put the cover back into place
1 Insert the cover diagonally, then fit it in place.
2 Fasten the screw.
NOTE
Whether the RAM module is properly recognized or not can be confirmed
in [Information] of the Setup Utility ( page 50). If the RAM module is
not recognized, power off the computer and insert it again.
Page 35
Port Replicator
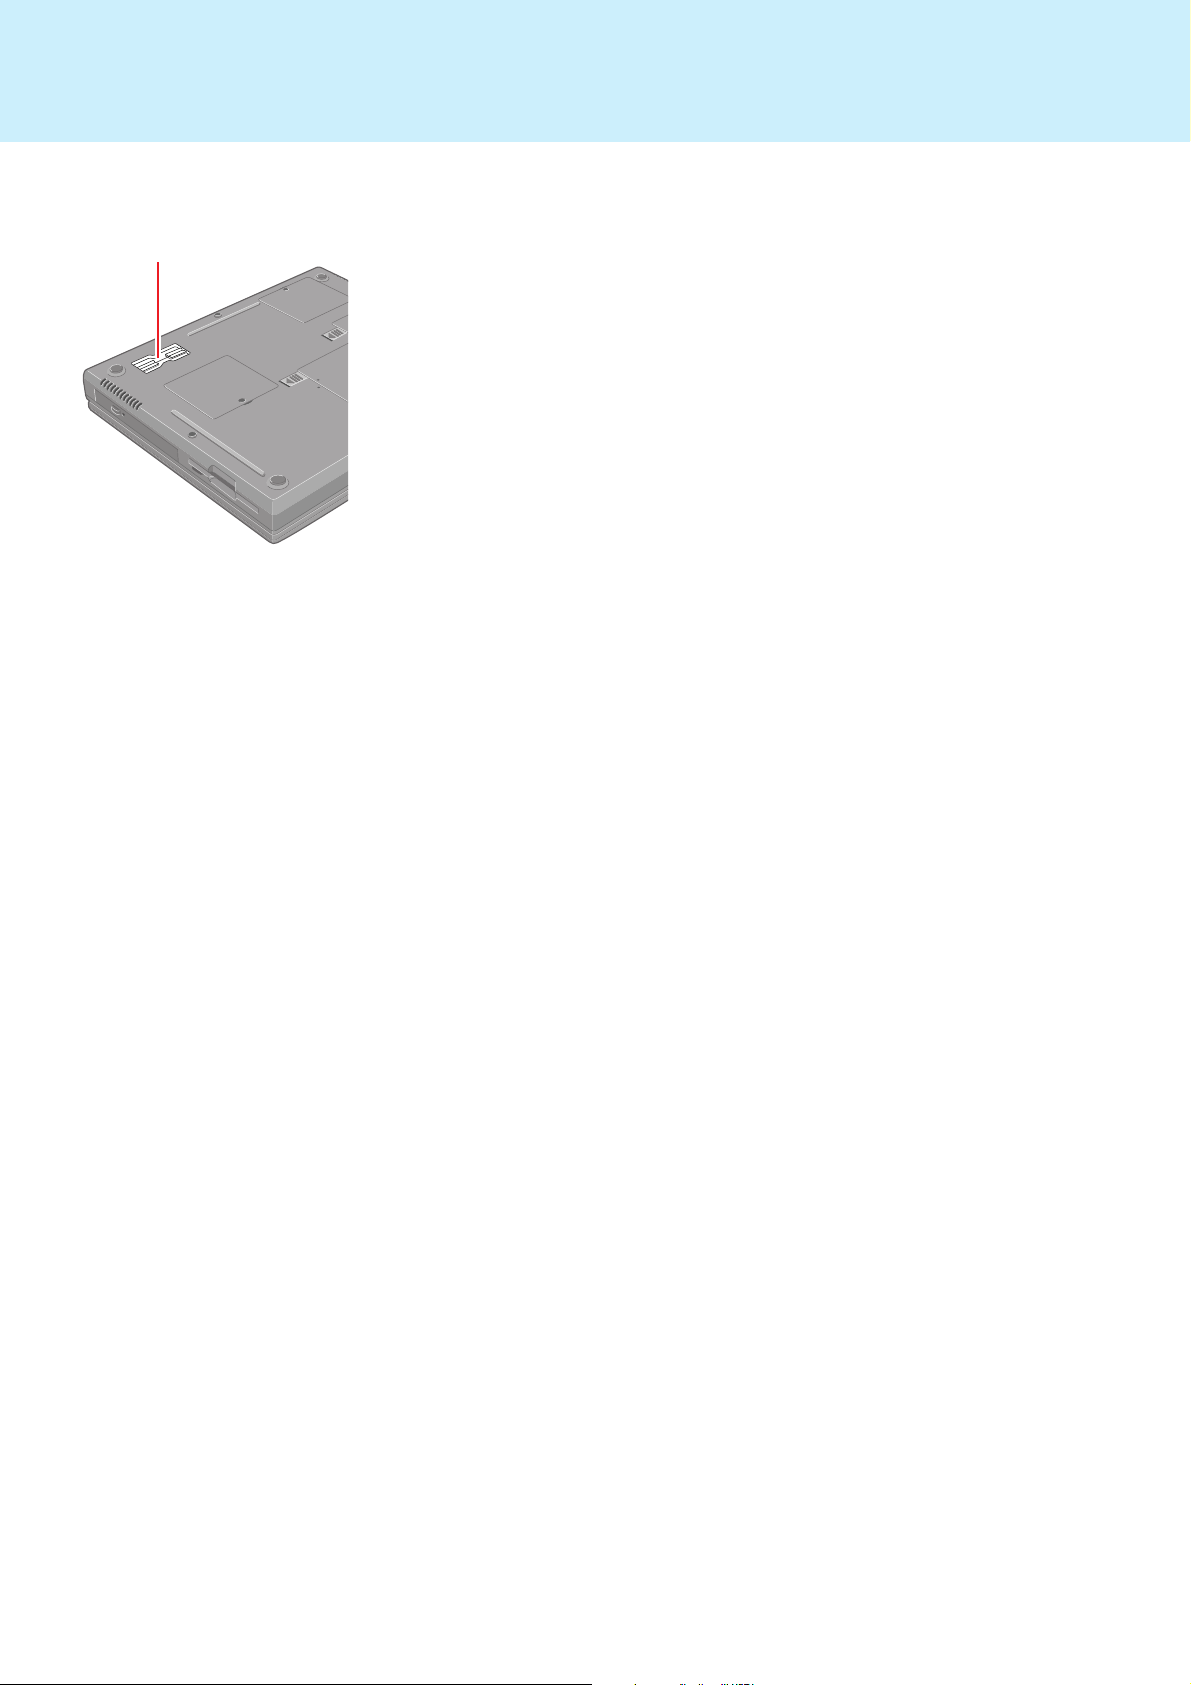
A port replicator is available as an option (CF-VEB501). This device elimi-
Expansion Bus Connector
nates the hassles of having you connect/disconnect the various cables when
carrying your computer around and allows a variety of peripherals to be
connected.
The port replicator connects to the expansion bus connector on the bottom
of your computer.
For more detailed information, refer to the operation manual of the port
replicator.
35
Page 36
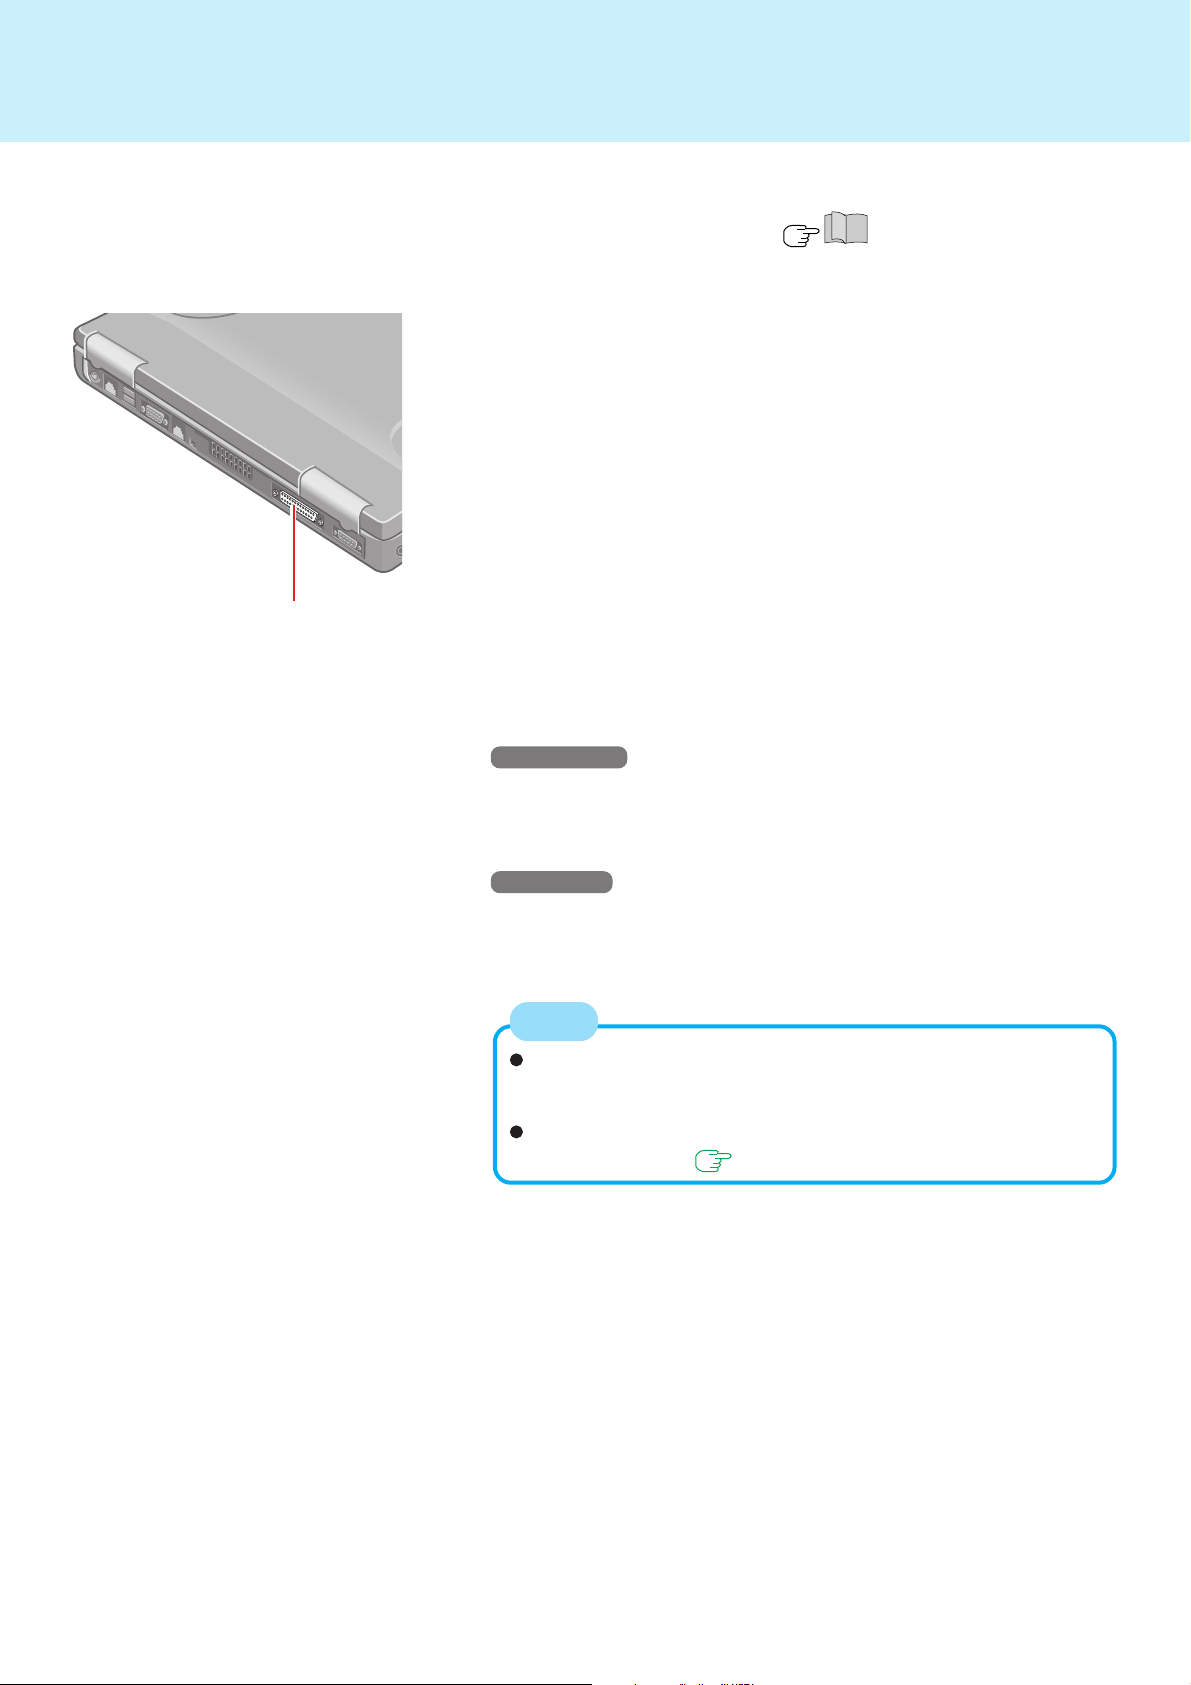
Printer
Parallel Port
1
Power off your computer ( “Starting Up/Shutting Down”)
Do not shut down using the standby or hibernation function.
2
Connect the printer to your computer
3
Turn on the printer, then turn on your computer
36
4
Setting your printer
Windows 2000
Select [Start] - [Settings] - [Printers].
Find your printer’s icon, click on it, then select [File] - [Set as Default
Printer]. If no icon is available, select [Add Printer] icon and follow the
on-screen instructions.
Windows XP
Select [start] - [Printers and Faxes].
Find your printer’s icon, double-click on it, then select [Printer] - [Set as
Default Printer]. If no icon is available, select [Add a printer] and follow
the on-screen instructions.
NOTE
You may need to install a driver for your printer. Follow the onscreen instructions and refer to the operation manual of the printer
on how to install the driver.
Confirm whether or not the setting for [Parallel Port] in the Setup
Utility is optimal. ( page 51)
Page 37
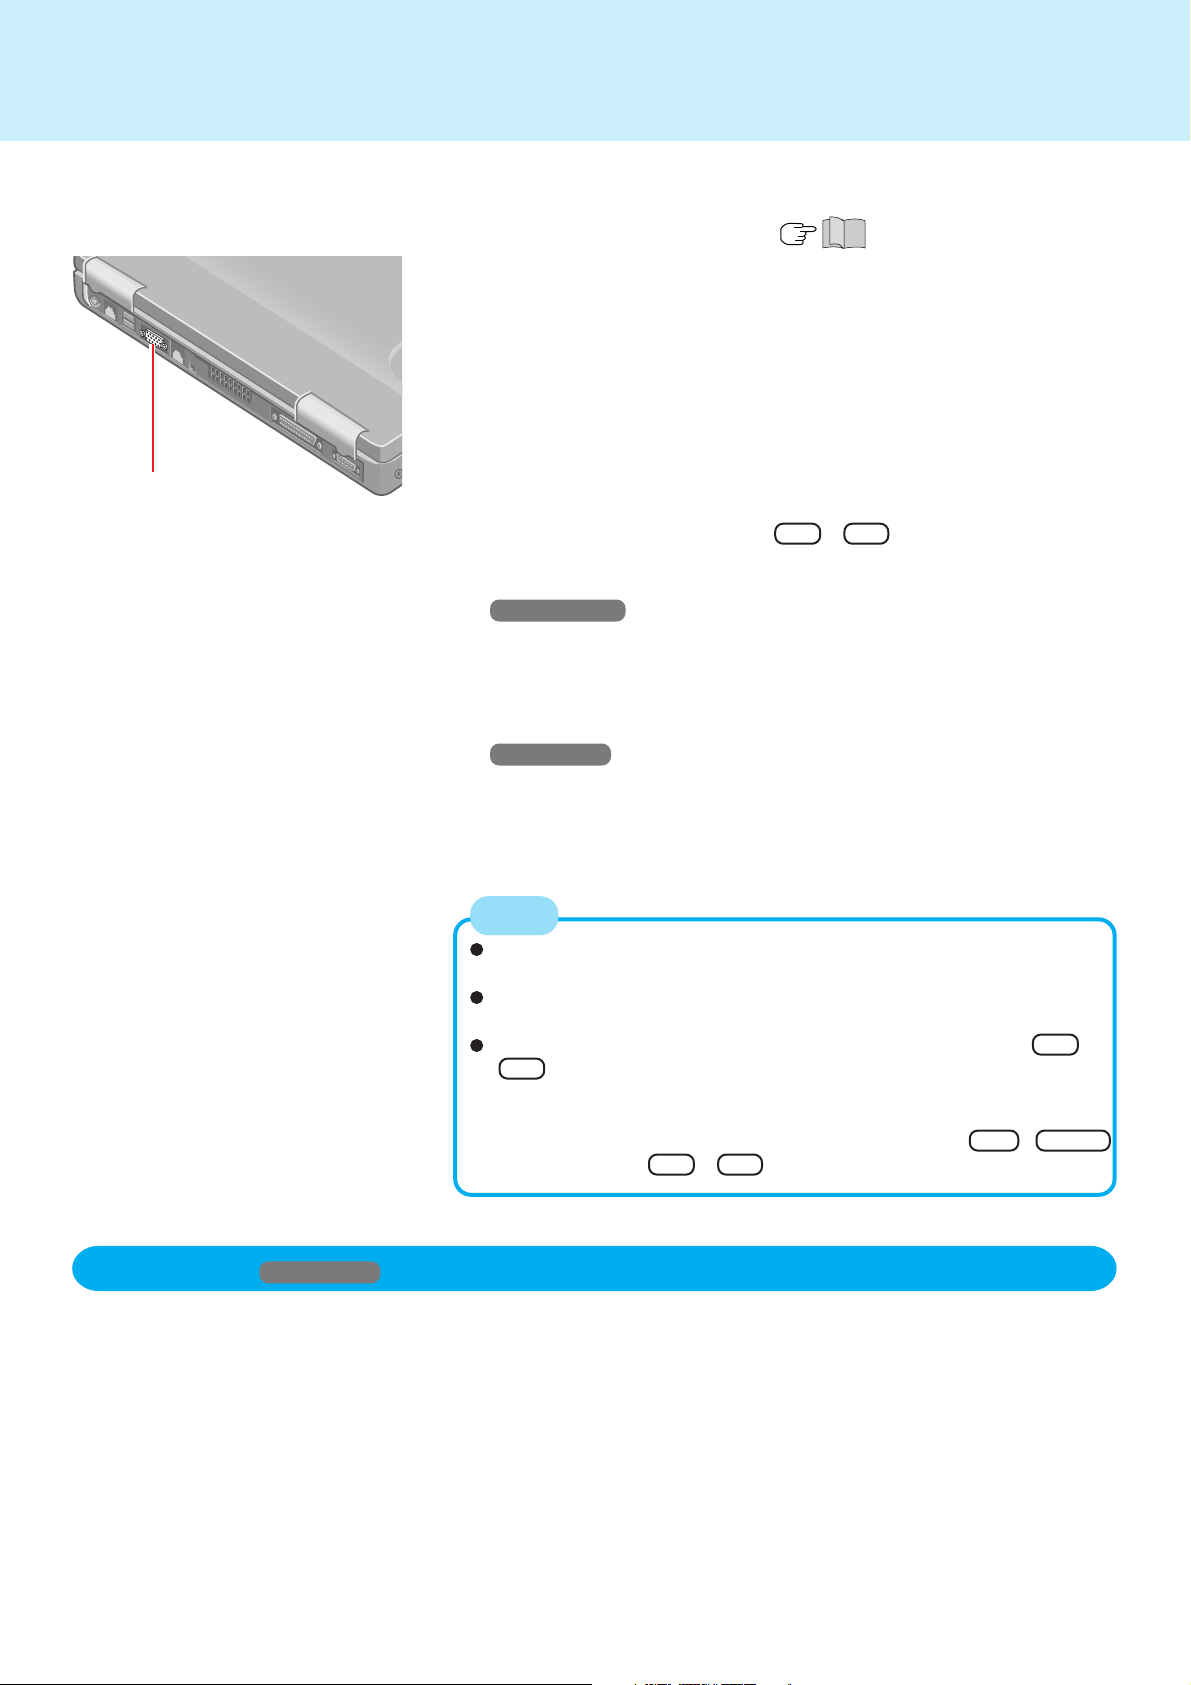
External Display
1
Power off your computer ( "Starting Up/Shutting Down")
Do not shut down using the standby or hibernation function.
2
Connect the external display to the external display port
on your computer
3
Turn on the external display, then turn on your computer
When an external display is connected, the computer displays on both
the internal LCD and the external display after Windows starts up re-
External Display Port
gardless of [Display] setting in the Setup Utility.
It is possible to change the setting to display only on the external display
or only on the internal LCD with Fn + F3 .
4
Set your external display
Windows 2000
Select [Start] - [Settings] - [Control Panel] - [Display] - [Settings] - [Advanced] - [Monitor] and make the monitor settings.
When a monitor that does not conform to the Plug & Play standards is
connected, select [Monitor] - [Properties] - [Driver] - [Update Driver] and
make the monitor settings.
Windows XP
Select [start] - [Control Panel] - [Appearance and Themes] - [Display] [Settings] - [Advanced] - [Monitor] and make the monitor settings.
When a monitor that does not conform to the Plug & Play standards is
connected, select [Monitor] - [Properties] - [Driver] - [Update Driver]
and make the monitor settings.
37
Dualview Windows XP
NOTE
For more detailed information, refer to the operation manual of the
external display.
Set number of colors, screen resolution, or refresh rate correctly to
suit the monitor.
When the display destination of the screen is switched using Fn +
F3 after [Command Prompt] screen is set to “Full Screen”, the
display destination returns to the destination before switching if an
“EXIT” is input and [Command Prompt] screen is closed. This can
also happen if the “Full Screen” is canceled via an Alt + Enter
command. Press Fn + F3 again.
With Dualview, you can use both the internal LCD and the external display
as an extended display domain. You can also drag a window from the internal LCD to the external display. To use the Dualview;
1
Select [Settings] in [Control Panel] - [Appearance and Themes] - [Display].
2
Select display [2] and add a check mark for [Extend my Windows desktop
onto this monitor], then select [Apply].
3
Make the settings for each display (screen area, colors, etc.).
(To next page)
Page 38
External Display
NOTE
When using Dualview, the display destination of the screen cannot be changed
with Fn + F3 .
If you change the resolution and/or color setting, be sure to restart the computer.
There are some applications that cannot be used in the Dualview.
When the button to maximize a window is pressed, one of the displays will show
the maximized display.
A window that has been maximized cannot be moved to the other display.
When the Dualview is being utilized, the pop-up icon window is displayed only on
the display [1].
CAUTION
When the application running is not shown on the display, refer to the following
items.
(Under the condition the application is in the external display (external display
[2]), or after the application is closed in the external display, there are cases the
application will not be shown in the display when executed the next time if the
position of the Extension Display is changed or the Dualview is closed.)
38
When there is no display after the position of the Extension Display is
changed:
The application running is being displayed at the position of the Extension
Display before the change. Return the position of the Extension Display to the
condition before the change. Move the application to the internal LCD (internal
LCD [1]), and then correct the position of the Extension Display.
When there is no display when the Dualview is disabled:
The application running is being displayed in the external display (external
display [2]). Set the Dualview again, move the application from the external
display (external display [2]) to the internal LCD (internal LCD [1]) and then
disable the Dualview.
When the Dualview is used, set [Never] for [Plugged in] and [Running on batteries] for [Turn off monitor] in [Control Panel] - [Performance and Maintenance] [Power Options] - [Power Schemes].
If this setting is not made, there are cases the display will not be shown properly.
To prevent images from being burned onto the external display, manually shut off
the power to the external display when the display does not have to be used.
When the display domain for the Dualview is changed, there are cases the wallpaper and icons become displaced.
Wallpaper: Change the setting for the wallpaper.
Icons: Run the command to automatically realign the icons. (Auto Arrange)
When an animated pointer is used for the mouse pointer (e.g., when changing
the theme in [Appearance and Themes] of [Control Panel]), an error may occur
when resuming from the standby or hibernation mode. In such cases, change
the mouse pointer to the standard pointer with the following procedure.
1
In [Control Panel], select [Printers and Other Hardware] - [Mouse].
2 Select [Pointers].
3
Select [Windows Default (system scheme)] in [Scheme], then select [OK].
When an external display not compatible with VESA DPMS is used, there are
cases the display of the external display will be adversely affected when the LCD
panel is closed. In such cases, turn the power of the external display OFF.
Page 39
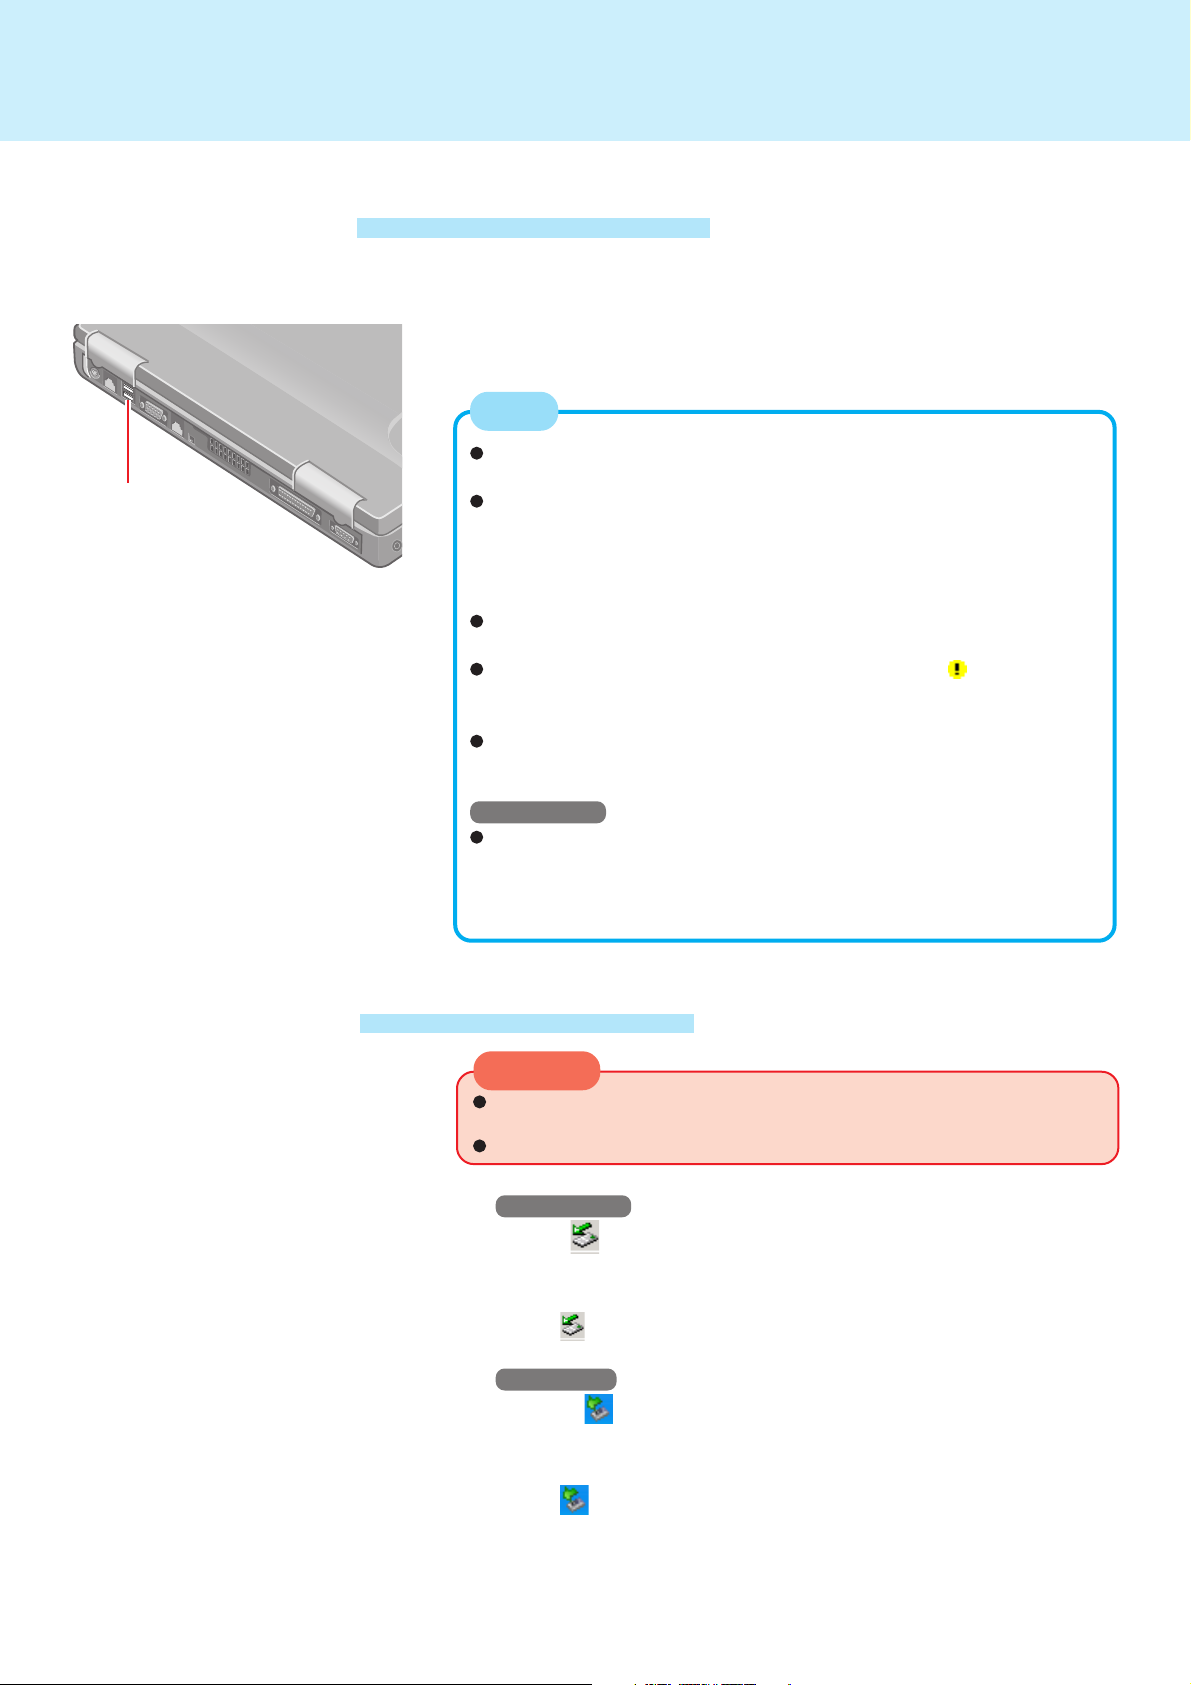
USB Devices
Connecting USB devices
USB Ports
39
Connect the USB device to your computer, referring to the
operation manual of the USB device
You may need to install drivers compatible with the OS you are using for your
USB devices. Follow the on-screen instructions and refer to the operation
manual for USB devices on how to install the driver.
NOTE
USB devices may be attached or removed without turning off the
computer’s power.
When a USB device is connected, there are cases the standby or
hibernation function will not operate in a normal manner due to the
USB device. In addition, a USB device may have to be removed
temporarily and the computer restarted in cases where the computer
is unable to start up properly.
Some devices will not operate when connected to a USB HUB; these
devices must be connected directly to the USB port on your computer.
When a USB device is removed and then inserted, may appear in
the Device Manager and the device may not be correctly recognized.
If this happens, try removing and connect the device once more.
When USB devices are connected, power consumption increases.
Remove USB devices when not in use, especially when operating on
battery power.
Windows 2000
When the computer enters standby or hibernation mode and then resumes while a USB 1.1 device is connected, a device disconnection
warning message may appear on the screen, but this will not impede
the computer’s operation.
Removing USB devices
CAUTION
Do not remove a USB device while your computer is in the standby
or hibernation mode.
Save important data and close each application.
1
Windows 2000
Select on the taskbar and select the USB device, then
select [Stop]
Follow the on-screen instructions.
(When is not displayed or when the USB device has been removed
after the computer is turned off, this step is not necessary.)
Windows XP
Select on the taskbar and select the USB device,
then select [Stop]
Follow the on-screen instructions.
(When is not displayed or when the USB device has been removed
after the computer is turned off, this step is not necessary.)
2
Remove the USB device
Page 40
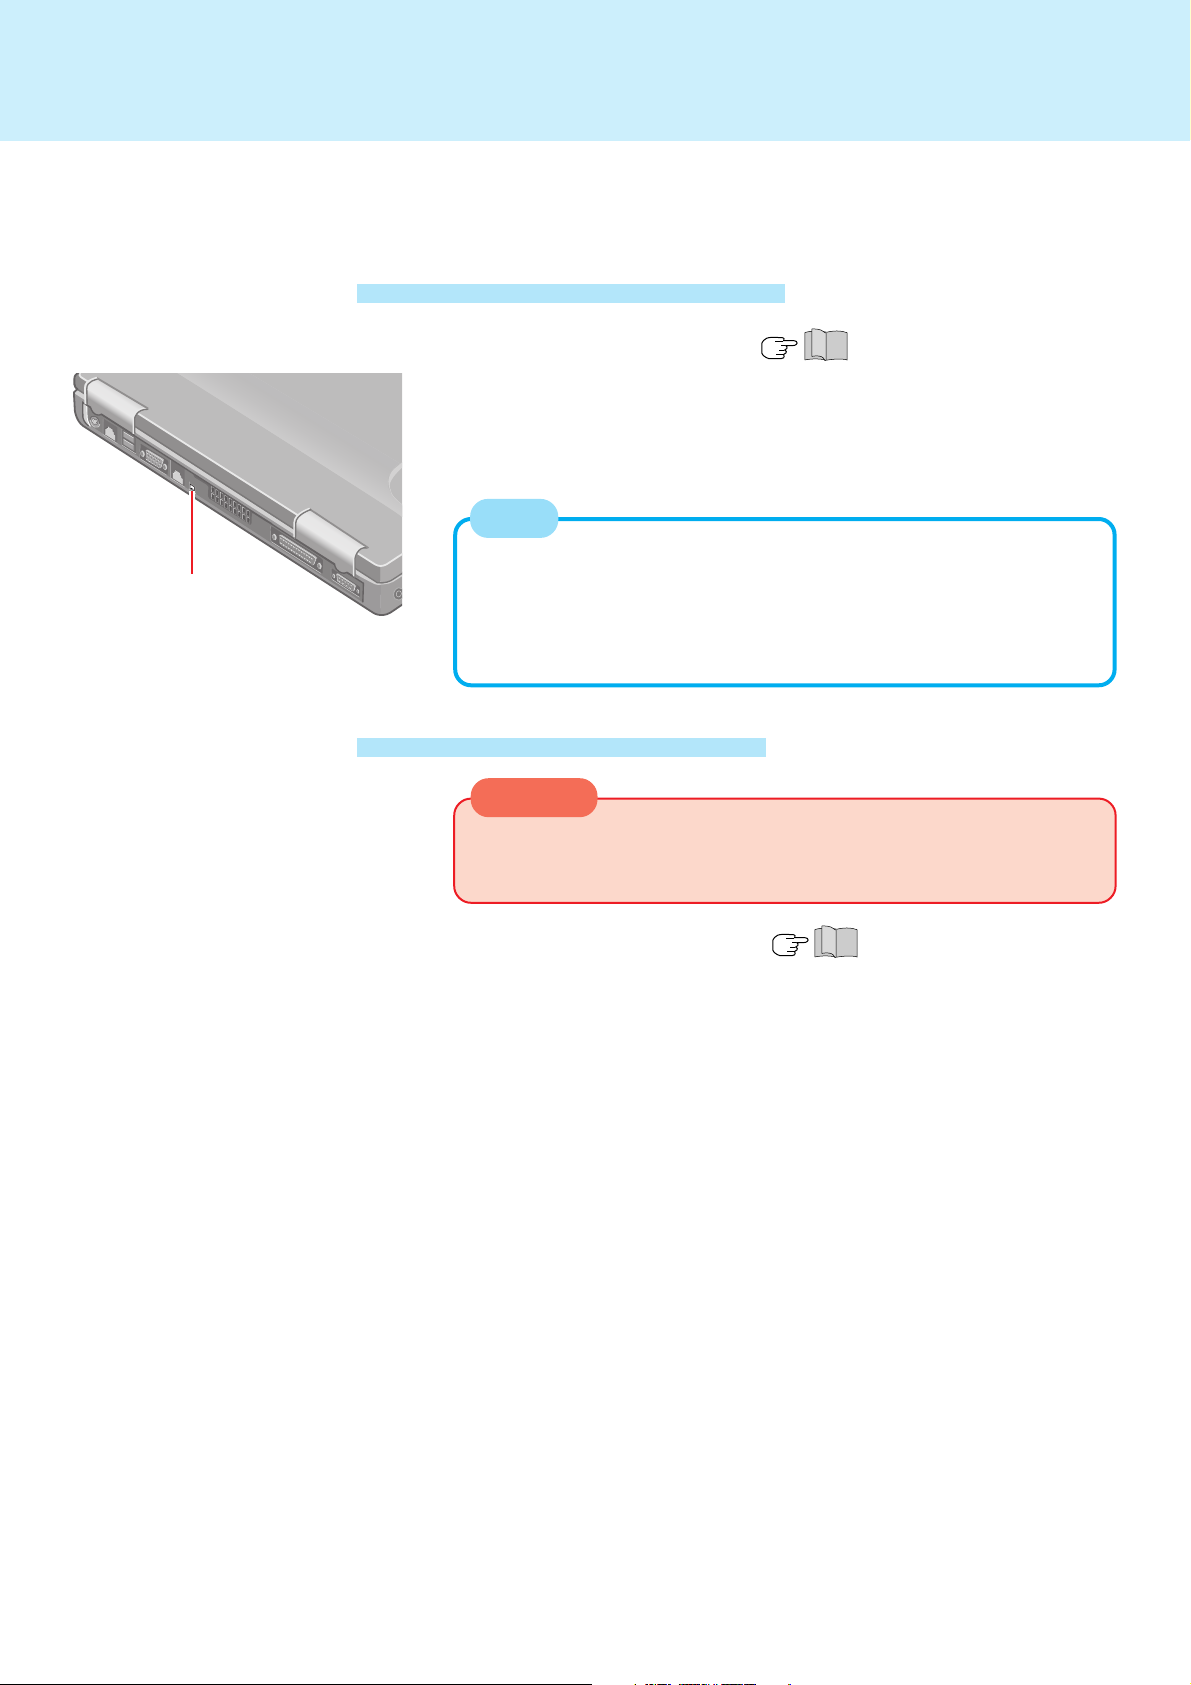
IEEE 1394 Devices
A digital video camcorder or other IEEE 1394 standard device can be connected to the
computer.
Connecting IEEE 1394 devices
1
Turn on the computer ( “Starting Up/Shutting Down”)
and the IEEE 1394 device
2
Connect the IEEE 1394 device to the computer
Refer to the instructions manual included with the IEEE 1394 devices.
NOTE
For more detailed information, refer to the operation manual of the IEEE
IEEE 1394 Interface
Connector
1394 device.
You may need to install drivers compatible with the OS you are using for
your IEEE 1394 devices. Follow the on-screen instructions and refer to
the operation manual for IEEE 1394 devices on how to install the driver.
40
Removing IEEE 1394 devices
CAUTION
When an IEEE 1394 device is connected to the computer and the power
for both the device and the computer is on, do not power off the IEEE
1394 device.
1
Power off the computer ( “Starting Up/Shutting Down”)
and remove the cable from the IEEE 1394 Interface connector of the computer
2
Power off the IEEE 1394 device and remove the cable
Page 41
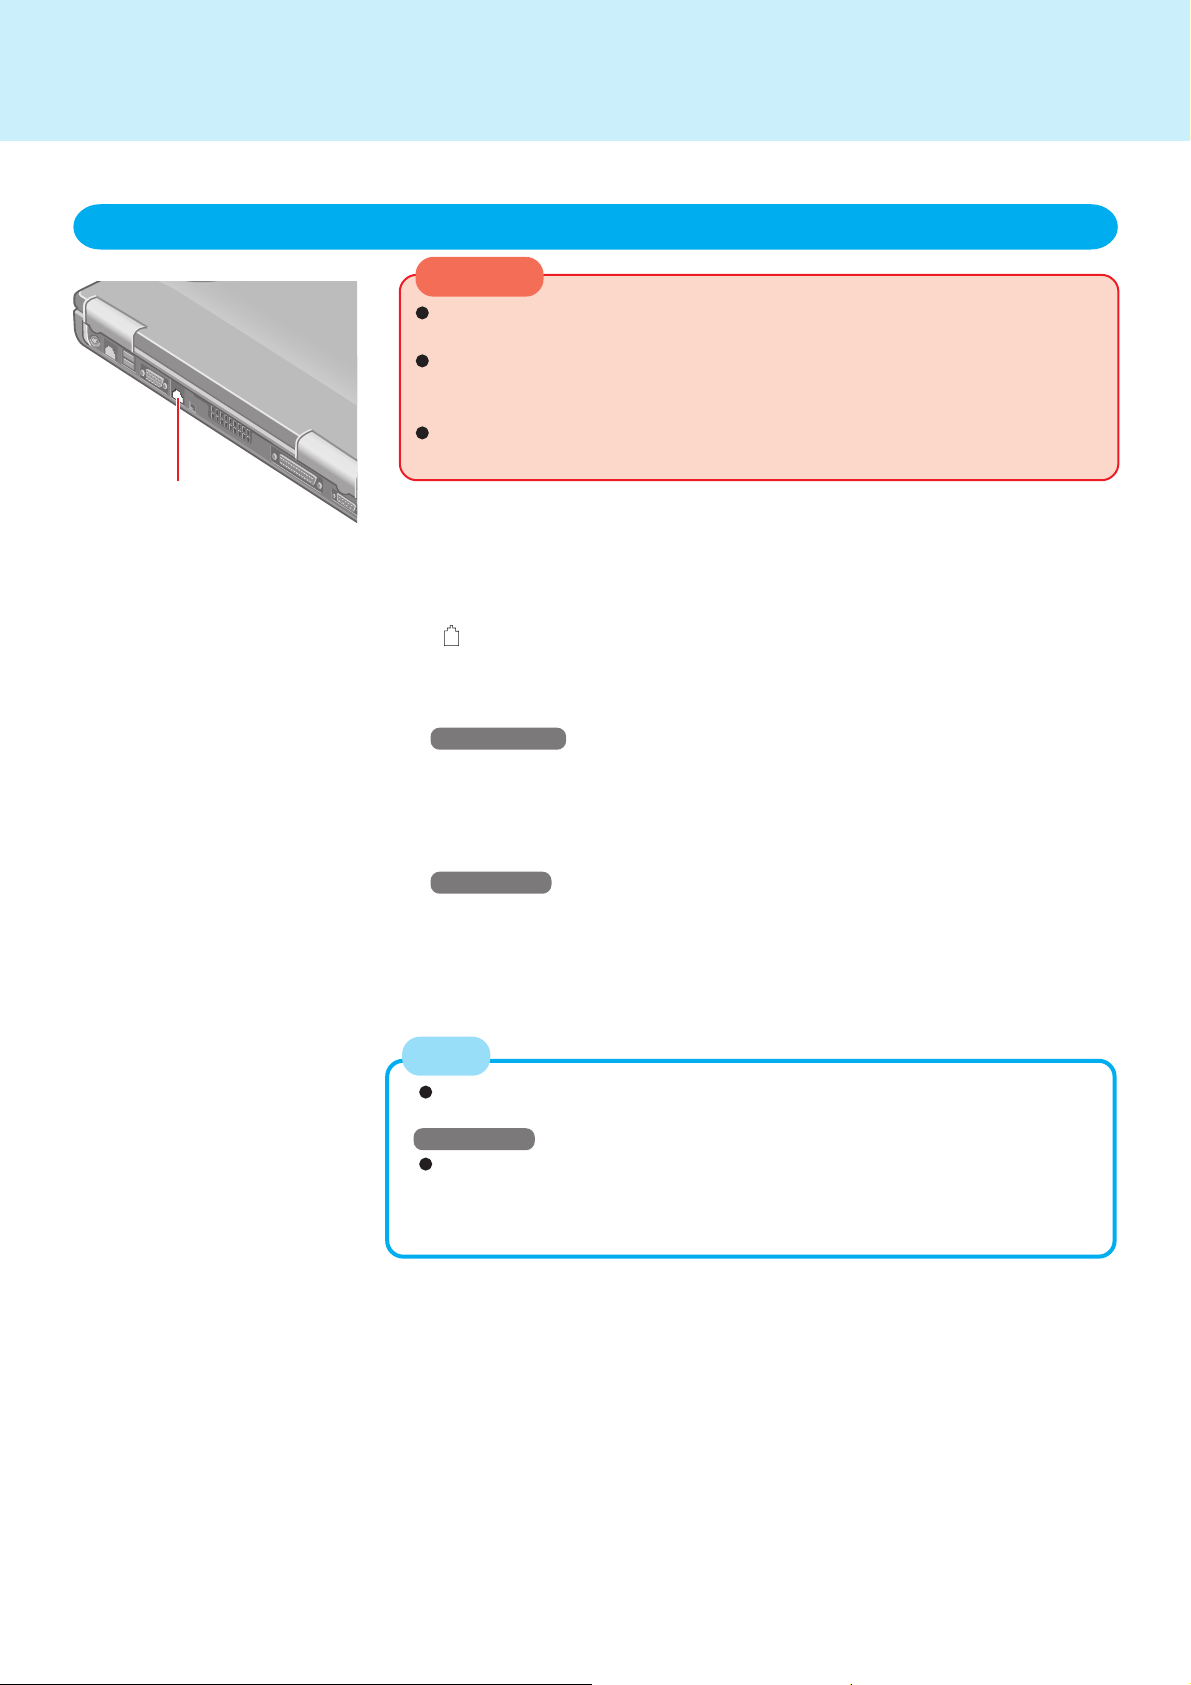
Modem
Connecting the Internal Modem with a Telephone Jack
CAUTION
Do not use the PBX internal phone lines inserted in company offices. Doing so may lead to a fire or electric shock.
It is not possible to connect the modem to any of the following lines.
· Internal home phones
· Intercoms
Be sure to connect the modular cable into the modem port, not into the
LAN port.
Modem
1
Connect the computer and the telephone jack using a modem telephone cable
Open the modem cover, position the cable so that the tab matches the port
( ), and insert the cable.
41
2
Set the modem
Windows 2000
1
Select [Edit] in [Start] - [Settings] - [Control Panel] - [Phone and Modem Options] - [Dialing Rules], then select the location from which you will be dialing
in [Country/region].
2
Input the necessary information (items such as the country, area code, etc.),
select [OK], then select [OK].
Windows XP
1
Select [Edit] in [start] - [Control Panel] - [Printers and Other Hardware] - [Phone
and Modem Options] - [Dialing Rules], then select the location from which
you will be dialing in [Country/region].
2
Input the necessary information (items such as the country, area code, etc.),
select [OK], then select [OK].
NOTE
Do not enter either the standby or hibernation mode during communications.
Windows XP
When creating a new connection via the New Connection Wizard, the
following error message may be displayed: [System error 1717 has occurred. The interface is unknown.] This will not affect the operation of
the computer. Disregard this error message.
Page 42
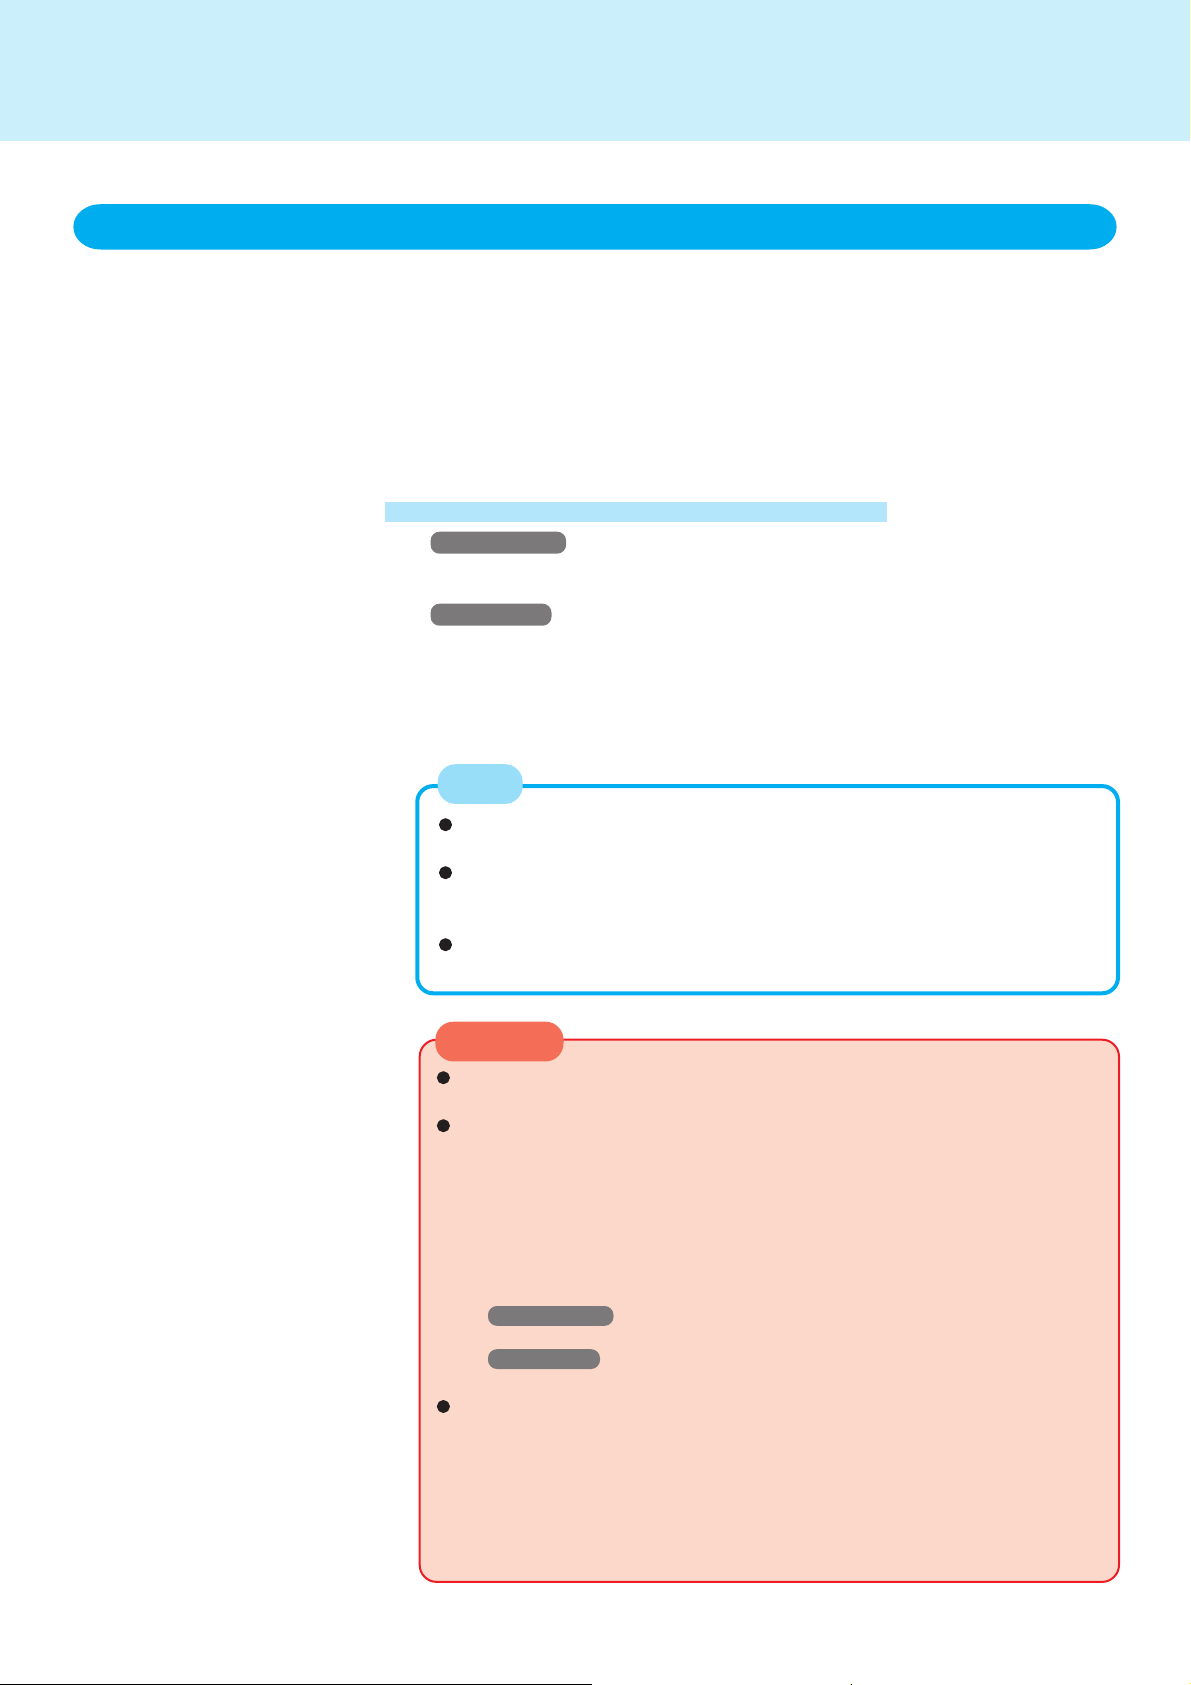
Modem
Ring Resume Function
With this function, if the telephone that is connected to the modem rings in the standby
mode, the power of the computer automatically switches ON.
This function is convenient when using automatic information receiving applications
such as a FAX application.
When using this function, it is necessary to run a software application able to maintain the condition to receive telephone calls and to return the computer to the original condition after a call. For further details, refer to the operation manuals provided
with software applications.
Enabling the Ring Resume Function
1
Windows 2000
Select [Device Manager] in [Start] - [Settings] - [Control Panel] - [System] [Hardware].
Windows XP
Select [Device Manager] in [start] - [Control Panel] - [Performance and Maintenance] - [System] - [Hardware].
2
Select the modem you are using from [Modems].
3
Select [Power Management], add the check mark for [Allow this device to bring
the computer out of standby], then select [OK].
42
NOTE
This function does not work when the computer is off or is in hibernation
mode.
After operations are resumed from standby status, the screen remains
dark. The former screen display will be restored when the keyboard or
touch pad is touched.
The computer cannot resume if a telephone is connected to the line of a
modem (e.g., a PC Card modem) other than the internal modem.
CAUTION
When using this function, it is recommended that the AC adaptor be connected to the computer.
Concerning the setting for [System standby]*
• Roughly consider the communication time and then set [System standby].
There may be cases where the computer enters the standby mode after
the time set for [System standby] elapses even during communications,
and cuts off the communications.
• If [Never] is set, the computer will not enter the standby mode during
communications, but once the computer resumes, the power of the computer will remain on while the user is absent.
* Windows 2000 : Select [Star t] - [Settings] - [Control Panel] - [Power Options]
- [Power Schemes]
Windows XP : Select [star t] - [Control Panel] - [Performance and Mainte-
nance] - [Power Options] - [Power Schemes]
When the Ring Resume function is being used, some time elapses before
a connection is established (equal to the time for the computer to resume).
To allow the computer to resume, set the “Call” to a larger value than a
typical telephone call.
If it is not possible for the sending side to set a long “Call”, set the “Number
of rings until answer” (with the software application that is able to maintain
the condition to receive telephone calls) to a small value.
Page 43
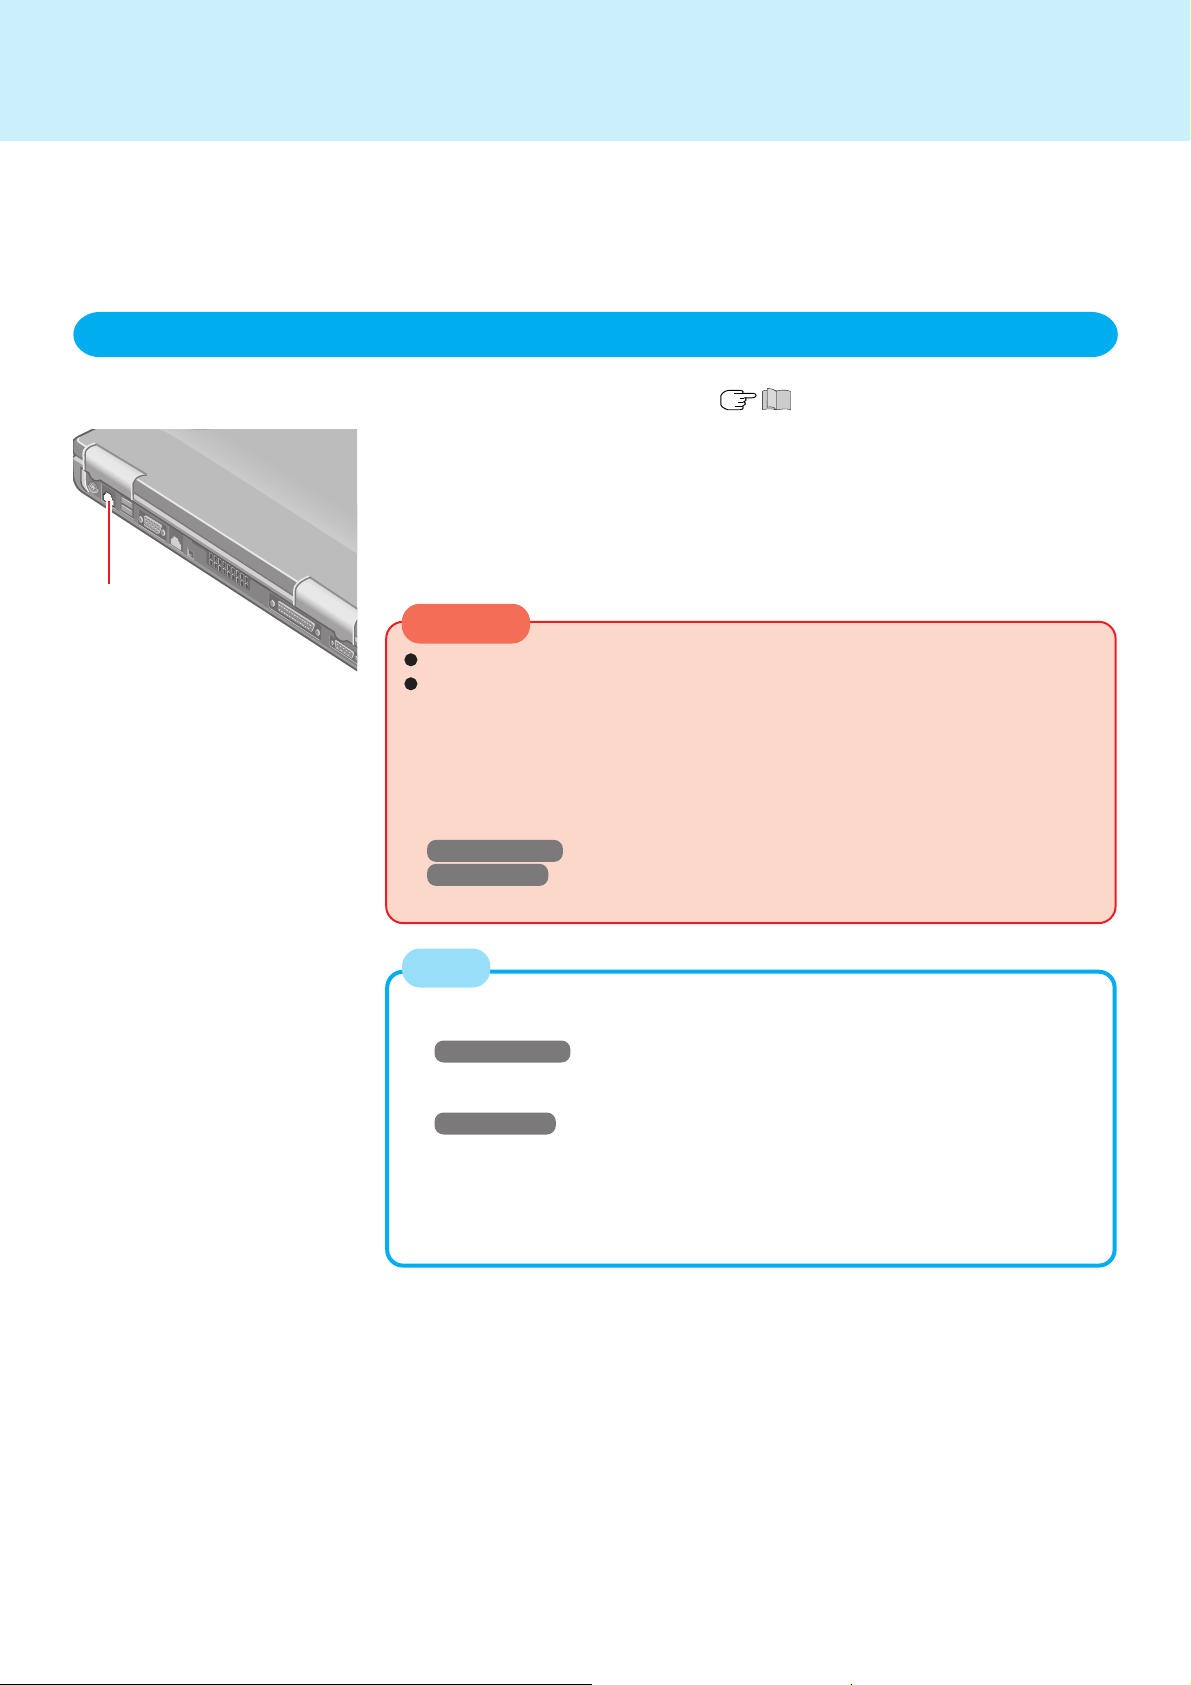
LAN
Connecting LAN
LAN
When using the computer as a network computer, some additional settings may
have to be made depending on the usage conditions. We recommend asking your
system administrator or the person in charge of the network.
1
Power off your computer ( “Starting Up/Shutting Down”)
Do not shut down using the standby or hibernation function.
2
Connect the cable
Connect the LAN port and the network system (server, HUB, etc.) using a LAN
cable.
CAUTION
Do not connect the modem telephone cable into the LAN port.
Do not use the standby or hibernation functions during communications (except when the Wake up from LAN function is in use), as this may cause an
error in data transmission or reception. The timeout function may engage
even during data transmissions, causing the computer to automatically go
into standby or hibernation mode. When not using the Wake up from LAN
function, we recommend disabling the timeout function using the following
procedure.
Windows 2000 : [Control Panel] - [Power Options] - [Power Schemes]
Windows XP : [Control Panel] - [Performance and Maintenance] - [Power
Options] - [Power Schemes]
43
NOTE
If you are unable to connect to the network (when the indicator of your HUB unit
does not light):
1
Windows 2000
Select [Device Manager] in [Start] - [Settings] - [Control Panel] - [System] [Hardware].
Windows XP
Select [Device Manager] in [start] - [Control Panel] - [Performance and Maintenance] - [System] - [Hardware].
2
Select the network adaptor name you are using from [Network adapters].
3
Select [Advanced].
4
Confirm the settings of each item.
Page 44
LAN
Wake up from LAN
This is a function of the internal LAN to automatically power the computer on from a
network server when the computer is in the standby or hibernation mode. To use this
function, it is necessary to have a network environment that accommodates Wake
up from LAN.
Enabling the Wake up from LAN Function
Windows 2000
1
Select [Device Manager] in [Start] - [Settings] - [Control Panel] - [System] [Hardware].
2
Select the network adaptor name you are using from [Network adapters].
3
Select [Power Management], add the check mark for [Allow this device to bring
the computer out of standby] and [Allow the computer to turn off this device to
save power], then select [OK].
4
Delete the check mark for [Prompt for password when computer goes off standby]
in [Control Panel] - [Power Options] - [Advanced], then select [OK].
Windows XP
1
Select [Device Manager] in [start] - [Control Panel] - [Performance and Maintenance] - [System] - [Hardware].
2
Select the network adaptor name you are using from [Network adapters].
3
Select [Power Management], add the check mark for [Allow this device to bring
the computer out of standby] and [Allow the computer to turn off this device to
save power], then select [OK].
4
Delete the check mark for [Prompt for password when computer resumes from
standby] in [Control Panel] - [Performance and Maintenance] - [Power Options]
- [Advanced], then select [OK].
44
NOTE
Be sure to connect the AC adaptor, and enable the supply of power.
Make settings to allow the use of a Local Area Network.
The computer will not “wake up” if the LAN cable is disconnected and reconnected.
The Wake up from LAN function will not operate under the following conditions:
When the computer has been shut down
When the power switch is pressed over for four seconds or longer to turn off
the power (e.g., when the computer hangs)
When the AC adaptor and battery pack are removed from the computer or
reattached to the computer
After operations are resumed from standby status, the screen remains dark.
The former screen display will be restored when the keyboard or touch pad is
touched.
The computer may start up if accessed by another computer on the network.
Windows XP
The following procedure can be used to prevent startup due to unintentional
access by a computer.
1
Select [start] - [Control Panel] - [Performance and Maintenance] - [System]
- [Hardware] - [Device Manager] - [Network adapters], then select the net-
work adaptor name you are using, and then select [Power Management].
2
Add the check mark for [Only allow management stations to bring the com-
puter out of standby], then select [OK].
Page 45
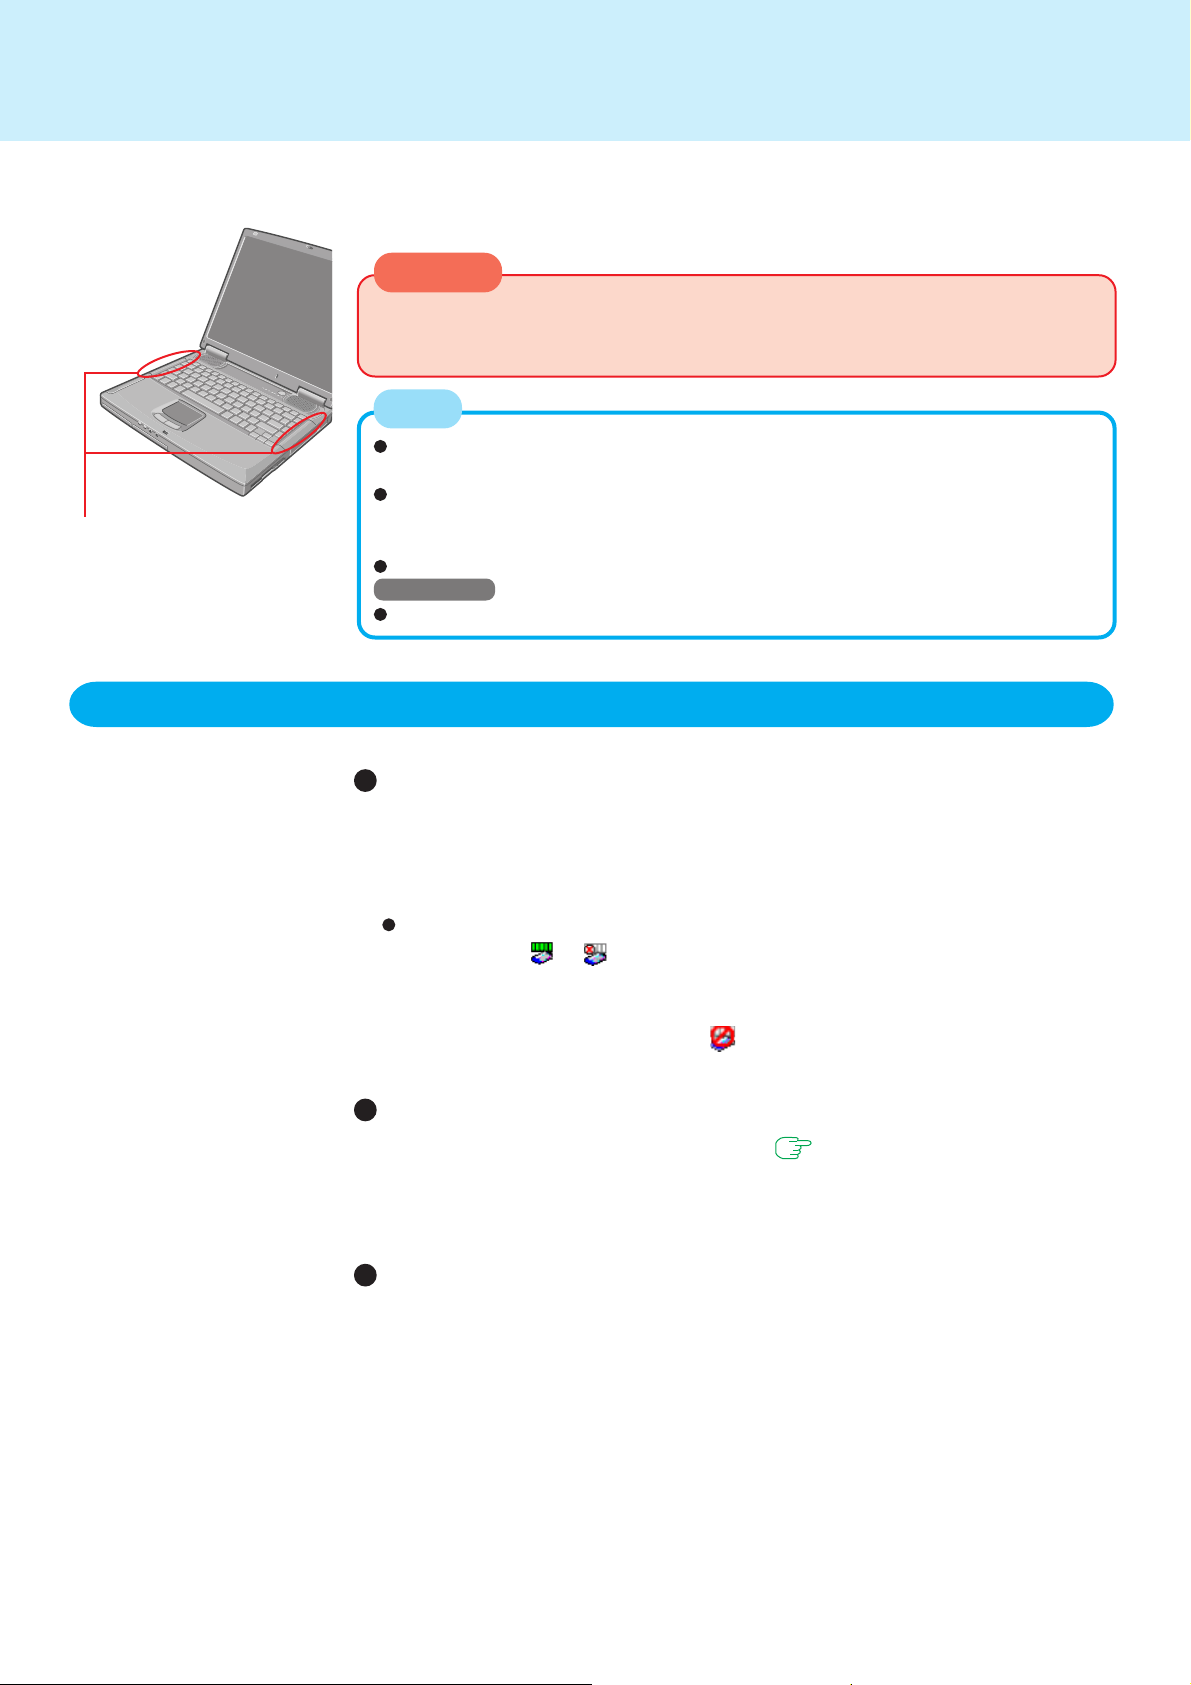
Wireless LAN
If you use a wireless LAN, you can use a network without cable connections.
CAUTION
Communication is performed through the wireless LAN antenna. Do not block the
antenna area with your hand or otherwise interfere with the passage of the radio
signals.
NOTE
The communication speeds and distances differ depending on the devices that support the wireless LAN, the installation environment and other ambient conditions.
One characteristic of radio waves is that their transmission rate tends to drop as
Wireless LAN Antenna
the communication distance increases. It is recommended that the devices supporting the wireless LAN be used in close vicinity to each other.
The rate may drop while a microwave oven is being used.
Windows XP
Do not use the Fast User Switching function.
45
Precautions
Do not use wireless LAN on airplanes, in hospitals, or in
other locations where wireless LAN signals may affect
the operation of devices in the vicinity
If you intend to use the computer in the environments described above, turn the
wireless LAN off using the following method:
To turn off the wireless LAN
1
Double-click or on the taskbar.
2
Select your wireless LAN adaptor and select [General].
3
Select [Off] for [Switch radio].
4
Select [OK]. The icon will turn to .
To prevent theft of data or unauthorized access to the
hard disk via a wireless LAN
If you plan to use wireless LAN functions, we recommend that you do so only after
making the appropriate security settings, such as for data encryption.
( page 13)
We recommend turning the wireless LAN off when it is
not in use or out of range
If you leave the wireless LAN on, the battery’s operating time is shortened.
Page 46
Wireless LAN
The Settings
To use the wireless LAN, set the profile using the following procedure.
The settings will vary for different network environments depending on the network
system being used. For more details, ask your system administrator or the person in
charge of the network.
46
CAUTION
Set profiles for each user by following the procedure shown below.
NOTE
Windows 2000
After setting the profile, delete the profile displayed at the time of purchase (profile
name: Default).
Windows XP
If [Windows XP is currently configured to manage the Intel(R) PRO/Wireless LAN
adaptor.] is displayed, select [Yes].
1
Double-click on the taskbar
2
Select your wireless LAN adapter and select [General]
3
Select [On] for [Switch radio]
4
Select [Networks] and select [Add]
5
Enter the profile name and network name, and then make other
necessary changes, then select [Next]
6
Make necessary changes and select [Finish]
7
Select [OK]
NOTE
About WLAN Security Client
WLAN Security Client is an implementation of the client side of the IEEE 802.1X-Port
Based Network Access Control protocol. 802.1X access control provides improved
security for both wired and wireless networks.
• Since the WLAN Security Client has already started when is displayed on
the taskbar, do not double-start it. If is not displayed, start up the WLAN
Security Client in the following menu.
Windows 2000
Select [Start] - [Programs] - [Intel] - [WLAN Security Client Manager].
Windows XP
Select [start] - [All Programs] - [Intel] - [WLAN Security Client Manager].
• For more information about how to use the WLAN Security Client, refer to the
[Help] in the menu bar or;
Windows 2000
Select [Getting Started Guide] or [User's Guide] in [Start] - [Programs] - [Intel].
Windows XP
Select [Getting Started Guide] or [User's Guide] in [start] - [All Programs] - [Intel].
Page 47

Wireless LAN
Check the Communication Status
Double-click or on the taskbar to check the communication status.
For more information about how to use the Intel PROSet, refer to [Help] in the menu bar.
If the function fails to operate correctly
Read the operating instructions for the access point carefully and check the settings.
The access point fails to be displayed in [Available Net-
works]
Select the profile you are using, and select [Advanced] in [Networks]. [Connect
to ad hoc networks only] may have been selected in [Connection preference]. In
this case, select [Connect to infrastructure and ad hoc networks].
This computer uses channels 1 through 11*. Check the channel being used.
* In the case of wireless communications, the frequency band being used can be
divided into segments, so that different communications can be conducted on
each band segment. A “Channel” refers to the individual frequency bandwidth
divisions.
47
The access point cannot be accessed
The network key setting may not conform to the access point.
Check the network key setting of the access point and, if necessary, set it again
correctly.
Depending on the access point and settings, access may not be accepted unless
the computer’s MAC address is registered beforehand. In this case, check the
computer’s MAC address using the following procedure and register it according to
the operating instructions of the access point.
1
Display [Command Prompt]
Windows 2000
Select [Start] - [Programs] - [Accessories] - [Command Prompt].
Windows XP
Select [start] - [All Programs] - [Accessories] - [Command Prompt].
2
Input [ipconfig /all], and press Enter.
3
Make a note of the 12-digit string of alphanumerics displayed on “Physical Address” line on Wireless LAN side. Then input [exit], and press Enter .
The IP address of the access point is wrong
Following the operating instructions of the access point, set the IP address of the
access point again correctly.
Page 48
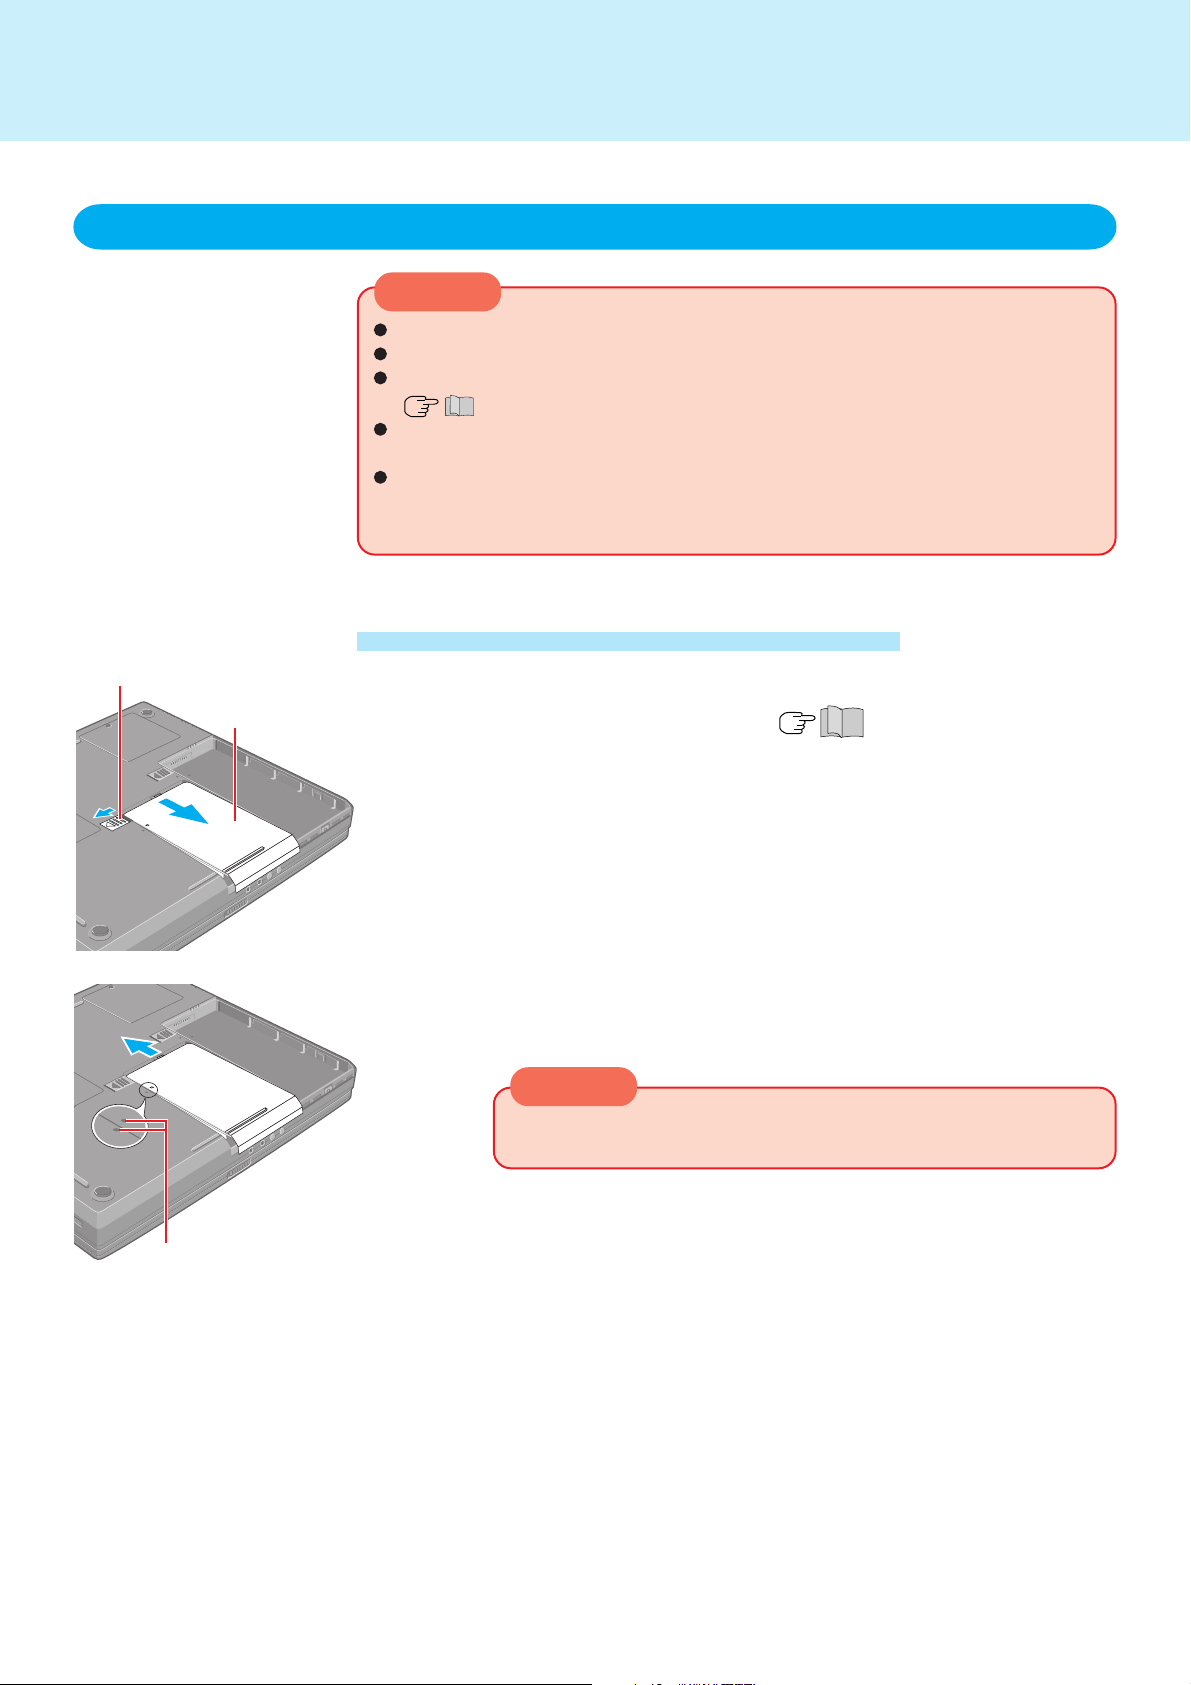
Hard Disk Drive
To change your hard disk drive, contact Panasonic Technical Support
CAUTION
To change your hard disk drive, contact Panasonic Technical Support.
Be sure to back up all important data before the change.
You can erase the data before changing the hard disk drive.
( “Hard Disk Data Erase Utility”)
If [Hard Disk Lock] is set to [Enable] in the Setup Utility, change this to [Disable]
before the change.
Be careful when replacing the hard disk drive. The hard disk drive is extremely
sensitive to shock. In addition, static electricity could later affect some internal
components.
Installing/Removing the hard disk drive
Latch
48
Mark
Cover
1
Power off your computer ( “Starting Up/Shutting Down”)
Do not shut down using the standby or hibernation function.
Disconnect the AC adaptor, then turn your computer over and remove
the battery pack.
2
Remove the cover
Slide the latch, and then without releasing it, slide and lift the cover
carefully.
The hard disk is attached behind the cover.
3
Change the hard disk drive and close the cover
Match the mark on the cover to the body of the computer, then slide the
cover back into place and put the battery pack back in place.
CAUTION
For an improperly attached cover, the hard disk drive may fall out
while you are carrying around your computer.
Page 49
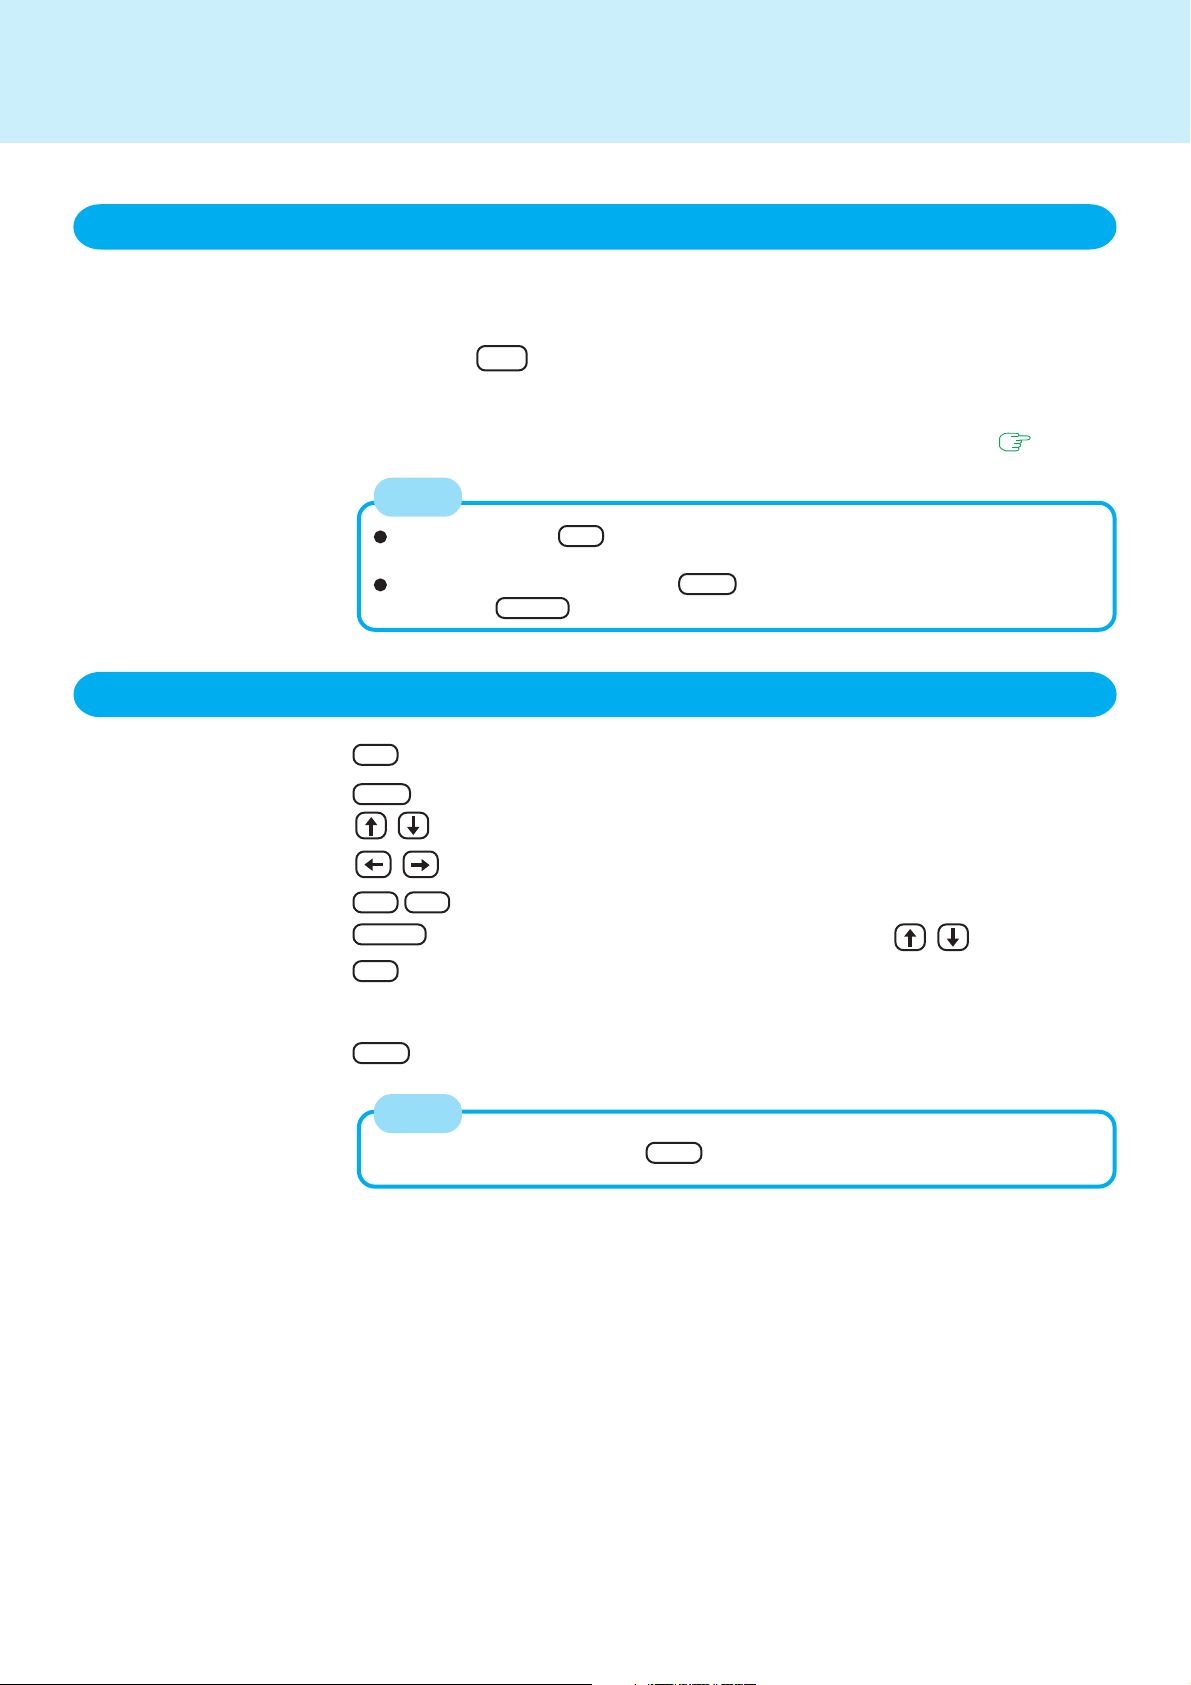
Setup Utility
Running the Setup Utility
1
Turn on or restart the computer
2
Press F2 while [Panasonic] boot screen is displayed soon
after the computer begins the startup procedure
If [Enter Password] is displayed, enter your password.
When a User Password is entered, some contents cannot be changed ( page 13).
NOTE
If you fail to press F2 at the right moment, the Setup Utility will not start up. In
this case, power off the computer and try again.
To close the Setup Utility, press Esc , select the exiting method in [Exit] menu,
then press Enter .
49
Key Operations
F1 :To display the corresponding “help” file.
Esc :To display [Exit] menu.
:To move among the items.
:To move among the menus.
F5 F6 :To move among the values.
Enter :To display sub-menu of each item selected by .
F9 :To set default settings (except the password).
(When starting up the Setup Utility with the User Password, this key
is not available.)
F10 :To save the settings and exit.
NOTE
When setting date and time, Tab can be used to move the cursor.
Page 50

Setup Utility
Information Menu
Language: [English]
Model No.: xxxx
Serial No.: xxxx
CPU Type: xxxx
CPU Speed x.x GHz
BIOS: Vx.xxLxx
Embedded Controller: Vx.xxLxx
System Memory: xxx MB
Video RAM: xxx MB
Primary Master: xx GB
Secondary Master: CD Drive
50
Parameters
Language*
1
Main Menu
Parameters
( : Default)
English
Japanese
System Date: [xx/xx/xxxx]*
System Time: [xx:xx:xx]*
*1Select the language for displaying the Setup
Utility.
2
3
Touch Pad: [Enable]
Display: [Simultaneous]
Display Expansion: [Enable]
CD Drive Speed: [High]
Environment: [Normal Temperature]
*2Date is shown in order of Month / Day / Year.
3
*
Time is shown in 24-hr. style.
( : Default)
Touch Pad
Display*
Display Expansion
CD Drive Speed*
Environment
4
Disable
Enable
External Monitor
Internal LCD
Simultaneous
Disable
Enable
5
High
Low
Normal Temperature
High Temperature
*4The display destination in cases where Win-
dows is not running is set here. When an external display is connected, the computer displays on both the internal LCD and the external display after Windows starts up regardless
of [Display] setting.
5
*
For a DVD-ROM&CD-R/RW drive and a DVD
MULTI drive, the description for “CD Drive
Speed” applies to read only.
Page 51
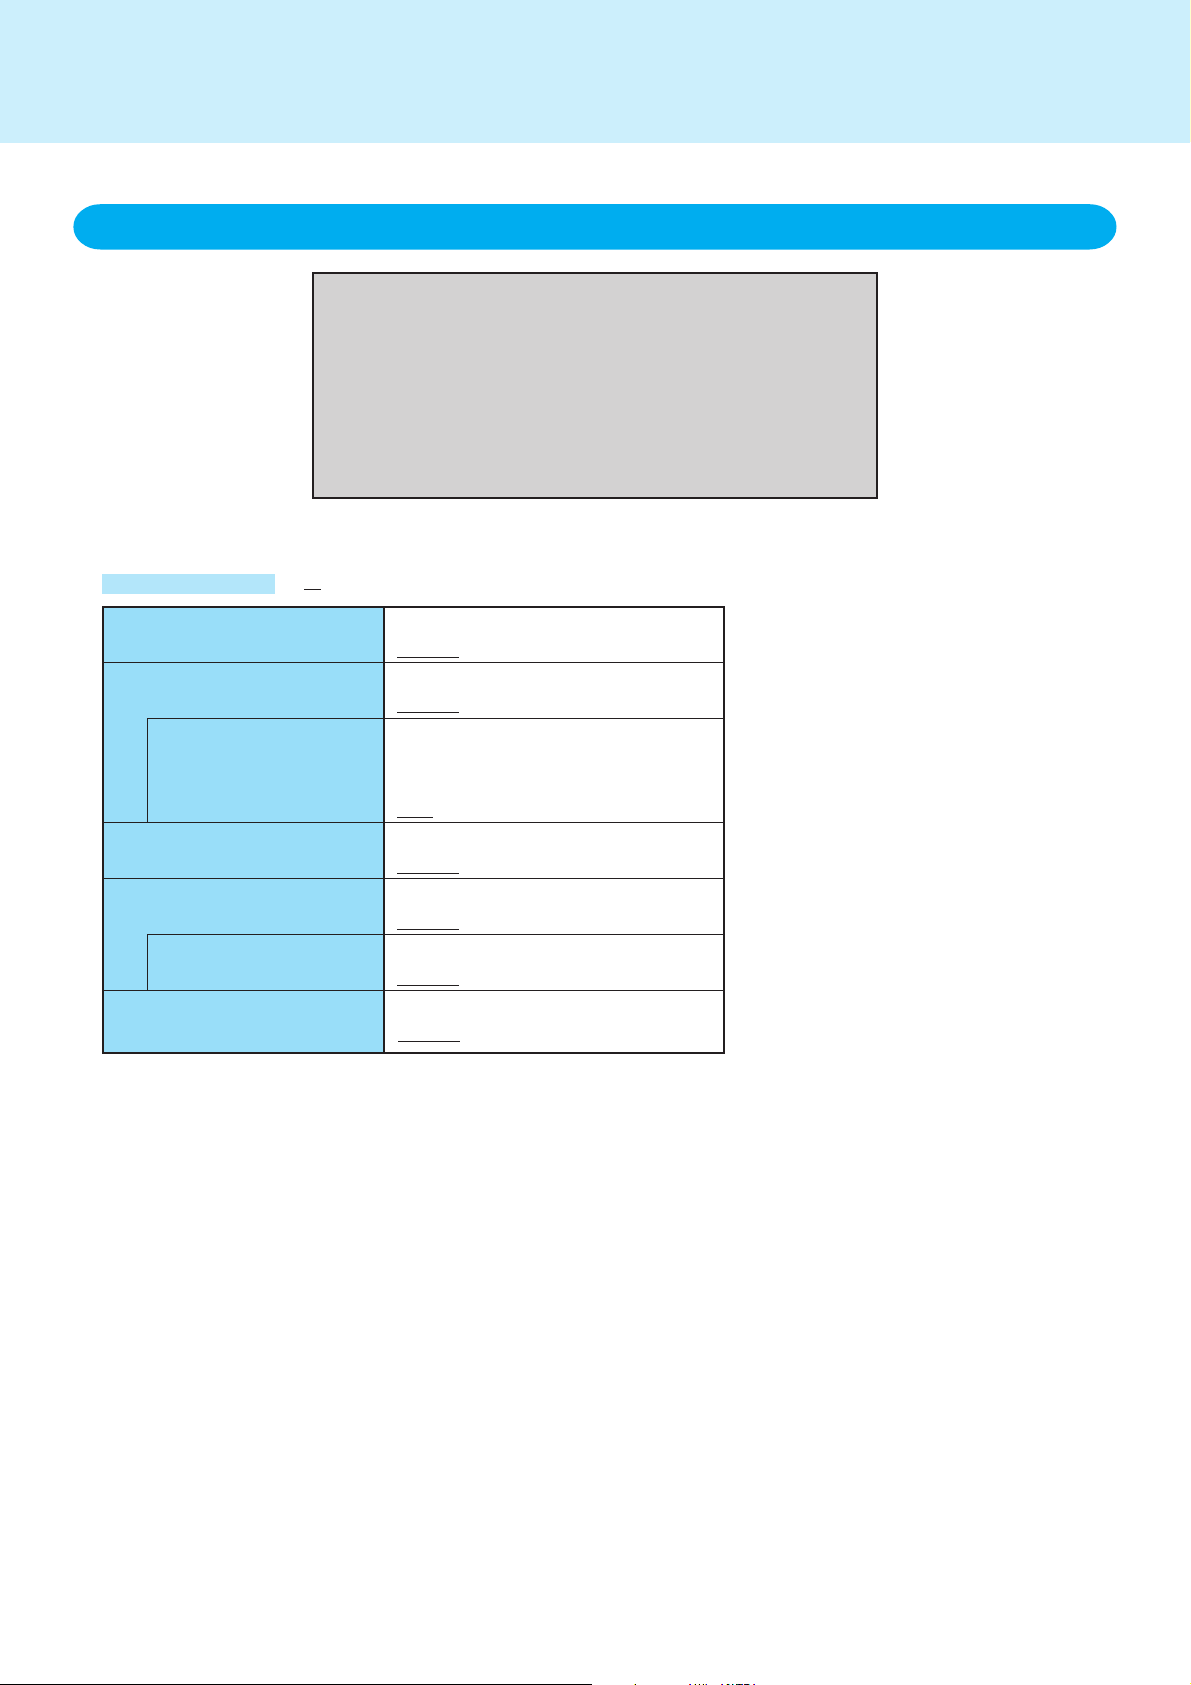
Setup Utility
Advanced Menu
Serial Port : [Enable]
Parallel Port: [Enable]
Modem : [Enable]
LAN: [Enable]
Wireless LAN: [Enable]
51
Mode: [ECP]
Boot up from LAN: [Enable]
Parameters
Serial Port
Parallel Port
1
Mode*
Modem
LAN
Boot up from LAN*
Wireless LAN
( : Default)
2
Disable
Enable
Disable
Enable
Uni-directional
Bi-directional
EPP
ECP
Disable
Enable
Disable
Enable
Disable
Enable
Disable
Enable
*1This item is displayed only when [Parallel Port]
is set to [Enable].
*2[Disable] is automatically set when [LAN] is set
to [Disable].
Page 52
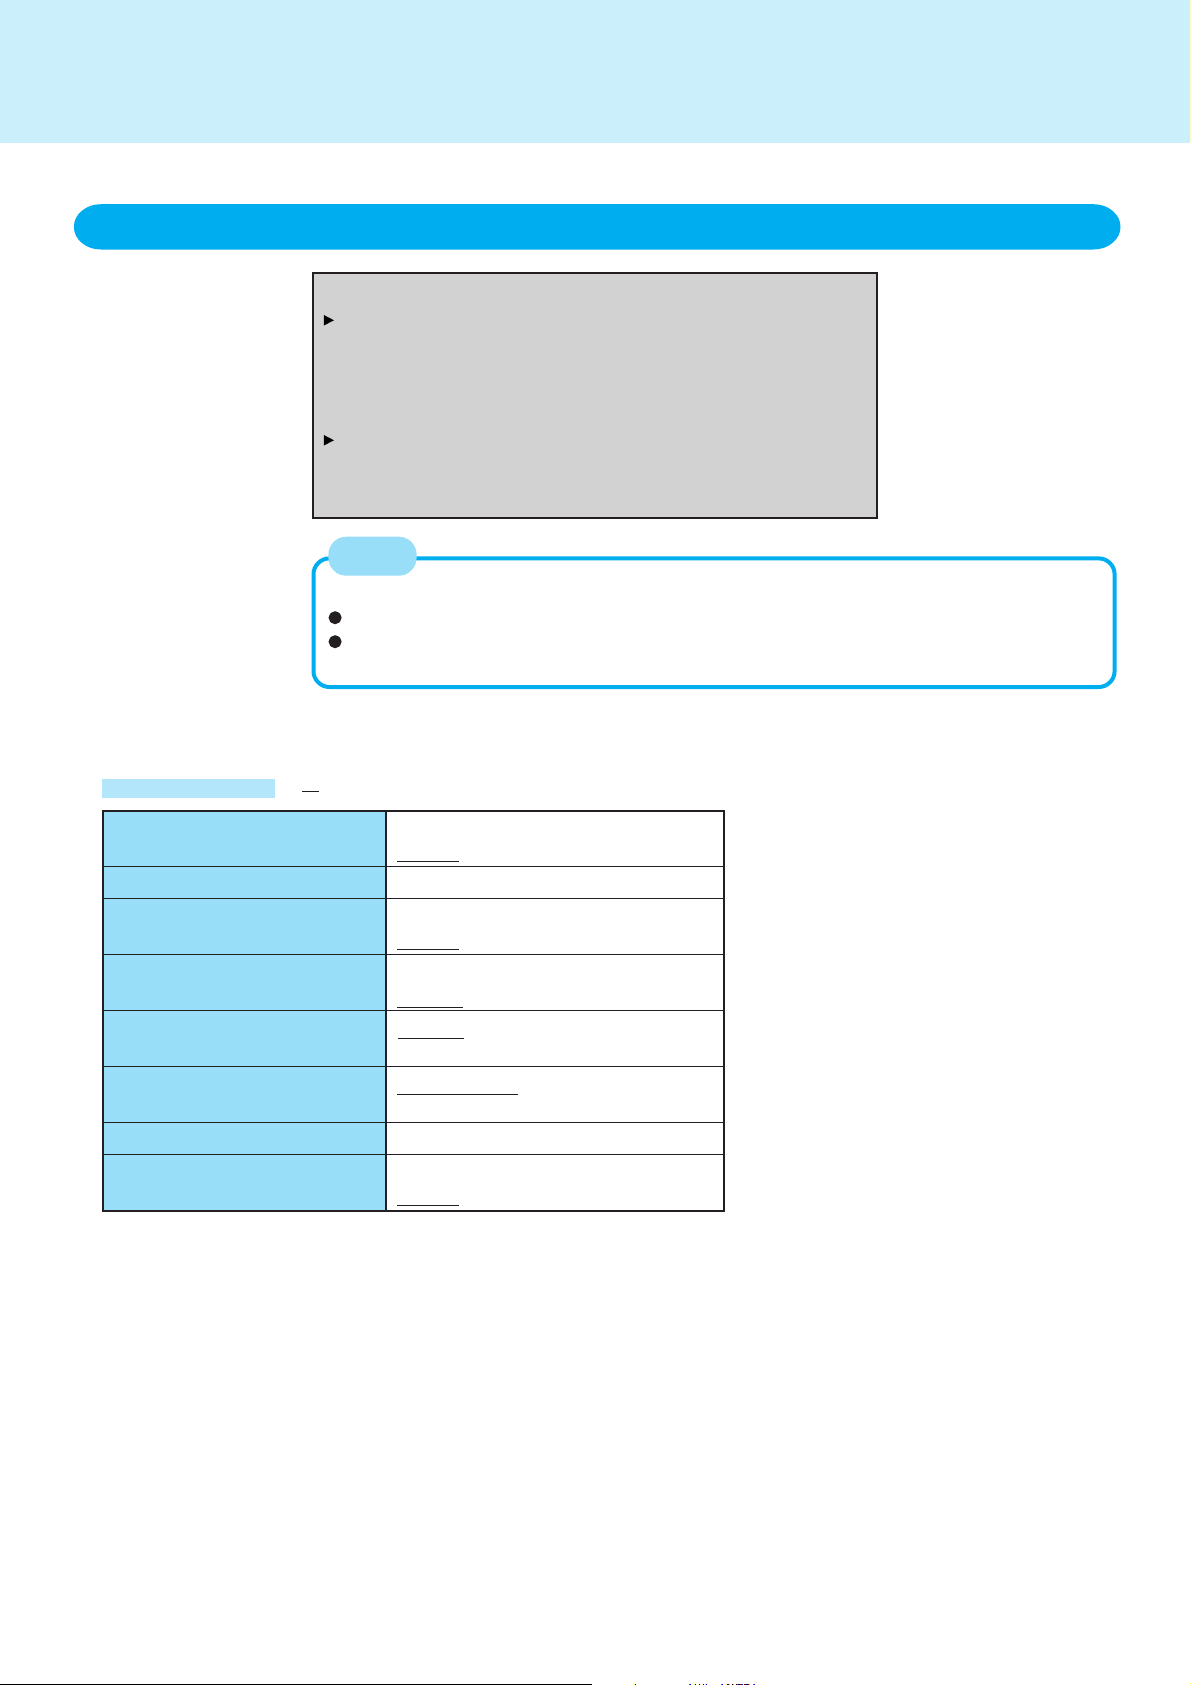
Setup Utility
Security Menu
Password on boot: [Enable]
Set Supervisor Password: [Enter]
Setup Utility Prompt: [Enable]
Boot First Menu: [Enable]
Hard Disk Lock: [Disable]
User Password Protection: [No Protection]
Set User Password: [Enter]
Floppy Operation: [Enable]
When the Setup Utility is started up with the User Password;
52
NOTE
[Set Supervisor Password] and [Hard Disk Lock] will not be displayed.
The User Password can be changed only when [User Password Protection] has been
set to [No Protection]. The User Password cannot be deleted.
Parameters
Password on boot
Set Supervisor Password
Setup Utility Prompt
Boot First Menu
Hard Disk Lock*
User Password Protection
Set User Password*
Floppy Operation
( : Default)
Disable
Enable
To the sub-menu
Disable
Enable
Disable
Enable
Disable
Enable
No Protection
Protected
To the sub-menu
Disable
Enable
* Setting impossible when the Supervisor Pass-
word is not set.
Page 53
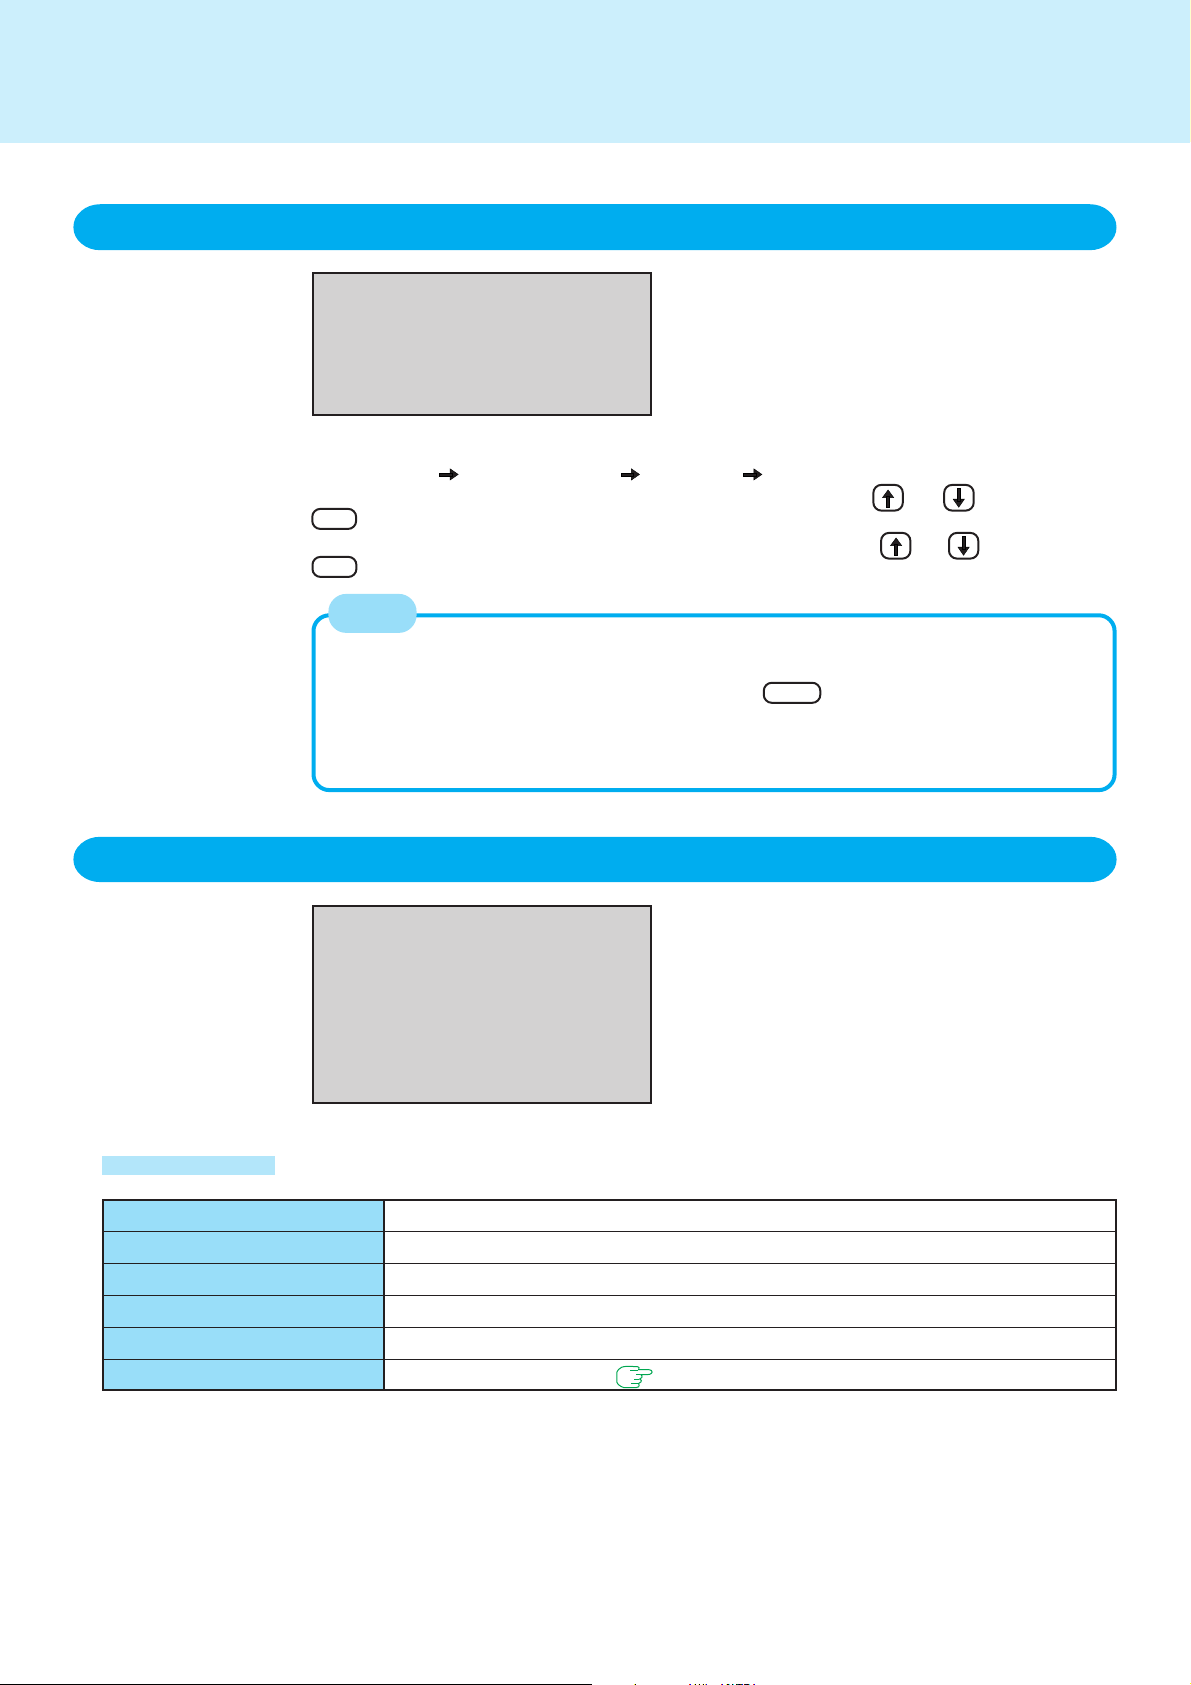
Setup Utility
Boot Menu
Floppy Drive
Hard Disk Drive
CD Drive
LAN
The default order is as follows:
[Floppy Drive] [Hard Disk Drive] [CD Drive] [LAN].
To move a device up by one in the order, select the device with and ,and then press
F6 .
To move a device down by one in the order, select the device with and ,and then press
F5 .
Boot First Menu
53
NOTE
The device for starting up the operating system can also be selected during computer
start-up. After the computer is turned on, and Esc is pressed at [Panasonic] boot
screen, [Boot Menu] (the device selection display) will appear. When the setting of
[Boot] menu is changed, the selection screen display will also change. [Boot Menu] is
displayed only when [Boot First Menu] in [Security] menu is set to [Enable].
Exit Menu
Save Values & Exit
Exit Without Saving Changes
Get Default Values
Load Previous Values
Save Current Values
Refresh Battery
Parameters
Save Values & Exit
Exit Without Saving Changes
Get Default Values*
Load Previous Values
Save Current Values
Refresh Battery
* This item may not be displayed when star ting up the Setup Utility with the User Password.
Exit the Setup Utility and save your changes to CMOS.
Exit the Setup Utility without saving your changes to CMOS.
Set the default settings.
Load previous values from CMOS for all Setup items.
Save your changes to CMOS.
Refreshing the Battery ( page 23)
Page 54

Technical Information
Network Connections and Communications Software
If the power saving function (standby or hibernation mode) activates while communications software is being used, the network connection may be interrupted, or performance may be adversely affected. If this happens, restart the computer.
Be sure to close the communications software before using the power saving function.
When using the computer in a network environment, we recommend that you set [System standby] and [System hibernates] to [Never], using the following procedure:
Windows 2000
[Start] - [Settings] - [Control Panel] - [Power Options]
Windows XP
[start] - [Control Panel] - [Performance and Maintenance] - [Power Options] - [Power
Schemes]
When using the Files on the Retail Version of the Windows CD-ROM
54
The Windows files included in the Retail Version of the Windows CD-ROM for each OS
are contained in the following folders:
Windows 2000
c:\winnt\cdimage
Windows XP
c:\windows\docs, c:\windows\dotnetfx, c:\windows\i386, c:\windows\support,
c:\windows\valueadd
Precautions When Using a CardBus Type LAN Card
Prior to usage, optimize the LAN card settings by following the procedure given below.
Failure to do so may result in an error message being displayed when performing a
copy operation via the LAN card with a computer on the network.
1
Select the network card you are using from [Network adapters] in [Control Panel] [System] - [Hardware] - [Device Manager]
2
Select [Advanced], select [Store And Forward] from [Property], then set [Enable] for
[Value] if it is set to [Disable]
(This item may be unavailable for some types of network cards.)
Windows 2000
Page 55
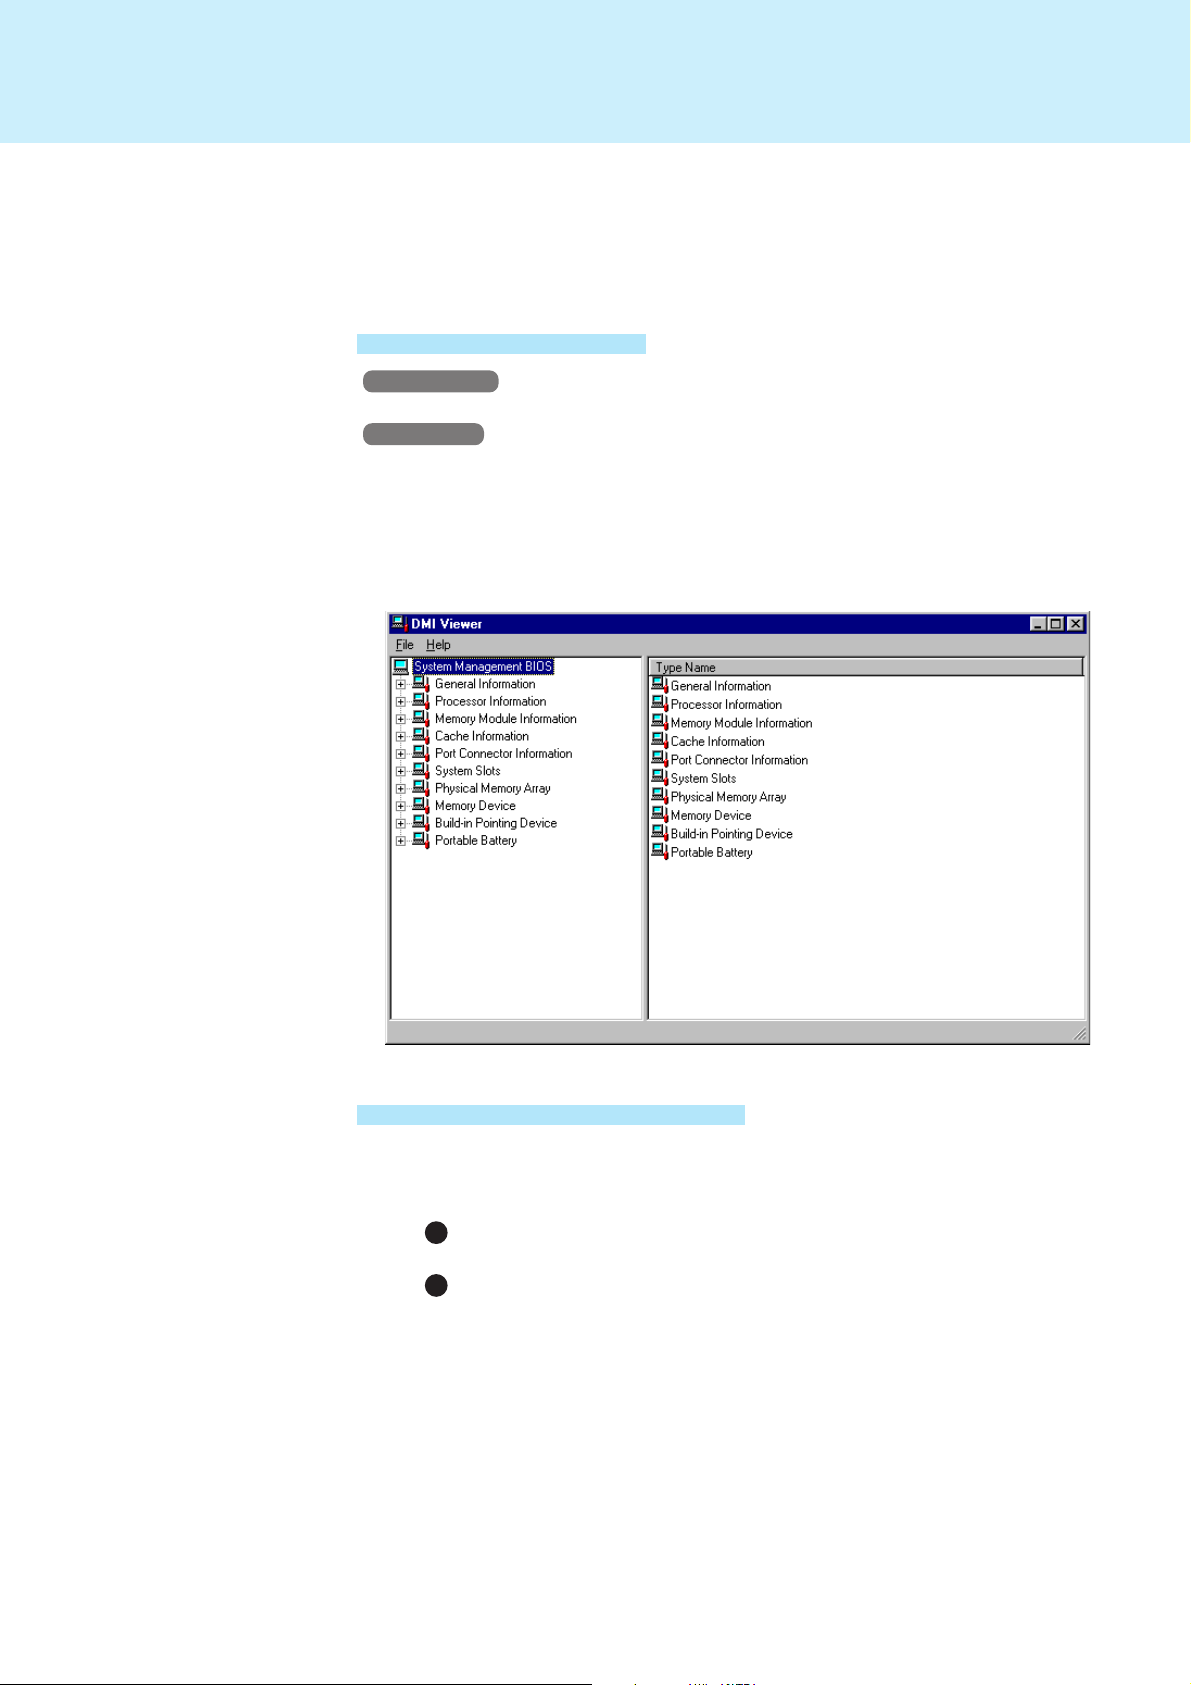
DMI Viewer
This computer conforms to the specifications of the Desktop Management Interface
(DMI). The DMI Viewer can be used when you want to know information on the internal systems this computer supports, starting with the CPU and memory.
Running DMI Viewer
Windows 2000
Select [DMI Viewer] from [Start] - [Programs] - [Panasonic]
Windows XP
Select [DMI Viewer] from [start] - [All Programs] - [Panasonic]
The screen shown below is displayed.
When you click on an item, detailed information on that item will be displayed.
55
Saving Information to a File
Displayed information can be saved to a text file (.txt). Run the DMI Viewer and
display the information you wish to save.
1
2
To save the item that is displayed
Select [Save Selected Data] from [File] menu.
To save all items
Select [Save All Data] from [File] menu.
Select the folder, input the file name, and select [Save]
Page 56

List of Error Codes
The following is a list of the messages that BIOS can display. Most of them occur during POST. Some of them display
information about a hardware device, e.g., the amount of memory installed. Others may indicate a problem with a
device, such as the way it has been configured. Following the list are explanations of the messages and remedies for
reported problems.
If your system displays any of the below error messages other that the ones marked with an asterisk (*), write down the
message and contact Panasonic Technical Support. If your system fails after you make changes in the Setup menus,
reset the computer, enter Setup and install Setup defaults or correct the error.
0200 Failure Fixed Disk
Fixed disk in not working or not configured properly. Check to see if fixed disk is attached properly. Run Setup. Find out if the
fixed-disk type is correctly identified.
0210 Stuck key
Stuck key on keyboard.
0211 Keyboard error
Keyboard not working.
0212 Keyboard Controller Failed
Keyboard controller failed test. May require replacing keyboard controller.
0213 Keyboard locked - Unlock key switch
Unlock the system to proceed.
0230 System RAM Failed at offset :
System RAM failed at offset
0231 Shadow RAM Failed at offset :
Shadow RAM failed at offset
0232 Extended RAM Failed at offset :
Extended memory not working or not configured properly at offset
0250 System battery is dead - Replace and run SETUP
The CMOS clock battery indicator shows the battery is dead. Replace the battery and run Setup to reconfigure the system.
*0251 System CMOS checksum bad - Default configuration used
System CMOS has been corrupted or modified incorrectly, perhaps by an application program that changes data stored in
CMOS. The BIOS installed Default SETUP Values. If you do not want these values, enter Setup and enter your own values. If the
error persists, check the system battery or contact Panasonic Technical Support.
0260 System timer error
The timer test failed. Requires repair of system board.
0270 Real time clock error
Real-time clock fails BIOS test. May require board repair.
*0280 Previous boot incomplete - Default configuration used
Previous POST did not complete successfully. POST loads default values and offers to run Setup. If the failure was caused by
incorrect values and they are not corrected, the next boot will likely fail. On systems with control of wait states, improper Setup
settings can also terminate POST and cause this error on the next boot. Run Setup and verify that the wait-state configuration
is correct. This error is cleared the next time the system is booted.
0281 Memory Size found by POST differed from EISA CMOS
Memory size found by POST differed from EISA CMOS.
02B0 Diskette drive A error
02B1 Diskette drive B error
Drive A: or B: is present but fails the BIOS POST diskette tests. Check to see that the drive is defined with the proper diskette
type in Setup and that the diskette drive is attached correctly.
02B2 Incorrect Drive A type - run SETUP
Type of floppy drive A: not correctly identified in Setup.
02B3 Incorrect Drive B type - run SETUP
Type of floppy drive B: not correctly identified in Setup.
02D0 System cache error - Cache disabled
Contact Panasonic Technical Support.
02F0: CPU ID:
CPU socket number for Multi-Processor error.
02F4: EISA CMOS not writable
ServerBIOS2 test error: Cannot write to EISA CMOS.
nnnn
nnnn
of the 64k block at which the error was detected.
nnnn
nnnn
of the 64k block at which the error was detected.
nnnn
nnnn
.
56
Page 57

List of Error Codes
02F5: DMA Test Failed
ServerBIOS2 test error: Cannot write to extended DMA (Direct Memory Access) registers.
02F6: Software NMI Failed
ServerBIOS2 test error: Cannot generate software NMI (Non-Maskable Interrupt).
02F7: Fail - Safe Timer NMI Failed
ServerBIOS2 test error: Fail-Safe Timer takes too long.
device
address Conflict
device
Address conflict for specified
Allocation Error for:
Run ISA or EISA Configuration Utility to resolve resource conflict for the specified
Failing Bits :
The hex number
a failed bit. See error 230,231 or 232 for offset address of the failure in System, Extended or Shadow memory.
Invalid System Configuration Data
Problem with NVRAM (CMOS) data.
I/O device IRQ conflict
I/O device IRQ conflict error.
Operating System not found
Operating system cannot be located on either drive A: or drive C:. Enter Setup and see if fixed disk and drive A: are properly
identified.
Parity Check 1
Parity error found in the system bus. BIOS attempts to locate the address and display it on the screen. If it cannot locate the
address, it displays ????. Parity is a method for checking errors in binary data. A parity error indicates that some data has been
corrupted.
Parity Check 2
Parity error found in the I/O bus. BIOS attempts to locate the address and display it on the screen. If it cannot locate the address,
it displays ????.
Press <F1> to resume, <F2> to Setup
Displayed after any recoverable error message. Press <F1> to start the boot process or <F2> to enter a Setup and change the
settings. Wr ite down and follow the information shown on the screen.
nnnn
nnnn
nnnn
nnnn
device
is a map of the bits at the RAM address which failed the memory test. Each 1 (one) in the map indicates
.
device
.
57
Page 58
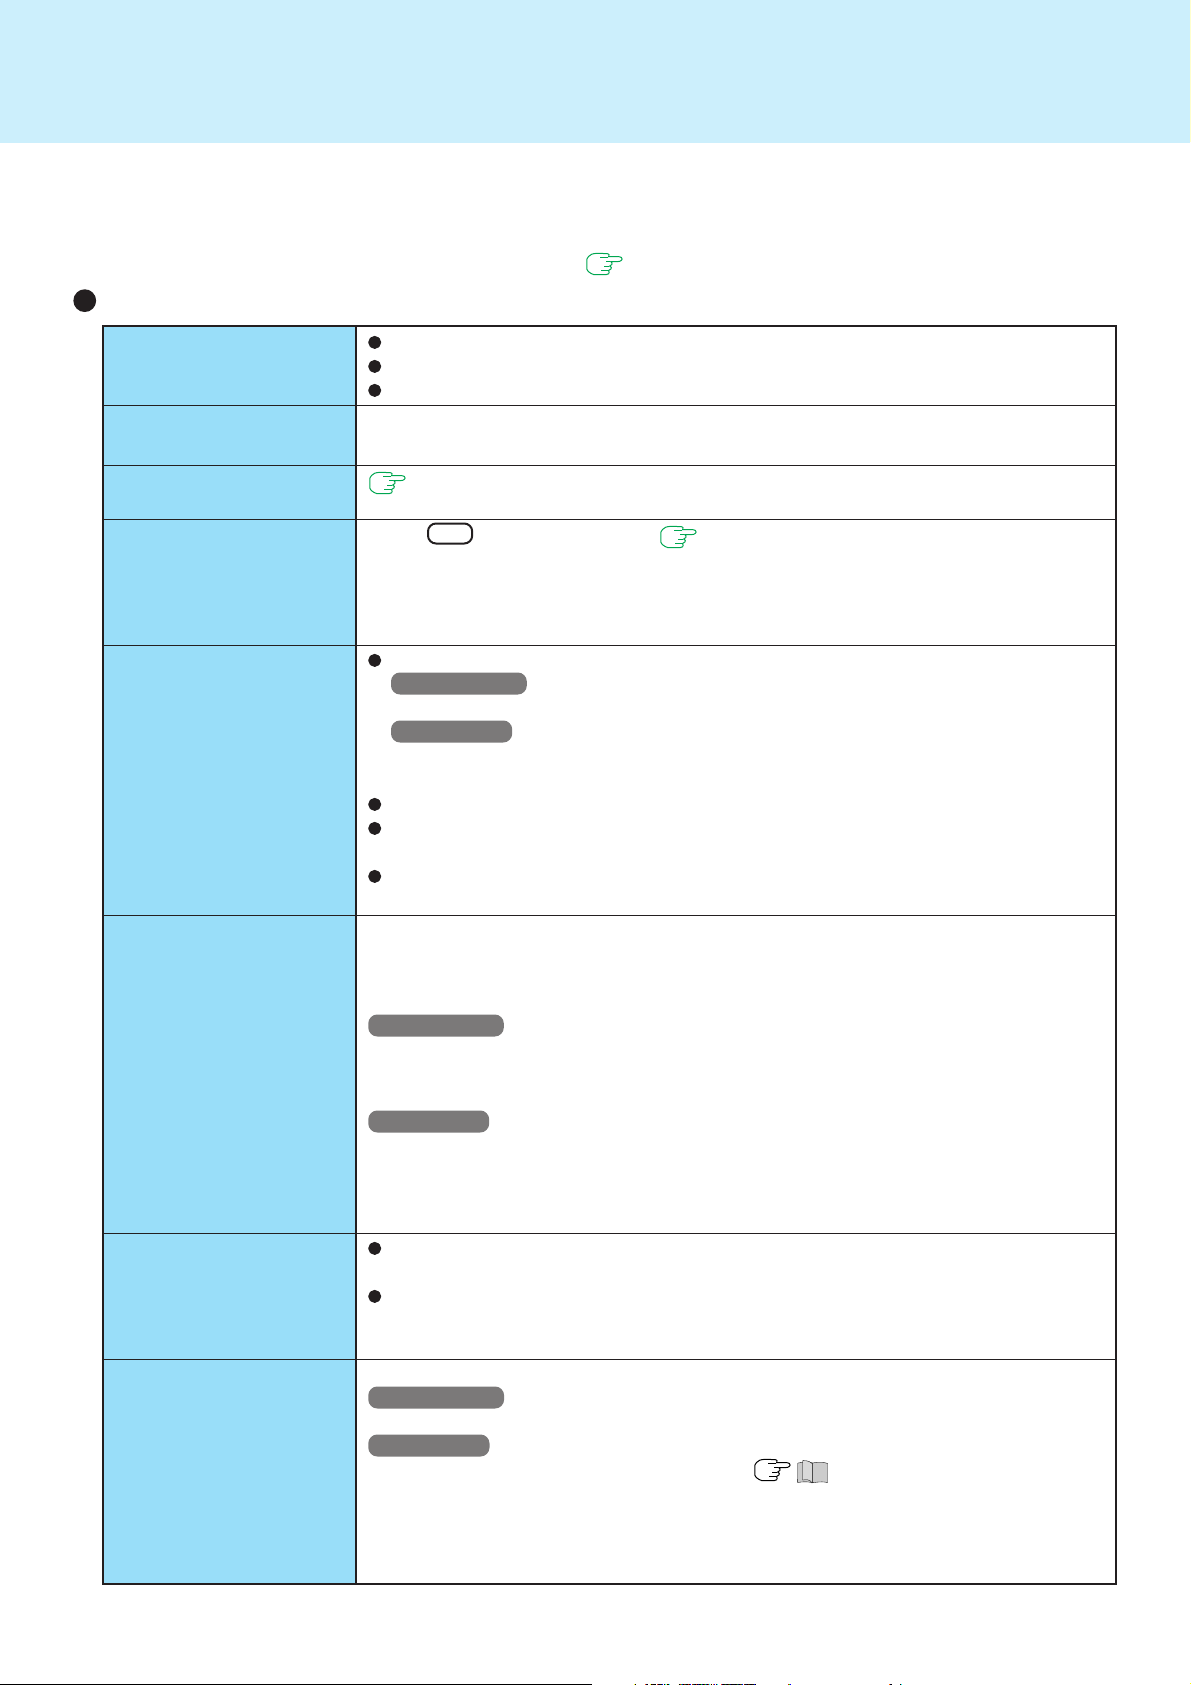
Dealing with Problems (Advanced)
When a problem occurs, refer to this page. If a problem appears to be related to a software application, read the software
related manual. If you still cannot troubleshoot the problem, contact Panasonic Technical Support. You can use the PC
Information Viewer to check the computer’s usage status ( page 65).
Starting Up
58
The power indicator or
battery indicator is not lit
[Enter Password] is displayed
POST Startup Error(s) is
displayed
Windows startup, or an
operation is extremely
slow
The date and time are incorrect
When resuming from the
standby or hibernation
mode, [Enter Password]
does not appear even if
a password has been set
in the Setup Utility
When “Invalid system
disk. Replace the disk,
and then press any key.”
(or a similar message) is
displayed
When the administrator
password is forgotten
Check the cable connection for the AC adaptor.
Check to see if a fully charged battery is properly inserted.
Remove the battery pack and disconnect the AC adaptor, then connect them again.
Input your Supervisor Password or User Password. If you have forgotten it, contact
Panasonic Technical Support.
page 56
Press F9 in the Setup Utility ( page 49). This will restore the Setup Utility's
settings to their default values (except the password settings). Then, the Setup Utility
must be run once again for you to input the appropriate operating environment settings. (The processing speed depends on the application software used, so this
operation may not cause the processing speed to increase.)
You can set the date and time using the following procedure.
Windows 2000
[Start] - [Settings] - [Control Panel] - [Date/Time]
Windows XP
[start] - [Control Panel] - [Date, Time, Language, and Regional Options] - [Date
and Time]
When the computer is connected to a LAN, confirm the date and time of the server.
If you continue to experience problems, the internal battery maintaining the clock
may need to be replaced. Contact Panasonic Technical Support.
This computer will not correctly recognize the date and time starting from the year
2100 A.D.
Even when a password has been set in the Setup Utility, [Enter Password] does not
appear when the computer resumes from the standby or hibernation mode.
If you want to use the security function when using the standby or hibernation mode,
use the Windows password as follows:
Windows 2000
Set the password in [Control Panel] - [Users and Passwords], then add the check
mark for [Prompt for password when computer goes off standby] in [Control Panel] [Power Options] - [Advanced].
Windows XP
Select the account to change in [Control Panel] - [User Accounts] and set the password, then add the check mark for [Prompt for password when computer resumes
from standby] in [Control Panel] - [Performance and Maintenance] - [Power Options]
- [Advanced].
This means a floppy disk that does not contain system startup information has
been left in the floppy disk drive. Remove the floppy disk, and press any key.
If the message still appears even after trying the above measure, this may be an
indication that some type of hard disk failure has occurred. Contact Panasonic
Technical Support.
Set the password again in the following procedure.
Windows 2000
After reinstalling, setup Windows and then set the password again.
Windows XP
If you have created a password reset disk ( “First-time Operation”), a message is displayed when you fail to correctly enter the password. Follow the message’s
instructions and set the password again by using the password reset disk.
If you have not created a password reset disk, after reinstalling, setup Windows and
then set the password again.
Page 59
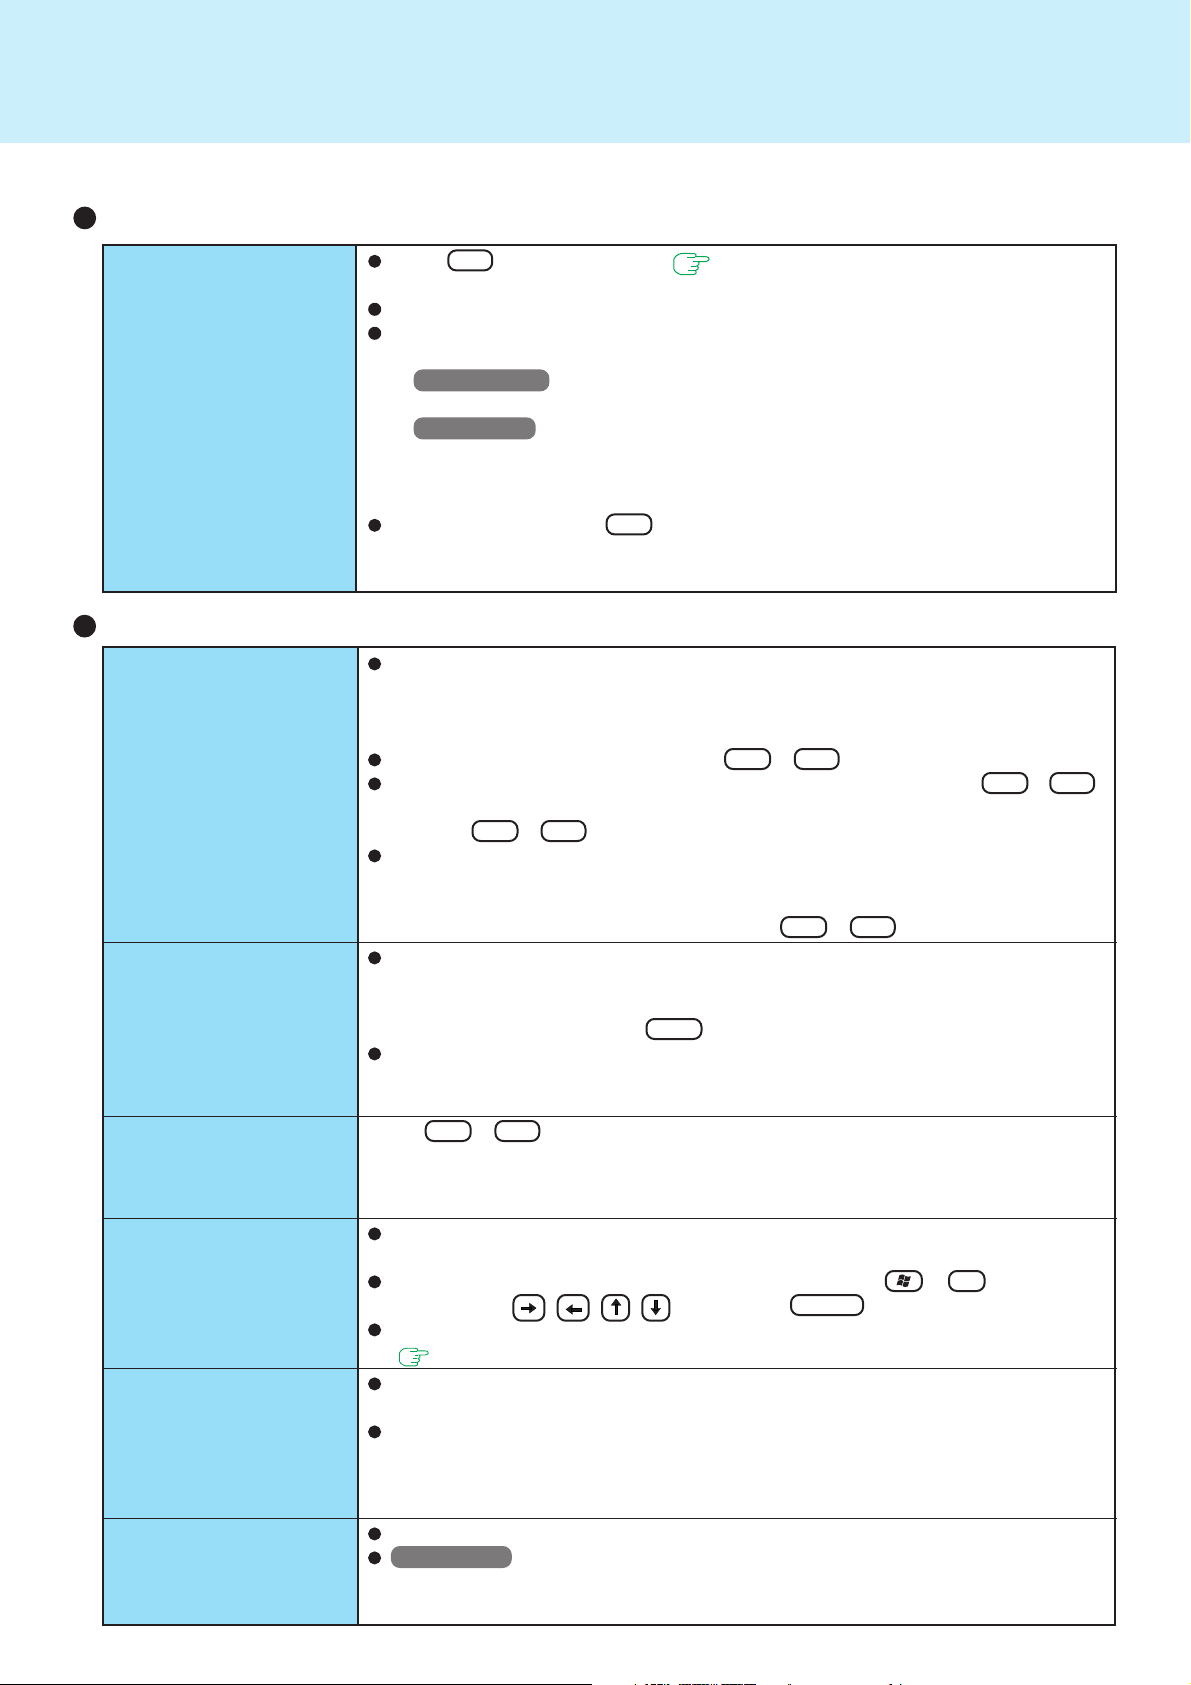
Dealing with Problems (Advanced)
Starting Up (continued)
59
When the previous item
is not the cause
Display
No display after powering
on
The power has not been
turned off, but after a certain period of time, there
is no display
When the battery pack is
used, the screen is
darker than when the AC
adaptor is connected
The cursor cannot be
controlled properly
An afterimage appears
(e.g., green, red, and blue
dots remain on the display) or there are dots not
displaying the correct
colors
The screen becomes disordered
Press F9 in the Setup Utility ( page 49). This will restore the Setup Utility’s
settings to their default values (except the password settings).
Try removing all peripheral devices.
Check a disk error using the following procedure.
1
Display [Local Disk (C:) Properties].
Windows 2000
Select [Local Disk(C:)] with the right button in [My Computer], and select [Properties].
Windows XP
Select [Local Disk(C:)] with the right button in [start] - [My Computer], and select [Properties].
2
Select [Tools] - [Check Now].
3
Select [Start] after selecting required items in [Check disk options].
At startup, hold down F8 when [Panasonic] boot screen disappears, and
release your finger when the Windows Advanced Option Menu is displayed. Start
the computer in Safe Mode, and confirm the details of the error.
When there is no display to an external display,
• Check your cable connection to the external display.
• Confirm your display is powered on.
• Check the settings for your external display.
Try switching the display by pressing Fn + F3 .
If you want to switch the display destination repeatedly by pressing Fn + F3 ,
make sure that the display destination has switched completely each time before
pressing Fn + F3 again.
When displaying only through an external display, if the computer is shut down by
using the standby or hibernation function, there will be no display on the LCD
unless the external display is connected when operations are resumed. In this
case, connect the external display or press Fn + F3 .
Has the computer been set to the power-saving mode?
To resume operation of your computer from the condition the power of the display
is off (for energy conservation purposes), press any key unrelated to the direct
triggering of a selection, like Ctrl .
To save power, your computer may have automatically entered the standby mode
(power indicator blinks green) or hibernation mode (power indicator turns off). In
such cases, press the power switch.
Press Fn + F2 and adjust the brightness. Note, however, that when the brightness is increased, the battery running time will become shorter.
Brightness can be set to separate levels for when the AC adaptor is connected and
when it is disconnected.
If you are using an external mouse, ensure that the external mouse has been
connected correctly.
Restart the computer by using the keyboard (Press , U , and select
[Restart] with , then press Enter ).
If the computer does not respond to keyboard commands, read “No response”
( page 64).
If an image is displayed for a prolonged period of time, an afterimage may appear. This is
not a malfunction. The afterimage will disappear when a different screen is displayed.
High-precision and advanced technologies are necessary in the production of color
liquid crystal displays (color LCDs). Therefore, if 0.002% or less of the picture
elements either fail to light or remain constantly lit (that is, more than 99.998% of
elements are functioning properly), no defect is considered to exist.
Changing the number of colors of the display may affect the screen. Restart the computer.
Windows XP
When using Dualview, use the same display colors for the external display as
those used by the LCD.
Page 60
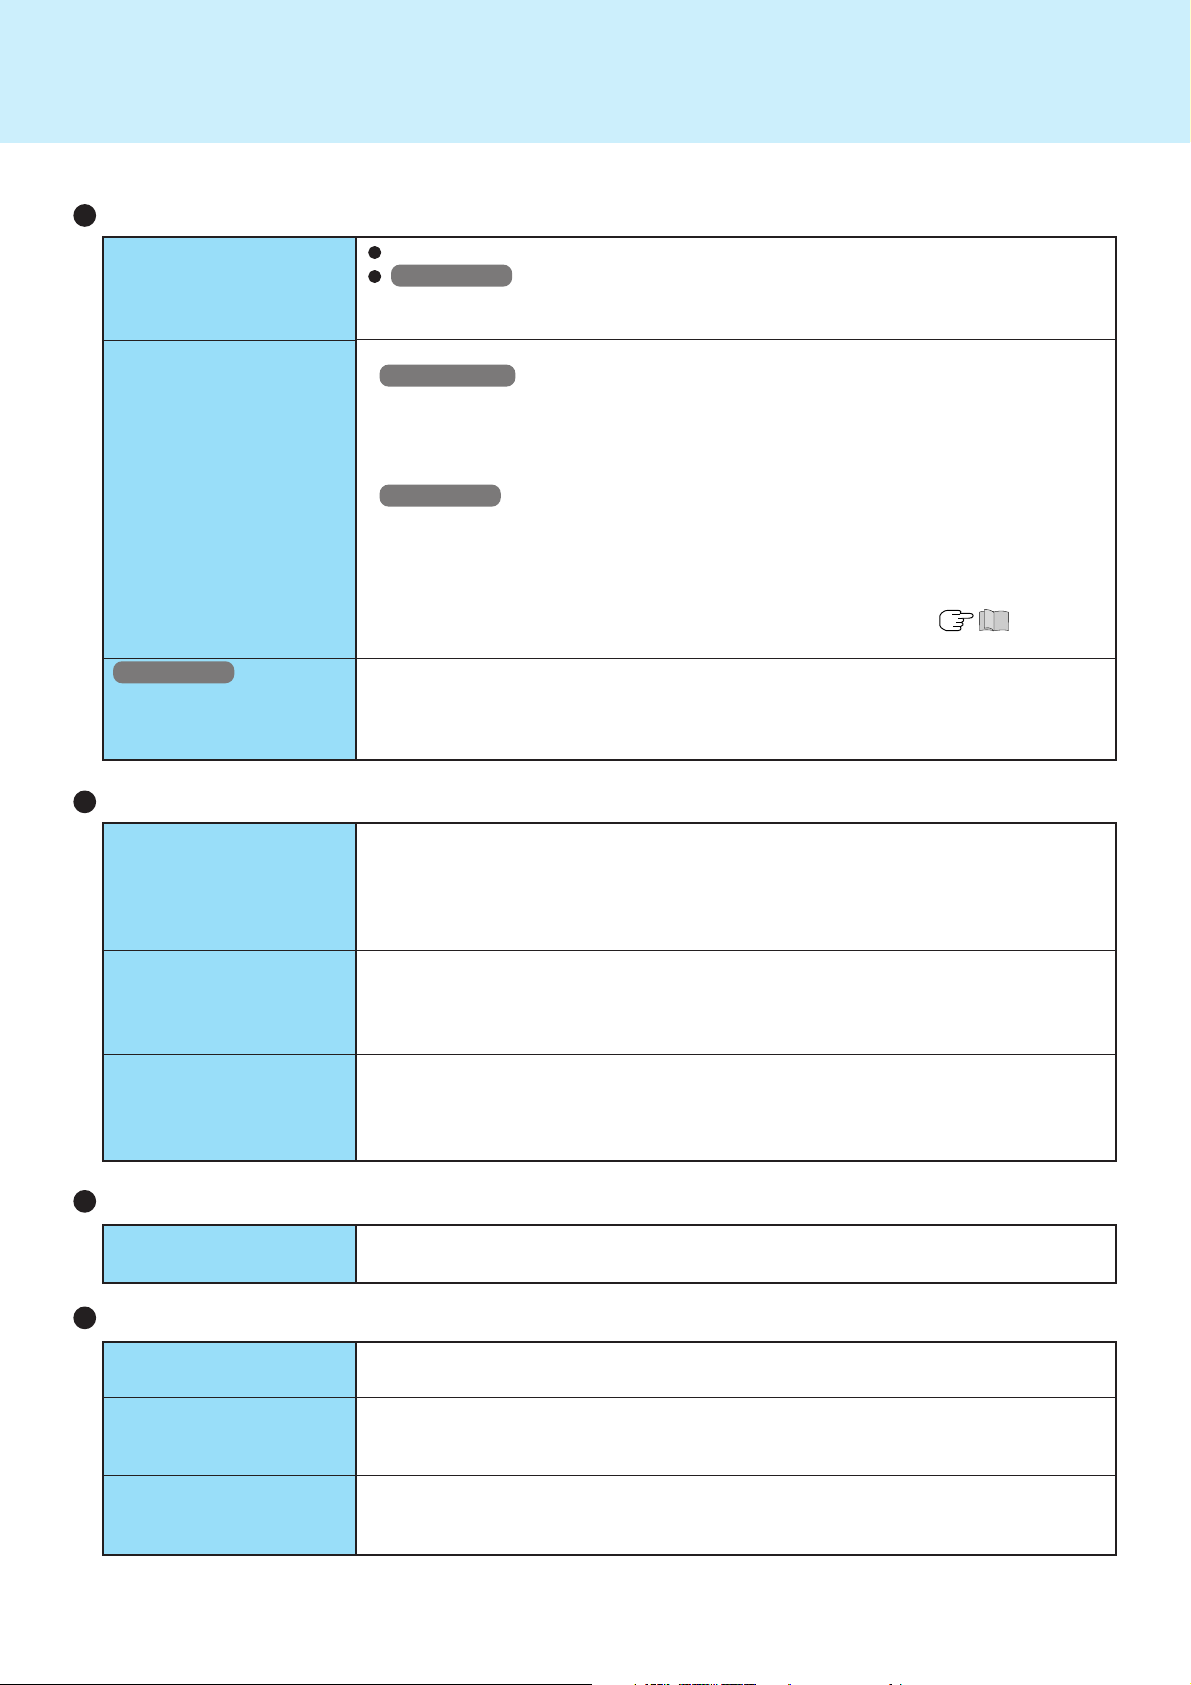
Dealing with Problems (Advanced)
Display (continued)
60
The external display no
longer displays properly
When you want to display the fonts or icons at
a larger size
Windows XP
An error occurs or the
computer freezes while
using Dualview
Battery Indicator
Changing the number of colors of the display may affect the screen. Restart the computer.
Windows XP
When using Dualview, use the same display colors for the external display as
those used by the LCD.
Change the settings as follows (for more details, refer to the Windows Help).
Windows 2000
1
Select [Start] - [Settings] - [Control Panel] - [Display] - [Appearance].
2
Select the scheme labeled “large” or “extra large” in [Scheme] to change the font
size, and select [Icon] in [Item] to change the icon size.
3
Select [OK].
Windows XP
1
Select [start] - [Control Panel] - [Appearance and Themes] - [Display] - [Appearance].
2
Select the font size in [Font size], and select [Effects] and then add the check mark
for [Use large icons] to increase the icon size.
3
Select [OK], then select [OK].
You can change the size of the icons, etc. using “Icon Enlarger” ( “ First-time
Operation”).
If you use a 3D screen saver while in Dualview mode at a high resolution, an error
may occur or the computer may freeze. Under these conditions, do not use a 3D
screen saver.
The red indicator lights
The red indicator blinks
The orange indicator
blinks
The battery level is very low (the charge is less than approx. 9% capacity).
Connect the AC adaptor. You can use the computer when the battery indicator light
is orange. If you do not have an AC adaptor, save your data and power off your
computer. After replacing the battery pack with a fully charged one, turn your
computer on.
Quickly save your data and power off your computer. Remove the battery pack and
disconnect the AC adaptor, then connect them again.
If the problem persists, contact Panasonic Technical Support. The battery pack or
recharging function may be defective.
Battery cannot be recharged temporarily because the internal temperature of the
battery pack is outside of the acceptable temperature range for recharging. Once the
allowable range requirement is satisfied, charging begins automatically. Your computer can be used normally in this state.
Shutting Down
Windows cannot be shut
down or restarted
If a USB device is connected, try removing it.
Standby/Hibernation Function
Unable to enter standby
or hibernation mode
Unable to automatically
enter standby or hibernation mode
The computer does not
resume
If a USB device is connected to the computer (note: only for some USB devices),
remove the USB device temporarily. If the problem persists, restart the computer.
If an IEEE1394 device or other peripheral is connected to the computer, disconnect
the device.
Did you press the power switch and hold it for four seconds or more?
If you press the power switch and hold it for four seconds or more, the power will be
turned off forcibly. In this case, all unsaved data will be lost.
Page 61
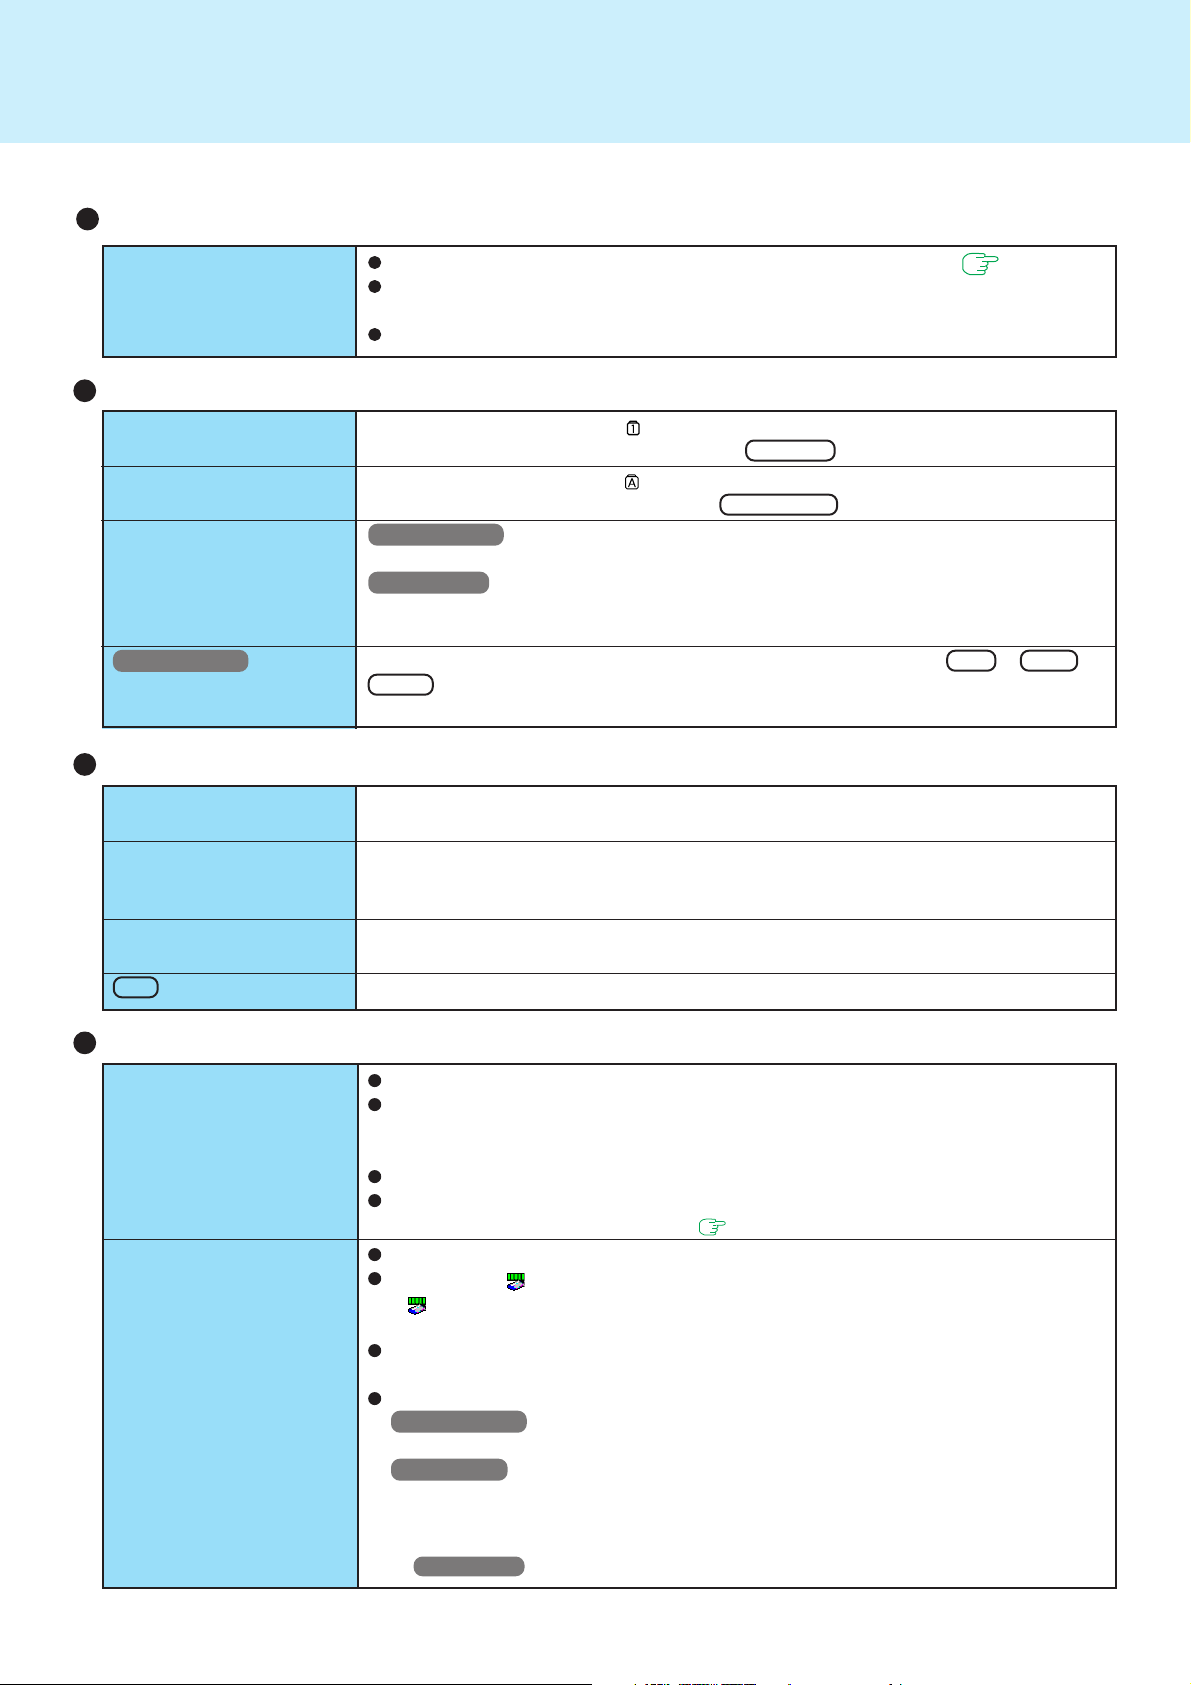
Dealing with Problems (Advanced)
Touch Pad
61
Unable to input using the
touch pad
Keyboard
Only numbers can be inputted
Only capital letters are
being inputted
How to input European
characters (ß, à, ç), symbols or Euro Currency
Symbol is unclear
Windows 2000
After resuming, input keys
do not work properly
Setup Utility
[Enter Password] is displayed
[Advanced] or [Boot]
menu can not be registered
Some items in [Security]
menu can not be registered
F9 does not work
Has the Setup Utility been used to set [Touch Pad] to [Enable]? ( page 50)
When mouse drivers are installed (e.g., IntelliMouse), the touch pad is unable to
be used.
Has the touchpad driver been properly installed?
Check whether the indicator is on. If it is on, the computer is in ten-key keyboard
mode. To disable the ten-key mode, press NumLk .
Check whether the indicator is on. If it is on, the computer is in Caps Lock mode.
To disable the Caps Lock mode, press Caps Lock .
Windows 2000
Select [Start] - [Programs] - [Accessories] - [System Tools] - [Character Map].
Windows XP
Select [start] - [All Programs] - [Accessories] - [System Tools] - [Character Map].
The Character Map will be displayed. Point to the desired font name and select it.
When the computer enters standby or hibernation mode while Alt , Ctrl or
Shift are held down, these keys may remain in “pressed” mode when the computer
resumes operation. Pressing these keys once will return the keys to normal.
Enter the User Password or Supervisor Password. If you have forgotten it, contact
Panasonic Technical Support.
Restart the Setup Utility with the Supervisor Password.
Restart the Setup Utility with the Supervisor Password.
Restart the Setup Utility with the Supervisor Password.
Network
Unable to connect to a
network
Unable to use wireless
LAN
Confirm that either [Modem] or [LAN] is set to [Enable] in the Setup Utility.
When using the computer as a network computer, some additional settings may
have to be made depending on the usage conditions. We recommend asking your
system administrator or the person in charge of the network.
If the standby or hibernation mode is entered, the computer may have to be restarted.
If the link lamp on the HUB unit is not on and the network cannot be accessed, set
the speed to match the HUB unit. ( page 43)
Confirm that [Wireless LAN] is set to [Enable] in the Setup Utility.
Confirm that is displayed on the taskbar.
If is not displayed on the taskbar, confirm that [ON] is selected for [Switch radio]
in [Intel(R) PROSet] - [General].
Confirm the setting of the IP address for the access point, following the operating
instructions for that access point.
Confirm whether the Intel(R) PROSet is installed using the following menu.
Windows 2000
[Start] - [Settings] - [Control Panel] - [Add/Remove Programs].
WindowsXP
[start] - [Control Panel] - [Add or Remove Programs].
If it has not been installed, input [c:\util\drivers\wlan\proset\proset.exe] in [Start]*1 -
[Run] to install.
1
*
Windows XP : [start]
Page 62
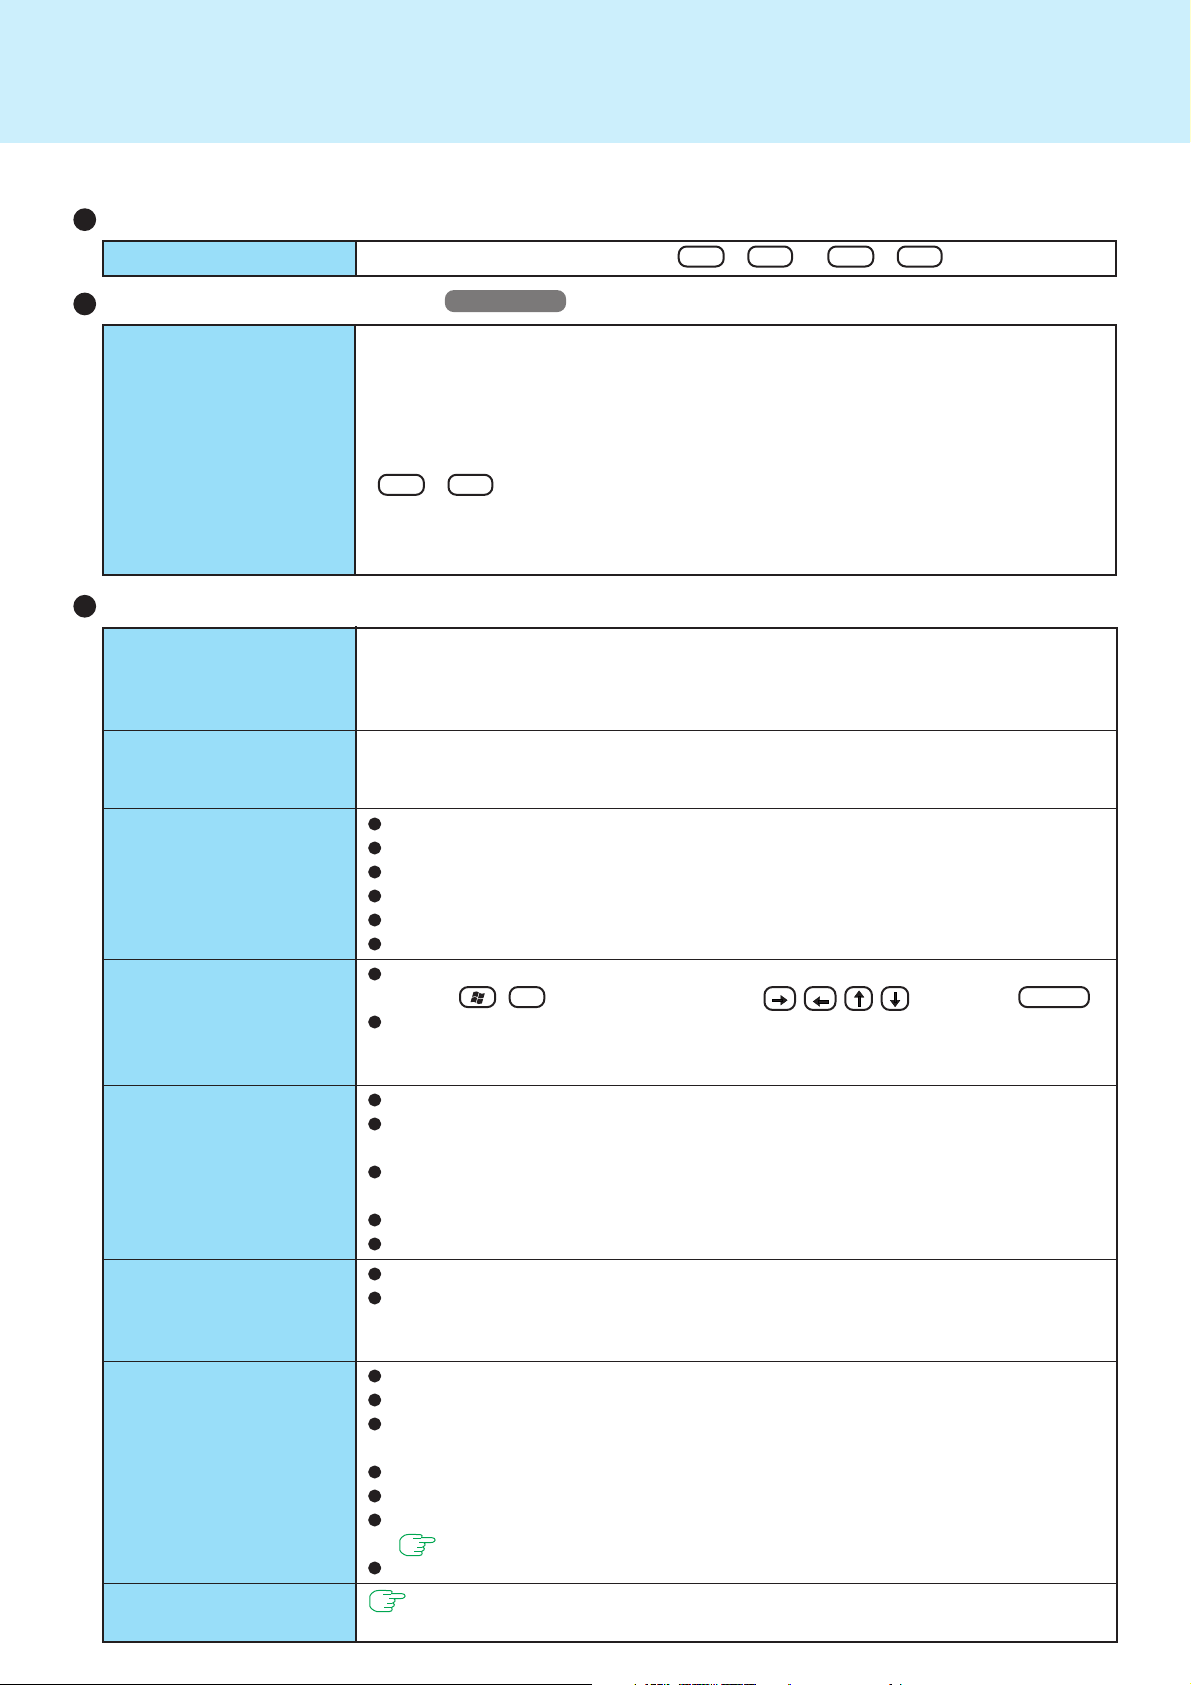
Dealing with Problems (Advanced)
Sound
The sound is not heard Try changing the mute by pressing Fn + F4 or Fn + F6 .
62
Fast User Switching function
Some applications do not
work properly
When switching to a different user with the Fast User Switching function, the following
problems may occur. In this case, log off all users, and try the operation once more. If
the problem persists, restart the computer.
• Some applications may not work properly.
• It may not be possible to set the settings of the display.
• A serial mouse may not work.
• Fn + F3 may not work.
• The wireless LAN cannot be used.
• The B's CLiP icon will no longer be shown on the taskbar and a CD-RW disc cannot
be written on.
Connecting Peripherals
An error occurs while installing the driver
Your peripheral does not
work
Unable to print
The cursor does not move
from mouse operations
The device connected to
the serial port does not
work
External mouse or
trackball connected to the
external keyboard/mouse
port does not work
A PC Card does not work
You do not know the
available RAM module
When you install the driver for a PC Card or peripheral device, be sure to use a driver
that is compatible with the operating system. If you use an incompatible driver, malfunction may occur. For information on drivers, contact the manufacturer of the peripheral device you purchased.
When operation resumes from the standby or hibernation mode, serial devices such
as a mouse, modem or PC Cards may not function properly. In such cases, you will
need to restart your computer or reinitialize the individual devices.
Check the computer-printer connection.
Make sure the printer is on.
Make sure the printer is in the online state.
Make sure paper is in the printer tray and there is no paper jam.
Has the Setup Utility been used to set [Parallel Port] to [Enable]?
Depending on the printer, EPP or ECP may not work at times.
Check your mouse connection, then restart the computer by using the keyboard
(Press , U , and select [Restart] with , then press Enter ).
A driver which is compatible with the connected mouse must be installed, however, if the device does not operate when the driver is installed, set [Touch Pad] to
[Disable] in the Setup Utility.
Check the connection.
Confirm that the device driver for the serial port works. Refer to the reference
manual of the device.
Confirm that two mouse devices are not connected, one through the external keyboard/mouse port and the other through the serial port.
Try setting [Touch Pad] to [Disable] in the Setup Utility.
Confirm that [Serial Port] has not been set to [Disable].
Try setting [Touch Pad] to [Disable] in the Setup Utility.
In some circumstances, if a PS/2 external mouse with a serial interface conversion
function is connected to the port, it may not operate normally. Try connecting it to
the serial port.
Make sure the card is properly inserted.
Confirm that the card conforms to the PC Card Standard.
Note that after a driver (PC card driver or other) is installed, the computer must be
restarted.
Check that the proper port settings have been made.
Read the PC Card’s manual. Or, you may need to call the manufacturer of the PC Card.
Try removing/reinserting the PC Card by following the proper procedure.
( page 32)
Confirm that a driver for your operating system has been installed.
page 34
Windows XP
Page 63
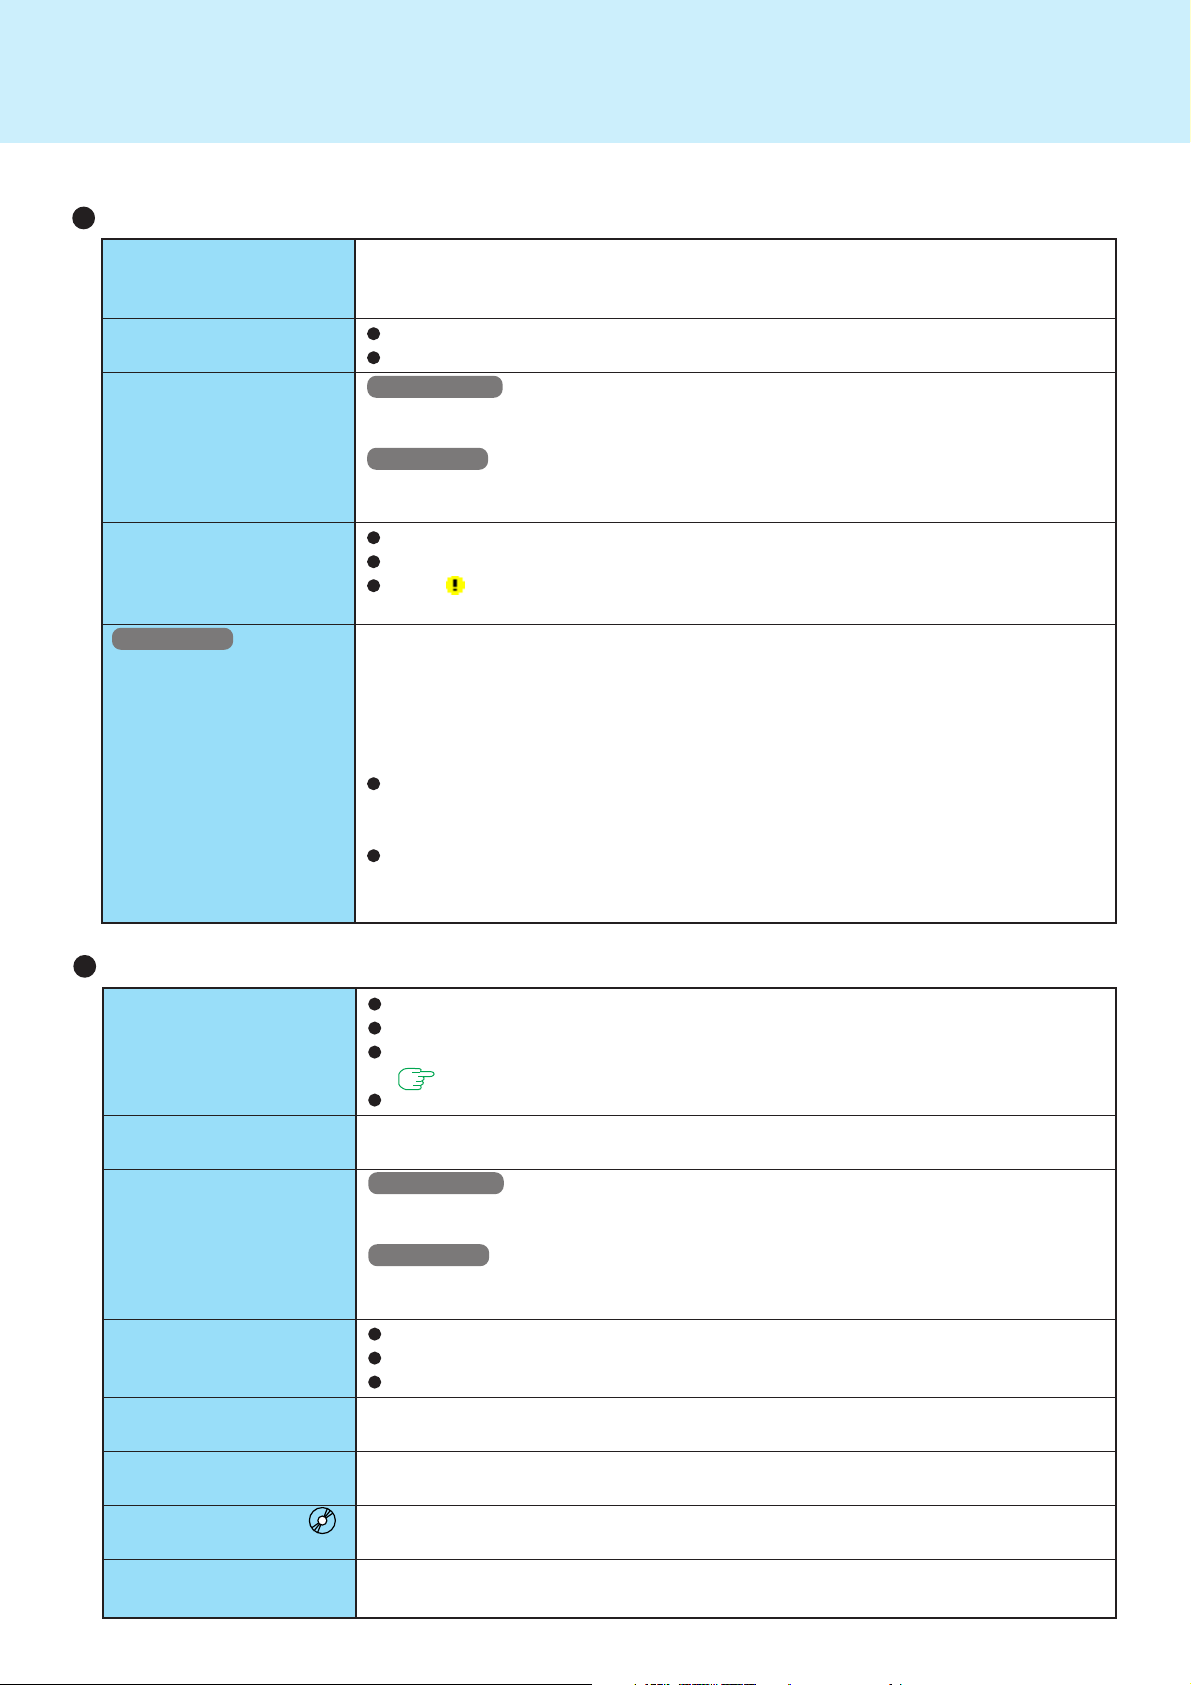
Dealing with Problems (Advanced)
Connecting Peripherals (continued)
63
Cannot tell whether the
RAM module has been
correctly installed
The RAM module has not
been recognized
The address map for IRQ,
I/O port address, etc. is
unclear
A USB device does not
work
Windows XP
Insufficient performance when forwarding data via a PC card
(e.g., unstable video
images when writing
videos to a DV camera
using an IEEE1394 PC
card)
You can check whether the RAM module is recognized using [Information] menu in
the Setup Utility. If the RAM module is not recognized, turn the computer off and
reinsert the RAM module.
Make sure the RAM module has been properly inserted.
Use the RAM module that supports the recommended specifications.
Windows 2000
Check the address map by going to [View] - [Resources by type] in [Control Panel] [System] - [Hardware] - [Device Manager].
Windows XP
Check the address map by going to [View] - [Resources by type] in [Control Panel] [Performance and Maintenance] - [System] - [Hardware] - [Device Manager].
Make sure a driver is installed.
Contact the manufacturer of the product.
When is displayed in the Device Manager, try removing and inserting the device
once more. If the problem persists, restart the computer.
Execute the following operations after logging on with administrator authority.
1
Input [c:\util\cpupower\setup.exe] in [start] - [Run], and select [OK].
Follow the on-screen instructions.
2
Select [Performance] in [start] - [All Programs] - [Panasonic] - [CPU Idle Setting]
and select [OK], then select [Yes].
The computer will be restarted automatically.
These operations will be helpful in alleviating the loss of data forwarding performance that results from CPU power saving functions, but will not be effective against
performance losses resulting from other causes.
These operations will reduce the battery operating time somewhat, so if no error
occurs, we recommend that you return the computer’s settings to [Battery (Windows XP Standard)] in [CPU Idle Setting].
Disk Operations
Cannot read/write to a
floppy disk
Unable to write to a
floppy disk
How to format a floppy
disk is unclear
Unable to read/write to
the hard disk
When the previous item
is not the cause
Trouble has occurred
with the disc
The access lamp ( )
does not light
Cannot play disc or read
data from it
Has the floppy disk been correctly inserted?
Has the floppy disk been correctly formatted?
Has the Setup Utility been used to set [Floppy Operation] to [Enable]?
( page 52)
Your floppy disk content may be corrupted.
Is the floppy disk write-protected?
Windows 2000
Select [Format] in [My Computer] - [3 1/2 Floppy (A:)] - [File]. After confirming the
disk volume and format type, start formatting.
Windows XP
Select [Format] in [start] - [My Computer] - [3 1/2 Floppy (A:)] - [File]. After confirming
the disk volume and format type, start formatting.
Your drive or file may not have been properly set.
Check to see if the hard disk is full. If it is full, delete unnecessary files.
Your hard disk content may be corrupted. Contact Panasonic Technical Support.
Try testing another drive or media.
You may need to clean the lens or disc.
Is the disc loaded on the tray correctly?
Is the disc bent, scratched, or dirty?
Page 64
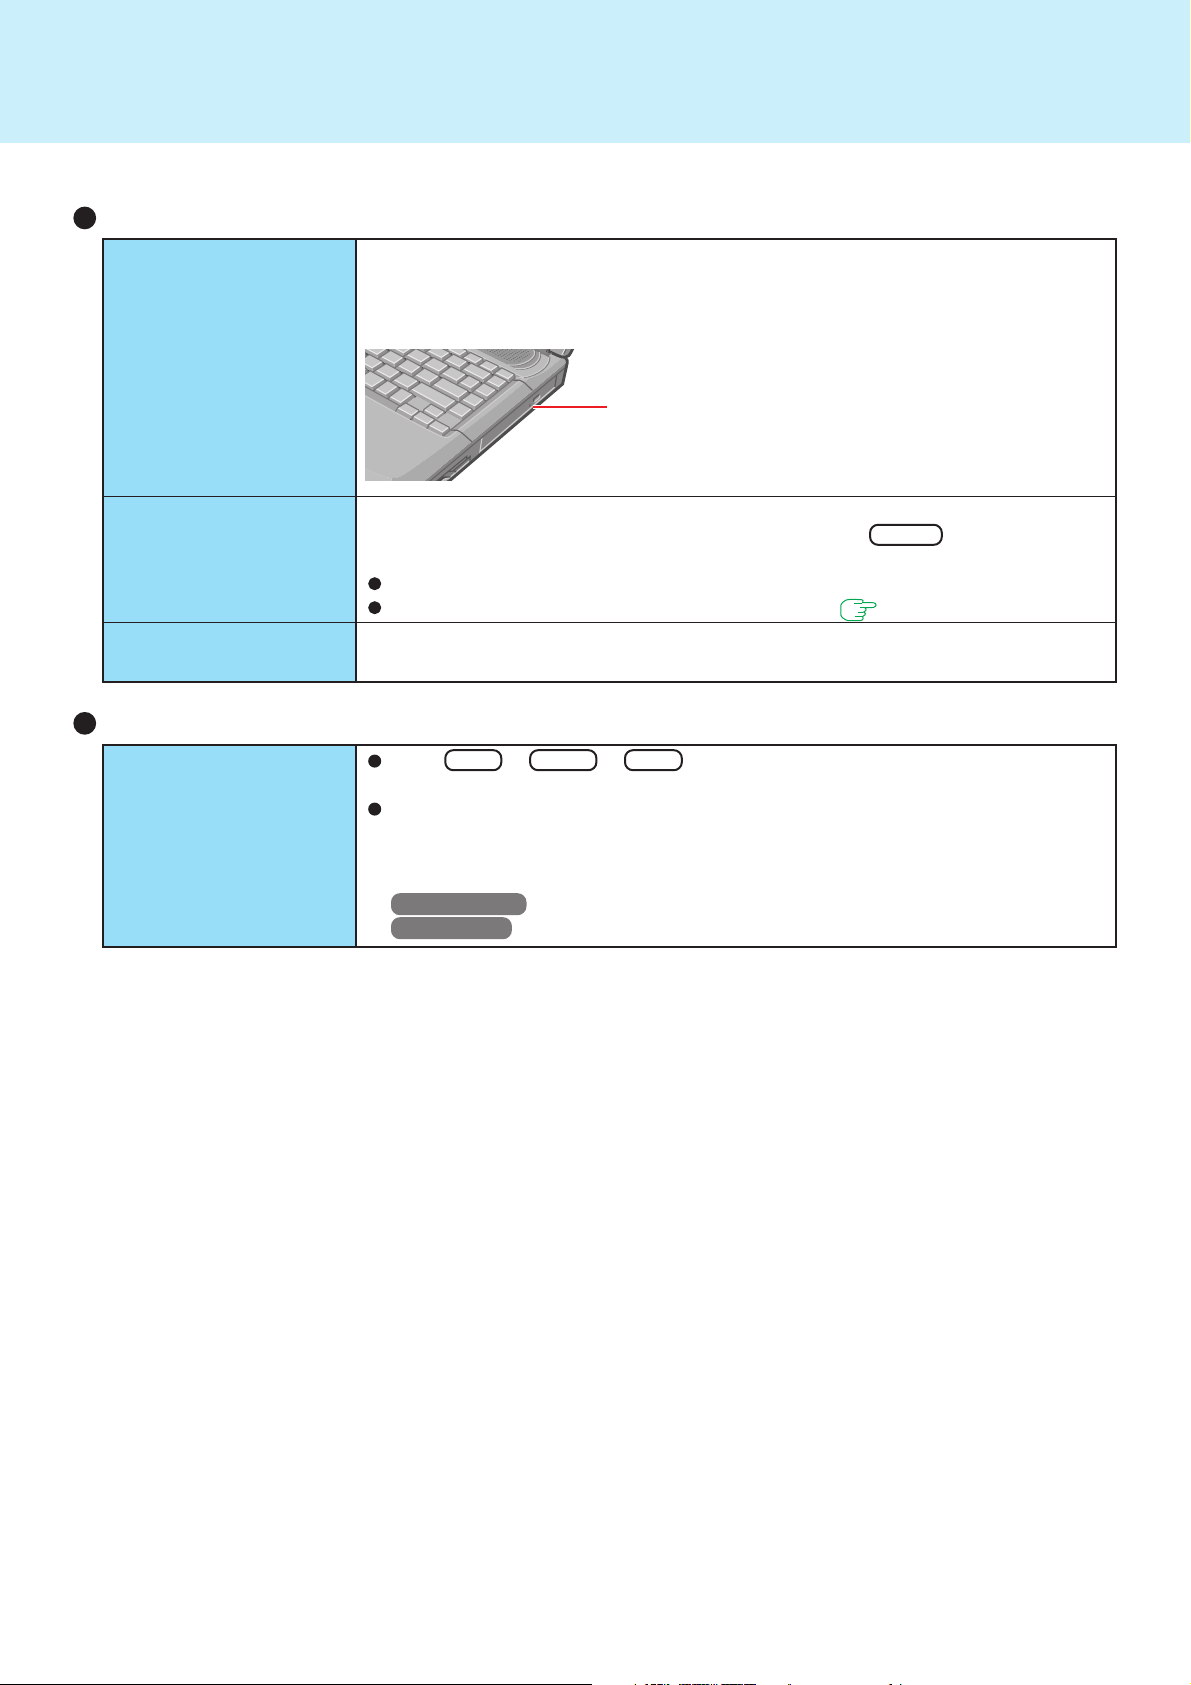
Dealing with Problems (Advanced)
Disk Operations (continued)
64
Cannot eject disc
A blue background appears on the screen with
the MPEG image
The CD drive vibrates a
lot
The disc tray does not
close
Others
No response
Is the computer powered on?
To remove a disc when the computer is powered off, insert a pointed object (e.g., the
bent-out tip of a paper clip, or the tip of a pencil or ballpoint pen) into the emergency
hole. Pushing it completely to the end will free the tray so that it can be pulled out.
Emergency Hole
(The position of the emergency hole differs depending
on the drive.)
Did you open the CD drive or remove the MPEG disc while it was operating?
Re-insert the MPEG disc and close the CD drive. Press Enter .
Is the disc bent or labeled?
Set [CD Drive Speed] to [Low] in the Setup Utility. ( page 50)
Did you touch the eject button when you close the tray?
Press Ctrl + Shift + Esc to open Task Manager and close the software
application which is not responding.
After shutting down by pressing the power switch for more than four seconds,
press the power switch to power on and open the application again.
If the program no longer works normally, delete the program using the following
procedure. Then reinstall the program.
Windows 2000 : [Start] - [Settings] - [Control Panel] - [Add/Remove Programs]
Windows XP : [start] - [Control Panel] - [Add or Remove Programs]
Page 65
Dealing with Problems (Advanced)
Check the Computer’s Usage Status
You can use the PC Information Viewer to check the computer’s usage status, and
use this information when calling technical support office for advice. (If you have
not logged on with administrator authority, some information will be displayed as
[Not Found].)
Running PC Information Viewer
Windows 2000
1
Select [Start] - [Programs] - [Panasonic] - [PC Information Viewer] - [PC
Information Viewer].
Windows XP
1
Select [start] - [All Programs] - [Panasonic] - [PC Information Viewer] - [PC
Information Viewer].
Click on the items to display detailed information for each item.
Save information to a file
Displayed information can be saved to a text file(.txt).
1
Run the PC Information Viewer and display the information you wish to save.
2
Select [Save].
To save the item that is displayed.
·
Select [Save only the information displayed] and [OK].
65
NOTE
Some of the hidden information on the screen, which cannot be
shown without scrolling the screen, will be saved, too.
To save all items.
·
Select [Save all the information] and [OK].
3
Select the folder, input the file name, then select [Save].
Save a copy of the screen to a file
You can save a copy of the screen currently being displayed to a file in
bitmap format (.bmp).
1
Display the screen you want to save.
2
Press Ctrl + Alt + F8 .
[pcinfo.bmp] will be saved in [My Documents] folder. If [pcinfo.bmp] file
already exists, it will be overwritten. (If [pcinfo.bmp] file is set as a “Read
only” or “Hidden” file, the new file cannot be saved).
NOTE
You can also save a copy of the screen to a file using the following procedure.
Windows 2000
Select [Start] - [Programs] - [Panasonic] - [PC Information Viewer] - [Screen Copy].
Windows XP
Select [start] - [All Programs] - [Panasonic] - [PC Information Viewer] [Screen Copy].
At the time of purchase, the computer is set so that a copy of the screen
can be saved to a file by pressing Ctrl + Alt + F8 . This setting can
be changed using the following procedure.
1
Select [PC Information Viewer].
Windows 2000
Select [Start] - [Programs] - [Panasonic] - [PC Information Viewer].
Windows XP
Select [start] - [All Programs] - [Panasonic] - [PC Information Viewer].
2
Select [Screen Copy] with the right button, and select [Properties] - [Shortcut].
3
Move the cursor to [Shortcut key], and press the key to be used for the
shortcut.
Colors are saved in 256 colors.
When using Dualview.
A copy of the screen displayed on the primary device will be saved.
Page 66

Copyright
This manual is copyrighted by Matsushita Electric Industrial Co., Ltd. with all rights reserved. No part of this manual may
be reproduced in any form without the prior written permission of Matsushita Electric Industrial Co., Ltd.
No patent liability is assumed with respect to the use of the information contained herein.
© 2003 Matsushita Electric Industrial Co., Ltd. All Rights Reserved.
Disclaimer
Computer specifications and manuals are subject to change without notice. Matsushita Electric Industrial Co., Ltd.
assumes no liability for damage incurred directly or indirectly from errors, omissions or discrepancies between the
computer and the manuals.
Trademarks
Microsoft, Windows, the Windows logo and IntelliMouse are registered trademarks of Microsoft Corporation of the
United States and/or other countries.
PS/2® is a registered trademark of International Business Machines Corporation.
Intel, Pentium and SpeedStep are either registered trademarks or trademarks of Intel Corporation.
Adobe® and Acrobat® are either registered trademarks or trademarks of Adobe Systems Incorporated in the United
States and/or other countries.
Panasonic is a registered trademark of Matsushita Electric Industrial Co., Ltd.
66
PCE0131A_2K/XP
 Loading...