

Panasonic CF-37LBA2BAM Reference Manual

95
Personal Computer
Reference Manual
CF-37 Series
Contents
Read Me First......................................................2
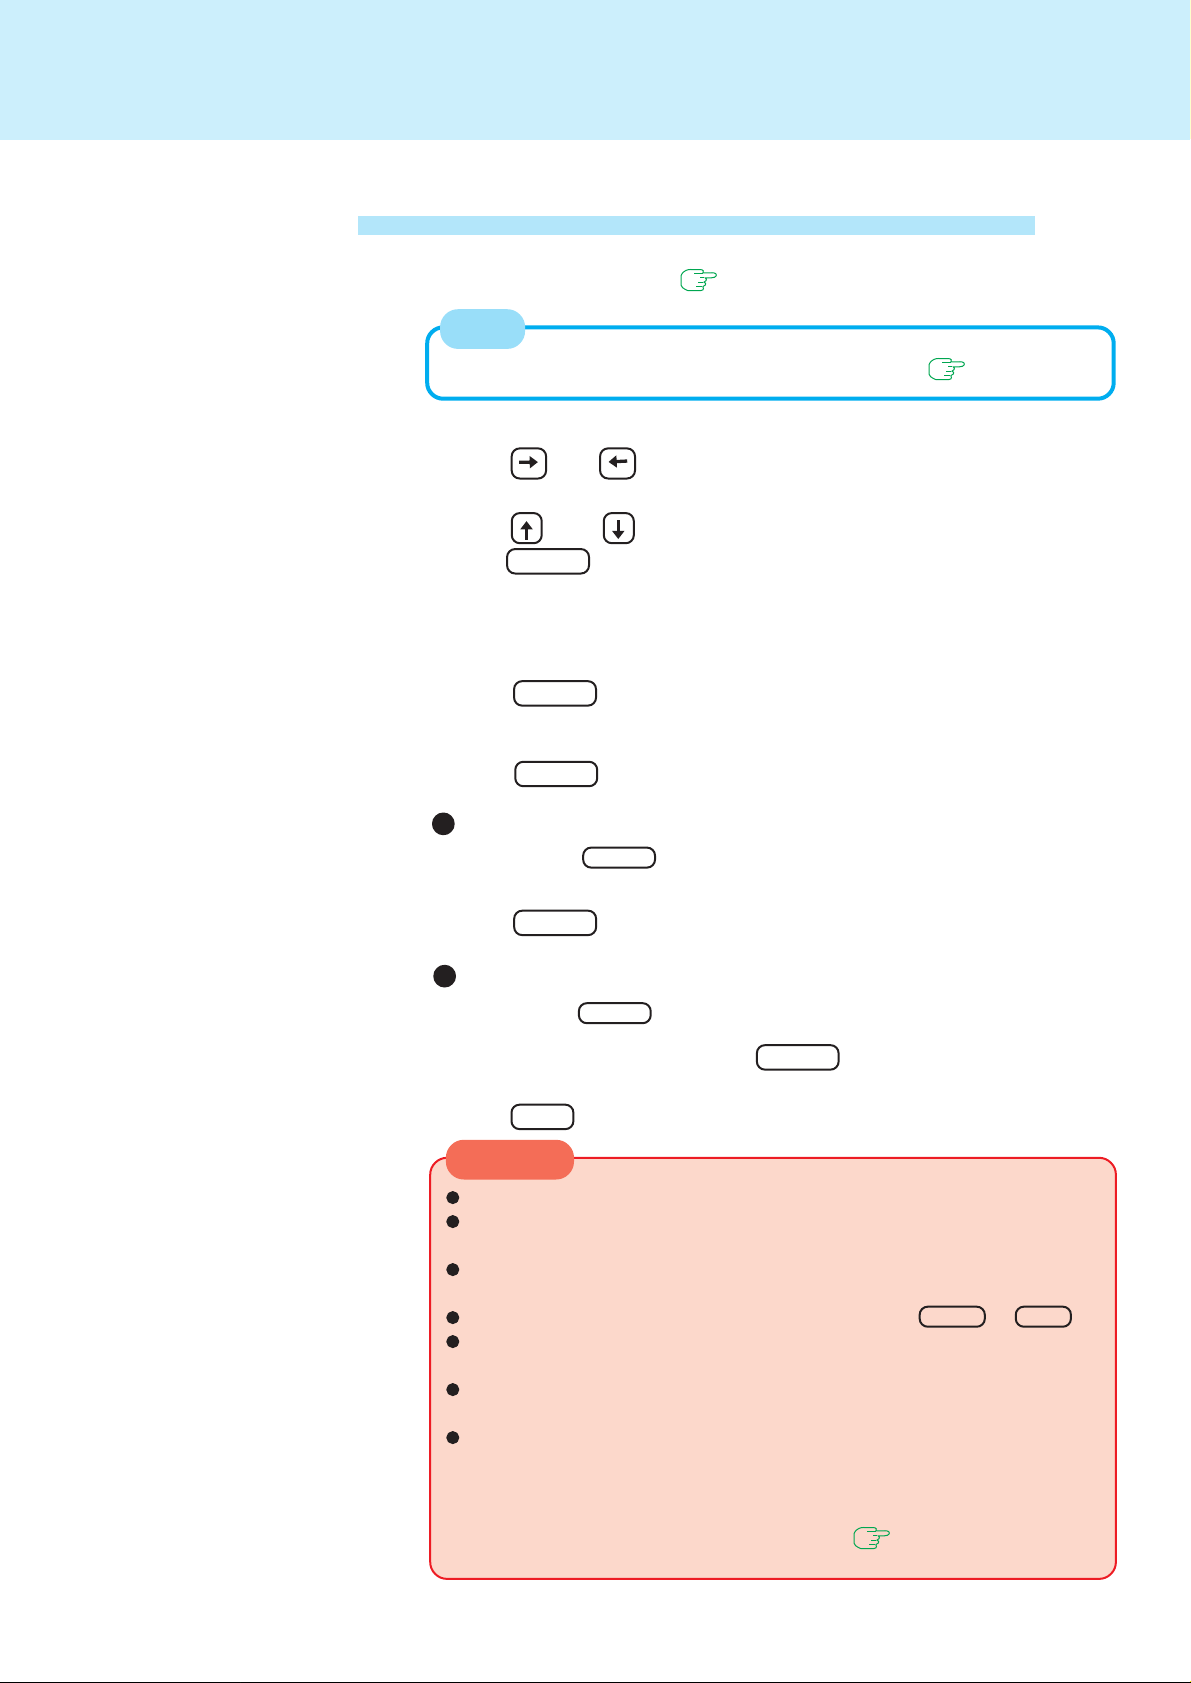
Key Combinations..............................................4
LED Indicators....................................................5
Touch Pad (Advanced) .......................................6
Touchscreen .....................................................11
Panasonic Hand Writing (Touchscreen) .........13
Display Rotation Tool .......................................14
Suspend/Hibernation Functions .....................15
Security Measures............................................18
Computing On The Road..................................22
Battery Power ...................................................25
Multimedia Pocket ............................................32
CD-ROM/DVD-ROM Drive.................................33
TM
SuperDisk
PC Cards ...........................................................38
RAM Module......................................................39
Printer................................................................40
External Display ...............................................41
USB Devices .....................................................42
Infrared Data Communications .......................44
Modem...............................................................46
Hard Disk Drive.................................................47
Setup Utility ......................................................48
Smart Boot ........................................................54
Technical Information ......................................55
DMI Viewe r ........................................................56
List of Error Codes...........................................57
Dealing With Pro blems (Advanced) ................59
Drive .............................................36
®
Illustrations in this Reference Manual
NOTE: NOTE provides a useful fact or helpful information.
CAUTION: CAUTION indicates a condition that may result in minor or moderate injury.
WARNING: WARNING indicates a hazard that may result in moderate or serious injury.
[Start]-[Shut Down]: This illustration means to click [Start], then to click [Shut Down].
(For some applications, you may need to double-click.)
Enter : This illustration means to press the [Enter] key.
Fn + F5 : This illustration means to press and hold the [Fn] key, then press the [F5] key.
page: When the cursor is moved to an item under [Contents] or to page (green display), the
shape of the cursor will change to . Under this condition, if characters are tapped (or a
click is made), the corresponding page in the Reference Manual will be displayed.
: This illustration means to refer to the Operating Instructions.
We recommend that this Reference Manual be printed.
Read Me First
Saving Data on the Hard Disk
Do not expose your computer to shock.
Please use care when handling your computer, shock may damage your hard disk
or make your software applications and data unusable.
Do not power off your computer while software applications are running or
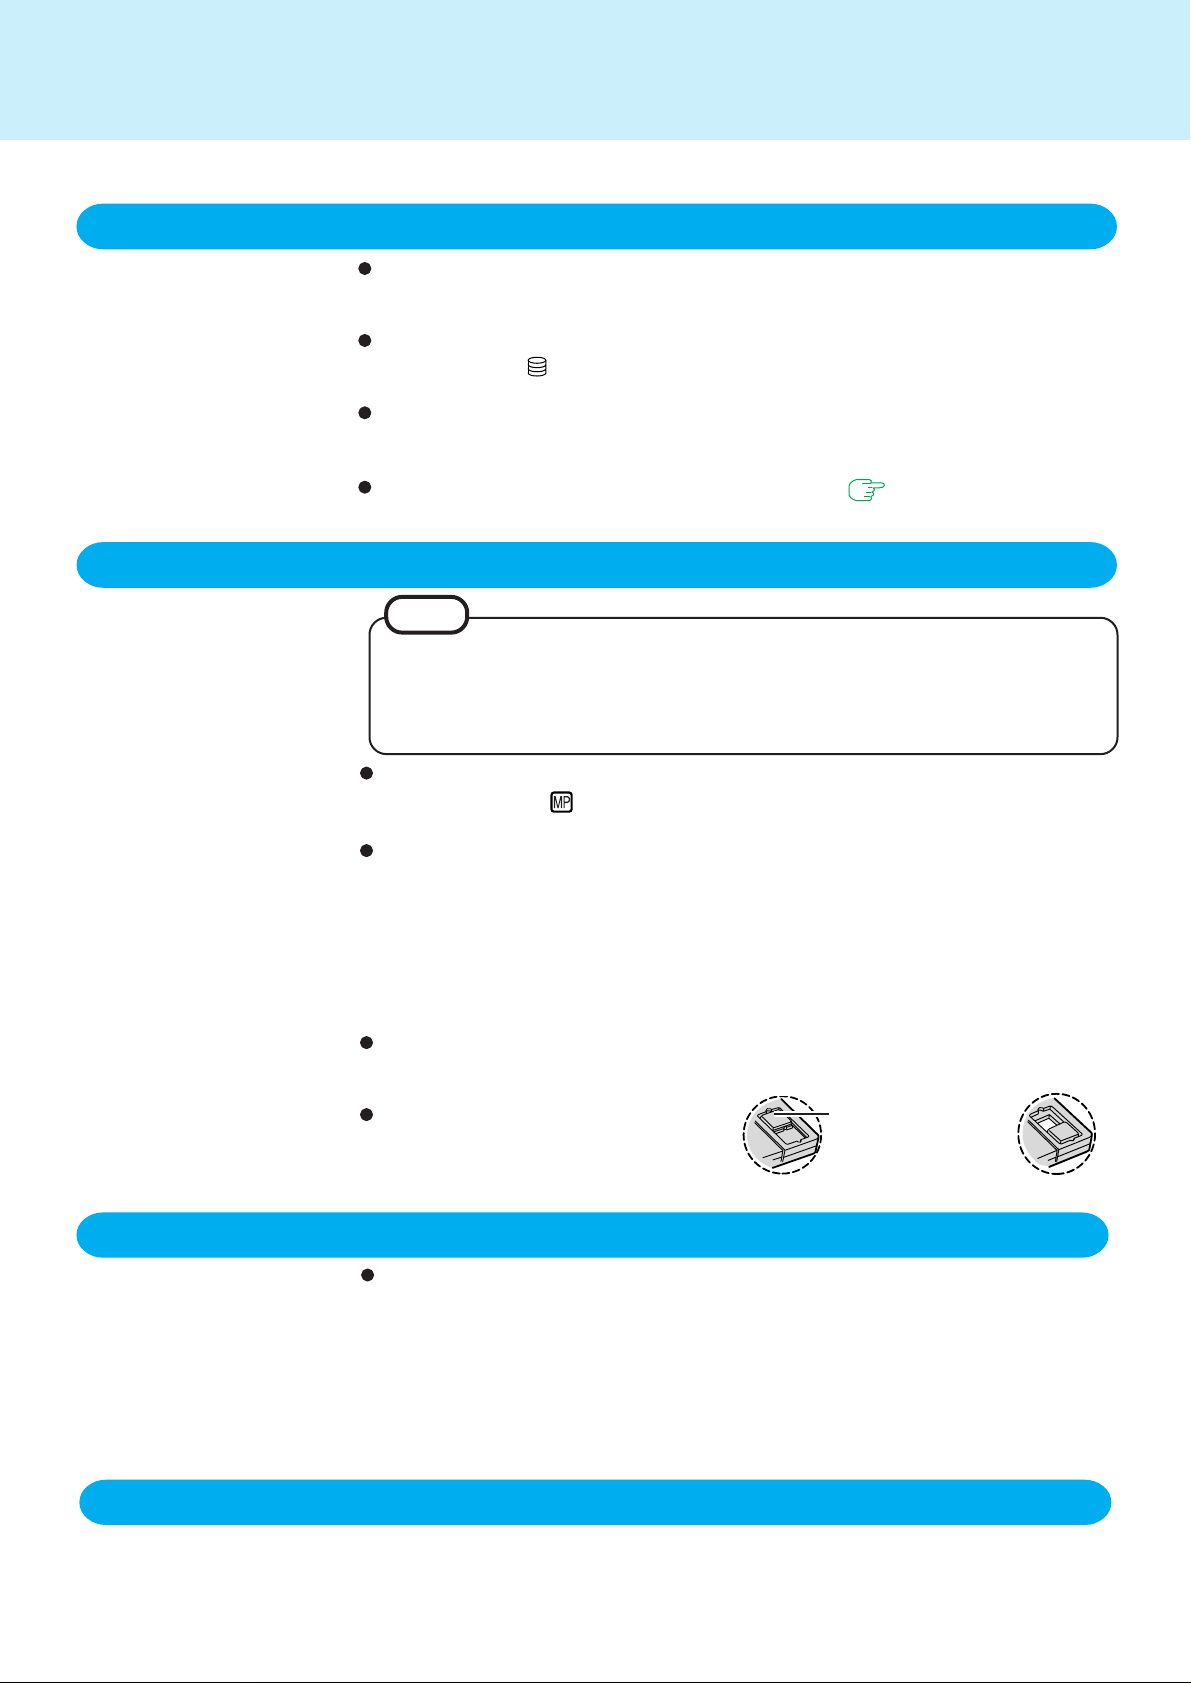
HDD indicator ( ) is on.
Properly shut Windows* down to avoid problems ([Start] - [Shut Down] ).
Save all valuable data to disks.
Backing up data to disks will limit damage should trouble occur to your computer or
should you inadvertently change or erase data.
Use the security function for all important data. ( page 18)
Saving Data on Disks
NOTE
In this manual, the followings are described as disks.
When using disks, an optional SuperDisk Drive P ack (CF-VFS371/CF-VFS372) is needed.
* This computer uses Microsoft
SuperDisk (120 MB)
Floppy disk (720 KB, 1.44 MB)
®
Windows® 95 Operating System.
2
Computer Viruses
Do not power off your computer or press the SuperDisk drive eject b utton while
the MP indicator ( ) is on.
Doing so may damage the data on the disk and render the disk useless.
Use care when handling disks.
To protect the data on your disks or to prevent a disk from becoming stuck in your
computer, avoid the following:
• Sliding the shutter on the disk manually.
• Exposing the disk to a magnetic field.
• Storing the disk in locations prone to high temperatures, low pitched noise, dampness,
or dust.
• Applying more than one label on the disk.
Confirm the contents of a disk before formatting it.
Confirm that no impor tant data is on the disk, because all data on the disk will be
erased.
Use the write-protect tab.
This is a must for preserving important data.
This prevents y our data from being er ased
or overwr itten.
Users are advised to purchase the latest versions of virus protection software
and use them regularly.
We recommend you run the software:
• When booting your computer.
• After receiving data.
We recommend that you check data received on disks or from external sources,
such as data downloaded from the Internet, e-mail, etc. (For compressed files,
please uncompress them before running a check).
Write Enable
Write-protect T ab
Write Disable
LCD Panel
High-precision and advanced technologies are necessary in the production of color
liquid crystal displays (color LCDs). Therefore, if 99.998% or more of the picture
elements are functioning properly, no defect is considered to exist.

Read Me First
Usage Environment
Env i r onment
Places not to use your computer
Handling
This computer has been designed so as to minimize shoc k to the LCD and hard disk drive, the
leakage of liquid (e.g., w ater) from the ke yboard, etc., but no warranty is pro vided against such
trouble. Therefo re, as a precision instrument, please be e xtremely careful in the handling.
Do not drop or hit your computer against solid objects.
Do not stand the computer on its side or allow it to tip ove r. When the computer receives extremely strong shock after falling, the hard disk or flopp y disk drive, etc., ma y become inoper able.
Do not carry your computer when it is ON.
Remov e all cables before transporting y our computer.
We recommend preparing a fully charged battery (and optional charger, if possible).
When transporting spare batteries inside a package, briefcase, etc., it is recommended
that the batteries be stored in a plastic bag.
Do not place the computer upright. When the computer receives extremely strong shock
after falling, the hard disk or floppy disk driv e, etc., may become inoperable.
Do not carry the computer while the display is open, or carry it by gripping the display.
Do not put anything (e .g., a piece of paper) between the display and keyboard.
Alwa ys carry your computer with y o u. Never check it in with luggage. For use of the computer
inside an aircraft, w e recommend asking the airlines regarding their policy on this issue.
<When using the SuperDisk drive>
It is a good idea to make bac kup copies on disks and carry them with you.
Do not leav e a disk in the drive while transporting your computer.
3
Place the computer on a flat stable surface.
In use: Temperature: 5 °C to 35 °C {41 °F to 95 °F}
Humidity: 30% to 80% RH (No condensation)
Not in use: Temperature: -20 °C to 60 °C {-4 °F to 140 °F}
Humidity: 30% to 90% RH (No condensation)
Such areas may result in damage to the computer.
Areas with electronic equipment
These areas may interfere with your display or cause your computer to
produce strange sounds.
Areas with extremely high/low temperatures
Do not leave things near the computer that are sensitive to heat. During operation, the computer may become warm.
Maintenance
Display
Av oid using water when cleaning the panel. Ingredients included in water may leave
residue and reduce readability of the screen.
Touch Pad
page 8
CAUTION
Do not use benzene or thinner, or ru bbing alcohol. Doing so ma y adv ersely affect the surface, e .g., discoloration. In addition,
do not use commercially-available cleaners and cosmetics , as the y may contain components harmful to the surface.
Do not directly add or spray water or detergent. If liquid enters the inside of the computer, it may cause it to work
improperly or be damaged.
<When cleaning dust/dirt>
Avoid rubbing off dust/dirt with cloth since it may leave scratch on the screen.
Sweep dust/dirt with fine brush, then wipe it with “dry” soft cloth used f or cleaning glasses.
<When cleaning oily surface>
Apply camera lens cleaner on a soft gauze and clean it with gentle force. Then, wipe
with dry soft cloth used for cleaning glasses.
Areas excluding the display
Wipe these areas with a soft cloth, after applying water or detergent diluted with water
to the soft cloth and firmly wringing out excess water.

Key Combinations
CAUTION
Do not press the following key combinations repeatedly in (quick) succession.
Do not press the following key combinations while using the touch pad (mouse) or other keys.
When a MIDI file is playing, do not use the f ollo wing k ey combinations. The tempo of the MIDI file ma y temporarily slow.
4
Key
Fn + F1
Fn + F2
Fn + F3
Fn + F4
Fn + F5
Fn + F6
Functions Popup Window
LCD brightness control ( down)
LCD brightness control ( up)
Display change
Speakers on/off s witch
*1
Volume control
( d own)
*1
Volume control ( up)
Holding down on the keys
changes the sound level.
Pressing this key combination adjusts the brightness
of LCD.
By pressing this key combination, you can select either an external display, LCD or simultaneous, even
if an external display is not connected. Rebooting
the computer, or powering off then on, restores the
display setting of the Setup Utility.
Pressing this key combination turns on/off audio from
the internal speak ers and headphone jack. Rebooting
the computer or powering off then on, restores the
speaker setting of the Setup Utility.
CAUTION
Disabling the speakers will also disable the warning beep.
Pressing this key combination adjusts the volume of
the internal speakers and headphone jack.
NOTE
This key combination cannot be used to adjust the vo lume of the warning beep and the touchscreen sound.
Is displayed when
the brightness is at
its maximum value .
Is displayed when
the brightness is at
its minimum value .
OFF
ON
Down
Up
Fn + F7
*2
Power off using the
suspend function
Pressing this key combination causes the current
screen on the display to be saved to memor y, and
powers off the computer . When the computer is po wered on, by sliding the po wer switch, the sa ved screen
will be displayed. (The computer must be plugged
into the AC adapter or have a battery pack with sufficient remaining power installed.)
Fn + F8
*3
Power management
enable/disable switch
Pressing this key combination temporarily disables
the power management (timeout f eature) of the Setup
Enable
Utility. Rebooting the computer,or powering off then
on, restores the power management setting of the
Disable
Setup Utility. pages 24,48
Fn + F9
Fn + F
Remaining capacity of
the battery pack
*2
ECO mode for conserv-
10
ing power
Pressing this key combination displays the remaining battery capacity on the screen. page 25
Pressing this key combination turns off the LCD, external display and hard disk drive until operation is
78
Remaining
A
%
capacity (%)
B
%
displa y
A
%
Battery pack is
B
not installed.
%
resumed by pressing any ke y or mouse*4 (except the
keyboard and mouse connected to the USB port).
*1 Under the condition the sound function of Windows is not working, or is displayed, but the volume does not change.
2
*
When [Disable] is set for [Fn+F7/Fn+F10 key] with the Setup Utility, these key combinations become inoperable.
3
*
Depending on the state of the system, settings may be unable to be changed. In such cases, try performing the settings again.
4
*
This "mouse" indicates the touch pad, the touchscreen and an external mouse.
LED Indicators
5
Caps Lock
NumLk
(Numeric key)
ScrLk (Scroll lock)
Hard disk status
Multimedia pocket
device status
Battery pack
status
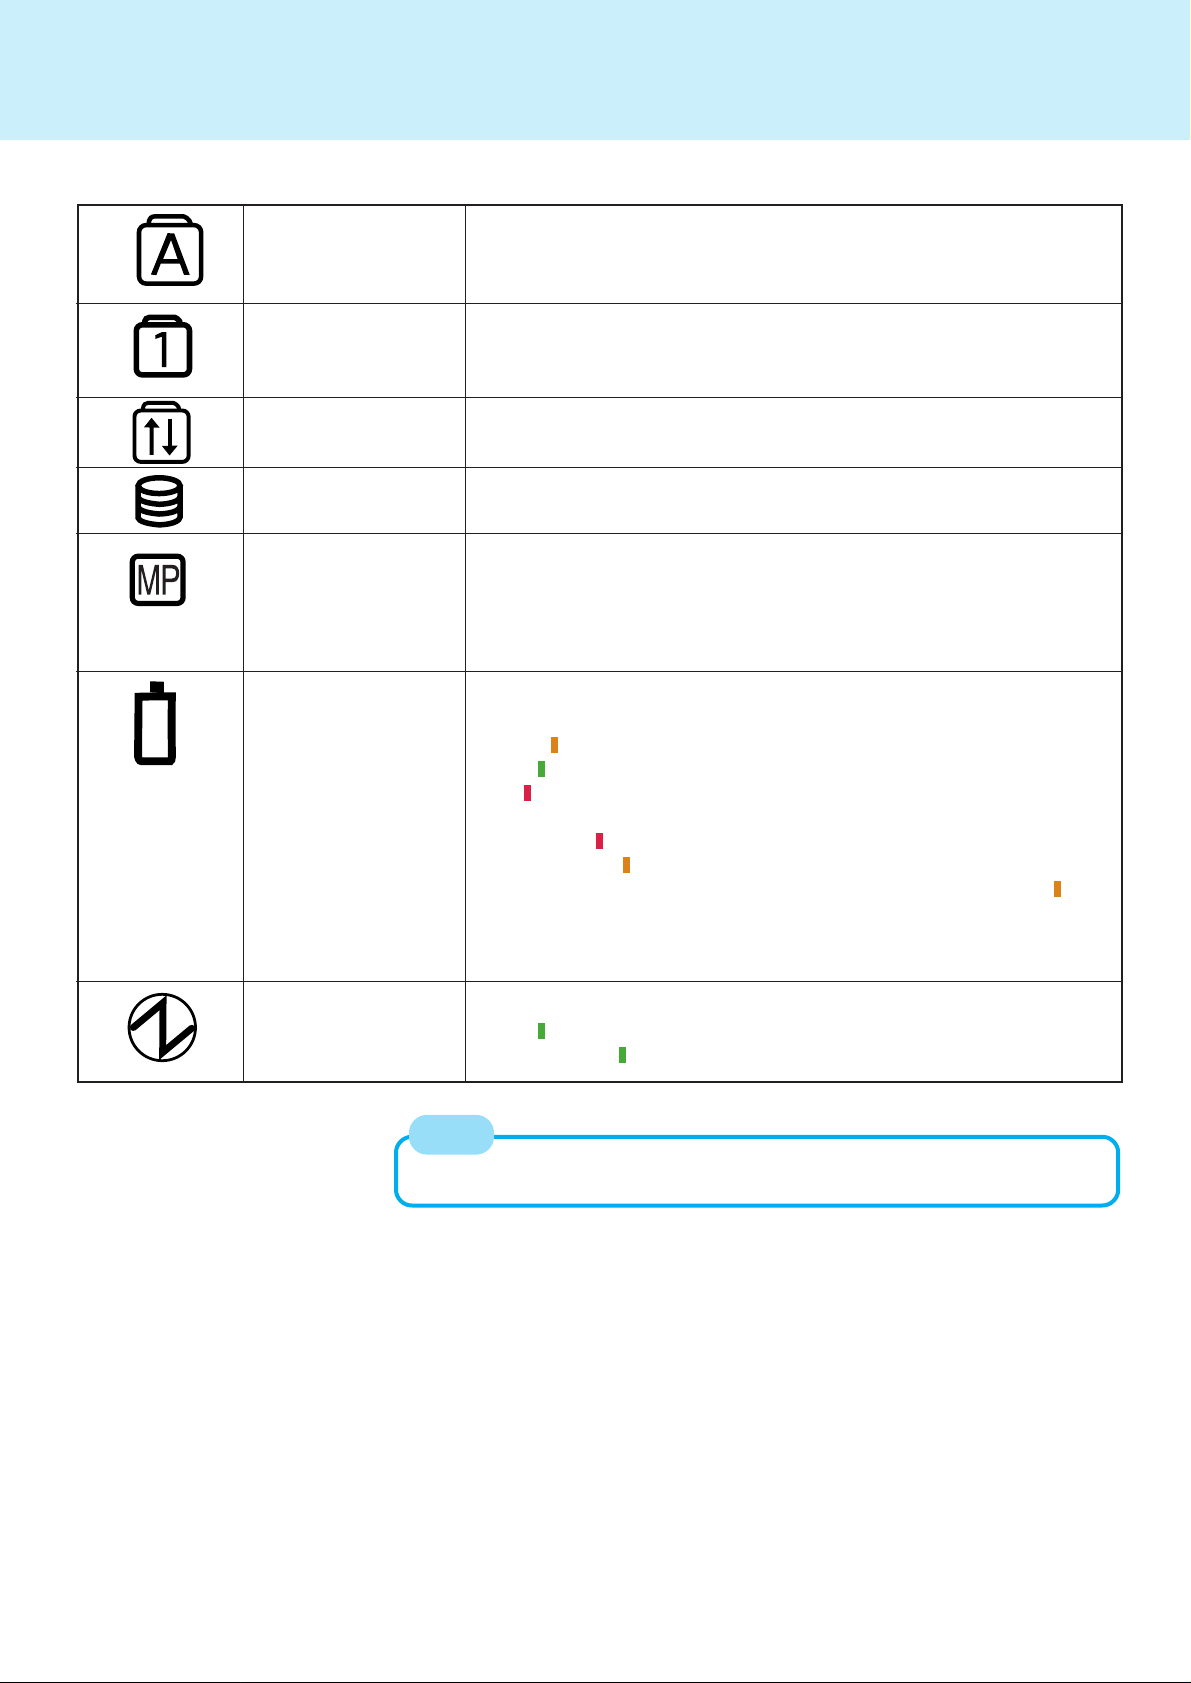
This indicator lights green when Caps Lock is pressed. Subsequent nonshifted input is capitalized.
These indicators light green when NumLk is pressed. This causes a portion of the keyboard to function as a numeric keypad. The [Enter] key
functions differently depending on the application.
This indicator lights green when ScrLk is pressed. Scroll lock functions
differently depending on the application.
This indicator lights when the hard disk drive is accessed.
This indicator lights when the multimedia pocket device (CD-ROM drive,
DVD-ROM drive or SuperDisk drive) is accessed.
When the battery pack (including the adapter) is set in the Multimedia
Po cket, the Multimedia Pocket device status LED shows the same indications as the battery pack status LED (see below).
Not lit : AC adapter not connected or charging not being per-
formed.
Orange : Charging in progress.
Green : Charging finished.
Red : Battery is low
(remaining battery capacity is approx. 9% or less).
Blinking red : Battery pack or charging malfunction.
Blinking orange : Battery capacity being refreshed.
Blinking orange five times after the AC adapter is connected :
Charging on standby. (The ambient temperature is outside the allowab le range . Once the allowable range requirement is satisfied, charging begins automatically.)
Power status
Not lit : Power off / Hibernation mode
Green : Power on
Blinking green : Suspend mode
NOTE
MP is the abbreviation for Multimedia Pocket.
Touch Pad (Advanced)
6
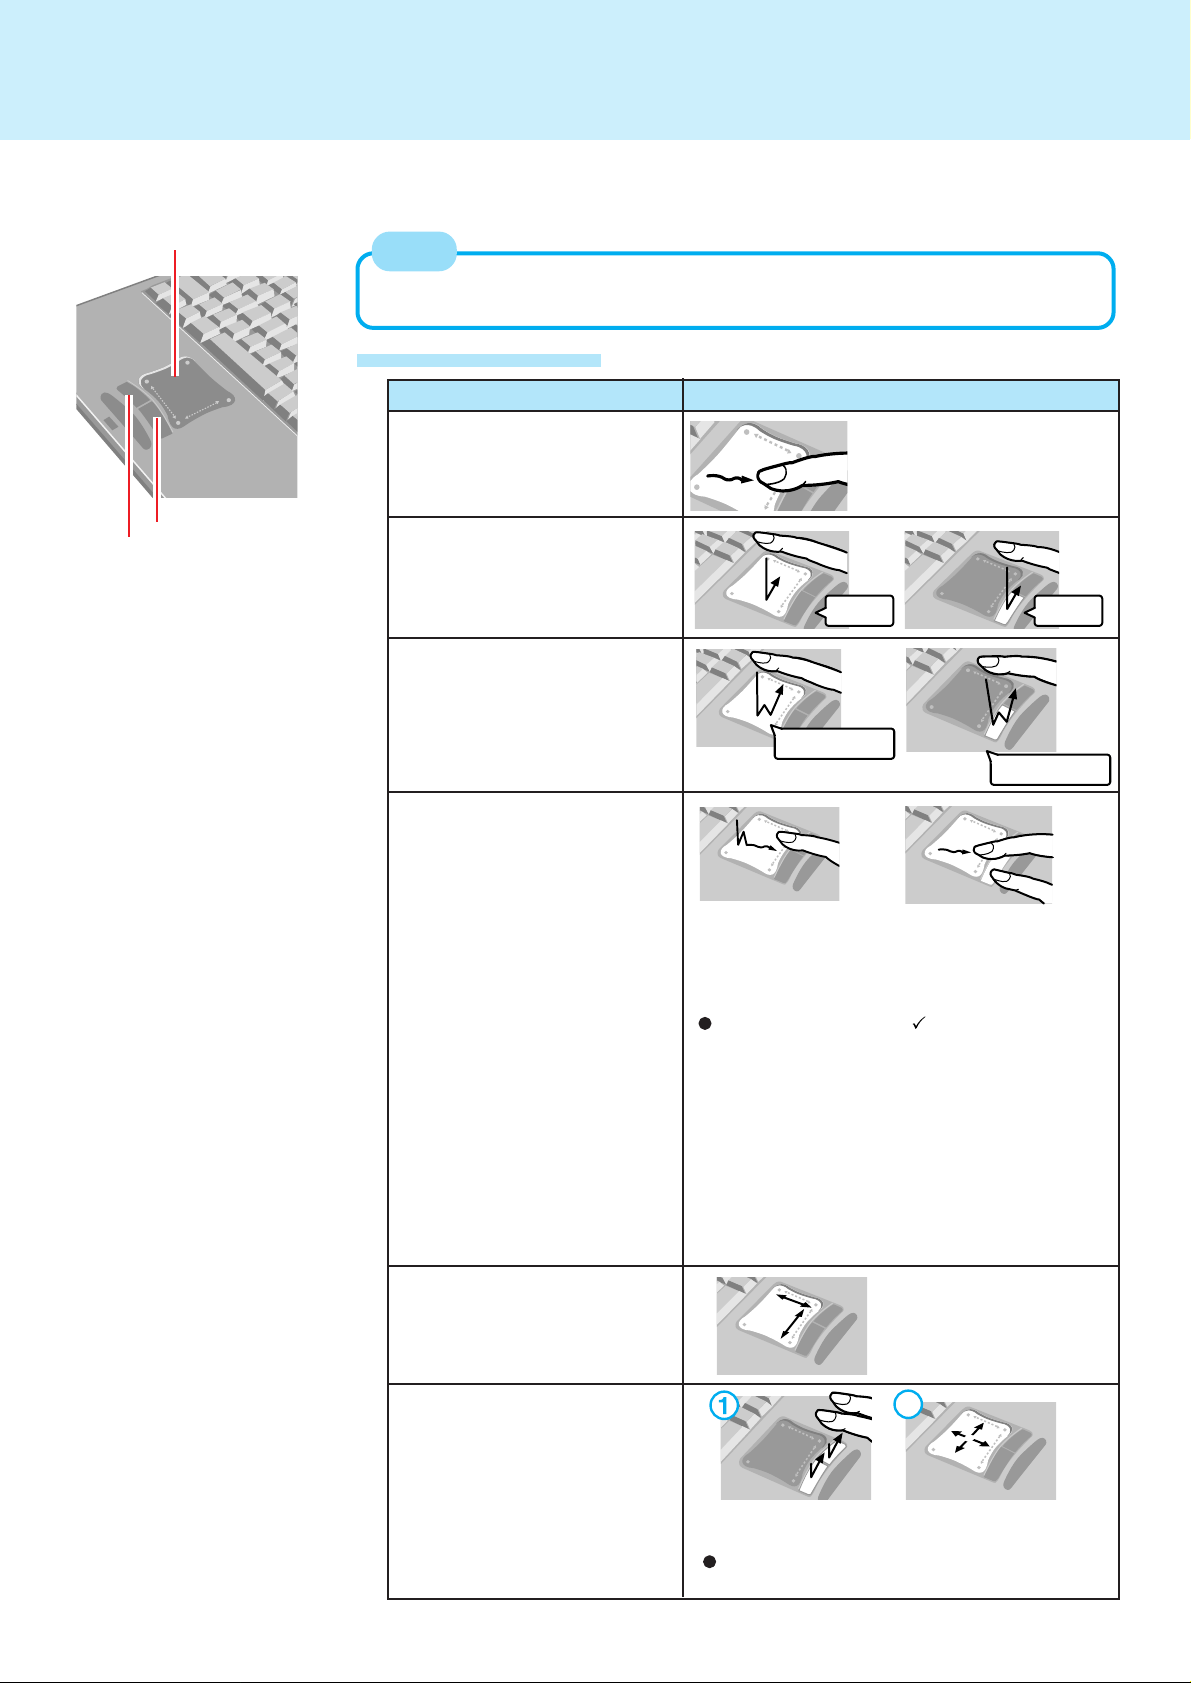
Work Surface
Right Button
Left Button
Use the touch pad to mov e the cursor on the display and perf orm normal computer operations.
NOTE
The touch pad has been designed to work only when a finger is used. Therefore, do
not use any implement on the touch pad.
Basic Operation
Function
Moving the Cursor
Tapping/Clicking
Double-Tapping/
Double-Clicking
Touch Pad Operation
Move the tip of your finger
lightly over the surface.
or
tapping
or
double-tapping
clic king
double-clic king
Dragging
Scroll*
Scroll a document
(rotate the wheel)
or
T wo quic k taps, but on the
second tap leaving your
finger down (applying
pressure) and moving it
on the work surface .
When a check mark is added for [Drag
Lock] *
After the drag operation (above : left side), it
is necessary to determine the destination (i.e.,
location of drop) by one tap. Under the condition no destination is selected, do not use
the suspend or hibernation function. Nothing
is shown on the display, even after resuming
from the suspend or hibernation mode.
In this case, the display will return after a tap
or click is made.
* In [Start] - [Settings] - [Control Panel] - [Mouse] - [Tapping]
While holding down the
button, moving your finger on the work surface.
Auto Scroll*
Automatically scroll a document
2
Operate after pressing the two buttons simultaneously.
When releasing the auto scroll function:
One tap on the work surface.
(To next page)

Touch Pad (Advanced)
7
Function
Pan*
Scroll in various directions of a
document
Zoom*
Magnify/reduce the display of
a document.
Data Zoom*
Display or hide a document, or
perform operations to return to or
proceed with Internet Explorer .
* Indicates that the movements will differ depending on the application.
Touch Pad Operation
Operate while holding down the two buttons.
Magnify
Ctrl +
Shift +
Reduce
CAUTION
When an external mouse or trackball with additional functions (e.g., wheel function) is connected, a part or all of the additional functions may fail to operate . To
use these additional functions, install the driver or application software of the
external device by following the procedure below. However, once the driver or
application software is installed, touch pad functions (e.g., auto scroll) may not
operate ev en if the touch pad is enabled (see the procedure for “When you want
to re-enable the touch pad.”).
1
Po wer off your computer ( "Starting Up/Shutting Down") and connect
the external mouse or trackball device to the computer.
2
Turn the power on and run the Setup Utility ( page 48). In [Main] menu,
set [Touch Pad] to [Disable] and close the Setup Utility.
3
Following the operating instructions for the connected external mouse, install
the necessary driver.
When you want to re-enable the touch pad;
1
In [Start] - [Settings] - [Control Panel] - [System] - [Device Manager], when an
external mouse or trackball device is displayed in [Mouse], press [Remove] to
delete it, and then press [OK] to confirm the deletion.
2
P ower off your computer ( "Starting Up/Shutting Down" ) and remove
the external mouse or trackball device.
3
Turn the power on and run the Setup Utility ( page 48). In [Main] menu,
set [Touch Pad] to [Enable] and close the Setup Utility.
4
Confirm whether [Alps GlidePoint] e xists in [Mouse] (in [Control Panel] - [System] -[Device Manager]).
It is possible that no input is accepted from the touch pad while typing is being
performed. To change the settings, add the check mark for [Tap off when typing]
in [Start] - [Settings] - [Control Panel] - [Mouse] - [Tapping]. ( page 10)
(To next page)

Touch Pad (Advanced)
CAUTION
When [PS/2 Compatible Mouse] is displayed instead of [ALPS GlidePoint]
in [Start] - [Settings] - [Control Panel] - [System] - [Device Mana ger] - [Mouse]:
1
Select [PS/2 Compatible Mouse] and then press [Properties].
2
Select [Driver] - [Update Driver] and then press [Next].
3
Select [No, select drive from list] and then press [Next].
4
At the [Device Driver Wizard], select [Alps GlidePoint] and press [Finish].
5
At the [Insert Disk], press [OK].
6
Input [c:\util\drivers\mouse] and then press [OK].
7
Press [Close].
Handling the Touch Pad
Do not place any object on the work surface or press down forcefully with sharppointed objects (i.e. nails), hard objects that can leave marks (i.e. pencils and ball
point pen).
Do not allow contact with substances that could dirty the touch pad, such as oil.
The cursor may not work properly in such cases.
When the touch pad becomes dirty:
Wipe to remove dirty areas by using a dry soft cloth such as a gauze or soft cloth
first applied with detergent diluted with water and then thoroughly wrung.
Do not use benzene or thinner, or disinfectant-type alcohol.
8
Touch Pad (Advanced)
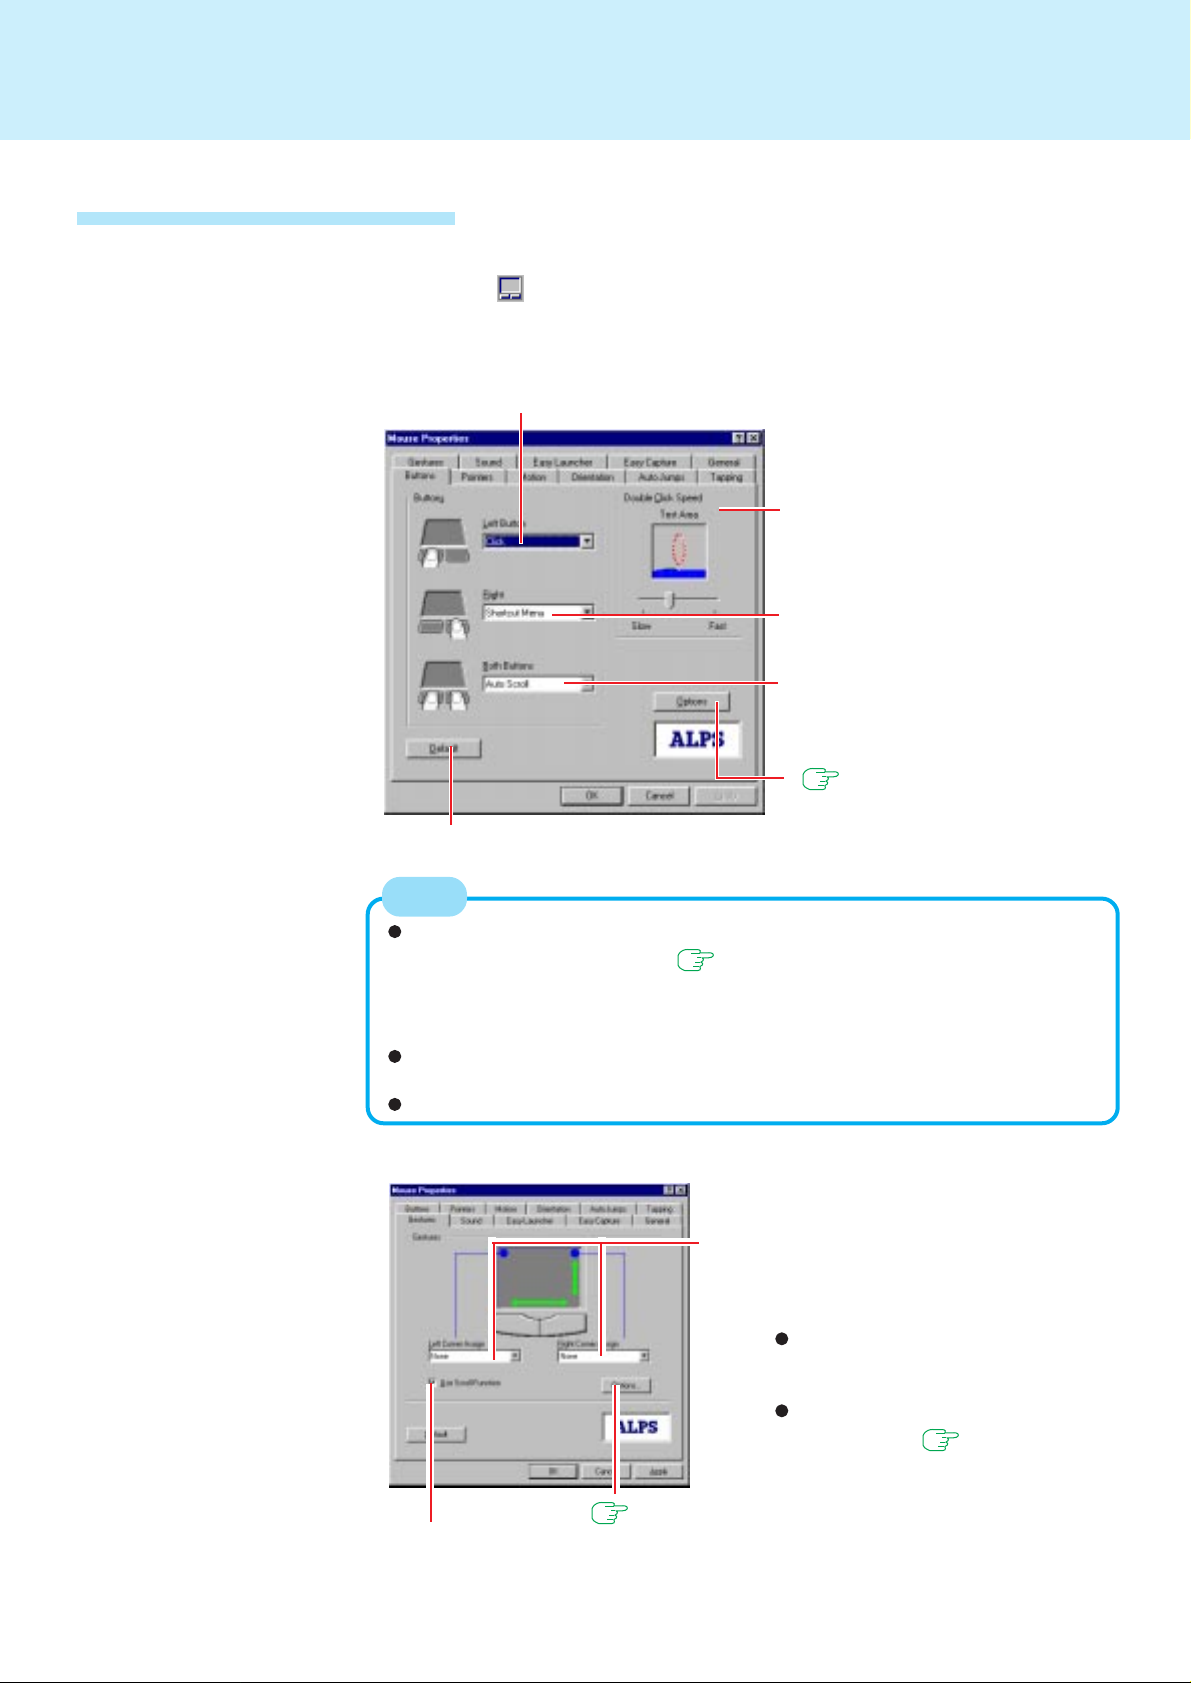
Configuring the Touch Pad
When needed, the touch pad can be configured using the following steps.
Select from the taskbar or select [Mouse] from [Start] -
1
[Settings] - [Control Panel]
Click [Buttons]
2
Set the function to be activated when pressing the left button.
9
Set the function when double-clicking
either button or the surface of the Touch
P ad.
Set the function to be activated when
pressing the right button.
Set the function to be activated when
pressing the left and right buttons simultaneously.
page 10
Press this button to return all settings (including the Options settings) of the Buttons settings display to the factory settings.
NOTE
It is also possible to change the double-click time in [Windows] for [Start] - [Programs] - [Updd] - [Settings] ( page 12). However, when the double click
time in [Windows] is changed, the doub le-click speed in [Buttons] is changed. In
addition, the setting in [Buttons] takes effect after the computer is restarted or
enters the suspend or hibernation mode.
The scroll function (including the auto scroll function) may not operate depending on the
application. In addition, its response ma y be slo w f or rapid repeating actions.
For more information, refer to on-line help.
Click [Gestures]
3
In the top corners of the Touch Pad, set the functions to be activated. To change the functions,
make selections from within the list boxes.
Easy Launcher can be operated simply by clic king the mark in the top corner when the Easy
Launcher function is set.
Easy Capture can be operated simply by clicking the mark in the top corner when the Easy
Capture function is set. page 10
page 10
Set whether to enable or disable the scroll function. When the scroll function is
used, scrolling operations are possible even when the pointer is not moved to the
scroll bar. In addition, it is possible to perform the operations of zoom and data
zoom.
(To next page)

Touch Pad (Advanced)
NOTE
<Easy Launcher>
When Easy Launcher is operated, the window displa yed
on the right is shown. With Easy Launcher, it is possible
to start an application, shut Windows down, or operate
a window. Some applications may be unable to be
closed or minimized. In such cases , tr y pressing the
Exit button or the Minimize button in the application.
<Easy Capture>
When Easy Capture is operated, the window display on
the right is shown. With Easy Capture, it is possible to
paste an image or characters to the currently running applications with the Touch Pad.
Click [Options]
4
10
Set the scroll speed for when the scroll function is
enabled.
Set the area for scroll operations on the Touch Pad
and the area of operation of each mark (in each
corner).
The regions where the scrolling areas in the horizontal and vertical directions overlap become the
operating areas of the marks.
If the box is checked, is displayed on the task
bar.
Click [ Tapping]
5
If the box is checked, there is no response when the Touch Pad is tapped while
typing is being performed. It is possible to adjust the time to return to the tap function
enabled condition after the typing has stopped, i.e., from [Short] to [Long], with [Delay after last key is hit].
Make necessary changes, click [OK].
Adjust the tapping speed on the work surface.
If the box is checked, it is possible to make a d rag
lock setting whereby the drag condition is maintained after dragging via a tap operation even if the
hand leaves the work surf ace. In addition, it is possible to select the method of release from the drag
condition, i.e., [Auto Release] or [Tap Release].
When [Auto Release] is selected, it is possible to
set the time for release.
CAUTION
When [Tap Release] is set, do not enter the suspend or hibernation mode during drag lock. After resuming, nothing will be shown on the display.
In such cases, tap the work surface or click a button.
Make necessary changes
6
Click [OK]
7

Touchscreen
Your computer is equipped with a touchscreen display allowing you to perform the
same operations as the touch pad or mouse by touching the surface of the displa y with
your finger. (The following explanation gives one example (for the default settings).
The operation settings can be changed in [Start] - [Programs] - [Updd] - [Settings].)
11
Moving the cursor
Cursor
Double-clic king
Two quick
taps
Clicking
One tap
Dragging
Touch and hold the object (i. e.
file or icon), move y our finger on
the surface (dragging the object
to the desired location), then release your finger.
CA UTION
The touchscreen function can not be used in the MS-DOS mode and when
using the full screen in [MS-DOS prompt].
When the operation of panning (LCD only) is performed while the screen resolution is set to [1024 x 768 dots], the touchscreen function will not work properly.
If a change is made to the screen resolution, or the cursor can not be pointed
correctly with your finger, be sure to perform [Calibrate]. page 12
Handling the Touchscreen
Do not place any object on the surface or press down forcefully with sharp-pointed
objects (i.e. nails), hard objects that can leave marks (i.e. pencils and ball point
pen).
Do not apply pressure within 5 mm of the perimeter of the display panel. The
cursor may move to the edge of the display.
Do not operate the computer when such things as dust are on the screen. Do not
allow contact with substances that could dirty the touchscreen, such as oil. The
cursor may not work properly in such cases.
When the touchscreen becomes dirty:
Wipe to remove dirty areas by using a dry soft cloth such as a gauze or soft cloth
first applied with detergent diluted with water and then thoroughly wrung.
Do not use benzene or thinner, or disinfectant-type alcohol.
(To next page)

Touchscreen
Configuring the Touchscreen
When needed, the touchscreen can be configured using the following steps.
Select from the taskbar or select [Settings] from [Start] -
1
[Programs] - [Updd]
The following screen will appear.
Windows
Set the “double-click”
settings.
Devices
Configure the device controller.
Hardware
Set the hardware resources.
Match this setting with the
setting for [Base I/O] in the
Setup Utility.
Settings
Set the general protocol
settings.
12
Calibration
Define the calibration setup.
Use when the cursor can not be pointed correctly with
your finger. (Needed if the alignment of the touchscreen
with the visual image change or adjust the display resolution).
Status
Display the status of the controller.
About
Display the version number.
Button Modes
Set the button modes.
General
Set the general settings and functions.
Events
Set the ev ents that can be generated
by a controller.
Advanced
Set the advanced settings.
NOTE
For more information, refer to [Help].
NOTE
The touchscreen can be used for only [Whole Desktop] setting in [Devices] [Modify] - [logical desktop segment]. This setting is default.
Make necessary changes
2
Click [OK]
3
NOTE
It is also possible to change the double-click speed in [Buttons] for [Start] [Settings] - [Control Panel] - [Mouse]. However, when [Double Click Speed] in
[Mouse] is changed, the double click time in [Windows] is also changed. In
addition, the setting becomes the setting for [Buttons] in [Mouse] after the
computer is restarted or enters the suspend or hibernation mode. page 9
Immediately run [Calibrate] when the number of points of calibration is changed.

P anasonic Hand Writing (Touchscreen)
Drawing Characters or Figures
Simple characters and figures like signatures and arrows can be made by using the
work surface of the touchscreen, and can be saved to a file as a bitmap (.bmp) format.
CAUTION
To draw, an object with a rounded tip (e.g., a pen for tablets) can be used.
Do not use any of the following objects, as they may damage the work surface.
• Objects with an extremely sharp tip, like screwdrivers and nails.
• Objects that leave marks, like ball point pens.
Panasonic Hand Writing does not operate properly when the Touchscreen cannot be used.
Select from the taskbar or select [Panasonic Hand Writing]
1
from [Start] - [Programs] - [Panasonic]
Draw a character or figure using the work surface of the
2
touchscreen
13
NOTE
Data can be copied to the clipboard with [Edit] - [Copy]. Copied data can be
added to other applications that support the bitmap format by using the paste
function. Pasting is not possible to applications that do not support the bitmap
format.
CAUTION
Do not perform a drag operation by the Touch Pad or the external mouse as the
movement will be input on the display.
Select [Save As] or [Save] from [File]
3
NOTE
The file size of a bitmap image to be saved or pasted to another application can
be changed with [Option] - [Window size].
CAUTION
Drawing accuracy may be degraded if another application, such as FD accessing, is being executed simultaneously. Begin drawing only after other applications have been closed.
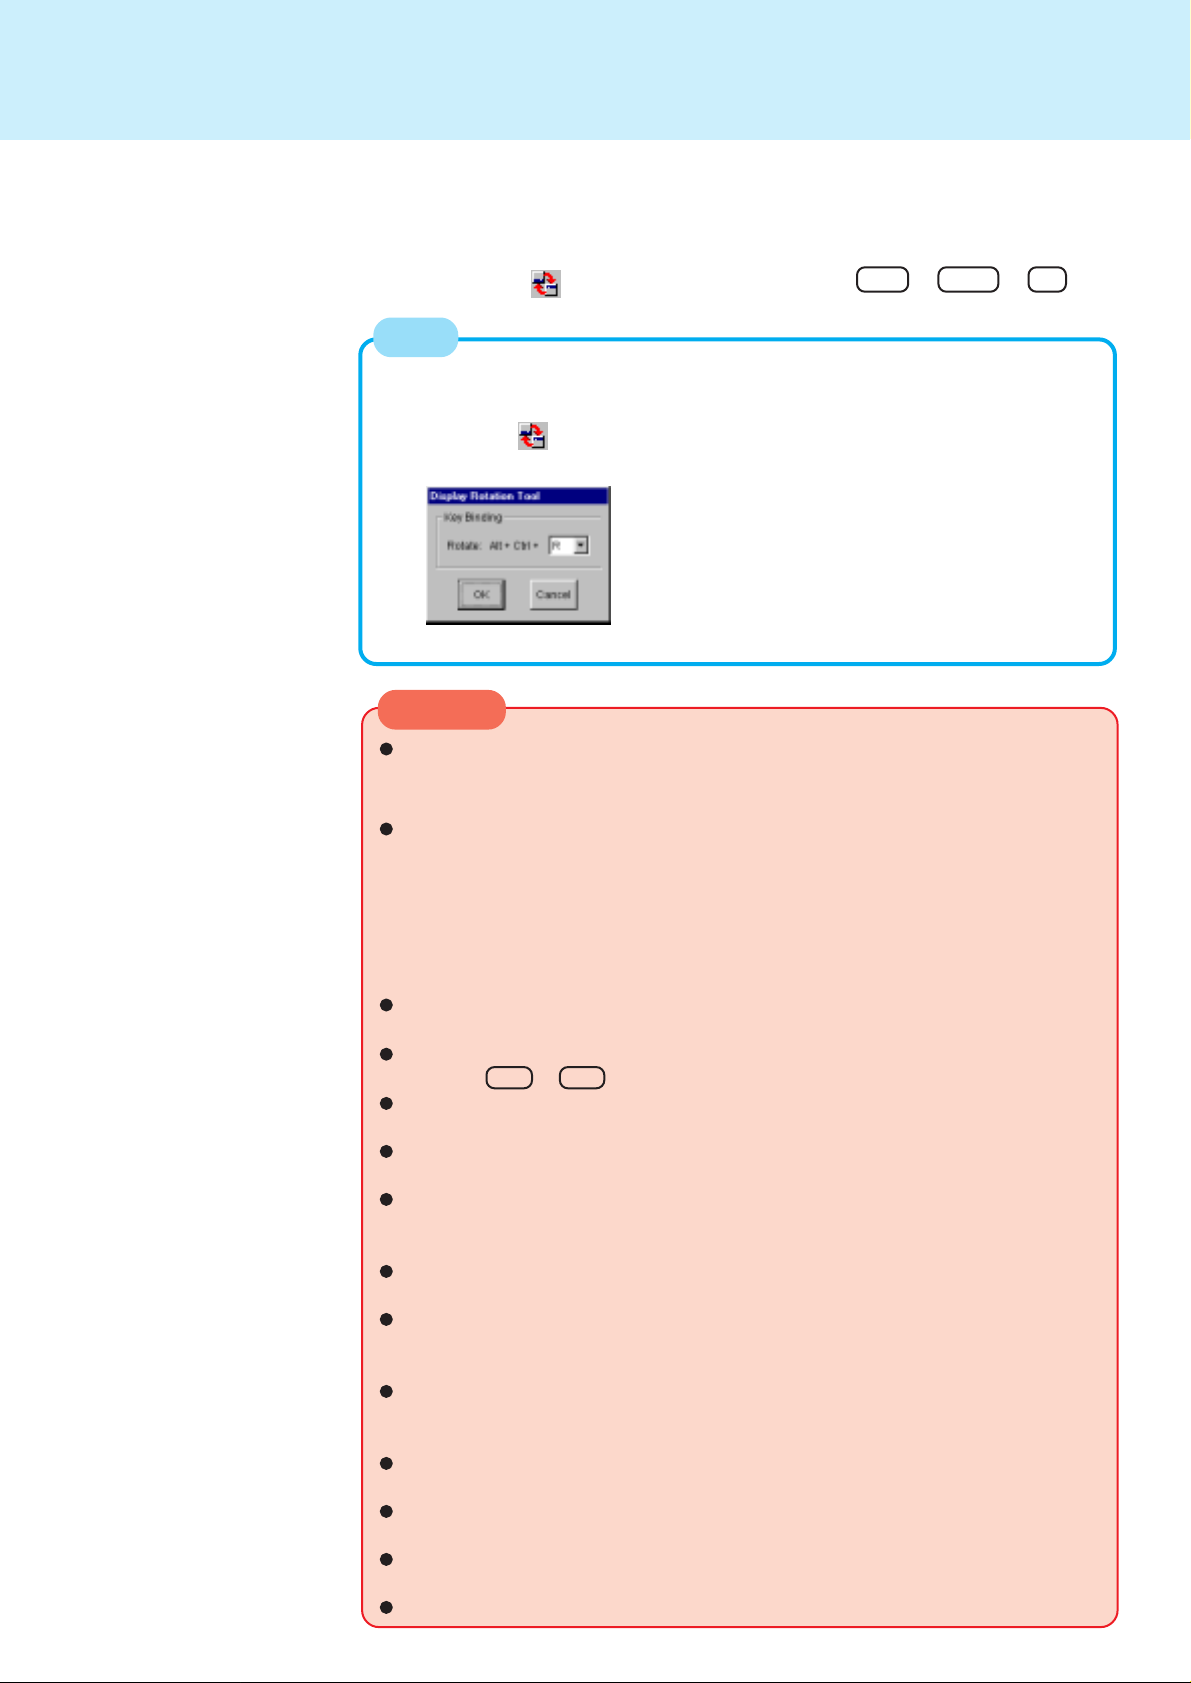
Display Rotation Tool
By running the Display Rotation Tool, it is possible to rotate the LCD computer screen
180 degrees and to perform Touchscreen operations in the rotated mode.
Double-Click from the taskbar or press Alt + Ctrl + R .
NOTE
When changing the key combination:
(Only the third key can be changed.)
1
Right click in the taskbar.
2
Select [Setting].
3
Select the key.
14
CAUTION
The Display Rotation Tool can be used in the only following modes:
800 x 600, High Color [16 bit]
800 x 600, 256 Color
When a moving picture is played with one of the applications below, there may be
times when the display will be unable to be rotated. In such cases, the moving
picture should be play ed after the display is rotated.
Windows Media Player
ActiveMovie
Direct Draw applications
MPEG overlay
When an external monitor is connected, the image on the external monitor will be
simultaneously rotated.
During display rotation, it is not possible to change the display output location by
pressing Fn + F3 .
The full screen displa y of the [MS-DOS prompt] during display rotation is shown in the
standard display direction. (The oper ation of the touch pad accommodates the rotation.)
When the display is rotated in the full screen display of the [MS-DOS prompt], the
[MS-DOS prompt] becomes an icon.
W e recommend not rotating the displa y when the path of the cursor has been set to
be displayed and [Scheme] (in [Start] - [Settings] - [Control P anel] -[Mouse] - [P ointer])
has been changed, since the movement of the cursor will become extremely slow.
When the displa y is being rotated, a mo ving image ma y not be displa y ed correctly if
an application using a CD+ is run.
When the message “Cannot rotate display. There is DirectDr a w application running”
is displayed, close all applications currently running. If there is no change in the
situation (after all applications currently running are closed), restart Windows.
When the display is rotated, there is a slight drop in the overall performance. For
example, the speed for data transmission using infrared communications or using
the serial port becomes slow.
When the number of points of calibration for T ouchscreen is changed, be sure to run
[Calibrate] before rotating the display.
After the display is rotated, it tak es about four seconds before the Touchscreen can
be used.
A rotated display state may be cancelled if certain screensavers (such as 3D Maze)
are activated.
During a drag operation, the cursor may appear to fly from its actual location.
Suspend/Hibernation Functions
Starting Up Your Computer Quickly
If you want to immediately start up and continue an application after shutting down
your computer, you can do so by using the suspend or hibernation function.
Differences between the suspend and hibernation functions
15
Function
Where data is saved to
Speed
Requires power supply
Suspend function Hibernation function
Memory Hard disk
Fast Somewhat slow
Yes (if power is cut, all data is lost) Power not required to maintain data
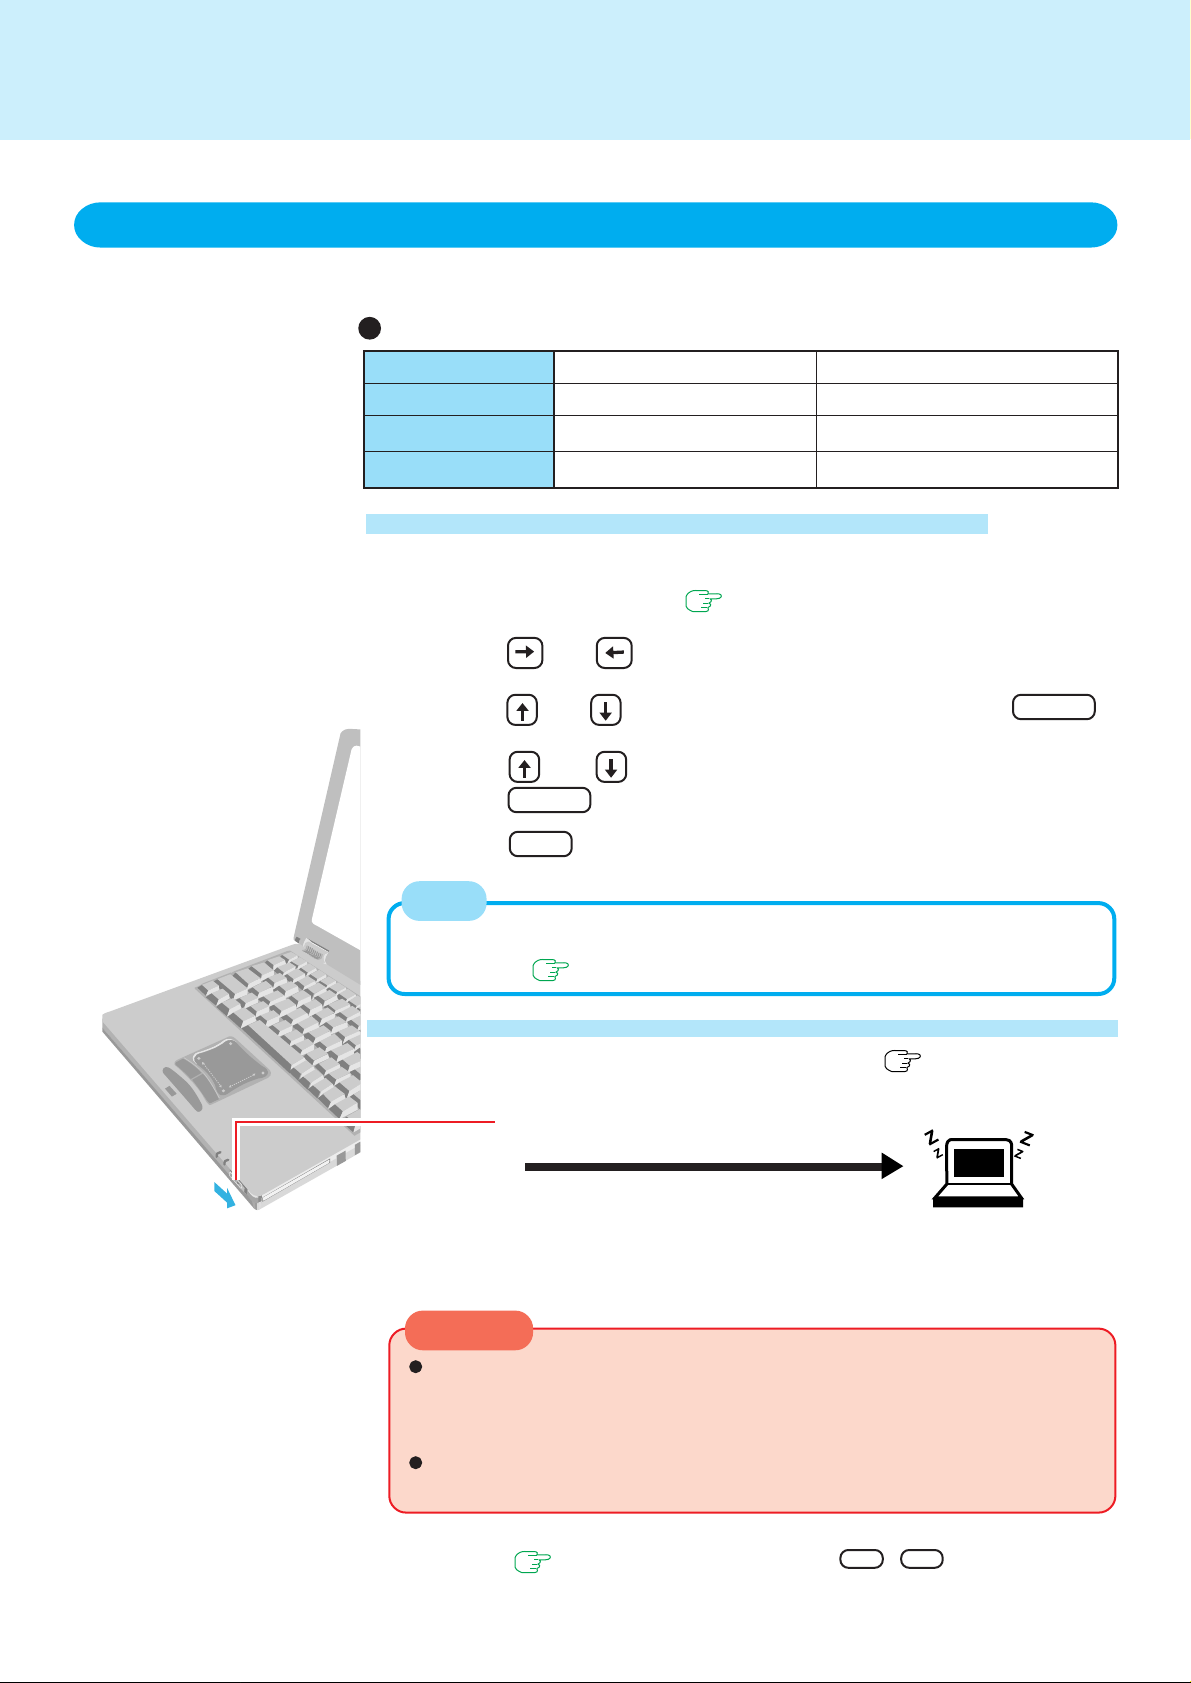
Setting the Suspend or Hibernation Function
[Hibernation] is factory set.
Run the Setup Utility ( page 48)
1
Using and , select [Power]
2
Using and , select [Power Switch] and press Enter
3
Using and , select [Suspend] or [Hibernation] and
4
press Enter
Press F10 , then select [Yes]
5
NOTE
The Suspend or Hibernation function can be set even with [Panel Switch] in the
Setup Utility. page 52
Shutting Down Using the Suspend or Hibernation Function
The computer should be set for suspend or hibernation ( see the above procedure).
Slide the power switch
(After releasing your finger from the
power switch, do not touch the power
switch, keyboard or mouse while the
computer is entering in the suspend or
hibernation modes.)
CAUTION
At the "beep*" sound, release your finger from the power switch. If you con-
tinue to slide the switch and hold it for more than four seconds, the power will
go off. Data not previously saved will be lost.
Slide the power switch to power on.
If the computer will not be operated for an extended period of time, it is recom-
mended that hibernation mode be used instead of the suspend mode.
* When the speaker function is disabled, e.g., by setting [Disable] for [Speaker] with the
Setup Utility ( page 48) or by the key combination Fn + F4 , there will be no beep
sound.
Suspend Mode
or
Hibernation Mode
(To next page)

Suspend/Hibernation Functions
NOTE
With the method below, y ou can shut down the computer by using the suspend
function.
Fn + F7 ( page 4)
Select [Suspend] from the [Start] menu.
[Suspend] is deleted from the [Start] menu by unchecking [Allow Windows to
manage power use on this computer.] in [Start] - [Settings] - [Control Panel] [Power] or by unchecking [Show suspend command on Start menu] in [Advanced].
Resuming Operation
16
Slide the power switch
If the security indicator ( ) is displayed, your password has been set.
CAUTION
After the display returns, the computer needs a short period of time to reinitialize.
This takes about 15 seconds. Do not shut down or restart Windows, or use the
suspend or hibernation functions again during this time, as this may subsequently cause Windows to operate abnormally.
Do not install or remove peripherals while your computer is in the suspend or
hibernation mode; abnormal operation may result.
When operation resumes, serial devices such as a mouse, modem or PC Cards
may not function properly. In such cases, you will need to restart your computer or reinitialize the individual devices.
(To next page)
Suspend/Hibernation Functions
Precautions for Using the Suspend or Hibernation Function
Save all data before powering off your computer.
When restarting from or shutting down to the suspend or hibernation mode, do not
touch the touch pad or touchscreen (or move the mouse (serial or PS/2 type) if one is
connected). These devices may fail to operate, you will then need to restart your
computer using the keyboard.
Do not enter the suspend/hibernation mode during the following periods (you may
corrupt your data or file):
• While the MP indicator ( )* or HDD indicator ( ) is on.
* Except when using a second battery pack.
• While playing/recording audio files.
• While communications software is being used.
Do not use the suspend or hibernation function when using an operating system
other than the one that comes with your computer, the Setup Utility, or when experiencing static electricity or noise.
If you hold down on the Alt , Ctrl or Shift key to enter the suspend or
hibernation mode, after resuming operation, you must press the same key. For ex ample, if you hold down on the key while pushing the power switch, upon
resuming, if you do not press the key again, only capital letters will result from
typing.
Only when the computer stops operating or locks up should the power switch be held
more than four seconds to power off the computer. Slide the power switch to power
on and data not previously saved will be lost.
In the suspend mode, power is consumed. If PC Cards (e.g., a modem card) are
inserted, more of that power may be consumed. When all power has been consumed, all data at suspend is lost since it is retained in memory. We therefore recommend plugging in the AC adapter when using the suspend function.
Repeatedly using the suspend or hibernation function will use up a lot of the system
resources and the computer may not work proper l y. Shut down Windows ([Start][Shut Down]) on a regular basis, i.e. approximately once a week, without using the
suspend or hibernation function. Doing so will restore the system resources.
Do not use the suspend or hibernation function during the following periods. The
suspend or hibernation function, or peripherals may not work.
• When a file in devices such as a CD-ROM drive, exter nal hard disk, or ATA card is
opened, the suspend or hibernation function may not work. In such cases , close the
file.
• SCSI cards may not recover after entering the suspend or hibernation mode. If this
occurs, restart the computer.
After a Windows 95 USB device driver has been installed, do not use the suspend or
hibernation function. If the suspend or hibernation mode is activated, the computer
may not function properly. Power off, then on, using the power switch to resume
proper operation.
If you want to use the suspend or hibernation function after the USB driver is installed, disable the USB device function of the computer by following the procedure
below.
1
In [Start] - [Settings] - [Control Panel] - [System] - [Device Manager], select [Intel(r)
82440MX PCI to USB Universal Host Controller] in [Universal serial bus controller].
2
Add the check mark for [Disable in this hardware profile] in [Properties] - [General], press [OK], and then press [Close].
3
In [Start] - [Shut Down], select [Restart], then press [OK].
If you want to enable the USB device function again, delete the check mark for [Disable in this hardware profile] in step 2. When the message appears asking whether
to reboot the computer, select [Yes]. If the message is not displayed, go to step 3.
Shift
Shift
17
Security Measures
To prevent unauthorized access of your computer, the various security measures are provided below.
Situation Function to use Reference
You do not want your computer to be used without permission
You want to prevent theft or damage to data by using a disk
When you do not want your computer to be used without permission
You can set your "Supervisor Password" and "User Password" (The User Pa ssword
can only be set when the Supervisor Password has been set).
Without the password, access to your computer is impossible.
CAUTION
It is not necessary to set the User Password.
It is necessary to set [Password on boot] in the Setup Utility to [Enable].
Supervisor Password below
User Password
Prevent operation by
using a disk
page 21
18
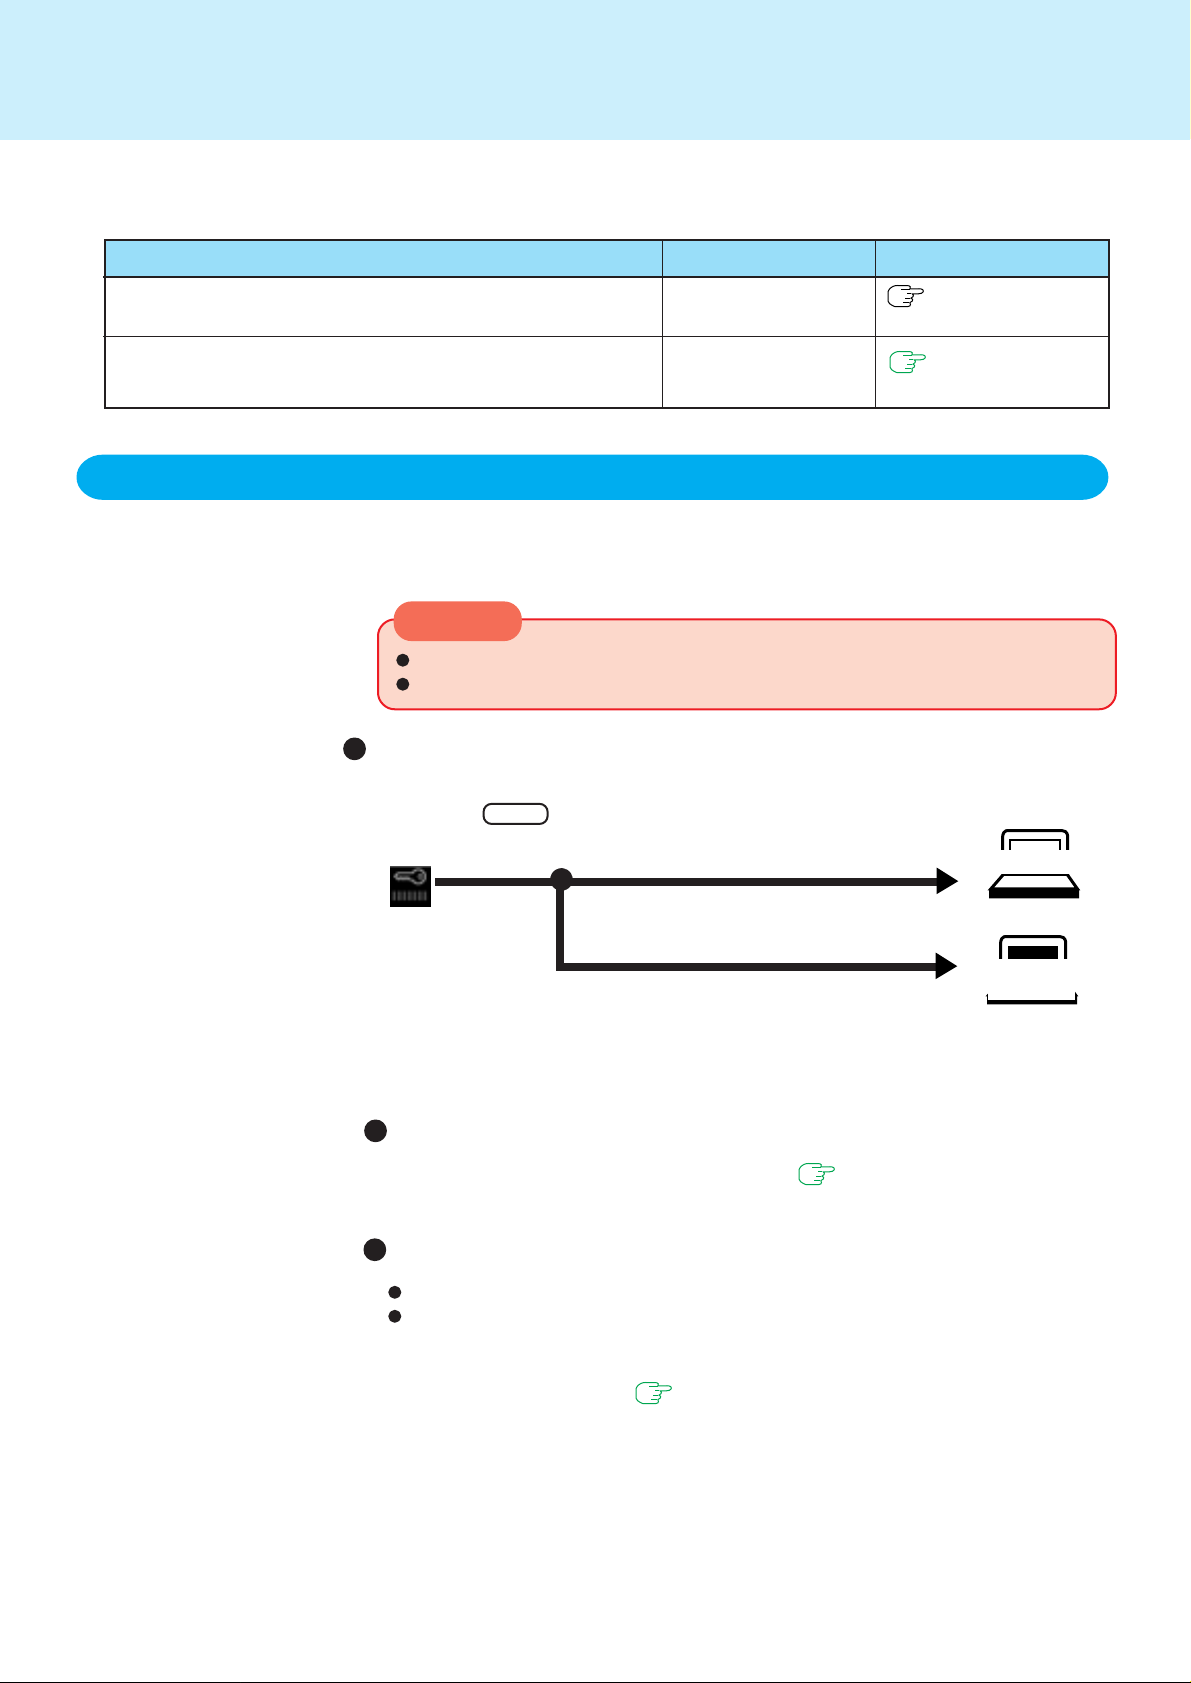
Starting up when the password is set
Upon entering your Supervisor Password or User Passw ord and
pressing Enter .
If the correct password is input, Will Start
Over three incorrect attempts,
or no password is entered for about one minute,
Will Not Start*
* If after three attempts the correct password is not
input, or if no password is entered for about a min ute ,
the computer returns to the condition just before
the attempt was made to start up the computer.
(Power off)
If entering the Setup Utility with Supervisor Password
You can register all items of the Setup Utility ( page 48).
If entering the Setup Utility with User Password
You can not register [Advanced] menu.
When [User Password Protection] has been set to [Protected], you can not register the User Password.
When [User Password Protection] has been set to [No Protection], you can reg-
ister the User Password ( page 48).
(To next page)

Security Measures
Setting the Supervisor Password
(enabling, changing, disabling)
Run the Setup Utility ( page 48)
1
Using and , select [Security]
2
Using and , select [Set Supervisor Password], then
3
press Enter
<Only when the Supervisor Password has been set>
4
Enter your password at the [Enter Current Password], then
press Enter
Enter your password at the [Enter New Password], then
5
press Enter
19
To disable the Supervisor Password
Simply press Enter
Re-enter your passwor d at the [Confirm Ne w P assw or d] , then
6
press Enter
To disable the Supervisor Password
Simply press Enter
At the [Setup Notice], press Enter
7
Press F10 , then select [Yes]
8
CAUTION
Your password will not be displayed on the screen.
Limit your password to seven characters. Note that there is no distinction between upper and lower case letters.
White colored keys can be used. Note that the space bar and function
keys cannot be used.
Do not input your password while holding down on Shift or Ctrl .
Use only the upper horizontal row of numeric keys to input your user
password.
Do not forget your password. If a password is forgotten you will be unable to use your computer. Contact Panasonic Technical Support.
When running the Setup Utility, do not leave your computer even for a
short time.
NOTE
When you do not want the User Password enabled, changed, or disabled without permission,
using and , select [User Password Protection] and press Enter
using and , select [Protected] and press Enter .
(To next page)
Security Measures
Setting the user password (enabling, changing, disabling)
1
Run the Setup Utility ( page 48)
NOTE
Set the Supervisor Password if you have not done so. ( page 19)
Using and , select [Security]
2
Using and , select [Set User Password], then
3
press Enter
<Only when the User Password has been set>
4
Enter your password at the [Enter Current Password], then
20
press Enter
Enter your password at the [Enter New Password], then
5
press Enter
To disable the User Password
Simply press Enter
Re-enter your password at the [Confirm Ne w P ass w or d] , then
6
press Enter
To disable the User Password
Simply press Enter
At the [Setup Notice], press Enter
7
Press F10 , then select [Yes]
8
CAUTION
Your password will not be displayed on the screen.
Limit your password to seven characters. Note that there is no distinction between upper and lower case letters.
White colored keys can be used. Note that the space bar and function
keys cannot be used.
Do not input your password while holding down on Shift or Ctrl .
Use only the upper horizontal row of numeric keys to input your user
password.
Do not forget your password. If a password is forgotten, you will be
unable to use your computer. Contact Panasonic Technical Support.
When running the Setup Utility, do not leave your computer even for a
short time.
To prevent the changing of your password without permission
•Set the User Password Protection option ( page 19).
(To next page)
 Loading...