

Panasonic CF-19KHRAGAM, CF-19KHRL6AM, CF-19KHRAX2M, CF-19KHRCXAM, CF-19KJRAGAM Reference Manual
...
1
Reference Manual
Personal Computer
Model No. CF-19 Series
We recommend that this Reference Manual be printed.
Regarding Windows Vista
2
User Account Control
User Account Control is a new security component of Windows Vista to stop unauthorized changes to your computer.
The User Account Control message will pop up every time you try making an important change to your computer.
Windows Sidebar
The Windows Sidebar does not appear in the default setting. To display it, click (Start) - [All Programs] - [Accessories] [Windows Sidebar].
z To always display the sidebar:
A Right-click the sidebar icon on the notification area, and click [Properties].
B Add a check mark for [Start Sidebar when Windows starts] and click [OK].
When Using Wireless LAN
If you cannot communicate with the access point or if the access point is not detected, right-click on the notification area
and click [Connect to a network], and then click in the [Connect to a network] screen.
Sound and Video
z Sound (e.g. MP3, WMA) and video (e.g. MPG, WMV) recorded in PC Cards and SD Memory Cards may be interrupted
during playback. If this happens, copy them to the hard disk drive and play back.
z Sound and video in AVI files may be interrupted or produce a time-lag during playback. If this happens, click or on
the notification area, and click [High performance]. This may remedy the problem.
z Depending on the processing status on Windows, sound may be interrupted at Windows startup. You can mute the sound
at startup.
A Right-click the desktop and click [Personalize] - [Sounds].
B Remove the check mark from [Play Windows Startup sound], and click [OK].
Key Combinations
NOTE
z Do not repeatedly press the keys in quick succession.
z Do not use the key combinations together with touch pad (external mouse), touchscreen (only for model with touch-
screen), digitizer (only for model with digitizer), tablet buttons, or other key operations.
z Do not use the key combinations before you log on to Windows. Wait until the hard disk drive indicator turns off.
On the Setup Utility screen, you can use the key combinations of
z The key combinations may not work with some applications.
z The pop-up icon appears after logging on to Windows. It may not appear in some application conditions.
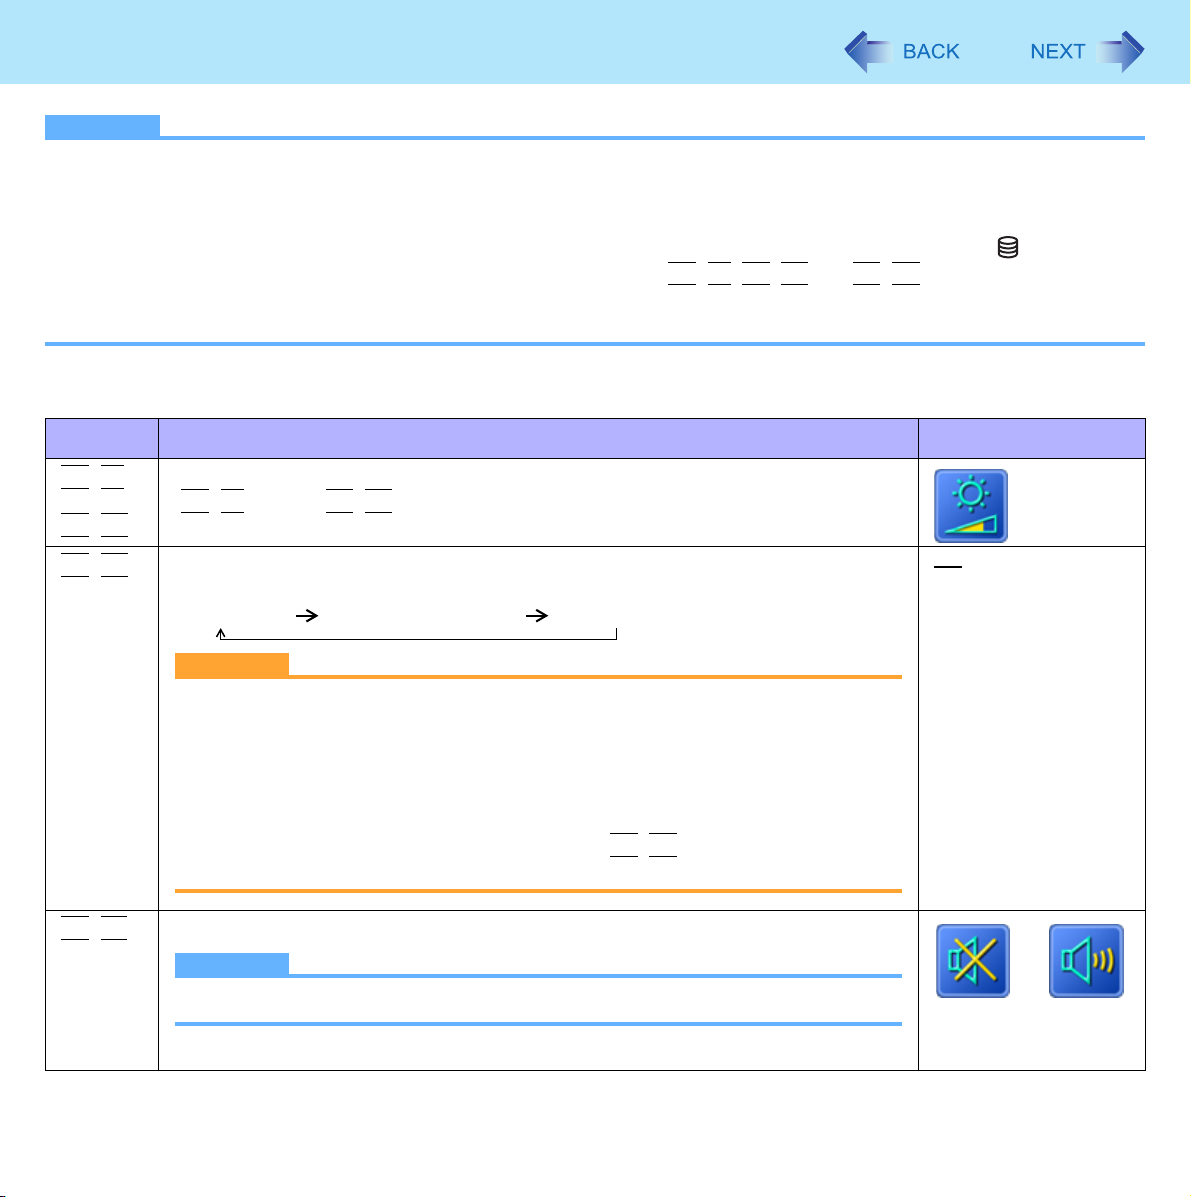
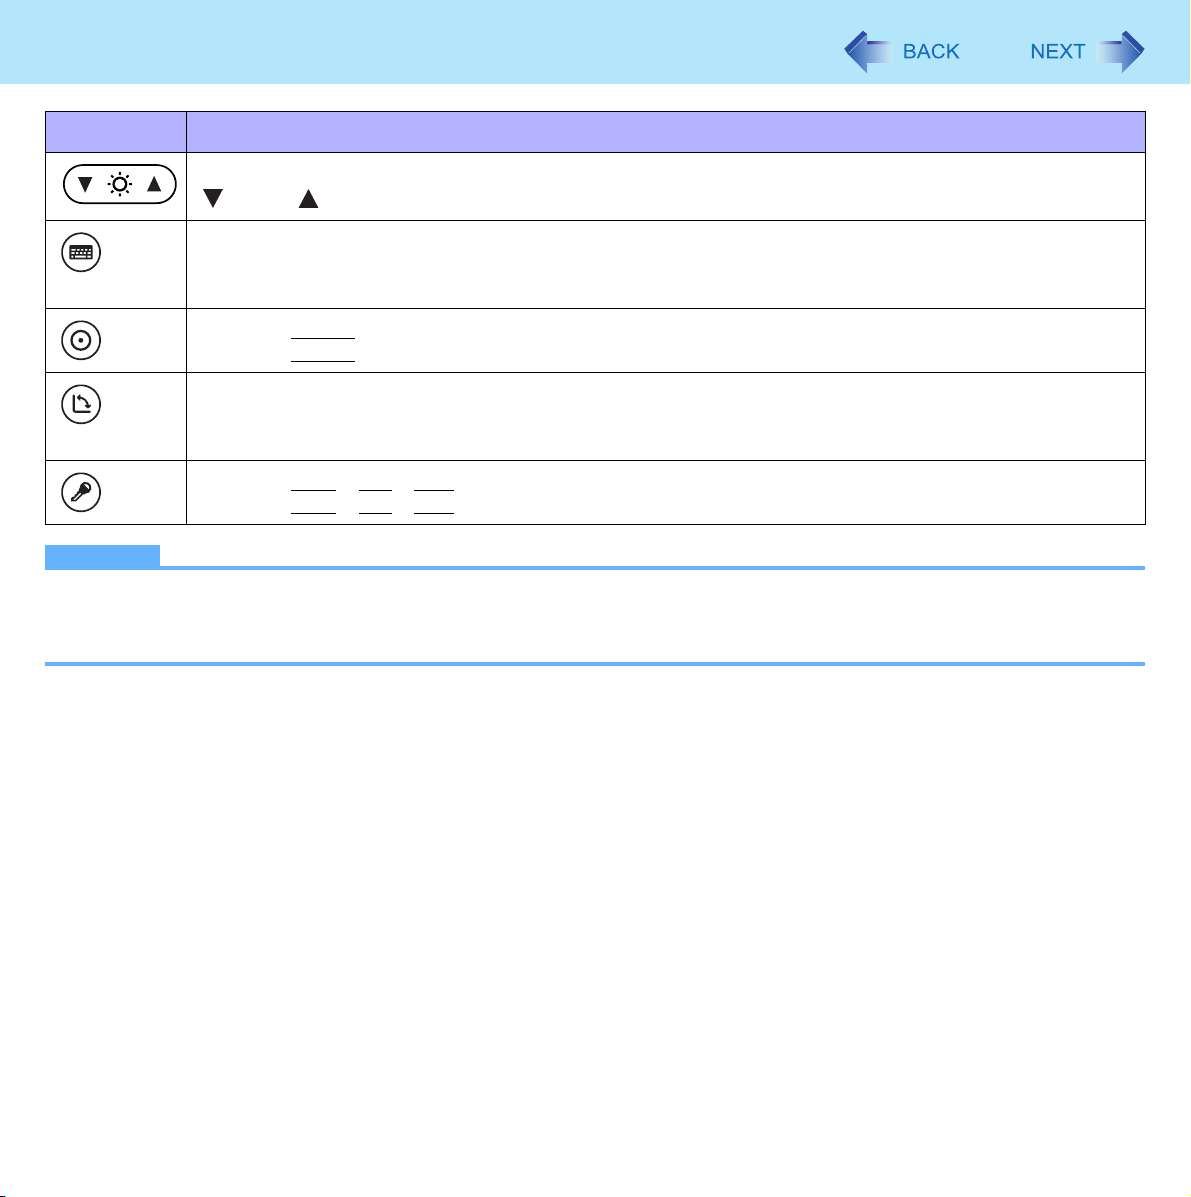
Key Function Pop-up icon
Fn+F1, Fn+F2
and Fn+F3.
3
Fn+F1
Fn+F2
Fn+F3
Fn+F4
LCD brightness
(
Fn+F1
Display switching (Î page 46)
(When an external display is connected)
Internal LCD Simultaneous display External display
Speaker on/off
= down / Fn+F2= up)
CAUTION
z Do not press any keys until the display has finished switching.
z Do not use this function:
• When an external display is not connected.
• When playing motion video such as DVD or MPEG.
• When using the Extended Desktop.
z Until Windows startup is completed (during Setup Utility, etc.), the simulta-
neous display cannot be used and pressing
between the internal LCD and the external display.
NOTE
z Beeps do not sound if you turn off the speaker sound.
Fn+F3
switches the display
OFF
(MUTE)
ON
Key Combinations
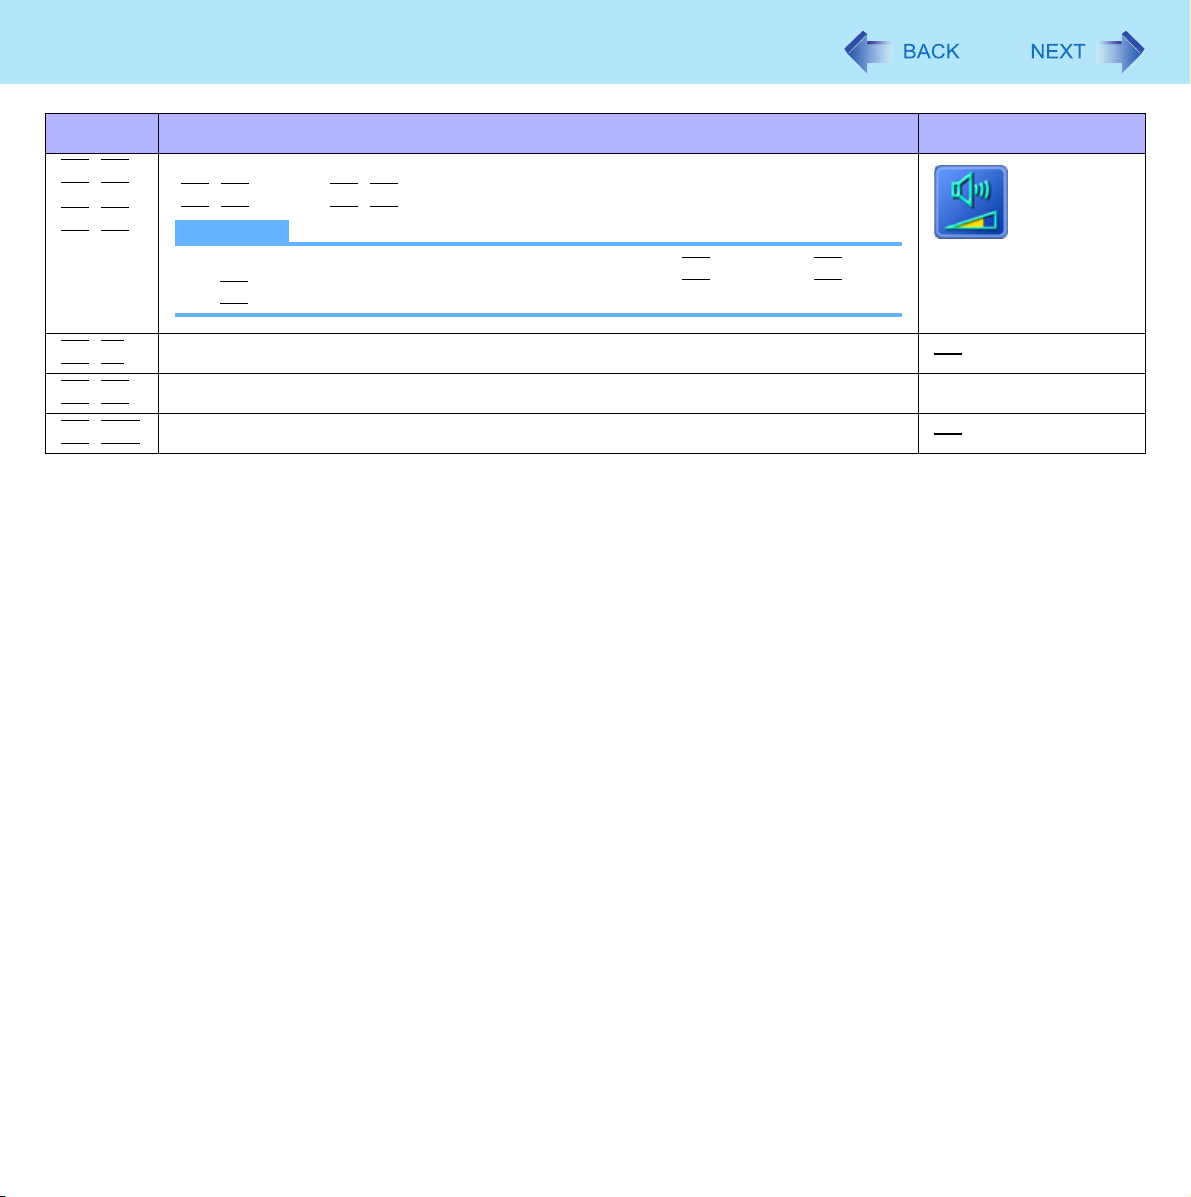
Key Function Pop-up icon
4
Fn+F5
Fn+F6
Fn+F7
Fn+F9
Fn+F10
Volume
(
Fn+F5
Activate sleep (Î page 17)
Remaining battery level (Î page 26)
Activate hibernation (Î page 17)
= down / Fn+F6= up)
NOTE
z When fine-tuning the sound volume, press and hold
F6
intermittently.
Fn
, and press F5 or
Key Combinations
Hotkey Settings
You can make two settings:
• Fn key lock
When you press
combinations.
• Pop-up icon on/off
1 Start up the Hotkey Settings.
Click (Start) - [All Programs] - [Panasonic] - [Hotkey Settings].
2 Make the settings.
[Use Fn key lock]
z When using an
A Press
B Press another key. (Lock released)
z When using successive
A Press
B Press another key.
Fn key remains locked until you press
Fn
, the key is locked (pressed-down) until you press another key. Use this when pressing difficult key
Fn
key combination
Fn
once. (Locked)
Fn
Fn
twice. (Locked)
key combinations
Fn
again.
5
[Notification]
[Make sounds when Fn key is pressed]
[Show status on screen]: Displays the Fn key status on the notification area.
Fn
•:
•:
[Disable popup]
The pop-up icon will not be displayed.
is locked.
Fn
is not locked.
3 Click [OK].
NOTE
z You can have different settings for each user.
*1
If the speakers are muted, beeps do not sound.
*1
Tablet Buttons
Button Function
LCD Brightness
: down / : up
Input Panel
Tablet PC Input Panel on/off
z This button does not work on the Welcome screen.
Enter
Works as
Rotation
Rotates the display. (Î page 14)
z Do not press the button again until the display rotation is completed.
Security
Works as
NOTE
z The Tablet buttons work when the Windows screen is displayed.
z The Tablet buttons may not work immediately after Windows is started up or the Windows logon screen (or the Wel-
come screen) is displayed.
Enter
Ctrl
+
.
Alt
+
Del
.
6
Tablet Buttons
7
Setting the Tablet Buttons
NOTE
z You can have different settings for each user.
z On the Windows logon screen and Welcome screen, the tablet buttons are enabled and work in default irrespective of
the settings you made.
To change the tablet button functions
You can change the functions of the Input Panel ( )/Enter ( )/Rotation ( ) buttons.
1 Open the setting screen.
Click (Start) - [Control Panel] - [Hardware and Sound] - [Set tablet buttons to perform certain tasks].
2 Click the tablet button and click [Change].
3 Select the function in [Press] and [Press and hold].
z You cannot select Fn for [Press a key or key combination].
z Click [Browse] to select the application if you select [Start a program].
4 Click [OK].
5 Click [OK].
Touchscreen
<Only for model with touchscreen>
You can use the touchscreen function to perform the same operation as the touch pad and mouse. Touch the screen surface
with the stylus (included).
For further information, click (Start) - [All programs] - [Tablet PC] - [Tablet PC Touch Training].
z To right-click
A Touch and hold with the stylus, or touch and select the right button of “touch pointer”.
NOTE
z The touchscreen function does not work in the Setup Utility.
8
Operation of the touchscreen
Operate the touchscreen with your finger or with an approved stylus
When using the touchscreen function, use only your finger or an approved stylus on the surface.
Operating the touchscreen with an object other than your fingertip or the stylus (a fingernail or metal object, or other hard
or sharp objects that may leave a mark) may scar or stain the surface, causing the touchscreen to malfunction.
Do not apply too much pressure when operating the touchscreen
Only a light touch is required to operate the touchscreen. Applying too much pressure may damage the surface.
Maintaining the performance of the touchscreen
When the touchscreen becomes dirty, wipe it with an approved soft cloth
The touchscreen is specially treated to prevent dirt from adhering to the surface, so dirt can be removed easily using a dry
cloth (use only the approved soft cloth). If the dirt does not come off easily, breathe on the surface and try again.
Do not apply water or solvents to the soft cloth.
Clean the touchscreen while the computer is powered off
Cleaning the screen while the power is on may cause the computer to malfunction. Also, dirt on the touchscreen is easier
to see when the computer is powered off, and so is easier to clean.
Wash the soft cloth when it becomes dirty
When the soft cloth becomes dirty, wash it with mild detergent. Do not use bleach or fabric conditioner (softener), or try to
sterilize the cloth by boiling.

Touchscreen
If the soft cloth is dirty, it may be ineffective in cleaning the touchscreen, and in fact may cause dirt to adhere to the touchscreen.
9
Check the following to prevent the surface of the touchscreen from being scratched
z Are you using your finger or a stylus to operate the touchscreen?
z Is the surface clean?
z Is the soft cloth clean?
z Are you using the stylus with the tip extended?
z Is the tip of the stylus clean?
z Is your finger clean?
Things to keep in mind when using the touchscreen
Do not touch the screen outside of the LCD display area
The touchscreen input area is defined by the LCD display screen. Touching the screen outside of the display area may
result malfunctions or damage to the touchscreen.
Do not apply excessive force to the touchscreen
Do not lift the computer while holding the LCD screen, or allow the screen to be twisted. Do not place any objects on the
LCD screen. Any of the above may cause the touchscreen glass to break, or may damage the LCD screen.
Operation response may be slower in low temperature environments
The touchscreen may respond to operations more slowly when using the computer in temperatures less than 5°C, but this
is not a malfunction. Response time will return to normal when the computer is returned to room temperature.
If the cursor jumps to a location other than where the screen was touched, or if
the LCD resolution changes, recalibrate the touchscreen
Perform the procedure of “Touchscreen Calibration” (Î page 10).
Touchscreen
10
Touchscreen Calibration
A standard user needs to perform the calibration as an administrator before performing the calibration for each user.
Touch Screen Calibration Utility
NOTE
z At first, log on to Windows as an administrator, and perform this calibration.
z Return the rotated display to [Primary Landscape] before the touchscreen calibration.
1 Run [Touch Screen Calibration Utility].
Click (Start) - [Control Panel] - [Additional Options] - [Tablet Calibration].
2 Using the stylus, touch each of the 9 “+” target marks one by one.
Tablet PC Settings
NOTE
z Perform the following calibration for each user.
1 Run [Tablet PC Settings].
Click (Start) - [Control Panel] - [Mobile PC] - [Tablet PC Settings].
2 Click [Calibrate].
3 Using the stylus, touch each of the four “+” target marks one by one, and then click [OK].
z Perform the calibration for the orientation to be used.
Digitizer
<Only for model with digitizer>
You can use the digitizer function to perform the same operation as the touch pad and mouse. Touch the screen surface with
the pen (included).
For further information, click (Start) - [All Programs] - [Tablet PC] - [Tablet PC Pen Training].
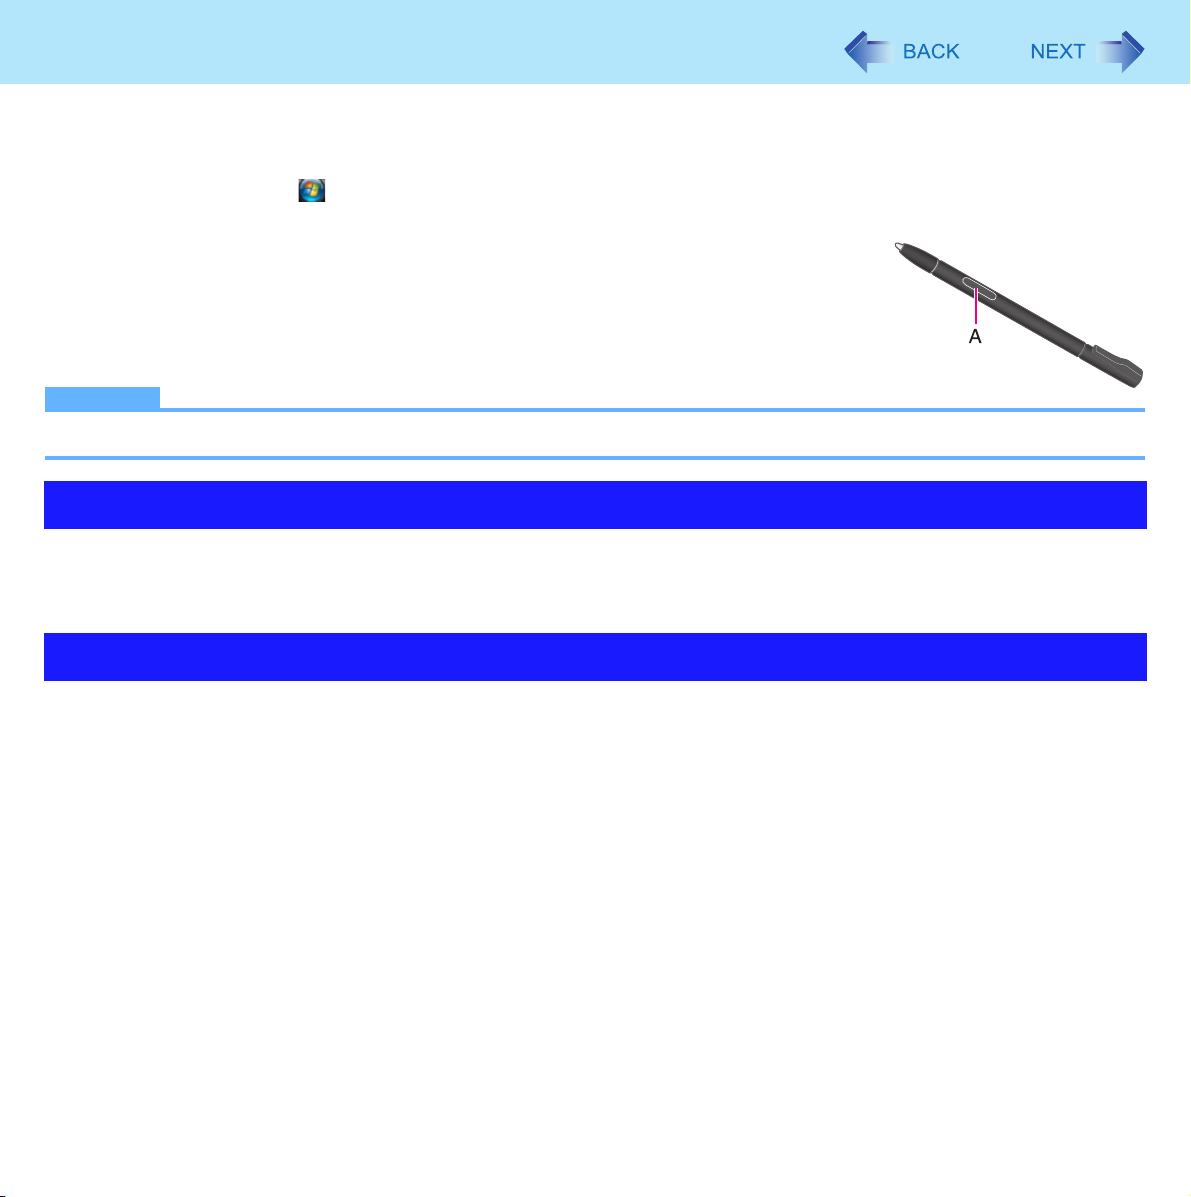
z To right-click
A Press and hold the button (A) of the pen, and then tap the object.
NOTE
z The digitizer function does not work in the Setup Utility.
11
Operation of the digitizer
Do not apply too much pressure when operating the digitizer
Only a light touch is required to operate the digitizer. Applying too much pressure may damage the surface.
Maintaining the performance of the digitizer
When the screen becomes dirty, wipe it with an approved soft cloth
The screen is specially treated to prevent dirt from adhering to the surface, so dirt can be removed easily using a dry cloth
(use only the approved soft cloth). If the dirt does not come off easily, breathe on the surface and try again.
Do not apply water or solvents to the soft cloth.
Wash the soft cloth when it becomes dirty
When the soft cloth becomes dirty, wash it with mild detergent. Do not use bleach or fabric conditioner (softener), or try to
sterilize the cloth by boiling.
If the soft cloth is dirty, it may be ineffective in cleaning the screen, and in fact may cause dirt to adhere to the screen.
Check the following to prevent the surface of the screen from being scratched
z Is the surface clean?
z Is the soft cloth clean?
z Is the tip of the digitizer clean?
Digitizer
12
Things to keep in mind when using the digitizer
Do not apply excessive force to the screen
Do not lift the computer while holding the LCD screen, or allow the screen to be twisted. Do not place any objects on the
LCD screen. Any of the above may cause the screen glass to break, or may damage the LCD screen.
If the cursor jumps to a location other than where the screen was touched, or if
the LCD resolution changes, recalibrate the touchscreen
Perform the procedure of “Digitizer Calibration” (below).
Digitizer Calibration
NOTE
z Perform this calibration for each user.
1 Run [Tablet PC Settings].
Click (Start) - [Control Panel] - [Mobile PC] - [Tablet PC Settings].
2 Click [Calibrate].
3 Using the pen, touch each of the four “+” target marks one by one, and then click [OK].
z Perform the calibration for the orientation to be used.

Panasonic Hand Writing
You can make a bitmap file (.bmp) of a simple character and a figure such as signature by handwriting on the touch pad and
the touchscreen.
CAUTION
z Do not use the Fast User Switching function while Panasonic Hand Writing is active.
z If you install other pointing devices (e.g., commercially available mouse driver) and overwrite the touch pad driver,
Panasonic Hand Writing will not work.
NOTE
z The display of Panasonic Hand Writing may be distorted if the number of display colors is changed. Right-click on
the notification area and click [Exit Panasonic Hand Writing], and then restart Panasonic Hand Writing.
z Panasonic Hand Writing may not work properly if another application software is active. In this case, close the applica-
tion software and try handwriting again.
13
Starting Panasonic Hand Writing
1 Double-click on the notification area.
Alternatively you can click (Start) - [All Programs] - [Panasonic] - [Panasonic Hand Writing].
NOTE
z Select the image size before handwriting by clicking [Option] - [Window size]. If you change the size after handwriting,
the image quality will become lower.
z You can copy the bitmap image by clicking [Edit] - [Copy], and paste it in another application software that supports bit-
map format.
z The touch pad mode may not work properly when using the extended desktop.
z The touch pad mode may not work properly when the display is rotated 90 or 270 degree.
z The touch pad mode will be canceled in the following cases.
• Switching to another application
• Resuming from sleep or hibernation
• Pressing
• Touching the touchscreen
z An external mouse or trackball connected via the keyboard/mouse port of the port replicator (optional) or the car
mounter (optional) will not work during handwriting in the touch pad mode.
Alt
Display Rotation
14
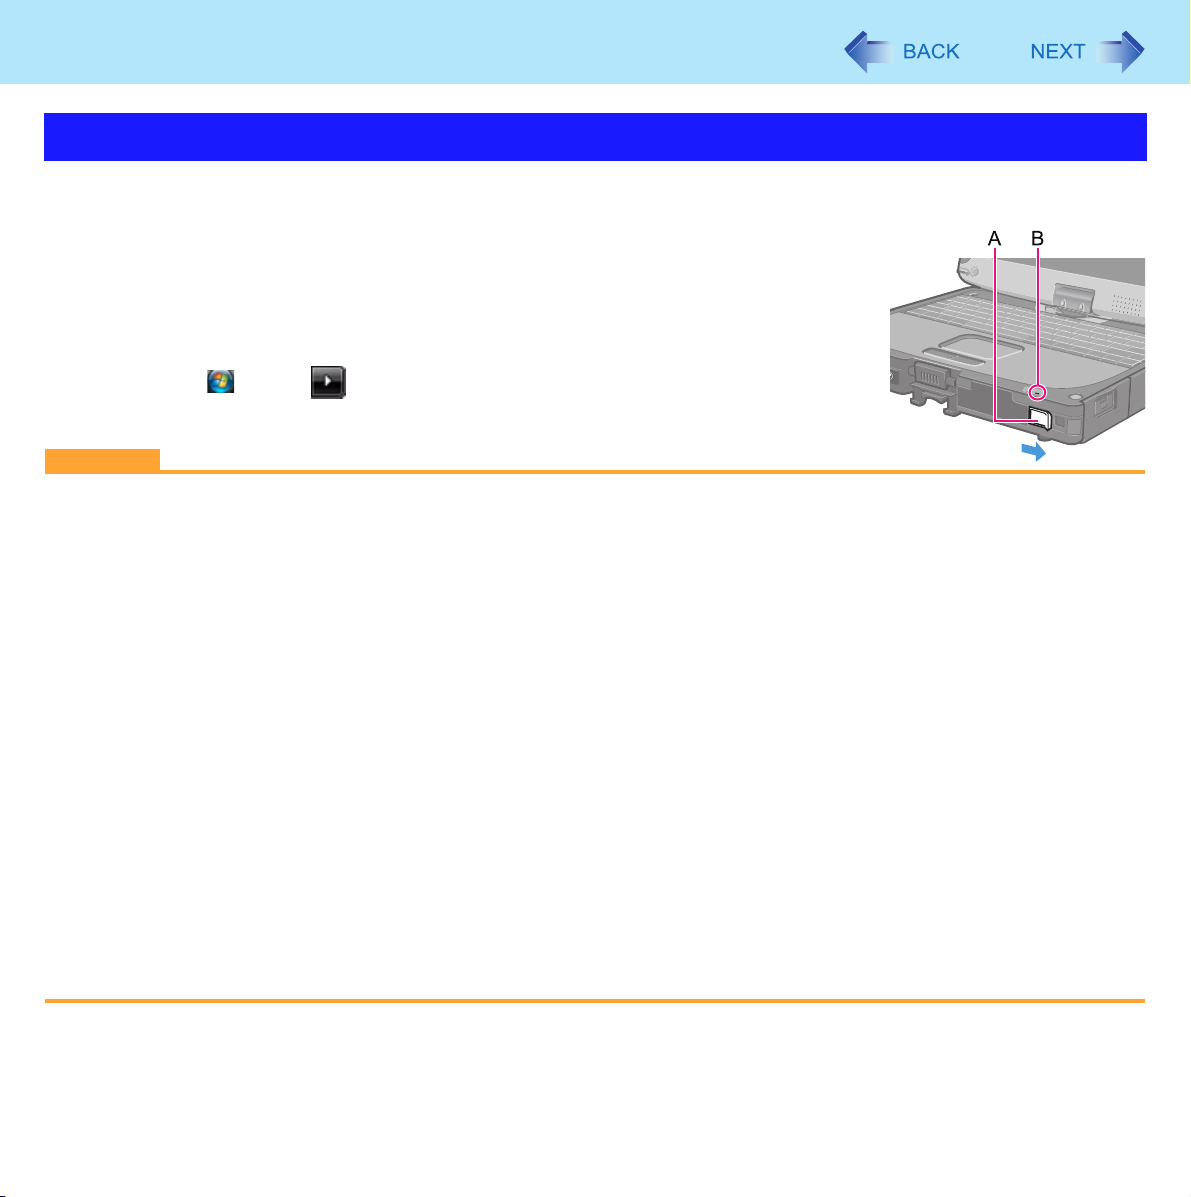
Rotating the Display
1 Press the Rotation button (A).
Each time you press the button, the screen display rotates counter-clockwise by 90°.
NOTE
z Alternatively you can rotate the display by the following procedure.
Click (Start) - [Control Panel] - [Mobile PC] - [Change screen orientation].
z While the display is rotated:
• Do not use the Extended Desktop. The touch pad, touchscreen (only for model with touchscreen), or digitizer (only
for model with digitizer) may not work properly.
• Do not operate Touch Screen Calibration Utility (Î page 10), but you can operate Tablet PC settings (Î page 10)
(only for model with touchscreen).
• Do not set the resolution larger than that of the internal LCD.
• The computer’s performance is slightly lowered.
• The touch pad scroll, zoom, and data zoom functions do not work.
z When the display is rotated, the motion video may not be displayed correctly or the sound may be distorted. Return the
display angle to [Primary Landscape]
z When you start up Windows and rotate the display right after logging on, the display may return to the previous state in
approximately 1 minute. In this case, rotate the display again.
.
Display Rotation
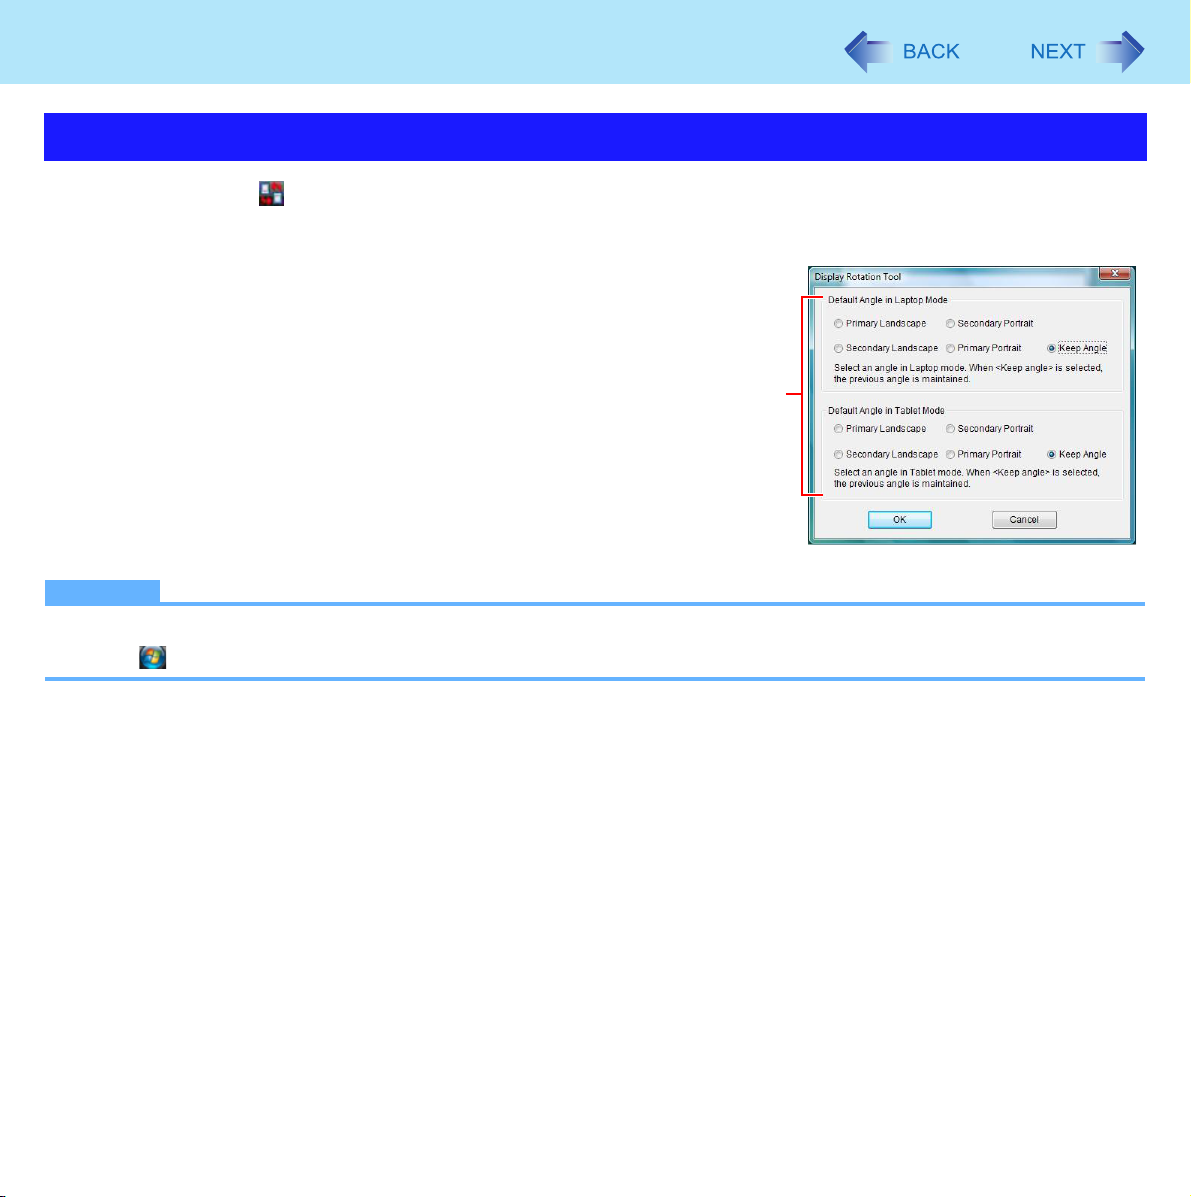
Changing the Settings
1 Right-click on the notification area and click [Setting].
The Display Rotation Tool screen appears.
2 Change the settings.
(A): In the following cases, the display is automatically set to the
default angle.
z When switching from Laptop mode to Tablet mode, or vice versa
z When Windows is started up
z When another user logs on with the Fast User Switching function
3 Click [OK].
NOTE
z You can set the order of display rotation positions in the following menu.
Click (Start)- [Control Panel] - [Mobile PC] - [Change screen orientation] - [Change].
15
A
Sleep or Hibernation Functions
16
Starting Up Your Computer Quickly
The sleep or hibernation functions allow you to shut off the computer without closing programs and documents. You can
quickly return to the programs and documents that you were working on before sleep or hibernation.
Function Data is saved to Recovery time Power supply
Sleep Memory Short Required. (If power is not supplied, all data will be lost.)
Hibernation Hard disk Rather long Not required. (However power is slightly consumed to
keep the hibernation.)
Precautions
z Connect the AC adaptor if the computer will be in sleep for a long period of time. If you cannot use the AC adaptor, use
hibernation instead.
z Using sleep or hibernation repeatedly may cause malfunction of the computer. To stabilize computer operation, restart
Windows regularly (about once a week) without using sleep or hibernation.
z Save the necessary data.
z Close files you have opened from removable disks and network drives.
z It may take one or two minutes to enter hibernation. Do not touch any key though the screen becomes dark.
z The password you set in the Setup Utility is not requested at resuming. You can use the Windows password for security in
sleep or hibernation. In the default setting, you are requested to enter the Windows password when the computer
resumes.
z Do not enter sleep or hibernation in the conditions below, otherwise the data or file may be corrupted, sleep or hibernation
may not work, or malfunction may occur in the computer or the peripheral devices.
• When any of the hard disk drive indicator and the SD Memory Card indicator is on, or when the CD/DVD drive
indicator is blinking (accessing drive or card).
• When playing/recording audio files or displaying motion video such as MPEG files.
• When playing a DVD-Video.
• When writing to a disc.
• When using communication software or network function.
• When using peripheral devices.
(If peripheral devices fail to work normally, restart the computer.)
Sleep or Hibernation Functions
Entering/Resuming from Sleep or Hibernation
To enter sleep or hibernation
17
1 Close the display, or slide the power switch (A) until a beep
*1
sounds.
Sleep: The power indicator (B) blinks green.
Hibernation: The power indicator (B) goes off.
z You can alternatively use the Windows menu to enter sleep or hibernation.
Click (Start) - - [Sleep] / [Hibernate].
CAUTION
While the computer is entering sleep or hibernation
z Do not:
• Touch the keyboard, touch pad, touchscreen (only for model with touchscreen), digitizer (only for model with digi-
tizer), tablet buttons, or power switch.
• Use an external mouse or other peripheral devices.
• Connect or disconnect the AC adaptor.
• Operate the wireless switch.
• Close or open the display.
• Insert and remove the SD Memory Card.
Wait until the power indicator blinks green (sleep) or goes off (hibernation).
z It may take one or two minutes to enter sleep or hibernation.
z At the beep
cator blinks or goes off. If you slide and hold the power switch for longer than four seconds, the computer will forcibly
shut down and unsaved data will be lost even if you have set [When I press the power button:] to any item in [Change
what the power buttons do].
*1
If the speakers are muted, beeps do not sound.
*1
, immediately release the power switch. After releasing the switch, do not operate it until the power indi-
In sleep or hibernation
z Do not attach or remove a peripheral device. Doing so may cause malfunction.
z Power is consumed in sleep. Power consumption may increase when a PC Card is inserted. When power is
exhausted, the data retained in memory will be lost. Connect the AC adaptor when using the sleep function.

Sleep or Hibernation Functions
18
To resume from sleep or hibernation
1 Open the display, or slide the power switch (A).
z In the default setting, the Windows password will be requested to resume.
CAUTION
z Do not perform the following operations until resuming is complete. After the display is resumed, wait approximately
15 seconds (normally) or 60 seconds (when the computer is on a network).
• Touch the keyboard (except for password input), touch pad, touchscreen (only for model with touchscreen), digitizer
(only for model with digitizer), tablet buttons, or power switch.
• Use an external mouse or other peripheral devices.
• Connect or disconnect the AC adaptor.
• Close or open the display.
• Shut down or restart Windows.
• Enter sleep or hibernation (Wait approximately one minute).
• Operate the wireless switch.
• Insert and remove the SD Memory Card.
z If the computer enters sleep while a USB keyboard or mouse is connected, touching the USB keyboard keys or mouse
will resume the computer.
NOTE
z <Only for model with Bluetooth>
After resuming from sleep or hibernation, the message “TosBtMng has stopped working” may appear.
Click “Close program”.
If Bluetooth connections are cut off, click (Start) - [All Programs] - [Bluetooth] - [Bluetooth Settings], and connect to
the Bluetooth devices again.
Sleep or Hibernation Functions
19
Changing When the Computer Sleeps or Hibernates
Sleep
1 Click or on the notification area, and click [More power options] - [Change when
the computer sleeps].
2 Select the setting for [Put the computer to sleep:], and then click [Save changes].
z The setting for hibernation may change unexpectedly when you change the setting for sleep. Confirm that the
time to enter hibernation is 1,080 minutes (default setting) or longer (below).
Hibernation
1 After the step 1 of “Sleep” setting (above), click [Change advanced power settings].
2 Double-click [Sleep], and double-click [Hibernate after].
3 Click the item and select the setting.
4 Click [OK].

Saving Power
You can extend battery life and save power also during AC adaptor usage.
20
Reducing Power Consumption
Use the methods below to reduce power consumption.
z Change [Power Options]
Click (Start) - [Control Panel] - [System and Maintenance] [Power Options] to select [Power saver].
While [Panasonic Power Management] is selected as the factory
default, selecting [Power saver] will further reduce power consumption.
Also, make detailed settings such as reducing the time entered in
the [Turn off the display] setting.
z Use Power Saving Utility Î page 21
Power Saving Utility provides additional power saving functions
not available in [Power Options].
z Press
z Turn off the computer when it is not in use
z Disconnect external devices (USB devices, PC cards, external mice, etc.) that are not being used
z Use Sleep/Hibernation
Fn
+ F1 to reduce LCD brightness
Reducing internal LCD brightness will reduce power consumption.
You can also turn off only the wireless LAN, wireless WAN or
Bluetooth power.
Press
Fn
+ F7 to set the computer to sleep or Fn +
shuts down computer operation to reduce power consumption.
Disable Wake Up from wired LAN and Wake Up from wireless LAN functions when they are not needed. This reduces
power consumption in Sleep/Hibernation.
To confirm current settings, click (Start) - [All Programs] - [Panasonic] - [Power Saving Utility] - [Advanced] to view
[Wired LAN standby power saving function] or [Wireless LAN standby power saving function].
F10
to set it to hibernation when you have to leave the computer. This

Saving Power
21
Using Power Saving Utility
A single setting allows you to enable all the following power saving features. Enable each of these functions to prolong battery operation time.
z Intel video driver power saving function (Intel® Display Power Saving Technology)
This function adjusts video contrast, color and other factors to lower internal LCD power consumption while retaining adequate image quality.
Disable this function for work that requires subtle image and color nuances or in video editing using video editing applications.
z Wired LAN standby power saving function
Enabling this function disables the Wake Up from wired LAN function to save power in sleep/hibernation.
Disable this function if you want to use the Wake Up from wired LAN function.
z Wireless LAN standby power saving function
Enabling this function disables the Wake Up from wireless LAN function to save power in sleep/hibernation.
Disable this function if you want to use the Wake Up from wireless LAN function.
z Screen colors
This function set [Colors] in [Display Settings] to [Medium (16 bit)].
z Power plan
This function set the power plan to [Panasonic Power Management] (default settings), and then make the following
changes:
Change [Maximum processor state] in [Processor power management] (both [On battery] and [Plugged in]) from [100 %]
to [50 %].
Setup
1 Click (Start)- [All Programs] - [Panasonic] - [Power Saving Utility] - [Advanced].
2 Click [Enable] for each function.
Click [OK] in the confirmation screen that appears.
z To enable “Intel video driver power saving
function”
Select [Enable], and slide the slide bar to the
“Longest battery life” end.
3 Click [OK].
Click [Restore initial settings] to return to the factory
default settings, and click [OK].

Saving Power
NOTE
z Even if you can enable each function using power saving utility, you can also enable them as follows.
• For how to enable the Intel video driver power saving function.
A Right-click the desktop and click [Graphics Properties]. The [Intel(R) GMA Driver for Mobile] screen appears.
B Click [Notebook], [Apply] and [OK].
C Click [Display Settings].
D Click [Power Settings].
E Click [Intel(R) Display Power Saving Technology] to add a check mark.
F Move the slide bar to [Maximum Battery] and click [OK].
G Click [OK].
There is no need to reboot the computer.
• For how to enable/disable the Wake Up from wired LAN function Î page 55
• For how to enable/disable the Wake Up from wireless LAN function Î page 64
22

Security Measures
Use these features to protect your data.
z Other security measures
• Embedded Security (TPM) (
Module (TPM)”.
Setting the Supervisor Password/User Password
Set the Supervisor Password before setting the User Password.
1 Start up the Setup Utility (Î page 69).
2 Select [Security].
Î page 74): For further information, refer to the Installation Manual of “Trusted Platform
23
3 Select [Set Supervisor Password] or [Set User Password], and press
4 Enter your password in [Enter New Password] and press
z When the password has been set, you need to enter your password in [Enter Current Password] and press
Enter
z To disable the password, leave the input field empty and press
.
Enter
Enter
.
.
5 Enter your password again in [Confirm New Password] and press
6 In [Setup Notice], press
7 Press
CAUTION
z Do not forget your password. If you forget your Supervisor Password, you will not be able to use your computer. Con-
tact Panasonic Technical Support.
z When running the Setup Utility, do not leave and go away from your computer even for a short time, since other people
may set or change the password.
NOTE
z The password will not be displayed on the screen.
z You can use up to 32 alphanumeric characters (including spaces).
• The case (upper/lower) is ignored.
• Use only the upper horizontal row of numeric keys to input your password.
• You cannot use
z Disabling the Supervisor Password also disables the User Password.
F10
, and then select [Yes] and press
Shift
and
Enter
Ctrl
to input a password.
.
Enter
.
Enter
Enter
.
.

Security Measures
24
Preventing Your Computer from Unauthorized Use
You can set a start-up password to protect your computer from unauthorized use.
1 Set the password (Î page 23), and select [Enable] in [Password on boot] in the [Security]
menu of the Setup Utility (Î page 74).
NOTE
z If the Supervisor Password or User Password has been set, the password input screen will be displayed on starting-up
of the Setup Utility even though [Password on boot] is set to [Disable].
Preventing Your Hard Disk Data from Being Read or Written
The hard disk lock function protects the hard disk data from being read or written when the hard disk is attached to another
computer. The data can be read/written when the hard disk is returned to the original computer.
1 Select [Enable] in [Hard Disk Lock] in the [Security] menu of the Setup Utility (Î page 74).
CAUTION
z For the data being read/written on the original computer, the Setup Utility settings must be the same as when the hard
disk was removed.
z You cannot use the hard disk lock function without setting the Supervisor Password. Set the Supervisor Password
beforehand (Î page 23).
z When you have your hard disk drive repaired
• Contact Panasonic Technical Support.
• Before sending back the hard disk drive, be sure to set the [Hard Disk Lock] to [Disable].
NOTE
z The hard disk lock function works with the built-in hard disk. It does not work with the external hard disk.
z We recommend you to set [Password on boot] to [Enable] to ensure security though it is not required to enable the
hard disk lock. (Note that the hard disk lock does not guarantee complete protection of the data.)
Battery Power
Battery Indicator
Battery indicator Battery status
Not lit The battery pack is not inserted or not being charged.
Orange Charging is in progress.
Green The battery is fully-charged.
25
Blinking green
Red The remaining battery is approximately 9% or less.
Blinking red The battery pack or the charging circuit is not operating properly.
Blinking orange The battery cannot be charged temporarily due to the following reasons:
Blinking green and
orange alternately
*1
In high temperature mode, the 100% battery level is equivalent to 80% level of the normal temperature mode.
NOTE
z Once the battery is fully charged, the computer performs recharging only when the battery level becomes less than
approximately 95%, so overcharging is avoided.
In high temperature mode, the battery pack is discharging the power to 80%
temperature mode (Î page 27). Do not remove the battery pack in this status.
• Its internal temperature is out of the acceptable range.
• The power supply is not enough because software applications or peripheral
devices are consuming a large amount of power.
The temperature is low and the computer is warming up to prevent the hard disk drive
from malfunctioning. The computer will start automatically after warming-up.
*1
of normal
Battery Power
Checking the Remaining Battery Charge
You can check the remaining battery charge on the screen.
(After logging on to Windows)
26
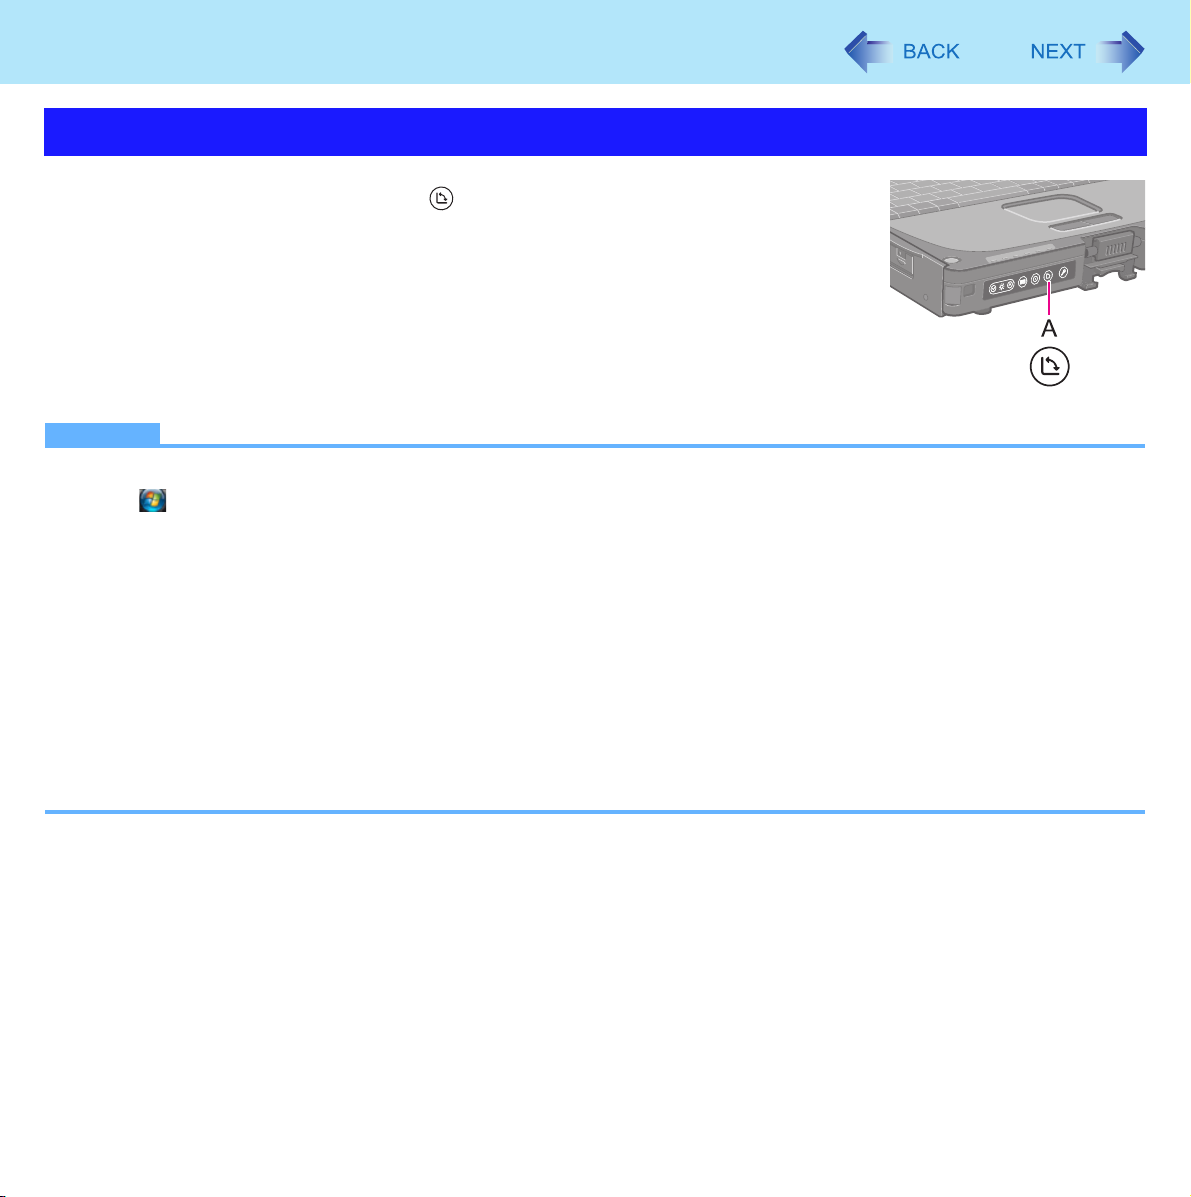
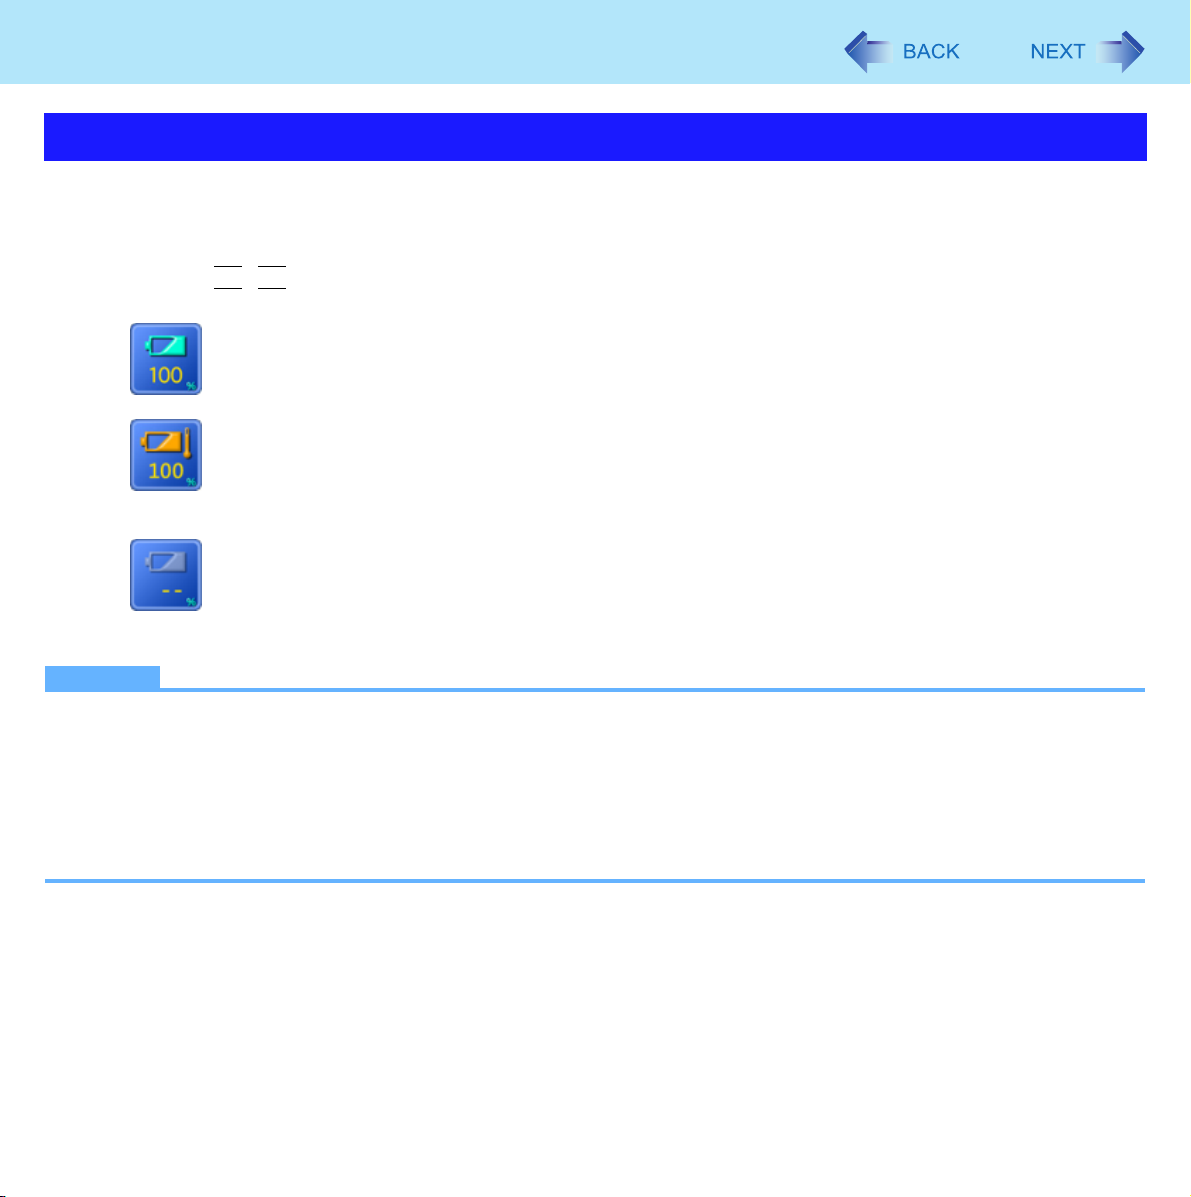
1 Press
z When the battery pack is inserted (example)
z When the battery pack is not inserted
NOTE
z The battery display may not correspond to the actual remaining battery charge in the cases as below. To correct the
display, perform the Battery Recalibration (Î page 29).
• The battery indicator remains red.
• The indicator lights orange and the display shows 99% for a long time.
• Low battery warning appears soon after a short time of use.
This can occur when the computer is in sleep for a long time without power supply from the AC adaptor.
z The battery display may not be the same as that of notification area. This is not a malfunction.
Fn+F9
: Normal temperature mode (Î page 27)
: High temperature mode (Î page 27)
.

Battery Power
27
High temperature mode
The high temperature mode can prevent the battery from deteriorating when the computer is used in high-temperature environment or used for a long time with its battery fully charged.
Select [Auto] (default) or [High Temperature] in [Environment] of the [Main] menu of the Setup Utility (Î page 71).
NOTE
z Note that a level corresponding to a 100% charge for high temperature mode is approximately equivalent to an 80%
charge level for normal temperature mode.
z After switching from [Normal Temperature] to [High Temperature] or vice versa, the remaining battery capacity will not
be displayed correctly until the battery pack is completely discharged or fully charged.
z In the [Auto] mode:
Once the computer has automatically switched from the normal temperature mode to the high temperature mode, the
computer will not switch back to the normal temperature mode until the battery has been used and recharged to a total
charge level of about five times as much as that of the fully-charged state. This is to avoid battery deterioration.
Battery Power
Computer behavior with low battery
The default settings are as follows.
28
When the battery level becomes 10%
[Low battery alarm]
z Displays a message that the battery level is low. z The computer enters hibernation.
↓↓
Charge the battery. Connect the AC adaptor or replace the battery to start up
z Connect the AC adaptor immediately. If you do not
have the AC adaptor, exit the running programs and
Windows, then confirm that the power indicator is off.
z If you have a fully charged spare battery, turn off the
computer, replace the battery and turn the computer on
again.
When the battery level becomes 5%
[Critical battery alarm]
the computer.
z Connect the AC adaptor and charge the battery.
z If you have a fully charged spare battery, turn off the
computer, replace the battery and turn the computer on
again.
When the computer enters hibernation with the battery
down and you resume the operation without charging
the battery, the Windows Resume Loader starts up. Follow the on-screen instructions. After that, however,
Windows may not start up normally, or the [Low battery
level]/[Critical battery level] function may not work normally.
 Loading...