

Page 1
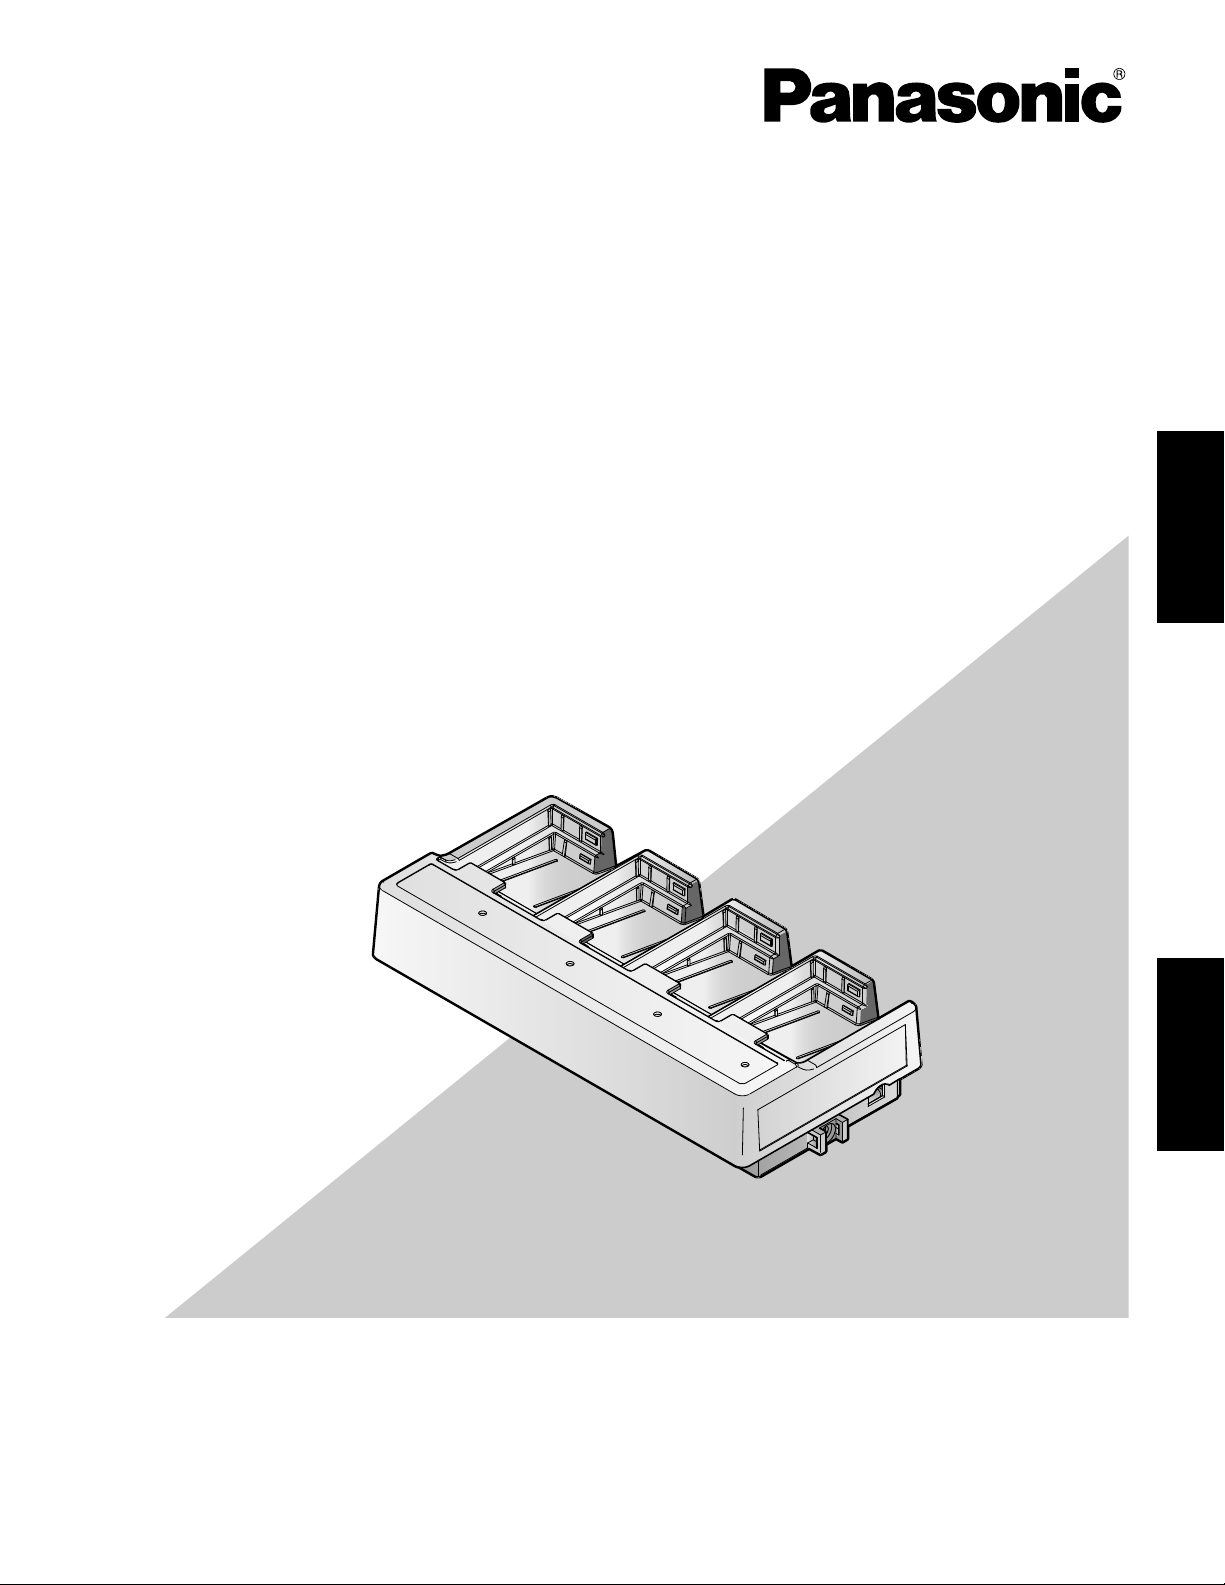
Battery Charger
Operating Instructions
Model No. WX-Z3040
Before attempting to connect or operate this product,
please read these instructions carefully and save this manual for future use.
No model number suffix is shown in this Operating Instructions.
ENGLISHFRANÇAIS
Page 2

2
The lightning flash with arrowhead symbol, within an equilateral triangle, is intended to alert the
user to the presence of uninsulated "dangerous
voltage" within the product's enclosure that may
be of sufficient magnitude to constitute a risk of
electric shock to persons.
The exclamation point within an equilateral triangle is intended to alert the user to the presence of important operating and maintenance
(servicing) instructions in the literature accompanying the appliance.
CAUTION: TO REDUCE THE RISK OF ELECTRIC SHOCK,
DO NOT REMOVE COVER (OR BACK).
NO USER-SERVICEABLE PARTS INSIDE.
REFER SERVICING TO QUALIFIED SERVICE PERSONNEL.
CAUTION
RISK OF ELECTRIC SHOCK
DO NOT OPEN
ATTENTION:
A lithium-ion battery that is recyclable powers the product you have purchased. Please call 1-800-8-BATTERY
for information on how to recycle this battery.
WARNING:
• Apparatus shall be connected to a main socket outlet with a protective earthing connection.
• The mains plug or an appliance coupler shall remain readily
operable.
• To reduce the risk of fire or electric shock, do not expose this
apparatus to rain or moisture.
• The apparatus should not be exposed to dripping or splashing
and that no objects filled with liquids, such as vases, should be
placed on the apparatus.
• All work related to the installation of this product should be made
by qualified service personnel or system installers.
• To prevent injury, this apparatus must be securely attached to
the floor/wall in accordance with the installation instructions.
• The connections should comply with local electrical code.
• When the equipment is not used, make sure to contact your dealer and remove it.
CAUTION:
• Danger of explosion if battery is incorrectly replaced. Replace
only with the same or equivalent type.
• These servicing instructions are for use by qualified service personnel only. To reduce the risk of electric shock do not perform
any servicing other than that contained in the operating instructions unless you are qualified to do so.
The model number and serial number of this product may be
found on the surface of the unit.
You should note the model number and serial number of this
unit in the space provided and retain this book as a permanent record of your purchase to aid identification in the event
of theft.
Model No.
Serial No.
For U.S.A.
This equipment has been tested and found to comply with the limits for a Class B digital device, pursuant to part 15 of the
FCC Rules. These limits are designed to provide reasonable protection against harmful interference in a residential installation. This equipment generates, uses and can radiate radio frequency energy and, if not installed and used in accordance
with the instructions, may cause harmful interference to radio communications. However, there is no guarantee that interference will not occur in a particular installation. If this equipment does cause harmful interference to radio or television reception, which can be determined by turning the equipment off and on, the user is encouraged to try to correct the interference
by one or more of the following measures:
––Reorient or relocate the receiving antenna.
––Increase the separation between the equipment and receiver.
––Connect the equipment into an outlet on a circuit different from that to which the receiver is connected.
––Consult the dealer or an experienced radio/TV technician for help.
This device complies with part 15 of the FCC Rules. Operation is subject to the following two conditions: (1) This device may
not cause harmful interference, and (2) this device must accept any interference received, including interference that may
cause undesired operation.
Operation is subject to the following two conditions: (1) this device may not cause interference, and (2) this device must accept any interference, including interference that may cause undesired operation of the device.
For U.S.A.
For Canada
ENGLISH VERSION
Page 3

3
Limitation of Liability
THIS PUBLICATION IS PROVIDED "AS IS" WITHOUT WARRANTY OF ANY KIND, EITHER EXPRESS OR IMPLIED, INCLUDING
BUT NOT LIMITED TO, THE IMPLIED WARRANTIES OF MERCHANTABILITY, FITNESS FOR ANY PARTICULAR PURPOSE, OR
NON-INFRINGEMENT OF THE THIRD PARTY'S RIGHT.
Disclaimer of Warranty
IN NO EVENT SHALL Panasonic Corporation BE LIABLE TO
ANY PARTY OR ANY PERSON, EXCEPT FOR REPLACEMENT OR REASONABLE MAINTENANCE OF THE PRODUCT, FOR THE CASES, INCLUDING BUT NOT LIMITED TO
BELOW:
(1) ANY DAMAGE AND LOSS, INCLUDING WITHOUT LIMI-
TATION, DIRECT OR INDIRECT, SPECIAL, CONSEQUENTIAL OR EXEMPLARY, ARISING OUT OF OR
RELATING TO THE PRODUCT;
(2) PERSONAL INJURY OR ANY DAMAGE CAUSED BY
INAPPROPRIATE USE OR NEGLIGENT OPERATION OF
THE USER;
(3) UNAUTHORIZED DISASSEMBLE, REPAIR OR MODIFI-
CATION OF THE PRODUCT BY THE USER;
(4) ANY PROBLEM, CONSEQUENTIAL INCONVENIENCE,
OR LOSS OR DAMAGE, ARISING OUT OF THE SYSTEM
COMBINED BY THE DEVICES OF THIRD PARTY;
(5) PERSONAL INJURY, ANY LOSS OR DAMAGE, ARISING
OUT OF THE DROP CAUSED BY THE INCOMPLETE
INSTALLATION.
ENGLISH
Page 4

4
Important Safety Instructions
1) Read these instructions.
2) Keep these instructions.
3) Heed all warnings.
4) Follow all instructions.
5) Do not use this apparatus near water.
6) Clean only with dry cloth.
7) Do not block any ventilation openings. Install in accordance with the manufacturer's instructions.
8) Do not install near any heat sources such as radiators, heat registers, stoves, or other apparatus (including amplifiers) that
produce heat.
9) Do not defeat the safety purpose of the polarized or grounding-type plug. A polarized plug has two blades with one wider
than the other. A grounding type plug has two blades and a third grounding prong. The wide blade or the third prong are
provided for your safety. If the provided plug does not fit into your outlet, consult an electrician for replacement of the obsolete outlet.
10) Protect the power cord from being walked on or pinched particularly at plugs, convenience receptacles, and the point
where they exit from the apparatus.
11) Only use attachments/accessories specified by the manufacturer.
12) Use only with the cart, stand, tripod, bracket, or table specified by the manufacturer, or sold with the apparatus. When a cart
is used, use caution when moving the cart/apparatus combination to avoid injury from tip-over.
13) Unplug this apparatus during lightning storms or when unused for long periods of time.
14) Refer all servicing to qualified service personnel. Servicing is required when the apparatus has been damaged in any way,
such as power-supply cord or plug is damaged, liquid has been spilled or objects have fallen into the apparatus, the apparatus has been exposed to rain or moisture, does not operate normally, or has been dropped.
S3125A
Page 5

5
Limitation of Liability ................................................................................................................................... 3
Disclaimer of Warranty ............................................................................................................................... 3
Important Safety Instructions ...................................................................................................................... 4
Preface ....................................................................................................................................................... 6
Precautions ................................................................................................................................................. 6
Major Operating Controls and Their Functions ........................................................................................... 7
Preparation/Installation ............................................................................................................................... 8
How To Charge Batteries ............................................................................................................................. 9
Specifications ............................................................................................................................................. 10
Standard Accessories ................................................................................................................................ 10
CONTENTS
Page 6

6
Preface
This battery charger is exclusively designed for Battery WX-B3030 (1UF653450R-MDSP)*.
• It is possible to charge four batteries quickly at the same time.
• It is possible to charge the batteries while the battery cases of All-in-One Headset are being attached.
• WX-B3030 and 1UF653450R-MDSP are same models.
* Battery WX-B3030 is the rechargeable battery exclusively designed for All-in-One Headset WX-H3050 and Order Taker WX-
T3020.
Precautions
Charging
• Stop charging and remove the batteries from this product after the batteries are fully charged.
• Charger and batteries get hot during charging, but this is not a trouble. (Li-ion batteries get hotter than NiMH and NiCd batteries.)
• The batteries may not be fully charged first time or after a long period of interval (more than 3 months). That is due to the
characteristics of the batteries. In such a case, charge and discharge the batteries several times.
Place to use this product
• Handle this product with care. The product contains sensitive components that can be damaged by improper handling or
storage.
• Repair or replace any defective components.
• Use this product for indoor use only.
• Do not expose this product to direct sunlight for hours and do not install the product near a heater or an air conditioner.
Otherwise, it may cause deformation, discoloration and malfunction. Keep this product away from water.
• Avoid installing in the following locations.
• Locations where a chemical agent is used such as a swimming pool
• Locations under the air conditioner
• Locations near the fryer
• Locations near the grill
• Locations in a humid or dust-laden environment
• Locations near flammable gas or vapor
• Locations where radiation or x-ray emissions are produced
• Locations subject to strong magnetic field or radio waves
• Locations where corrosive gas is produced
• Locations where it may be damaged by briny air such as seashores
• Locations subject to vibrations (This product is not designed for on-vehicle use.)
• Be sure to remove this product if it is not in use.
• Avoid connections during a lightning storm. Otherwise, an electric shock may be caused.
• Use this product at temperature within 5 °C to 35 °C {41 °F to 95 °F} and humidity below 90%. Batteries may not be fully
charged or may require longer time when charging the battery in areas exceeding this range.
The input power source for this apparatus is 100 V to 240 V AC, 50 Hz/60 Hz.
About Recycling Li-ion Batteries
Do not throw away used batteries. Instead, recycle them in accordance with laws and regulations.
A warning that batteries shall not be exposed to excessive heat such as sunshine, fire or the like.
ATTENTION:
A lithium-ion battery that is recyclable powers the product you have purchased. Please call 1-800-8-BATTERY for
information on how to recycle this battery.
Cleaning
Unplug the power cord from the AC outlet when cleaning this product.
Use a dry cloth to clean this product.
Page 7

7
q
< Top >
ew
< Side >
t
t
r
r
< Bottom >
q LED indicator
Off: No battery
Yellow: Charging
Green: Ready (Charge complete)
Yellow and green (Blinking alternately): Fault (Error)
w DC jack
Use the provided AC adaptor.
INPUT: 100 V to 240 V AC, 50 Hz/60 Hz
OUTPUT: 8 V DC, 3.5 A
e Cable rings
Power cord and fastened here by the cable tie.
(See page 8.)
r Screw holes for mount bracket (x4)
Screws are fastened when securing the wall mount
bracket to the charger. (See page 8.)
t Rubber feet (x4)
Major Operating Controls and Their Functions
Page 8

8
It is possible to use this charger either by laying on a level
place or mounting on the wall.
1. Insert the DC connector of AC adaptor into the DC jack
of charger.
Preparation/Installation
2. Pass the cable tie through either of the cable rings at the
side of charger, and make a loop with the cable tie.
3. Pass the DC cable through the loop of cable tie, and pull
the end of cable tie to fasten the DC cable to the cable
ring.
4. Plug the AC adaptor into the AC outlet.
■ When Mounting the Charger on the Wall
Important:
Surely clamp the DC cable to this battery charger and
screw the DC cable to the wall using the provided cable
clamper.
1. Secure the provided mount bracket to the rear of charger by fastening the provided screws (x4).
Recommended tightening torque: 0.78 N·m {8kgf·cm}
2. Secure the mount bracket to the wall by locally procured
screws (x5).
• Procure 5 mounting screws according to the material of the installation area.
In this case, wood screws and nails should not be
used.
Recommended screw: M4 x 25 mm
• Required pull-out capacity of a single screw/bolt is
118 N {12 kgf} or more.
• If a wall board is too weak to support the total
weight, the area shall be sufficiently reinforced.
DC connector
DC cable
Cable ring
Cable tie
(provided)
Mount bracket
(provided)
Screws (provided)
Cable clamper
(provided)
85 mm
(3-3/8")
127 mm (5")
Screws (locally procured)
Page 9

9
How To Charge Batteries
It may take around 3 hours to complete the charging.
1. Insert the rechargeable batteries into the battery charger
until they click.
2. Plug the AC adaptor into the AC outlet. LED indicator will
light yellow.
3. When charging is complete, the LED indicator will turn
green.
4. Remove the batteries from the charger.
Caution: When an error occurs during charging, the LED
indicator will blink yellow and green alternately. In such
a case, remove the batteries from the charger, or
change the slot to charge. If the problem cannot be
solved, contact your dealer.
Rechargeable battery
(for WX-H3050)
Rechargeable battery
(for WX-T3020)
Page 10

10
Specifications
AC adaptor: Rated input: 100 V to 240 V AC, 50 Hz/60 Hz
Rated output: 8 V DC, 3.5 A
Fast charge current: 400 mA ±10% 4 circuits
Ambient operating temperature: 5 °C to 35 °C {41 °F to 95 °F}
Dimensions: 204 (W) x 100 (H) x 46.5 (D) mm
{8-1/32" (W) x 4-5/16" (H) x 1-13/16" (D)
Weight (excluding AC adaptor and mount bracket): 435 g {0.96 lbs.}
Dimensions and weights indicated are approximate.
Specifications are subject to change without notice.
Standard Accessories
Operating Instructions (this manual) ................................ 1 pc.
AC adaptor (N0JEEJ000007)............................................ 1 pc.
AC cable .......................................................................... 1 pc.
Screws .............................................................................. 4 pcs.
Mount bracket................................................................... 1 pc.
Cable tie............................................................................ 1 pc.
Cable clamper .................................................................. 1 pc.
Page 11

11
FRANÇAIS
L'éclair à extrémité fléchée placé dans un
triangle équilatéral est destiné à attirer
l'attention de l'utilisateur sur la présence
d'une "tension potentiellement dangereuse"
et non isolée se trouvant dans les limites du
coffret de l'appareil dont la puissance est suffisante pour constituer un risque important
d'électrocution.
Le point d'exclamation placé dans un triangle
équilatéral sert à attirer l'attention de
l'utilisateur sur des instructions de fonctionnement et d'entretien (de dépannage) à
caractère important dans la brochure qui
accompagne l'appareil.
ATTENTION: POUR ÉVITER TOUT RISQUE
D'ÉLECTROCUTION, LE COUVERCLE (OU LE PANNEAU
ARRIÈRE) NE DOIT JAMAIS ÊTRE DÉMONTÉ. AUCUNE
PIÈCE DESTINÉE À L'UTILISATEUR NE SE TROUVE À
L'INTÉRIEUR DE L'APPAREIL. CONFIER LES RÉGLAGES
ET LES RÉPARATIONS À UN DEPAN-NEUR
PROFESSIONNEL.
CAUTION
RISK OF ELECTRIC SHOCK
DO NOT OPEN
VERSION FRANÇAISE
(FRENCH VERSION)
L'utilisation de ce dispositif est autorisée seulement aux deux conditions suivantes : (1) il ne doit pas produire de brouillage, et (2) l'utilisateur
du dispositif doit être prêt à accepter tout brouillage radioélectrique reçu, même si ce brouillage est susceptible de compromettre le
fonctionnement du dispositif.
ATTENTION:
• Risque d'explosion si la batterie n'est pas placée correctement.
Remplacer uniquement avec le même type ou un type
équivalent.
• Ces instructions de dépannage sont uniquement destinées au
personnel technique professionnel. Afin de limiter tout risque
d'électrocution, ne jamais exécuter de dépannage autre que
celui spécifié dans la notice d'instructions à moins que vous
possédiez des qualifications pour le faire.
Le numéro de modèle et le numéro de série de ce produit se
trouvent sur la surface de l'appareil.
Nous vous conseillons de relever le numéro de série de votre
appareil dans l'espace réservé ci-dessous et de conserver
précieusement votre notice d'instructions en tant que
justificatif d'achat aux fins d'identification en cas de vol.
No. de modèle
No. de série
AVERTISSEMENT:
• Le périphérique doit être connecté à une prise de sortie secteur
munie d'une connexion de mise à la terre de sécurité.
• La prise de sortie secteur ou l'adaptateur d'alimentation du
périphérique doit toujours être prêt à être utiliser.
• Ne jamais exposer cet appareil à la pluie ni le laisser dans un lieu
humide sous peine de créer un amorçage électrique ou une
électrocution.
• L'appareil ne devrait pas être exposé à des éclaboussures ou
des projections d'eau et aucun récipient rempli de liquide tels que
des vases ne devraient être posé sur l'appareil.
• Tous les travaux d'installation de ce produit devraient être confiés
à des techniciens et dépanneurs professionnels ou des
installateurs de système.
• Pour éviter tout accident corporel, cet appareil doit être
solidement fixé au sol/au mur conformément aux directives
d'installation.
• Les connexions doivent être conformes au code électrique local.
• Quand le matériel n'est pas utilisé, veiller contacter votre
distributeur et le retirer.
Page 12

12
Limitation de responsabilité
CETTE PUBLICATION EST FOURNIE "COMME TEL" SANS GARANTIE DE TOUTE SORTE, EXPRÈS OU IMPLICITE, ÉTANT
INCLUSE MAIS NON LIMITÉE AUX GARANTIES IMPLICITES DE LA VALEUR MARCHANDE, ADAPTATION POUR TOUT BUT
PARTICULIER OU NON-INFRACTION DES DROITS D'UN TIERS.
Déni de la garantie
EN AUCUN CAS Panasonic Corporation NE SERA TENU
POUR RESPONSABLE POUR TOUTE PARTIE OU TOUTE
PERSONNE, À L'EXCEPTION DU REMPLACEMENT OU
D'UNE MAINTENANCE RAISONNABLE DE CE PRODUIT
POUR LES CAS CITÉS, INCLUS MAIS NON LIMITÉS À CE
QUI SUIT:
(1) TOUT DÉGÂT ET PERTE, Y COMPRIS SANS
LIMITATION, DIRECT OU INDIRECT, SPÉCIAL,
IMPORTANT OU EXEMPLAIRE, SURVENANT OU
CONCERNANT LE PRODUIT;
(2) BLESSURE PERSONNELLE OU TOUT DÉGÂT CAUSÉS
PAR UN USAGE NON APPROPRIÉ OU UNE
UTILISATION NÉGLIGENTE DE L'UTILISATEUR;
(3) DÉMONTAGE, RÉPARATION OU MODIFICATION NON
AUTORISÉS DU PRODUIT EFFECTUÉS PAR
L'UTILISATEUR;
(4) TOUT PROBLÈME, INCOMMODITÉ IMPORTANTE OU
PERTE OU ENDOMMAGEMENT, SURVENANT DU
SYSTÈME COMBINÉ PAR LES APPAREILS DE TIERS;
(5) DES BLESSURES PERSONNELLES, TOUTE PERTE OU
DÉGÂTS, PROVENANT D'UNE CHUTE PROVOQUÉE
PAR UNE INSTALLATION INACHEVÉE.
Page 13

13
Instructions de sécurité importantes
1) Veiller à lire ces instructions.
2) Conserver ces instructions.
3) Tenir compte de tous les avertissements.
4) Se conformer à toutes les instructions.
5) Ne pas utiliser cet appareil près de lieux en présence d'eau.
6) Nettoyer uniquement avec un chiffon sec.
7) N'obturer aucune des ouvertures d'aération. Installer conformément aux instructions du fabricant.
8) Ne pas utiliser à proximité de sources de chaleur telles que des radiateurs, des bouches de chauffage, des appareils de
chauffage ou tout autre appareil (y compris les amplificateurs) produisant de la chaleur.
9) Ne pas asservir l'objectif de sécurité de la prise polarisée ou de la prise de mise à la terre. Une prise polarisée possède
deux lames dont l'une est plus large que l'autre. Une prise de mise à la terre possède deux lames ainsi qu'un troisième
élément, un ergot de mise à la terre. La lame qui est large ou le troisième élément, l'ergot, sont installés pour assurer votre
sécurité. Si la prise fournie ne s'engage pas correctement dans votre prise, veuillez consulter un électricien pour qu'il
effectue le remplacement de l'ancienne prise de sortie secteur.
10) Protéger le cordon d'alimentation afin que personne ne puisse marcher dessus ni ne soit pincé, notamment près des prises,
les prises pratiques et les points de sortie de l'appareil.
11) Utiliser uniquement les fixations ou les accessoires spécifiés par le fabricant.
12) Utiliser uniquement le chariot, le support, le trépied, la platine de fixation ou la tablette spécifiée par le fabricant ou vendu
avec l'appareil. Quand un chariot est utilisé, prendre toutes les précautions nécessaires lors du déplacement de la
combinaison chariot-appareil afin que le tout ne se renverse pas.
13) Débrancher cet appareil pendant les orages électriques ou s'il n'est pas utilisé sur de longues périodes de temps.
14) Toute réparation ou dépannage doit être confié à un personnel qualifié. Un dépannage est nécessaire lorsque l'appareil a
été endommagé d'une manière quelconque, par exemple, lorsque le cordon d'alimentation électrique ou la prise ont été
endommagés, quand du liquide s'est répandu dessus ou si des objets sont tombés dans l'appareil, lorsque l'appareil a été
exposé à la pluie ou à l'humidité, ne fonctionne pas normalement ou s'il a fait une chute.
S3125A
Page 14

14
Limitation de responsabilité ....................................................................................................................... 12
Déni de la garantie ..................................................................................................................................... 12
Instructions de sécurité importantes .......................................................................................................... 13
Préface ....................................................................................................................................................... 15
Mesures de précaution .............................................................................................................................. 15
Principaux organes de commande et fonctions ........................................................................................ 16
Préparatifs/Installation ................................................................................................................................ 17
Comment charger des batteries ................................................................................................................ 18
Caractéristiques techniques ...................................................................................................................... 19
Accessoires standard ................................................................................................................................ 19
TABLE DES MATIÈRES
Page 15

15
Préface
Ce chargeur de batterie est exclusivement conçu pour la batterie WX-B3030 (1UF653450R-MDSP)*.
• Il est possible de charger rapidement quatre batteries en même temps.
• Il est possible de charger les batteries tandis que les boîtiers de batterie de combiné microcasque tout intégré sont en
place.
• WX-B3030 et 1UF653450R-MDSP sont les mêmes modèles.
* La batterie WX-B3030 est la batterie rechargeable exclusivement conçue pour le combiné microcasque tout intégré WX-
H3050 et le preneur de commande WX-T3020.
Mesures de précaution
Charge en cours
• Cesser de charger et retirer les batteries de ce produit après que les batteries soient entièrement chargées.
• Le chargeur et les batteries deviennent chauds pendant l'opération de charge, mais ceci ne constitue pas un cas de panne.
(Les batteries Li-ion deviennent plus chaudes que les batteries NiMH et NiCd.)
• Les batteries risquent de ne pas être complètement chargées la première fois ou après une longue période d'intervalle
(plus de 3 mois). Ceci est dû aux caractéristiques des batteries. Dans ce cas, charger et décharger les batteries plusieurs
fois.
Emplacement pour utiliser ce produit
• Manipuler ce produit sans brutalités. Ce produit renferme des composants extrêmement sensibles qui risquent d'être
endommagés à la suite d'une manipulation ou d'un rangement inapproprié.
• Réparer ou remplacer tous les composants défectueux.
• Ce produit est essentiellement conçu pour un usage sous abri.
• Ce produit ne doit pas être exposé directement au soleil pendant des heures et ne doit pas être installé près d'un appareil
de chauffage ou d'un système d'air conditionné. Sinon, il risque d'être déformé, de subir une décoloration voire tomber en
panne. Maintenir l'unité éloignée de l'eau.
• Éviter toute installation dans les emplacements suivants.
• Emplacements où un agent chimique est utilisé comme dans le cas d'une piscine
• Emplacements sous un climatiseur
• Emplacements proches de la friteuse
• Emplacements proches d'un grill
• Emplacements dans un environnement humide ou chargé de poussières
• Emplacements près du gaz ou d'une vapeur inflammable
• Emplacements où des émissions de rayonnement ou de rayon X sont produites
• Emplacements exposés à de puissants champs magnétiques ou ondes radio
• Emplacements où du gaz corrosif est produit
• Emplacements où il peut être endommagé par de l'air saumâtre tel qu'en bord de mer
• Emplacements sujet aux vibrations (ce produit n'est pas conçu pour un usage en véhicule.)
• Faire en sorte de retirer ce produit s'il est n'est pas utilisé.
• Éviter de faire les connexions pendant un orage. Dans le cas contraire, il y a un risque d'électrocution.
• Utiliser ce produit dans des limites de température ambiante se situant entre 5 °C et 35 °C (41 °F à 95 °F) et un taux
d'humidité inférieur à 90 %. Les batteries risquent de ne pas être entièrement chargées ou peuvent nécessiter une plus
longue durée au moment de charger la batterie dans des limites dépassant cette gamme.
La source d'entrée d'alimentation de cet appareil se situe dans les limites de 100 V à 120 V c.a. à 50 Hz/60 Hz.
À propos du recyclage des batteries Li-ion
Ne pas jeter simplement les batteries usées. Au lieu de cela, les recycler conformément aux lois et aux réglementations.
Un avertissement indiquant que les batteries ne doivent pas être exposées à une chaleur excessive telle que le soleil, un feu ou
autre.
Nettoyage
Débrancher le cordon d'alimentation de la prise de sortie secteur au moment de nettoyer ce produit.
Se servir d'un morceau d'étoffe sèche pour nettoyer ce produit.
Page 16

16
q
< Haut >
ew
< Côté >
t
t
r
r
< Base >
q Indicateur à diode électroluminescente
Éteint: Aucune batterie
Jaune: Charge en cours
Vert: Prêt (Charge terminée)
Jaune et vert (clignotant alternativement): Erreur (erreur)
w Prise de C.C.
Utiliser l'adaptateur d'alimentation secteur fourni.
ENTRÉE: 100 V à 120 V c.a. à 50 Hz/60 Hz
SORTIE: 8 V c.c., 3,5 A
e Bagues de câble
Cordon de secteur et attaché ici par le serre-câble.
(Voir pages 17.)
r Trous filetés pour platine de fixation d'installation (x4)
Des vis sont attachées en fixant la platine de fixation
d'installation murale au chargeur. (Voir pages 17.)
t Pieds en caoutchouc (x4)
Principaux organes de commande et fonctions
Page 17

17
Il est possible d'utiliser ce chargeur soit en le posant sur un
emplacement à niveau soit par un installation sur le mur.
1. Insérer le connecteur C.C. de l'adaptateur d'alimentation
à C.A. dans la prise de C.C. du chargeur.
Préparatifs/Installation
2. Faire passer le serre-câble soit par l'une ou l'autre
bagues de câble sur le côté du chargeur, soit en faisant
une boucle avec le serre-câble.
3. Faire passer le câble C.C. par la boucle du serre-câble
et tirer sur l'extrémité du serre-câble pour attacher le
câble C.C. à la bague de câble.
4. Brancher le cordon d'alimentation secteur dans une
prise de sortie secteur.
■ Lorsque la platine de fixation du
chargeur est installée sur le mur
Important:
Fixer fermement le câble C.C. à ce chargeur de batterie
et visser le câble C.C. au mur à l'aide de l'attache de
câble fourni.
1. Fixer la platine de fixation d'installation fournie à l'arrière
du chargeur en attachant les vis fournies (x4).
Couple de serrage recommandé: 0,78 N·m {8 kgf·cm}
2. Fixer la platine de fixation d'installation sur le mur avec
les vis de fixation obtenues localement (x5).
• Obtenir 5 vis de montage selon le matériau de la
zone d'installation.
Dans ce cas-ci, des vis à bois et des clous ne
devraient pas être utilisés.
Vis recommandée: M4 x 25 mm
• La capacité de résistance d'extraction exigée d'une
seule vis/d'un boulon est de 118 N {12 kgf} ou plus.
• Si un panneau mural présente une trop faible
résistance pour supporter le poids total, la zone
devra être suffisamment renforcée.
Connecteur C.C.
Câble C.C.
Bague de câble
Serre-câble
(fournies)
Platine de fixation d'installation (fournies)
Vis (fournies)
Attache de câble
(fourni)
85 mm
(3-3/8")
127 mm (5")
Vis (à se procurer localement)
Page 18

18
Comment charger des batteries
Il faudrait approximativement 3 heures pour l'opération de
charge complète.
1. Insérer les batteries rechargeables dans le chargeur de
batterie jusqu'à ce qu'un déclic se produise.
2. Brancher le adaptateur d'alimentation secteur dans une
prise de sortie secteur. L'indicateur à diode électroluminescente s'allume en jaune.
3. Quand la charge est terminée, la diode électroluminescente de chargeur reste allumée en vert.
4. Retirer les batteries du chargeur.
Précautions: Quand une erreur se produit pendant la
charge, l'indicateur à diode électroluminescente
clignotera en jaune et vert alternativement. Dans ce cas,
retirer les batteries du chargeur ou changer de fente
pour charger. Si le problème ne peut pas être résolu,
contacter votre distributeur.
Batterie rechargeable
(pour WX-H3050)
Batterie rechargeable
(pour WX-T3020)
Page 19

19
Caractéristiques techniques
Adaptateur d'alimentation secteur: Puissance d'entrée nominale: 100 V à 240 V C.A., 50 Hz/60 Hz
Puissance de sortie nominale: 8 V c.c., 3,5 A
Intensité de charge rapide: 400 mA ±10 % 4 circuits
Température ambiante en service: 5 °C à 35 °C {41 °F à 95 °F}
Dimensions: 204 (L) x 100 (H) x 46,5 (P) mm
{8-1/32"(L) x 4-5/16"(H) x 1-13/-16"(P)}
Poids (à l'exclusion de l'adaptateur d'alimentation secteur et de la
platine de fixation d'installation): 435 g {0,96 lbs.}
Les poids et dimensions indiqués sont approximatifs.
Sous réserve de modification des renseignements techniques sans préavis.
Accessoires standard
Manuel d'utilisation (cette documentation) ............................................. 1 él.
Adaptateur d'alimentation secteur (N0JEEJ000007) ............................. 1 él.
Cordon d'alimentation secteur ............................................................... 1 él.
Vis ........................................................................................................... 4 él.
Platine de fixation d'installation .............................................................. 1 él.
Serre-câble ............................................................................................. 1 él.
Attache de câble .................................................................................... 1 él.
Page 20

Panasonic System Solutions Company,
Unit Company of Panasonic Corporation of North America
www.panasonic.com/business/
For customer support, call 1.800.528.6747
Three Panasonic Way 2H-2, Secaucus, New Jersey 07094
Panasonic Canada Inc.
5770 Ambler Drive, Mississauga, Ontario, L4W 2T3 Canada
(905)624-5010
http://www.panasonic.ca
Printed in Japan
© Panasonic Corporation 2008 NM0708-2108 3TR005575CAA Imprimé au Japon
Panasonic Sales Company
Panasonic Puerto Rico, Inc.
AVE 65de Inf, Km 9.5 Carolina, PR 00985
(787)750-4300
 Loading...