

Supplementary Instructions for EVDO
Personal Computer
Model No. CF-18 Series
This Supplementary Instructions manual points out cases where the operation of the computer will differ from that in the Operating
Instructions.
For U.S.A
Federal Communications Commission Radio
Frequency Interference Statement
Note: This equipment has been tested and found to comply with the
limits for a Class B digital device, pursuant to Part 15 of the FCC
Rules. These limits are designed to provide reasonable protection
against harmful interference in a residential installation. This
equipment generates, uses and can radiate radio frequency energy
and, if not installed and used in accordance with the instructions,
may cause harmful interference to radio communications. However,
there is no guarantee that interference will not occur in a particular
installation. If this equipment does cause harmful interference to
radio or television reception, which can be determined by turning the
equipment off and on, the user is encouraged to try to correct the
interference by one or more of the following measures:
Reorient or relocate the receiving antenna.
Increase the separation between the equipment and receiver.
Connect the equipment into an outlet on a circuit different
from that to which the receiver is connected.
Consult the Panasonic Service Center or an experienced radio/TV technician for help.
Warning
To assure continued compliance, use only shielded interface
cables when connecting to a computer or peripheral. Also, any
changes or modifications not expressly approved by the party
responsible for compliance could void the user’s authority to
operate this equipment.
FCC RF Exposure Warning:
This equipment is provided with PC Card slot that could be
used with wireless transmitters, which will be specifically
recommended when they become available.
Other third-party wireless transmitters have not been RF exposure evaluated for use with this computer and may not
comply with FCC RF exposure requirements.
This equipment complies with FCC radiation exposure limits
set forth for an uncontrolled environment.
This equipment has been approved for portable operation,
and unless otherwise advised in separate supplemental instructions for individual wireless transmitter(s), requires minimum 1.5 cm spacing be provided between antenna(s) and all
person’s body (excluding extremities of hands, wrist and feet)
during wireless modes of operation.
This equipment may use multiple installed transmitters, which
may be capable of simultaneous transmission.
This equipment is provided with external antenna connector(s)
for connection to optional Car Mounter or Port Replicator for
mobile external mounted antenna(s). External antenna(s) must
be professionally installed and cannot exceed recommended
maximum antenna gain as described in individual provided
supplement instructions for wireless transmitters. Also, user
must maintain minimum 20 cm spacing between external
antenna(s) and all person’s body (excluding extremities of
hands, wrist and feet) during wireless modes of operation.
This device complies with Part 15 of the FCC Rules. Operation
is subject to the following two conditions:
(1) This device may not cause harmful interference, and
(2) This device must accept any interference received, including
interference that may cause undesired operation.
Responsible Party: Panasonic Corporation of North America
One Panasonic Way
Secaucus, NJ 07094
Tel No:1-800-LAPTOP5 (1-800-527-8675)
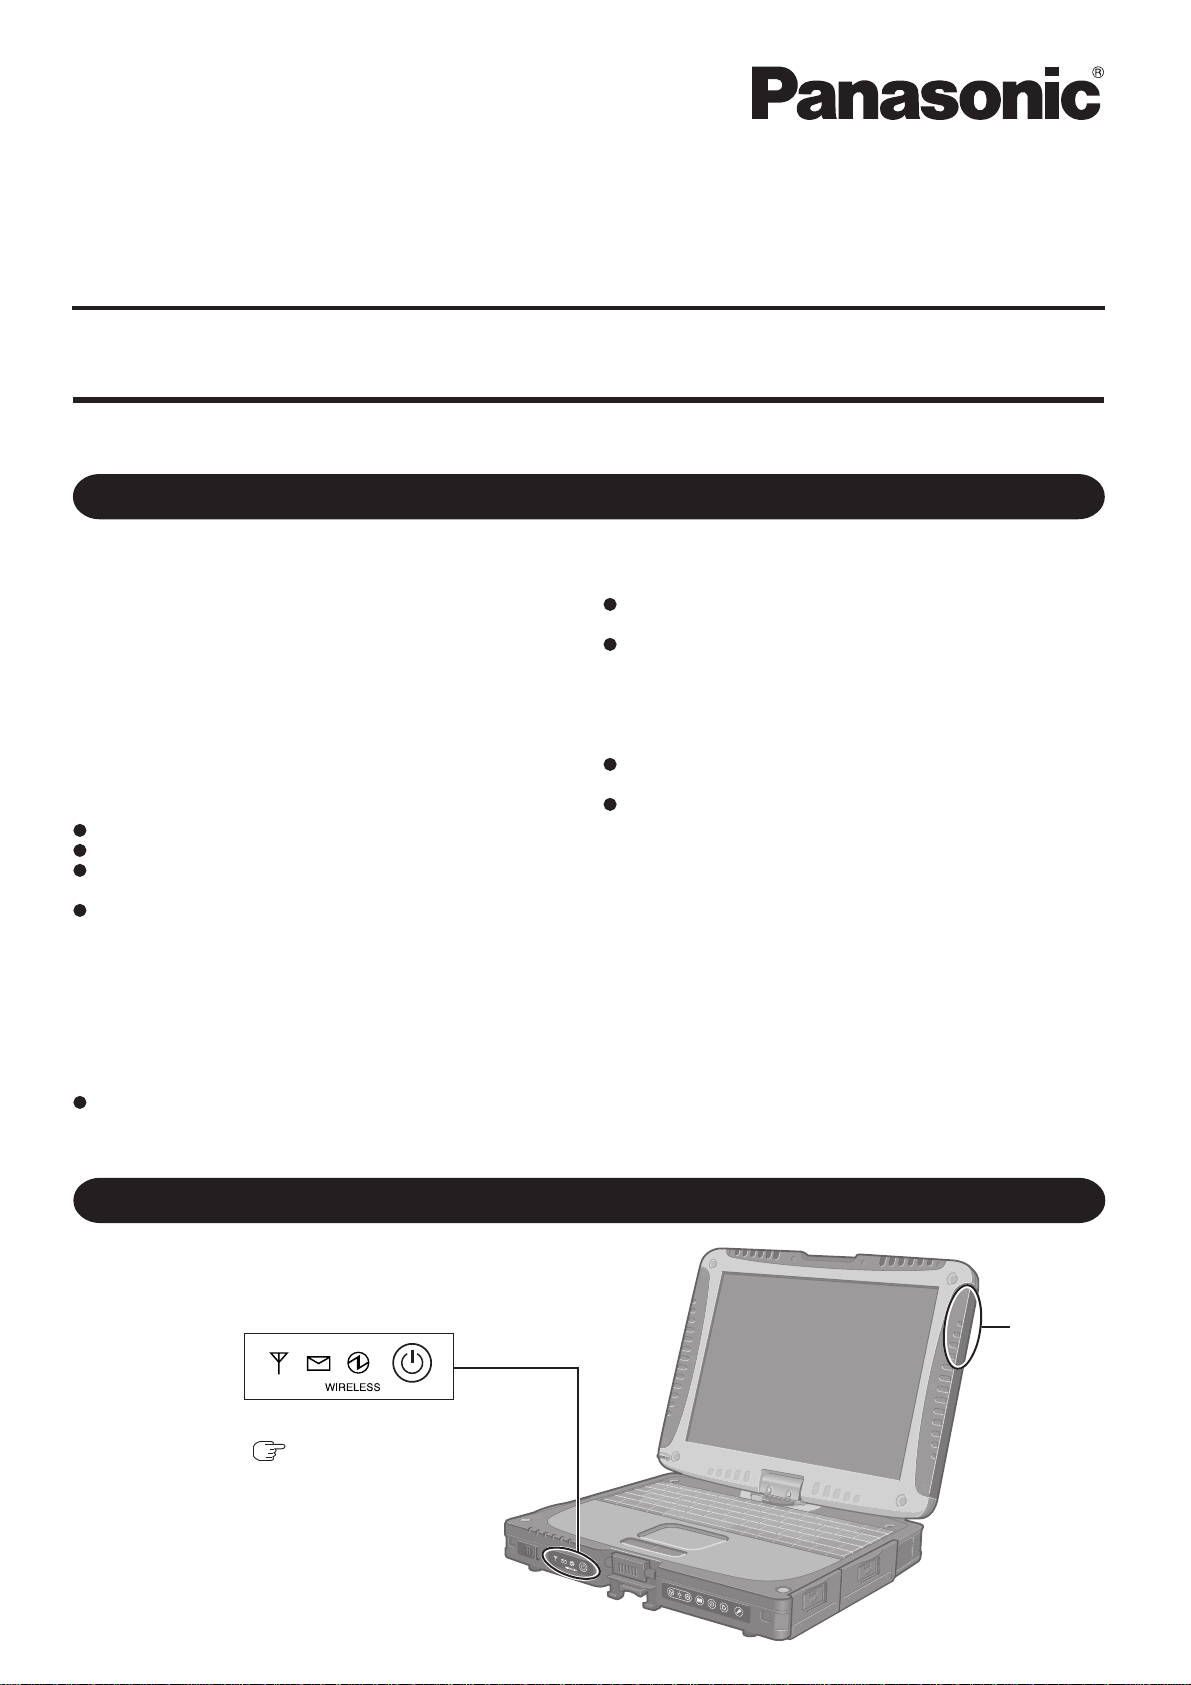
Names and Functions of Parts
Except the followings, refer to the Operating Instructions.
LED Indicators
( User Manual for Toughbook with
integrated EM5625D EVDO modem)
Antenna

Table of Contents
The EM5625 wireless modem . . . . . . . . . . . . . . . . . . . . . . . . . . . . . . . . . . . . . . . . . .9
About your EM5625 . . . . . . . . . . . . . . . . . . . . . . . . . . . . . . . . . . . . . . . . . . . . . . . . . 9
Feature availability . . . . . . . . . . . . . . . . . . . . . . . . . . . . . . . . . . . . . . . . . . . 9
CDMA networks . . . . . . . . . . . . . . . . . . . . . . . . . . . . . . . . . . . . . . . . . . . . . . . . 9
Network account and coverage. . . . . . . . . . . . . . . . . . . . . . . . . . . . . . . . 10
Roaming . . . . . . . . . . . . . . . . . . . . . . . . . . . . . . . . . . . . . . . . . . . . . . . . . . . . . 10
System Select (roaming options) . . . . . . . . . . . . . . . . . . . . . . . . . . . . . . 11
WiFi . . . . . . . . . . . . . . . . . . . . . . . . . . . . . . . . . . . . . . . . . . . . . . . . . . . . . . . . . . 11
Watcher overview . . . . . . . . . . . . . . . . . . . . . . . . . . . . . . . . . . . . . . . . . . . . . . . . . 11
Interpreting icons . . . . . . . . . . . . . . . . . . . . . . . . . . . . . . . . . . . . . . . . . . . . . . 12
Windows system tray icons . . . . . . . . . . . . . . . . . . . . . . . . . . . . . . . . . . . . . 13
About EM5625 Watcher . . . . . . . . . . . . . . . . . . . . . . . . . . . . . . . . . . . . . . . . 13
The Watcher Window . . . . . . . . . . . . . . . . . . . . . . . . . . . . . . . . . . . . . . . . . . . . . . . .15
Watcher views . . . . . . . . . . . . . . . . . . . . . . . . . . . . . . . . . . . . . . . . . . . . . . . . . . . . 15
Full view . . . . . . . . . . . . . . . . . . . . . . . . . . . . . . . . . . . . . . . . . . . . . . . . . . . . . . 15
Compact view . . . . . . . . . . . . . . . . . . . . . . . . . . . . . . . . . . . . . . . . . . . . . . . . . 16
Docking . . . . . . . . . . . . . . . . . . . . . . . . . . . . . . . . . . . . . . . . . . . . . . . . . . . . . . 16
Always On Top . . . . . . . . . . . . . . . . . . . . . . . . . . . . . . . . . . . . . . . . . . . . . . . . 16
Display components . . . . . . . . . . . . . . . . . . . . . . . . . . . . . . . . . . . . . . . . . . . . . . . 16
Status box . . . . . . . . . . . . . . . . . . . . . . . . . . . . . . . . . . . . . . . . . . . . . . . . . . . . 17
Connection status area . . . . . . . . . . . . . . . . . . . . . . . . . . . . . . . . . . . . . . . . . 18
Call status area . . . . . . . . . . . . . . . . . . . . . . . . . . . . . . . . . . . . . . . . . . . . . . . . 19
Clear status messages . . . . . . . . . . . . . . . . . . . . . . . . . . . . . . . . . . . . . . . 20
Indicator area . . . . . . . . . . . . . . . . . . . . . . . . . . . . . . . . . . . . . . . . . . . . . . . . . 21
Menus . . . . . . . . . . . . . . . . . . . . . . . . . . . . . . . . . . . . . . . . . . . . . . . . . . . . . . . . . . . 21
VIEW menu . . . . . . . . . . . . . . . . . . . . . . . . . . . . . . . . . . . . . . . . . . . . . . . . . . . 21
TOOLS menu . . . . . . . . . . . . . . . . . . . . . . . . . . . . . . . . . . . . . . . . . . . . . . . . . . 22
HELP menu . . . . . . . . . . . . . . . . . . . . . . . . . . . . . . . . . . . . . . . . . . . . . . . . . . . 22
Rev 0.21 Dec.04 1

Online Help for VZW EM5625 NB
Data Services . . . . . . . . . . . . . . . . . . . . . . . . . . . . . . . . . . . . . . . . . . . . . . . . . . . . . . .23
Data features . . . . . . . . . . . . . . . . . . . . . . . . . . . . . . . . . . . . . . . . . . . . . . . . . . . . . 23
Data tab . . . . . . . . . . . . . . . . . . . . . . . . . . . . . . . . . . . . . . . . . . . . . . . . . . . . . . 23
Connection Manager . . . . . . . . . . . . . . . . . . . . . . . . . . . . . . . . . . . . . . . . . . . . . . 24
Connection Manager window . . . . . . . . . . . . . . . . . . . . . . . . . . . . . . . . . . . 24
Restrict to default profiles . . . . . . . . . . . . . . . . . . . . . . . . . . . . . . . . . . . . . . 24
Add a data profile . . . . . . . . . . . . . . . . . . . . . . . . . . . . . . . . . . . . . . . . . . . . . . 25
Connection profile properties . . . . . . . . . . . . . . . . . . . . . . . . . . . . . . . . . . . . 25
Specifying the autolaunch properties for the connection . . . . . . . . . . . . 26
Restore default settings . . . . . . . . . . . . . . . . . . . . . . . . . . . . . . . . . . . . . . . . 27
Default data profile . . . . . . . . . . . . . . . . . . . . . . . . . . . . . . . . . . . . . . . . . . . . 27
Delete a data profile . . . . . . . . . . . . . . . . . . . . . . . . . . . . . . . . . . . . . . . . . . . . 28
Opening and closing connections . . . . . . . . . . . . . . . . . . . . . . . . . . . . . . . . . . . 28
Establish a data connection . . . . . . . . . . . . . . . . . . . . . . . . . . . . . . . . . . . . . 28
Make a high-speed data connection . . . . . . . . . . . . . . . . . . . . . . . . . . . . . . 29
Always-on connection . . . . . . . . . . . . . . . . . . . . . . . . . . . . . . . . . . . . . . . 29
Determine the amount of data transferred . . . . . . . . . . . . . . . . . . . . . . 30
Quick 2 Net . . . . . . . . . . . . . . . . . . . . . . . . . . . . . . . . . . . . . . . . . . . . . . . . . . 31
End a data session . . . . . . . . . . . . . . . . . . . . . . . . . . . . . . . . . . . . . . . . . . . . . 31
Automatic data call disconnection. . . . . . . . . . . . . . . . . . . . . . . . . . . . . 31
Determining the signal strength. . . . . . . . . . . . . . . . . . . . . . . . . . . . . . . . . . . . . 32
WiFi Connections . . . . . . . . . . . . . . . . . . . . . . . . . . . . . . . . . . . . . . . . . . . . . . . . . . .33
Enabling support for a WiFi network adapter . . . . . . . . . . . . . . . . . . . . . . . . . . 33
Broadcasting and non-broadcasting WiFi hotspots . . . . . . . . . . . . . . . . . 34
WEP keys . . . . . . . . . . . . . . . . . . . . . . . . . . . . . . . . . . . . . . . . . . . . . . . . . . . . . 35
WiFi tab. . . . . . . . . . . . . . . . . . . . . . . . . . . . . . . . . . . . . . . . . . . . . . . . . . . . . . . . . . 35
WiFi Profiles tab (Connection Manager window) . . . . . . . . . . . . . . . . . . . . . . 35
Establishing a WiFi connection . . . . . . . . . . . . . . . . . . . . . . . . . . . . . . . . . . . . . 36
Determining the signal strength. . . . . . . . . . . . . . . . . . . . . . . . . . . . . . . . . . . . . 37
Ending a WiFi connection . . . . . . . . . . . . . . . . . . . . . . . . . . . . . . . . . . . . . . . . . . 37
Managing both VZAccess and WiFi connections . . . . . . . . . . . . . . . . . . . . . . 37
2 2130548

Contents
Monitoring hotspots . . . . . . . . . . . . . . . . . . . . . . . . . . . . . . . . . . . . . . . . . . . . . . . 38
Viewing hotspot details . . . . . . . . . . . . . . . . . . . . . . . . . . . . . . . . . . . . . . . . . 39
Managing WiFi profiles . . . . . . . . . . . . . . . . . . . . . . . . . . . . . . . . . . . . . . . . . . . . 40
Creating WiFi profiles . . . . . . . . . . . . . . . . . . . . . . . . . . . . . . . . . . . . . . . . . . 41
Editing WiFi profiles . . . . . . . . . . . . . . . . . . . . . . . . . . . . . . . . . . . . . . . . . . . . 42
Deleting WiFi profiles . . . . . . . . . . . . . . . . . . . . . . . . . . . . . . . . . . . . . . . . . . 42
Ranking WiFi profiles for autoconnection . . . . . . . . . . . . . . . . . . . . . . . . . 42
Text Messaging Services . . . . . . . . . . . . . . . . . . . . . . . . . . . . . . . . . . . . . . . . . . . .45
Short text messaging . . . . . . . . . . . . . . . . . . . . . . . . . . . . . . . . . . . . . . . . . . . . . . 45
SMS message notification . . . . . . . . . . . . . . . . . . . . . . . . . . . . . . . . . . . . . . 45
Mobile Messenger window . . . . . . . . . . . . . . . . . . . . . . . . . . . . . . . . . . . . . . . . . 46
Mobile Messenger - Inbox . . . . . . . . . . . . . . . . . . . . . . . . . . . . . . . . . . . . . . . . . . 46
Read SMS messages . . . . . . . . . . . . . . . . . . . . . . . . . . . . . . . . . . . . . . . . . . . 47
Forward SMS messages . . . . . . . . . . . . . . . . . . . . . . . . . . . . . . . . . . . . . . . . 47
Reply to SMS messages . . . . . . . . . . . . . . . . . . . . . . . . . . . . . . . . . . . . . . . . 48
Phone the sender of a text message . . . . . . . . . . . . . . . . . . . . . . . . . . . . . . 49
Add SMS callback to contacts . . . . . . . . . . . . . . . . . . . . . . . . . . . . . . . . . . . 49
Mobile Messenger - Outbox. . . . . . . . . . . . . . . . . . . . . . . . . . . . . . . . . . . . . . . . . 50
Create a new SMS message . . . . . . . . . . . . . . . . . . . . . . . . . . . . . . . . . . . . . 50
SMS message composition . . . . . . . . . . . . . . . . . . . . . . . . . . . . . . . . . . . . . 51
Address an SMS message . . . . . . . . . . . . . . . . . . . . . . . . . . . . . . . . . . . . . . 51
Send an SMS message to a contact. . . . . . . . . . . . . . . . . . . . . . . . . . . . 51
Add SMS Recipients window . . . . . . . . . . . . . . . . . . . . . . . . . . . . . . . . . 52
Save a draft message . . . . . . . . . . . . . . . . . . . . . . . . . . . . . . . . . . . . . . . . . . . 52
Revise a draft message . . . . . . . . . . . . . . . . . . . . . . . . . . . . . . . . . . . . . . . . . 53
Send an SMS message . . . . . . . . . . . . . . . . . . . . . . . . . . . . . . . . . . . . . . . . . 53
Override the callback number . . . . . . . . . . . . . . . . . . . . . . . . . . . . . . . . . . . 54
Retain sent messages . . . . . . . . . . . . . . . . . . . . . . . . . . . . . . . . . . . . . . . . . . 54
Review SMS messages . . . . . . . . . . . . . . . . . . . . . . . . . . . . . . . . . . . . . . . . . 55
Enhanced SMS delivery acknowledgement . . . . . . . . . . . . . . . . . . . . . . . . 55
Rev 0.21 Dec.04 3

Online Help for VZW EM5625 NB
Managing SMS messages. . . . . . . . . . . . . . . . . . . . . . . . . . . . . . . . . . . . . . . . . . 56
Delete SMS messages . . . . . . . . . . . . . . . . . . . . . . . . . . . . . . . . . . . . . . . . . 56
Expire SMS messages . . . . . . . . . . . . . . . . . . . . . . . . . . . . . . . . . . . . . . . . . . 56
Voice Services . . . . . . . . . . . . . . . . . . . . . . . . . . . . . . . . . . . . . . . . . . . . . . . . . . . . . .57
Voice features . . . . . . . . . . . . . . . . . . . . . . . . . . . . . . . . . . . . . . . . . . . . . . . . . . . . 57
Headset / TTY use . . . . . . . . . . . . . . . . . . . . . . . . . . . . . . . . . . . . . . . . . . . . . 57
Headset volume. . . . . . . . . . . . . . . . . . . . . . . . . . . . . . . . . . . . . . . . . . . . . 57
Mute a call . . . . . . . . . . . . . . . . . . . . . . . . . . . . . . . . . . . . . . . . . . . . . . . . . 58
Use a TTY . . . . . . . . . . . . . . . . . . . . . . . . . . . . . . . . . . . . . . . . . . . . . . . . . . 58
Call Privacy . . . . . . . . . . . . . . . . . . . . . . . . . . . . . . . . . . . . . . . . . . . . . . . . . . . 58
Minute Alert . . . . . . . . . . . . . . . . . . . . . . . . . . . . . . . . . . . . . . . . . . . . . . . . . . 58
Service Alert . . . . . . . . . . . . . . . . . . . . . . . . . . . . . . . . . . . . . . . . . . . . . . . . . . 59
The Voice tab . . . . . . . . . . . . . . . . . . . . . . . . . . . . . . . . . . . . . . . . . . . . . . . . . . . . 59
Scratch Pad . . . . . . . . . . . . . . . . . . . . . . . . . . . . . . . . . . . . . . . . . . . . . . . . . . . 59
Outgoing calls . . . . . . . . . . . . . . . . . . . . . . . . . . . . . . . . . . . . . . . . . . . . . . . . . . . . 60
Dial a voice call . . . . . . . . . . . . . . . . . . . . . . . . . . . . . . . . . . . . . . . . . . . . . . . . 61
Manual dialing. . . . . . . . . . . . . . . . . . . . . . . . . . . . . . . . . . . . . . . . . . . . . . 61
Auto-Hyphenation feature . . . . . . . . . . . . . . . . . . . . . . . . . . . . . . . . . . . . 61
Prefix dialing with “1”. . . . . . . . . . . . . . . . . . . . . . . . . . . . . . . . . . . . . . . . 62
Redial a number . . . . . . . . . . . . . . . . . . . . . . . . . . . . . . . . . . . . . . . . . . . . 62
Auto-Retry feature . . . . . . . . . . . . . . . . . . . . . . . . . . . . . . . . . . . . . . . . . . . 62
3-way calling . . . . . . . . . . . . . . . . . . . . . . . . . . . . . . . . . . . . . . . . . . . . . . . . . . 63
KeyGuard . . . . . . . . . . . . . . . . . . . . . . . . . . . . . . . . . . . . . . . . . . . . . . . . . . . . . 63
Mute key tones (overdial) . . . . . . . . . . . . . . . . . . . . . . . . . . . . . . . . . . . . . . . 63
Incoming calls . . . . . . . . . . . . . . . . . . . . . . . . . . . . . . . . . . . . . . . . . . . . . . . . . . . . 64
Incoming call notification . . . . . . . . . . . . . . . . . . . . . . . . . . . . . . . . . . . . . . . 64
Any-Key Answer . . . . . . . . . . . . . . . . . . . . . . . . . . . . . . . . . . . . . . . . . . . . . . . 65
Auto-Answer feature . . . . . . . . . . . . . . . . . . . . . . . . . . . . . . . . . . . . . . . . . . . 65
Call Waiting Alert . . . . . . . . . . . . . . . . . . . . . . . . . . . . . . . . . . . . . . . . . . . . . . 66
Missed Call notification . . . . . . . . . . . . . . . . . . . . . . . . . . . . . . . . . . . . . . . . 66
Ending a voice call . . . . . . . . . . . . . . . . . . . . . . . . . . . . . . . . . . . . . . . . . . . . . . . . 66
4 2130548

Contents
Voice Mail. . . . . . . . . . . . . . . . . . . . . . . . . . . . . . . . . . . . . . . . . . . . . . . . . . . . . . . . 67
Voice Mail notification . . . . . . . . . . . . . . . . . . . . . . . . . . . . . . . . . . . . . . . . . . 67
Clear the Voice Mail icon . . . . . . . . . . . . . . . . . . . . . . . . . . . . . . . . . . . . . 67
Access your Voice Mail . . . . . . . . . . . . . . . . . . . . . . . . . . . . . . . . . . . . . . . . . 68
Configure DTMF tones . . . . . . . . . . . . . . . . . . . . . . . . . . . . . . . . . . . . . . . 68
Change your Voice Mail access number . . . . . . . . . . . . . . . . . . . . . . . . . . 68
Contact Management . . . . . . . . . . . . . . . . . . . . . . . . . . . . . . . . . . . . . . . . . . . . . . . .71
Phone Book . . . . . . . . . . . . . . . . . . . . . . . . . . . . . . . . . . . . . . . . . . . . . . . . . . . . . . 71
Contact Properties . . . . . . . . . . . . . . . . . . . . . . . . . . . . . . . . . . . . . . . . . . . . . 71
Dial a contact . . . . . . . . . . . . . . . . . . . . . . . . . . . . . . . . . . . . . . . . . . . . . . . . . 72
Link Dialing . . . . . . . . . . . . . . . . . . . . . . . . . . . . . . . . . . . . . . . . . . . . . . . . . . . 72
Call Log. . . . . . . . . . . . . . . . . . . . . . . . . . . . . . . . . . . . . . . . . . . . . . . . . . . . . . . . . . 73
Reply to logged calls . . . . . . . . . . . . . . . . . . . . . . . . . . . . . . . . . . . . . . . . . . . 73
Copy the Call Log to a text file . . . . . . . . . . . . . . . . . . . . . . . . . . . . . . . . . . . 74
Copy a phone number from the Call Log to the clipboard . . . . . . . . . . . . 74
Add a Call Log entry to your contacts . . . . . . . . . . . . . . . . . . . . . . . . . . . . . 74
Call Log view options . . . . . . . . . . . . . . . . . . . . . . . . . . . . . . . . . . . . . . . . . . . 75
Sort the Call Log display . . . . . . . . . . . . . . . . . . . . . . . . . . . . . . . . . . . . . 75
Delete entries from the Call Log . . . . . . . . . . . . . . . . . . . . . . . . . . . . . . . . . 75
Outlook integration . . . . . . . . . . . . . . . . . . . . . . . . . . . . . . . . . . . . . . . . . . . . . . . . .77
Enabling Outlook integration . . . . . . . . . . . . . . . . . . . . . . . . . . . . . . . . . . . . . . . 77
Sending SMS messages . . . . . . . . . . . . . . . . . . . . . . . . . . . . . . . . . . . . . . . . . . . 77
Viewing sent messages . . . . . . . . . . . . . . . . . . . . . . . . . . . . . . . . . . . . . . . . . 79
Viewing unsent outgoing messages . . . . . . . . . . . . . . . . . . . . . . . . . . . . . . 79
Reading SMS messages . . . . . . . . . . . . . . . . . . . . . . . . . . . . . . . . . . . . . . . . . . . 80
Replying to SMS messages . . . . . . . . . . . . . . . . . . . . . . . . . . . . . . . . . . . . . 80
Forwarding SMS messages . . . . . . . . . . . . . . . . . . . . . . . . . . . . . . . . . . . . . 81
Deleting SMS messages . . . . . . . . . . . . . . . . . . . . . . . . . . . . . . . . . . . . . . . . 82
Dialing from Outlook . . . . . . . . . . . . . . . . . . . . . . . . . . . . . . . . . . . . . . . . . . . . . . 82
Synchronizing Phone Book contacts (in Watcher) with Outlook . . . . . . . . . 83
Rev 0.21 Dec.04 5

Online Help for VZW EM5625 NB
Security . . . . . . . . . . . . . . . . . . . . . . . . . . . . . . . . . . . . . . . . . . . . . . . . . . . . . . . . . . . .85
Security features . . . . . . . . . . . . . . . . . . . . . . . . . . . . . . . . . . . . . . . . . . . . . . . . . . 85
Unlock the modem . . . . . . . . . . . . . . . . . . . . . . . . . . . . . . . . . . . . . . . . . . 85
Initial lock code . . . . . . . . . . . . . . . . . . . . . . . . . . . . . . . . . . . . . . . . . . . . . 85
Warning . . . . . . . . . . . . . . . . . . . . . . . . . . . . . . . . . . . . . . . . . . . . . . . . . . . . . . 86
Functionality when the EM5625 is locked . . . . . . . . . . . . . . . . . . . . . . . . . 86
Enable/disable the lock code . . . . . . . . . . . . . . . . . . . . . . . . . . . . . . . . . . . . . . . 86
Lock the EM5625 immediately . . . . . . . . . . . . . . . . . . . . . . . . . . . . . . . . . . . 87
Change the lock code. . . . . . . . . . . . . . . . . . . . . . . . . . . . . . . . . . . . . . . . . . . . . . 87
Customization Options . . . . . . . . . . . . . . . . . . . . . . . . . . . . . . . . . . . . . . . . . . . . . .89
Options window . . . . . . . . . . . . . . . . . . . . . . . . . . . . . . . . . . . . . . . . . . . . . . . . . . 89
General tab in Options . . . . . . . . . . . . . . . . . . . . . . . . . . . . . . . . . . . . . . . . . . 90
Auto-launch Watcher, Launch minimized . . . . . . . . . . . . . . . . . . . . . . . 90
Warning messages . . . . . . . . . . . . . . . . . . . . . . . . . . . . . . . . . . . . . . . . . . . . 90
Prompt before exit . . . . . . . . . . . . . . . . . . . . . . . . . . . . . . . . . . . . . . . . . . . . . 91
Data tab in Options . . . . . . . . . . . . . . . . . . . . . . . . . . . . . . . . . . . . . . . . . . . . 91
Disable Microsoft network bindings for VZAccess connection . . . . . 91
Messaging tab in Options . . . . . . . . . . . . . . . . . . . . . . . . . . . . . . . . . . . . . . . 91
Network tab in Options . . . . . . . . . . . . . . . . . . . . . . . . . . . . . . . . . . . . . . . . . 92
Update the system clock with CDMA time . . . . . . . . . . . . . . . . . . . . . . 92
Security tab in Options . . . . . . . . . . . . . . . . . . . . . . . . . . . . . . . . . . . . . . . . . 92
Sounds tab in Options . . . . . . . . . . . . . . . . . . . . . . . . . . . . . . . . . . . . . . . . . . 92
Customize sounds. . . . . . . . . . . . . . . . . . . . . . . . . . . . . . . . . . . . . . . . . . . 93
Voice tab in Options . . . . . . . . . . . . . . . . . . . . . . . . . . . . . . . . . . . . . . . . . . . 93
Activation . . . . . . . . . . . . . . . . . . . . . . . . . . . . . . . . . . . . . . . . . . . . . . . . . . . . . . . . . .95
Activation overview. . . . . . . . . . . . . . . . . . . . . . . . . . . . . . . . . . . . . . . . . . . . . . . . 95
CDMA service provider account . . . . . . . . . . . . . . . . . . . . . . . . . . . . . . . . . 95
6 2130548

Contents
Activation Wizard . . . . . . . . . . . . . . . . . . . . . . . . . . . . . . . . . . . . . . . . . . . . . . . . . 96
Activation Wizard - Select Option . . . . . . . . . . . . . . . . . . . . . . . . . . . . . . . . 96
Manual Activation . . . . . . . . . . . . . . . . . . . . . . . . . . . . . . . . . . . . . . . . . . . . . 97
Input Activation Code . . . . . . . . . . . . . . . . . . . . . . . . . . . . . . . . . . . . . . . . 97
Enter Phone Number . . . . . . . . . . . . . . . . . . . . . . . . . . . . . . . . . . . . . . . . 97
Enter Provider Specific Data . . . . . . . . . . . . . . . . . . . . . . . . . . . . . . . . . . 97
Congratulations . . . . . . . . . . . . . . . . . . . . . . . . . . . . . . . . . . . . . . . . . . . . . 97
Voice-Assisted / Automated Activation . . . . . . . . . . . . . . . . . . . . . . . . . . . 98
Troubleshooting . . . . . . . . . . . . . . . . . . . . . . . . . . . . . . . . . . . . . . . . . . . . . . . . . . . .99
Not in Service . . . . . . . . . . . . . . . . . . . . . . . . . . . . . . . . . . . . . . . . . . . . . . . . . . . . 99
Modem is In Use . . . . . . . . . . . . . . . . . . . . . . . . . . . . . . . . . . . . . . . . . . . . . . . . . . 99
SMS Failed . . . . . . . . . . . . . . . . . . . . . . . . . . . . . . . . . . . . . . . . . . . . . . . . . . . . . . . 99
Cannot send or receive SMS . . . . . . . . . . . . . . . . . . . . . . . . . . . . . . . . . . . . . . . . 99
Optimize performance . . . . . . . . . . . . . . . . . . . . . . . . . . . . . . . . . . . . . . . . . . . . 100
Glossary . . . . . . . . . . . . . . . . . . . . . . . . . . . . . . . . . . . . . . . . . . . . . . . . . . . . . . . . . .101
Definitions . . . . . . . . . . . . . . . . . . . . . . . . . . . . . . . . . . . . . . . . . . . . . . . . . . . . . . 101
Rev 0.21 Dec.04 7

Online Help for VZW EM5625 NB
8 2130548

1: The EM5625 wireless modem
About your EM5625
Your EM5625 wireless modem allows you to do the following
(subject to feature availability), without using a wireline phone
or network:
• Connect to the Internet, VPN and corporate networks
• Send and receive e-mail
• Connect to a dial-up service
• Send and receive SMS messages
• Make and receive phone calls
Your EM5625 connects to wireless CDMA networks, providing
data transmission speeds up to 2.4 Mbps.
1
To use the EM5625, you must have an account that gives you
access to the Verizon Wireless VZAccess
Feature availability
The EM5625 provides a wide range of capabilities using
CDMA wireless network technology.
Some features described may not be available with your
network account. For details of the services and accounts
available, contact Verizon.
SM
service.
CDMA networks
The EM5625 provides a variety of connectivity features,
depending on your account:
• BroadbandAccess
known as 1xEV-DO, supports Internet connections with
data rates up to 2.4 Mbps (downlink from the network),
and 153.6 kbps (uplink to the network). Actual speed
depends on the network conditions.
• NationalAccess high-speed packet data, sometimes
known as 1X, supports Internet connections with data
rates up to 153.6 kbps (downlink from the network) and
76.8 kbps (uplink to the network). Actual speed depends
on the network conditions.
• Circuit switched (dial-up) data, using the earlier CDMA
IS-95 specification, supports dial-up data connections at
rates up to 14.4 kbps.
SM
high-speed packet data, sometimes
Rev 0.21 Dec.04 9
Online Help for VZW EM5625 NB
• Quick 2 NetSM provides a simplified way to dial into an
Internet connection (using circuit switched data).
• SMS (Short Message Service) allows you to send and
receive short text messages using the EM5625.
• Vo i ce calling, including E911 (Phase I) support for
emergency services.
Network account and coverage
To use the network, you require a Verizon Wireless account.
The area in which you can obtain CDMA network service is
called the coverage area. To obtain coverage you must:
• Be in proximity to a CDMA network, operating in a
frequency band supported by the modem.
• Have an account that allows you to access that network.
You can make phone calls (subject to feature availability)
wherever you have coverage and the network accepts your
account.
In areas where there is CDMA coverage but no VZAccess
(NationalAccess or BroadbandAccess) service, you can use the
EM5625 for dial-up and Quick 2 Net connections (subject to
feature availability). Where VZAccess is implemented, you can
make NationalAccess or BroadbandAccess high-speed packet
data connections. To determine available services, check the
Connection status area icons.
With roaming service, you can use your account on networks
outside of the Verizon Wireless VZAccess coverage area.
Roaming
An icon in the Connection status area of Watcher indicates
roaming.
You are in a preferred roaming area. If this icon is flashing,
you are in a non-preferred roaming area, and you may not be
able to complete your calls.
You are within your own service provider's network.
You can configure a Service Alert to notify you when your
coverage changes.
>>| Service Alert
10 2130548

The EM5625 wireless modem
System Select (roaming options)
Note: Change the setting ONLY if instructed to do so by your service
provider.
To change the roaming setting:
1. From the
“
System select” drop-down list to select the option recom-
mended by your service provider.
·
Home Only - roaming is not allowed.
·
Home Preferred or Automatic - roam on “preferred” service
provider networks.
·
Automatic A - roaming is allowed on “preferred” service
provider networks and on non-preferred A-side
providers.
·
Automatic B - roaming is allowed on “preferred” service
provider networks and on non-preferred B-side
providers.
2. Click
Network tab of the Options window, use the
OK to save the setting.
WiFi
The Watcher application also allows you to manage and
monitor connections with a WiFi network adapter.
Watcher overview
Watcher for the EM5625 wireless modem is the application
that allows you to manage and monitor the connection
between the EM5625 and the CDMA network.
Without running Watcher, you can make a VZAccess highspeed data connection simply by launching whatever application you want to use (such as your web browser or e-mail
application). Prerequisites: you must have previously enabled,
in Watcher, “Always-on” for the high-speed connection, and
• (If you have enabled auto-launch:) WiFi coverage is either
not available, or is available but no WiFi profiles have been
set to autoconnect.
However, to make use of other features of the EM5625, you
must run Watcher.
Watcher also allows you to manage and monitor connections
with a WiFi network adapter.
Explore:
Rev 0.21 Dec.04 11

Online Help for VZW EM5625 NB
>>| The Watcher Window
>>| Data Services
>>| Text Messaging Services
>>| Voice Services
>>| WiFi Connections
>>| Contact Management
>>| Security
>>| Customization Options
>>| Activation
Interpreting icons
See Connection status area
See Indicator area
See Windows system tray icons
See Call Log
See Review SMS messages
12 2130548
The EM5625 wireless modem
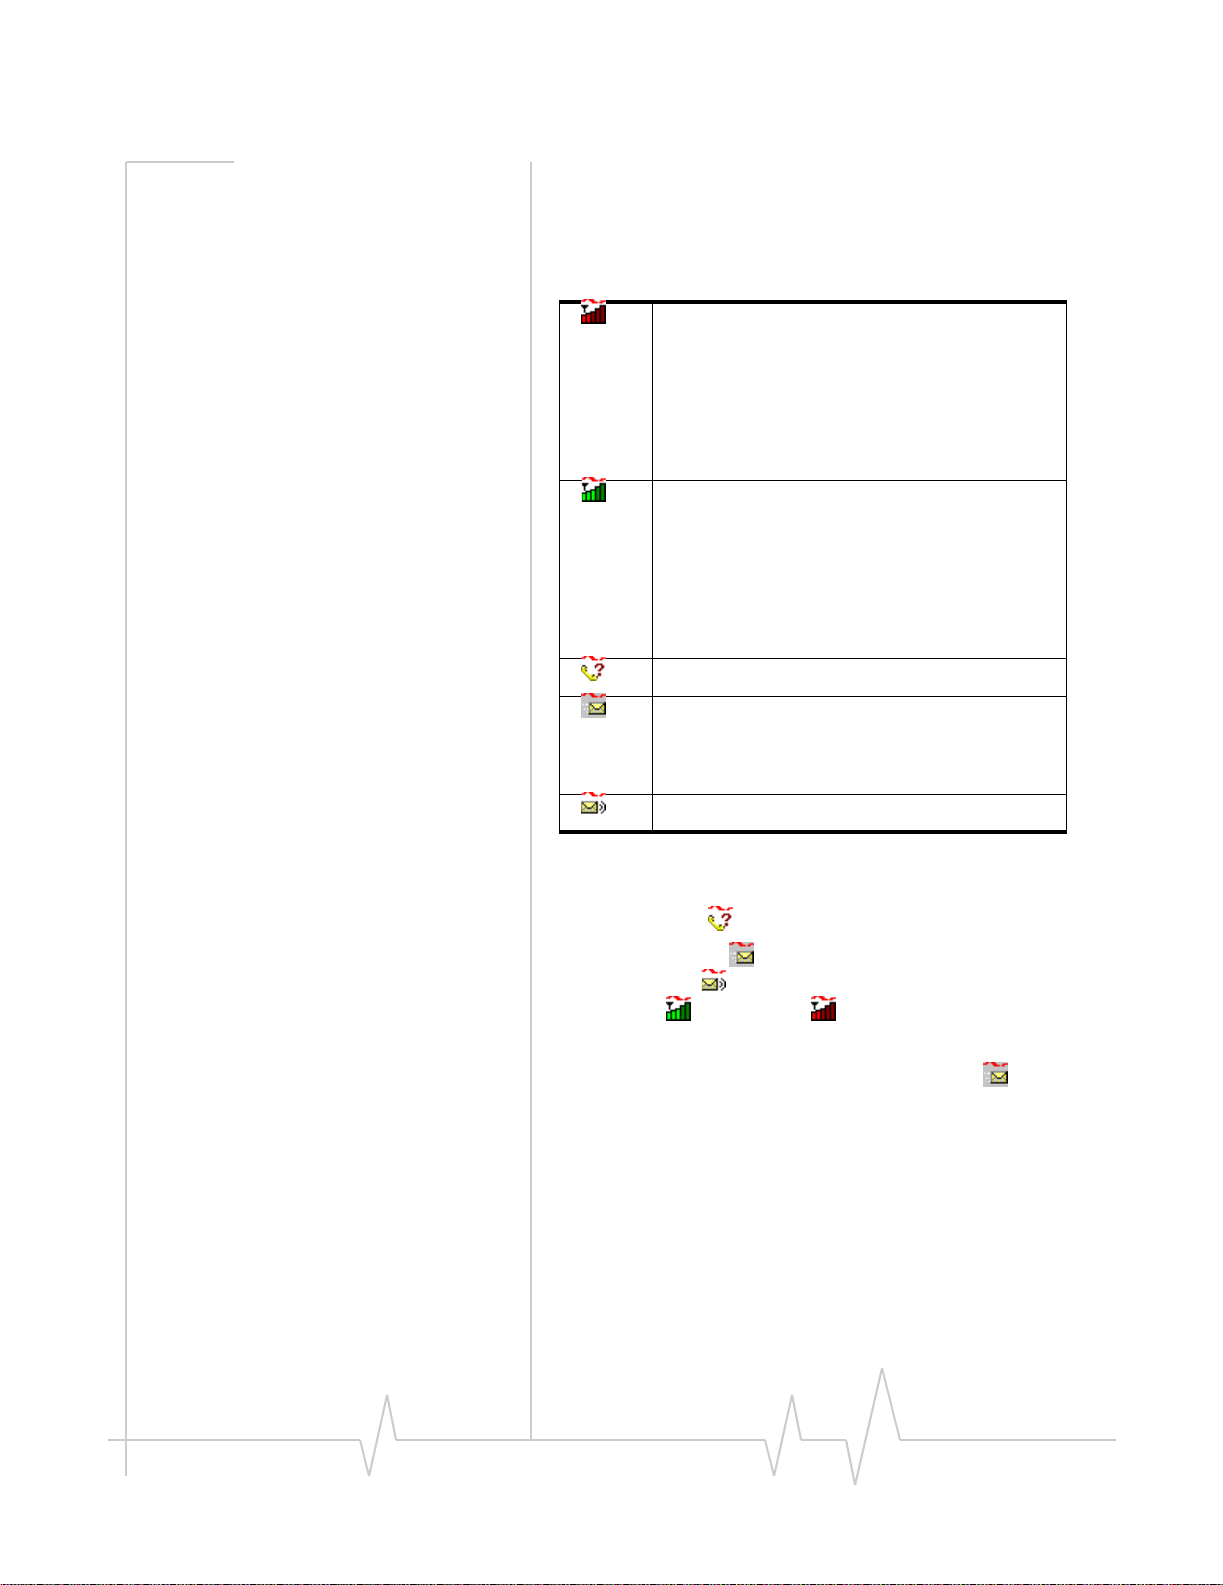
Windows system tray icons
The bottom right of the screen is the Windows system tray.
Watcher places an icon in this area when it is running. Click
the icon to restore a minimized Watcher window.
There is no active data or voice connection.
The number of red bars indicates the signal
strength.
If you have a WiFi network adapter, and the
EM5625 is in service on the CDMA network, the
signal strength is that of the CDMA network. If the
EM5625 is not in service, the signal strength is
that of the WiFi hotspot.
A data or voice connection is active.
The number of green bars indicates the signal
strength.
If you have a WiFi network adapter, and the
EM5625 is in service on the CDMA network, the
signal strength is that of the CDMA network. If the
EM5625 is not in service, the signal strength is
that of the WiFi hotspot.
You have a missed call.
(If you have Outlook integration enabled and
Outlook is running, the following information does
not apply.)
You have a new SMS message.
You have new voice mail.
Only one icon can be displayed at a time. The priority of icons,
from highest to lowest, is:
• Missed call ( )
• SMS message ( )
• Voice mail ( )
• Active ( ) or inactive ( ) data or voice connection.
For example, if you have unread SMS messages, and then
make a connection, the icon is still displayed as (SMS
message).
About EM5625 Watcher
The About EM5625 Watcher window displays:
• Your wireless phone number
• The unit's ESN (Electronic Serial Number)
• Versions of the software, driver, hardware (the modem
itself), and firmware.
Rev 0.21 Dec.04 13

Online Help for VZW EM5625 NB
• Version of the PRL (Preferred Roaming List)
This information may be requested by a technical service
representative.
To display the About... window, select
HELP > About....
14 2130548
2: The Watcher Window
Watcher views
Watcher has two formats: Full view and Compact view.
You can control the Watcher window by:
• Switching between full view and compact view (by using
the view toggle button in the top right, or by selecting
VIEW > Toggle Full/Compact).
• Minimizing Watcher so that the window is closed but the
application remains running. (You can use the icon in the
system tray to determine the status or to restore the
window).
• Enabling/disabling the Docking and Always On Top
features (from the VIEW menu).
Explore:
>>| Display components (full view)
>>| Menus
>>| Interpreting icons
2
Full view
The window includes a display much like a cell phone. The
Status box has three areas that display messages and icons,
including signal strength.
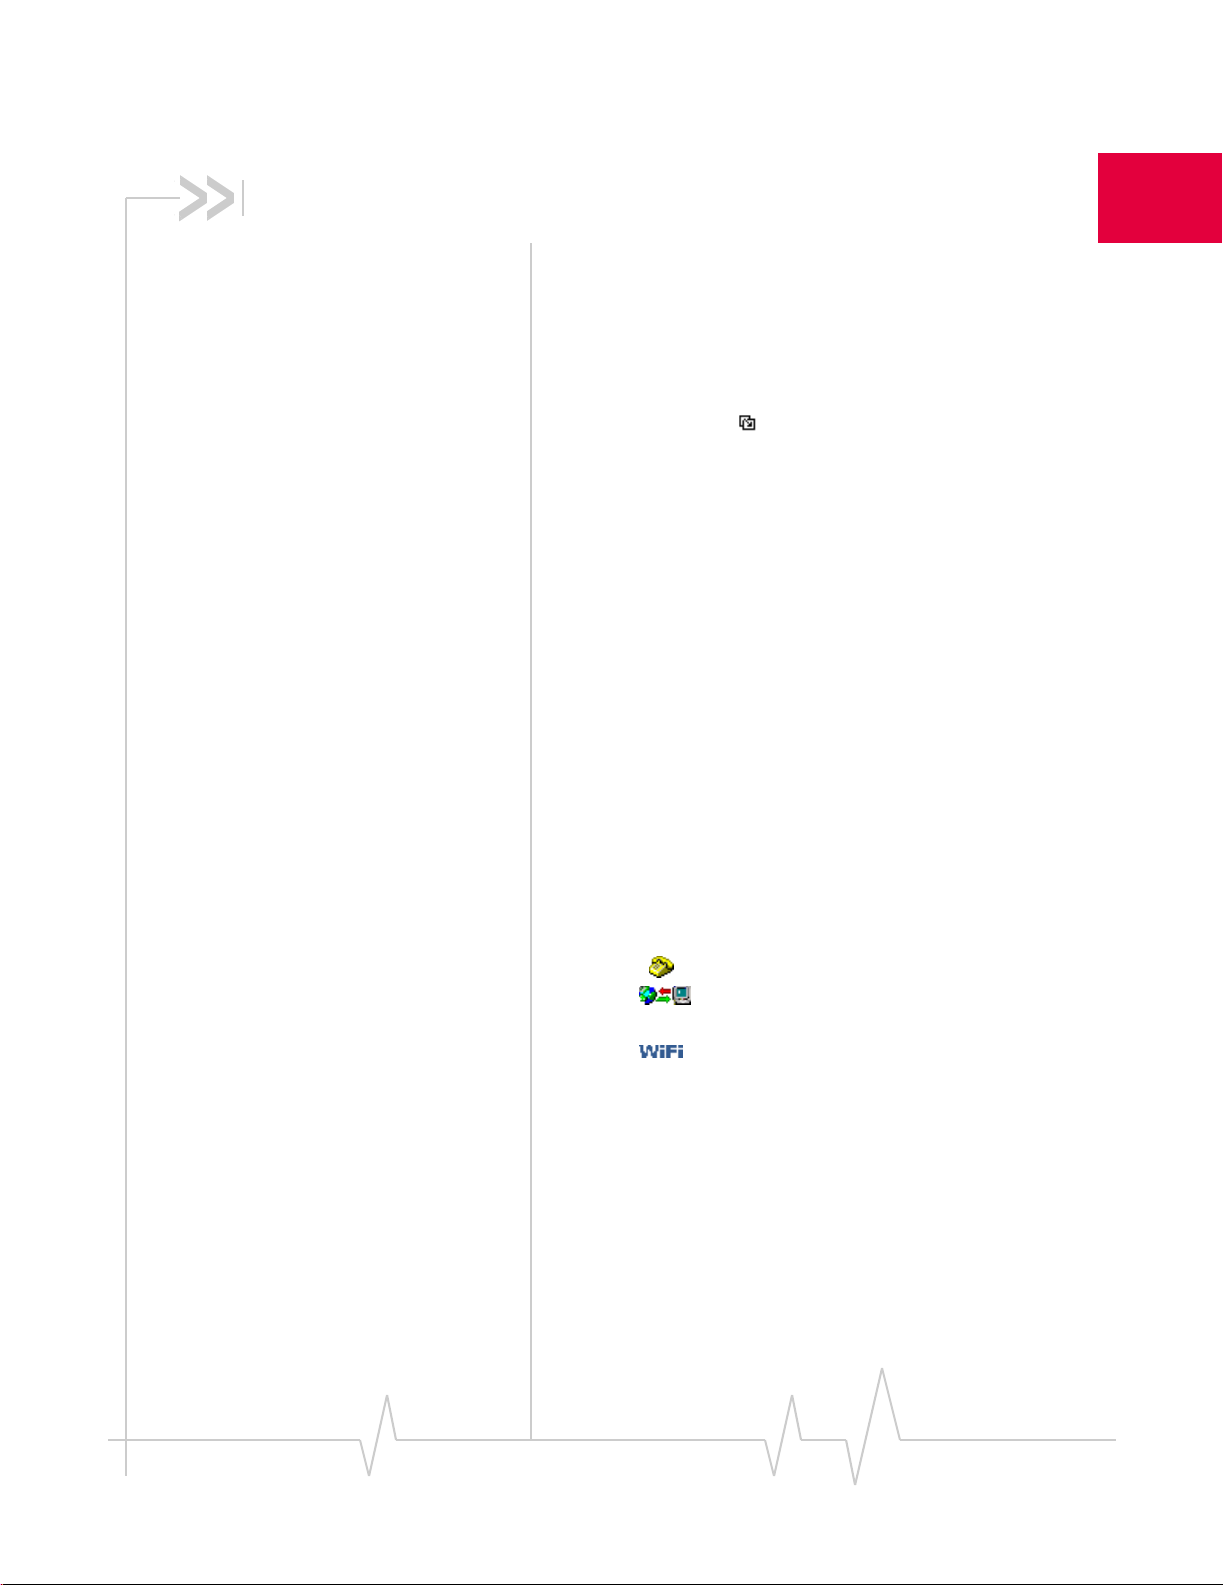
Subject to feature availability, there are several tabs:
•
Voice , with a dial pad for making calls
•
Data , allowing you to connect and disconnect
Internet and dial-up data services
•
WiFi , allowing you to manage and monitor connec-
tions with a WiFi network adapter
There is a menu offering:
Related Topics:
>>| Watcher views
>>| Display components
>>| Compact view
>>| Interpreting icons
VIEW, TOOLS, and HELP.
Rev 0.21 Dec.04 15
Online Help for VZW EM5625 NB
Compact view
The compact view displays only the Connection status area
and Indicator area of the Status box. This permits monitoring
the connection with a minimum of screen space.
You must use Full view to make voice calls, data connections,
disconnect, or access Watcher features. To return to full view,
select the view toggle button in the top right.
If there is an incoming voice call, full view is restored.
Related Topics:
>>| Watcher views
>>| Display components (full view)
>>| Full view
>>| Interpreting icons
Docking
You can set the Watcher window to “jump” to the edge of your
screen when you move the window close to an edge. This lets
you easily position Watcher in a corner of the screen.
• Select
VIEW > Docking
Always On Top
You can set Watcher to always display in front of other
windows. This allows you to monitor connection status while
using another maximized application, such as your web
browser.
• Select
VIEW > Always On Top
Display components
>>| Status box
>>| Connection status area
>>| Call status area
>>| Indicator area
>>| Menus
>>| Data tab
>>| The Voice tab
>>| WiFi tab
16 2130548
The Watcher Window
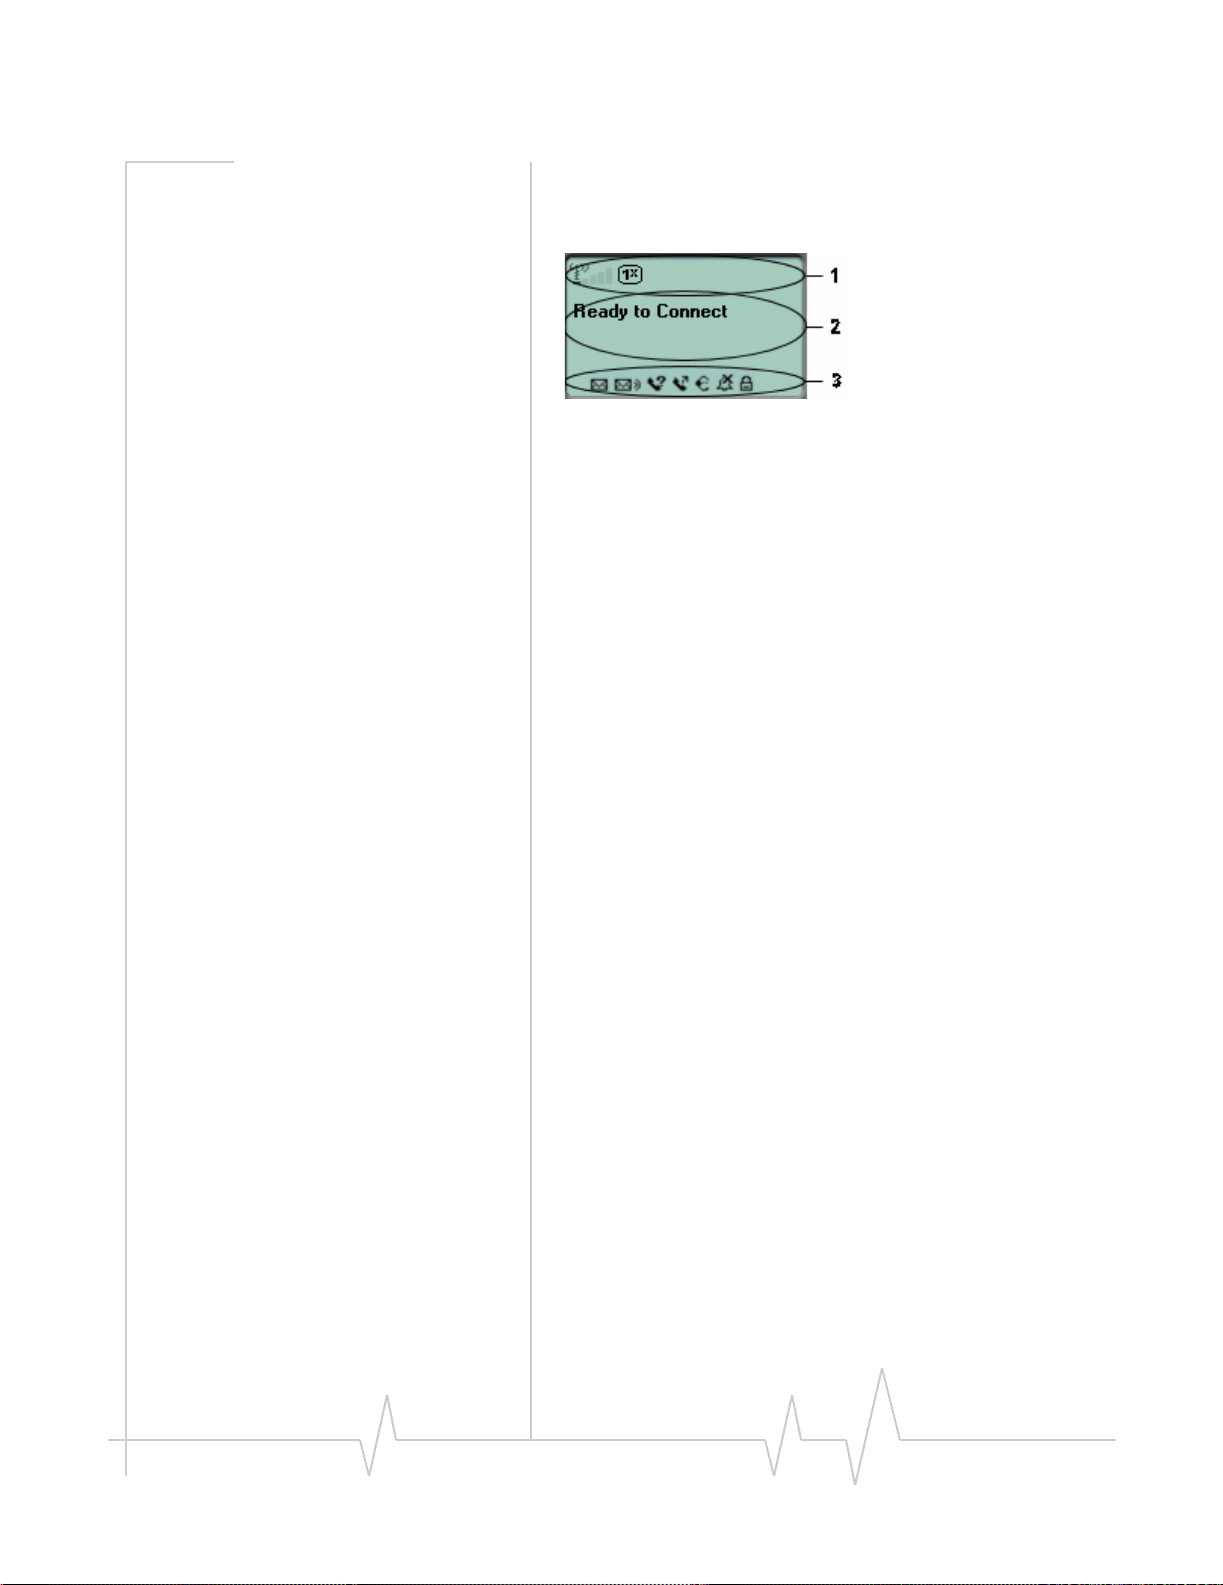
Status box
The status box of Watcher has three areas:
1. Connection status area
2. Call status area
3. Indicator area
Related topic:
>>| Interpreting icons
Rev 0.21 Dec.04 17
Online Help for VZW EM5625 NB
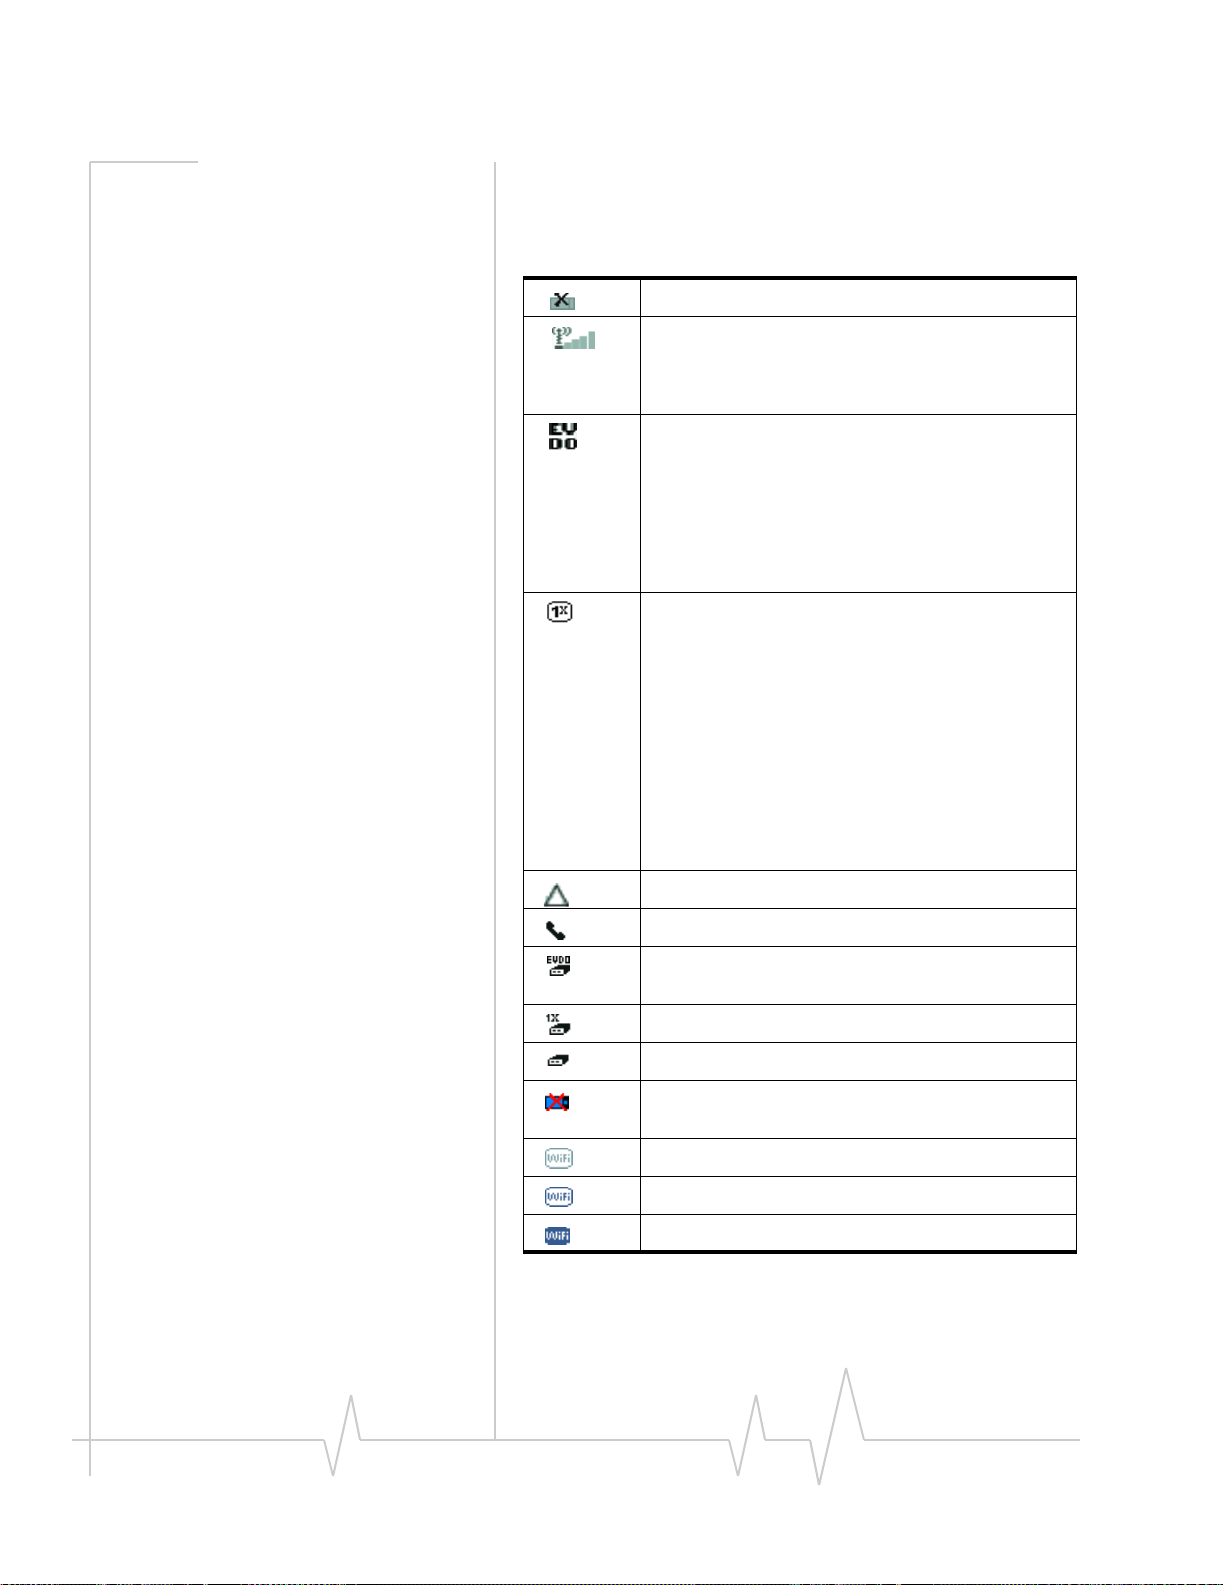
Connection status area
The upper portion of the Status box shows connection icons to
indicate status:
EM5625 not detected.
CDMA network signal strength, indicated by the
number of bars (displayed in the left part of the
connection status area). A crossed out antenna
indicates no service is available (Not in Service).
BroadbandAccess (1xEV-DO) service is available.
High-speed packet data calls can be made.
Note: You may incur a premium charge when placing
a BroadbandAccess data call, depending on your
account.
If high-speed connections fail, or the indicator is not
lit, a data connection may be made using
Quick 2 Net, if supported by your account.
NationalAccess (1X) service is available. High-speed
packet data calls can be made; you can send and
receive SMS.
Note: You may incur a premium charge when placing
a NationalAccess data call, depending on your
account.
If high-speed connections fail, or the indicator is not
lit, a data connection may be made using
Quick 2 Net, if supported by your account.
Note: If you are in an area with 1X voice service but
high-speed packet data service is not available, this
indicator may be on although you cannot make a
high-speed packet data connection.
You are roaming.
A voice call is in progress.
A BroadbandAccess (1xEV-DO) packet data call is
active.
A NationalAccess (1X) packet data call is active.
A dial-up data call is in progress.
WiFi network adapter not detected (displayed in the
right part of the connection status area)
No hotspots are detected (no WiFi coverage).
At least one hotspot has been detected.
You have a WiFi connection.
18 2130548
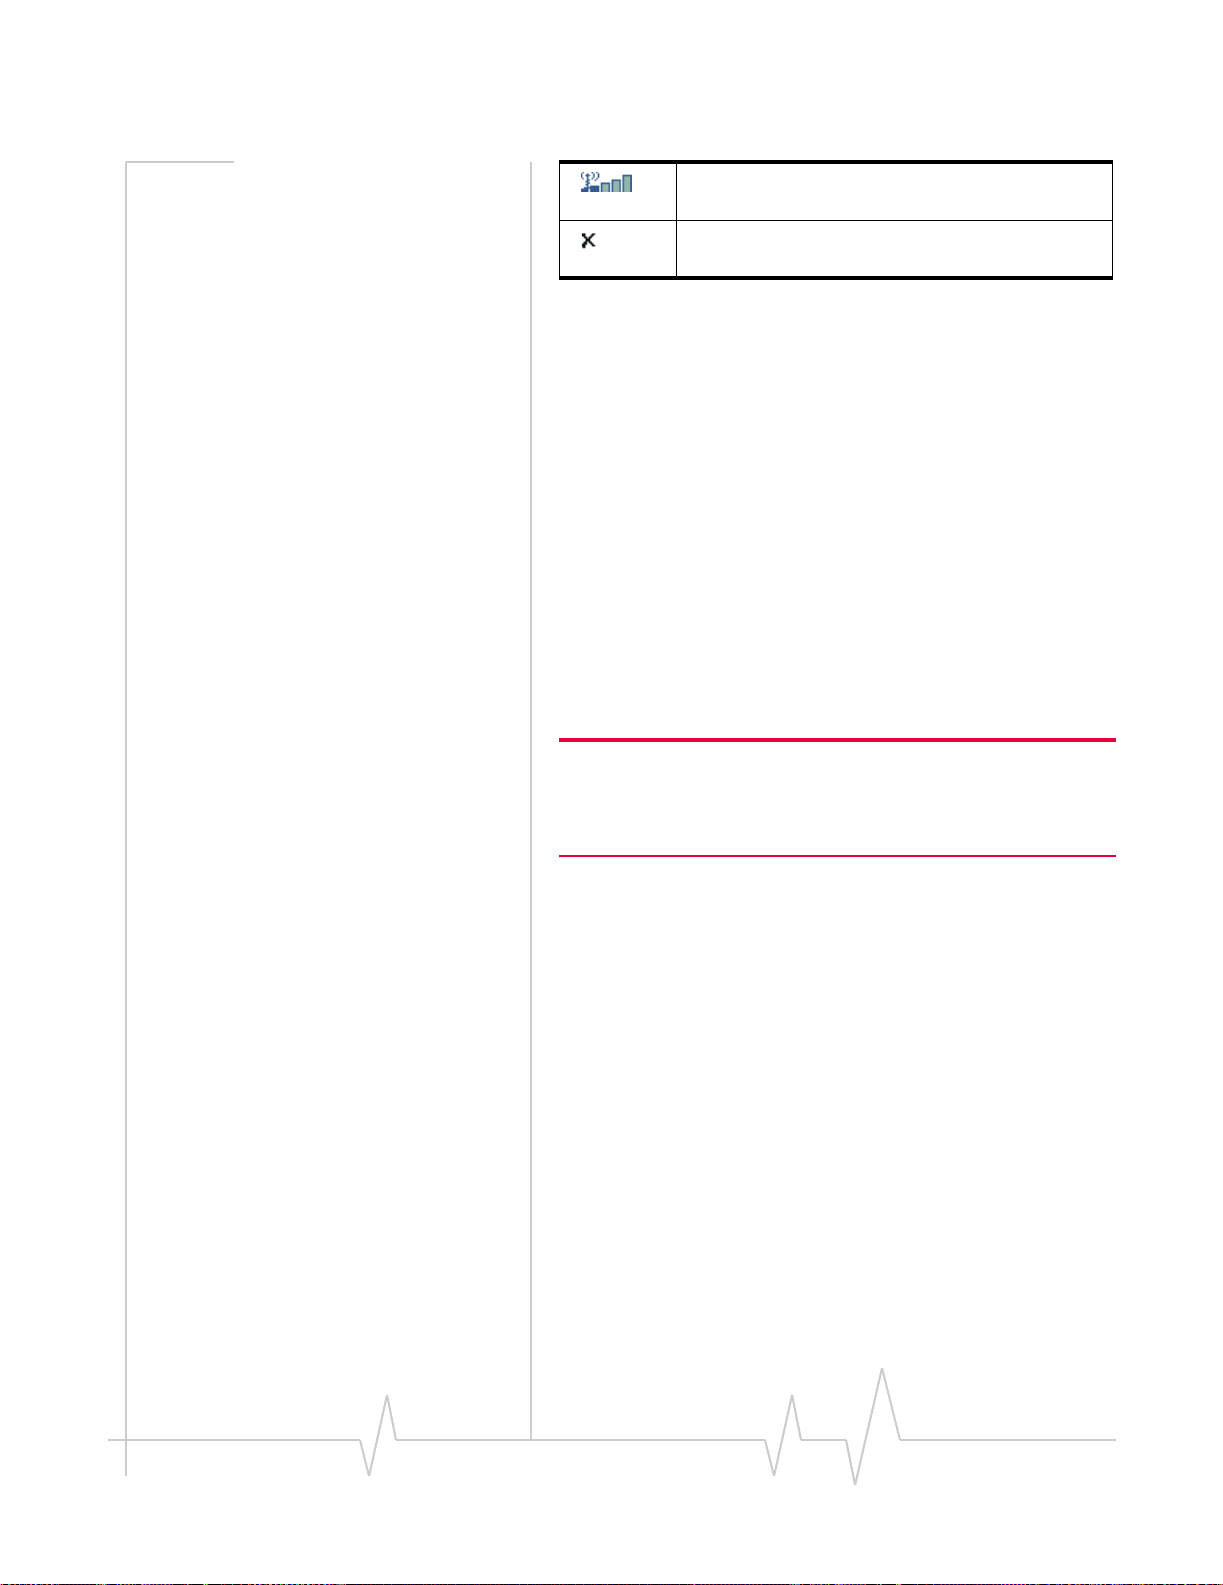
The Watcher Window
WiFi signal strength (displayed in the right part of the
connection status area)
An error has occurred; the device is not working
properly. If this icon persists, reset the device.
Some icons are subject to feature availability.
Call status area
The call status is shown in the central part of the Status box
while in Full view. Information about the current call is
provided as noted below:
Data calls
Subject to feature availability.
• “Ready to connect”
• “
Connecting”, and the connection name and phone number.
• “
Authenticating”
• “
Connecting to Internet” - the wireless device is acquiring an
IP address via DHCP.
• Once connected: duration of the connection, number of
bytes received (Rx), and transmitted (Tx).
Note: Even though the approximate number of bytes sent and
received is displayed while the connection is running, this is not
necessarily the actual amount of data being transmitted across the
network.
WiFi
Subject to feature availability.
• “Ready to connect”
• “
Connecting to” (hotspot name)
• “
Connected to” (hotspot name)
• “
Unable to connect to the Internet”
Voice calls
Subject to feature availability.
• “Ready to connect”
• The phone number as you are entering it
• “
Dialing” and the name (if available) and phone number of
the person you are calling; then, if you are using Link
Dialing, “
Link Dial Mode”
• For incoming calls:
· “
Voice Call From”, or, if you are roaming, “Roam Call
From
”
Rev 0.21 Dec.04 19

Online Help for VZW EM5625 NB
· The name and phone number of the caller (may be
“
Unknown”)
· If the call results in a voice mail message - “
Voice Mail!
”
You have new
· If the call is not answered and no voice message is left -
“
new missed call(s)”
• Once connected: duration of the current connection, name
and phone number.
• “
Muted” flashes when you Mute a call.
You can clear some status messages, if not needed.
Clear status messages
To clear status messages displayed in the Call status area:
• Click in the Call status area, or
• Use the
BACK button on the Voice tab , or
• Press <Esc> on the wireless device’s keyboard
Note: Certain status messages for voice calls cannot be cleared.
Status messages for data calls cannot be cleared.
Related topics:
>>| Clear the Voice Mail icon
>>| Data features
>>| Voice features
>>| WiFi Connections
20 2130548
The Watcher Window
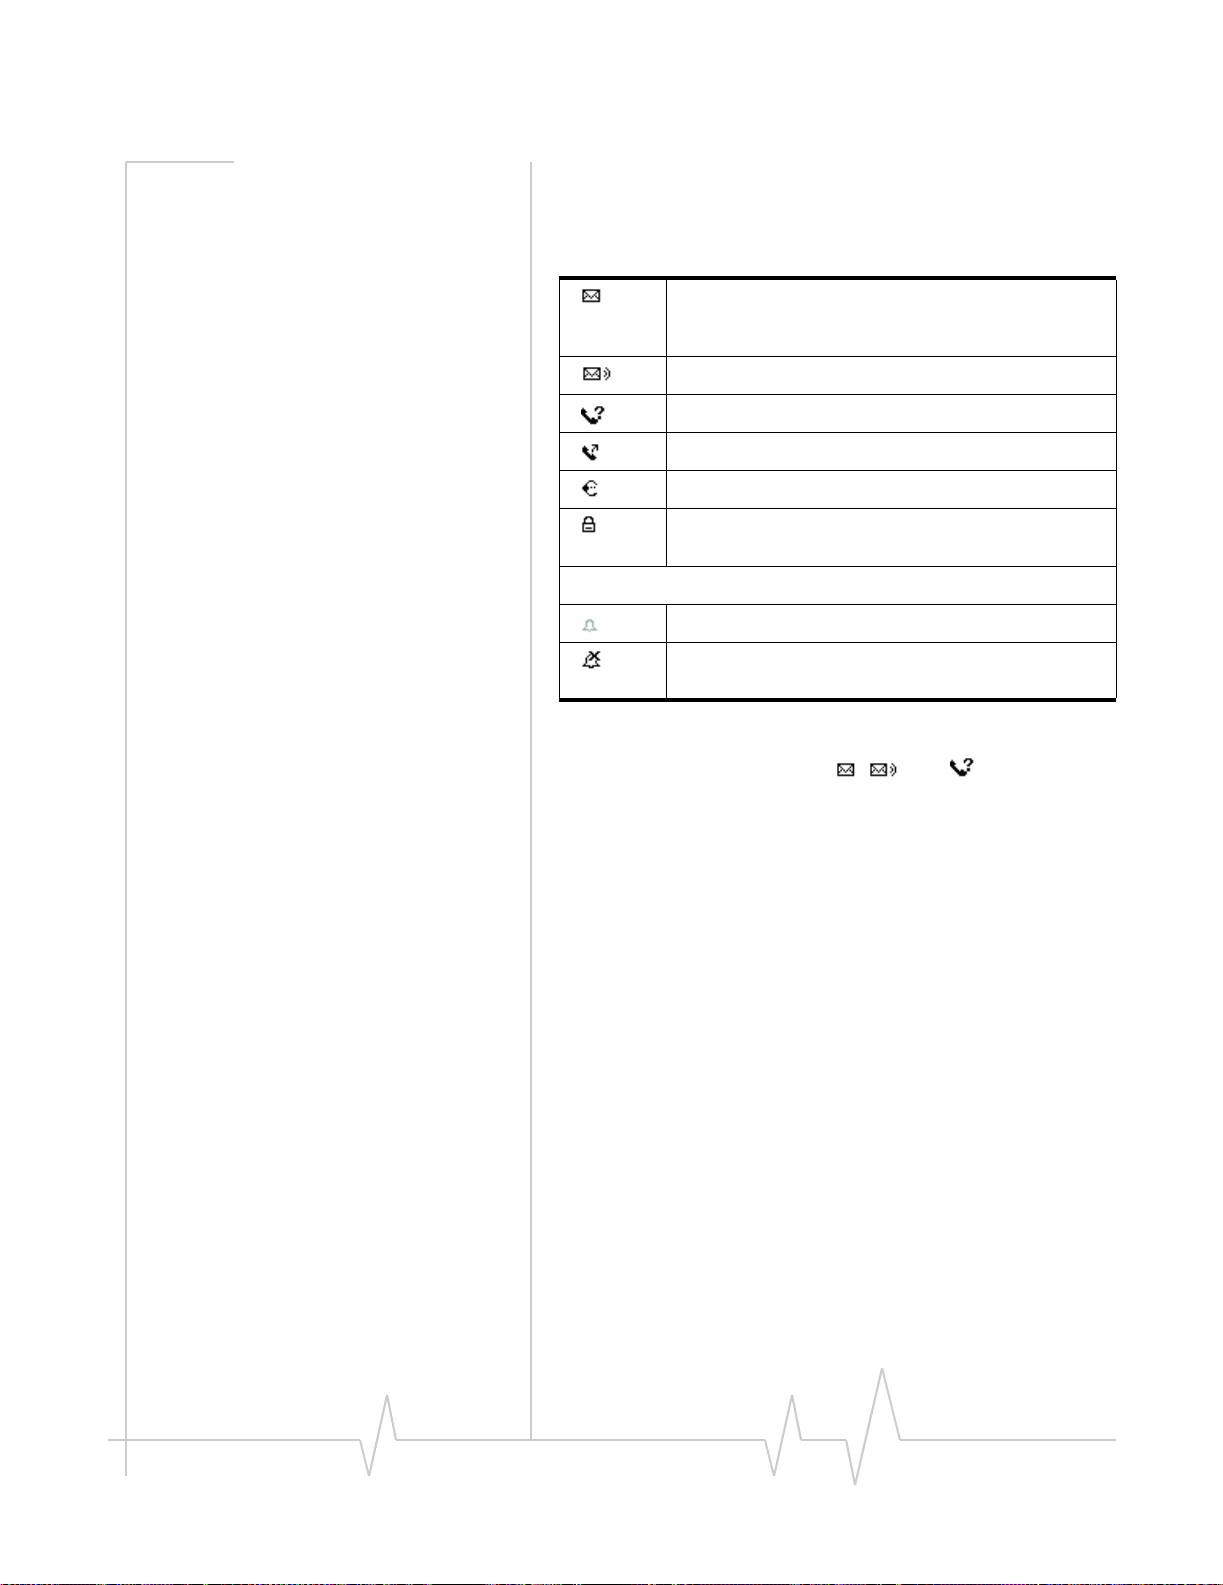
Indicator area
The bottom line of the Status box displays icons for these
events and settings:
(If you have Outlook integration enabled and Outlook
is running, the following information does not apply.)
You have unread SMS messages.
Voice Mail notification
Missed Call notification
Auto-Answer feature enabled
Headset / TTY use (connected)
Call Privacy (Encryption) is on (for voice calls);
automatically enabled when supported by the network
Incoming call notification
Normal ring (the icon is off, indicating normal ringing)
Silent Ring (the icon is on as a reminder that there is
no sound for rings)
Some icons are subject to feature availability.
By selecting some of the icons ( , , and ), you can open
the related window.
Menus
There are three menu options. Select one for additional detail:
>>| VIEW menu
>>| TOOLS menu
>>| HELP menu
VIEW menu
From the VIEW menu, you can control the Watcher window:
• Set the window to be Always On Top
• Enable Docking
• Toggle Full/Compact Watcher views
Rev 0.21 Dec.04 21

Online Help for VZW EM5625 NB
TOOLS menu
Options are subject to feature availability.
From the TOOLS menu, you can call up other windows that
allow you to:
• Read and manage Short text messaging
(Mobile Messenger...) — Unavailable if Outlook Integration is
enabled; for SMS, use Outlook.
• Access your Phone Book
• Use the Call Log
• Manage connection profiles (Connection Manager...)
• Prevent accidental dialing (KeyGuard)
• Access Customization Options
• Start the Activation Wizard
HELP menu
From the HELP menu, you can call up other windows that
allow you to:
• Access this help system (Help Topics)
• View information About EM5625 Watcher
22 2130548
3: Data Services
Data features
Subject to feature availability.
Watcher allows you to:
• Make a VZAccess (NationalAccess or BroadbandAccess)
high-speed packet data connection
• Make a Quick 2 Net circuit switched connection to the
Internet
• Connect to a dial-up server
• Disconnect a data session
Related Topics:
>>| Data tab
>>| Connection Manager
>>| Always-on connection
>>| Automatic data call disconnection
>>| Call Log
3
Data tab
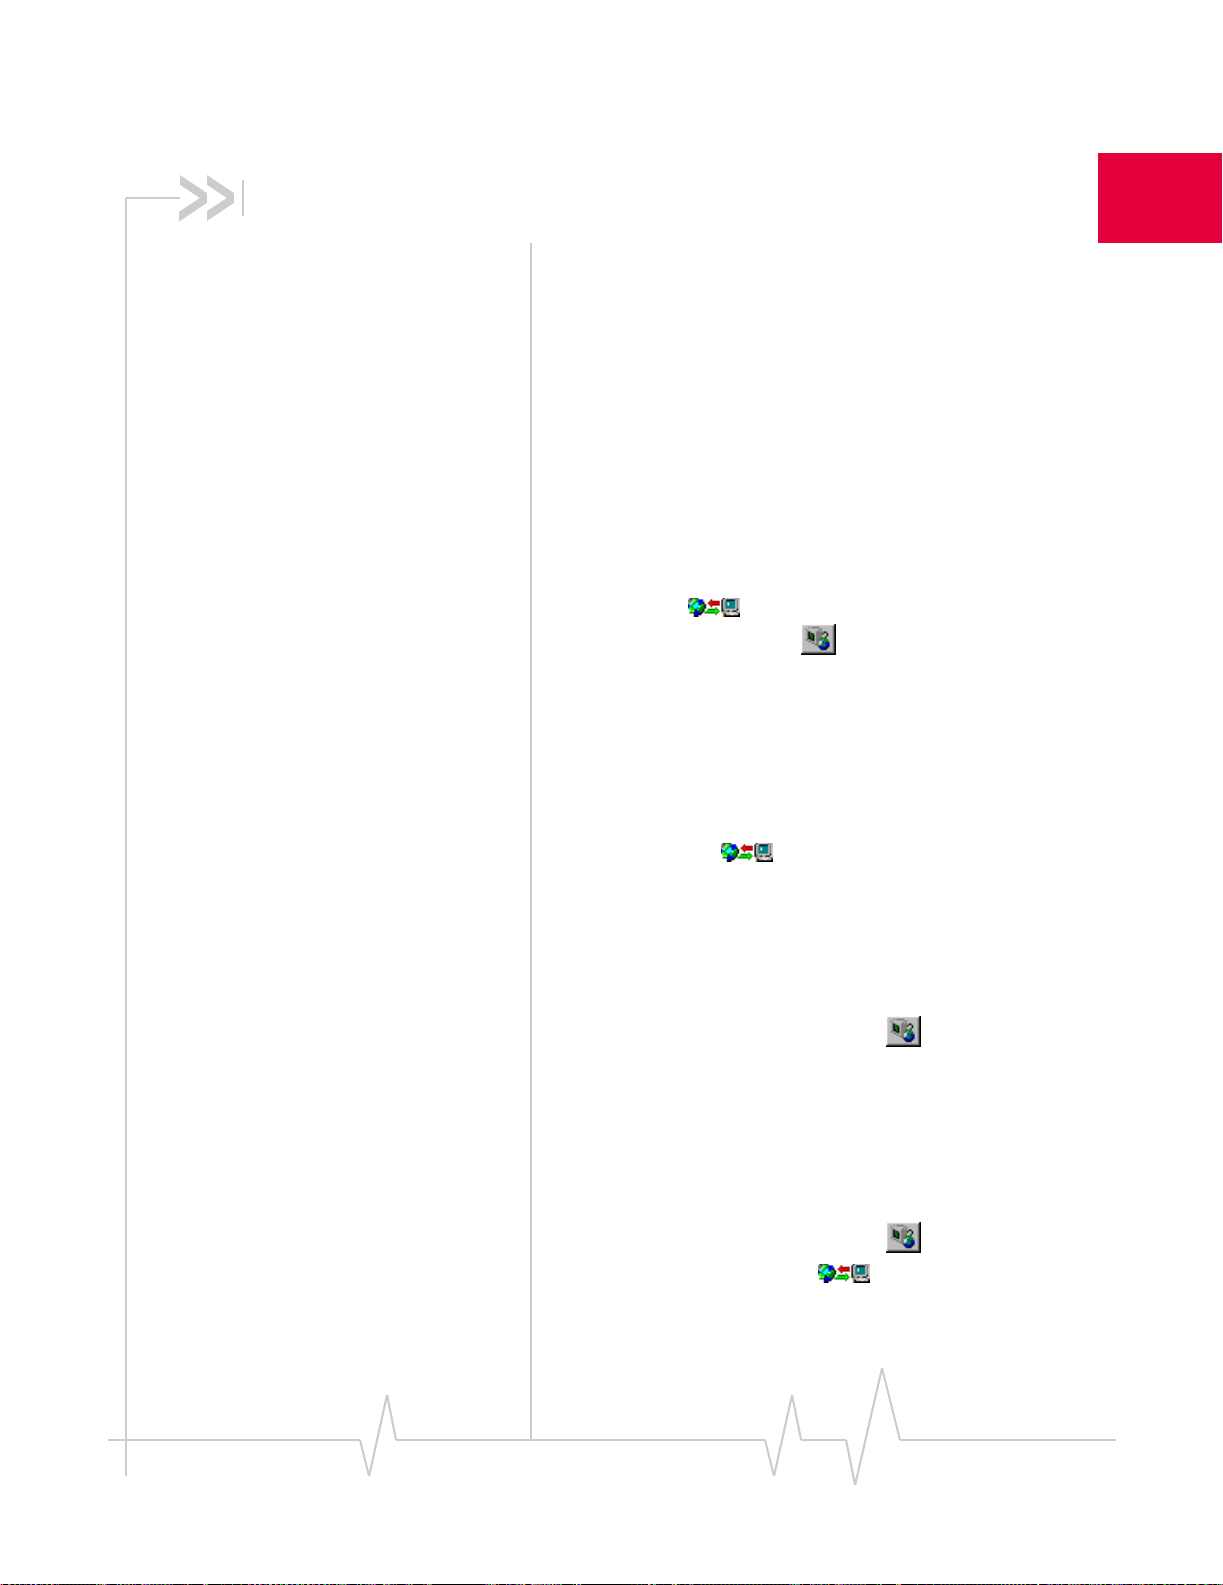
From the Data tab of Watcher, you can:
VZAccess/Dial-up connections:
• Establish a connection using the default profile (
button)
• Select a profile to dial
• End the connection (
• Access the Connection Manager
• (Dial-up/Quick 2 NetSM (14.4kbps) connections only:)
Temporarily override the properties of the selected profile
(the
Dial-Up # field)
WiFi connections:
• Establish a WiFi connection
• End the connection (
• Access the Connection Manager
To access the Data tab, select below the title bar of the
main Watcher window (Full view).
The Call status area displays information about the connection.
Cancel or Disconnect button)
Cancel or Disconnect button)
Connect
Rev 0.21 Dec.04 23
Online Help for VZW EM5625 NB
Note: Depending on the connection status of the EM5625, the text on
the button is Connect, Cancel, or Disconnect.
Connection Manager
Subject to feature availability.
>>| Connection Manager window
>>| Add a data profile (Dial-up connections only)
>>| Connection profile properties
>>| Restore default settings
>>| Default data profile
>>| Delete a data profile
>>| Opening and closing connections
Connection Manager window
Subject to feature availability.
The Connection Manager is used to:
VZAccess/Dial-up connections:
• Create a connection profile (Dial-up connections only)
• Change the properties of a profile
• Delete a profile
• Set a default profile
• Restore default settings
WiFi connections:
• Manage WiFi profiles
• Restore default settings
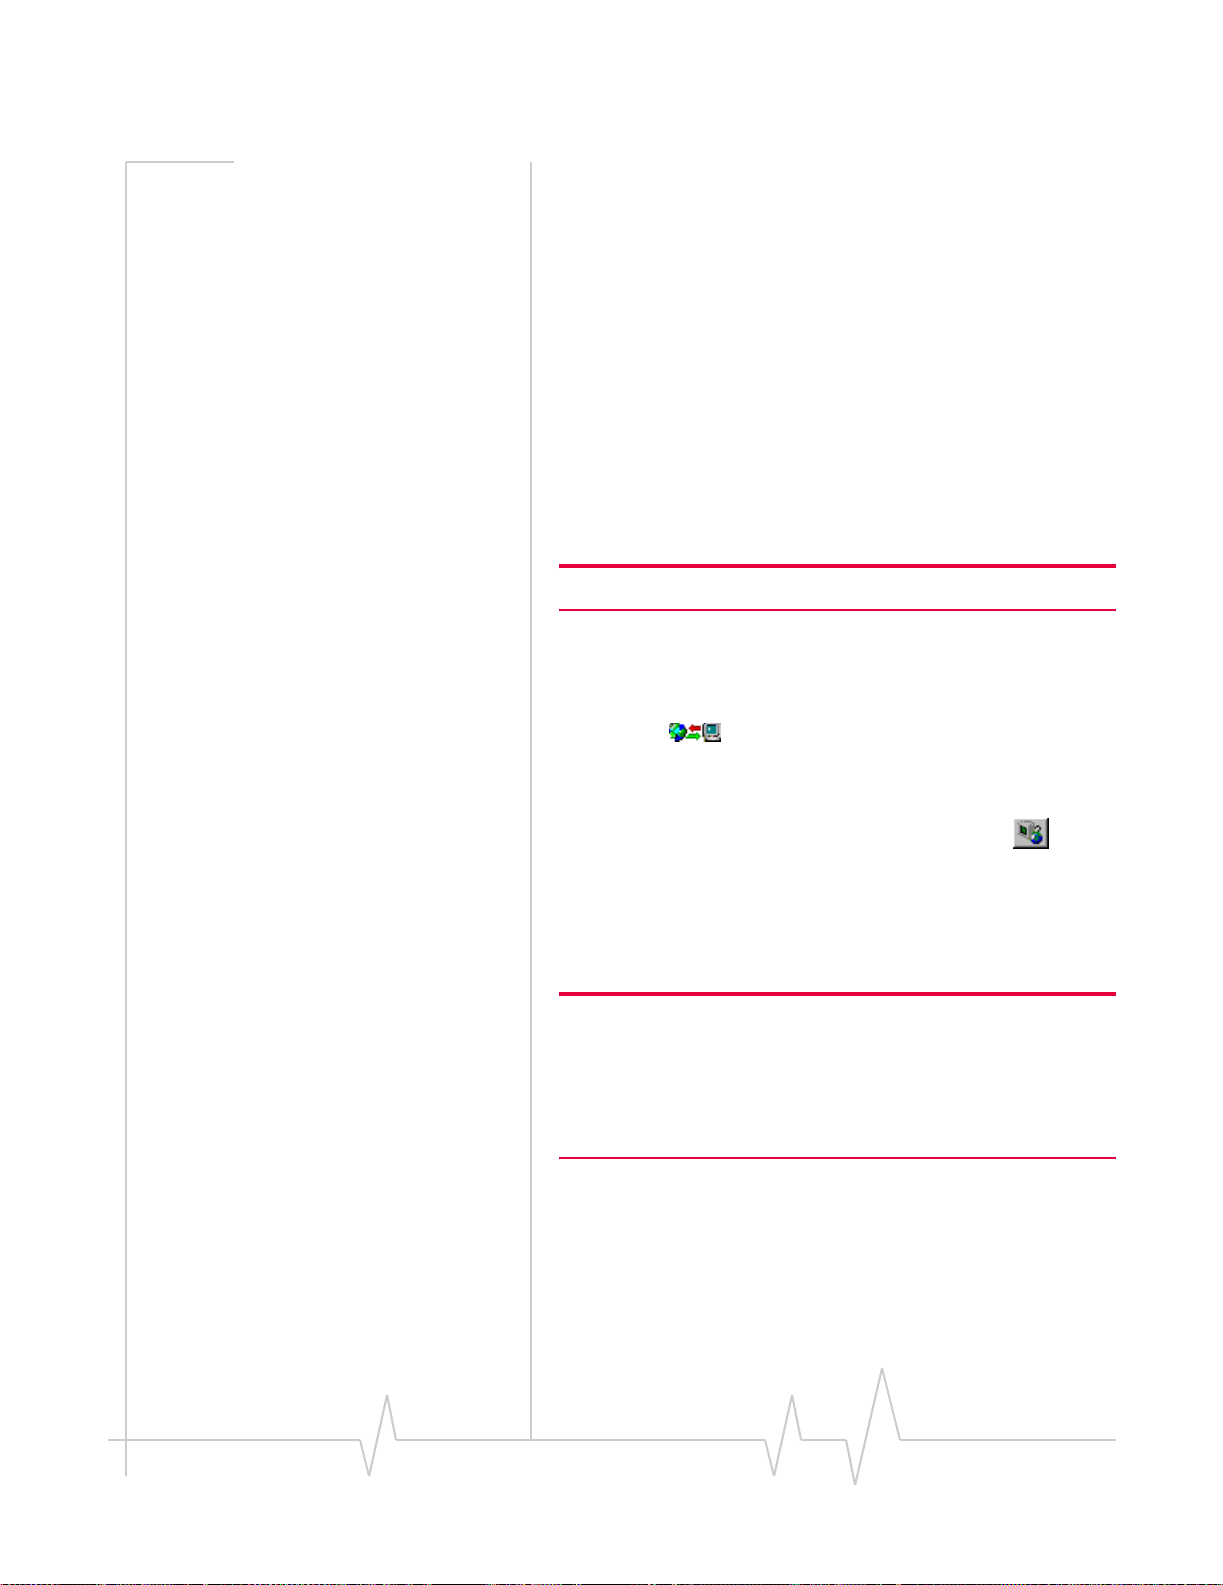
To access the Connection Manager:
• Select
• On the
TOOLS > Connection Manager..., or
Data tab , use the button.
Restrict to default profiles
The data profiles available in Watcher are those defined in
Windows Dial-up Networking (DUN) and attached to the
EM5625 wireless modem.
24 2130548

Data Services
When Watcher starts, it verifies (and creates if needed)
standard profiles appropriate to Verizon Wireless and your
account. If your account includes access to dial-up data
services, you can create custom data profiles.
If you have a large number of defined data profiles, Watcher
may take a long time to initialize. To prevent this, you can
limit Watcher to use only its original default profiles.
1. From the
default connections only
2. Click
Data tab of the Options window, select the “Allow
” check box.
OK to save the setting.
Watcher must be restarted for this setting to take effect.
Add a data profile
Subject to feature availability.
Note: Applies only to dial-up connections. Does not apply to
VZAccess (NationalAccess or BroadbandAccess) connections.
To add a dial-up data profile to your list of profiles:
1. Access the Connection Manager window.
2. Select the
3. Click
Connections tab.
Add to open the profile properties window.
4. Enter the configuration in the profile properties window.
You must give the profile a name.
5. Optionally, select the
Options tab, to set the auto-launch
properties.
6. Click
OK to save the profile.
Related Topic:
>>| Restrict to default profiles
>>| Creating WiFi profiles
Connection profile properties
Note: You cannot change profile properties while there is an active
data connection. You must first disconnect.
To access the properties of a profile:
1. Access the Connection Manager window.
2. Select the
3. Select the profile you want to view.
Connections tab.
Rev 0.21 Dec.04 25

Online Help for VZW EM5625 NB
4. Select Edit.
Editing properties:
• You cannot change the
Connection Name of an existing
profile. (For dial-up connections, youYou can delete the
profile and make a new one.)
• If the number is a long distance number, select the
code
check box to enter the area code. If applicable, select
the
Use 1 check box.
Use area
• If connecting to a system that requires you to log-in, enter
your
Username and Password.
• If you prefer not to enter your password each time you
make this connection, select the “
Save password” check
box.
5. Optionally, select the
Options tab, to set the auto-launch
properties.
6. Click
OK to save the profile.
(Dial-up/Quick 2 NetSM (14.4kbps) connections only:) You
may be able to make a one-time change to the number to be
dialed by using the Dial-Up # field in the main Watcher
window. For example, you can add a “
1” in front of a number
that is normally a local call, but that you are now calling long
distance.
Related Topic:
>>| Restore default settings
Specifying the autolaunch properties for the connection
1. After completing the fields in the General tab of the profile,
you can optionally specify, in the
cation you want Watcher to automatically launch when a
connection is established:
· None—Do not autolaunch any application.
· Webs ite—Autolaunch Internet Explorer. In the URL
field, specify the web site (such as http://
www.sierrawireless.com) you want to view on
connection.
· Microsoft VPN (PPTP) Connection—Autolaunch a
Windows VPN connection. From the drop-down list,
select the VPN connection. (The list may be unavailable,
if you have set, under
Allow default connections only.)
TOOLS > Options> Data, the option
· Application (VPN client, etc.)—Autolaunch an installed
VPN program, or any other program. In the field, enter
Options tab, which appli-
26 2130548
Data Services
the path to the program, or use the Browse button to
locate the program.
2. Select
OK.
Restore default settings
Subject to feature availability.
If you modify the profiles provided with your wireless device,
and then want to restore their initial settings:
1. Access the Connection Manager window.
2. Select the
Connections or the WiFi Profiles tab.
Regardless of which tab you have selected, settings for
both VZAccess/dial-up and WiFi profiles will be restored.
3. Select
Note: This does not affect profiles you have created.
Restore Defaults.
Default data profile
The default profile is used when you use the Connect button in
the
Data tab without making a selection from the drop-
down list of profiles.
To set a profile as the default profile:
1. Select
TOOLS > Connection Manager... or use the
button.
2. Select the
Connections tab.
3. Select the desired profile.
4. Select the
Note: When you launch an Internet application without first starting a
profile using Watcher, the wireless device uses the profile defined
through Start > Settings > Control Panel > Internet Options. Watcher
initially sets this to the profile appropriate to your account. Changing
the default profile in Watcher does not change the wireless device’s
default Internet connection.
Default column.
Related Topics:
>>| Restrict to default profiles
>>| Creating WiFi profiles
>>| Ranking WiFi profiles for autoconnection
Rev 0.21 Dec.04 27
Online Help for VZW EM5625 NB
Delete a data profile
To delet e a pr ofile:
1. Access the Connection Manager window.
2. Select the
3. Select the desired profile.
4. Select
If you delete a profile that is standard with your account, the
profile is re-created the next time you start Watcher.
Related Topics:
>>| Restrict to default profiles
>>| Deleting WiFi profiles
Connections tab.
Delete.
Opening and closing connections
Note: You cannot establish a
data connection if a voice call is
active. You must first end the
voice call.
>>| Establish a data connection
>>| Make a high-speed data connection
>>| Always-on connection
>>| Quick 2 Net
>>| Determine the amount of data transferred
>>| End a data session
Establish a data connection
Connections are made using profiles defined the Connection
Manager.
Using the default profile:
1. In the
Using a profile that is not the default:
1. From the drop-down list in the
2. (Dial-up/Quick 2 NetSM (14.4kbps) connections only:)
Data tab , click Connect, without making a
selection from the drop-down list of profiles.
Data tab of Watcher,
select the profile you want to use.
Optionally, you may be able to make a one-time change to
the number to be dialed (for profiles you create) by using
the Dial-Up # field in Watcher. For example, you can add a
28 2130548
Data Services
“1” in front of a number that is normally a local call, but
that you are now calling long distance.
3. Click
Connect.
The connection progress is displayed in the Call status area.
Related Topics:
>>| End a data session
>>| Default data profile
>>| Always-on connection
>>| Restrict to default profiles
>>| Establishing a WiFi connection
Make a high-speed data connection
Note: You cannot establish a
data connection if a voice call is
active. You must first end the
voice call.
Note: You may incur a premium charge when placing a VZAccess
(NationalAccess or BroadbandAccess) packet data call, depending on
your account.
To make a high-speed packet data connection:
1. Select the
Data tab of Watcher.
2. Ensure high-speed data service is available; the and/or
icon is shown.
3. If your VZAccess profile is not the default profile, use the
drop-down menu to select it.
4. Click
Connect.
The connection progress is displayed in the Call status area.
Related Topics:
>>| End a data session
>>| Default data profile
>>| Determine the amount of data transferred
Always-on connection
Subject to feature availability.
Note: This feature works only with VZAccess (NationalAccess or
BroadbandAccess) packet data connections.
Rev 0.21 Dec.04 29
 Loading...