

Page 1
PVP100 Portable DVD Player
User's Guide
PALSONIC CORPORATION PTY LTD
1 JOYNTON AVENUE
WATERLOO NSW 2017 AUSTRALIA
TEL: (02) 9313 7111
FAX: (02) 9313 7555
www.palsonic.com.au
PALSONIC CUSTOMER SERVICE
TELEPHONE
AUSTRALIA: 1300 657 888
Page 2

Contents
Foreword
Safety Precautions .......................................................................................................
Important Safety Instructions.........................................................................................
Panel & Operation Instruction ......................................................................................
Power Supply ...............................................................................................................
Remote Controller ........................................................................................................
Connection
Connecting to TV .........................................................................................................
Playback in Car ............................................................................................................
Function Illustrations
System Setting .............................................................................................................
Remote Controller Operation .......................................................................................
MP3 Playback ..............................................................................................................
Kodak Picture CD Playback .........................................................................................
JPEG Playback ............................................................................................................
2
3
5
11
13
14
15
16
24
31
33
36
JEPG/WMA Playback ..................................................................................................
Basic Playback
Troubleshooting ............................................................................................................
Specifications ...............................................................................................................
Attachment ...................................................................................................................
Using Remote Controller ..............................................................................................
37
38
39
40
41
1
Page 3
Safety Precautions
CAUTION:
WARNING:
CAUTION
RISK OF ELECTRICAL SHOCK
DO NOT OPEN
THE LIGHTNING FLASH WITH ARROW
HEAD SYMBOL WITHIN AN EQUILATERAL
TRIANGLE IS INTENDED TO ALERT THE
USER TO THE PRESENCE OF
UNINSULATED "DANGEROUS VOLTAGE"
WITHIN THE UNIT'S CABINET THAT MAY
BE OF SUFFICIENT MAGNITUDE TO
CONSTITUTE A RISK OF ELECTRIC
SHOCK TO PERSONS.
THE EXCLAMATION POINT WITHIN AN
EQUILATERAL TRIANGLE IS INTENDED
TO ALERT THE USER TO THE PRESENCE
OF IMPORTANT OPERATING AND
MAINTENANCE (SERVICING)
INSTRUCTIONS IN THE MANUAL
ACCOMPANYING THE UNIT.
THE UNIT EMPLOYS A LASER SYSTEM. TO
ENSURE THE PROPER USE OF THE UNIT,
READ THIS MANUAL CAREFULLY AND
KEEP IT FOR FUTURE REFERENCE.
IF THE UNIT REQUIRES SERVICING, CONTACT
THE SELLER OR OUR SERVICE CENTRE - SEE
"TROUBLE SHOOTING".
TO PREVENT DIRECT EXPOSURE TO THE
LASER RADIATION, DO NOT OPEN THE
CABINET. VISIBLE LASER MAY RADIATE WHEN
THE CABINET OPENED OR THE INTERLOCKS
ARE DEFEATED. DO NOT STARE INTO THE
LASER BEAMS.
CAUTION:
THE DVD VIDEO PLAYER IS A CLASS 1 LASER
PRODUCT. USE OF CONTROLS OR ADJUSTMENTS OR PERFORMANCE OF PROCEDURES
OTHER THAN THOSE SPECIFIED HEREIN MAY
RESULT IN HAZARDOUS RADIATION EXPOSURE.
AS THE LASER BEAM USED IN THIS DVD VIDEO
PLAYER IS HARMFUL TO THE EYES, DO NOT
ATTEMPT TO DISASSEMBLE THE CABINET.
REFER SERVICING TO QUALIFIED PERSONNEL
ONLY.
TO PREVENT FIRE OR ELECTRIC SHOCKS, DO NOT
EXPOSE THE UNIT TO RAIN OR MOISTURE. NEVER
ATTEMPT TO OPEN THE CABINET, DANGEROUS
HIGH VOLTAGES ARE PRESENT IN THE UNIT. REFER
SERVICING TO QUALIFIED SERVICE PERSONNEL.
CAUTION:
TO PREVENT ELECTRIC SHOCKS, MATCH WIDEBLADE PLUG WITH WIDE SLOT, FULLY INSERT.
THE APPARATUS SHALL NOT BE EXPOSED TO
DRIPPING OR SPLASHING AND THAT NO OBJECTS
FILLED WITH LIQUIDS SUCH AS VASES SHALL BE
PLACED ON THE APPARATUS.
WARNING:
FCC REGULATIONS STATE THAT ANY CHANGE
OR MODIFICATION TO THE EQUIPMENT, NOT
EXPRESSLY APPROVED BY MAKER OR ITS
AUTHORISED PARTIES, COULD VOID USERS
AUTHORITY TO OPERATE THIS EQUIPMENT.
Remark
PLEASE WRITE DOWN THE MODEL NO. AND
SERIAL NO. PRINTED ON THE REAR PANEL
AT THE BLANK BELOW.
Model No.
Serial No.
2
Page 4

Important Safety Instructions
1. READ INSTRUCTIONS
All the safety and operating instructions should
be read before the product is operated.
2. KEEP INSTRUCTIONS
The safety and operating instructions should be
retained for future reference.
3. HEED WARNINGS
All warnings on the unit and in the operating
instructions should be adhered to.
4. FOLLOW INSTRUCTIONS
All operating and use instructions should be
followed.
5. CLEANING
Unplug this product from the wall outlet before
cleaning. Do not use liquid cleaners or aerosol
cleaners. Use a damp cloth for cleaning.
6. ATTACHMENTS
Do not use attachments not recommended by the
product manufacturer as they may cause hazards.
7. WATER AND MOISTURE
Do not use this product near water for example,
near a bathtub, wash bowl, kitchen sink or laundry
tub; in a wet basement, or near a swimming pool;
and the like.
8. ACCESSORIES
Do not place this product on an unstable cart, stand,
tripod, bracket, or table. The product may fall,
causing serious injury to a child or adult and serious
damage to the product. Use only with a cart, stand,
tripod, bracket, or table recommended by the
manufacturer or sold with the product. Any mounting
of the product should follow the manufacturer's
instructions, and should use a mounting accessory
recommended by the manufacturer.
9. VENTILATION
Slots and openings in the case are provided for
ventilation to ensure reliable operation of the
product and to protect it from overheating. and these
openings must not be blocked or covered. These
openings should never be blocked by placing the
product on a bed, sofa, rug, or other similar surface.
This product should not be placed in a built-in
installation such as a bookcase or rack unless proper
ventilation is provided or the manufacturer's
instructions have been adhered to.
10. POWER SOURCES
This product should be operated only from the type
of power source indicated on the marking label. If
you are not sure of the type of power supply to your
home, consult your product dealer or local power
company. For products intended to operate from
battery power, or other sources, refer to the operating
instructions.
11. GROUNDING OR POLARISATION
This product may be equipped with a polarised
alternating current line plug (a plug having one blade
wider than the other). This plug will fit into the power
outlet only one way. This is a safety feature. If you
are unable to insert the plug fully into the outlet, try
reversing the plug. If the plug still fails to fit,
contact your electrician to replace your obsolete
outlet. Do not defeat the safety purpose of the
polarised plug.
12. POWER-CORD PROTECTION
Power supply cords should be routed so that they are
not likely to be walked on or pinched by items placed
upon or against them, paying particular attention to
cords at plugs, convenience receptacles, and the point
where they exit from the unit.
13. LIGHTNING
For added protection for this product during a
lightning storm, or when it is left unattended and
unused for long periods of time, unplug it from the
wall out let and disconnect the antenna or cable
system. This will prevent damage to the product due
to lightning and power lines surges.
3
Page 5

Important Safety Instructions
14. OVERLOADING
Do not overload wall outlets, extension cords, or
integral convenience receptacles, as this can result
in a risk of fire or electric shock.
15. OBJECT AND LIQUID ENTRY
Never push objects of any kind into this product
through openings as they may touch dangerous
voltage points or short-out parts that could result
in a fire or electric shock. Never spill liquid of any
kind on the product.
16. SERVICING
Do not attempt to service this product yourself as
opening or removing covers may expose you to
dangerous voltage or other hazards. Refer all
servicing to qualified service personnel.
17. DAMAGE REQUIRING SERVICE
Unplug this product from the wall outlet and refer
servicing to qualified service personnel under the
following conditions:
A) When the power-supply cord or plug is
damaged,
B) If liquid has been spilled, or objects have fallen
into the product,
C) If the product has been exposed to rain or
water,
D) If the product does not operate normally by
following the operating instructions. Adjust only
those controls that are covered by the
operating instructions as an improper
adjustment of other controls may result in
damage and will often require extensive work
by a qualified technician to restore the product
to its normal operation,
E) If the product has been dropped or damaged in
anyway, and
F) When the product exhibits a distinct change in
performance this indicates a need for service.
19. SAFETY CHECK
Upon completion of any service or repairs to this
product, ask the service technician to perform
safety checks to determine that the product is in
proper operating condition.
20. HEAT
The product should be situated away from heat
sources such as radiators, heat registers, stoves,
or other products (including amplifiers) that
produce heat.
18. REPLACEMENT PARTS
When replacement parts are required, be sure the
service technician has used replacement parts
specified by the manufacturer or have the same
characteristics as the original part. Unauthorised
substitutions may result in fire, electric shock, or
other hazards.
4
Page 6
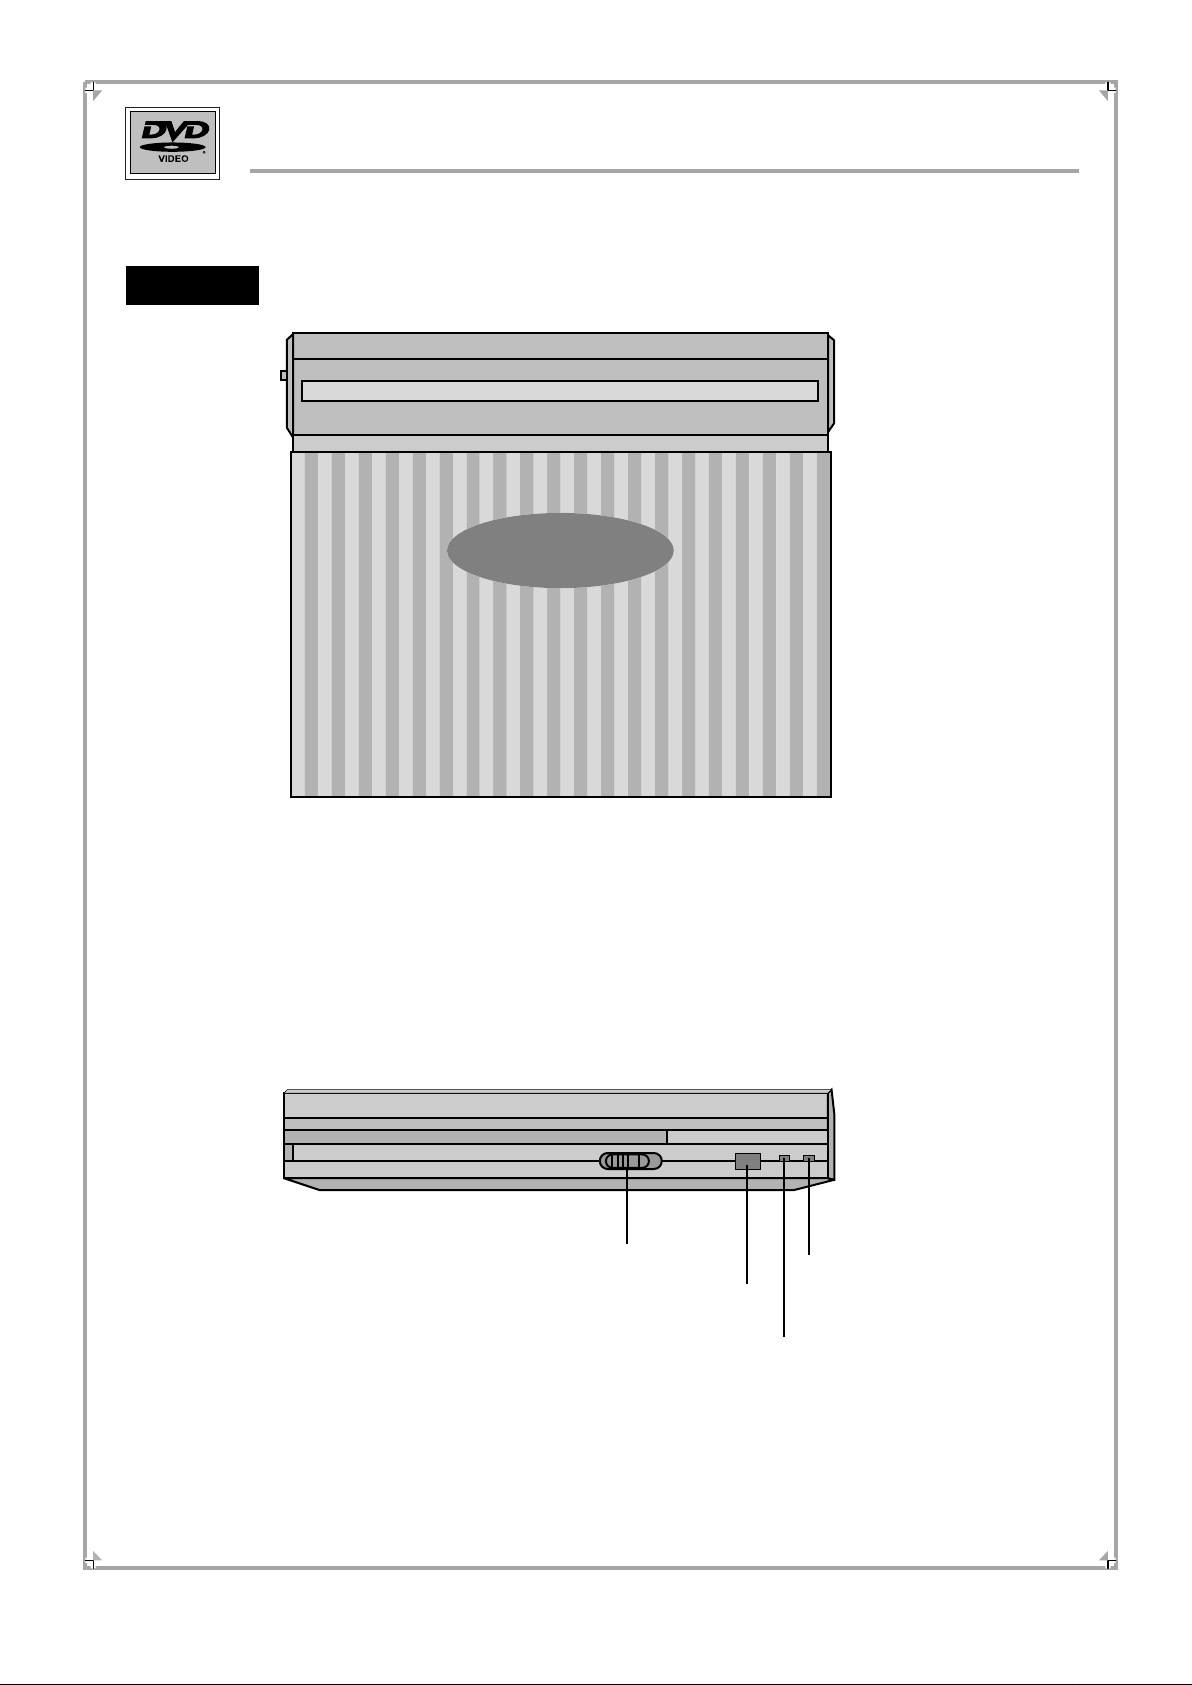
Topper
Panel Instruction
Screen lock
Remote receiver
Instructor for Charge
5
Instructor for Stand by
Page 7
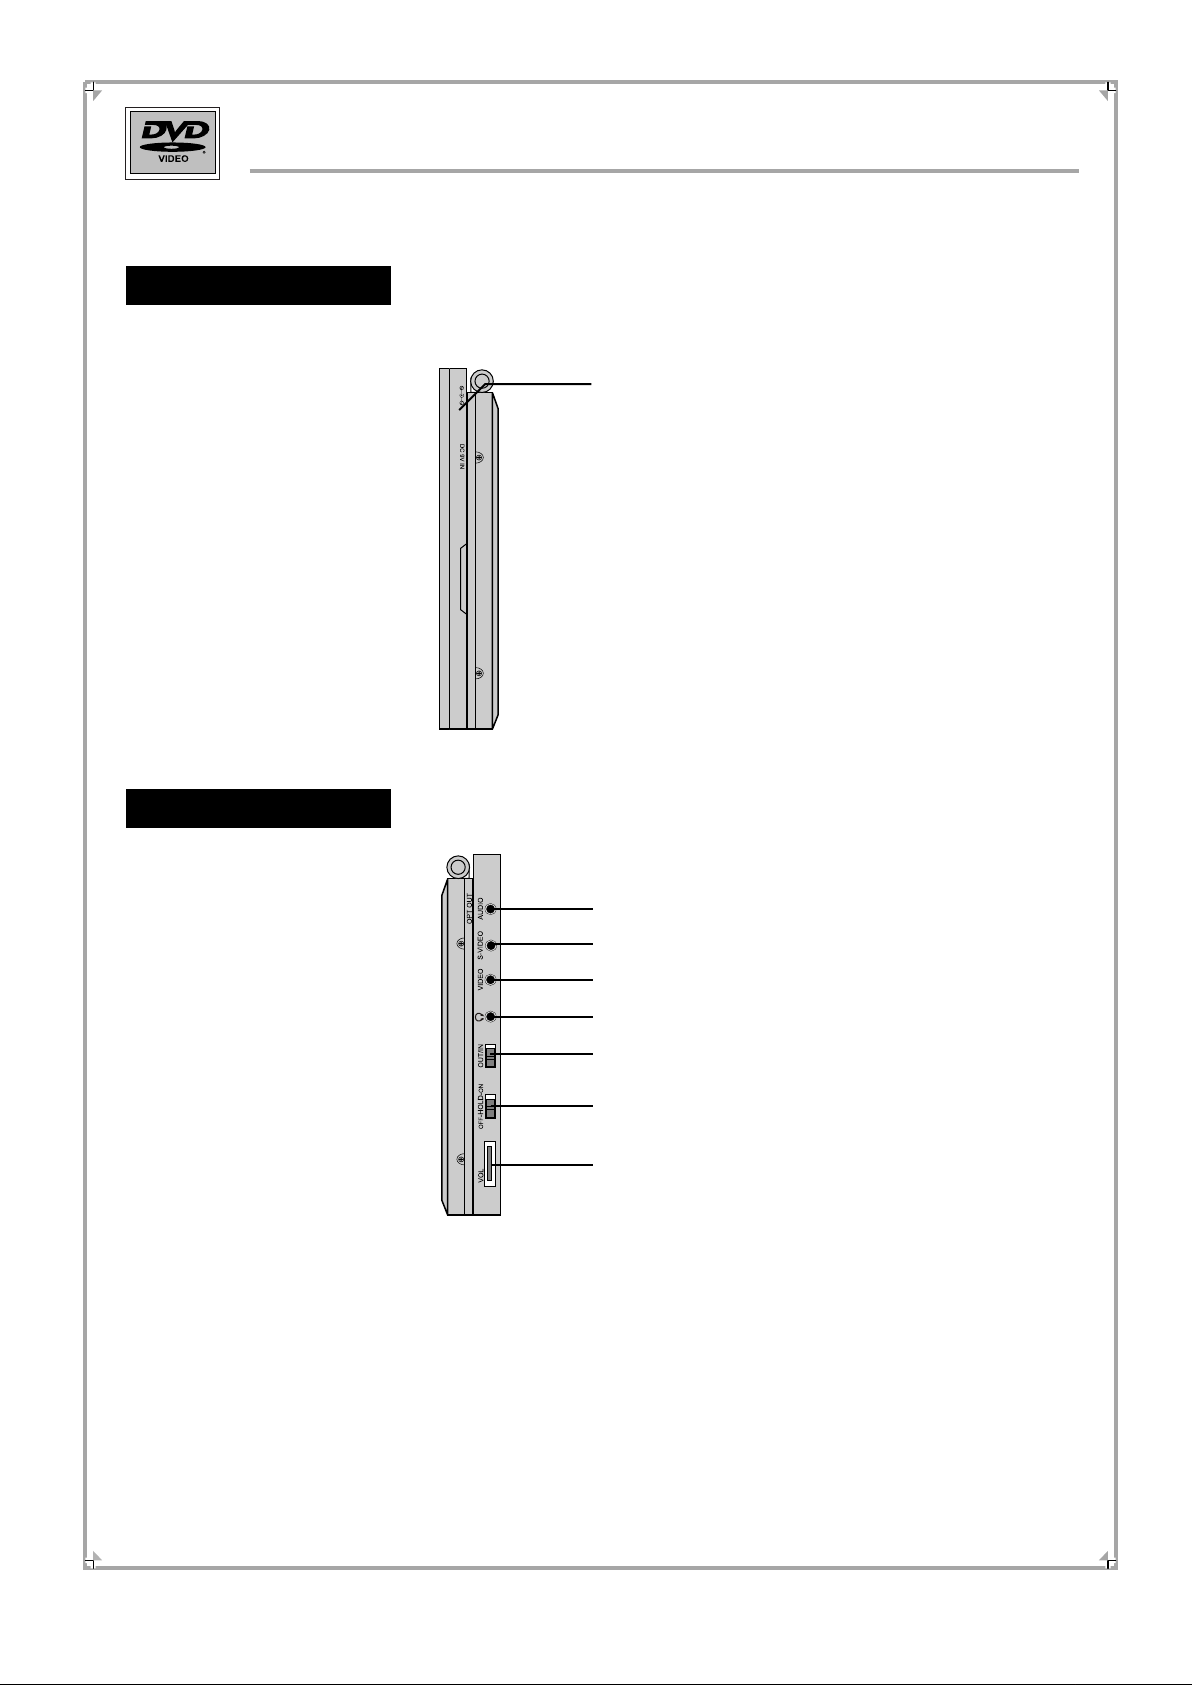
Panel Instruction
Input and Output
9V Power Input
Input and Output
NOTE:
Optical Digital Audio/Analog Audio Output
S-Video Output
Composite Video Input/Output
Earphone Output
Video Input & Output Select
Key hold on/off
Volume
This player can also be used as a monitor. Please set the IN/OUT switch as IN,
then you can input the CVBS signal by video jack and display on the TFT-LCD panel.
6
Page 8

Panel Instruction
4
3
2
16
10
12
17
5
6
7
8
9
11
11
13
15
1
1
Open button
3
Speakers
5
Monitor adjustment button
7
Title button
9
Status button
Previous/Fast Backward button
Pause button
Playback button
10
12
14
16
2
Disc topper
4
LCD Screen
6
Stand by/on button
8
Menu button
Next/Fast Forward button
Enter and Arrow button
Stop button
Mini display
13
14
15
17
Power switch for the screen
7
Page 9

Panel Operation Instruction
Set the OFF-HOLD-ON switch as OFF, and set the OUT/IN switch as OUT status,
then the panel operation will be available.
1. Press OPEN button to open the cover, and load the disk.
2. Press STAND BY/ON button to turn on the player. The player will play the disc
automatically.
3. Press PAUSE button, the playback will be paused, the mini screen display:
press PAUSE continuously, the movie will be played by Step mode, press PLAY to
resume.
4. Press STOP button, the LCD screen will display the Power Up logo, the mini screen
will display: the LCD screen will display. Please press PLAY to resume.
5. Press PREVIOUS button once to jump to the beginning of the track or chapter, press it
again to jump to previous track or chapter, press and hold it continuously, the movie will
be backward played as the order: 2X, 4X, 8X. 16X 32X.
6. Press NEXT button to jump to next track or chapter, press it and hold it continuously,
the movie will be forwards played as the order: 2X, 4X, 8X. 16X 32X.
7. Press MENU button the LCD screen will display the menu of disc, and the mini screen
will display or
8. Press TITLE button to display the Title menu of your disc.
NOTE: It is available only for DVD.
9. Press MONITOR button to display some optional display mode, push the little ball
LEFT or RIGHT to switch 4:3 6:9 or Screen Power Off mode.
If you want to adjust the colour ,brightness and contrast of LCD, please press MONITOR
continuously to show the current colour ,brightness and contrast status and push the
arrow ball LEFT or RIGHT to adjust.
8
Page 10
Panel Operation Instruction
9. During VCD or SVCD playback. Press the STATUS button on the player,
the screen will display:
Preview Window
Menu
Track
Disc time
Track time
Repeat
Bit rate 71
Press button to highlight the item you want to adjust, then press ENTER to
confirm.
Track:
Disc time:
Track time:
Repeat:
Time:
Instructor of the total tracks number and the current track number.
Instructor of the time has been played of the whole disc.
Instructor of the time of the current track.
Instructor of the status of repeat. (PBC is OFF).
Instructor of the time has been played of the current track.
Elapsed time of title 0:01:37
04/16
1:05:48
0:03:13
Off
9
Page 11
Panel Operation Instruction
During DVD playback, press STATUS button, the LCD screen will display:
Preview Window
Menu
Title
Chapter
Audio
Subtitle
Bit rate 45
Show type of Disc
Press button to highlight the item you want to adjust, press ENTER to confirm.
Title:
Chapter:
Audio:
Subtitle:
Angle:
Title time:
Chapter time:
Repeat:
Time Disp:
Instructor of the current title.
Instructor of the current chapter.
Instructor of the current audio.
Instructor of the current subtitle.
Instructor of the current angle.
Instructor of the time of current title.
Instructor of the time has been played of current chapter.
Instructor of the current status of repeat.
Instructor of the time has been played of current title.
Elapsed time of title 0:11:42
01/01
09/16
5.1CH
Off
10
Page 12
Power Supply
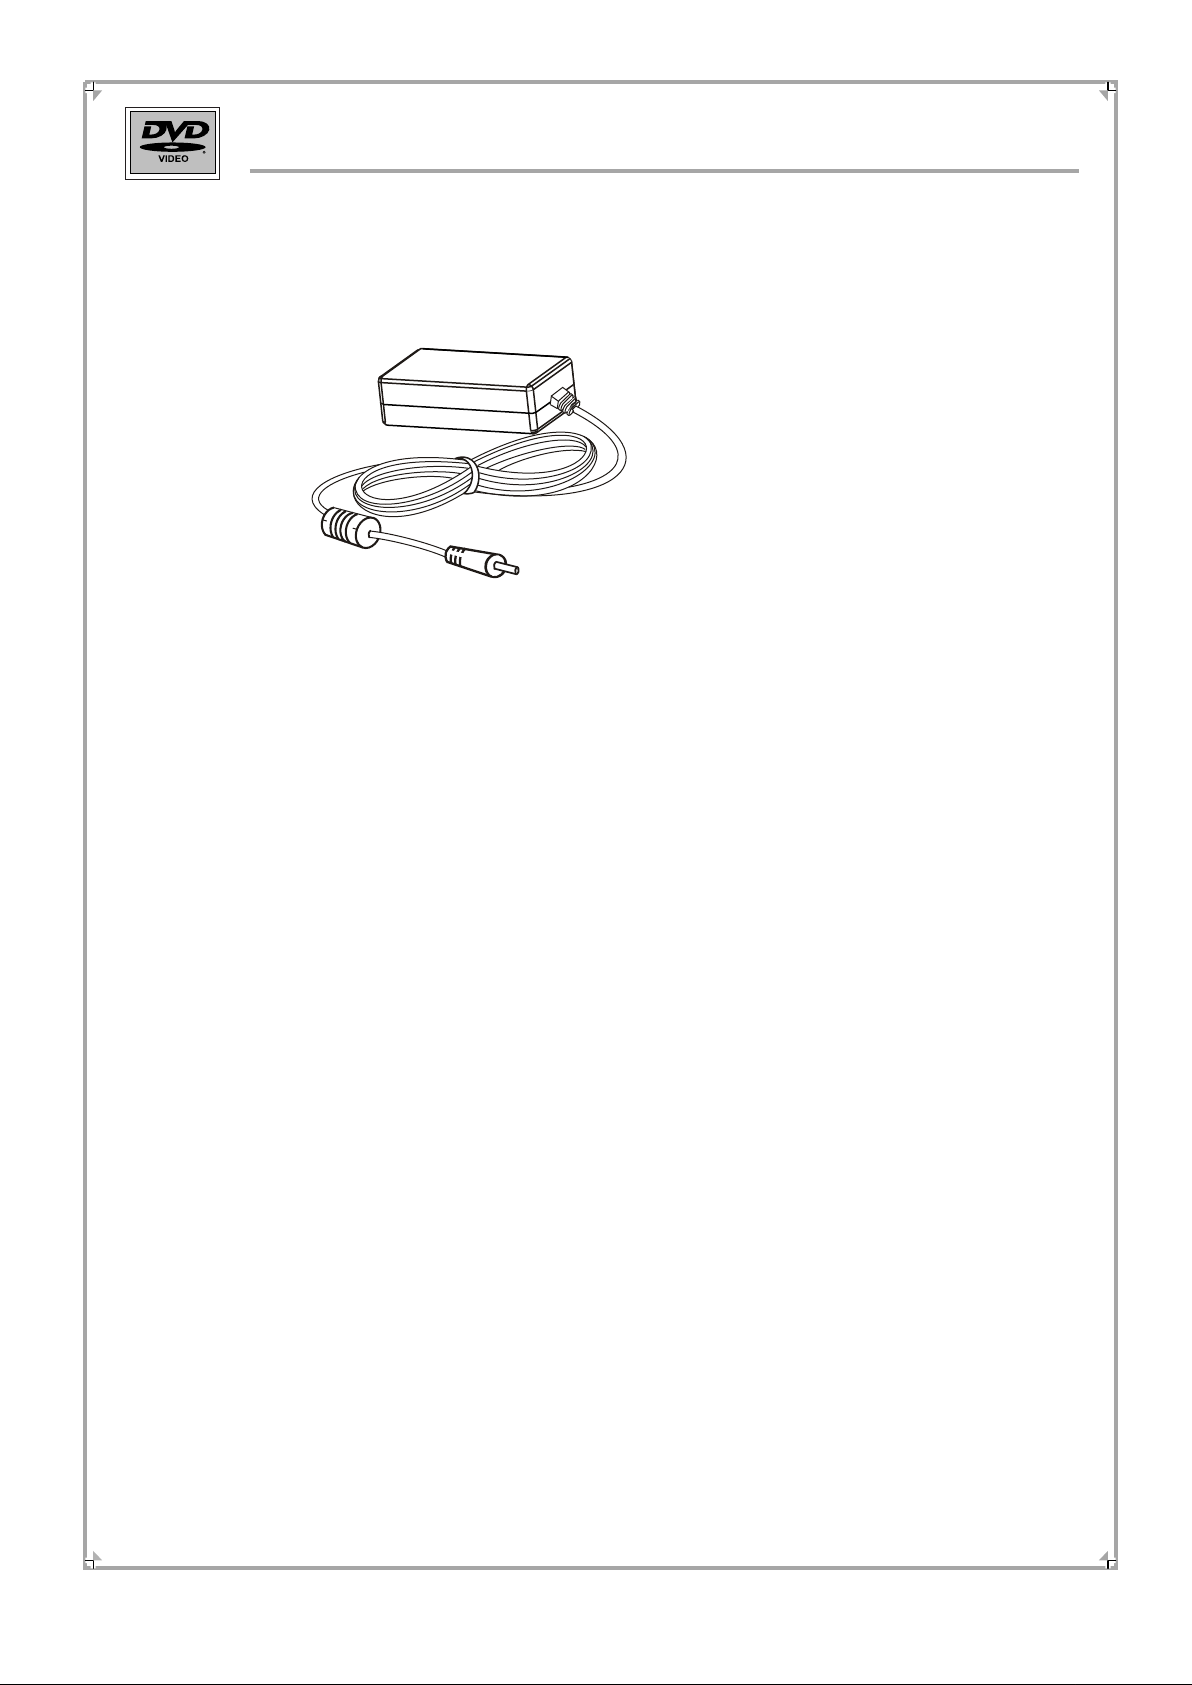
1. Adaptor Power Supply
Please connect your Portable DVD player with the power adaptor in the package box.
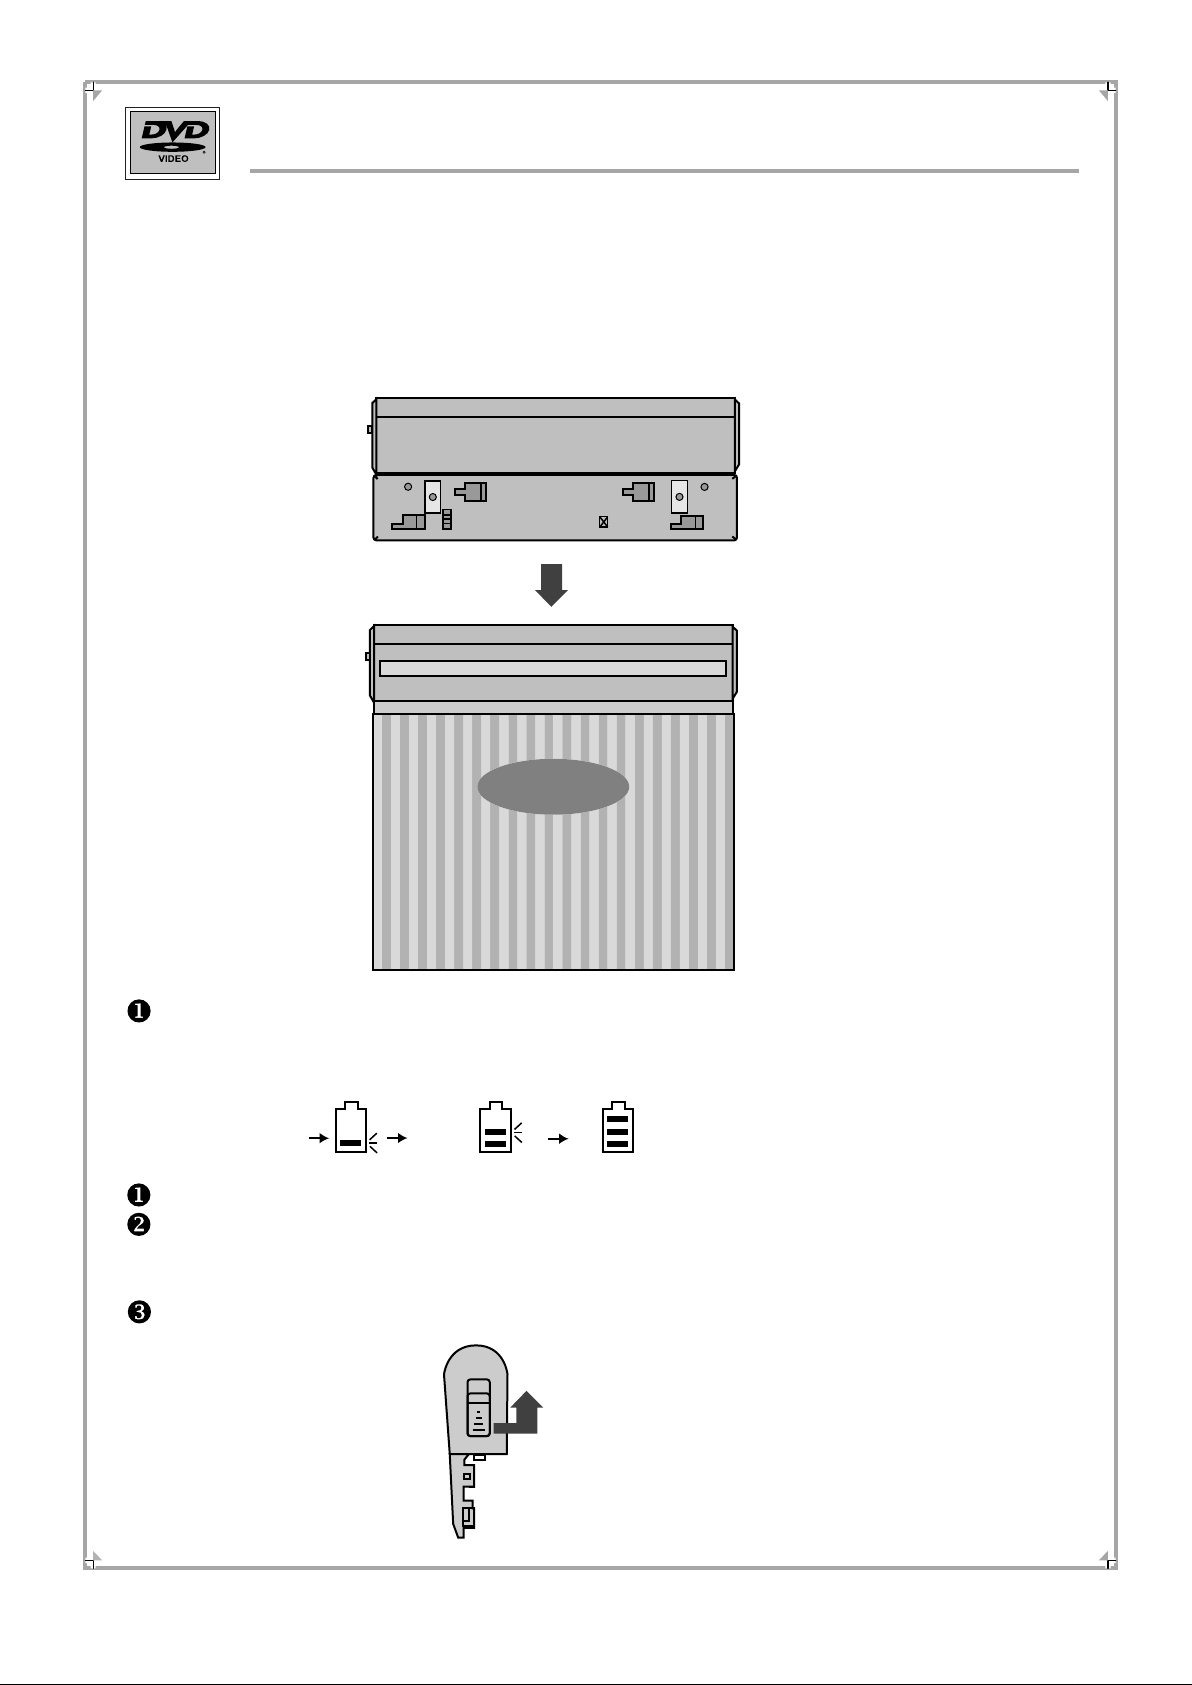
2. Battery Charging.
Please make sure the locks on both player and battery are aimed at line, then push the
battery to left, it is installed successfully when you hear a clatter.
Note:
The charging time is about 5 hours, the working time with screen show is about 3
hours, and the working time without screen show is about 5 hours.
During charging, the mini screen on the panel will show the status as follows:
Flash
The battery is rechargeable, and the time is up to 300 times.
When you do not use the player, please offload the battery to avoid some possible
damage caused by discharge excessively. Recharge your battery again before you
are going to use it.
Please push the button on the left side of the unit and push the battery rigthward to
offload the battery,
Flash
Flash
11
Page 13
Power Supply
3. Charge: It is strongly recommended to use the adaptor attached in your box for the
charging to avoid some possible danger.
Adaptor for battery charging
Note: During the playback mode, the charging time is a littler longer.
If you do not want to use the player for a long time, please make sure the
battery is full charged before you save it.
Please make sure you are using the power adaptor for charging, not the car
adapter.
12
Page 14
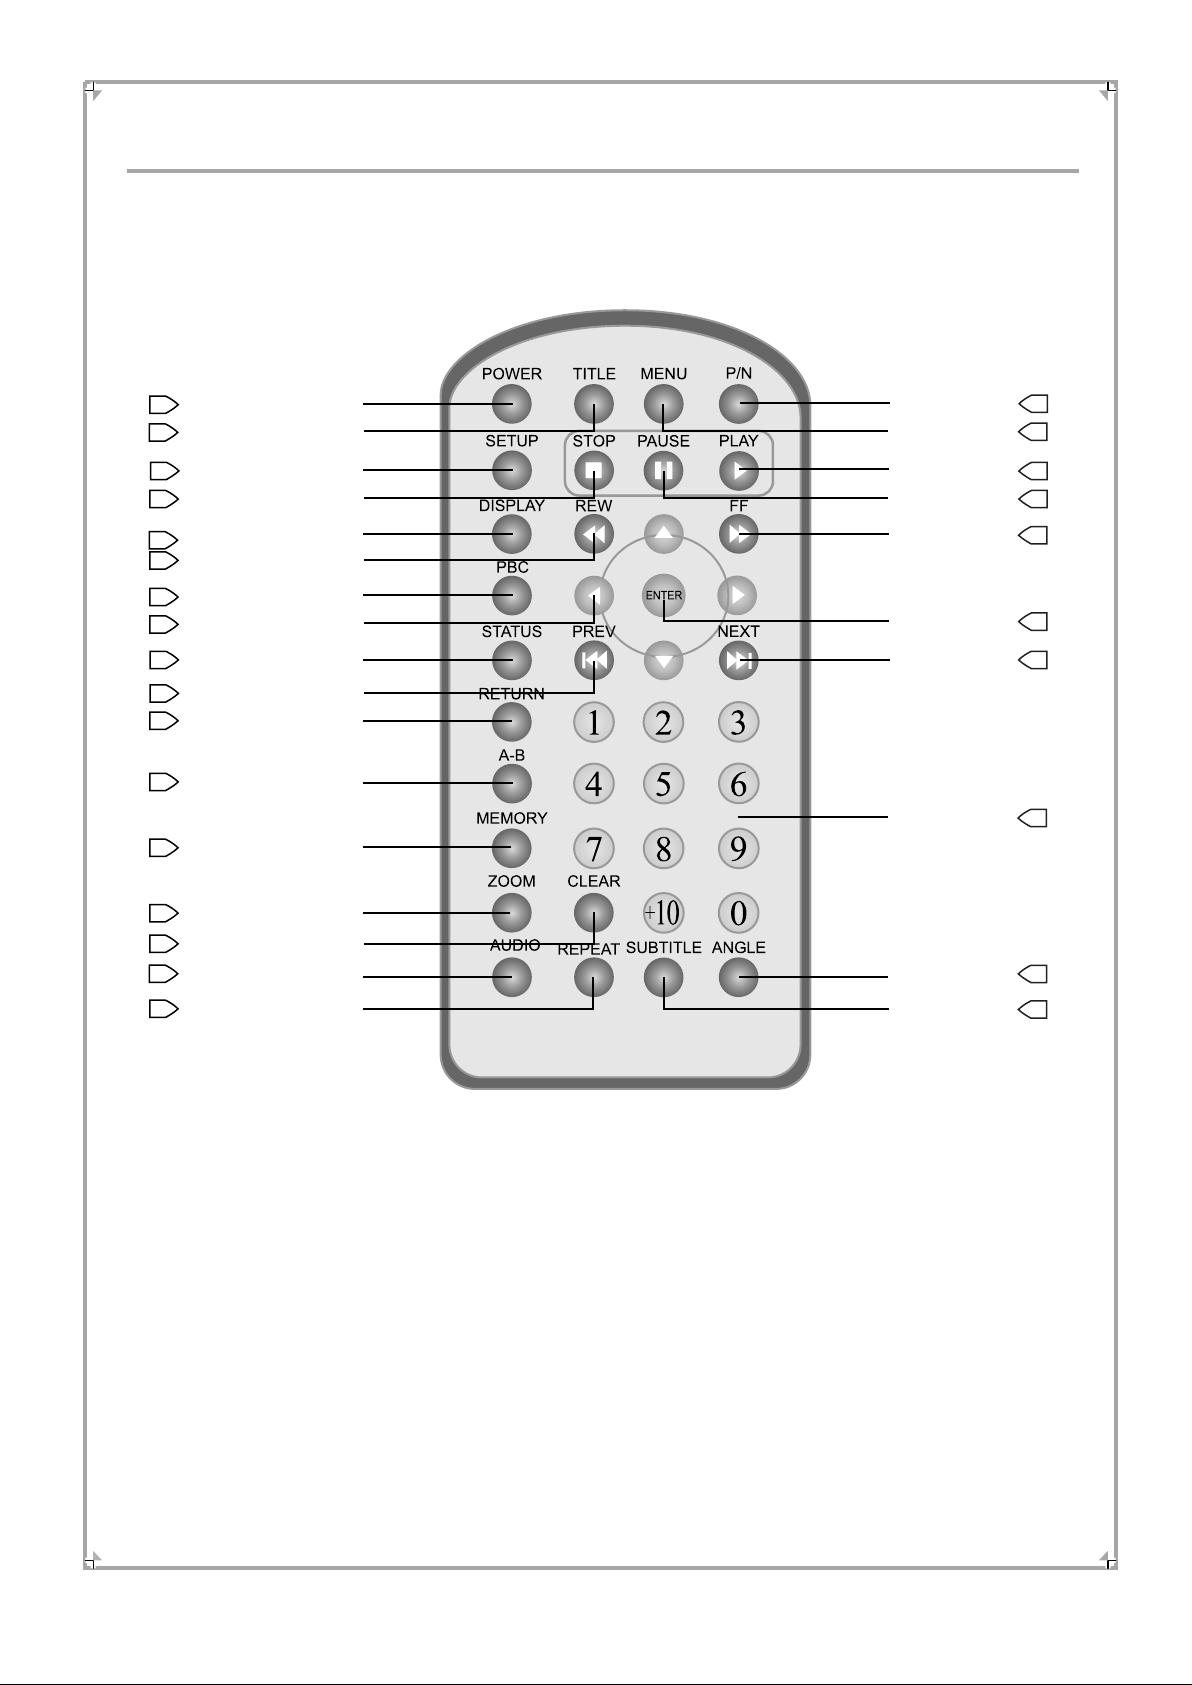
Remote Controller
1
2
5
6
9
10
Fast Backward
12
PBC ON/OFF
13
15
16
18
19
20
22
23
24
25
Power
Title
Setup
Stop
Display
Arrow
Status
Previous
Return
A-B
Memory
Zoom
Clear
Audio
Repeat
P/N
Menu
Play
Pause
Fast
Forward
Enter
Next
Number
Angle
Subtitle
3
4
7
8
11
14
17
21
26
27
13
Page 15

Connect to TV Set
Video Plug
(Yellow)
Audio Plug
(Black)
White
Red
L
R
Audio Input
NOTE:
You can use the S-Video cord
to get clearer picture.
The S-Video cord is not included
in the packaging box.
If your want to use your TV set,
it is recommended to close the
screen of the player and make
the volume of player' s speakers
minimum.
Yellow
Video Input
14
Page 16

Playback in Car
With the carry bag and power cord special for car use attached, you can also enjoy
movies in your car!
Please kindly refer the following instructions to setup the player:
1. Connect one tip of the power cord to the player, and the other to the standard 12V
jack in the car.
Note: This power cord can not be used for
charging, just for playback only.
Offload the battery before you use the car
adaptor as power supplier.
Please make sure the power of your car
is 12V DC.
2. Put the player in the bag, fix it with the belt in the carry bag, see the picture following:
3. Then you can hang the bag on the back of the seat, and enjoy your movies freely.
Operations for playback please refer Function Instruction behind.
Note:
Please insert the car adapter cord from the hole on the left-bottom of the carry bag to the
power input jack on the left side of player.
Another hole under the handle is for earphone cord.
15
Page 17

System Setting
Setup
Press SETUP button on the remote controller, and the LCD screen will display:
-- General Setup Page
TV Type
TV Display
Angle Mark
OSD Lang
SPDIF Output
Captions
Screen Saver
Set TV Standard
Press ENTER or button to come into General Setup.
Press or button to select the item.
Press ENTER button on the remote controller to confirm.
Press SETUP button on the remote controller to quit the setup menu.
1. General Setup
Highlight the item of General Setup, it will display the submenu of each item, press
ENTER or to confirm.
NTSC
Wide
On
Eng
Off
On
Press button
to select.
Press ENTER button
on the remote
controller to confirm.
Press to return.
Press SETUP on
the remote
controller to quit.
-- General Setup Page
TV Type
TV Display
Angle Mark
OSD Lang
SPDIF Output
Captions
Screen Saver
Set TV Standard
16
NTSC
Wide
On
Eng
Off
On
PAL
NTSC
Page 18

System Setting
TV Type setup
Highlight TV Type to display the submenu, press ENTER or to confirm.
-- General Setup Page
TV Type
TV Display
Angle Mark
OSD Lang
SPDIF Output
Captions
Screen Saver
Set TV Type
NTSC
Wide
On
Eng
Off
On
PAL
NTSC
Press button to select.
Press ENTER button to confirm.
Press to return.
Press SETUP button to exit.
PAL ---- PAL output.
NTSC ---- compel NTSC output.
TV Display setup
Highlight TV Display, the submenu will appear, press ENTER or to confirm.
-- General Setup Page
TV Type
TV Display
Angle Mark
OSD Lang
SPDIF Output
Captions
Screen Saver
Set TV Display
NTSC
Wide
On
Eng
Off
On
Normal/PS
Normal/LB
Wide
Press button to select.
Press ENTER button to confirm.
Press to return.
Press SETUP button to exit.
NORMAL/PS ---- pan scan output.
NORMAL/LS ---- letter box format
output.
Wide ---- wide screen output.
17
Page 19

System Setting
Angle Mark setup
Highlight Angle Mark item, press ENTER or button to confirm.
Press button to select.
-- General Setup Page
TV Type
TV Display
Angle Mark
OSD Lang
SPDIF Output
Captions
Screen Saver
NTSC
Wide
On
Eng
Off
On
On
Off
Press ENTER button to confirm.
Press to return.
Press SETUP button to exit.
During the multi-angle
disc playback, Set the item as On,
the angle mark will display
on the screen; Set it as Off to
cancel.
Set Angle Mark
This function is subject to the
multi-angle DVD disc.
OSD Language setup
Highlight OSD Lang to display the submenu and press ENTER or button to
confirm.
-- General Setup Page
TV Type
TV Display
Angle Mark
OSD Lang
SPDIF Output
Captions
Screen Saver
NTSC
Wide
On
Eng
Off
On
English
Chinese
Press button to highlight the
item.
Press ENTER button to confirm.
Press to return.
Press SETUP button to exit.
Set OSD Language
18
Page 20

System Setting
SPDIF Output setup
Highlight SPDIF Output to display the submenu and press ENTER or button to
confirm.
Press button to select.
-- General Setup Page
TV Type
TV Display
Angle Mark
OSD Lang
SPDIF Output
Captions
Screen Saver
Setup SPDIF
NTSC
Wide
On
Eng
Off
On
SPDIF OFF
SPDIF/RAW
SPDIF/PCM
Press ENTER button to confirm.
Press to return.
Press SETUP button to exit.
SPDIF Off: Turn off the output of
the digital audio.
SPDIF/RAW: Output the original
signal without being
decoded.
SPDIF/PCM: Decode the original
signal, and output it
in PCM format.
Caption setup
Highlight Captions to display the submenu and press ENTER or button to confirm.
-- General Setup Page
TV Type
TV Display
Angle Mark
OSD Lang
SPDIF Output
Captions
Screen Saver
Closed Caption
NTSC
Wide
On
Eng
Off
On
On
Off
Press button to select.
Press ENTER button to confirm.
Press to return.
Press SETUP button to exit.
This function is subject to TV and
the playing disc.
Only the NTSC TV can display or
hide the captions when the disc
with the function of hiding the
captions is playing.
19
Page 21

System Setting
Screen Saver setup
Highlight Screen Saver to display the submenu and press ENTER or button to enter.
Press button to select.
-- General Setup Page
TV Type
TV Display
Angle Mark
OSD Lang
SPDIF Output
Captions
Screen Saver
Setup Screen Saver
NTSC
Wide
On
Eng
Off
Off
On
Off
Press ENTER button to confirm.
Press to return.
Press SETUP button to exit.
When Screen Saver On, the
player will automatically enter
screen saver after 3 minutes
in Stop or No Disc mode.
Initial setup
Under the ABSOLUTE STOP mode, NO DISK or Disc Topper open mode, press
Setup to display the General setup page menu, the press button, it will display
the Preference Page menu, the press button to come into Preference
Page setup.
-- Preference Page
Press button to select.
Press ENTER button to confirm.
Press to return.
Press SETUP button to exit.
Audio
Subtitle
Disc Menu
Parental
Password
Default
Go To Preference Page
ENG
ENG
ENG
Note: During the playback, press STOP button twice to make the player in
ABSOLUTE STOP mode, then you can enter the Initial Setup.
20
Page 22

System Setting
Audio setup
Highlight Audio to display the submenu and press ENTER or button to confirm.
-- Preference Page
Audio
Subtitle
Disc Menu
Parental
Password
Default
ENG
ENG
ENG
English
French
Spanish
Chinese
Japanese
Korean
Russian
Thai
Press button to select.
Press ENTER button to confirm.
Press to return.
Press SETUP button to exit.
This function is subject to the discs.
Preference Audio Language
Subtitle setup
Highlight Subtitle to display the submenu and press ENTER or button to confirm.
-- Preference Page
Audio
Subtitle
Disc Menu
Parental
Password
Default
ENG
ENG
ENG
English
French
Spanish
Chinese
Japanese
Korean
Russian
Thai
Preference Subtitle Language
Press button to select.
Press ENTER button to confirm.
Press to return.
Press SETUP button to exit.
This function is subject to the discs.
21
Page 23

System Setting
Disc Menu setup
Highlight Disc Menu to display the submenu and press ENTER or button to confirm.
-- Preference Page
Audio
Subtitle
Disc Menu
Parental
Password
Default
ENG
ENG
ENG
English
French
Spanish
Chinese
Japanese
Korean
Russian
Thai
Press button to select.
Press ENTER button to confirm.
Press to return.
Press SETUP button to exit.
This function is subject to the discs.
Preference Menu Language
Parental Control setup
Highlight Parental to display the submenu and press ENTER or button to confirm.
-- Preference Page
Audio
Subtitle
Disc Menu
Parental
Password
Default
ENG
ENG
ENG
1 KID SAF
2 G
3 PG
4 PG13
5 PGR
6 R
7 NG17
8 ADULT
Press button to select.
Press ENTER button to confirm.
Press to return.
Press SETUP button to exit.
Note: Please set the parental
setting according to your
children's age.
Set Parental Control
Press buttons to select the item you desired, and press ENTER to confirm, then
the Password Confirmation page will appear on the screen.
22
Page 24

System Setting
Password
OK
Password setup
Highlight Password and press ENTER or button to confirm.
-- Preference Page
Enter the correct password
to set the desired level.
Press SETUP button to exit.
Audio
Subtitle
Disc Menu
Parental
Password
Default
Change Password
ENG
ENG
ENG
Press ENTER to change your
password.
Change
Default setup
Highlight Default to display the submenu and press ENTER or button to confirm.
-- Preference Page
Audio
Subtitle
Disc Menu
Parental
Password
Default
ENG
ENG
ENG
Press button to select.
Press ENTER button to confirm.
Press to return.
Press SETUP button to exit.
Reset
Change Password
Select RESET and press ENTER button to resume the factory setting.
23
Page 25

Remote Controller Operation
POWER
1
2
3
During the playback, press POWER button, the player will stop
playback and turn to the standby mode.
While the player is in standby mode, press POWER button to resume.
TITLE
During DVD playback, press the button, the DVD menu will appear on
the screen or play from title 1, or be or no effect.
The button dose not work during the VCD, MP3 and CD playback.
Note: The function is subject to the discs.
P/N
During discs playback, press this button, the player will switch
between PAL and NTSC.
Note: The screen will have a flash while you press the button.
4
6
MENU
STOP
During the DVD playback, press MENU button to display the menu
of the current disc.
During VCD, SVCD playback (PBC on), press MENU button to
display the menu.
Note: This function is subject to the discs.
Press Stop button when the player is playing, and the playback will
be paused, press Play button, and playback will start again.
Pressing the Stop button twice to stop the playback and return the
original mode, then press the Play button, it will replay from the
beginning.
Note: If the player stops for over 3 minutes, screen saver will
turn on automatically if screen saver is set as ON.
24
Page 26

Remote Controller Operation
During the playback, press the button once, the playback is paused,
PAUSE
press Play button again to resume.
7
PLAY
8
DISPLAY
9
Current track
Under the Pause mode, press this button to play by step.
During STOP mode, press this button to resume.
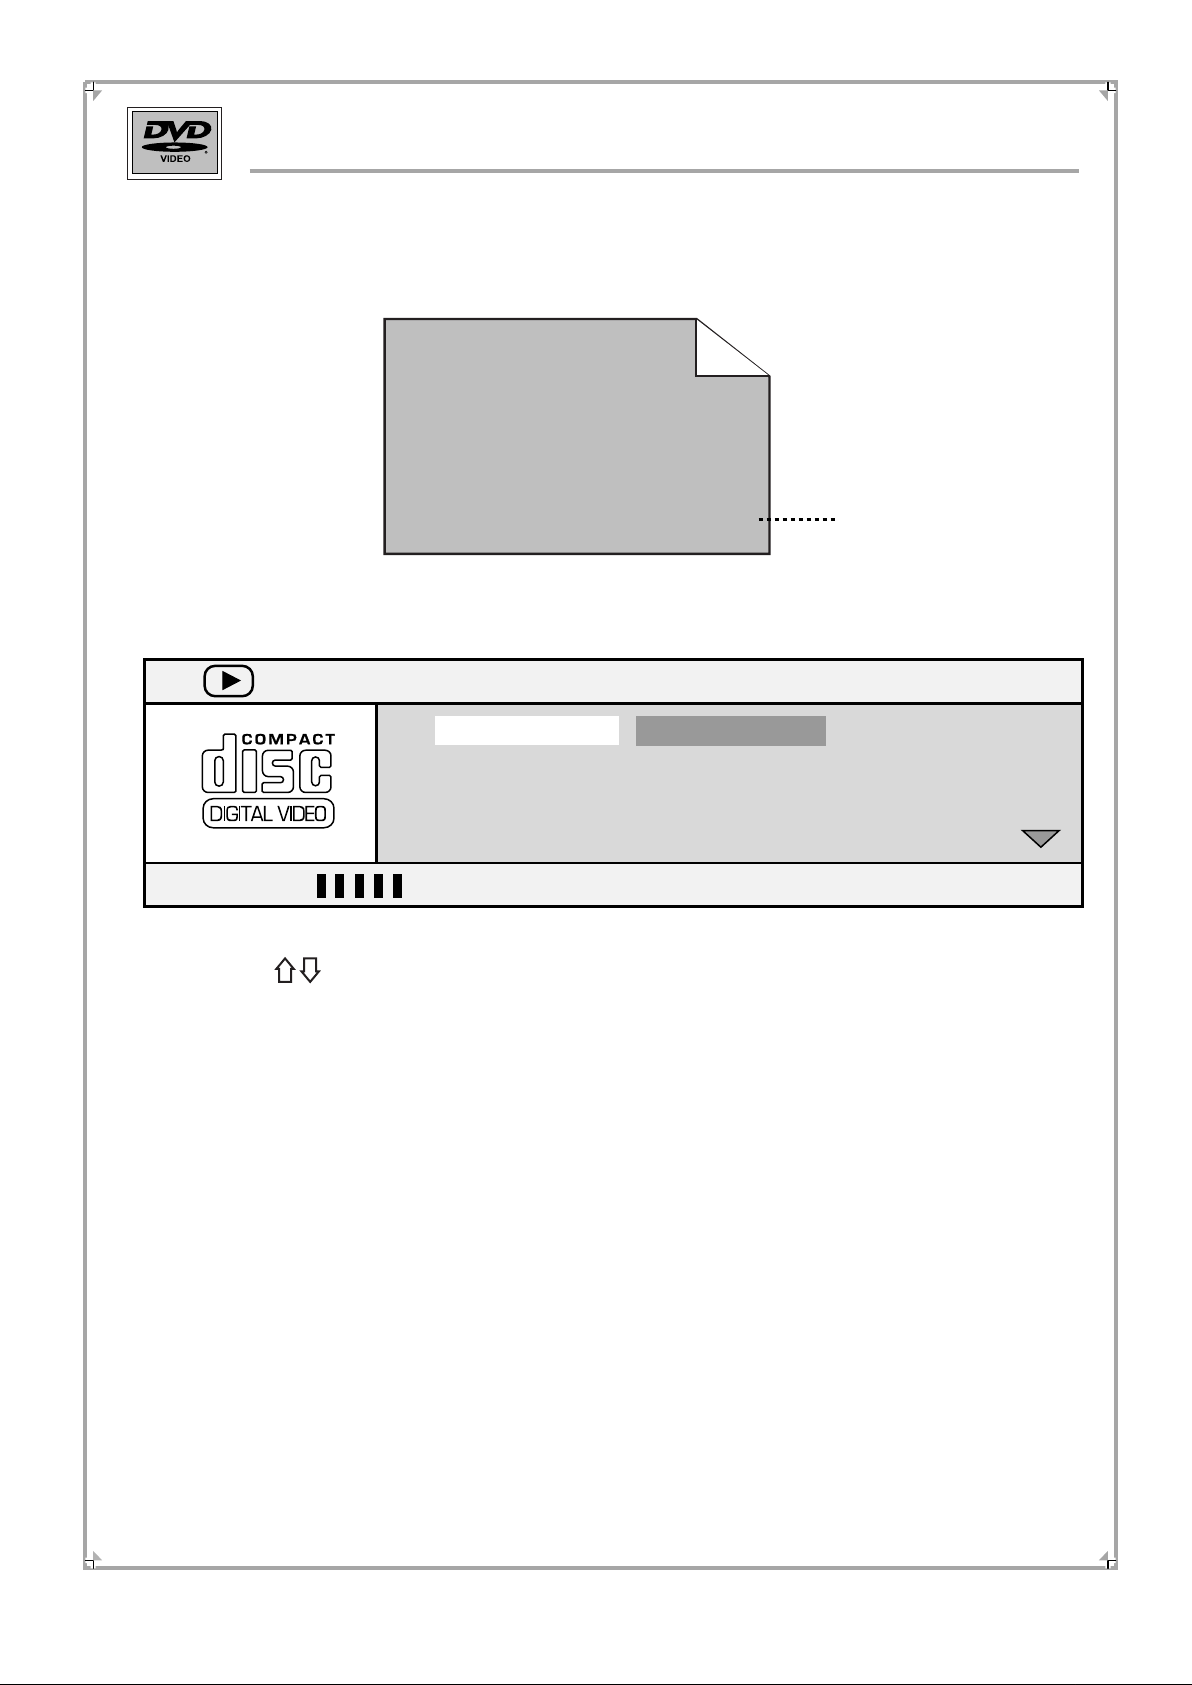
During playback mode, press DISPLAY button to change the display
as follows:
SVCD
SVCD
SVCD
CD
CD
CD
VCD
Track 01/15 02:52
VCD
Track 01/15 01:20
VCD
Track 01/15 02:58
Elapsed time of
track
Remain time of
track
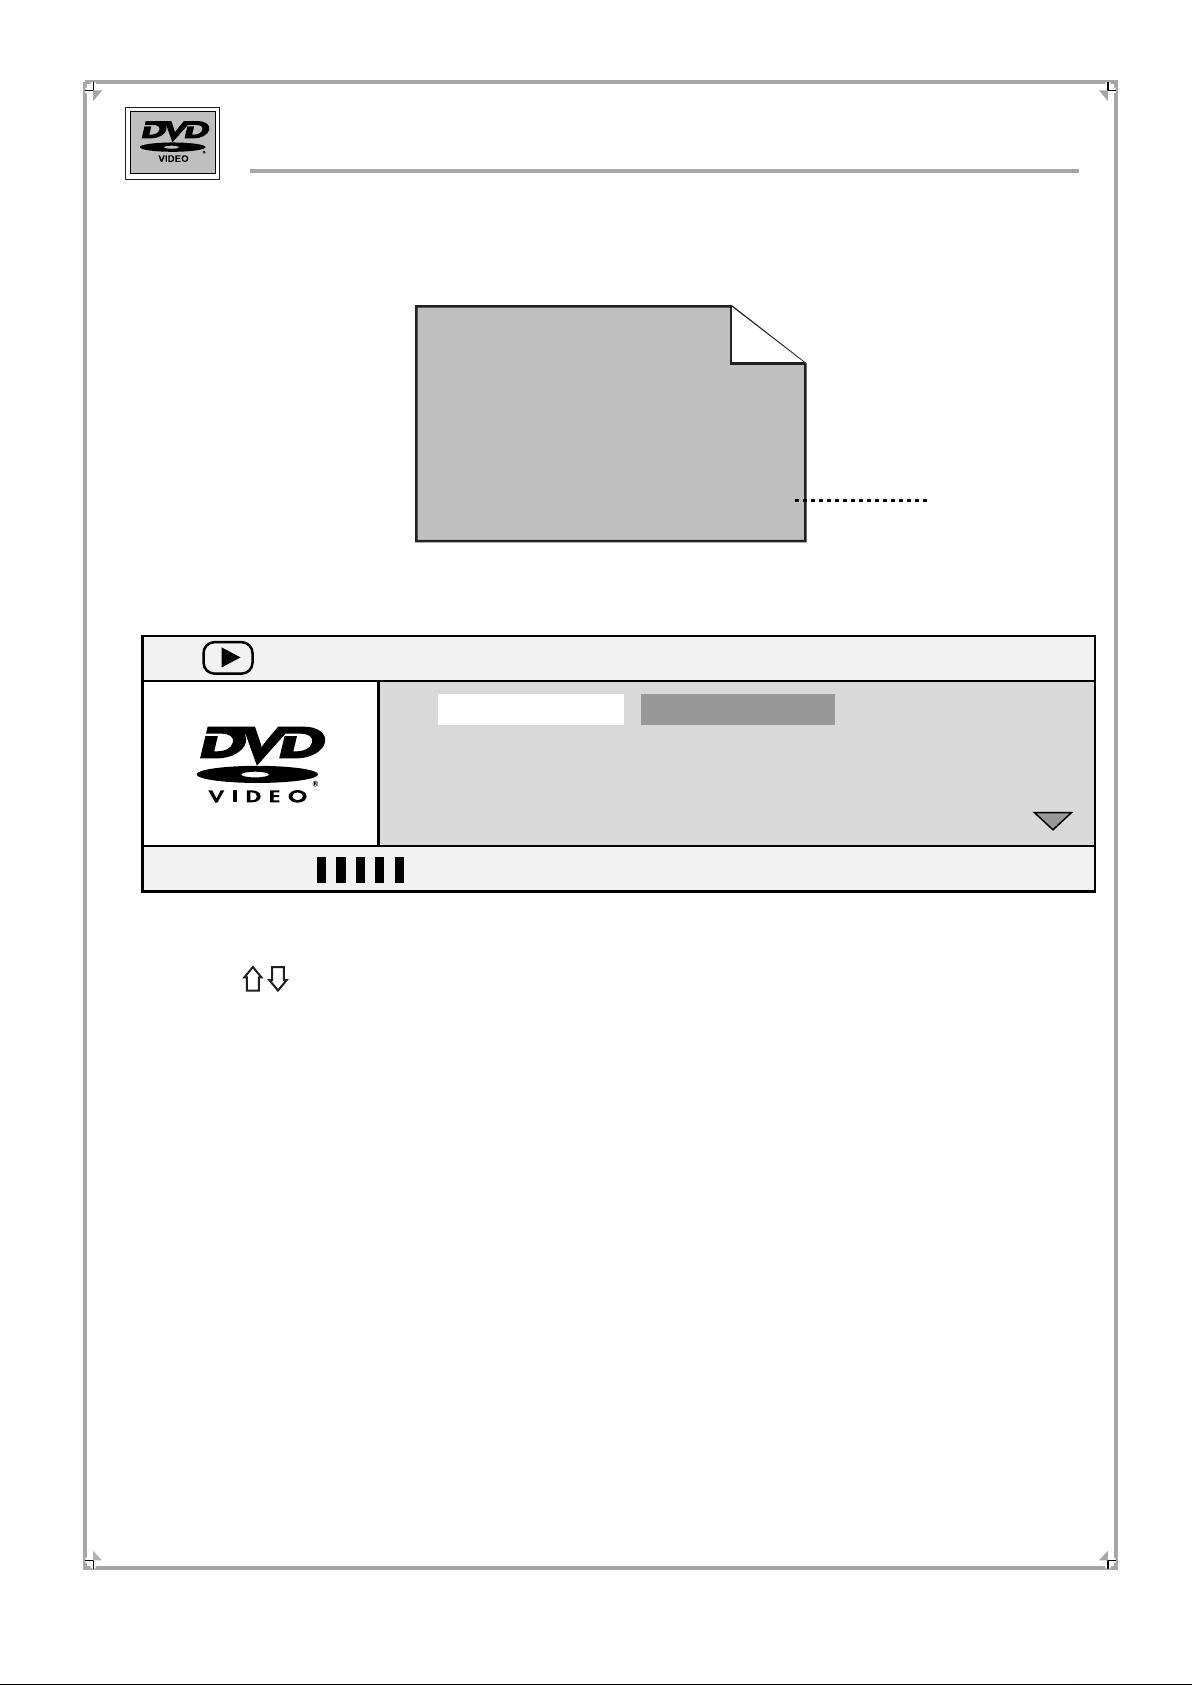
DVD-VIDEO
TT 04/10 CH 01/07 0:01:17
Current title
DVD-VIDEO
TT 04/10 CH 01/07 0:51:14
DVD-VIDEO
TT 04/10 CH 01/07 0:01:40
Elapsed
time of title
Current chapter
Remain time of
title
CD
SVCD
VCD
Track 01/15 00:30:20
SVCD
VCD
Display Off
CD
Elapsed time of
disc
Remain time of
disc
DVD-VIDEO
TT 04/10 CH 01/07 0:00:52
DVD-VIDEO
Display Off
Elapsed time of
chapter
Remain time of
chapter
NOTE: During SVCD, VCD playback, Elapsed time of disc and Remain time of disc can
be displayed only when PBC is off.
25
Page 27

Remote Controller Operation
REW
10
11
Press the button continuously during the playback to review the played
program at following speed:
2X 4X 8X 16X 32X PLAY
Press PLAY button to play normally.
FF
Press the button during the playback, the playing speed of the
disc will cycle as follows :
2X 4X 8X \ 16X 32X PLAY
Press PLAY button to play normally.
PBC
12
STATUS
13
PBC means Playback Control. During VCD/SVCD playback, the button
is to control PBC on/off.
When PBC is On, it plays by menu and when PBC is Off, it plays in
random.
During CD and DVD playback, this function is invalid.
During the VCD, SVCD, DVD playback, this button on controller is the
same as the one on the panel.
During the CD playback, this button is used for searching. Press it
once, it is Disc Time Search; press it twice, it is Track Time Search;
press it for three times, it is Track Selection.
26
Page 28

16
Remote Controller Operation
PREV
During DVD, CD, VCD, SVCD playback, press this button once to
play from the beginning of the item (track or chapter) you are enjoying.
Press the button twice to play the previous chapter or track.
NEXT
17
RETURN
18
19
Press the Button to skip to the next track or chapter.
When the VCD or VCD 2.0 (PBC is on) is playing, press RETURN
button to go back to the program menu.
During DVD playback, press this button to back to the upper menu.
A-B
During the playback, press A-B button to select A point.
Press it again to select B point. The player will repeat the section from
A to B automatically.
Press A-B button the third time to cancel repeating and clear A and B
points.
Note: During CD/VCD/SVCD playback, point A and B should be at the
same track.
During DVD playback, point A and B should be at the same chapter.
27
Page 29

Remote Controller Operation
During playback, press the button to memory the content and status
MEMORY
of the current disc.
20
DIGITAL buttons
21
Press this button again, it will play from the memory point,
meanwhile the player will clear the content and be ready for next
memory.
Note: The player can memory CD, VCD (or SVCD), DVD three different
types of discs. As to the same kind of discs, it can just memory only for
one disk, MP3 disks are invalid for this function.
This function is unavailable to MP3 disc.
It should not be power off between your two presses ,otherwise,
the function will not work.
When the item with digits input cursor displays on the screen,
press Digits buttons to select the desired one, and press Enter
button to confirm.
When CD and VCD or SVCD (PBC is off) is playing, press Digits
buttons to select track directly.
22
ZOOM
2X
When CD and VCD or SVCD (Menu is displayed) is playing, press
Digits buttons to select track directly.
During DVD playback, it is unavailable to use digits buttons to
select title directly except when Menu is displayed.
During VCD, DVD playback, press the button continuously to cycle
zoom in/out as follows:
1/3 1/41/24X3X
Normal
28
Page 30

Remote Controller Operation
CLEAR
23
24
AUDIO
Press CLEAR button to delete the digits you have inputted.
During SVCD playback, press this button continuously to select the
audio output you desired, the optional audio is up to 4.
During DVD playback, press this button continuously to select the
audio output you desired, the optional audio is up to 8.
During VCD playback, press this button continuously to select the
following track:
Mono Left
NOTE: The number of optional audio is subject to the discs.
Mono Right
Mix-Mono Stereo
REPEAT
25
During DVD playback, press the button continuously, the play mode
will cycle as follows:
REP-TITLEREP-CHPTER
During CD, VCD, SVCD (PBC OFF) playback, press the button
continuously, the play mode will cycle as follows:
REP-TRACK
NOTE: Please make sure the PBC is OFF.
REP-ALL
REP-ALL REPEAT OFF
REPEAT OFF
29
Page 31

Remote Controller Operation
ANGLE
26
SUBTITLE
27
During DVD playback, press the button and you will view the pictures
from the different camera angles.
Press it once and you view the picture from one camera angle to
another.
Note: This function is subject to the discs' type.
During DVD playback, press this button to select up to 32 kinds of
subtitles.
Note: This function is subject to the discs.
If the disc is set to display the subtitles automatically,
it is unavailable to use this button to turn off the subtitles.
30
Page 32

MP3 Playback
Total time of current track
Elapsed time of current track
Current director
Total directories
00:00 00:00 Stop
001/012
\
CD1
CD2
CD3
CD4
CD5
CD6
Play directory
For example select directory 3 to enter the following menu:
00:00 99:59 Stop
001/012
\CD3
...
MP3 1
MP3 11
MP3 12
MP3 2
MP3 3
Press button to select the
desired item.
Press ENTER or PLAY button to play.
Press button to return.
Press
button to select.
Press
button or
ENTER to
confirm.
For example, select track 3 to enter the following menu:
31
Page 33

MP3 Playback
Total time of current track
Elapsed time of current track
Current track number
Total track number
00:20 02:52 128 Play
003/013
\CD3
...
MP3 1
MP3 11
MP3 12
MP3 2
MP3 3
Press button
to select track.
Press ENTER or
PLAY button to
play.
Press button
to back upper
menu.
During the playback mode, press ANGLE button to switch between directory play and file
list mode.
File List: List all the file names of disc and play them in order. You can press or,
NEXT/PREVIOUS button to select your desired item.
Directory Play: List all the directories of disc and press button to select.
You can press Enter or button to confirm.
32
Page 34

KODAK Picture CD Playback
The introduction of KODAK PICTURE CD
A Kodak Picture CD has the size and shape of a regular CD. You can order a KODAK
Picture CD simply by checking the box on the photo finishing envelope when you drop
off a roll of film (35mm or Advanced Photo System (APS) colour print Film) at the time of
processing in Kodak Express store displaying "Kodak Picture CD" sign. When your
order is returned, you receive your prints, negatives, and your full roll of pictures safely
stored on your KODAK Picture CD. Each KODAK Picture CD brings you the tools to
enhance, share and manage your pictures on your computer. You also can record the
JPEG picture into CD-R or CD-RW with the CD-Rewriter yourself.
Note:
1. The Max. Size of normal JPEG Picture can be supported: 3072x3072 pels
2. JPEG stands for Joint Picture Experts Group. It is the first International
Standard on Still Picture Compressing: ISO 10918-1, constituted by the
Committee on Still Picture Compressing Standard of ISO. The pictures on
KODAK Picture CD are stored in this format (JPEG). This player can decode
the JPEG pictures in KODAK Picture CD and playback the pictures in different
modes.
Now you can playback Kodak Picture CDs on this player and view your wonderful
pictures on the screen.
This player will playback automatically after the Kodak Pictures CD is put into the player
General function
You can set slide show transition modes for any pictures.
Press PAUSE button to stop playing.
Press PLAY or ENTER button to continue slide show transition.
Press PREV button or NEXT button to see the previous or next picture.
Press ANGLE button to change 17 kinds of magic lantern playing mode.
33
Page 35

KODAK Picture CD Playback
Image Rotation
There are four modes to rotate a picture Invert, Mirror, Left and Right. These operations
are allowed only when a picture is being displayed normally and will be cancelled
automatically when a new picture is displayed. The arrow button is used to select the
different rotation modes:
Press button,
Press button,
Press button,
Press button,
Invert/Normal
Mirror/Normal
Turn left (Rotate 90 degree for pressing once)
Turn right (Rotate 90 degree for pressing once)
Zoom Function
This player provides both zoom in/out and zoom pan function. Press the ZOOM
button to open the zoom function, press ZOOM button again to close the function.
In zoom on, press FF button, the picture will cycle as follows:
ZOOM 100% ZOOM 125% ZOOM 150% ZOOM 200%
In zoom on, press REW button, the picture will cycle as follows:
ZOOM 100% ZOOM 75% ZOOM 50%
Note:
The zoom function is invalid for JPEG Picture under progressive scan.
You can move and view the picture with arrow button in Zoom in mode.
The times of zoom in is subject to the pels of the picture.
34
Page 36

KODAK Picture CD Playback
Digest function
During the Picture CD playback, press STOP or MENU button to display twelve
pictures at a pro ratio.
Press ARROW button to select the desired picture, then press Enter
button, the selected picture will zoom into full screen.
Press PREV or NEXT button to select the previous or next twelve-picture page.
Note: The quality of the picture displaying on your screen is mostly subjected to
your display equipment.
35
Page 37

JEPG Playback
When playing the disc with both MP3 and Picture file, the screen will display the
the default MP3 menu as following after reading the disc.
00:00 99:59
001/012
\
CD1
CD2
CD3
CD4
JPEG5
JPEG6
Press button to
select the desired
directory.
Select the directory with MP3 files and the screen will display as following:
00:00 99:59
001/012
\CD3
...
MP3 1
MP3 11
MP3 12
MP3 2
MP3 3
Please refer to the MP3 Playback for the operating process of MP3.
Select the directory with JPEG files and the screen will display as following:
00:00 99:59
001/012
\JPEG 4
...
JPEG 1
JPEG 2
JPEG 3
JPEG 4
JPEG 5
36
Picture preview window
Page 38

JEPG/WMA Playback
Please refer to the KODAK Picture CD for the operating process of JPEG files.
You can set the MP3 music as background music during playing JPEG pictures.
The operating steps are as following:
Open the directory and select one song, press Enter button to play.
During MP3 playback, open JPEG picture directory and select one picture, press
PLAY button, the player will play the selected song and JPEG picture at the same time.
During JPEG playback, press STOP button, the screen will display twelve pictures at
a pro ratio. Press MENU button, the screen will display the directory.
Hints for JPEG Picture CD making:
Supported files system: ISO9660, JOLIET.
Make sure that the file format is in JPEG format (*.jpg) when making the picture CD
with computer.
Remember to make Finalise after recording.
WMA Playback
When playing the disc with WMA files, the screen will display as following:
00:00 99:59
001/012
\
CD1
SONG 1
SONG 1
SONG 2
SONG 3
SONG 3
Notes: The operating process of WMA playback are same with the MP3.
37
Page 39

Troubleshooting
Please read the user's manual carefully before using the unit. If you have any troubles in
using this player, try to solve the problems by the suggestions mentioned below. If you can
not remove the trouble after using all the suggestions, please contact our company or the
technical service centre authorised by us. For the sake of your safety, please do not open
the cover and repair the player by yourself, if that, it may cause electric shock.
NO POWER
Check whether the power or battery is connected well.
NO SOUND BUT HAVE PICTURE
Check whether you have turned down the volume.
NO PICTURE
Check whether the TFT Power switch is chocked in the hole.
Check whether the OUT/IN switch is set as IN, and no signal input from CVBS jack.
ABNORMAL DISPLAY OF THE COLOUR OR BRIGHTNESS
Please setup the player in STOP mode with your remote controller, open the menu, select
the defaulted setup to resume.
BLACK AND WHITE POINTS IN SCREEN
The LCD monitor made by high precision technology, it is normal for 0.01% of the
Pels to appear black or white points.
REMOTE IS INSENSITIVE OR DOES NOT WORK
Check the battery of remoter and make sure that they are to be powerful and good
conductivity.
Direct the remote controller to the IR sensor of the player.
Check whether there are some obstacles between the remoter and IR sensor.
THE PLAYER TURNS OFF AUTOMATICALLY
Under the screen saver mode, if there is no operation in 10 minutes, to save the power,
the player will turn off automatically.
CAN NOT WORK WITH THE BATTERY
Power of the battery is insufficient. Try to unload the battery and connect the adaptor to
the player, then put on the battery to charge.
38
Page 40

Specifications
TFT LCD:
Frequency response:
Horizontal resolution:
Audio SIN ratio:
Display format:
THD:
Video output:
Audio mixed out:
Audio digital out:
Weight (N/G):
7 inch (16:9)
20Hz ---- 20KHz
Over 500 lines
Over 90 dB
16:9 or 4:3
less than 0.05%
1.0 Vp-p 0.2 (75 ohms)
2.V (10K ohms)
0.5 Vp-p (75 ohms)
0.63KGs/1.3KGs
Dimension (W x H x D):
Power adaptor:
Optional equipment:
Operating ambient temperature:
The specification is subject to change without notice.
Weight and dimension are approximate.
190 x 143 x 26.5 mm
Input 110-240V AC
Output 9V DC
Earphone
5-350 C
39
Page 41

Attachment
1. Remote Controller
3. Power adaptor
2. Power cord
4. Battery
5. Car adaptor
40
Page 42

Using Remote Controller
Install the button battery into the remote
controller to operate the DVD player.
The back of
the remote
controller
+
If you do not use the remote controller for a long time,
remove the battery to avoid possible damage from
battery corrosion.
If the remote controller does not function correctly or the
operating range become reduced, replace all battery
with a new one.
The battery can be used 1 year normally.
Battery model: CR2025
Operate with the remote controller correctly.
Point the remote controller at the remote sensor and press the button.
Do not expose the remote sensor of
the unit to strong light source such as
direct sunlight or other illumination.
Notes:
Direct the remote controller at the remote
sensor of the DVD player.
Do not drop or give the remote controller a
shock.
Do not leave the remote controller near an
extremely hot or humid place.
Do not spill water or put anything wet on the
remote controller.
Do not open the remote controller.
If the remote controller function correctly, the
usage life of the battery is about one year.
41
Page 43

The product complies with the
KODAK Picture CD format and
will display KODAK Picture CDs.
The "KODAK Picture CD Compatible"
logo is a trademark of Eastman Kodak
Company and is used with permission.
Warning
To prevent children from watching programs which have a rating above their
age, please be sure to set the rating in the setup menu appropriately. Before you
set this rating, the password must be unlocked. If you forget your unique
password, then please use the universal password as set by the manufacturer.
The universal password is "1369". Please detach this sheet and keep it in a safe
Manufactured under license
from Dolby Laboratories. "Dolby"
"Pro Logic and the double-D
symbol are trademarks of Dolby
Laboratories.
This product incorporates copyright protection technology that is protected by
method claims of certain U.S. patents and other intellectual property rights owned
by Macrovision Corporation and other rights owners. Use of this copyright protection
technology must be authorised by Macrovision Corporation, and is intended for home
and other limited viewing uses only unless otherwise authorised by Macrovision
Corporation. Reverse engineering or disassembly is prohibited.
place, away from children.
Page 44

PALSONIC CORPORATION PTY LTD
1 JOYNTON AVENUE
WATERLOO NSW 2017 AUSTRALIA
TEL: (02) 9313 7111
FAX: (02) 9313 7555
www.palsonic.com.au
PALSONIC CUSTOMER SERVICE
TELEPHONE
AUSTRALIA: 1300 657 888
FKV2.037.746SSE
 Loading...