

Page 1

Instruction manual
Mini Component Sound System
PSML-826
PALSONIC CORPORATION PTY LTD
1 JOYNTON AVENUE
WATERLOO NSW 2017 AUSTRALIA
TEL: (02) 9313 7111
FAX: (02) 9313 7555
www.palsonic.com.au
PALSONIC CUSTOMER SERVICE
TELEPHONE
AUSTRALIA:1300 657 888
Page 2

TABLE OF CONTENTS
CONTENTS / IMPORTANT SAFEGUARDS ...................................................................
PRECAUTIONS AND MAINTENANCE ...........................................................................
SPEAKER CONNECTIONS / AUX / PHONO CONNECTION .........................................
LOCATION OF CONTROLS ............................................................................................
REMOTE CONTROL FUNCTION / SOUND CONTROL .................................................
USING THE TUNER / THE CHANGER / USING THE CASSETTE DECK
/ USING THE SLEEP / TIMER FUNCTION ...................................................................
TROUBLESHOOTING GUIDE ........................................................................................
SPECIFICATIONS ...........................................................................................................
Save the carton and packing material, they will be useful if you ever have to transport the unit.
P.2
P.3
P.4-5
P.6-7
P.8-9
P.10-17
P.18
P.19
2
Page 3
WORTH
knowing
Please keep the sound system's guarantee card and receipt safe for
warranty purposes, if guarantee card is supplied to you.
Precautions
Read carefully through this manual to familiarise yourself with this
high - quality sound system.
Make sure the rating of your household electricity supply matches that
shown on the back of the sound system.
Refer to this chapter and the "Installation/connections" chapter (page
18/19) to help you install and adjust your sound system.
Do not ...
...
expose the sound system to high levels of humidity and heat, to avoid
the risk of fire and electric shock.
...
connect the sound system to the power supply if you have just moved
it from a cold to a warm environment. This can result in condensation
inside the system and cause serious damage to the machine and
cassettes. Wait around two hours to allow it to reach room
temperature.
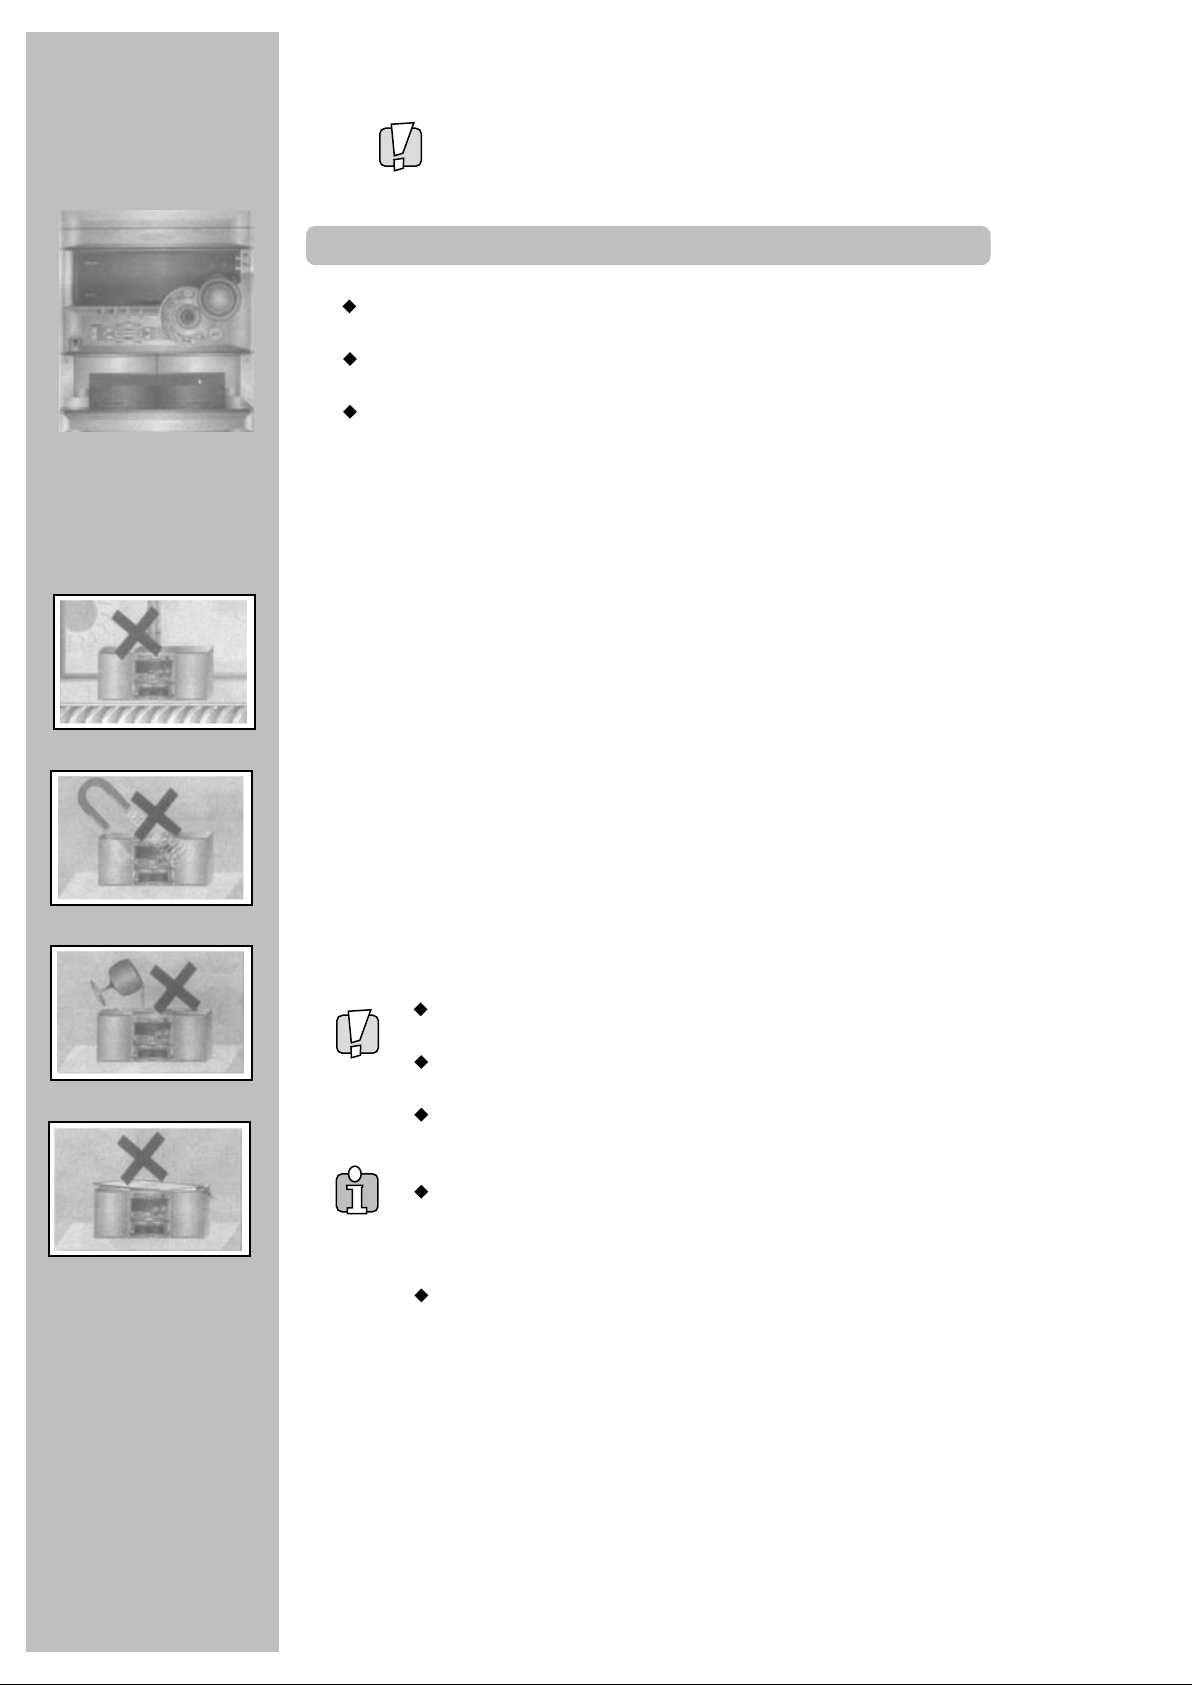
Make sure ...
...
the system is placed on a stable, flat surface.
...
you place the system where there is good ventilation all around.
...
you clean the system only with a soft, line-free cloth, do not use
aggressive or alcohol-based cleaning agents.
...
you disconnect the power supply if the system appears to be working
incorrectly, is making an unusual sound, has a strange smell, has
smoke emitting from it or liquids have got inside it.
Have a qualified technician check the system.
...
you disconnect the power supply and aerial if you will not be using the
system for a long period or during a thunderstorm.
For your own safety!
There are no components in this sound system you can
service or repair yourself.
Do not open the case of the sound system. Only allow
qualified personnel to repair or service your set.
"Class 1 Laser Product" : Do not override the safety locks
around the laser unit of the CD player : Laser beams can
damage your eyes!
This sound system is designed for continuous operation.
Switching it off does not disconnect it from the mains
(stand-by). To disconnect it from the mains, you have to
unplug it.
Recording any copyright protected material may infringe
a copyright.
3
Page 4
INSTALLATION/
CONNECTIONS
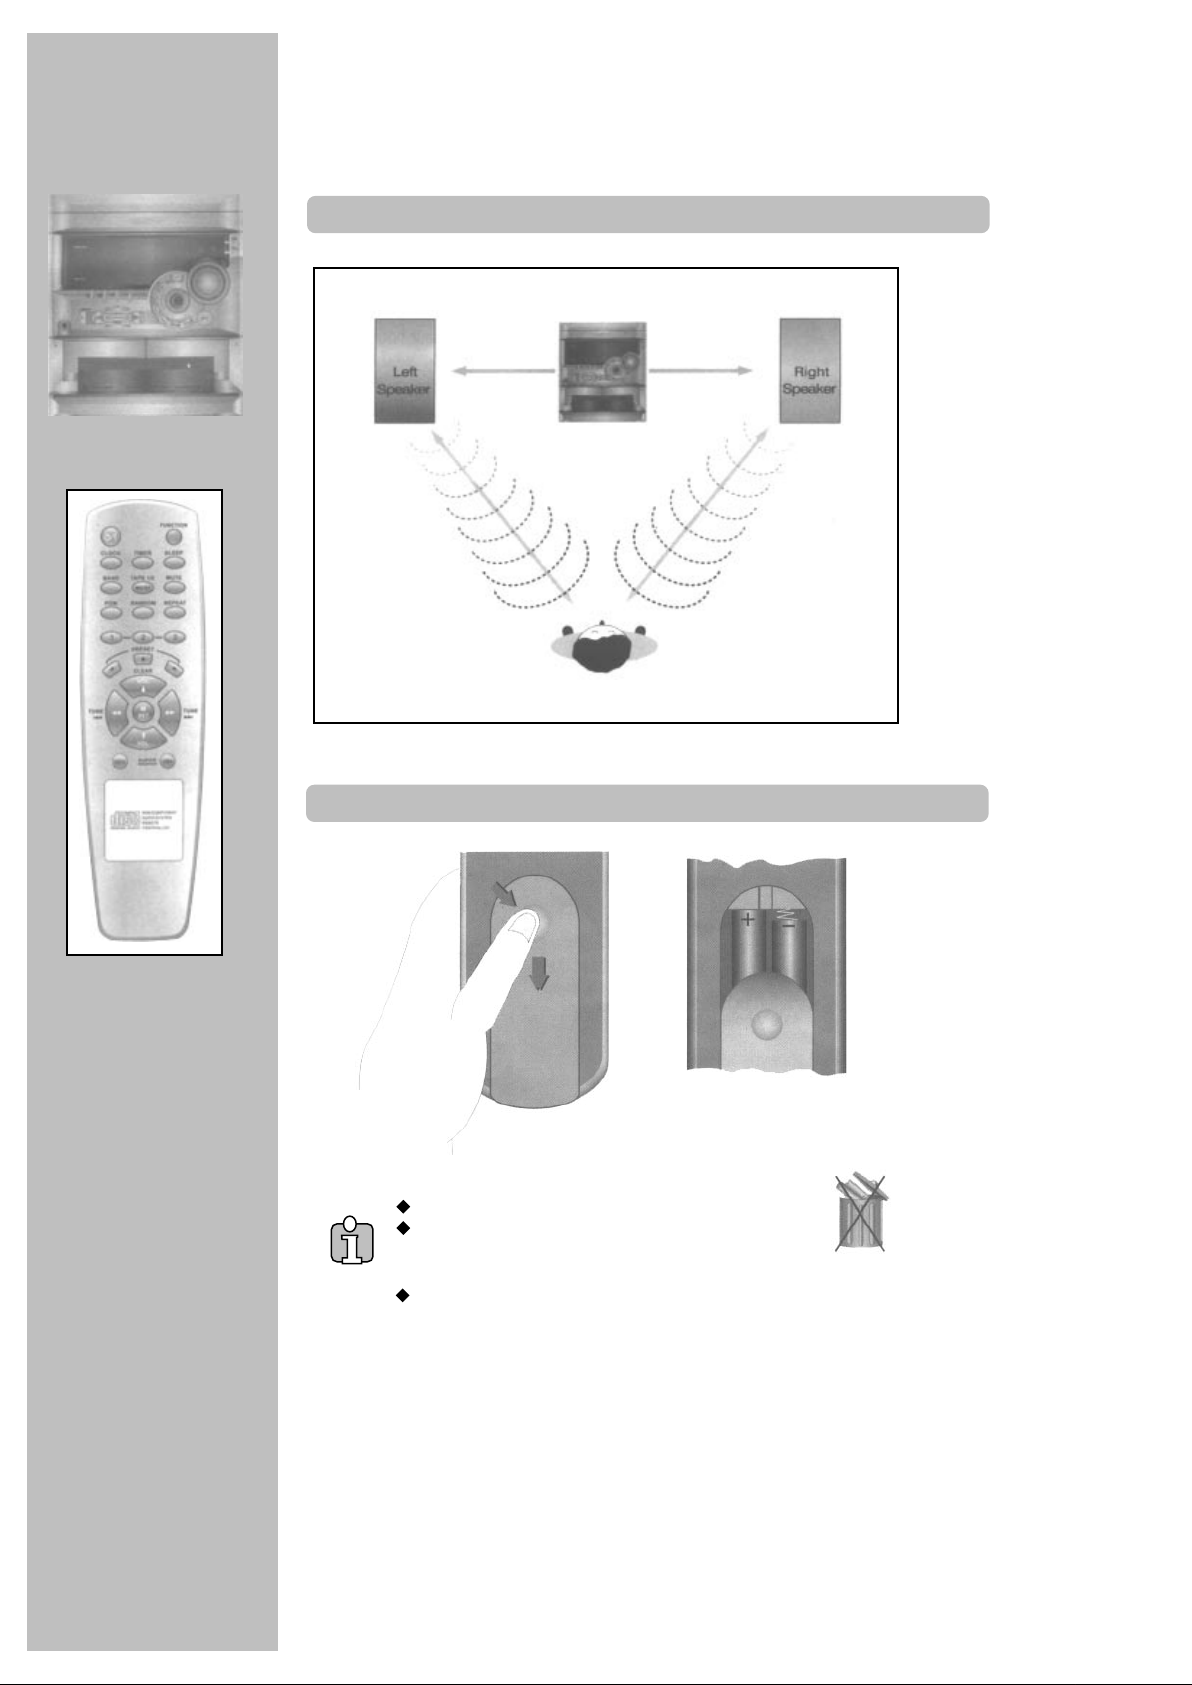
Placing your sound system components
Same distance
Optimal stereo position
Remote control and batteries
Batteries for remote control unit are not provided.
Please protect your environment! As batteries contain certain
toxic substances they pollute the environment if not properly
disposed of. Your specialised dealer will accept used batteries.
Make sure the batteries are always of the same type and age, and
remove them from the remote control if you are not using it for a long period.
Fit the batteries to match the
+ and - symbols in the
compartment.
4
Page 5
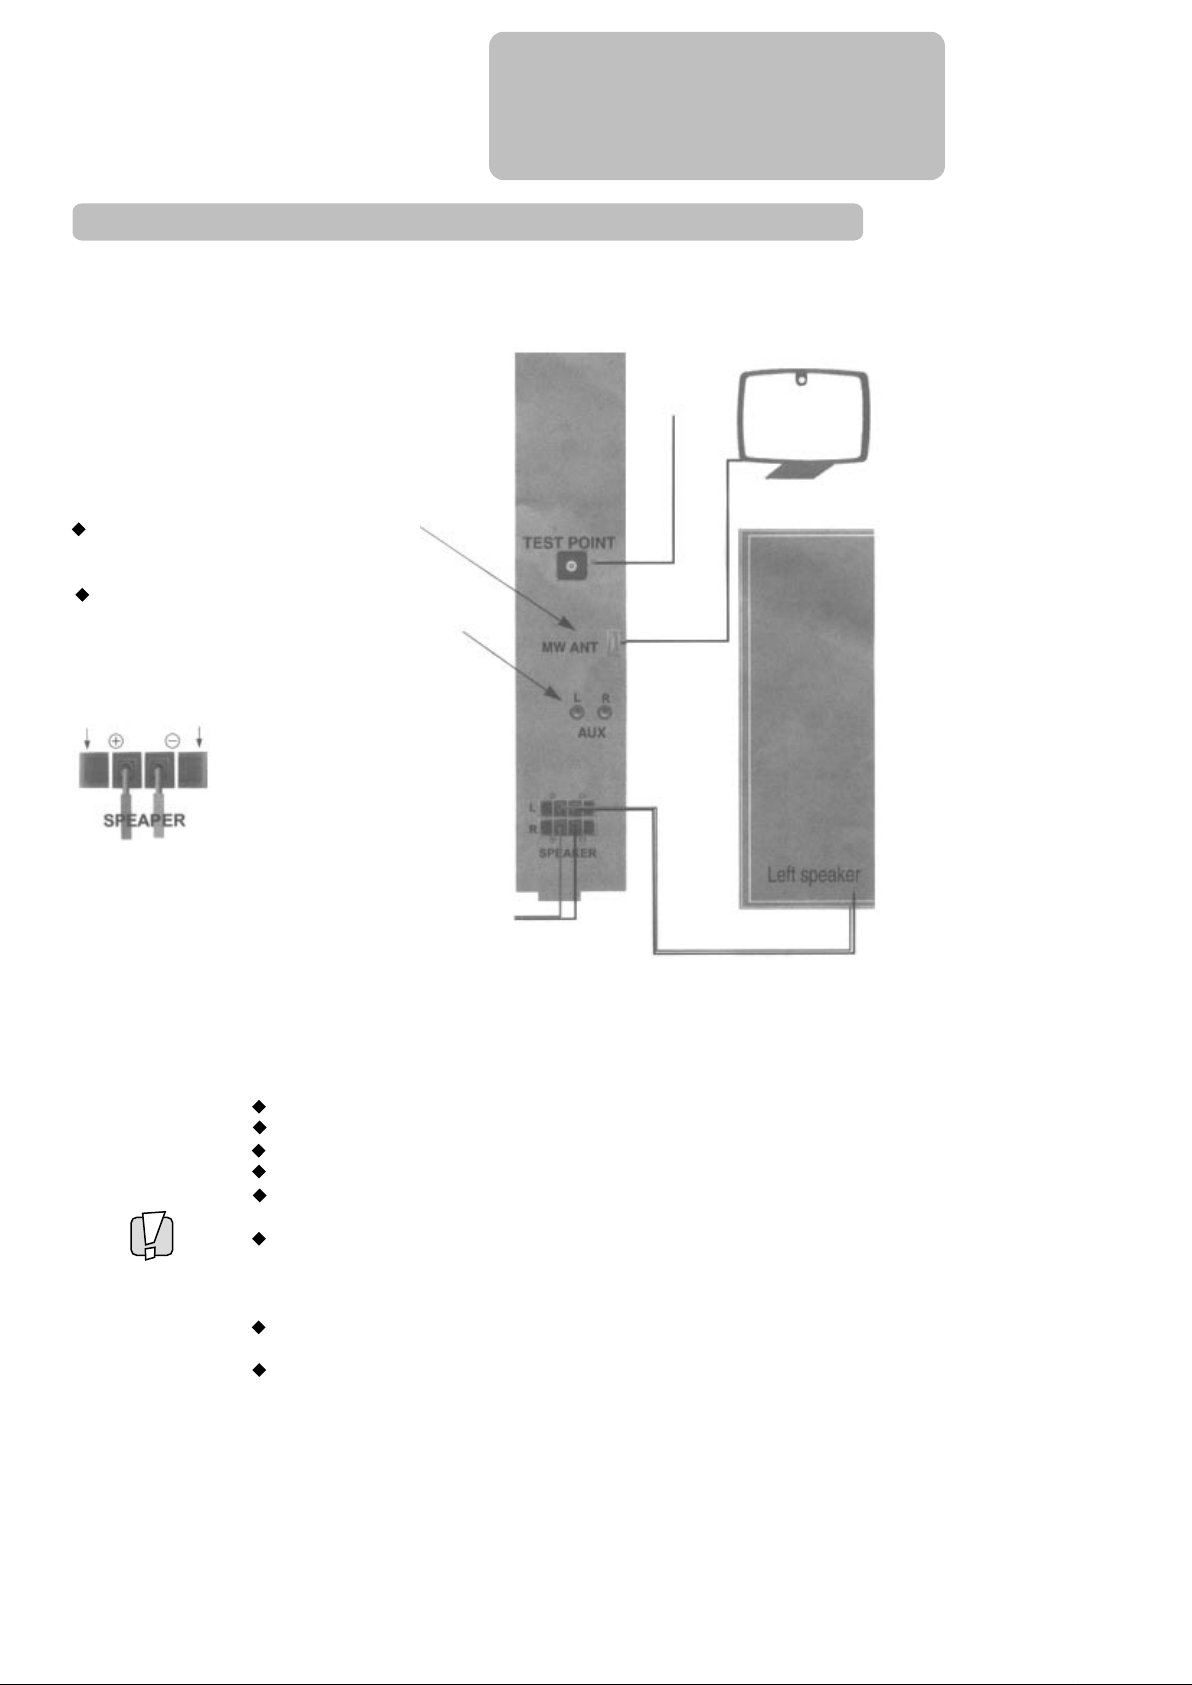
Installation
Plug the provided AM (MW)antenna here.
Plug a device like a video recorder, TV set,
or minidisc, etc. here.
Be sure to connect sockets and plugs of
the same colour.
INSTALLATION/
CONNECTIONS
FM ANT
Push here
Fit the speaker cables.
Be sure to connect the
pair of cables (for the left
and the right speaker) so
that the marked flexes
have both the same
colour (phase).
Right speaker
Make sure the rating of your household electricity supply matches that shown
on the back of the sound system.
Do not stack objects on top of the sound system.
Do not block the ventilation holes of the sound system.
Place the system so that air can circulate freely.
Switch devices off when connecting or disconnecting.
Do not expose the sound system to high levels of humidity and heat, to avoid the risk of fire and
electric shock.
Do not connect the sound system to the power supply if you have just moved it from a cold to a
warm environment. This can result in condensation inside the system and cause serious
damage to the machine and cassettes. Wait around two hours to allow it to reach room
temperature.
Be sure you disconnect the power supply and aerial if you will not be using the system for a
long period or during a thunderstorm.
Be sure to read the precautions on page 3.
5
Page 6
CONTROLS
Place your sound system
horizontally on a flat, steady base so that air can circulate around it for ventilation.
away from humidify and heat, magnetic fields, such as those from loudspeakers etc.,
and with no heavy objects placed on top.
The system
STANDBY/ON
To system power ON (stand-by).
Power save mode (Only Europe) : This mode is implemented to
reduce power consumption at stand-by operation. At this time, all
display are turn off except stand-by mode (power save) L.E.D. This
mode is activated by power button after clock setting. Clock, Power,
Function, Disc direct, Open/Close
, Disc change buttons are available at this mode .
3
2
1
Direct access to one of the three discs that you can
load into your sound system.
TAPE
1/2
TUNER
BAND
OPEN/
CLOSE
DISC
CHANGE
To open or close the disc compartment to load /
unload CDs.
To play the next disc and to turn disc tray for loading
up to 3 discs. Also to load a disc while another is
playing.
Headphone socket. Plugging in a headphone
switches the speakers off.
CD
AUX
CD
To select tape 1, tape 2, tuner and band,
a connected device (video ...), or CD player.
To start play or to select station presets.
SET
To tune in stations, to set values in
programming, to fast reverse or advance
tape and CD.
CLEAR
For a short pause during recording of a
tape or CD play or to advance in a
programming. (e.g. clock set).
To stop play and record or to cancel
values and functions.
UBS enhancement, see page 9.
To mute (on/off) the volume for a while, e.g. during a
telephone call.
To show the current time in the system's display.
6
Page 7

The system
CONTROLS
Press to play TAPE 2 in one direction " " both directions " " or
repeatedly " " using MODE button on the machine.
To select timer setting and to activate / deactivate timer stand-by.
DISPLAY / DEMO : to switch between the system's display and a display
demonstration.
You can see demonstration of this system by press DEMO/DISPLAY
button shortly. Or to modify graphic equalising display, press
DEMO/DISPLAY button more than 1 sec during music playing. And you
can select your favourite display sequentially.
To dub a tape at high or normal speed with synchronised start of both,
playing and recording tapes.
To dub a CD with synchronised start of disc and tape.
Tape compartment 1
for playing tapes.
To start a recording.
To select music styles, see page 9.
UP
DN
To set the volume level.
Gently twist left or right.
Tape compartment 2 for playing tapes in both directions
(see page 11 PLAY MODE) and recording tapes.
7
Page 8

CONTROLS
The remote control is the principal means of control, but the main functions are also
available on the front of the machine.
Press the buttons POWER or FUNCTION (TAPE, TUNER, AUX, CD) to turn on the
power.
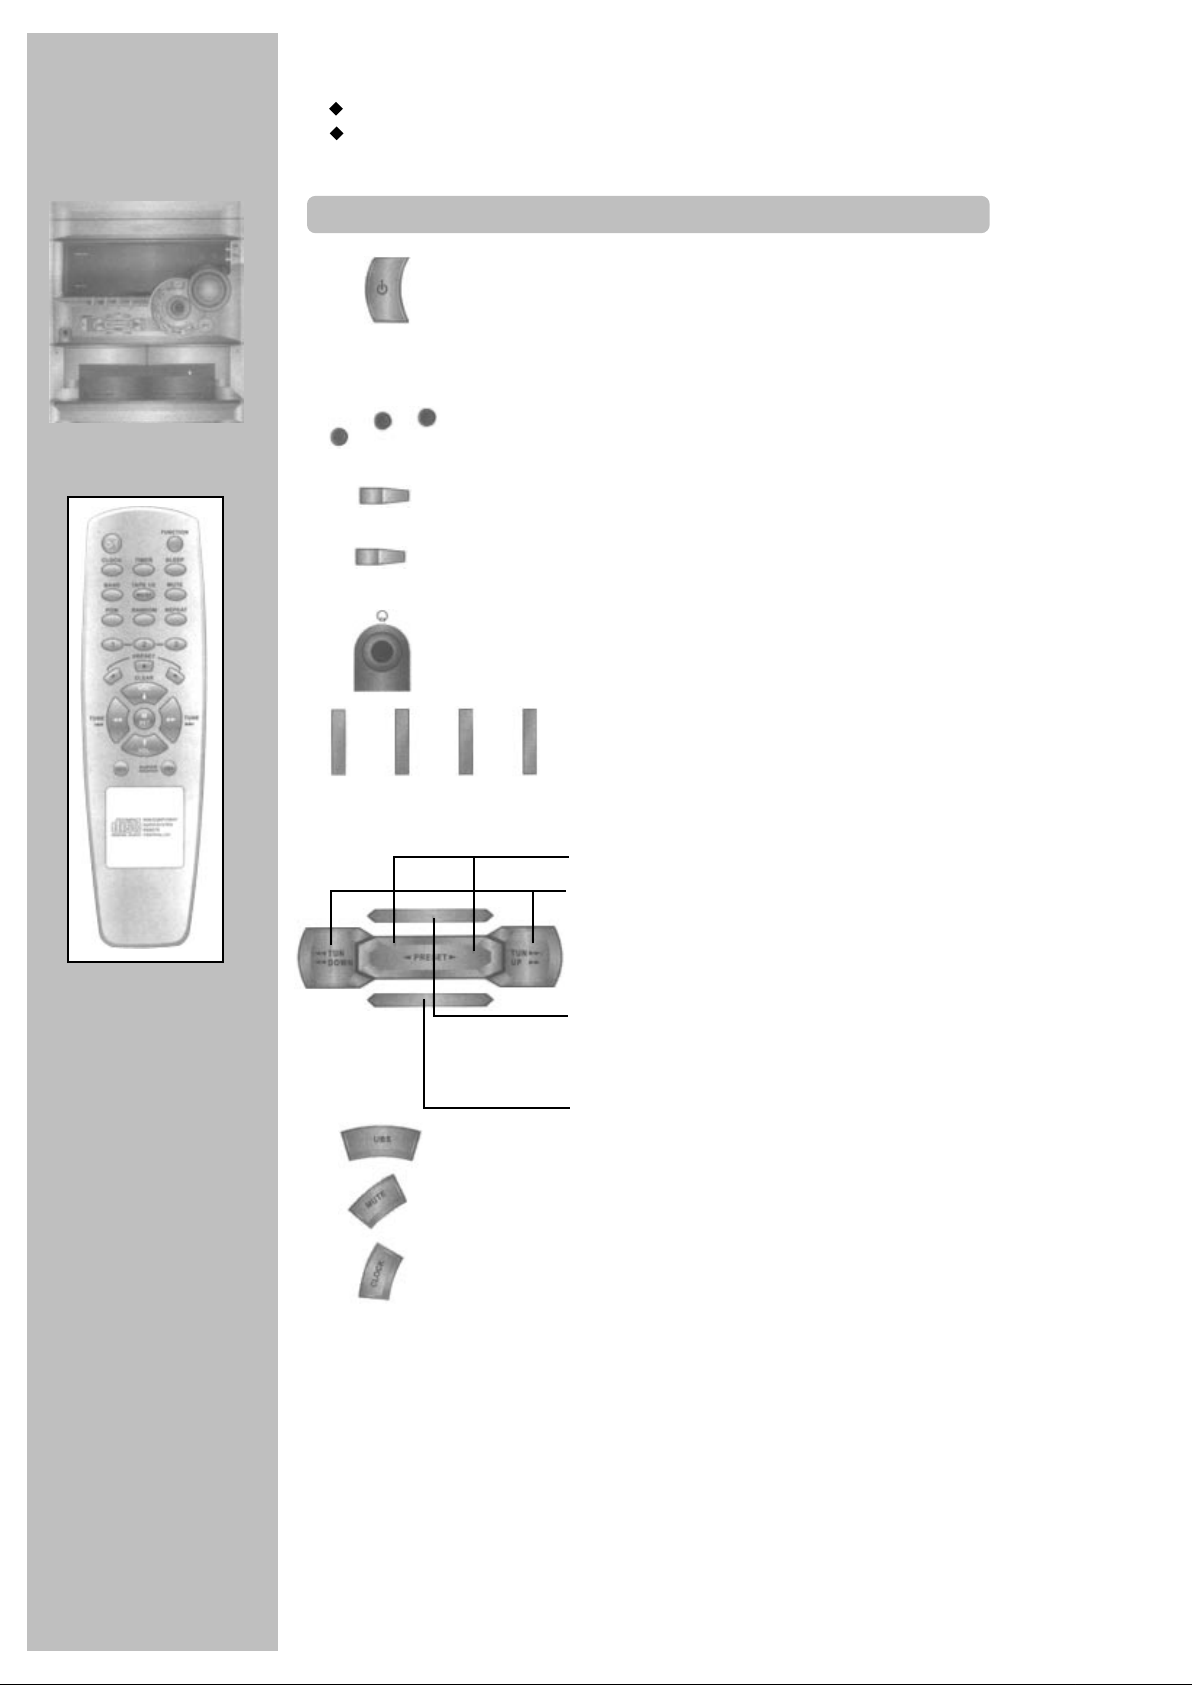
The Remote Control Unit
Power on / off (stand-by).
Power save mode (Only Europe): This model is implemented to reduce power
consumption at stand-by operation. At this time, all displays are turned off except
stand-by mode (power save) LED.
FUNCTION
To select tape, tuner, a connected device (video ...) or CD
player.
To set the volume level.
MAX.
4M
MAX.
4M
TUNE TUNE
PRESET
CLEAR
PGM
RANDOM
REPEAT
CLOCK
SLEEP
TIMER
BAND
To tune in stations, to set values in programming, to fast reverse
or advance tape and CD.
To start play CD or to select station presets.
To stop play or cancel values and function.
To enter programme play.
To select random play for all CDs or track of the selected
disc. Press repeatedly.
To select repeat play for a track, a CD, or all CDs.
Direct Access to one of three discs that you load onto your
sound system.
To show the current time in system's display.
To set the minutes after which the system is to switch off
automatically. Press repeatedly for time between 90 and
10 minutes
For a short pause during recording of a tape or CD play or to
advance in a programming (e.g. clock set).
To select timer setting and to activate / deactivate timer
stand-by.
To select FM or AM radio.
MUTE
TAPE 1/2
To select music style setting, see page 9.
To mute (on/off) the volume for a while, e.g. during a
telephone call.
To select FM mono for a weak stereo reception, or TAPE
1/2.
Bass enhancement (on/off), see page 9.
8
Page 9

With your sound sound system you have unique possibilities
to modify the sound of your music
The sound
CONTROLS
DN
On the
machine
UP
Volume level
Volume control both on the system as well as on the
remote control.
Mute
If you want to turn the volume down very quickly, because
the phone rings or someone is knocking at the door, press
this button. Press again or the volume button to get the
previous volume level.
On the
remote control
MUTE
Music styles
This adjustment section lets you adjust your system's
sound to the music style you are listening to such as
Merengue, Classic, Reggae, Salsa, Samba, Jazz, Rock
and Pops (Flat means no style).
Press the buttons repeatedly for the desired mode and
watch the display.
Ultra Bass Sound system
Use this button on the machine or on the remote control
to give music more volume and power by boosting its bass
section (on/off).
9
Page 10

RADIO
listening
Tuning stations
FUNCTION
BAND
TUNE TUNE
TAPE 1/2
Programming station presets
TUNE TUNE
Select the tuner function.
Select the band.
To find weak stations too, press
repeatedly while tuning.
To find powerful stations quickly tune
automatically keeping either button
pressed until tuning starts.
A station is being received.
FM stereo broadcasts with too
much noise can be switched to
mono for less noise.
You can store up to 30 FM /
15 AM stations.
Find a station as under "Tuning
stations".
Selecting station presets
PRESET
On the machine select the tuner function and the band by pressing
BAND / TUNER button. The other buttons are on the machine too.
If you try to store a 31st FM / 16th AM (MW) station, the display will
show "FULL".
To clear a preset station, select it, press / CLEAR , then / SET for 3 seconds.
You can use the button of the remote control to switch back to stereo.
TAPE 1/2
Store.
The system assigns a station to
a number beginning with 1 one
after another.
Select lower or higher preset
numbers.
10
Page 11

TAPE 1: To playback prerecorded tapes.
TAPE 2: Only to playback prerecorded tapes
and to record tapes.
For tape recording see page 14-15.
Playing tapes
TAPE
playing
FUNCTION
button on the machine
PRESET
CLEAR
Winding
CLEAR
TUNE TUNE
Skipping a track (AUTO FIND)
Select the TAPE 1 or TAPE 2 function.
Open either tape compartment to load the tape.
Be sure to have the open part of the cassette downwards and the left
hand spool fully wound.
Close the compartment door again, pushing it softly.
Start playback.
TAPE 2 you can start in either direction
Stop playback.
Stop playback.
Fast rewind or advance the tape.
PRESET
TUNE TUNE
Continuous playback
FUNCTION
PRESET
Select the tape function by pressing the TAPE 1/2 button.
PLAY MODE : Select if the system is to play TAPE 2 in one direction " ", both directions " " or
repeatedly " " using MODE button on the main unit.
The tape counter resets to "0000" when a tape compartment is opened ("0000" need not be the beginning
of the tape).
To find the next piece of music at least 5 sec. free space has to left between the music tracks.
During playback.
Fast rewind to the beginning of the current
piece of music or advance to the next piece.
Select the TAPE 2 function in the mode.
Load tapes into both compartments.
Set TAPE 2 to play.
After playing both sides of TAPE 2, the machine
will commence with TAPE 1 (one side).
11
Page 12

CD
playing
Playing CDs
FUNCTION
OPEN/
CLOSE
DISC
CHANGE
on the machine
on the machine
CD label up
Select the CD function.
Open the disc compartment to
load a disc.
Be sure to have the disc label facing
upwards.
To play 1 or 2 discs, place them
in the first tray and / or second
tray DISC Compartments.
To play 3 discs, place 2 discs and turn
the trays for the third tray, using DISC
CHANGE button. (Also to load a disc
while another is playing.)
PRESET
CLEAR
Searching
TUNE TUNE
Skipping
TUNE TUNE
Start playback.
The currently played disc is the one on
the left, when you open the
compartment.
To start a specific disc.
If you want to interrupt playback
briefly - and to continue.
Stop playback.
To search for a particular point
on the disc reverse or forwards.
To Skip tracks down / up
(if you want, press the button
repeatedly).
On the machine select the CD function, by pressing the CD button.
The other buttons are on the machine too.
When the disc stops the machine shows its total time.
During playback the machine shows the current disc number, the current
track number, and the tracks play time.
12
Page 13

Please read remarks about discs on page 19
Programmed CD tracks playback
CD
playing
CLEAR
PGM
TUNE TUNE
PRESET
CLEAR
Repeat playback
REPEAT
Stop the disc.
Select the programme function.
Choose a disc.
Select a track number.
Select this number for the programme.
With the last two steps select up to 30 tracks for your programme.
DISC CHANGE button has no effect in programming.
Play your programme.
You can search and skip during programmed playback.
Stop Playback
To cancel programmed CD playback, press the button twice.
Select the repeat function, press repeatedly to have ...
" REPEAT "
DISC
" REPEAT "
ALL
" REPEAT "
to repeat the current track
to repeat the current disc,
to repeat all discs.
Random playback
RANDOM
To cancel repeat playback, press the button until "REPEAT"
in the display is unmarked.
You can repeat a programme by " REPEAT" or a track
ALL
"REPEAT" during programme playback.
Select the random function, press repeatedly to have ..
RANDOM "
"
DISC
to play tracks of the
current disc randomly.
RANDOM "
"
ALL
to play tracks from disc
1, 2 and 3 randomly.
To cancel random playback, press the button until
"RANDOM" in the display is unmarked.
13
Page 14

RECORDING
Load a tape with enough free recording time into TAPE 2.
Be sure to have the open part of the cassette downwards and the left hand spool fully
wound.
Close the compartment door again, pushing it softly
Recording stations
TUNER
BAND
TUNER
BAND
buttons on the machine
Select the TUNER function.
Select the band.
Choose the station
(see also page 10).
Start your recording.
SET
If you want to interrupt
recording briefly-and to
continue.
CLEAR
Stop your recording.
Recording from a connected device
AUX
buttons on the machine
Select the AUX function.
Be sure the audio output of the
device is properly connected (TV
set, video recorder, minidisc, etc.)
to the AUX input sockets on the
back of the machine
(see also page 5).
SET
CLEAR
Start your recording.
If you want to interrupt
recording briefly-and to
continue.
Stop your recording.
To find the point the recording is to start, use the functions on page 11.
14
Page 15

TAPE 1: Only to playback prerecorded tapes
TAPE 2: To playback prerecorded tapes in both
directions and to record
RECORDING
Recording CDs with synchro start
The synchro start function gives you a very comfortable way of copying (tracks of) CDs to a tape: One
press of a button starts both CD playing and tape recording at the right time.
CD
OPEN/
CLOSE
buttons on the machine
Select the CD function.
Open the disc compartment to load a disc.
3
2
1
Select the disc you want to record.
Stop CD play before recording start.
To find a track to be recorded.
Start your recording.
CLEAR
Stop your recording.
Recording from another tape (dubbing)
TAPE
1/2
buttons on the machine
CLEAR
Select the TAPE function.
Load a tape with enough free recording time into
TAPE 2.
Load the prerecorded tape (the one to be dubbed)
into TAPE 1.
Start your dubbing by selecting dubbing speed:
"Hi-DUB" dubs with double speed = half the time
"DUB" dubs with normal tape speed.
Press repeatedly.
Stop your recording.
If the tape is not rewound completely, rewind it first.
If you want to start at the current position, press REC button.
Use only good quality tape cassettes.
Keep cassettes away from excessive moisture or dust, magnetic and electrical fields
(loudspeakers and computer monitors, for example)
Always wind the tape to the beginning when you have finished.
Store the cassette in its cover.
You can protect your precious recordings from being wiped by breaking out the safety tab on the
side of the cassette.
Should you wish to re-use the tape after removing the tab, cover the hole with adhesive tape.
15
Page 16

CONTROLS
Power save mode is activated by power button after clock setting.
Setting the clock (24 hour)
Switch off your sound
system*.
Enter clock-set mode, the hour
and minute digits flash.
TUNE TUNE
TUNE TUNE
Displaying the time
CLOCK
Setting the sleep timer
SLEEP
Set the current hour.
Switch to the minute digits.
Set the current minutes.
Start the clock and exit
clock set.
The machine shows the time
for approx. 4 seconds.
You can set the machine to
automatically switch off after a
specified time
Select the SLEEP function.
FUNCTION
SLEEP
Each time you press the
button, you cut off time from
90 minutes down to 10
minutes (then off).
If you want to cancel the SLEEP function. Dress the button till "SLEEP"
disappears from the display.
* Only if the clock was set before.
16
Page 17

You can set the machine to automatically
switch on and off at a specified time.
Be sure the clock is set accurately.
Setting the timer
TIMER
and clock
TIMER
FUNCTION
TUNE TUNE
TUNE TUNE
TUNE TUNE
Select the TIMER function.
(Timer display disappears after about 9 seconds.)
Select, if you want to listen to the radio, tape, CD, or a
connected device when the system turns on. Press
repeatedly.
Enter 'on' time.
Set the hour of the time the machine is to switch on.
Switch to the minute digits.
Set the minutes of the time the machine is to switch on.
Switch to volume setting.
Set the volume between (MIN.) 1 and (MAX.) 28.
Switch to the time the machine is to switch off again.
Each time you press the button, you cut increase off time
from 10 minutes up to 240 minutes.
Exit the setting.
Timer (record) stand-by on / off
Press the button repeatedly to switch :
TIMER
Checking the timer
TIMER
Select the TIMER function.
TIMER
Press the button repeatedly for the timer items.
Timer record :
Set the timer as above. Load a tape with enough space and without safety hole (page 15) into TAPE 2.
Then set timer standby to
timer stand-by to play
timer record stand-by to record.
timer disable.
17
Page 18

APPENDIX
Before you ask a specialist
No sound
No Display
Noise with radio sound
Bad sound with tapes
Not recording
Not playing CDs
Remote control does
not work
- No mains supply?
- Volume at minimum?
- Are headphones plugged in the headphone socket?
- Did someone press the MUTE button?
- The power save mode ?
- Replug the AC Cord.
- Station not tuned accurately? Tune again.
- Weak FM station? Switch to mono using MODE button.
- Weak AM stations? Move the AM antenna slowly for
better reception.
- Antenna accurately fitted?
- Be sure playing / recording heads and tape guiding
parts are clean, see bottom of this page.
- Try another cassette.
- Cover the protective hole of the cassette with adhesive
tape.
- Correct source CD, tape, tuner, AUX selected?
- Load a CD with the label facing upwards.
- CD scratched, broken, deformed, ... Try with another.
- Condensation e.g. after a transport? Wait for a
while (20-30 minutes).
- CD dirty? Wipe with a soft cloth from the centre to the
outside.
- Check Batteries polarity? See page 18.
- Batteries run down? Try new ones.
- An object is blocking the direct line between remote
control and the system. Max distance to the system is
4-7 m pointing to its front.
Cleaning the audio heads of the tape deck
Unplug your sound system from the mains. Open the tape compartments.
After playing and recording for a time, the sound of the tape recorders may
become muffled. Then clean the heads and tape guiding parts.
Only use a soft utensil with
alcohol or a special head
cleaning liquid.
erasing head playing/
recording head
tape guiding
parts
18
Page 19

Compact discs
Always ... Never ...
APPENDIX
handle your discs with care. Hold a disc
with the fingers touching the edge or the
hole.
place the disc with the label facing up.
place the disc properly into the tray using
the proper guide area for 12 cm or 8 cm
discs.
replace a disc in its case after playing and
store it in a vertical position.
use a soft cloth to clean a disc if
necessary and wipe from the centre to the
outside.
Technical data
Dimensions (W x D x H)
Set:
Speaker:
Weight:
Power supply
Voltage:
Power consumption
Power save of stand-by (Only Europe)
Less than 1 watt
275 x 377 x 317.5 mm
225 x 235 x 315 mm
7.6 kg + 3.5 kg x 2
AC 240V/50Hz
88 watt
play a deformed, cracked, or chipped disc.
try to repair a disc with adhesive tape or
glue.
close the tray with a disc slipping out of
the guide area, or two disc inside.
scratch a disc or store it in direct sunlight,
high humidity or high temperature.
use record cleaning sprays, benzene, static
electricity liquids or any other solvent, if the
disc surface is soiled.
wipe the disc in a circular motion, since
circular scratches are likely to occur, which
will cause noise.
write on the disc.
move the system during playback.
3 x CD changer
Converter:
Oversampling:
Tape
Synchro recording. 1x auto reverse
High Speed Dubbing, Automatic level control.
Amplifier
Output Power:
Speakers
Woofer
Tweeter
Impedance
16 bit D/A
8x
50 watt + 50 watt (RMS)
6"
2.5"
8 ohm
Reception range
FM:
AM:
Subject to technical alterations without notice.
87.5MHz - 108MHz
522 - 1620kHz
19
Page 20

PALSONIC CORPORATION PTY LTD
1 JOYNTON AVENUE
WATERLOO NSW 2017 AUSTRALIA
TEL: (02) 9313 7111
FAX: (02) 9313 7555
www.palsonic.com.au
PALSONIC CUSTOMER SERVICE
TELEPHONE
AUSTRALIA: 1300 657 888
 Loading...