

Page 1
INSTRUCTION MANUAL
PORTABLE RADIO CASSETTE
RECORDER WITH CD PLAYER
PRC-510
PALSONIC CORPORATION PTY LTD
1 JOYNTON AVENUE
WATERLOO NSW 2017 AUSTRALIA
TEL: (02) 9313 7111
FAX: (02) 9313 7555
www.palsonic.com.au
PALSONIC CUSTOMER SERVICE
TELEPHONE
AUSTRALIA: 1300 657 888
Page 2

1. SAFETY PRECAUTIONS
For your own protection, please read these safety instructions completely before
operating the appliance, and keep this manual for future reference.
Carefully observe all warnings, precautions, and instructions on the appliance, or
the ones described in the operating instructions, and adhere to them.
CAUTION
RISK OF ELECTRICAL SHOCK
DO NOT OPEN
CAUTION:
TO REDUCE THE RISK OF ELECTRIC SHOCK,
DO NOT REMOVE COVER (OR BACK)
NO USER SERVICEABLE PARTS INSIDE
REFER SERVICING TO QUALIFIED SERVICE PERSONNEL
This symbol indicates that dangerous voltage constituting a risk of
electric shock is present within this unit.
This symbol indicates that there are important operating and
maintenance instructions in the literature accompanying this unit.
WARNING
TO REDUCE THE RISK OF FIRE OR ELECTRIC SHOCK, DO NOT EXPOSE
THIS APPLIANCE TO RAIN OR MOISTURE.
CAUTION: This product should be connected to a power supply only of the
type as marked on the product.
To prevent electric shocks and fire hazards, do NOT use any other
power source.
LASER SAFETY
This unit employs a laser. Only qualified service personnel should remove the
cover or attempt to service this device due to possible eye injury.
DANGER
THE CD PLAYER IS A 'CLASS 1 LASER PRODUCT' WHICH USES INVISIBLE
LASER BEAMS WHICH COULD DAMAGE YOUR EYES. THE UNIT IS
EQUIPPED WITH SAFETY DEVICES WHICH PREVENT ANY LASER BEAMS
EMERGING FROM IT. NEVER DISCONNECT BY PASS THESE SAFETY
DEVICES.
WARNING: Non-waterproof product. Keep away from water.
2
Page 3
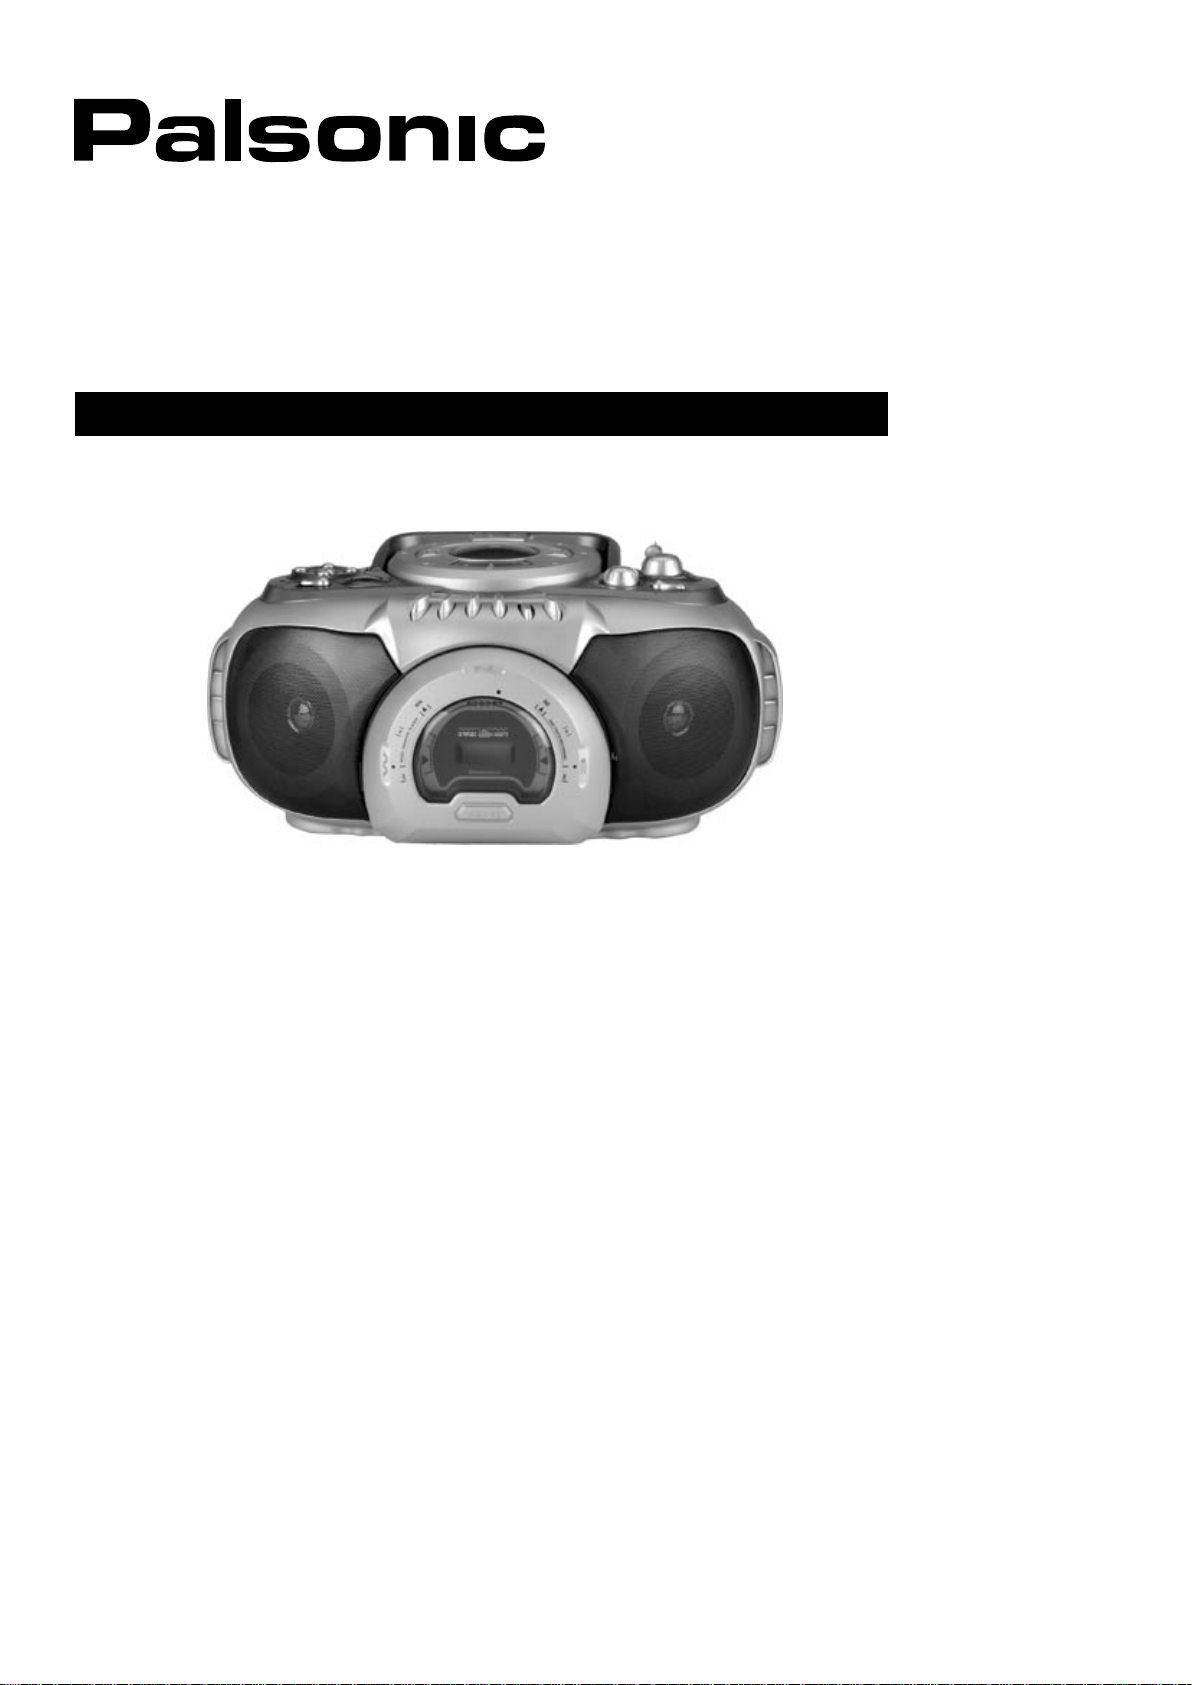
TOP VIEW
1.
CD LED DISPLAY
2.
FUNCTION SELECTOR
(CD, TAPE, TUNER)
3.
POWER LED DISPLAY
4.
FM STEREO INDICATOR
5.
HEADPHONE JACK
6.
CD CONTROL KEYS
(PLAY/PAUSE, STOP,
REPEAT( 1, ALL), SKIP UP/DOWN)
7.
FM ROD ANTENNA
8.
TUNING DIAL
9.
TUNING WHEEL
10.
BAND SELECTOR
(AM/ FM/ FM STEREO)
11.
VOLUME CONTROL
12.
CASSETTE CONTROL KEYS
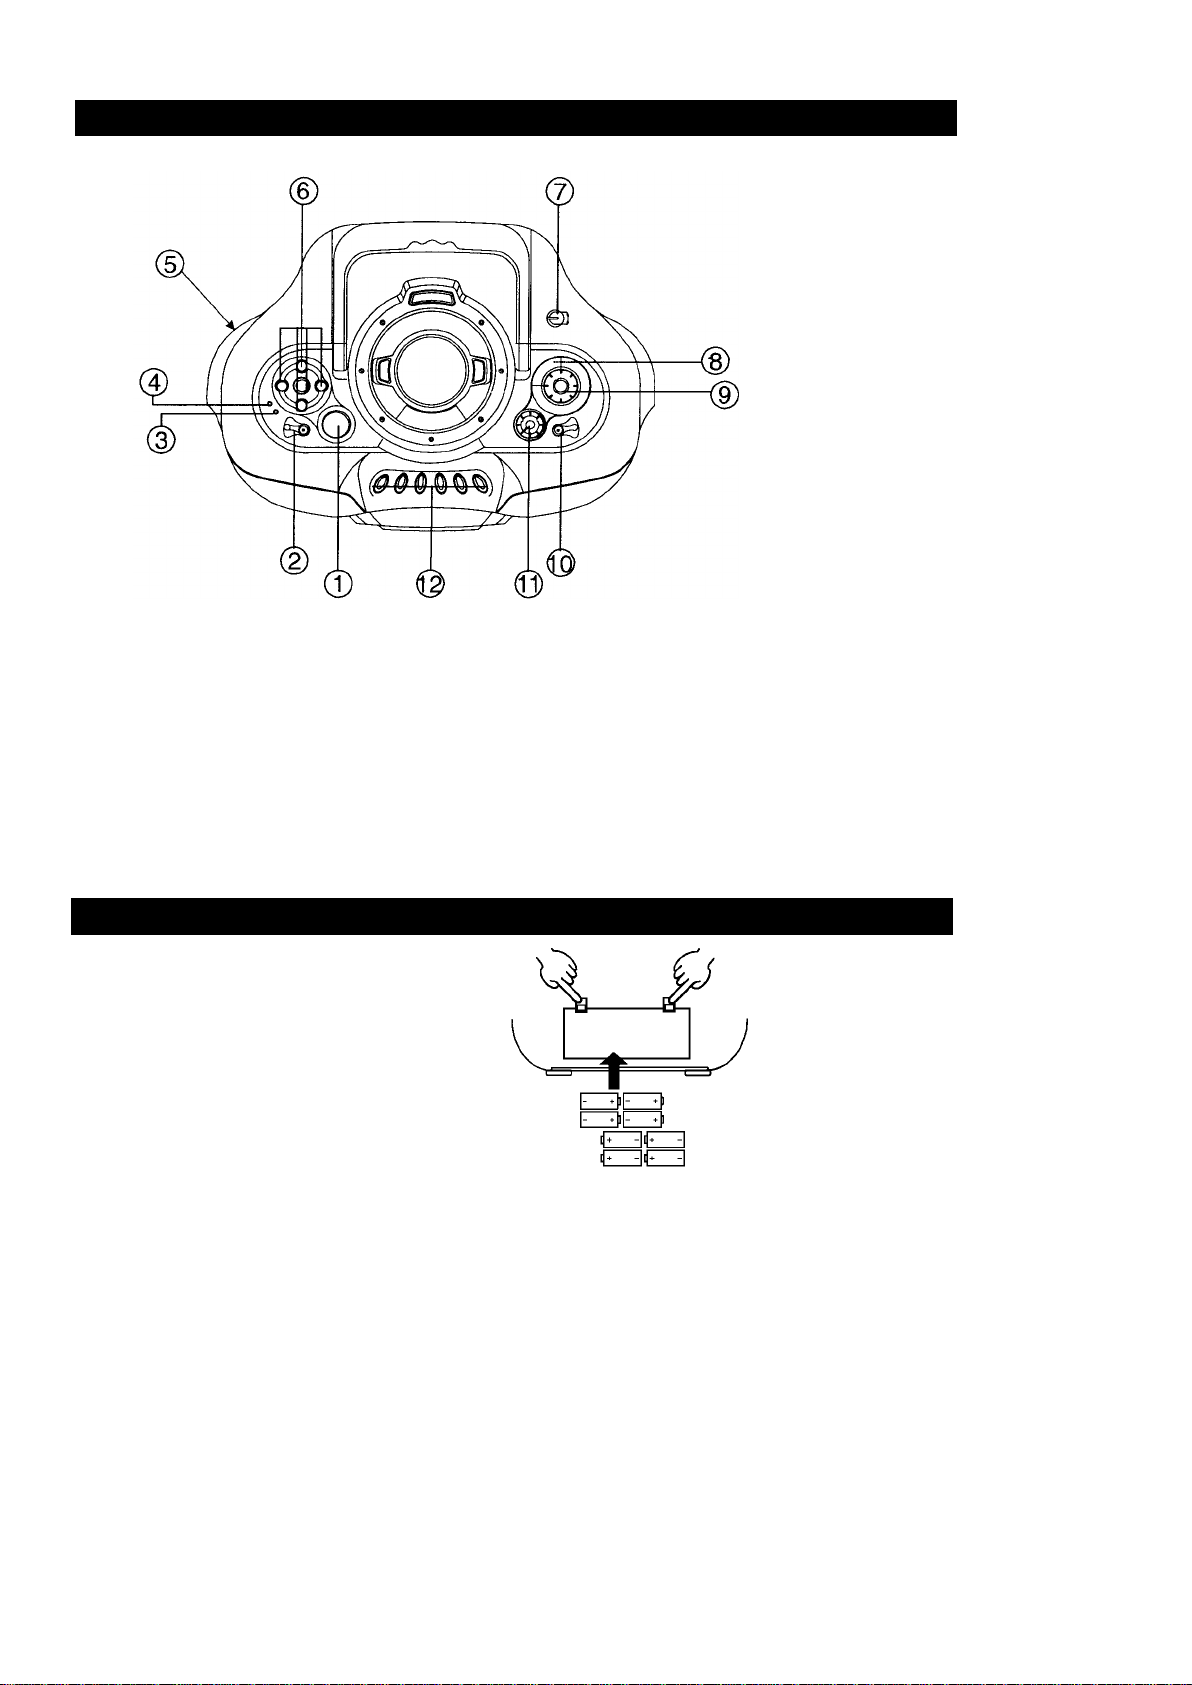
2. BATTERY OPERATION
1.
Open the battery compartment cover.
2.
Insert eight C-size (UM-2, R-14) batteries
in the battery compartment and make sure
the proper polarities are maintained.
3.
Close the battery compartment cover.
3
Page 4

3. RADIO OPERATION
1. Set the function selector switch
to the TUNER position.
2.
Slide the Band switch to the
AM, FM or FM STEREO position.
3. Tune a desired station by turning
the TUNING wheel.
4. To turn the radio off, set the
function selector switch to the
TAPE position.
FM STEREO indicator. It will light up when receiving a
stereo signal in FM STEREO mode.
ADJUSTING THE ANTENNA FOR THE BEST RECEPTION
AM Rotate the unit FM
Extend FM rod
4
Page 5

4. CD PLAYER OPERATION
LOADING CD
1. Press down the CD door and
open the door.
PLAYING CD
1. Set the function selector switch
to the CD position.
3. To play, press the PLAY/
PAUSE button.
2. Load a disc with label side
upwards and close the door.
2. Load a CD with label side
upwards and close the door.
If no disc or damaged
disc, the display
shows "--".
If a disc contains
15 tracks, the
display show "15".
4. To stop play, press the STOP
button.
SUSPEND PLAYBACK
Press the PLAY/PAUSE button once
during play.
To resume playback, press the
PLAY/PAUSE button again.
SKIP FUNCTION REPEAT PLAYBACK
SKIP: Press the SKIP or
button momentarily to advance or to
lower the track number.
Press the REPEAT button repeatedly.
To repeat the current
back, press once.
To repeat the current
disc, press twice.
5
Page 6

5. CASSETTE DECK OPERATION
PLAYBACK
1. Set the function selector switch
to the TAPE position.
3. To playback, press the PLAY
button.
SUSPEND PLAYBACK
To suspend playback, press
the PAUSE button.
2. Insert a prerecorded cassette tape
4. To stop playback, press the
STOP / EJ button.
When the end of tape is reached,
the tape will automatically stop.
REWIND OR FAST FORWARD TAPE
F.F REW
To resume playback,
press the PAUSE button again.
STOP/EJECT
6
Page 7

TAPE RECORDING - FROM RADIO
1. Set the function selector to TUNER
position.
3. Tune in the desired station.
5. To record, press the RECORD
button.
TAPE RECORDING - FROM CD PLAYER
1. Set the function selector switch
to CD position.
2. Select the desired band.
4. Insert a blank tape.
6. To stop recording, press the
STOP / EJ button.
Recording automatically
stops, when the tape is
completed.
2. Load a disc in the compartment
and close the door. If necessary
select a track by pressing the
SKIP buttons.
3. Insert a blank tape.
5. To stop recording, press the
STOP / EJ button.
Recording automatically
stops, When the tape is
completed.
4. To record from a disc, press the
RECORD button.
7
Page 8

6. TECHNICAL SPECIFICATION
GENERAL
Power Source ............................................................
Power Consumption ..................................................
Dimensions (W x D x H) ............................................
Weight .......................................................................
RADIO
Frequency Range .....................................................
CASSETTE SECTION
Tape Speed ..............................................................
Frequency Response ................................................
AUDIO
Output Power ............................................................
Speaker ....................................................................
240V/50Hz
12 W
363 x 251 x 173 (mm)
2.4 kg
AM : 522-1620kHz
FM : 87.5-10MHz
4.76 CM/SEC
125 -6300Hz
1.5W/CH
3" 8 Ohm
COMPACT DISC SECTION
Converter ....................................................................
Optical Pickup .............................................................
Frequency Response ...................................................
ACCESSORY
Battery .......................................................................
Design and Specification subject to change without notice.
1 bit D/A
3 - Beam Laser
125Hz - 20kHz
Not Included
8
 Loading...