

Page 1
INSTRUCTION MANUAL
PORTABLE RADIO CASSETTE
RECORDER WITH CD PLAYER
PRC-241
PALSONIC CORPORATION PTY LTD
1 JOYNTON AVENUE
WATERLOO NSW 2017 AUSTRALIA
TEL: (02) 9313 7111
FAX: (02) 9313 7555
www.palsonic.com.au
PALSONIC CUSTOMER SERVICE
TELEPHONE
AUSTRALIA: 1300 657 888
Page 2

SAFETY INSTRUCTIONS
WARNING: TO PREVENT FIRE OR SHOCK HAZARD, DO NOT EXPOSE THIS APPLIANCE
TO RAIN OR MOISTURE.
CAUTION
RISK OF ELECTRICAL SHOCK
DO NOT OPEN
The lightning flash and
arrow head within the
triangle is a warning
sign alerting you of
"dangerous voltage"
inside the product.
CAUTION : TO REDUCE THE RISK OF
ELECTRIC SHOCK DO NOT REMOVE
COVER (OR BACK) NO USER
SERVICEABLE PARTS INSIDE. REFER
SERVICING TO QUALIFIED SERVICE
PERSONNEL
THESE IMPORTANT SAFETY INSTRUCTIONS INCLUDE, AS APPLICABLE TO THE
APPLIANCE, STATEMENTS THAT CONVEY TO THE USER THE INFORMATION ITEMISED
IN THESE PARAGRAPHS:
1.
Read instructions - All the safety and operating instructions should be read before the appliance is
operated.
2.
Retain instructions - The safety and operating instructions should be retained for future reference.
3.
Heed Warnings -All warnings on the appliance and in the operating instructions should be adhered to.
4.
Follow instructions - All operation and use instructions should
be followed.
5.
Water and Moisture - The appliance should not be used near water; for example, near a bathtub,
washbowl, kitchen sink, laundry tub, in a wet basement, or near a swimming pool, and the like.
6.
Ventilation - The appliance should be situated so that its location or position does not interfere with its
proper ventilation. For example, the appliance should not be situated on a bed; sofa, rug, or similar
surface that may block the ventilation openings; or placed in a built-in installation, such as a bookcase
or cabinet that may impede the flow of air through the ventilation openings.
7.
Heat - The appliance should be situated away from heat sources such as radiators, heat registers,
stoves or other appliances (including amplifiers) that produce heat.
8.
Power Sources - The appliance should be connected to a power supply only of the type described in
the operating instructions or as marked on the appliance.
9.
Grounding or Polarisation - Precautions should be taken so that the grounding or polarisation means of
an appliance is not defeated.
10.
Power-Cord Protection - Power supply cords should be routed so that they are not likely to be walked
on or pinched by items placed upon or against them, paying particular attention to cords at plugs,
convenience receptacles and the point where they exit from the appliance. plug specified by the
manufacturer that has the same overload protection as the original plug.
11.
Cleaning - The appliance should be cleaned only as recommended by the manufacturer.
12.
Non-use Periods - The power cord of the appliance should be unplugged from the outlet when left
unused for a long period of time.
The exclamation point
within the triangle is a
warning sign alerting you
of important instructions
accompanying the
product.
1
Page 3
Object and Liquid Entry - Care should be taken so that objects do not fall and liquids are not spilled into
13.
the enclosure through openings.
Damage Requiring Service - The appliance should be serviced by qualified service personnel when:
14.
A. The power supply cord or the plug has been damaged; or
B. Objects have fallen, or liquid has been spilled into the appliance; or
C. The appliance has been exposed to rain; or
D. The appliance does not appear to operate normally or exhibits a marked change in performance; or
E. The appliance has been dropped, or the enclosure damaged.
Servicing - The user should not attempt to service the appliance beyond that described in the operating
15.
instructions. All other servicing should be referred to qualified service personnel.
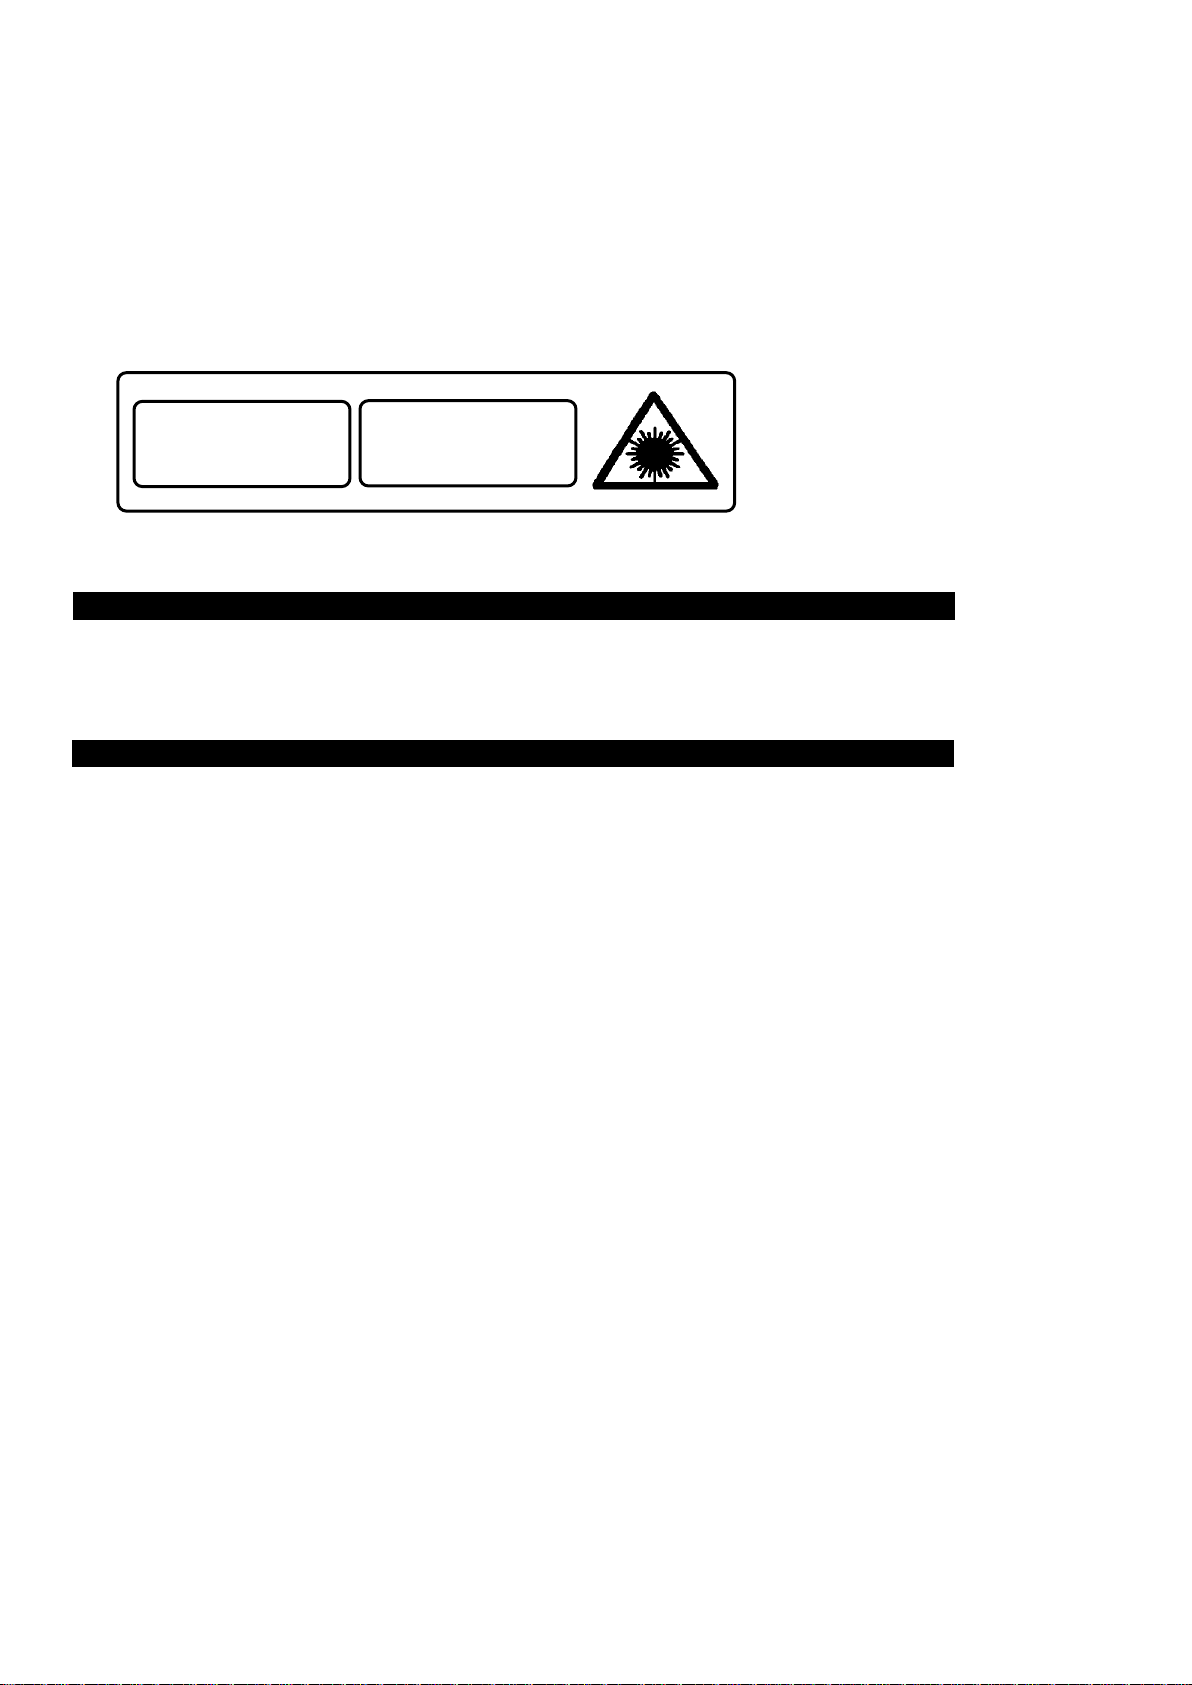
CLASS 1 LASER PRODUCT
CLASS 1 LASER PRODUCT
APPAREIL LASER DE CLASSE 1
PRODUCT0 LASER DECLASE 1
This product contains a low Dower laser device.
Follow the advice below for safe and appropriate operations
ON PLACEMENT
.
Do not use the unit in places which are extremely hot, cold, dusty or humid.
.
Place the unit on a flat and even surface.
.
Do not restrict the air-flow of the unit by placing it in a place with poor ventilation by
Covering it with a cloth or by placing it on a carpet.
ON PROTECTION AGAINST LASER ENERGY EXPOSURE
.
As the laser beam used in this compact disc player is harmful to the eyes, do not attempt to
disassemble the casing.
.
Stop operation immediately if any liquid or solid object should fall into the cabinet.
.
Do not touch the lens or poke at it. If you do, you may damage the lens and the player may not operate
properly.
.
Do not put anything in the safety slot. If you do, the laser diode will be ON when the CD door is still
open.
If the unit is not to be used for a long period of time, make sure that all power sources are
disconnected from the unit. Remove all batteries from the battery compartment, and unplug the
AC-DC adaptor from the wall outlet. Make it a practice to remove the AC-DC adaptor by grasping the
main body and not by pulling the cord.
.
This unit employs a laser. The use of controls or adjustment or performance of procedures other than
those specified here may result in exposure to hazardous radiation.
INVISIBLE LASER RADIATION
WHEN OPEN AND INTERLOCKS
AVOID EXPOSURE TO BEAM
CAUTION
DEFEATED
2
Page 4

ON CONDENSATION
.
When left in a healed room where it is warm and damp, water droplets or condensation may form
inside the unit.
.
When there is condensation inside the unit, the unit may not function normally.
.
Let it stands for 1 to 2 hours before turning the power on, or gradually heat the room up and dry the
unit before use.
Should any trouble occurs, remove the power source and refer servicing to qualified personnel
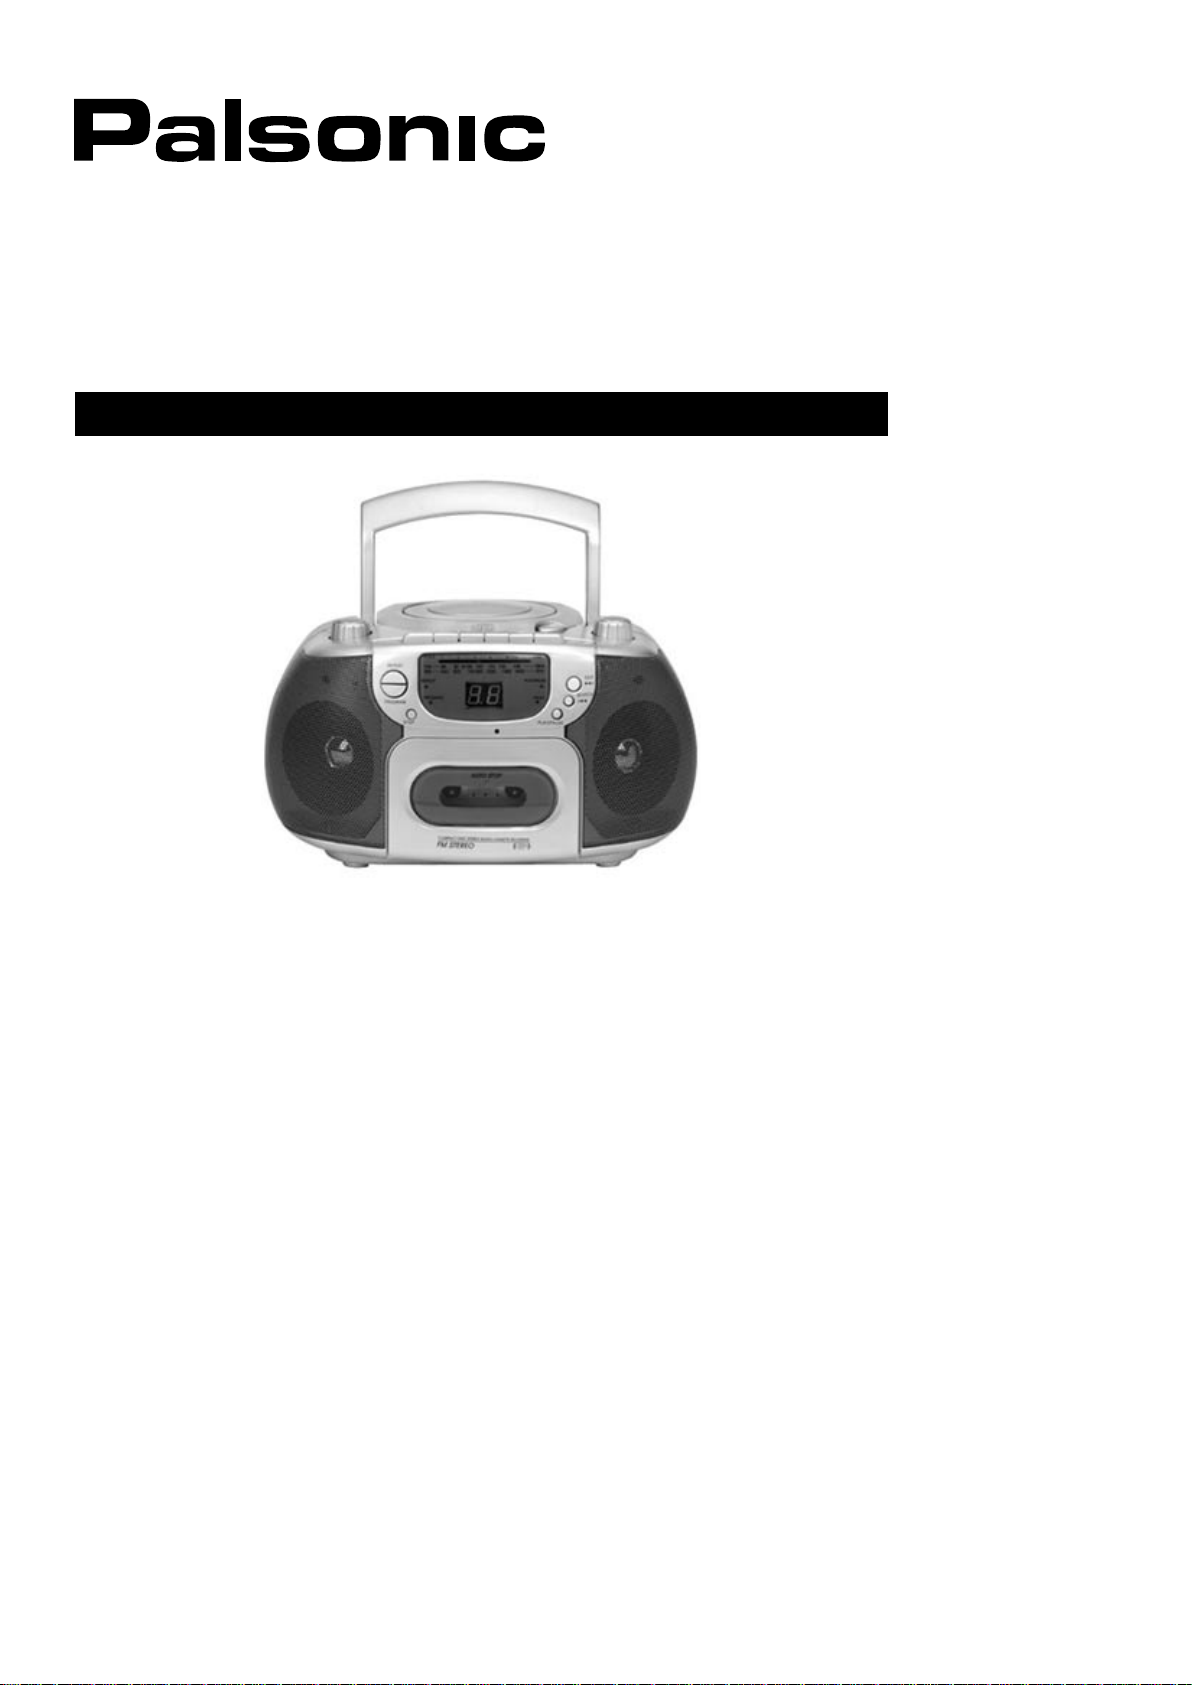
FUNCTION AND CONTROLS
1.
Function Selector
2.
Telescopic Antenna
3.
Folding Handle
4.
CD Door
5.
CD Door Open Button
6.
Band Selector
7.
Tuning Knob
8.
Cassette Record Button (REC)
9.
Cassette Play Button
10.
Cassette Rewind Button (REW)
11.
Cassette Fast Forward Button (F.FWD)
12.
Cassette Stop/Eject Button
13.
Cassette Pause Button
14.
Rotary Volume Knob
15.
Dynamic Speakers
16.
CD Skip/Search Backward Button
17.
CD Skip/Search Forward Button
18.
CD Repeat Button
19.
Dial Lens
20.
LED Track Display
21.
Program Button
22.
CD Stop Button
23.
CD Play/Pause Button
24.
Cassette Door
25.
CD Play/Pause Indicator
26.
CD Repeat 1/All Indicator
27.
CD Program Indicator
28.
FM Stereo Indicator
29.
Built-in Condenser Microphone
30.
Stereo Headphone Jack
31.
AC Power Socket
32.
Battery Door
This CD Cassette Recorder operated on 8 x "D" size (UM-1) batteries or from line power supply.
3
Page 5

POWER SOURCE
A. BATTERY OPERATION
12Remove the Battery Door (#32).
Following the polarity diagram as shown on the Battery Door (#32) insert 8 x "D" size (UM-1)
batteries (not included)
IMPORTANT: Be sure that the batteries are installed correctly. Wrong polarity may damage the unit.
3.
For better performance and longer operating time, we recommend the use of alkaline-type
batteries.
4.
Do not mix old and new batteries.
5.
Do not mix alkaline, standard (carbon-zinc) or rechargeable (nickel-cadmium) batteries.
6.
If the unit is not to be used for an extended period of time, remove the batteries. Old or leaking
batteries can cause damage to the unit and may void the warranty.
B. AC OPERATION
When the AC power cord (included) is connected to the AC Power Socket (#31) at the back of the unit
and the other end to a wall outlet with AC 230V 50Hz power supply, the unit will disconnect the
batteries automatically, and operate on AC Power instead
CD PLAYER OPERATION
1.
Set the Function Selector (#1) to the "CD" position and the LED Track Display (#20) will display "00"
2.
Open the CD Door (#4) Carefully place an audio CD with its label side upward in the CD compartment
and close the CD Door (#4) by pressing on the CD Door where indicated (#5).
3.
The total number of tracks on the CD will appear in the LED Track Display after a few seconds.
4.
Press the CD Play Button (#23) The CD Play Indicator (#25) will light and the CD will start playing from
the first track.
5.
Adjust the Volume Control (#14) to obtain the desired sound level from the Dynamic Speakers (#15).
6.
To suspend playing, press the CD Pause Button (#23) and the CD Pause Indicator (#25) will flash. To
resume playing, press the Pause Button again.
7.
You can choose to play your favourite track directly by pressing either the Skip Forward Button (#17) or
Skip Backward Button (#16). The LED Track Display (#20) will indicate the correct track number
selected.
8.
To locate a particular passage within a track, keep the CD Search Forward Button (#17) or CD Search
Backward Button (#16) depressed until it is found.
9.
To repeat a particular track, press the CD Repeat Button (#18) until the CD Repeat 1/All Indicator (#26)
flashes.
10.
To repeat the entire CD, press the Repeat Button (#18) until the CD Repeat 1/All Indicator (#26) lights
steadily.
11.
To stop playing, press the CD Stop Button (#22).
12.
When you wish to turn off the CD Player, set the Function Selector (#1) to the "TAPE" position.
4
Page 6

CD PROGRAMMED PLAY
This function allows the tracks to be played in a programmed sequence.
1.
Press the Program Button (#21) once. The CD Program Indicator (#27) will flash and the LED Track
Display (#20) will display "0" and blink.
2.
Press the CD Skip Forward Button (#17) or CD Skip Backward Button (#16) to select the song to be
programmed.
3.
Press the Program Button (#21) again to store selection. The CD Program Indicator (#27) will flash and
the LED Track Display (#20) will go to "0" and blink.
4.
Press the CD Skip Forward Button (#17) or CD Skip Backward Button (#16) to select the next song to
be programmed and press the Program Button to store selection.
5.
You may repeat steps #1- #4 to program as many as 19 tracks. If you attempt to program more than 19
tracks, the LED Track Display (#20) will display "--" instead.
6.
To check the programmed tracks, press Program Button (#21). The LED Track Display (#20) will
display the track number. Press Program Button (#21) more times to check the following tracks.
7.
Press CD Play Button (#23) to start playing in the programmed sequence.
8.
To cancel programmed play, press the CD Stop Button (#22).
RADIO RECEPTION
1.
Set the Function Selector (#1) to "RADIO" position.
2.
Set the Band Selector (#6) to "AM" or "FM" for the desired radio band.
3.
Adjust the Tuning Knob (#7) to select the desired radio station.
4.
Adjust the Volume Control (#14) to obtain the desired sound level from the Dynamic Speakers (#15).
5.
When you wish to turn off the Radio, set the Function Selector (#1) to the "TAPE" position.
TIPS FOR GOOD RADIO RECEPTION
1.2.To insure maximum FM tuner sensitivity, the Telescopic Antenna (#2) should be fully extended and
rotated to obtain the best possible reception. The FM Stereo Indicator (#28) will light steadily when a
stereo program is being received.
When tuning in AM reception, be sure to place the unit in a vertical position. To insure best AM
sensitivity, try repositioning the unit until the best reception is obtained.
CASSETTE RECORDER OPERATION
1.
Open the Cassette Door (#24) and insert a pre-recorded cassette tape with the exposed tape facing
upwards. Close the Cassette Door (#24).
2.
Press the Cassette Play Button (#19) and adjust the Rotary Volume Control (#14) to obtain the desired
sound level.
3.
Press Cassette Pause Button (#13) to suspend play. Press same button again to resume.
4.
Press the Cassette Fast Forward Button (#11) or the Cassette Rewind Button (#10) to rapidly advance
or rewind the tape.
5.
Press the Cassette Record Button (#8) to record from either Radio, Dynamic Built-in Condenser (#29)
or CD. Use Function Selector (#1) to choose your signal source accordingly.
6.
Press the Cassette Stop Button (#12) to stop operation.
5
Page 7

AUTOMATIC STOP
To protect your cassette tapes and prevent unnecessary wear to the pinch roller of the cassette mechanism,
this unit is equipped with an Automatic Stop System. When the tape ends during play, the Cassette Play
Button (#9) will automatically release to stop the cassette from running.
CASSETTE TAPE OPERATING TIPS
1.
High quality tapes are recommended to obtain maximum quality reproduction from recordings.
2.
Tapes with playing time of 120 minutes (C-120) are not recommended because they contain thinner and
longer tape that has a greater chance to malfunction and jam, which may damage the cassette
mechanism.
3.
To obtain good reproduction, the head should be cleaned after every 10 to 20 hours of use. It is also
recommended that the cassette be kept away from excessive heat or cold.
4.
If there is slack in the tape, remove the slack prior to inserting the cassette. To remove the slack, insert a
pencil into the hub and rotate clockwise as shown below:
Tape Supply Reel
Tape Take-up Reel
5.6.A leader tape is provided at the beginning on each cassette. There is no recording on this area, so it is
necessary to let the tape run for about five seconds to clear the head.
Keep the tape head clean since a dirty head can cause distorted sound or improper tape speed.
Depress the Cassette Play Button and use a small cotton swab with tape head cleaner or alcohol to
clean the tape head, capstan and pinch roller as shown below:
Pinch Roller
Capstan
Playback Head
USING HEADPHONE (NOT INCLUDED)
Inserting the plug of your headphones into the Stereo Headphone Jack will enable you to listen to the CD,
Radio or Cassette music in private. When using headphone, the Built-in Speakers will be disconnected.
READ THIS IMPORTANT INFORMATION BEFORE USING YOUR HEADPHONES
1. Avoid extended play at very high volume as it may impair your hearing.
2. If you experience ringing in your ears, reduce the volume or shut off your unit.
3. Do not use while driving a motorised vehicle. This is dangerous and also illegal in some countries.
4. Keep the volume at a reasonable level even if your headset is an open-air type designed to allow you
to hear outside sounds. Please note excessively high volume may still block outside sounds.
6
Page 8

CARE AND MAINTENANCE
1.
Clean your unit with a damp (never wet) cloth. Solvent or detergent should never be used.
2.
Avoid leaving your unit in direct sunlight or in hot, humid or dust places.
3.
Keep your unit away from heating appliances and sources of electrical noise such as fluorescent lamps
or motors.
4.
If drop-outs or interruptions occur in the music during CD play, or if the CD fails to play at all, its bottom
surface may require cleaning. Before playing, wipe the disc from the centre outwards, with a good soft
cleaning cloth.
SERVICE
Please instructions refer to the on the enclosed warranty card for returning your unit for service. When
returning the unit, please remove batteries to prevent damage to the unit in transit and/or from possible
battery leakage. We are not responsible for batteries returned with the product or for the cost of
replacement.
TROUBLE SHOOTING GUIDE
PROBLEMS
No power supply.
The cassette cannot be inserted.
The tape does not run.
The tape gets caught in the tape transport
mechanism.
Tape running is unstable.
There is excessive noise, the sound quivers or
there are breaks in the sound.
The REC button cannot be pressed.
Recording cannot be done.
The previous recording cannot be erased.
CD play does not begin.
The CD produces no sound.
The CD sound jumps.
ITEMS TO CHECK
Is the power cord unplugged or loose?
Are batteries installed?
Are the batteries properly aligned?
Is the cassette facing the wrong direction
when you try to insert it?
Is the || PAUSE button on?
Is the pinch-roller or capstan dirty?
Is there excessive slack in the tape?
Is there excessive slack in the tape?
Are the heads dirty?
Is the cassette dirty?
Is the cassette erasure prevention tab broken off?
Are the heads dirty?
Is the erasure head dirty?
Is the CD upside down?
Is the CD or lens excessively dirty?
Is the disc holder closed properly?
Is the function selector set to CD?
Is the pause mode on?
Is there condensation inside the unit?
Is the lens or CD excessively dirty?
Is the unit subject to excessive vibration?
Are there any bad scratches on the CD?
7
Page 9

TECHNICAL SPECIFICATIONS
GENERAL
Power Source ................................................. 240V 50Hz
Power Consumption ....................................... 18W
Dimensions (WxDxH) ..................................... 298 x 230 x 165 mm
Weight ............................................................ 2.8 kgs
RADIO
Frequency Range .......................................... AM 522 - 1620kHz
FM 87.5 - 108MHz
CASSETTE SECTION
Tape Speed .................................................... 4.76CM/SEC
Frequency Response ..................................... 125 - 6300Hz
AUDIO
Output Power ................................................. 2W + 2W
Speaker .......................................................... 3.5" 4 Ohm
COMPACT DISC SECTION
Converter ....................................................... 1 bit D/A
Optical Pickup ................................................ 3 - Beam Laser
Frequency Response .................................... 125Hz - 20kHz
ACCESSORY
Battery ............................................................ Not Included
Specification subjects to be changed without notice.
IM-A535-DW-GB-02
8
Page 10

PALSONIC CORPORATION PTY LTD
1 JOYNTON AVENUE
WATERLOO NSW 2017 AUSTRALIA
TEL: (02) 9313 7111
FAX: (02) 9313 7555
www.palsonic.com.au
PALSONIC CUSTOMER SERVICE
TELEPHONE
AUSTRALIA: 1300 657 888
 Loading...