

Page 1
YOUR PERSONAL INFORMATION ORGANIZER
9
TIP
To pencil in an appointment, open the
appointment, select Status, and then select
Te n t a t i v e .
Adding an alarm reminder to an event
1 Create an event, and then select it.
2 Press Edit (left action key).
3 Select Reminder, and then select
Remind Me.
4 Enter the number of minutes, hours,
days, or weeks before the event you
would like to receive the alarm.
Type of time units
Number of time units
5 Press OK .
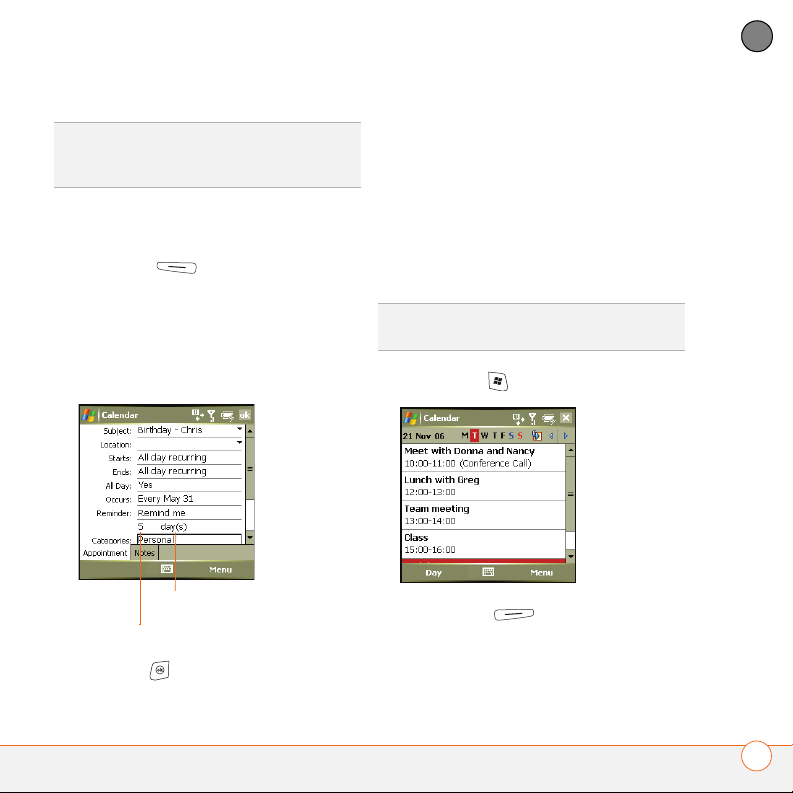
Creating an untimed event
An untimed event, such as a birthday,
anniversary, or vacation, does not occur at
a particular time. These events appear as
banners at the top of your calendar; they
don’t occupy blocks of time. For example,
“Submit Final Draft” in the screenshot
shown here is an untimed event.
DID YOU KNOW
longer than a day.
?
An untimed event can last
1 Press Start and select Calendar.
2 Press Menu (right action key)
and select New Appointment.
3 Enter a subject (description).
4 Select the starting and ending dates.
CHAPTER
CALENDAR
153
Page 2
YOUR PERSONAL INFORMATION ORGANIZER
9
CHAPTER
5 Select All Day, and then select Ye s .
6 Press OK .
Scheduling a repeating appointment
1 Create an appointment or untimed
event, and then select it.
2 Press Edit (left action key).
3 Select Occurs, and then select a repeat
pattern. To create a repeat pattern,
select Edit pattern and follow the
onscreen instructions.
TIP
To enter a birthday or an anniversary,
create an untimed event that repeats every
year.
4 Press OK .
Sending a meeting request
You can email meeting invitations to
contacts who use Microsoft Office
®
Outlook
BEFORE YOU BEGIN Create contact
or Outlook Mobile.
entries with email addresses for the people
you want to invite to a meeting. You can’t
access contact entries without email
addresses from your calendar.
1 Create an event, and then select it.
2 Press Edit (left action key).
3 Select Attendees, and then select the
name of the contact you want to invite.
To invite other attendees, select Add
and select the names.
DID YOU KNOW
Server 2003 with Service Pack 2, you can use
your corporate Global Address List to find
contact information for an attendee. Select
Attendees, press Menu (right action key), and
then select Find Online. Enter the name of
the attendee and select Find.
?
If you are using an Exchange
4 Press OK .
The next time you synchronize, the
meeting request is sent to the attendees.
When attendees accept your meeting
request, the meeting is automatically
added to their schedules. When you
receive their response, your calendar is
updated as well.
Marking an event as sensitive
If other people have access to your
Microsoft Office Outlook calendar on your
computer and you don’t want them to see
154
CALENDAR
Page 3
YOUR PERSONAL INFORMATION ORGANIZER
9
an appointment, you can mark that
appointment as private to hide it from other
Microsoft Office Outlook users.
1 Create an event, and then select it.
2 Press Edit (left action key).
3 Select Sensitivity, and then select one
of the following:
Private: Displays the event on your
smartphone and on your computer.
Meeting attendees or recipients see
“Please treat this as Private” near the
top of an open appointment. If you sync
with Exchange Server, other users who
can access your folders can’t see your
private events; they see private events
as unavailable time slots.
Pers on al: Displays the event on your
smartphone and on your computer.
Meeting attendees or recipients see
“Please treat this as Personal” near the
top of an open appointment.
Confidential: Displays the event on
your smartphone and on your computer.
Meeting attendees or recipients see
“Please treat this as Confidential” near
the top of an open appointment.
TIP
If you don’t see an option on the screen,
press Down on the 5-way to scroll to other
options. For example, when editing an event,
you don’t see the Sensitivity option until you
scroll toward the bottom of the entry.
4 Press OK .
Organizing your schedule
Use categories to view various types of
events.
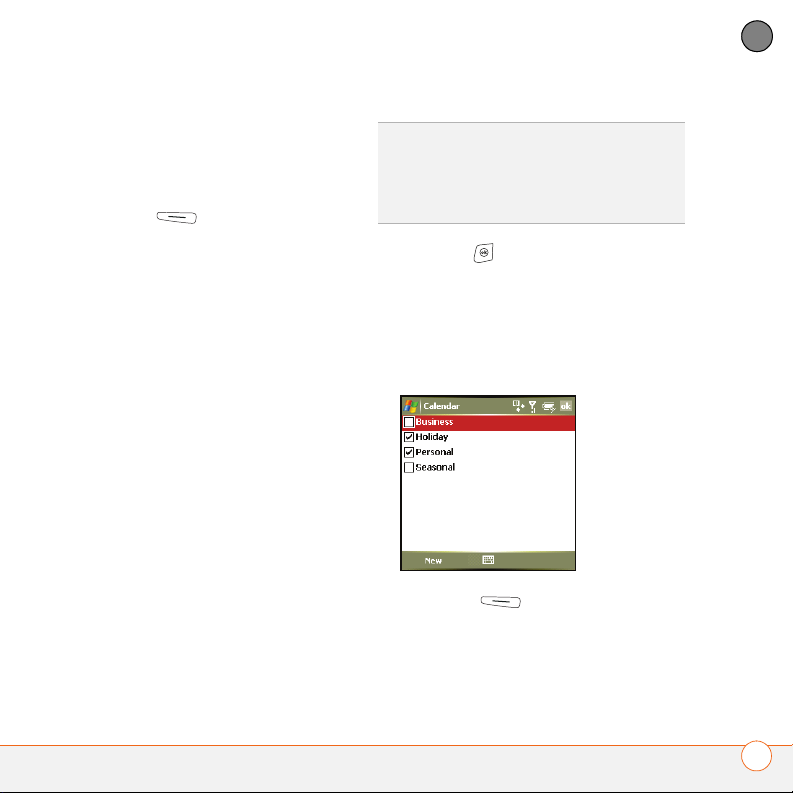
1 Create an event, and then select it.
2 Press Edit (left action key).
3 Select Category, and then check the
categories that apply to this event.
To add a new category, press New
CHAPTER
CALENDAR
155
Page 4
YOUR PERSONAL INFORMATION ORGANIZER
9
CHAPTER
(left action key), enter the
category name, and then press OK .
4 Press OK two more times.
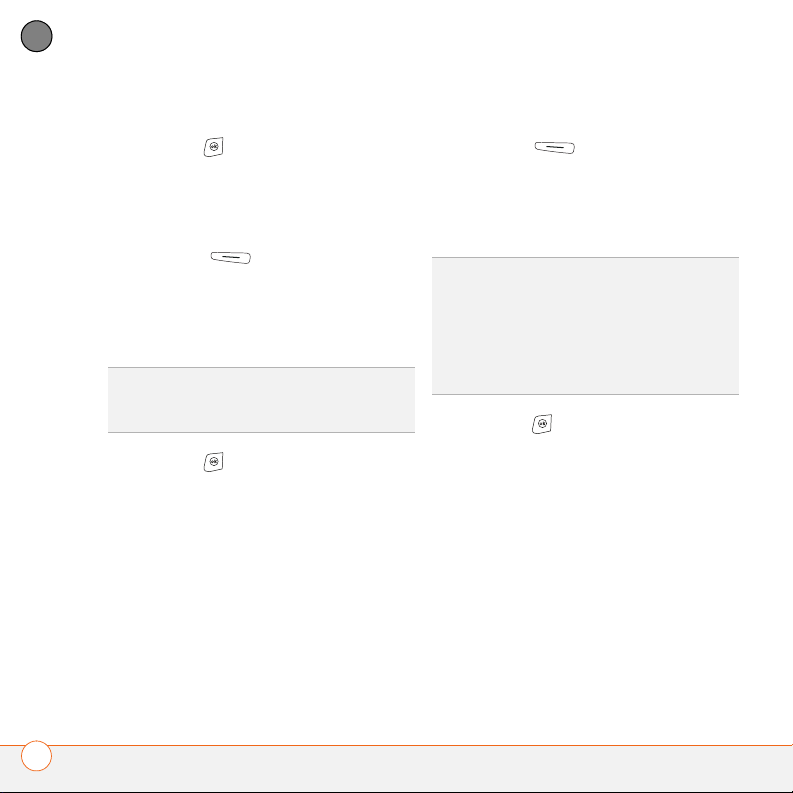
5 After you assign events to categories,
press Menu (right action key)
and select Filter.
TIP
Wonder why you’re not seeing all the
events in your day? Check to make sure that
the filter is set to All Appointments.
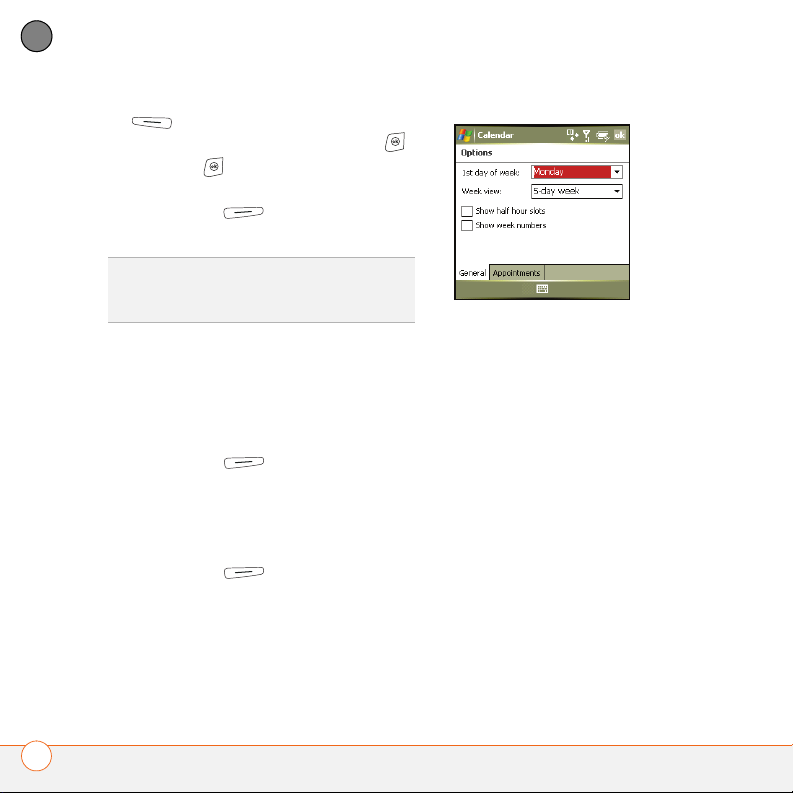
2 On the General tab, set any of the
6 Select the type of events you want to
view.
following options:
1st day of week: Specifies Sunday or
Monday as the first day of the week for
Deleting an event
1 Highlight the event you want to delete.
2 Press Menu (right action key)
and select Delete Appointment.
3 Select Ye s .
Customizing Calendar
1 Press Menu (right action key)
and select Options.
all Calendar views.
Week view: Specifies whether five, six,
or seven days appear in Week View.
Show half hour slots: Specifies
whether time slots appear in hour or
half-hour increments in Day View and
Week View.
Show week numbers: Specifies
whether week numbers (1–52) appear
in Week View.
3 Select the Appointments tab and set
any of the following options:
156
CALENDAR
Page 5
YOUR PERSONAL INFORMATION ORGANIZER
9
Set reminders for new items:
Specifies whether a reminder is
automatically added to new events and
how long before the event the reminder
appears. You can override this setting
for individual events.
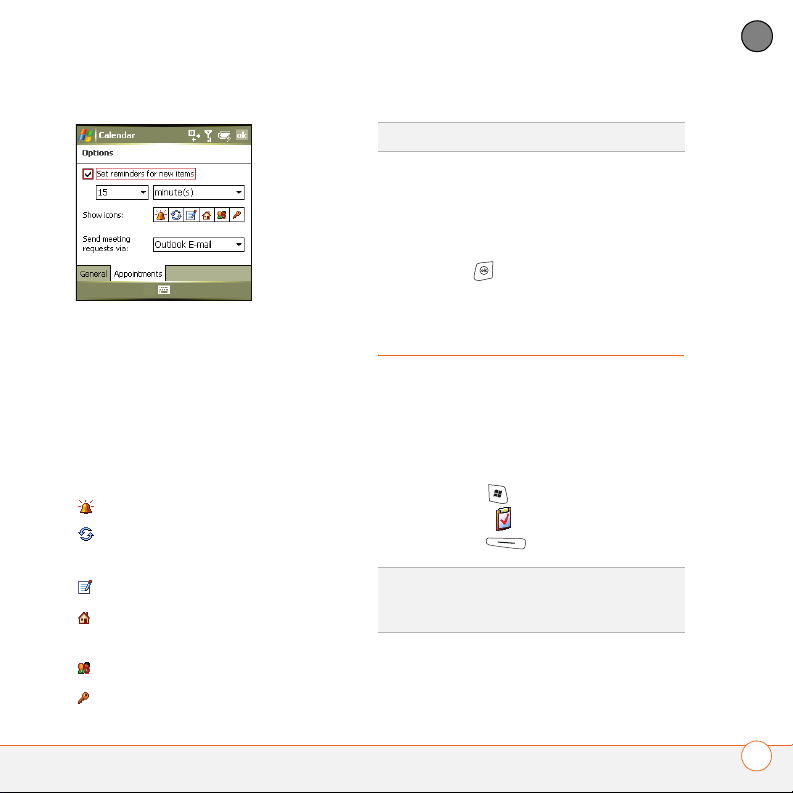
Show icons: Specifies which icons
appear next to events.
The event has a reminder.
The event repeats in a specified
pattern.
The event has a note attached.
A location has been assigned to the
event.
The event is a meeting.
The event is marked private.
TIP
Not all icons appear in all Calendar views.
Send meeting requests via: Specifies
the messaging method used to send
meeting requests: email, MMS, or
SMS.
4 Press OK .
Tasks
You can use Tasks to remind you of tasks
you need to complete and to keep a record
of completed tasks.
Adding a task
1 Press Start and select Programs.
2 Select Ta s k s .
3 Press New (left action key).
TIP
You can also add a task by selecting the
Tasks entry bar at the top of the task list
screen.
4 Enter a description of the task in the
Subject field.
CHAPTER
TASKS
157
Page 6
YOUR PERSONAL INFORMATION ORGANIZER
9
CHAPTER
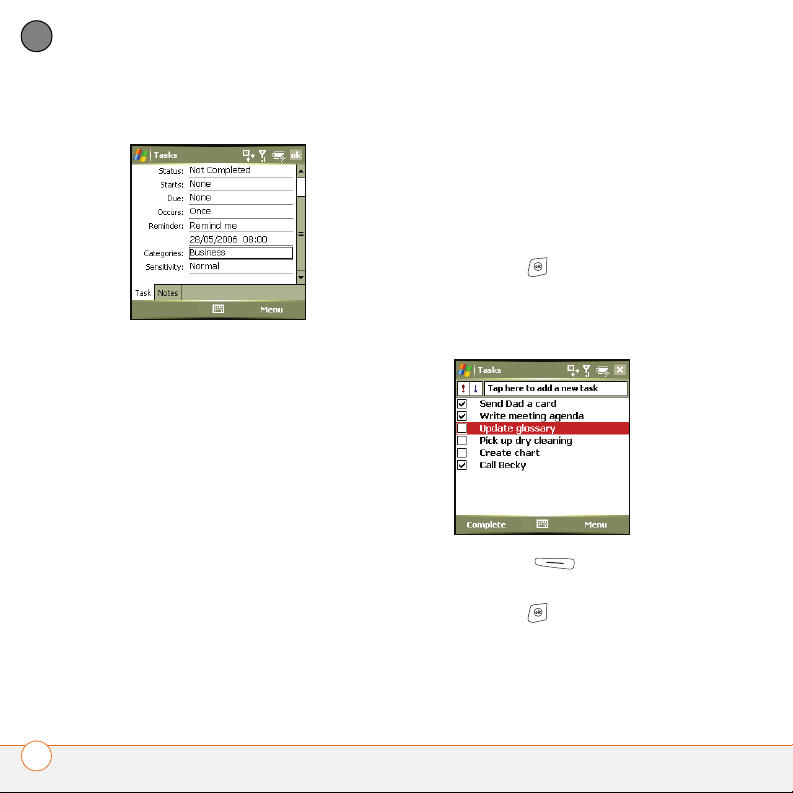
5 Set any of the following:
• Categories: Assigns the task to one
or more categories.
Sensitivity: Marks this task as Normal,
Personal, Private, or Confidential.
Notes: Enables you to enter additional
text for the task.
6 Press OK .
Checking off a task
1 Select the task you want to check off.
Priority: Specifies the priority level for
this task. Later you can arrange your
tasks based on the importance of each
task.
Status: Indicates whether the task is
now completed.
• Starts: Specifies when the task
begins.
• Due: Specifies the due date for the
task.
• Occurs: Indicates if the task repeats
at regular intervals and how often it
repeats.
• Reminder: Sets an alarm for this task
2 Press Edit (left action key).
3 Select Status and select Completed.
4 Press OK .
and indicates when you want to be
reminded.
158
TASKS
Page 7

YOUR PERSONAL INFORMATION ORGANIZER
9
TIP
You can also mark a task complete by
tapping the check box next to the task on the
Tasks list.
DID YOU KNOW
?
Overdue tasks appear in red.
Organizing your tasks
1 In the Tasks list, press Menu
(right action key) and select Filter.
2 Select which tasks you want to view:
All Tasks, Recently Viewed,
No Categories, Active Tasks,
Completed Tasks, or a specific
category, such as Business or Personal.
3 Press Menu (right action key)
and select Sort By.
4 Select the sort method: Status,
Priority, Subject, Start Date, or
Due Date.
Deleting a task
1 Highlight the task you want to delete.
2 Press Menu (right action key)
and select Delete Task.
3 Select Ye s .
Customizing Tasks
1 Go to the Tasks list.
2 Press Menu (right action key)
and select Options.
3 Set any of the following options:
Set reminders for new items:
Automatically adds a reminder to new
tasks. The default reminder is set to
8:00 on the morning the task is due. You
can override this setting for individual
tasks.
Show start and due dates: Displays
task start and due dates in the Tasks
list.
Show Tasks entry bar: Displays the
Tasks entry bar at the top of the Tasks
list.
4 Press OK .
Notes
Notes are a great way to capture thoughts,
questions, and meeting notes on your Palm
Treo 750v smartphone. You can also create
CHAPTER
NOTES
159
Page 8
YOUR PERSONAL INFORMATION ORGANIZER
9
CHAPTER
a voice note or add a recording to an
existing note.
BEFORE YOU BEGIN To take advantage of
all the sync features available in the Notes
application, install the desktop
synchronization software from your
Windows Mobile Getting Started Disc.
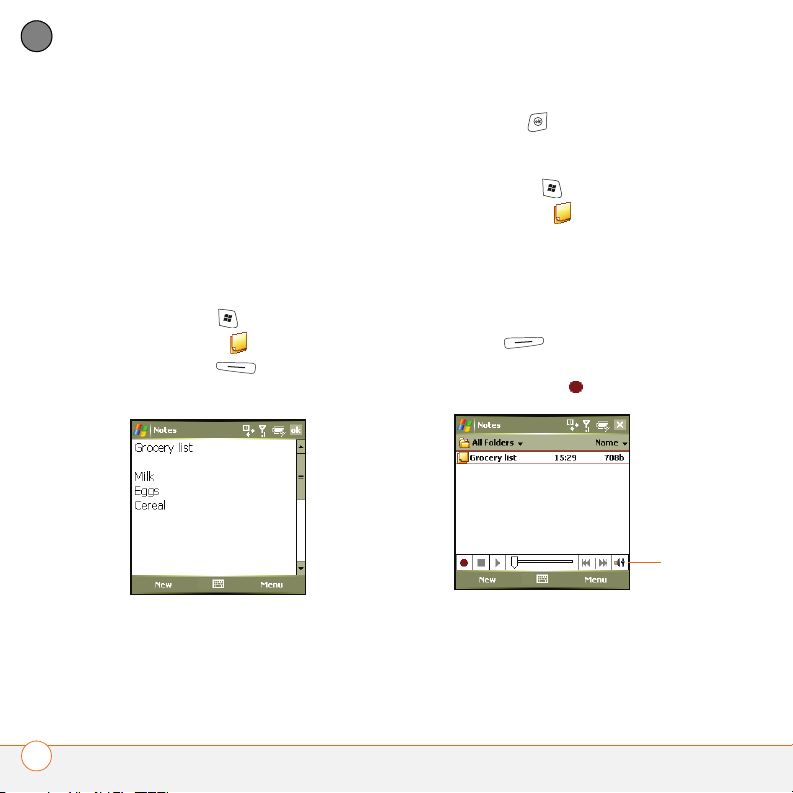
Creating a note
1 Press Start and select Programs.
2 Select Notes .
3 Press New (left action key).
4 Do one of the following:
5 Press OK .
Creating a voice note
1 Press Start and select Programs.
2 Select Notes .
3 To add a voice recording to an existing
note, open the note to which you want
to add the recording.
4 If the voice note controls are not visible
at the bottom of the screen, press
Menu (right action key) and
select View Recording Toolbar.
5 Tap the Record icon.
Voi ce
note
controls
• Type the text with the keyboard.
• Write the text with the stylus.
• Draw a sketch with the stylus,
6 Speak into your smartphone’s
microphone or hold it close to another
sound source.
crossing at least three ruled lines.
160
NOTES
Page 9
YOUR PERSONAL INFORMATION ORGANIZER
9
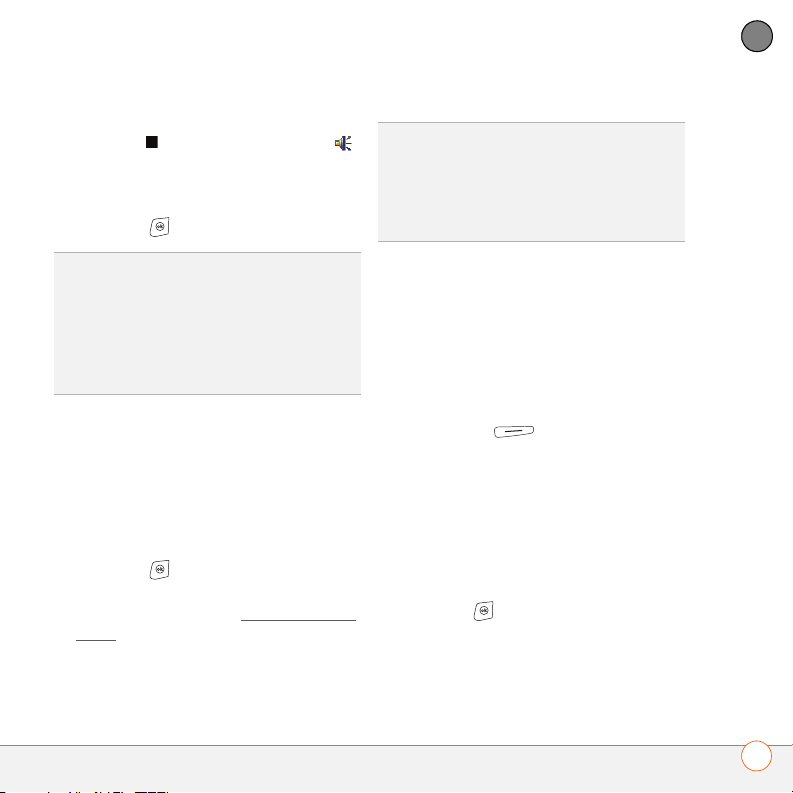
7 When you have finished recording, tap
the Stop icon. A Recording icon
appears in the note or note list,
depending on where you recorded the
note.
8 Press OK .
DID YOU KNOW
notes within a single note.
TIP
To play a recording, select the voice note
in the Notes list or open the note containing
the recording and tap the Recording icon. Tap
the controls at the bottom of the screen to
control playback and volume.
?
You can add several voice
Creating a note from a template
1 Go to the Notes list.
2 Select the Show list in the upper-left,
and then select Te m p l a t e s .
3 Open the template you want to use.
4 Enter the information.
5 Press OK .
6 Rename the note and move it to the
appropriate folder. See Organizing your
notes for details.
TIP
To create a new template, open the note
you want to save as a template. Press Menu
(right action key) and select Rename/Move.
Select Name, and then enter a name for the
template. Select the Show list, and then
select Template. Press OK.
Organizing your notes
You can rename your notes, move notes to
another folder, and move notes between
your smartphone and an expansion
(storage) card.
1 Go to the Notes list and highlight a note
you want to move.
2 Press Menu (right action key)
and select Rename/Move.
3 Select Name, and then enter a new
name for the note.
4 Select Folder, and then select the folder
in which you want to store the note.
5 Select Location, and then select Main
memory or Storage Card.
6 Press OK .
CHAPTER
NOTES
161
Page 10

YOUR PERSONAL INFORMATION ORGANIZER
9
CHAPTER
TIP
To create a new folder, go to the Notes list,
select the Show list in the upper-left, and then
select Add/Delete. Select New, enter a name
for the folder, and then press OK.
3 Set any of the following options:
Default mode: Makes the default entry
mode either Writing or Typing. The
default is Typing; if you change it to
Writing, you can write notes directly on
Deleting a note
1 Go to the Notes list and highlight the
note you want to delete.
2 Press Menu (right action key)
and select Delete.
3 Select Ye s .
Customizing Notes
1 Go to the Notes list.
2 Press Menu (right action key)
and select Options.
the screen using the stylus.
Default template: Specifies the default
template for new notes.
Save to: Indicates the default location
where new notes are stored.
Record button action: Specifies what
happens when you press the Side
button to record a voice note while in
another application: whether the Notes
application opens or whether you stay
in the current application.
4 Press OK .
162
NOTES
Page 11

Your Microsoft Office tools
Your smartphone enables you to take your office with you—
including your Microsoft Office files. With Microsoft Office, you
can carry, create, view, and edit Microsoft Word and Excel files
directly on your smartphone. You can also view, carry, and
manage PowerPoint files on your smartphone. You can keep
updated copies of the files on both your smartphone and your
computer so that you can work on them in the most
convenient location any time.
Benefits
• Manage Word, Excel, and
PowerPoint files on your
smartphone
• Improve productivity by taking
important docs, spreadsheets, and
presentations with you
CHAPTER
10
Page 12

In this chapter
Synchronizing your Microsoft Office files. . . . . . . . . . . . . . . . . . . . . 165
Word Mobile . . . . . . . . . . . . . . . . . . . . . . . . . . . . . . . . . . . . . . . . . . 165
PowerPoint Mobile. . . . . . . . . . . . . . . . . . . . . . . . . . . . . . . . . . . . . . 171
Excel Mobile. . . . . . . . . . . . . . . . . . . . . . . . . . . . . . . . . . . . . . . . . . . 172
Page 13
YOUR MICROSOFT OFFICE TOOLS
10
Synchronizing your
Microsoft Office files
You can edit files on your computer or on
your smartphone and then synchronize
your files with your computer. To
synchronize Microsoft Office files with your
computer, you must set the Files sync
option; see Setting synchronization
options. The files are stored in your Files
folder on your computer.
To copy a file from your computer to your
smartphone, open My Computer or
Windows Explorer on your computer,
copy the file into the Mobile Device folder,
and then sync.
Word Mobile
You can create and edit documents and
templates and save them as DOC, RTF,
TXT, and DOT files. You can also edit
Microsoft Office Word documents and
templates that you create on your
computer. However, keep in mind that
some of the information and formatting
may be lost when you save the document
on your smartphone.
DID YOU KNOW
you can view the file using Picsel PDF Viewer.
Press Start, select Programs, and then select
PDF Viewer.
?
If you have a PDF file (.pdf),
The following features are not supported in
Word Mobile:
• Backgrounds.
• Bidirectional text.
• Document protection.
• Metafiles.
• Artistic page borders. Lined page
borders are supported.
• Password-protected files. Remove
password protection on your computer
before opening the file on your
smartphone.
• Shapes and text boxes.
• Smart tags.
CHAPTER
SYNCHRONIZING YOUR MICROSOFT OFFICE FILES
165
Page 14
YOUR MICROSOFT OFFICE TOOLS
10
CHAPTER
The following features are partially
supported in Word Mobile:
• Picture bullets. Regular bullets are
supported.
• Revision marks. Documents appear as
though all revisions were accepted; if
the document is saved, revision marks
are lost.
• Table styles. Some or all of the
formatting is lost if the document
is saved.
• Underline styles. Unsupported styles
are mapped to one of the four
supported styles: regular, dotted, wavy,
or thick/bold/wide.
• Legacy Pocket Word files. You can open
PSW files, but if you edit a file, you
need to save it in DOC, RTF, TXT, or DOT
format.
• Footnotes, endnotes, headers, and
footers.
• Lists. Indented lists are mapped to the
closest indentation level supported by
Word Mobile.
• Page breaks. Although not displayed, all
page breaks, except a break placed at
the end of a document, are retained in
the document.
Creating a document
1 Press Start and select Programs.
2 Select Word Mobile .
3 Press New (left action key).
4 Enter the text of the document.
5 Press OK to save the file. When you
save a new document, it is
automatically named after the first
several words in the file.
The following features are not supported
on your smartphone, but they remain in the
file so that when you open the file on your
computer, they appear as expected:
• Fonts and font sizes. Original fonts are
listed on your smartphone and are
mapped to the closest font available.
Opening an existing document
1 Press Start and select Programs.
2 Select Word Mobile .
3 In the document list, select the
document you want to open.
WORD MOBILE
166
Page 15
YOUR MICROSOFT OFFICE TOOLS
10
TIP
To zoom in or out, press View, select
Zoom, and then select the zoom level.
Creating a document from a template
1 Go to the documents list.
2 Select the Show list in the upper-left,
and then select Te m p l a t e s . If you don’t
see Templates in the Show list, select
More Folders to access this folder.
3 Open the template you want to use and
enter the information.
4 Press OK .
5 Rename the document and move it to
the appropriate folder. See Organizing
your documents for details.
TIP
To create a new template, open the
document you want to save as a template.
Press Menu and select Rename/Move.
Select Name, and then enter a name for the
template. Select the Show list, and then
select Template. Press OK.
Finding or replacing text in a document
1 Open the document containing the text
you want to find.
2 Press Menu (right action key)
and select Edit > Find/Replace.
3 Select Find what and enter the text you
want to find.
4 (Optional) Check the Match case box
to find text that matches
the capitalization in the text you entered
step 3.
5 (Optional) Check the Match whole
words only box to find only full words
that match the text you entered in
step 3.
6 Select Find to locate the first instance
of the text you entered in step 3, or
select Replace and enter the
replacement text.
7 Select Next to find the next instance of
the text, or select Replace to replace it.
To replace all instances of the text,
select Replace All.
8 When you see a message that the
search is done, press OK .
Moving or copying text
1 Open the document containing the text
you want to move or copy.
CHAPTER
WORD MOBILE
167
Page 16
YOUR MICROSOFT OFFICE TOOLS
10
CHAPTER
2 Highlight the text you want to move or
copy.
3 Press Menu (right action key)
and select Copy to copy the text, or
select Cut to move the text.
4 Open the document where you want to
insert the text and position the insertion
5 Select the Ty p e list, and then select the
format in which you want to save the
file.
6 Select the Location list, and then select
whether you want to store the file on
your smartphone or an expansion card.
7 Select Save.
point where you want the text to
appear.
5 Press Menu (right action key)
and select Paste.
Saving a copy of a document
NOTE If a document was previously saved
on a computer, any unsupported formatting
may be lost when you save the file.
1 Open the document you want to copy.
2 Press Menu (right action key)
and select File > Save As.
3 Select Name and enter a new name for
the file.
4 Select the Folder list, and then select
the folder where you want to save the
file.
Formatting text
1 Open the document you want to
format.
2 Highlight the text you want to format.
3 Press Menu (right action key)
and select Format > Font.
4 Set any of the following options for the
highlighted text:
Font: Specifies the typeface.
Font color: Specifies the color.
Size: Specifies the point size.
Bold: Indicates whether the text
appears normal or thick.
Italics: Indicates whether the text
appears upright or slanted.
Underline: Indicates whether the text
appears with an underscore.
WORD MOBILE
168
Page 17
YOUR MICROSOFT OFFICE TOOLS
10
Highlight: Indicates whether the text
appears with a yellow highlight.
Strikethrough: Indicates whether the
text appears with a line through it.
5 Press OK to return to the document.
Formatting paragraphs and lists
1 Open the document you want to
format.
2 Position the insertion point in the
paragraph you want to format.
3 Press Menu (right action key)
and select Format > Paragraph.
4 Set any of the following options:
Alignment: Aligns the text with the left,
right, or center of the paragraph.
List: Creates a bulleted or numbered
list.
Indentation: Changes the paragraph
margins.
• Left: Sets the left margin for the
entire paragraph.
• Right: Sets the right margin for the
entire paragraph.
• Special: Lets you indent the first line
or set a hanging indent.
• By: Sets the size of the Special
indentation.
5 Press OK to return to the document.
TIP
You can also use the Formatting toolbar to
create a list and to align text. To indent text in
lists, you must use the Formatting toolbar.
Checking spelling in a document
1 Open the document you want to check.
2 Press Menu (right action key) and
select To o l s > Spelling. To check the
spelling of specific text, highlight it
before you select the Spelling
command.
3 If an unknown or misspelled word is
encountered, do one of the following:
• Select the correct word in the list if
the word is spelled incorrectly.
• Select Ignore if the word is spelled
correctly.
• Select Add to add a new word to the
spelling dictionary.
CHAPTER
WORD MOBILE
169
Page 18
YOUR MICROSOFT OFFICE TOOLS
10
CHAPTER
Organizing your documents
You can rename your documents, move
your documents to another folder, and
move your documents between your
smartphone and an expansion (storage)
card.
1 Go to the documents list.
2 Highlight a file.
3 Press Menu (right action key)
and select Rename/Move.
4 Select Name, and then enter a new
name for the document.
5 Select the Folder list, and then select
the folder you want to move the
document to.
6 Select the Location list, and then select
Main memory or Storage card.
7 Press OK .
8 Select the Show list in the upper-left,
and then select the folder you want to
view.
9 Select the Sort By list in the upper-right,
and then select the sort method.
TIP
To create a new folder, go to the
documents list, select the Show list in the
upper-left, and then select the Add/Delete
tab. Select New, enter a name for the folder,
and then press OK.
TIP
When you go to a folder, you can easily
search your documents by sorting by type.
Deleting a document
1 Go to the documents list.
2 Highlight the document you want to
delete.
3 Press Menu (right action key)
and select Delete.
4 Select Ye s .
Customizing Word Mobile
1 Go to the document list.
2 Press Menu (right action key)
and select Options.
3 Set any of the following options:
Default template: Sets the default
template for new documents.
Save to: Sets the default location
where new documents are stored.
WORD MOBILE
170
Page 19
YOUR MICROSOFT OFFICE TOOLS
10
Display in list view: Sets the types of
files that appear in the documents list.
4 Press OK .
PowerPoint Mobile
With PowerPoint Mobile, you can open and
view slide show presentations created on
your computer. Many presentation
elements such as slide transitions,
animations, and URL links are also
supported. Microsoft
features not supported on your
smartphone include the following:
• Notes written for slides
• Rearrangement or editing of slides
• Files created in PPT format earlier than
Microsoft PowerPoint ‘97
• HTML files in HTM and MHT formats
TIP
To copy a file from your computer to your
smartphone, open My Computer or Windows
Explorer on your computer, copy the file into
the Mobile Device folder, and then sync.
®
Office PowerPoint®
Playing a presentation
NOTE If a presentation is set up as a timed
slide show, the slides advance
automatically. Presentations pause during
zooming.
1 Press Start and select Programs.
2 Select PowerPoint Mobile .
3 In the presentation list, highlight the
presentation you want to play.
4 Press Center .
5 Do any of the following:
• Press Right to advance to the next
slide or Left to view the previous
slide.
• Press Menu (right action key),
select Go to Slide, and select the
slide you want to view.
• Select Next or Previous to play
animations.
• Press Menu (right action key),
select Zoom In, and then select to
zoom in or to zoom out. To scroll
within the current slide, tap and drag
the slide. To return to the slide show,
select .
CHAPTER
POWERPOINT MOBILE
171
Page 20
YOUR MICROSOFT OFFICE TOOLS
10
CHAPTER
• Press Menu (right action key)
and select End Show.
Loop continuously: Advances to the
first slide after playing the last slide in a
presentation.
Setting presentation playback options
6 Press OK .
1 Open the presentation for which you
TIP
want to change the settings.
2 Press Menu (right action key)
and select Show Options.
To turn the presentation into a
continuously looping slide show, check both
the Use timings, if present, and the Loop
continuously boxes.
3 On the Orientation tab, select the
orientation you want. To select the
orientation that best fits your
smartphone’s screen, select Default.
4 Select the Playback tab, and check the
Override playback options for all files
box.
5 Set any of the following options:
Show without animation: Tur ns o f f
builds and other animations.
Show without slide transition: Turn s
off transition effects between slides.
Use slide timings, if present: Enables
the timings recorded with each slide in
a presentation. If a presentation is set
up as a timed slide show, the slides
advance automatically. Presentations
pause during zooming.
Excel Mobile
With Excel Mobile you can create and edit
workbooks and templates on your
smartphone. You can also edit workbooks
and templates that you create on your
computer. However, keep in mind that you
may lose some of the information and
formatting when you save the workbook on
your smartphone.
Note the following formatting
considerations:
• Alignment: Vertical text appears
horizontal.
• Borders: Appear as a single line.
EXCEL MOBILE
172
Page 21

YOUR MICROSOFT OFFICE TOOLS
10
• Cell patterns: Patterns applied to cells
are removed.
• Fonts and font sizes: The original font
is listed on your smartphone and
mapped to the closest font available.
Original fonts reappear on your
computer.
• Number formats: Microsoft® Office
Excel® 97 conditional formatting is
displayed in Number format.
• Formulas and functions: Unsupported
functions are removed, and only the
returned value of the function appears.
Formulas containing the following are
also converted to values:
• An array or array argument, for
example, =SUM({1;2;3;4})
• External link references or an
intersection range reference
• References past row 16384 are
replaced with #REF!
• Protection settings: Most protection
features are disabled but not removed.
However, password protection is
removed. You must remove the
password protection in Microsoft Office
Excel on your computer before opening
the file on your smartphone.
• Zoom settings: Worksheet-specific
zoom settings are not retained. The
zoom setting applies to the entire
workbook.
• Worksheet names: Names that refer to
other workbooks, arrays, array formulas,
or intersection ranges are removed
from the name list, causing those
formulas to be resolved as “#NAME?”
All hidden names are not hidden.
• AutoFilter Settings: AutoFilters that
cause rows to be hidden are supported.
Use the Unhide command to display
hidden rows. Other AutoFilters are
removed, but you can use the AutoFilter
command in Excel Mobile to perform
similar functions.
• Chart Formatting: All charts are saved
as they appear in Excel Mobile.
Unsupported chart types are changed to
one of these supported types: Column,
Bar, Line, Pie, Scatter, and Area.
Background colors, gridlines, data
labels, trend lines, shadows, 3D effects,
secondary axes, and logarithmic scales
are turned off.
CHAPTER
EXCEL MOBILE
173
Page 22
YOUR MICROSOFT OFFICE TOOLS
10
CHAPTER
The following features aren’t supported in
Excel Mobile and are removed or modified
when you open a workbook on your
smartphone:
• Hidden, dialog, and macro sheets
• VBA modules
• Tex t boxe s
• Drawing objects and pictures
• Lists
• Conditional formats and controls
• Pivot table data (converted to values)
6 Repeat steps 4 and 5 to enter the
remaining info.
7 Press OK to save the file. When you
save a new workbook, it is automatically
named and placed in the workbook list.
Creating a workbook from a template
1 Go to the workbook list.
2 Select the Show list in the upper-left,
and then select Te m p l a t e s .
3 Open the template you want to use and
enter the information you want to
include in the template.
DID YOU KNOW
you can view the file using Picsel PDF Viewer.
Press Start, select Programs, and then select
PDF Viewer.
?
If you have a PDF file (.pdf),
4 Press OK .
5 Rename the workbook and move it to
the appropriate folder. See Organizing
your documents for details.
Creating a workbook
1 Press Start and select Programs.
2 Select Excel Mobile .
3 Press New (left action key).
TIP
To create a new template, open the
workbook you want to save as a template.
Press Menu and select Rename/Move, and
then enter a name for the template. Select
Folder, and then select Template. Press OK.
4 Highlight a cell where you want to enter
text or other info.
5 Enter the info in the cell, and then press
Enter .
EXCEL MOBILE
174
Page 23
YOUR MICROSOFT OFFICE TOOLS
10
Viewing a workbook
TIP
To copy a file from your computer to your
smartphone, open My Computer or Windows
Explorer on your computer, copy the file into
the Mobile Device folder, and then sync.
1 Press Start and select Programs.
2 Select Excel Mobile .
3 In the workbook list, select the
workbook you want to view.
4 Press View (left action key), and
then select any of the following:
Full Screen: Shows as much data as
possible on the screen. To return to the
normal view, select Restore in the
upper-right.
Zoom: Sets the magnification level so
that you can easily read the worksheet.
Sheet: Lets you switch to a different
worksheet.
DID YOU KNOW
worksheets by selecting the sheet list at the
bottom of the screen.
?
You can also switch
Split: Divides the window into two
scrollable areas. To move the split bar,
tap and drag it. To remove the split bar,
select View > Remove Split.
Freeze Panes: Locks rows and columns
so they remain visible while you scroll.
Highlight the cell at the juncture you
want to lock before you select this
command. To unlock the rows or
columns, select View > Unfreeze
Panes.
To o l b a r : Indicates whether the toolbar
appears onscreen.
Status Bar: Indicates whether the
status bar appears onscreen.
Show: Indicates whether headings and
scroll bars appear onscreen.
TIP
To jump to a cell or region, press Menu
and select Edit > Go To. Select Cell
reference or name and enter the target cell
info or select Current region. Select OK.
CHAPTER
EXCEL MOBILE
175
Page 24
YOUR MICROSOFT OFFICE TOOLS
10
CHAPTER
Calculating a sum
1 Press View (left action key) and
select To o l b a r .
2 Highlight the cell where you want to
insert the sum.
TIP
To insert a symbol, place the insertion
point where you want the symbol. Press
Menu and select Insert > Symbol. Highlight
the symbol you want to insert, and then select
Insert.
3 Select .
4 Tap and drag the stylus across the cells
you want to add.
5 Press Enter .
TIP
For simple calculations, use the Calculator
(see Calculator
).
Inserting a function
1 Open the workbook where you want to
insert the function.
Entering a formula
1 Highlight the cell where you want to
enter the formula.
2 Enter equals sign ( = ) followed by any
values, cell references, name
references, operators, and functions.
Examples:
• =(B4/25)+100
• =Revenue-Expenses
3 Press Enter .
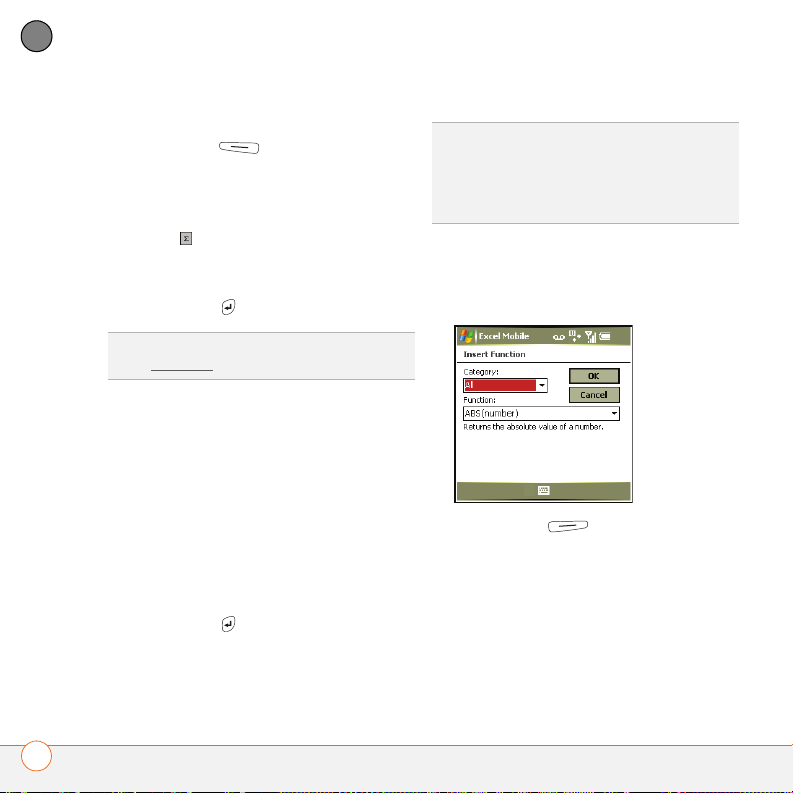
2 Press Menu (right action key)
and select Insert > Function.
3 Select the Category list, and then
select the type of function you want to
insert.
4 Select the Function list, and then select
the specific function you want to insert.
5 Select OK.
EXCEL MOBILE
176
Page 25

YOUR MICROSOFT OFFICE TOOLS
10
Entering a sequence automatically
1 Highlight both the cells containing the
info you want to automate and the
adjacent destination cells.
2 Press Menu (right action key)
and select Edit > Fill.
3 Select the Direction list, and then
select the direction you want to
populate.
4 Select the Fill type list, and then
select Series.
5 Select the Series type list, and then
select the type of series you want. If
you select Date or Number, enter a
Step value increment.
6 Select OK.
TIP
Select Auto fill as the series type to
quickly fill cells with repetitive data such as
numbers or repeated text. Autofill takes the
content of the first cell in the highlighted row
or column and copies it down or across the
rest of the selection.
Adding cells, rows, and columns
1 Open the workbook you want to add to.
2 Highlight the area where you want to
insert elements.
3 Press Menu (right action key)
and select Insert > Cells.
4 Select how you want to insert the
elements:
Shift cells right: Inserts a new cell. The
highlighted cell and all cells on its right
move one column to the right.
Shift cells down: Inserts a new cell.
The highlighted cell and all cells below it
move down one row.
Entire row: Inserts a new row. The
entire row in which the highlighted cell
is located and all rows below it move
down one row.
Entire column: Inserts a new column.
The entire column in which the
highlighted cell is located and all
columns to its right move one column
to the right.
5 Select OK.
CHAPTER
EXCEL MOBILE
177
Page 26

YOUR MICROSOFT OFFICE TOOLS
10
CHAPTER
TIP
To add a new worksheet, press Menu and
select Format > Modify Sheets. Select
Insert, enter a name for the worksheet, and
then press OK. To change the order of the
worksheets, highlight a worksheet you want
to move, and then select Move Up or Move
Down. Press OK to finish.
Formatting cells
1 Open the workbook you want to format.
2 Highlight the cells you want to format.
3 Press Menu (right action key)
and select Format > Cells.
4 Select any of the following:
Size: Sets the row height and column
width.
Number: Sets the type of information
the cells contain.
Align: Sets whether text wraps within
the highlighted cells, and sets horizontal
and vertical alignment position.
Font: Sets the typeface, color, size, and
style attributes.
Borders: Turns borders on and off for
various cell edges, and sets the border
and background colors.
5 Press OK .
TIP
To name the highlighted cell or range of
cells, press Menu and select Insert > Define
Name. Enter the name and select Add. Press
OK.
Formatting rows and columns
1 Open the workbook you want to format.
2 Highlight the rows or columns you want
to format.
3 Press Menu (right action key),
and then select Format > Row or
Format > Column.
4 Select any of the following:
AutoFi t: Adjusts the size of the
highlighted rows or columns to their
contents.
Hide: Hides the highlighted rows or
columns.
Unhide: Displays hidden rows or
columns in the highlighted area.
EXCEL MOBILE
178
Page 27

YOUR MICROSOFT OFFICE TOOLS
10
DID YOU KNOW
row size by tapping and dragging the right
edge of the column or the bottom edge of the
row. To automatically fit rows and columns to
their contents, double-tap the lower edge of
the row heading or the right edge of the
column heading.
?
You can adjust the column and
Renaming a worksheet
1 Open the workbook containing the
worksheet you want to rename.
2 Press Menu (right action key))
and select Format > Modify Sheets.
3 In the Sheets list, highlight the
worksheet you want to rename.
4 Select Rename, enter a new name for
the worksheet, and then press OK
twice.
Sorting info in a worksheet
1 Highlight the cells you want to sort.
2 Press Menu (right action key)
and select To o l s > Sort.
3 Select the Sort by list, and then select
the primary sort column.
4 Check or uncheck the Ascending box to
indicate if you want to sort in ascending
or descending order.
5 (Optional) Select the Then by lists, and
then select second- and third-level
sorting options.
6 Check or uncheck the Exclude header
row from sort box to indicate whether
you want to sort the header row.
7 Select OK.
Filtering info in a worksheet
1 Highlight the cells that contain the info
you want to filter.
2 Press Menu (right action key)
and select To o l s > AutoFilter. A list
appears at the top of each related
column.
3 Select one of the new lists, and then
select a filter. This hides all rows that do
not include the selected filter.
4 (Optional) Do any of the following:
• Select the other lists, and then select
other filters.
• To display all rows again, select the
filter lists, and then select All.
CHAPTER
EXCEL MOBILE
179
Page 28

YOUR MICROSOFT OFFICE TOOLS
10
CHAPTER
• To turn off filtering, press Menu and
select To o l s > AutoFilter again.
DID YOU KNOW
filters where you specify comparisons. Select
the filter lists, and then select Custom.
?
You can also create custom
Creating a chart
1 Open the workbook you want to create
a chart from.
2 Highlight the cells you want to include
in the chart.
3 Press Menu (right action key)
and select Insert > Chart.
4 Select the type of chart, and then press
Next (right action key).
5 Confirm the area you want the chart to
include, and then press Next
(right action key).
6 Select the data layout, and then press
Next (right action key).
7 Check the boxes to indicate whether
the first row and column represent
labels.
8 Select whether you want the chart to
appear as a separate worksheet within
the current workbook, or as part of the
current worksheet.
9 Press Finish (right action key).
Formatting or changing a chart
1 Open the workbook that contains the
chart you want to format.
2 Open the chart.
3 Press Menu (right action key)
and select Format > Chart.
4 Select any of the following:
Titles: Specifies the title of the chart
and headings, whether a legend
appears, and the placement of the
legend.
Scale: Specifies the minimum and
maximum scales for charts with x and y
axes.
Ty p e : Specifies the chart style. You can
use this setting to convert your chart to
a different format.
Series: Lets you add, modify, format, or
delete related data points without
affecting the info in your worksheet.
5 Press OK .
EXCEL MOBILE
180
Page 29

YOUR MICROSOFT OFFICE TOOLS
10
Finding or replacing info in a workbook
1 Open the workbook containing the info
you want to find.
2 Press Menu (right action key)
and select Edit > Find/Replace.
3 Select Find what and enter the info you
want to find.
4 (Optional) Check the Match case box
to find text that matches the
capitalization in any text you entered in
step 3.
5 (Optional) Check the Match whole
words only box to find only full words
that match any text you entered in
step 3.
6 Select Find to locate the first instance
of the info you entered in step 3, or
select Replace and enter the
replacement info.
7 Select Next to find the next instance of
the info, or select Replace to replace it.
To replace all instances of the info,
select Replace All.
8 When you see a message that Excel
Mobile is done searching, press OK .
Organizing your workbooks
TIP
When you go to a folder, you can easily
search your documents by sorting by type.
You can rename your workbooks. You can
also move them to another folder or move
them between your smartphone and an
expansion (storage) card.
1 Go to the workbook list.
2 Select a file.
3 Press Menu (right action key)
and select Rename/Move.
4 Select Name, and then enter a new
name for the workbook.
5 Select the Folder list, and then select
the folder you want to move the
workbook to.
6 Select the Location list, and then select
Main memory or Storage card.
7 Press OK .
8 Select the Show list in the upper-left,
and then select the folder you want to
view.
9 Select the Sort By list in the upper-right,
and then select the sort method.
CHAPTER
EXCEL MOBILE
181
Page 30

YOUR MICROSOFT OFFICE TOOLS
10
CHAPTER
Deleting cells, rows, and columns
NOTE Excel Mobile adjusts formulas to
reflect the new cell locations. However, a
formula that refers to a deleted cell
displays the #REF! error value.
1 Open the workbook containing the
elements you want to delete.
2 Highlight the area you want to delete.
3 Press Menu (right action key)
and select Edit > Delete Cells.
4 Select how you want to remove the
elements:
Shift cells left: Deletes the highlighted
cells and moves all cells on their right
one column to the left.
Shift cells up: Deletes the highlighted
cells and moves all cells below them up
one row.
Entire row: Deletes the entire row in
which the highlighted cells are located,
and moves all rows below it up one row.
Entire column: Deletes the entire
column in which the highlighted cells
are located, and moves all columns on
5 Select OK.
TIP
To delete a workbook, go to the workbook
list and highlight the workbook you want to
delete. Press Menu and select Delete. Select
Ye s to confirm.
TIP
To delete a worksheet, press Menu and
select Format > Modify Sheets. Highlight
the worksheet you want to delete, and then
select Delete. Select Ye s , and then press OK
to finish.
Customizing Excel Mobile
1 Go to the workbook list.
2 Press Menu (right action key)
and select Options.
3 Set any of the following options:
Template for new workbook:
Specifies the default template for new
workbooks.
Save new workbooks to: Specifies
where new workbooks are stored.
Files to display in list view: Specifies
which types of files appear in the
workbook list.
4 Press OK .
their right one column to the left.
EXCEL MOBILE
182
Page 31

Your application and info
management tools
Your smartphone comes equipped with a variety of tools for
managing and organizing your information. Get the most out of
your smartphone: Install some of the thousands of business,
education, or leisure-time applications available. After you use
your smartphone to create or capture important business and
personal information, use one of several options to share it
with others. Insert expansion cards (sold separately) for a
compact and limitless answer to the storage dilemma. And
because there’s one on your smartphone, you never need to
carry a separate calculator.
Benefits
• Locate info in any application
• Install applications, games, and
other software
• Keep others up-to-date with
meaningful business and personal
information
• Store, carry, and exchange info
• Always have a calculator with you
CHAPTER
11
Page 32

In this chapter
Finding information . . . . . . . . . . . . . . . . . . . . . . . . . . . . . . . . . . . . . 185
Installing applications . . . . . . . . . . . . . . . . . . . . . . . . . . . . . . . . . . . . 187
Removing applications . . . . . . . . . . . . . . . . . . . . . . . . . . . . . . . . . . . 190
Sharing information . . . . . . . . . . . . . . . . . . . . . . . . . . . . . . . . . . . . . 191
Beaming information . . . . . . . . . . . . . . . . . . . . . . . . . . . . . . . . . . . . 191
Using expansion cards . . . . . . . . . . . . . . . . . . . . . . . . . . . . . . . . . . . 193
Calculator . . . . . . . . . . . . . . . . . . . . . . . . . . . . . . . . . . . . . . . . . . . . . 197
Page 33

YOUR APPLICATION AND INFO MANAGEMENT TOOLS
11
Finding information
Quickly find who or what you’re looking for
by using one of these search features:
• Lookup: Find and dial your contacts by
name or phone number. See Dialing by
contact name for details.
• Search: Look through the text in all the
applications on your smartphone.
• File Explorer: Browse through the files
and folders on your smartphone or on
an expansion card.
• Global Address List Lookup: Look up
names in your online corporate address
list.
TIP
For information on opening and closing
apps, see Opening and closing applications
Using Search
Search for files and other items stored in
the My Documents folder on your
smartphone or on an expansion card. You
can search by file name or by words
located in the item. For example, you can
.
search for words within notes,
appointments, contacts, and tasks.
DID YOU KNOW
not appear in the search results list.
?
Contacts on your SIM card do
1 Press Start and select Programs.
2 Select Search .
DID YOU KNOW
pressing Option + left Shift.
?
You can also open Search by
3 Select Search for, and then enter the
file name, word, or other info you want
to find.
CHAPTER
FINDING INFORMATION
185
Page 34

YOUR APPLICATION AND INFO MANAGEMENT TOOLS
11
CHAPTER
TIP
If you’ve looked for an item before, select
the Search for list, and then select the item in
the list.
Show list
4 Select the Ty p e list, and then select the
kind of information you want to find.
5 Press Search (left action key).
6 Use the 5-way to select and view an
item from the results of the search.
Exploring files and folders
You can use File Explorer to browse the
contents of folders on your smartphone.
The root folder on your smartphone is
named My Device. My Device is similar to
My Computer on your computer.
1 Press Start and select Programs.
DID YOU KNOW
displayed, you can sort them by name, date,
size, or type. Select the
upper-right, and then select the sort method.
TIP
The storage card symbol appears next to
the names of files that are stored on an
expansion card.
?
When the items in a folder are
Sort by list in the
2 Select File Explorer .
3 Select the folder you want to explore. If
the folder you want is not displayed, tap
the Show list in the upper-left and
select My Device to view all folders.
4 Do any of the following:
• To open an item, select it.
• To quickly delete, rename, beam, or
email an item, highlight the item,
press and hold Center to open
the shortcut menu, and then select
the appropriate command.
FINDING INFORMATION
186
Page 35

YOUR APPLICATION AND INFO MANAGEMENT TOOLS
11
• To move a file to another folder,
highlight the item, press and hold
Center to open the shortcut
menu, and then select Cut or Copy.
Open the destination folder, press and
hold Center to open the shortcut
menu, and then select Paste.
• To highlight multiple items, tap and
drag the stylus.
IMPORTANT Do not delete any files that
you cannot identify. These files may be
required for your smartphone to function
properly.
Installing applications
Your Palm® Treo™ 750v smartphone comes
with several built-in and ready-to-use
applications. You can also install any of the
additional software included on the
Windows Mobile Getting Started Disc as
well as other third-party applications that
are compatible with Windows Mobile
devices, such as business software,
games, and more.
®
5.0
Applications you download to your
computer are likely to be in a compressed
format such as ZIP. If the file is
compressed, you need to use a
decompression utility on your computer,
such as WinZip, before you install
applications on your smartphone.
These instructions tell you how to install
basic files onto your smartphone. Some
software uses an installer or wizard to
guide you through the process. For details,
consult the documentation that came with
the software.
TIP
If an application does not have a Microsoft
Mobile to Market certificate, you see a
message indicating that the application is
untrusted. If this occurs, you can indicate
whether you want to continue the installation.
Installing bonus software from the CD
The Windows Mobile Getting Started Disc
includes several bonus software
applications that you can install on your
smartphone. You can install these
applications when you install the desktop
software, or you can install them later.
CHAPTER
INSTALLING APPLICATIONS
187
Page 36

YOUR APPLICATION AND INFO MANAGEMENT TOOLS
11
CHAPTER
1 Insert the Windows Mobile Getting
Started Disc into the CD drive on your
computer.
2 Click Add Programs.
3 Click the name of the application you
want to install.
4 Click Install (on the right side of the
screen).
5 (Optional) Repeat steps 3 and 4 to
install additional applications.
6 Synchronize your smartphone with your
computer to install the application(s) on
your Treo 750v smartphone.
Installing third-party applications
When installing third-party applications,
note the following:
• Install only apps that use Microsoft
Windows Mobile 5.0 software for
Pocket PC Phone Edition. The Microsoft
Windows Mobile 5.0 software for
Smartphone is not compatible with your
Treo 750v smartphone. Also, programs
written for earlier versions do not
support 5-way navigation or action keys
and can have performance problems.
• Make sure that the third-party
application supports 240x240 screen
resolution. Some older applications
have screen-size limitations.
• If you can try a free version of the
software before purchasing it, you can
test it first to make sure it works
properly.
NOTE If you encounter a problem with a
third-party application (such as an error
message), contact the application’s vendor.
For general troubleshooting of third-party
applications, see Third-party applications
DID YOU KNOW
application that lets you run Palm OS
applications on your Treo 750v smartphone.
TIP
Before purchasing a third-party application,
try the free version.
?
You can purchase a third-party
.
®
Installing applications from the Internet
You can use Internet Explorer Mobile to
install Windows Mobile apps in the CAB
file format directly from the Internet. For
files in any other format except CAB, you
must first download the files to your
INSTALLING APPLICATIONS
188
Page 37

YOUR APPLICATION AND INFO MANAGEMENT TOOLS
11
computer and then install them to your
smartphone by synchronizing.
1 Make sure your phone is on (see
Turning your phone on
).
2 Press Start and select Internet
Explorer.
3 Go to the page that contains the link to
the application you want to download.
4 Press Left or Right to highlight the
link to the file, and then press Center
to start the download process.
5 Press Start and select Programs.
6 Select File Explorer .
7 Go to the My Documents folder in File
Explorer.
8 Tap the file you downloaded to start the
installation program.
Installing applications from your
computer
BEFORE YOU BEGIN To install an
application from your computer to your
smartphone, you must first install
ActiveSync
®
desktop software on
your computer (see Installing the desktop
synchronization software).
1 Open My Computer or Windows
Explorer on your computer.
2 Double-click Mobile Device .
3 Copy the application file(s) into the
Mobile Device folder.
4 Connect your smartphone to your
computer to synchronize and install the
application(s) on your smartphone.
Installing applications onto an expansion
card
BEFORE YOU BEGIN To install an
application from your computer to an
expansion card, you must first install
ActiveSync desktop software on
your computer (see Installing the desktop
synchronization software).
1 Insert the expansion card into the
expansion card slot (see Inserting and
removing expansion cards).
2 Connect your smartphone to your
computer.
3 Open My Computer or Windows
Explorer on your computer.
4 Double-click Mobile Device .
CHAPTER
INSTALLING APPLICATIONS
189
Page 38

YOUR APPLICATION AND INFO MANAGEMENT TOOLS
11
CHAPTER
5 Double-click My Windows
Mobile-Based Device to open the
Mobile Device folder.
6 Copy the application file(s) into the
Storage Card folder inside the Mobile
Device folder.
Removing
applications
To free up memory on your smartphone,
you can remove applications that you no
longer use. You can remove only
applications, patches, and extensions that
you install; you cannot remove the built-in
applications that reside in the ROM portion
of your smartphone.
1 Press Start and select Settings.
2 Select the System tab, and then select
Remove Programs .
3 Highlight the application that you want
to remove.
DID YOU KNOW
cannot be deleted are not listed in the
Remove Programs list.
4 Select Remove.
5 Select Ye s to confirm the deletion.
?
Built-in applications that
REMOVING APPLICATIONS
190
Page 39

YOUR APPLICATION AND INFO MANAGEMENT TOOLS
11
Sharing information
Your smartphone comes equipped
with a variety of options for sharing
information, so that you can choose the
quickest, most convenient way to send
your info or to receive info from another
device.
• When you have a file open in a program
such as Notes or PowerPoint Mobile,
you can easily share a file by selecting
the Menu, and then selecting Send via
E-Mail or Beam File.
• In Microsoft Outlook
picture or attach a note or other file to
an email. You can also receive pictures
and attachments (see Your email
• You can synchronize to share info
between your smartphone and your
computer or between your smartphone
and Microsoft Exchange Server 2003
(see Synchronizing information
• If you are near someone, you can beam
files and applications between your
smartphone and your neighbor’s device
using the IR port or Bluetooth
technology (see Beaming information
®
, you can insert a
).
).
®
wireless
).
• You can also store files on an expansion
card and share the expansion card (see
Using expansion cards
).
Beaming information
Your smartphone is equipped with an IR
(infrared) port that enables you to beam
information to another device with an IR
port. The IR port is located on the side of
your smartphone closest to the stylus, near
the top. You can also beam using the
built-in Bluetooth wireless technology on
your smartphone.
The normal range for beaming with IR is
about 20 centimeters (8 inches). The
maximum range for beaming with
Bluetooth technology is about 10 meters
(30 feet). Performance and range are
affected by physical obstacles, radio
interference from nearby electronic
equipment, and other factors.
CHAPTER
SHARING INFORMATION
191
Page 40

YOUR APPLICATION AND INFO MANAGEMENT TOOLS
11
CHAPTER
TIP
For best results, the path between the
two devices must be clear of obstacles, and
both devices kept stationary. If you have
difficulty beaming, shorten the distance and
avoid bright sunlight.
DID YOU KNOW
can beam depends on the type of device you
are beaming to. Other Windows Mobile
devices are always compatible with the Treo
750v smartphone.
?
The type of information you
2 Press Menu (right action key)
and select Beam… (the menu item
changes names based on the type of
item you highlighted).
3 Do one of the following:
Bluetooth: When the name of the
receiving device appears, select Ta p to
send to begin the transfer. A blue icon
indicates a Bluetooth connection.
IR: Point the IR port on your smartphone
Beaming a record
1 Highlight the entry or file you want to
beam.
directly at the IR port of the receiving
device. A red icon indicates an IR
connection.
4 Wait for Done to appear next to the
name of the receiving device before you
continue using your smartphone.
BEAMING INFORMATION
192
Page 41

YOUR APPLICATION AND INFO MANAGEMENT TOOLS
11
Receiving beamed information
1 Turn on your screen.
2 Point your smartphone’s IR port directly
at the IR port of the transmitting device.
3 When the Receiving Data message
appears, select Ye s to receive the
beam.
TIP
If you can’t receive beamed info, press
Start and select Settings. Select the
Connections tab, and then select Beam.
Make sure the Receive all incoming beams
box is checked. If you still can’t receive info,
try a soft reset (see Resetting your
smartphone).
Using expansion
cards
The expansion card slot on your
smartphone enables you to add miniSD
cards to extend the storage capacity of
your smartphone. For example, miniSD
expansion cards can store the following:
• Pictures
• Videos
• MP3 audio files
• Email attachments
• Games
• eBooks
• Applications
• Databases
Expansion cards are sold separately.
TIP
We recommend that you purchase
preformatted expansion cards. To format a
card on your own, you need to connect a card
reader (sold separately) to your computer.
Inserting and removing expansion cards
1 Open the expansion card slot door by
sliding your fingernail or another thin
object into the notch.
2 Hold your smartphone with the screen
facing you and hold the card with the
label facing you. The notch on the card
should be toward the bottom of your
smartphone.
3 Insert the card into the expansion card
slot until you feel it lock into place and
you hear the confirmation tone.
CHAPTER
USING EXPANSION CARDS
193
Page 42

YOUR APPLICATION AND INFO MANAGEMENT TOOLS
11
CHAPTER
4 To remove an expansion card, press
down and release the card.
Notch
5 After you feel the expansion card slot
eject the card, remove the card
from the slot.
USING EXPANSION CARDS
194
Page 43

YOUR APPLICATION AND INFO MANAGEMENT TOOLS
11
Opening applications on an expansion
card
After you insert an expansion card into the
expansion card slot, you can open any of
the applications stored on the expansion
card.
TIP
To run an application on an expansion card,
your smartphone must have enough free
space in the internal memory to run the
application.
1 Insert the expansion card into the
expansion card slot.
2 Press Start and select Programs.
3 Select File Explorer.
4 Tap the Show list in the upper-left, and
then select Storage Card.
Show list
5 Select the application you want to open.
Saving files to an expansion card
You can save space on your smartphone by
saving files to an expansion card. For
example, when you create new Word
Mobile documents, notes, Excel Mobile
workbooks, pictures, videos, and audio
files, you can save them directly to an
expansion card. Saving files to an
expansion card also makes it easy to share
those files with others. (Some applications
may not support this feature.)
1 Insert an expansion card into the
expansion card slot.
2 Open the application you want to save
the info from.
3 Press Menu (right action key)
and select Options.
4 Select the Save to list, and then select
Storage Card.
TIP
If you don’t see the Save to list on the
Options screen, look on the other tabs (if
present). If you still can’t find a Save to list, the
application may not support this feature.
5 Press OK .
CHAPTER
USING EXPANSION CARDS
195
Page 44

YOUR APPLICATION AND INFO MANAGEMENT TOOLS
11
CHAPTER
Moving info between your smartphone
and an expansion card
1 Insert an expansion card into the
expansion card slot.
2 Open the application from which you
want to move the info.
3 Go to the list view.
4 Press Menu (right action key)
and select Rename/Move.
5 Select the Location list, and then select
where you want to move the info:
Storage Card or Main Memory.
6 Press OK .
Copying or moving applications and files
between your smartphone and an
expansion card
1 Insert the expansion card into the
expansion card slot.
2 Press Start and select Programs.
3 Select File Explorer.
TIP
Your applications are usually located in the
My Device/Program Files folder.
5 Press Menu (right action key)
and select Edit > Copy or Edit > Cut.
6 Go to the folder where you want to
place the selected item.
7 Press Menu (right action key)
and select Edit > Paste.
8 Press OK .
Viewing available expansion card
memory
1 Insert the expansion card into the
expansion card slot.
2 Press Start and select Settings.
3 Select the System tab, and then select
Memory .
4 Select the Storage Card tab.
5 Press OK .
4 Select the file or application you want to
copy or move (see Exploring files and
folders).
USING EXPANSION CARDS
196
Page 45

YOUR APPLICATION AND INFO MANAGEMENT TOOLS
11
Exploring files on an expansion card
1 Insert the expansion card into the
expansion card slot.
2 Press Start and select Programs.
3 Select File Explorer.
4 Tap the Show list in the upper-left, and
then select Storage Card.
5 Select the folder or files you want to
view.
6 Press OK .
Renaming an expansion card
If you change the contents of an expansion
card, you may at some point want to
rename the card to better match its
contents.
TIP
Before copying information to or renaming
the files or folders on an expansion card, or
renaming the card itself, make sure the card is
not write-protected. See the instructions that
came with your card for details.
1 Insert the expansion card into the
expansion card slot.
2 Press Start and select Programs.
3 Select File Explorer.
4 Tap the Show list in the upper-left, and
then select My Device.
5 Highlight the current expansion card
name (Storage Card by default).
6 Press Menu (right action key)
and select Rename.
7 Enter a new name for the card.
8 Press OK .
Calculator
You can use Calculator for basic arithmetic
calculations, such as addition, subtraction,
multiplication, and division.
CHAPTER
CALCULATOR
197
Page 46

YOUR APPLICATION AND INFO MANAGEMENT TOOLS
11
CHAPTER
Performing calculations
1 Press Start and select Programs.
2 Select Calculator .
3 Enter numbers and perform
calculations, including the following:
Clears the last digit in a multi-digit
entry.
Clears the current calculation or the
displayed number.
Calculates the reciprocal of a
TIP
You can paste numbers into Calculator as
well as copy calculation results to be pasted
into another app. Press Menu (right action
key) and select Edit.
TIP
For more advanced calculations, use Excel
Mobile. See Excel Mobile
for details.
Using the Calculator memory
• To store a number, select the box to the
left of the entry box. An M appears in
the box.
number.
Calculates percentage.
Calculates the square root of a
DID YOU KNOW
memory, it replaces the number that is
currently stored.
?
When you store a number in
number.
Switches a number between
negative and positive.
• To add the displayed number to the
number stored in memory, select .
• To display the number stored in
memory, select .
• To clear the memory, select .
198
CALCULATOR
Page 47

Your personal settings
Customizing is optional. But why not personalize your
smartphone to make it match your lifestyle and work even
harder for you?
You can easily customize your smartphone’s sounds, fonts,
screen colors, and more. Take advantage of various levels of
security. Prevent making an accidental (and expensive) phone
call by locking the keyboard. Some preference settings can help
extend the life of your smartphone’s battery. There are lots of
ways to make your smartphone work better for you.
Benefits
• Conserve power
• Secure your data
• Make your screen easy to read
CHAPTER
12
Page 48

In this chapter
Today screen settings. . . . . . . . . . . . . . . . . . . . . . . . . . . . . . . . . . . . 201
System sound settings. . . . . . . . . . . . . . . . . . . . . . . . . . . . . . . . . . . 202
Display and appearance settings . . . . . . . . . . . . . . . . . . . . . . . . . . . 204
Application settings . . . . . . . . . . . . . . . . . . . . . . . . . . . . . . . . . . . . . 206
Locking your smartphone and info . . . . . . . . . . . . . . . . . . . . . . . . . . 210
System settings . . . . . . . . . . . . . . . . . . . . . . . . . . . . . . . . . . . . . . . . 214
Connection settings . . . . . . . . . . . . . . . . . . . . . . . . . . . . . . . . . . . . . 220
Page 49

YOUR PERSONAL SETTINGS
12
Today screen settings
Selecting your Today screen background
1 Press Start and select Settings.
2 On the Personal tab, select To d a y .
3 On the Appearance tab, check the Use
this picture as the background box.
4 Select Browse.
5 Select the picture you want to use.
6 Press OK .
TIP
To change the color theme for your
smartphone, select a new theme from the
Appearance tab in Today Settings.
Selecting which items appear on your
Today screen
1 Press Start and select Settings.
2 On the Person al tab, select To d a y .
3 Select the Items tab.
4 Check the boxes next to the items you
want to appear on your Today screen,
and uncheck any items you want to
hide.
5 (Optional) Select Options (if available)
to configure the settings for the current
item. Press OK to return to Today
Settings.
6 Press OK .
DID YOU KNOW
plug-ins available for your Today screen.
?
There are lots of third-party
CHAPTER
TODAY SCREEN SETTINGS
201
Page 50

YOUR PERSONAL SETTINGS
12
CHAPTER
System sound
settings
if the smartphone ring volume is set to the
loudest setting and you slide the ringer
switch to Sound Mode Off, you do not hear
the smartphone ring. When you move the
ringer switch back to Sound Mode On, the
When you’re in a meeting, at the movies,
or anywhere that silence is required, you
smartphone ring volume is still set to the
loudest setting.
can immediately silence all sounds on your
smartphone, including Calendar
notifications and system sounds. This does
not mute the speaker during phone calls.
Silencing sounds
TIP
Can't get music to play out of your
smartphone’s MP3 player? Check the ringer
switch. If it’s set to Sound Mode Off, you
won’t be able to hear music.
DID YOU KNOW
silent alarm that can vibrate even when the
ringer switch is set to Sound Mode Off.
?
Your smartphone includes a
Sound
Mode On
Selecting Sounds & Notifications
1 Press Start and select Settings.
2 On the Person al tab, select Sounds &
Sound
Mode Off
Notifications .
1 Slide the ringer switch to Sound Mode
Off . The smartphone vibrates briefly.
2 To hear all sounds again, slide the ringer
switch to Sound Mode On .
3 On the Sounds tab, set any of the
following options:
Events: Turns sounds on/off for system
warnings and error messages.
When you slide the ringer switch back to
the Sound Mode On position, it restores
the previous sound settings. For example,
SYSTEM SOUND SETTINGS
202
Page 51

YOUR PERSONAL SETTINGS
12
Programs: Turns sounds on/off in the
applications on your smartphone.
Notifications: Turns alarms and
reminders on/off in the applications on
your smartphone.
Screen taps: Turns sounds associated
with tapping the screen on/off, and sets
the volume level when this sound is
turned on.
Hardware buttons: Turns sounds
associated with pressing buttons on/off,
and sets the volume level when this
sound is turned on.
TIP
To record, preview, delete, and send
sounds, select the Manage tab. To record a
sound, press Menu and select New Sound.
To play a sound, select it and press Play. To
delete a sound, highlight it and press
Backspace. To send a sound, highlight it,
press Menu, and select Send Sound.
4 Select the Notifications tab and set
any of the following options:
Event: Specifies which action you want
to change the settings for. The
remaining options vary based on the
action you select.
Play sound: Lets you turn the sound
on/off for the selected event. To select a
different sound select the list to the
right of this setting, and then select a
CHAPTER
SYSTEM SOUND SETTINGS
203
Page 52

YOUR PERSONAL SETTINGS
12
CHAPTER
different sound. To preview the sound,
select Play Sound, and then select Play.
Repeat: Indicates whether the sound
plays more than once, if turned on.
Display message on screen: Indicates
whether a notification message appears
onscreen for the selected event.
Vibrate: Indicates whether your
smartphone vibrates to notify you about
the selected event.
5 Press OK .
Display and
Changing the text size and clarity
1 Press Start and select Settings.
2 Select the System tab, and then select
Screen .
3 Select the Text Size tab.
4 Press Left and Right to adjust the
text size.
5 Select the Clear Type tab.
6 To smooth the edges of screen fonts,
check the Enable Clear Type box.
7 Press OK .
Setting display formats
1 Press Start and select Settings.
appearance settings
Adjusting the brightness
1 Press Option , and then press .
2 Press Left and Right to adjust the
brightness.
3 Press OK .
2 Select the System tab, and then select
Regional Settings .
DISPLAY AND APPEARANCE SETTINGS
204
Page 53

YOUR PERSONAL SETTINGS
12
3 On the Region tab, select a region from
the list. The region selection sets the
default format settings.
4 (Optional) Select any of the following
tabs to customize the format settings:
Number: Sets the decimal symbol and
number of decimal places, the digit
grouping symbol and group size, list
separators, negative number sign
symbol and format, leading zero display,
and measurement system (metric vs.
U.S.).
Currency: Sets the currency symbol
and position, the decimal symbol and
position, digit grouping symbol and
group size, and negative number
format.
Time: Sets the time style, separators,
and AM and PM symbols.
Date: Sets the short date style,
separators, and long date style.
5 Press OK .
Aligning the screen to correct tapping
problems
Occasionally, your screen may need to be
readjusted. You know your screen needs
adjustment when the wrong feature is
activated when you tap the screen. To fix
the problem, align the screen.
1 Press Start and select Settings.
2 Select the System tab, and then select
Screen .
3 On the General tab, select Align
Screen.
4 Tap the screen where indicated.
5 Press OK .
Changing the system color scheme
TIP
You can also set the background for your
Today screen (see Selecting your Today
screen background).
1 Press Start and select Settings.
2 On the Person al tab, select To d a y .
3 On the Appearance tab, select a theme
in the list.
4 Press OK .
CHAPTER
DISPLAY AND APPEARANCE SETTINGS
205
Page 54

YOUR PERSONAL SETTINGS
12
CHAPTER
Changing screen orientation
Landscape orientations are determined by
which hand you would hold the stylus in.
1 Press Start and select Settings.
2 Select the System tab, and then select
Screen .
3 Select the General tab.
4 Select an orientation:
• Portrai t
• Landscape (right-handed)
• Landscape (left-handed)
5 Press OK .
1 Press Start and select Settings.
2 On the Person al tab, select Menus
.
3 Check the boxes next to the
applications you want to see in the Start
menu.
Application settings
Arranging the Start menu
You can change the first seven applications
listed on the Start menu. You can still
access the remaining applications by
4 Press OK .
TIP
Don’t forget the six.icons across the top of
the Start menu. They’re the apps you opened
most recently, and it’s easy to get back to
them: just use the 5-way to select one of the
icons
selecting Programs from the Start menu,
and then selecting the application’s icon.
Reassigning buttons
Buttons Settings lets you select which
applications are associated with many of
APPLICATION SETTINGS
206
Page 55

YOUR PERSONAL SETTINGS
12
the buttons and key combinations on your
smartphone.
1 Press Start and select Settings.
2 On the Personal tab, select Buttons
.
3 On the Program Buttons tab, highlight
the button or key combination you want
to change in the Buttons list. The
hardware buttons are mapped to the
following items:
• Start = Start menu.
• OK = OK/Close.
• Option + Phone/Send =
Messaging.
• Option + Start = Calendar.
• Option + OK = Task Manager.
• Hold Side button = Windows Media
Player.
4 Select the Assign a program list, and
then select the application you want to
assign to the button or key combination
you selected in step 3.
5 Press OK .
Setting up voice commands
IMPORTANT The Voice Command
application is available only for English,
French, and German.
Voice commands enable you to use speech
to execute some commands on the Start
menu and the Programs menu.
CHAPTER
APPLICATION SETTINGS
207
Page 56

YOUR PERSONAL SETTINGS
12
CHAPTER
1 Assign the Hold Side button to Voice
Command. See Reassigning buttons
details.
2 Press Start and select Settings.
3 On the Personal tab, select Voice
Command.
4 Select Enabled.
5 Select the items you want to enable. If
an item is highlighted and the Options
box is active, select the Options box to
choose the features you want enabled
for the highlighted item.
Using voice commands
DID YOU KNOW
the types of commands that can be used with
Voice Command, you can go to the on-device
Help by pressing Start and selecting Help.
?
If you have questions about
The Voice Command application is available
only for English, French, and German.
IMPORTANT Do not use voice commands
in your car until you read the End user
1 Set the ringer switch at the top of your
for
smartphone to On.
2 Hold your device about 230mm (nine
inches) away from your mouth, and then
press and release the assigned Voic e
Command button (see Setting up voice
commands). A tone plays and a
microphone icon appears at the top of
your screen.
3 In a clear voice say the command. For
example:
• To access Help, say,“Help.” After
Voice Command finishes speaking, a
microphone icon appears at the top of
your screen. Say your answer. For
example, say, “General” to access
general Help topics.
• To access your Calendar, say, “Start
Calendar.”
• To access your music, say, “Start
Windows Media.” After Voice
Command finishes speaking, a
microphone icon appears at the top of
your screen. Say your answer.
notice about this kind of usage; see End
user notice.
APPLICATION SETTINGS
208
Page 57

YOUR PERSONAL SETTINGS
12
TIP
You can move quickly through voice
commands by stopping the voice command
response before it finishes. When Voice
Command responds, you can press the Voi ce
Command button before it completes the
question. Once the microphone icon is visible,
you may say your answer.
Setting input options
1 Press Start and select Settings.
2 On the Personal tab, select Input .
3 Select the Word Completion tab and
set any of the following options:
Suggest words when entering text:
Indicates whether word suggestions
appear as you enter text. You can also
specify how many letters you want to
enter before a suggestion appears, how
many suggestions you want to see, and
whether a space appears after you
insert a suggested word.
TIP
To enter a suggested word, press Down
to highlight the suggestion, and then press
Center to accept it.
CHAPTER
Replace text as you type: Indicates
whether the text you type adds to
existing text or replaces it. This is similar
to the Insert function on a computer
keyboard.
4 Select the Options tab and set any of
the following options:
Voice recording format: Specifies the
format in which you save voice notes.
APPLICATION SETTINGS
209
Page 58

YOUR PERSONAL SETTINGS
12
CHAPTER
Locking your
smartphone and info
Your smartphone includes several features
that help you protect your smartphone
from inadvertent use and keep your
information private. The built-in security
software lets you use your smartphone for
Default zoom level for writing:
Specifies the initial size of text entered
from onscreen writing methods.
Default zoom level for typing:
Specifies the initial size of text entered
using the keyboard.
Capitalize first letter of sentence:
Specifies whether the first letter of a
sentence automatically appears in
uppercase, without requiring you to
press a Shift key.
Scroll upon reaching the last line:
Specifies whether the display
automatically scrolls when you select
the last line of visible info.
5 Press OK .
emergency calls, such as dialing the 112
emergency number, even if it is locked.
• Keyguard: Manually disables all buttons
and the screen’s touch-sensitive feature
to prevent accidental presses in your
briefcase or pocket.
• Auto-Keyguard and touchscreen
lockout: Automatically enables
Keyguard after a period of inactivity and
lets you disable the screen’s
touch-sensitive feature during an active
call.
• Phone Lock: Requires a PIN to make
and receive calls.
• System password lock: Requires a
password to see any information on
your smartphone.
LOCKING YOUR SMARTPHONE AND INFO
210
Page 59

YOUR PERSONAL SETTINGS
12
TIP
To avoid accidentally pressing onscreen
buttons while you’re holding your smartphone
up to your ear to speak, you can disable the
screen’s touch-sensitive feature during active
calls. When the screen’s touch-sensitive
feature is disabled, you must use the 5-way
navigator to access items on the screen.
Locking your keyboard (Keyguard)
By default, your keyboard locks so that you
don’t accidentally press buttons or activate
screen items while your smartphone is in a
pocket or bag.
• To dismiss Keyguard, press Center .
• To manually turn on Keyguard when
your smartphone screen is on, press
Option and Power/End .
TIP
If you’re using a headset or hands-free
device and your smartphone is in a pocket or
bag, you can manually turn on Keyguard
during a call to prevent accidental key
presses.
Auto-Keyguard enables you configure the
Keyguard feature.
1 Press Start and select Settings.
2 On the Personal tab, select
Keyguard .
3 Select the Auto-Keyguard list and then
disable the auto-keyguard feature or set
the period of inactivity that passes
before the keyboard automatically locks.
4 Press OK .
Locking your screen
1 Press Start and select Settings.
2 On the Personal tab, select
Keyguard .
3 Check or uncheck the Disable
touchscreen box to determine whether
the screen’s touch-sensitive feature is
enabled during a call.
4 Press OK .
CHAPTER
LOCKING YOUR SMARTPHONE AND INFO
211
Page 60

YOUR PERSONAL SETTINGS
12
CHAPTER
Locking the SIM card
You can lock your SIM (Subscriber Identity
Module) card to prevent unauthorized use
of your mobile account. When your SIM
card is locked, you must enter the PIN to
power on your phone to make or receive
calls, except for emergency numbers. The
SIM card remains locked even if you move
the card to another phone.
When your SIM card is locked, you can
unlock your SIM card by trying to turn on
the phone. A dial pad appears for you to
enter your PIN.
BEFORE YOU BEGIN You need the
following:
• Make sure your phone is on and that
you’re inside a coverage area (see
Turning your smartphone on/off
• Get your default PIN from your network
).
operator.
1 Press Start and select Settings.
2 On the Person al tab, select Phone .
3 Select the Security tab.
4 Check the Require PIN when phone is
used box.
5 Enter the PIN and press Done
(left action key).
6 Press OK to finish.
7 Turn your phone off to activate the
phone lock feature.
Your SIM card locks when you turn off your
phone and turn it back on. When your SIM
card is locked, you can unlock your SIM
card entering your PIN.
LOCKING YOUR SMARTPHONE AND INFO
212
Page 61

YOUR PERSONAL SETTINGS
12
DID YOU KNOW
your SIM card. Select Menu, Preferences,
and then Phone Settings. Select the
Security tab and uncheck the Require PIN
when phone is used box.
NOTE You need your PIN number to edit
?
You can permanently unlock
your PIN number or remove the locking
feature. If you enter an incorrect PIN more
times than allowed by your network
operator, the SIM card locks. Once the SIM
card locks, you need the PUK (PIN Unlock
Key) to unlock the SIM card. Contact your
network operator for more information and
the PUK.
Locking your smartphone
To protect your personal information, you
can lock the system so that you need to
enter your password to access any of your
information or use other features of
your smartphone.
IMPORTANT If you lock your system, you
must enter the exact password to unlock it.
If you enter an incorrect password, you are
given another chance. Each time an
incorrect password is entered, you are
given progressively longer time periods
between your chances to enter the
password. If you forget the password, you
need to perform a hard reset to resume
using your smartphone. Performing a hard
reset deletes all the entries in your
smartphone. However, you can restore all
previously synchronized info the next time
you sync (see Defining speed-dial buttons
.
1 Press Start and select Settings.
2 On the Person al tab, select Lock .
3 On the Password tab, check the
Prompt if device unused for box to
turn on the password feature.
4 Select the first list, and then select how
long a period of inactivity must pass
before you are prompted to enter a
password to unlock the system.
5 Select the Pass word type list, and then
select a format for your password.
6 Select Password, tap the onscreen
keyboard icon, and enter your
password. Then tap the onscreen
keyboard icon.
7 Select Confirm, tap the onscreen
keyboard icon, and enter the
password again. Then tap the onscreen
keyboard icon.
CHAPTER
LOCKING YOUR SMARTPHONE AND INFO
213
Page 62

YOUR PERSONAL SETTINGS
12
CHAPTER
8 (Optional) Select the Hint tab and enter
a hint to help you recall your password.
9 Press OK .
3 On the Identification tab, enter any of
the contact information you want to
include.
4 Select the Notes tab and then enter any
Entering owner information
You can enter personal information that you
want to associate with your smartphone,
such as your name, company name, and
phone number. You can also set whether
you want this information to appear when
you turn on your smartphone. If you lose
your smartphone, this feature can help the
person who finds it return it to you.
1 Press Start and select Settings.
additional text you want to include.
5 Select the Options tab and check the
boxes to indicate which info (if any) you
want to appear on the screen when you
turn on your smartphone.
6 Press OK .
TIP
You can also display your Owner
Information on your Today screen. See
Selecting which items appear on your
Today screen for details.
System settings
Setting the date and time
Clock & Alarms Settings lets you set the
time zone, time, and date for your home
location and a location that you visit.
2 On the Personal tab, select Owner
Information .
To set the display format for the date and
time, see Setting display formats
.
SYSTEM SETTINGS
214
Page 63

YOUR PERSONAL SETTINGS
12
1 Press Start and select Settings.
2 Select the System tab, and then select
Clock & Alarms .
3 On the Time tab, select Home.
4 Select the first list, and then select the
time zone for your home location.
5 Select the hour, and then press Up
or Down to increase or decrease the
hour setting. Repeat this process for the
minute, seconds, and AM/PM settings.
6 (Optional) Select Visiting and set the
info for a location that you visit often.
7 Press OK .
8 If prompted, select Ye s to accept your
changes.
Synchronizing the date, time, and time
zone with the network
By default your smartphone synchronizes
the date, time, and time zone with your
network operator’s network whenever your
phone is on and you are inside a coverage
area.
1 Press Start and select Settings.
2 Select the System tab, and then select
Clock & Alarms .
3 Select the More tab.
4 To disable this option, uncheck the
Enable local network time box.
5 If you want to keep your smartphone
date and time set for your selected
location, uncheck the Use network
time zone box.
Setting system alarms
System alarms let you set alarms that are
not associated with a task or appointment.
For example, you can use your smartphone
as an alarm clock when you travel, or set
alarms to remind you when it’s time to take
medication or pick up the kids.
CHAPTER
SYSTEM SETTINGS
215
Page 64

YOUR PERSONAL SETTINGS
12
CHAPTER
1 Press Start and select Settings.
TIP
To change the alarm sound, select the
alarm sound icon, select the Play Sound list,
and then select the alarm sound you want to
use.
9 Press OK to finish.
10 If prompted, select Yes to accept your
changes.
Managing identity certificates
2 Select the System tab, and then select
Clock & Alarms .
3 Select the Alarms tab.
4 Check a box to turn on that alarm.
5 Select the description next to the box
you checked and enter a description for
the alarm.
6 Select the days of the week you want
the alarm to go off. You can select
multiple days for each alarm.
7 Select the time you want the alarm to
go off, and then press OK .
8 Select , check the boxes to select
how you want the alarm to go off, and
Your smartphone may include preinstalled
certificates. Certificates are digital
documents that are used to authenticate
and exchange information on networks.
Certificates can be issued for a user, a
device, or a service.
1 Press Start and select Settings.
2 Select the System tab, and then select
Certificates .
3 Select any of the following:
Pers on al: Displays certificates that
establish your identity when you log in
to a secured network, such as a
corporate network.
then press OK .
SYSTEM SETTINGS
216
Page 65

YOUR PERSONAL SETTINGS
12
Root: Displays certificates that identify
the computers, such as servers, that
you connect to. These certificates help
prevent unauthorized users from
accessing your smartphone and
information.
4 Press OK to finish.
TIP
To delete a certificate, tap and hold the
certificate in the list, and then select
from the shortcut menu.
Delete
Enabling error reporting
Error Reporting sends info that helps
diagnose application errors for devices
running Windows Mobile software. When
an error is detected, a text file is created.
You can review the file and choose
whether you want it delivered to technical
support. The information is used by
programming groups at Microsoft for
quality control and is not used for tracking
individual users or installations for any
marketing purpose. The info that is
collected is technical info about the state of
your system when the error occurred. No
documents (or any info contained in them)
are intentionally sent with the report. To
ensure further security, the report is
transmitted via a secure connection and is
kept confidential and anonymous in a
limited-access database.
DID YOU KNOW
meets the privacy regulations of the European
Union (EU) as well as the Fair Information
Practice Principles of the Federal Trade
Commission. To view the Fair Information
Practice Principles, visit the Federal Trade
Commission website at www.ftc.gov/reports/
privacy3/fairinfo.htm.
?
This error reporting method
Your smartphone must be connected to
your computer when you send the error
report—provided your computer is
connected to the Internet.
1 Press Start and select Settings.
2 Select the System tab, and then select
Error Reporting .
3 Select whether you want to enable or
disable error reporting.
4 Press OK to finish.
CHAPTER
SYSTEM SETTINGS
217
Page 66

YOUR PERSONAL SETTINGS
12
CHAPTER
How much storage space do I have left?
1 Press and hold OK .
Stop. To close all open applications,
select Stop All.
2 Select any of the following tabs:
Main: Displays the amount of memory
assigned to your applications and info,
as well as the amount of memory in use
versus the available memory.
3 Press OK to finish.
Optimizing power settings
TIP
An easy way to check the battery level is
Storage Card: Displays the amount of
memory available on an expansion card
that is inserted in the expansion slot on
your smartphone.
Running Programs: Lists the
applications that are in use on your
smartphone. To switch to an application,
highlight it and select Activate. To close
an application, highlight it and select
by tapping the Battery icon in the title bar.
1 Press Start and select Settings.
2 Select the System tab, and then select
Power .
3 On the Battery tab, view the power
remaining in your battery.
4 Select the Advanced tab and set
whether your smartphone’s screen
turns off automatically after a specified
SYSTEM SETTINGS
218
Page 67

YOUR PERSONAL SETTINGS
12
period of inactivity. You can assign
different intervals for battery power and
external power.
5 Press OK to finish.
TIP
To conserve additional battery power,
adjust the display backlight setting. Press
Start and select Settings. Select the System
tab, and then select Backlight. On the
Battery Power tab, set whether the display
backlight turns off automatically after a period
of inactivity.
Turning wireless services on/off
1 From the Today screen, press Menu
(right action key) and select
Wireless Manager.
TIP
To change the settings for one of the
displayed wireless features, select Menu and
select the wireless feature you want to
change.
CHAPTER
SYSTEM SETTINGS
219
Page 68

YOUR PERSONAL SETTINGS
12
CHAPTER
Internet, simply start Internet Explorer
Mobile.
For special situations, such as connecting
to your internet service provider (ISP) or to
a remote access server (RAS), you can set
up another connection.
BEFORE YOU BEGIN Obtain the following
information from your ISP or system
administrator:
2 Turn your smartphone’s wireless
features on/off. Select All to turn all
wireless features on/off.
3 Press OK to finish.
You can also turn wireless services on and
off by tapping the signal-strength icon
at the top of the screen, and then selecting
Wireless Manager.
• ISP server phone number or access
point
• Username
• Password
1 Press Start and select Settings.
2 Select the Connections tab, and then
select Connections .
3 On the Ta s k s tab, select Manage
existing connections.
Connection settings
4 Select the Modem tab.
5 Highlight the connection you want to
Managing ISP settings
Your smartphone is already set up to
connect to the Internet using a high-speed
data connection on your network
operator’s network. To connect to the
view or change, and then select Edit, or
to create a new connection, select
New.
6 Follow the onscreen instructions to edit
or create the connection.
CONNECTION SETTINGS
220
Page 69

YOUR PERSONAL SETTINGS
12
Connecting to a VPN (virtual private
network)
If you want to use your smartphone to
access your corporate email account or
other files on your corporate server, you
may need to set up a VPN. A VPN enables
you to log in to your corporate server
through the company’s firewall (security
layer).
Check with your company’s system
administrator to see if a VPN is required to
access the corporate network. If you need
a VPN, you must purchase and install a
third-party VPN
client to use this feature.
Before you begin setting up a VPN, ask
your system administrator for the following
information:
• Your username and password
• Your server’s domain name
• Your server’s TCP/IP settings
• Your server’s host name or IP address
1 Install your third-party VPN client (see
Installing applications
).
2 Press Start and select Settings.
3 Select the Connections tab, and then
select Connections .
4 On the Ta s k s tab, select Add a new
VPN server connection.
5 Follow the onscreen instructions to
enter the settings provided by your
corporate system administrator.
TIP
To manually start a data connection on
your network operator’s network or another
network, go to Connections Settings, and on
the Tasks tab, select Manage existing
connections. Tap and hold the connection
you want to start, and then select Connect
from the shortcut menu.
Setting up a proxy server
1 Press Start and select Settings.
2 Select the Connections tab, and then
select Connections
3 On the Ta s k s tab, select Set up my
proxy server.
4 Check both boxes near the top of the
screen.
5 Select Proxy server and enter the proxy
server name.
6 Press OK .
CHAPTER
CONNECTION SETTINGS
221
Page 70

YOUR PERSONAL SETTINGS
12
CHAPTER
TIP
To change settings such as the port
number, proxy server type, or credentials,
select Advanced.
connection when you’ve finished browsing
the web.
1 Use the stylus to tap the data
connection icons or on the title
Ending a data connection
If your service plan includes
minutes-of-use fees for data connections,
bar.
2 Select Disconnect from the shortcut
menu.
you can reduce costs by ending the data
CONNECTION SETTINGS
222
Page 71

Common questions
CHAPTER
13
Transferring info from
another device
For information on transferring your info
from a previous Windows Mobile
or from a Palm OS
®
Palm
Treo™ 750v smartphone, visit
www.palm.com/treo750v-support
instructions.
®
device to your new
®
device
for
DID YOU KNOW
application that lets you run Palm OS
applications on your Treo 750v smartphone.
DID YOU KNOW
Windows Mobile, you can go to the Microsoft
Windows Mobile website. Search for Palm
devices or Pocket PCs for information.
IMPORTANT Do not use a backup utility to
transfer your info from another device to
your new smartphone. This can cause your
smartphone to malfunction.
?
You can purchase a third-party
?
If you have questions about
®
Page 72

COMMON QUESTIONS
13
CHAPTER
Reinstalling the
desktop software
If you have problems synchronizing using
ActiveSync
need to reinstall the software.
BEFORE YOU BEGIN Make sure your
computer profile includes administrator
rights to install software. In large
organizations, these are usually granted
by the system administrator.
1 Shut down your computer, and then
2 On your computer, click Start > Control
3 Remove Microsoft ActiveSync if it is on
4 Quit any active applications, including
5 Insert the Windows Mobile Getting
®
desktop software, you may
turn it on again.
Panel > Add or Remove Programs.
your computer.
virus scanners and Internet security
applications.
Started Disc into your computer’s CD
drive and follow the onscreen
instructions.
You must install the version of
ActiveSync desktop software that came
with your smartphone on the Windows
Mobile Getting Started Disc. Other
versions may not work with this
smartphone.
DID YOU KNOW
Started Disc installs the software and drivers
that let you synchronize with Microsoft Office
Outlook
different personal information manager (PIM),
you must install a third-party solution. Contact
the PIM’s vendor to learn if software
is available for your Treo 750v smartphone.
?
The Windows Mobile Getting
®
. If you want to synchronize with a
Resetting your
smartphone
Performing a soft reset
Performing a soft reset is similar to
restarting a computer. If your smartphone
is not responding or you have trouble
synchronizing with your computer, a soft
reset may help.
REINSTALLING THE DESKTOP SOFTWARE
224
Page 73

COMMON QUESTIONS
13
1 Open the expansion card slot door on
the side of your smartphone.
2 Use the stylus tip to gently press the
reset button next to the expansion card
slot.
3 Wait for the progress bar on the Treo
logo screen to fill before continuing to
use your smartphone.
TIP
You can also do a soft reset by removing
the battery and reinserting it.
DID YOU KNOW
wireless technology feature was on before a
reset, these automatically turn on after the
reset.
?
If the phone or the Bluetooth®
Performing a hard reset
A hard reset erases all personal
information, such as appointments,
contacts, and tasks, as well as programs
you have added, such as third-party
software on your smartphone. Never do a
hard reset without first trying a soft reset.
You can restore previously synchronized
information the next time you sync.
IMPORTANT Synchronize to restore your
Outlook data, such as Outlook email,
Calendar, Contacts, Notes, and Tasks. You
can use a backup and restore solution
(make sure it’s an application that’s
approved by Palm, such as the one
included on the Windows Mobile Getting
Started Disc) to restore configurations and
preferences such as speed-dials, SMS
entries, call log information, and personal
settings.
CHAPTER
RESETTING YOUR SMARTPHONE
225
Page 74

COMMON QUESTIONS
13
CHAPTER
TIP
Some third-party applications do not
create a backup on your computer when you
synchronize. If you do a hard reset, you may
lose info in these applications and you need to
reinstall the application on your smartphone
after the hard reset. Please contact the
developer to find out if your info is backed up
during synchronization.
DID YOU KNOW
hard reset, the source folder in My
Documents changes from Treo My
Documents to WM_your name.
?
When you synchronize after a
3 While pressing and holding Power/End
, use the tip of the stylus to gently
press and hold the reset button next to
the expansion card slot.
4 Continue pressing and holding both
buttons until the “Erase all data?”
prompt appears.
5 Press Up to confirm the hard reset.
6 Wait for the progress bar on the Treo
logo screen to fill before continuing to
use your smartphone.
7 (Optional) Synchronize to restore your
A hard reset can tell you whether a
problem stems from your smartphone or
from an application installed on it. If you do
not experience the problem after you
previously synchronized info. If you use
a backup utility, you may also need to
restore a backup to recover additional
info and settings.
perform a hard reset, the problem may be
related to software you installed. See
Third-party applications
for suggestions on
diagnosing third-party software issues.
1 Open the expansion card slot door on
the side of your smartphone.
2 If the screen is off, press Power/End
to wake up the screen.
Replacing the battery
Your smartphone comes with a replaceable
battery. Be sure to use a replacement
battery from Palm that is compatible with
Palm Treo 750v smartphones. Do not use a
battery from any earlier model of Treo
smartphone.
RESETTING YOUR SMARTPHONE
226
Page 75

COMMON QUESTIONS
13
TIP
Be sure to dispose of your old battery in an
evironmentally responsible and legal way. In
some areas, disposal in household or
business trash is prohibited. Visit
www.palm.com
information.
DID YOU KNOW
your info even when you remove the battery.
/environment for more
?
Your smartphone stores all
1 Press Power/End to turn off the
screen.
2 Use one hand to press the battery door
release and use the other hand to slide
the battery door downward to remove it
from your smartphone.
3 Place a finger in the notch between the
stylus and the battery, and lift the
battery at a 45-degree angle.
4 Align the battery contacts with the
phone contacts inside the battery
compartment.
5 Insert the battery into the compartment
at a 45-degree angle, pressing it into
place. Slide the battery door onto the
back of the smartphone until it clicks
into place.
Battery door
release
Battery
contacts
Notch
6 Wait for the screen to turn on.
CHAPTER
Phone
contacts
RESETTING YOUR SMARTPHONE
227
Page 76

COMMON QUESTIONS
13
CHAPTER
Performance
The applications are running slower than
usual
1 Press Start and select Settings.
2 Select System, and then select
Memory .
3 Select Running Programs.
TIP
Be sure that third-party applications are
compatible with Windows Mobile version 5 or
later. Applications written for earlier versions
can have performance problems.
Also make sure to install only apps that use
Microsoft Windows Mobile 5.0 software for
Pocket PC Phone Edition. If you can try a free
version of the software before purchasing it,
you can test it first to make sure it works
properly.
4 Select Stop All to close all your open
applications.
5 Press OK .
If the previous steps don’t fix the problem,
try doing a soft reset (see Performing a soft
reset). If the problem persists, follow these
steps to turn off the Voice Command
setting, if it is enabled:
1 Press Start and select Settings.
2 Select Personal, and then select Vo ic e
Command .
3 Uncheck the Enabled box.
4 Press OK .
My battery seems to drain quickly
If you have a push email solution (such as
operator-provided push email) or if you
have set up a schedule for wireless
synchronization, check with your email
provider or system administrator to make
sure that the server is set up properly to
work with your smartphone. Incorrect
server setup can cause excessive drain on
your battery.
For more tips on conversing battery life,
see Maximizing battery life
).
PERFORMANCE
228
Page 77

COMMON QUESTIONS
13
Screen
The screen appears blank
1 If you’re on a call, when the time period
specified in Backlight Settings expires,
the screen dims; one minute later, the
screen automatically turns off.
Press any key except Power/End to
wake up the screen. Pressing Power/
End hangs up the call.
2 Look closely at the screen. If you can
see a dim image, try adjusting the
screen brightness (see Adjusting the
brightness).
3 If that doesn’t work, perform a soft
reset (see Performing a soft reset
4 If that doesn’t work, connect your
smartphone to the AC charger (see
Charging the battery
reset again.
5 If that doesn’t work, perform a hard
reset (see Performing a hard reset
TIP
If you are using a third-party application,
make sure that the application supports
240x240 screen resolution. Some older
applications have screen-size limits
) and perform a soft
).
).
.
The screen doesn’t respond accurately to
taps or activates wrong features
1 Make sure there is no debris trapped
under the edges of the screen.
2 Press Start and select Settings.
3 Select the System tab, and then select
Screen .
4 On the General tab, select Align
Screen.
5 Follow the onscreen instructions to
align the screen.
6 Press OK .
Network connection
Signal strength is weak
1 If you’re standing, move about 3 meters
(10 feet) in any direction.
2 If you’re in a building, move near a
window. Open any metal blinds.
3 If you’re in a building, move outdoors or
to a more open area.
4 If you’re outdoors, move away from
large buildings, trees, or electrical wires.
CHAPTER
SCREEN
229
Page 78

COMMON QUESTIONS
13
CHAPTER
5 If you’re in a vehicle, move your
smartphone so that it’s level
with a window.
TIP
Become familiar with low coverage areas
where you live, commute, work, and play, so
you know when to expect signal strength
issues.
I can’t tell if data services are available
The following icons appear in the title bar
to indicate whether data services are
available:
Your phone is connected to a
UMTS network, but you are not
actively transmitting data. You can
still make or receive calls.
My smartphone won’t connect to the
mobile network
1 Try the suggestions above for weak
signals.
2 Turn off your phone and turn it on again
(see Turning your smartphone on/off
).
3 Perform a soft reset (see Performing a
soft reset).
Your phone is on and a UMTS data
connection is active. You can make
and receive calls and transmit data
simultaneously.
Your phone is connected to a GPRS
(EDGE if available) network, but you
are not actively transmitting data.
You can still make or receive calls.
Your phone is on and a GPRS
My phone seems to turn off by itself
If a system error and reset occur, the
phone automatically turns on if it was on
before the reset. However, if your
smartphone can’t determine if your phone
(EDGE if available) data connection
is active. You can still make or
receive calls, but the data
transmission is automatically
interrupted during a call.
was on before the reset, it does not
automatically turn on the phone (see
Turning your smartphone on/off
).
NETWORK CONNECTION
230
Page 79

COMMON QUESTIONS
13
KEY TERM
UMTS (Universal Mobile
Telecommunications System) A
third-generation (3G) wireless technology that
is designed for high-speed data transfer with
rates up to 384 Kbps.
KEY TERM
EDGE (Enhanced Data Rates for
GSM Evolution) A wireless technology that
can provide fast data transfer and Internet
access with rates up to 236.8 Kbps.
My smartphone won’t connect to the
Internet
Your smartphone supports GPRS or UMTS
wireless data networks. To connect to the
Internet, you must subscribe to data
services with your network operator.
• Contact your network operator to verify
that your subscription plan includes data
services and that these services have
been correctly activated. Your network
operator should also be able to tell you
if there are any outages in your location.
• Press and hold Power/End to turn
off your phone. Then press and hold the
same button to turn it back on.
• Perform a soft reset (see Performing a
soft reset).
• Confirm that data services are correctly
configured on your smartphone by
doing the following:
1 Press Start and select Settings.
2 Select the Connections tab, and then
select Connections .
3 On the Ta s k s tab, select Manage
existing connections.
4 If your network operator appears in the
list, press OK . If not, contact your
network operator for assistance.
I can’t send or receive text or multimedia
messages
• Make sure your phone is on (see
Turning your smartphone on/off
• Contact your network operator to verify
).
that your plan includes messaging
services, that these services have been
correctly activated, and that they are
available at your location. (Your network
operator should be able to tell you if
messaging services have been
experiencing transmission delays.)
• If possible, contact the recipient or
sender of the message, and make sure
CHAPTER
NETWORK CONNECTION
231
Page 80

COMMON QUESTIONS
13
CHAPTER
the receiving device can handle the type
of message you’re sending.
• If a text message arrives but does not
display a notification, perform a soft
reset (see Performing a soft reset
).
move the phone closer to the
hands-free device.
• The device specifications are
compatible with your smartphone.
I lost the connection between my
I can’t make or receive calls using a
hands-free device with Bluetooth
®
wireless technology
Verify all of the following:
• The Turn on Bluetooth box is checked
in Bluetooth Settings.
• Your Bluetooth device is charged and
turned on.
• Your smartphone is within range of the
hands-free device. Bluetooth range is
up to 10 meters (30 feet) in optimum
environmental conditions, which include
the absence of the following: obstacles,
radio interference from nearby
electronic equipment, and other factors.
• The Bluetooth Settings screen is closed.
• You are away from other devices using
smartphone and my Bluetooth headset
1 Press Start , and then select
Settings.
2 Select the Connections tab, and then
select Bluetooth.
3 Select Devices tab.
4 Select your headset name from the list.
5 In Partnership Settings, make sure the
Hands Free option box is checked.
6 Select Save.
7 Highlight the headset name.
8 Press and hold Center to open the
shortcut menu, and then select Set as
Hands-Free.
9 Test your headset by making or
receiving a call.
the 2.4 GHz radio frequency, such as
cordless phones, microwaves, and
Wi-Fi equipment. If this is impossible,
NETWORK CONNECTION
232
 Loading...