

Page 1
Start Here.book Page a Thursday, July 17, 2003 4:43 PM
Start Here to
Activate
a Guide to Your
Treo 600 Smartphone
Page 2

Start Here.book Page b Thursday, July 17, 2003 4:43 PM
Page 3

Start Here.book Page c Thursday, July 17, 2003 4:43 PM
PCS Service
www.sprintpcs.com
Copyright © 2003 Sprint Spectrum L.P. All rights reserved. No reproduction in whole or in part without prior written approval. Sprint and the
diamond logo design are trademarks of Sprint Communications Company L.P. All other trademarks are the property of their respective owners.
Portions copyright © 2003 Handspring, Inc. All rights reserved. Handspring, Treo, and the Treo logo are trademarks of Handspring, Inc., and
may be registered in some jurisdictions. Blazer Web Browser and the Handspring logo are registered trademarks of Handspring, Inc., are
registered trademarks in the U.S.A., and may be registered in other jurisdictions. Palm OS and HotSync are registered trademarks, and Palm and
the Palm Powered logo are trademarks, of PalmSource, Inc., and are used by Handspring under license. This product contains ACCESS Co., Ltd.’s
NetFront 3.0 Internet browser software. © 1996-2003 ACCESS Co., Ltd. and ACCESS Systems America, Inc. NetFront is the trademark or
registered trademark of ACCESS Co., Ltd. in Japan and in other countries except the United States of America. NetFront is a registered trademark
of NetFront Communications, Inc. in the United States of America and is used under a license. All other trademarks and trade names are the
property of their respective owners.
Printed in the U.S.A.
50-0118-00
Page 4

Start Here.book Page d Thursday, July 17, 2003 4:43 PM
Page 5

Start Here.book Page e Thursday, July 17, 2003 4:43 PM
Table of Contents
How to Use This Guide . . . . . . . . . . . . . . . . . . . . . . . . . . . . . . . . . . . . . . . . . . . . . . . . . . . . . . . . . . . . . . . . i
Where to learn more . . . . . . . . . . . . . . . . . . . . . . . . . . . . . . . . . . . . . . . . . . . . . . . . . . . . . . . . . . . . . . . . . . ii
Setting Up . . . . . . . . . . . . . . . . . . . . . . . . . . . . . . . . . . . . . . . . . . . . . . . . . . . . . . . . . . . . . . . . . . . . . . . . . . . 1
Getting Started . . . . . . . . . . . . . . . . . . . . . . . . . . . . . . . . . . . . . . . . . . . . . . . . . . . . . . . . . . . . . . . . . . . . . . . 7
Connecting . . . . . . . . . . . . . . . . . . . . . . . . . . . . . . . . . . . . . . . . . . . . . . . . . . . . . . . . . . . . . . . . . . . . . . . . . 17
Basics of Your PCS Phone . . . . . . . . . . . . . . . . . . . . . . . . . . . . . . . . . . . . . . . . . . . . . . . . . . . . . . . . . . . . 23
Your New PCS Phone . . . . . . . . . . . . . . . . . . . . . . . . . . . . . . . . . . . . . . . . . . . . . . . . . . . . . . . . . . . . . . 24
Your Phone’s Features: Top View . . . . . . . . . . . . . . . . . . . . . . . . . . . . . . . . . . . . . . . . . . . . . . . 24
Your Phone’s Features: Front View . . . . . . . . . . . . . . . . . . . . . . . . . . . . . . . . . . . . . . . . . . . . . . 25
Your Phone’s Features: Back View . . . . . . . . . . . . . . . . . . . . . . . . . . . . . . . . . . . . . . . . . . . . . . 26
Turning Your Phone On and Off . . . . . . . . . . . . . . . . . . . . . . . . . . . . . . . . . . . . . . . . . . . . . . . . . . . . . 27
Turning Wireless Mode ON . . . . . . . . . . . . . . . . . . . . . . . . . . . . . . . . . . . . . . . . . . . . . . . . . . . . 27
Turning Wireless Mode OFF . . . . . . . . . . . . . . . . . . . . . . . . . . . . . . . . . . . . . . . . . . . . . . . . . . . . 27
Turning the Screen On and Off . . . . . . . . . . . . . . . . . . . . . . . . . . . . . . . . . . . . . . . . . . . . . . . . . 27
Launching Applications . . . . . . . . . . . . . . . . . . . . . . . . . . . . . . . . . . . . . . . . . . . . . . . . . . . . . . . . . . . . 28
Moving Around the Treo Screen . . . . . . . . . . . . . . . . . . . . . . . . . . . . . . . . . . . . . . . . . . . . . . . . . . . . 30
Scrolling Through Screens . . . . . . . . . . . . . . . . . . . . . . . . . . . . . . . . . . . . . . . . . . . . . . . . . . . . . 30
Highlighting Items . . . . . . . . . . . . . . . . . . . . . . . . . . . . . . . . . . . . . . . . . . . . . . . . . . . . . . . . . . . 31
Accessing Command Buttons . . . . . . . . . . . . . . . . . . . . . . . . . . . . . . . . . . . . . . . . . . . . . . . . . . . 32
Choosing or Activating Items . . . . . . . . . . . . . . . . . . . . . . . . . . . . . . . . . . . . . . . . . . . . . . . . . . . 32
Selecting Menu Items . . . . . . . . . . . . . . . . . . . . . . . . . . . . . . . . . . . . . . . . . . . . . . . . . . . . . . . . . 32
Choosing Options in a Pick List . . . . . . . . . . . . . . . . . . . . . . . . . . . . . . . . . . . . . . . . . . . . . . . . . 33
Using the Keyboard . . . . . . . . . . . . . . . . . . . . . . . . . . . . . . . . . . . . . . . . . . . . . . . . . . . . . . . . . . . . . . . . 34
Using the Keyboard Backlight . . . . . . . . . . . . . . . . . . . . . . . . . . . . . . . . . . . . . . . . . . . . . . . . . . 34
Entering Lowercase and Uppercase Letters . . . . . . . . . . . . . . . . . . . . . . . . . . . . . . . . . . . . . . . 34
Entering Numbers, Punctuation, and Symbols that Appear Above the Letters on the Keys . . 35
Entering Other Symbols and Accented Characters . . . . . . . . . . . . . . . . . . . . . . . . . . . . . . . . . . 35
Using Your Treo Phone, Web, and Messaging Features . . . . . . . . . . . . . . . . . . . . . . . . . . . . . . . . . 37
Making Calls . . . . . . . . . . . . . . . . . . . . . . . . . . . . . . . . . . . . . . . . . . . . . . . . . . . . . . . . . . . . . . . . . . . . . 38
Dialing With the Keyboard . . . . . . . . . . . . . . . . . . . . . . . . . . . . . . . . . . . . . . . . . . . . . . . . . . . . . 38
Dialing by Contact Name . . . . . . . . . . . . . . . . . . . . . . . . . . . . . . . . . . . . . . . . . . . . . . . . . . . . . . 38
Page 6

Start Here.book Page f Thursday, July 17, 2003 4:43 PM
Dialing With a Favorites Button . . . . . . . . . . . . . . . . . . . . . . . . . . . . . . . . . . . . . . . . . . . . . . . . . 40
Dialing Using the Onscreen Dial Pad . . . . . . . . . . . . . . . . . . . . . . . . . . . . . . . . . . . . . . . . . . . . . 40
Dialing From a Web Page . . . . . . . . . . . . . . . . . . . . . . . . . . . . . . . . . . . . . . . . . . . . . . . . . . . . . . 41
Dialing From SMS Messages . . . . . . . . . . . . . . . . . . . . . . . . . . . . . . . . . . . . . . . . . . . . . . . . . . . . 42
Redialing the Last Number You Called . . . . . . . . . . . . . . . . . . . . . . . . . . . . . . . . . . . . . . . . . . . 42
Receiving calls . . . . . . . . . . . . . . . . . . . . . . . . . . . . . . . . . . . . . . . . . . . . . . . . . . . . . . . . . . . . . . . . . . . 43
Answering Calls . . . . . . . . . . . . . . . . . . . . . . . . . . . . . . . . . . . . . . . . . . . . . . . . . . . . . . . . . . . . . 43
Sending Calls to Voicemail . . . . . . . . . . . . . . . . . . . . . . . . . . . . . . . . . . . . . . . . . . . . . . . . . . . . . 43
Silencing the Ring of an Incoming Call . . . . . . . . . . . . . . . . . . . . . . . . . . . . . . . . . . . . . . . . . . . 43
Signal Strength and Phone Status . . . . . . . . . . . . . . . . . . . . . . . . . . . . . . . . . . . . . . . . . . . . . . . . . . . 44
What’s My Number? . . . . . . . . . . . . . . . . . . . . . . . . . . . . . . . . . . . . . . . . . . . . . . . . . . . . . . . . . . 45
Managing Active Calls . . . . . . . . . . . . . . . . . . . . . . . . . . . . . . . . . . . . . . . . . . . . . . . . . . . . . . . . . . . . . 46
Ending a Call . . . . . . . . . . . . . . . . . . . . . . . . . . . . . . . . . . . . . . . . . . . . . . . . . . . . . . . . . . . . . . . . 47
Returning to an Active Call From Another Application . . . . . . . . . . . . . . . . . . . . . . . . . . . . . . . 47
Making a Second Call . . . . . . . . . . . . . . . . . . . . . . . . . . . . . . . . . . . . . . . . . . . . . . . . . . . . . . . . . 47
Controlling Your Roaming Experience . . . . . . . . . . . . . . . . . . . . . . . . . . . . . . . . . . . . . . . . . . . . . . . 48
Setting Your Phone’s Roam Mode . . . . . . . . . . . . . . . . . . . . . . . . . . . . . . . . . . . . . . . . . . . . . . . 48
Feature Availability . . . . . . . . . . . . . . . . . . . . . . . . . . . . . . . . . . . . . . . . . . . . . . . . . . . . . . . . . . . 48
Internal Phone Book . . . . . . . . . . . . . . . . . . . . . . . . . . . . . . . . . . . . . . . . . . . . . . . . . . . . . . . . . . . . . . . 49
Adding a Contact . . . . . . . . . . . . . . . . . . . . . . . . . . . . . . . . . . . . . . . . . . . . . . . . . . . . . . . . . . . . 49
Viewing or Changing Contact Information . . . . . . . . . . . . . . . . . . . . . . . . . . . . . . . . . . . . . . . . 50
Deleting a contact . . . . . . . . . . . . . . . . . . . . . . . . . . . . . . . . . . . . . . . . . . . . . . . . . . . . . . . . . . . . 50
Saving Phone Numbers . . . . . . . . . . . . . . . . . . . . . . . . . . . . . . . . . . . . . . . . . . . . . . . . . . . . . . . 50
Defining your business card . . . . . . . . . . . . . . . . . . . . . . . . . . . . . . . . . . . . . . . . . . . . . . . . . . . . 50
Defining Favorites Buttons . . . . . . . . . . . . . . . . . . . . . . . . . . . . . . . . . . . . . . . . . . . . . . . . . . . . . . . . . 51
Creating a Speed Dial Favorites Button . . . . . . . . . . . . . . . . . . . . . . . . . . . . . . . . . . . . . . . . . . . 51
Creating an Application, Message, or Web Link Favorites Button . . . . . . . . . . . . . . . . . . . . . . 53
Editing or Deleting an Existing Favorites Button . . . . . . . . . . . . . . . . . . . . . . . . . . . . . . . . . . . . 53
Using a Phone Headset . . . . . . . . . . . . . . . . . . . . . . . . . . . . . . . . . . . . . . . . . . . . . . . . . . . . . . . . . . . . 54
Headset Specifications . . . . . . . . . . . . . . . . . . . . . . . . . . . . . . . . . . . . . . . . . . . . . . . . . . . . . . . . 54
Sending and Receiving Messages . . . . . . . . . . . . . . . . . . . . . . . . . . . . . . . . . . . . . . . . . . . . . . . . . . 55
Setting Up Your Voicemail . . . . . . . . . . . . . . . . . . . . . . . . . . . . . . . . . . . . . . . . . . . . . . . . . . . . . 55
Retrieving Your Voicemail Messages . . . . . . . . . . . . . . . . . . . . . . . . . . . . . . . . . . . . . . . . . . . . . 55
Page 7

Start Here.book Page g Thursday, July 17, 2003 4:43 PM
Accessing Your Voicemail From Another Phone . . . . . . . . . . . . . . . . . . . . . . . . . . . . . . . . . . . 55
Displaying Numeric Pages . . . . . . . . . . . . . . . . . . . . . . . . . . . . . . . . . . . . . . . . . . . . . . . . . . . . . 55
PCS Service Features . . . . . . . . . . . . . . . . . . . . . . . . . . . . . . . . . . . . . . . . . . . . . . . . . . . . . . . . . . . . . . 56
Call Waiting . . . . . . . . . . . . . . . . . . . . . . . . . . . . . . . . . . . . . . . . . . . . . . . . . . . . . . . . . . . . . . . . . 56
Call Forwarding . . . . . . . . . . . . . . . . . . . . . . . . . . . . . . . . . . . . . . . . . . . . . . . . . . . . . . . . . . . . . 56
Three-Way Calling . . . . . . . . . . . . . . . . . . . . . . . . . . . . . . . . . . . . . . . . . . . . . . . . . . . . . . . . . . . 57
PCS Voice CommandSM . . . . . . . . . . . . . . . . . . . . . . . . . . . . . . . . . . . . . . . . . . . . . . . . . . . . . . . 58
TTY Use With PCS Service From Sprint . . . . . . . . . . . . . . . . . . . . . . . . . . . . . . . . . . . . . . . . . . . 58
PCS VisionSM . . . . . . . . . . . . . . . . . . . . . . . . . . . . . . . . . . . . . . . . . . . . . . . . . . . . . . . . . . . . . . . . . . . . . . 60
Getting Started With PCS Vision . . . . . . . . . . . . . . . . . . . . . . . . . . . . . . . . . . . . . . . . . . . . . . . . 60
PCS Vision Features . . . . . . . . . . . . . . . . . . . . . . . . . . . . . . . . . . . . . . . . . . . . . . . . . . . . . . . . . . 61
Accessing PCS Vision Features . . . . . . . . . . . . . . . . . . . . . . . . . . . . . . . . . . . . . . . . . . . . . . . . . . 62
PCS Vision Symbols on Your Screen . . . . . . . . . . . . . . . . . . . . . . . . . . . . . . . . . . . . . . . . . . . . . 62
PCS Vision Billing Information . . . . . . . . . . . . . . . . . . . . . . . . . . . . . . . . . . . . . . . . . . . . . . . . . . 62
Using the Camera and Picture Mail . . . . . . . . . . . . . . . . . . . . . . . . . . . . . . . . . . . . . . . . . . . . . . . . . 63
Taking a Picture . . . . . . . . . . . . . . . . . . . . . . . . . . . . . . . . . . . . . . . . . . . . . . . . . . . . . . . . . . . . . 63
Viewing a Picture . . . . . . . . . . . . . . . . . . . . . . . . . . . . . . . . . . . . . . . . . . . . . . . . . . . . . . . . . . . . 64
Sharing a Picture . . . . . . . . . . . . . . . . . . . . . . . . . . . . . . . . . . . . . . . . . . . . . . . . . . . . . . . . . . . . . 64
Receiving Picture Mail . . . . . . . . . . . . . . . . . . . . . . . . . . . . . . . . . . . . . . . . . . . . . . . . . . . . . . . . 65
Moving Pictures . . . . . . . . . . . . . . . . . . . . . . . . . . . . . . . . . . . . . . . . . . . . . . . . . . . . . . . . . . . . . 66
Deleting a Picture From Your Phone . . . . . . . . . . . . . . . . . . . . . . . . . . . . . . . . . . . . . . . . . . . . . 66
Setting a Picture as Wallpaper . . . . . . . . . . . . . . . . . . . . . . . . . . . . . . . . . . . . . . . . . . . . . . . . . . 66
Uploading Pictures to Your Online Inbox . . . . . . . . . . . . . . . . . . . . . . . . . . . . . . . . . . . . . . . . . 67
Accessing Your Online Picture Mail Inbox . . . . . . . . . . . . . . . . . . . . . . . . . . . . . . . . . . . . . . . . 67
Working With Your Albums on the Picture Mail Web Site
Customizing your Picture Mail settings . . . . . . . . . . . . . . . . . . . . . . . . . . . . . . . . . . . . . . . . . . . 68
Viewing Pictures on Your Computer . . . . . . . . . . . . . . . . . . . . . . . . . . . . . . . . . . . . . . . . . . . . . 68
. . . . . . . . . . . . . . . . . . . . . . . . . . . . . . . . . . . .67
SMS . . . . . . . . . . . . . . . . . . . . . . . . . . . . . . . . . . . . . . . . . . . . . . . . . . . . . . . . . . . . . . . . . . . . . . . . . . . . . 69
Creating and Sending a Message . . . . . . . . . . . . . . . . . . . . . . . . . . . . . . . . . . . . . . . . . . . . . . . . 69
SMS Tips . . . . . . . . . . . . . . . . . . . . . . . . . . . . . . . . . . . . . . . . . . . . . . . . . . . . . . . . . . . . . . . . . . . 70
Receiving SMS Messages . . . . . . . . . . . . . . . . . . . . . . . . . . . . . . . . . . . . . . . . . . . . . . . . . . . . . . . 70
Using Links in Messages . . . . . . . . . . . . . . . . . . . . . . . . . . . . . . . . . . . . . . . . . . . . . . . . . . . . . . . 71
Chatting with SMS . . . . . . . . . . . . . . . . . . . . . . . . . . . . . . . . . . . . . . . . . . . . . . . . . . . . . . . . . . . 71
Managing Your Messages . . . . . . . . . . . . . . . . . . . . . . . . . . . . . . . . . . . . . . . . . . . . . . . . . . . . . . 72
Customizing Your SMS Settings . . . . . . . . . . . . . . . . . . . . . . . . . . . . . . . . . . . . . . . . . . . . . . . . . 73
Page 8

Start Here.book Page h Thursday, July 17, 2003 4:43 PM
Browsing the Web . . . . . . . . . . . . . . . . . . . . . . . . . . . . . . . . . . . . . . . . . . . . . . . . . . . . . . . . . . . . . . . . 75
Viewing a Web Page . . . . . . . . . . . . . . . . . . . . . . . . . . . . . . . . . . . . . . . . . . . . . . . . . . . . . . . . . . 75
Navigating in Optimized Mode . . . . . . . . . . . . . . . . . . . . . . . . . . . . . . . . . . . . . . . . . . . . . . . . . 76
Navigating in Wide Page Mode . . . . . . . . . . . . . . . . . . . . . . . . . . . . . . . . . . . . . . . . . . . . . . . . . 76
Creating a Bookmark . . . . . . . . . . . . . . . . . . . . . . . . . . . . . . . . . . . . . . . . . . . . . . . . . . . . . . . . . 76
Saving a Page . . . . . . . . . . . . . . . . . . . . . . . . . . . . . . . . . . . . . . . . . . . . . . . . . . . . . . . . . . . . . . . . 77
Viewing Bookmarks or Saved Pages . . . . . . . . . . . . . . . . . . . . . . . . . . . . . . . . . . . . . . . . . . . . . . 78
Editing or Deleting a Bookmark or Saved Page . . . . . . . . . . . . . . . . . . . . . . . . . . . . . . . . . . . . . 78
Arranging bookmarks and saved pages . . . . . . . . . . . . . . . . . . . . . . . . . . . . . . . . . . . . . . . . . . . 78
Downloading Files From a Web Page . . . . . . . . . . . . . . . . . . . . . . . . . . . . . . . . . . . . . . . . . . . . 79
Navigating Web Sites With Split Pages (Frames) . . . . . . . . . . . . . . . . . . . . . . . . . . . . . . . . . . . . 80
Copying Text From a Web Page . . . . . . . . . . . . . . . . . . . . . . . . . . . . . . . . . . . . . . . . . . . . . . . . 80
Dialing a Phone Number on a Web Page . . . . . . . . . . . . . . . . . . . . . . . . . . . . . . . . . . . . . . . . . . 80
Creating Email from a Web Page . . . . . . . . . . . . . . . . . . . . . . . . . . . . . . . . . . . . . . . . . . . . . . . . 81
Using the History List . . . . . . . . . . . . . . . . . . . . . . . . . . . . . . . . . . . . . . . . . . . . . . . . . . . . . . . . . 81
Finding Text on a Web Page . . . . . . . . . . . . . . . . . . . . . . . . . . . . . . . . . . . . . . . . . . . . . . . . . . . 81
Customizing Your Blazer Web Browser Settings . . . . . . . . . . . . . . . . . . . . . . . . . . . . . . . . . . . . 82
Business Connection . . . . . . . . . . . . . . . . . . . . . . . . . . . . . . . . . . . . . . . . . . . . . . . . . . . . . . . . . . . . . . 84
Using Your Treo Organizer Features . . . . . . . . . . . . . . . . . . . . . . . . . . . . . . . . . . . . . . . . . . . . . . . . . . . 85
Calendar . . . . . . . . . . . . . . . . . . . . . . . . . . . . . . . . . . . . . . . . . . . . . . . . . . . . . . . . . . . . . . . . . . . . . . . . . 86
Displaying Your Calendar . . . . . . . . . . . . . . . . . . . . . . . . . . . . . . . . . . . . . . . . . . . . . . . . . . . . . . 86
Creating an Event . . . . . . . . . . . . . . . . . . . . . . . . . . . . . . . . . . . . . . . . . . . . . . . . . . . . . . . . . . . . 86
Adding an Alarm to an Event . . . . . . . . . . . . . . . . . . . . . . . . . . . . . . . . . . . . . . . . . . . . . . . . . . . 87
Creating an Untimed Event . . . . . . . . . . . . . . . . . . . . . . . . . . . . . . . . . . . . . . . . . . . . . . . . . . . . 88
Scheduling a Repeating Event . . . . . . . . . . . . . . . . . . . . . . . . . . . . . . . . . . . . . . . . . . . . . . . . . . 88
Editing or Deleting an Event . . . . . . . . . . . . . . . . . . . . . . . . . . . . . . . . . . . . . . . . . . . . . . . . . . . . 89
Customizing General Preferences for Your Calendar . . . . . . . . . . . . . . . . . . . . . . . . . . . . . . . . 90
Customizing To Do List Preferences for Your Calendar . . . . . . . . . . . . . . . . . . . . . . . . . . . . . . 91
To Do List . . . . . . . . . . . . . . . . . . . . . . . . . . . . . . . . . . . . . . . . . . . . . . . . . . . . . . . . . . . . . . . . . . . . . . . . . 93
Adding a To Do Item . . . . . . . . . . . . . . . . . . . . . . . . . . . . . . . . . . . . . . . . . . . . . . . . . . . . . . . . . 93
Setting Item Priority, Due Date, and Other Details . . . . . . . . . . . . . . . . . . . . . . . . . . . . . . . . . . 93
Checking Off a To Do Item . . . . . . . . . . . . . . . . . . . . . . . . . . . . . . . . . . . . . . . . . . . . . . . . . . . . 95
Deleting a To Do Item . . . . . . . . . . . . . . . . . . . . . . . . . . . . . . . . . . . . . . . . . . . . . . . . . . . . . . . . 95
Purging To Do Items . . . . . . . . . . . . . . . . . . . . . . . . . . . . . . . . . . . . . . . . . . . . . . . . . . . . . . . . . 95
Customizing To Do List . . . . . . . . . . . . . . . . . . . . . . . . . . . . . . . . . . . . . . . . . . . . . . . . . . . . . . . 96
Page 9

Start Here.book Page i Thursday, July 17, 2003 4:43 PM
Memo Pad . . . . . . . . . . . . . . . . . . . . . . . . . . . . . . . . . . . . . . . . . . . . . . . . . . . . . . . . . . . . . . . . . . . . . . . . 97
Creating a Memo . . . . . . . . . . . . . . . . . . . . . . . . . . . . . . . . . . . . . . . . . . . . . . . . . . . . . . . . . . . . 97
Deleting a memo . . . . . . . . . . . . . . . . . . . . . . . . . . . . . . . . . . . . . . . . . . . . . . . . . . . . . . . . . . . . 97
CityTime . . . . . . . . . . . . . . . . . . . . . . . . . . . . . . . . . . . . . . . . . . . . . . . . . . . . . . . . . . . . . . . . . . . . . . . . . . 98
Setting Your Home City . . . . . . . . . . . . . . . . . . . . . . . . . . . . . . . . . . . . . . . . . . . . . . . . . . . . . . . 98
Selecting Remote Cities . . . . . . . . . . . . . . . . . . . . . . . . . . . . . . . . . . . . . . . . . . . . . . . . . . . . . . . 99
Adding Cities . . . . . . . . . . . . . . . . . . . . . . . . . . . . . . . . . . . . . . . . . . . . . . . . . . . . . . . . . . . . . . . . 99
Changing Locations . . . . . . . . . . . . . . . . . . . . . . . . . . . . . . . . . . . . . . . . . . . . . . . . . . . . . . . . . . 99
CityTime Tips . . . . . . . . . . . . . . . . . . . . . . . . . . . . . . . . . . . . . . . . . . . . . . . . . . . . . . . . . . . . . . . 99
Calculator . . . . . . . . . . . . . . . . . . . . . . . . . . . . . . . . . . . . . . . . . . . . . . . . . . . . . . . . . . . . . . . . . . . . . . . 100
Switching Between Basic and Advanced Calculator Modes . . . . . . . . . . . . . . . . . . . . . . . . . . 100
Selecting Functions in Advanced Calculator Mode . . . . . . . . . . . . . . . . . . . . . . . . . . . . . . . . . 100
Storing and Recalling Numbers in Advanced Mode . . . . . . . . . . . . . . . . . . . . . . . . . . . . . . . . 101
Looking Up Contacts and Other Information . . . . . . . . . . . . . . . . . . . . . . . . . . . . . . . . . . . . . . . . . 102
Name Lookup . . . . . . . . . . . . . . . . . . . . . . . . . . . . . . . . . . . . . . . . . . . . . . . . . . . . . . . . . . . . . . 102
Using Find . . . . . . . . . . . . . . . . . . . . . . . . . . . . . . . . . . . . . . . . . . . . . . . . . . . . . . . . . . . . . . . . . 103
Beaming Information . . . . . . . . . . . . . . . . . . . . . . . . . . . . . . . . . . . . . . . . . . . . . . . . . . . . . . . . . . . . . 104
Beaming a Record . . . . . . . . . . . . . . . . . . . . . . . . . . . . . . . . . . . . . . . . . . . . . . . . . . . . . . . . . . . 104
Beaming an Application . . . . . . . . . . . . . . . . . . . . . . . . . . . . . . . . . . . . . . . . . . . . . . . . . . . . . . 105
Receiving Beamed Information . . . . . . . . . . . . . . . . . . . . . . . . . . . . . . . . . . . . . . . . . . . . . . . . 106
Managing Applications on Your Treo . . . . . . . . . . . . . . . . . . . . . . . . . . . . . . . . . . . . . . . . . . . . . . . . . 107
Synchronizing Contacts and Other Personal Data . . . . . . . . . . . . . . . . . . . . . . . . . . . . . . . . . . . 108
Installing Applications . . . . . . . . . . . . . . . . . . . . . . . . . . . . . . . . . . . . . . . . . . . . . . . . . . . . . . . . . . . . 109
Installing Applications From the Internet . . . . . . . . . . . . . . . . . . . . . . . . . . . . . . . . . . . . . . . . 109
Installing Applications From a Windows Computer . . . . . . . . . . . . . . . . . . . . . . . . . . . . . . . . 110
Installing Applications From a Macintosh Computer . . . . . . . . . . . . . . . . . . . . . . . . . . . . . . . 111
Getting Help With Third-Party Applications . . . . . . . . . . . . . . . . . . . . . . . . . . . . . . . . . . . . . . 111
Removing Applications . . . . . . . . . . . . . . . . . . . . . . . . . . . . . . . . . . . . . . . . . . . . . . . . . . . . . . . . . . . 112
Manually Deleting Applications From Your Computer . . . . . . . . . . . . . . . . . . . . . . . . . . . . . . 113
Using Application Info . . . . . . . . . . . . . . . . . . . . . . . . . . . . . . . . . . . . . . . . . . . . . . . . . . . . . . . . . . . . 114
Using Expansion Cards . . . . . . . . . . . . . . . . . . . . . . . . . . . . . . . . . . . . . . . . . . . . . . . . . . . . . . . . . . . 115
Inserting and Removing Expansion Cards . . . . . . . . . . . . . . . . . . . . . . . . . . . . . . . . . . . . . . . . 115
Launching Applications on an Expansion Card . . . . . . . . . . . . . . . . . . . . . . . . . . . . . . . . . . . . 117
Copying Applications to an Expansion Card . . . . . . . . . . . . . . . . . . . . . . . . . . . . . . . . . . . . . . 117
Page 10

Start Here.book Page j Thursday, July 17, 2003 4:43 PM
Viewing Expansion Card Information . . . . . . . . . . . . . . . . . . . . . . . . . . . . . . . . . . . . . . . . . . . 119
Renaming an Expansion Card . . . . . . . . . . . . . . . . . . . . . . . . . . . . . . . . . . . . . . . . . . . . . . . . . 119
Formatting an Expansion Card . . . . . . . . . . . . . . . . . . . . . . . . . . . . . . . . . . . . . . . . . . . . . . . . . 120
Customizing Your Treo . . . . . . . . . . . . . . . . . . . . . . . . . . . . . . . . . . . . . . . . . . . . . . . . . . . . . . . . . . . . . . 121
Phone settings . . . . . . . . . . . . . . . . . . . . . . . . . . . . . . . . . . . . . . . . . . . . . . . . . . . . . . . . . . . . . . . . . . . 122
Selecting Ring Tones and SMS Alert Tones . . . . . . . . . . . . . . . . . . . . . . . . . . . . . . . . . . . . . . . 122
Adjusting Volume Settings . . . . . . . . . . . . . . . . . . . . . . . . . . . . . . . . . . . . . . . . . . . . . . . . . . . . 124
Assigning a Caller ID Picture . . . . . . . . . . . . . . . . . . . . . . . . . . . . . . . . . . . . . . . . . . . . . . . . . . 125
Choosing Wallpaper for the Phone screen . . . . . . . . . . . . . . . . . . . . . . . . . . . . . . . . . . . . . . . 125
System Sound Settings . . . . . . . . . . . . . . . . . . . . . . . . . . . . . . . . . . . . . . . . . . . . . . . . . . . . . . . . . . . 126
Display and Appearance . . . . . . . . . . . . . . . . . . . . . . . . . . . . . . . . . . . . . . . . . . . . . . . . . . . . . . . . . . 127
Turning on the keyboard backlight . . . . . . . . . . . . . . . . . . . . . . . . . . . . . . . . . . . . . . . . . . . . . 127
Adjusting the Contrast and Brightness . . . . . . . . . . . . . . . . . . . . . . . . . . . . . . . . . . . . . . . . . . . 127
Changing the Screen Font . . . . . . . . . . . . . . . . . . . . . . . . . . . . . . . . . . . . . . . . . . . . . . . . . . . . 127
Aligning the Touchscreen . . . . . . . . . . . . . . . . . . . . . . . . . . . . . . . . . . . . . . . . . . . . . . . . . . . . 128
Changing the System Color Scheme . . . . . . . . . . . . . . . . . . . . . . . . . . . . . . . . . . . . . . . . . . . . 128
Applications Launcher Settings . . . . . . . . . . . . . . . . . . . . . . . . . . . . . . . . . . . . . . . . . . . . . . . . . . . 129
Arranging Applications by Category . . . . . . . . . . . . . . . . . . . . . . . . . . . . . . . . . . . . . . . . . . . . 129
Displaying Applications by Category . . . . . . . . . . . . . . . . . . . . . . . . . . . . . . . . . . . . . . . . . . . . 130
Choosing the Applications Launcher Display . . . . . . . . . . . . . . . . . . . . . . . . . . . . . . . . . . . . . 130
Button Settings . . . . . . . . . . . . . . . . . . . . . . . . . . . . . . . . . . . . . . . . . . . . . . . . . . . . . . . . . . . . . . . . . . 131
Buttons Preferences . . . . . . . . . . . . . . . . . . . . . . . . . . . . . . . . . . . . . . . . . . . . . . . . . . . . . . . . . 131
Setting Default Applications . . . . . . . . . . . . . . . . . . . . . . . . . . . . . . . . . . . . . . . . . . . . . . . . . . . 132
Date and Time Settings . . . . . . . . . . . . . . . . . . . . . . . . . . . . . . . . . . . . . . . . . . . . . . . . . . . . . . . . . . . 133
Setting the Date and Time . . . . . . . . . . . . . . . . . . . . . . . . . . . . . . . . . . . . . . . . . . . . . . . . . . . . 133
Setting Date and Time Formats . . . . . . . . . . . . . . . . . . . . . . . . . . . . . . . . . . . . . . . . . . . . . . . . 134
General Preferences . . . . . . . . . . . . . . . . . . . . . . . . . . . . . . . . . . . . . . . . . . . . . . . . . . . . . . . . . . . . . 135
Locking Your Phone and Data . . . . . . . . . . . . . . . . . . . . . . . . . . . . . . . . . . . . . . . . . . . . . . . . . . . . . 136
Keyguard . . . . . . . . . . . . . . . . . . . . . . . . . . . . . . . . . . . . . . . . . . . . . . . . . . . . . . . . . . . . . . . . . . 136
Auto-Keyguard and Touchscreen Lockout . . . . . . . . . . . . . . . . . . . . . . . . . . . . . . . . . . . . . . . 136
Phone Lock . . . . . . . . . . . . . . . . . . . . . . . . . . . . . . . . . . . . . . . . . . . . . . . . . . . . . . . . . . . . . . . . 137
System Password Lock . . . . . . . . . . . . . . . . . . . . . . . . . . . . . . . . . . . . . . . . . . . . . . . . . . . . . . . 138
Setting Owner Preferences . . . . . . . . . . . . . . . . . . . . . . . . . . . . . . . . . . . . . . . . . . . . . . . . . . . . 139
Private Records . . . . . . . . . . . . . . . . . . . . . . . . . . . . . . . . . . . . . . . . . . . . . . . . . . . . . . . . . . . . . 140
Page 11

Start Here.book Page k Thursday, July 17, 2003 4:43 PM
Hiding or Masking All Private Records . . . . . . . . . . . . . . . . . . . . . . . . . . . . . . . . . . . . . . . . . . . 141
Viewing All Private Records . . . . . . . . . . . . . . . . . . . . . . . . . . . . . . . . . . . . . . . . . . . . . . . . . . . 141
Viewing Private Entries in a Specific Application . . . . . . . . . . . . . . . . . . . . . . . . . . . . . . . . . . 141
Security and Palm Desktop (Windows) . . . . . . . . . . . . . . . . . . . . . . . . . . . . . . . . . . . . . . . . . . 142
Additional Features . . . . . . . . . . . . . . . . . . . . . . . . . . . . . . . . . . . . . . . . . . . . . . . . . . . . . . . . . . . . . . 143
Accessories for Your Phone . . . . . . . . . . . . . . . . . . . . . . . . . . . . . . . . . . . . . . . . . . . . . . . . . . . . . . . 144
Sprint Accessories . . . . . . . . . . . . . . . . . . . . . . . . . . . . . . . . . . . . . . . . . . . . . . . . . . . . . . . . . . . 144
Handspring Accessories . . . . . . . . . . . . . . . . . . . . . . . . . . . . . . . . . . . . . . . . . . . . . . . . . . . . . . 144
Help . . . . . . . . . . . . . . . . . . . . . . . . . . . . . . . . . . . . . . . . . . . . . . . . . . . . . . . . . . . . . . . . . . . . . . . . . . . . . . . 147
Launching the Tutorial . . . . . . . . . . . . . . . . . . . . . . . . . . . . . . . . . . . . . . . . . . . . . . . . . . . . . . . 148
Upgrading From Another Palm Powered Device . . . . . . . . . . . . . . . . . . . . . . . . . . . . . . . . . . . . . 149
Trouble Installing Palm Desktop? . . . . . . . . . . . . . . . . . . . . . . . . . . . . . . . . . . . . . . . . . . . . . . . . . . 151
Resetting Your Treo . . . . . . . . . . . . . . . . . . . . . . . . . . . . . . . . . . . . . . . . . . . . . . . . . . . . . . . . . . . . . . 152
Soft Reset . . . . . . . . . . . . . . . . . . . . . . . . . . . . . . . . . . . . . . . . . . . . . . . . . . . . . . . . . . . . . . . . . 152
System Reset . . . . . . . . . . . . . . . . . . . . . . . . . . . . . . . . . . . . . . . . . . . . . . . . . . . . . . . . . . . . . . . 152
Hard Reset . . . . . . . . . . . . . . . . . . . . . . . . . . . . . . . . . . . . . . . . . . . . . . . . . . . . . . . . . . . . . . . . . 153
Screen . . . . . . . . . . . . . . . . . . . . . . . . . . . . . . . . . . . . . . . . . . . . . . . . . . . . . . . . . . . . . . . . . . . . . . . . . . 154
The Screen Appears Blank . . . . . . . . . . . . . . . . . . . . . . . . . . . . . . . . . . . . . . . . . . . . . . . . . . . . 154
The Screen Doesn’t Respond Accurately to Taps or Activates Wrong Features . . . . . . . . . . . 154
There's a Blinking Symbol at the Top of the Screen. . . . . . . . . . . . . . . . . . . . . . . . . . . . . . . . . . 54
Network Connection . . . . . . . . . . . . . . . . . . . . . . . . . . . . . . . . . . . . . . . . . . . . . . . . . . . . . . . . . . . . . 155
Signal Strength is Weak . . . . . . . . . . . . . . . . . . . . . . . . . . . . . . . . . . . . . . . . . . . . . . . . . . . . . . 155
The Treo Won’t Connect to the Mobile Network . . . . . . . . . . . . . . . . . . . . . . . . . . . . . . . . . . 155
The Treo Hangs Up When I Hold It to My Ear . . . . . . . . . . . . . . . . . . . . . . . . . . . . . . . . . . . . . 155
The Treo makes or answers calls when it’s in a briefcase or pocket . . . . . . . . . . . . . . . . . . . 155
Wireless Mode Seems to Turn Off by Itself . . . . . . . . . . . . . . . . . . . . . . . . . . . . . . . . . . . . . . . 156
The Treo Won’t Connect to the Internet . . . . . . . . . . . . . . . . . . . . . . . . . . . . . . . . . . . . . . . . . 156
I Can’t Send or Receive Picture Mail or SMS Messages . . . . . . . . . . . . . . . . . . . . . . . . . . . . . . 156
Synchronization (HotSync) . . . . . . . . . . . . . . . . . . . . . . . . . . . . . . . . . . . . . . . . . . . . . . . . . . . . . . . . 157
Desktop Does Not Respond to HotSync Attempt . . . . . . . . . . . . . . . . . . . . . . . . . . . . . . . . . . 157
HotSync Operation Starts But Stops Without Finishing . . . . . . . . . . . . . . . . . . . . . . . . . . . . . 158
HotSync Operation Finishes But Data Does Not Appear Where It Should . . . . . . . . . . . . . . . 159
Web . . . . . . . . . . . . . . . . . . . . . . . . . . . . . . . . . . . . . . . . . . . . . . . . . . . . . . . . . . . . . . . . . . . . . . . . . . . . 160
I Can’t Access a Page . . . . . . . . . . . . . . . . . . . . . . . . . . . . . . . . . . . . . . . . . . . . . . . . . . . . . . . . 160
Page 12

Start Here.book Page l Thursday, July 17, 2003 4:43 PM
An Image or Map Displays Too Small on the Treo Screen . . . . . . . . . . . . . . . . . . . . . . . . . . . 160
A Secure Site Refuses to Permit a Transaction . . . . . . . . . . . . . . . . . . . . . . . . . . . . . . . . . . . . . 160
I Can’t Select an Email Address From a Web Page . . . . . . . . . . . . . . . . . . . . . . . . . . . . . . . . . . 160
Picture Mail . . . . . . . . . . . . . . . . . . . . . . . . . . . . . . . . . . . . . . . . . . . . . . . . . . . . . . . . . . . . . . . . . . . . . 161
Third-Party Applications . . . . . . . . . . . . . . . . . . . . . . . . . . . . . . . . . . . . . . . . . . . . . . . . . . . . . . . . . . 162
Getting More Help . . . . . . . . . . . . . . . . . . . . . . . . . . . . . . . . . . . . . . . . . . . . . . . . . . . . . . . . . . 162
Errors . . . . . . . . . . . . . . . . . . . . . . . . . . . . . . . . . . . . . . . . . . . . . . . . . . . . . . . . . . . . . . . . . . . . . . . . . . . 163
Making Room On Your Treo . . . . . . . . . . . . . . . . . . . . . . . . . . . . . . . . . . . . . . . . . . . . . . . . . . . . . . . 164
Glossary . . . . . . . . . . . . . . . . . . . . . . . . . . . . . . . . . . . . . . . . . . . . . . . . . . . . . . . . . . . . . . . . . . . . . . . . . . . 165
Safety and Warranty Information . . . . . . . . . . . . . . . . . . . . . . . . . . . . . . . . . . . . . . . . . . . . . . . . . . . . . 169
Performance and Safety . . . . . . . . . . . . . . . . . . . . . . . . . . . . . . . . . . . . . . . . . . . . . . . . . . . . . . . . . . 170
Important Information About Your Phone and Service . . . . . . . . . . . . . . . . . . . . . . . . . . . . . 170
Maintaining Safe Use of and Access to Your Phone . . . . . . . . . . . . . . . . . . . . . . . . . . . . . . . . 171
Caring for Your Phone Battery . . . . . . . . . . . . . . . . . . . . . . . . . . . . . . . . . . . . . . . . . . . . . . . . . 172
Acknowledging Special Precautions and the FCC Notice . . . . . . . . . . . . . . . . . . . . . . . . . . . . 173
Terms and Conditions & Warranty Information . . . . . . . . . . . . . . . . . . . . . . . . . . . . . . . . . . . . . . 175
Terms and Conditions of Services . . . . . . . . . . . . . . . . . . . . . . . . . . . . . . . . . . . . . . . . . . . . . . 175
Terms of PCS Picture Mail Service . . . . . . . . . . . . . . . . . . . . . . . . . . . . . . . . . . . . . . . . . . . . . . 187
Handspring Product Warranty . . . . . . . . . . . . . . . . . . . . . . . . . . . . . . . . . . . . . . . . . . . . . . . . . 196
Specifications . . . . . . . . . . . . . . . . . . . . . . . . . . . . . . . . . . . . . . . . . . . . . . . . . . . . . . . . . . . . . . . . . . . 198
Index . . . . . . . . . . . . . . . . . . . . . . . . . . . . . . . . . . . . . . . . . . . . . . . . . . . . . . . . . . . . . . . . . . . . . . . . . . . . . . 199
Page 13

1
2
Start Here.book Page i Thursday, July 17, 2003 4:43 PM
How to Use This Guide
Welcome — you’ve made the right choice
The advantages of Sprint are as clear as each wireless call you make. With PCS Service,
we give you what you really want from a wireless service provider – clear calls, easy-tounderstand service plans, and self-servicing options for managing your account. All this
is designed to make your life easier and worry free.
We know you’re eager to start using your phone right away, and the two sections of this
guide are designed to help you do just that.
Setting Up.
PCS Phone Handspring Treo 600 and the desktop synchronization software.
Getting Started.
Service. Blank spaces are provided so you can write down important information
that you’ll want to remember. Things like your new PCS Phone Number, information
about your service plan, and your first invoice.
Basics of Your PCS Phone.
phone and service with quick, easy-to-follow instructions.
3
Using Your Treo Phone, Web and Messaging Features.
the wireless features on your Treo, including phone, Picture Mail, web
4
browsing, SMS, and email.
Using Your Treo Organizer Features.
in, full-featured, Palm Powered organizer that gives you instant access to your
5
Calendar, To Do List, Memo Pad, CityTime, Calculator, and more.
Managing Applications on your Treo.
delete extra applications, and use an expansion card with your Treo.
6
Customizing your Treo.
phone. Once you’ve learned the basics, you’ll want to explore additional
7
features on your Treo and customize its settings.
Help.
do if something goes wrong or you can’t figure out how to use a feature.
8
This section guides you through the steps required to set up your new
This section guides you through the steps to set up your PCS
This section guides you through the basics of your
This section guides you through
This section guides you through using the built-
This section guides you through how to add or
This section guides you through advanced features of your
This section answers frequently asked questions and shows you what to
i
Page 14
Start Here.book Page ii Thursday, July 17, 2003 4:43 PM
Where to learn more
A quick introduction to your new Treo:
Tutorial.
The
Tutorial
teaches you how to use many features of your Treo. It is
already installed on your Treo and you can launch it any time. See page 148.
Additional Tips and Shortcuts for Keyboard Navigation.
time-saving shortcuts, tips, and tricks. It is included in the box with your Treo.
While using your Treo:
Tips.
Many of the built-in applications include helpful tips for getting the most
out of your Treo. To view these tips, launch an application, press
then from the
Information.
corner. Tap the
Options
menu, choose
Tips
Many dialog screens have an
Information
icon with your stylus to learn about the tasks you
can perform in that dialog.
If you need more information:
Books.
Many books on Palm Powered devices are available in local or online
book retailers (look in the computers section).
Online forums.
Consult online Treo user discussion groups to swap information
and learn about areas you may find nowhere else.
Customer service from Sprint PCS.
For questions about your mobile account or PCS
Service, contact Sprint for the latest information and help. Visit
www.sprintpcs.com
for instant access to new Sprint PCS features and information.
This booklet provides a list of
.
Information
icon in the upper-right
Menu
,
ii
Page 15

Start Here.book Page 1 Thursday, July 17, 2003 4:43 PM
Setting Up
Setting Up Your
PCS Phone
Handspring® Treo™ 600
1
Page 16

Start Here.book Page 2 Thursday, July 17, 2003 4:43 PM
Setting Up
1
What You Need
You should have received all of the following components in the Treo box:
•Hardware
Treo handset
AC charger
USB HotSync® cable
headset
slip case
•Documentation
Start Here to Activate (this book)
Additional Tips & Shortcuts for Keyboard Navigation
•Software
Palm Desktop and synchronization software (on the CD in the Treo box)
As you work through the instructions in this section, you’ll also need the
following items:
•An electrical outlet
•The computer with which you will synchronize your personal data
2
Page 17
Start Here.book Page 3 Thursday, July 17, 2003 4:43 PM
2
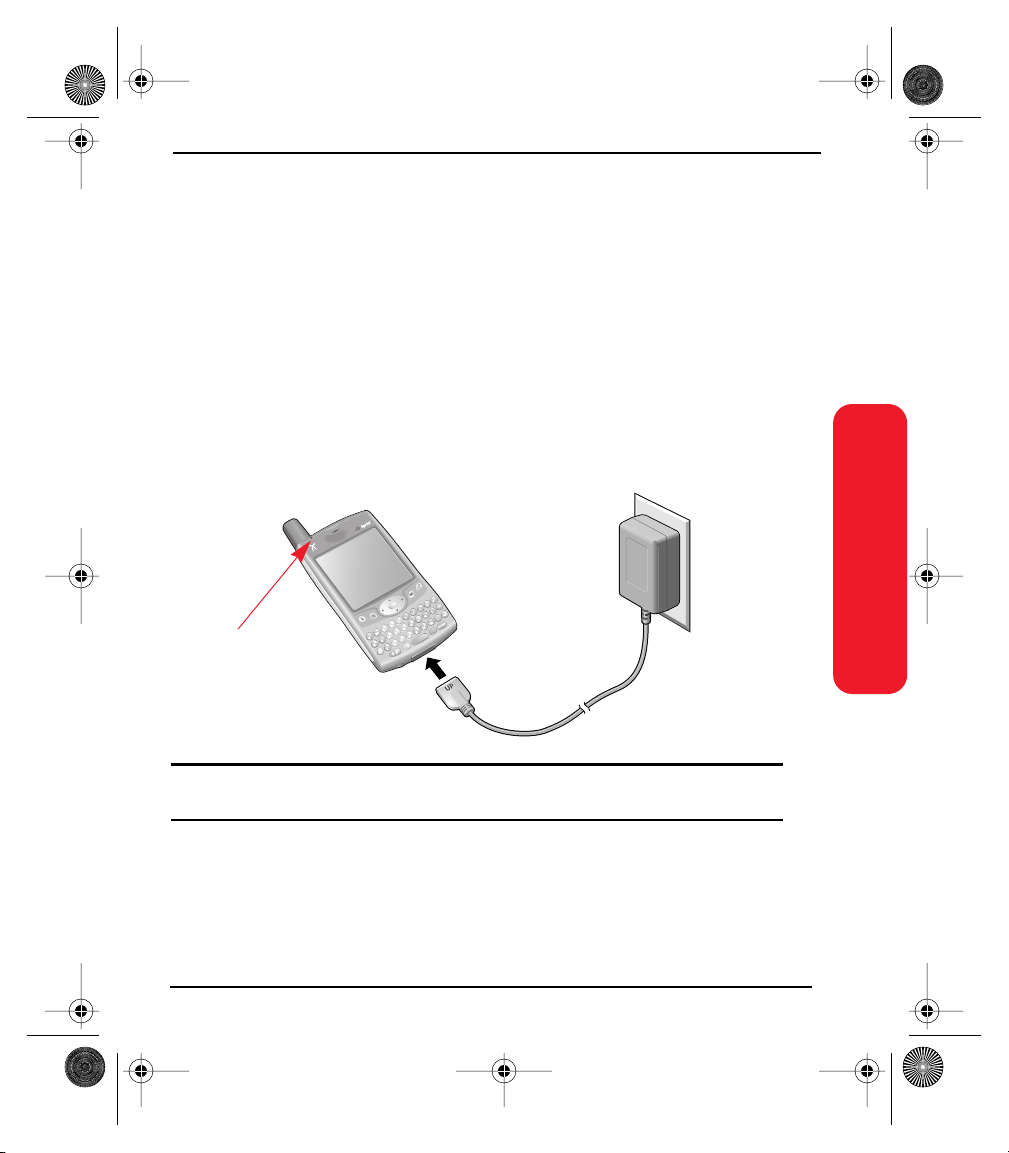
Charging the Battery
You must charge your Treo fully before using it. It may not turn on at all when you
first remove it from the box.
•Plug the AC charger into a wall outlet.
•Connect the charger cable to the bottom of the Treo with the word UP facing
the same way as your Treo screen.
•Wait for the LED to turn solid green. This may take up to 3 hours.
LED
Setting Up
Important Note:
unauthorized accessories could damage your phone and invalidate your warranty.
It is vital that you use only Sprint-approved AC adapter chargers. Use of
3
Page 18
Start Here.book Page 4 Thursday, July 17, 2003 4:43 PM
Setting Up
•Confirm your Treo is charging by checking the LED. If the battery is fully
drained, it may take a few moments for the LED to turn on while charging.
Red LED
: battery is charging.
Green LED
LED off: battery is not charging. Check the cable connection and the outlet to
: battery is fully charged.
which it is connected.
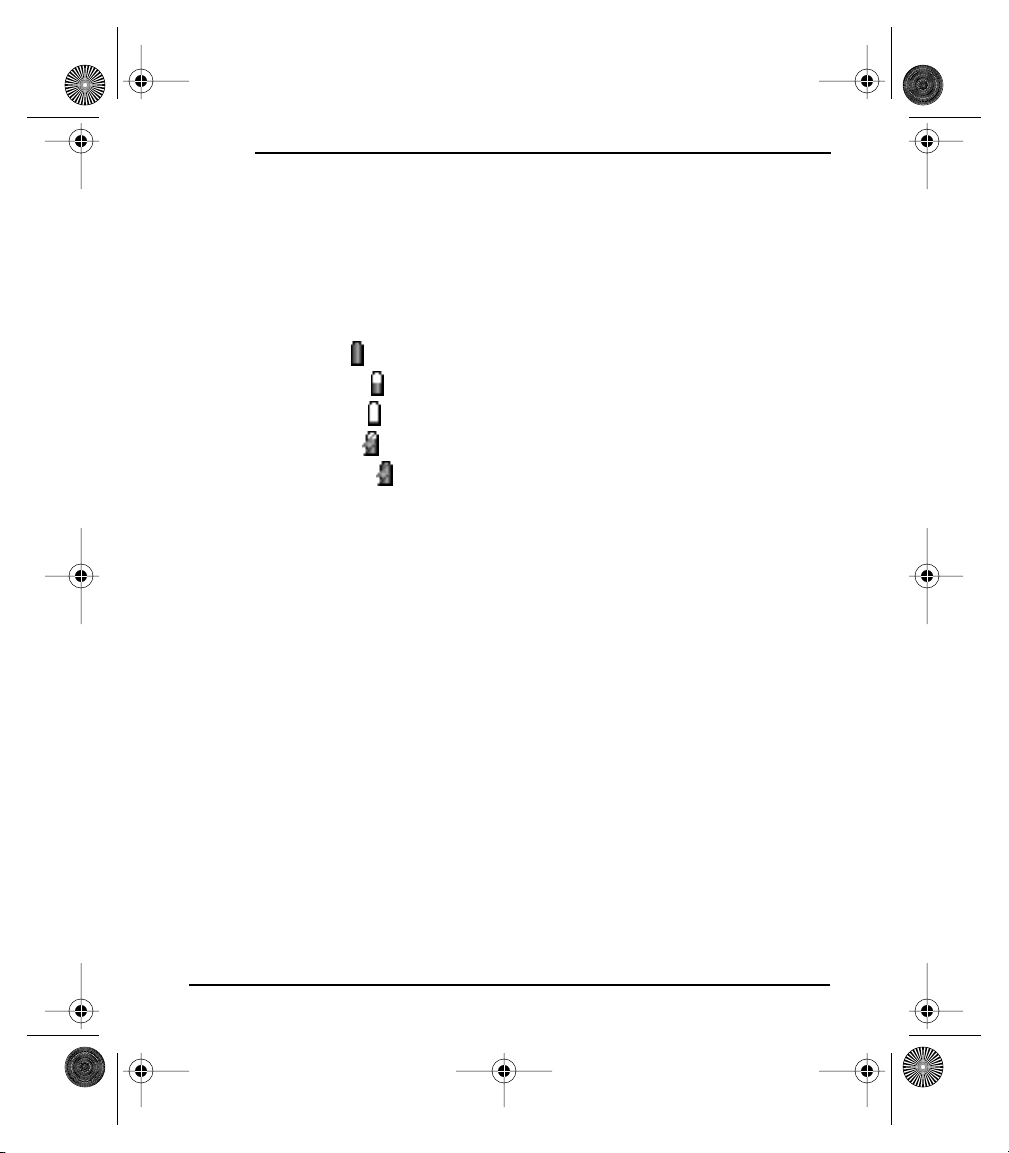
•After you set up your Treo, the onscreen battery gauge displays power status:
Full battery icon : battery is charged.
Partial battery icon : battery has some power but is not fully charged.
Empty battery icon : battery needs charging immediately.
Red lightning bolt : battery is charging.
Green lightning bolt : battery is fully charged.
Battery life
Battery life depends on individual use. Consumption factors include signal
strength, backlight and speakerphone use, and whether calls are data or voice
calls.
When Wireless Mode is on, the Treo battery provides approximately 4 hours of
talk time or approximately 10 days of standby time on the PCS, 1900 MHz band.
Talk time is slightly lower when roaming on the cellular 800Mhz band. When
Wireless Mode is off, the battery provides about 4 weeks of normal use.
If the battery drains to the point where your Treo doesn’t turn on, the Treo stores
your data safely for about 3 days. We recommend that you charge and synchronize
your Treo every day, especially if you use your phone often.
4
Page 19

Start Here.book Page 5 Thursday, July 17, 2003 4:43 PM
Maximizing battery life
You can increase the life of your Treo battery by following a few easy guidelines.
Remember that battery life depends on how you use your Treo.
•Charge your Treo whenever you’re at your desk. The Li-Ion battery has a much
longer useful life when it is topped off frequently, versus charging it after it is
fully drained.
•The wireless features of your Treo (phone, email, messaging, and web) consume
more power than its organizer features. However, if you spend a lot of time
using the camera, games, media players, eBooks, or other Palm OS applications,
keep an eye on the battery level and charge when necessary.
•If you don’t plan to use the wireless features on your Treo for a while, you may
want to turn off Wireless Mode. See page 27. You can forward calls to a different
number or let all calls be picked up by voicemail. See page 56.
•As with any mobile phone, if you are in an area with no wireless coverage, your
Treo searches for a signal, which consumes power. If you cannot move to an
area of better coverage, you may wish to temporarily turn off Wireless Mode.
•Use the keyboard backlight (see page 34) only when you need it. Turn down the
screen brightness (see page 127).
•Decrease the Auto-off setting in General Preferences. See page 135. This turns
off your screen automatically after a shorter period of inactivity.
Setting Up
5
Page 20

Start Here.book Page 6 Thursday, July 17, 2003 4:43 PM
Setting Up
6
Page 21

Start Here.book Page 7 Thursday, July 17, 2003 4:43 PM
Activating and Using PCS Service
Getting Started
7
Page 22
Start Here.book Page 8 Thursday, July 17, 2003 4:43 PM
Getting Started
1
Have these things ready before you call to activate
•Your PCS Phone (Make sure it’s fully charged)
•Your Social Security number
•Your driver’s license number
•Your Electronic Serial Number (also known as ESN;
refer to step 5 to locate the number)
•The city and state where your phone will primarily be used
•A pen
2
Setting up your service — You choose the way
•Visit us online at activate.sprintpcs.com.
– or –
•From your PCS Phone, enter , then press Center to dial.
– or –
•Use a phone other than your PCS Phone – dial 1-888-715-4588.
2
*
8
Page 23
Start Here.book Page 9 Thursday, July 17, 2003 4:43 PM
3
PCS Service Areas
Are you interested in where you can use your new phone? Check out the most upto-date coverage maps at
www.sprintpcs.com.
4
Your PCS Account Password
My Account Password is: ________________________
You’ll use this password when managing your account on www.sprintpcs.com and
with PCS Customer Solutions. Your default password is the last four digits of your
Social Security number.
Getting Started
9
Page 24
Start Here.book Page 10 Thursday, July 17, 2003 4:43 PM
Getting Started
5
Finding Your Phone’s ESN
If you set up service using your PCS Phone, the network automatically
communicates the ESN to us. You’ll only need this number when you’re setting up
service online at
new PCS Phone. The ESN DEC, or Electronic Serial Number (Decimal), is an 11digit number written on the barcode sticker on the back of your phone.
ESN DEC: ____________________________________
After writing down the ESN, turn on your phone by holding down the Wireless
Mode button on the top of your phone for a few seconds.
activate.sprintpcs.com or calling us from a phone other than your
6
PCS Clear PaySM Program
Check this box if you are on the PCS Clear PaySM Program. If you are not on
the PCS Clear Pay Program, skip ahead to step 7 on page 7.
Follow these easy steps to continue enjoying your new PCS Service:
• Keep track of your minutes
Enter , then press Center to dial from your PCS Phone (normal airtime
usage will apply) or log on to
you have currently used within your service plan.
10
4
*
www.sprintpcs.com to find out how many minutes
Page 25
Start Here.book Page 11 Thursday, July 17, 2003 4:43 PM
• Make payments
If you have exceeded the minutes in your plan or you have a past due balance,
you should make a payment to keep your service turned on. There are two easy
payment options:
Make a payment at any Western Union
find the nearest location, enter , then press Center to dial
®
location using the Swiftpay® form. To
8
9
*
6
from your PCS Phone. (Transaction fee applies; payment is credited to your
account within 12 hours.)
– or –
Enter , then press Center to dial from your PCS Phone (posting time
3
*
is 12 hours).
How we will help you keep your service turned on:
•In the event that your service has been turned off, you will receive an SMS
message stating: “Your PCS Service has been turned off. Press to make
3
*
a payment and turn service on.”
•The first time your service has been turned off you will be connected to a live
PCS Clear Pay Program Specialist who will explain why your service has been
turned off. You will be asked to pay your balance to get your service turned back
on (payment will be credited and service turned back on within 12 hours).
•For any additional times that your service has been turned off, you will be
connected to our automated payment process. You will have to pay your
balance to have your service turned back on (payment will be credited and
service turned back on within 12 hours).
Getting Started
11
Page 26
Start Here.book Page 12 Thursday, July 17, 2003 4:43 PM
Getting Started
7
Understanding Your PCS Service Plan
Use the following forms to record your PCS Service Plan and to familiarize yourself
with its features and options.
PCS Free & Clear Plans With Vision
Monthly Service Charge . . . . . . . . . . $__________
Anytime Minutes. . . . . . . . . . . . . __________
Unlimited Night & Weekend Minutes
(Mon.-Thur. 9pm-7am, Fri. 9pm-Mon. 7am) . . . Yes No
Each additional voice minute (overage). _________¢
Nationwide Long Distance Included . Yes No
SM
Unlimited PCS Vision
Options (monthly charges)
Unlimited Night & Weekend Minutes
(if not included with plan) . . . . . . $__________
Unlimited PCS-to-PCS Calling
PCS Voice Command
PCS Business Connection
PCS Add-a-Phone
Off-Network Minutes . . . . . . . . . $__________
PCS Equipment Replacement. . . . . $__________
Roadside Rescue . . . . . . . . . . . $__________
Other . . . . . . . . . . . . . . . . . $__________
. . . . . . . . Yes No
SM
. . . . $__________
SM
. . . . . . . . $__________
SM
. . . . . . $__________
SM
. . . . . . . . . . $__________
12
Page 27
Start Here.book Page 13 Thursday, July 17, 2003 4:43 PM
PCS Free & Clear Plans
Monthly Service Charge . . . . . . . . . . . $__________
Anytime Minutes . . . . . . . . . . . . __________
Unlimited Night & Weekend Minutes
(Mon.-Thur. 9pm-7am, Fri. 9pm-Mon. 7am) . . Yes No
Each additional voice minute (overage) _________¢
Nationwide Long Distance Included . . Yes No
Options (monthly charges)
Unlimited Night & Weekend Minutes
(if not included with plan). . . . . . . $__________
Unlimited PCS-to-PCS Calling
PCS Voice Command
SM
PCS Business Connection
PCS Add-a-Phone
SM
. . . . . . . . . . . $__________
Off-Network Minutes . . . . . . . . . $__________
PCS Equipment Replacement . . . . . $__________
Roadside Rescue . . . . . . . . . . . . $__________
Other. . . . . . . . . . . . . . . . . . $__________
SM
. . . . $__________
. . . . . . . . . $__________
SM
. . . . . . $__________
Getting Started
PCS Advantage Agreement
SM
:
I have agreed to a PCS Advantage Agreement.
___ 1 Year ___ 2 Year
I have opted not to sign a PCS Advantage Agreement.
$______ Monthly fee
Note: Your agreement for wireless service with Sprint is made up of the Service Plan you
choose and the Terms and Conditions of Service which can be found on page 175 of this guide.
13
Page 28

Start Here.book Page 14 Thursday, July 17, 2003 4:43 PM
Getting Started
8
Your New PCS Phone Number and User Name
PCS Phone Number
PCS User Name
Your user name is automatically assigned to you. Your user name, which
resembles an email address (for example,
PCS Mail and SMS services.
Note: You can use nearly any email address with the PCS Business Connection email
application (see page page 84). Your PCS user name is simply an additional email address that
identifies your Sprint PCS account.
name@sprintpcs.com), is used with
14
Page 29
Start Here.book Page 15 Thursday, July 17, 2003 4:43 PM
9
Understanding Your PCS Invoice
Your first invoice will arrive within a few days and will reflect these charges:
•Your first full month of service, which is your monthly service charge of $_____
•Additional charges such as taxes, roaming, or overages
•Charges for additional options you opt to subscribe to: $______
•Your one-time non-refundable activation fee of $______
The approximate total of your first invoice will be $______
10
Quick, Easy Options to Manage Your Account
With PCS Customer Solutions, there are two convenient options for managing
your account.
• Manage it online – visit www
Once you sign on, you can:
View the details of your PCS Service Plan
Find out how many minutes you have used and how many minutes are
remaining in your plan
View your current and previous 3 months invoices, including the call detail
Make a payment
Find out about PCS Products and Services
Learn how to set up your voicemail and more
.sprintpcs.com
Getting Started
15
Page 30
Start Here.book Page 16 Thursday, July 17, 2003 4:43 PM
Getting Started
•Use your PCS Phone – enter , then press Center to dial.
Once connected, you can:
Access a summary of your rate plan
Find out the number of minutes remaining in your plan for the current
invoice cycle
Access information about your most recent invoice
Find out when your last payment was received
Make a payment
4
*
Note: Normal airtime charges will apply when calling .
Welcome and thank you for choosing Sprint.
16
4
*
Page 31

Start Here.book Page 17 Thursday, July 17, 2003 4:43 PM
Connecting
Connecting Your
Computer
17
Page 32

Start Here.book Page 18 Thursday, July 17, 2003 4:43 PM
Connecting
1
Preparing Your Computer
Synchronization allows you to enter information on your computer in an
application called Palm Desktop or in Microsoft Outlook and then efficiently
transfer that information to your Treo. At the same time, changes you make on the
Treo are transferred to Palm Desktop software or to Microsoft Outlook. Even if
you manage all your contacts on your Treo, synchronization is a great way to back
up your data.
Before you can synchronize, you need to install the Palm Desktop synchronization
software on your computer. Even if you already own a Palm Powered device and
have installed a previous version of the Palm Desktop software, install the
software that comes on the CD with your Treo.
We strongly recommend that you install the Palm Desktop synchronization
software soon after you start using your Treo, and that you synchronize your Treo
and computer frequently to keep your information up-to-date (and backed up) in
both locations.
18
Page 33

Start Here.book Page 19 Thursday, July 17, 2003 4:43 PM
System requirements
Your computer should meet one of the following minimum system profiles:
•Windows 98SE, Me, 2000, or XP (later versions may also be supported)
32 MB of memory
30 MB of free hard disk space
CD-ROM drive
available USB port
USB cable (included with your Treo)
•Windows NT 4
32 MB of memory
30 MB of free hard disk space
CD-ROM drive
available serial port
serial synchronization cable (sold separately, visit www.handspring.com for
details)
•Macintosh OS X 10.1-10.2.x (later versions may also be supported)
32 MB of memory
25 MB of free hard disk space
CD-ROM drive
available USB port
USB cable (included with your Treo)
Connecting
19
Page 34

Start Here.book Page 20 Thursday, July 17, 2003 4:43 PM
Connecting
2
Connecting Treo to Your Computer
IMPORTANT: If you’re upgrading from another Palm Powered device, follow the upgrade steps
on page page 149 before you set up your computer for your new Treo.
•Plug the AC charger into a wall outlet. If necessary connect an adapter.
•Connect the charger to the short end of the HotSync cable. Be sure to match the
sides of the connectors labeled UP.
•Plug the USB HotSync cable into an available USB port or a powered USB hub on
your computer.
•Connect the long end of the HotSync cable to the bottom of your Treo with the
button facing up. Do not press the HotSync button until you are instructed to do
so in the next step.
20
USB Cable
Page 35

Start Here.book Page 21 Thursday, July 17, 2003 4:43 PM
3
Installing Palm Desktop Software on Your Computer
Your computer needs to have all its resources available to install the software.
Follow these guidelines for a successful installation:
•If you are installing on a computer at work, make sure your company allows you
to install new software. Contact your company’s IT department for help.
•Exit any applications that are currently running on your computer, including
those running in the background.
•Insert the CD that came with your Treo into the CD-ROM drive on your
computer. If you are installing on a Macintosh, double-click the CD icon on the
desktop, then double-click the Installer icon.
•Follow the onscreen instructions of the installation program. Click Install
Synchronization Software to install the Palm Desktop software. During the
installation process, you will be prompted to synchronize for the first time.
Connecting
HotSync
Button
21
Page 36

Start Here.book Page 22 Thursday, July 17, 2003 4:43 PM
Connecting
22
Page 37

Start Here.book Page 23 Thursday, July 17, 2003 4:43 PM
Basics of Your PCS Phone
23
Page 38

Start Here.book Page 24 Thursday, July 17, 2003 4:43 PM
Basics
Your New PCS Phone
1. Antenna 3. Stylus2. SD/MMC Expansion Card Slot
6. Wireless
Mode Button
5. Infrared (IR) Port
Your Phone’s Features: Top View
1. Antenna receives and sends wireless communication signals. The antenna does
not telescope out of your phone.
2. SD/MMC Expansion Card Slot allows you to expand the capabilities of your phone
using a Secure Digital (SD) cards or MultiMedia Cards (MMC). See page 115 for
details on using expansion cards.
3. Stylus serves as the instrument used to tap options on your phone screen. To
use the stylus, slide the stylus out of the slot, and hold it as you would a pen or
pencil.
4. Ringer Switch controls the ringer setting. See page page 126 for details on
changing the settings. Silencing the ringer turns off all system sounds,
including alarms.
5. Infrared (IR) Port uses infrared technology to transmit data to and receive data
from other Palm Powered devices.
6. Wireless Mode Button turns Wireless Mode on and off.
4. Ringer Switch
24
Page 39

Start Here.book Page 25 Thursday, July 17, 2003 4:43 PM
7. LED
15. Volume
Buttons
14. Phone Button
13. Calendar Button
8. Speaker
9. 5-way Navigation Control
10. Screen Button
11. Messaging Button
12. HotSync and
Power Connector
Your Phone’s Features: Front View
7. LED provides status information for your Treo based on the color of the light
and the blink state.
8. Speaker functions as the earpiece on your Treo.
9. 5-way Navigation Control lets you move around the Treo screen and choose
options.
10. Screen Button turns the phone screen on and off.
11. Messaging Button launches the SMS application.If you downloaded and installed
Business Connection, this button launches Business Connection.
12. HotSync and Power Connector enables you to attach the HotSync cable and power
adapter to your phone.
13. Calendar Button launches the Calendar application.
14. Phone Button launches the Phone application.
15. Volume Buttons adjusts the speaker volume level.
Basics
25
Page 40

Start Here.book Page 26 Thursday, July 17, 2003 4:43 PM
Basics
16. Camera
17. ESN
Lens
18. Reset Button
21. Vibrating
19. Headset Jack
Alarm
20. Microphone
Your Phone’s Features: Back View
16. Camera Lens enables you to take pictures using the built-in camera.
17. ESN (Electronic Serial Number) identifies your phone on the PCS network.
18. Reset Button restarts your Treo if an error occurs.
19. Headset Jack enables you to connect a hands-free headset.Use only headsets
that are compatible with your phone.
20. Microphone serves as the mouthpiece on your phone.
21. Vibrating Alarm notifies you when an alarm goes off and the ringer is set to silent.
Note: The Treo speaker includes a large magnet, so be sure not to store your Treo near credit
cards or other items that could become demagnetized.
26
Page 41

Start Here.book Page 27 Thursday, July 17, 2003 4:43 PM
Turning Your Phone On and Off
You can use the Palm OS features of your Treo independently of the wireless
features and applications. Therefore, the screen and Wireless Mode are designed to
be turned off and on separately.
Turning Wireless Mode ON
Wireless Mode connects your Treo to the PCS network so that you can make and
receive phone calls and use other wireless services.
Press and hold the Wireless Mode button to turn on Wireless Mode. (You will
hear a series of ascending tones and the phone displays “Welcome” and then
“Searching for Service” until it locates a signal.) At this point, Wireless Mode is
on and you’re ready to begin making and receiving calls and using the Internet
features (if supported by the local network).
Turning Wireless Mode OFF
When Wireless Mode is off, your Treo is not connected to the PCS network. You
can still use its other Palm OS features. This is ideal for airplane flights and
maximizing battery life.
Press and hold the Wireless Mode button again to turn off Wireless Mode.
You will hear a series of descending tones and a “Goodbye.” message appears
on the screen.
Basics
Turning the Screen On and Off
1. Press the Screen button to turn on the screen.
2. Press the Screen button again to turn off the screen.
27
Page 42

Start Here.book Page 28 Thursday, July 17, 2003 4:43 PM
Basics
Launching Applications
Each of the three application buttons on the front of the Treo can be used to
launch two applications. To access a button’s primary application, simply press the
button. To access a button’s secondary application, press Option , then press the
application button. The fourth button turns the screen on and off, and controls the
keyguard.
/
+
1R2
W
&
-
A
S
*
Z
3
E
T
4
6
5
D
G
F
7
9
8
X
V
C
Alt 0
Phone Calendar Messaging Screen
@
)
(
U
Y
$
J
H
#
N
B
P
O
I
:
!
'
L
K
?
.
M
menu
28
Button Primary Application Secondary Application
Phone + Blazer
®
Web
Browser
Calendar + CityTime
Messaging + SMS
Screen + Keyguard
Page 43

Start Here.book Page 29 Thursday, July 17, 2003 4:43 PM
Note: The Messaging button launches Business Connection if you downloaded and installed
Business Connection on your phone. You can also customize the buttons yourself. See page 131
for details.
In Palm OS, you access all available applications through a screen called the
Applications Launcher:
1. Press Applications Launcher .
2. Use the 5-way navigation control to highlight the application you want to use.
3. Press Center to launch the selected application.
In the Applications Launcher, you can also do any of the following:
Press Applications Launcher repeatedly to cycle through different categories of
applications.
Type the first few letters of the application’s name to highlight it. For example,
if you type c it highlights Calendar, then if you type i it highlights CityTime. If
you pause and then type i, it highlights the first application that starts with i.
Basics
29
Page 44

Start Here.book Page 30 Thursday, July 17, 2003 4:43 PM
Basics
Moving Around the Treo Screen
To move around the Treo screen, you can use the 5-way navigation control , or
tap items on the screen with the stylus. With use, you will find your own favorite
way to scroll, highlight, and select menu commands.
Note: Some third-party applications may not work with 5-way navigation, and you must use the
stylus instead. In this guide, we use arrow icons to indicate directions on the 5-way navigation
control . These arrows are different from any onscreen scroll arrows or pick list arrows.
The 5-way navigation control includes Right , Left , Up , and Down
and Center buttons.
.
Up
Left
Down
/
+
1R2
W
&
-
A
S
*
Z
3
E
T
4
6
5
D
G
F
7
9
8
X
V
C
Alt 0
@
)
(
U
Y
$
J
H
#
N
B
P
O
I
:
!
'
L
K
?
.
M
menu
Center
Right
Scrolling Through Screens
As on a computer, you scroll on the Treo to move from field to field, or page to
page, or in some cases to highlight an item or option in a list. There are several
methods of scrolling:
Press the 5-way navigation control on the front of the Treo. Pressing Right ,
Left , Up , and Down moves to the next field, button, or action in that
direction.
30
Page 45

Start Here.book Page 31 Thursday, July 17, 2003 4:43 PM
Tap an onscreen scroll arrow:
When inside a text field, press Up and Down to scroll through the text.
Drag the slider of an onscreen scroll bar:
Highlighting Items
The 5-way navigation control lets you highlight items before launching or
selecting them. Experiment with using the navigation control to highlight different
screen elements.
When an onscreen button (OK, Cancel, etc.) or pick list is
highlighted, the button acquires a blue glow around its border.
When a phone number, email address or web
link is highlighted on a web page or in a message,
the text appears in reverse type (light text on a
dark background).
When an entire text entry field is highlighted, you can press Center to edit the
text. After you edit the text, press Center again to highlight the entire field.
You can also use the stylus to highlight text on the screen. When text is
highlighted it appears in reverse type.
Drag the stylus across the text you want to highlight.
Double-tap a word to highlight it.
Triple-tap a line of text to highlight it.
Basics
31
Page 46

Start Here.book Page 32 Thursday, July 17, 2003 4:43 PM
Basics
Accessing Command Buttons
Command buttons, such as New, OK, and Details appear at the bottom of the
screen. In many cases you can jump directly to these buttons instead of scrolling to
them.
From a list screen, such as the Contacts list, press Right to jump to the first
button.
From a screen where you create or edit entries, such as Edit Contacts or Day
View in Calendar, press Center to jump to the first button.
From a dialog box, such as the Edit Categories, press Option then Return
for OK, or Option then Backspace for Cancel.
Choosing or Activating Items
After highlighting an item with the 5-way navigation control , you can choose or
activate it by pressing Center. You can also choose an item by tapping it with the
stylus.
Selecting Menu Items
Many applications have menus to provide access to additional features. These
menus are usually hidden from view, but they appear when you press Menu .
To get the most out of your Treo, it’s a good idea to familiarize yourself with the
additional features available through the various application menus.
1. Press Menu to display an application’s menus.
32
Page 47

Start Here.book Page 33 Thursday, July 17, 2003 4:43 PM
2. Press Right and Left to switch between menus.
3. Press Up and Down to highlight a menu item.
4. Press Center to choose the menu item, or press Menu to close the menu and
cancel your selection.
Tip: Most menu commands have keyboard shortcuts listed in the menu. To use a shortcut, press
Menu plus the shortcut letter. You don’t have to see the menu item to use the shortcut.
Choosing Options in a Pick List
A range of options is often presented in a type of menu called a pick list, which
can be identified by a downward-pointing arrow to the left of the currently
selected choice. You can select an option from a pick list by doing one of the
following:
Use the 5-way navigation control to highlight the pick list, then press Center to
display the items in the list. Press Up and Down to highlight the item you
want, then press Center to accept your selection. To exit the pick list and cancel
your selection, press Left or Right .
Use your stylus to tap the pick list, then tap the item you want from the list.
Tip: You can jump to an item in a pick list by using the keyboard to type the first letter of item you
want to select.
Basics
Pick list
33
Page 48

Start Here.book Page 34 Thursday, July 17, 2003 4:43 PM
Basics
Using the Keyboard
When using the keyboard, most people find it easiest to hold the Treo with two
hands and use the tips of both thumbs to press the keys.
Option
Shift/Find
/
+
1R2
W
E
&
-
A
4
S
D
7
*
Z
X
Alt Space
3
U
T
Y
!
$
6
5
G
F
8
V
C
Alt
0
J
H
#
9
?
N
B
P
O
I
:
'
L
K
.
M
menu
@
)
(
Applications Launcher
Backspace
Return
Menu
Using the Keyboard Backlight
Treo includes a keyboard backlight for nighttime use. The keyboard backlight
activates automatically when the screen turns on, but shuts off if the keyboard is
not in use.
To manually turn on the backlight, press Option then . The backlight may
not be visible in bright sunlight.
To manually turn off the backlight, press Option then again.
Entering Lowercase and Uppercase Letters
To type lowercase letters, press the desired keys.
To type an uppercase letter, press Shift , then type a letter. You don’t need to
hold down Shift while typing.
To turn Caps Lock on, press Shift twice. To turn it off, press Shift again.
When Caps Lock is on, this symbol appears in the lower right:
34
Page 49

Start Here.book Page 35 Thursday, July 17, 2003 4:43 PM
Entering Numbers, Punctuation, and Symbols that Appear Above
the Letters on the Keys
Press Option , then press the key with the desired character shown above the
letter. You don’t need to hold down Option while pressing the second key.
To turn Option Lock on, press Option twice. To turn it off, press Option
again. When Option Lock is on, this symbol appears in the lower right:
Tip: Some application views automatically default to Option Lock, such as the Dial Pad of the
Phone application, or the Calculator. In this case, you do not have to hold down
enter numbers.
Option to
Entering Other Symbols and Accented Characters
1. Type the character that corresponds to the symbol or accented character you
want. See the table on the next page.
2. Press Alt .
3. Press Up or Down to highlight the desired character.
4. Press Center to insert the character, or just continue typing the next character.
Tip: In many applications you can view a list of all the alternate characters. From the Edit menu,
choose
Keyboard Help (/G). The alternate characters are grouped according to their similarity to
the corresponding key. For example, the alternate characters available for the e key are é, è, ë,
ê and .
Basics
35
Page 50

Start Here.book Page 36 Thursday, July 17, 2003 4:43 PM
Basics
Type
…
a
A
b or B
c
C
d
D
e
E
f or F
i
I
l or L
m or M
n
N
o
O
p or P
r or R
s
S
t or T
u
…then press
to choose…
à á ä â ã å æ
À Á Ä Â Ã Å Æ
ß
ç ¢ © ^ ˆ
Ç ¢ © ^ ˆ
† ‡
† ‡ √
è é ë ê
È É Ë Ê
ƒ
ì í ï î
Ì Í Ï Î
£
µ
ñ
Ñ
ò ó ö ô õ ø
Ò Ó Ö Ô Õ Ø
¶
®
ß §
ß ≥ §
~ ™ † ‡
ù ú ü û
Type ……then press
to choose…
U
x or X
y
Y
0
1
2
3
.
,
!
?
:
.
'
"
$
+
/
%
#
(
)
Ù Ú Ü Û
∞
∆ ÿ ¥
∆ Ÿ ¥
‰ º
∂ π ∫
∑
∏
? ! …
‚‚‚
¡
¿
; :-) :-( ;-) :-D
? ! …
‘ ’ ‹ › ~ `
“ ” « »
£ ¥
&
_ ~ • – —
\ ÷ ≠
‰
=
<[{‹
>]}›
36
Page 51

Start Here.book Page 37 Thursday, July 17, 2003 4:43 PM
Using Your Treo Phone, Web,
and Messaging Features
37
Page 52

Start Here.book Page 38 Thursday, July 17, 2003 4:43 PM
Phone, Web, & Messaging
Making Calls
Your Treo offers several options for making phone calls. As you get familiar with
your Treo, you’ll discover which method you prefer.
IMPORTANT: Before making a call, make sure Wireless Mode is on (see steps on page 27). If
No Service appears in the upper-left, you are out of a wireless coverage area. If you believe you
are in a wireless coverage area and this problem persists, contact Sprint for assistance.
Dialing With the Keyboard
1. Press Phone .
2. Using the numbered keys on the keyboard, start dialing a phone number. You
do not need to press Option to access the numbers on the keyboard.
3. Press Center to dial.
Tip: If you make a mistake while dialing, press Backspace to erase one digit at a time, or
choose Cancel to start over.
Dialing by Contact Name
Before you can dial a call by contact name, you must create some contacts (see
page 49), or import them with a HotSync operation (see page 108).
1. Press Phone .
2. Use the 5-way navigation control to access the Contacts list.
38
Page 53

Start Here.book Page 39 Thursday, July 17, 2003 4:43 PM
3. Using the keyboard, begin typing one of the following for the contact you want
to call:
First initial and last name
First name
Last name
4. Choose the number you want to dial, or to see more information about a
contact, highlight the name and press Center to view the address, company, and
other details.
5. With the number highlighted, press Center to dial.
To start another search, press Backspace to delete letters you’ve entered. Or,
just press Phone to start all over.
Tip: You can also begin a Name Lookup immediately from the Main view in the Phone
application. From the
Options menu, select Display Preferences (/Q), then choose Typing Starts
Contacts Search.
Phone, Web, &Messaging
39
Page 54

Start Here.book Page 40 Thursday, July 17, 2003 4:43 PM
Phone, Web, & Messaging
Dialing With a Favorites Button
Favorites buttons can be used as shortcuts for dialing phone numbers and
performing other common tasks. You can use the built-in Favorites buttons, or see
page 51 to create some of your own.
1. Press Phone .
2. Use the 5-way navigation control to access your Favorites buttons.
3. Highlight the desired Favorites button.
4. Press Center to dial the selected Favorites button.
Dialing Using the Onscreen Dial Pad
1. Press Phone .
40
Page 55

Start Here.book Page 41 Thursday, July 17, 2003 4:43 PM
Note: If you changed the wallpaper in the Main view of the Phone application (see page 66), you
can access the Dial Pad by pressing Center, then choosing Dial Pad.
2. Type the desired phone number using the keyboard, or tap the numbers on the
onscreen Dial Pad.
3. Press Center to dial.
Tip: You can also paste numbers directly into the Dial Pad view. Copy a number from another
application, then switch to Dial Pad view. Press
Paste (/P). Press Center to dial.
Menu , then from the Edit menu, choose
Dialing From a Web Page
Treo recognizes most phone numbers that appear in web pages. If you can’t
highlight and dial a phone number on a web page, using the 5-way navigation
control or stylus, it means that Treo does not recognize it as a phone number.
1. Use the 5-way navigation control to highlight the phone number you want to
dial in the web page or SMS message.
2. Press Center to dial.
Phone, Web, &Messaging
41
Page 56

Start Here.book Page 42 Thursday, July 17, 2003 4:43 PM
Phone, Web, & Messaging
Dialing From SMS Messages
Treo recognizes most phone numbers that appear in SMS messages. If you can’t
use the 5-way navigation control or stylus to highlight and dial a phone number
from an SMS message, it means that Treo does not recognize it as a phone number.
1. Use the 5-way navigation control to scroll to the text box.
2. Press Center to choose the text box.
3. Press Up to highlight the phone number in the SMS message.
4. Press Center to dial.
Redialing the Last Number You Called
Do either of the following to redial the last number you called:
Press Phone , then press Center to display a list of your most recently dialed
numbers. To view all your recent incoming and outgoing calls in chronological
order, choose Call Log from the list.
42
Page 57

Start Here.book Page 43 Thursday, July 17, 2003 4:43 PM
Receiving calls
To receive calls, Wireless Mode must be on. This is different from having just the
screen turned on. See page 27.
Answering Calls
To answer a call, do one of the following:
Using the 5-way navigation control , choose the onscreen Answer button.
If the headset is attached, press the headset button.
Tip: To prevent calls from accidentally being answered while the phone is in a pocket or
briefcase, you can disable the touchscreen when an incoming call arrives (see page 136).
Sending Calls to Voicemail
To ignore a call and send it to voicemail, do one of the following:
Press Backspace .
Using the 5-way navigation control , choose the onscreen Ignore button.
Silencing the Ring of an Incoming Call
To silence the ringer while your phone is ringing:
Press the volume buttons or any key on your Treo except the 5-way navigation
control , Space , Return , or Backspace .
To immediately silence all system sounds including the ringer, slide the ringer
switch to Sound Mode Off (see page 126).
When you silence the ringer, you can either answer the call or let it ring through to
voicemail.
Some third-party applications let you play MP3 music on your Treo 600. If music is
playing through the internal speaker or headset, and a call arrives, you can still
hear the phone ringing softly. The music continues playing but you won’t hear it
during your call. Go to your third-party application to stop the music.
Phone, Web, &Messaging
43
Page 58

Start Here.book Page 44 Thursday, July 17, 2003 4:43 PM
Phone, Web, & Messaging
Signal Strength and Phone Status
You can monitor the status of your phone’s signal strength and several other items,
using icons at the top of the Phone screen:
Network
name
Displays Sprint when Wireless Mode is on and you’re in your Home
network. If you roam outside the PCS network, the network name indicates
you are roaming outside your network neighborhood. If you’re outside a
coverage area,
Mode, it displays
Appears when you have new voicemail messages. You can tap this icon to
retrieve your messages.
Appears when roaming is active.
Appears with gray arrows when Wireless Mode is on and you’re connected
to the Vision network. You can still receive calls.
Appears with green arrows when you are connected to the Vision network
and a data session is active (for example, when you are browsing the web).
You cannot receive calls.
Displays the signal strength. The stronger the signal, the more bars appear.
If you are outside a coverage area, no bars appear.
Displays the battery charge status. As the battery drains, the icon changes
from black to clear, and then to red when it’s time to recharge.
Appears when your Treo battery is charging.
Appears when your Treo battery is fully charged.
No service appears instead. When you turn off Wireless
Wireless Mode is Off.
Tip: To display details about your battery power, tap the battery icon at the top of the screen.
44
Page 59

Start Here.book Page 45 Thursday, July 17, 2003 4:43 PM
What’s My Number?
1. Make sure Wireless Mode is on. See page 27.
2. Press Phone .
3. Press Menu .
4. From the Options menu, choose Phone Info (/I). If your phone number isn’t listed,
consult Sprint to confirm your phone is activated.
Look here for your
phone number
Phone, Web, &Messaging
45
Page 60

Start Here.book Page 46 Thursday, July 17, 2003 4:43 PM
Phone, Web, & Messaging
Managing Active Calls
When you make or receive a call, the Active Call view appears. To toggle between
the Active Call view and the Main view of the Phone application, repeatedly press
Phone .
Use the 5-way navigation control to access the onscreen buttons in this view and
manage an active call:
Hang Up All (or pressing Backspace ) ends the call immediately.
Spkr-phone (or pressing Space ) switches to the personal speakerphone.
The personal speakerphone lets you use other features, such as checking your
calendar, during a call.
Hold (or pressing Period ) places the current call on hold.
Dial Pad opens the Dial Pad so that you can enter extra digits or manually dial an
additional number.
Mute (or pressing Return ) mutes the Treo speaker so you cannot be heard.
Add Call lets you place another call while keeping the first call active. First
choose Hold, then choose Add Call.
Extra Digits dials any extra digits (such as a password or extension) that you
assigned to a Favorites button. This button appears only during outbound calls
to numbers that include pre-defined extra digits. See page 51, for more on
creating a speed dial Favorites button.
Current duration of call
Caller’s name
and number
Dial Pad
Mute
Tip: To avoid accidentally pressing onscreen buttons while you’re holding the phone up to your
ear to speak, you can disable the touchscreen during active calls (see page 136).
46
Page 61

Start Here.book Page 47 Thursday, July 17, 2003 4:43 PM
Ending a Call
Do one of the following:
Choose Hang Up All.
Press Backspace .
Press the headset button (if the headset is attached).
Returning to an Active Call From Another Application
You can use nearly any other application on Treo while holding a phone
conversation, including the organizer and SMS features. You cannot browse the
web or send and receive email while on an active call.
From any application, press Phone to return to the Active Call view.
Making a Second Call
You can make a second call while your first call is still active.
1. After dialing the first number, use the 5-way navigation control to choose Hold.
2. Use the navigation control to choose Add Call.
3. Dial the second number using Favorites, Contacts, Dial Pad, Call Log, or Redial
list (see page 38).
The Active Call view now includes two status lines, each representing one of the
calls. You can join the two calls in a conference call, but you cannot switch
between the two calls.
4. Use the navigation control to choose Hang Up All to end both calls.
Phone, Web, &Messaging
47
Page 62

Start Here.book Page 48 Thursday, July 17, 2003 4:43 PM
Phone, Web, & Messaging
Controlling Your Roaming Experience
Your phone is dual band, which means you can make and receive calls while on
the enhanced Sprint Nationwide PCS Network and you can also roam on other
networks where we’ve implemented roaming agreements with other carriers.
When you roam outside the Sprint Nationwide PCS Network, the Roaming icon
appears at the top of the screen. Additional charges may apply if you use your Treo
while roaming.
To learn more about roaming, visit
Setting Your Phone’s Roam Mode
1. Press Phone .
2. Press Menu .
3. From the Options menu, choose Phone Preferences (/A).
4. Check the Enable Digital Roaming box.
5. Choose OK.
Feature Availability
You can make and receive calls while roaming.
You will have access to voicemail while roaming.
Other features which are standard on the enhanced Sprint Nationwide PCS
Network, such as Call Waiting, PCS Voice Command, and PCS Vision are
unavailable while roaming.
www.sprintpcs.com.
48
Page 63

Start Here.book Page 49 Thursday, July 17, 2003 4:43 PM
Internal Phone Book
The internal phone book is located in the Contacts view in Phone. If you are
familiar with Palm Powered devices, you may recognize that the Contacts view is
similar to the Address Book on previous devices.
If you have several contacts to enter, it’s more efficient to use the Palm Desktop
software or Microsoft Outlook on your computer and then synchronize data
between the Treo and your computer. For more information, see page 108.
Adding a Contact
1. Press Phone .
2. Use the 5-way navigation control to access the Contacts list.
3. Choose New Contact.
Phone, Web, &Messaging
4. Use the 5-way navigation control to move between fields as you enter
information. Be sure to correctly label your contact’s mobile number(s). The
SMS application (see page 69) only looks up Mobile numbers and email
addresses.
5. To place the entry in a category or mark it private, choose Details.
6. To add a note to an entry, choose Note.
7. After you enter all the information, choose Done.
49
Page 64

Start Here.book Page 50 Thursday, July 17, 2003 4:43 PM
Phone, Web, & Messaging
Viewing or Changing Contact Information
1. In the Contacts list, begin typing one of the following for the contact you want
to view or edit:
First initial and last name
First name
Last name
2. Choose the name of the entry you want to open.
3. Choose Edit.
4. Make changes to the entry as necessary.
5. Choose Done.
Deleting a contact
1. Open the contact you want to delete.
2. Press Menu .
3. From the Record menu, choose Delete Contact (/D).
4. Choose OK.
Saving Phone Numbers
1. In the Call Log (see page 42), highlight the number you want to save.
2. Select Add Contact.
3. Enter the information for the entry.
4. Choose Done.
Defining your business card
1. Create a new contact with your business card.
2. From Contact Edit view, press Menu .
3. From the Record menu, choose Select Business Card.
Now you can beam your business card to other Palm OS devices. In any Phone
view, press Menu . From the Record menu, choose Beam Business Card (/M).
50
Page 65

Start Here.book Page 51 Thursday, July 17, 2003 4:43 PM
Defining Favorites Buttons
Treo provides approximately 50 programmable Favorites buttons for quick access
to the following common tasks:
Dialing a phone number (speed dial).
Launching an application.
Accessing a web page.
Addressing an SMS message.
Accessing voicemail (preset on Treo).
For each Favorite, you can also set up a Quick Key that gives you instant access to
the phone number or application.
Phone, Web, &Messaging
Creating a Speed Dial Favorites Button
1. Press Phone .
2. Use the 5-way navigation control to access your Favorites buttons.
3. Choose a blank button.
Tip: If there are no blank Favorites buttons on the current Favorites page, press Right to scroll
through the other pages.
4. Choose the Types pick list, then select Speed Dial.
5. Enter a label for the Favorite:
51
Page 66

Start Here.book Page 52 Thursday, July 17, 2003 4:43 PM
Phone, Web, & Messaging
If the entry is for an existing contact, choose Lookup. Start typing the
contact’s last name, then select the contact when it appears in the Lookup
list.
If the entry is for a new contact, type the Label, press Down and type the
Number.
6. (optional) Enter a Quick Key. When you are in the Main, Dial Pad, or Favorites
view of the Phone application, press and hold the Quick Key to instantly
launch the Favorite.
7. (optional) Choose More, and select advanced options:
Extra Digits lets you define additional digits to dial, such as a password or
extension.
Dial Extra Digits Automatically dials pre-defined Extra Digits immediately after
dialing the phone number, when checked.
Ringtone assigns a special ringtone for incoming calls from that contact.
Image assigns a Caller ID picture that displays when that person calls.
8. Choose OK.
Tip: To view all the contact numbers for the selected person or business, highlight the Favorites
button then press Space .
52
Page 67

Start Here.book Page 53 Thursday, July 17, 2003 4:43 PM
Creating an Application, Message, or Web Link Favorites Button
1. Press Phone .
2. Use the 5-way navigation control to access your Favorites buttons.
3. Choose a blank button.
4. Choose the Types pick list, then select Application, SMS or Web Link.
5. Enter a label and any other necessary information on the Favorite screen.
6. (optional) Enter a Quick Key. When you are in the Main, Dial Pad, or Favorites
view of the Phone application, press and hold the Quick Key to instantly
launch the Favorite.
7. Choose OK.
Editing or Deleting an Existing Favorites Button
You can edit or delete most Favorites buttons. Note that you cannot edit or delete
the preset voicemail button, but you can add Extra Digits or move the voicemail
button to a different position.
1. Press Phone .
2. Use the 5-way navigation control to access your Favorites buttons.
3. Highlight the Favorites button you want to edit or delete.
4. Press Menu .
5. From the Edit menu, choose Edit Favorites Button (/E).
6. Make the desired changes. For example, add a Quick Key shortcut to any
Favorite. When you are in the Main, Dial Pad, or Favorites view of the Phone
application, press and hold the Quick Key to instantly launch the Favorite.
7. To delete the entry, choose Delete.
8. Choose OK.
Phone, Web, &Messaging
Tip: You can also organize your Favorites buttons on different pages. From the Edit menu,
choose
Edit Favorites Pages. To scroll through your Favorites pages, repeatedly press Right to
see the next page and Left to see the previous page.
53
Page 68

Start Here.book Page 54 Thursday, July 17, 2003 4:43 PM
Phone, Web, & Messaging
Using a Phone Headset
You can connect a phone headset for hands-free operation. If you need to use your
phone while driving and this is permitted in your area, we recommend using a
phone headset.
Speaker
Microphone
Headset
Button
You can press the headset button to perform any of the following tasks:
Answer an incoming call
Answer a call-waiting call
Switch between two active calls or join the calls in a 3-way conference
Hang up a single call
Headset Specifications
Your Treo uses a 2.5 mm, 3-pin headset connector. In addition to the headset that
came with your Treo, you can use other third-party headsets that are designed for
this type of connector. When in doubt, ask the third-party headset manufacturer if
their product is compatible with Treo phones. If you hear a headset buzz or poor
microphone performance, your headset may be incompatible with Treo.
To hear in stereo through the jack (such as music), use a stereo adapter or other
accessory. Visit
Note: The headset designed for previous models of Treo is not compatible with the Treo 600.
54
www.handspring.com for more information.
Page 69

Start Here.book Page 55 Thursday, July 17, 2003 4:43 PM
Sending and Receiving Messages
Setting Up Your Voicemail
Your voicemail number is preset when you activate your phone. The first time you
call voicemail, you are prompted to enter your voicemail pass code. If necessary,
please contact Sprint for your pass code, and enter it as prompted.
1. Turn on Wireless Mode, as described on page 27.
2. Press Phone .
3. Use the 5-way navigation control to access Favorites.
4. Choose the Voicemail Favorites button.
5. Follow the system prompts to create your pass code and record your greeting.
Retrieving Your Voicemail Messages
When you have a new voicemail message, you are notified with an alert and a
voicemail icon that appears near the top of your screen.
1. Press Phone .
2. From the Phone application Main view, Dial Pad, or Favorites, press and hold 1.
3. Follow the system prompts.
Phone, Web, &Messaging
Tip: Enter your voicemail pass code using the Treo keyboard, or choose Extra Digits if you
defined this option. See page 53, for information on editing Favorites buttons. Remember, you do
not need to press Option to type numbers, *, or # while on an active call.
Accessing Your Voicemail From Another Phone
1. Dial your PCS Phone Number.
2. Press when your voicemail answers.
3. Enter your pass code, then press .
*
#
Displaying Numeric Pages
1. From the New Message alert, highlight an item with a phone icon .
2. Choose Go To to view the page in the SMS application.
55
Page 70

Start Here.book Page 56 Thursday, July 17, 2003 4:43 PM
Phone, Web, & Messaging
PCS Service Features
Call Waiting
When you are on an active call, you can receive a second call. When the second
call comes in, the Call Waiting dialog appears, giving you the following options for
handling the second call:
To put your first call on hold and answer the second call, use the 5-way navigation
control to choose Answer. (To switch between calls, choose Swap.)
To continue your first call and send the second call to voicemail, use the
navigation control to choose Ignore.
Note: When you have more than one active call, and you choose the Hang Up All button, it ends
both calls. If the call that was on hold was an incoming call, your phone automatically redials
that number so that you can continue the conversation.
Call Forwarding
Call Forwarding lets you forward your calls to another number. You can still make
calls from your phone while this is activated. There is a per-call charge for this
service.
1. Press Phone .
2. Press Menu .
3. From the Options menu, choose Phone Preferences (/A).
56
Page 71

Start Here.book Page 57 Thursday, July 17, 2003 4:43 PM
4. Choose the Forward all calls pick list.
If the forwarding number appears in the pick list, select the number.
If the forwarding number does not appear in the pick list, select Edit Numbers,
then choose New. Enter a 10-digit forwarding number without spaces.
Choose OK to finish.
5. Choose OK.
Three-Way Calling
Talking with two different people at the same time is made easy with Three-Way
Calling.
1. Enter a number you wish to call and press Center to dial.
2. After you establish the connection, place a second call (see page 47). You cannot
initiate a three-way call if the second call is an incoming call.
3. When you’re connected to the second party, use the 5-way navigation control
to choose Conf. to begin your three-way call.
If one of the people you called hangs up, you and the remaining caller stay
connected. If you initiated the call and are the first to hang up, all three callers are
disconnected.
4. To end the three-way call, use the navigation control to choose Hang Up All and
end all the calls.
Phone, Web, &Messaging
Note: When using Three-Way Calling, normal airtime rates apply for each of the two calls.
57
Page 72

Start Here.book Page 58 Thursday, July 17, 2003 4:43 PM
Phone, Web, & Messaging
PCS Voice Command
If you subscribe to the PCS Voice Command service, you can call a number just by
saying a name.
Get started by setting up your Personal Address Book
1. Press , then Center. Follow the system prompts. (You’ll hear a tone
2. Say “Add Name” to begin setting up your Personal Address Book.
Making a call with PCS Voice Command
1. Press , then Center. (You’ll hear a tone followed by the prompt “Ready.”)
2. After the prompt, say “Call” and the name of the person or the number you
3. Say “Yes” to call the number or person. Say “No” to cancel.
*
followed by the prompt “Ready.”)
*
want to call. (Your request will be repeated and you will be asked to verify.)
SM
TTY Use With PCS Service From Sprint
A TTY (also known as a TDD or Text Telephone), is a telecommunications device
that allows people who are deaf or hard of hearing, or who have speech or
language disabilities, to communicate by telephone.
Your phone is compatible with select TTY devices. You can connect a TTY/TDD
machine to your phone through the headset jack, but you cannot use your headset
jack with a headset or handsfree kit, while this mode is enabled. Please check with
the manufacturer of your TTY device for connectivity information and to ensure
that the TTY device supports digital wireless transmission.
When establishing your PCS Service, please call PCS Customer Solutions
state Telecommunications Relay Service (TRS) by first dialing , then
pressing Center. Then provide the state TRS with this number: 866-727-4889.
To turn TTY mode on or off:
1. Press Phone .
2. Press Menu .
3. From the Options menu, choose Phone Preferences (/A).
7
1 1
SM
via the
58
Page 73

Start Here.book Page 59 Thursday, July 17, 2003 4:43 PM
4. Choose the TTY Mode pick list, then select one of the following modes:
Default Mode sends and receives text.
VCO Mode sends voice and receives text.
HCO Mode sends text and receives voice.
Off disables TTY mode and sends and receives voice.
5. Choose OK.
IMPORTANT NOTICE: Sprint recommends that TTY users make emergency calls by other
means including Telecommunications Relay Services (TRS), analog cellular, and landline
communications. Wireless TTY calls to 911 may be corrupted when received by public safety
answering points (PSAPs) rendering some communications unintelligible.
Phone, Web, &Messaging
59
Page 74

Start Here.book Page 60 Thursday, July 17, 2003 4:43 PM
Phone, Web, & Messaging
PCS Vision
SM
Getting Started With PCS Vision
To sign up for PCS Vision services or to access complete instructions, visit
www.sprintpcs.com/manage. For information on charges associated with features that
use a PCS Vision connection, refer to your PCS Service Plan.
Launching PCS Vision
1. Make sure Wireless Mode is turned on, as described on page 27.
2. Press Phone .
3. Use the 5-way navigation control to choose Web .
4. When the Connect to the Internet dialog appears, choose Ye s to launch a PCS
Vision connection.
If you have not already done so, select Now when the Preparing Vision Services
dialog appears. This initiates a one-time process to configure your Vision
services. At the end of this two-minute process, your phone connects to the
PCS Vision Home page.
If you want to cancel the connection, select No.
Tip: To bypass the selection screen in the future, check the Don’t ask me again box.
5. Use the 5-way navigation control to scroll around and select from a variety of
online services.
6. Exit the browser to end your session.
60
Page 75

Start Here.book Page 61 Thursday, July 17, 2003 4:43 PM
PCS Vision Features
With PCS Vision services, you have access to additional features, better performance,
faster Web connections, and a wider variety of online services. Features such as Web
access, graphically-enriched games, and sending/receiving digital images are
available on your Treo through the enhanced Sprint Nationwide PCS Network.
Picture Mail
Take digital pictures with the built-in camera and share them with other PCS
Vision users or email users.
SMS
Send and receive email and text messages, or chat.
Games
Play exciting games with full-color graphics, sound, and vibration.
Ringers
Personalize your PCS Phone by downloading ring tones. You can use Sound
preferences to assign these tones to different applications and speed dial
Favorites buttons.
Screen Savers
Download unique images to Picture Mail. Use these images as wallpaper, or
make it easy to tell who’s calling by assigning specific images to numbers in
your speed dial Favorites buttons.
SM
Phone, Web, &Messaging
Web
Experience full-color graphic versions of popular Web sites.
PCS Business Connection
Secure, real-time access to your Microsoft
SM
®
Outlook® or Lotus Notes®
company email, calendar, business directory, and personal contacts.
61
Page 76

Start Here.book Page 62 Thursday, July 17, 2003 4:43 PM
Phone, Web, & Messaging
Accessing PCS Vision Features
Once your phone is activated, you are signed in and ready to connect to PCS
Vision services at any time. You will only be charged for services when you use
them.
PCS User Name
Your PCS user name is automatically assigned to you. Your user name, which
resembles an email address (for example, name@sprintpcs.com), is used with PCS
Mail and SMS services. Remember, with PCS Business Connection you can use
virtually any email address (see page 84). Your PCS user name is simply an
additional address that identifies your Sprint PCS account.
When your PCS Phone is Vision-enabled, your user name automatically appears on
the Phone Info screen.
To find your user name:
1. Press Phone .
2. Press Menu .
3. From the Options menu, choose Phone Info (/I).
PCS Vision Symbols on Your Screen
Phone is not currently able to access PCS Vision service features.
Connection is active (data is being transferred) when the arrows are green.
Outgoing calls can be made, but incoming calls go directly to your
voicemail.
Connected, and voice calls can be sent and received when the arrows are gray.
PCS Vision Billing Information
See your service plan for details on PCS Vision billing.
62
Page 77

Start Here.book Page 63 Thursday, July 17, 2003 4:43 PM
Using the Camera and Picture Mail
Your phone comes with an easy-to-use built-in camera, which allows you to
instantly take, view, and share pictures with your friends and family. To add a
personal touch to your phone, use your pictures as wallpaper on the Main Phone
screen and as caller ID images.
You can store your pictures on your phone, upload them to albums on the Picture
Mail Web site, move them to an expansion card, and copy them to your computer
by performing a HotSync operation.
Additional fees may apply for Picture Mail service. Contact Sprint for additional
information.
Taking a Picture
The camera takes 12-bit color pictures that are at a maximum resolution of
640x480 pixels (0.3 megapixels).
1. Press Phone .
2. Press Right to launch Pictures.
3. Using your phone screen as a viewfinder, aim the lens on the back of your Treo
at the subject you want to photograph.
4. Press Center to take the picture.
5. If desired, edit the picture name and category at the top of the screen.
6. Choose Keep to save the picture on your phone, choose Discard to cancel the
picture, or choose Share to share the picture. For details on sharing pictures,
see the instructions on page 64.
Phone, Web, &Messaging
63
Page 78

Start Here.book Page 64 Thursday, July 17, 2003 4:43 PM
Phone, Web, & Messaging
Viewing a Picture
1. Choose the Pictures view icon .
2. Choose the picture you want to view.
3. Choose Next or Prev to move between pictures.
4. Choose Done.
Sharing a Picture
You can share a picture with someone who uses a phone enabled with PCS Vision,
Internet access, or with someone who has an email address.
The first time you share a picture, you are prompted to establish a Picture Mail
Web site account and password. Enter a four- to eight-digit, alpha-numeric
password and press Center. Once you receive confirmation, you may continue to
upload and share pictures.
Tip: You can reduce the size of an image before sending it. From the Picture menu, choose
Downsize. Indicate whether you want to resize the original or save a reduced copy.
1. From the Pictures view, choose the picture you want to share.
2. Choose Share.
64
Page 79

Start Here.book Page 65 Thursday, July 17, 2003 4:43 PM
3. Choose the To pick list to address the message:
If the recipient’s name appears in the To pick list, select it from the list.
If the recipient is in your Contacts list, choose Lookup in Contacts List, then
start typing the first few letters of the recipient’s first or last name. Highlight
the recipient’s phone number or email address, then choose Add.
If the recipient’s name is not in the pick list or your Contacts list, type the
full phone number or email address.
4. Press Down .
5. Type your message or choose Canned msgs to insert predefined phrases.
6. Choose Share.
Your phone uploads the picture to the Picture Mail Web site, creates a private
Guest Book for the recipient on the Picture Mail Web site, and sends your message
to the recipient. The recipient can then use a web browser to access this private
Guest Book to view this picture and to enter comments. You can view the
comments later from the Picture Mail Web site.
Receiving Picture Mail
You can automatically download new messages or have Treo notify you that a
message is ready to download. In either case, an alert appears when you have a
new message.
From the alert:
To view your message(s), choose Go To.
To dismiss the alert and view the message(s) later, choose OK.
To be reminded again in 5 minutes, choose Snooze.
Phone, Web, &Messaging
65
Page 80

Start Here.book Page 66 Thursday, July 17, 2003 4:43 PM
Phone, Web, & Messaging
Moving Pictures
1. From the Pictures view, choose the picture(s) you want to move.
2. Press Menu .
3. From the Picture menu, choose Move (/M).
4. Choose the category or expansion card where you want to move the
picture(s).
5. Choose Move to finish.
Deleting a Picture From Your Phone
1. From the Pictures view, choose the picture you want to delete.
2. Choose Delete (/D).
3. If prompted, choose OK to confirm deletion.
Setting a Picture as Wallpaper
1. From the Pictures view, choose the picture you want to use as wallpaper.
2. Press Menu .
3. From the Picture menu, choose Set Wallpaper.
4. When the confirmation message appears, confirm by selecting Yes , or decline
by selecting No.
66
Page 81

Start Here.book Page 67 Thursday, July 17, 2003 4:43 PM
Uploading Pictures to Your Online Inbox
Your Picture Mail account includes an Inbox on the Picture Mail Web site. You can
use your Inbox to store and view pictures from your phone or a computer with
Internet access.
1. From the Pictures view, choose the picture(s) you want to move.
2. Press Menu .
3. From the Picture menu, choose Upload (/U).
Accessing Your Online Picture Mail Inbox
1. From any Picture Mail view, choose the Web icon to access your Inbox.
2. Choose any of the following:
Share Inbox enables you to share all the pictures in your Inbox.
Save Inbox As copies the pictures in your Inbox into a new album.
Move All Pictures To transfers the pictures in your Inbox to an existing album.
Back returns to the Camera application on your phone.
Album List displays a list of all the albums in your Picture Mail account.
Tip: You can also view and manage your pictures on your computer at
www.picturemail.sprintpcs.com.
Phone, Web, &Messaging
Working With Your Albums on the Picture Mail Web Site
1. From any Camera view, choose the Web icon to access your Inbox.
2. Choose Album List.
3. Choose an album, then choose View, Share, Options, or Edit to perform the
corresponding action.
Tip: To download a picture from the Picture Mail Web site to your phone, tap and hold the stylus
on the picture until you are prompted to confirm the download request.
67
Page 82

Start Here.book Page 68 Thursday, July 17, 2003 4:43 PM
Phone, Web, & Messaging
Customizing your Picture Mail settings
1. From any Picture Mail view, press Menu .
2. From the Options menu, choose Preferences.
3. Set any of the following preferences:
Default name assigns a name to a series of pictures to be captured, such as
Seattle001, Seattle002, etc.
Category sets the default category for newly captured pictures.
Picture size sets the default size for newly captured pictures. Large is 640 x
480 pixels, small is 160 x 120 pixels.
Play capture sound plays a sound to confirm picture capture.
Confirm before deleting instructs Picture Mail to ask if you’re sure you want to
delete a picture before erasing it.
Confirm before saving instructs Picture Mail to ask if you’re sure you want to
save a picture before storing it on your Treo.
Backup settings backs up the Treo image database on your computer.
4. Choose OK.
Viewing Pictures on Your Computer
If you customized the Picture Mail settings to backup pictures onto your Windows
computer (see above), you can view these pictures in JPEG format, or email them
to friends with your desktop email application.
1. Locate your Pictures folder. When you installed the desktop software from the
Treo CD, a shortcut to the Treo Pictures folder was created on your desktop.
You can also look in C:\Program Files\Handspring\Treo Pictures\(user name), or if you
upgraded from another Palm powered device, in C:\Program Files\Palm\Treo
Pictures\(user name).
2. Double-click any file to launch it with the default picture viewing software on
your Windows computer.
68
Page 83

Start Here.book Page 69 Thursday, July 17, 2003 4:43 PM
SMS
SMS messages are brief text messages that you exchange with other wireless
phones that have text messaging capability, or with email addresses. You can
exchange messages of up to 160 characters (including the destination email
address or mobile number). Before you use your Treo to send or receive SMS
messages, you need to verify pricing and availability with Sprint.
Creating and Sending a Message
1. Make sure Wireless Mode is turned on, as described on page 27.
2. Press Messaging .
3. Choose New.
Phone, Web, &Messaging
4. Choose the To pick list to address the message:
If the recipient’s name appears in the To pick list, select it from the list.
If the recipient is in your Contacts list, choose Lookup in Contacts, press Option
to turn off Option Lock, then start typing the first few letters of the
recipient’s first or last name. Highlight the recipient’s phone number or
email address, then choose Add.
If the recipient’s name is not in the pick list or your Contacts list, type the
full phone number, or press Option to turn off Option Lock and then type
the email address.
5. Press Down to jump to the body of the message.
6. Type your message.
7. Choose Send.
69
Page 84

Start Here.book Page 70 Thursday, July 17, 2003 4:43 PM
Phone, Web, & Messaging
If you are out of a coverage area or if Wireless Mode is off, outgoing messages go
into the Outbox folder. When you return to a coverage area, messages are sent
automatically.
SMS Tips
You can address SMS messages to multiple recipients by separating the
addresses with a comma. If you address a single message to three people, you
will be billed for three messages.
When entering a message, you can insert emotive symbols by choosing
Emoticons or predefined QuickText phrases by choosing QuickText and then
selecting a phrase. To add a new phrase, select Edit QuickText from the list.
You cannot use all symbols available on your phone in SMS messages. The SMS
application automatically replaces invalid characters before it sends messages.
You can send and receive SMS messages even while you are on a phone call.
This is easiest when using the hands-free headset or speakerphone.
Receiving SMS Messages
When your phone is on and in a wireless coverage area, you automatically receive
SMS messages sent to you. You can configure your Treo to automatically notify you
when new SMS messages arrive, using a ringtone or simply an onscreen alert.
70
Page 85

Start Here.book Page 71 Thursday, July 17, 2003 4:43 PM
From the New Message alert:
To view your message(s), choose Go To.
To dismiss the alert, choose OK. The message will go straight to the Inbox.
To be reminded of the new message again in 5 minutes, choose Snooze.
Using Links in Messages
The SMS software is designed to recognize links within a message and give you
one-tap access to them. When you receive an SMS message that contains a
recognizable telephone number, email address, or URL, you can dial the number,
send an email message, or go to the web page directly from the SMS message.
1. Choose a message from the list.
2. Choose the phone number, email address, or URL (the link appears as
underlined blue text).
3. Your Treo automatically launches the appropriate application from the link.
Phone, Web, &Messaging
Chatting with SMS
When you exchange more than one SMS message with a single contact, your
messages will automatically be grouped into a chat session. The upper part of the
Chat view displays all messages you’ve exchanged with this address, and the lower
part provides a text entry area where you can continue the conversation. You can
carry on multiple chats at the same time and easily switch between them, using
the pick list at the top of the screen.
71
Page 86

Start Here.book Page 72 Thursday, July 17, 2003 4:43 PM
Phone, Web, & Messaging
1. From the Inbox, choose a chat.
2. Type your message.
3. Choose Send.
To find the conversations you had with someone, open your SMS Inbox and select a
chat session.
Managing Your Messages
The status icons that appear next to each message in the Inbox, Outbox, and Sent
folders indicate the following:
72
An incoming message. Unread messages appear in bold; messages you’ve read
appear in plain text.
An item that is locked and cannot be deleted or purged until you unlock it.
An outbound message.
A chat session. Chats containing unread incoming messages appear in bold text.
A voicemail page. An unopened voicemail page appears in bold.
Page 87

Start Here.book Page 73 Thursday, July 17, 2003 4:43 PM
You can rearrange the messages in any folder using the Sort command. This makes
it easier to find and view messages.
1. From list view, press Menu .
2. From the View menu, choose Sort by Name or Sort by Date.
You can also delete several messages at once from any folder using the Purge
command.
1. From list view, press Menu .
2. From the Message menu, choose Purge (/K).
3. Choose the Purge pick list, then select an option.
4. Choose OK.
Customizing Your SMS Settings
1. Press Menu .
2. From the Options menu, choose Preferences.
3. Set any of the following Messages preferences for your individual SMS
messages:
Phone, Web, &Messaging
Confirm deletions indicates whether you want deletion confirmation messages
to appear.
Return to list view after delete indicates whether you want to view the next
message or chat, or to return to the list view after deleting a message.
73
Page 88

Start Here.book Page 74 Thursday, July 17, 2003 4:43 PM
Phone, Web, & Messaging
Addressing new messages determines whether typing in the To field enters
numbers or letters by default. You can still switch between digits and letters
by pressing Option .
4. Set any of the following Chat preferences for your chat sessions:
Show time stamps in chats displays the local date and time the message was sent
next to each message.
Display name in chat window as sets the text label for your messages in Chat
view.
Label color selects the label color for your messages in the Chat view.
Use color for indicates whether you want to view both the chat partner’s name
and message in a different color, or only the name.
5. Choose OK.
74
Page 89

Start Here.book Page 75 Thursday, July 17, 2003 4:43 PM
Browsing the Web
The Blazer Web Browser on your Treo is designed to provide quick and easy access
to web pages.You can view the regular Web sites you use today, including sites
with advanced features such as JavaScript, frames, and cookies and secure sites
such as online shopping, banking, and email sites. However, Blazer does not
support plug-ins (Flash, Shockwave, etc.) or Java applets. Some secure sites require
specific browsers and may not work with Blazer.
To use your Treo to browse the web, you must first activate PCS Vision data
services from Sprint.
Viewing a Web Page
1. Make sure Wireless Mode is turned on, as described on page 27.
2. Press Phone .
3. Use the 5-way navigation control to choose Web .
4. Choose the Page View icon .
5. Press Space to jump between the web page contents and the icons at the
bottom of the screen.
6.
Navigate to the web page you want:
To view a portal of mobile content designed specifically for your Treo,
choose .
To go to any web page on the Internet, choose . If you browse to a
secure web page, a Lock icon appears.
To view the previous or next page, choose or .
To refresh the page with the latest content available from the Internet,
choose .
To view a list of sites you’ve visited, tap and hold or .
Phone, Web, &Messaging
Tip: If graphics are slowing you down, you can browse the web faster by turning off images.
From the Options menu, choose Preferences, and then check the Don’t Show Images box.
75
Page 90

Start Here.book Page 76 Thursday, July 17, 2003 4:43 PM
Phone, Web, & Messaging
Navigating in Optimized Mode
The Blazer Web Browser uses a patent-pending technology to optimize normal
web pages for your Treo. By default, Blazer Web Browser reformats web pages to
fit into one long column on your Treo screen. This way, you can see everything
easily without needing to scroll left or right.
Press Up or Down to move through a web page.
Press Left or Right to move between links on the page. To follow a link to
another web page, highlight the link and then press Center. You can also tap on
the link on the screen with your stylus.
Navigating in Wide Page Mode
Some web pages, such as maps, are easier to view without the optimization done
in Optimized Mode. You may want to view these pages in Wide Page Mode. This
mode presents the web page as you would expect to see it on your computer’s
web browser.
1. Go to the page you want to view.
2. Press Menu .
3. From the Page menu, choose Wide Page Mode (/W).
Press Up , Down , Left , or Right to scroll through the wide page.
To follow a link to another web page, tap the link with your stylus.
Creating a Bookmark
Bookmarks let you instantly access a web page, without needing to type the
address every time. Blazer Web Browser can store up to 100 bookmarks or saved
pages, allowing you to open your favorite web pages quickly. Remember, a Blazer
Web Browser bookmark is different from a Favorite (see page 51).
1. Go to the page you want to bookmark.
2. Press Menu .
3. From the Page menu, choose Add Bookmark (/A).
76
Page 91

Start Here.book Page 77 Thursday, July 17, 2003 4:43 PM
4. If desired, change the Name and Description.
5. Choose OK
6. Use the stylus to drag and drop the new bookmark into a slot on the current
page. To move the bookmark to a different page, drag and drop it on the page
icon (see page 78 for more information about arranging bookmarks).
7. Choose OK.
Tip: You can make Bookmark view the default view when you launch the browser. From the
Options menu, choose Preferences, then select the Bookmarks icon as your Initial View.
Saving a Page
Blazer Web Browser lets you save single pages for offline viewing. This feature
saves the page’s text and images onto your Treo, so you don’t need an Internet
connection to view the page’s content later.
1. Go to the page you want to save.
2. Press Menu .
3. From the View menu, choose Save Page.
4. Choose OK.
5. Use the stylus to drag and drop the bookmark into a slot on the current page.
To move the bookmark to a different page, drag and drop it on the page icon.
6. Choose OK.
Phone, Web, &Messaging
77
Page 92

Start Here.book Page 78 Thursday, July 17, 2003 4:43 PM
Phone, Web, & Messaging
Viewing Bookmarks or Saved Pages
Bookmarks and saved pages both appear in Bookmark view. Saved pages are
indicated by a small triangle in the upper-right corner of the bookmark.
1. Choose the Bookmarks view icon .
2. Choose the bookmark or saved page you want to view.
Editing or Deleting a Bookmark or Saved Page
1. From the Bookmarks view, press Menu .
2. From the Bookmarks menu, choose Edit Bookmarks.
3. Choose the bookmark you want to edit or delete.
4. Enter the desired changes.
5. Choose OK.
Arranging bookmarks and saved pages
Blazer Web Browser includes 10 pages so that you can arrange bookmarks and
saved pages in a logical fashion. For example, you can store travel links on one
page, stock links on another, and business links on third page.
1. From the Bookmarks view, press Menu .
2. From the Bookmarks menu, choose Edit Bookmarks.
78
Page 93

Start Here.book Page 79 Thursday, July 17, 2003 4:43 PM
Page icons
3. Type a new title for this page.
4. Use the stylus to drag and drop bookmarks into different slots on the current
page. To move a bookmark to a different page, drag and drop it on the page
icon.
5. Choose OK.
Bookmark slots
Downloading Files From a Web Page
Blazer Web Browser lets you download files that are usable on your Treo, such as
ring tones, new applications, or pictures that are tagged specifically for download.
When you download a file, it is automatically sent to the application that can use
the file. For example, if you download a JPEG image, it is stored in Picture Mail for
later viewing.
1. Go to the page that contains the link to the file you want to download.
2. Press Left or Right to highlight the link to the file, then press Center to
initiate the download process.
Phone, Web, &Messaging
Note: You can only download files that you can open on your Treo. If you try to download a file
that does not have a corresponding application on your Treo, an error appears.
79
Page 94

Start Here.book Page 80 Thursday, July 17, 2003 4:43 PM
Phone, Web, & Messaging
Navigating Web Sites With Split Pages (Frames)
Some web sites split their pages into separate areas, each with their own scroll
bars. The easiest way to navigate these sites is to zoom in on one of the separate
areas.
1. Tap the area of the split page you want to enlarge. Make sure you tap an area
that is not a link, otherwise you will navigate to the selected link.
2. Tap the Magnifying Glass icon at the bottom of the screen to expand the
selected area to fill the entire screen. The Magnifying Glass icon appears only
when a page is split into separate areas.
Copying Text From a Web Page
You can copy text from a web page and paste it in other applications.
1. Use the stylus to highlight the text you want to copy.
2. Press Menu .
3. From the Edit menu, choose Copy (/C).
4. Go to the application in which you want to paste, then position the cursor
where you want to paste the text.
5. Press Menu .
6. From the Edit menu, choose Paste (/P).
Dialing a Phone Number on a Web Page
Blazer Web Browser can dial most phone numbers that appear on web pages (see
page 41). If Blazer Web Browser does not recognize a phone number as dialable,
you can copy the phone number (as text) and paste it into the Phone Dial Pad (see
page 40).
80
Page 95

Start Here.book Page 81 Thursday, July 17, 2003 4:43 PM
Creating Email from a Web Page
Email addresses often appear as links on web pages. After you configure an email
application on your Treo, you can select an email address link to create a message
to the selected address.
Using the History List
The History list stores the addresses of the most recent pages you visited in Blazer
Web Browser. If you want to go back to a page you remember visiting, but did not
bookmark the page, you can use the History list to jump directly to that page.
Items in the History list are sorted chronologically.
1. From the Page view, press Menu .
2. From the Page menu, choose History (/H).
3. Press Down to navigate through the list.
4. Choose the web page you want to load.
Finding Text on a Web Page
1. From the Page view, press Menu .
2. From the Page menu, choose Find Text on Page.
3. Type the text you want to find.
Phone, Web, &Messaging
81
Page 96

Start Here.book Page 82 Thursday, July 17, 2003 4:43 PM
Phone, Web, & Messaging
4. Check or uncheck the Wrap Search box to indicate whether you want the
search to wrap from the end of the page to the beginning when the end is
reached.
5. Choose Find to start the search.
Customizing Your Blazer Web Browser Settings
1. Press Menu .
2. From the Options menu, choose Preferences.
3. Set any of the following preferences:
Home Page sets the web page that appears when you choose the Home
icon. Choosing Restore Default selects the original Spring PCS Vision page if
you changed it.
Initial view determines which view displays every time you launch Blazer Web
Browser.
Don’t show images selects whether you want images to appear when you load
a web page. If you don’t view images, web pages will load faster. If you
choose not to view images, you can still see any image by choosing the
placeholder box on the web page.
4. Choose Advanced and set any of the following preferences:
82
Page 97

Start Here.book Page 83 Thursday, July 17, 2003 4:43 PM
Set limit on memory for storing recently viewed pages (cache) sets the amount of
memory used for your cache. Pages are cached so they load faster the next
time you view them.
Memory Management enables you to free up memory on your device by
clearing the memory for recent pages, history and cookies.
Set Proxy sets up a proxy server to access the Internet. If your connection
requires a proxy server, please contact your Internet service provider or IT
administrator for this information.
Accept cookies allows some web sites to store personalized information on
your Treo. Some sites do not work properly unless you select this option.
5. Choose OK.
Phone, Web, &Messaging
83
Page 98

Start Here.book Page 84 Thursday, July 17, 2003 4:43 PM
Phone, Web, & Messaging
Business Connection
You can install the optional Business Connection application for secure, real-time
access to your Microsoft
business directory, and personal contacts. For more information and to sign up,
visit
www.sprintpcs.com.
1. Press Applications Launcher .
2. Choose the pick list in the upper-right corner, then select All.
3. Choose the Get BC icon .
4. Follow the onscreen instructions to download and install the software.
After you install the Business Connection application on your phone, you can
access it by pressing Messaging .
®
Outlook® or Lotus Notes® company email, calendar,
84
Page 99

Start Here.book Page 85 Thursday, July 17, 2003 4:43 PM
Organizer Features
Using Your Treo
85
Page 100

Start Here.book Page 86 Thursday, July 17, 2003 4:43 PM
Organizer
Calendar
Calendar is a powerful organizer application that helps you manage your schedule.
Displaying Your Calendar
Do any of the following:
Press Calendar repeatedly to cycle through the various active views.
Use the 5-way navigation control to move to another day, week, or month
(depending on the current view).
Choose Go, or press Menu , then from the Options menu, choose Go to Day (/O).
Then choose a date from the calendar.
Creating an Event
You can enter events on your phone. However, if you have several appointments
to enter, it’s more efficient to use the Palm Desktop software or Microsoft Outlook
on your computer and then synchronize data between the Treo and your
computer. For more information, see page 108.
1. Press Calendar until you are in Day view.
2. Press Left and Right to select the desired day.
3. Using the keyboard, type a starting time for the event. For example, type 53 for
5:30. (Remember to press Option before typing numbers.)
4. Press Down and type the ending time for the event.
5. Choose OK.
6. Type a description for the event.
86
 Loading...