

Page 1

YOUR APPLICATION AND INFO MANAGEMENT TOOLS
10
1 Insert the expansion card into the
expansion card slot. The Card category
of Applications View automatically
appears.
2 Select the category pick list in the title
bar, and select All.
3 Select the icon for the application in
which you want to open the item. For
example, to view a picture, select
Pics&Videos.
Copying applications between an
expansion card and your Treo
You can copy applications from your Treo
to your expansion card and vice versa.
TIP
Before you copy an application to an
expansion card, make sure that it is
compatible with Palm OS software version
5.4.5 or later. Some applications do not work
with expansion cards and do not allow you to
store files in a location that is separate from
the application.
1 Press Applications .
2 Press Menu .
3 Select Copy from the App menu.
4 Select the Copy To pick list and select
the destination: Phone or <card
name>.
5 Select the From pick list and select the
location of the application you want to
copy: Phone or <card name>.
6 Highlight the application you want to
copy.
7 Select Copy.
CHAPTER
USING EXPANSION CARDS
225
Page 2
YOUR APPLICATION AND INFO MANAGEMENT TOOLS
10
CHAPTER
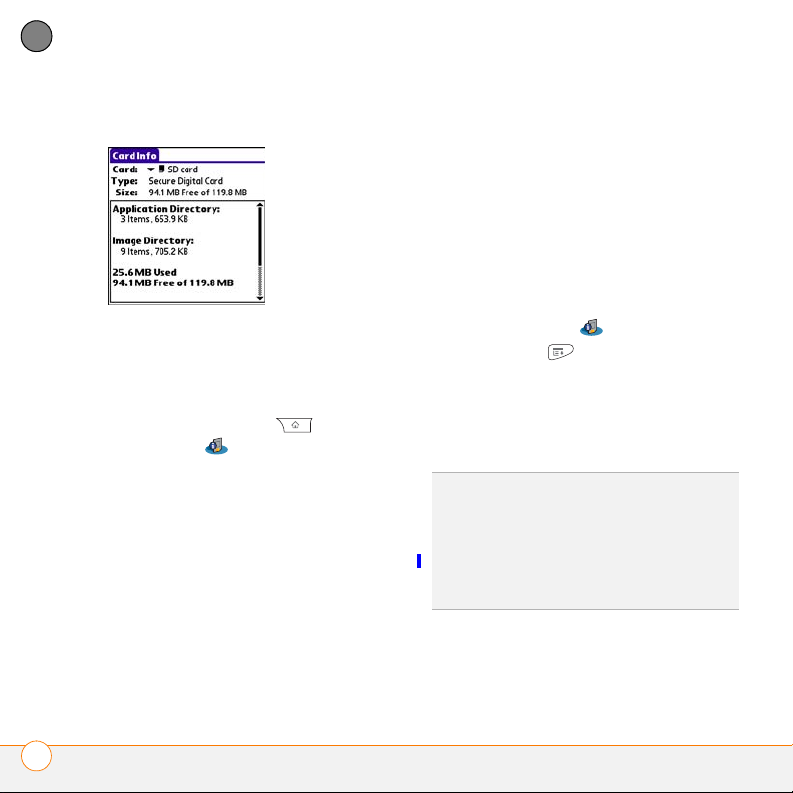
Viewing expansion card information
Renaming an expansion card
If you change the contents of an expansion
card, you may at some point want to
rename the card to better match its
contents.
1 Insert the expansion card into the
expansion card slot.
2 Select the category pick list at the top
of the screen and select All.
The Card Info application displays general
information about the expansion card that
is currently in the expansion slot, and it
enables you to rename and format a card.
• Press Applications and select
Card Info .
3 Select Card Info .
4 Press Menu .
5 Select Rename Card from the Card
menu.
6 Enter a new name for the card.
7 Select OK.
TIP
If you have trouble copying info to,
renaming, or formatting an expansion card,
make sure the card is not write-protected.
Press Applications and select Card Info. If a
“This card is read-only” message appears, the
card is write-protected. See the instructions
that came with your card for additional info.
Formatting an expansion card
Formatting an expansion card is similar to
formatting a disk on a computer. When
USING EXPANSION CARDS
226
Page 3
YOUR APPLICATION AND INFO MANAGEMENT TOOLS
10
you format an expansion card, you erase all
the information stored on the card.
TIP
If you format a card, any photos or
documents that were previously stored on the
card are deleted from your desktop software
the next time you sync. You can recover these
files from the backup folder, or you can
prevent the deletion by temporarily changing
your sync settings for the affected application
to Desktop overwrites handheld.
1 Insert the expansion card into the
expansion card slot.
2 Select the category pick list at the top
of the screen and select All.
3 Select Card Info .
4 Press Menu .
5 Select Format Card from the Card
menu.
6 Enter a new name for the card.
7 Select OK.
CHAPTER
USING EXPANSION CARDS
227
Page 4

YOUR APPLICATION AND INFO MANAGEMENT TOOLS
10
CHAPTER
USING EXPANSION CARDS
228
Page 5

CHAPTER
Your personal settings
Customizing your Palm®Tr eo™ XXX is a great way to make it
match your lifestyle and work even harder for you.
On your Treo
screen colors, and more. Take advantage of different levels of
security. Prevent making an accidental (and expensive) phone
call by locking the keyboard. Some settings can help extend
the life of your Treo battery. There are lots of ways to make
your Treo work better for you.
Benefits
• Access applications quickly
• Make your screen easy to read
, you can easily customize the sounds, fonts,
• Conserve power
• Enjoy your Treo XXX more
11
Page 6

In this chapter
System sound settings. . . . . . . . . . . . . . . . . . . . . . . . . . . . . . . . . . . 231
Display and appearance settings . . . . . . . . . . . . . . . . . . . . . . . . . . . 232
Applications settings . . . . . . . . . . . . . . . . . . . . . . . . . . . . . . . . . . . . 235
Locking your Treo and info . . . . . . . . . . . . . . . . . . . . . . . . . . . . . . . . 238
System settings . . . . . . . . . . . . . . . . . . . . . . . . . . . . . . . . . . . . . . . . 244
Connecting to a VPN . . . . . . . . . . . . . . . . . . . . . . . . . . . . . . . . . . . . 247
Page 7

YOUR PERSONAL SETTINGS
Sound Off
Sound On
11
System sound
settings
Silencing sounds
You can immediately silence all alerts,
ringtones, music that plays through the
built-in speaker, and system sounds by
sliding the Ringer switch to Sound Off.
This does not mute the audio during a
phone call.
1 Slide the Ringer switch to Sound Off
. Your Treo XXX vibrates once to let
you know that you’ve turned sounds
off.
2 To hear all sounds again, slide the
Ringer switch to Sound On .
If you have set up Push to Talk, your PTT
availability status is affected by the Ringer
switch setting. When the Ringer switch is
set to Sound Off, your availability is set to
Silent.
NOTE For info on setting the vibrate
option, see the section on setting alert
tones in the chapters that describe the
individual applications.
Sliding the Ringer switch back to Sound On
restores the previous sound settings.
Setting system volume levels
You can set the volume level for system
sounds, such as the tone that plays when
you synchronize.
TIP
If the Ringer switch is set to Sound Off,
the ringer setting overrides the sound settings
and all sounds are turned off.
1 Press Applications and select
Sounds .
2 Select the Application pick list and
select System.
CHAPTER
SYSTEM SOUND SETTINGS
231
Page 8

YOUR PERSONAL SETTINGS
Backlight
11
CHAPTER
3 Select the System Volume and Game
Volume pick lists and select the
volume levels.
2 Press Left and Right to adjust the
brightness.
3 Select Done.
TIP
To temporarily set the backlight to the
preset low setting, press Option + Menu.
TIP
You can also adjust the backlight and set
4 Select Done.
Display and
appearance settings
the brightness duration during a call in Power
Preferences. See Optimizing power settings
Changing the screen font
You can change the screen font in
Calendar, Contacts, Memos, Messaging,
.
Tasks, and Web. The font styles may vary
Adjusting the brightness
Depending on the lighting conditions in
which you’re using your Treo, you may
need to adjust the brightness of the
screen.
1 Press Option , and then press
between applications, and some
applications may offer fewer choices.
1 Open the application in which you want
to change the font.
2 Press Menu .
3 Select Options, and then select Font.
Backlight .
DISPLAY AND APPEARANCE SETTINGS
232
Page 9
YOUR PERSONAL SETTINGS
Large bold fontSmall font
Small bold font
Large font
11
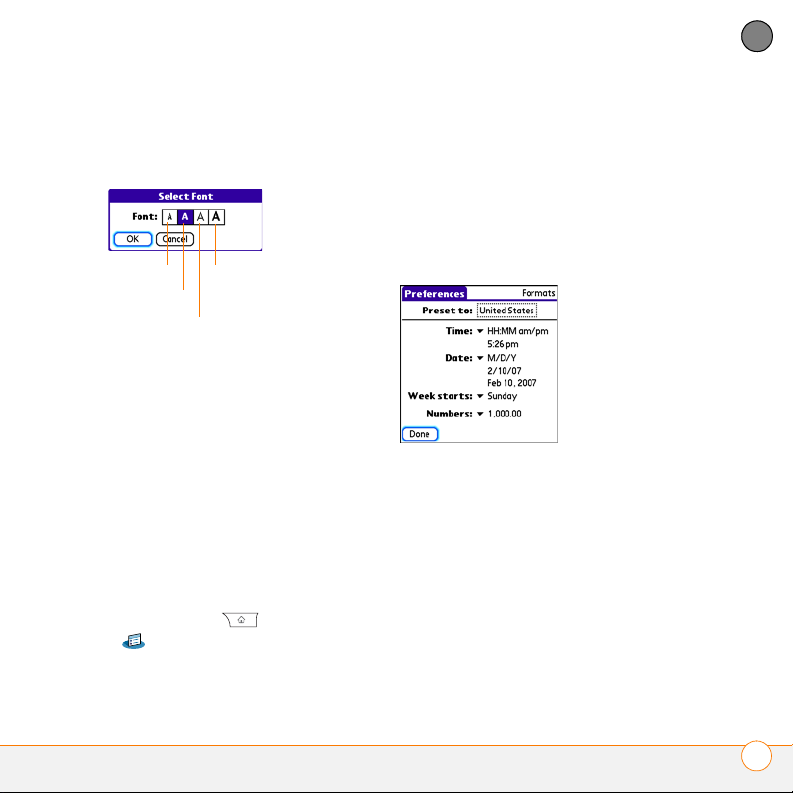
4 Select a font style. (In the web browser,
select the Font size pick list and select
Large or Small.)
5 Select OK.
Setting display formats
Formats Preferences enable you to select
number conventions based on geographic
regions. For example, in the United
Kingdom, time often is expressed using a
24-hour clock. In the United States, time is
expressed using a 12-hour clock with an
AM or a PM suffix. Many of the built-in
applications on your Treo XXX use the
Formats Preferences settings.
1 Press Applications and select
Prefs .
2 Select Formats.
3 Set any of the following preferences:
Preset to: The standard number
conventions for your country. When you
select a country, the other Formats
Preferences are automatically set to
that country’s conventions. You can
also edit each option individually.
Time: The time format. Select HH:MM
to display a 24-hour clock.
Date: The date format.
Week starts: The first day of the week
(usually Sunday or Monday).
Numbers: The format for numbers with
decimal points and commas.
4 Select Done.
CHAPTER
DISPLAY AND APPEARANCE SETTINGS
233
Page 10

YOUR PERSONAL SETTINGS
11
CHAPTER
Aligning the screen to correct tapping
problems
Occasionally, the Treo touchscreen
alignment may need to be readjusted. If
this problem occurs, you may see the
wrong feature being activated when you
Changing the system color scheme
1 Press Applications and select
Prefs .
2 Select Color Theme.
3 Select a color scheme from the list.
tap the screen. To fix the problem, you can
align the screen at any time.
1 Press Applications and select
Prefs .
2 Select Touchscreen.
3 Follow the onscreen instructions and
tap the screen where indicated.
4 Select Done.
TIP
You can also set the wallpaper for the
Main tab in the Phone application (see
Customizing the Main tab in the Phone
application) and the background for Calendar
Agenda View (see Customizing display
options for your calendar).
4 Select Done.
DISPLAY AND APPEARANCE SETTINGS
234
Page 11
YOUR PERSONAL SETTINGS
11
Applications settings
You can change the Applications settings
on your Treo so that you can easily access
the applications you use most often.
You can arrange and display your
applications by category, reassign
the buttons on your Treo, and select
default applications for specific tasks.
Arranging applications by category
You can assign an application to a category
and then display a specific category of
applications in Applications View.
1 Press Applications .
2 Press Menu .
3 Select Category on the App menu.
4 Select the pick list next to each
application and select a category.
5 Select Done.
TIP
To create a new category, select the
category pick list and select Edit Categories.
Select New, and then enter the category
name. Select OK to close the dialog box, and
then select OK.
DID YOU KNOW
the expansion slot, the card appears in the
category pick list and is treated as a category
when you press Applications repeatedly.
?
If there is an expansion card in
Displaying applications by category
Do one of the following:
• Press Applications repeatedly to
cycle through the categories.
• Select the category pick list at the top
of the screen and select a category.
Select All to display all your
applications.
Changing Applications View
By default, Applications View displays each
application as an icon. As an alternative,
you can view a list of applications. The list
view is particularly useful when you have
so many applications in a category that the
applications fill up more than one screen.
CHAPTER
APPLICATIONS SETTINGS
235
Page 12
YOUR PERSONAL SETTINGS
11
CHAPTER
1 Press Applications .
2 Press Menu .
3 Select Options, and then select
Preferences.
4 Select the View By pick list and select
List.
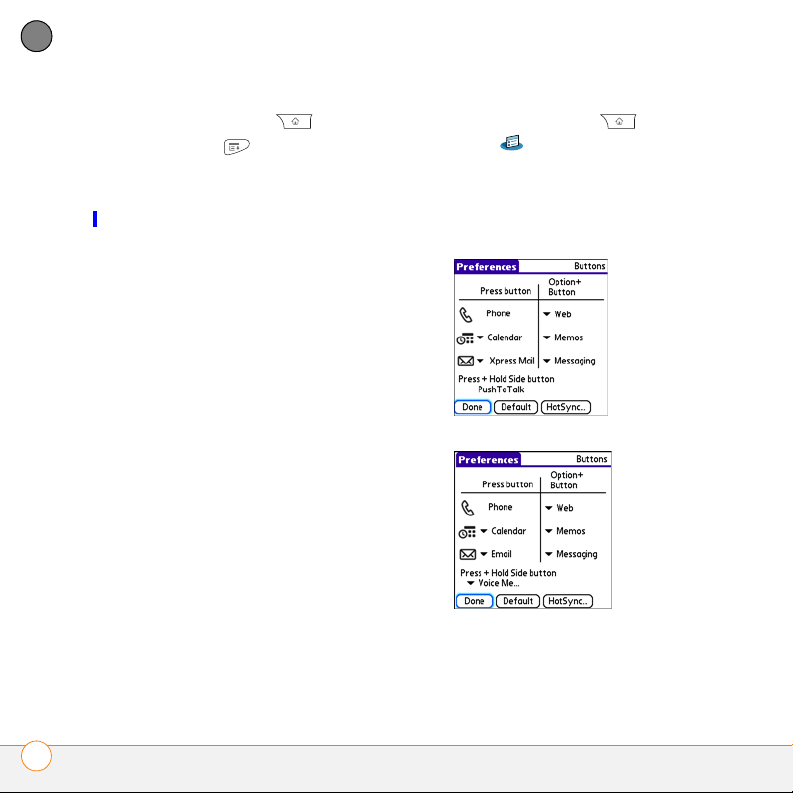
1 Press Applications and select
Prefs .
2 Select Buttons.
3 Select the pick list next to the item you
want to reassign, and then select an
application.
5 Select OK.
Reassigning buttons
With Buttons Preferences, you can select
which applications are associated with the
quick buttons and the Side button on your
Treo. You can assign a primary and
secondary application to each of the three
quick buttons that open an application.
NOTE We recommend that you keep the
primary button assignments on the factory
settings until you become comfortable
with the features of your Treo XXX. If you
do change the primary button
assignments, remember that the
instructions in this guide and in the other
help features refer to the original button
settings.
4 Select Done.
APPLICATIONS SETTINGS
236
Page 13
YOUR PERSONAL SETTINGS
11
DID YOU KNOW
application to open with the sync button on
the USB sync cable. To change this setting,
select HotSync on the Buttons Preferences
screen.
TIP
To restore all the buttons and key
combinations to their factory settings, select
Default.
DID YOU KNOW
automatically take over a button when you
install the application. For example, when you
provision PTT, PTT takes over the Side button,
and it cannot be changed back unless you do
a hard reset.
?
You can also choose an
?
Some third-party applications
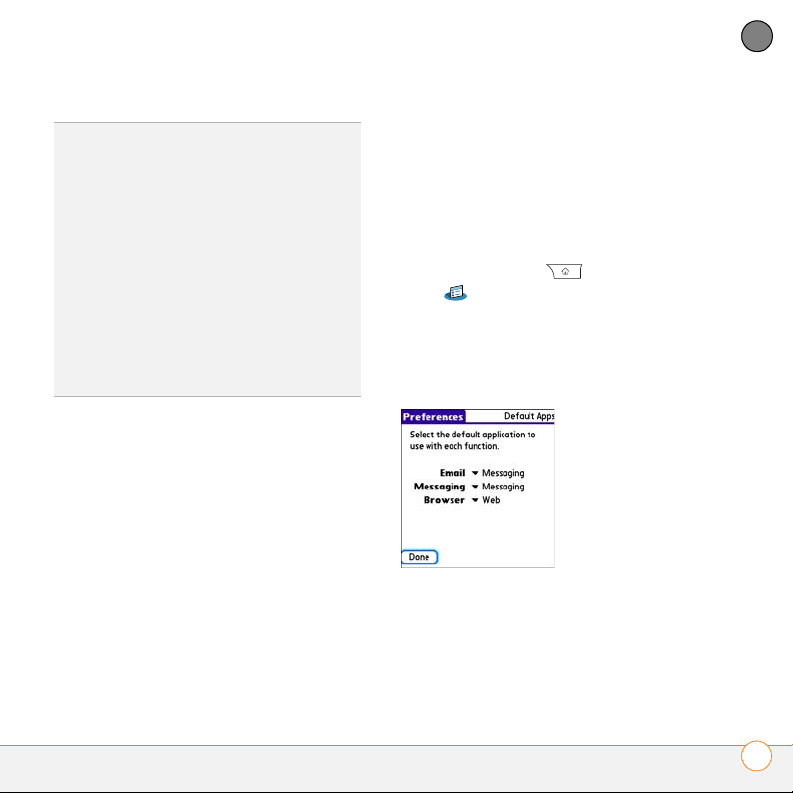
Changing default applications
Sometimes one application looks for
another application to handle information
(for example, a mail application might open
a browser when you select a link in an
email message). Your Treo XXX comes
with a set of predefined applications to
handle email, messaging, and browser
requests from other applications. If you
have more than one application to handle
these requests on your Treo XXX, you can
specify which application you want to use
for each function.
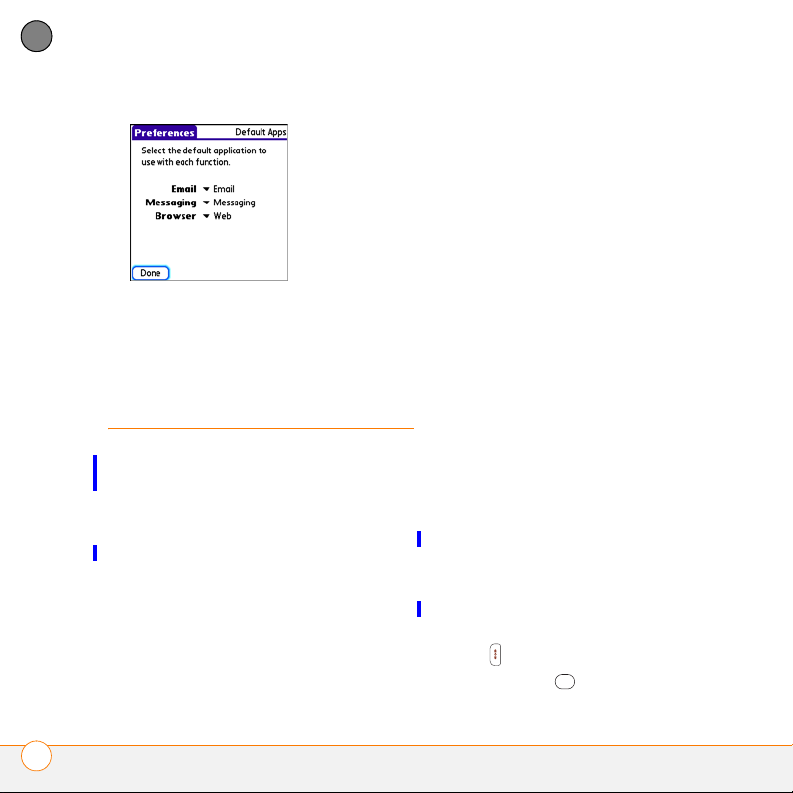
The email function is initially set to
Messaging so you can send messages to
email addresses even if you don’t have an
email application set up yet. You can
change this setting to Email (or Xpress
Mail) once you know how you want to set
the default.
1 Press Applications and select
Prefs .
2 Select Default Apps.
3 Select each pick list and select the
application you want to associate with
that function.
CHAPTER
APPLICATIONS SETTINGS
237
Page 14
YOUR PERSONAL SETTINGS
11
CHAPTER
4 Select Done.
Locking your Treo
and info
Your Treo includes several features that
protect it from inadvertent use and keep
your information private. You can lock any
of the following features on your Treo XXX:
Keyboard (Keyguard): You can use the
Keyguard feature to disable the keyboard
and all buttons to prevent accidental
presses in your bag or pocket.
Screen: You can disable the screen’s
touch-sensitive feature during an active call
or call alert.
Phone (Phone Lock): You can set your
phone to require a password for making
calls. The built-in security software lets you
make emergency calls even if your phone
is locked.
Tr e o : You can set your Treo to require a
password for viewing any information on
your Treo.
Entries: You can mask or hide entries
marked as private and set your Treo XXX to
require a password for viewing them.
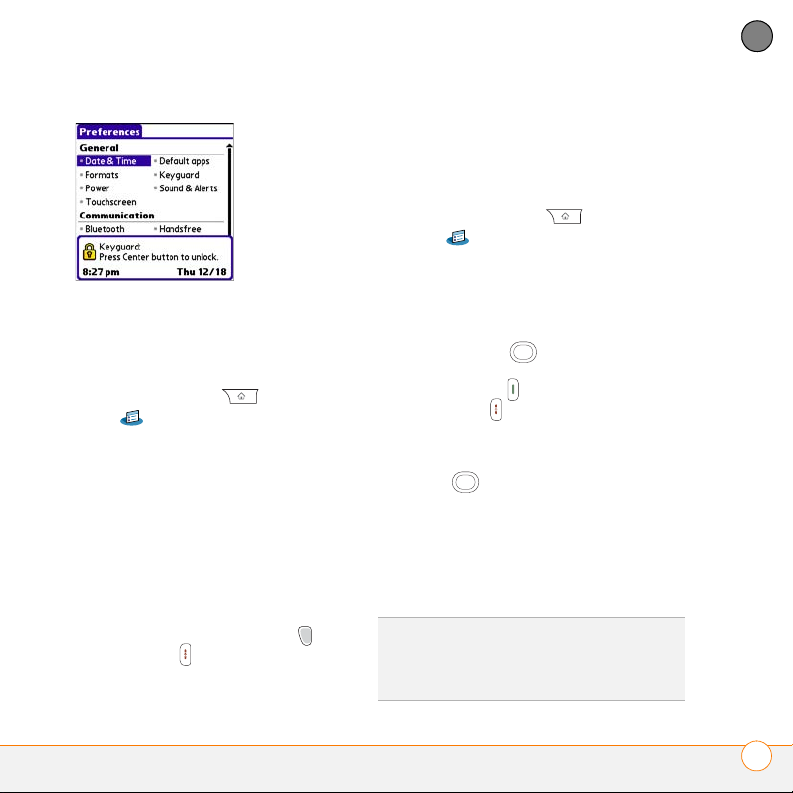
Locking your keyboard (Keyguard)
The Keyguard feature locks the keyboard
so that you don’t accidentally press
buttons or activate items on the screen
while your Treo XXX is in a pocket or bag.
By default, Keyguard turns on whenever
the screen is off. Each time you wake up
the screen, you must turn off Keyguard to
unlock the keyboard and use your
Treo XXX.
To turn off Keyguard, do the following:
1 When the screen is off, press Power/
End to wake up the screen.
2 Press Center to turn off Keyguard.
LOCKING YOUR TREO AND INFO
238
Page 15
YOUR PERSONAL SETTINGS
11
You can change how quickly Keyguard
turns on, or you can disable this feature
altogether. To change the Keyguard
settings, do the following:
1 Press Applications and select
Prefs .
2 Select Keyguard.
3 Select the Auto- Keygu ard pick list, and
then do one of the following:
• Select how quickly you want
Keyguard to turn on: When power is
turned off, 5 seconds after power
off, or 30 seconds after power off.
• Select Disable to completely disable
the Keyguard feature until you turn it
on again by pressing
Power/End
when the screen is on.
Option +
4 Select Done.
Locking your screen
You can set your Treo XXX to automatically
lock the screen’s touch-sensitive features
in certain situations.
1 Press Applications and select
Prefs .
2 Select Keyguard.
3 Check any of the following boxes:
Incoming calls received: Disables the
screen when the phone rings. You must
use the 5-way to select the
onscreen Answer and Ignore buttons,
or press Send to answer the call or
Power/End to ignore the call.
On a call: Disables the screen after you
answer a call. You must use the
5-way to select the onscreen
buttons during the call. Use this setting
to avoid accidentally pressing onscreen
buttons while you’re holding your
Treo XXX near your ear to speak.
4 Select Done.
DID YOU KNOW
disable the touchscreen during a call, the
touchscreen is automatically enabled again
after you end the call.
?
When you check the boxes to
CHAPTER
LOCKING YOUR TREO AND INFO
239
Page 16
YOUR PERSONAL SETTINGS
11
CHAPTER
Locking your phone (Phone Lock)
You can lock your SIM card to prevent
unauthorized calls and use of other
wireless features. When your SIM card is
locked, you must enter the correct PIN
code to unlock it, even if you move it to a
different phone. You can still make
emergency calls when your phone is
locked, however.
IMPORTANT If your SIM card is locked
and you enter the wrong PIN more than
three times, you must call AT& T your
network operator for your unique PIN
unlock key (PUK) to unlock your SIM card.
5 When prompted, enter the current PIN
and select OK. (Unless you changed
your PIN, enter the default PIN,
provided with AT& T your
account materials.)
6 If you want to change the PIN, select
Change PIN, enter a new PIN, and then
select OK. Repeat this step to verify the
new PIN.
7 If your SIM card supports fixed number
dialing (FDN), select Advanced and
check the Enable Fixed Number
Dialing box to restrict dialing to the
numbers in your FDN list. When
prompted, enter your PIN2 and then
select OK.
TIP
When Phone Lock is turned on, other
people can still see the info on your Treo XXX,
but they cannot make or receive phone calls
or use the other wireless features without
your password.
8 Turn your phone off to activate the
phone lock feature.
9 To turn your phone on again, press and
hold Power/ End , enter your PIN, and
then select OK to unlock your Treo XXX.
1 Press Phone .
2 Press Menu .
3 Select Options, and then select Phone
Lock.
TIP
To manage your FDN list, press
Applications, select SIM Book, press Menu,
and then select Modify FDN from the
Options menu.
4 Check the Lock SIM box.
LOCKING YOUR TREO AND INFO
240
Page 17
YOUR PERSONAL SETTINGS
11
Your SIM card locks again when you turn
off your Treo XXX and then turn it back on.
To disable the current Phone Lock
settings:
1 Press Phone .
2 Press Menu .
3 Select Options, and then select Phone
Lock.
4 Uncheck the Lock SIM box.
5 Enter your PIN code.
6 Select OK.
Locking your Treo
To protect your personal information, you
can lock your Treo XXX so that you need to
enter your password to access any of your
information or to use any of the features on
your Treo, including the phone. You can,
however, still make emergency calls when
your Treo is locked.
IMPORTANT If you lock your Treo, you
must enter the exact password to unlock
it. If you forget the password, you need to
perform a hard reset to resume using your
Treo. Performing a hard reset while your
Treo is password locked deletes all the
entries in your Treo and completely
reformats it. If you use password
protection in Palm Desktop software, you
must remember your password to restore
your info. However, if you do not use
password protection in Palm Desktop
software, you can restore all previously
synchronized info the next time you sync
(see Synchronizing information—the
basics).
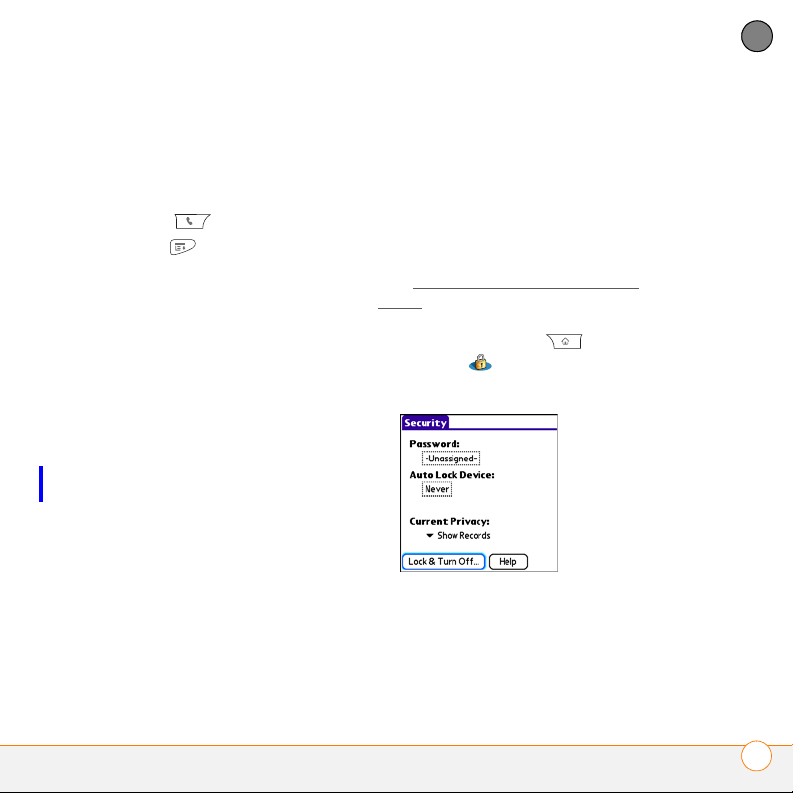
1 Press Applications and select
Security .
2 Select the Password box.
3 Assign a password and a password hint.
4 Select the Auto Lock Device box.
5 When prompted, enter your password
and select OK.
6 Select one of the following options:
CHAPTER
LOCKING YOUR TREO AND INFO
241
Page 18

YOUR PERSONAL SETTINGS
11
CHAPTER
Never: Prevents your Treo from locking
automatically.
TIP
After you create a password, you can lock
your system manually. Press Applications
and select Security. Select Lock & Turn Off,
and then select Off & Lock.
TIP
To change your password, select the
Password box, enter your current password,
and then enter the new password. To delete
your password, select the Password box and
then select Unassign.
Working with private entries
On power off: Locks your Treo when
you turn off the screen, or when it
shuts off with the Auto-off feature.
At a preset time: Locks your Treo at a
specific time of day.
After a preset delay: Locks your Treo
after a period of inactivity.
7 Select OK.
8 Do one of the following:
• Select Lock & Turn Off to lock your
Treo immediately.
• Press Applications to accept
your settings and continue using your
Treo.
In most applications, you can mark
individual entries as private. All private
entries remain visible and accessible until
you select the Security setting. You have
three Security setting options:
Show Records: Private records are visible.
Hide Records: Private entries do not
appear anywhere in the application.
Mask Records: Private entries are
replaced with a gray bar that lets you know
the entry is there but keeps it from being
legible.
After you enable the mask or hide setting,
any entries marked as private are
immediately hidden or masked. If you
LOCKING YOUR TREO AND INFO
242
Page 19

YOUR PERSONAL SETTINGS
11
define a password, you must enter it to
display private entries. If you do not define
a password, you (or anyone else) can
reveal private entries without a password.
1 Open the entry that you want to mark
private.
2 Select Details.
3 Check the Private box.
4 Select OK.
Hiding or masking all private entries
Make sure the entries you want to mask or
hide are marked private.
1 Press Applications and select
Security .
2 Select the Current Privacy pick list and
select either Hide Records or Mask
Records.
3 If prompted for your password, enter it
and then select OK.
Viewing all private records
You can reveal all the entries you’ve hidden
or masked.
1 Press Applications and select
Security .
2 Select the Current Privacy pick list and
select Show Records.
3 If prompted for your password, enter it
and then select OK.
Viewing private entries in a specific
application
1 Open the application that contains the
private entries you want to see.
2 Press Menu .
3 Select Options, and then select
Security.
4 Select the Current Privacy pick list and
select Show Records.
5 Select OK.
6 If prompted for your password, enter it
and then select OK.
Security and Palm Desktop software
(Windows)
You can set the Windows version of
®
Desktop software to observe the
Palm
security password for your Treo XXX. If you
forget your password, you cannot view
your information in Palm Desktop. If your
Treo XXX is unlocked, you can change your
password on your Treo XXX, but all entries
CHAPTER
LOCKING YOUR TREO AND INFO
243
Page 20
YOUR PERSONAL SETTINGS
11
CHAPTER
marked as private are deleted. You can
restore your private entries the next time
you sync, and then create a new password.
Follow these steps to recover from a lost
password:
1 Press Applications and select
Security .
2 Select the Password box.
3 Select Lost Password.
1 Press Applications and select
Prefs .
2 Select Owner.
3 If you assigned a password with the
Security application, select Unlock,
enter your password, and then select
OK to continue.
4 Enter the text that you want to appear
in the Owner Preferences screen.
4 Select Ye s .
TIP
If you want additional security for
Palm Desktop files, you may want to
purchase a third-party solution.
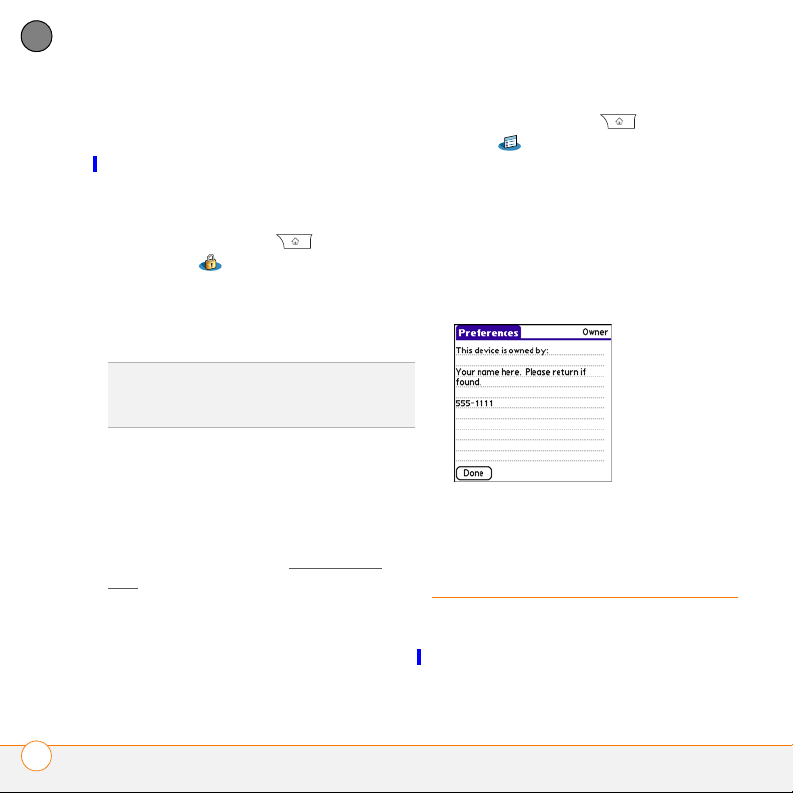
Entering owner information
You can use Owner Preferences to record
information that you want to associate
with your Treo XXX, such as your name,
5 Select Done.
company name, and home phone number.
If you lock your Treo (see Locking your
Tr eo ), the Owner Preferences information
System settings
appears on the screen that requests your
password to unlock it, and you must also
enter your password to change the Owner
Preferences information.
Setting the date and time
By default, your Treo XXX synchronizes the
date, time, and time zone with the AT&T
SYSTEM SETTINGS
244
Page 21

YOUR PERSONAL SETTINGS
11
network when your phone is on and you
are inside a coverage area. Date & Time
Preferences also enable you to manually
set the date, time, and location (time zone)
setting for your Treo XXX.
1 Press Applications and select
Prefs .
2 Select Date & Time.
3 Select the Automatically set pick list
and select one of the following settings:
NOTE The options that appear on the
screen vary based on the setting you
select in step 3.
Date, time and time zone: The date,
time, and time zone are acquired from
your the AT&T network.
Date and time: Lets you set the time
zone manually. The date and time are
acquired from your the AT&T network.
Nothing: Lets you set the date, time,
and time zone manually. No info is
acquired from your the AT&T network.
4 If the Location pick list appears, select
it, and then select a city in your time
zone.
TIP
If a city in the same time zone is not on
the list, select Edit List, select Add, select a
city in your time zone, and then select OK. If
necessary, modify any of the settings in the
Edit Location dialog box, and then select OK.
5 If the Date and Time fields appear,
select the Date field and select the
date, and then select the Time field and
select the time.
6 Select Done.
TIP
You can also set time zones for Calendar
events. See Creating an event
.
CHAPTER
SYSTEM SETTINGS
245
Page 22

YOUR PERSONAL SETTINGS
11
CHAPTER
Optimizing power settings
Power Preferences enable you to adjust
settings to maximize the battery’s
performance.
1 Press Applications and select
Prefs .
2 Select Power.
3 Set any of the following preferences:
Brightness: Sets the intensity of the
screen backlight. Drag the slider or
press Left and Right to adjust the
brightness level.
On a call, dim (or turn off) backlight
after: Determines how long the
backlight stays on at normal intensity
during a phone call. After the specified
time period, the backlight dims (or turns
off) to conserve power during a long
phone call.
Beam Receive: Determines whether
your Treo is ready to receive
information over an infrared beam. If
you leave this option turned off, you
must return to this screen to turn on
this option the next time you want to
receive a beamed item.
Power Save Mode: When this option is
selected, after the specified time
period, the backlight dims to one level
above off to conserve power during a
long phone call or when MP3 is playing
in the background.
4 Select Done.
Auto-off after: Determines how long
your screen stays on during a period of
inactivity. When there is no interaction
with the keyboard or screen for the
TIP
You can also access the brightness setting
by pressing Option + P. To temporarily set
the backlight to the preset low setting, press
Option + Menu.
specified time period, your Treo XXX
turns off automatically.
SYSTEM SETTINGS
246
Page 23
YOUR PERSONAL SETTINGS
11
Connecting to a VPN
If you want to use your Treo to access your
corporate email account or other files on
your corporate server, you may need to set
up a virtual private network (VPN) on your
Treo. A VPN enables you to log in to your
corporate server through the company’s
firewall (security layer). You need a VPN
client on your Treo XXX if your Treo and
your company’s server are located on
opposite sides of the firewall.
Check with your company’s system
administrator to see if a VPN is required for
accessing the corporate server. If a VPN is
required, you must purchase and install a
third-party VPN client on your Treo XXX to
use this feature.
TIP
For information about third-party VPN
client software, visit g
go.palm.com/treoxxx/.
1 Install your third-party VPN client. See
Installing applications
2 Press Applications and select
Prefs .
o.palm.com/treoxxx-att/
for details.
3 Select VPN.
4 Enter the settings provided by your
corporate system administrator.
CHAPTER
CONNECTING TO A VPN
247
Page 24

YOUR PERSONAL SETTINGS
11
CHAPTER
CONNECTING TO A VPN
248
Page 25

CHAPTER
Common questions
Although we can’t anticipate all the questions you might have,
this chapter provides answers to some of the most commonly
asked questions. For additional information and answers to
other common questions, visit g
go.palm.com/treoxxx/.
o.palm.com/treoxxx-att/
12
Page 26

In this chapter
Upgrading. . . . . . . . . . . . . . . . . . . . . . . . . . . . . . . . . . . . . . . . . . . . . 251
Desktop software installation. . . . . . . . . . . . . . . . . . . . . . . . . . . . . . 253
Resetting your Treo . . . . . . . . . . . . . . . . . . . . . . . . . . . . . . . . . . . . . 253
Replacing the battery . . . . . . . . . . . . . . . . . . . . . . . . . . . . . . . . . . . . 255
Screen . . . . . . . . . . . . . . . . . . . . . . . . . . . . . . . . . . . . . . . . . . . . . . . 257
Synchronization . . . . . . . . . . . . . . . . . . . . . . . . . . . . . . . . . . . . . . . . 258
Phone. . . . . . . . . . . . . . . . . . . . . . . . . . . . . . . . . . . . . . . . . . . . . . . . 265
Hands-free devices . . . . . . . . . . . . . . . . . . . . . . . . . . . . . . . . . . . . . 267
Email . . . . . . . . . . . . . . . . . . . . . . . . . . . . . . . . . . . . . . . . . . . . . . . . 268
Messaging . . . . . . . . . . . . . . . . . . . . . . . . . . . . . . . . . . . . . . . . . . . . 269
Web . . . . . . . . . . . . . . . . . . . . . . . . . . . . . . . . . . . . . . . . . . . . . . . . . 270
Camera. . . . . . . . . . . . . . . . . . . . . . . . . . . . . . . . . . . . . . . . . . . . . . . 273
Making room on your Treo . . . . . . . . . . . . . . . . . . . . . . . . . . . . . . . . 274
Third-party applications . . . . . . . . . . . . . . . . . . . . . . . . . . . . . . . . . . 275
Error messages . . . . . . . . . . . . . . . . . . . . . . . . . . . . . . . . . . . . . . . . 277
Page 27

COMMON QUESTIONS
12
Upgrading
If you experience problems with your
®
Palm
Tr eo™ XXX smart device after
performing the upgrade steps in this guide,
you may have incompatible applications or
settings that were not quarantined during
the installation process. These
incompatible applications or settings can
lead to numerous issues, including system
resets and freezes. If you experience a
problem after upgrading, follow the steps
in this section to remove the incompatible
apps from your Treo XXX and to transfer
your other info to your new Treo XXX.
NOTE If you have trouble installing a
third-party application, contact the
developer for assistance.
We recommend that you do not install
apps that do any of the following:
• Modify phone functions, such as
ringtones, dialing, or caller ID
• Replace organizer features, such as
Contacts or Calendar
• Set data connection features, such as
activating or ending data connections
• Provide web-clipping features, such as
PQA files
• Provide instant messaging features
If you want to continue using these types
of applications, please contact the
third-party developer for software updates
and for info about compatibility with your
Treo XXX.
WINDOWS ONLY
1 On your computer, click
Start>Programs>Palm>Safe
HotSync.
2 Follow the instructions on the screen.
3 Locate the Old_Apps folder on your
computer. This folder is usually located
inside one of the following folders:
C:\Program Files\Palm\
C:\Program Files\palmOne\
C:\Program Files\Handspring\
4 To help you identify the app that is
causing the problem, move one app at a
time from the Old_Apps folder to the
Backup folder, and then sync.
CHAPTER
UPGRADING
251
Page 28
COMMON QUESTIONS
12
CHAPTER
If the problem recurs, delete the last
app you installed and report the
problem to its developer.
5 Repeat step 4 for each of the apps in
the Old_Apps folder.
NOTE If you have trouble moving apps
from the Old_Apps folder to the Backup
folder, or determining which files to move,
try reinstalling the app using the original
third-party developer files.
3 Confirm that your copy includes the
Backup subfolder and that all the files in
the original Backup subfolder are also in
the copy of the Backup subfolder.
4 Delete all files from the original Backup
subfolder.
5 Perform a hard reset on your Treo XXX.
See Resetting your Treo
for instructions.
6 Sync your Treo XXX with your new
desktop software and be sure to select
your existing device name from the
User list.
TIP
Need more info on the Backup folder? See
What is the backup folder?
.
7 To help you identify the app that is
causing the problem, move one
third-party app from the copy of the
MAC ONLY
1 Locate your user folder on your
computer.
NOTE Your user folder name is the same
as your device name and is usually found in
this location: <Mac hard drive> : Users :
<your Mac username> : Documents :
Backup subfolder to the original
Backup subfolder, and then sync.
If the problem recurs, delete the last
app you installed and report the
problem to its developer.
8 Repeat step 7 for each of the third-party
apps in the copy of the Backup folder.
Palm : Users
2 Select your user folder and Option-drag
it to your Mac desktop to make a copy
of that folder.
252
UPGRADING
Page 29
COMMON QUESTIONS
12
Desktop software
installation
If you are having trouble installing the
desktop software, you may have the
wrong version of the software or some of
your computer’s resources may be
unavailable.
TIP
The Palm Software Installation CD installs
software that lets you synchronize using
®
Palm
Desktop software or Microsoft Outlook
for Windows. If you want to synchronize
using a different personal information
manager (PIM), you must install a third-party
solution. Contact the PIM’s author or vendor
to learn if software is available for your
Treo XXX.
Follow these steps to retry the installation.
1 Make sure your computer profile
includes administrator rights to install
software. In large organizations, these
are usually granted by the system
administrator.
2 Restart your computer.
3 Quit any active applications, including
virus scanners and Internet security
applications.
4 Make sure you’re installing the software
from the Palm Software Installation CD
that came with your new Treo XXX.
Other versions of the desktop software
may not work with your Treo XXX.
5 Insert the Palm Software Installation CD
to restart the installation.
IMPORTANT Always use the same
language for your Treo, your computer
operating system, and your desktop
software. Otherwise, you may lose
information or have difficulty with
synchronization. Support is not provided
for mismatched language setups.
Resetting your Treo
Performing a soft reset
Performing a soft reset is similar to
restarting a computer. If your Treo is not
responding or you have trouble
synchronizing with your computer, a soft
CHAPTER
DESKTOP SOFTWARE INSTALLATION
253
Page 30

COMMON QUESTIONS
12
CHAPTER
reset may help. All your info is retained
when you perform a soft reset.
1 Remove the battery from your
Treo XXX, and then reinsert it.
Don’t know how? See Replacing the
battery.
NOTE The reset begins when you reinsert
the battery.
2 At the end of the soft reset, Date &
Time Preferences appears. Select
Done.
Performing a system reset
A system reset, also called a safe or warm
reset, tells your Treo to stop what it’s
doing and start over again without loading
any system extras. If your Treo loops or
freezes during or after a soft reset, a
system reset may help. Performing a
system reset can release your Treo from
an endless loop so that you can uninstall a
third-party application that may be causing
the looping.
1 Remove the battery from your
Treo XXX, and then reinsert it.
Don’t know how? See Replacing the
battery.
2 When the Palm logo appears, press and
hold Up until the black status bar at
the bottom of the screen fills and
disappears, and then release Up .
3 Delete the third-party application that
you suspect is causing the problem.
4 Perform a soft reset. The wireless
features of your Treo XXX are not
available until you complete this step.
Performing a hard reset
A hard reset erases all information and
third-party software on your Treo. Never
perform a hard reset without first trying a
soft reset and a system reset and trying to
resolve third-party software issues. (See
Third-party applications
for suggestions on
diagnosing third-party software issues.)
After a hard reset, you can restore
previously synchronized information the
next time you sync.
IMPORTANT If you set a password on
your Treo XXX, performing a hard reset
reformats your Treo XXX. This is a more
severe form of a hard reset, which
RESETTING YOUR TREO
254
Page 31

COMMON QUESTIONS
12
removes all your information, and restores
your formats, preferences, and other
settings to the factory default settings.
TIP
Some third-party applications do not
create a backup on your computer when you
synchronize. If you perform a hard reset, you
may lose data in these applications and you
will need to reinstall the application after the
hard reset. Please contact the application’s
developer to find out which data is backed up
during synchronization.
1 Remove the battery from your
Treo XXX, and then reinsert it.
Don’t know how? See Replacing the
battery.
2 When the Palm logo appears, press and
hold Power/End until the black
status bar at the bottom of the screen
fills and disappears, and then release
Power/End .
3 When the Erase all data? prompt
appears, press Up to confirm the
hard reset.
IMPORTANT If a Reformatting in
progress message appears, do not touch
your Treo XXX until the process is
complete. This may take up to 10 minutes.
4 When the language selection screen
appears, select the same language you
selected for your desktop software.
IMPORTANT Always use the same
language for your Treo, your computer
operating system, and your desktop
software. Otherwise, you may lose
information or have difficulty with
synchronization. Support is not provided
for mismatched language setups.
5 (Optional) If you want to confirm that
the hard reset was successful, press
Applications and select
HotSync . If you see your device
name in the upper-right corner, the hard
reset was not successful.
Replacing the battery
Your Treo XXX comes with a replaceable
battery. Be sure to use a replacement
battery that is recommended or sold by
Palm and is compatible with the Treo XXX.
CHAPTER
REPLACING THE BATTERY
255
Page 32

COMMON QUESTIONS
Battery door
Battery contacts
Treo XXX
contacts
12
CHAPTER
CAUTION Failure to use the proper
battery may result in a risk of personal
injury or product damage, and it voids your
Treo XXX warranty.
battery compartment, insert the new
battery into the compartment at a
45-degree angle, and then press it into
place.
1 Press Power/End to turn off the
screen.
2 Press the Battery door near the top
where the door and camera sections
meet and slide it downward to remove
it from your Treo XXX.
IMPORTANT Use the battery that came
with your Treo XXX. Do not use a battery
from another Treo model in your Treo XXX.
Similarly, do not use the Treo XXX battery
in another Treo model. Using a battery that
is designed for another Treo model can
3 Place a finger in the notch next to the
battery, and lift up the old battery at a
45-degree angle to remove it from the
compartment.
4 Align the metal contacts on the new
battery with the contacts inside the
damage your Treo XXX.
5 Slide the battery door onto the back of
the Treo XXX until it clicks into place.
6 Connect your Treo to the charger or
sync cable to charge the new battery.
REPLACING THE BATTERY
256
Page 33

COMMON QUESTIONS
12
TIP
Be sure to dispose of your old battery
properly. In some areas, disposal in household
or business trash is prohibited.
Screen
The screen appears blank
1 When a call lasts longer than the limit
specified in Power Preferences, the
screen dims automatically. In certain
lighting conditions, the screen may
appear blank when this occurs.
Press any key except Power/End to
restore the screen to normal brightness.
Pressing Power/End hangs up the call.
2 When a period of inactivity lasts longer
than the limit specified in Power
Preferences, the screen turns off. Press
and release Power/E nd to wake up
the screen.
3 Look closely at the screen. If you can
see a dim image, try adjusting the
screen brightness (see Adjusting the
brightness).
4 If the screen is still blank, perform a soft
reset (see Performing a soft reset
).
5 If the problem persists, connect your
Treo to the charger (see Charging the
battery) and perform a soft reset again.
6 If that doesn’t work, perform a hard
reset (see Performing a hard reset
TIP
To find carrying cases that protect the
screen, and other useful accessories, visit
g
o.palm.com/treoxxx-attgo.palm.com/treoxxx/
.
).
The screen doesn’t respond accurately to
taps or it activates wrong features
1 Press Applications .
2 Use the 5-way to select Prefs .
3 Use the 5-way to select
Touchscreen.
4 Follow the onscreen instructions to
align the screen.
5 Select Done.
6 If the problem persists, check for dirt
between the screen and the edge of the
Treo XXX.
7 If you’re using a screen protector, make
sure that it is properly installed.
CHAPTER
SCREEN
257
Page 34

COMMON QUESTIONS
12
CHAPTER
There’s a blinking bell in the upper-left
corner
The blinking bell in the upper-left corner of
the screen is the Alert icon. It appears
when you have alarms or messages that
you haven’t acknowledged.
1 Press and hold Center or tap the
blinking bell with your stylus.
2 When the list of pending alerts appears,
do either of the following:
• Select the text of the alert to view the
item. The item stays in the list.
• Check the box next to an alert to clear
it from the list, and then select Done.
your info by synchronizing with your
Treo XXX. To make sure you always have
an up-to-date backup of your info,
synchronize frequently.
This section describes synchronization
between your Treo and a desktop
computer running Palm Desktop software.
You can also synchronize the information
on your Treo using third-party applications.
See the documentation for the third-party
application for information on features and
configuration.
Before you attempt to synchronize, make
sure you’ve installed the desktop
synchronization software from the Palm
Software Installation CD.
Synchronization
Synchronization backs up the information
TIP
Every device needs a unique name. Never
synchronize more than one device to the
same device name on your computer.
from your Treo onto your computer and
vice versa. If you ever need to perform a
hard reset or otherwise need to erase all
your information on your Treo XXX, you can
synchronize your Treo XXX with your
computer to restore the info. Similarly, if
your computer crashes and your Palm
I can’t find my user folder
Windows: If your device name is one
word, your user folder name is the first six
characters of your device name. If your
device name is two words, your user folder
name consists of the first six characters of
Desktop info is damaged, you can recover
SYNCHRONIZATION
258
Page 35

COMMON QUESTIONS
12
the second word of your device name,
followed by the first letter of the first word.
For example, if your device name is John
Smith, your user folder is named SmithJ.
Your user folder is usually located inside
one of the following folders:
C:\Program Files\Palm\
C:\Program Files\palmOne\
C:\Program Files\Handspring\
Mac: Your user folder name is the same as
your device name and is usually found in
this location: <Mac hard drive> : Users :
<your Mac username> : Documents :
Palm : Users
What is the backup folder?
The Backup folder is located inside your
user folder (see I can’t find my user folder
During synchronization, the HotSync
®
manager puts a copy of most of your info
and applications into the Backup folder.
(Some third-party apps do not put a copy
into the Backup folder.) The next time you
sync, the HotSync manager compares the
contents of the Backup folder to the
contents of your Treo XXX, and then
restores any missing info or applications.
If an app that you deleted reappears on
your Treo XXX, try deleting the app from
your Backup folder.
Palm Desktop does not respond to a sync
attempt
1 Make sure that the USB sync cable is
securely connected to the USB port on
your computer and on the bottom of
your Treo XXX (see Synchronizing
information—the basics).
TIP
If you’re having trouble trying to sync
using an IR or Bluetooth
connection, try using the USB sync cable
instead. If this solves the problem, check your
IR or Bluetooth settings (see Synchronizing
information—advanced).
®
wireless technology
).
2 Make sure that the HotSync manager is
running:
Windows: Right-click HotSync
manager in the taskbar in the
lower-right corner of your computer
screen, and make sure that Local USB
is checked. If you don’t see the
HotSync manager icon, click Start,
select Programs, select Palm, and then
select HotSync manager.
CHAPTER
SYNCHRONIZATION
259
Page 36

COMMON QUESTIONS
12
CHAPTER
discoloration. Carefully clean the
connector by dipping a cotton swab in
some rubbing alcohol and gently wiping
the metal contacts on the connector.
Mac: Find the Palm folder on your Mac
hard drive. Double-click the HotSync
manager icon in the Palm folder. In
the Connection Settings panel, set the
Local Setup port to Palm USB.
3 Synchronize. If the synchronization is
successful, you do not need to
complete the remaining steps.
4 Perform a soft reset (see Performing a
soft reset).
5 Synchronize. If the synchronization is
successful, you do not need to
complete the remaining steps.
6 If problems persist and you’re
synchronizing through a USB hub, try
connecting the sync cable to a different
USB port or directly to your computer’s
built-in USB port.
7 Synchronize. If the synchronization is
successful, you do not need to
complete the remaining steps.
8 Check the multi-connector on the
bottom of your Treo XXX for debris or
Try to sync again.
9 Check the connector on the USB sync
cable for integrity and cleanliness. Make
sure the pins on the connector are
straight, protruding, and not damaged. If
the cable appears to be damaged, stop
here and locate another USB sync
cable.
WINDOWS ONLY Uninstall
10
Palm Desktop software. Click Start,
select Settings, select Control Panel,
select Add or Remove Programs,
select Palm Desktop software, and
then click Change/Remove.
NOTE Mac computers do not provide an
option for uninstalling Palm Desktop
software. Contact Technical Support if the
problem persists after you complete step 7.
11 Restart your computer.
12 Reinstall Palm Desktop software from
the Palm Software Installation CD that
came with your Treo XXX.
SYNCHRONIZATION
260
Page 37

COMMON QUESTIONS
12
Synchronization starts but stops without
finishing
TIP
The HotSync Log can give you information
about your most recent synchronization.
Windows: Right-click the HotSync manager
icon in the taskbar in the lower-right corner of
your computer screen, and then select View
Log.
Mac: Open Palm Desktop software. From the
HotSync menu, select View Log.
If you upgraded from a previous Palm OS
device or received a system error, such as
Sys0505, there may be conflicts with
software on your Treo XXX.
1 Locate your Backup subfolder and
rename the folder (for example,
BackupOld).
Windows: C:\Program
Files\Palm\<device name>
Mac: <Mac hard drive> : Applications
: Palm : Users : <device name>
NOTE Can’t find a Palm folder in Program
Files? Then look for a palmOne or
Handspring folder instead. For more info,
see I can’t find my user folder
.
2 Synchronize.
3 If the problem is resolved, begin
reinstalling your third-party applications
one at a time by double-clicking a single
file in the original Backup subfolder that
you renamed, and sync after each
application you install. If the problem
recurs, delete the last application you
installed and report the problem to its
developer.
WINDOWS ONLY If the Windows New
4
Hardware Wizard appears, the
®
synchronization process may be timing
out before the wizard completes its job.
Follow all instructions in the New
Hardware Wizard, and then sync again.
WINDOWS ONLY Uninstall
5
Palm Desktop software. Click Start,
select Settings, select Control Panel,
select Add or Remove Programs,
select Palm Desktop software, and
then click Change/Remove.
NOTE Mac computers do not provide an
option for uninstalling Palm Desktop
software. Contact Technical Support if the
problem persists after you complete
step 3.
CHAPTER
SYNCHRONIZATION
261
Page 38

COMMON QUESTIONS
12
CHAPTER
6 Restart your computer.
7 Reinstall Palm Desktop software from
the Palm Software Installation CD that
came with your Treo XXX.
Synchronization finishes but info doesn’t
appear where it should
3 Open HotSync manager on your
computer, and make sure the necessary
conduits are set to Synchronize the
files.
NOTE If you need to change the setting to
Synchronize the files, be sure to check
the Set as default box as well.
1 Make sure you’re synchronizing with
4
the intended desktop personal
information manager (PIM). The Palm
Software Installation CD enables you to
choose whether you want to
synchronize with Palm Desktop
software or Microsoft Outlook for
Windows. Reinsert the installation CD
and select Change your
synchronization method if necessary.
If you use a different PIM, you need to
install third-party software to
synchronize. For more information,
consult the company that makes the
PIM.
2 If multiple Palm OS devices are
synchronizing with your computer,
make sure the name of the device you
are synchronizing appears in the User
field on the toolbar of Palm Desktop
software.
WINDOWS ONLY Uninstall
Palm Desktop software. Click Start,
select Settings, select Control Panel,
select Add or Remove Programs,
select Palm Desktop software, and
then click Change/Remove.
MAC ONLY Mac computers do not
provide an option for uninstalling Palm
Desktop software. Contact Technical
Support if the problem persists after
you complete step 3.
5 Restart your computer.
6 Reinstall Palm Desktop software from
the Palm Software Installation CD that
came with your Treo XXX.
7 (Outlook only) If you’re trying to
synchronize offline, set your Outlook
Calendar, Contacts, Notes, and Tasks to
be available offline.
SYNCHRONIZATION
262
Page 39

COMMON QUESTIONS
12
TIP
Outlook subfolders and public folders are
not accessible with the included software.
You may want to use a third-party solution
instead.
TIP
(Outlook only) If you want to sync your
info with a global Exchange Address Book,
you must copy the addresses to your local
Contacts list in Outlook (right-click the
addresses and select Add to Personal
Address Book).
TIP
For more info on Outlook conduits,
right-click the HotSync manager icon in the
taskbar, select Custom, select an app with
Outlook in its name, and then select Help.
I have duplicate entries in Microsoft
Outlook after I sync
1 Open Microsoft Outlook and delete the
duplicate entries.
2 On your computer, go to the application
with duplicate entries and manually
enter any info you added to your
Treo XXX since the last time
you synchronized.
3 Right-click HotSync manager in the
taskbar and select Custom.
4 Select an application that has duplicate
entries and also has Outlook in its
name.
5 Click Change.
6 Select Desktop overwrites handheld,
and then click OK.
7 If more than one application has
duplicate entries, repeat steps 4
through 6 for each application with
duplicates.
8 Click Done.
9 Synchronize your Treo XXX and your
computer.
My appointments show up in the wrong
time slot after I sync
If you create an appointment in the wrong
time zone (that is, your desktop was set to
the wrong time zone), it shows up in the
wrong time zone on your Treo. To be safe,
enable local network time and avoid
assigning time zones to your
appointments.
If you’re using Microsoft Outlook:
1 Make sure that you installed the
Microsoft Outlook conduit that came
CHAPTER
SYNCHRONIZATION
263
Page 40

COMMON QUESTIONS
12
CHAPTER
with your Treo XXX. If you’re not sure
whether this software is installed,
reinstall Palm Desktop software from
the Palm Software Installation CD that
came with your Treo XXX.
2 Open Microsoft Outlook and correct the
wrong entries.
3 On your computer, manually enter any
Calendar info you added to your
Treo XXX since the last time you
synchronized.
4 Click HotSync manager in the
taskbar and select Custom.
5 Select an application that has both
Calendar and Outlook in its name.
6 Click Change.
7 Select Desktop overwrites handheld,
and then click OK.
8 Synchronize your Treo XXX and your
computer.
9 Repeat steps 4 through 6 to open the
Calendar Change HotSync Action dialog
box again.
10 Make sure Synchronize the files is
selected and Set as default is checked,
and then click OK.
You should now be able to assign time
zones to your events without encountering
this problem.
If you’re using Palm Desktop software:
1 On your Treo XXX, press
Calendar .
2 Press Menu .
3 Select Options, and then select
Preferences.
4 Uncheck the New events use time
zones box (if it’s checked).
5 On your computer, open Palm Desktop
software and correct the wrong entries.
6 On your computer, manually enter any
Calendar info you added to your
Treo XXX since the last time
you synchronized.
7 Click HotSync manager in the
taskbar and select Custom.
8 Select Calendar.
9 Click Change.
sktop overwrites handheld,
lect De
10 Se
and then click OK.
11 Synchronize your Treo XXX and your
computer.
SYNCHRONIZATION
264
Page 41

COMMON QUESTIONS
12
12 Repeat steps 7 through 9 to open the
Calendar Change HotSync Action dialog
box again.
13 Make sure Synchronize the files is
selected and Set as default is checked,
and then click OK.
You should now be able to assign time
zones to your events without
encountering this problem.
IMPORTANT To avoid this problem in the
future, do not assign time zones to your
events. Palm Desktop software does not
support time zones.
The text of my memos is truncated after I
sync
If you use your desktop software to create
a memo that is longer than 4,096
characters, the excess characters are
truncated when you transfer the memo to
your Treo XXX.
Phone
Signal strength is weak
Become familiar with low coverage areas
where you live, commute, work, and play.
Then you will know when to expect signal
strength issues. You can check signal
strength by looking at the Signal Strength
icon in the title bar of the Main tab in
the Phone application. The stronger the
signal, the more bars that appear. If you are
outside a coverage area, no bars appear.
1 If you’re standing, move about ten feet
in any direction.
2 If you’re in a building, move near a
window. Open any metal blinds.
3 If you’re in a building, move outdoors or
to a more open area.
4 If you’re outdoors, move away from
large buildings, trees, or electrical wires.
5 If you’re in a vehicle, move your Treo so
that it’s close to a window of your
vehicle.
CHAPTER
PHONE
265
Page 42

COMMON QUESTIONS
12
CHAPTER
My Treo won’t connect to the mobile
network
1 Try the suggestions about signal
strength described in Signal strength is
weak.
2 Turn off your phone and turn it on again
(see Turning your phone on and off
3 Remove the SIM card and reinsert it
(see Inserting the SIM card and battery
4 Perform a soft reset (see Performing a
soft reset).
The other person hears an echo
• Try decreasing the volume on your Treo
to avoid coupling or feedback on the
other person’s end. This applies to both
the speakerphone and the earpiece.
• Position the earpiece closer to your ear
to prevent sound leaking back to the
microphone. Keep your hand away from
the microphone hole, which is on the
bottom right side of the Treo XXX.
• If you’re using the speakerphone
feature with your Treo lying on a flat
surface, try turning the Treo face down
(screen facing the surface).
I hear my own voice echo
Ask the person on the other end of the call
to turn down the volume on his or her
phone or to hold the phone closer to his or
her ear.
My voice is too quiet on the other end
).
• Be sure to place the bottom of the Treo,
or the hands-free microphone, close to
).
your mouth.
• Check the Signal Strength icon in
the title bar of the Main tab in the Phone
application. If the signal is weak (few
bars are displayed), try the suggestions
about signal strength described in
Signal strength is weak
I hear static or interference
Check the Signal Strength icon in the
title bar of the Main tab in the Phone
application. If the signal is weak (few bars
are displayed), try the suggestions about
signal strength described in Signal strength
is weak.
If you’re using a Bluetooth
device, see I hear static or interference
.
®
hands-free
266
PHONE
Page 43

COMMON QUESTIONS
12
when using my Bluetooth
hands-free device.
My phone seems to turn off by itself
If a system error and reset occur, the
Treo XXX automatically turns the phone on
if it was on before the reset. However, if
the Treo XXX can’t determine if your phone
was on before the reset, the phone does
not automatically turn on (see Turning your
phone on and off). If the problem persists
and you’re using third-party applications,
see Third-party applications
for additional
suggestions.
My Treo makes or answers calls when it’s
in a bag or pocket
Items in your bag or pocket may be
pressing the onscreen Answer button or
otherwise activating screen items. If this
happens, be sure to press Power/End
to turn off the screen before placing your
Treo in a bag or pocket. You may also want
to disable the screen’s touch-sensitive
feature during incoming calls (see Locking
your screen).
TIP
To find carrying cases that can help prevent
your Treo XXX from making calls, as well as
other useful accessories, visit g
treoxxx-attgo.palm.com/treoxxx/.
o.palm.com/
Hands-free devices
TIP
Bluetooth range is up to 30 feet in
optimum environmental conditions.
Performance and range may be affected by
physical obstacles, radio interference from
nearby electronic equipment, and other
factors.
I can’t make or receive calls using a
Bluetooth
Confirm all the following:
• The Bluetooth device is compatible with
• Press Applications and select
®
hands-free device
your Treo XXX. Go to g
o.palm.com/
treoxxx-att/go.palm.com/treoxxx/ for a
list of compatible devices.
Bluetooth . Make sure the
Bluetooth setting is set to On.
CHAPTER
HANDS-FREE DEVICES
267
Page 44

COMMON QUESTIONS
12
CHAPTER
• You have already formed a partnership
between your Treo XXX and your
hands-free device, and the hands-free
device appears in the Trusted Devices
list. (See Connecting to a Bluetooth
hands-free device.)
• Your hands-free device is charged and
turned on.
• Your Treo is within range of the
hands-free device.
If the problem persists, turn the Bluetooth
setting to Off and then turn it on again. If it
still persists, create a new partnership with
the hands-free device (see Connecting to a
Bluetooth® hands-free device).
I hear static or interference when using
my Bluetooth hands-free device
• Try moving your Treo closer to the
hands-free device. Audio quality
degrades as the distance between your
Treo and hands-free device increases.
• If the problem persists, turn the
Bluetooth setting to Off and then turn it
back on again. If it still persists, create a
®
new partnership with the hands-free
device (see Connecting to a Bluetooth
hands-free device).
TIP
For best performance, keep your
Bluetooth hands-free device and your phone
on the same side of your body.
Some features of my Bluetooth
hands-free device don’t work with my
Tr e o
• Check the Palm compatibility list at
o.palm.com/treoxxx-att/go.palm.com/
g
treoxxx/ to ensure that your device is
compatible.
• Check the documentation that came
with your device or the manufacturer’s
website for information specific to
your device.
®
The effective range for a device varies
between manufacturers.
• Confirm that no obstructions, including
Email
your body, are between your Treo and
your hands-free device.
• For troubleshooting info on Xpress Mail,
pressmail.att.com/subscriber.
go to x
268
EMAIL
Page 45

COMMON QUESTIONS
12
• For troubleshooting info on the
Ver saM ail
®
application, see the User
Guide for the VersaMail Application on
your computer.
Windows: Start>Programs>Palm
Mac: Insert the Palm Installation CD
and click the link to the User Guide for
the VersaMail Application in the
Documentation folder.
Messaging
I can’t tell if data services are available
When your phone is on, icons appear in the
title bar in the Main tab in the Phone
application to indicate whether data
services are available and whether a data
connection is active. Make sure that either
of the following icons appears in the title
bar of the Main tab: . If you do not
see either of these icons, data services are
not available in your current location and
you cannot exchange multimedia
messages.
I can’t send or receive text messages
• Make sure your SIM card is inserted
correctly (see Inserting the SIM card
and battery) and your phone is turned on
(see Turning your phone on and off
• Contact AT&T your network operator to
).
verify that your plan includes text
messaging services, that these services
have been correctly activated, and that
they are available at your location. AT&T
Your network operator should be able to
tell you if text messaging services have
been experiencing transmission delays.
Delays can also occur between the time
that a message is sent and the time it is
received.
• Verify with the recipient that the
receiving device can handle text
messages.
• If a text message arrives but does not
display an alert, perform a soft reset
(see Performing a soft reset
).
I can’t send or receive multimedia
messages
• Make sure your phone is turned on (see
Turning your phone on and off
).
CHAPTER
MESSAGING
269
Page 46

COMMON QUESTIONS
12
CHAPTER
• Contact AT&T your network operator to
verify that your plan includes
Web
multimedia messaging services (MMS),
that these services have been correctly
activated, and that they are available at
your location. AT& T Your network
operator should be able to tell you if
multimedia messaging services have
been experiencing transmission delays.
Delays can also occur between the time
that a message is sent and the time it is
received.
• Make sure that either of the following
icons appears in the title bar of the Main
I can’t tell if data services are available
When your phone is on, icons appear in the
title bar in the Main tab in the Phone
application to indicate whether data
services are available and whether a data
connection is active. Make sure that either
of the following icons appears in the title
bar of the Main tab: . If you do not
see either of these icons, data services are
not available in your current location and
you cannot connect to the Internet.
tab: . If you do not see either of
these icons, data services are not
available in your current location and
you cannot exchange multimedia
messages.
• Verify with the recipient that the
receiving device can handle multimedia
messages.
• If a message arrives but does not
display an alert, perform a soft reset
(see Performing a soft reset
).
My Treo won’t connect to the Internet
Your Treo XXX supports GPRS and EDGE
wireless data networks. To connect to the
Internet, you must subscribe to and
activate data services with AT &T your
network operator, and you must be in a
location with data coverage.
1 Press and hold Power/End to turn
off your phone. Then press and hold the
same button to turn it back on again.
2 Press Phone and look for either
of the following icons in the title bar of
the Main tab: .
270
WEB
Page 47

COMMON QUESTIONS
12
3 If you see these icons, you are in a data
coverage area. Try connecting to the
Internet again. If you do not see either
of these icons, press
Applications , select Prefs ,
and continue with the following steps.
4 Select Network.
5 Select the Service pick list and select
MEdia Net your wireless service
provider’s data service.
6 Select Connect.
7 If the connection is successful, go to
the web browser. If you still can’t make
a connection, perform a soft reset (see
Performing a soft reset
).
8 If your phone did not turn on
automatically after the soft reset, press
and hold Power/End to turn on your
phone, and try connecting to the
Internet.
9 Contact AT&T your network operator to
verify the following:
• Your subscription plan includes
high-speed data services.
• Data services have been activated on
your account.
• Data coverage is available in your
location.
• There are no data service outages in
your location.
I can’t access a web page
First, make sure you have Internet access:
Open the web browser and try to view
another web page you’ve loaded before.
To ensure you’re viewing the page directly
from the Internet, press Menu , select
Go, and then select Refresh.
If you can view the other web page after
you refresh it but you still can’t access the
page you were originally trying to view, the
page may contain elements that are not
supported by the web browser. These
include Flash, Shockwave, VBScript,
WMLScript, and other plug-ins.
Some websites use a redirector to their
true home page. If the web browser on
your Treo XXX can’t follow the redirector,
try using a desktop browser to see
the landing page of the redirector, and then
enter that address in the web browser on
your Treo XXX.
CHAPTER
WEB
271
Page 48

COMMON QUESTIONS
12
CHAPTER
TIP
Your Treo can open your email application
when you select an email address on a web
page. If nothing happens when you select the
link, make sure your email application is
already set up.
It takes a long time for a web page to load
If it is taking longer than usual to load web
pages, you may have traveled from an
EDGE service area to a GPRS service area.
Although GPRS data service is considered
a high-speed data service, it seems slow if
you are used to EDGE speed.
1 Press Phone and look for either
of the following icons in the title bar of
the Main tab to confirm that you have a
data connection:
.
2 Try opening a different web page to see
if the problem persists.
• If you can open a different web page,
it is likely that the original website is
experiencing problems, and the
problem is not related to your Treo.
• If the problem persists on a different
web page, you may have a problem
with your connection to the AT&T
your network operator network.
3 To be sure there is not a problem with
your connection to the AT&T your
network provider, press and hold
Power/End to turn off your phone.
Then press and hold the same button to
turn it back on again.
4 Try opening the web page again to see
if it loads faster.
An image or map is too small on
my screen
The web browser has two modes:
Optimized and Wide Page. Optimized
Mode resizes all images and page
elements to fit into a single column on the
Treo XXX screen. Switch to Wide Page
Mode to see the full-size image (see
Viewing a web page
).
You may also be able to save the image on
your Treo XXX or an expansion card and
then view the image later on your
computer.
A secure site refuses to permit a
transaction
Some websites don’t support certain
browsers for transactions. Please contact
the site’s webmaster to make sure the site
272
WEB
Page 49

COMMON QUESTIONS
12
allows transactions using Blazer™ web
browser from your Treo.
My Bluetooth DUN connection isn’t
working
Check all of the following:
• Press Applications and select
Bluetooth . Make sure the
Bluetooth setting is set to On.
• You have already formed a partnership
between your Treo XXX and your
computer (see Creating a partnership
between your Treo and your computer).
• The Bluetooth feature on your computer
is turned on.
• Your Treo is within 30 feet of your
computer.
TIP
Bluetooth range is up to 30 feet in
optimum environmental conditions.
Performance and range may be affected by
physical obstacles, radio interference from
nearby electronic equipment, and other
factors.
If the problem persists, try the following:
• Turn the Bluetooth setting to Off and
then turn it back on again.
• Try moving your Treo closer to your
computer. The effective range for a
computer varies between
manufacturers.
• Confirm that no obstructions, including
your body, are between your Treo and
your computer.
• If the problem persists, create a new
partnership with your computer (see
Creating a partnership between your
Treo and your computer).
Camera
Here are some tips for taking good pictures
with the built-in camera:
• Clean the camera’s lens with a soft,
lint-free cloth.
• Take pictures in bright lighting
conditions. Low-light images may be
grainy, due to the sensitivity of the
camera.
CHAPTER
CAMERA
273
Page 50

COMMON QUESTIONS
12
CHAPTER
• Hold the Treo XXX as still as possible.
Try supporting your picture-taking arm
against your body or a stationary object
(such as a wall).
• Keep the subject of the picture still.
Exposure time is longer with lower light
levels, so you may see a blur.
• For best results, verify that you have the
brightest light source coming from
behind you, lighting the subject’s face.
Avoid taking indoor pictures with the
subject in front of a window or light.
• Make sure the subject is at least 18
inches away from the camera to ensure
good focus.
Remember that when you synchronize
your Treo XXX with your computer, your
camera images are stored in the My
Pictures/Palm Photos folder on your hard
drive (see Viewing pictures and videos on
your computer).
Making room on your
Tre o
Keep in mind that your Treo XXX includes
an expansion card slot, and that you can
store applications and information on
expansion cards (sold separately).
However, you still need free memory on
the Treo XXX itself to run applications from
an expansion card. For more info on using
expansion cards, see Using expansion
cards.
If you store a large number of records or
install many third-party applications, the
internal memory on your Treo XXX may fill
up. Here are some common ways to clear
space:
• Email: Messages that have large
attachments can quickly consume
memory on your Treo. Delete
messages with large attachments. If
you have hundreds of messages with or
without attachments, you may want to
delete older messages to make room
(see the User Guide for the VersaMail
Application on your computer or the
MAKING ROOM ON YOUR TREO
274
Page 51

COMMON QUESTIONS
12
Xpress Mail documentation at
x
pressmail.att.com/subscriber).
• Windows: Start>Programs>Palm
• Mac: Insert the Palm Installation CD
and click the link to the User Guide for
the VersaMail Application in the
Documentation folder.
• Pictures & Videos: Large images take
up a lot of memory. Move images to an
expansion card or synchronize them to
your computer, and then delete the
images from your Treo (see Viewing
pictures and videos on your computer).
• Music: Music files often consume a lot
of memory. Move music files to an
expansion card, or delete large files
from your Treo.
• Messaging: Multimedia content can
also consume a lot of memory. Move
multimedia content to an expansion
card, or delete large files from your Treo
(see Deleting messages
• Internet: If you set a large web browser
).
cache, you may want to use the web
browser’s advanced Memory
Management settings to clear all recent
pages (see Customizing your web
browser settings).
• Third-party applications: You can
delete infrequently used applications
(see Removing applications
) or move
them to an expansion card (see Copying
applications between an expansion card
and your Treo).
Third-party
applications
Some third-party applications can cause
conflicts on your Treo XXX. For example,
third-party applications that were not
written with the Treo keyboard and 5-way
navigator in mind may cause strange
behavior or errors when using the
keyboard and 5-way navigator in these
applications. Third-party applications that
modify wireless features may require extra
troubleshooting.
If you recently installed an application and
your device seems to be stuck, try the
following:
CHAPTER
THIRD-PARTY APPLICATIONS
275
Page 52

COMMON QUESTIONS
12
CHAPTER
1 Perform a soft reset (see Performing a
soft reset).
2 If the problem persists, perform a
system reset (see Performing a system
reset).
3 Delete the most recently installed
application from your Treo XXX (see
Removing applications
).
4 If the problem persists, perform another
system reset.
5 If possible, synchronize your Treo XXX
with your computer to back up your
most recent info.
6 If you’re unable to perform the
preceding steps or the problem
persists, locate your Backup subfolder
on your computer and rename the
folder (for example, BackupOld).
Windows: C:\Program
Files\Palm\<device name>
Mac: <Mac hard drive> : Applications
: Palm : Users : <device name>
NOTE Can’t find a Palm folder in Program
7 Perform a hard reset (see Performing a
hard reset).
8 Sync to restore your info in Calendar,
Contacts, Tasks, Memos, and Pictures
& Videos.
9 If the problem is resolved, begin
reinstalling your third-party applications
one at a time by double-clicking a single
file in the original Backup subfolder that
you renamed, and sync after each
application you install.
10 If the problem recurs, delete the last
application you installed and report the
problem to its developer.
I can’t exit a game or third-party
application
Press Option + Applications to
return to Applications View.
Getting more help
Contact the author or vendor of the
third-party software if you require further
assistance.
Files? Then look for a palmOne or
Handspring folder instead. For more info,
see I can’t find my user folder
.
THIRD-PARTY APPLICATIONS
276
Page 53

COMMON QUESTIONS
12
Error messages
Your Treo XXX is designed to minimize
interruptions when a system error occurs.
If your Treo XXX encounters a system
error, it automatically resets itself and
resumes functioning as normal. If possible,
it even turns the phone back on if it was on
before the error occurred.
Sometimes you might want to know more
about an error. Your Treo XXX uses a
special interface to show error messages
in greater detail.
1 Press Phone .
2 Enter #*377, and then press Send .
3 Review the screen with details about
the conditions that led up to the most
recent automatic reset.
4 Select OK.
NOTE Third-party developers create their
own error messages. If you do not
understand an error message, please
contact the developer of the application for
help.
CHAPTER
ERROR MESSAGES
277
Page 54

COMMON QUESTIONS
12
CHAPTER
ERROR MESSAGES
278
Page 55

Ter ms
Alt (alternative)
A keyboard key. Enter a letter on the
keyboard, and then press Alt to access
variations such as international characters
and symbols.
Applications View
The screen on your Palm
smart device from which you can open all
applications.
Auto -o ff interval
The time of inactivity that passes before
the screen on your Treo XXX turns off. The
wireless features on your Treo XXX are
unaffected by this setting.
Beam
The process of sending or receiving an
entry or application using the infrared (IR)
port on your Treo.
®
Bluetooth
wireless technology
Technology that enables devices such as
the Treo XXX, mobile phones, and
computers to connect wirelessly to each
®
Tr eo™ XXX
other so that they can exchange
information over short distances. For more
info, visit www.bluetooth.com
.
CSD (circuit-switched data)
A dial-up Internet connection. You pay for
the connection time, not for how much
information you transfer. Contrast with
GPRS.
Device name
The name associated with your Treo XXX
and with the info in your desktop software.
The device name (sometimes called the
username) distinguishes your Treo XXX
from all other Palm OS
®
devices. When you
first synchronize your Treo XXX, you are
asked to give it a device name. This name
appears in the User list in Palm Desktop
software. Every Palm OS device that is
synchronized with the same computer
must have a unique device name.
Dialog box
A set of options and command buttons that
is enclosed by a border and that enables
you to carry out a specific task.
TERMS
279
Page 56

EDGE (Enhanced Data rates for GSM
Evolution)
An enhanced version of GPRS that delivers
data speeds that are up to three times
faster than standard GPRS connections.
(Additional charges may apply.)
Favorite
A button that provides quick access to a
phone number (speed-dial button) or
commonly used application (such as Web
or Messaging). You can define an unlimited
number of favorite buttons in the Phone
application.
GPRS (General Packet Radio Service)
A mobile Internet connectivity technology
that allows persistent data connections.
(Additional charges may apply.)
HotSync
®
The technology that synchronizes your
Treo and your computer with the simple
press of a button.
HotSync manager
The computer application that manages the
synchronization of your Treo with your
computer.
Infrared (IR)
A way of transmitting information using
light waves; this is called beaming. The IR
port on your Treo enables you to transfer
information to other IR devices within a
short radius.
Lithium Ion (Li-Ion)
The rechargeable battery technology used
in the Treo XXX.
MMS
An enhanced form of messaging that
enables you to send pictures, videos,
animations, sounds, and ringtones almost
instantly.
Option key
The keyboard key that enables you to
access the alternative feature that is
indicated above the letter on each key.
®
Desktop software
Palm
A PIM application for computers that helps
you manage your personal information and
keep your personal information
synchronized with your Treo.
280
TERMS
Page 57

Palm® OS by ACCESS
The operating system of your Treo XXX.
Palm OS is known for its simplicity of use
and for the large number of compatible
third-party applications that can be added
to your Treo XXX.
Palm™ Quick Install
The component on your Windows
computer that enables you to install Palm
OS applications and other information on
your Treo.
Partnership
Two Bluetooth devices—for example, your
Treo XXX and a hands-free device—that
can connect because each device finds the
same passkey on the other device. Once
you form a partnership with a device, you
don’t need to enter a passkey to connect
with that device again. Partnership is also
known as paired relationship, pairing,
trusted device, and trusted pair on some
devices.
Phone
The application on your Treo XXX that
enables you to make and receive phone
calls.
PIM (personal information manager)
A genre of software that includes
applications such as Palm Desktop
software, Microsoft Outlook, Lotus Notes,
and ACT!. PIMs generally store contacts,
schedules, tasks, and memos.
PIN (personal identification number)
The four-digit password assigned to your
SIM card by AT& T your carrier. Turning on
the PIN lock secures your wireless
account. See also PUK.
PIN2 (personal identification number 2)
A code that protects certain network
settings such as call barring or fixed dialing.
PUK (PIN unlock key)
A special extended password assigned to
your SIM card. If you enter the wrong PIN
more than three times, your SIM card is
blocked and you must call AT&T your
carrier for the PUK.
Quick key
A letter that you can press and hold to
activate a favorite from any tab in the
Phone app. For example, create a
speed-dial button for your mother’s number
and enter the letter M for “Mom” as the
TERMS
281
Page 58

Quick Key. Then when you want to call her,
go to the Phone app and press and hold M.
Your Treo XXX dials the number.
SIM (Subscriber Identity Module) card
The smartcard, inserted in your Treo XXX,
that contains your mobile account
information, such as your phone number
and the services to which you subscribe.
Phonebook entries and SMS messages
can also be stored on the SIM card.
Slide
A collection of text, pictures, videos, and
sounds that are grouped together within a
multimedia message created in the
Messaging application. During playback, all
the items within a particular slide appear
on the same screen. If a multimedia
message contains multiple slides, each
slide can be viewed separately during
playback.
SMS
The service that exchanges short text
messages almost instantly. Text messages
are typically sent to a mobile phone
number, rather than to an email address
(although this too is possible). These
messages can usually include up to 160
characters; messages with more than 160
characters are automatically split into
several messages. You can send and
receive SMS messages while you are on a
voice call.
Streaming
Technology that enables you to access
media content—for example, watch video
or listen to an audio program—directly
from the Internet on your Treo XXX without
needing to download a file to save on your
Treo XXX.
User folder
The folder on your computer that contains
the information you enter in Palm Desktop
software and the information you enter on
your Treo XXX and synchronize with
Palm Desktop software.
282
TERMS
Page 59

Important safety and
legal information
FCC Notice
This equipment has been tested and found to comply with the limits
for a Class B digital device, pursuant to part 15 of the FCC Rules.
These limits are designed to provide reasonable protection against
harmful interference in a residential installation. This equipment
generates, uses and can radiate radio frequency energy and, if not
installed and used in accordance with the instructions, may cause
harmful interference to radio communications. However, there is no
guarantee that interference will not occur in a parti cular installation. If
this equipment does cause harmful interference to radio or television
reception, which can be determined by turning the equipment off and
on, the user is encouraged to try to correct the interference by one or
more of the following measures:
• Reorient or relocate the receiving antenna.
• Increase the separation between the equipment and receiver.
• Connect the equipment into an outlet on a circuit different from
that to which the receiver is connected.
• Consult the dealer or an experienced radio/TV technician for help.
This device complies with part 15 of the FCC Rules. Operation is
subject to the following two conditions:
1 This device may not cause harmful interference, and
2 This device must accept any interference received, including
interference that may cause undesired operation.
Antenna Care/Unauthorized Modifications
Use only the supplied integral antenna. Unauthorized antenna
modifications or attachments could damage the unit and may violate
FCC regulations. Any changes or modifications not expressly
approved by the party responsible for compliance could void the
user's authority to operate the equipment.
FCC RF Safety Statement
In order to comply with FCC RF exposure safety guidelines, users
MUST use one of the following types of bodyworn accessories.
®
brand body-worn accessory that has been tested for
3A Palm
SAR compliance and is intended for use with this product.
4 An accessory that contains NO metal (snaps, clips, etc.) and
provides AT LEAST 1.5 cm of separation bet ween the users body
and the unit.
Do NOT use the device in a manner such that it is in direct contact
with the body (i.e., on the lap or in a breast pocket). Such use will
likely exceed FCC RF safety exposure limits. See w
rfsafety/ for more information on RF exposure safety.
ww.fcc.gov/oet/
Declaration of Conformity
This device meets the FCC Radiofrequency Emission Guidelines and
is certified with the FCC as.
FCC ID number: O8F-728.
Industry Canada ID number: 3905A-728
More information on the device's SAR can be found from the
following FCC website:
https://gullfoss2.fcc.gov/prod/oet/cf/eas/reports/GenericSearch.cfm
Declaration of Conformity
We, Palm Inc., declare under sole responsibility that the produ ct:
Model name: Treo XXX
Description: PDA phone
Is in conformity with the following standards and/or other normative
document:
• ETSI EN 301 511
• ETSI EN 301 908-1
• ETSI EN 301 908-2
• ETSI EN 300 328
• ETSI EN 301 489-1/-7/-17/-24
• EN60950-1
.
IMPORTANT SAFETY AND LEGAL INFORMATION
283
Page 60

• EN 50360
We hereby declare that the above named product is in conformance
to all essential requirements of the RTTE Directive 1999/5/EC.
The conformity assessment procedure referred to in Article 10 and
detailed in Annex IV of directive 1999/5/EC has been related to
Articles:
• R&TTE Article 3.1 (a) Health and Safety
• R&TTE Article 3.1 (b) EMC
• R&TTE Article 3.2 Spectrum Usage
Identification mark: 0984 (Notified Body) CE.
This identification mark is permanently provided on the device label.
The technical documentation relevant to the above equipment will be
held at:
Palm Inc.
950 W Maude Avenue
Sunnyvale, CA. 94085
U.S.A.
Person responsible for making this declaration:
David Woo/Sr Compliance Engineer
Sunnyvale/August 31, 2006
Static Electricity, ESD, and Your Palm® Device
Electrostatic discharge (ESD) can cause damage t o electronic devices
if discharged into the device, so you should take steps to avoid such
an occurrence.
Description of ESD Static electricity is an electrical charge caused
by the buildup of excess electrons on the surface of a material. To
most people, static electricity and ESD are nothing more than
annoyances. For example, after walking over a carpet while scuffing
your feet, building up electrons on your body, you may get a shock—
the discharge event—when you touch a metal doorknob. This little
shock discharges the built-up static electricity.
ESD-susceptible equipment Even a small amount of ESD can
harm circuitry, so when working with electronic devices, take
measures to help protect your electronic devices, including your
®
device, from ESD harm. While Palm has built protections
Palm
against ESD into its products, ESD unfortunately exists and, unless
neutralized, could build up to levels that could harm your equipment.
Any electronic device that contains an external entry point for
plugging in anything from cables to docking stations is sus ceptible to
entry of ESD. Devices that you carry with you, such as your Palm
device, build up ESD in a unique way because the st atic electricity
that may have built up on your body is automatically passed to the
device. Then, when the device is connected to another device such
as a docking station, a discharge event can occur.
Precautions against ESD Make sure to discharge any built-up
static electricity from yourself and your electronic devices before
touching an electronic device or connecting one device to another.
The recommendation from Palm is that you take this precaution
before connecting your Palm device to your computer, placing a
device in a cradle, or connecting it to any other device. You can do
this in many ways, including the following:
• Ground yourself when you’re holding your device by
simultaneously touching a metal surface that is at earth ground.
For example, if your computer has a metal case and is plugged
into a standard three-prong grounded outlet, touching the case
should discharge the ESD on your body.
• Increase the relative humidity of your environment.
• Install ESD-specific prevention items, such as grounding mats.
Conditions that enhance ESD occurrences Conditions that can
contribute to the buildup of static electricity in the environment
include the following:
• Low relative humidity.
• Material type. (The type of material gathering the charge. For
example, synthetics are more prone to st atic buildup than natural
fibers like cotton.)
IMPORTANT SAFETY AND LEGAL INFORMATION
284
Page 61

• The rapidity with which you touch, connect, or disconnect
electronic devices.
While you should always take appropriate precautions to discharge
static electricity, if you are in an environment where you notice ESD
events, you may want to take extra precautions to protect your
electronic equipment against ESD.
Precaution against hearing loss Protect your hearing. Listening to
this device at full volume for a long period of time can damage your
hearing.
A pleine puissance, l'écoute prolongée du baladeur peut
endommager l'oreille de l'utilisateur. Consultez notre site web
www.palm.com/fr
pour plus d'informations.
Waste disposal Please recycle appropriately. For appropriate
recycling and disposal instructions please visit:
ww.palm.com/environment.
w
0,655
IMPORTANT SAFETY AND LEGAL INFORMATION
285
Page 62

IMPORTANT SAFETY AND LEGAL INFORMATION
286
Page 63

Specifications
Radio • GSM 850/900/1800/1900 quad band world phone
• GPRS class 10, class B
• EDGE up to 59kbps per time slot
• Supports CSD (circuit-switched data)
Phone features • Speakerphone
• Hands-free headset jack (2.5mm, 4-barrel connector)
• Microphone mute option
• TTY/TDD compatible
• 3-way calling
Processor technology Intel PXA270 Bulverde processor, 312MHz
Expansion MicroSD card slot
Battery • 1180mAH, rechargeable lithium ion
• Removable for replacement
Palm OS® version Palm OS 5.4.9
Camera • 1.3 megapixel
• Still-image capture resolution (1280 x 1024)
• 2x digital zoom
• Video capture resolution (352 x 288)
• Automatic light balance
Size 4.2 in. x 2.1 in. x 0.73 in.107 mm x 53.6 mm x 18.6 mm
SPECIFICATIONS
287
Page 64

Weight 4.1 ounces116 grams
Connectivity • IR
• Bluetooth
®
wireless technology (1.2 compliant)
Display • Touch-sensitive LCD screen (includes stylus)
• 65,536 colors (16-bit color)
• User-adjustable brightness
• 320 x 320 resolution
Keyboard • Built-in QWERTY keyboard plus 5-way navigator
• Backlight for low lighting conditions
SPECIFICATIONS
288
Page 65

Included software • Phone (including Favorites
and Dial Pad)
• Pics & Videos (includes
camera and camcorder)
• Messaging (text and
multimedia)
• Blazer
®
web browser
(Internet)
• Pocket Tunes™ Deluxe
• Xpress Mail (download
required)
• Good Mobile
Messaging™ (download
required)
• VersaMail
• Contacts
• Calendar
• Memos
• Tasks
• SIM Book
• SIM Services
®
(email)
• AT&T Mall
• Google Maps
• Voi ce Dial
• Voi ce Memo
• Documents To Go
Professional
• Calculator (Basic and
Advanced)
• World Clock
• My Palm
®
• Palm
• Palm
Backup
®
Desktop software
and HotSync
• Push to Talk
• Quick Tour
• Telenav (download
required)
• MobiTV (download
required)
• Instant messaging (IM)
System requirements • Windows 2000, XP, or Vista with USB port
• Mac OS 10.2–10.3 with USB port
• Later versions may also be supported
®
®
manager
SPECIFICATIONS
289
Page 66

Operating and storage
temperature range
• 32°F to 104°F (0°C to 40°C)
• 5% to 90% relative humidity (RH)
SPECIFICATIONS
290
Page 67

Index
SYMBOLS
! in Tasks list 194
NUMERICS
24-hour clock 233
5-way navigator 29, 30
911 calls 240
A
AC charger 11
accented characters 34, 36
accessing
application menus 31
applications 38
command buttons 31
documentation 3
email 87, 108, 247
Palm online support 4
Quick Tour 3
web browser 38, 146
World Clock 191
accessories 8
Account Setup dialog 94
accounts
call forwarding and 59
conference calls and 58
customer support for 4
email and. See email
accounts
phone services and 2
text messages and 2, 109
TTY connections and 81
voicemail and 52
active call buttons 137
Active Call View 53, 54, 137
active calls. See phone calls
Activity Log 98, 102
Add Bookmark command
147
Add Call button 57
Add Contact command
dd Ne
w Number dialog 56
A
Add New Number prompt 56
Add Song button 180
Add to album command 173
adding
accessories 8
bookmarks 147
caller IDs 64, 65, 66
captions to photos 166,
173
cities to World Clock 191
contacts 62, 126
emoticons 109
events 184, 185
56
favorite buttons 68–70
nicknames 127
partnerships 73, 155
passwords 241, 243
photos or videos to
albums 172
playlists 179, 180
private entries 242
QuickText phrases 109
signatures 104
tasks 192
wallpaper 173
addresses
adding recipients 70, 109
entering web 146
getting maps to 63–64
highlighting 30
looking up 107
selecting 30, 145
sending messages and
92, 95, 109, 111, 113
synchronizing 263
viewing website 151, 152
Advanced Mode (calculator)
206, 207
enda list
ag
Agenda View 78, 183, 188
Alarm check box 185
alarm clock 192
s 183
INDEX
291
Page 68

alarm preferences 192
alarms
adding calendar 185, 189
adding task 193, 195
recording tones for 190
selecting tones for 189,
190, 195
Album command 173
Album list 97, 170, 173
albums. See photo albums;
video albums
alert buttons 112
Alert dialog box 52, 113, 205
Alert Sound pick list 103
alert tones 77, 103, 118
alerts
See also alarms
changing status of 133
clearing 206
displaying 82, 140, 205
downloading messages
and 103, 105, 112
hiding text in 116
receiving 52, 132, 133,
136
responding to 113, 258
sending Call-Me 140
aligning the screen 234
Alt key 34, 279
alternate characters 34, 35,
36
answering phone 51, 58, 75
antenna 283
applets 145
application categories 235
application list view 235
applications
See also specific built-in
app; third-party apps
accessing menus in 31
beaming
changing
5
21
default 237
closing 37, 276
copying 225
customizing 235–238
defining buttons for 70,
236
deleting 20, 210, 211
displaying 38, 39, 235
downloading 150, 209
getting help with 210
highlighting 38, 39
installing 208–210, 251
making phone calls and 55
moving around in 27
opening 37, 38, 39, 224
playing music and 179
running on expansion
cards 274
searching in 205
selecting 38
sending over Bluetooth
devices 213
synchronizing 23, 217
transferring to device 19
troubleshooting 251
updating information in 23
upgrading and 20
viewing information about
3, 211–212
Applications button 37, 39
Applications View 38–39,
235, 279
appointments 184, 263
See also events
Archive folder 210
area codes 80, 127
area conversions 207
arrow icons 29
sk to add un
A
known phone
numbers check box 67
AT&T accounts. See
accounts
AT&T customer service 4
AT&T Mall 149
AT&T service contracts 2
292
INDEX
Page 69

AT&T SIM cards. See SIM
cards
Attach Signature option 105
attachments
adding 96–98
displaying 99, 108, 199
downloading 99, 104
removing 96
storing large 274
supported formats for 199
attendee information 186
audio. See music; sounds;
voice memos
audio adapters 72
Audio Caption command 166
Auto Accept Invitations
options 141
Auto Lock Device option 241
Auto naming pick list 169
Auto Sync 102, 103
Auto-complete option 152
Auto-hide Toolbar option 171
Auto-Keyguard pick list 239
Auto-off After pick list 246
auto-off interval 279
Availability icons 131–132
availability pick list 125
B
back icon (browser) 147
Background check box 188
background music 171
backgrounds 78, 188
backing up info 19, 23, 255
backlight 33, 232
Backlight button 232
Backspace key 33
Backup folder 211, 252
Basic Mode (calculator) 206
battery
charging 11–13
conserving 14, 246
f 257
osing o
disp
inserting 10, 255–256
precautions for 11
removing 256
replacing 14, 255
viewing status 12, 13, 84
battery door release 8
battery icons 13, 83
Beam Business Card
command 67
Beam Category command
215
Beam command 215, 216
Beam From pick list 216
Beam Receive pick list 246
Beam Status dialog 215, 216
beaming 214–216, 246, 279
bell icon 82, 258
Bill Balance button 68
blank screens 257
blank text messages 109
blank time slots 188
Blazer application 145
See also web browser
blinking bell 82, 258
Bluetooth adapters 154, 156
Bluetooth application 72
Bluetooth devices
connecting to 72, 157–
161, 219
disabling 74, 213
enabling 74, 213
entering passkeys for 159,
160
listening to music and
al range for 72
optim
17
receiving calls and 54, 74,
266
receiving info over 213
sending over 212, 213
switching between 75
synchronizing over 219,
220, 259
9
INDEX
293
Page 70

troubleshooting 267, 268,
273
visibility options for 159,
160, 213, 220
Bluetooth icon 72, 84
Bluetooth icons (Phone
application) 82
Bluetooth technology 154,
212, 279
bonus software. See built-in
apps
Bookmark Page icon 149
bookmarks 147–149, 215
Bookmarks View 148, 149
Bookmarks View icon 148
border glow (highlight) 30
brightness (screen) 54, 232,
246
brightness duration
(backlight) 232, 246
Brightness slider 246
browsing files 224
browsing the web. See web
built-in apps 3, 210, 289
See also applications;
specific app
built-in camera. See camera
built-in security software 238
business cards 67
buttons
See also favorite buttons
accessing command 31
customizing 236
disabling 55, 239
navigating and 29, 30
opening apps and 37
restoring default 237
speed-dialing and 48, 69–
70
web browsing and 147
Buttons Preferences screen
236
C
cache 154, 275
Calc button 206
calculating device
calculator
space 19
34, 206
Calculator app 206–207
calculator modes 206
calendar
accessing 183
adding alarms 185, 189
adding events 184, 185,
186
color-coding events 187
customizing 188–189
deleting events 187
saving 114
viewing items on 79, 188
Calendar application
changing fonts for 232
changing views for 183
opening 38, 79
overview 183
setting default view 188
Calendar button 37, 38, 183
calendar views 183, 188
call forwarding 59–61
call forwarding icon 82
Call Log screen 50, 61, 138
Call Log tab 16
Call-Me alerts 136, 140
Call Preferences dialog box
59, 60
Call Totals dialog box 61
Call View. See Active Call
View
call waiting 57
Call Waiting dialog box 58
caller IDs 64, 65, 66
See ph
one calls
esolution 167
calls.
camcorder r
Camcorder View 166, 168,
173
camera 165, 273, 287
camera buttons 166
294
INDEX
Page 71

Camera icon 165
camera lens 8
camera settings 168
Camera View 168, 173
cancelling menu selections
31
Caps Lock mode 34
captions. See voice captions
car kits 71
Card category 224
Card Info 226–227
Card Info button 226
card readers 177
carrying cases 267
cascading style sheets 147,
153
Category command 235
category marker 188
category names 235
Category pick list 188, 189,
194, 235
Category tab 194
CDs 177
Center button 7
certificates 145
changing
bookmarks 148
contact information 63
contact names 127
default applications 237
email accounts 101
events 187
favorite buttons 70
owner information 244
passwords 242, 243
personal IDs 240
playlists
180
prim
ary button
s 236
PTT groups 129–130
QuickText phrases 110
screen fonts 232
sync defaults 217, 218,
219, 227
sync method 262
web page layouts 146
character entry 34, 36
character limits
memos 200
text messages 109
character searches 205
charge indicator 7, 12, 13
charger cable 12
charging battery 11–13
charging device 11, 12, 14
chat icon 115, 119
chat sessions 115, 117
Chat View 112, 115
Choose song button 178
Choose Songs command
180
circuit-switched data
connections 279
city information 191, 245
City pick list 191
Clear Cache button 154
Clear Cookies button 154
clock 190, 233
See also World Clock
closing
application menus 31
applications 37, 276
pick lists 32
color palette 168
color preferences 117, 168,
234
ol
or themes 234
c
color-coding events 187
colored backgrounds 30
command buttons 31
completed tasks 193, 194,
195
completion dates 195
Compress Day View check
box 188
compressed files 208, 209
computers
connecting device to 22
INDEX
295
Page 72

creating partnerships for
155
installing from 209, 253
quarantined files on 251
setting up DUN
connections for 156
synchronizing with 18–23,
26
transferring apps to 209
transferring media to 174
transferring music from
176, 177–178
Con button (calculator) 207
Conduit Settings command
218
conduits 184, 263
Conference button 58
conference calls 58–59, 138
Confirm message deletion
check box 116
conflicting apps 225, 251
conflicting events 188
Connect Bluetooth
command 74
connection icons (phone) 82
connection icons (web) 146
connections
Bluetooth devices and 72,
157, 213, 219
device to PCs 22
dial-up networking and
154, 157
hands-free devices and
72–75
messaging preferences
for 117
restrictions for 55
synchronizing over
Bluetooth 219, 220
synchronizing over
infrared 221–222
troubleshooting 266, 270,
273
VPNs and 247
web services and 146,
154, 270
constants 20
Contact
7
Edit dialog box 62
contact names 46
contacts
adding alerts for 132, 133
adding photos to 64, 173
adding ringtones for 65,
66
categorizing 63
changing info for 63
checking availability of 131
copying 68
creating 62, 126
deleting 67, 128
displaying 63
entering events for 186
entering phone numbers
for 56, 61
getting directions for 63
importing 63
looking up 47, 78
marking as private 63
renaming 127
saving 114
setting preferences for 66
sorting 62, 67, 141
viewing details about 47,
49
Contacts application 61, 66,
232
Contacts list 62, 67
Contacts tab 16
conversion functions
(calculator) 206, 207
Convert to cellular icon 138
cookies 145, 153, 154
Copy button 172, 225
Copy command
py It
ems dialog box 172
Co
151, 225
Copy items to pick list 172
Copy to command 172
296
INDEX
Page 73

Copy To pick list 225
copying
applications 225
contact information 68
media files 176
messages 114
phone numbers 46, 151
photos or videos 172
text 151
copyrighted materials 171
corporate email accounts
107, 247
corporate servers 247
country-specific preferences.
See language settings
coupling 266
coverage area 15, 44, 81,
265
coverage area alerts 77
Coverage in/out pick list 77
crashes 258
Create chats from messages
pick list 117
creating
application categories 235
bookmarks 147
business cards 67
contacts 62, 126
email messages 95, 145
events 184, 185
multimedia messages
110–112
nicknames 127
partnerships 73, 155
passwords 241, 243
playlists 179, 180
private entries 242
PTT contact lists 126–128
PTT groups 126, 128, 135
speed-dial buttons
xt memos
te
69–70
201
text messages 109–110
voice captions 166, 173
voice memos 201
CSD (circuit-switched data)
connections 279
current date and time 190
current events 79
Current Privacy list 243
customer service 4
customizing
applications 235–238
buttons 236
calendar 188–189
chat sessions 117
email 101–105
hands-free devices 75
MMS messaging 116
system date and time 245
system sounds 231–232
tasks 195
web browser 152–154
D
daily events 189
data. See information
data service icons 146
data services 87, 145, 269
databases 205
Date & Time Preferences
screen 185, 245
date formats 233
date preferences 245
Date stamp pick list 169
dates
See also calendar
adding to photos 169
changing event
eting tasks and 193,
compl
194, 19
187
5
selecting 184
setting system 244
sorting on 114
synchronizing 244
viewing current 190
viewing due 194, 195
Day View 183, 188
INDEX
297
Page 74

daylight savings 191, 192
decimal values 207, 233
decompression utilities 209
Default Alarm pick list 190
Default Apps Preferences
screen 237
default settings 237
Default View pick list 79, 188
degrees 207
delays 242, 269, 270
Delete Contact command 67
Delete events older than pick
list 187
Delete From pick list 211
Delete Memo command 201
Delete Task command 195
Deleted folder 112
deleting
albums 173, 174
alerts 206
applications 20, 210, 211
attachments 96
bookmarks 148
contacts 67, 128
cookies 154
device names 20
email 100, 101, 274
events 187
favorite buttons 71
files 275
memos 201
messages 112, 114, 116
music from playlists 180
passwords 242
photos 166, 173, 174
playlists
180
TT groups
P
131
tasks 195
video clips 168, 173, 174
desktop software. See Palm
Desktop software
device names
Bluetooth devices and 73,
219, 220
defined 279
selecting 258
selecting Treo 20
devices. See Bluetooth
devices; hands-free
devices; Treo smart device
Dial another call prompt 57
Dial button 49
Dial Number dialog box 49
Dial Pad 16, 34, 45, 54
Dial Pad button 54
Dial Preferences screen 79
dial text message 156
dialog boxes 4, 31, 279
dial-up networking 83, 154–
157, 273
digital cameras 169
See also camera
dimmed images 257
dimming backlight 232, 246
dimming the screen 38
Disable cookies box 153
Disable JavaScript box 153
disabling touch-sensitive
features 239
discovery 157, 159, 214
Discovery icon 159
Discovery Results list 159,
213
discussion groups 4
display formats 233
Display my name in chat
option 117
dow as
win
Display Options box 188
Display Options command
188
displaying
alerts 205
application info 211–212
application menus 31
applications 38, 39, 235
attachments 99, 108, 199
bookmarks 148
298
INDEX
Page 75

connection info 146, 157
contact info 47, 49, 63
current date and time 190
due dates 194, 195
email messages 98, 183,
188
error messages 277
event categories 188
events 79, 188, 189
favorite buttons 48
free space 19
items in pick lists 32
multimedia messages
112, 113
personal calendar 183
phone status 81
photos 169, 170, 174
private entries 243
signal strength 82
slide shows 171
tasks 183, 188, 194, 195
video clips 169, 170, 174
video recording time 167
web addresses 152
web pages 145, 147
documentation 2, 3, 4, 29
Documents application 108
See also Documents To
Go
Documents button 200
Documents To Go 199–200
downloading
applications 150, 209
attachments 99, 104
email messages 102
files 149, 169, 208
multimedia messages
112, 117
Palm info and updates 4
ngtones 75
ri
, 150
text messages 112
Downloads bookmark 150
drafts 96, 110
drained battery icon 13
draining the battery 12, 13
Draw on command 166
drivers 221
drop-down lists. See pick lists
Due Date pick list 193
due dates 193, 195
DUN connections 83, 154–
157, 273
Dynamic Call command 135
E
earpiece 7, 134
echoes 266
EDGE connections 82, 270,
272, 280
Edit Bookmark List dialog box
149
Edit Bookmarks command
148, 149
Edit Categories option 187
Edit Category screen 66
Edit Favorite command 70
Edit Group command 129
Edit Group dialog box 130
Edit Location dialog box 245
Edit Playlist dialog box 180
edit screens 31
Effects pick list 168
email
See also attachments
accessing 87, 108, 247
adding signatures 104
addressing 70, 95
checking
83, 183, 188
creating 95, 145
ng buttons for 70
fini
de
deleting 100, 101, 274
dialing from 49
forwarding 99
resending 96
restrictions for 55
retrieving 83, 98, 102
INDEX
299
Page 76

scrolling 98
selecting default
application for 237
sending 96, 106, 113, 145
setting alerts for 103
setting preferences for
101, 103, 104
sorting 100
troubleshooting 268
viewing status of 98, 100
email accounts
changing 101
setting up 91, 92, 93, 105,
107
Email application. See
VersaMail application
email applications 61, 87,
237, 272
Email icon 92
email providers 2, 87, 91
emergency calls 240
emoticons 109
empty battery icon 13
empty time slots 188
Empty Trash command 101
Enable background play
check box 179
Enable Fixed Number Dialing
check box 240
encryption 145
Eng(x) display format 207
engineering notation 207
Enhanced Data rates for
GSM Evolution. See EDGE
connections
envelope icon 100
errors 261, 267, 277
Escalate ring tone volume
check box 76
event conflicts 188
Event Details dialog box 185,
186, 187
event preferences 185
nts
eve
adding alarm
s for 185, 189
categorizing 187
changing 187
color-coding 187
creating 184, 185
deleting 187
displaying 79, 188, 189
entering incorrect time
zones and 263
scheduling repeating 186
synchronizing 183
troubleshooting 263–265
viewing duration of 188
Excel spreadsheets 97, 199
Exchange ActiveSync
accounts 105, 106, 107
Exchange Address Book 263
Exchange servers 105, 107,
183
exiting applications 276
expansion card slot 223
expansion cards
accessing items on 224
caution for 225, 227
copying to 172, 225
deleting apps on 210
displaying photo or video
albums on 170
downloading to 150
formatting 226
inserting 223
installing apps on 210
managing files on 224
moving files to 20, 176
opening items on 200,
224, 274
removing
re
naming
224
226
sending attachments to 99
storing information on
203, 223
transferring applications
from 19, 225
300
INDEX
Page 77

troubleshooting 226
viewing information about
226
Export to SIM command 68
extensions (phone) 55, 69
Extra Digits button 55
Extract Call button 59
F
fade setting 188
Fast mode (browser) 153
Fast mode icon 147
favorite buttons 48, 68–71,
280
Favorites tab 16, 48
FDN list 240
feedback 266
files
See also specific type
accessing 199, 247
attaching to email 97
browsing 224
checking size of 212
deleting 275
downloading 149, 169,
208
moving 20, 176, 275
opening 199, 200
saving 200
streaming 150
transferring to device 19,
199
Files application 224
financial calculator 206
financial functions 207
Find dialog box 205
Find Text on Page command
152
finding
chat sessions 115
contacts 47, 78
specific characters
20
5
text 152, 205
wireless services
80
firewalls 247
Fixed display format 207
fixed number dialing 240
flight mode 44
Float display format 207
folder pick list 100
folders
accessing 263
deleting messages in 114
locating 258
sorting messages in 114
switching between Inbox
100
Font command 146, 232
fonts 146, 232, 233
forgetting passwords 241,
243
Format Card command 227
format options (email) 104
Formats Preferences screen
233
formatting expansion cards
226
forums 4
Forward all calls list 60
forward icon (browser) 147
forwarding
email 99
phone calls 59–61
Free Space information 19
freeing memory 154, 210,
274
freezes 254
full charge (battery) 11
G
Game Volume pick list 232
General Packet Radio Service
technology. See GPRS
connections
GetGood applic
Good Mobile
ation. See
Messaging
getting started 2, 3, 15
INDEX
301
Page 78

Glossary 279
Good Mobile Messaging
application 87, 108
GPRS connections 82, 270,
272, 280
GPS receivers 160
gradients 207
graphics. See images
groupware information 105
H
Handheld overwrites
Desktop option 218
Handheld overwrites
Macintosh option 219
hands-free devices
adding 71, 74
checking status of 83
connecting to 72–75, 157
customizing 75
disabling or enabling 54
entering passkeys for 73
finding compatible 72
troubleshooting 267–268
Hands-free Setup button 73
hanging up phone 55, 57, 59
hard resets 241, 254
hardware 1
headphones 72, 174
headset button 51, 54
headset jack 8
headsets 55, 71, 160
help 3, 4, 249, 276
hexadecimal characters 207
Hide Records option 242
hiding
blank time slots 188
private entries 242, 243
toolbars 151, 171
highlight, moving
highlight
applicat
30
ing
ions 38, 39
items in pick lists 32
menu items 31
phone numbers 49
text 30, 31
web links 30, 146
hints 241
History list 151
Hold button 54
holidays 186
home city 191
home page 147, 152
HotSync icon 217, 259
HotSync Log 261
HotSync manager 220, 221,
280
HotSync operations. See
synchronization
HotSync Setup button 220
HotSync technology 280
HTML messages 99, 104
hyper links. See web links
I
icons 235
IM application 289
image files 110, 150, 169
images
See also photos; pictures
dimmed 257
disabling web 147, 153
downloading 150
saving 150
selecting as wallpaper 78
sending 110, 111
transferring to expansion
cards 20, 275
troubleshooting
ting
impor
act information 63
cont
272
phone numbers 193
inactivity 242, 246, 257
Inbox 98, 100, 118
Incoming dialog box 103
302
INDEX
Page 79

incompatible applications
225, 251
Incompatible Apps folder 18
indicator light 7, 12, 13
Info screens 211
information
backing up 19, 23, 255
beaming 215
entering 33–35
erasing all 258
losing 227, 241, 254, 255
marking private 242–243
masking 238, 242, 243
protecting 238, 241
receiving 213, 216
sending over Bluetooth
devices 212
storing 203, 223, 274
synchronizing 21, 23, 217
transferring 19, 214
updating 23, 203
upgrading and 20
infrared port. See IR port
installing
applications 208–210, 251
Palm software 18, 20,
209, 253
SIM cards 9–11
synch software 21–22
third-party applications
274
VPN client software 247
Instant Messaging 119
instant messaging 121, 289
interference 266, 268
internal memory. See
memory
international characters. See
alternate characters
international clock.
rl
d Clock
Wo
See
international information. See
language settings
Internet 143, 169, 208, 270
See also web browsing
Into album pick list 172
invalid characters 110
invitations 127, 129, 140,
141
Invite ALL Members
command 130
Invite Selected Member
command 130
IR port
beaming from 214, 215,
216
defined 280
synchronizing over 221,
259
iTunes 175, 176, 178
J
JavaScript elements 153
K
key terms. See Glossary
keyboard
dialing from 46, 47
entering alternate
characters from 34, 36
entering info from 33–35
locking 43, 238
restoring defaults for 237
searching from 79
keyboard backlight 33, 232
Keyguard 43, 238–239
Known Caller pick list 76
L
Label color pick list 117
land-line phones 51
language settings 11, 233,
253
Lanyard loop 8
laptops 220, 221
LED light
length f
7, 12, 13
unctions
207
INDEX
303
Page 80

lightning bolts 13, 83
links. See URLs; web links
List By option 67
list screens 30, 31
See also pick lists
list view (applications) 235
listening to
music 72, 174, 178
voice captions 170
voice memos 202
voicemail 52, 53
location information 245
Lock & Turn Off option 242
lock codes 240
Lock Device dialog box 241
Lock icon 146, 171, 215
Lock SIM check box 240
locking
keyboard 43, 238
phone 240–241
screen 239
smart device 241
logging in to corporate
servers 247
logic functions 207
looping (device) 254
losing
information 227, 241,
254, 255
passwords 241, 243
Lotus Notes 108
low coverage areas 265
lowercase letters 34
M
Mac systems
installing from 22, 209
installing to expansion
cards and 210
removing apps and 211
requirements for
g email and 91,
ndin
se
18
101, 107
synchronizing and 24,
218, 222, 260
transferring music from
176, 177, 178
uninstalling desktop
software and 260
upgrading and 20, 252,
261
magnet 9
mail. See email
mail servers 95, 106, 108
Mail Type pick list 94
Main tab 16, 44, 78
Manage Playlists command
180
map (World Clock) 191
maps 63–64
marking information as
private 242–243
masks 238, 242, 243
mathematical functions 207
Media application 174
media features 14, 43
Media Player 175, 177
MEdiaNet Home 149
memory
freeing 154, 210, 274
running apps and 274
saving 187
storing web pages and
153
memory slots (calculator)
207
memos 201, 265
See also notes; voice
memos
Memos application
changing fonts for 232
opening 38, 201
overview 197
Memos button
nu icon 31
Me
nu items 31
me
201
Menu key 7, 33
304
INDEX
Page 81

menu shortcuts 32
menus 31
Message Center option 140
message icons 119
Message Tone pick list 118
messages
See also email; multimedia
and text messages
defining buttons for 70
displaying status of 118
invalid characters in 110
retrieving voicemail 53, 82
saving as drafts 96, 110
selecting phone numbers
in 49
sending from PTT lists 139
setting color of 117
setting formats for 104
setting preferences for
116–118
setting priority for 112
troubleshooting 269
Messages tab 116
Messaging application
changing fonts for 232
customizing 116
opening 38, 109
overview 108
sorting options for 114
status icons for 118
viewing contacts and 61
messaging applications 237
Messaging button 7, 37, 38
messaging services 109
metric values 207
microphone 8, 55, 169
Microsoft Excel
spreadsheets 97, 199
Microsoft Exchange servers
105, 107
, 183
Microsoft Office Manager
Se
e Documents To Go
Microsoft Outlook. See
Outlook
Microsoft Windows. See
Windows systems
Microsoft Word 97, 199
mirror 8
mismatched languages 253
MMS messaging 108, 280
MMS messaging services 2,
270
MMS Receipts option 116
mobile networks 266
MobiTV 289
modems 154
Modify FDN command 240
Month View 183, 189
moving around device 27, 29
moving through web pages
146, 153
multi-connector pin 8
multimedia files 110, 169,
170, 275
multimedia icons 119
multimedia messages
adding voice memos 202
addressing 111
attaching photos or videos
to 166, 168, 171
checking status of 83
copying 114
creating 110–112
deleting 112, 114, 116
dialing from 49
displaying 112, 113
downloading 112, 117
playing 113
previewing 112
prioritizing 112
ictions for 55
restr
ieving 83
retr
sending 108, 112
setting alert tones for 118
setting delivery
confirmation for 116
sorting 114
INDEX
305
Page 82

storing 275
troubleshooting 269
viewing details of 114
multimedia messaging
services. See MMS
messaging services
music
adjusting volume 179
answering phone and 51
changing playlists for 180
converting 175, 176, 177
creating playlists for 179,
180
downloading 150
listening to 72, 174, 178
memory and 275
pausing 178
playing 150, 178, 179
selecting 178
stopping 179
uploading 176
music files 150, 176, 275
music player. See Pocket
Tunes
Music_Audio folder 177
Mute button 55
My Minutes button 68
My Treo icon 3
N
names
making PTT calls and 125,
141
personalizing 127
sorting on 114
synchronizing and 258,
279
naming
categories 235
device 20, 258
expansion cards 226
photo albums
oto groups
ph
165
169
playlists 180
PTT groups 128
video albums 167
voice memos 201, 202
navigator buttons 29, 30
network connection icon 156
Network tab 117
networks 80, 117, 266, 270
New Bookmark dialog 147
New Contact command 62,
126
New Favorite command 69
New Favorites dialog 69, 70
New Group command 128
New Group dialog 128
New message option 116
New Message screen 96
Next Song button 178
nicknames 127
Normal mode 147, 153
Note button 63
notes 63, 187, 193, 200
notifications 52
See also alerts
number formats 233
number pad 63
numbers 34, 206, 207
O
offline synchronization 262
offline viewing (web) 148
on-device documentation 3
online forums 4
online support (Palm) 4
opening
applications
37, 38
, 39,
224
Applicatio
ns View 38
Call Log 50
Dial Pad 45, 54
email applications 272
files 199, 200
History list 151
HotSync manager 217
306
INDEX
Page 83

Pocket Tunes 178
Push to Talk 125
Quick Tour 3
Redial list 49
web browser 38, 146
World Clock 191
operating systems 18, 253,
281
Optimized Mode 145, 146
Option key 33, 34, 38, 280
Option Lock mode 34, 109
Organize Favorites command
69, 70
organizer features 14, 43,
181
Outbox 96, 118, 119
Outlook
accessing mail for 108
adding caller IDs and 65
appointments and 184
duplicate entries in 263
synchronizing with 22, 24,
262, 263
time zones and 184, 263
Outlook folders 263
overdue tasks 183, 188, 194
owner information 244
Owner Preferences screen
244
P
Page View 148, 151, 152
paging 109
pairing. See partnerships
Palm Desktop software
adding caller IDs and 65
appointments and 184
defined 280
installing 18, 20, 209, 253
password-protecting 243
reinstalling
synchr
262
onizing with 22, 24,
259
me zones and 184, 264
ti
troubleshooting 253, 259
uninstalling 260
viewing and editing media
from 174
PALM folder 165, 167
Palm online support 4
Palm OS (defined) 281
Palm OS application files 208
Palm OS database files 208
Palm OS devices 19, 261,
262
Palm Quick Install. See Quick
Install
Palm Software Installation
CD 2, 253
paper clip icon 96, 99
partial battery icon 13
partnerships 73, 155, 281
passkeys 72, 73, 155, 159
Password box 241, 244
password hints 241
passwords
changing 242, 243
deleting 242
dialing 55, 69
email and 93
forgetting 241, 243
owner info and 244
private entries and 238,
242
requiring 241
unlocking Treo and 241
voicemail and 53
Paste command 151
pasting
phone numbers
46
text 151
ause bu
P
tton 178
pausing
music 178
streamed content 151
video playback 168, 171
video recording 168
voice memos 202
INDEX
307
Page 84

PCs. See computers
PDF files 97, 199
pending alerts 113, 258
Pending invitation icon 129
pending messages 116, 119
personal identification
numbers. See PINs
personal information 181,
238, 241, 244
personal information
managers 253, 281
personalizing device 229
phone
See also phone calls; Treo
smart device
adding hands-free devices
for 71, 74
adjusting volume 17, 77,
78
answering 51, 58, 75
conference calls and 58
dialing 45–50, 63, 69, 79
getting started with 15
hanging up 55, 57, 59
keyboard backlight and 33
listening to music and 51
locking 240–241
overview 53
receiving messages and
113
restrictions for 55
running apps and 55
searching for wireless
networks for 80
selecting tones for 75–77
setting preferences for 59,
60, 75
silencing ringer for 52, 231
switching to PTT calls and
138
troubleshooting 265–267
turning on and off 44
viewing usage for 50
P
hone application
, 61
customizing 75–81
defined 281
displaying events in 189
opening 38, 44
overview 41
selecting wallpaper for
173
status icons for 81–84
phone book 63, 66, 67
Phone button 37, 38, 51, 56
Phone Call screen 51
phone calls
See also phone; phone
numbers
adding a second 57
disabling screen for 239
driving and 71
forwarding 59–61
making 45–50, 54, 57, 79
muting 55
placing on hold 54, 57
receiving 51, 57
restricting 240
sending to voicemail 51
switching between 58
viewing details about 53
Phone Display Options
command 78
phone icons 82
phone indicator. See indicator
light
Phone Info screen 17
Phone Lock 240, 241
phone numbers
adding for contacts 56, 61
adding pauses to 62, 69
adding prefixes to 80
clearing 45
copying 46, 151
creating Quick Keys for 69
308
INDEX
Page 85

creating speed-dial
buttons for 69–70
dialing extra digits with 55,
69
dialing with voice
commands 47
entering 45, 46, 47, 63
getting device 17
highlighting 30
importing 193
pasting into Dial Pad 46
redialing most recent 49
saving 56
selecting 49, 50, 151
Phone Off message 44, 81
phone service contracts 2
photo albums 97, 165, 170,
172, 173
Photo Settings screen 168
photos
See also pictures
adding captions 166
adding to albums 172, 173
adding to contacts 64, 173
copying 172
deleting 166, 173, 174
displaying info about 173
downloading 150
grouping 170
personalizing 166, 168
rotating 173
selecting as wallpaper 173
selecting background 188
sending 96, 111, 166, 171
setting default size 169
storing 163, 165
synchronizing 174
16
30, 32
9, 170, 174
viewing
pick lists
Pics & Videos app 169
Pics & Videos icon 170
picture formats 169
Picture list 171
pictures
See also images; photos
attaching to multimedia
messages 110, 111
saving 114, 166, 169
setting preferences for
168–169
synchronizing 65
taking 165–166, 273
PIMs 253, 281
PIN unlock key 281
PINs 240, 281
plain text formats 99, 104
Play button 178
Play icon (browser) 150
playing
multimedia messages 113
music 150, 178, 179
streamed content 150
video clips 168, 170
voice captions 170
voice memos 202
voicemail messages 52,
53
playlists 179
plug-ins 145, 271
Pocket Tunes 174, 178, 179
Pocket Tunes icons 178
POP protocols 104
power preferences 15, 246
Power Save Mode option
246
Power/End button 43, 44
PowerPoint files 97
ences
prefer
, 199
alarm tones 189
alert tones 77
applications 236, 237
buttons 236
calculator 207
camera 168
contact information 66
country-specific 233
email 101, 103
INDEX
309
Page 86

events 185
hands-free devices 75
Keyguard 239
messaging 116–118
owner information 244
phone 59, 60, 75
power settings 246
ringtones 76
system colors 234
system info 185, 245
system sounds 231
tasks 195
web browser 148
web pages 152–154
Prefs button 244
preinstalled apps 3, 210, 289
See also applications;
specific application
preset delays 242
preset passkeys 73, 159,
160
pressing keyboard keys 33
pressing onscreen buttons
239
Previous Song button 178
primary applications 236
primary buttons 236
prioritizing messages 112
prioritizing tasks 193, 195
privacy flag 193
Privacy Mode check box 116
Private check box 243
private entries 238, 242–243
processor 287
programs. See applications;
software
progress indicator (video)
168
Prompt sound pick list 16
pr
otecting device 238–244
8
protecting personal
information 238, 241
protecting the screen 8
proxy servers 154
PTT accounts 124
PTT buttons 137
PTT calls
See also Push to Talk
adding a second 138
checking contact
availability 131
converting to cellular 138
customizing 141
ending 134
making 133–135, 138
overview 121, 123
placing on hold 137
receiving 136
sending messages and
139, 140
setting availability for 125,
126
updating names for 141
viewing details about 137
viewing messages for 140
PTT group names 128
PTT groups
changing 129–130
contacting members in
135, 139
creating 126, 128, 135
deleting 131
joining 129
leaving 131
PTT lists 124, 126–128
PTT Settings dialog box 141
pTunes icon 176
PUK (PIN unlock key)
mmand 115, 187,
rge co
Pu
281
195
Purge pick list 115
purging information 20
push technology 105–107,
108
Push to Talk app 8, 121, 125
See also PTT calls
310
INDEX
Page 87

Push to Talk service
contracts 2
Push to Talk status icons 84
Q
quarantined files 18, 21, 251
quick buttons 37–38, 236
Quick Groups 135, 139
Quick Install 210, 281
Quick Keys 69, 70, 281
Quick Tour 3
QuickText phrases 109
R
radians 207
radio 287
random numbers 207
range (Bluetooth devices) 72
Rcl button (calculator) 207
receipts (messaging) 116
recently viewed web page
icon 147
rechargeable battery. See
battery
Record command 215
Record Completion Date
check box 195
recorder 201
recording
ringtones 76
sounds 190
videos 111, 166–167
voice memos 201
voice messages 139
Records button 212
recovering information 258
recovering passwords 244
recurring events 186, 189
Redial list 49
redirector (websites) 271
refreshing web pages 147
,
271
reinstalling Palm
Desktop
software 262
reinstalling third-party
applications 251, 252, 255
Remember Last Category
option 66
Reminder Sound pick list 190
reminders. See alarms; alerts
Remote Address Lookup
107
Remove from album
command 173
removing. See deleting
Rename Card command 226
Rename Memo command
202
renaming contacts 127
repeat intervals (events) 186
Repeat list 186, 190, 193
repeating alarms 190
repeating events 186, 189
repeating tasks 193
rescheduling events 187
Reset Counters button 61
resets 251, 253–255
caution for 241, 254
Resolution pick list 169
resolution settings 166, 167
restarting device. See resets
restoring factory defaults 237
Return key 33
Review photos/videos pick
list 169
ringer 52, 78, 231
Ringer switch 9, 44
ringtone file types 110, 150
Ringtone pick list 66
ringtones
adding to caller IDs
ading 75, 150
wnlo
do
65, 66
recording 76
sending with messages
97, 110, 111
INDEX
311
Page 88

setting for phone 75–77
setting preferences for 76
rotating photos 173
S
Save As command 200
Save as Contact command
173
Save as Wallpaper command
173
Save List button 180
Save Page command 148
Save Picture command 114
Save Sound command 113
saved web page indicator
148
saving
calendars 114
contact information 114
files 200
images 150
messages 96, 110
phone numbers 56
pictures 114, 166, 169
playlists 180
video clips 168, 169
voice memos 201
web pages 148
scheduling events 184, 185,
186
Sci(x) display format 207
scientific calculator 206
scientific notation 207
screen
activating items on 30
activating wrong features
257
adjusting brightness 54,
232, 246
aligning 234
dimming 38
disabling 238, 239
highlighting items on 30
locking 239
oving
around on 27, 29
m
protecting 8
selecting items on 30, 31,
32
troubleshooting 257–258,
267
turning on or off 43, 246,
267
waking up 43
screen fonts 232
screen protectors 257
scroll arrows 30, 98
scrolling 146, 153
searching for
contacts 47, 78
specific characters 205
text 152, 205
wireless services 80
secondary apps 236
secure websites 145, 146,
272
security 73, 238, 242, 243,
244
Security button 241, 243
security certificates 145
Security command 243
Security screen 241
security software 238
Select Font dialog box 233
Select Media screen 97
Select Network command 80
self-portrait mirror 8
Send button 7
Send command 213
Send To Handheld droplet
177
sending
applications over
Bluetooth 213
Call-Me aler
calls to
ts 140
voicemail 51
email 96, 106, 113, 145
312
INDEX
Page 89

multimedia messages 108
photos 96, 111, 166, 171
text messages 50, 51,
108, 140
to chat rooms 116
video clips 168, 171
voice memos 202
voice messages 139
Sent folder 118
servers 95, 106, 247
service contracts 2
Set All Contact Alerts
command 133
Set Contact Alert option 133
Set Your Name option 141
settings (incompatible) 251
Setup Devices button 220
Setup Devices dialog box 73,
155, 158, 220
Shift/Find key 34, 205
short text messaging. See
SMS messaging
Show Address Bar option
152
Show Calendar event option
79, 189
Show Categories option 195
Show Category Column
option 188
Show Category List option
188, 189
Show Completed Tasks
option 195
Show Due Dates option 193,
195
Show Due Tasks option 188
Show Messages option 188
Show Priorities option 195
Show Records option 242,
243
Show SIM Phonebook option
66, 68
Show Time Bars option 188
Show timestamps in chats
tion
117
op
Shutter sound pick list 168
Side button 7, 236
signal strength 82, 265
Signal Strength icon 265
signatures 104
silencing system sounds 52,
231
silencing the ringer 52
silent alarm 76, 77, 190, 231
silent alerts 118
SIM Book command 63
SIM cards 3, 9, 240, 282
SIT files 208, 209
size information 212
slide shows 171
slides 110, 282
Slideshow Setting command
171
smart device. See Treo
smartcards 282
SMS messaging 108, 282
soft resets 253
software
See also applications
accessing 2, 150
conflicts with 261
installing 262
troubleshooting 253
uninstalling 260
updating 251
Software Installation CD 2,
253
songlists. See playlists
songs. See music
Sort by check box 195
Sort by Date command
y Name command 114
rt b
So
114
Sort command 114
Sort contacts by availability
setting 141
sorting
contacts 62, 67, 141
INDEX
313
Page 90

messages 100, 114
tasks 195
Sound & Alerts Preferences
screen 189
sound clips 110, 111, 113
Sound Off position (ringer)
52, 231
Sound On position (ringer)
231
sounds 110, 189, 190, 231
Sounds button 231
space (device) 19, 274
Space key 33
speaker 8
speakerphone 14, 54, 134,
266
Speakerphone button 54
special characters 34, 36,
110
speed-dial buttons 48, 69–70
speed-dial icon 48
spreadsheets 97, 199
starting chat sessions 115
static 266, 268
static electricity 284
statistical functions 207
statistical information 211
status icons 16, 81–84, 100
stereo adapters 72, 174
stereo headsets 72, 174
Sto button (calculator) 207
storing
information 203, 223, 274
music files 177
notes 200
photos 163, 165
Treo 8, 9
videos 163, 167
streaming content
e sheets 147
styl
150, 282
, 153
stylus 8, 29, 31, 32
support (AT&T) 4
support (Palm) 4
Swap button 57
SXGA digital camera. See
camera
symbols 34, 36, 62, 110
sync. See synchronization
sync button 25, 177
sync cable 22, 25
synchronization
Bluetooth devices and
157, 219, 220
changing defaults for 217,
218, 219, 227
device names and 20
Exchange ActiveSync and
105
IR ports and 221–222
offline 262
Outlook and 262, 263
overview 23, 203
precautions for 19, 92
removing apps and 211
setting up device for 18–
23
starting 25
third-party applications and
65, 253, 255, 258
troubleshooting 258–265
synchronization software
21–22, 237, 262
Synchronize the files setting
262
system colors 234
system dates and time 191,
244
system errors 261, 267, 277
system requirements 18
system resets 251, 254
system sounds
System Volum
e pick list 232
52, 231
–232
T
tabs 45, 56, 79
taking pictures 165–166, 273
Tap and Drag check box 153
314
INDEX
Page 91

tapping 29, 30, 32, 234
Task Details dialog 192, 193
tasks
See also events
adding alarms 193, 195
categorizing 193
completing 193, 195
creating 192
deleting 195
displaying 183, 188, 194
marking as private 193
prioritizing 193, 195
viewing attachments and
99
viewing due dates for 194,
195
Tasks application 192, 232
Tasks button 192
Tasks list 183, 193, 194, 195
Tasks Preferences screen
195
technical support (AT&T) 4
technical support (Palm) 4
Telenav 289
telephone. See phone;
phone calls
temperature conversions
207
text
copying 151
displaying on backgrounds
188
entering 34, 201
finding 152, 205
highlighting 30, 31
resizing 146
selecting 31, 114, 153
truncated 265
text message icon 119
text messages
See also messages
addressing
checking st
109
atus of
82, 83
creating 109–110
deleting 112, 114, 116
dialing from 49
downloading 112
making calls and 115
opening 112
retrieving 83
selecting links in 113
sending 50, 51, 108, 140
setting alerts for 118
special characters and 110
troubleshooting 269
text messaging services 2,
269
third-party applications
5-way navigator and 29
adding caller IDs and 65
adding security and 244
backing up info and 19,
255
beaming and 216
caution for 237, 251
compatibility with 18, 21
deleting 20, 275
getting help with 210
hard resets and 254
installing 251, 274
manually deleting 211
moving 20
reinstalling 251, 252, 255
searching in 205
synchronizing and 21
troubleshooting 275–276
uninstalling 210, 254
VPN clients and
third-part
y software.
247
See
third-party applications
Thumbnail View 170, 171,
174
time
recording videos and 167
scheduling events and
184, 187
INDEX
315
Page 92

setting system 244
viewing 190
time bars 188
time formats 233
time preferences 245
time slots (calendar) 188
Time Zone pick list 184
time zones 185, 245, 263
Timed Events check box 189
timestamps 117
tips 3
Tips icon 4
to do items. See tasks
toolbars 151, 171
touchscreen. See screen
Touchscreen Preferences
screen 234
touch-sensitive features 239
transactions 146, 272
transmission delays 269, 270
Trash folder 100, 101
travel alarm 192
Treo smart device
adding security for 244
charging 11, 12, 14
compatible hands-free
devices for 71
connecting to PCs 22
displaying space on 19
features described 1, 7–9
freeing space on 19, 210,
274
getting help with 3, 249
installing third-party apps
and 21, 275
locking 241
naming 20, 258
not responding 25
onalizing 229
pers
3
precautions for 283, 285
protecting 238–244
required items for 2
setting up 5
storing 8, 9
troubleshooting 4, 249
turning on and off 43
unlocking 240
unpacking 1
trickle-charging device 12
trigonometric functions 207
troubleshooting 4, 249
truncated text 265
Trusted Devices button 158
Trusted Devices list 155,
158, 160, 213
trusted pairs. See
partnerships
TTY/TDD devices 80
tutorial 3
Typing starts search option
78
U
unauthorized users 238
Unfiled category 214
uninstalling
Palm software 260
third-party apps 210, 254
Unknown Caller pick list 76
unlocking
smart device 240
the keyboard 238
unread messages 83, 104,
118, 183, 188
untimed events 185, 186,
189
updating
application software 251
information 2
W
orld Clock 191
3, 203
upgrades 18, 69, 251, 261
uploading music files 176
uppercase characters 34
urgent messages 119
URLs 113, 146, 152, 215
See also web links
USB hubs 22, 260
316
INDEX
Page 93

USB ports 22
Use color for pick list 117
user discussion groups 4
user folders 252, 258, 282
User Guide 3
usernames 94
V
Validity Period option 116
VersaMail application
changing accounts for 101
customizing 101–105
documentation for 274
getting started with 91
opening 92
sending email and 87, 96,
99
setting up 92, 93, 105
troubleshooting 269
version numbers 212
Vibrate pick list 76, 77, 190
vibrating alarm 76, 77, 190,
231
video albums 167, 170, 172,
173
video files 110, 150, 170
video recording screen 167
Video Settings screen 168
videos
adding to albums 172, 173
adjusting volume for 168
attaching to messages 96,
110, 111, 168
copying 172
deleting 168, 174
displaying info about 173
downloading 150
grouping 170
jumping to specific
sections of 168
pausing 1
playing 150, 16
68, 171
8, 170
recording 111, 166–167
removing from albums
173, 174
saving 168, 169
sending 168, 171
setting default size 169
setting preferences 168
storing 163, 167
synchronizing 174
viewing 169, 170, 174
View Activity Log command
102
View Contact command 127
virtual private networks 247
Visibility pick list 160, 213
voice captions
adding 166, 173
overriding 171
playing 170
Voice Dialing application 47
Voice Memo application 197,
201–202
Voice Memo list 202
voice memos 111, 201, 202
voice messages 139
voicemail
checking for 82
disabling alerts for 52
listening to 52, 53
retrieving 53, 82
sending calls to 51
setting alert tones for 77
setting up 52
Voicemail Alert pick list 77
Voicemail icon 53, 82
volume
alarm tones
189
alert tones 77
sic 179
mu
ph
one 17, 77, 266
ringer 78
ringtones 76
video clips 168
voice memos 202
INDEX
317
Page 94

Volume button 17, 77
volume conversions
(calculator) 207
Volume pick list 76, 77
volume preferences 231
VPN client software 247
W
waking up screen 43
walkie-talkie service 121
wallpaper 78, 173
warranty 256
web addresses 146, 147,
151, 152
web browser
accessing email and 87
auto-completion options
for 152
beaming from 215
connection status for 146
customizing 152–154
hiding toolbar in 151
opening 38, 146
overview 143, 145
restrictions for 145
setting default view 148,
152
setting home page 152
streaming and 151
unsupported items 271
web browser buttons 147
web browsing
See also web browser
DUN connections and
154, 157
from smart device 145
memory and 275
restrictions for 55
secure sites and 145
setting default app for 237
troubleshooting
owsing service 2
b br
we
270–273
web forms 146
Web icon 146
web links 30, 70, 145, 146
web pages
accessing 145, 147, 271
adding favorite buttons for
70
bookmarking 147–149
caching 154, 275
changing fonts for 232
changing layouts for 146
copying text from 151
dialing from 49, 151
disabling images 147, 153
displaying 145, 147
finding text on 152
opening 113, 153, 272
optimizing 272
redirecting 271
refreshing 147, 271
resizing text on 146
saving 148
scrolling 146, 153
selecting most recent 148
selecting text on 151, 153
sending email from 145
setting preferences for
152–154
viewing offline 148
web-based email 87
websites
See also web browsing
accessing secure 145,
146, 272
deleting cookies for 154
downloading from 149,
169
installing from
ening
op
208
History list for
151
submitting transactions
and 146, 272
Week View 183
weight conversions 207
Wide Page Mode 145, 146
318
INDEX
Page 95

Windows systems
installing from 209
installing to expansion
cards and 210
removing apps and 211
requirements for 18
sending email and 91,
101, 107
synchronizing and 22, 24,
26, 217, 221, 259
transferring music from
175, 177
upgrading and 251, 261
viewing multimedia on
174
wireless accounts. See
accounts
wireless connections 143,
158, 212, 213
wireless features 14, 275
wireless modems 154
wireless networks 80
Word documents 97, 199
World Clock 190–192
World Clock icon 191
world map 191
Wrap Search check box 152
X
Xpress Mail 87, 107, 268,
275
Y
Year View 183
Z
ZIP files 208, 209
zoom settings (camera) 166
INDEX
319
Page 96

320
INDEX
 Loading...