

Ozito PXHDK-200U User Manual
COMPACT
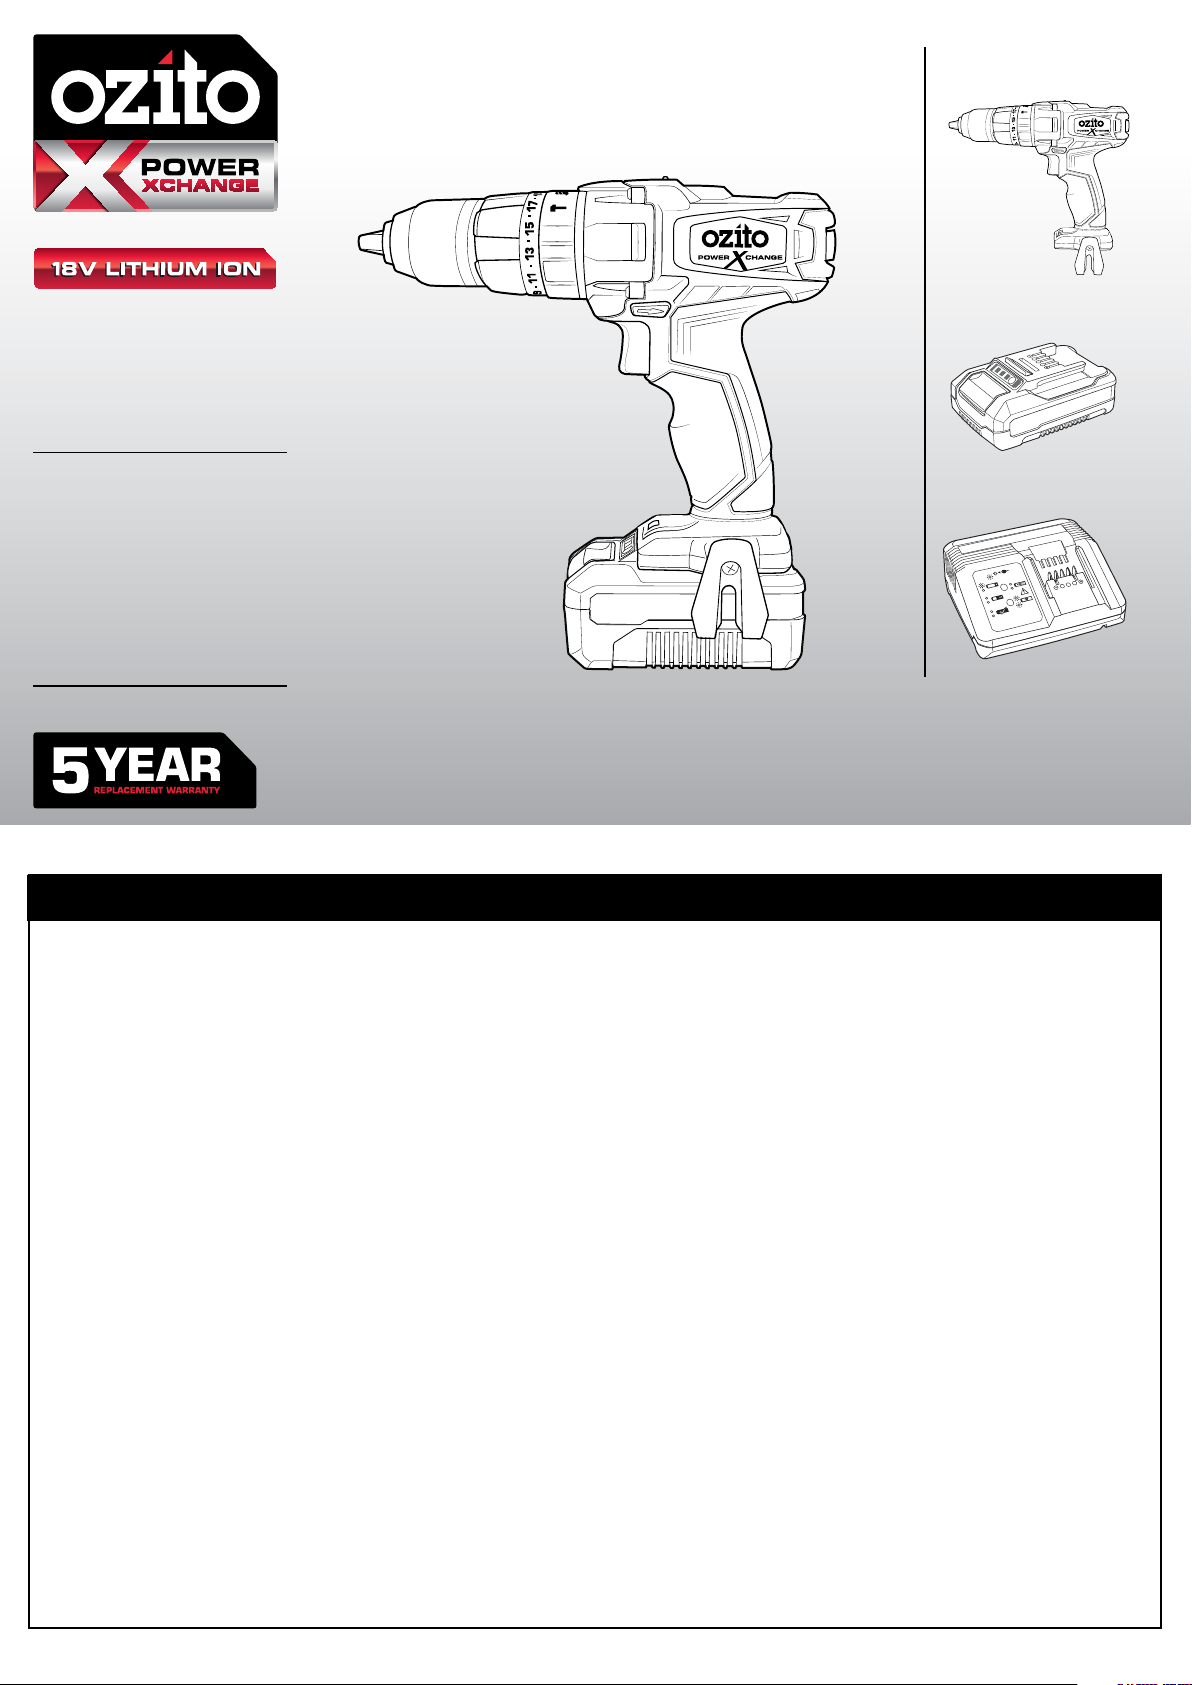
HAMMER DRILL
ORIGINAL INSTRUCTIONS
WHAT’S IN THE BOX
Cordless Hammer Drill
SPECIFICATIONS
Input: 18V
Chuck Size: 13mm Keyless
No Load Speed: 0-350 / 0-1,250/min
Impact Rate: 0-5,250 / 0-18,750bpm
Torque Setting: 18
Max. Torque: 36Nm
Battery: 18V 2.0Ah Li-Ion
Charge Time: 40min
Weight: 1.1kg (Tool Only)
ozito-diy.co.uk
WARRANTY
All of our products undergo strict quality checks to ensure that they reach you in perfect
condition. In the unlikely event that your device develops a fault, please contact our service
department at the address shown on this guarantee card. You can also contact us by
telephone using the customer service number shown. Please note the following terms under
which guarantee claims can be made:
1. These warranty terms regulate additional warranty services, which the manufacturer
mentioned below promises to buyers of its new products in addition to their statutory
guarantee claims are not affected by this guarantee. Our guarantee is free of charge to you.
2. The warranty services only covers defects due to material or manufacturing faults on
a product which you have bought from the manufacturer mentioned below are limited to
either the rectication of said defects on the product or the replacement of the product,
whichever we prefer.
Please note that our devices are not designed for use in commercial, trade or professional
applications. A guarantee contract will not be created if the device has been used by
commercial, trade or industrial business or has been exposed to similar stresses during the
guarantee period.
3. The following are not covered by our guarantee:
- Damage to the device caused by a failure to follow the assembly instructions or due to
incorrect installation, a failure to follow the operating instructions (for example connecting
it to an incorrect mains voltage or current type) or a failure to follow the maintenance and
safety instructions or by exposing the device to abnormal environmental conditions or by
lack of care and maintenance.
- Damage to the device caused by abuse or incorrect use (for example overloading the
device or the use or unapproved tools or accessories), ingress of foreign bodies into the
device (such as sand, stones or dust, transport damage), the use of force or damage caused
by external forces (for example by dropping it).
- Damage to the device or parts of the device caused by normal or natural wear or tear or by
normal use of the device.
2.0Ah Battery Pack
Fast Charger
PXHDK-200U
covered by a 12 month warranty. Warranty excludes consumable parts. Guarantee claims
should be submitted before the end of the guarantee period within two weeks of the defect
being noticed. No guarantee claims will be accepted after the end of the guarantee period.
The original guarantee period remains applicable to the device even if repairs are carried
out or parts are replaced. In such cases, the work performed or parts tted will not result
in an extension of the guarantee period, and no new guarantee will become active for the
work performed or parts tted. This also applies if an on-site service is used.
IN ORDER TO MAKE A CLAIM UNDER THIS WARRANTY YOU MUST RETURN THE PRODUCT TO
THE PLACE OF PURCHASE WITH YOUR REGISTER RECEIPT.
Please refer to the restrictions of this warranty concerning wearing parts, consumables and
missing parts as set out in the service information in these operating instructions.
CUSTOMER SERVICE HELPLINE
GB: 0151 294 4488
IRL: 1850 882711
Ozito-diy.co.uk
4. Your Product is guaranteed for a period of 60 months from the original date of purchase
and is intended for DIY (Do It Yourself) use only. Lithium Ion batteries and chargers are
OZITO UK Unit 9 Stadium Court, Wirral International Business Park, Plantation Road, Bromborough, Wirral, CH62 3QG
0816
KNOW YOUR PRODUCT
SETUP & PREPARATION
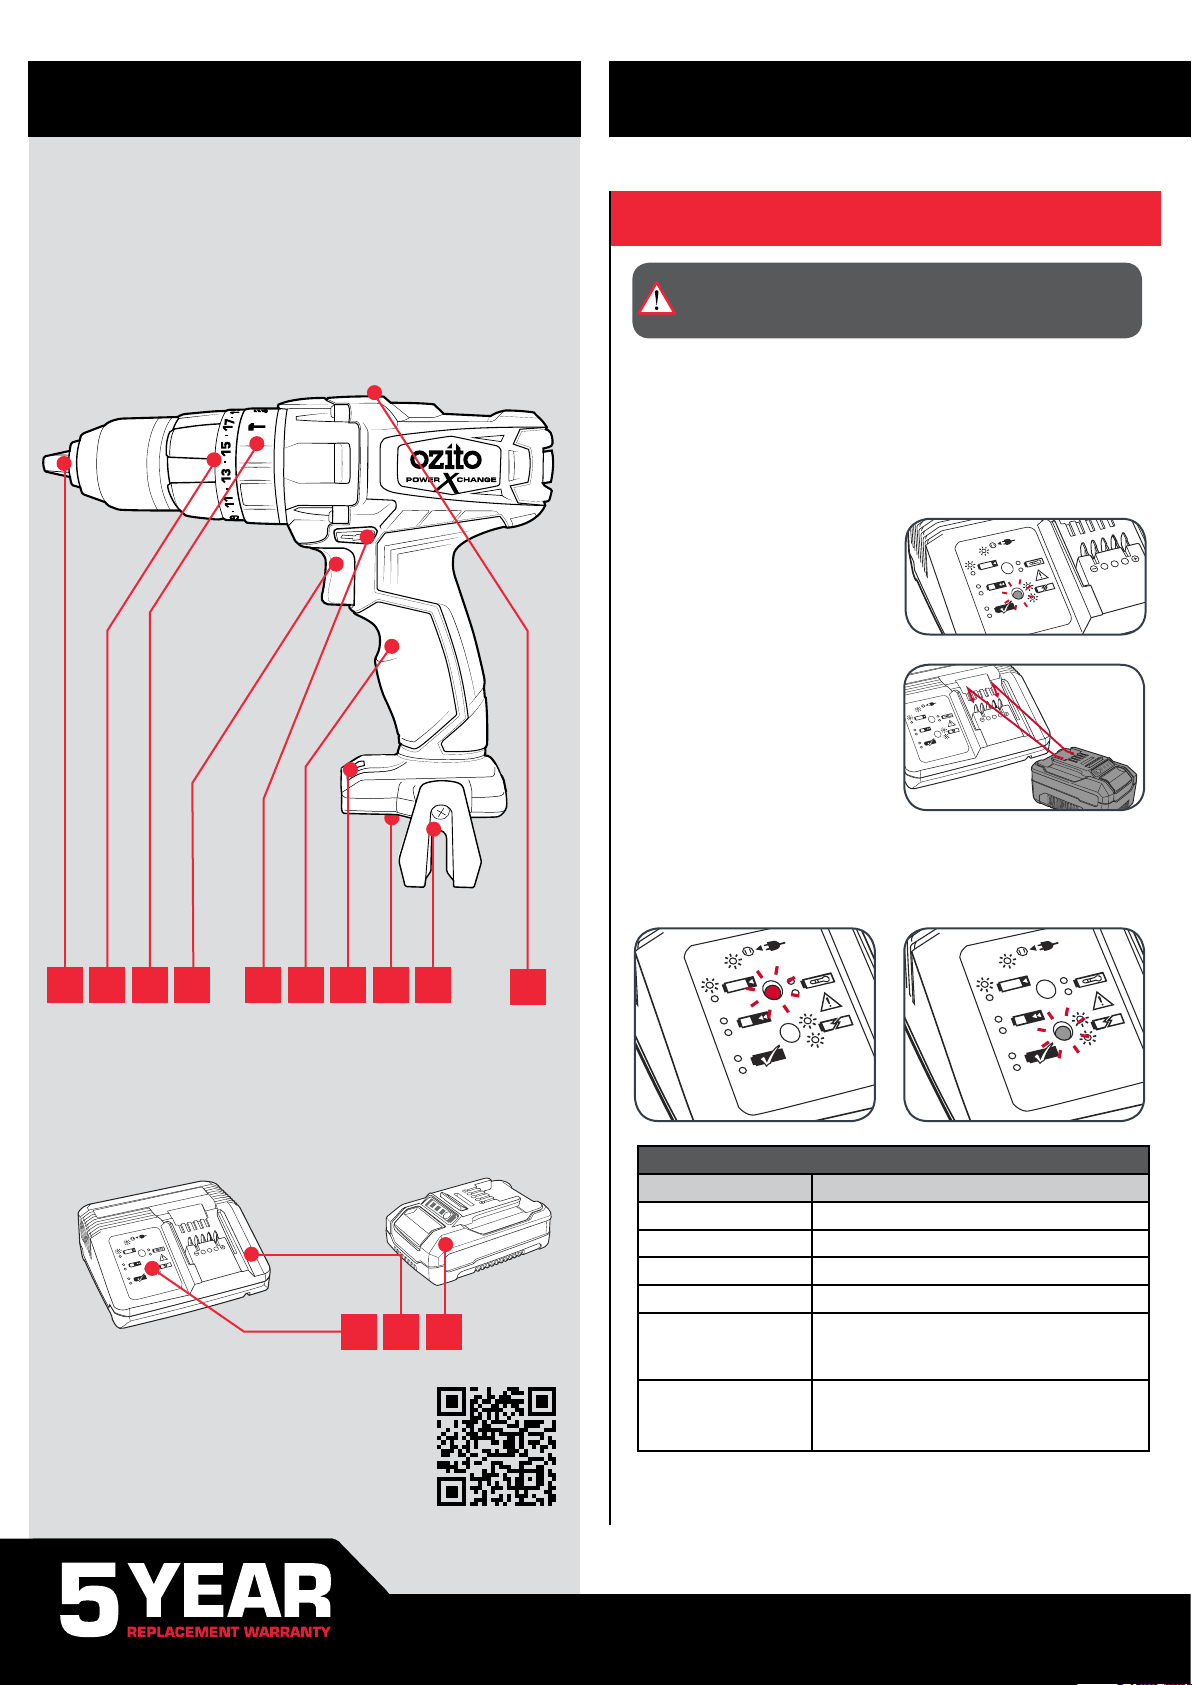
COMPACT HAMMER DRILL
1 Metal Ratcheting Chuck
2 Torque Adjustment Collar
3 Function Collar
4 Variable Speed Trigger
5 Forward / Reverse Lever
6 Sure Grip Handle
7 LED Light
8 Battery Seating
9 Belt Clip
10 Gear Selector
1. BATTERY & CHARGING
CAUTION: THE CHARGER FOR THIS PRODUCT SHOULD
BE PROTECTED BY A RESIDUAL CURRENT DEVICE
(RATED AT 30mA OR LESS).
The purchased battery will be shipped in a low charge condition, and requires charging
prior to use. Allow several cycles of charging and discharging (through use of the tool)
for the battery to reach its optimum performance / runtime.
Charging your lithium ion battery - Fast Charger
1 Connect the charger into a mains power outlet.
2 The charger LED will ash green
showing power is being supplied
to the charger.
3 With the charger sitting on a at
surface, align the raised ribs on
the battery with the recess in the
charger and slide onto the charger
ensuring a rm connection.
1 2 3 4 5 6 7 8109
ACCESSORIES
11 Charging Unit LED
12 Charging Unit
ONLINE MANUAL
Scan this QR Code with your
mobile device to take you to the
online manual.
13 2.0Ah Battery
11 12 13
4 The charger LED will illuminate
red signifying that the battery is
charging.
Charger LED Indicator
LED Indicator Situation
GREEN (Flashing) Stand By (no battery pack is inserted)
RED (Flashing) Battery is charging (low charge)
RED (Illuminated) Battery is charging (mid charge)
GREEN (Illuminated) Battery is 85% - 100% charged and ready for use
BOTH(Illuminated) Battery pack is too hot or too cold (charging will begin
automatically when battery reaches correct charging
temperature).
BOTH (Flashing) Defective battery. Never charge a defective battery
pack!
Remove battery pack from charger.
5 The charger LED will illuminate
green once the battery is charged
and ready for use.
2. BATTERY INSTALLATION
Charging your lithium ion battery - Eco Charger
1 Connect the charger into a mains power outlet.
2 The charger LED will ash green
showing power is being supplied
to the charger.
3 With the battery sitting on a at
surface, align the raised ribs on the
battery with the recess in the charger
and slide onto the battery ensuring a
rm connection.
4 The charger LED will illuminate red signifying that the battery is charging.
5 When removing the charger from the
battery, rst press the battery release
tab, then slide the charger from its
position.
Charger LED Indicator
LED Indicator Situation
GREEN (Flashing) Stand By (no battery pack is inserted)
RED (Illuminated) Battery is charging (low charge)
GREEN (Illuminated) Battery is charged and ready for use
RED (Flashing) Battery or Charger fault
RED & GREEN (Flashing) Battery pack is too hot or too cold (remove battery from
charger and store at room temperature 20ºC. Insert
battery again when at correct charging temperature). If
this happens again, the battery is defective and needs
to be replaced.
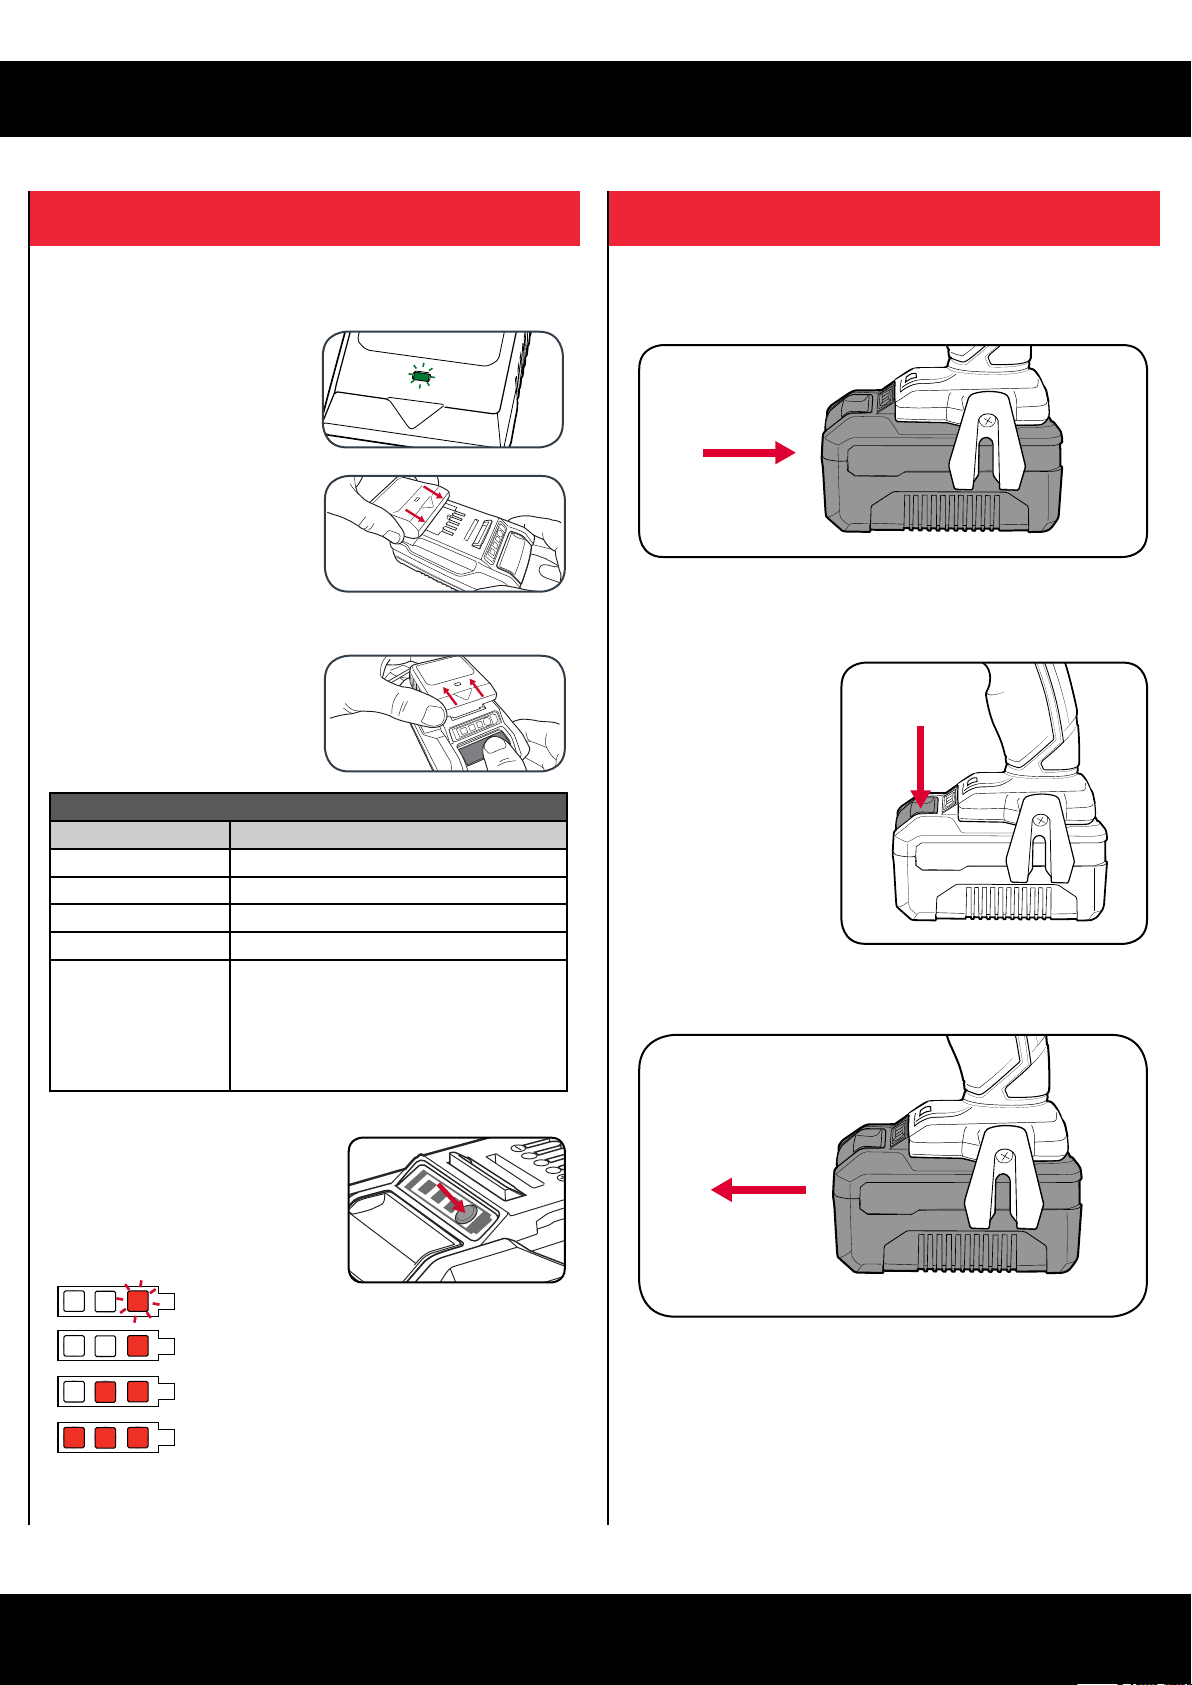
Installing the Battery Pack
1 Slide the battery into the drill base until it clicks into place.
Removing the Battery Pack
1 Hold down the battery
release button.
2 Slide the battery out.
Battery Charge Indicator
The purchased battery is equipped with a
battery charge indicator to show the state of
the battery charge.
Press the charge indicator button and look to
see which LED lights.
Battery requires
immediate charging
Low state of charge, requires charging soon.
Mid state of charge
Full state of charge.
Note: The battery needs to be removed from the tool to check the state of charge.
FWD
REV
OPERATION
3. KEYLESS CHUCK 4. CONTROLS
WARNING! ENSURE THE TOOL IS SWITCHED OFF AND
DISCONNECTED FROM THE POWER SUPPLY BEFORE
PERFORMING ANY OF THE FOLLOWING TASKS.
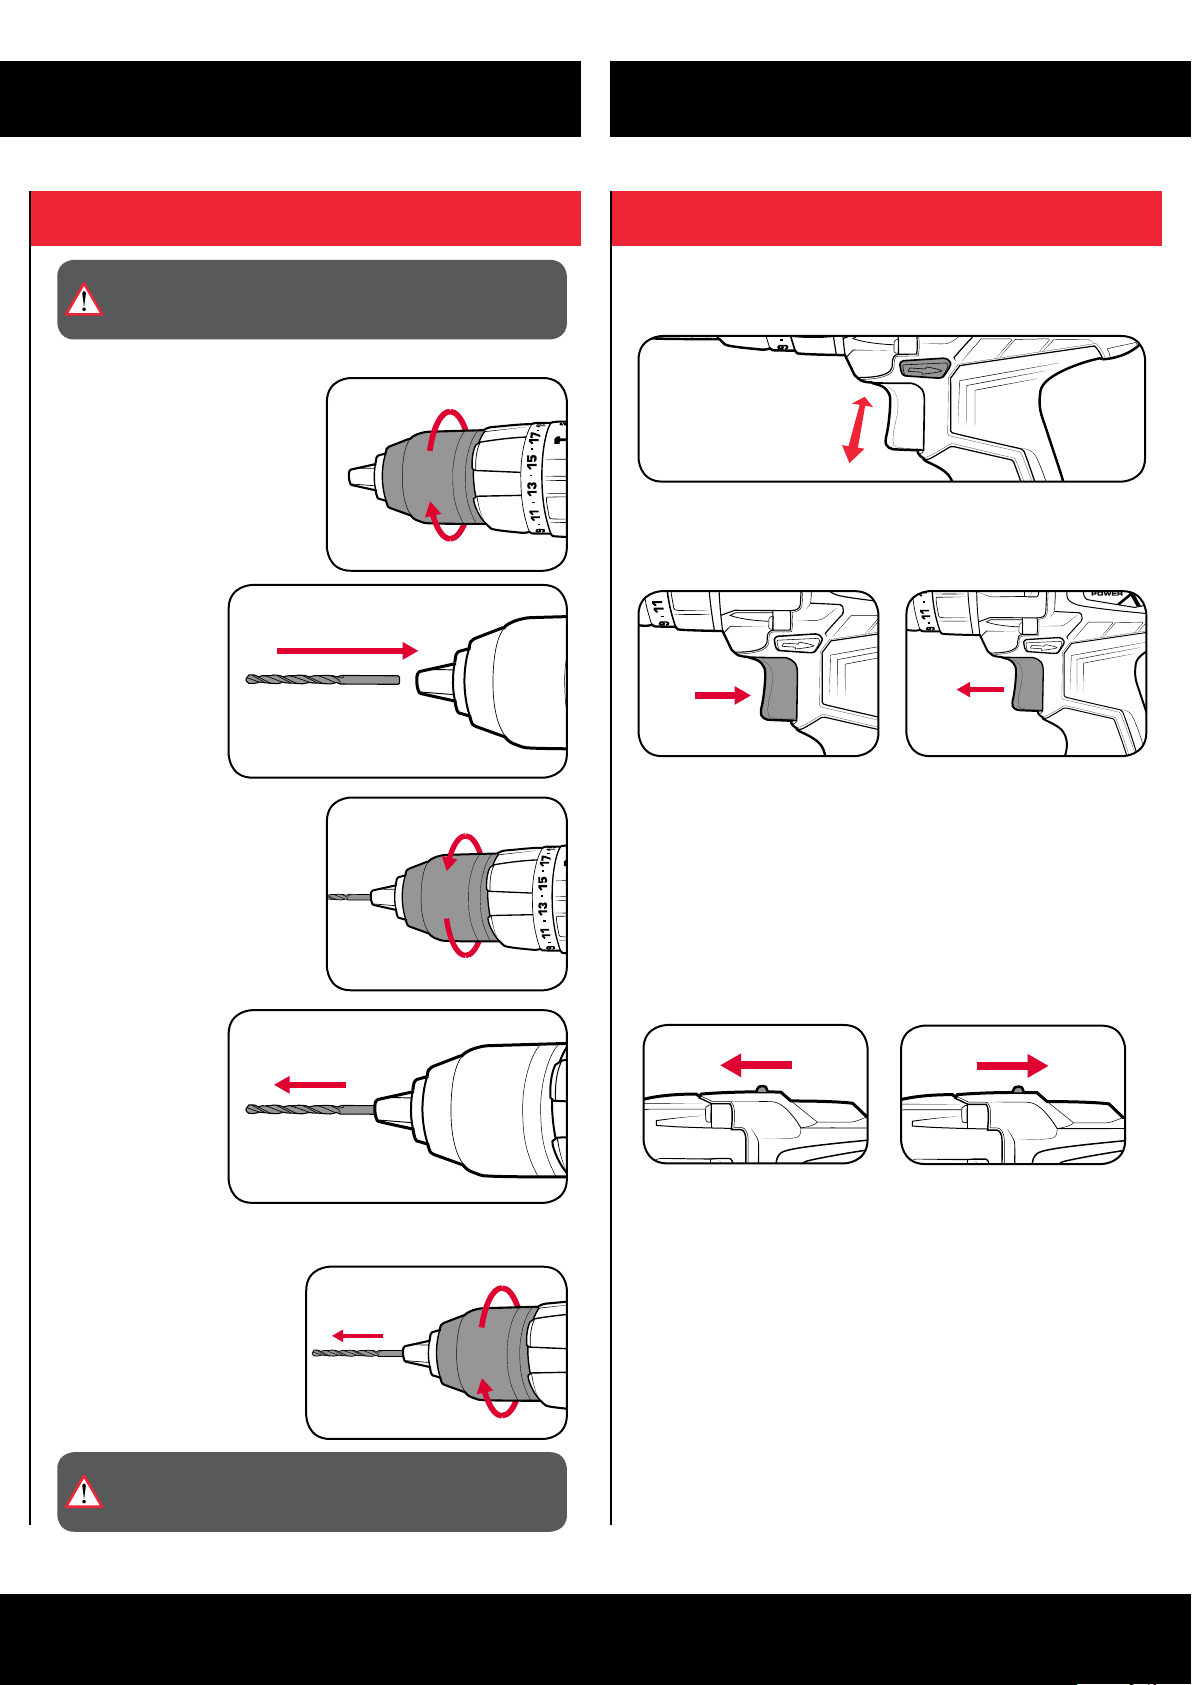
Installing a Drill Bit
1 Rotate the chuck collar anti-
clockwise to open the chuck.
2 Insert the drill bit,
making sure it
is centred in the
chuck.
3 Tighten the chuck by turning
clockwise.
Forward/ Reverse Lever
1 For forward rotation, push the fwd/rev lever towards the left side of the drill. For
reverse rotation push fwd/rev lever to the right.
Variable Speed Trigger
1 To start drilling squeeze the variable
speed trigger.
Note: The more the variable speed trigger is depressed, the faster the drill bit will
rotate.
2 To stop drilling release the trigger.
4 Pull on the bit to
ensure it is rmly
secured.
Removing a Drill Bit
1 Open the chuck by rotating the
chuck collar and remove the
drill bit.
Speed Control
The gear selector controls the speed of the drill. First gear allows slower drilling
with more torque, while second gear is suitable when less torque but higher speed
is required.
1 Slide the switch forward to select
rst gear.
2 Slide the switch backward to
select second gear.
CAUTION! TO REDUCE THE RISK OF INJURY, WE
RECOMMEND THE USE OF GLOVES WHEN HANDLING
DRILL BITS.

5. FUNCTIONS
FWD
REV
3
5
7
9
6. DRILLING
Drilling
1 To drill into wood, metal or plastic,
turn the function collar to the align
the arrow on the housing with the
drill icon.
Screwdriving
1 To screw into wood, metal or
plastic, turn the function collar to
the align the arrow on the housing
with the screw icon.
The clutch is then enabled to
adjust torque.
Note: 1st gear (low speed)
is recommended for
screwdriving.
2 To adjust the torque, rotate the torque collar to the desired setting.
Before starting to drill, perform a few simple checks.
1 Depress and release the variable
speed trigger to ensure it is not
locked on.
2 Check the function selector
and forward/reverse lever is on
desired setting.
3 Secure the material to be drilled in a vice or clamp to stop it turning whilst
drilling.
4 Hold the drill rmly and place the
bit at the point to be drilled.
5 Depress the variable speed
trigger to start the drill.
Note: Selecting a higher torque setting will allow the drill to use more torque to drive
the screw in or out. To prevent damaging the screw head, it is recommended to
start at a low torque setting and increase when necessary.
Hammer Drilling
1 To drill into concrete, brick or
other masonry, turn the function
collar to the align the arrow on
the housing with the hammer
icon.
Note: 2nd gear (high speed) is
recommended for hammer
drilling.
6 Move the drill bit into the workpiece.
Note: Do not force the drill or apply side pressure to elongate the hole. Let
the drill do all the work.
PXHDK-200U
 Loading...