

Ozito PXIDS-300, PXBIS-320 Instruction Manual
CORDLESS
IMPACT DRIVER
18V Lithium Ion
INSTRUCTION MANUAL
SPECIFICATIONS
Voltage: 18V
No Load Speed: 0-2700/min
Chuck Size: 6.35mm (1/4”) Hex
Impact Rate: 0-3200/min
Max. Torque: 120Nm
Weight: 1.4kg
PXIDS-300
WHAT’S IN THE BOX
Impact Driver
ozito.com.au
Battery & Charger
sold separately
ONLINE MANUAL
Scan this QR Code with your
mobile device to take you to
the online manual.
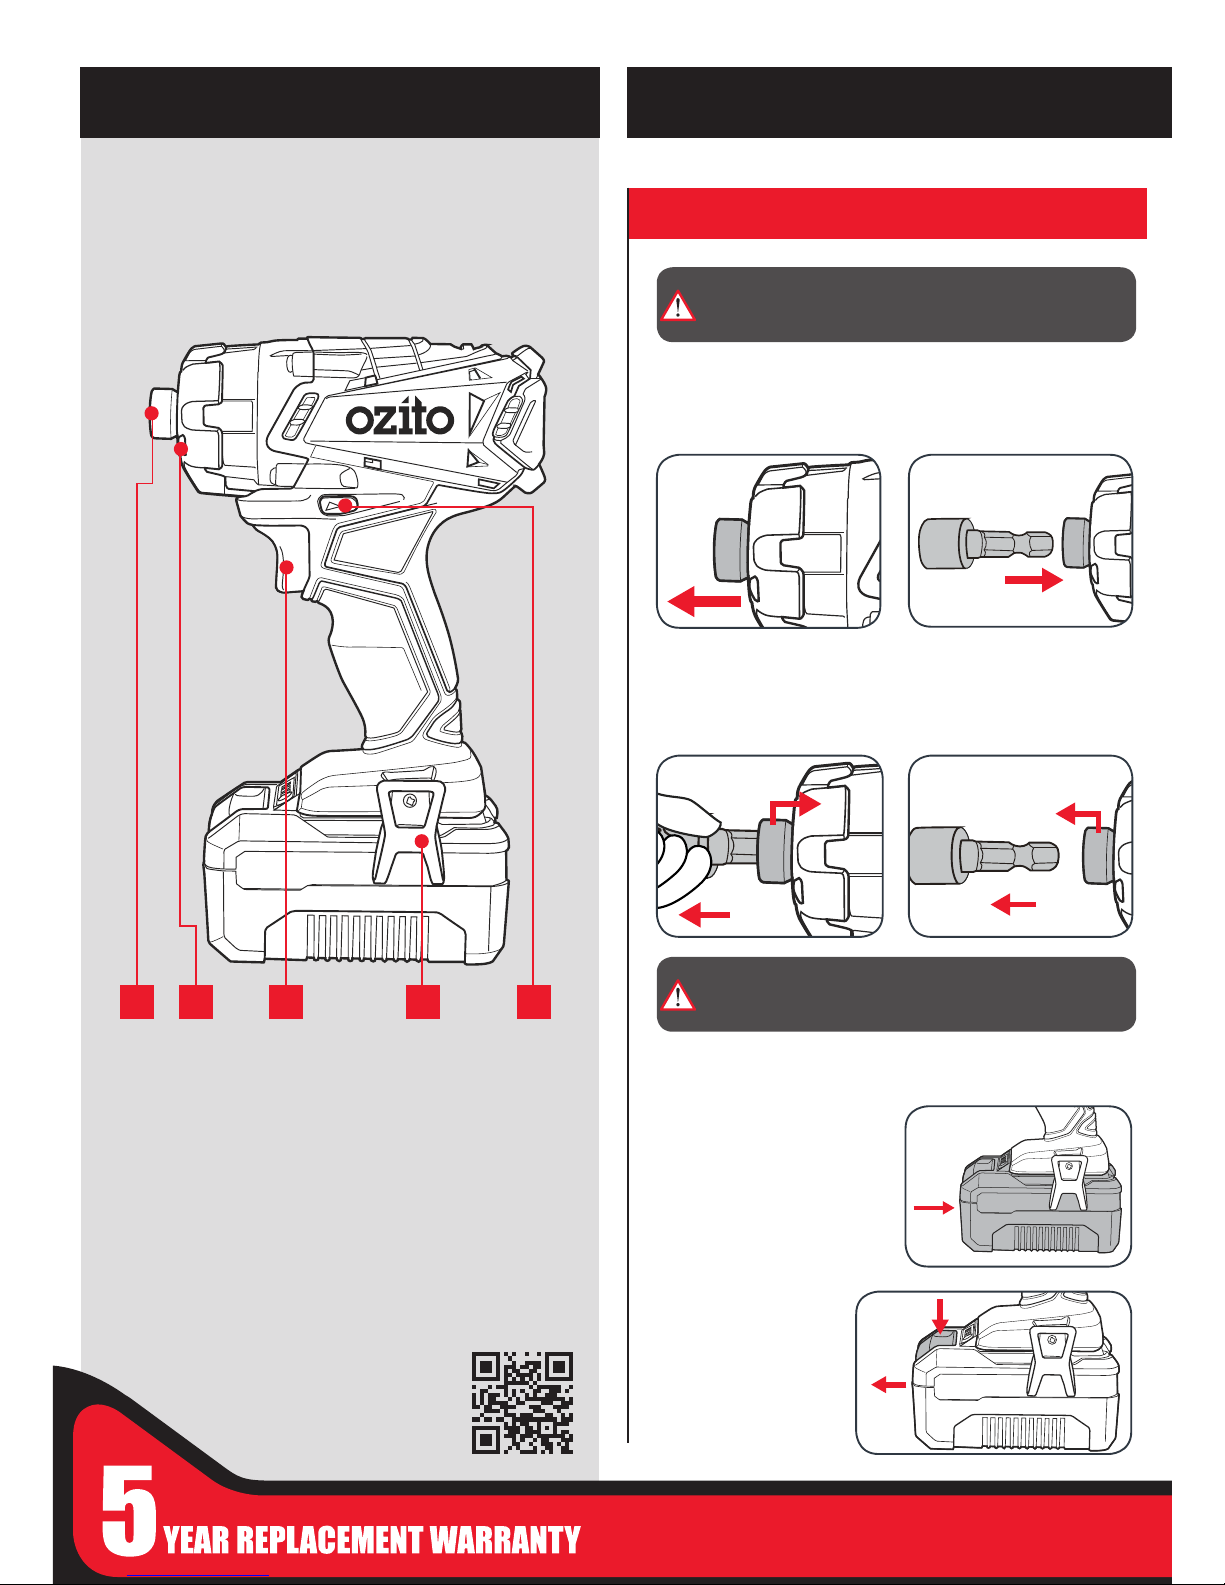
KNOW YOUR PRODUCT SETUP & PREPARATION
1. ASSEMBLY
CORDLESS IMPACT DRIVER
1 2 3 4 5
1 Drive Bit Retaining Ring
2 Tri-Beam LED Light
3 Variable Speed Trigger
4 Belt Hook
5 Forward/ Reverse Lever
BATTERY & CHARGER (sold separately)
Compatible chargers
Eco charger PXCSCH-120
“ “ PXCG-120
Fast charger PXCFCH-030
“ “ PXCG-030
Compatible battery packs
1.5Ah PXCBAT-015
“ PXBP-150
3.0Ah PXCBAT-030
“ PXBP-300
5.2Ah PXCBAT-052
“ PXBP-520
Inserting & Removing the Battery (not included)
1 Align the ribs of the battery
with the recess at the base
of the driver hanlde and
push in until it clicks into
place.
2 To remove, press
and hold the battery
release tab and
then slide out.
1 Pull the drive retaining ring
forward.
3 Release the drive bit
retaining ring then pull on
the bit to ensure it is rmly
in place.
4 To remove, pull the drive
retaining ring forward &
remove the driving bit.
2 Insert the hex shank of the
appropriate (1/4”) driver
bit.
WARNING! ENSURE THE TOOL IS SWITCHED OFF AND
THE BATTERY IS REMOVED BEFORE PERFORMING ANY
OF THE FOLLOWING TASKS.
CAUTION! DO NOT HANDLE ACCESSORIES WITHOUT
GLOVES AS THEY ARE SHARP AND CAN BECOME HOT
AFTER USE, POTENTIALLY CAUSING PERSONAL INJURY.
b
a
b
a
Inserting & Removing Accessories
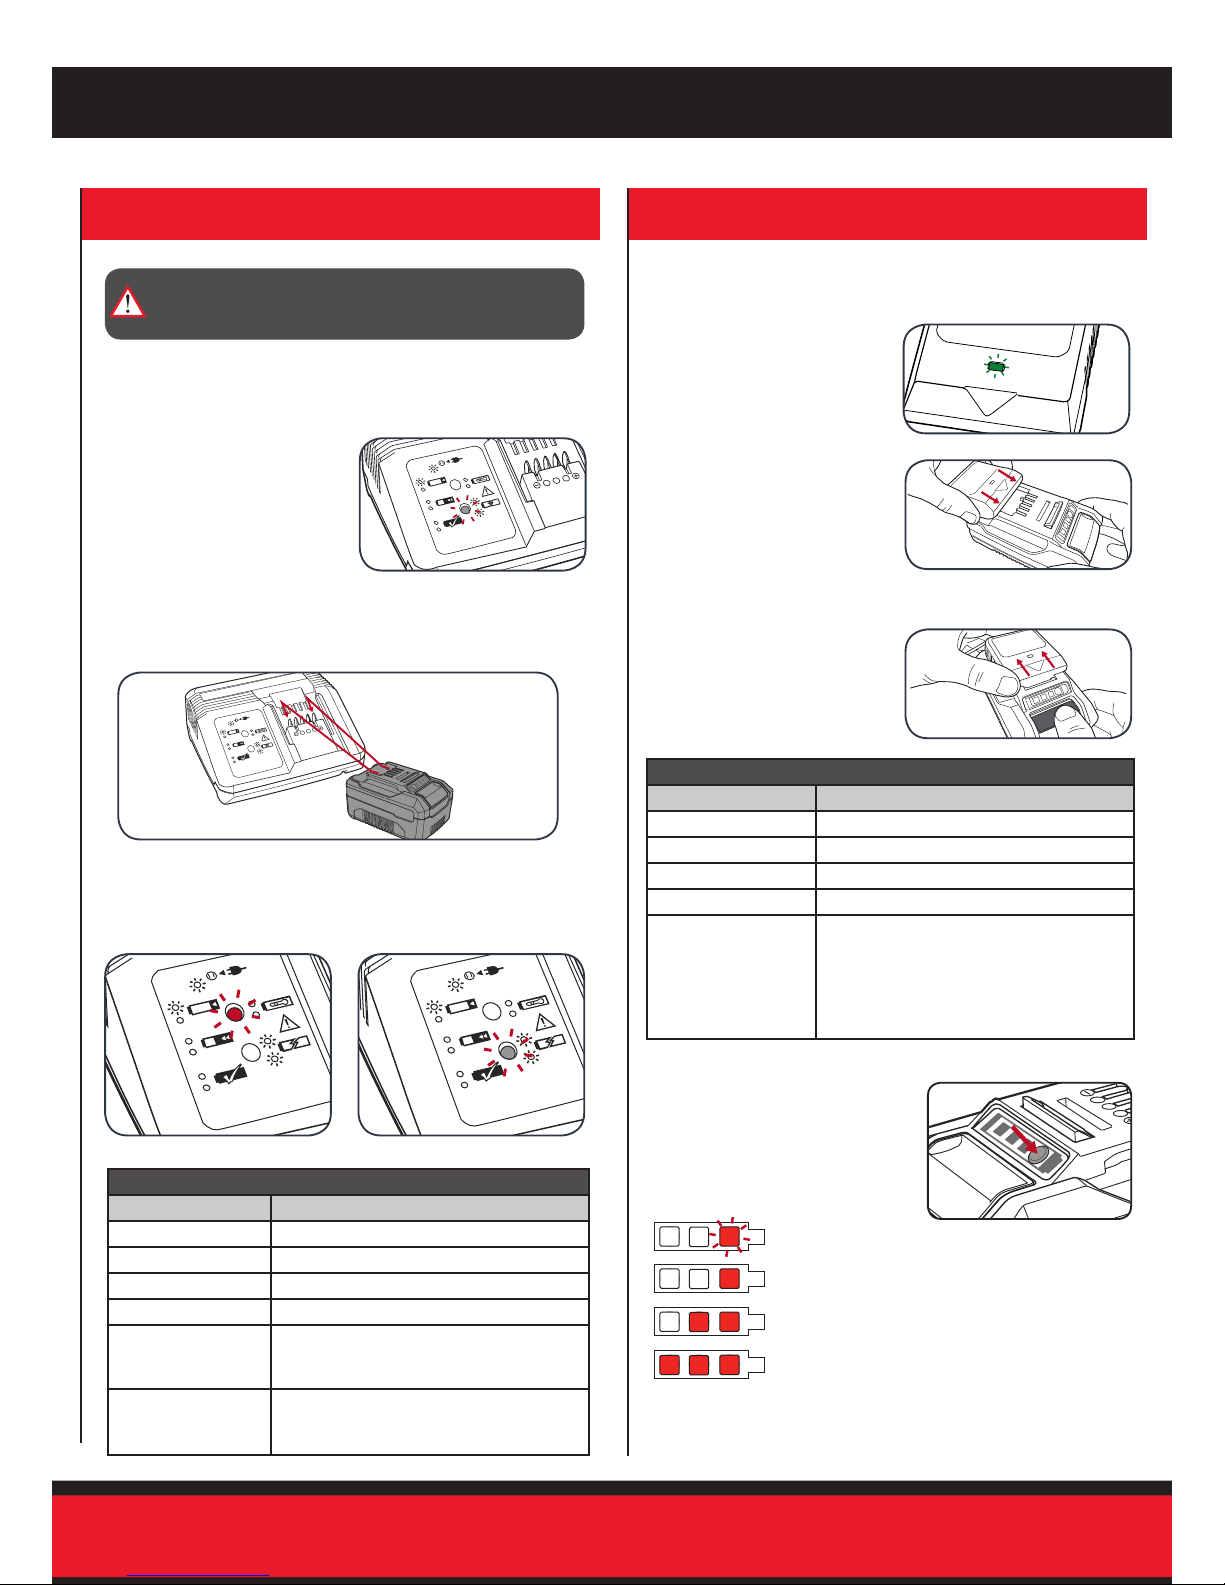
Battery Charge Indicator
The purchased battery is equipped
with a battery charge indicator to
show the state of the battery charge.
Press the charge indicator button and
look to see which LED lights.
Battery requires
immediate charging
Low state of charge, requires charging soon.
Mid state of charge
Full state of charge.
Note: The battery needs to be removed from the tool to check the state
of charge.
1 Connect the charger into a mains power outlet.
4 The charger LED will illuminate red signifying that the battery
is charging.
3 With the battery sitting on a at
surface, align the raised ribs
on the battery with the recess
in the charger and slide onto
the battery ensuring a rm
connection.
2 The charger LED will ash
green showing power
is being supplied to the
charger.
5 When removing the charger
from the battery, rst press the
battery release tab, then slide
the charger from its position.
Charging your lithium ion battery - Eco Charger
Charger LED Indicator
LED Indicator Situation
GREEN (Flashing) Stand By (no battery pack is inserted)
RED (Illuminated) Battery is charging (low charge)
GREEN (Illuminated) Battery is fully charged
RED (Flashing) Battery or Charger fault
RED & GREEN
(Flashing)
Battery pack is too hot or too cold (remove
battery from charger and store at room
temperature 20ºC. Insert battery again when
at correct charging temperature). If this
happens again, the battery is defective and
needs to be replaced.
CAUTION: THE CHARGER FOR THIS PRODUCT SHOULD
BE PROTECTED BY A RESIDUAL CURRENT DEVICE
(RATED AT 30MA OR LESS).
1 Connect the charger into a mains power outlet.
4 The charger LED will
illuminate red signifying that
the battery is charging.
3 With the charger sitting on a at surface, align the raised ribs
on the battery with the recess in the charger and slide onto
the charger ensuring a rm connection.
2 The charger LED will ash
green showing power
is being supplied to the
charger.
5 The charger LED will
illuminate green once the
battery is fully charged.
Charging your lithium ion battery - Fast Charger
Charger LED Indicator
LED Indicator Situation
GREEN (Flashing) Stand By (no battery pack is inserted)
RED (Flashing) Battery is charging (low charge)
RED (Illuminated) Battery is charging (mid charge)
GREEN (Illuminated) Battery is fully charged
BOTH (Illuminated) Battery pack is too hot or too cold (charging
will begin automatically when battery reaches
correct charging temperature).
BOTH (Flashing) Defective battery. Never charge a defective
battery pack!
Remove battery pack from charger.
2. BATTERY & CHARGING (sold separately)
 Loading...