

Page 1
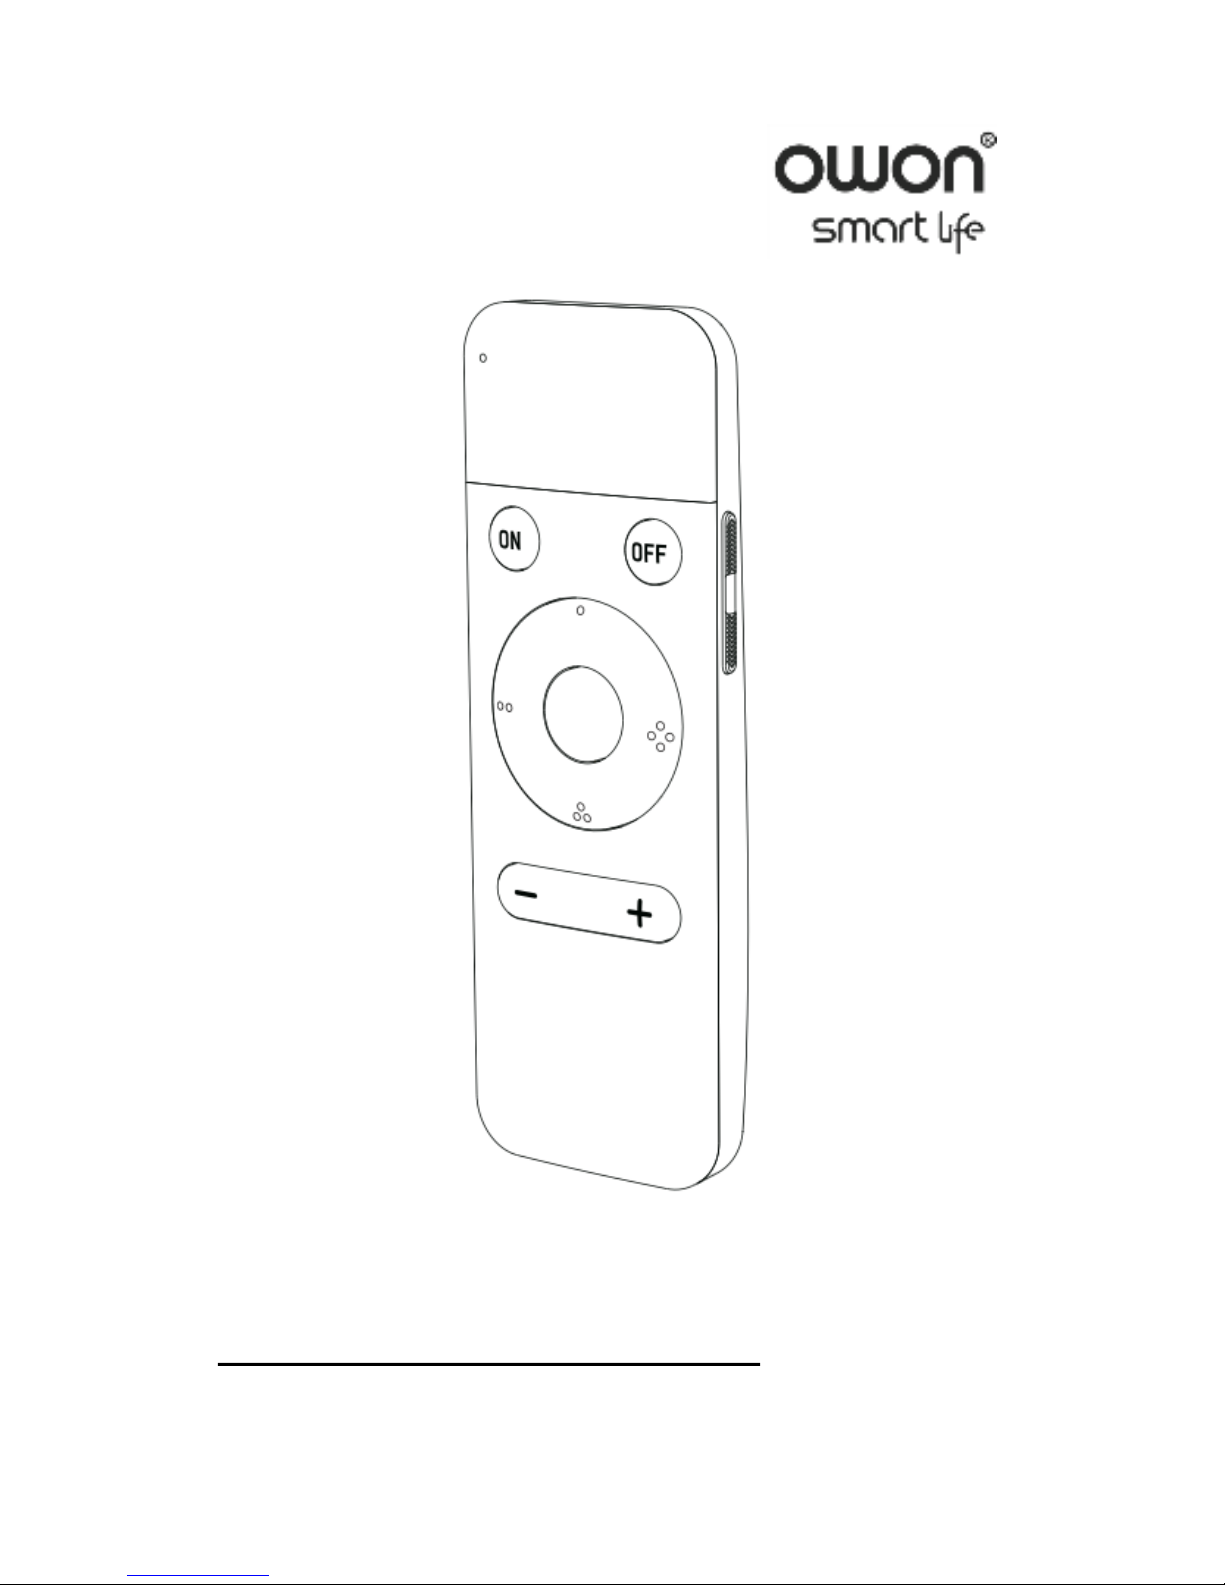
RC204 ZigBee Remote Control
Quick Start Guide
Page 2
2
1. Welcome
The RC204 ZigBee Remote Control is used to control up
to four devices either at one time or individually. Take
controlling CCT Tunable LED bulbs as an example, you
are able to use it to control the following.
Turn on/off the LED bulbs at one time or individually.
Adjust each of the brightness of the CCT tunable LED
bulb individually.
Adjust each of the color temperature of the CCT
tunable LED bulb individually.
2. Get to know your device
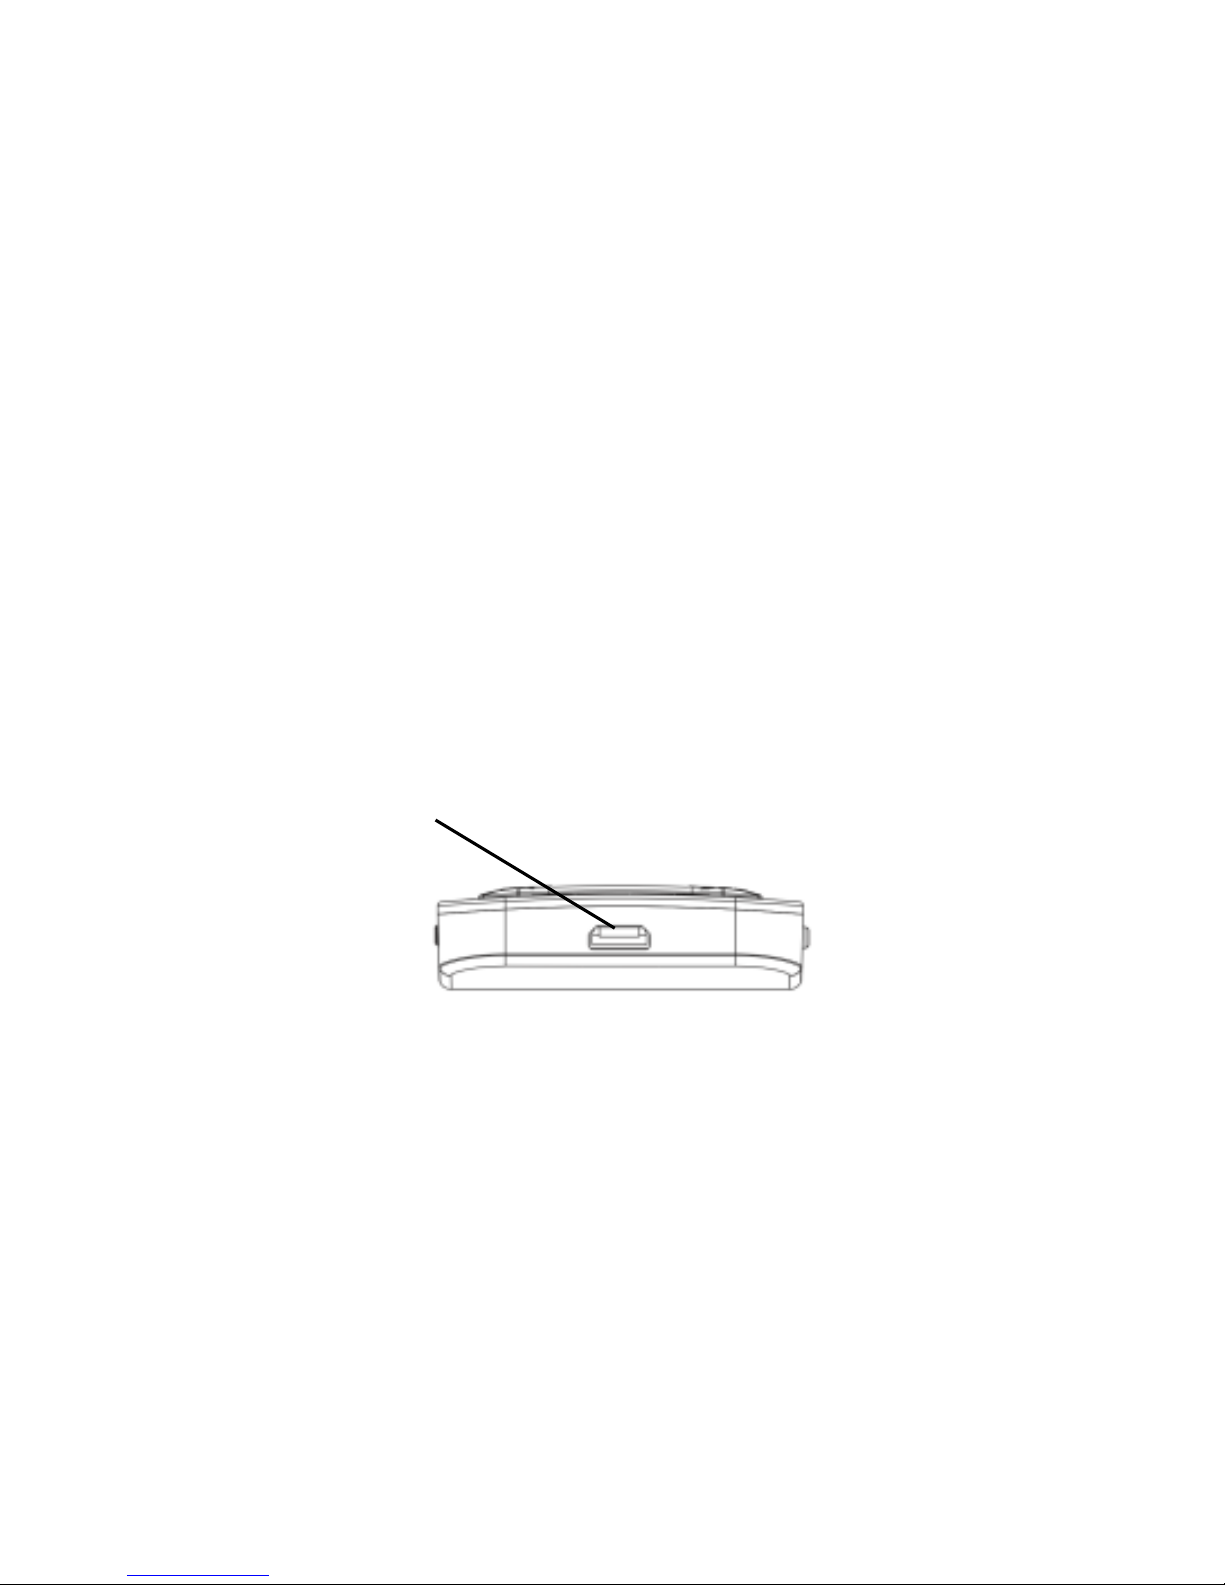
2.1. RC204 at a glance
Micro USB
Page 3
3
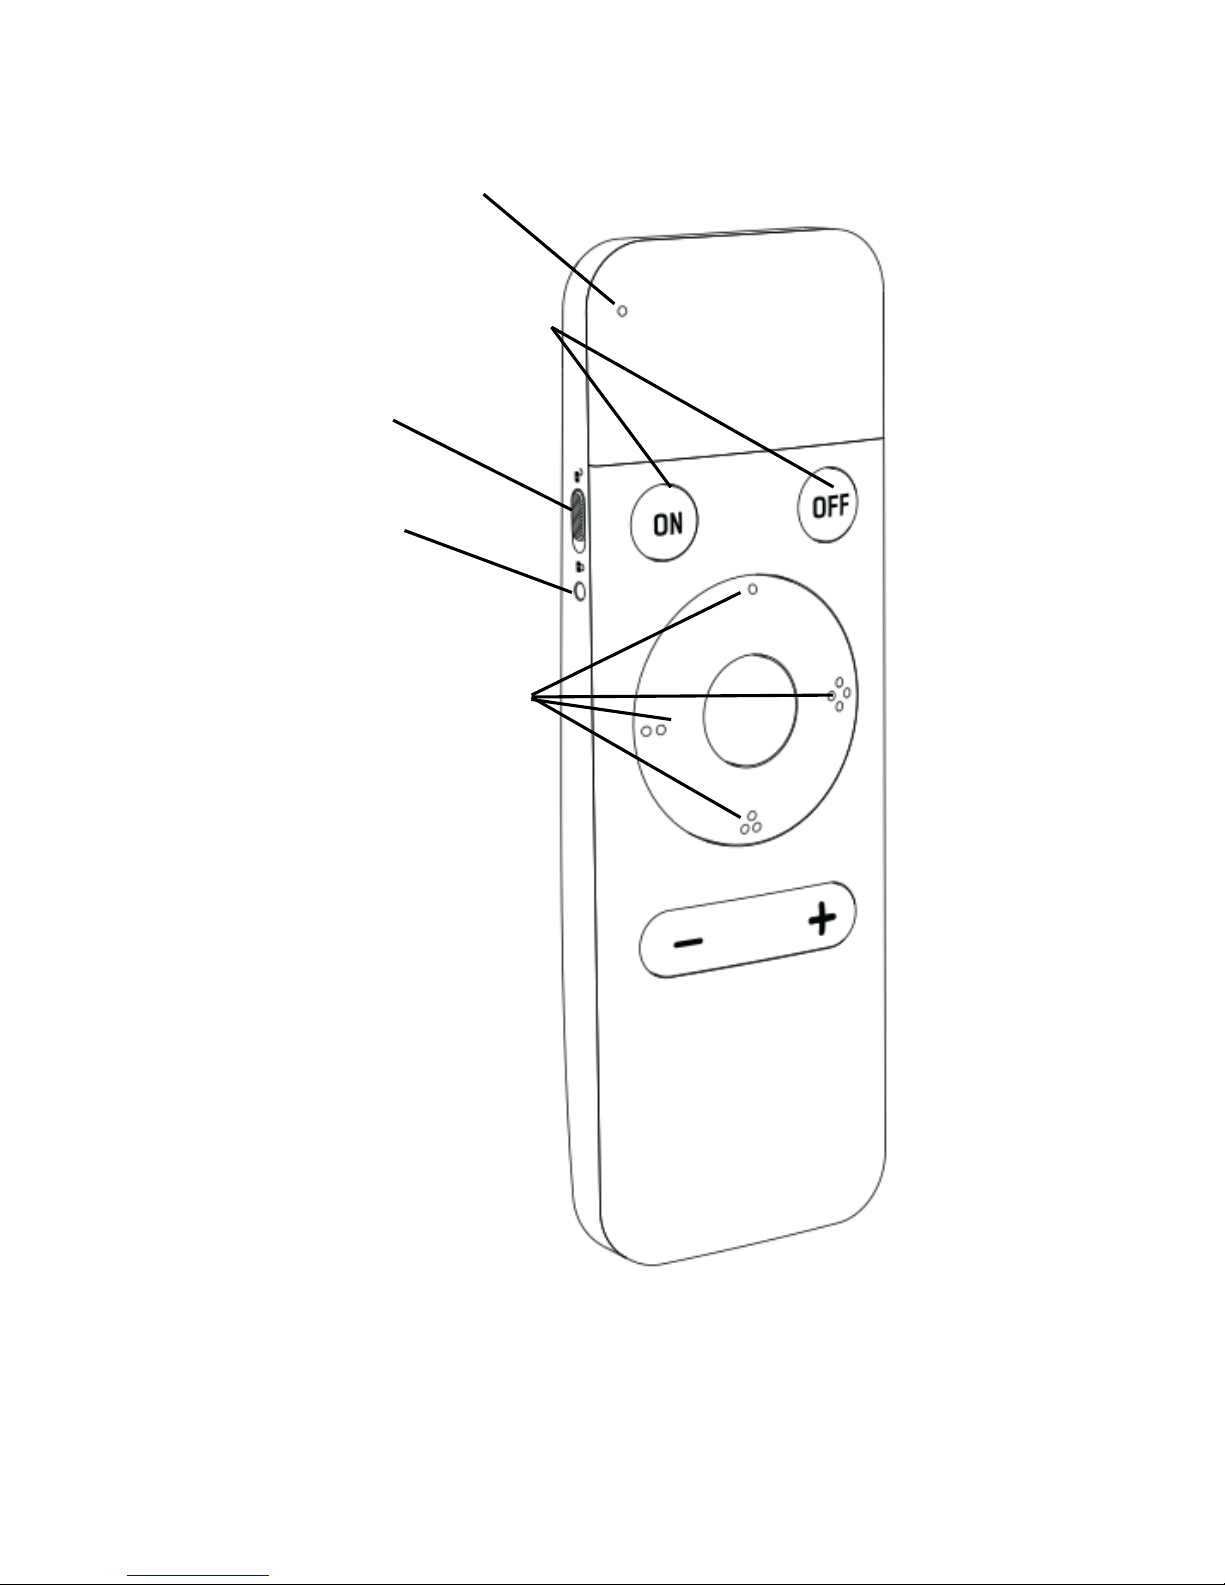
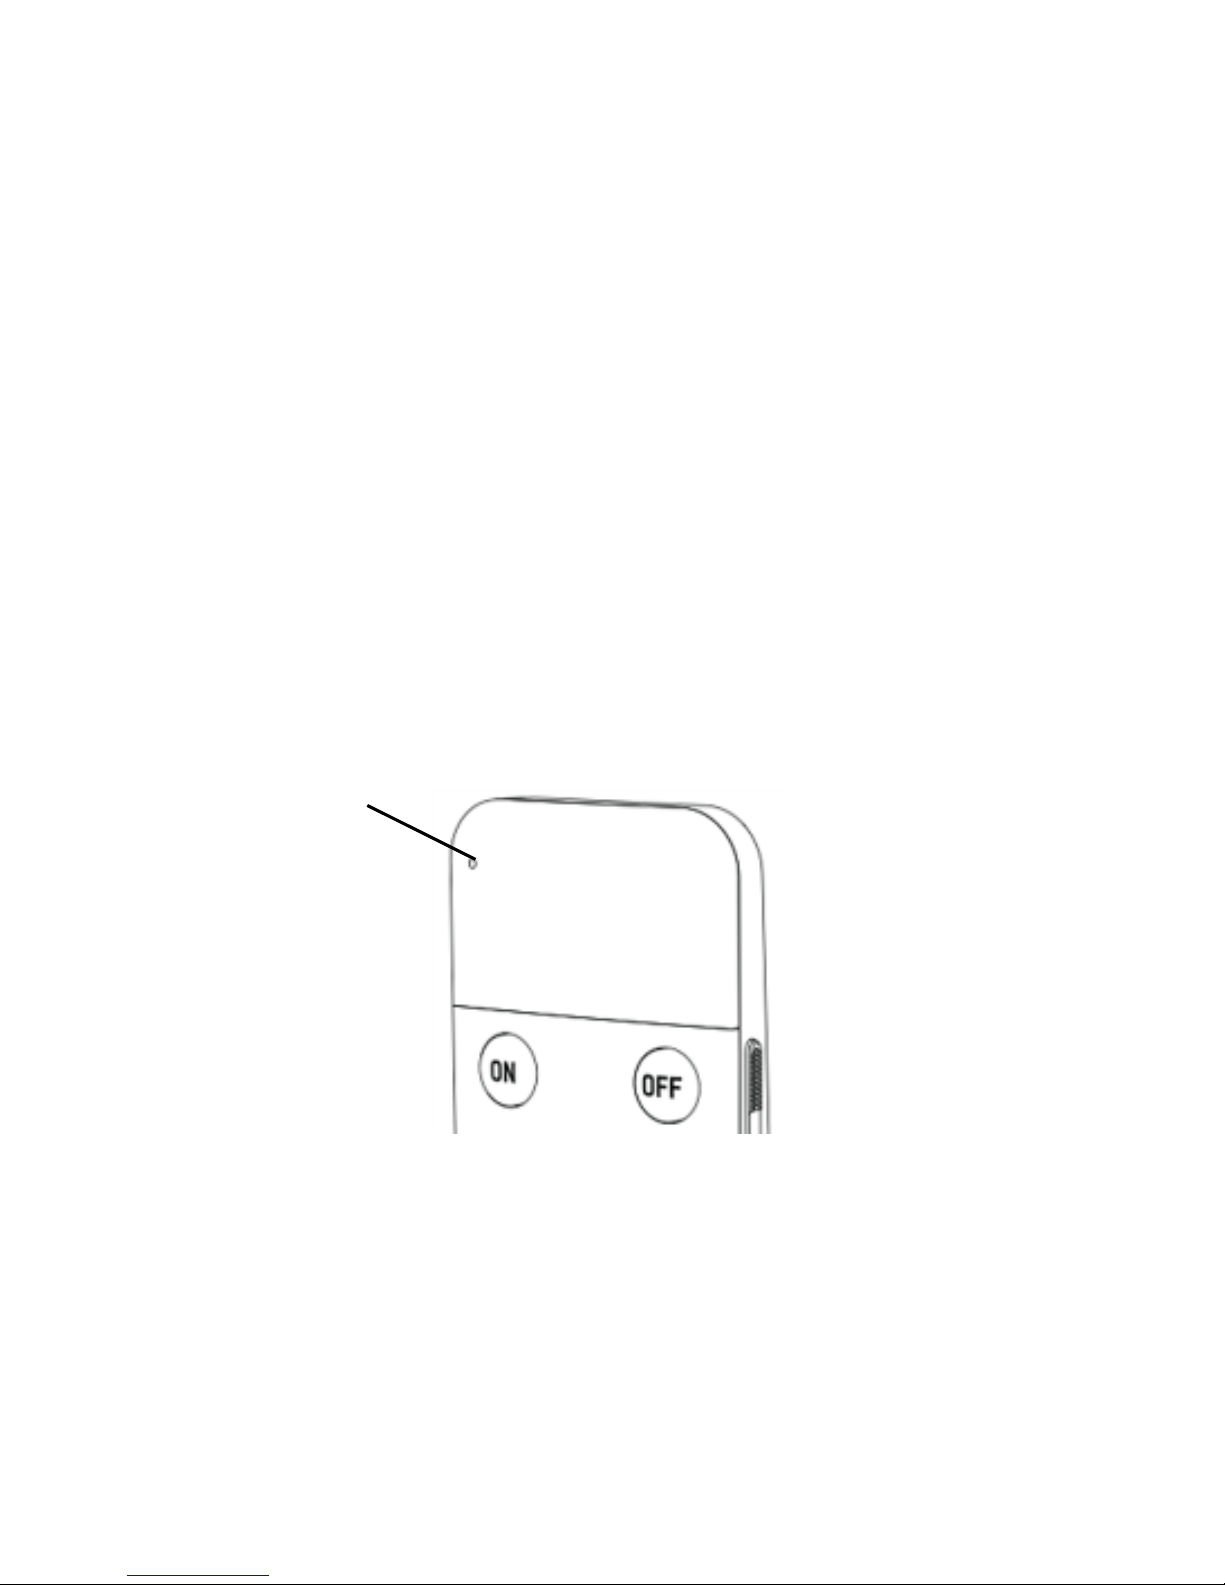
Main LED indicator
All on and all off buttons
Lock Switch
Reset button
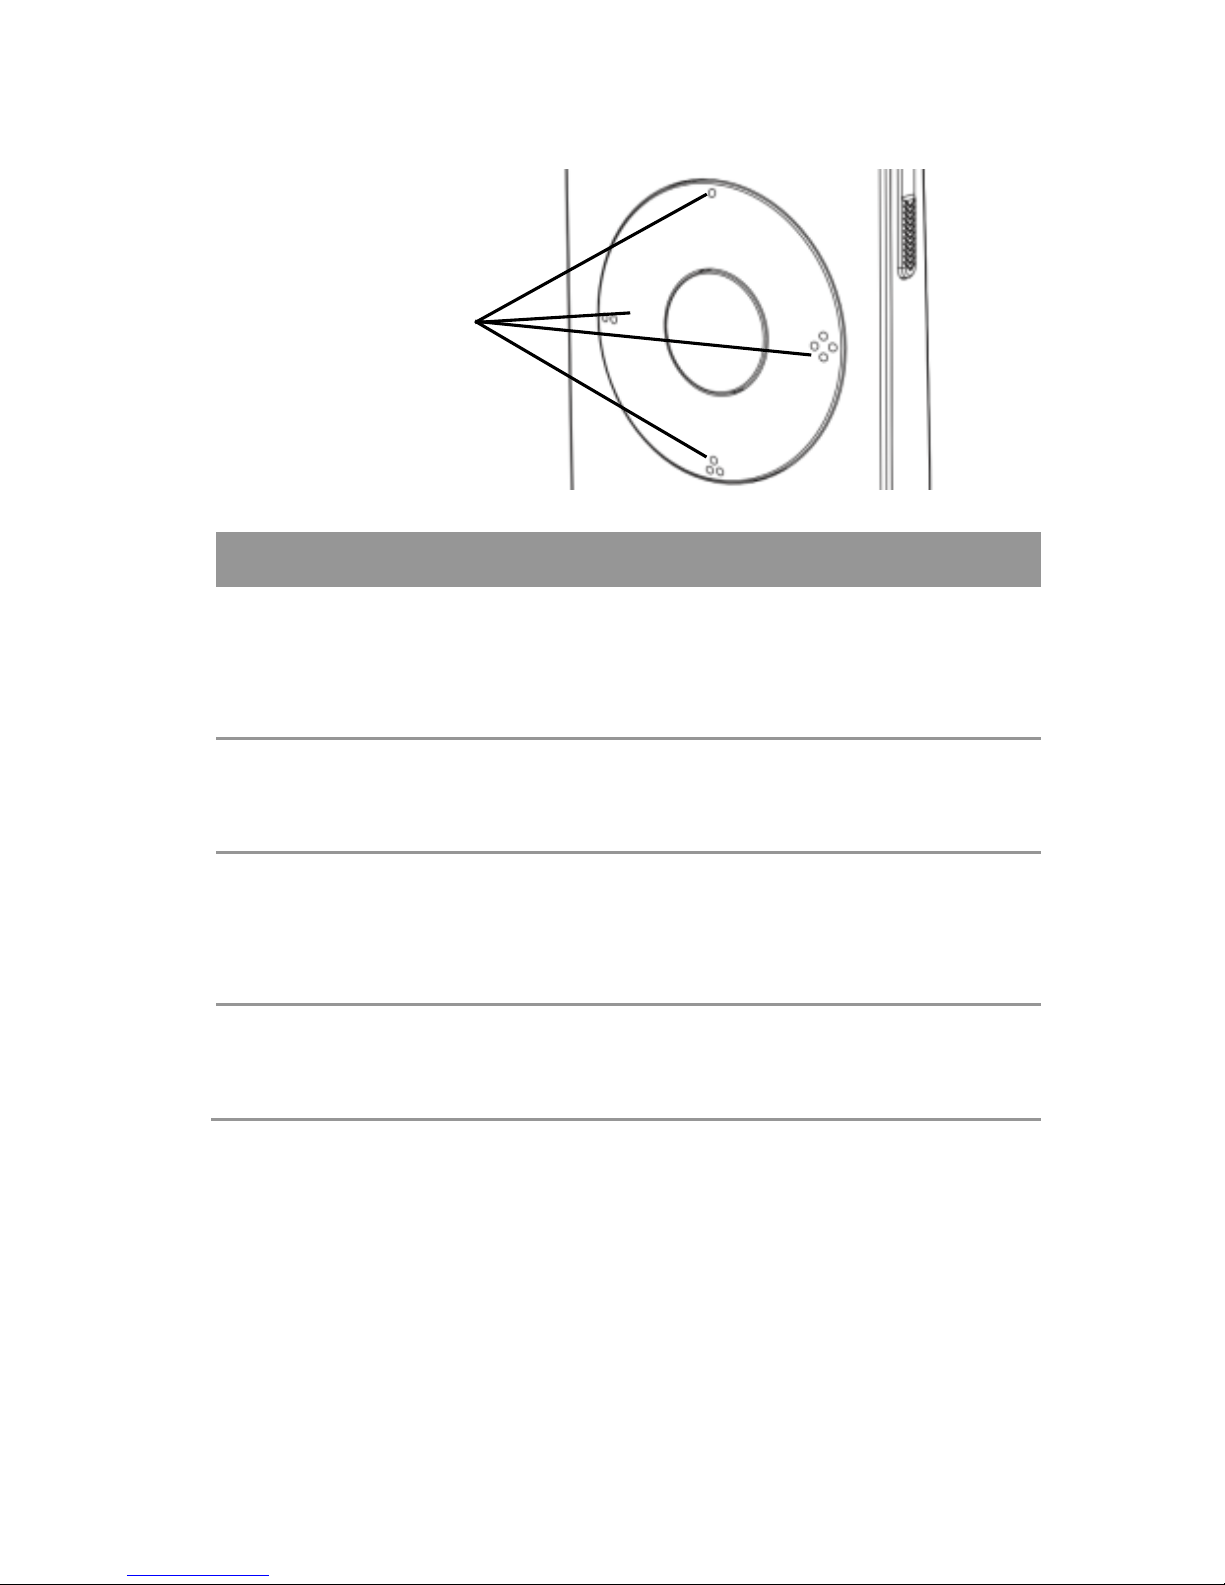
Individual on/off
buttons & status LED
indicators
Page 4
4
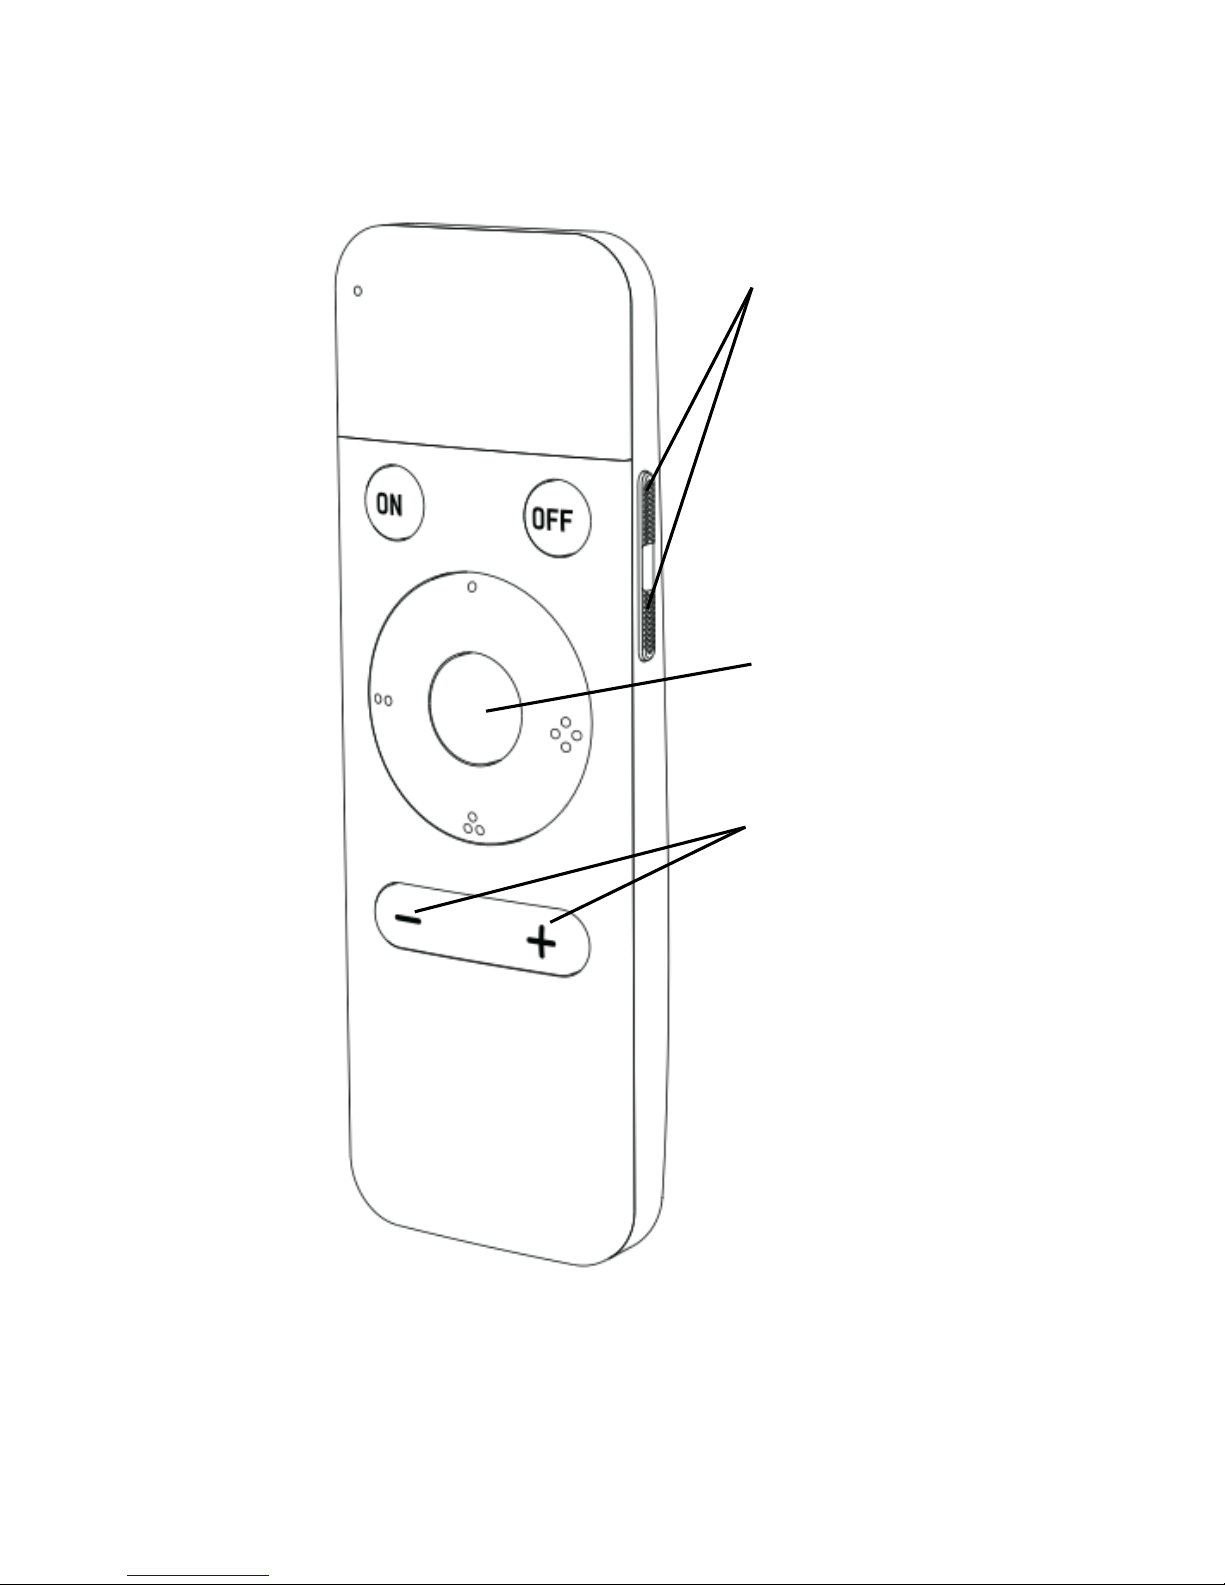
Color temperature
adjustment button
Status button
Brightness
adjustment button
Page 5

5
2.2. Buttons and switch
All on and all off button
Use the all on and all off button to do the following:
Turn on and off of all the binding devices such as LED
bulbs, smart plugs, power relays.
Four individual on/off buttons
Use the on/off buttons to do the following:
Turn On/off the corresponding device individually.
Status button
Use the status button to do the following:
Know the device on/off status.
Reset button
Use the reset button to do the following:
Set this device on bind mode so as to bind with an
on/off device.
Return this device to factory settings.
Brightness adjustment button
Use the brightness adjustment button to do the
following:
Adjust the brightness of the corresponding light
(Only when light could support this function)
Color temperature adjustment button
Use the color temperature adjustment button to do the
following:
Adjust the color temperature of the corresponding
light (Only when light could support this function)
Tips: operation details will be described below.
Page 6
6
2.3. Switch
Lock Switch
Use the lock switch to do the following:
Set this device be able/unable to bind with other
devices.
2.4. Micro USB
The micro USB is used to charge the battery of this
device. Connect RC204 to a power outlet using the
standard Micro USB cable and USB power adapter.
2.5. LED indicators
Main LED indicator status
Main LED indicator
Page 7

7
LED status
What it means
Green LED
solid
The battery charging is complete
(when it is connected to a power
adapter)
Green LED
flashes one
time
1. Indicate that you press and hold
the one of the individual on/off
buttons for three seconds, then
immediately release this button will
enter binding status (when you
press and hold one of the individual
on/off buttons).
2. Indicate that you press and hold
the reset button for three seconds
(when you press and hold the reset
button), then immediately release
the reset button will restart this
device.
3. Indicate that you press and hold
the reset button for ten seconds
(when you press and hold the reset
button), then immediately release
this device will return this device to
factory default settings.
Red LED
solid
The device is in the process of
charging (when it is connected to a
power adapter)
Red LED
flashes for
three times
The device hasn’t added a network
(when you press any button).
LED flashes
for one time
The device has added a network
(when you press any button).
Page 8
8
Status LED indicators
LED status
What it means
Green LED
solid
The binding on/off device such as
LED bulb is on (when it is bound to
an on/off device and pressing the
status button).
Green LED
flashes three
times
Binding is successful.
Red LED
solid
The binding on/off device such as
LED bulb is off (when it is bound to
an on/off device and pressing the
status button).
Red LED
flashes three
times
Binding is failure.
Individual on/off
indicators
Page 9
9
3. Get started
To get started, you will at least need:
A SEG-X3 Smart Gateway
1 ~ 4 x CCT Tunable LED bulb LED622 (At least you
will need one LED bulb)
The SmartOWON mobile app
Then follow the steps below:
Step 1: Check the RC204 status.
Press any button to check if the main LED indicator is
red flashing for three times.
Tips: if not, please return it to factory default settings by
using a pin key tool to press and hold the reset button
for ten seconds until the LED light flashes a second time,
if succeed, the main LED indicator will flash fast for
around ten times.
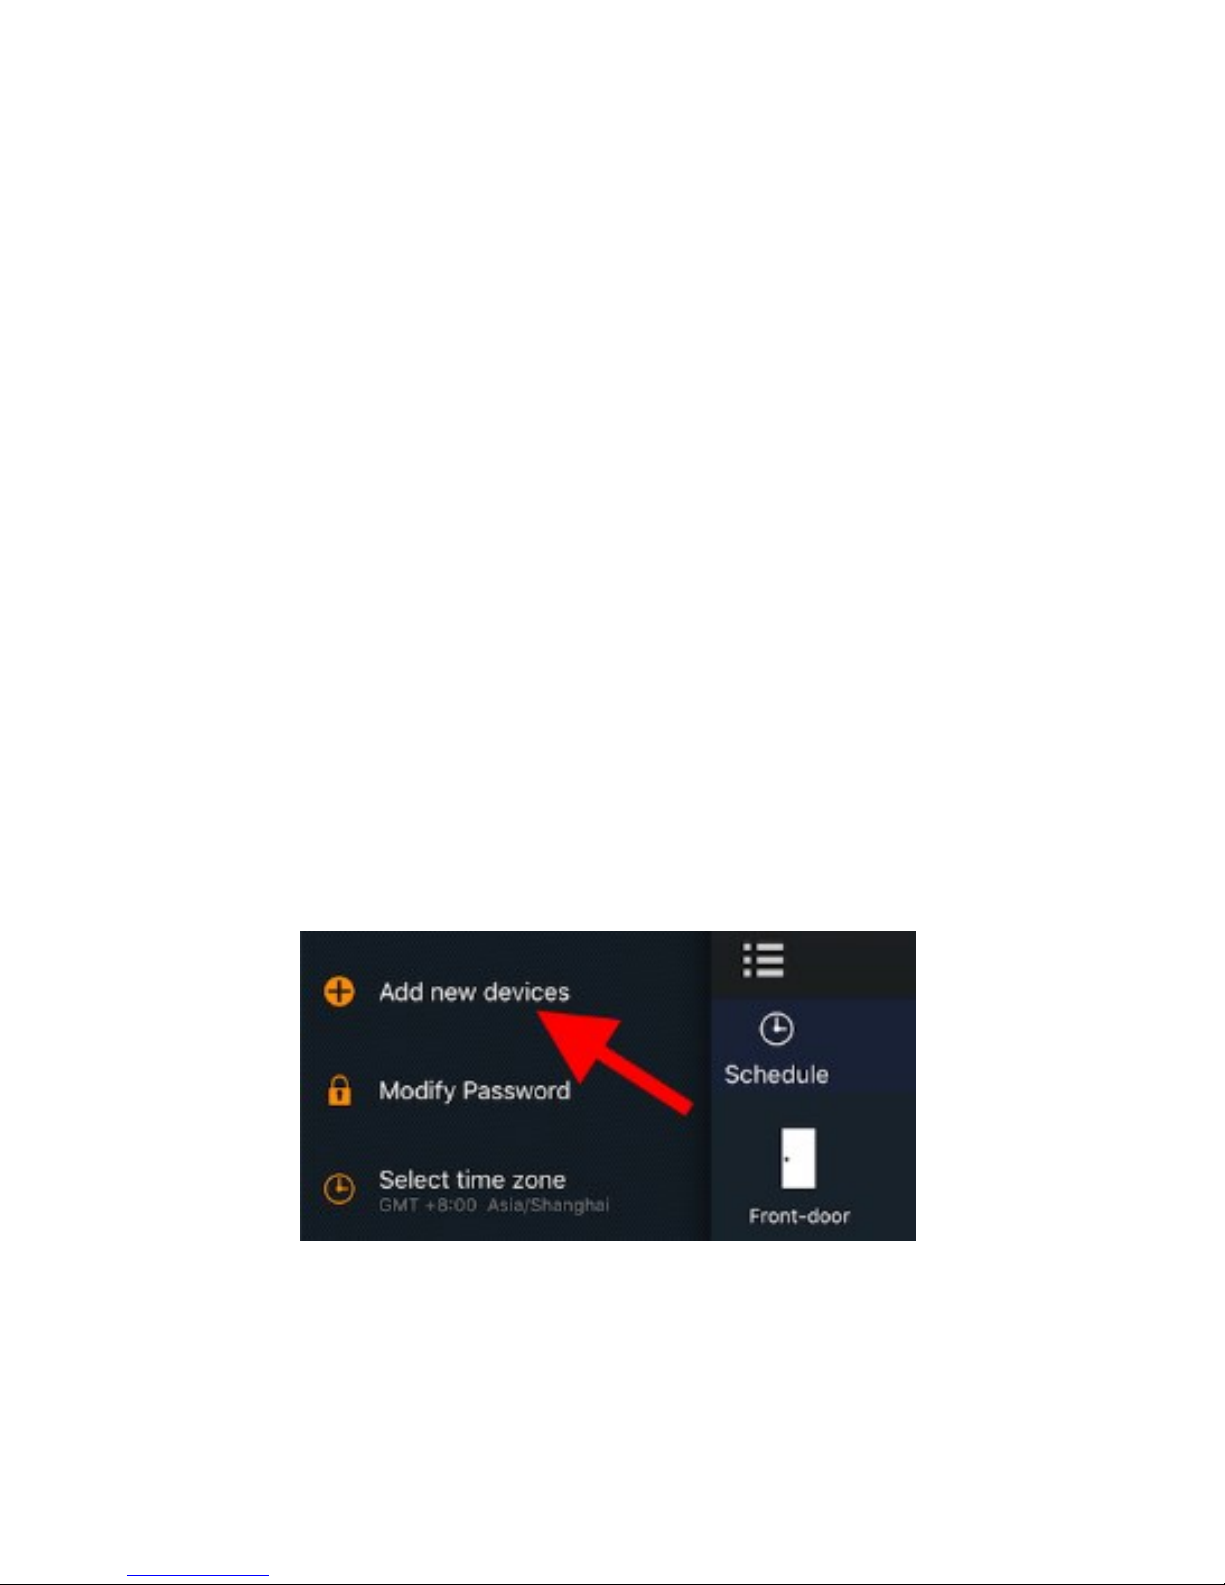
Step 2: Select “Add new devices” in the menu of the
app.
Tips: for this step, you could also press “Z” button for
two seconds until the LED indicator turns blue solid.
Page 10
10
Step 3: Use a pin key tool to press the reset button.
Then the device will add the ZigBee network of the
gateway.
Step 4: Check if this device added into the gateway.
If the remote control is added into the gateway
successfully, the main LED indicator will be green
flashing for three times. After adding, please press any
button to check if the main LED indicator is red flashing
one time indicating that it is added into the system.
Tips: After trying to add, when pressing any button, if
the main LED indicator will be red flashing for three
times means it hasn’t added into the gateway. You will
need to repeat from step 2.
Step 5: Bind with 1-4 CCT Tunable LED bulb LED622
Note: please make sure the LED622 is also added into
the network of the gateway and can be controlled by the
mobile app before you do the following.
(1): Make sure the LED bulbs that want to bind with this
remote control is powered on.
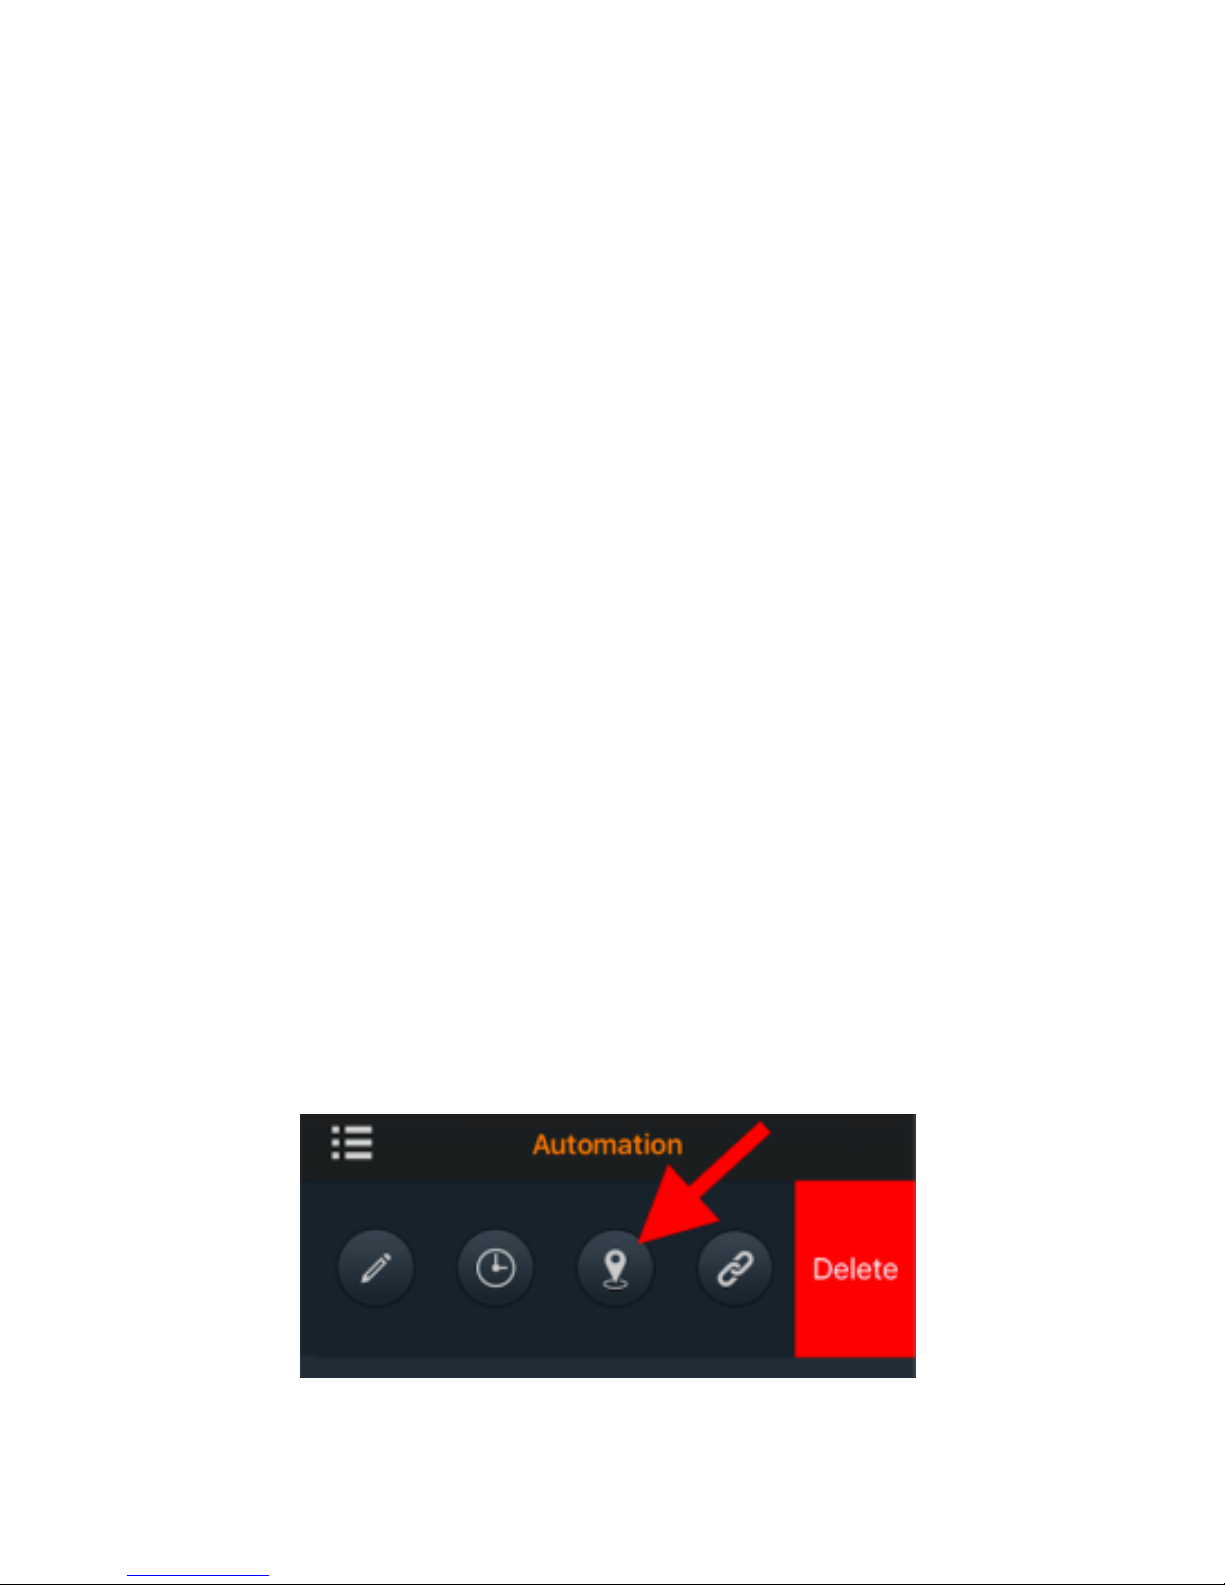
(2) Go to “Automation” section, tap “Edit” (Android
phone) or swipe from left to right (iPhone), tap
“Identify”. The LED bulb will be flashing during the
“Identify” process.
Page 11
11
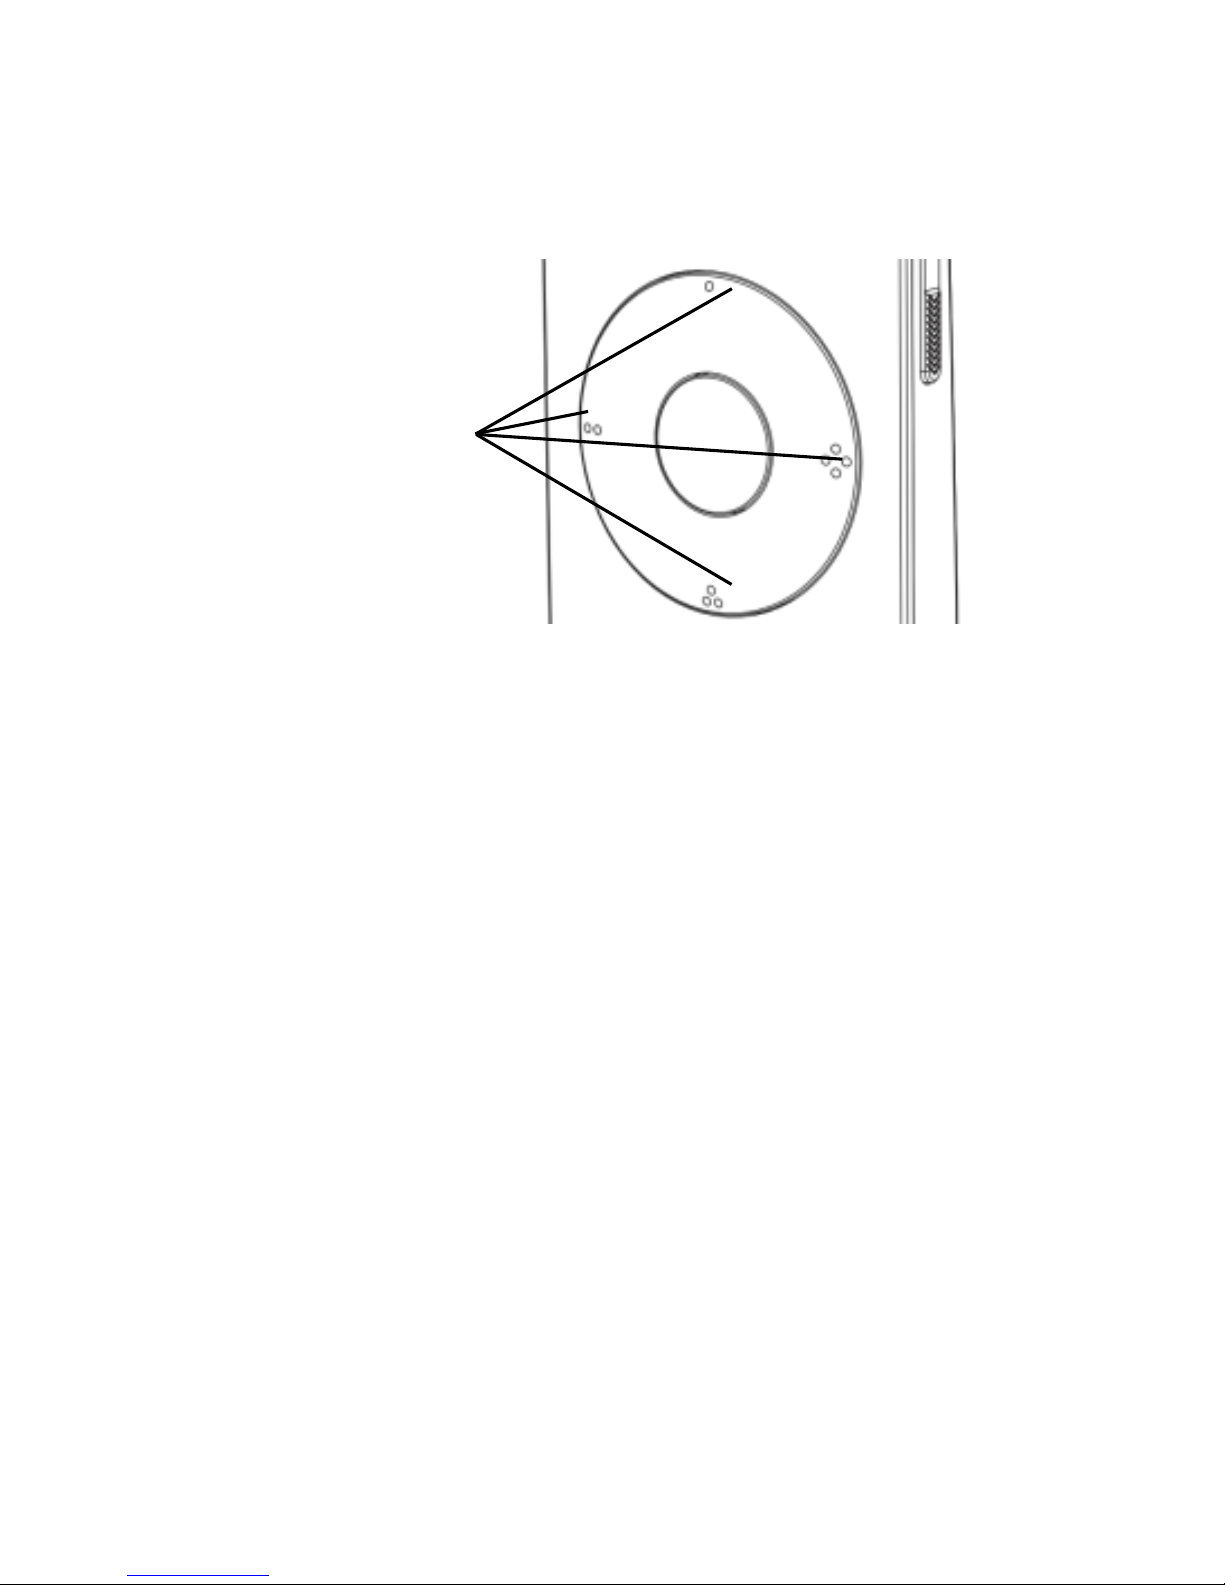
(3) Place the remote control near to the LED bulb, then
press and hold one of the below individual on/off
buttons of the remote control for three seconds until
the main LED indicator green flashes one time.
(4) After successful binding, the LED bulb will stop
flashing, and the corresponding status LED indicator will
be green flashing three times.
Tips: if binding is failure, the corresponding status LED
indicator will be red flashing three times. If failure,
repeat this process again.
(5) Follow from (1) again to bind with other LED bulbs
when required.
You are now able to control the LED bulb using the
remote control
on/off the bulb
adjust brightness
adjust color temperature
Tips: to see operation details, please visit
http://.owon.me/docs/user_guides.html to see the
system user guides.
Individual on/off
buttons
Page 12

12
4. FAQ
Q1. How to return this device to factory default
settings?
A1: Use a pin key tool to press and hold the reset button
for ten seconds until the LED indicator green flashes a
second time, then after you release the main LED
indicator will flash fast about ten times.
Q2. How to restart this device?
A2: Use a pin key tool to press and hold the reset button
for three seconds until the LED indicator green flashes
one time.
Q3. Can I use this device to control a CCT tunable LED
bulb without a gateway and the mobile app?
A3: Yes. but the LED bulb need to be based on standard
ZigBee Lighting Link profile. If you have a ZigBee Lighting
Link version CCT tunable LED bulb, please use this
device to bind them together follow below:
Note: before this below operation, both device need to
return to factory default settings.
Step 1: place the remote control near to the LED bulb,
press and hold one of the individual buttons for about
three seconds until the LED flashes in green for three
times.
Step 2: If bind is successful, the LED bulb will flash for
several times.
Q4. Can I use this remote control to control LED bulbs
without the help of the gateway and the SmartOWON
mobile app?
A4: Yes. But the LED bulb needs to be based on standard
ZigBee Lighting Link profile such as OWON LED622. If
Page 13
13
you have LED622 bulbs, please use this device to bind
with follow below:
Note: All below devices need to return to factory default
settings before your operation.
(1): Place the RC204 Remote Control near to the LED622,
press and hold the one of the individual on/off buttons
of the RC204 for about three seconds until the LED
flashes in green for three times.
(2): If binding is successful, the LED bulb will flash for
several times.
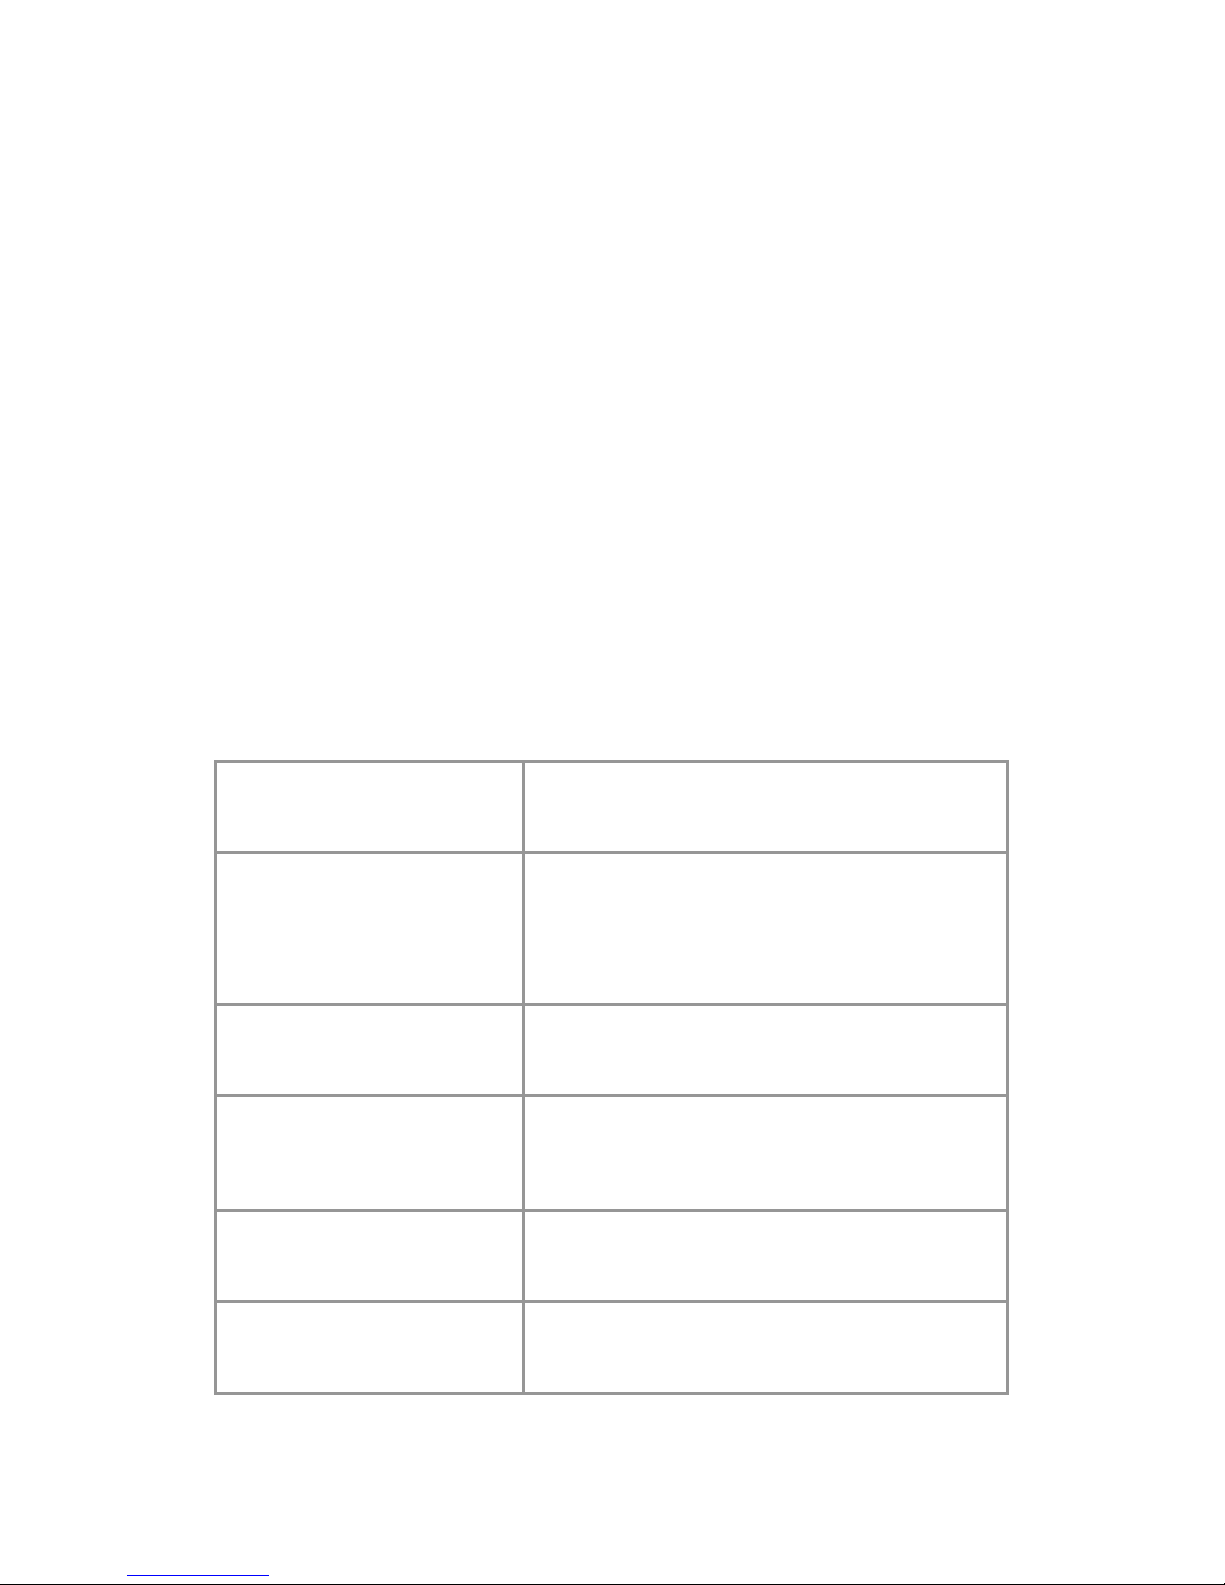
5. Technical Specifications
Wireless
Connectivity
ZigBee 2.4GHz IEEE 802.15.4
RF
Characteristics
Operating frequency: 2.4GHz
Range outdoor/indoor:
100m/30m
Internal PCB antenna
ZigBee Profile
ZigBee Lighting Link Profile
Battery
Type: 2 x AAA batteries
Voltage: 3V
Battery Life: 1 year
Dimensions
Diameter: 90.2mm
Thickness: 26.4mm
Weight
66 g
Page 14
14
6. Appendix: Safety Notice
WARNING: Failure to follow these safety
notices could result in fire, electric shock,
other injuries, or damage to the device or
other property. Read all the safety
notices below before using the device.
Avoid high humidity or extreme temperatures.
Avoid long exposure to direct sunlight or strong
ultraviolet light.
Do not drop or expose the unit to intense vibration.
Do not disassemble or try to repair the unit on your
own.
Do not expose the unit or its accessories to
flammable liquids, gases or other explosives.
 Loading...