

Page 1
Quick Setup Guide
IA
S
-
2000
Internet Access Gateway
Page 2
1
1
Internet Access Gateway
IAS
-
2000
English
This Quick Installation Guide provides instructions and reference material
for getting started with IAS-2000. This guide will also show you how to
connect IAS-2000 to other network e
quip
ments.
1.2 Package Contents
Front Panel
1. IAS-2000 x 1
2. CD-ROM x 1
3. Quick Installation Guide x 1
4. Power Cord x 1
5. Ethernet Cable (Crossover) x 1
6. Ethernet Cable (Straight) x3
7. Console Cable x 1
Warning: Using a power supply with different voltage rating will damage
this product.
English
1.1 Preface
1. Introduction
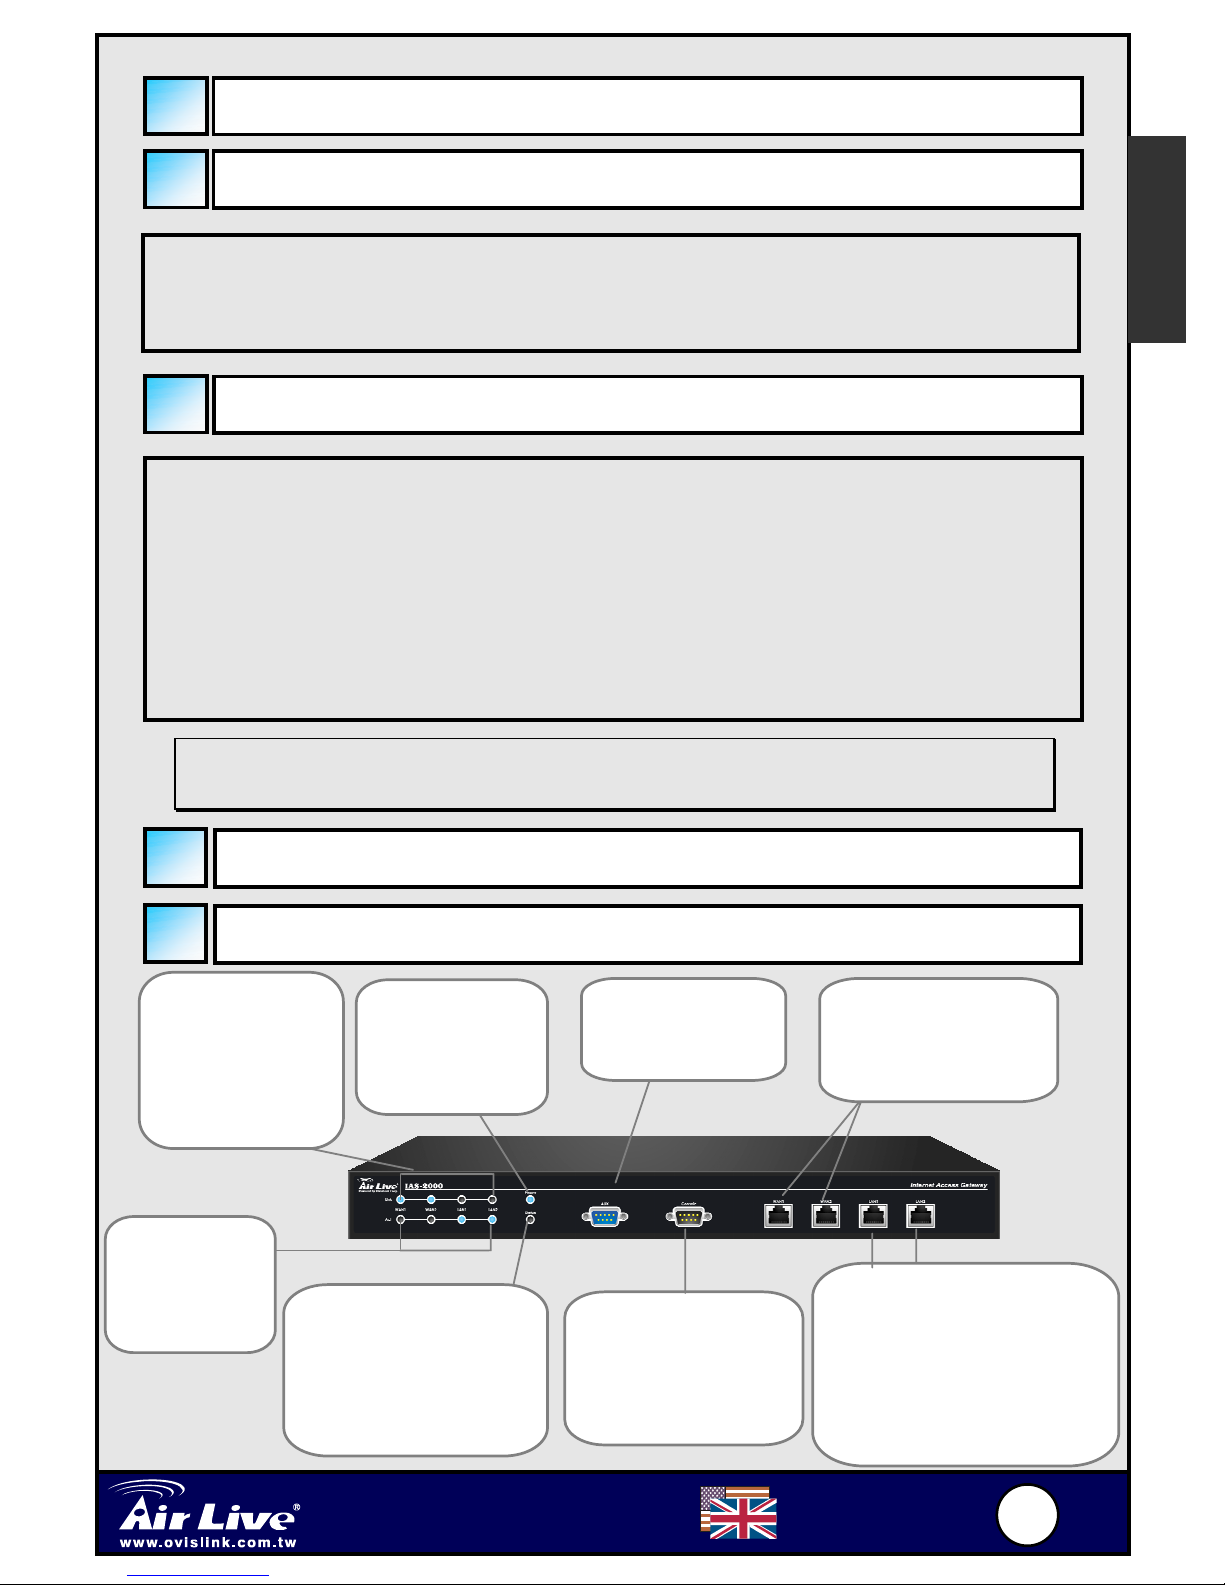
1.3 System Overview
1.3.1 Hardware Introduction
Link LED:
It stands for
being
connected to
RJ45
connectors.
Power LED:
Should light
stand for the
power is on.
AUX Port:
It is reserved for
future usa
g
e.
WAN1/WAN2:
Connects to the
Intranet or Internet
Act LED:
It stands for
transmitting
data.
Status LED:
Black indicates BIOS
running. Blink light
indicates OS running.
Solid light indicates
Console Port:
It resumes the
factory defaults or
reconfigures the
system.
LAN1/LAN2:
Connects to the open
network environment. It
can be chosen to require or
not require authentication
to access network
resources and Internet
Page 3
2
2
Internet Access Gateway
IAS
-
2000
English
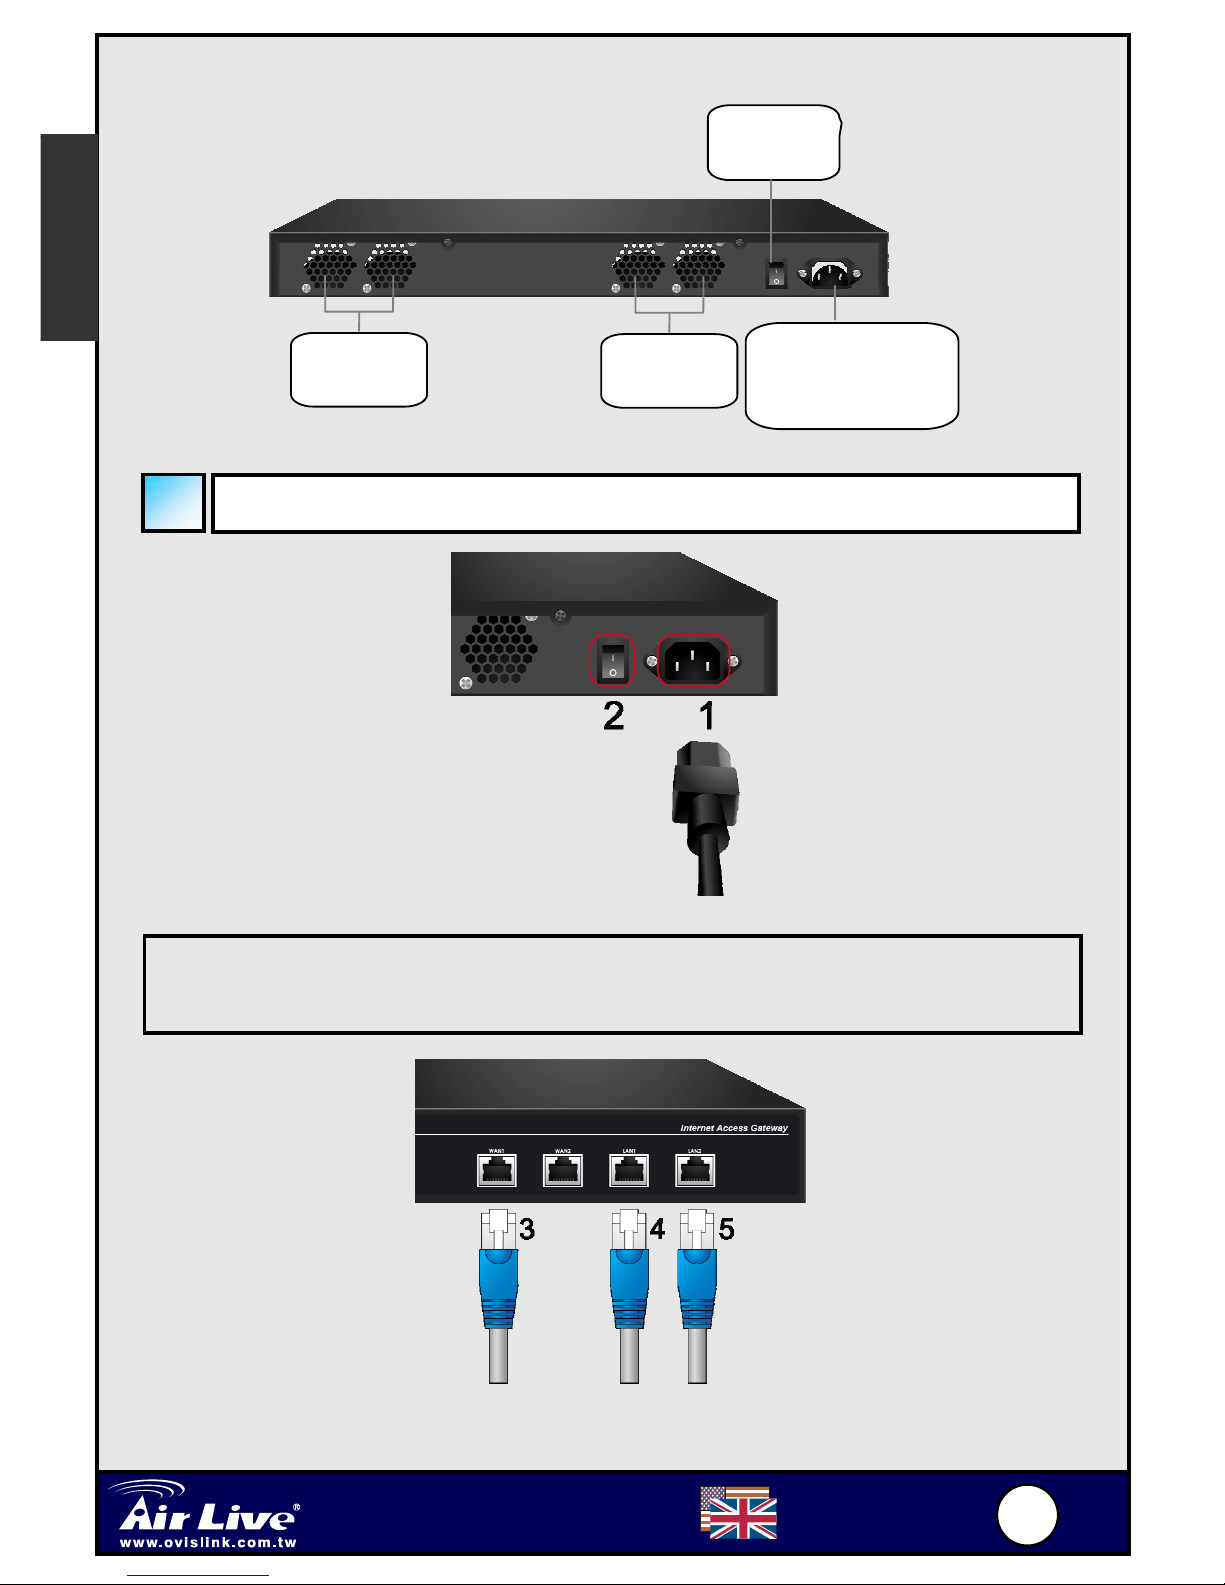
1.3.2 Hardware Installation
Rear Panel
English
1. Connect the power cord to the power socket on the rear panel.
Power
Switch
Power Socket:
The power cord
attaches here.
System
System
Page 4
3
3
Internet Access Gateway
IAS
-
2000
English
2. Connect an Ethernet cable to the WAN1 Port on the front panel.
Connect the other end of the Ethernet cable to ADSL modem, cable
modem or a switch/hub of the internal network. The LED of this WAN
should be on to indicate a proper connection.
3. Connect an Ethernet cable to one LAN Port with the user
authentication function enabled on the front panel. The default ports
are LAN1 ports. (Note: Authentication is required for the users to
access the network via these LAN Ports. The LAN port with
authentication function is referred to
as Public LAN.) Connect the
other end of the Ethernet cable to an AP or switch. The LED of this
LAN should be on to indicate a proper connection.
4. Connect an Ethernet cable to one LAN Port with the user
authentication function disabled on the front panel. The default ports
are LAN2 ports. (Note: No authentication is required for the users to
access the network via these LAN Ports. The LAN port without
authentication function is referred to as Private LAN and the
administrator can enter the administrative user interface to perform
configurations via Private LAN.) Connect the other end of the
Ethernet cable to a client’s PC. The LED of this LAN should be on to
indicate a
prop
er connection.
1.3.3 Getting Started
Attention: Usually a straight RJ-45 could be applied if IAS-2000 is
connected to a hub/computer that supports automatic 7
such as the Access Point. However, after the Access Point hardware
reset, IAS-2000 should not be able to connect to Access Point while
connecting with a straight cable unless the cable was pulled out and
plug-in again. This scenario does NOT occur while using a crossover
cable.
English
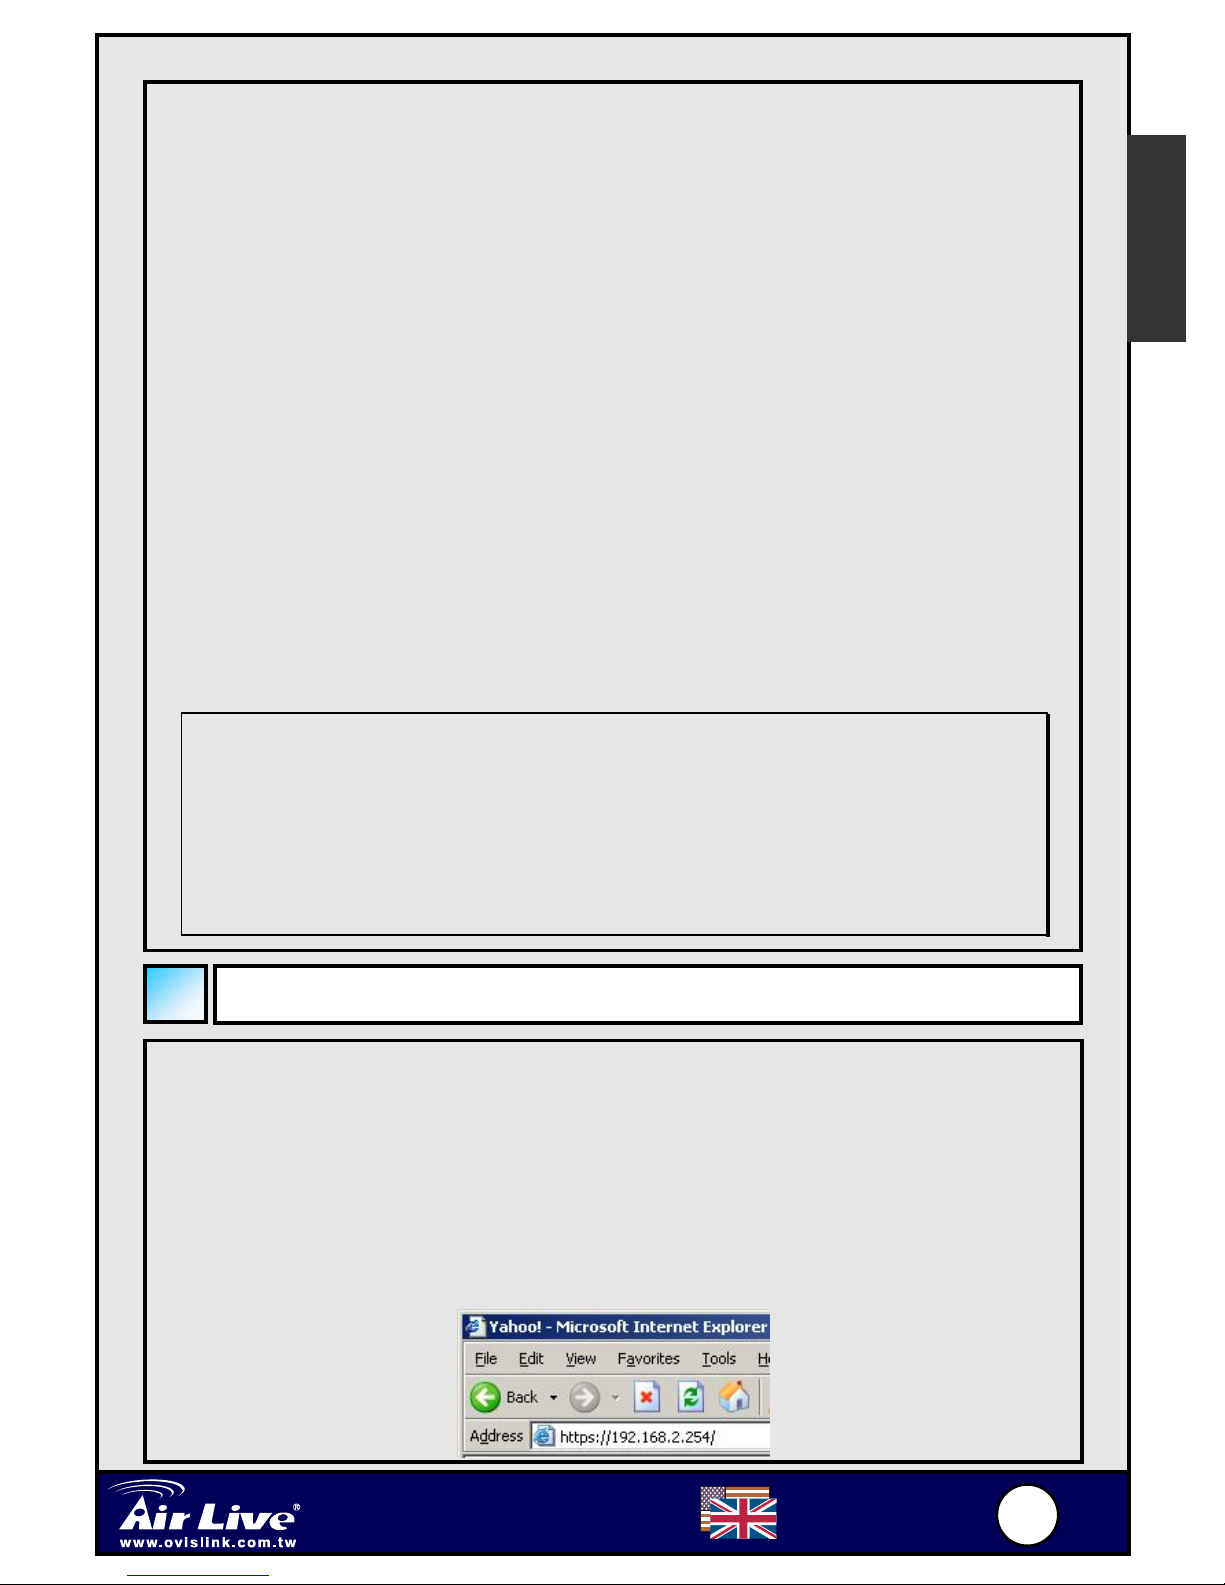
The IAS-2000 provides web-based configuration. After completing the
hardware installation, IAS-2000 can be configured through a PC using
JavaScript enabled Internet Explorer version 6.0 and above.
To access the configuration screen, connect the PC and IAS-2000 in
advance via the Private Port of IAS-2000. Then, launch the web browser
and enter the IP address of the default gateway for that port in the address
field then press Enter. Default IP address of the default gateway of the
private ports is “https://192.168.2.254”. (Note: https is used for a
secured
connection.)
Page 5

4
4
Internet Access Gateway
IAS
-
2000
English
2. Common Settings
Once the IAS-2000 has been connected,
the login screen will appear on the
browser. Enter the default username,
“admin”, and the default password,
“sohoware”, in the User Name and
Password column. Click the Enter icon to
lo
g
in.
IAS-2000 is an all-in-one product specially designed for wireless network
environment. It integrates “Access Control” and “Wireless Network
Access” into one system to fulfill the needs in Hotel and Campus.
In the Quick Installation Guide, two common settings are described below
that allows you to use the Configuration Wizard utility to speed up the
configuration process of IAS-2000. Please refer to section 2.1 Hotel for
hotel environment and section 2.2 Cam
p
us for campus environment.
English
A
fter successfully logging into IAS-2000,
a web management interface with a
welcome message will appear. To logout,
simply click the Logout icon on the upper
right corner of the i nterface to return to th e
login screen.
Click System Configuration on the
upper left corner to go to the System
Configuration screen and run the
Configuration Wizard to help you
complete the configuration.
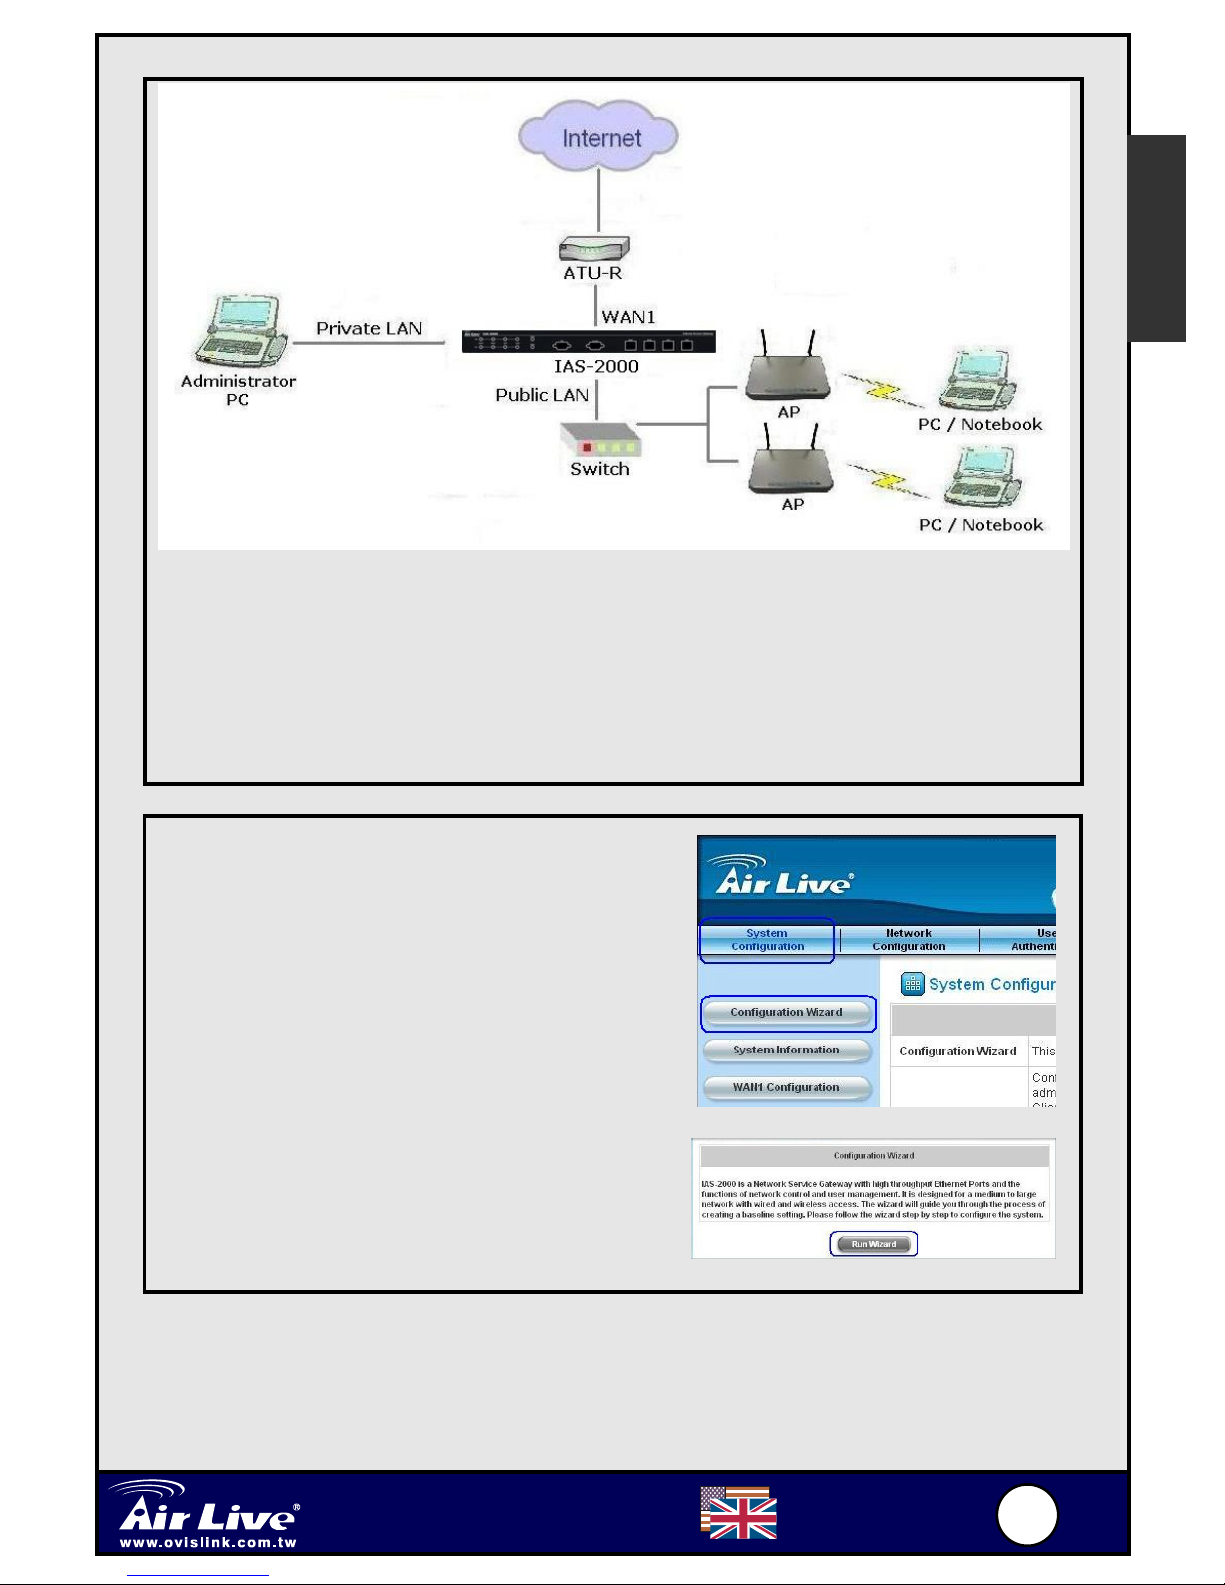
2.1 Hotel
IAS-2000 used in the hotel environment is usually connected to Internet
through ADSL. Please refer to the following figure on connecting IAS-2000
and ADSL modem.
Page 6
5
5
Internet Access Gateway
IAS
-
2000
English
Click the System Configuration from the
menu and the System Configuration
screen will appear. Then, click the
Confi
g
uration Wizard icon.
English
A
fter completing the hardware installation and successfully logging into the
configuration screen, IAS-2000 can then be configured from the web
browser. In the hotel environment, it is convenient to use the built-in
authentication server to quickly setup the services. One example is to set
Local User authentication method in the Configuration Wizard for
employees and fo
r
customers
.
Click Run Wizard to begin the
Configuration Wizard.
Page 7

6
6
Internet Access Gateway
IAS
-
2000
English
The Configuration Wizard will appear in
a separate browser window.
Click Next to be
g
in.
Step 1: Change Admin’s Password
Enter a new password for the admin
account and retype it in the verify
password field (twenty characters
maximum and no spaces allowed).
Click Next to continue.
English
Step 2: Choose System’s Time Zone
Select a proper time zone via the
pull-down menu.
Click Next to continue.
Page 8

7
7
Internet Access Gateway
IAS
-
2000
English
Step 3: Set System Information
Home Page: Enter the URL that users
should be initially directed to when
successfully authenticated to the
network.
NTP Server: Enter the URL of external
time server for IAS-2000 time
synchronization or use the default.
DNS Server: Enter a DNS Server
provided by your ISP (Internet Service
Provider). Contact your ISP if you are
not sure of the DNS IP Address.
Click Next to continue.
English
Step 4: Select the Connection Type for
WAN1 Port
There are three types of WAN port to
select from: Static IP Address, Dynamic
IP Address and PPPoE Client. Select a
proper Internet connection type.
PPPoE connection type is the most
common setting for ADSL service, so
select PPPoE Client.
Click Next to continue.
Step 5: Set PPPoE Client’s Information
Enter the Username and Password
provided by your ISP.
Click Next to continue.
Page 9

8
8
Internet Access Gateway
IAS
-
2000
English
Step 6: Configure LAN1’s Information
IP Address: Enter the LAN1 port IP
A
ddress or use the default.
Subnet Mask: Enter the LAN1 port
Subnet Mask or use the default.
Disable DHCP Server: If the DHCP
server is disabled, the LAN1 clients must
be configured with an IP address
manually.
Enable DHCP Server: When the option is
selected, IAS-2000 will automatically
provide the necessary IP addresses to all
LAN1 clients.
Click Next to continue.
Step 7: Set LAN1 DHCP Server
If the Enable DHCP Server option is
selected, fields marked with red asterisk
must be filled in.
DHCP Scope: These fields define the IP
address range that will be assigned to the
LAN1 clients. (Note: Be sure that IP
address assigned in this range is NOT
used in other setting through
IAS-2000.)
Domain Name: Enter a domain name
provided by your ISP (e.g. y ahoo.com.tw ).
WINS Server: Enter the IP address of the
WINS Server (Windows Internet
Naming
Service Server). This field is optional.
Preferred DNS Server: The DNS Server
settings are provided by your ISP. Only
the Preferred DNS Server field is
mandatory. Contact your ISP if you are
unsure of the DNS Server settings.
Alternate DNS Server: The DNS Server
settings are provided by your ISP. This
field is optional.
Click Next to continue.
Page 10

9
9
Internet Access Gateway
IAS
-
2000
English
Step 8: Select Default Authentication
Server
Please specify the policy name for this
authentication method. The Postfix Name
field (e.g. Local) will be used as the
postfix name (e.g. username@Local). An
authentication method has to be selected
from one of the five options appeared in
this window (Local User is selected for
this setup example). Local User is an
authentication method that uses the
built-in user account database supported
by IAS-2000.
Click Next to continue.
Step 9: Add User
A
new user can be added to the local use
r
database. To add a user here, enter the
Username (e.g. test), Password (e.g.
test), MAC (optional) and assign a policy
to this particular user (or use the default).
Upon completing adding a user, more
users can be added to this authentication
method by clicking the ADD bottom.
Click Next to continue.
Step 10: Restart
Click Restart to save the current settings
and restart IAS-2000. The Setup Wizard
is now completed.
Page 11

110
0
Internet Access Gateway
IAS
-
2000
English
During IAS-2000 restart, a “Restarting
now. Please wait for a moment.”
message will appear on the screen.
Please do not interrupt IAS-2000 until the
Configuration Wizard window has
disappeared. This indicates that the
restart
p
rocess has completed.
If all the steps are done properly, IAS-2000 can be further connected to
the managed network to experience the controlled network access
environment. Firstly, connect an end-user device to the network at
IAS-2000’s Public LAN and set the end-user device to obtain an IP
address automatically. After the network address is obtained, the user
opens an Internet browser and links to any website. The default logon
web
pag
e will appear in the Internet browser.
Key in the username and password
created in the local user account
database or from on-demand user
account, click Submit button. Here, key in
the local user account (e.g. test@Local
for the username and test for the
password) to connect to the network.
Attention: If you want to use the local user account, please key in
“username@postfix” created previously in the username field.
Now, the base configuration for Hotel
environment has been finished!
Page 12

111
1
Internet Access Gateway
IAS
-
2000
English
Congratulation!
Login page appearing means IAS-2000
has been installed and configured
successfully. Now, you can browse the
network or surf the Internet!
2.1 Campus
IAS-2000 used in the campus environment is usually connected to LDAP
Server as an external authentication server. Please refer to the following
fi
g
ure on connecting IAS-2000 and ADSL modem.
A
fter completing the hardware installation and successfully logging into the
configuration webpage, IAS-2000 can then be configured from the web
browser. Please refer to the following steps.
Page 13

112
2
Internet Access Gateway
IAS
-
2000
English
Click Run Wizard to begin the
Configuration Wizard.
The Setup Wizard will appear in a
separate browser window.
Click Next to be
g
in.
Click the System Configuration from the
top menu and the System Configuration
screen will appear. Then, click on
Configuration Wizard icon.
Step 1: Change Admin’s Password
Enter a new password for the admin
account and retype it in the verify
password field (twenty characters
maximum and no spaces allowed).
Click Next to continue.
Page 14

113
3
Internet Access Gateway
IAS
-
2000
English
Step 2: Choose System’s Time Zone
Select a proper time zone via the
pull-down menu.
Click Next to continue.
Step 3: Set System Information
Home Page: Enter the URL that users
should be initially directed to when
successfully authenticated to the network.
NTP Server: Enter the URL of external
time server for IAS-2000 time
synchronization or use the default.
DNS Server: Enter a DNS Server
provided by your ISP (Internet Service
Provider). Contact your ISP if you are not
sure of the DNS IP Address.
Click Next to continue.
Step 4: Select the Connection Type for
WAN1 Port
Select a proper Internet connection. In
enterprises, Static IP Address type is the
most common setting. Static IP Ad dress is
an assigned IP address used to connect
to the Internet, so select Static IP
A
ddress.
Click Next to continue.
Page 15

114
4
Internet Access Gateway
IAS
-
2000
English
Step 5: Set WAN1 Port’s Static IP
Address
Enter the IP Address, Subnet Mask and
Default Gateway provided by your ISP.
Click Next to continue.
Step 6: Configure LAN1’s Information
IP Address: Enter the LAN1 port IP
A
ddress or use the default.
Subnet Mask: Enter the LAN1 port
Subnet Mask or use the default.
Disable DHCP Server: If the DHCP
server is disabled, the LAN1 clients must
be configured with an IP address
manually.
Enable DHCP Server: When the option
is selected, IAS-2000 will automatically
provide the necessary IP addresses to all
LAN1 clients.
Step 7: Set LAN1 DHCP Server
If the Enable DHCP Server option is
selected, fields marked with red asterisk
must be filled in.
DHCP Scope: These fields define the IP
address range that will be assigned
to the
LAN1 clients. (Note: Be sure that IP
address assigned in this range is NOT
used in other setting through IAS-2000.)
Domain Name: Enter a domain name
provided by your ISP (e.g. y ahoo.com.tw ).
Page 16

115
5
Internet Access Gateway
IAS
-
2000
English
WINS Server: Enter the IP addre ss of the WINS Serv er (Window s In ternet
Naming Service Server). This field is optional.
Preferred DNS Server: The DNS Server settings are provided by your
ISP. Only the Preferred DNS Server field is mandatory. Contact your ISP i
f
you are unsure of the DNS Server settings.
Alternate DNS Server: The DNS Server settings are provided by your
ISP. This field is optional.
Click Next to continue.
Step 8: Select Default Authentication
Server
Please specify the policy name for this
authentication method. The Postfix
Name field (e.g. LDAP) will be used as
the postfix name (e.g. username@LDAP).
A
n authentication method has to be
selected from one of the five options
appeared in this window (LDAP User is
selected for this setup example). LDAP
User is an authentication method that
uses the external authentication server
and the user account database.
Click Next to continue.
Step 9: Authenticati on Method-LDAP
You can add a new user to the LDAP use
r
database. Enter the “LDAP Server”,
“Server Port” and “Base DN”. And then,
you have to select one kind of Binding
Type and Account A ttribute to access
the LDAP server.
If you select User Account binding
type, the system will use the Base DN
to be the user account to access the
LDAP server.
Page 17

116
6
Internet Access Gateway
IAS
-
2000
English
If you select Anonymous binding type,
the system will access the LDAP
servers without requiring
authentication.
If you select Windows AD binding
type, please enter the domain name of
Windows AD to access the LDAP
server.
Click Next to continue.
Step 7: Restart
Click Restart to save the current settings
and restart IAS-2000. The Setup Wizard
is now completed.
Page 18

117
7
Internet Access Gateway
IAS
-
2000
English
During IAS-2000 restart, a “Restarting
now. Please wait for a moment.”
message will appear on the screen.
Please do not interrupt IAS-2000 until
the Configuration Wizard has
disappeared. This indicates that the
restart process has been completed.
Now, the base configuration for
Campus environment has been
finished!
If all the steps are done properly, IAS-2000 can be further connected to
the managed network to experience the controlled network access
environment. Firstly, connect a user-end device to the network at
IAS-2000’s Public LAN and se t to obt ai n an IP address automatically. Afte
r
the network address is obtained at the user end, open an Internet brow se
r
and link to any website . Then, the default logon webp age will appear in the
Internet browser.
Key in the username and password (e.g.
test@LDAP for the username and test
for the password) already existed in the
LDAP server then click Submit button.
Attention: Use the LDAP server user account, please key in
“username@postfix” where the username is already existed in your
LDAP server.
Page 19

118
8
Internet Access Gateway
IAS
-
2000
English
Congratulation!
Logon page appearing means IAS-2000 has
been installed and configured successfully.
Now, you can browse the network or surf the
Internet!
For further information, please refer to the user’s manual.
 Loading...