

Outdoor Great Room Providence Fire Pit User Manual
Providence Fire Pit
Installation Instructions For All Providence Fire Pit
Models And top Styles
1 | P a g e

90209 REV A 4-4-14
Contents
Package Contents and Required Tools………3
Placing and assembling the Table.…4-7
Gas
Connection……………………….…………….8
Igniter
Installation…………….………………………...9
Locating Propane tank………..………….11
Finishing Touches…………………………..12
2 | P a g e
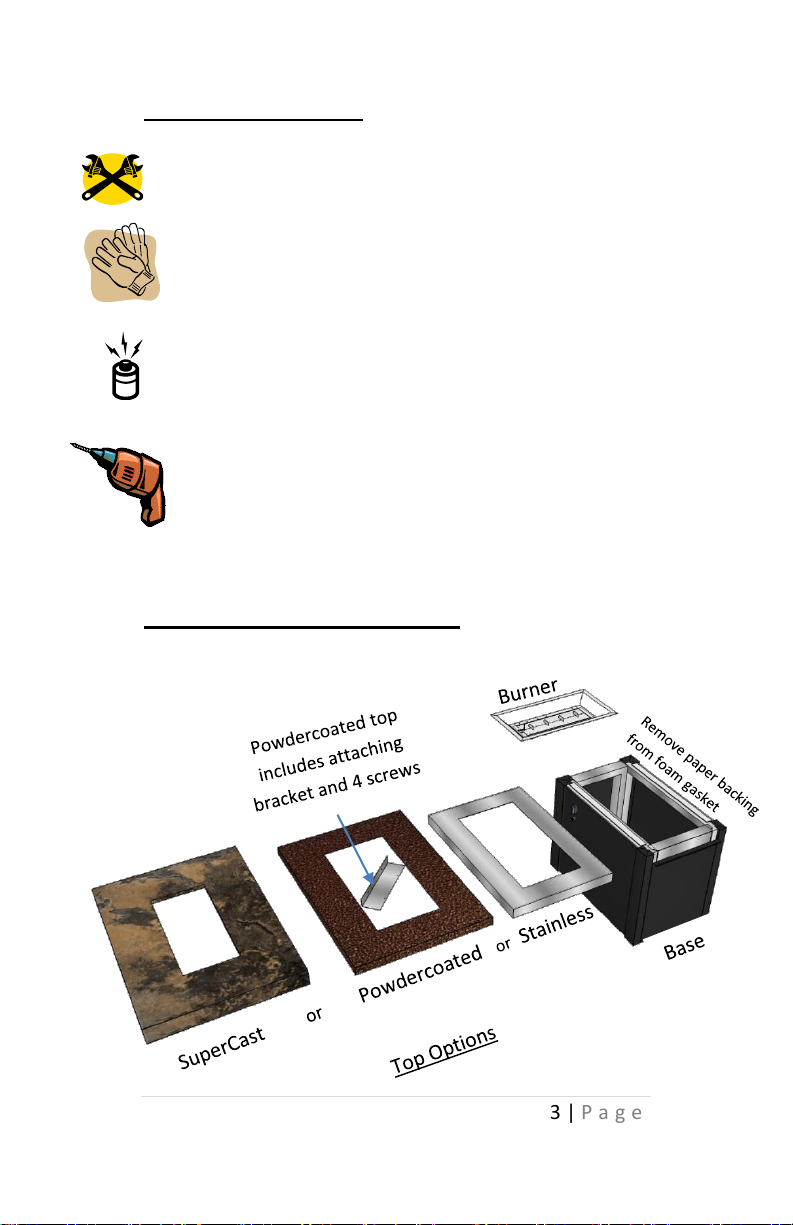
Required Tools
2 Open Ended Wrenches
To make gas connections
Leather Gloves
To protect hands from rough edges found
on the coffee table.
One (1) AAA Battery (not included)
Required for piezoelectric igniter
installation.
Electric Screw Gun with Philips tip
(used for metal tops excluding brushed
stainless model)
Included in packaging
3 | P a g e
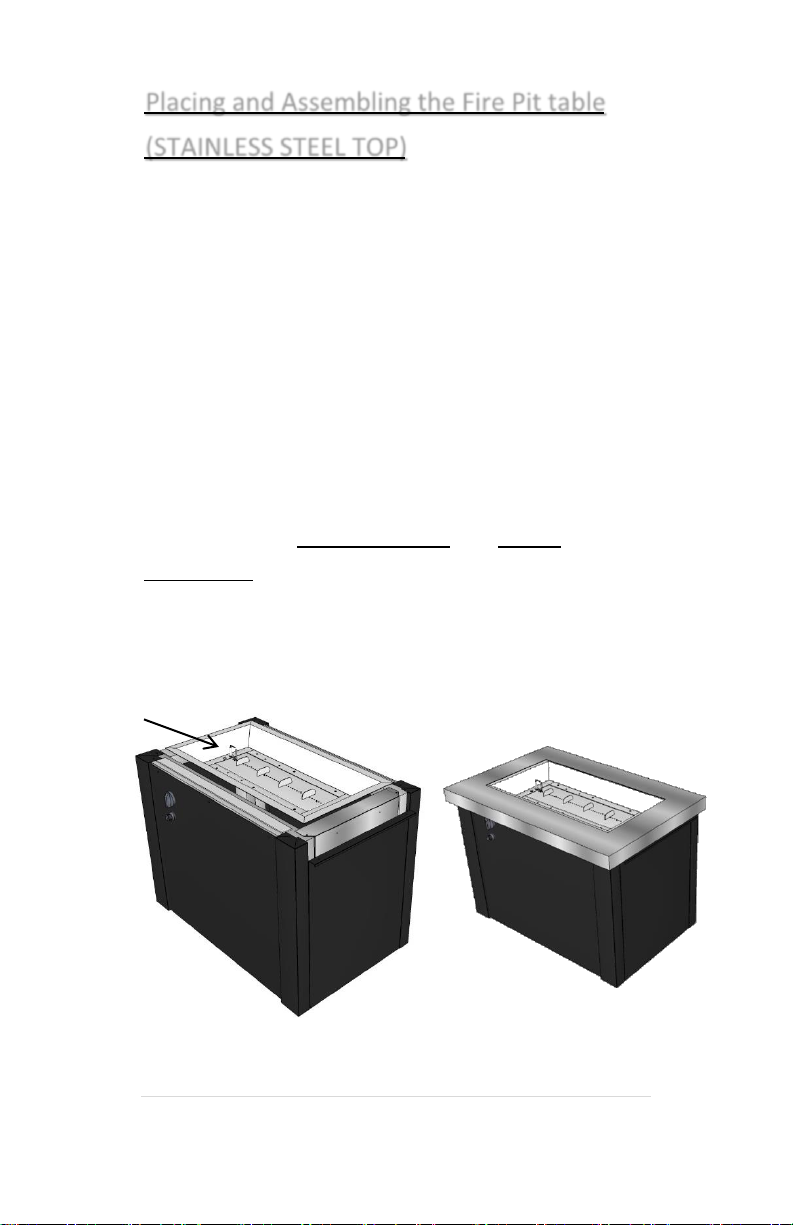
Placing and Assembling the Fire Pit table
Igniter
(STAINLESS STEEL TOP)
1. Remove all components from packaging.
2. Move the base (remove door) to desired
location and set into place.
3. When locating your coffee table, refer to the
manual included with your burner and maintain
clearance to combustibles.
4. Set burner into place with the igniter at the
opposite end from the door of the fire pit. See the
section labeled Gas Connection and Igniter
Installation to install gas lines and piezoelectric
igniter , then set the stainless steel top into place
on TOP of the burner.
4 | P a g e
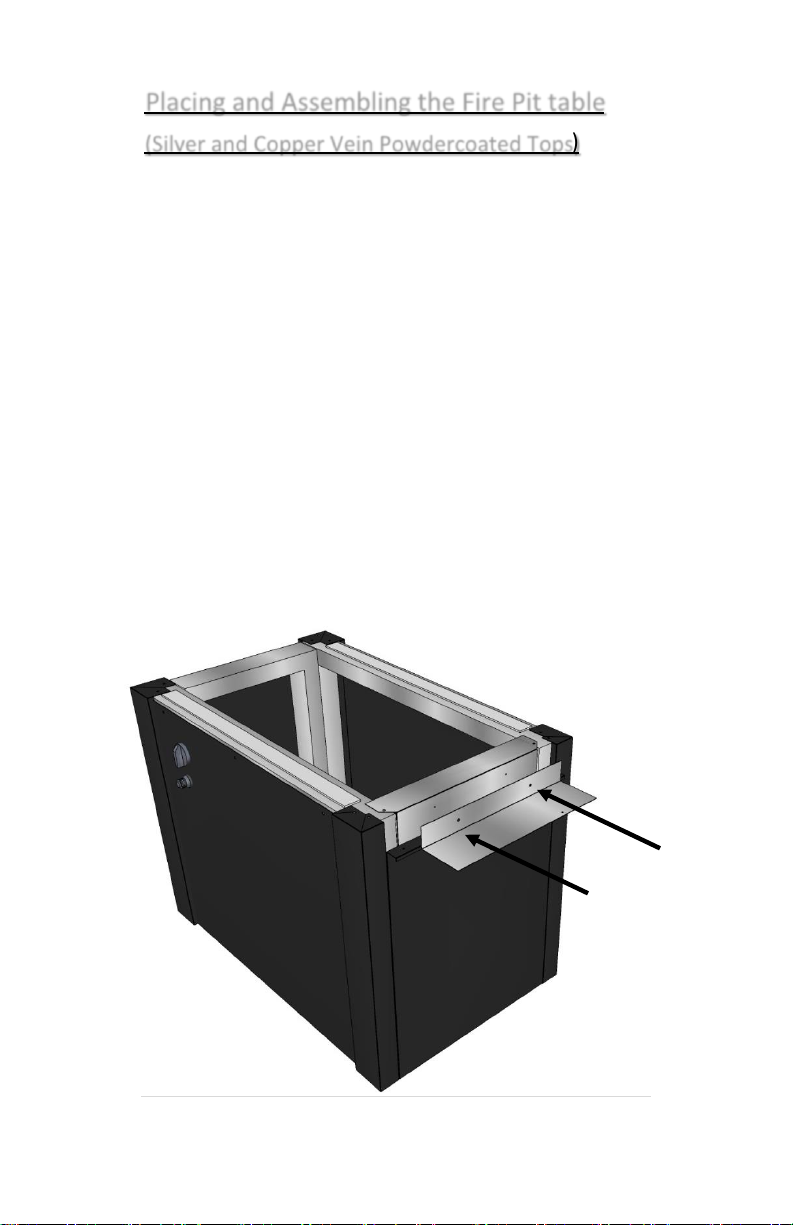
Placing and Assembling the Fire Pit table
(Silver and Copper Vein Powdercoated Tops)
1. Remove all components from packaging.
2. Move the base (remove door) to desired location
and set into place.
3. When locating your coffee table, refer to the
manual included with your burner and maintain
clearance to combustibles.
4. This model utilizes a metal bracket to keep the
top from sliding around during windy conditions or
when bumped. Place the bracket on the door-side
of the fire pit as shown and line holes up. Insert
two screws as shown.
5 | P a g e
NOTE: Do not
from the base!
5. Set burner into place with the igniter at the
opposite end from the door of the fire pit. See the
section labeled Gas Connection and Igniter
Installation to install gas lines and piezoelectric
igniter , then set the metal top into place on TOP of
the burner.
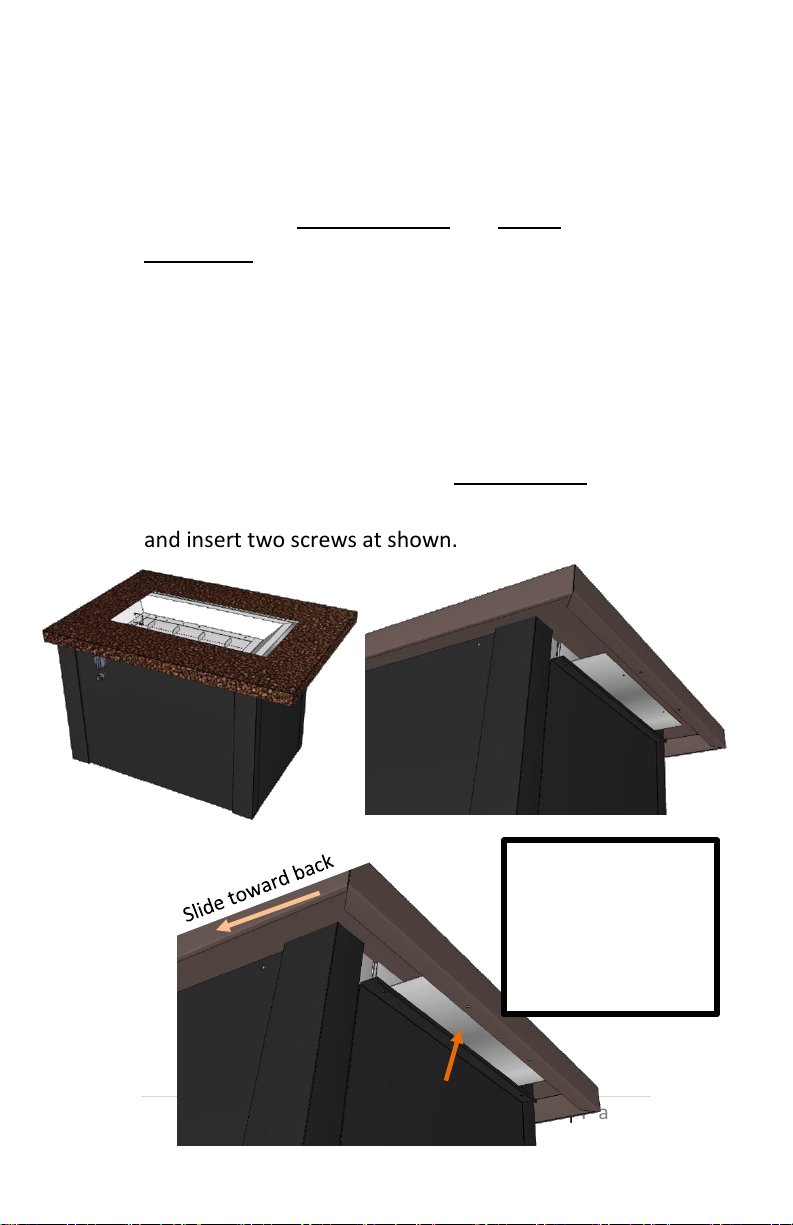
6. The underside of this top has two screw holes.
Rotate the top to match these up with the
previously installed tab, set the top onto the base,
and slide the mounting bracket up and under the
lip of the powdercoated top. Line up screw holes
and insert two screws at shown.
attempt to lift or
carry fire pit by its
top. Always lift
6 | P a g e
 Loading...