How it Works
Log In / Sign Up
Buy Points
How it Works
FAQ
Contact Us
Questions and Suggestions
Users
Oursson
Loading...
#
МО2610
МО3020
M
MF2005-GA
MF2005-IV
MF3500D
MG1310
MG1310/DC
MG1310/GA
MG2000
MG2010
MG2010/OR
2
MG2010/RD
MG2011
MG2012
2
MG2013
MG5000
MG5020
MG5025-OR
MG5520-GA
MG5530-RD
MG5540-RD
MG5550
MI5040PSD
Mi5040PSD-IV
MM1701
MM1702
MM2002
MM2002-DC
MM2005
MM2005/GA
MM2005/IV
MM2005/RD
MM2006-DC
MM2006-OR
MM2009
MO0601
MO0905
MO1402
MO2300
MO2305
4
MO2325
MO2325-DC
MO2610
6
MO2610-RD
MO2620
2
MO2620-RD
MO3020
4
MO3020-DC
MO3030
2
MO3030-RD
MO3815
3
MO3815/RD
MO4225
3
MP1010S
MP4002PSD
MP5002PSD
MP5005PSD
MP5005PSD/IV
MP5010PSD
MP5010PSD-DC
MP5010PSD-RD
MP5015PSD
MP5015PSD-DC
MP5015PSD/IV
MP5021SD
MP6002PSD
2
MS2060
MS2060-GA
MS2060-IV
MS2060-OR
O
OG2075
2
OG2075-GA
OG2075-OR
P
PB1550HTD-RD
R
RF0480
RF0710
RF 1000/RD
RF 1005
RF1005-IV
RF 1005-RD
RL97072
RL97073
S
SC1205-SB
SM3302
T
TO2120
TO2130D
TO2130D-GA
TO2130D-IV
TO2130D-OR
TO2145D
2
TO2145D-GA
TO2145D-IV
TO2145D-RD
TP3310PD
3
TP3310PD/DC
TP4310PD
2
TP4310 PD/IV
TP5510PD
V
VS0434-GA
VS0434-RD
Loading...
Loading...
Nothing found
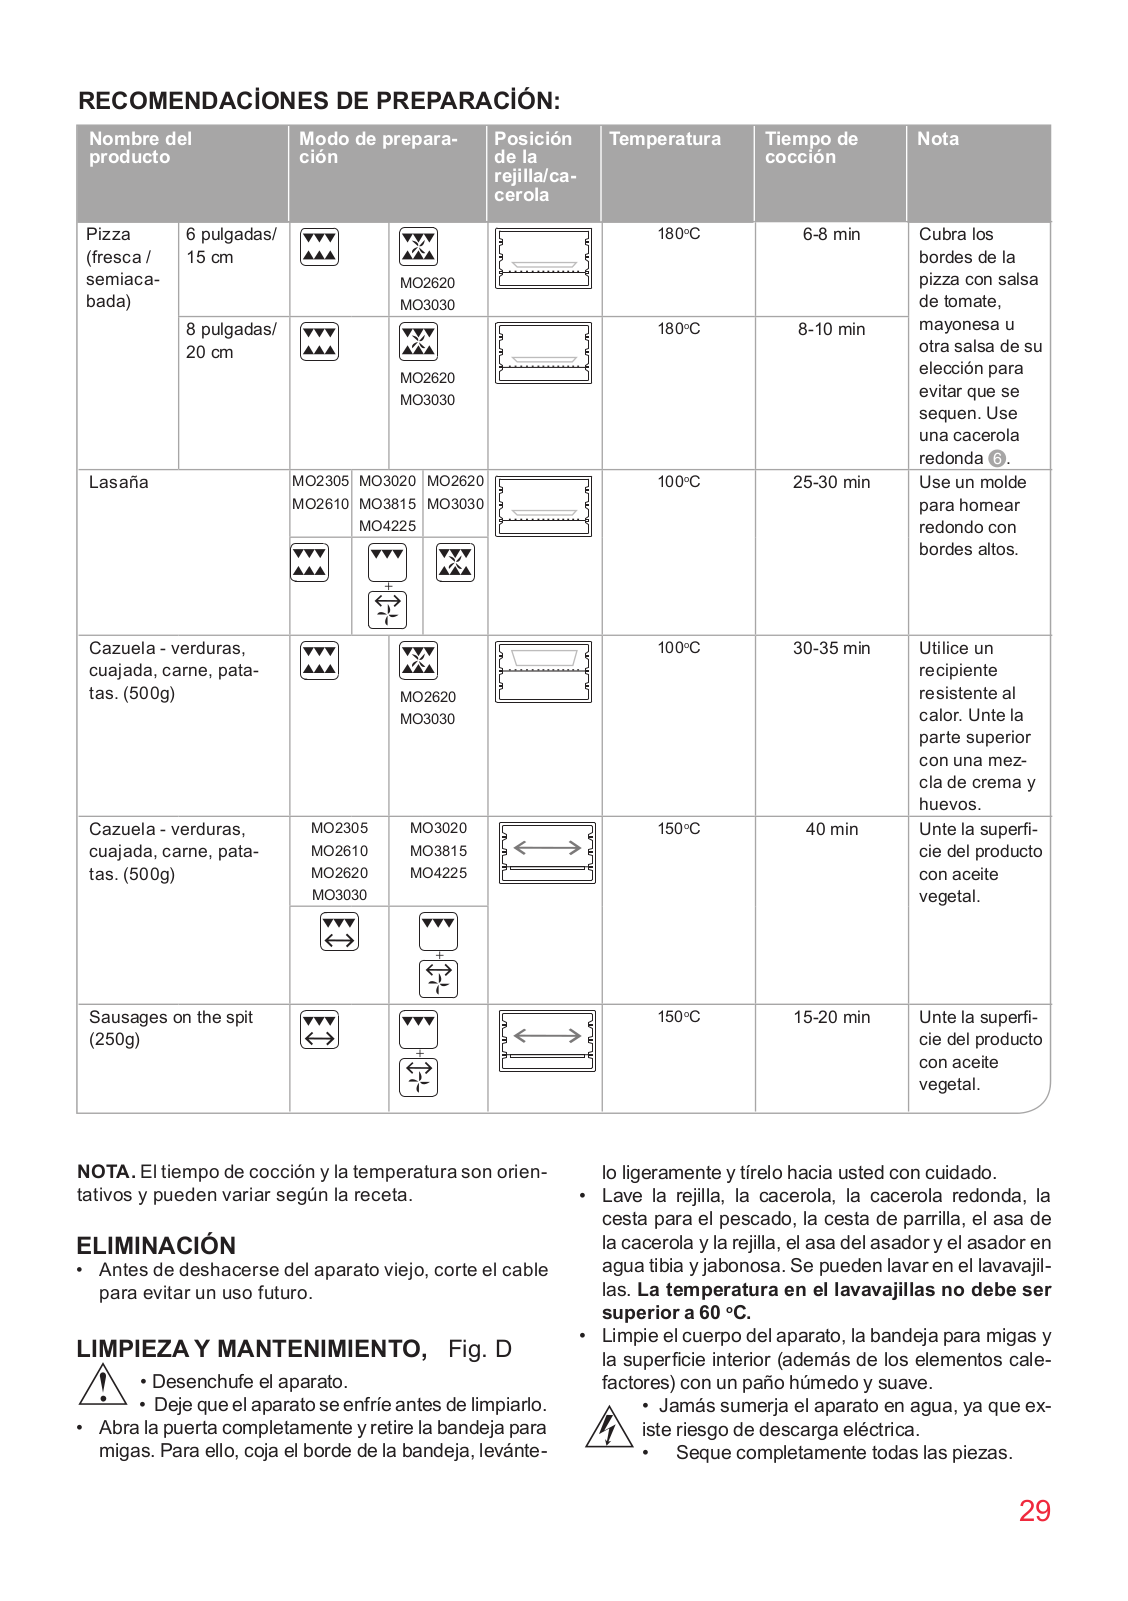
MO4225
Instruction Manual
45 pgs
1.9 Mb
0
Instruction Manual
96 pgs
1.82 Mb
0
User Manual [ru]
96 pgs
1.81 Mb
0
Table of contents
Loading...
Oursson MO4225 User Manual [ru]
...
Oursson User Manual [ru]
Download
Specifications and Main Features
Frequently Asked Questions
User Manual
Download
Loading...
+
67
hidden pages
Unhide
You need points to download manuals.
1 point = 1 manual.
You can buy points or you can get point for every manual you upload.
Buy points
Upload your manuals
 Loading...