

Page 1
INSTRUCTION MANUAL
Orion Mini 50mm Guide Scope
#8891
Providing Exceptional Consumer Optical Products Since 1975
OrionTelescopes.com
Customer Support (800) 676-1343
E-mail: support@telescope.com
Corporate Offices (831) 763-7000
89 Hangar Way, Watsonville, CA 95076
© 2011 Orion Telescopes & Binoculars
IN 407 Rev. A 02/11
Page 2
Congratulations on your purchase of the Orion Mini 50mm
Guide Scope – a “new breed” of simple, compact, and lightweight guide scope designed for use with the Orion StarShoot
AutoGuider, Orion StarShoot Planetary Imager & AutoGuider,
or similar, sensitive small-chip CCD cameras. It’s ideal for
guiding long-exposure astrophotographs with short to medium
focal length telescopes up to 1500mm focal length. Its bright,
wide-field optics serve up lots of potential guide stars on your
autoguider’s CCD sensor, and it’s small enough to stash in an
accessory case!
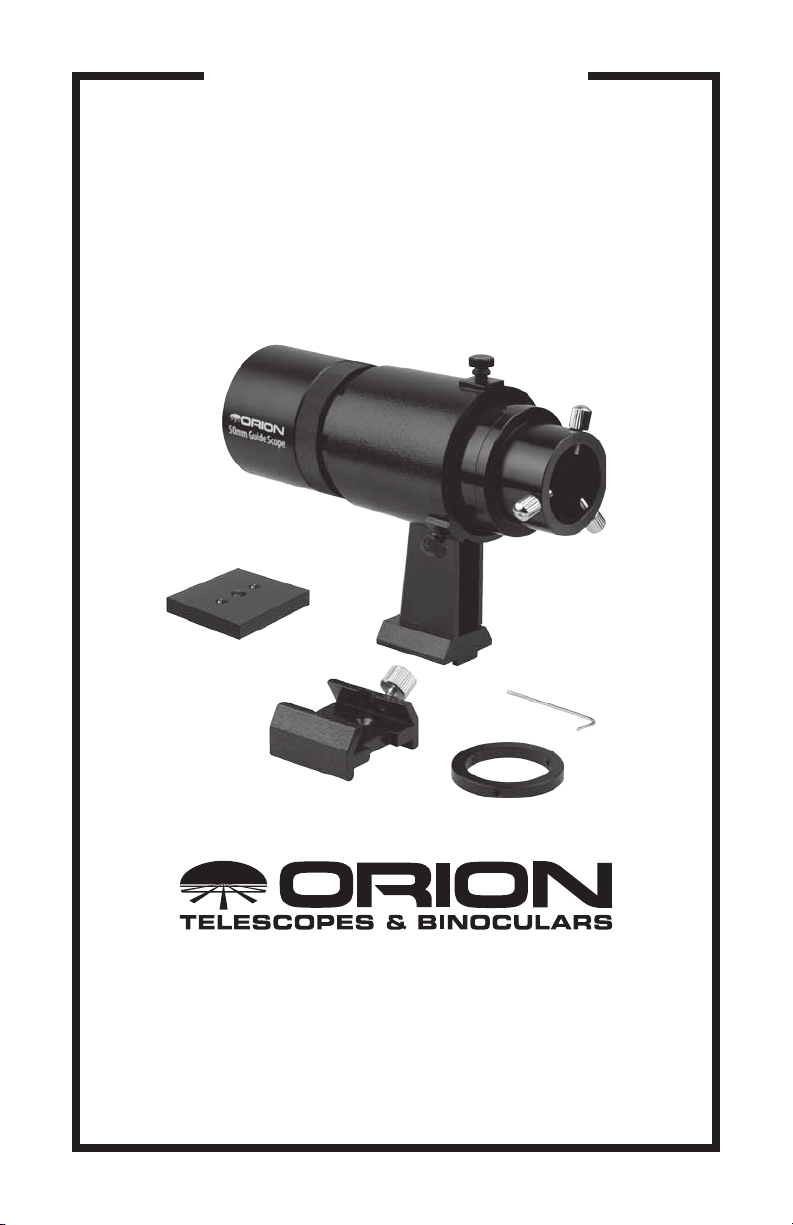
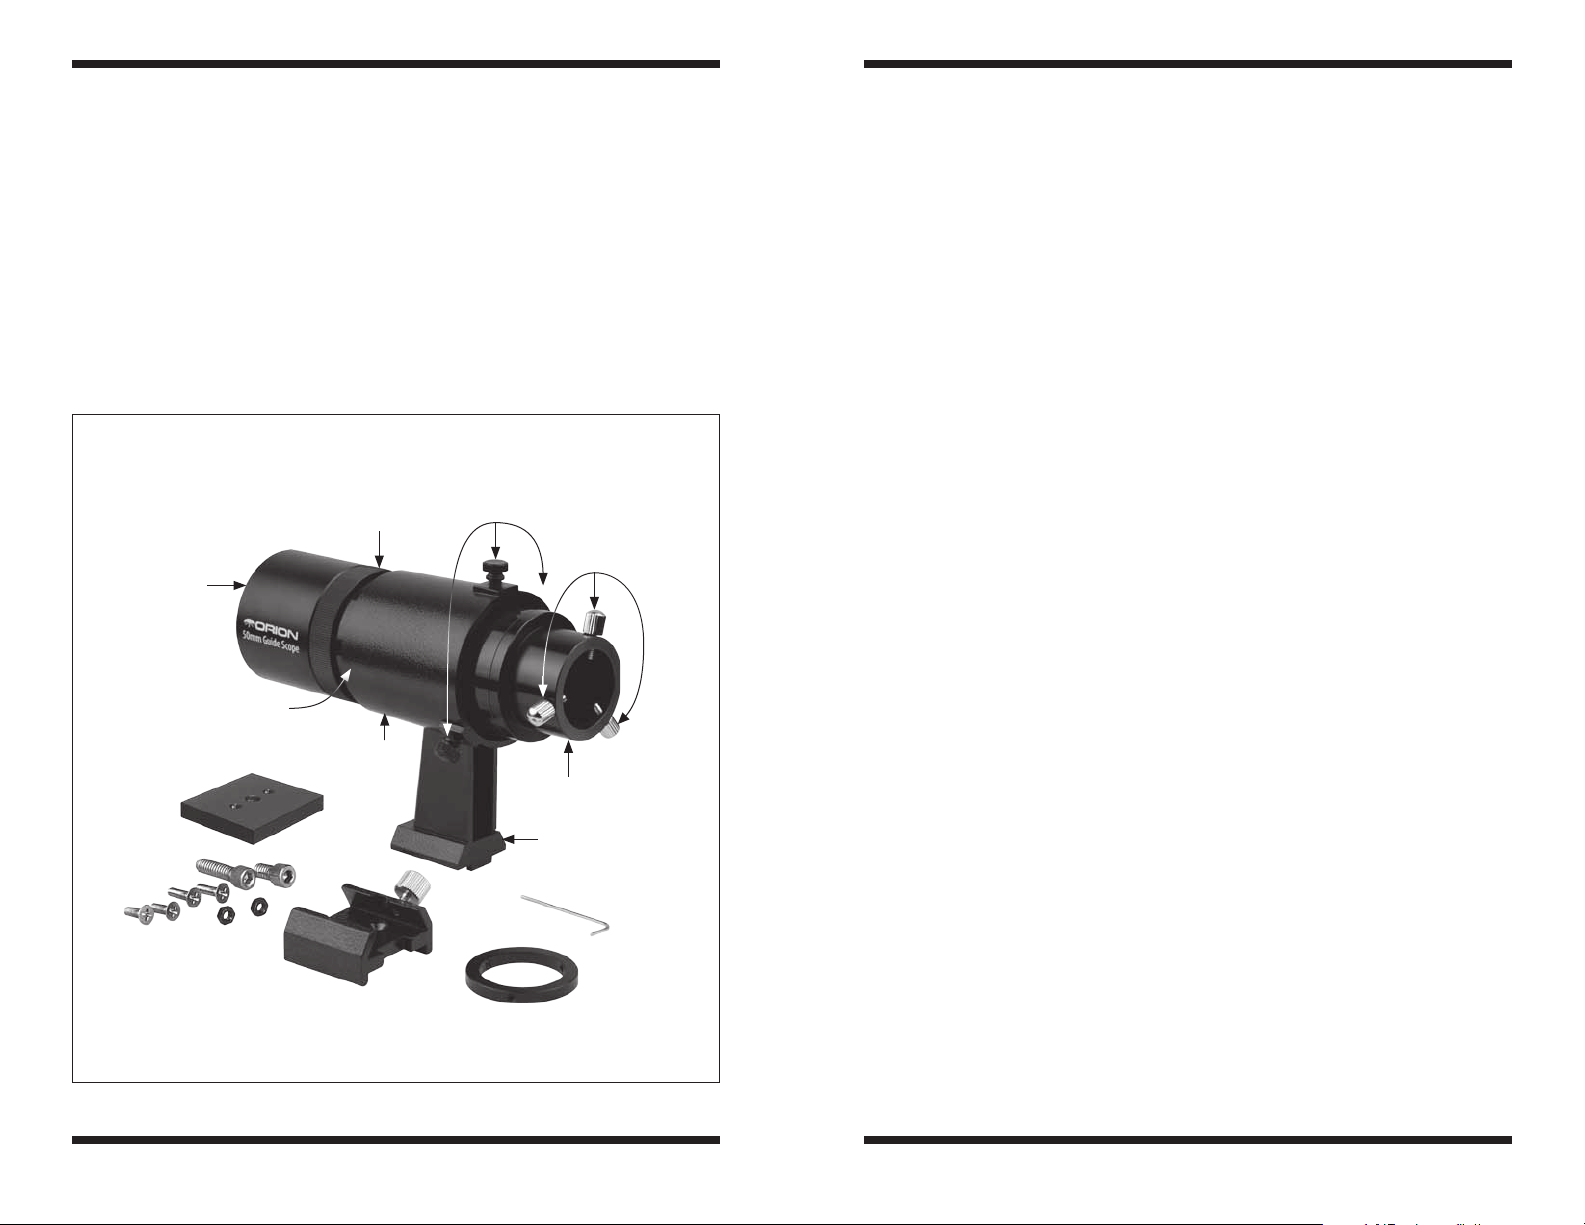
Parts List
1 Guide scope optical tube assembly
1 Dovetail bracket
1 Dovetail base
2 #8-32 x 3/8" flat (countersunk) Phillips head screws, and 2 hex nuts
2 #8-32 x ½" length flat (countersunk) Phillips head screws
1 Adapter plate
1 Socket head screw, ¼"-20 x 1"
1 Socket head screw, ¼"-20 x 1/2"
1 Parfocal ring, 1.25"
1 Allen wrench, 1.5mm
Adapter plate
#8-32 Screws
Objective
lens cell
Hex nuts
O-ring
(not visible)
Socket head
screws (x2)
Dovetail base
Lock ring
Bracket
Adjustment
thumbscrews (x3)
1.25" Parfocal ring
Thumbscrews,
camera
attachment
1.25"
Holder
Dovetail foot
1.5mm
Allen
wrench
Assembly
The Mini Guide Scope comes fully assembled and mounted in the dovetail
bracket. Refer to Figure 1 to familiarize yourself with the features and parts of the
guide scope.
Mounting the Mini Guide Scope
The Mini 50mm Guide Scope’s mounting bracket has a dovetail foot that fits the
Orion dovetail finder scope base included on many Orion telescopes. The guide
scope also comes with a separate dovetail base (Orion part #7214), with two
#8-32 x 3/8" flat Phillips-head screws and two hex nuts, for custom installations.
To mount the Mini 50mm Guide Scope on a dovetail plate such as Orion’s Wide or
Narrow Universal mounting plates, or similar plates produced under other brands,
we’ve included an adapter plate that makes it easy. The Mini Guide Scope can
then be piggybacked on top of your main instrument’s tube rings, or on a side-byside saddle plate, for autoguiding.
On the adapter plate there are three threaded holes. The two outer ones are for
attaching the dovetail base to the adapter plate, using the two included #8-32 x
½" length flat (countersunk) Phillips head screws. (These are the longer of the
four #8-32 screws.) Once the dovetail base is securely attached, you can mount
the adapter plate onto a dovetail mounting bar or plate by inserting one of the
supplied 1/4"-20 socket head screws up through an unthreaded hole or slot in the
dovetail plate and into the ¼"-20 hole in the center of the adapter plate. Tighten
with a 3/16" Allen wrench (user supplied). We have provided two different socket
head screws for your convenience, one is ½" long, the other 1" long. Choose the
one that best fits your mounting bar or plate.
Figure 1. The Mini 50mm Guide Scope and included components
2 3
Page 3

Focusing
Focusing can be done in daylight on
Parfocal
ring
Autoguiding camera
a distant object, or at night under the
stars. For best results we recommend
doing final, fine focusing at night at
the beginning of your imaging session,
following the focusing procedures in
the imaging software you use for astrophotography, such as MaxIm DL, PHD
1.25"
Nosepiece
Guiding, or Images Plus.
1. Slide the 1.25" parfocal ring onto
the nosepiece of your autoguiding
camera (Figure 2). If it doesn’t
slip on easily, make sure the three
setscrews in the ring are backed
off enough to provide clearance
for the nosepiece. A 1.5mm Allen
wrench is provided for adjusting the
Figure 2. Slide the parfocal ring onto
the 1.25" nosepiece of the Orion StarShoot
AutoGuider or other autoguiding camera.
Do not tighten the setscrews yet.
1.25" Holder
Camera nosepiece
setscrews. Leave the ring loose on
the nosepiece; do not tighten the
setscrews yet.
2. Next, insert the nosepiece of your
guide camera about halfway into
the 1.25" holder of the guide scope,
then lightly tighten the three thumb-
Holder thumbscrew (x3)
screws on the holder to temporarily
secure the autoguiding camera in
place (Figure 3).
3. Make sure your autoguider camera
is powered on and connected to
your laptop computer, and that the
Figure 3. Insert the autoguider
nosepiece about halfway into the 1.25"
holder of the Mini Guide Scope, then lightly
tighten the three thumbscrews on the
holder to secure the camera in place for the
moment.
software you will use for autoguiding is up and running. With the
imaging software set to take continuous exposures, slightly loosen just one of
the thumbscrews holding the autoguider nosepiece – just enough to be able
to move it very gradually forward or back, while you watch the stars or reference numbers (e.g., FWHM) on your laptop screen. When the stars are pretty
sharp, or you’ve reached approximately the lowest FWHM, tighten the loose
thumbscrew so that the camera is secure in the guide scope.
4. Final, fine focusing can be done by rotating the objective lens cell on the
front of the guide scope. First, back off the objective cell lock ring a couple of
turns by rotating it counterclockwise (Figure 4). This frees up the objective
cell to be turned either clockwise or counterclockwise. Turn it one way or the
other by a quarter turn or so and see what effect that has on the star focus.
Once you’ve achieved the best
focus you can get, lightly re-tighten
the lock ring by turning it clockwise
rotate to
focus
Objective
lens cell
while holding the objective lens cell
steady. You’re done!
Of course, if you turn the objective lens
cell until it can rotate inward no further,
or you rotate it outward so far that it
unthreads completely and comes off,
you should reset it to about the midpoint of its thread travel and re-adjust
the coarse focus, i.e., the position of
the autoguider nosepiece in the 1.25"
holder. Then, you can attempt to finefocus again using the objective lens cell.
Figure 4. After setting the coarse focus
with the camera in the guide scope holder,
fine focusing can be done by rotating the
scope’s objective lens cell. First, you’ll
need to loosen the lock ring by rotating it
counterclockwise a couple of turns.
Lock ring
Setting the Parfocal Ring
Once the guiding camera’s nosepiece has been set at the optimal focus position
following the above procedure, you can lock the parfocal ring on the camera’s
nosepiece. This will enable you to return the camera to the same position in the
guide scope’s holder on subsequent imaging sessions (assuming you remove
the camera from the guide scope after each session), obviating the need to go
through the coarse focusing procedure (steps 2 and 3 above) again. You should
still, of course check the guide scope’s focus at each imaging session. But if any
adjustment is needed, it will probably be minor and can be done using the fine
focus of the objective lens cell (step 4 above).
To set the parfocal ring, which you inserted on the guide camera’s nosepiece in
step 1 above, simply slide it forward until it lies flush against the guide scope’s 1.25"
holder (Figure 5). Then carefully tighten each of the three setscrews in the ring.
1.25" Holder
Parfocal
ring
1.5mm Allen
wrench
Setscrew (x3)
Figure 5.
focus is achieved,
set the parfocal ring
by first sliding it up
against the 1.25"
holder. Then, using
the provided Allen
wrench, secure the
ring to the camera
nosepiece with the
three setscrews.
Once
4 5
Page 4

Aiming the Mini Guide Scope
The Mini 50mm Guide Scope is mounted in a dovetail bracket that has three black
thumbscrews to the secure the guide scope tube in place. The tube is secured to
the front of the bracket with a rubber O-ring. Although you may never need to do it
in order to find a guide star, you can adjust the direction the guide scope is pointed
within the bracket by alternately loosening and tightening the three thumbscrews.
Just make sure that all three thumbscrews are tightened before you begin guiding.
Do not over-tighten them, however, or you could strip the screw threads.
Caring for the Mini 50mm
Guide Scope
To keep dust from getting inside the guide scope and from accumulating on the
objective lens, keep the front and rear caps installed when the guide scope is not
in use. We recommend storing the guide scope in a padded accessory case.
Cleaning the Lens
Although it shouldn’t need cleaning very often, you can clean the front lens of the
guide scope with any quality optical lens cleaning tissue and optical lens cleaning
fluid designed for multi-coated optics. Never use regular glass cleaner or cleaning
fluid designed for eyeglasses. Before cleaning with fluid and tissue, blow any loose
particles off the lens with a blower bulb or compressed air. Then apply some cleaning fluid to a tissue, never directly on the optics. Wipe the lens gently in a circular
motion, then remove any excess fluid with a fresh lens tissue. Oily fingerprints and
smudges may be removed using this method. Use caution, as rubbing too hard
may scratch the lens. Never re-use tissues.
One-Year Limited Warranty
This Orion Mini 50mm Guide Scope is warranted against defects in materials or workmanship
for a period of one year from the date of purchase. This warranty is for the benefit of the original
retail purchaser only. During this warranty period Orion Telescopes & Binoculars will repair or
replace, at Orion’s option, any warranted instrument that proves to be defective, provided it is
returned postage paid to: Orion Warranty Repair, 89 Hangar Way, Watsonville, CA 95076. If the
product is not registered, proof of purchase (such as a copy of the original invoice) is required.
This warranty does not apply if, in Orion’s judgment, the instrument has been abused, mishandled, or modified, nor does it apply to normal wear and tear. This warranty gives you
specific legal rights, and you may also have other rights, which vary from state to state. For
further warranty service information, contact: Customer Service Department, Orion Telescopes
& Binoculars, 89 Hangar Way, Watsonville, CA 95076; (800) 676-1343.
OrionTelescopes.com
89 Hangar Way, Watsonville, CA 95076
Customer Support Help Line (800) 676-1343
© 2011 Orion Telescopes & Binoculars
6 7
 Loading...