

Page 1
Orion® Imaging Flip Mirror
#5523
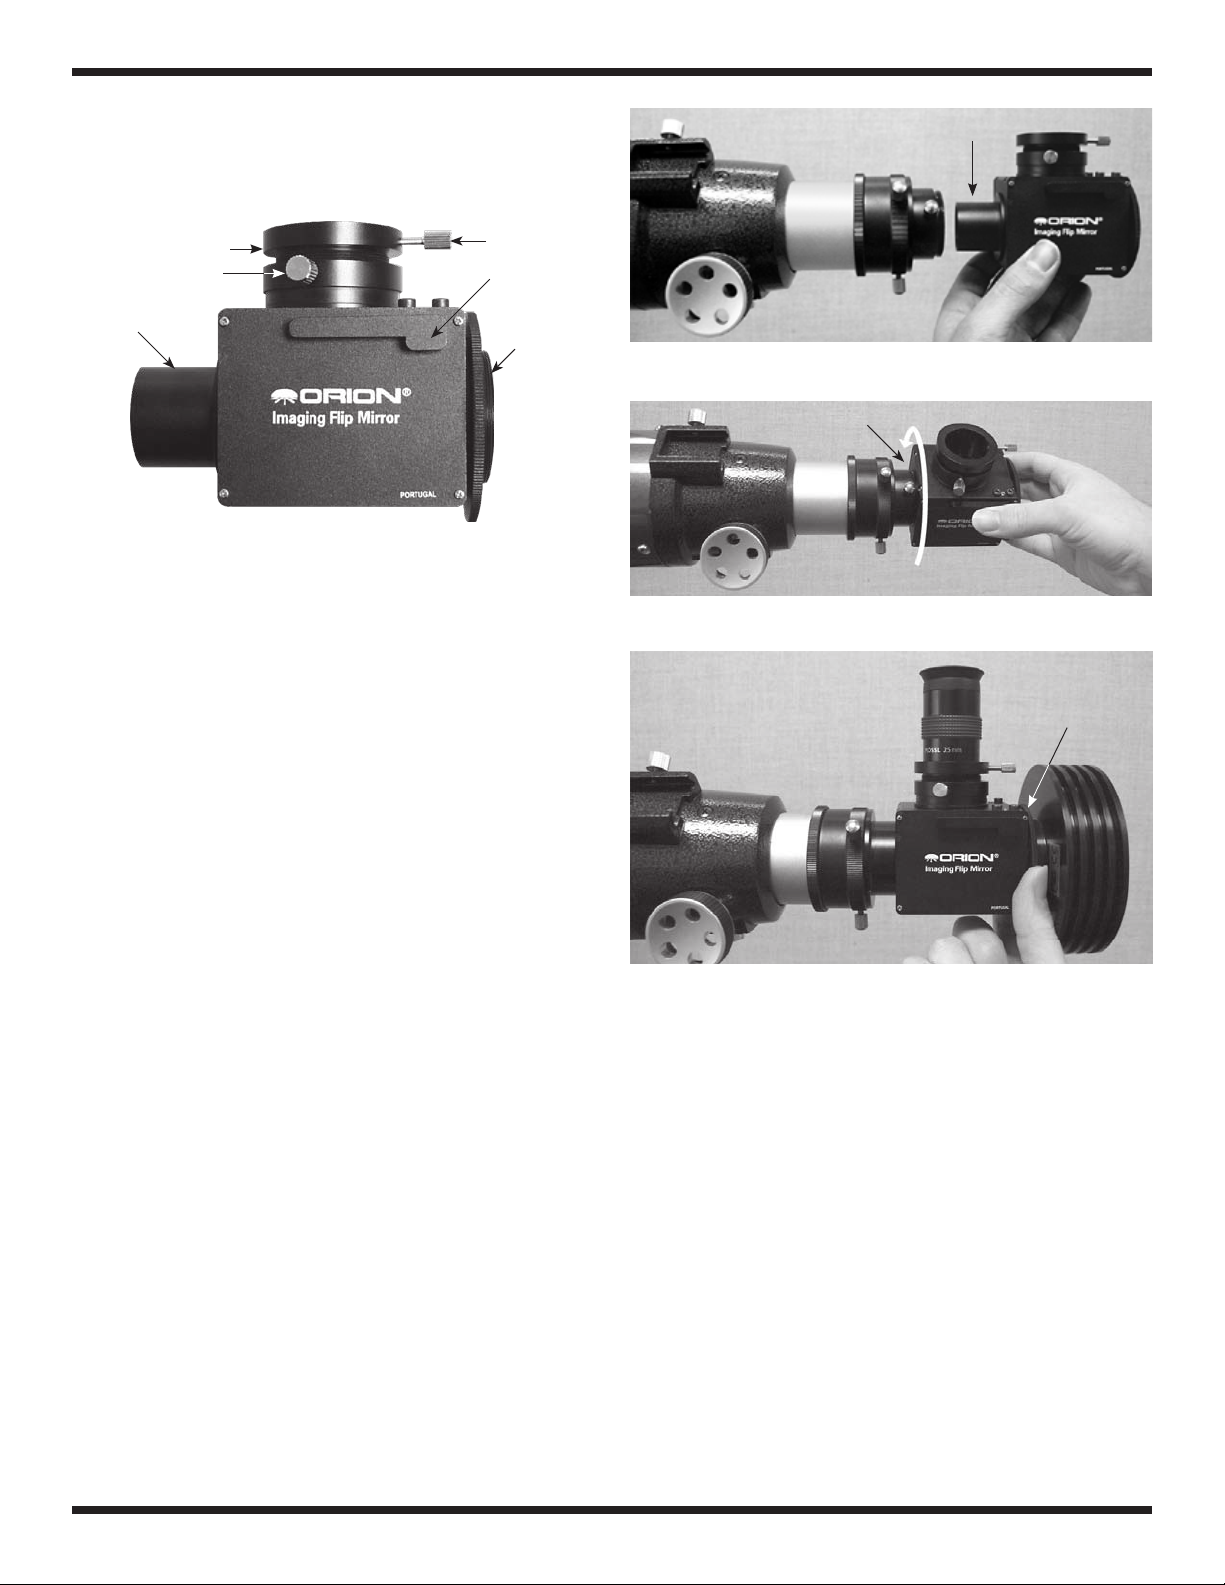
Nosepiece
1.25" Eyepiece holder with
helical focus mechanism
Focus lock thumbscrew
Removable 1.25"
nosepiece
Eyepiece holder
thumbscrew
Flip mirror lever
Camera adapter
with knurled
lock ring
Figure 1. The Imaging Flip Mirror and its components
Congratulations on your purchase of the Orion® Imaging Flip
Mirror. Your Imaging Flip Mirror enables easy object acquisition,
centering, and focusing for your CCD camera. Easily switch your
telescope’s light path from your CCD camera to your eyepiece,
and visa-versa, without removing your camera or disrupting its
focus and orientation.
Parts List
Flip Mirror body, includes:
1.25" Eyepiece holder with helical focus mechanism
1.25" Nosepiece
Camera adapter with knurled lock ring
Camera adapter metal dust cap
Figure 2. Insert the Imaging Flip Mirror nosepiece into your
telescope’s 1.25” adapter.
Focuser T-threads
Figure 3. Attach the flip mirror body directly to the focuser T-threads
by first removing the nosepiece.
Kurled
lock ring
Setting Up the Imaging Flip Mirror
The Imaging Flip Mirror is designed to accommodate your CCD
camera and eyepiece using the same telescope focuser. The
Imaging Flip Mirror comes fully assembled and ready to attach to
your telescope and CCD camera.
Attaching the Imaging Flip Mirror to a Telescope
The Flip Mirror is equipped with a standard removable 1.25" nosepiece and female T-threads, ready to attach to most telescopes.
Using the 1.25" Nosepiece
If your telescope features a 1.25" focuser or adapter, the easiest
way to attach the Imaging Flip Mirror is by using the included 1.25"
nosepiece. Simply insert the nosepiece into your telescope’s 1.25"
eyepiece adapter and secure it by tightening the thumbscrew
(Figure 2).
Using T-threads
Some Orion telescopes feature focus adapters with exterior
T-threads. If you are using such a telescope, you can attach the
flip mirror body directly to the T-threads without using the 1.25"
nosepiece. Remove the 1.25" nosepiece. Then carefully attach the
flip mirror body to the T-threads. (Figure 3).
Figure 4.
Use the knurled lock ring to secure the camera orientation.
Attaching a CCD Camera to the Imaging Flip Mirror
All Orion StarShoot™ cameras, and most commercial CCD cameras, have accessible T-threads which attach directly to the rear
side of the flip mirror body. Remove the nosepiece of your CCD
camera to reveal the T-threads. Attach the camera body to the flip
mirror body by rotating the camera clockwise until tight.
To change the camera orientation, unthread the camera counterclockwise only until you have reached the desired camera orientation. Then turn the knurled lock ring counter-clockwise (when
facing the back of the camera) against the camera body until the
camera fits snug against the ring (Figure 4).
Eyepiece Use
The Imaging Flip Mirror should reach focus with nearly all 1.25"
eyepieces. Simply insert your eyepiece into the 1.25" eyepiece
holder and secure it with the eyepiece holder thumbscrew.
IN 342 Rev B 02/09
Page 2
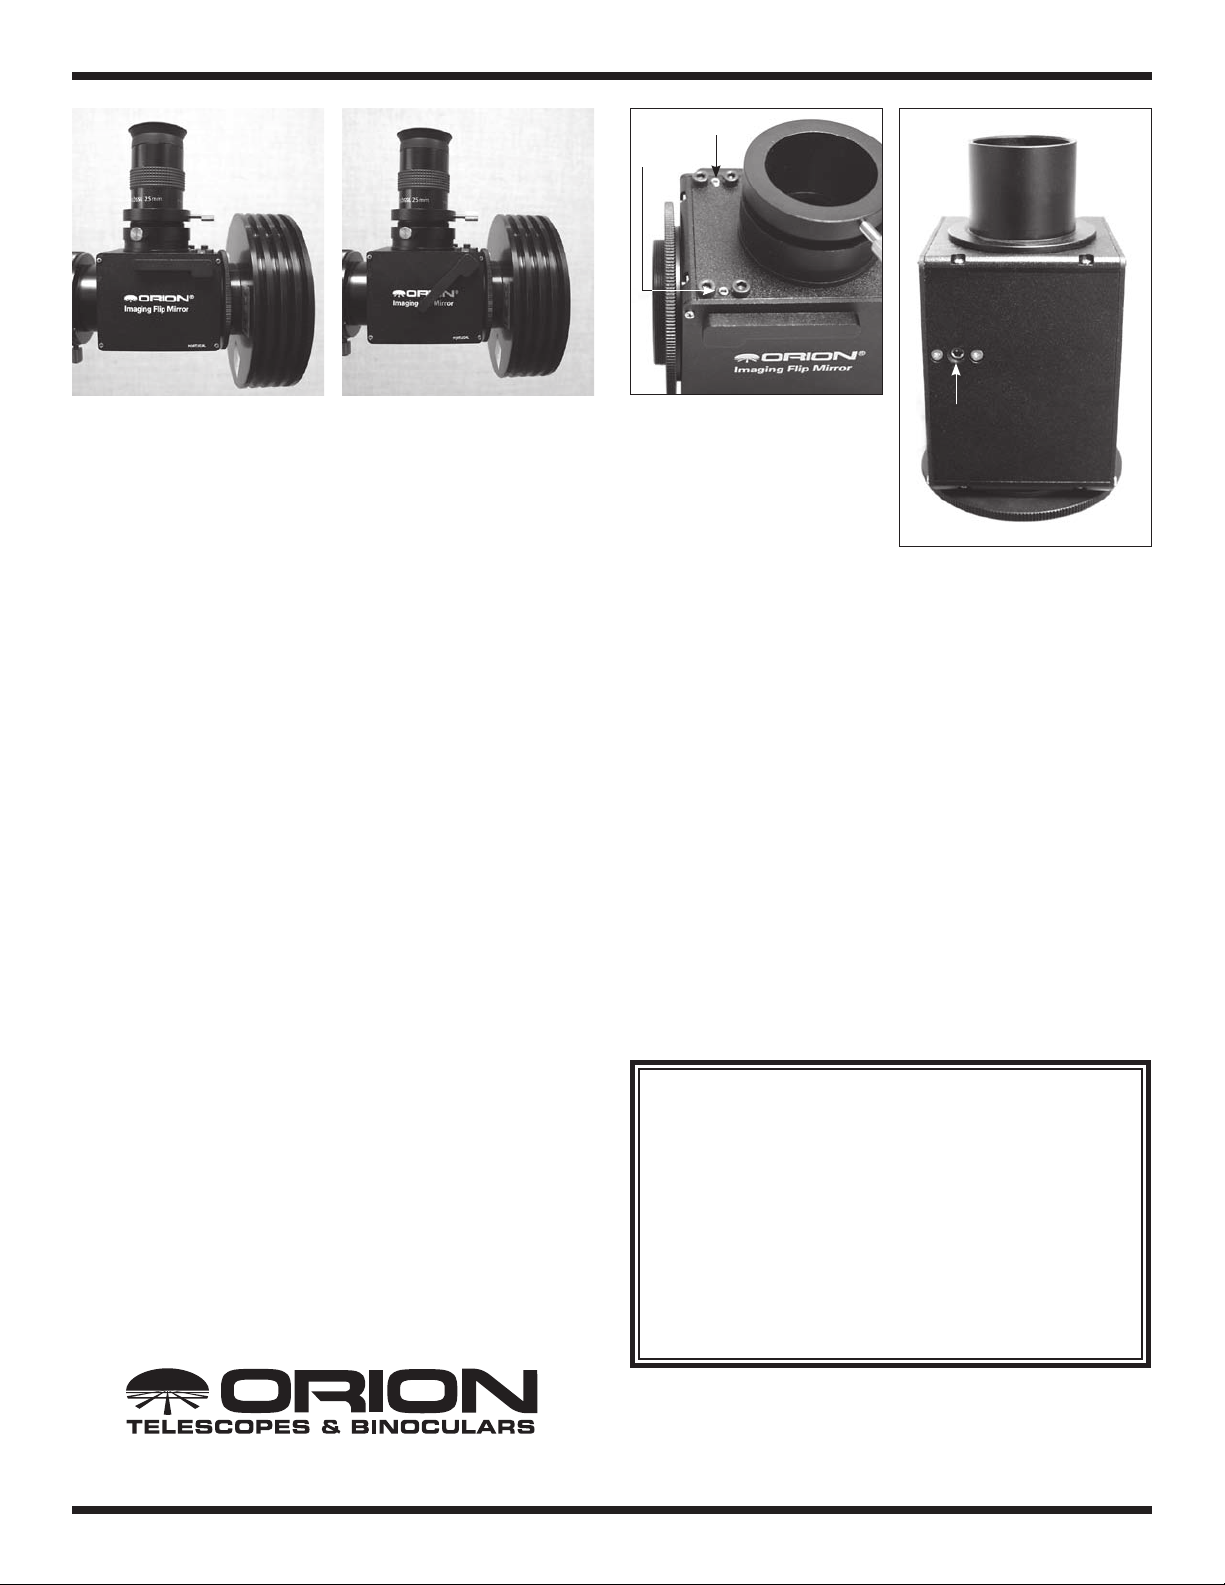
Lever tension
adjustment
screws
Figure 5.1. Lever up directs the light path to the CCD camera.
Figure 5.2. Lever down directs the light path to the eyepiece.
Using the Imaging Flip Mirror
Keep the flip mirror lever in the “up” position (Figure 5.1) to let the
telescope focus on the camera. Flip the mirror to the “down” position to let the telescope focus on the eyepiece (Figure 5.2).
With the flip mirror lever in the “up” position, focus your CCD camera using your telescope’s focuser. Then, flip the mirror to the
“down” position to switch the light path to your eyepiece. Focus
the eyepiece using the helical focus mechanism, making sure not
to disrupt the telescope’s focuser. When your eyepiece is focused,
lock the helical focus mechanism by tightening the focus lock
thumbscrew.
Other Adjustments
The flip mirror lever tension and stop angle are factory set.
However, if needed, adjustments can be made to change the lever
tension and stop angle.
Adjusting the Lever Tension
Locate the two silver socket head set screws (one on each side)
located above the lever (Figure 6).
Using the provided 1.5mm hex key, loosen or tighten the set
screws as needed to reach the desired lever tension.
Adjusting the Flip Mirror Stop Angle
Check if any adjustment is necessary first. The Imaging Flip Mirror
stop angle is factory-set and typically does not require adjustment.
Center the image subject in your CCD camera. Then flip the mirror
down to bring the light path to the eyepiece. The subject should
be centered in the eyepiece. If the subject is not centered in the
eyepiece as is was in the CCD camera, you need to adjust the
mirror stop angle.
To adjust the flip mirror stop angle:
1. Locate the socket head set screw on the bottom of the flip
mirror body (Figure 7).
2. If the subject is above the center of the field of view (when
facing the rear of the flip mirror), turn the set screw clockwise
Figure 6. (above) The two silver
socket head screws located above
the lever adjust the lever tension.
Flip Mirror stop angle
adjustment set screw
Figure 7. (right) The socket
head set screw located beneath
the flip mirror body adjusts the
mirror stop angle.
(using the provided 2.5mm hex key). If the subject is below the
center of the field of view, turn the set screw counter-clockwise.
3. Check your adjustment by comparing the CCD camera view with
the eyepiece view. The subject should be centered in both views.
Care and Storage
The mirror surface should only be cleaned on a minimal bases.
Small dust particles will not effect the optical performance. You can
occasionally remove dust with compressed air or a blower bulb. If
you need to clean the mirror surface, first unthread the 1.25” eyepiece holder from the flip mirror body to allow easy access to the
mirror. Use a cotton Q-tip with a drop of isopropyl alcohol or lens
cleaning solution. Lightly drag the Q-tip across the surface of the
mirror. Replace the Q-tip frequently while cleaning to ensure you
do not smear particles across the mirror. Use caution, as scratching or stripping the delicate aluminum surface can easily occur.
To avoid excessive dust buildup, be sure to attach the dust caps
prior to storing, and use a foam-lined accessory case. The foamlined box your Imaging Flip Mirror arrives in also acts as a convenient storage container. Store in a dry place away from direct
sunlight.
One-Year Limited Warranty
This Orion Imaging Flip Mirror is warranted against defects in materials or
workmanship for a period of one year from the date of purchase. This warranty is for the benefit of the original retail purchaser only. During this warranty
period Orion Telescopes & Binoculars will repair or replace, at Orion’s option,
any warranted instrument that proves to be defective, provided it is returned
postage paid to: Orion Warranty Repair, 89 Hangar Way, Watsonville, CA
95076. If the product is not registered, proof of purchase (such as a copy of
the original invoice) is required.
This warranty does not apply if, in Orion’s judgment, the instrument has been
abused, mishandled, or modified, nor does it apply to normal wear and tear.
This warranty gives you specific legal rights, and you may also have other
rights, which vary from state to state. For further warranty service information,
contact: Customer Service Department, Orion Telescopes & Binoculars, 89
Hangar Way, Watsonville, CA 95076; (800)-676-1343.
Providing Exceptional Consumer Optical Products Since 1975
OrionTelescopes.com
Customer Support (800)‑676‑1343
E‑mail: support@telescope.com
Corporate Offices (831)‑763‑7000
89 Hangar Way, Watsonville CA 95076
 Loading...