

Page 1
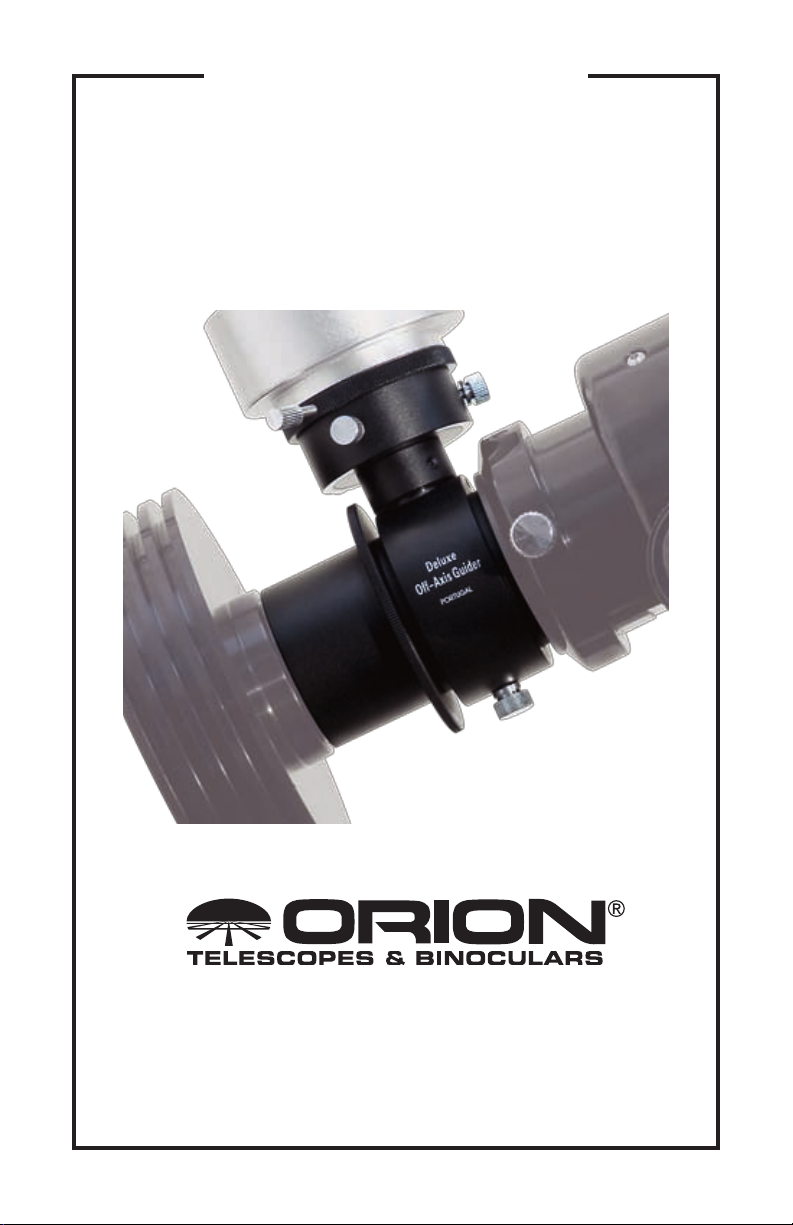
INSTRUCTION MANUAL
Orion®
Deluxe Off-Axis Guider
#5521
Providing Exceptional Consumer Optical Products Since 1975
Customer Support (800) 676-1343
E-mail: support@telescope.com
OrionTelescopes.com
Corporate Offices (831) 763-7000
89 Hangar Way, Watsonville, CA 95076
IN 351 Rev. B 08/09
Page 2
2
3
➌
➋
➊
➍
➐
➎
➑
➏
Figure 1a.
Congratulations on your purchase of the Orion Deluxe
Off-Axis Guider. This useful imaging accessory enables
you to image and guide through the same telescope,
thereby eliminating the need for a separate guide scope
which also saves weight on your mount. The Deluxe OffAxis Guider is especially useful for Schmidt-Cassegrain
telescopes or other systems that are prone to optical flexure or mirror shift. Since the autoguider detects the exact
same movement as the imaging camera, you are assured
highly-accurate tracking.
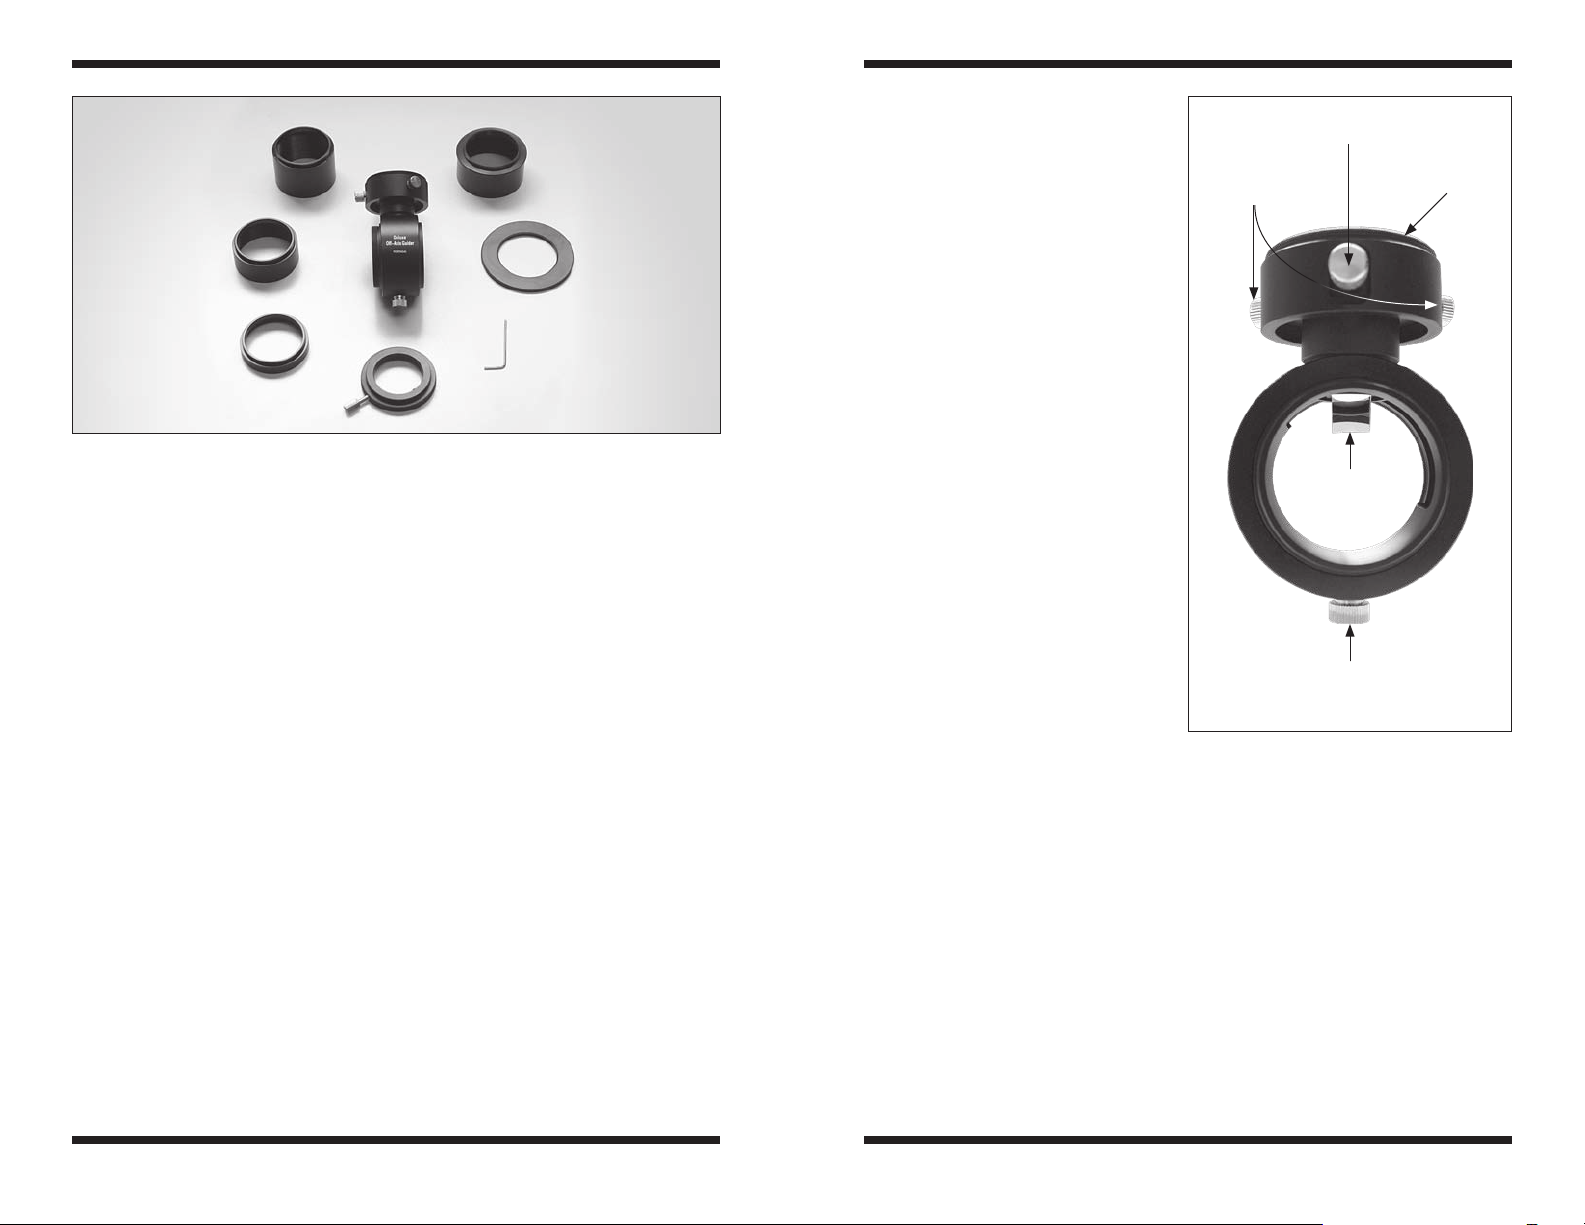
Parts List
1. Deluxe Off-Axis Guider Main Body
2. 2" Nosepiece
3. 30mm Extension
4. 17mm Extension
5. 7mm Extension
6. Fine Focus Guiding Adapter and 1.25" Eyepiece Holder
7. Rotate Lock Ring
8. Hex Key
1. Getting Started
The Deluxe Off-Axis Guider comes
with all of its parts already attached;
however, you should remove the
parts first because you may not have
to use all of them to guide with your
particular telescope, camera, and
autoguider. Please take a moment
to familiarize yourself with the parts
(Figure 1a and 1b).
The Deluxe Off-Axis Guider accommodates nearly any imaging camera and autoguider. We recommend
using a compact autoguider, such
as the StarShoot AutoGuider; however many other autoguider cameras
with a 1.25" nosepiece or female
T-threads are also appropriate. You
can also use any 1.25" eyepiece
to help visually locate a guide star
before attaching the autoguider.
Manually guiding with a 1.25" reticle
eyepiece is possible too.
Prism tilt adjustment screw
Course focus
height adjustment
lock thumbscrews
Pick-off prism
T-threads
Setting the Correct
Imaging Camera and
Radial adjustment
lock thumbscrew
Autoguider Spacing
The imaging camera and autoguider
must come to the same focus point
to successfully operate the Deluxe
Off-Axis Guider. The imaging chip in
your CCD or DSLR camera and the
detector in your autoguider must be equidistant to the focal plane of your telescope. Three extension pieces (30mm, 17mm, and 7mm) are included to allow
you to achieve focus with both your imaging camera and autoguider when
using the Deluxe Off-Axis Guider.
If you are imaging with the StarShoot AutoGuider and the StarShoot Pro,
StarShoot Pro V2.0 or a Canon or Nikon DSLR, please refer to Figures 2a-2c
for the suggested Deluxe Off-Axis Guider configuration.
For any other imaging setup, you must determine the correct spacing configuration to allow your autoguider and imaging camera to reach focus. Keep in
mind that the farther away the imaging camera’s chip is from the Deluxe OffAxis Guider, the farther away the autoguider detector must also be.
Figure 1b. The main body of the Deluxe
Off-Axis Guider contains the guiding end
which enables guide star acquisition and
focus.
Page 3

4
5
StarShoot
AutoGuider,
nosepiece removed
7mm extension
Fine focus
guiding adapter
Deluxe Off-Axis
Guider main body
17mm
extension
2" focuser on
telescope
StarShoot Pro,
nosepiece
removed
Rotation
lock ring
StarShoot Pro/DSCI II
with StarShoot AutoGuider
Configuration
Deluxe Off-Axis
Guider main body
17mm
extension
StarShoot Pro,
nosepiece
removed
Rotation
lock ring
StarShoot
AutoGuider,
nosepiece removed
Fine focus
guiding adapter
2" focuser on
telescope
StarShoot Pro V2.0
with StarShoot AutoGuider
Configuration
Deluxe Off-Axis
Guider main body
30mm
extension
DSLR
camera body
Rotation
lock ring
T-ring
StarShoot
AutoGuider,
nosepiece removed
Fine focus
guiding adapter
2" focuser on
telescope
DSLR Camera
with StarShoot AutoGuider
Configuration
Figure 2a.
2. Attaching
the Imaging
Camera to the
Deluxe OffAxis Guider
Once you have estimated what the
approximate spacing configuration
should be, you are ready to attach
the Deluxe Off-Axis Guider to your
imaging camera. Simply thread the
imaging camera’s female T-threads
into the back of the Deluxe Off-Axis
Guider (Figure 3). You can optionally
use the rotate lock ring to fix the
orientation of the Deluxe Off-Axis
Guider in relation to the camera.
This can be particularly useful for
DSLRs because the guider’s radial
adjustment sometimes interferes
with the camera body.
Using a StarShoot Deep
Space Imaging Camera
Thread the camera to the Deluxe OffAxis Guider as shown in Figure 3.
Figure 3.
into the Deluxe Off-Axis Guider. If you are
using a DSLR, the T-ring should already be
attached to the camera body.
Thread the imaging camera
Figure 2b.
Figure 2c.
3. Attaching the
Figure 4a.
Autoguider to
the Deluxe OffAxis Guider
Thread the fine focus guiding adapter to the guiding end of the Deluxe
Off-Axis Guider; then tighten the fine
focus lock thumbscrew (Figure 4a).
Next, thread the autoguider camera
body to the Deluxe Off-Axis Guider
(Figure 4b).
Figure 4b.
Page 4

6
7
Figure 5.
and hex key to secure the autoguider
nosepiece or 1.25" eyepiece.
Use the socket head setscrew
Figure 6. Deluxe Off-Axis Guider direct
T-thread attachment to the telescope.
Using the 1.25" Eyepiece Holder
The fine focus guiding adapter also functions as a 1.25" eyepiece holder to
support cameras that use only a 1.25" nosepiece or any standard 1.25" eyepiece. Insert the camera nosepiece or eyepiece barrel into the 1.25" holder.
Locate the socket head setscrew and secure the camera or eyepiece using
the provided 1.5mm hex key (Figure 5), also refer to “Finding and Focusing a
Guide Star”.
4. Attaching the Deluxe Off-Axis
Guider to a Telescope
The Deluxe Off-Axis Guider is equipped with a standard removable 2" nose
piece and female camera T-threads, ready to attach to most telescopes. You
can either insert the Deluxe Off-Axis Guider like an eyepiece using the 2" nosepiece, or attach it directly to your imaging scope’s T-threads (if equipped) for
a direct threaded connection.
Using the 2" Nosepiece
If your telescope features a 2" focuser or adapter, the easiest way to attach
the Deluxe Off-Axis Guider is by using the included 2" nosepiece. Simply insert
the nosepiece into your telescope’s 2" focuser or accessory and secure it by
tightening the thumbscrew.
Using T-threads
Some Orion telescopes feature focusers with male T-threads. If you are using
such a telescope, you can attach the Deluxe Off-Axis Guider body directly to
the T-threads without using the 2" nosepiece. Remove the 2" nosepiece. Then
carefully thread the Deluxe Off-Axis Guider body to the T-threads (Figure 6).
The assembled setup when attached to the telescope will resemble Figure 7.
Figure 7. The Deluxe Off-Axis Guider, imaging camera, and autoguider are properly
attached to the telescope.
5. Focusing and Finding a Guide Star
When your imaging camera and autoguider are attached and the Deluxe OffAxis Guider is connected to your telescope, you are ready to begin focusing
and finding a guide star. The Deluxe Off-Axis Guider features coarse and fine
focus adjustments for the guiding end. The coarse adjustment is made by
sliding the guiding end up and down and locking the position with two thumbscrews (Figure 8). The fine focus adjustment is made by loosening the focus
lock thumbscrew and turning the fine focus guiding adapter. Firmly retighten
the fine focus lock thumbscrew to secure the autoguider position.
Warning: Do not turn the fine focus guiding adapter more than two (2)
full turns counter-clockwise, or the autoguider could fall off!
Finding and Focusing a Guide Star
Finding a guide star can be challenging because the pick-off prism only intercepts a small portion of the focal plane to avoid interfering with the imaging
camera’s view. Please read the following procedure to best find and focus a
guide star.
To find a guide star and focus with the Deluxe Off-Axis Guider:
1. Focus your imaging camera first. Use your telescope’s focuser.
Note: We highly recommend using an eyepiece to locate the guide star before
the exact focus is found. This only needs to be done the first time you use
the Deluxe Off-Axis Guider. Once you have achieved focus, you can keep the
Deluxe Off-Axis Guider locked in the same focus position and skip steps 2-5.
Once the autoguider is focused, it will be much easier to locate guide stars.
Page 5

8
9
Prism tilt
adjustment
thumbscrew
Course focus height
adjustment thumbscrews
Fine focus lock thumbscrew
Radial adjustment lock thumbscrew
Figure 8a and 8b. Guide star acquisition and focus adjustments are made by
these thumbscrews
2. Insert a 1.25" eyepiece into the fine focus guiding adapter. Secure the eye-
piece by tightening the socket head setscrew with the provided 1.5mm hex
key (Figure 5). Locate a guide star through the guiding end of the Deluxe
Off-Axis Guider using an eyepiece.
3. Unlock the radial adjustment lock thumbscrew and slowly rotate the
autoguider until you see a guide star. If necessary, you can also use the
prism tilt adjustment setscrew to help find a guide star (Figures 8a-8b).
4. If you can see a guide star in the eyepiece but the star is not focused,
remove the eyepiece and connect your autoguider. It’s time to focus on the
guide star with your autoguider to start imaging! If you cannot find a guide
star, refer to “I Can’t Seem to Find a Guide Star!".
5. With your autoguider connected, use the coarse and fine focus adjust-
ments on the guiding end of the Deluxe Off-Axis Guider. Do not adjust your
telescope’s focuser because that will disrupt your imaging camera’s focus.
Remember not to turn the fine focus guiding adapter more than two full
turns counter-clockwise, or the autoguider could fall off!
6. Ensure that all setscrews are securely tightened, and be careful not to
move the telescope or Deluxe Off-Axis Guider, as the guide star could drift
away. Attach the autoguider if you have not already done so. You are ready
to begin imaging.
Note: If you cannot get the guide star to reach focus, try to determine if you
need more inward or outward travel. You may need to add or remove one of
the three included spacers to allow the autoguider to reach focus.
I Can’t Seem to Find a Guide Star!
Don’t get discouraged if you cannot find a guide star at first. It can be challenging. But once you have focused your imager and autoguider, it will be far
easier to locate a guide star. If necessary, move the telescope to a denselypopulated and bright star field. An open star cluster would be ideal. This will
improve your chances of finding a star through the Deluxe Off-Axis Guider to
obtain an accurate focus before moving to the object you want to image.
We recommend keeping the Deluxe Off-Axis Guider focus position locked for
future use. You can still remove all the components for storage, but the coarse
and fine focus adjustments should stay locked in place. The next time you
setup your Deluxe Off-Axis Guider, your autoguider will already be parfocal
with the imaging camera, saving you significant setup time.
6. Care and Storage
Be careful not to accidentally strike the delicate pick-off prism inside the guider. If necessary, you may use a cotton swab with clearning solution (approved
for multi-coated glass) to gently clean the surface of the prism.
The Deluxe Off-Axis Guider should be treated with care to last a lifetime. Store
the Deluxe Off-Axis Guider in its original packaging when not in use.
Page 6

One-Year Limited Warranty
This Orion Deluxe Off-Axis Guider is warranted against defects in materials or workmanship for a period of one year from the date of purchase.
This warranty is for the benefit of the original retail purchaser only.
During this warranty period Orion Telescopes & Binoculars will repair or
replace, at Orion’s option, any warranted instrument that proves to be
defective, provided it is returned postage paid to: Orion Warranty Repair,
89 Hangar Way, Watsonville, CA 95076. If the product is not registered,
proof of purchase (such as a copy of the original invoice) is required.
This warranty does not apply if, in Orion’s judgment, the instrument
has been abused, mishandled, or modified, nor does it apply to normal
wear and tear. This warranty gives you specific legal rights, and you
may also have other rights, which vary from state to state. For further
warranty service information, contact: Customer Service Department,
Orion Telescopes & Binoculars, 89 Hangar Way, Watsonville, CA 95076;
(800) 676-1343.
Orion Telescopes & Binoculars
89 Hangar Way, Watsonville, CA 95076
Customer Support Help Line (800) 676-1343
OrionTelescopes.com
10
 Loading...