

Page 1

Notes for operation in New Zealand..................................................6
Safety Information..............................................................................7
TABLE OF CONTENTS
MI40 User guide
1.8GHz DECT Cordless Telephone
Digital Answering Machine,
Caller ID & Handset Speakerphone
Getting Started....................................................................................8
Unpacking .........................................................................................8
Your Telephone....................................................................... ......... 9
LCD Display on the Handset...........................................................10
Basic Steps to Install.......................................................................11
Battery Level Indication...................................................................12
Charging the Handset.....................................................................12
Menu Overview.................................................................................13
Basic Operations..............................................................................16
During Standby...............................................................................16
Making External Calls.....................................................................16
Using Traditional Dialling............................................................. 16
To End a Call............................................................................... 16
Using Pre-Dialling........................................................................ 17
Using Quick Dialling .................................................................... 17
Using Direct Dialling....................................................................18
Using Last Number Re-Dialling function......................................19
Inserting Pause for PBX System..................................................... 21
Receiving External Calls.................................................................21
Recall.......... ....................................................................................22
Adjusting the Handset Ringing Volume ...........................................22
Adjusting the Receiver Volume....................................................... 23
Handsfree Operation.......................................................................23
Using the Handsfree Speaker......................................................23
2 of 72
Page 2

Using a Headset (Not supplied)...................................................23
Microphone Mute / Un-mute............................................................24
Handset Locator (page function))....................................................24
Handset Keypad Lock/Unlock.........................................................24
Low Power Mode............................................................................25
Using the Phone Book.....................................................................25
Storing an Entry....................................................................... ....... 25
Reviewing the Phonebook ..............................................................26
Editing an Entry...............................................................................26
Dialling a number from Phonebook.................................................27
Deleting a Phonebook Entry............................................................27
VIP Ringing (Melody)......................................................................28
Caller ID.............................................................................................29
Call Waiting Caller ID. .....................................................................29
Call Log...........................................................................................30
Reviewing the Call Log................................................................... 30
Saving the CID record into phonebook............................................31
Deleting a CID Record....................................................................31
Call Back from the Call Log.............................................................32
Answering Machine..........................................................................32
Answering Mode.............................................................................33
Changing Answering Mode..........................................................33
Outgoing Message (OGM)..............................................................33
Recording OGM...........................................................................34
Playing OGM...............................................................................34
Deleting the customized OGM.....................................................35
Answering Machine On / Off...........................................................35
Answering Machine Quick OFF...................................................36
Memo..............................................................................................36
Recording Memo.........................................................................36
Playing Memo..............................................................................37
Deleting Memo............................................................................37
Incoming Message (ICM)................................................................38
Recording ICM ............................................................................38
Playing ICM................................................................................. 39
Deleting ICM................................................................................40
Ring Delay......................................................................................40
Alert Tone.......................................................................................41
Message Length............................................................................. 42
Speaker Filtering...................................................................... ....... 42
Call Screening.................................................................................43
Block the Blocker............................................................................45
Remote Access Code.....................................................................45
SOS Code.......................................................................................46
Remote Access to the Answering Machine.....................................47
Remote Access Shortcuts...........................................................48
Remote Access Responses.........................................................48
Answering Machine Shortcuts Summary.........................................49
Additional Features..........................................................................49
Network Services............................................................................ 49
Service Number..............................................................................50
Adding a new Network Service ....................................................50
Reviewing Network Services....................................................... 50
Dialling out the Service Number..................................................51
Editing Network Service Number.................................................51
Delete a Network Service............................................................52
Prefix Matching...............................................................................52
Call Barring.....................................................................................54
Ringer Melody for External Calls.............................. ............... ........ 56
Ringer Melody for Internal Calls...................................................... 56
3 of 72
4 of 72
Page 3

Ringing Volume for Base ................................................................57
Base Ringer Melody for External Calls............................................57
Alert Tones......................................................................................58
Out of Range Warning....................................................................59
Auto Answering............................................................................... 59
Recall Timing..................................................................................60
Handset Name................................................................................60
Call Timer .................. .....................................................................61
Backlit LCD.....................................................................................62
Delete All Records..........................................................................63
Using Additional Cordless Handsets ..............................................63
Registration.....................................................................................63
Base Selection................................................................................64
Making Internal Calls.......................................................................65
Or Use Pre-Dialling......................................................................65
To end intercom call....................................................................65
Receiving external call during Internal Call.....................................66
Inquiry Call......................................................................................66
Call Transfer...................................................................................66
Conference Call..............................................................................67
Room Monitoring.............................................................................67
De-register a Handset.....................................................................68
Change the PIN Code for Base.......................................................69
Reset Factory Default.....................................................................70
Appendix: Default Settings............................................................. 71
Notes for operation in New Zealand
The grant of a Telepermit for any item of terminal equipment indicates
only that Telecom has accepted that the item complies with the
minimum conditions for connection to its network. It indicates no
endorsement of the product by Telecom, nor does it provide any sort
of warranty. Above all, it provides no assurance that any item will
work correctly in all respects with another item of Telepermitted
equipment of a different make or model, nor does it imply that any
product is compatible with all of Telecom’s network services. This
device may be subject to ringing or bell tinkle when certain other
devices are connected to the same line. If this occurs, the problem
should not be referred to the Telecom Faults service.
This equipment shall not be set to make automatic calls to the
Telecom “111” Emergency Service. This equipment may not provide
for the effective hand-over of a call to another device connected to the
same line.
REN (RN for New Zealand)
The REN (Ringer Equivalence Number) or (RN) is of significance only
if you wish to connect more than 1 telephone to your telephone line. A
standard telephone line has a maximum REN capacity of 3 (RN of 5).
It is possible to connect 3(5) devices with a REN of 1 (RN of 1) with
no degradation to the product’s performance. Exceeding this limit may
cause the volume of the ringer in any phone to decrease or not ring at
all.
Caller ID
Customers using non Telecom toll services should not use the dial
back feature for local calls as this will incur a charge only the 7 digit
number should be dialled. Some of the CID services listed may not be
available in New Zealand
Warranty Information.......................................................................72
5 of 72
6 of 72
Page 4
Safety Information
• Avoid exposure of this telephone to moisture or liquid.
• To prevent electric shock, do not open the handset or base
cabinet.
• Avoid metallic contact (e.g. metal clips, keys) between the battery
contacts and charging conductors.
• Do not use the handset in an explosive hazard area such as
where there is gas leaking.
• There is a slight chance that the telephone could be damaged by
an electrical storm. It is recommended that users unplug the
phone from the mains supply and telephone socket during a
storm.
• Follow the local regulations regarding the disposal of your
packing materials, exhausted batteries and used phone.
Wherever possible, recycle those materials.
• We advise that this phone should not be used near intensive care
medical equipment or by persons with pacemakers.
• Clean with a dry, soft, lint-free cloth. Never use cleaning agents,
particularly aggressive solvents.
•
Because the phone works by sending radio signals between base
station and handset, wearers of hearing aids may experience
interference in the form of a humming noise.
Your phone can interfere with electrical equipment such as
•
answering machines, TV and radio sets, clock radios and
computers if placed too close. It is recommended that you
position the base unit at least one metre from such appliances
CAUTION
This telephone is not designed for making emergency telephone
calls when the mains power fails. Always have a corded
telephone available to be able to make and receive calls to
emergency services.
Do not use your telephone during an electri cal storm
thunderstorm as it is possible to get an electric shock. Refer to
information contained in Telstra White pages directory.
.
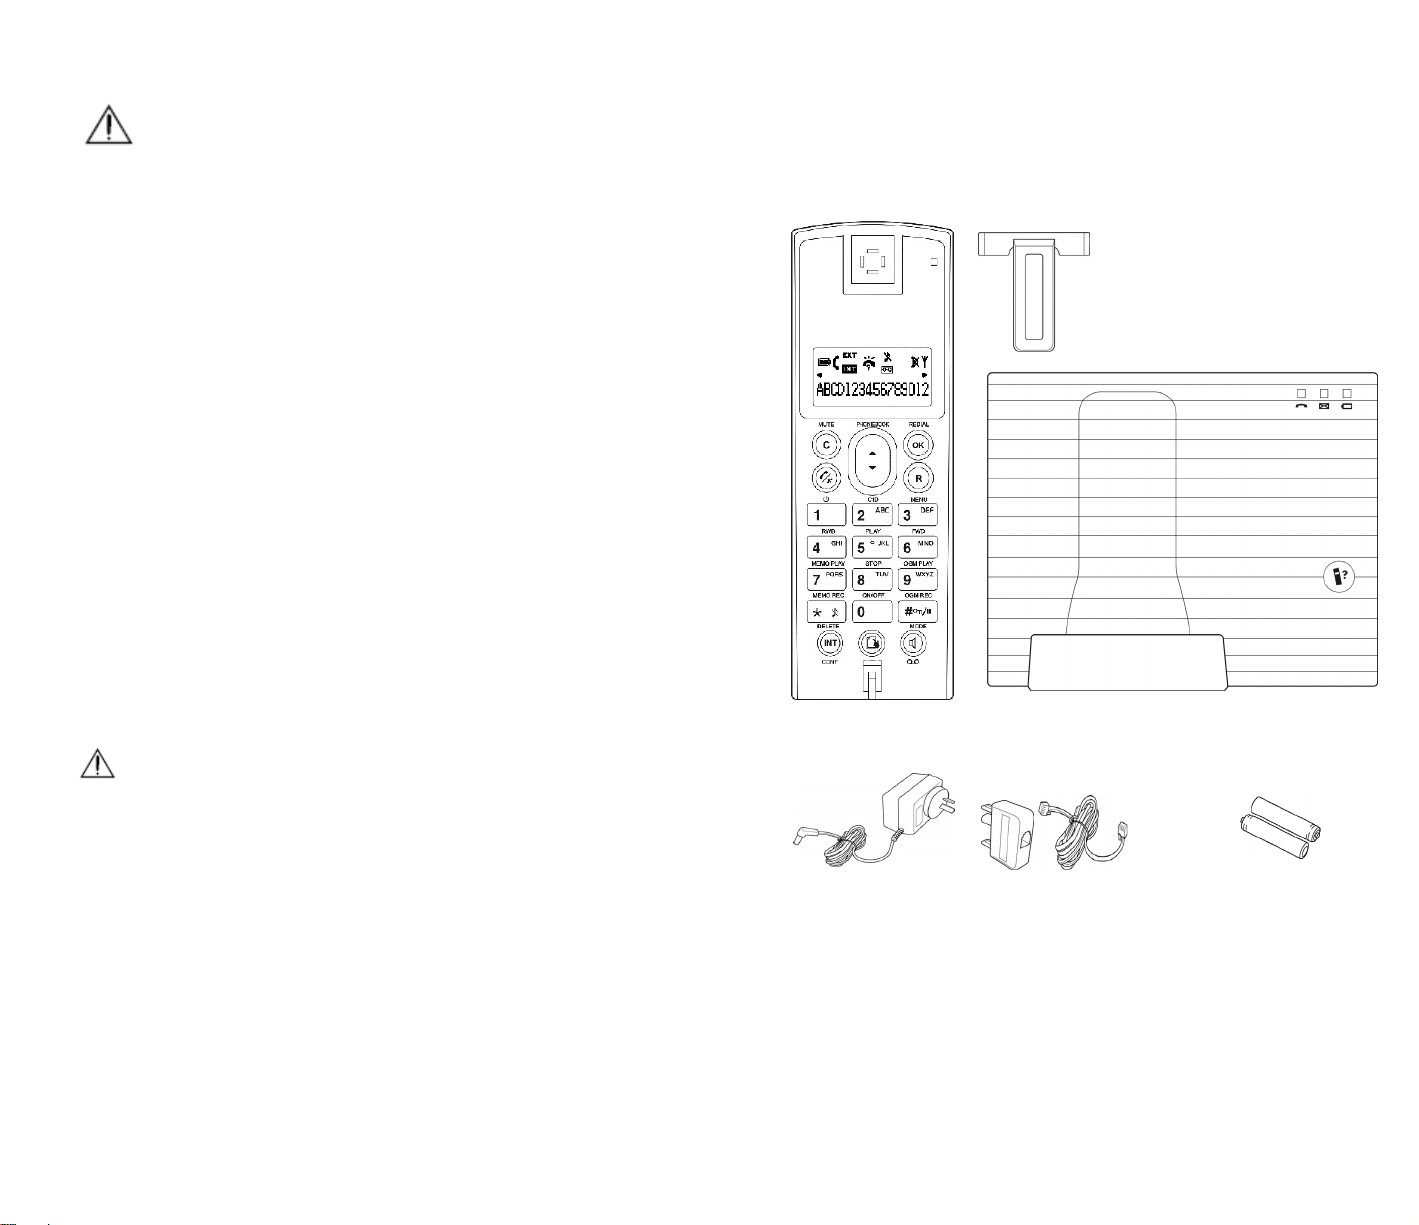
Getting Started
Unpacking
This package should contain the following:
Handset Belt Clip
Power Adaptor Phone Lead and
And this Owner’s Manual
Headset is not included.
If any of these items are missing, please contact your retailer were
you purchased the product from.
Base Unit
modular plug
Rechargeable Batteries
Ni-MH, 1.2V 650mAh
2* AAA size (HR 10/44)
7 of 72
8 of 72
Page 5
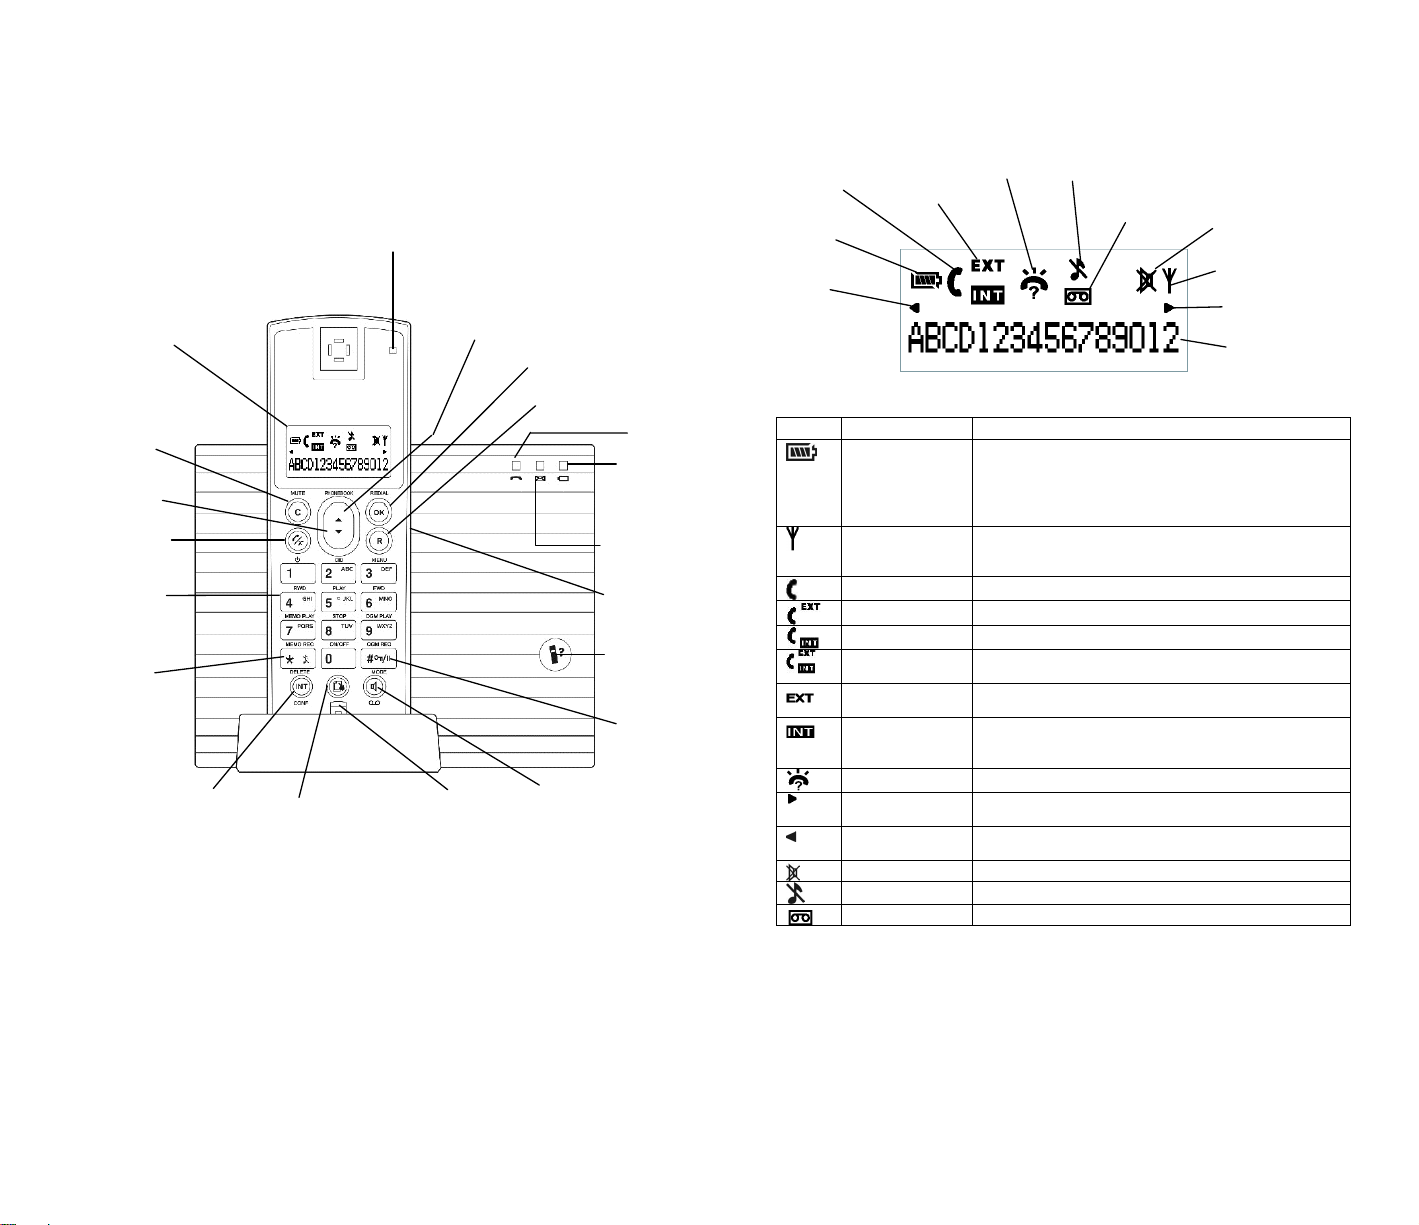
p
/
p
Your Telephone
LCD Display
Cancel / Mute
CID / Scroll down
Volume down
PHONE On / Off
POWER On / Off
Dialling keys /
Shortcuts to
honebook
Dialling key /
Ringer Off / on
Intercom /
Conference Call
Operator Service
LED
Phonebook /
Scroll up /
Volume u
Microphone
Redial / Confirm
Menu / Recall
Speakerphone /
ANS MAC Mode
In Use
Charging
ANS MAC On /
DTAM Message
waiting
Headset
Paging
Dialling
key /
Pause /
LCD Display on the Handset
Phone On
External /
Internal /
Conference
New CID
Ringer Off
Battery
Left Scroll
Icon Name Description
Battery
Signal Indicator Steadily – signal linkage between handset and base is
Off Hook Display during off hook.
Calling External User is calling outside.
Calling Internal User is making an intercom call
Conference User is talking with one external and another internal
External Call Blinking – there is a call from outside.
Intercom Blinking – there is an intercom call.
New CID number New callers number Caller ID (CID) received.
Right Scroll
Left Scroll The number displayed contains more than 16 digits and
Mute Handset microphone is muted during off hook.
Ringer Off The handset ringer is turned off.
Answer Machine The answering machine is on.
• Animated when charging.
• When the battery indicator displays 4 blocks, the
battery is fully charged.
• When the battery indicator displays no block, the
battery is almost empty, and requires charging.
established.
Blinking – no signal linkage with any base.
user.
Steady – Line is engaged.
– When being paged.
Steady – Line is engaged.
The number displayed contains more than 16 digits and
the first 16 digits are displayed.
the rightmost digits are displayed.
Answering
Machine
On
Mute
Signal Indicator
Right Scroll
Digits Display
9 of 72
10 of 72
Page 6
Basic Steps to Install
1. Connect the output plug of the mains adaptor to the
socket
on the back of the base unit and the mains adaptor to the wall
mains supply.
2. Insert the 2 rechargeable Ni-MH AAA batteries (included),
observing their polarity, into the battery compartment on the
handset.
3. Slide the battery door firmly into place.
4. Place the handset on the base unit and let the batteries charge
for a full 24 hours before using for first time.
5. Connect the telephone lead to the
socket on the back of the
base unit and to the wall phone socket.
6. Align the belt clip with the holes on the both sides of the handset
and click into place.
CAUTION
Use only the mains adaptor supplied with this telephone.
Incorrect adaptor polarity or voltage can seriously damage the
unit.
Adaptor Model No.:
Input: 230 VAC 50 Hz
Output: 9 VDC 300 mA
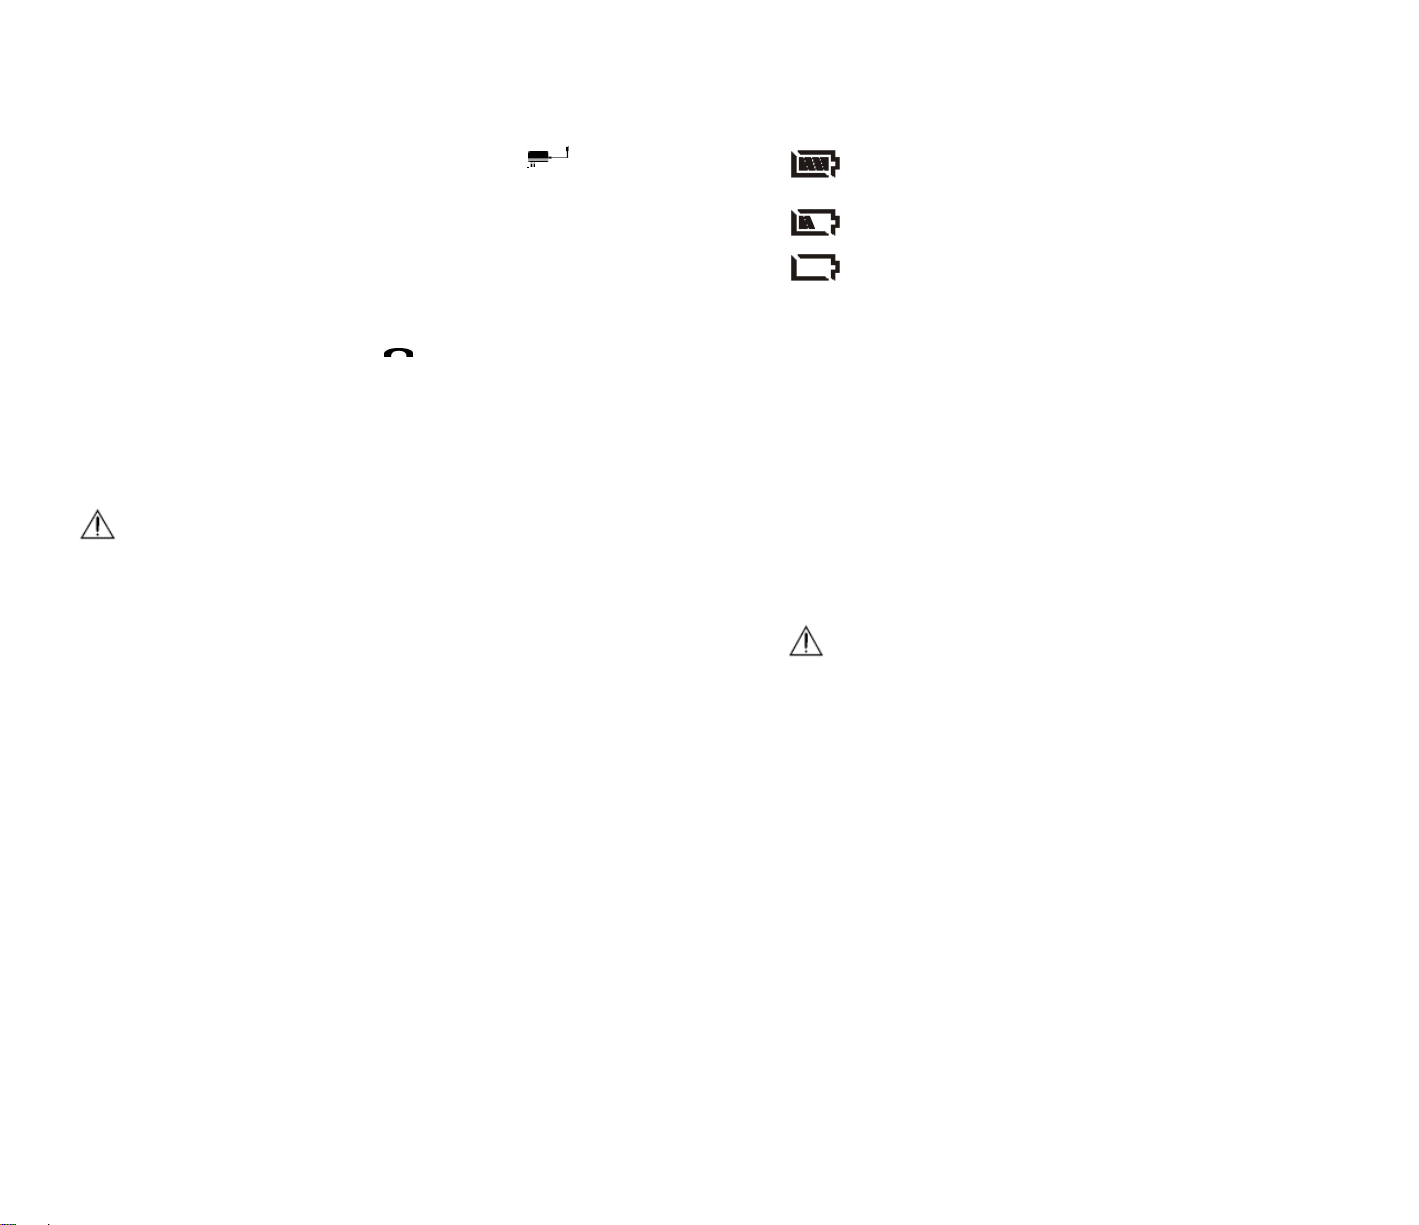
Battery Level Indication
The Battery icon is always displayed when the
handset is on. When charging, the battery icon will
be scrolling to indicate that the batteries are being
charged. When fully charged, four bars are
displayed. The scrolling will stop.
When an empty battery icon is displayed, place the
handset on the base cradle to recharge the
batteries. If low battery level happens during offhook, a series of short beeps will be heard from the
speaker of the handset.
Charging the Handset
When the handset is placed on the base cradle to charge the handset
batteries, a charging tone, if set to ON, will be emitted from the
handset’s speaker. (Refer to Alert Tone Section). During charging,
the charge LED on the base unit will be steadily lit. The battery icon
will be scrolling to indicate that the batteries are being charged.
Get into the habit of putting the handset on the base unit to charge
when it is not in use to ensure the handset is always fully charged.
CAUTION
RISK OF EXPLOSION IF BATTERY IS REPLACED BY AN
INCORRECT TYPE. Never use non-rechargeable batteries; use
recommended type supplied with this telephone. Ni-MH
batteries must be disposed of in accordance with applicable
waste disposal regulations.
11 of 72
12 of 72
Page 7

Menu Overview
FEATURES
MONITOR
ON
OFF
DIR DIAL
ON
OFF
QUICK DIAL
Select a key 1…9
ON
PREFIX P OFF
Select a prefix
ON
CALL BAR P OFF
Select a handset
SOUNDS OFF
HS RINGER ALL
VOLUME EXEMPT
EXT MELODY BAR
INT MELODY
BS RINGER
VOLUME
MELODY
TONES
KEY BEEP
CONFIRM
SETTINGS CHARGING
AUTO ANS
FLASH TIME
DISPLAY
LABEL
CALL TIMER
BACKLIT
SYSTEM
REGISTER
BS 1 2 3 4
SELECT BS
AUTO
FIXED
DELETE HS
CHANGE PIN
RESET
RECORDS
SETTINGS
ANSWER MAC
RING DELAY
ALERT TONE
MSG LENGTH
SPK FILTER
SCREENING
OFF
ALL
EXEMPT
SCREEN
BLOCKER
REMOTE PIN
SOS CODE
Phonebook Menu
Select an entry
EDIT ENTRY
DELETE
VIP MELODY
ADD ENTRY
NAME?
Enter Name
NUMBER?
Enter Number
Call Log Menu
Select a CID
SAVE ENTRY
DELETE
Redial Menu
Select a redial
Number
SAVE ENTRY
DELETE
13 of 72
14 of 72
Page 8
Service Menu
Select a Service
EDIT ENTRY
DELETE
ADD ENTRY
NAME?
Enter Name
NUMBER?
Enter Number
Basic Operations
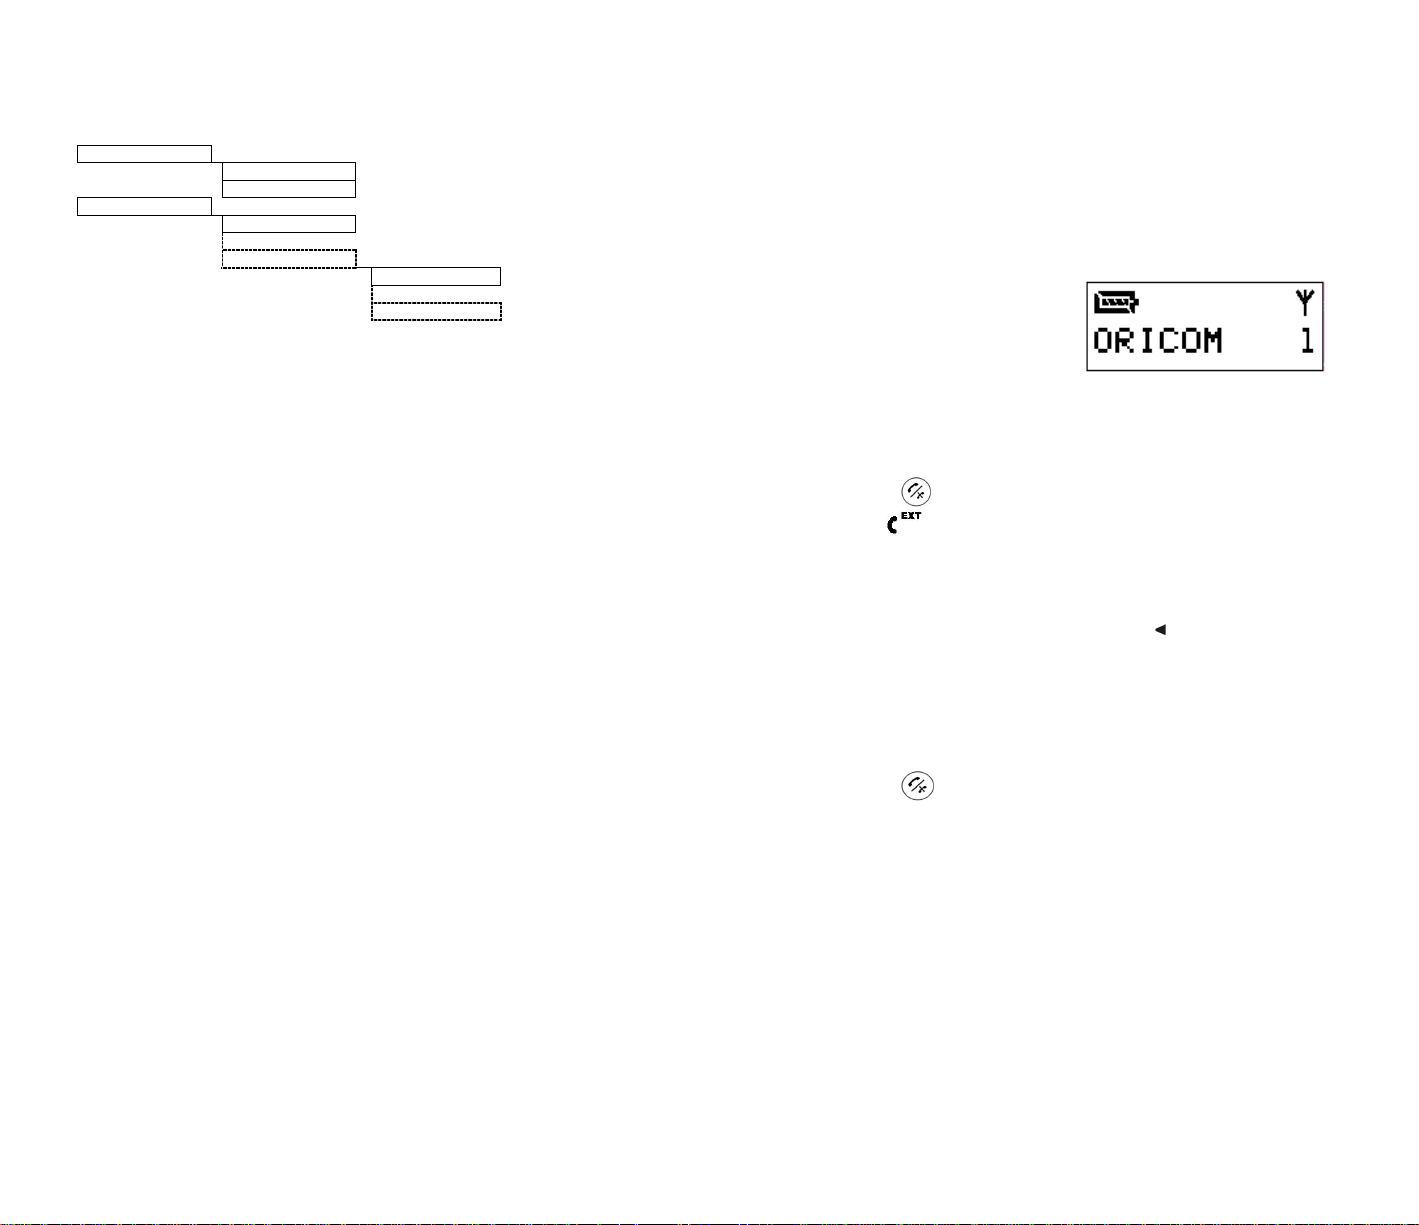
During Standby
When the phone is not in use, the LCD displays the phone m odel no.,
the handset no., the battery icon, and the Signal indicator.
Making External Calls
Using Traditional Dialling
• Press
• The
and wait for dialling tone.
icon on handset will be turned on.
• The LED on the handset and the In Use LED on the base unit
will also be turned on.
Use the keypad to dial the phone number. The display shows
•
the digits as you enter them.
• If more than 16 digits are entered, the
Only the last 16 digits will be displayed.
icon will be turned on.
• The call timer will display after a while and start timing the call.
To End a Call
• Press
, or
• Place the handset back on the base unit.
• The duration of the call will remain for about 5 seconds after
you hang up.
15 of 72
16 of 72
Page 9

Using Pre-Dialling
You can enter a telephone number and verify it on the display
before you place the call.
• Use the keypad to enter the phone number. The display
shows the digits as you enter them.
• If more than 16 digits are entered, the
icon will be turned on.
Only the last 16 digits will be displayed.
Press
•
, the number entered will be dialled out.
Note: If you make a mistake, press
time or press and hold
to erase one digit at a
for 2 seconds to clear the entire
number and return to Standby.
Using Quick Dialling
The dial keys 1, 2, 3, 4, 5, 6, 7, 8, and 9 can be linked to a
phonebook record.
• During standby, press and hold the key will dial out the
number directly.
The number dialled will be displayed on the LCD.
•
• If the number is more than 16 digits, the LCD will display the
rightmost digits with the
icon turn on.
To Set the Quick Dial:
• Press
• The display reads FEATURES. Press
• Use
• Press
during predial or standby.
.
to scroll until the display reads QUICK DIAL.
.The display will show KEY 1.
• Press at OFF will de-activate the quick dial feature for the
selected key.
•
Press
at ON will activate the quick dial feature for the
selected key. The name of the first record in the phonebook
will be displayed.
• Use
to scroll through the phonebook records or use the
starting letters to select record.
• Press
• Press
at a record to view the number.
at the number to confirm. The quick dial feature is
activated on the selected key.
• Press and hold
to return to standby.
Note
: If there is no record in the phonebook, press
at ON will
show EMPTY.
Using Direct Dialling
This feature allows you to store a number in the Direct Dial
memory for quick dialling later.
When the direct dial feature is activated, the prompt, DIR DIAL,
will be blink on the display during standby. Press any key
except
during standby to dial out the designated number.
To activate:
• Press
.
Use
to scroll through the menu until the display
reads FEATURES.
• Press
. Use to scroll through the menu until the display
reads DIR DIAL.
• Use
selection.
• Use
to scroll through KEY 1 to KEY 9. Press on a
to select ON or OFF.
17 of 72
• Press
. Use to select ON. Press .
• The display will read NUMBER? Or, the previously entered
direct dial number.
• Enter the number to be dialled out.
18 of 72
Page 10

• Press to confirm.
• If no number was entered but
is pressed, the feature will
be de-activated.
• Press
to exit. A blinking DIR DIAL is displayed during
standby.
To de-activate:
• Press
• Press
• Press
• Press
• Press and hold
will go directly to DIR DIAL
. The display will show ON.
to select OFF.
to de-activate the function.
to return to standby.
• The blinking DIR DIAL on the display is turned off.
Using Last Number Re-Dialling function
The last 10 numbers dialled (up to 18 digits) are stored. If a
number is dialled several times, its position in the list will be
changed to reflect the real history of last dialled calls. Pause #
and recall keystrokes are also in the redial number.
Only the first 18 digits will be saved as redial number. If the
number consists of more than 16 digits, the first 16 digits together
with the
icon will be displayed. Press to view the remaining
digits.
You can select any number on the redial list to redial in Pre-
Dialling mode. However, you can only select the last number for
redial in dialling mode.
Redial the Last Dialled Number
• Press
• Press
and wait for dial tone.
, the last number dialled will be displayed and
dialled out automatically.
Note: The display will show EMPTY if there is no number in the
redial list.
Redial the Last Dialled Number by Using Pre-dialling
• Press
• Press
Press
•
• The
, the last number dialled will be displayed.
to scroll through the last 10 dialled numbers.
.
icon on the display will be turned on.
• The phone will connect the line and dial the number displayed.
• The
icon on the display will also be turned on.
Save the Redial Number in the Phonebook
• Press
• Press
, the last number dialled will be displayed.
to scroll through the last 10 dialled numbers.
• Press
on the number you wish to save.
• The display will show SAVE ENTRY.
• Press
• Use the numeric keys & the
. The display will show NAME?
key to enter the name. If
name is not entered, the entry will be identified by a set
Of brackets ( ).
• Press
Edit the number by using the numeric keys & the
•
to confirm. The redial number will be displayed.
key.
19 of 72
20 of 72
Page 11
• Press to confirm the entry and exit to SAVE ENTRY.
• Press
to return to the redial list.
Delete a Redial Number
• Press
• Use
Press
•
, the last number dialled will be displayed.
to scroll through the last 10 dialled numbers.
on a selected number. SAVE ENTRY will be
displayed.
• Use
• Press
• Press
to scroll until the display reads DELETE.
. The display reads DELETE?
. The selected number will be deleted. The display
will return to the redial list.
• Repeat the steps to delete another dialled number.
•
Press
to exit the redial list.
Note: You can refer to Delete All Records section to delete the entire
redial list at once.
Inserting Pause for PBX System
Press and hold
to insert a Pause of 3 seconds will be
shown on the display.
Note: If there is a
in the predial, phonebook, redial or service
number, the handset will pause for the pre-programmed
duration before dialling out the next digit.
Receiving External Calls
When receiving an external call, all handsets including the base unit
will ring, provided that the ringers are turned on. The
icon on the
display will blink. The LED on the handset and the In Use LED on the
base unit will also blink.
When the handset is on the base unit, lift the handset:
• To answer the call when the AUTO ANS feature is turned on.
• Press
to connect the call if the AUTO ANS feature is
turned off. (Refer to section “Auto Answering” for details)
When the handset is not on the base unit:
•
Press
to connect the call.
Recall
The
key s also used for a number of Network services provided
by your telephone network operator, and for use when connected to
certain telephone PBX’s. Details on how to use this button will be
explained by your network service provider. (Refer to Recall Timi ng
Section)
Adjusting the Handset Ringing Volume
• Press
.
Use
to scroll through the menu until the display
reads SOUNDS.
• Press
. Use to scroll through the menu until the display
reads HS RINGER.
Press
•
• Press
Use
•
OFF.
. The display reads VOLUME.
.
to select from , , , , and VOL
Represents the minimum volume level whereas
represents the maximum volume level.
• Press
to confirm the selection and exit to VOLUME.
21 of 72
22 of 72
Page 12

• To turn off the ringer volume, press on VOL OFF. The icon
on the display will be turned on.
• You can also press and hold
standby to turn off the ringer. The
during phone ringing or
icon on the display will be
turned on. To turn on the ringer, user can press and hold
during phone ringing or standby. The
icon on the display will
be turned off.
Adjusting the Receiver Volume
During a call, user can adjust the receiver volume by pressing
There are 3 levels of receiver volume to choose from:
• Press
• Press
• Press
, the current volume level is displayed.
to increase the volume.
to decrease the volume.
.
, & .
Handsfree Operation
Using the Handsfree Speaker
•
Press
for handsfree operation during a call.
• The earpiece is turned off and the speaker is turned on. You
can now talk into to the microphone without holding the
handset to the ear.
• Press
again. The speaker is turned off and the earpiece
is turned on. You will need to hold the handset against the
ear.
Using a Headset (Not supplied)
• Gently flip back (do not remove) the rubber cover on the side
of the handset to gain access to the headset socket.
• Plug the headset into to the headset socket.
• The handset receiver and microphone are now turned off.
You can now talk into to the microphone of the headset
•
without holding the handset to the ear.
• For additional mobility and full handsfree, mode clip handset
to your belt using the clip supplied.
Microphone Mute / Un-mute
During a call, User can mute the microphone by pressing
The
icon on the display will turn on. To un-mute, press again.
icon on the display will turn off.
The
Handset Locator (page function))
In the event of misplacing the handset, briefly press the
button on
the base unit will page all handsets. All handsets on st andby will ring
for 30 seconds. The
icon and the prompt BS PAGING will be
blinking on the display. User can press any key on a handset to sto p
the paging. Note: If you press and hold the page key for more than 4
seconds, the phone will enter into registration mode.
Handset Keypad Lock/Unlock
You can lock the handset to prevent pressing any keys accidentally .
When the keypad is locked, all keys will be inactive.
To lock:
Press and hold
•
during standby.
• The display will show HOLD #.
To unlock:
• Press and hold
during standby.
Note: When a call comes in, user can answer the call by pressing
if the handset is not on cradle or lift the handset from the cradle
23 of 72
24 of 72
Page 13

provided AUTO ANS is ON. Once the call is ended by pressing
or returning to the cradle, the keypad remains locked.
Low Power Mode
You may put the handset in low power mode to conserve the battery
consumption. The display and ringer will be turned off. Any incoming
calls will ring at the base and other handsets that are not on low
power mode.
To activate Low Power Mode,
• Press and hold
for 2 seconds during standby.
To de-activate,
• Press
; or
• Place the handset back on the cradle
Using the Phone Book
Storing an Entry
• You can store up to 50 phone records with up to 10 characters for
name and 18 digits for number.
• To store a phone record, press
The display reads ADD ENTRY.
•
• Press
. The display reads NAME?
• Use the alphanumeric keypad to enter the name of the person
whose telephone number you wish to enter. If no name is entered,
the name will be displayed as ( ) in the phonebook.
• Press
Enter the telephone number (maximum 18 digits), the
•
. The display reads NUMBER?
show when the number is more than 16 digits.
• Press
to confirm storing of the number. The telephone
number entered must be unique. If not, the display will remain at
the number.
during predial or standby.
icon will
• To exit, Press .
Note: If there 50 records have been added, pressing
at ADD
ENTRY will display FULL and then return to ADD ENTRY.
The Phonebook record and Services number cannot be the
same.
Reviewing the Phonebook
•
Press
during predial or standby.
• The display reads ADD ENTRY.
or
• Use the
key to scroll through the entries.
• You may also use the alphanumeric keys to view the entries.
When 1…0 is pressed, the first alphabetically entry starting with
the first character of the key will be displayed. Pressing the same
key again will display the first entry starting with the next available
character. For example, pressing
A will be displayed. Pressing
once, entry starting with
twice, entry starting with B
will be displayed.
•
Press
on the name of an entry, the number of the entry is
displayed.
• If the number consists of more than 16 digits, the
icon is turned
on and the first 16 digits of the number are displayed. Press
the remaining digits are displayed.
• Press
• To exit, press
again will display the name of the entry.
.
Editing an Entry
• Press
during predial or standby.
• The display reads ADD ENTRY.
• Use the numeric key,
• Press
on an entry (except ADD ENTRY).
or key to scroll through the records.
• The display will show EDIT ENTRY.
,
25 of 72
26 of 72
Page 14

• Press .
• The name of the entry will be displayed.
• Use the alphanumeric keypad and the
changes.
• Press
to confirm.
• The number of the entry will be displayed.
• Press
to delete any digits you wish to alter and re-enter the
number.
• Press
• Press
• Press and hold
to confirm.
to return to phonebook.
will exit to standby.
Dialling a number from Phonebook
• Press
during predial or standby. The display reads ADD
ENTRY.
• Use
to scroll through the records Press to view the
number.
• Press
on the selected phonebook record to dial out the
number.
Deleting a Phonebook Entry
• Press
during predial or standby.
• The display reads ADD ENTRY.
key to make the
• Press to confirm and the selected entry is deleted. The
display will return to phonebook.
• Press
• Press and hold
to exit.
will exit to standby.
Note: Refer to Delete All Records section to delete the entire
phonebook at once.
VIP Ringing (Melody)
You can assign a distinctive ringing tone to incoming calls from
specific callers. When the CID of an incoming call matches with a
phonebook number, the phonebook name will be displayed and the
VIP melody defined for that record, provided the VIP melody is set to
on, will be played as the handset ringing melody.
• Press
during predial or standby.
• The display reads ADD ENTRY.
• Use the numeric key, the
• Press
The display will show EDIT ENTRY.
•
• Use
• Press
• Press
on an entry (except ADD ENTRY).
to scroll until VIP MELODY is displayed.
. Use to choose OFF or ON.
.
key to scroll through the records.
• If OFF is chosen, only the external melody will be played when a
call from this number come in.
• Use
• Press
The display will show EDIT ENTRY.
•
• Use
• Press
to scroll through the records.
on an entry (except ADD ENTRY).
to scroll until DELETE is displayed.
, DELETE? is displayed.
27 of 72
• If ON is chosen, Use
1 to MELODY 10. Press
ringing for the selected number.
• Press
• Press and hold
to return to phonebook.
will exit to standby.
to select one of ten melodies: MELODY
on a melody to confirm the VIP
28 of 72
Page 15

Caller ID
If you subscribe (charges may apply) to your telephone service
providers Caller ID service, numbers of the incoming calls will be
displayed on the display and stored in the call log. (Please consult
your telephone service provider for details about this service)
When an external call comes in, the display will show either:
• The name of the phonebook entry if the number of the incoming
number is the same as the number of the phonebook entry, or
• The first 10 characters of the name of the phone book entry, or
• The last 16 digits of the number of the phone book entry if the
name is unavailable, or
• NOT AVAIL for Out of Area calls and PRIVATE for Private calls
icon will be displayed if the number of the CID is displayed and
The
has more than 16 digits.
When you have new/unanswered calls, the
handsets that currently connected to the same base unit will be
turned on.
Call Waiting Caller ID
If you have subscribed to your telephone network operators Call
Waiting Caller ID service, your phone will display the number of the
other incoming call for around 7 seconds while you are talking on the
phone.
• While the handset is on an external call, a series of short beeps is
heard.
• Press
answer the 2
• Press
then will place the first external call on hold and
nd
call.
then to toggle between two calls.
(Please consult your telephone service provider for details about the
service).
icon on all the
Call Log
The call log stores the last 20 unanswered and answered incomi ng
calls, up to 10 characters for names or prompt messages, 18 digits for
numbers, date and time.
If a number has been identified several times, it will be stored each
time the phone rings. Once the 20 numbers are stored the next
incoming unanswered or answered call will replace the first stored
number.
Once the call log has been reviewed, the
icon on the display of
that handset will turn off.
Note: The call log is stored on the handset. Deletion of call records on
one handset is not applicable to all other handsets registered to
the same base unit.
Reviewing the Call Log
• Press
during predial or standby.
• The most recent received CID is displayed.
• If the call log is empty, EMPTY will be displayed for 2 seconds
and returned to standby.
• Press
pressing
number with the
remaining digits and the
Date / Time and pressing
to view the next available information. For example,
on the name will bring out the first 16 digits of the
icon turned on. Press again to view the
icon is on. Press again to display
at Date / Time will display the name
and so on.
• Use
• To exit, press
to scroll through the call log.
29 of 72
30 of 72
Page 16

Saving the CID record into phonebook
• Press
on a CID while reviewing the call log.
• The display will show SAVE ENTRY.
• Press
. The display reads NAME? or the name of the CID
(transmitted from the network or from the phonebook).
• Use the numeric keys and
to enter or edit the name for the
entry. If a name is not entered, the entry will be identified by a set
of brackets ( ). User can refer to the editing an entry section on
how to edit the phonebook name.
• Press
. The display reads NUMBER? Or the number of the
CID will be displayed.
• Use the numeric keys and
to enter or edit the number for the
entry.
• Press
phonebook, the display will remain at the number.
• Press
• Press and hold
to confirm. If the number already exists in the
will return to call log.
will exit to standby.
Deleting a CID Record
• Press
on a CID while reviewing the call log.
• The display will show SAVE ENTRY.
• Use
• Press
• Press
to scroll until the display reads DELETE.
. The display will read DELETE?
to confirm and the selected CID is deleted.
• If there is no more record in the call log, the display will show
EMPTY for 2 seconds and return to standby.
Note: Refer to Delete All Records section to delete the entire call log
at once.
Call Back from the Call Log
This feature only works if the CID record contains a valid phone
number.
•
Press
during predial or standby to bring out the call log.
• The most recent received CID is displayed.
• If the call log is empty, EMPTY will be displayed for 2 seconds
and returned to standby.
• Use
• Press
to scroll through the call log.
on the selected CID to dial out the number.
Answering Machine
The answering machine functions are controlled from the h andset in
the answering machine mode (AM) by pressing
In the answering machine mode,
If the answering machine is off, the display will show AM OFF.
•
• If the answering machine is on, and the Answer Record mode is
selected, the display will show ANS RECORD.
• If the answering machine is on, and the Answer Only mode is
selected, the display will show ANS ONLY.
• Press
or to abort the current operations, exit the
answering machine mode and return to standby.
Note: If more than one handset is registered to the same base unit,
only one handset can access the answering machine at a time.
When the second handset tries to access the answering
machine, the display will show NOT AVAIL for 2 seconds and
then remain in the answering machine mode.
during standby.
31 of 72
32 of 72
Page 17

Answering Mode
There are two modes available to answer an incoming call when the
answering machine is on.
When the answering machine is in Answer and Record (ANS
RECORD) mode, the answering machine will allow the caller to leave
a message after OGM1 is played.
When the answering machine is in Answer Only (ANS ONLY) mode,
the answering machine will drop the call once OGM2 is finished.
When the memory of the answering machine is full, the answering
mode will automatically enter into ANS ONLY mode.
Changing Answering Mode
• Press
• Press
enter into answering machine mode.
to toggle between answering mode.
• If the answering machine is on, the display will show ANS
RECORD or ANS ONLY depending on which answering
mode the user selected.
• If the answering machine is off, the display will show ANS
RECORD or ANS ONLY for 2 seconds and then goes back to
AM OFF.
Outgoing Message (OGM)
You can choose which OGM will be played to callers once the
answering machine answers the incoming call.
• OGM1 for ANSWER (ANS) RECORD mode,
OGM2 for ANSWER (ANS) ONLY mode.
•
You should record your own personalized OGM1 (maximum 40 secs)
inviting callers to leave a message.
If required you should next record OGM2 (maximum 40 secs)
advising callers that a message can not be left at this time.
When the answering machine answers the call, your customized
OGM1 or 2 will play to the caller as selected.
If the customized OGM’s are deleted or not recorded the default OGM
will be played to callers.
Recording OGM
• Press
to enter into answering machine mode.
• If the answering machine is on, the display will show the
answering mode, ANS RECORD or ANS ONLY. If the
answering machine is off, the display will show AM OFF.
• If the answering machine is in ANS RECORD mode, OGM1
will be recorded. If the answering machine is in ANS ONLY
mode, OGM2 will be recorded.
• Press
.
• The display will show REC OGM1 or REC OGM2 depending
on the answering mode.
• Wait for a beep tone that indicates the beginning of the
recording. Record your OGM by talking into the microphone
at a normal tone of voice.
• Press
to stop the recording.
• The recorded OGM will be played back after the recording.
• During the OGM play back, the display will show PLAY
OGM1 or PLAY OGM2 depending on the answering mode.
• If you didn’t stop the recording within 40 seconds, the
recording will be stopped automatically after 40 seconds an d
two-beep tone will be heard. The recorded OGM will play
back.
Playing OGM
• Press
to enter into answering machine mode.
• If the answering machine is on, the display will show the
answering mode, ANS RECORD or ANS ONLY. If the
answering machine is OFF, the display will show AM OFF.
• Press
.
33 of 72
34 of 72
Page 18

• If the answering machine is in ANS RECORD mode, OGM1
will be played. The display will show PLAY OGM1.
• If the answering machine is in ANS ONLY mode, OGM2 will
be played. The display will show PLAY OGM2.
• Press
• Press
to adjust the speaker volume.
to stop the playback or the answering machine
will stop at the end of the OGM. The display will show STOP.
Two-beep tone will be emitted when the playback was
stopped by itself.
Deleting the customized OGM
• Press
to enter into answering machine mode.
• If the answering machine is on, the display will show the
answering mode, ANS RECORD or ANS ONLY. If the
answering machine is OFF, the display will show AM OFF.
• Press
.
• If the answering machine is in ANS RECORD mode, OGM1
will be played. The display will show PLAY OGM1.
• If the answering machine is in ANS ONLY mode, OGM2 will
be played. The display will show PLAY OGM2.
• During the playback of the customized OGM, press
.
• The display will show DELETED. The OGM will stop and a
confirmation tone will be heard. The customized OGM is
deleted and the default OGM is restored.
Note: The default OGM’s cannot be deleted.
Answering Machine On / Off
• Press
to enter into answering machine mode.
• If the answering machine is OFF, the display will show AM OFF.
• Press
to turn answering machine to on. A confirmation
tone will be heard. The display will show ANS RECORD or ANS
ONLY, depending on the answering mode, and icon on the
display and the DTAM LED on th e ba se un it wi l l also be turned on.
Press
•
tone will be emitted. The display will show AM OFF. The
to turn answering machine to off. A confirmation
icon
on the display and the DTAM LED on the base unit will be turned
off.
Note: If the answering machine is off, it will also be turned on after ten
rings.
Answering Machine Quick OFF
If you pick up the incoming call from a phone on another
extension during the period when the OGM is being played, you
can stop the answering machine operation by pressing the # key
on the extension telephone.
Memo
You can record a memo in the answering machine. The memo will not
be included when the incoming messages (ICM’s) are played.
If there is a memo being recorded in the answering machine, the
display on all handsets registered to the same base unit will show
NEW MEMO during standby.
Note: Only one memo can be stored in the answering machine at a
time. User will need to delete the old memo before a new
memo can be recorded.
Recording Memo
• Press
• Press
to enter into answering machine mode.
. The display will show REC MEMO.
• Wait for a beep that indicates the beginning of recording.
Record the memo by talking into the microphone at a normal
tone of voice.
35 of 72
36 of 72
Page 19

• Press to stop the recording. The display will show
STOP.
• The memo will be played back. During play back, the display
will show PLAY MEMO.
• If the recording was not stopped. Once the maximum duration
is reached or the memory is full, the recording will stop by
itself. The memo will be played back. During play back, the
display will show PLAY MEMO.
•
Press
to stop the playback or the playback will stop at
the end of the Memo. The display will show STOP and twobeep tone will be heard.
Note: Your can specify the maximum duration of the memo and
ICM (Refer to Message Length Section for details).
Playing Memo
• Press
The display will show PLAY MEMO.
•
• Press
to listen to the memo.
during the playback to replay the memo from
the beginning.
• Press
• Press
to adjust the speaker volume.
to stop the playback or the playback will stop at
the end of the Memo. The display will show STOP and twobeep tone will be heard.
• Once the memo is played, the prompt NEW MEMO that
displays during standby mode will turn off.
Note: If there is no memo being recorded, the display will show
NO MEMO when
is pressed.
Deleting Memo
• Press
during memo playback.
• The memo will stop playing and a confirmation tone will be
heard.
• The display will show DELETED.
Incoming Message (ICM)
A maximum of 25 messages ICM’s can be recorded, unless a memo
has been recorded. You can specify the maximum duration of the
ICM and Memo (Refer to Message Length Section for details).
When there is at least one ICM in the answering machine, XX-XX
MESSAGES will be displayed on all the handsets registered to the
same base unit during standby where the first XX stands for the
number of new ICM and the second XX stands for the number of old
ICM. For example, the prompt will show 01-02 MESSAGES when
there is one new ICM and two old ICM’s.
When the maximum number of messages is recorded or the memory
is full, the display will show XX-XX MEM FULL. For example, the
prompt will be 05-20 MEM FULL.
When there is unheard ICM in the answering machine, the DTAM
LED on the base unit will be blinking. The handset LED will also be
blinking during on hook. The message waiting alert tone will also be
emitted periodically from the handset speaker during standby,
provided that the alert tone is set to on (Refer to Alert Tone Section
for details).
Note: The total recording memory will be shared between ICM’s and
Memo.
Recording ICM
ICM will be recorded only if the answering machine is in ANS
RECORD mode.
• When the answering machine answers the call, OGM1 is
played. Caller can record the message in the answering
machine after a short beep that indicates the recording
begins.
37 of 72
38 of 72
Page 20

• When maximum recording duration for the ICM has reached
or the memory is full if the caller doesn’t hang up, a twobeeps tone will emit to the user when the recording stops.
The answering machine will release the line.
• If there is CID information from the call, the date and time of
the ICM will be recorded.
Playing ICM
• Press
• Press
to enter into answering machine mode.
to play the messages.
• New ICM’s will be played from the oldest new ICM until all the
new messages are played. When there is no new ICM, the
old ICM’s will be played starting from the oldest ICM of the
old ICM’s until all messages are played. A new ICM will be
marked as old once it is played back.
• Press
to stop. The display will show STOP.
• A short beep will be heard in between two ICM’s. When all
ICM’s were played, two beeps tone will be heard.
During ICM playing, user can
• Press
or after the first 5 seconds of the
message to replay the current ICM.
• Press
within the first 5 seconds of the message to play
the ICM older than the current one unless the current one is
the oldest ICM. Otherwise, the current ICM will be replayed.
• Press
to play the ICM newer than the current one
unless the current ICM is the newest. Otherwise, the
playback will be stopped.
• Press
• Press
• Press
at the first ICM to replay the ICM.
to view the message info.
to adjust the speaker volume.
When an ICM is played back, the display will show
• the ICM’s number in the memory, e.g. 05 for message
number 5,
• the date recorded from the CID, e.g. 02/11, and
The time recorded from the CID, e.g. 10:20.
•
Deleting ICM
During ICM playing,
• Press
The display will show DELETED until the message is deleted.
•
to delete the current ICM.
A confirmation tone will be heard.
• The next ICM will be played...
• If the deleted ICM is the last ICM in the memory, the display
will show STOP.
To delete all ICM’s,
• Press
• Press
The display will show DELETE?
•
• Press
• Press
If
•
to enter into answering machine mode.
.
to confirm.
to cancel the deletion. Press and hold to exit.
is pressed. The display will show DELETED. A
confirmation tone will be heard.
Ring Delay
The number of rings allowed before the answering machine answers
the incoming call can be set. There are seven choices: ECONOMY, 2,
3, 4, 5, 6, and 7 rings. When 2 to 7 is selected, the answering
machine will answer the call after the selected number of rings. When
ECONOMY is selected, the answering machine will answer the c all
after 4 rings when there is no new ICM/memo or after 2 rings when
there is at least one new ICM or new memo.
To set Ring Delay:
• Press
to enter the menu mode
39 of 72
40 of 72
Page 21

• Use scroll through the menu until the disp lay re ads ANSWER
MAC.
Press
•
• Use
Press
•
• Use
Press
•
.
to scroll until the display reads RING DELAY.
. The current ring delay will be displayed.
to select among ECONOMY, RING2 to RING7.
to confirm the selection and exit to RING DELAY.
Alert Tone
When the alert tone is set to ON, a short beep will be emitted once
every minute from the handset speaker during standby when there is
at least one new ICM or new memo on the answering machine.
• Press
• Use
to enter the menu mode
scroll through the menu until the display reads ANSWER
MAC.
• Press
• Use
• Press
• Use
• Press
.
to scroll until the display reads ALERT TONE.
. The current setting is displayed.
to select ON or OFF.
to confirm the selection.
Note: This feature is handset dependent. You may turn this feature
on and off on each handset registered to the system.
Message Length
User can specify the maximum duration of the message (ICM) or
memo that can be recorded. There are two choices of message
length: 1 minute or 2 minutes.
• Press
• Use
to enter the menu mode
scroll through the menu until the display reads ANSWER
MAC.
• Press
Use
•
.
scroll through the menu until the display reads MSG
LENGTH.
• Press
• Use
• Press
. The current message length will be displayed.
to select one of the two choices.
to confirm the selection and exit to MSG LENGTH.
Speaker Filtering
Speaker Filtering is to allow all calls to be listened on the speaker of
handsets #1. Once activated, handsets #1 speaker will be turned on
automatically when the answering machine answers the call. User will
be able to hear the OGM and ICM recording from handset #1 speaker.
• Press
• Use
to enter the menu mode
scroll through the menu until the display reads ANSWER
MAC.
• Press
• Use
.
scroll through the menu until the display reads SPK
FILTER.
• Press
.
The current setting will be displayed.
• To activate speaker filtering,
41 of 72
42 of 72
Page 22

o Use to scroll to ON.
o
Press
to activate and exit to SPK FILTER.
• To de-activate speaker filtering,
o
Use
o Press
to scroll to OFF.
to de-activate and exit to SPK FILTER.
Note: If remote access code or SOS code is entered when Speaker
Filtering is on, the handset speaker will be turned off once the
caller entered *. The handset speaker will be turned on again if
the code entered is incorrect and the OGM is replayed.
If handset #1 has monitor feature on, Speaker Filtering will not
work.
Call Screening
Incoming calls can be screened and sent directly to the answering
machine.
OFF: The screening is turned off. The answering machine
will answer all calls after the number of rings specified
by the ring delay setting (if the answering machine is
ON) or after 10 rings (if the answering machine is OFF).
ALL: The answering machine will answer all the incoming
calls. There won’t be any ring when an external call
comes in. Caller can use the SOS code to
breakthrough the screening and let the base ring.
EXEMPT: Only the number with/starts with the designated digits
will ring. All other calls will be diverted to the
answering machine. Callers from those screened calls
can use the SOS code the breakthrough the screening
and let the base ring.
SCREEN: The number with/starts with the designated digits will
be diverted to the answering machine. Calls from other
numbers will ring according to the ring delay setting.
Caller of the screened number can use the SOS code
to breakthrough the screening and let the base ring.
To set the screening:
• Press
• Use
to enter the menu mode
scroll through the menu until the display reads ANSWER
MAC.
• Press
Use
•
• Press
.
to scroll until the display reads SCREENING.
. The current setting is displayed.
• To de-activate any screening,
o Use
o Press
to scroll until the display reads OFF.
to de-activate all screening features.
• To set screening for all calls,
o
o
Use
Press
to scroll until the display reads ALL.
to activate the screening feature. All calls will be
diverted to the answering machine without ringing.
• To set an exempt number for the screening,
o
Use
o Press
to scroll until the display reads EXEMPT.
. The display will show NUMBER? Or the previously
entered exempt number.
o Use the numeric keys and
to enter the number up to 18
digits.
o Press
to confirm the number and the feature is activated.
o Calls from the number will be allowed to ring.
• To choose a number to be screened,
o Use
o Press
to scroll until the display reads SCREEN.
. The display will show NUMBER? Or the previously
entered screen number.
43 of 72
44 of 72
Page 23

o
Use the numeric keys and
to enter the number up to 18
digits.
o
Press
o
Calls from the number will be diverted to the answering
to confirm the number and the feature is activated.
machine.
Block the Blocker
When the blocker feature is on, all calls with Private CID will be
answered immediately by the answering machine (if it is turned o n).
The blocker caller can use the SOS code to breakthrough and let the
base ring for 8 seconds.
• Press
• Use
to enter the menu mode.
scroll through the menu until the display reads ANSWER
MAC.
• Press
• Press
. Use to scroll until the display reads BLOCKER.
. The current setting is displayed.
• Press . Use to scroll until the display reads REMOTE PIN.
• Press
. The display will show PIN?
• Enter the correct remote access code of the connected base (The
default remote access code is 123).
• Press
. The display will show NEW PIN?
• Enter the new pin code.
• Press to confirm.
• The display will show REPEAT.
• Re-enter the new pin code.
• Press
to confirm and exit to REMOTE PIN.
SOS Code
A 3-digit SOS code is used to breakthrough when the call is scree ned
or blocked.
• Press
to enter the menu mode
Use
•
• Press
to select ON or OFF.
to confirm the selection and exit to BLOCKER.
Note: If both the SCREEN screening and BLOCKER feature are on,
calls from the screened numbers as well as those with Private
CID will be diverted to the answering machine.
Remote Access Code
A 3-digit remote access code is used to access the answering
machine remotely from any tone dialling telephone.
• Press
• Use
to enter the menu mode
scroll through the menu until the display reads ANSWER
MAC.
45 of 72
• Use
scroll through the menu until the display reads ANSWER
MAC.
• Press
• Press
.
Use
. The display will show PIN?
to scroll until the display reads SOS CODE.
• Enter the correct SOS code of the connected base (The default
SOS code is 111).
Press
•
. The display will show NEW PIN?
• Enter the new pin code.
• Press
to confirm.
• The display will show REPEAT.
• Re-enter the new pin code.
• Press
to confirm and exit to SOS CODE.
Note: The Remote Access code and SOS code cannot be the same
because user can enter either code while OGM is played.
46 of 72
Page 24

Remote Access to the Answering Machine
The answering machine can be accessed from other tone dialling
telephones.
• Place a call to your phone.
If the answering machine is on, the OGM plays
•
o
While the OGM is playing, press * and then the 3-digit remote
access code by using the keypad of the touch-tone phone
o If the code is entered correctly, you will hear 2 beeps.
The new messages, if any, will be played back starting
with the oldest new one. Otherwise, the oldest message
will be played back.
You can also enter a short cut within 8 seconds. For
example, press 5 to stop the message playing. Press 9 to
record a new OGM etc.
o
If the code is entered incorrectly, the OGM will be replayed.
Use the keypad of the touch-tone phone to re-enter * and
then the 3-digit remote access
• If the answering machine is off,
o After 10 rings, the answering machine is turned on.
o You will hear 2 beeps and the OGM plays.
o While the OGM is playing, press * then the 3-digit remote
access code by using the keypad of the touch-tone phone
o
If the code is entered correctly, you will hear 2 beeps.
The new messages, if any, will be played back starting
with the oldest new one. Otherwise, the oldest message
will be played back.
You can also enter a short cut within 8 seconds. For
example, press 5 to stop the message playing. Press 9 to
record a new OGM etc.
o If the code is entered incorrectly, the OGM will be replayed.
Use the keypad of the touch-tone phone to re-enter * and
then the 3-digit remote access
Note: The answering machine will drop the line after three failed
attempts.
If there is no incoming message and you do not enter anything
within 8 seconds after the remote access code was correctly
entered, the line will be dropped.
Remote Access Shortcuts
Shortcuts for most remote access functions are the same as
those accessed from answering machine mode except Delete All
Messages
• Press * and then 0 within 2 seconds to delete all ICM’s.
Remote Access Responses
Most tones and alerts for remote access operations are the same
as those in the answering machine mode except
• When 8 are pressed to turn the answering machine on, two
beeps confirmation tone will be heard.
• When 8 are pressed to turn the answering machine off, a
short beep tone will be heard.
• When # is pressed to change from ANS ONLY to ANS
RECORD mode, two beeps confirmation tone will be heard.
• When # is pressed to change from ANS RECORD to ANS
ONLY mode, a short beep tone will be heard.
• If the Memo is recorded when the memory is full, a long beep
reject tone will be heard.
47 of 72
48 of 72
Page 25

Answering Machine Shortcuts Summary
The available shortcuts for ANS MAC mode and remote access are:
Feature Shortcut for
ANS MAC
mode
Play messages
Repeat current message
Play previous message
Play next message
Stop
Delete the current message while the
message is being played
Delete all Messages
Record OGM
Play OGM
Record a memo
Play a memo
Answer Machine On / Off
Select Answer-Record or AnswerOnly mode
Shortcut for
Remote access
control
2
1
1
3
5
*
* + 0
9
6
7
4
8
#
Additional Features
Network Services
There are 7 network service memories. Each can contain up to 10
characters for the name of service and 18 digits for the access
number of the service. Three of the 7 numbers are pre-programmed
(Australia models only), but can be changed. You may program other
services of your choice. Charges may apply for the use of these
services. Check with your network operator. The network services
functions are accessed like the phonebook except that they can also
be accessed when the phone is off-hook.
Service Number Name Service code
Service1 Call W ON *43#
Service2 Call RTN *10#
Service3 Call W OFF #43#
Service4
Service5
Service6
Service7
Adding a new Network Service
• Press
during predial or standby
• The display reads ADD ENTRY.
• Press
. The display reads NAME? (If 7 services have
already been recorded, FULL will be displayed for 2 seconds
and returned to ADD ENTRY)
• Use the alphanumeric keypad and
to enter the name of
the service (up to 10 characters). (If no name is entered, the
display will remain at NAME? Every entry must have a name)
• Press
• Use the numeric keys and
to confirm. The display reads NUMBER?
to enter the number of the
service (up to 18 digits). You can also enter a recall by
pressing
, R will be displayed. (If no number is entered, the
display will remain at NUMBER?)
•
Press
to confirm.
Note: The phonebook records and Services numbers cannot be
the same.
Reviewing Network Services
49 of 72
50 of 72
Page 26

• Press during predial or standby.
• The display reads ADD ENTRY.
Use
•
to scroll through the services or press a digit to
search like the phonebook records.
• On the name of a service except ADD ENTRY, press
view the number of that service.
• Press
at any time to return to standby.
Dialling out the Service
Number
During standby,
• press
• Use
Press
•
to bring up the list of services,
to select a service.
on a selected service will dial out the number.
When off-hook,
• Press
Use
•
• Press
. The list of services will be available to select.
to select a service.
and the number of the selected service will be
dialled out.
Editing Network Service Number
• Press
during predial or standby.
• The display reads ADD ENTRY.
• Use
to scroll through the services or press a digit to
search like the phonebook entries.
• Press
on a service. The display will read EDIT ENTRY.
to
• Press . The name of the service will be displayed.
• Edit the name and press
to confirm.
• The number of the entry will be displayed.
• Edit the number and press
The display will return to EDIT ENTRY.
•
• Press
• Press and hold
will return to the services list.
will exit to standby.
to confirm.
Delete a Network Service
• Press
during predial or standby.
• The display reads ADD ENTRY.
• Use
to scroll through the services or press a digit to
search like the phonebook entires.
• Press
• Use
• Press
• Press
on a service. The display will read EDIT ENTRY.
to scroll until the display reads DELETE.
. The display reads DELETE?
again to confirm and the selected service is
deleted.
• The display will return to the services list.
• Press
to exit.
Note: Refer to Delete All Records section to delete all the
services numbers at once.
Prefix Matching
User can program to automatically add a prefix to the number dialled
if the first few digits of the number match the ones described i n the
prefix rules. User can add up to three rules each of which inc ludes up
to five digits for both prefix and the starting digits to the number to
match.
51 of 72
52 of 72
Page 27

When the prefix rules are activated, the numbers for quick dial, direct
dial, predial, phonebook dial, call back from call log and redial w ill be
checked if a prefix would be added to them.
If the number going to be dialled starts with the digits entered in the
prefix rules, the respective prefix will be appended before th e number
and dialled out. For example, prefix for rule one is 123, and the
number for rule one is 589, when trying to dial out the number
5897648, it will be dialled as 1235897648. The prefix appende d to
the number and dialled out however will not be displayed nor stored in
the redial log.
Press
•
• Use
.
to scroll through the menu until the display reads
FEATURES.
• Press
• Use
.
to scroll through the menu until the display reads
PREFIX.
• Press
• Enter the correct PIN of the base. Press
The display will show PREFIX 1.
•
• Use
• Press
• Use
• Press
• Press
. The display reads PIN?
.
to scroll through PREFIX 1 to PREFIX 3.
on a selection.
to select ON or OFF.
on OFF will de-activate the selected prefix rule.
on to activate the selected prefix rule.
• The display will read PREFIX? Or the previously entered prefix.
Use the numeric keys and the
•
• Press
to confirm the prefix entered.
to enter the prefix.
• The display will read NUMBER? Or the previously entered
number.
• Use the numeric keys and the
to enter the number.
• Press to confirm the number entered.
Note: When the number for the prefix rule does not contain any digit,
it will apply to any number dialled.
The feature is not applicable to traditional dialling.
The dialled prefix will not be stored into the redial list.
Prefix matching will not be done on the emergency numbers.
Call Barring
Call barring prevents any one dialling certain types of numbers such
as premium numbers or international calls without having the PIN
Number.
The following call barring options can be selected:
OFF: All calls allowed
ALL: All external calls except those to emergency numbers
are barred
EXEMPT: All external calls starting with the exempt number will
be allowed. Other external calls except those to the
emergency numbers will be barred.
BAR: All the external calls starting with that prefix will be
barred. However, if the emergency numbers begin with
the barred prefix, calls to those numbers will be allowed.
• Press
• Use
.
to scroll through the menu until the display reads
FEATURES.
• Press
• Use
.
to scroll through the menu until the display reads CALL
BAR.
• Press
• Enter the correct PIN of the base. Press
. The display reads PIN?
.
• The display will show HANDSET 1.
• Use
to scroll through HANDSET 1 to HANDSET 5.
53 of 72
54 of 72
Page 28

• Press on a selection.
• To de-activate any call bar setting for the selected handset,
o Use
o
Press
to scroll until the display reads OFF.
. The function is de-activated. All calls will be
allowed.
• To bar all external calls on the selected handset,
o Use
o Press
to scroll until the display reads ALL.
. User cannot dial out external calls except
emergency calls.
To bar external calls except the EXEMPT number on the selected
•
handset,
o Use
o
Press
to scroll until the display reads EXEMPT.
. The display reads NUMBER? Or the previously
entered exempt number.
o
Use the numeric keys and
to enter the number to be
exempted.
o
Press
o
All external calls starting with the EXEMPT number will be
to confirm the entry.
allowed. Other external calls will be barred.
• To bar external calls with the BAR number on the selected
handset,
o
Use
o Press
to scroll until the display reads BAR.
. The display reads NUMBER? Or the previously
entered bar number.
o Use the numeric keys and
to enter the number to be
barred.
o Press
to confirm the entry.
o All external calls starting with the BAR number will be barred.
Other external calls will be allowed.
Note: If is pressed when no digit is entered for EXEMPT and
BAR, the call barring feature will be turned off for that
handset.
Ringer Melody for External Calls
• Press
. Use to scroll through the menu until the display
reads SOUNDS.
• Press
. Use to scroll through the menu until the display
reads HS RINGER.
Press
•
. Use to scroll through the menu until the display
reads EXT MELODY.
• Press
• Use
.
to select the desire melody, MELODY 1 to MELODY 10,
for incoming external call ringing.
• Press
• Press and hold
to confirm the selection and exit to EXT MELODY.
will exit to standby.
Note: The default ringer melody for external calls is MELODY 1.
Ringer Melody for Internal Calls
Press
•
. Use to scroll through the menu until the display
reads SOUNDS.
• Press
. Use to scroll through the menu until the display
reads HS RINGER.
55 of 72
56 of 72
Page 29

• Press . Use to scroll through the menu until the display
reads INT MELODY.
• Press
• Use
.
to select the desire melody, MELODY 1 to MELODY 10,
for internal call ringing.
• Press
• Press and hold
to confirm the selection and exit to INT MELODY.
will exit to standby.
Note: The default ringer melody for internal calls is MELODY 2.
Ringing Volume for Base
• Press
.
Use
to scroll through the menu until the display
reads SOUNDS.
• Press
. Use to scroll through the menu until the display
reads BS RINGER.
• Press
• Press
• Use
OFF.
. The display reads VOLUME.
.
to select from , , , , and VOL
represents the minimum volume level whereas
represents the maximum volume level.
• Press
To turn off the base ringer volume, press
to confirm the selection and exit to VOLUME.
on VOL OFF.
Base Ringer Melody for External Calls
• Press
. Use to scroll through the menu until the display
reads SOUNDS.
• Press . Use to scroll through the menu until the display
reads BS RINGER.
Press
•
. Use to scroll through the menu until the display
reads MELODY.
Press
•
Use
•
.
to select the desire melody, MELODY 1 to MELODY 10,
for incoming external call ringing.
• Press
• Press and hold
to confirm the selection and exit to MELODY.
will exit to standby.
Alert Tones
User can choose to turn on or off the following tones according to
your preference.
Key Beep: You will hear tone each time a key is pressed. For long
presses, there will be two tones: one upon key
depression and the other upon long press being
activated.
Confirmation: You will hear a tone when a setting or choice is
confirmed.
Charging: You will hear a tone when the handset is returned to
the base cradle for charging.
• Press
. Use to scroll through the menu until the display
reads SOUNDS.
• Press
. Use to scroll through the menu until the display
reads TONES.
• Press
. Use to select from KEY BEEP, CONFIRM and
CHARGING.
• Press
• Press
Press and hold
•
on a selection to select ON or OFF.
to confirm the selection and exit to CHARGING.
will exit to standby.
57 of 72
58 of 72
Page 30

Out of Range Warning
When the handset is too far away from the base during standby and
the link is lost with the base, the display will show BS SEARCH and
icon will blink.
the
• Bring the handset nearer to the base so that the signal gets
stronger.
• When the signal between the handset and base re-establishes,
the display will go to standby and the
icon will be steady.
When the handset is too far away from the base during a call, user
will hear an alert tone through the earpiece.
• Bring the handset closer to the base so that the signal gets
stronger.
• If you fail to bring the handset back in range with the base,
your call would be disconnected.
Auto Answering
When the function is activated, user is able to answer a call by lifting
the handset out of the base cradle without having to press the
key.
• Press
.
Use
to scroll through the menu until the display
reads SETTINGS.
• Press
. Use to scroll through the menu until the display
reads AUTO ANS.
• Press
.
• To activate:
o Use
o Press
the base cradle without having to press the
to select ON.
. User can answer a call by lifting the handset out of
key.
• To de-activate:
o
o
Use
Press
to select OFF.
. User will need to press the key to answer a
call no matter the handset is on the base cradle or out of the
base cradle.
Recall Timing
Recall timing default settings are: Australia 100ms and New Zeal and
600ms. You should not need to change these settings.
If when you are using network services or a PBX the
button
does not work you can select a different setting.
• Press
.
Use
to scroll through the menu until the display
reads SETTINGS.
• Press
. Use to scroll through the menu until the display
reads FLASH TIME.
• Press
. Use to select from the two durations choose Flash
1 for Australia and Flash 2 for New Zealand.
Press
•
• Press and hold
on a selection to confirm and exit to FLASH TIME.
will exit to standby.
Handset Name
If you choose to you may programme each handset with its own
name to be displayed during standby.
Press
•
. Use to scroll through the menu until the display
reads DISPLAY.
• Press
. Use to scroll through the menu until the display
reads LABEL.
59 of 72
60 of 72
Page 31

• Press . Use the numeric keys and to enter the name for
the handset (max 10 characters).
• Press
• Press and hold
to confirm the name entered and exit to LABEL.
will exit to standby.
Call Timer
The length of the call can be timed and displayed. The timer will s t art
counting once the phone goes off hook. When the call has started for
10 seconds, the call timer in the format of mm:ss (e.g. 00:10) will be
displayed if the call timer is activated. Once the timer reaches 59
minutes and 59 seconds (59:59), the format will change to hh:mm
(e.g. 01:00). Call timer will reset to 00:00 (mm:ss) and start over again
after 17 hr 59 min 59 sec (17:59). When the call has ended, the call
timer will stop counting and keep on displaying for 5 seconds.
To activate:
• Press
. Use to scroll through the menu until the display
reads DISPLAY.
• Press
. Use to scroll through the menu until the display
reads CALL TIMER.
Press
•
• Press
• Press and hold
. Use to scroll until the display reads ON.
to confirm and exit to CALL TIMER.
will exit to standby.
To de-activate:
• Press to confirm and exit to CALL TIMER.
• Press and hold
will exit to standby.
Backlit LCD
The backlight will turn on:
• when a key is pressed
• when the handset is powered up
• when there is an incoming call
when paging from the base
•
The backlight will automatically turn off:
• approx. 10 seconds after a key is pressed
• when paging is stopped by itself
• when the incoming internal call ends without being answered
• when the incoming call expires at the handset.
User can also choose to turn off the Backlit LCD by
• Pressing
.
Use
to scroll through the menu until the display
reads DISPLAY.
• Press
. Use to scroll through the menu until the display
reads BACKLIT.
• Press
• Press
. Use to select OFF.
to turn off the backlight.
To turn on the backlit, user can
• Press
. Use to scroll through the menu until the display
reads DISPLAY.
.
• Press
Use
reads DISPLAY.
Press
•
. Use to scroll through the menu until the display
reads CALL TIMER.
• Press
. Use to scroll until the display reads OFF.
to scroll through the menu until the display
61 of 72
• Press
reads BACKLIT.
• Press
• Press
. Use to scroll through the menu until the display
. Use to select ON.
to turn on the backlight.
62 of 72
Page 32

Delete All Records
You can reset the phonebook records, redial list, call log and netw ork
services numbers by using this menu.
• Press
. Use to scroll through the menu until the display
reads RESET.
• Press
• Press
• Press
• Press and hold
. Use to scroll until the display reads RECORDS.
. The display will show RESET?
to confirm and exit to RECORDS.
will exit to standby.
Note: Once reset, all entries in the phonebook, redial list, call Log are
deleted and the network Services numbers are reset to factory
default.
Using Additional Cordless Handsets
Registration
Each additional compatible handset must go through the registration
process with the base. Each Oricom handset can be registered with
up to 4 base units. Each base can have up to 5 handsets registered
to it.
When registering, each handset can select base number fo r the base
to be registered so that it can be identified at base selection setting.
To register:
• Press
reads SYSTEM.
Press
•
reads REGISTER.
• Press
.
Use
. Use to scroll through the menu until the display
. The display will read BS 1 2 3 4.
to scroll through the menu until the display
• Enter the number of the base unit you wish to register using the
numeric key.
• The handset will read PIN?
• Enter the PIN number (default is 0000).
• Press and hold the PAGE button
on the base unit until you
hear 2 beeps.
• Press
on the handset. The handset will read SEARCH BS X
while it searches for the base unit (where ‘X’ is the number of the
base you are registering to).
• Once a connection has been made, the handset name and
number (the next available number if the number of handsets
already registered with the base is less than 5) will be shown on
the display.
Base Selection
AUTO If the base selection setting is set to auto, whenever the
handset is lost link or powered up, it will search any
available registered base to connect.
Fixed One of the bases registered can be assigned as a fixed
base so that it will be the only base to be searched when
the handset is lost link or powered up.
To set:
Press
•
. Use to scroll through the menu until the display
reads SYSTEM.
• Press
. Use to scroll through the menu until the display
reads SELECT BS.
To select AUTO,
•
o
Press
o Press
. The display reads AUTO.
will confirm the selection. The handset will search
any available registered base during registration.
• To select Fixed base,
63 of 72
64 of 72
Page 33

o
Use
to scroll through the menu until the display reads
FIXED.
o
Press
. The display reads BS 1 2 3 4.
o Use the numeric keys to enter the base number to be set as
the fixed base.
o The handset will search the base according to the selection
during registration.
Making Internal Calls
To make internal calls you need needs to have more than one
handset registered to the base.
• Press
• The
.
icon on handset will be turned on.
• Press the registered handset number you wish to call.
• The call timer will display after a while and start timing the call.
Or Use Pre-Dialling
Enter the number of the handset you wish to call.
•
• Press
.
• The call will be connected.
To end intercom call
• Press
, or
• Place the handset back on the base unit.
• The duration of the call will remain for about 5 seconds after
you hanged up.
Note: During an internal call, if an external call comes through,
you will hear short beeps.
Icon on handset will blink.
Receiving external call during Internal Call
If an external call comes in while the handset is on internal call, the
icon will be blinking and a series of short beeps can be heard
from the earpiece. The CID of the caller will be displayed on the
screen.
Press
•
• Press
to hang up the internal call.
again to answer the external call.
Inquiry Call
While talking on the external line, the handset can put the external
call on hold and make an inquiry call to another handset. The handset
can then toggle between the external call and the other handset.
While the external call is on hold, a tone will be emitted to the external
party to indicate that the call is on hold.
• During an external call, press
.
• The external call will be put on hold and internal dialling tone can
be heard from the earpiece or speaker.
• The
icon is displayed in addition to and icons.
• Press the number of the handset you wish to call.
If there is no reply, press
•
again to reconnect to the external
call and the other handset will stop ringing. Press again to
make another call to other handset number.
• When the other handset answers the call, the two handsets can
communicate while keeping the external call on hold.
• Press
to toggle between the internal and external calls.
Call Transfer
You can transfer phone calls to other handsets registered to the same
base unit.
• During an external call, press
.
65 of 72
66 of 72
Page 34

• The external call will be put on hold and internal dialling tone can
be heard from the earpiece or speaker.
The
•
icon is displayed in addition to and icons.
• Press the number of the handset you wish to call.
• When the other handset answers the call, press
on the
handset or place the handset on the cradle will transfer the call.
The
and icons will be turned off.
Conference Call
Conference call can be activated between external call, and two
handsets.
• During an external call, press
.
• The external call will be put on hold and internal dialling tone can
be heard from the earpiece or speaker.
• The
icon is displayed in addition to and icons.
• Press the number of the handset you wish to call.
• When the other handset answers the call, press and hold the
will activate the conference call. The
icon on both handsets
will be turned on.
• You can exit the conference call by pressing
on the handset
or place the handset on the cradle. The other handset and the
external call will still be connected. The
and icons will be
turned off.
Room Monitoring
When more than one handset is registered to the same base unit, one
of the handsets can be used as a room (baby) Monitor devic e.
To activate:
• Press
. Use to scroll through the menu until the display
reads FEATURES.
• Press . Use to scroll through until the display r eads
MONITOR.
Press
•
• Press
• Press and hold
. Use to select ON.
.
to exit to standby.
MONITOR will flash on the display to indicate the handset is in
monitor mode during standby. User can make internal call to this
handset from another handset, the microphone on this handset is
activated (being in monitor mode) and noise from the room can be
heard. User can also press
to hear from the speaker. There will
be no internal ringing.
To de-activate:
• Press
Press
•
•
Press
• Press
• Press and hold
will take you to the MONITOR menu directly.
. The display reads ON.
to select OFF.
to confirm and exit to MONITOR.
to exit to standby.
Note: The handset under monitor mode will not ring when an external
call comes in.
De-register a Handset
One handset can de-register all other handsets registered to the
same base unit.
• Press
. Use to scroll through the menu until the display
reads SYSTEM.
• Press
. Use to scroll through until the display reads
DELETE HS.
67 of 72
68 of 72
Page 35

• Press . HANDSET 1 will be displayed.
• Use
to select the desired handset (HANDSET 1 to HANDSET
5) to be deleted.
• Press
to confirm the selection. The display will read PIN?
• Enter the correct PIN of the connected base and press
confirm the deletion of the handset.
Note: You cannot de-register the handset you are using.
Change the PIN Code for Base
PIN code for the base unit is required in order to
Change Prefix settings,
•
• Change Call Barring settings,
• Register a handset,
• Deregister a handset,
• Reset the phone settings, and
• Change the current PIN.
The PIN code can be zero to eight digits.
To change the PIN code:
• Press
. Use to scroll through the menu until the display
reads SYSTEM.
• Press
. Use to scroll through the menu until the display
reads CHANGE PIN.
• Press
. The display reads PIN?
• Enter the correct PIN of the connected base.
• Press . The display reads NEW PIN.
• Enter the new PIN (maximum 8 digits).
•
Press
to confirm. The display will read REPEAT.
• Re-enter same PIN again.
• Press
• Press and hold
to confirm and exit to CHANGE PIN.
will exit to standby.
to
Note: If you changed the PIN CODE, you’ve to use the new PIN
CODE in all handsets.
Reset Factory Default
All settings for both the handset and base can be restored to the
factory defaults by this menu.
• Press
.
Use
to scroll through the menu until the display
reads RESET.
• Press
. Use to scroll through the menu until the display
reads SETTINGS.
• Press
. The display reads PIN?
• Enter the correct PIN of the connected base.
• Press to confirm. The display will read RESET?
• Press
to confirm.
Note: User cannot restore factory default setting on the base or on the
handset alone. Also, if you want to restore factory setting on
other handset currently connected to the same base, you will
need to restore factory setting on that handset.
69 of 72
70 of 72
Page 36

Appendix: Default Settings
A
A
External ringer melody (handset and base): MELODY 1
Internal ringer melody (handset): MELODY 2
Handset Ring Volume:
Base Ring Volume:
Receiver Volume: Medium
Flash Timing: FLASH 1
Dial Mode: Tone
Auto Answer: On
Key Beep Tone: On
Confirmation Tone: On
Charging Tone: On
Call Timer: On
Backlit LCD: On
Monitor: Off
Direct Dial function: Off
Direct Dial number: Empty
Quick Dial: Off
Prefix Dialling: Off
Prefixes and numbers: Empty
Call Barring: Off
Call bar and exempt numbers: Empty
Operator services: Default services (for Australia Models)
Empty (for New Zealand Models)
Base Selection: Auto
PIN Code: 0000 (for base menu)
Answering Machine: On
Answering Mode: Answer Record
Ring Delay: Economy
OGM: Pre- Recorded
New Message Alert tone: Off
ICM message length: 2 minutes
Call Screening: Off
Call screen and exempt numbers: Empty
Speaker Filtering: On
Blocker: Off
Remote Access Code (3 digits): 123
SOS Code (3 digits): 111
ICM: Empty
Memo: Empty
TAD Message Volume: Medium
Handset Name: Oricom
Warranty Information
This product is covered by a 12 months warranty against defective
workmanship or parts. The warranty does not extend to damage
caused by misuse, negligence, excessive voltage, faults on the
telephone line or lightning. This guarantee in no way affects your
statutory rights. Full details of the warranty are contained in the
enclosed warranty card.
If you feel this product is not working correctly please consult the user
guide and ensure that you are using the product in accordance with
the instructions.
Remove all extra telephone equipment and connect only this
telephone directly to the telephone socket. If the fault is still presen t,
connect another telephone (if available) to the telephone socket. The
results will show you whether the fault lies with this unit or with the
telephone line. If the product is working correctly the fault is on the
telephone line. Please contact your network operator for assistance
In the unlikely event of a fault developing, please contact us for
assistance. If the product is then found to be faulty you will be
asked to return it directly to us with a copy of the purchase
receipt.
To orders spare parts additional handsets, replacement batteries and
in case of any technical issues you may have with product please
consult our website for further information or send us an email for a
prompt response to your enquiry.
ustralia
Oricom International Pty Ltd
ABN 46 086 116 369
PO Box 5681
South Windsor, NSW 2756
Customer support
Email: support@oricom.com.au
Web: www.oricom.com.au
Fax: (02) 4572 0939
Ph: 1300 889 785
New Zealand
tlas Gentech (NZ) Limited
Private Bag 14927,
Panmure, Auckland
Customer support
Email:
support@atlasgentech.co.nz
Web: www.atlasgentech.co.nz
Fax: (09) 574 2722
Ph: 0900 50 025 (Toll Call)
71 of 72
72 of 72
 Loading...