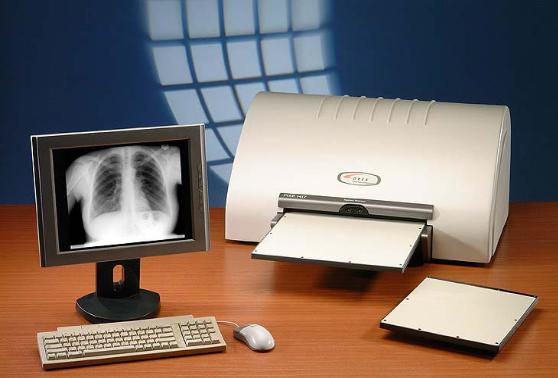
Orex PcCR 1417 User manual

PcCR 1417
Scanner Interface
Guide
Version 2.5.1.09
January 2003
Table of Contents
•Contact Information…………………………………………1
•User………………………………………………………..2-3
•Anatomical………………………………………………...4-6
•Image..…………………………………………………….7-8
•Configuration…………………………………………….9-13 o Diagnostic Image Mode……………………………..12-13
•Operation Update……………………………………….14-15
•Diagnostics……………………………………………..16-17
•Automatic Tests…..………………………………………..18
•Advance………………………………………………...19-20
•About……………………………………………….………21
Contact Information
Orex Computed Radiography Inc.(USA)
2000 Commonwealth Ave. Suite 200
Auburndale, MA 02466
Main Line 1-617-244-9000
Toll Free 1-888-844-7775
Fax 1-617-244-9020
Technical Services: Dial “3” from main menu
Note: Before returning any materials, you will need to call for an RA# before shipping.
- 1 -

User Interface
8.
9.
1. 10.
l
11. 12.
2. 3. 4. 5. 6. 7.
1.Anatomical Selector: Selects the region of the body to be imaged
2.Scan: Starts the scanning cycle.
3.Stop: Aborts the current operation in progress.
4.Erase: Allows user to manually perform an erase cycle on a plate/cassette.
5.Eject: Ejects the plate/cassette from the machine.
6.Setup: Enters the setup function of the software.
7.Exit: Exits the Scanner Interface Program.
8.Configuration Selector: Selects one of four (4) configurations.
9.Configuration Name: Shows the name of the currently selected configuration.
10.Preview screen: A preview of the image, as it is being scanned, is displayed here.
- 2 -
User Interface
11.Scanner status indicator: Provides feedback to the user on the state of the scanner.
12.Timer: Shows the time left for current operation.
- 3 -

Anatomical Screen
1. |
|
|
2. |
|
6. |
3. |
4. |
7. |
8.
5.
11. 9.
10.
12.
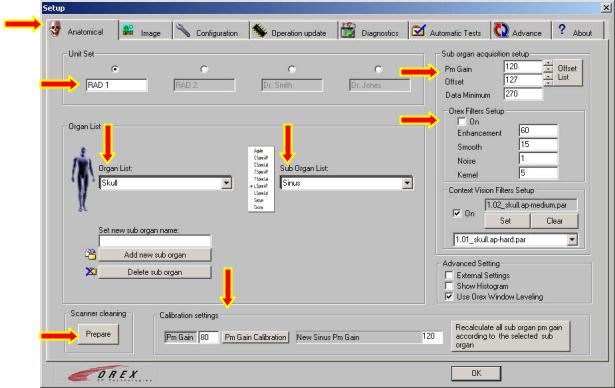
1. Tab Select Region: Clicking on the various tabs along the top row will bring up the corresponding set up screen.
2. Unit Set: Allows software to have four (4) different Anatomical Setups. This is defined as Organ, Sub organ, PM Gain, Offset and selected Filters. NOTE: The filters can be selected and saved, but not turned on/off using unit sets.
3.Organ List: Selects the major organ category for the current setup.
4.Sub Organ List: Selects Sub Organ category for the current setup.
5.Set New Sub Organ Name: This feature allows for a new Sub Organ category to
be added to any Major Organ Category.
6. Sub Organ Acquisition Setup: This section is used to define the setup of each Sub Organ. PM Gain and Offset can be freely set at anytime. The grayed out values require using the “edit” button, which will prompt for a password. Following is a brief description of each feature.
- 4 -
Anatomical Screen
6.Sub Organ Acquisition Setup: CONT.
•Data Minimum: Is a factor, which is used to enhance the window leveling of the image.
•PM Gain: Photo-multiplier Gain is a factor which determines how much gain is applied to the signal received by the photo-multiplier.(Factory Set)
•Offset: Offset is a factor, which is used to eliminate noise from the image. (Factory Set)
7.Orex Filters Setup: Check the “ON” box to use these filters. Three of these settings
make up an “Unsharp Masking” filter, the remaining one is noise reduction.
•Enhancement: One of three Unsharp Mask Parameters*. Smooth, Kernel and Enhancement are used together to define how the Unsharp Mask Filter will function. Enhancement can be set anywhere from 0 – 80.
•Smooth: One of three Unsharp Mask Parameters*. Smooth, Kernel and Enhancement are used together to define how Unsharp Mask will function. Smooth can be set anywhere from 0 – 80.
•Noise: This is a noise reduction filter. Noise can be set to either 0 or 1.
•Kernel: One of three Unsharp Mask Parameters*. Smooth, Kernel and Enhancement are used together to define how Unsharp Mask will function. Kernel can be set to 3, 5 or 7.
8.Context Vision Filters Setup: Check the “On” box to use these filters. Filters
(also know as GOP) are used for image enhancement.
•Grayed out Window: This indicates which, if any, filter is currently selected. NOTE: Even if a filter is “selected”, no filter will be applied if the “On” box is unchecked.
•“SET”: This button will select the current filter in the drop down window below. The filter will then be displayed in the grayed out window above.
•“CLEAR”: This button will remove the currently selected filter from the grayed out window, leaving no filter selected.
•Drop down window: This window will show a list of available filters to select from.
9.Advanced Setting: Check the box to activate an option.
•External Settings: This feature allows the use of an external program to select an Organ, Sub Organ and Scanning Resolution.
-5 -
Anatomical Screen
9.Advanced Setting: CONT.
•Show Histogram: This feature will show a graphical Histogram after an image is scanned.
•Use Orex Window Leveling: This feature will allow the scanner Interface to determine the optimal Width and Center values for any scanned image.
10.Scanner Cleaning: This function is used during the roller cleaning procedure.
•“PREPARE”: This button is pressed prior to removing power from the scanner during the cleaning procedure. Please see user manual for complete instructions.
11.Calibration Settings: The Orex PcCR 1417 comes from the factory pre-calibrated.
Only minor adjustments need to be made when the System is installed. Only Certified Orex technicians should make these adjustments.
12. OK: This Button will exit setup.
- 6 -
 Loading...